


In reply to TGMF:
You got it. Not much more than a clutch job. Just make sure you buy or rent the special tool kit to lock the timing and remove the bearing. Unbolt the flywheel, remove the old bearing, press a new one in and you can be done.

In reply to TGMF:
You got it. Not much more than a clutch job. Just make sure you buy or rent the special tool kit to lock the timing and remove the bearing. Unbolt the flywheel, remove the old bearing, press a new one in and you can be done.

TGMF wrote: I've always heard about the IMS bearing and how much of a nightmare, avoid at all costs, problem it is. Your write up makes it appear that it's not all that much more than a clutch job. It appears that this repair is nothing really scary at all, assuming one buys a car with a currently good engine. Are people really blowing these things out of proportion this much?
People, on the internet, blow things out of proportion? Never!!!!
I always took it, pre failure, as about the same as replacing the rear main seal (which apparently needs to be done too) while doing the clutch.
It's nice to see that my assumption was right. Keep up the great work MRAP!
You wouldn't happen to have a write up on how to calm down an angry wife would you?
TGMF wrote: You wouldn't happen to have a write up on how to calm down an angry wife would you?
My Service Manual references using a Porsche Special Tool for that job. Unfortunately it's NLA.
mrap1000 wrote:TGMF wrote: You wouldn't happen to have a write up on how to calm down an angry wife would you?My Service Manual references using a Porsche Special Tool for that job. Unfortunately it's NLA.

tuna55 wrote: So breakdown the costs that you have in her so far?
I just filed the receipts this morning:
$298 Clutch kit
$441 Replacement IMS bearing, cover and oil feed modification
$37 CV joint, flywheel and pressure plate bolts
$32 Rear main seal (from Stealership)
$75 IMS bearing tool rental
Coming from the Volvo/Mini Cooper world, I think the parts cost seems reasonable.
I could have selected a less-expensive IMS bearing option (like the $185 kit from Pelican Parts) but I wanted to provide the new bearing with a little better lubrication than reliance on the oil splash/vapor environment in the sump.

In reply to mrap1000:
Did you ever get a read on the tensioner & chain guide block wear?
Dashpot wrote: In reply to mrap1000: Did you ever get a read on the tensioner & chain guide block wear?
The Boxster Workshop Manual doesn't list a specification for the "working" length of the tensioner plunger. As I understand it, you monitor the deviation in the relative positions of the crankshaft and camshafts to determine chain stretch and the associated pad wear.

I have been contemplating a Cayman / Boxster in my future but as others have pointed out I was concerned about all the horror stories of the IMS. I have an older 911 and have done many major repairs on it. After reading your thread I feel confident I could perform this task.
Thank you very much for the detailed instructions, pictures and lessons learned!
In reply to mrap1000:
Thanks for clarifying, I hope yours was well within spec.
Wear on those components seem to be a good indicator of oil change frequency. German cars in particular (lookin' at you MINI & VW) seem to develop expensive cam chain related repairs when they get over ~100K. Makes me question the ~10K oil change intervals in a lot of these models.

Bearing engineer here. I'd love to get my hands on this IMS bearing for a little science experiment if you still have it kicking around...?
I'm not a Porsche guy by any means, aside from building a V8 944 back in the day... but from my armchair and limited reading-
Frankly, I'm unsure why anyone would think that a sealed ball bearing is a good idea in any oil bath/splash/vacuum mist environment. I understand the desire to minimize bearing contamination, but from the sounds and looks of it there really isn't anything to protect. Engine oil in a pressurized sump is not anything to be concerned about in terms of extreme oil degradation, and like many have mentioned already, bearings can run for an almost infinite service life provided it's lubrication means are A) reliable and B) continuous. Notice that I didn't reference lube quality. For the intents and purposes of a bearing like this, regular oil change intervals would provide way more than enough fresh lubricant to the bearing in its service life to not have to concern ones self with contamination-related failures. I mean, it's filtered oil for pete's sake. While I'm not sure of the quantity of oil available/reaching the bearing during normal engine operation, a bearing of that size at those speeds doesn't require much lubricant to keep running reliably. For a double row radial bearing, guessing the size at approximately 30mm ID, my books state anywhere from .3-.5cc/min contacting the bearing surface at 240 degrees. I'd find it very hard to believe that a sump-based oil environment cannot produce that quantity of oil to the bearing. Granted, setting up a direct lube path is eliminating that 'educated guess', so it certainly won't hurt at all.
Depending on the seal landing type as well, that bearing will most likely be internally pressurizing during engine operation, which would result in a reverse-vacuum scenario every heat/cooling cycle. This is really bad. Think bearing heats to running temp -> creates internal bearing pressure which pushes a small quantity of grease OUT of the bearing cavity -> bearing cools -> internal bearing pressure self-regulates by sucking sump engine oil IN due to being partially submerged -> oil mixes with grease, which alters lubricant viscosity slightly for the next heat cycle.
Rinse and repeat over time, and you get a sealed bearing devoid of lube, with the seals preventing engine oil from relubing it under operation, which is exactly when you want to lube the bearing. Bearing overheats, then brinells, flakes raceways, and ultimately travels through the engine.
I'd also be willing to place my money on the fact that the 'engine oily sludge' that you mention being in the shaft after bearing removal was actually a mixture of engine oil with the original bearing grease that was being repeatedly purged, sucked back in, and spit out through the other side. You're seeing half of the contamination- the other half leaked out of the sump-side seal and was not noticed due to (hopefully) frequent oil change intervals.
I'm now very intrigued as to what this bearing looks like internally and under a microscope.
In reply to golfduke:
who do you guys use for oil analysis in a failure state?
Flight Service wrote: In reply to golfduke: who do you guys use for oil analysis in a failure state?
We have an RDE spectroscope, IR spec, and do our own viscosity testing in-house. We also have capabilities to do particulate counts, wear particle shape analysis, ferrography, and acid/base metering.
Most of the stuff we do is baselined and used for trending in predictive maintenance applications (for manufacturing equipment, power generation, and large machine gearboxes), but we can get pretty nerdy into root-cause failure analysis as well.
If on the very rare occasion that we send anything out for further analysis, we use Mecoil Srl out of Italy. Their capabilities are pretty exhaustive.
golfduke wrote:Flight Service wrote: In reply to golfduke: who do you guys use for oil analysis in a failure state?We have an RDE spectroscope, IR spec, and do our own viscosity testing in-house. We also have capabilities to do particulate counts, wear particle shape analysis, ferrography, and acid/base metering. Most of the stuff we do is baselined and used for trending in predictive maintenance applications (for manufacturing equipment, power generation, and large machine gearboxes), but we can get pretty nerdy into root-cause failure analysis as well. If on the very rare occasion that we send anything out for further analysis, we use Mecoil Srl out of Italy. Their capabilities are pretty exhaustive.
Thank you for the source and I hate you because I am jealous
In reply to golfduke:
Fantastic write-up, and I'm on board with all your observations. The most popular IMS bearing fix has been to install a unsealed bearing with ceramic hybrid balls and rely on splash lubrication from the sump. It is pretty spendy though, and I chose a different path for my car.
I'm afraid I can't give up the IMS bearing from my car. It's currently sitting on my desk at work and I pick it up and spin it periodically for stress relief. It's probably getting more wear than when it was mounted in my Boxster...
I'd advise you to check with your local independent Porsche repair shop. Most places are doing 2-3 bearing replacements every month.
So - synthetic oil would make the oil/grease intermixing issue better or worse?
Wondering this beyond the Boxster issue. Thinking a cold engine has greater tolerances, synthetics flow better at low temps than conventional oils...

Fantastic information and very well written. I too have been shying away from a Boxster and this makes it seem less intimidating. Your costs are less than what I used to spend on the front end rebuild on my 944 Turbo every two years.
My big question is this. If you replace the IMS bearing with every clutch replacement, is it still critical to get the oil analyzed with every change? Even what you spent on your IMS bearing itself, that would seem like cheap insurance to replace it when doing a clutch.
In reply to racerdave600:
The oil analysis is just to make sure I didn't mess anything up during the bearing installation. If my iron level stays around the 7 ppb I had in my first analysis, I may stop having the analysis run after every oil change.
But I think my last analysis from WIX via Amazon Prime was less than $30. That's pretty cheap insurance to monitor stuff like journal bearing wear and oil/coolant mixing.

In reply to mrap1000:
Last I checked you can get a prepaid WIX kit through NAPA for ~$15, PN FIL 4077.
Agent98 wrote: So - synthetic oil would make the oil/grease intermixing issue better or worse? Wondering this beyond the Boxster issue. Thinking a cold engine has greater tolerances, synthetics flow better at low temps than conventional oils...
I don't want to take away from this amazing thread, but the above notion is a slight misconception/misunderstanding. A conventional weight motor oil will have the same exact viscosity off the shelf at all operating temperatures than the synthetic equivalent.
The caveat- conventional oils break down faster, due to their generally larger and more irregularly shaped mineral/molecular structure, in addition to the molecular bonds being weaker than a lab-created synthetic. As a result, over X time, yes a conventional motor oil will actually increase in viscosity at a greater rate than synthetics.
I know it's splitting hairs and all but for the sake of clarity, conventional oils aren't really 'bad' in that regard. It's really more about the mineral bond degradation/breakdown in conventional oils than it is the flow rates/viscosities that shorten lifespans as well as service intervals. It's fact at this point- a lab-made bond between two elements in a controlled manufacturing setting will be exponentially stronger than the equivalent bond made naturally millions of years ago. It's those bonds that are the life-blood of engine oil. Bonds form lubricating complexes, which keep metal away from metal. This is good. Break down bonds, and those complexes shrink down, and your metals get closer together. This creates heat, friction, and in extreme situations, interference. Interference is bad... very bad.
With regard to whether using synthetic oil would make the oil/grease intermixing better or worse, that's entirely dependent on the type of grease being used to lubricate the bearing internally. Generally, synthetic greases play well with all other hydrocarbons- synthetic or dino. There is definitely some concern with mineral greases being used with synthetic interaction, however. In my experience and some testing done internally, many mineral-based greases break down much faster in the presence of any liquid intrusion, synthetic, conventional, aqueous, whatever it is. If it's liquid and the grease is conventional/nonsynthetic, a red flag waves in my brain and I would not feel comfortable with that running scenario.
I hope this makes sense. This was written P.C.- Pre-Caffeine.
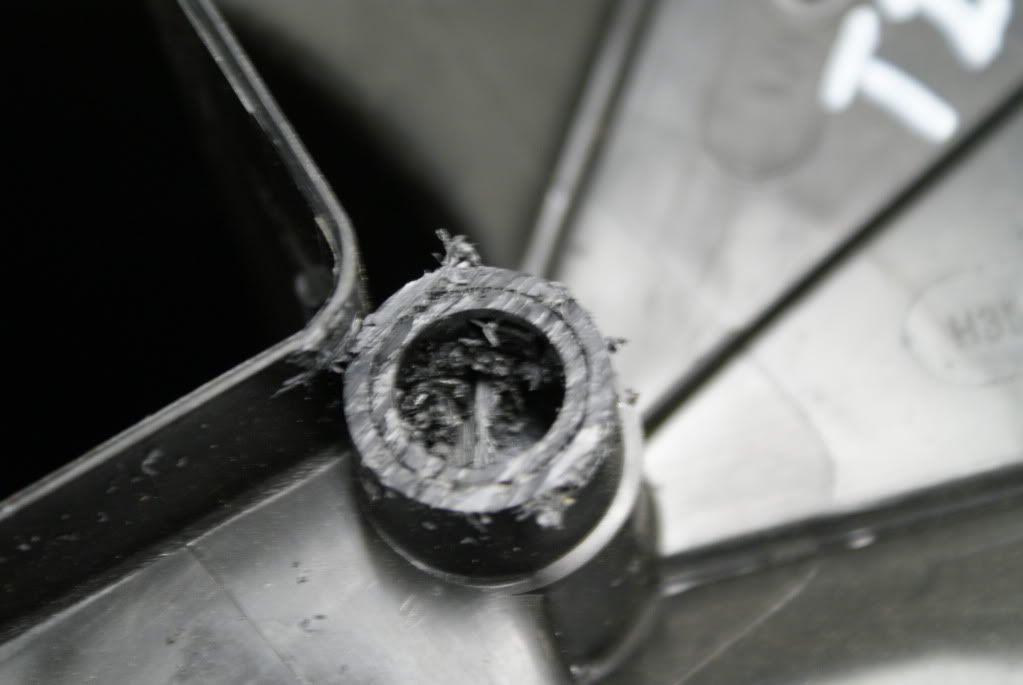
Does your Boxster change gears with a sense of ennui? Is your shifter lever so loose, that you row it about in frantic search of a gear – any gear, so you can take your foot off the clutch? Well, the Frugal Mechanic is going to tell you how to fix that with a few debit card transactions that won’t raise the ire of SWMBO.
The manual transmission in the Boxster is a cable set-up. The cables are around 5 feet long because the back of the transmission lies behind the rear bumper. The shifter mechanism is mostly plastic, and loosens up with continued use. All this adds up to a feeling of vague malaise when the gearbox is stirred energetically. After 100,000 miles my shifter had lots of slop, the detent separating first/second and third/fouth functioned intermittently, leaving me wondering what gear I was in. When I caught myself longing for a gear indicator light on the instrument panel, I realized I’d hit rock bottom and it was time to frugally fix something.
With replacement cables running around $400, upgrading the shifter mechanism offers a better return on investment. B&M makes a great short-shift kit for the Boxster, and is actually stocked with a Porsche part number as a dealer installed upgrade. The kit has a re-proportioned shifter arm which shortens the throws by about 30% and includes upgraded bushings for the points where high wear occurs.
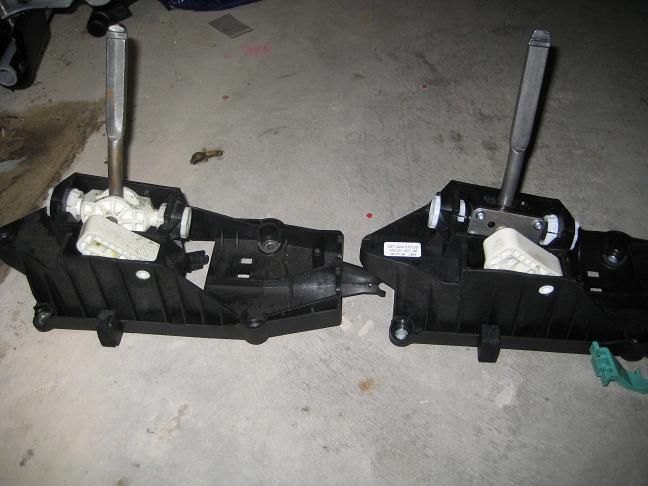
Some folks love the short-shift kit, but others feel it’s a bit too “notchy”. A nice compromise is fitting the redesigned shifter assembly Porsche used in the 997 and Cayman. The throws are around 10% shorter and the shifter is fabricated with more robust materials to reduce wear. Here’s a comparison, with the Boxster shifter on the left and a 997 unit on the right.
Fortunately for a Frugal Mechanic, many 997 and Cayman owners upgrade their shifters to expensive all-aluminum designs with ball bearings at every pivot point. This means there’s a constant supply of used shifters available on the Fleabay. The going rate for a low mileage shifter assembly runs around $125. I jumped on a higher mileage unit with a buy it now price of $30.
Since the 997 shifter has a lot more metal and uses a tough thermoplastic for the pivot shaft, I knew my high mileage unit would have significantly less wear. I also expected the pivot bushings to be shot – and they were. I was surprised to learn that while the 997 shifter typically interfaces with a six-speed transmission, it would work just fine with five-speed unit in my Boxster.
I considered replacing the pivot bushings with aluminum units. Since Fleabay has lots of Chinese knock-offs of the B&M shifter design for about the same price, I ended up buying one to cannibalize the upgraded bushings from the kit. I liked having the option to use the shifter arm from the kit if I wasn’t thrilled with the shorter throw on the 997 unit.
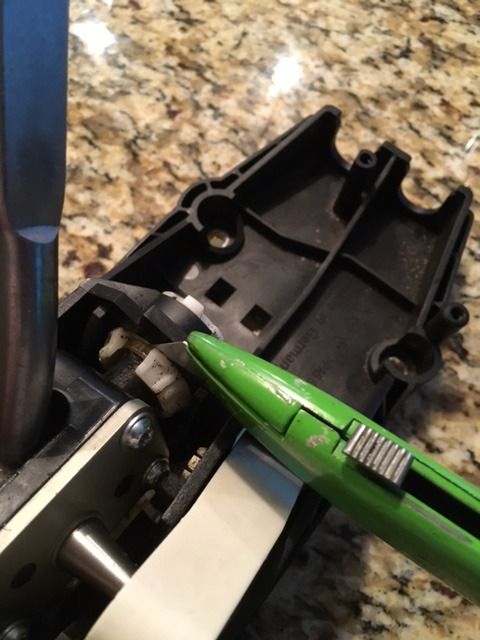
First, lets get rid of the old bushings. The dusting of white dandruff on my 997 shifter shows how much they have wallowed out over time. Just slice off the clips on the old bushings.
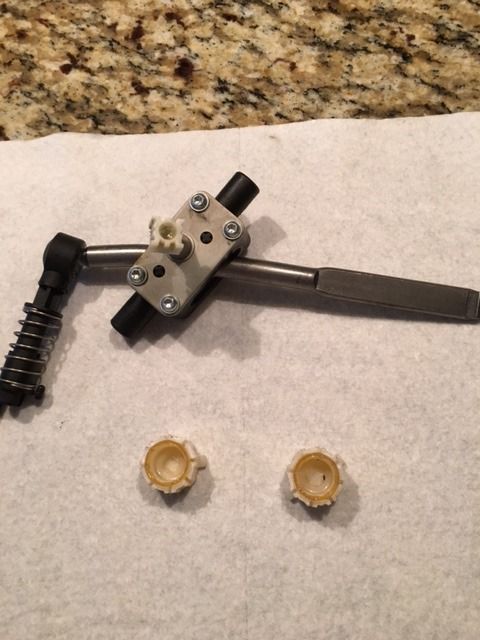
And here’s the more robust shifter arm released from the 997 assembly, with the trashed bushings beneath it.
The upgraded bushings from the short-shift kit are aluminum with nylon sleeves. After the bushings are lubricated, they slide into the shifter assembly and are held in place with circlips. The threaded rods are tightened to center the shift arm and remove all fore and aft movement from the pivot assembly. Working it through the gears and making vroom vroom noises, I could already tell it would be a huge improvement when I got it installed in my car.
Removing the old shifter knob was awkward and I was in constant fear that my significant other would walk into the garage and double up with laughter. The knob is a press fit onto the shaft. Basically, I had to straddle the shifter with one foot on the driver’s seat and one foot on the passenger seat and pull straight up. It took about six, eye-popping pulls with both hands wrapped around the knob before it finally yielded. The shifter boot unclips from the console and removes with the knob.
Console removal is pretty straightforward. I won’t go into all the locations of the screws as there are excellent guides on the internet. One area that the internet guides seem to miss are the three screws in the storage bin at the back of the console. You uncover the first screw when you pull up the rubber mat in the bottom of the bin. The plastic beneath the rubber cover is a “false” floor, you pry from the back and pop it out to expose the second screw. The third screw is hidden beneath the slotted coin holder in the bin.
To make it easier to manipulate the lower console over the shifter arm, I removed the upper console which provides CD storage (or AC controls on some models). Pull off the front panel and remove two screws, pull off the side carpet pieces and remove two more screws.
I put some painters tape over the emergency brake handle, but didn’t really need it. The entire console lifted out easily.
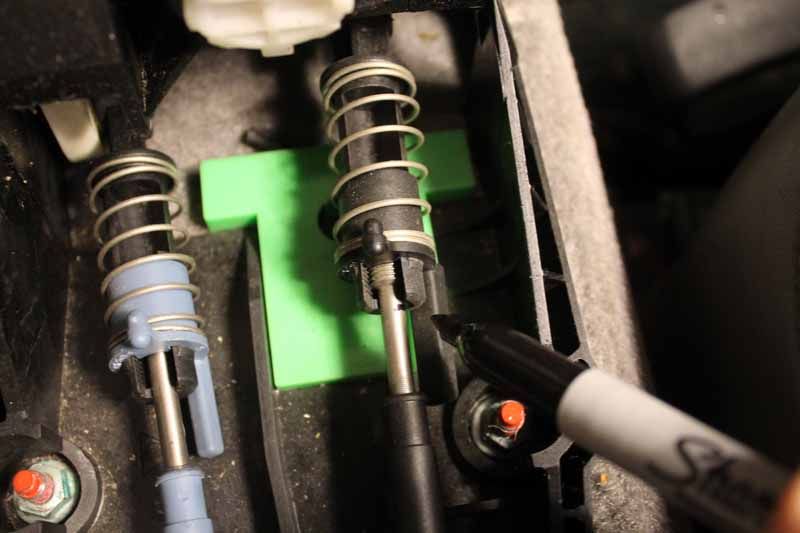
The ends of the shifter cable have threaded metal tips around an 1/8 inch in diameter. The plastic ball joints on the shifter assembly have female threaded recesses which are exposed when you pull back a spring-loaded cover. Pull back the cover, snap the threaded tips into the recesses and the cover slides back over to hold everything in place. Before I removed them from the old shifter box, I marked the threaded tips so I could return them to the same position in the new shifter box.
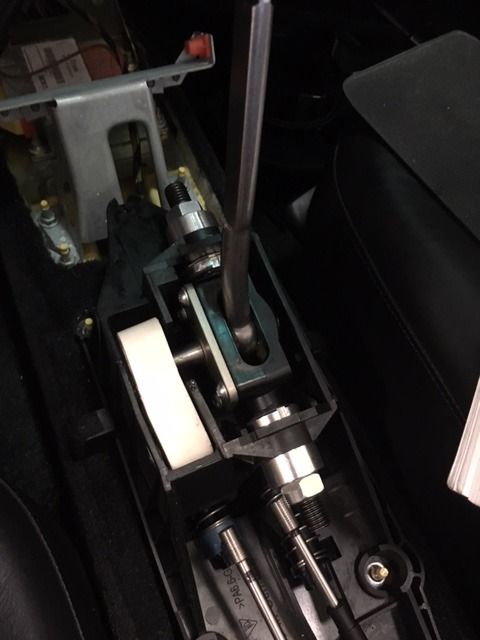
Swapping the new 997 box in was simple. Everything lined right up. Snapped the cable ends into their positions in the new ball joints and gave it a quick run through the gears to make sure this six speed shifter could indeed adapt to my five speed transmission.
It only took 30 minutes to reinstall the consoles. Porsche uses a very high grade of plastic for the interior pieces and everything fits together with precision. No stripped screws and no rattles.
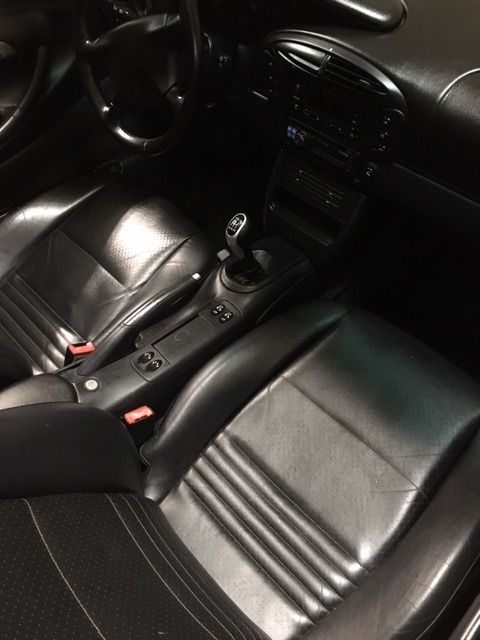
Took the car for a short drive and found I'd made a dramatic improvement. The shifter now has clearly defined gates and feels much more solid. Between gears, the lever centers itself, and no longer flops from side to side. It's made a huge difference in how the car drives.
The Frugal Mechanic seals a Boxster AC Evaporator
The air conditioning worked when I picked up the car, but the next day it was blowing warm. The system held a charge long enough for my check to clear. Oh well, caveat emptor.
I normally drive with the top down, so have little need for A/C. However, when it rains down here in the humid south, it’s nice to have the ability to defog the windshield. So with my Boxster running and shifting smoothly, it was time to address creature comforts.
I have some basic tools for A/C repair. I have a set of receiver gauges purchased from a pawnshop in Charlotte, NC. The owner of the pawnshop weighed 300 pounds and cradled a tiny Chihuahua dog in his meaty fingers. The dog wore a diamond tennis bracelet as a collar and growled at me as we haggled over the price. I like places like that.
I was planning to shoot a can of UV dye into the system to pinpoint the leak, when a chance search on Amazon pulled up Freon detectors. Holy smokes, these things have dropped in price. Just a few years ago, a decent Freon sniffer ran about $300. I took a chance, and dropped $26 on a “LotFancy” halogen detector that had over a hundred positive reviews.
Pulled the engine cover hatch behind the seats, started the car, and turned the A/C on. I verified that the compressor clutch was working properly and the compressor shaft was spinning. I turned on the Freon detector and moved the probe close to a can of R134a that I’d emptied into our SUV the day before. I got a nice Geiger counter buzz from the detector. Snooped the shaft and lines on the compressor – nothing. Popped the front hood, AKA “Frunk”, in Porsche parlance, and snooped the high and low pressure charging ports – de nada. Snooped the condenser in the front bumper – still nothing. So, I moved the probe next to the A/C vent in the cabin.
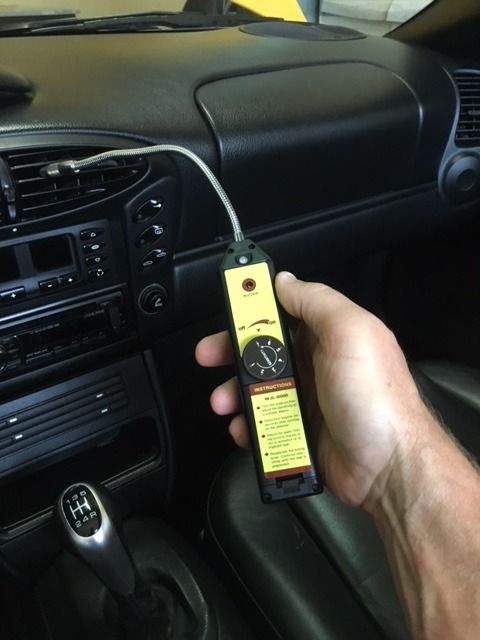
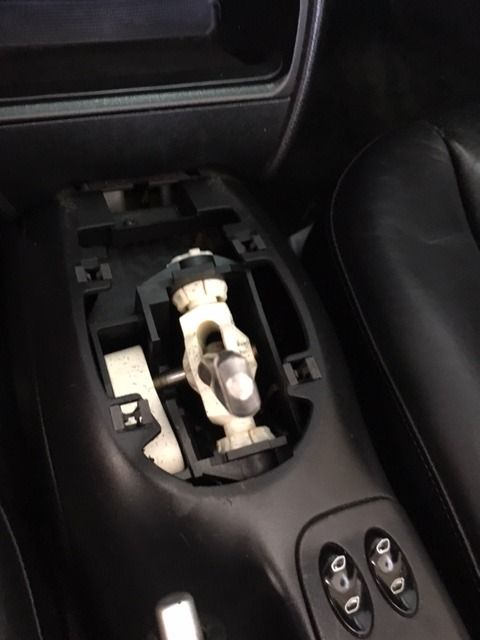
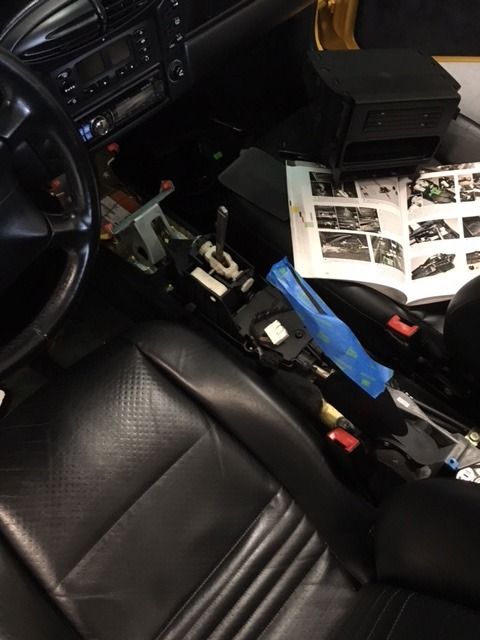
And the detector chattered like crazy. Crap, that means the leak is in the evaporator coil. And Porsche, like many manufacturers, buries the evaporator coil in an airbox deep inside the dash. Just getting to the evaporator requires disassembly of the dash and most of the interior. Here’s a picture from another Porsche Boxster thread, taken right about the time that the owner began to wonder what he'd gotten himself into:
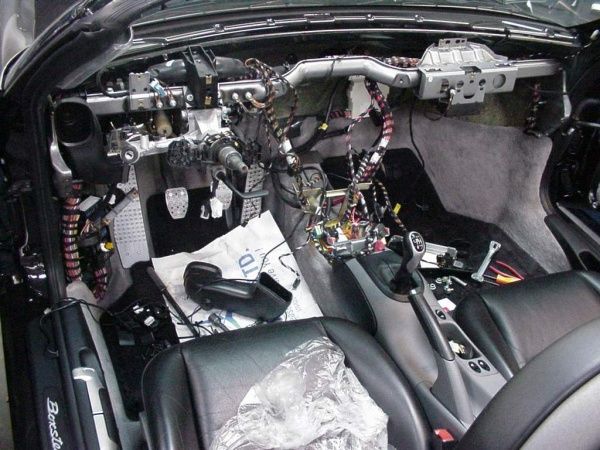
Mind you, the guy who posted that still had a few more hours of work to get to the airbox and extract the evaporator coil.
I’ve heard a lot of theories as to why aluminum evaporator coils don’t seem to hold up. Some folks believe that contaminants in the refrigeration system form acids and pinhole leaks. When I replaced the evaporator in my 850 back in 2004, Volvo believed that pollen collecting on the outside surface of the evaporator created corrosion cells that caused the coils to leak. I was willing to tear out my dash to replace the evaporator, but decided to try something else, mainly because I thought you guys might be interested.
Over the past few years, a new generation of sealers has come on the market which claim to re-seal leaky evaporators. The sealers are composed of Silane compounds, the same stuff that’s used in concrete sealers. Silane compounds cure when exposed to moisture, and the ones used in refrigeration are injected into the stream of Freon and lubricant circulating within the A/C system. The evaporator condenses water on the surface when the system is operating. The silane compound seeps through the pinhole leaks in the evaporator and solidifies on exposure to water – sealing the leak.
The sealant also reacts to any residual moisture in the A/C system, so it’s important to recover the refrigerant in the system and pull a vacuum on it to remove any water vapor. It’s also a good idea to replace the A/C drier canister before sealing.
So, I had a set of pawn shop receiver gauges, now all I needed was a vacuum pump. Amazon ended up having better prices than Harbor Freight and for $60 I had a 1.5 cfm oil-filled unit that would work just fine. A friend in the A/C business dropped by the house and recovered the residual Freon in my leaky system for a sixer of Fat Tire Ale. It's important that you don't just vent this stuff to atmosphere as it's a nasty green house gas and will put you in hot water with the EPA.
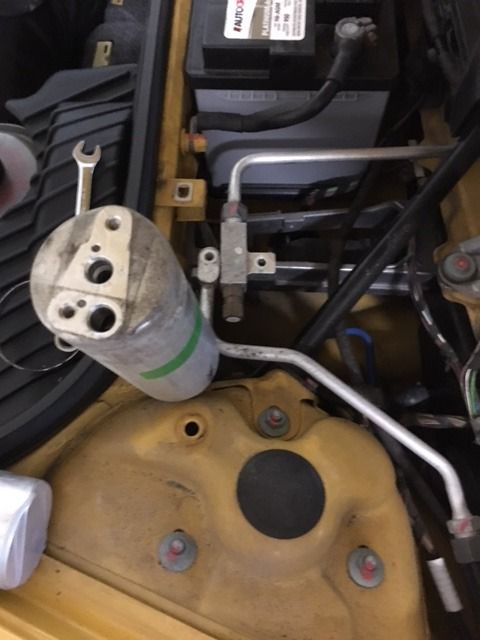
A new AC Delco filter/drier was ordered off Amazon for the princely sum of $19. Pop open the Frunk, remove the access panels on the left and right sides of the battery cover and everything you need for A/C repair is right there. The filter/drier came sealed with pressure-sensitive adhesive to keep the contents dry. It also came with two new o-rings.
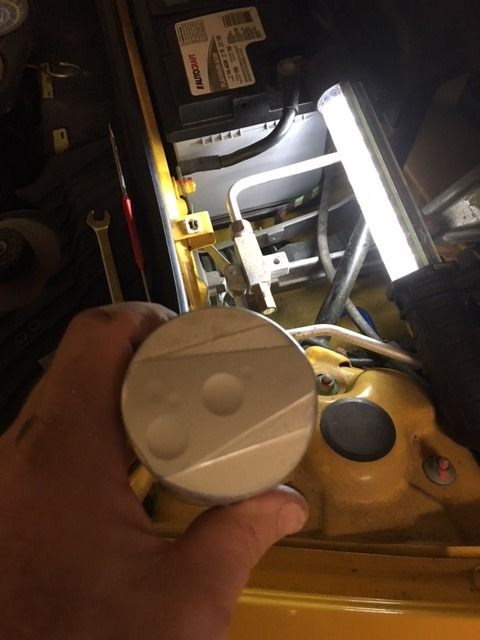
Remove the two bolts and a hose clamp, and out with the old, and in with the new.
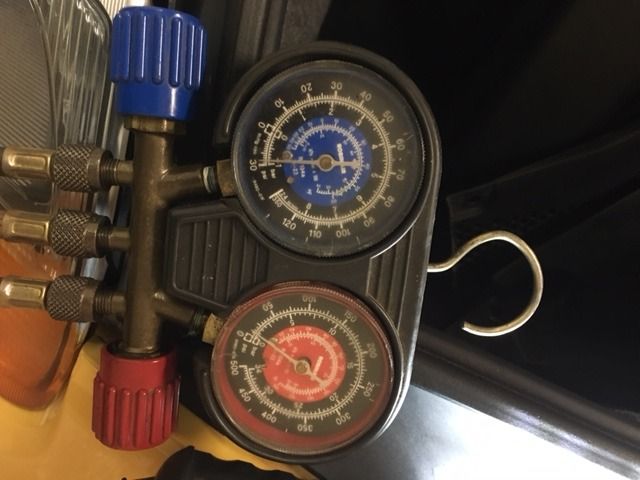
The A/C receiver gauge set has three hoses. The blue one attaches to the low side port and the red one to the high side port. The yellow one in the middle attaches to the vacuum pump. The low side gauge is on the left and can read both positive and negative pressure.
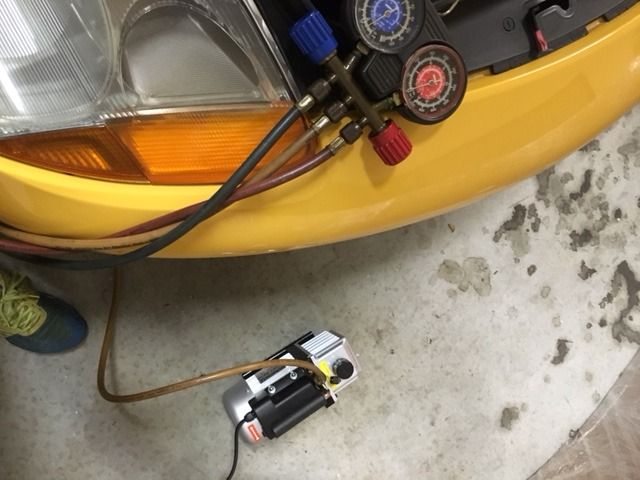
Turned on the vacuum pump and opened the valve on the left hand side of the receiver gauge to align the pump to the system. The instructions for the sealant I used called for vacuuming the system down to 25 inches of mercury, and then shutting off the pump and seeing if the system would hold a vacuum. My little 1.5 CFM vacuum pump reached this after about 2 minutes of operation, and held the vacuum for five minutes with the pump shut off – looking good.
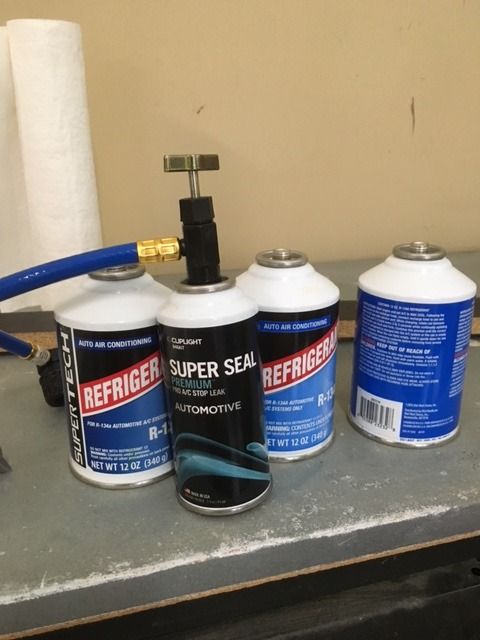
I used a product from Cliplight called SuperSeal, mainly based on positive reviews on Amazon. The sealant cost about $30. If you are doing this from scratch, a vacuum pump and gauge set will cost around $100, the sealant and drier another $50, and three cans of Freon to charge the system around $15. I know that seems a little high, but most shops charge around 15 hours for an evaporator R&R. I took about 3 days to replace the evaporator in my Volvo 850, and it took a week to get the feeling back in my fingers.
Anyway, once I’d passed the leak test, I turned the vacuum pump back on, opened the valve on the low pressure side of my gauge set and pulled it down to 30 inches of mercury. I let the vacuum pump pull on the system for about an hour to help flash out any residual moisture. Then, I isolated the system and replaced the vacuum pump with a can of Freon. I started the car, turned the A/C on, and opened the low side valve on the gauge set to start charging. The low side pressure jumped from vacuum to 40 psig, and the compressor started spinning. You can tell the system is charging because the can starts getting real cold.
The Porsche workshop manual calls for 30 oz of Freon. I put in two cans (24 oz). The low side pressure was 40 psig, and the high side pressure was around 220 psig, which aligned with my rule of thumb (2 times the ambient temperature plus 40 psig). I decided to add the sealant and then top off the system to the appropriate charge weight.
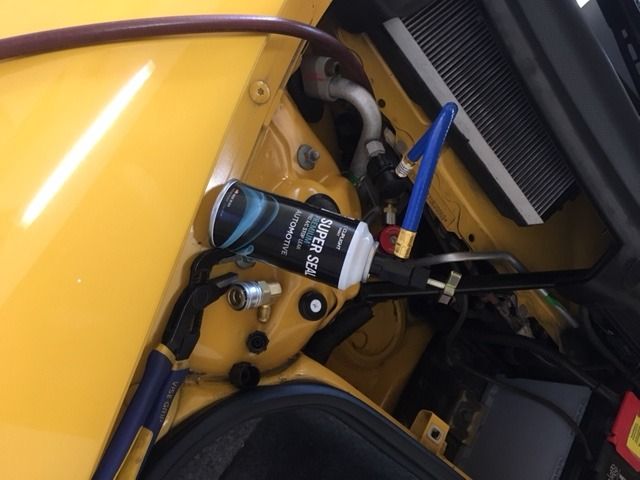
The sealant can was attached to the low pressure port, with the supplied hose. The valve on the can was opened to charge the sealant can with Freon, and then the sealant can was tipped upside down to drain the sealant into the system.
It was a humid day outside, and condensate was just pouring out of the bottom of my car. As soon as the sealant went in, I smelled a strong chemical odor and the condensate puddle beneath my car turned cloudy. This was a good sign, as it indicated the sealant was seeping through the pinhole leaks in my evaporator and curing. I let the car idle for 10 minutes, before topping up the system with the last 6 oz of Freon.
It’s been over a week, and the Boxster still blows nice, cold air.

I've used Red Devil leak stop on three cars (my Volvo 850, a friend's Prius, and a friend's Taurus X) and every time it's done a good job of sealing the leaks. I think it's amazing what they've done with these sealants nowadays.
mrap1000 great post. I was hoping to see an update on how the bearing is doing. I just got my hands on a 2004 with 71000 miles I want to do the IMS bearing and I like the ems bearing but was hoping to see some reviews on its quality and I can't find any. There is a guy that posted on pelican board that installed one back in 2014 I'm hoping to get some feedback from him. How is yours behaving so far how many miles have you put on it. Any help is appreciated.
In reply to JGONZALEZ16:
I've put about 2000 miles on my Boxster since the bearing replacement. No issues whatsoever. Some folks speculate that using the hollow IMS shaft to provide an oil feed to the bearing could result in shaft imbalance, but I haven't noticed anything out of the ordinary. The engine is smooth as silk and I'm very happy with my decision.
Vertex Motors in Florida sells a lot of rebuilt engines, and as I understand it, uses this bearing in every engine that leaves their facility. There's a lot of these bearings rolling around out there, and an absence of folks reporting early failures.
Welcome to another installment of the Frugal Mechanic versus a Porsche Boxster. Since replacing my IMS bearing, clutch and rear main seal back in June, I’ve put several thousand trouble-free miles on my car. The clutch has been light and progressive and the updated main seal design has kept my garage floor free of the oil spotting typical of Porsche ownership. My air conditioning still blows cold, and I’m ready to declare my evaporator sealing a success.
All is not perfect, however. For the first time since purchasing the car, I bumped the setting on my climate control fan up to maximum and was greeted with a shower of crumbling, black foam confetti. As a recovering Volvo 850 series owner, I immediately recognized the debris as the biodegradable material the environment-conscious Europeans used in the 90’s to seal air ducts and air control vanes. These bits of foam stuck to my face and arms and were annoyingly difficult to dislodge. I soon assumed the appearance of a plague victim, and became the object of interest to a delighted 6 year old in a car in front of me in the Chick Fil A drive through. His parents avoided eye contact…..
Taking a high-end German sports car for a spin shouldn’t require one to shower afterwards. You are welcome to interpret that statement as you see fit. Owners on the various Boxster forums claimed that being pelted with this stuff was one of the “charms” of Porsche ownership. Apparently, the condition improves over time as the old foam is purged from the system. There were recommendations to stash tweezers in the glove compartment to assist with removal. Digging deeper, I discovered the primary source of the nasty confetti is a foam-covered air vane which controls the flow of air through the heater core. I also found some instructions on resolving the issue that didn’t require tearing apart the dashboard and interior to access the airbox.
Fortunately, the engineers at Zuffenhausen have made it fairly easy to remove the Boxster’s heater core, which allows access to the offending air vane. Unfortunately, removing the air vane without tearing the dash apart requires some minor surgery to the airbox. And so we encounter a dilemma frequently encountered in the Porsche community. Do I pay the shop $3000 to install a new air vane, or do I violate the purity of my automobile by hacking up the airbox? And so, Porsche owners drive around picking crumbled foam out of their teeth.
As this minor surgery will be covered by heater core cover and a plastic windshield fascia, I’m going to guess it will pass concourse judging at Pebble Beach. So, put away the tweezers, and let’s get started by removing the windshield wiper arms and the plastic fascia panel beneath.
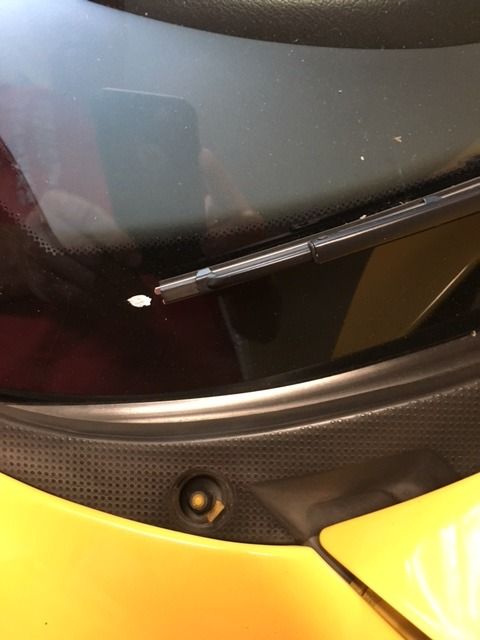
The plastic fascia panel is connected to the fenders with plastic nuts on the driver and passenger sides. There’s also an easy-to-miss torx screw by the passenger side wiper. Open the hood (AKA “frunk), and remove the two horizontal screws behind the battery. Undo the electrical connections for the windshield washer nozzle heaters and the washer tubing. The fascia panel is most easily removed by sliding it towards the windshield.
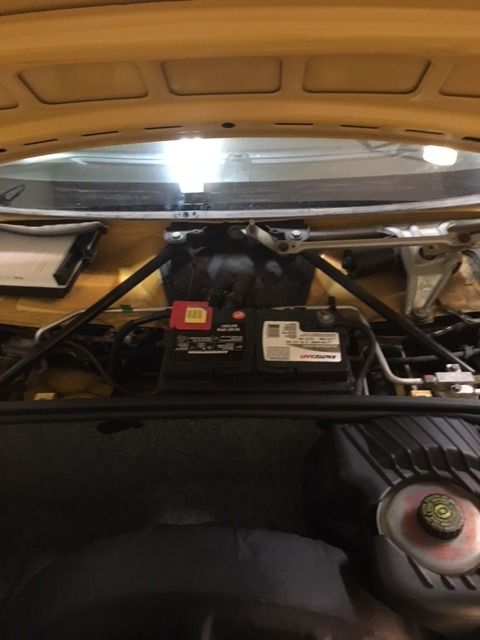
The heater core is behind the battery, underneath that black cover. I removed the battery (negative terminal first), the two black chassis braces, and their bracket on the firewall. Note the orientation of the plastic inserts which keep the chassis braces from rubbing on the firewall bracket. It took a bit of head-scratching to get these back in. Three bolts hold the wiper assembly in. Once these are out, you can unplug the motor and remove the whole thing.
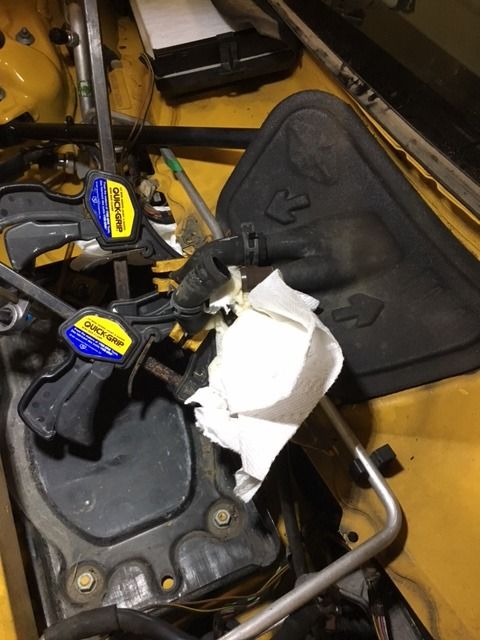
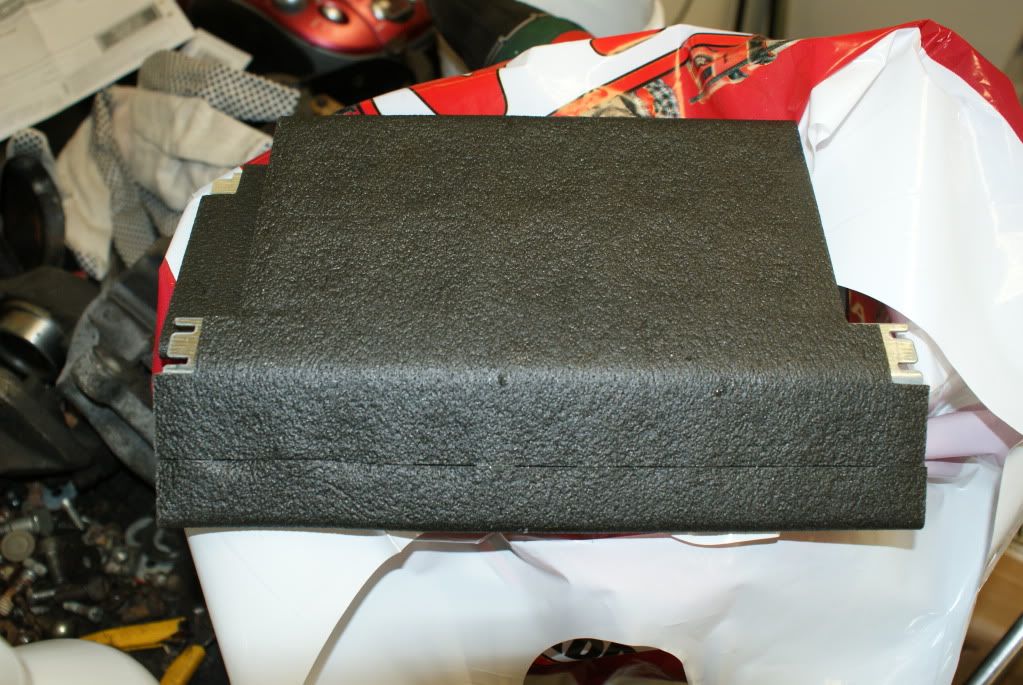
I have a dog with a sweet tooth that will happily mistake coolant for limeade. As a result, I’m really careful about preventing coolant spills. After wedging some paper towels beneath, I clamped the coolant lines and removed the tension clamps on the heater. A little dribble when the lines came off, but nothing made it to the floor. The foam cover on the heater core is held down by some sticky butyl rubber sealant. Peel the cover off, keep the sealant clean, and it will re-stick just fine when you reinstall everything. The core is held in by two small screws. Remove and you’ll see this:
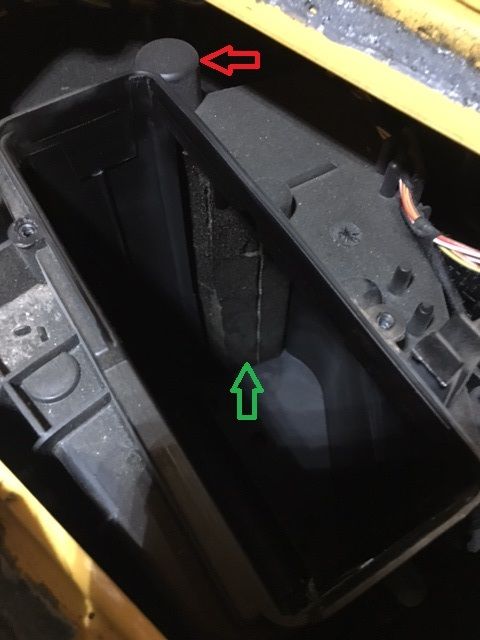
The green arrow is the air vane. We’re looking at the heater core side, and you can still see plenty of foam covering the vane. I haven’t used the heater since I purchased my Boxster so there’s never been airflow on this side to dislodge that foam. But it crumbled when I touched it, and the thought of what would have happened if I had used my heater made my flesh crawl. The red arrow points to the location of the vane’s pivot bushing. There’s another one on the bottom of the airbox. Removing these two bushings allows us to pull the vane from the airbox. Unfortunately, removing the top bushing requires a little minor surgery to the airbox housing.
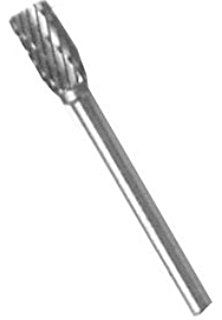
This cutting tip in my Dremel motor tool allowed me to slowly mill away the airbox housing on top of the upper bushing. The sheet metal on the firewall prevents getting a straight shot, but after a few passes, I broke through the top of the housing and the bushing became visible. The bushing is recessed a few millimeters, so a steady hand removes the restraining plastic without touching the bushing. Here’s what it looked like when I was finished.
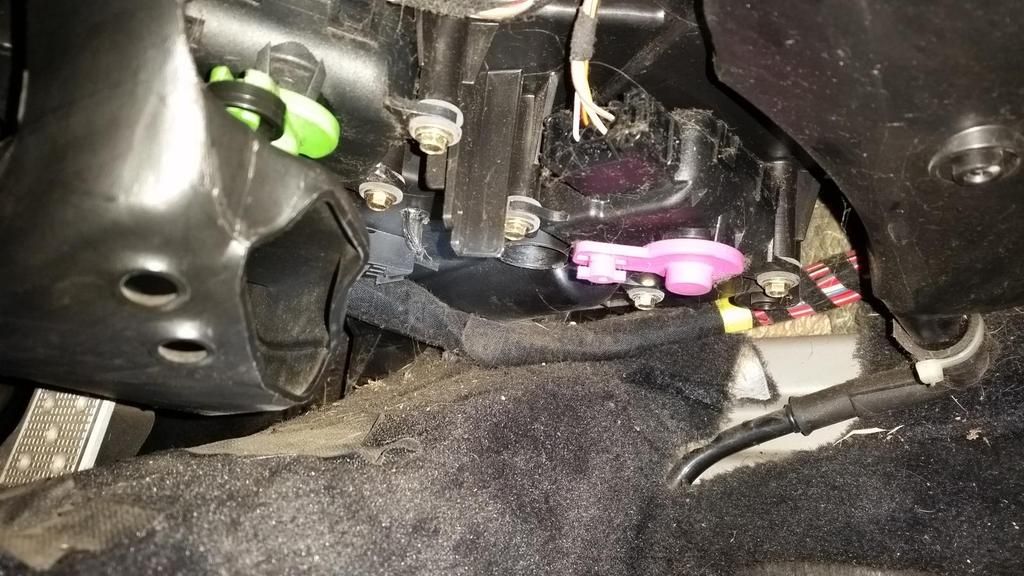
Don’t remove the upper bushing yet, as it’s best to get the bottom bushing out first. If you remove the two plastic screws and the foam cover on the passenger side footwell you’ll see the stepper motor and the two bar linkage which rotates the air vane. This assembly is next to the transmission “hump”, just look for the pink actuator arm. This actuator arm is attached to a two bar linkage which connects to the bottom bushing with a 7 mm hex head screw. Remove the screw, and rotate the linkage to remove it from the pink actuator arm. The lower bushing falls right out. Here’s a picture with the linkage and bushing removed.
Back in the “frunk” area, I was able to remove the upper bushing by working it out with my finger. With both bushings removed, I carefully rotated and removed the vane from the airbox; trying to keep the crumbling foam from dislodging. Here’s what it looked like when I pulled it out. Ugh, makes my skin crawl.....
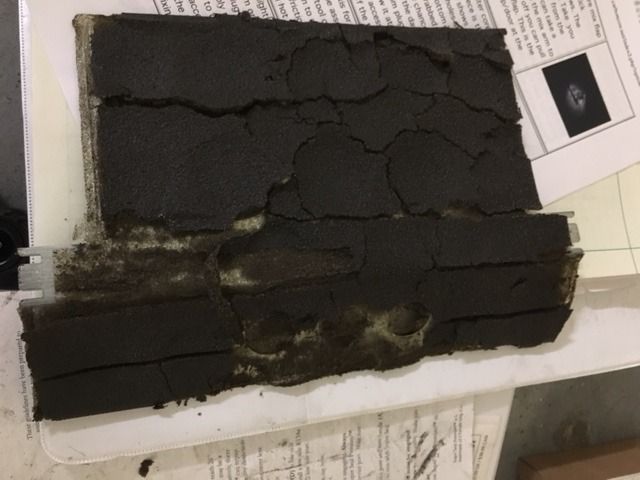
The other side was exposed when airflow bypassed both the heater core and A/C evaporator. This missing foam is what coated me when I turned up the blower fan. It’s really a neat design. The flapper is made of galvanized sheet metal, with punched holes to reduce weight. It has enough rigidity to direct airflow while remaining light enough to reduce loading on the stepper motor. The foam wrapping provides sealing at the edges and insulates the hot and cold areas of the airbox. If only Porsche hadn’t followed the lead of the Corporate Sustainability Director and selected a foam with low Volatile Organic Compound content.
As a Frugal Mechanic, I’m willing to forego environmental chastity in favor of the right material for the job. I’ve been using this stuff to quiet rattling dashboards and talkative children for years. It sticks to any surface, sneers at exposure to weather, and doesn’t flake or crumble. Apparently, it also insulates piping from freezing, but as a child of the South, I have no experience in such matters.
Unfortunately, I didn't take a picture of my flapper with the new foam installed. Here's a picture (not mine) of a brand new flapper to give you an idea of the coverage.
Re-installing my re-covered air vane was a little fiddle-y. Both bushings connect to the vane with a loose friction fit. I smeared a little Superlube grease on the bushings to keep everything moving nice. Fitting the vane back into position within the airbox, I inserted the upper bushing into the housing and twisted it until it slipped onto the vane. Back in the passenger footwell, I aligned the vane by sticking my pinky finger into the recess on the airbox. Then I separated the two bar linkage for the lower bushing into two pieces by squeezing the pivot. I inserted the lower bushing, rotated it until it slipped onto the vane, and eyeballed the required location for the linkage. After removing the bushing, I installed the screw and one bar of the linkage in the required position and loosely fit the other linkage bar into the pink actuator arm. Then, I reinserted the bushing aligned the two bars in the linkage and snapped the linkage back together by pressing pivot. You have to go through this sequence because the bushing is held in place by tension on the linkage back through the actuator arm.
Re-installation was the reverse of removal. Since I’d trapped some air in the heater core, I opened the bleeder valve on the coolant expansion tank to burp the air out while I took it on a short drive. With the engine warmed, I dialed up the heat on the climate control and the cabin began to warm up nicely. And no confetti from the air vents. I’ll call this one a success.
You'll need to log in to post.


