


On the fabrication metal, I keep mine in a couple of 5 gallon buckets. Works pretty good for me. Unless of God how many feet in length, in which case I just took that behind the bench. Case in point would be 20-foot sticks of one by one tube

On the fabrication metal, I keep mine in a couple of 5 gallon buckets. Works pretty good for me. Unless of God how many feet in length, in which case I just took that behind the bench. Case in point would be 20-foot sticks of one by one tube

stylngle2003 said:perhaps you can fill those tubes with something (sand?) to prevent bending and add rigidity? I think also that redundant cabling to the ceiling rafter may be a good idea? Altimax Arctics on a miata must be a lot of fun
I don't know if sand would help. Honestly, buying stronger pipe is easy and relatively cheap and I can reuse this stuff for something else. I'll probably put that redundant cables in just in case.
Dusterbd13 said:On the fabrication metal, I keep mine in a couple of 5 gallon buckets. Works pretty good for me. Unless of God how many feet in length, in which case I just took that behind the bench. Case in point would be 20-foot sticks of one by one tube
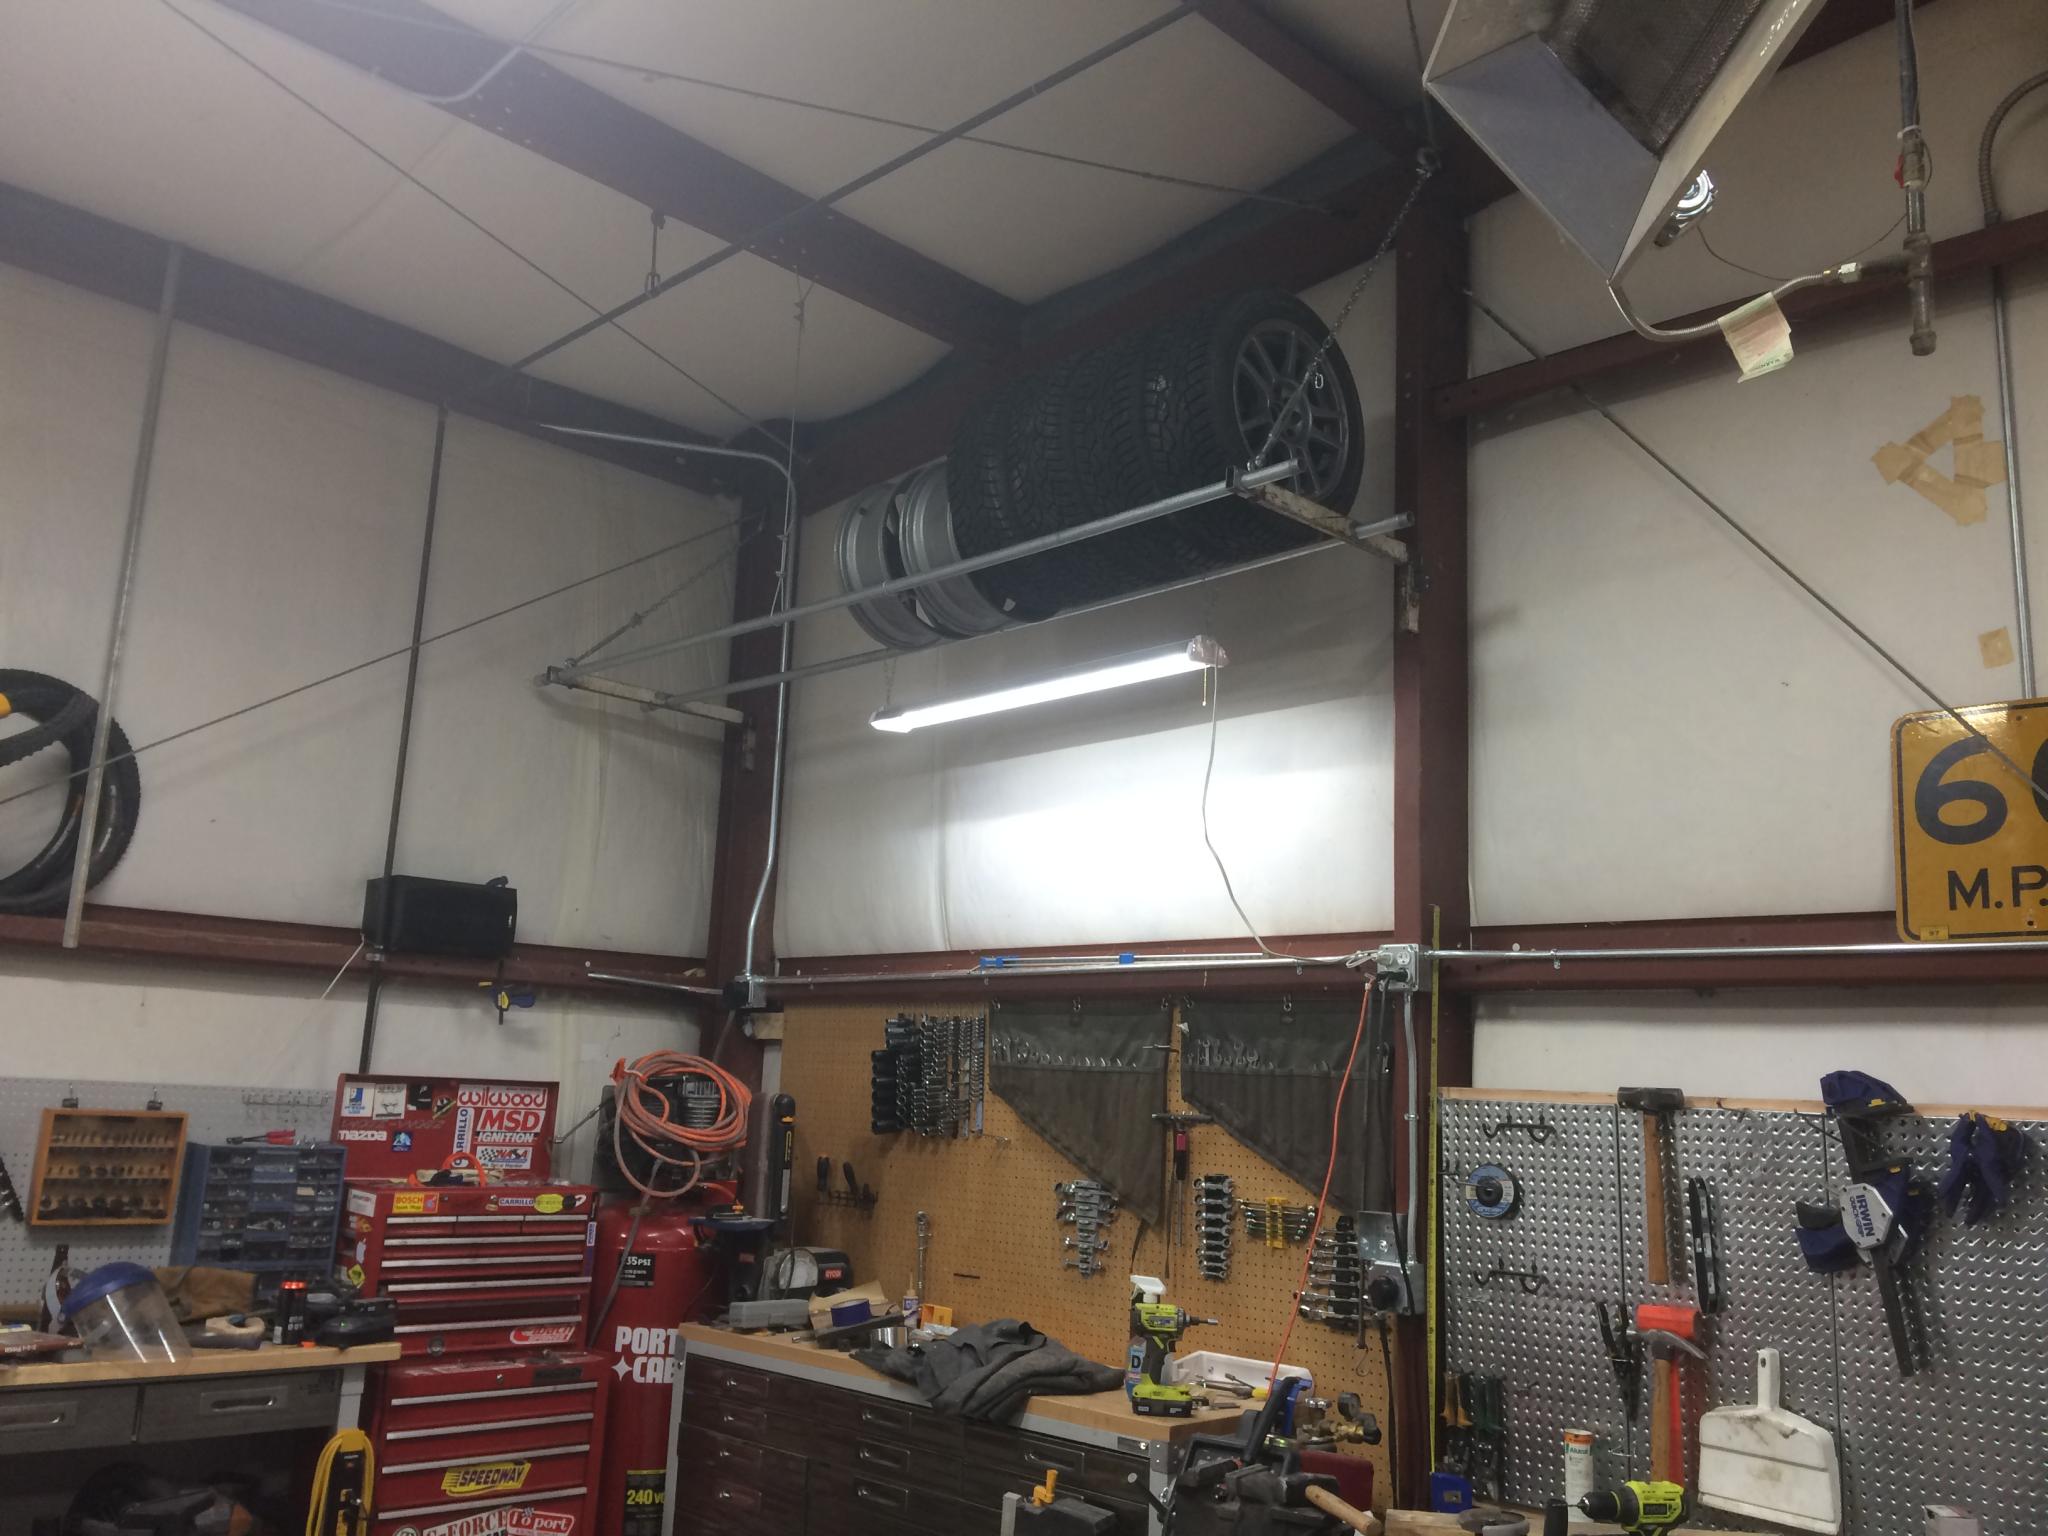
You can see my buckets o' metal under the bench in the picture. I couldn't fit the flat stuff in there well though. I'd just like to have those buckets on wheels so they're easy to pull out.

I'd probably put the two pipes an inch or two further apart, the tires look less stable up there than ideal. Then again, I live in earthquake country, so perhaps I'm excessively paranoid. :)
They're 16" apart. It seems to be quite stable and this has the added advantage that I can put bare wheels up there as well.
Update on the tire rack: failure.
I used cables to support the thing from above, and one of the clamps on the looped cable appears to have let go. It was tightened with a pretty tough little impact gun, but apparently it just didn't have the grip for the load. Luckily the falling wheels didn't damage anything so I'm just left with a scar on the wooden workbench where the pipes landed. But it's enough that I won't be trying cable again and it's fairly obvious that I don't want falling wheels near anything I care about.
I'm going to build a serious version now. Proper crossbars, chain to hang it and a better connection at the joist. I figure that this 9' long rack could potentially hold up to 500 lbs of tires, so I'll use chain with a WLL of 750 lbs. Haven't decided on exactly what the crossbars will be yet, but I'm thinking of something like a 1x2 square tube. Welding shall be involved.
This was a cheap lesson!

In reply to Keith Tanner :
Is storing tires vertically, especially with only two relatively small contact points, good for the tires? I think I’d prefer a shelf I could stack them on, either in pairs or sets, if I had much intention of putting them back into service.

Pete Gossett said:In reply to Keith Tanner :
Is storing tires vertically, especially with only two relatively small contact points, good for the tires? I think I’d prefer a shelf I could stack them on, either in pairs or sets, if I had much intention of putting them back into service.
The only weight on them is the gravity of their own weight, I wouldn't think it would be an issue.
I have *ahem* a few spare sets of wheels and have become creative with storage of them. I like your general plan Keith, and I think with chain and welding and all that you'll be set.
A few pics from my garage of how I'm storing wheels in case it helps spark creativity for someone else.
-Set of wheels stacked on the cabinet will be used for projects in the near future, thus easy access, not long term storage.
-Set of wheels flat hanging on the wall, storage for a spare set of wheels. I used some mounting pegs I got off amazon for like $45, but now that I have a welder I could easily make more myself. They are just a plate mounted to the wall with a ~1.5" tube welded on sticking out at a slight upward angle.
Apologies for the really blurry picture on this one, but it's the only one I had handy that shows my other wheel hanging setup.
-Made this out of 2x4s mounted and hanging from the trusses above. Space for 2 full sets of wheels, plus a spare or two.
-The rest of the spares are just shoved in the attic area of the garage and stacked.
I'm digging your lighting!
I hadn't thought about the total weight of the setup when I started this. I think the the overall design was good, I just went too light on all the materials. The cable is rated well, but apparently needs to be doubled up on the clamps. No worries, the chain will take care of that.
Currently, I have tires stacked all over but they're something I don't need very often and bulky, which makes them ideal for putting up high. The heat isn't ideal for them but so it goes. As for the point loading, these things would have at least 550 lbs of load if they were on a car, putting 40 lbs on two bars isn't a big concern.
Keith Tanner said:I'm digging your lighting!
Thanks! I have more strips for finish out the other side of the garage, just haven't put them in yet... I am very happy with the lighting already though, very little shadows since the light is so full.
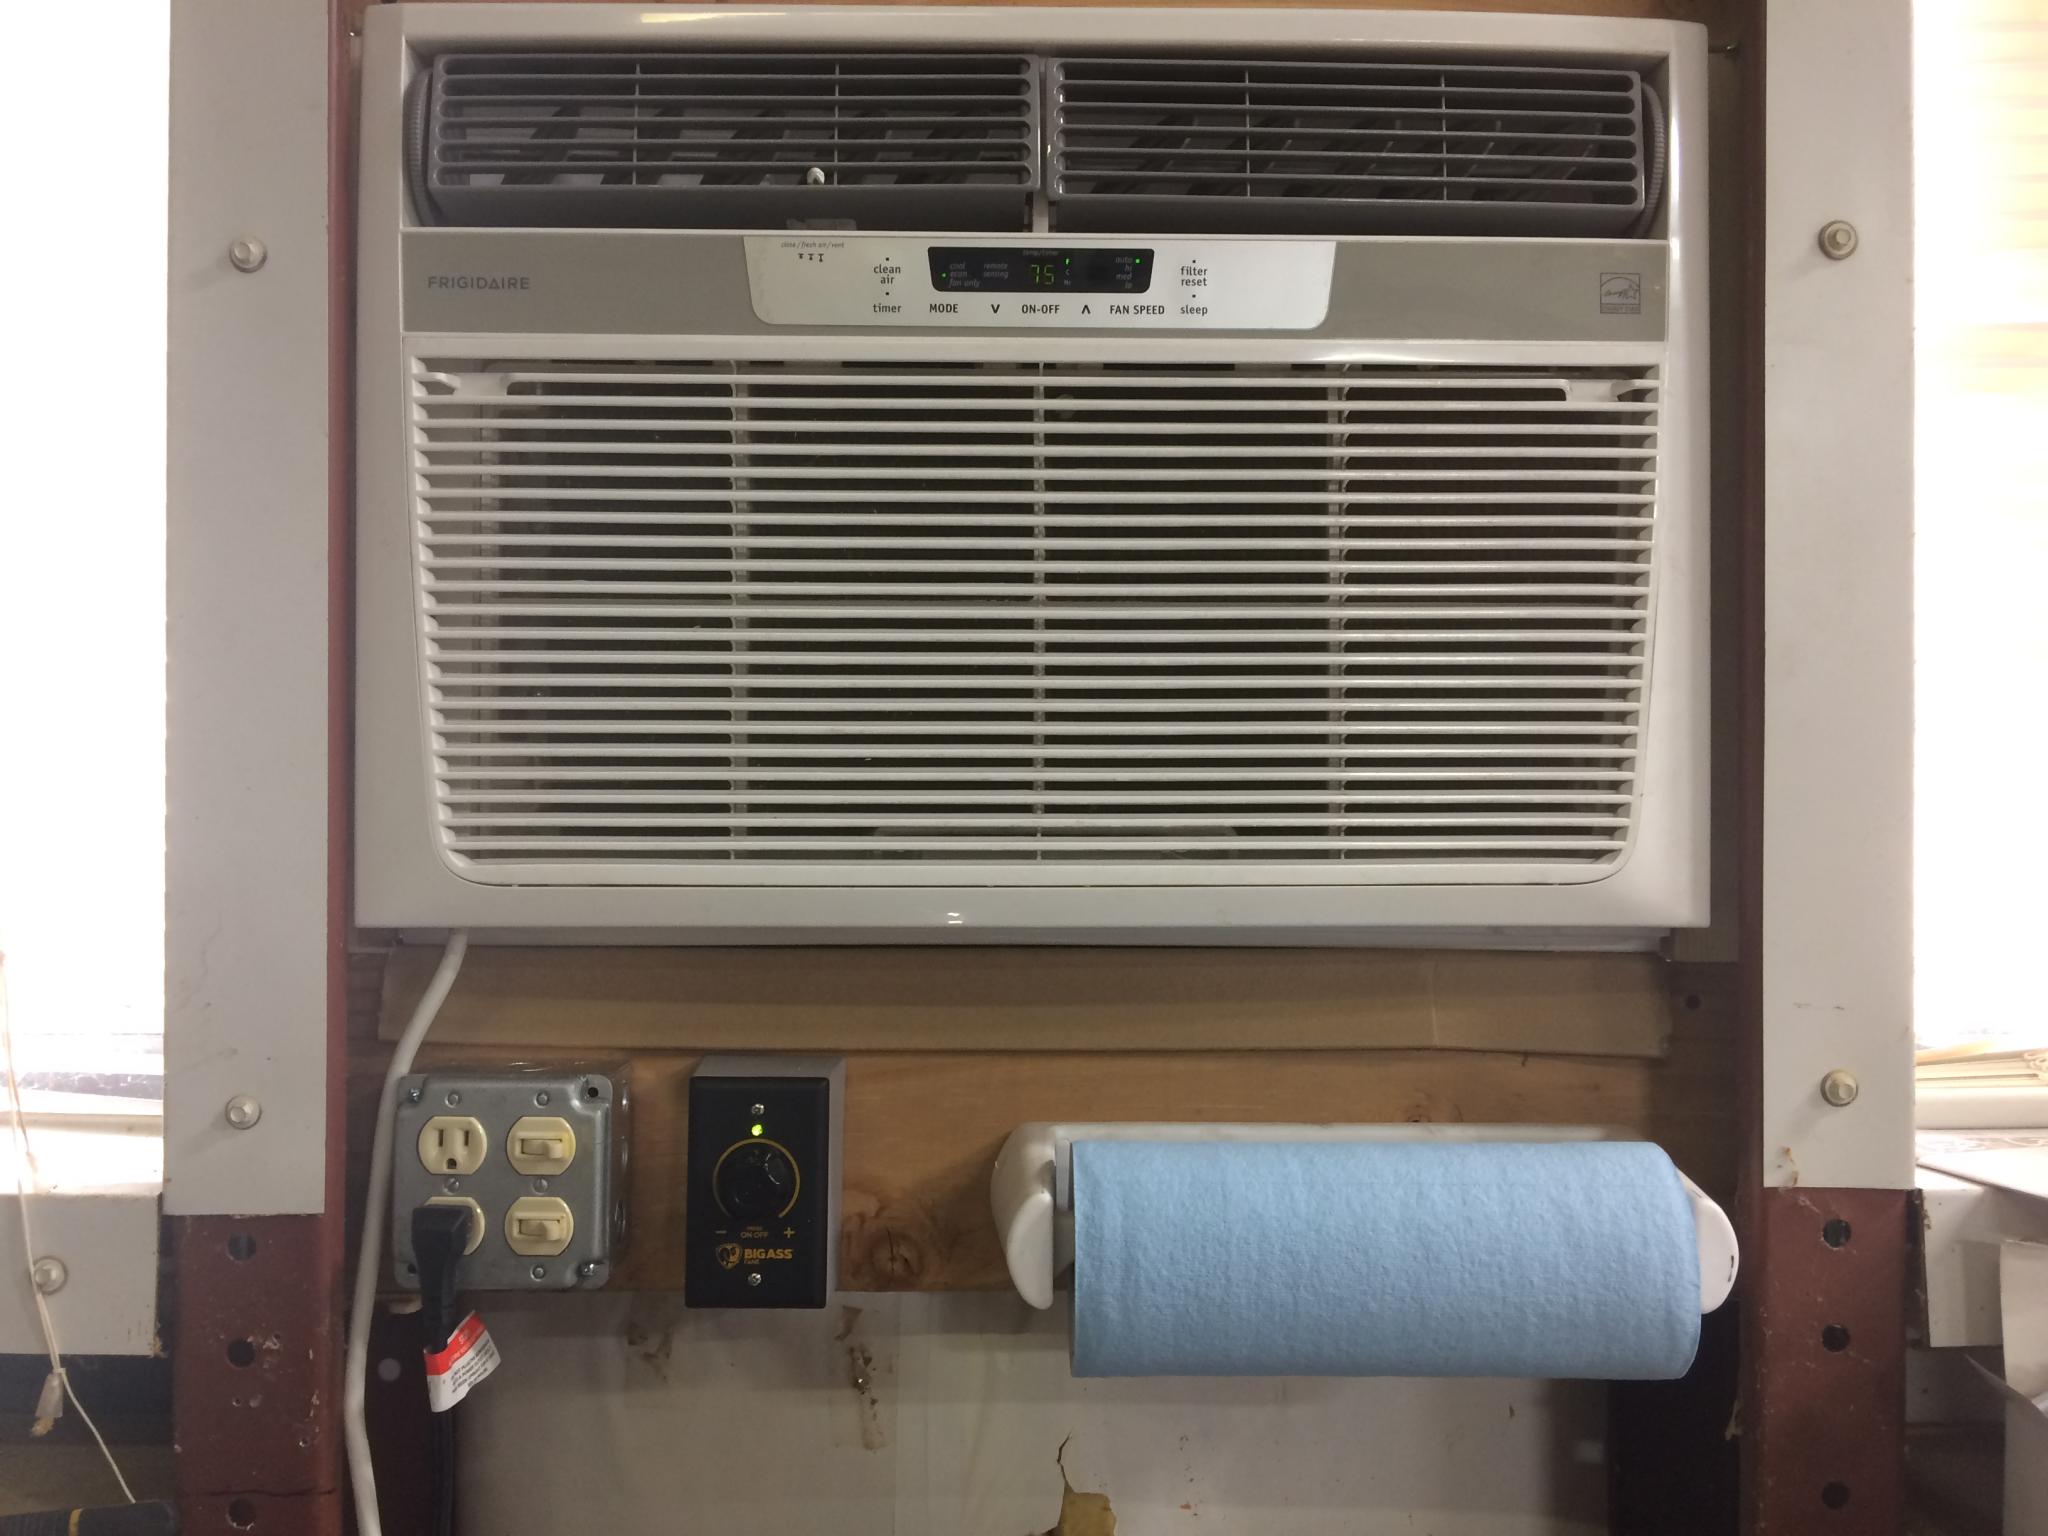
I had a planned order of jobs for yesterday, but got a bit of a late start. By the time I got back from a hardware store run it was starting to warm up and I decided the AC was now the first priority.
I got lucky here. The unit needs an opening that's 26.75" wide. I was going to put the unit in the back half of the garage but measured the width between the beams that support the windows. 26.75". I measured it again and again just to make sure but it was an absolutely perfect fit. You can't ignore that.
My original plan was to make a steel frame to support it, but with the two vertical beams available to me I switched to lumber. Joist hangers for the two joists - a 2x8 for the lower - and some carefully shaped sides. Not shown in the pic are a couple of 2x4s to form a sill and give me somewhere to re-anchor the trimmed, floppy metal wall.
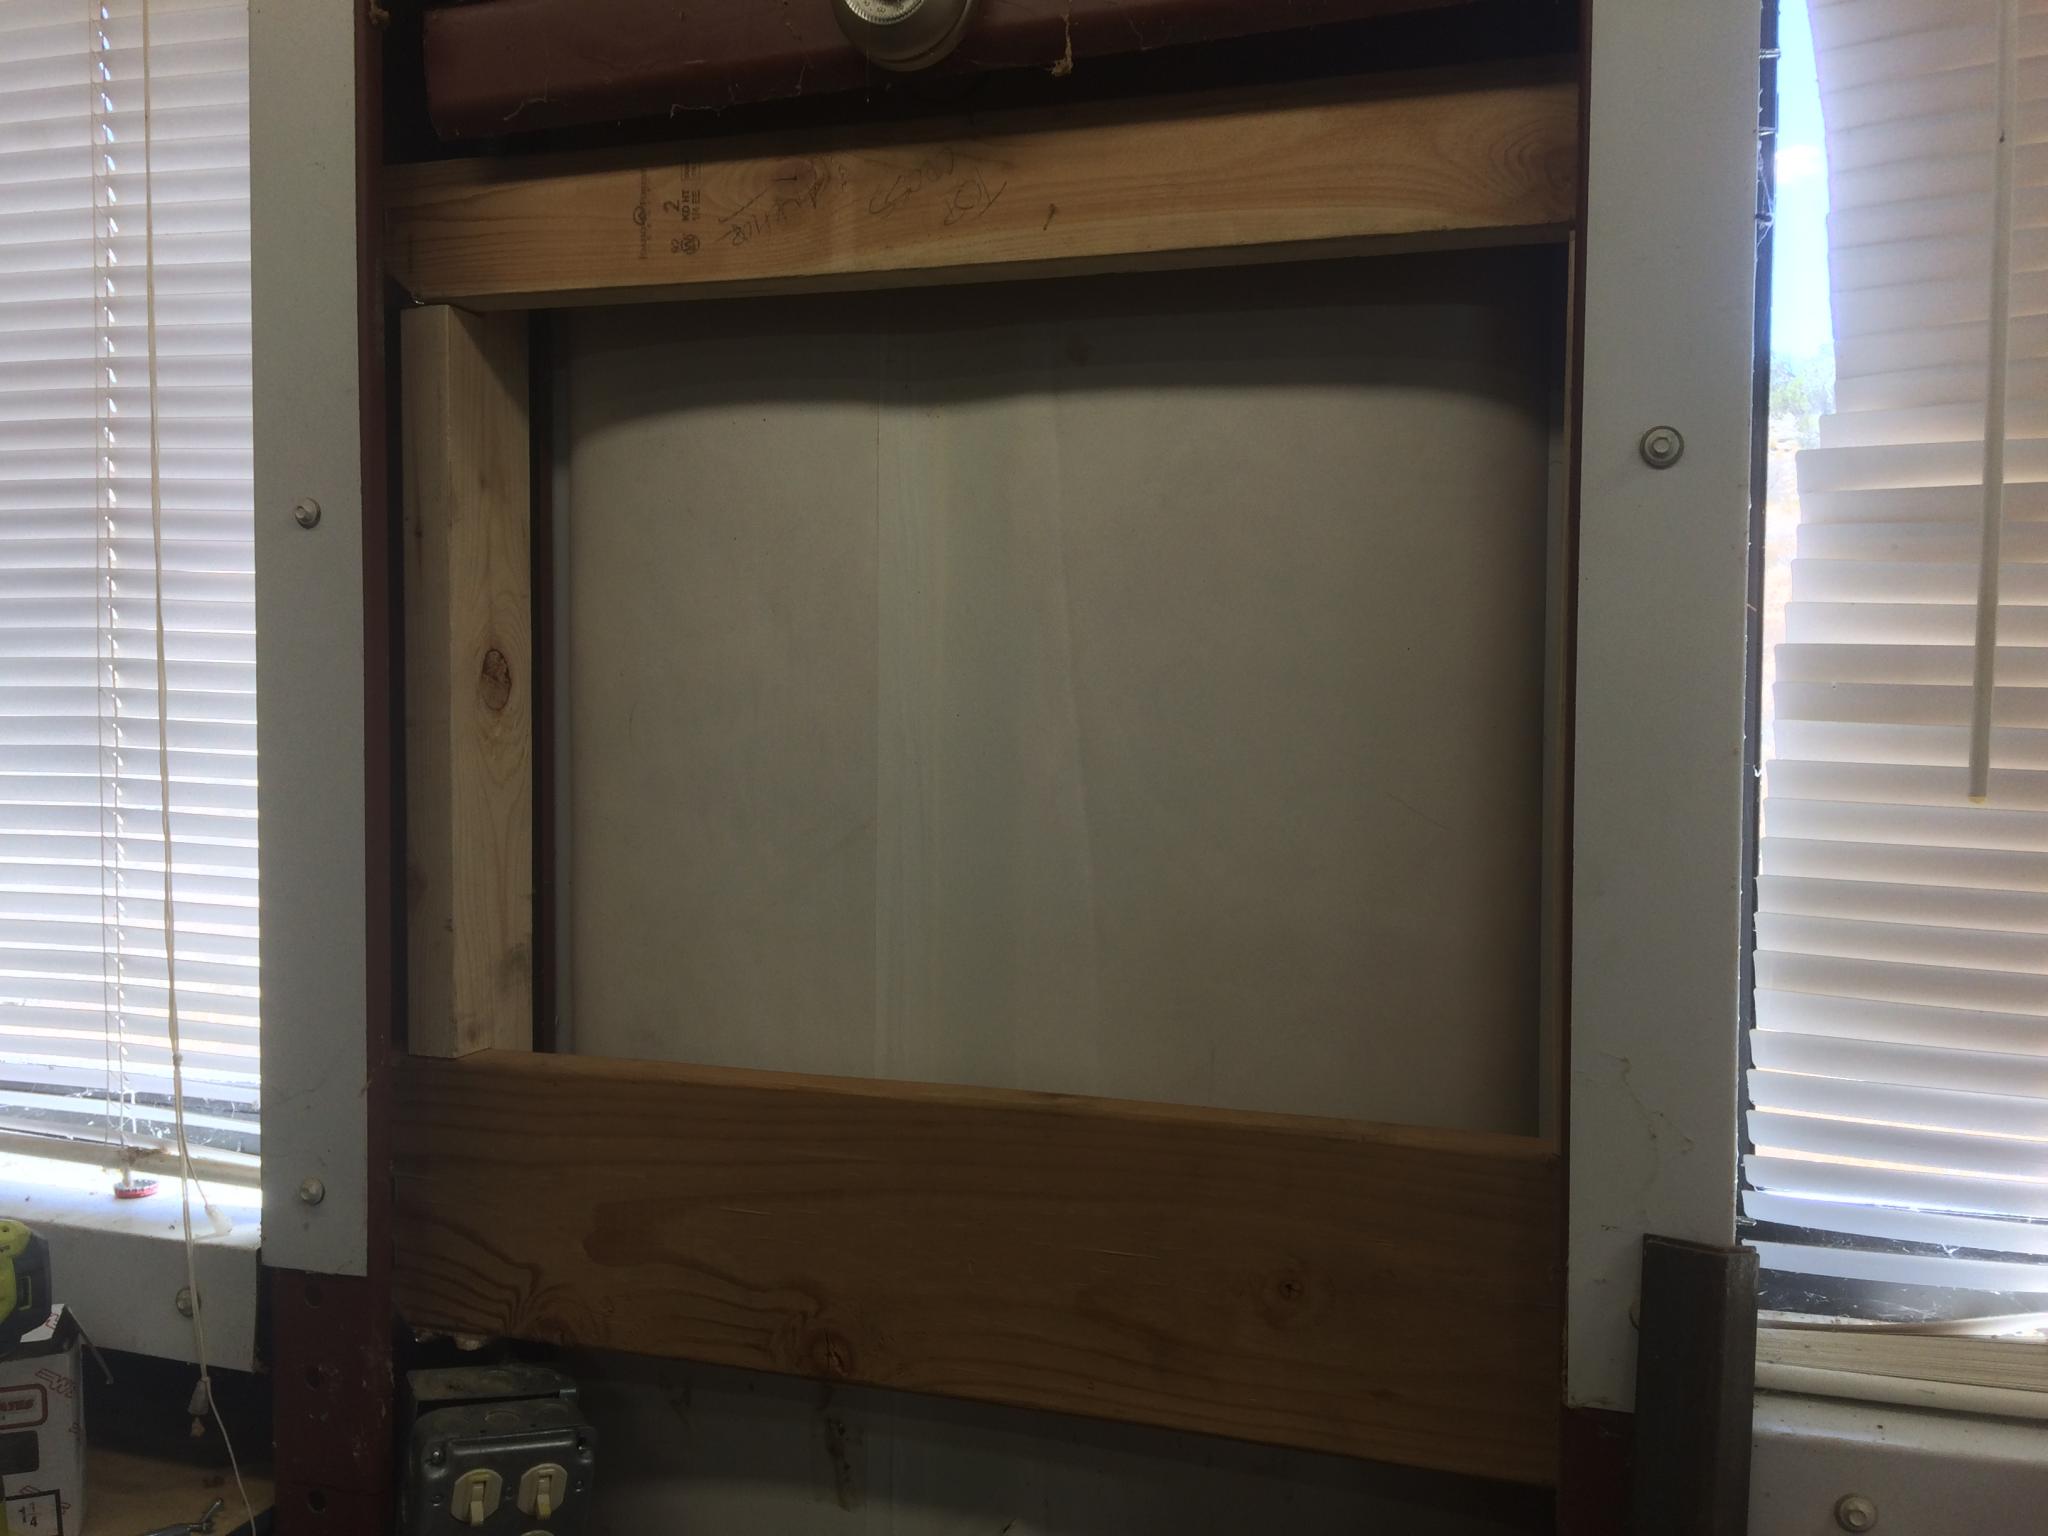
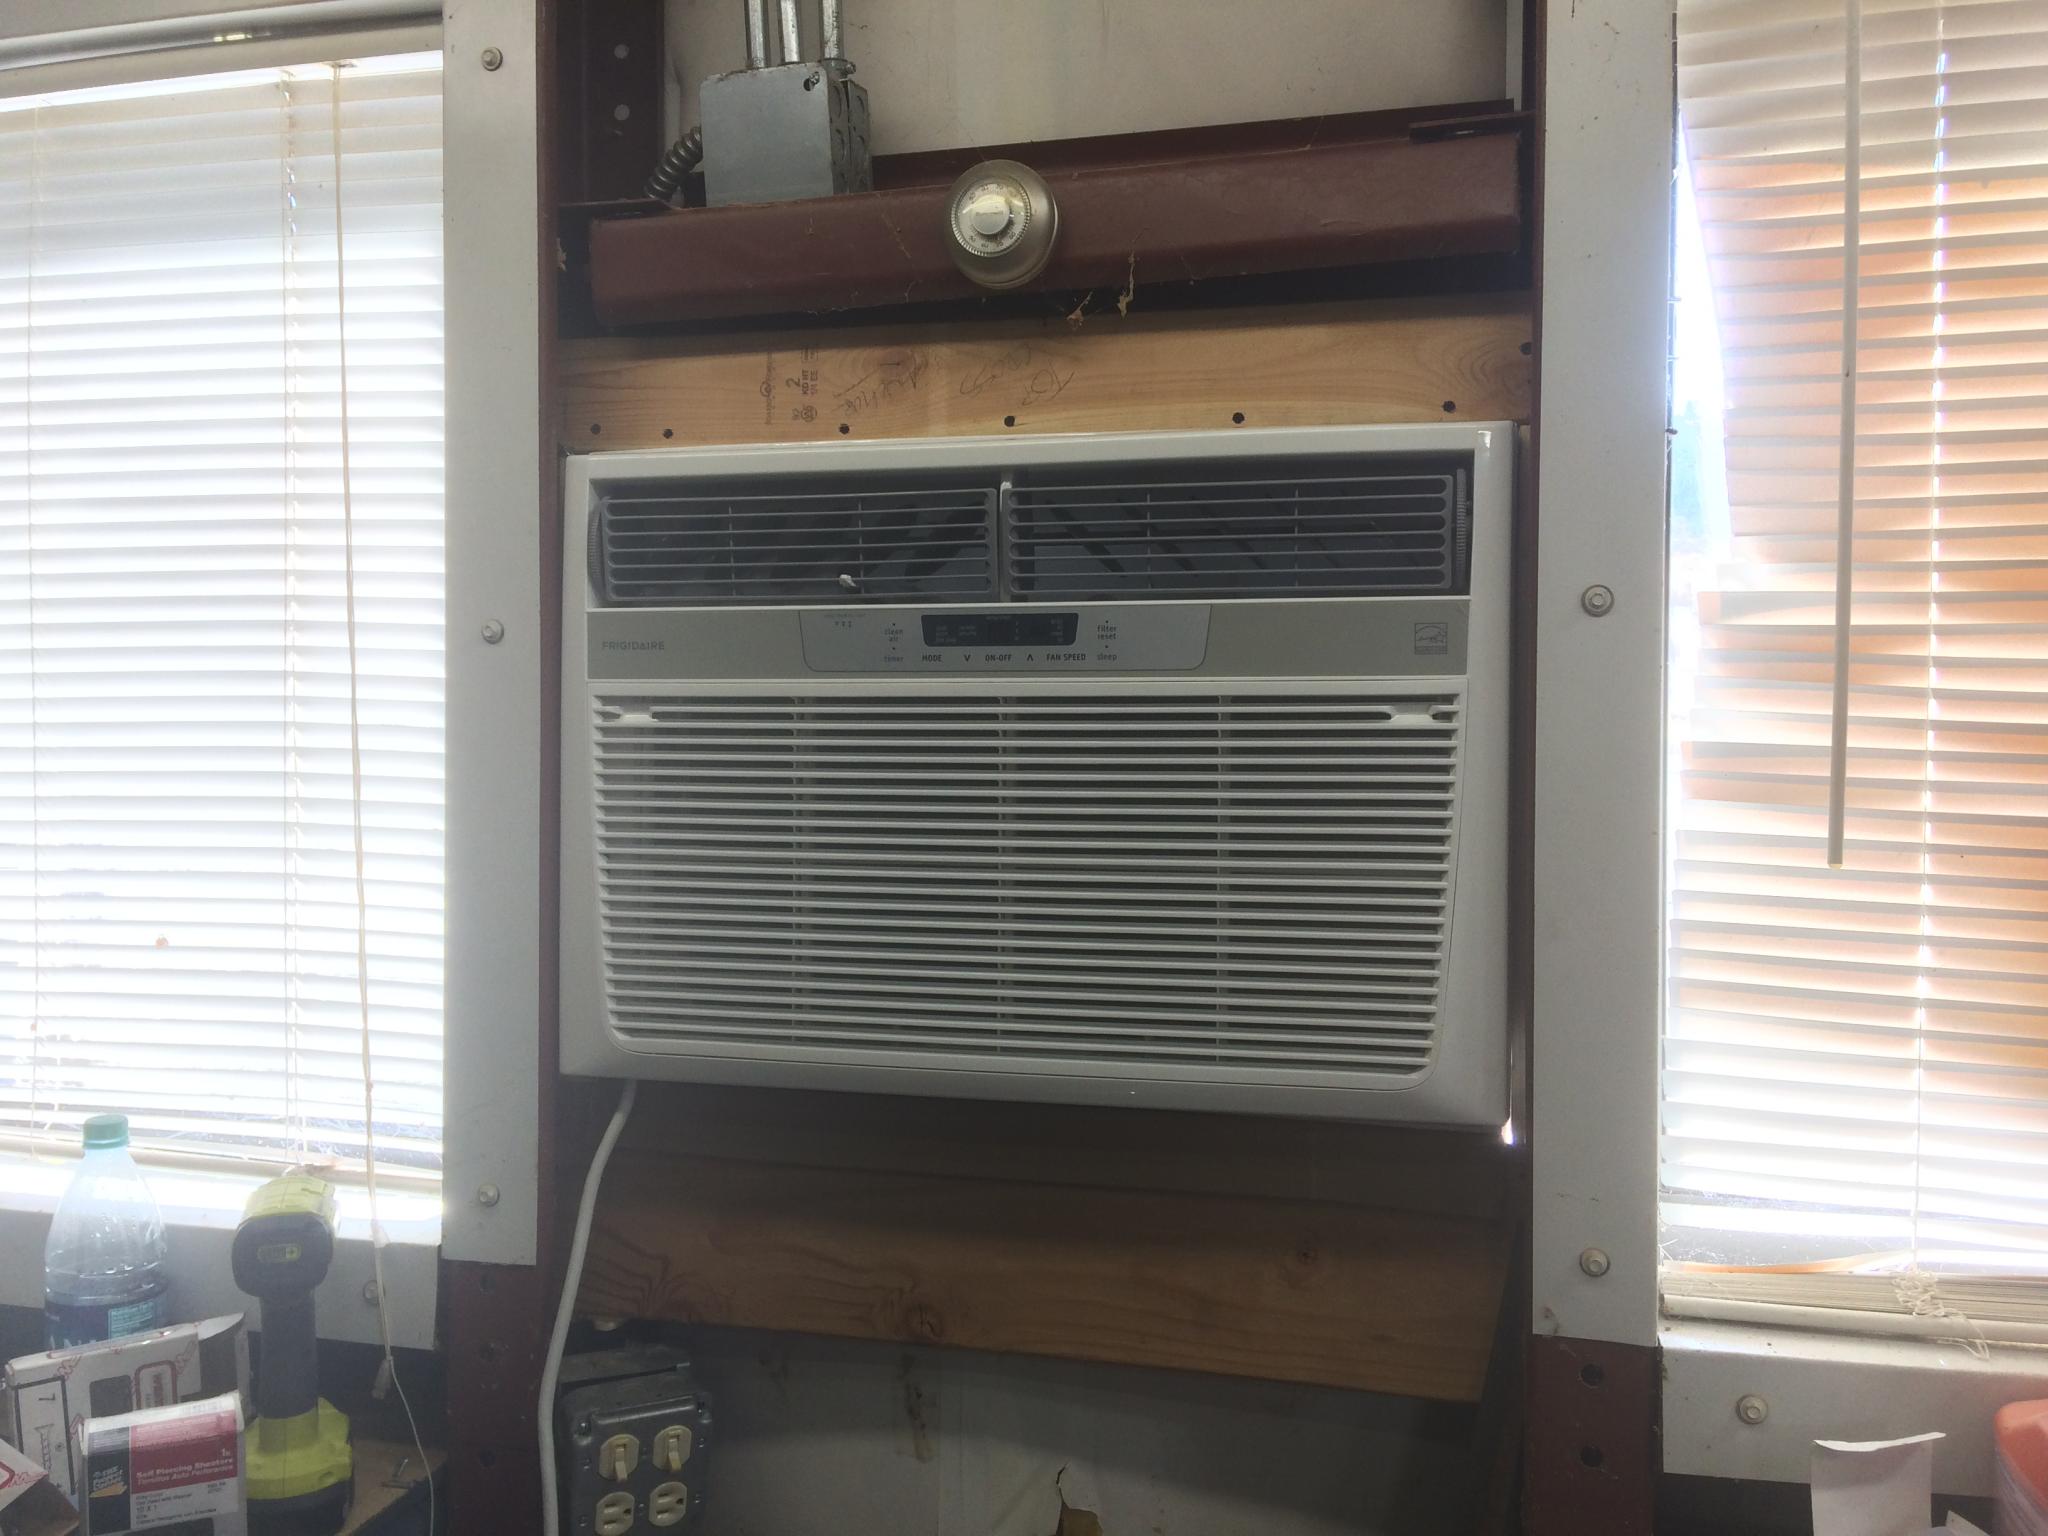
I appear to have not taken a picture of the hole in the wall. I was very careful with the cut to make it absolutely the minimum required size. This, of course, meant that I had to go back and do a little bit of trimming and then a little bit more, but eventually I got it right. The housing went in, then the AC unit slid into the middle. What a beautiful sight.
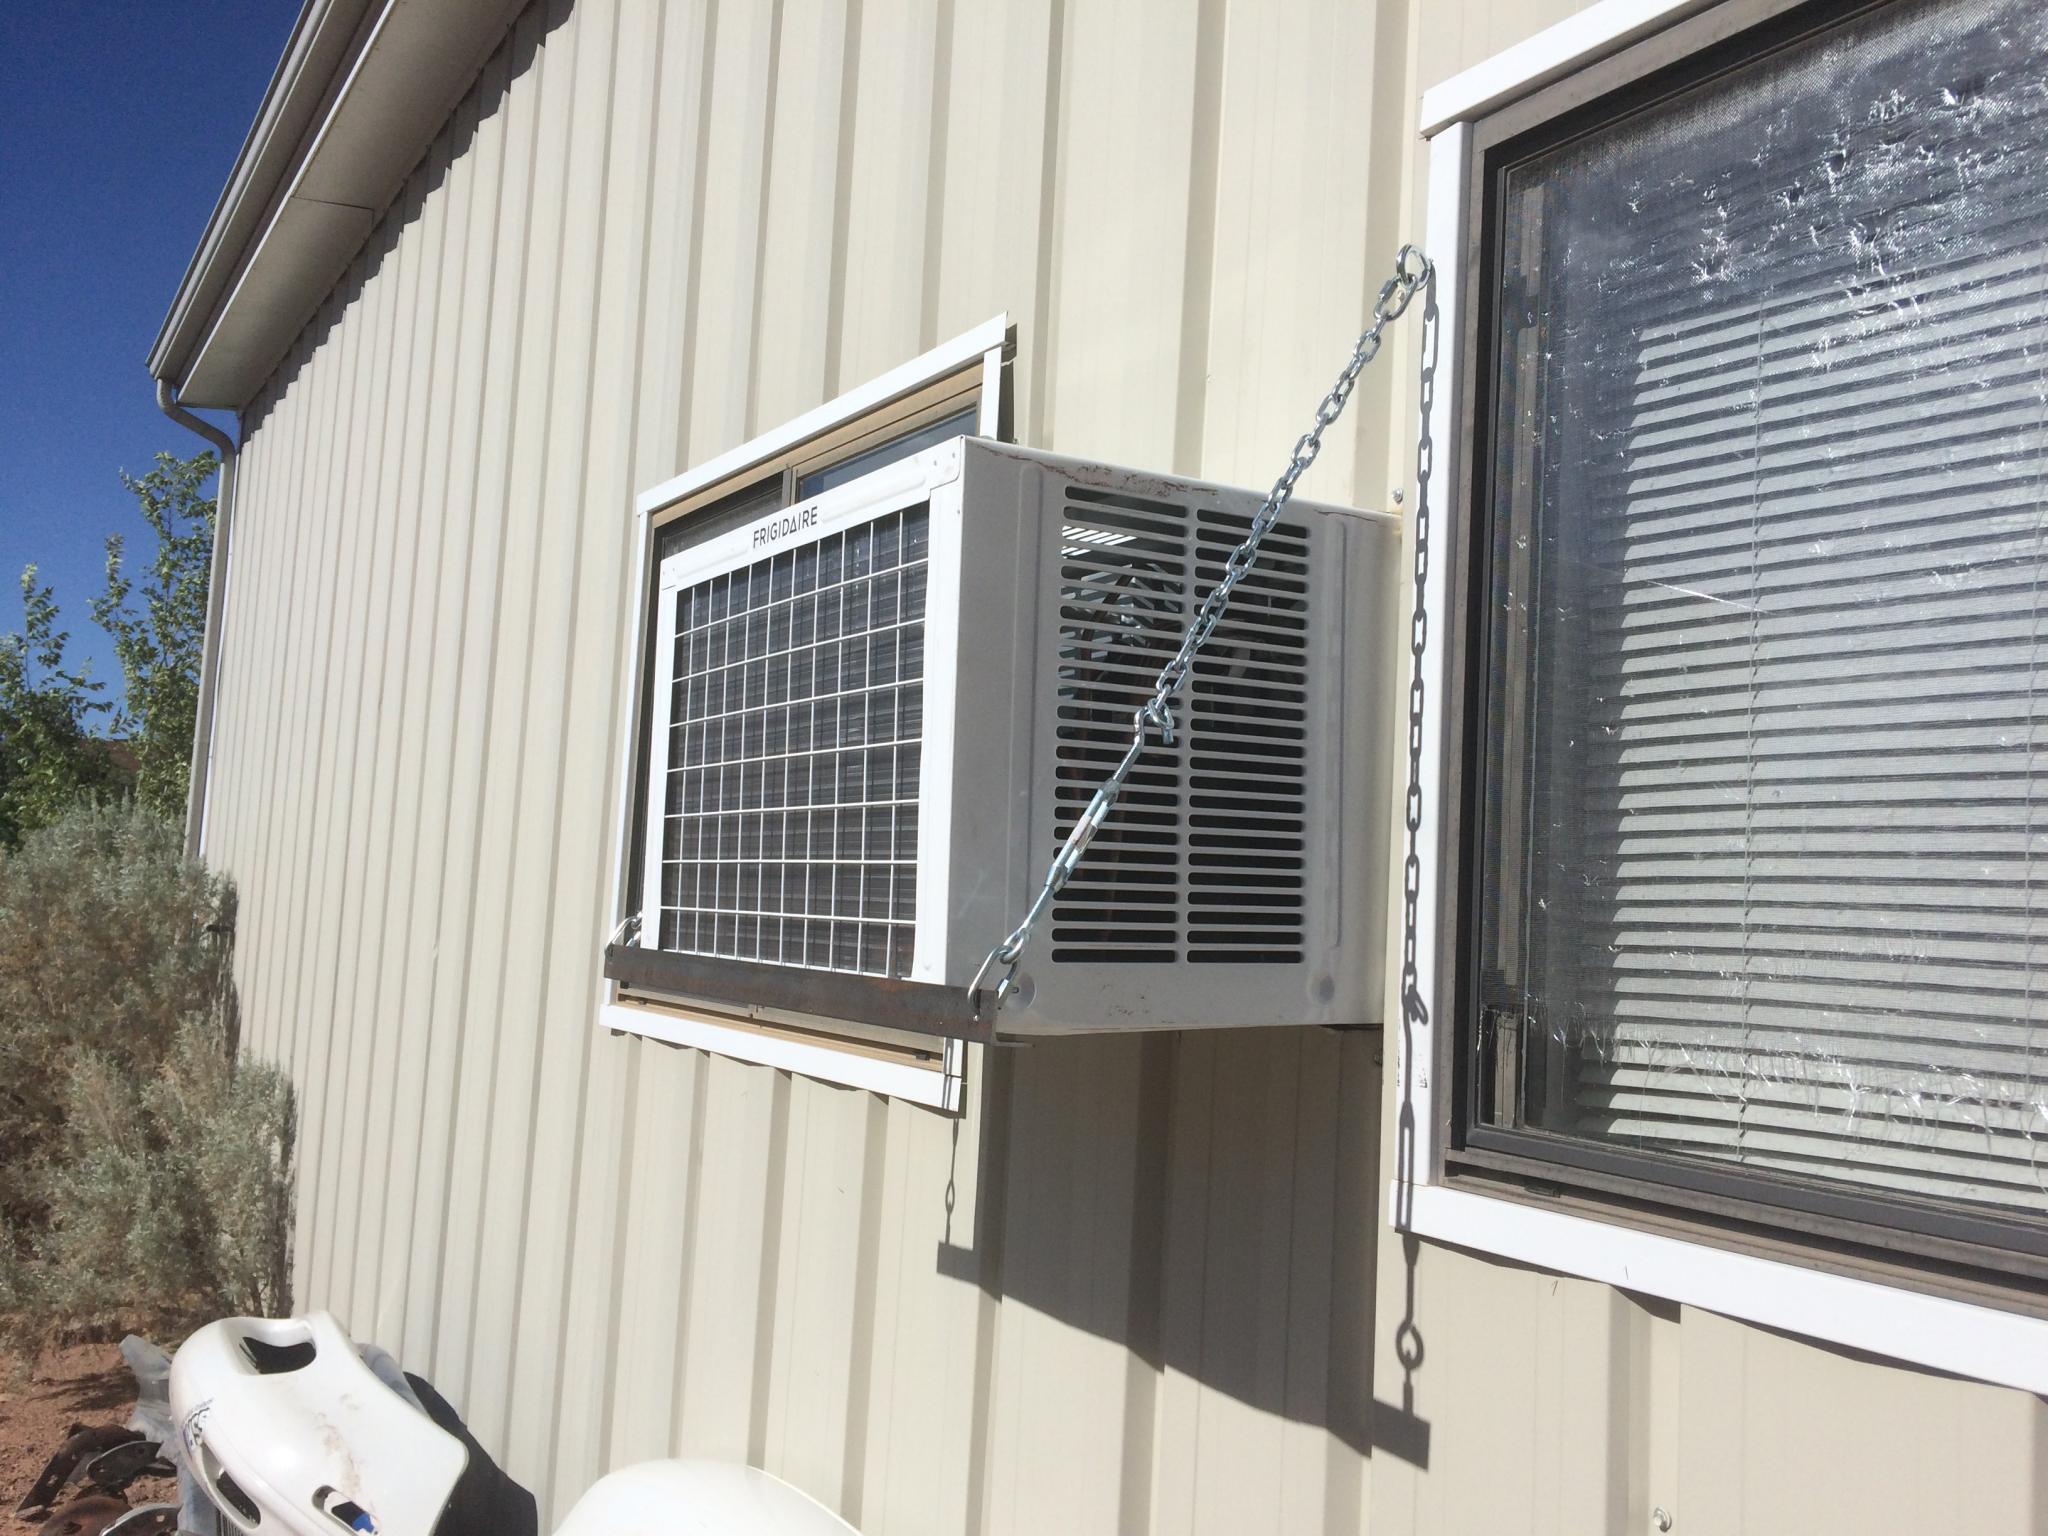
On the outside, I supported the unit with a couple of chains. It's a little redneck to my eye but it's strong and adjustable thanks to a couple of turnbuckles. Janel seems to think I should replace the screens in the windows for some reason.
I still have some wiring to do for a permanent electrical solution, but I was able to build an extension cord to feed 220v to the unit and get it running for testing. Aaaaah, cool air! Thanks again to RossD for the size calculations. I have confidence that this thing will help keep the garage comfortable during the next couple of months.
By the time I was done, it was over 90 degrees in the shop. I was out of time so it'll get a proper test today - I didn't want to leave it running without supervision. Once the F1 race is over, it's time to start working on that aborted list from yesterday.
Tire rack v.2 is up. Instead of 2x4 wood beams, it has 1x2 steel bars. Instead of cable, it has chain with a WLL of 750 lbs. There’s also a third vertical support just in case. I think this one will hold.
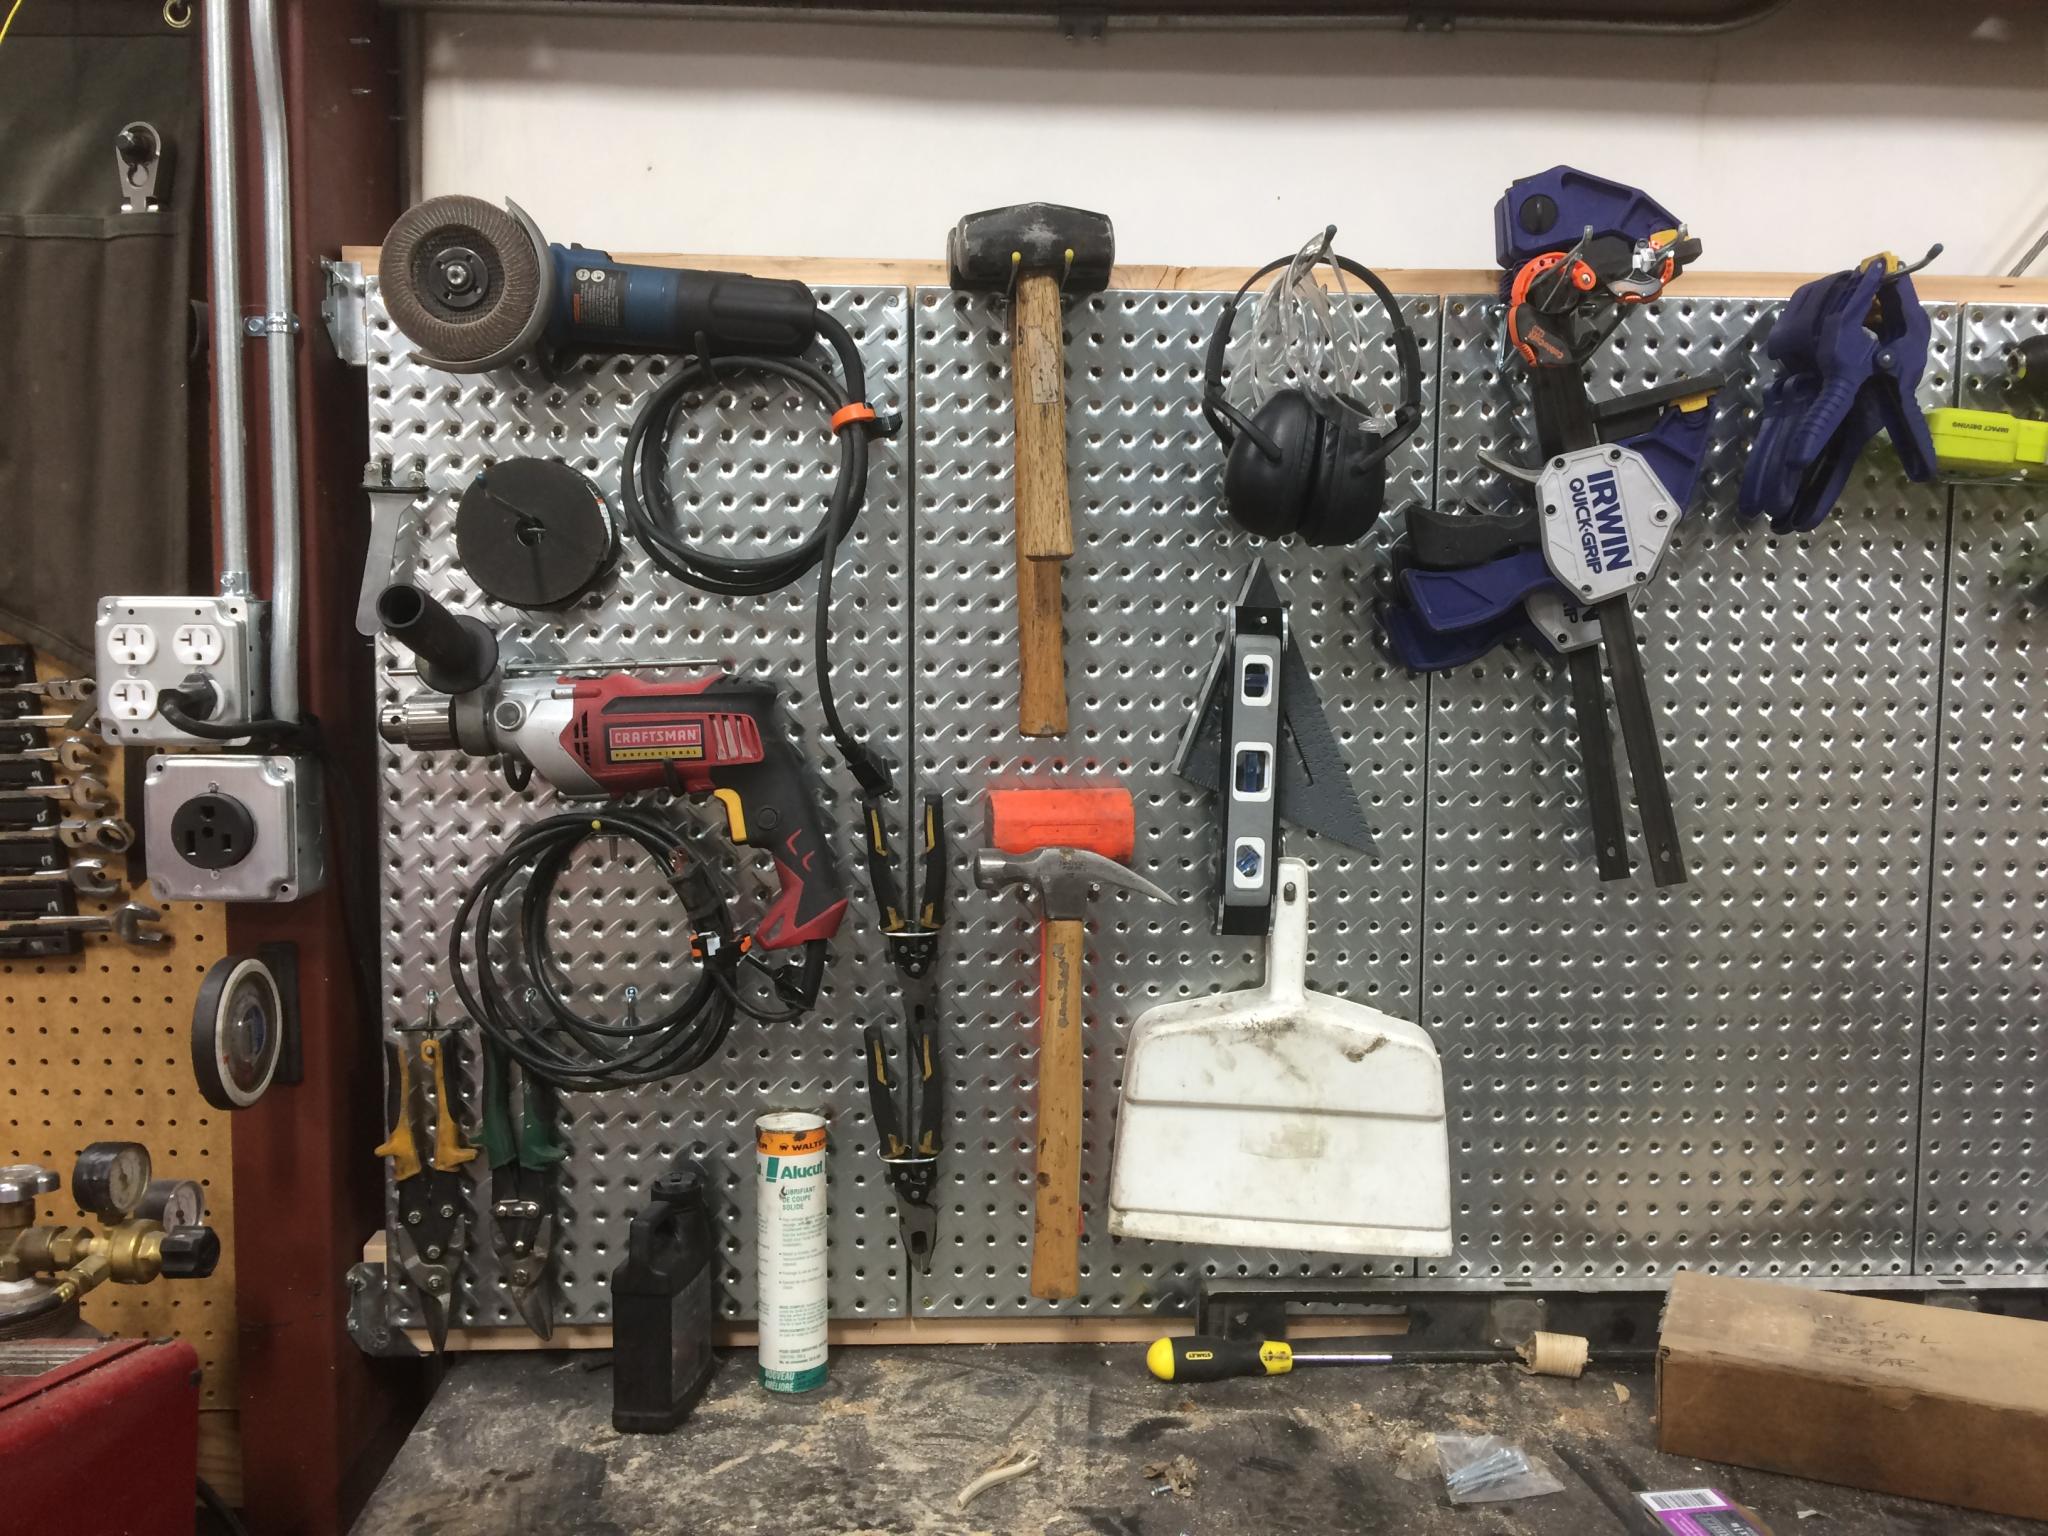
I spent a bunch of time just working - moving an electrical box, changing the layout a little bit, adding a couple of power bars and laying out some of the pegboard. Things are starting to find their homes. It’s a workable space now.
Here’s the back of the fab bench. The bench beside it has all the mechanical and automotive electrical tools, with some finer detail and wood tools on the other side. I’m going to have stations of sort depending on what I’m working on.
I have a few more piles of...stuff... that need to be stashed away or trashed. Some will have to be negotiated, such as what to do with the lawnmower (you don’t mow sagebrush) or the old Christmas tree that’s too tall for our current ceilings and is kinda falling apart anyhow. You know, the detritus that accumulates. It’s also become clear that the rolling benches in the middle of the garage are going to end up piled up with crap. That’s going to require a change in operation on my part. Let’s see if I can be trained.
AC report: it’s having a bit of trouble keeping up. It was 80F at the lift when I fired up the unit this morning, and it’s at about 85 now. Meanwhile, the outdoor temp has gone to the mid-90s. The problem is that there’s not enough air circulation, I think. That will be sorted out soon.
Spent some time doing important things.
Added a bar fridge and stocked it with Mexican Coke and bottled water. No picture. I've never had a fridge in the shop before, but I've always had a shop that was closer to the house.
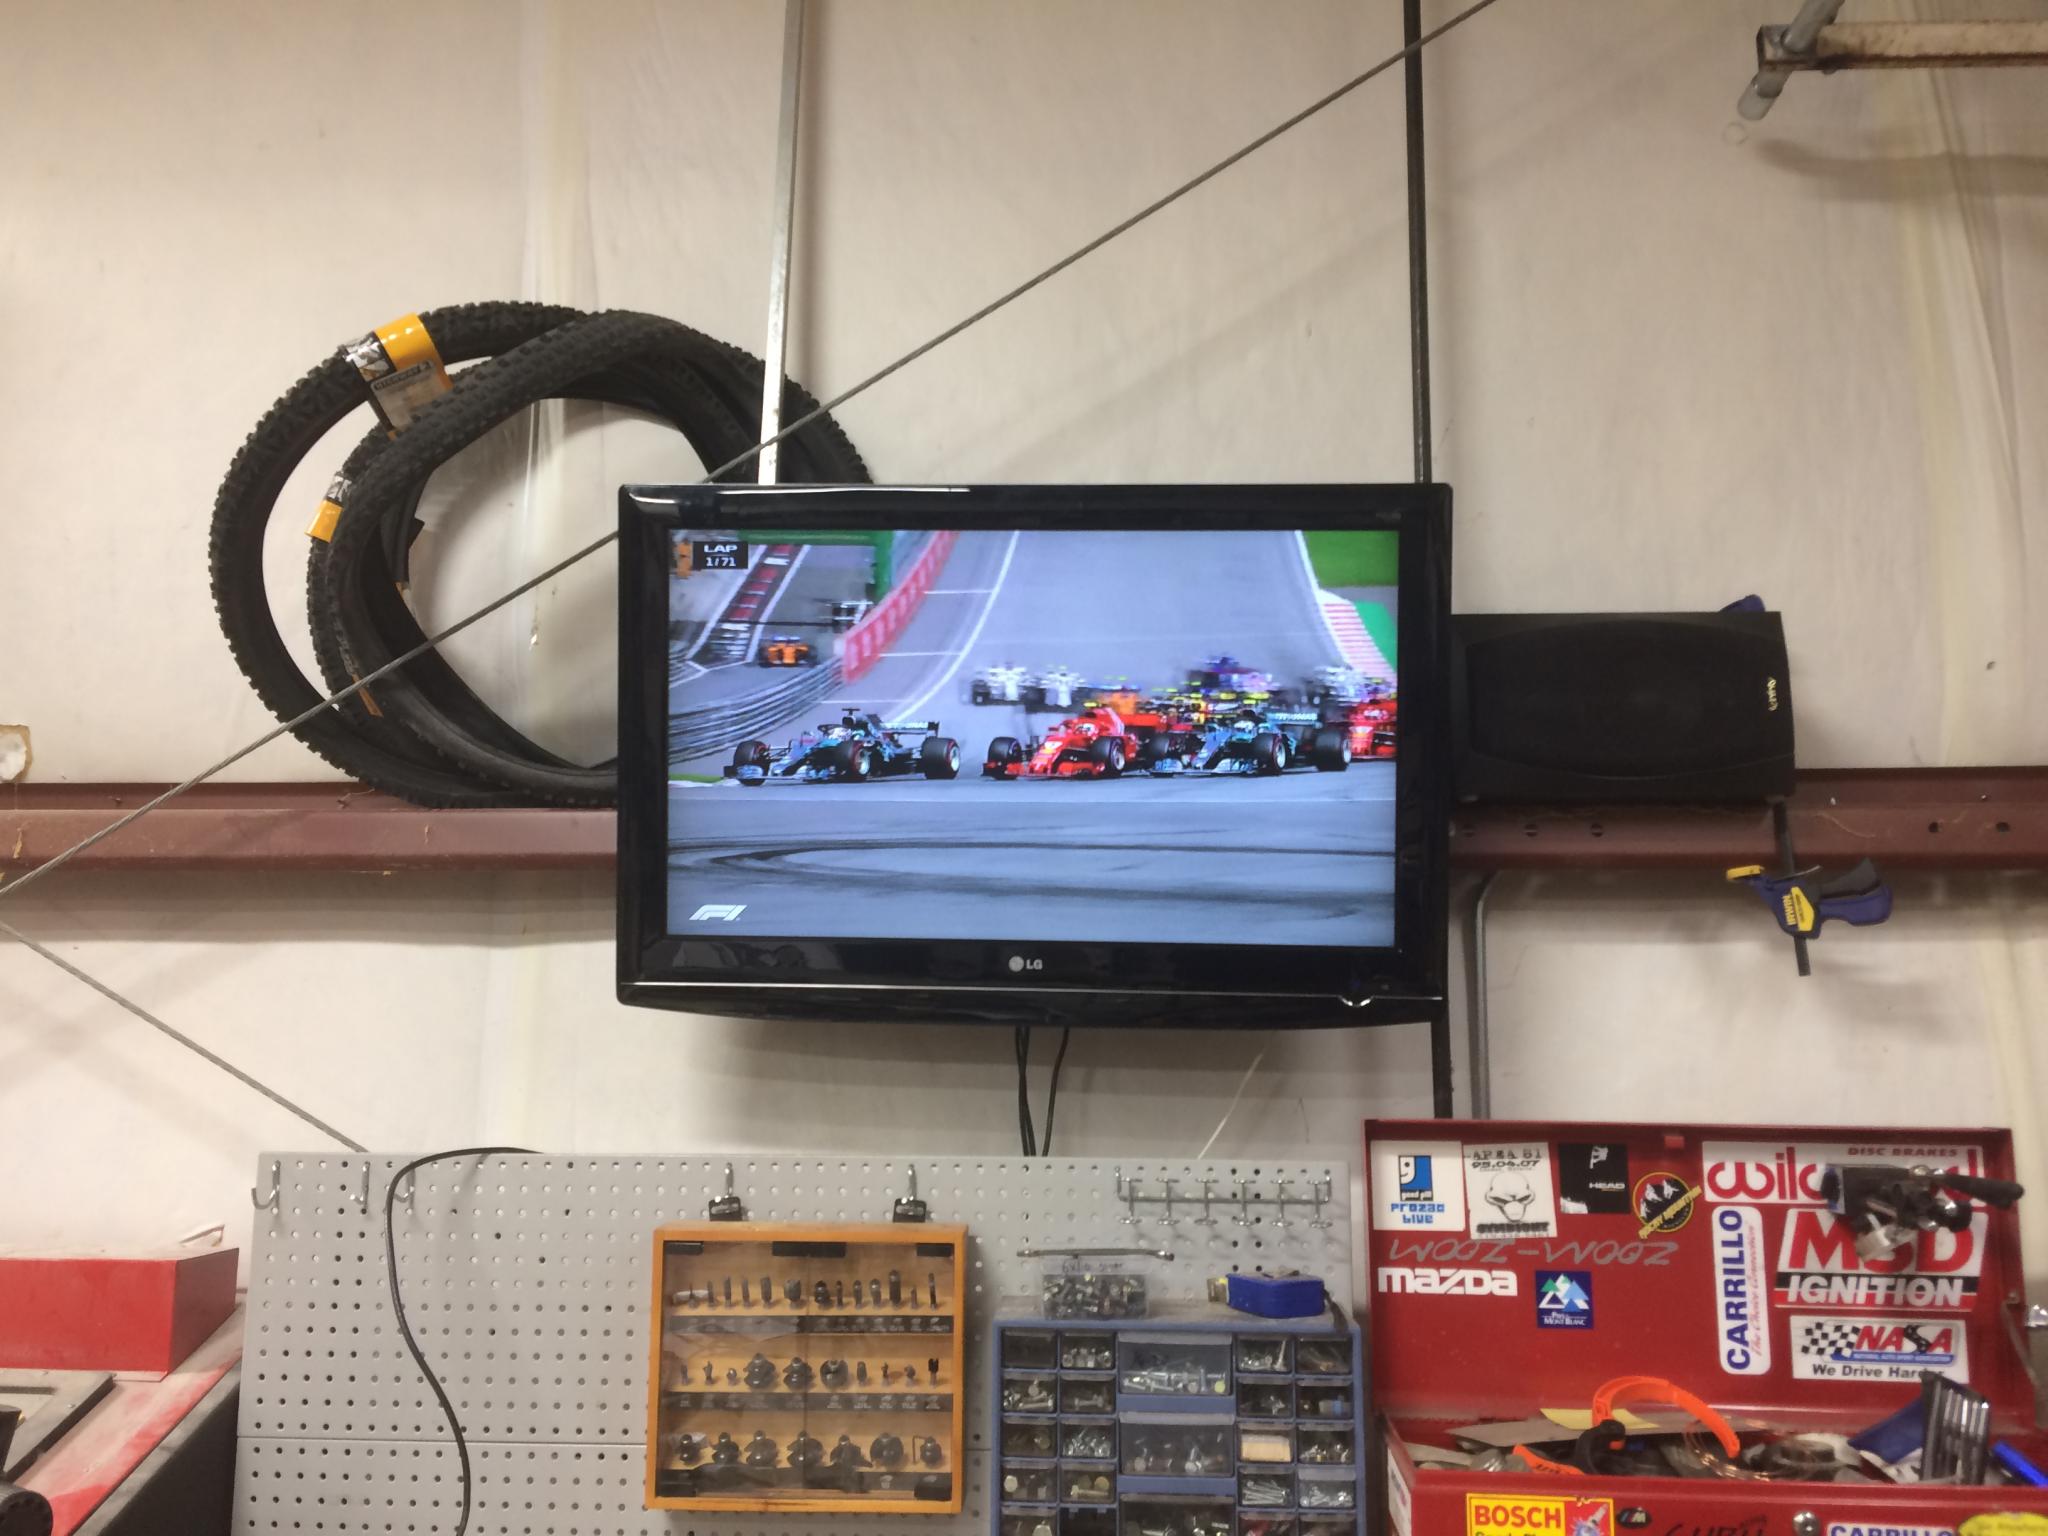
Installed the TV, which required making a steel bracket to mount to the beam here. It's on a hospital-style mount so it can be tilted and rotated around. The tilt is handy since it's fairly high. I spent the rest of the day with the F1 race on in the background, much more interesting than listening to a baseball game. Never had a TV in the shop before, this is weird. But I had a spare screen and what the heck. I like having the races!
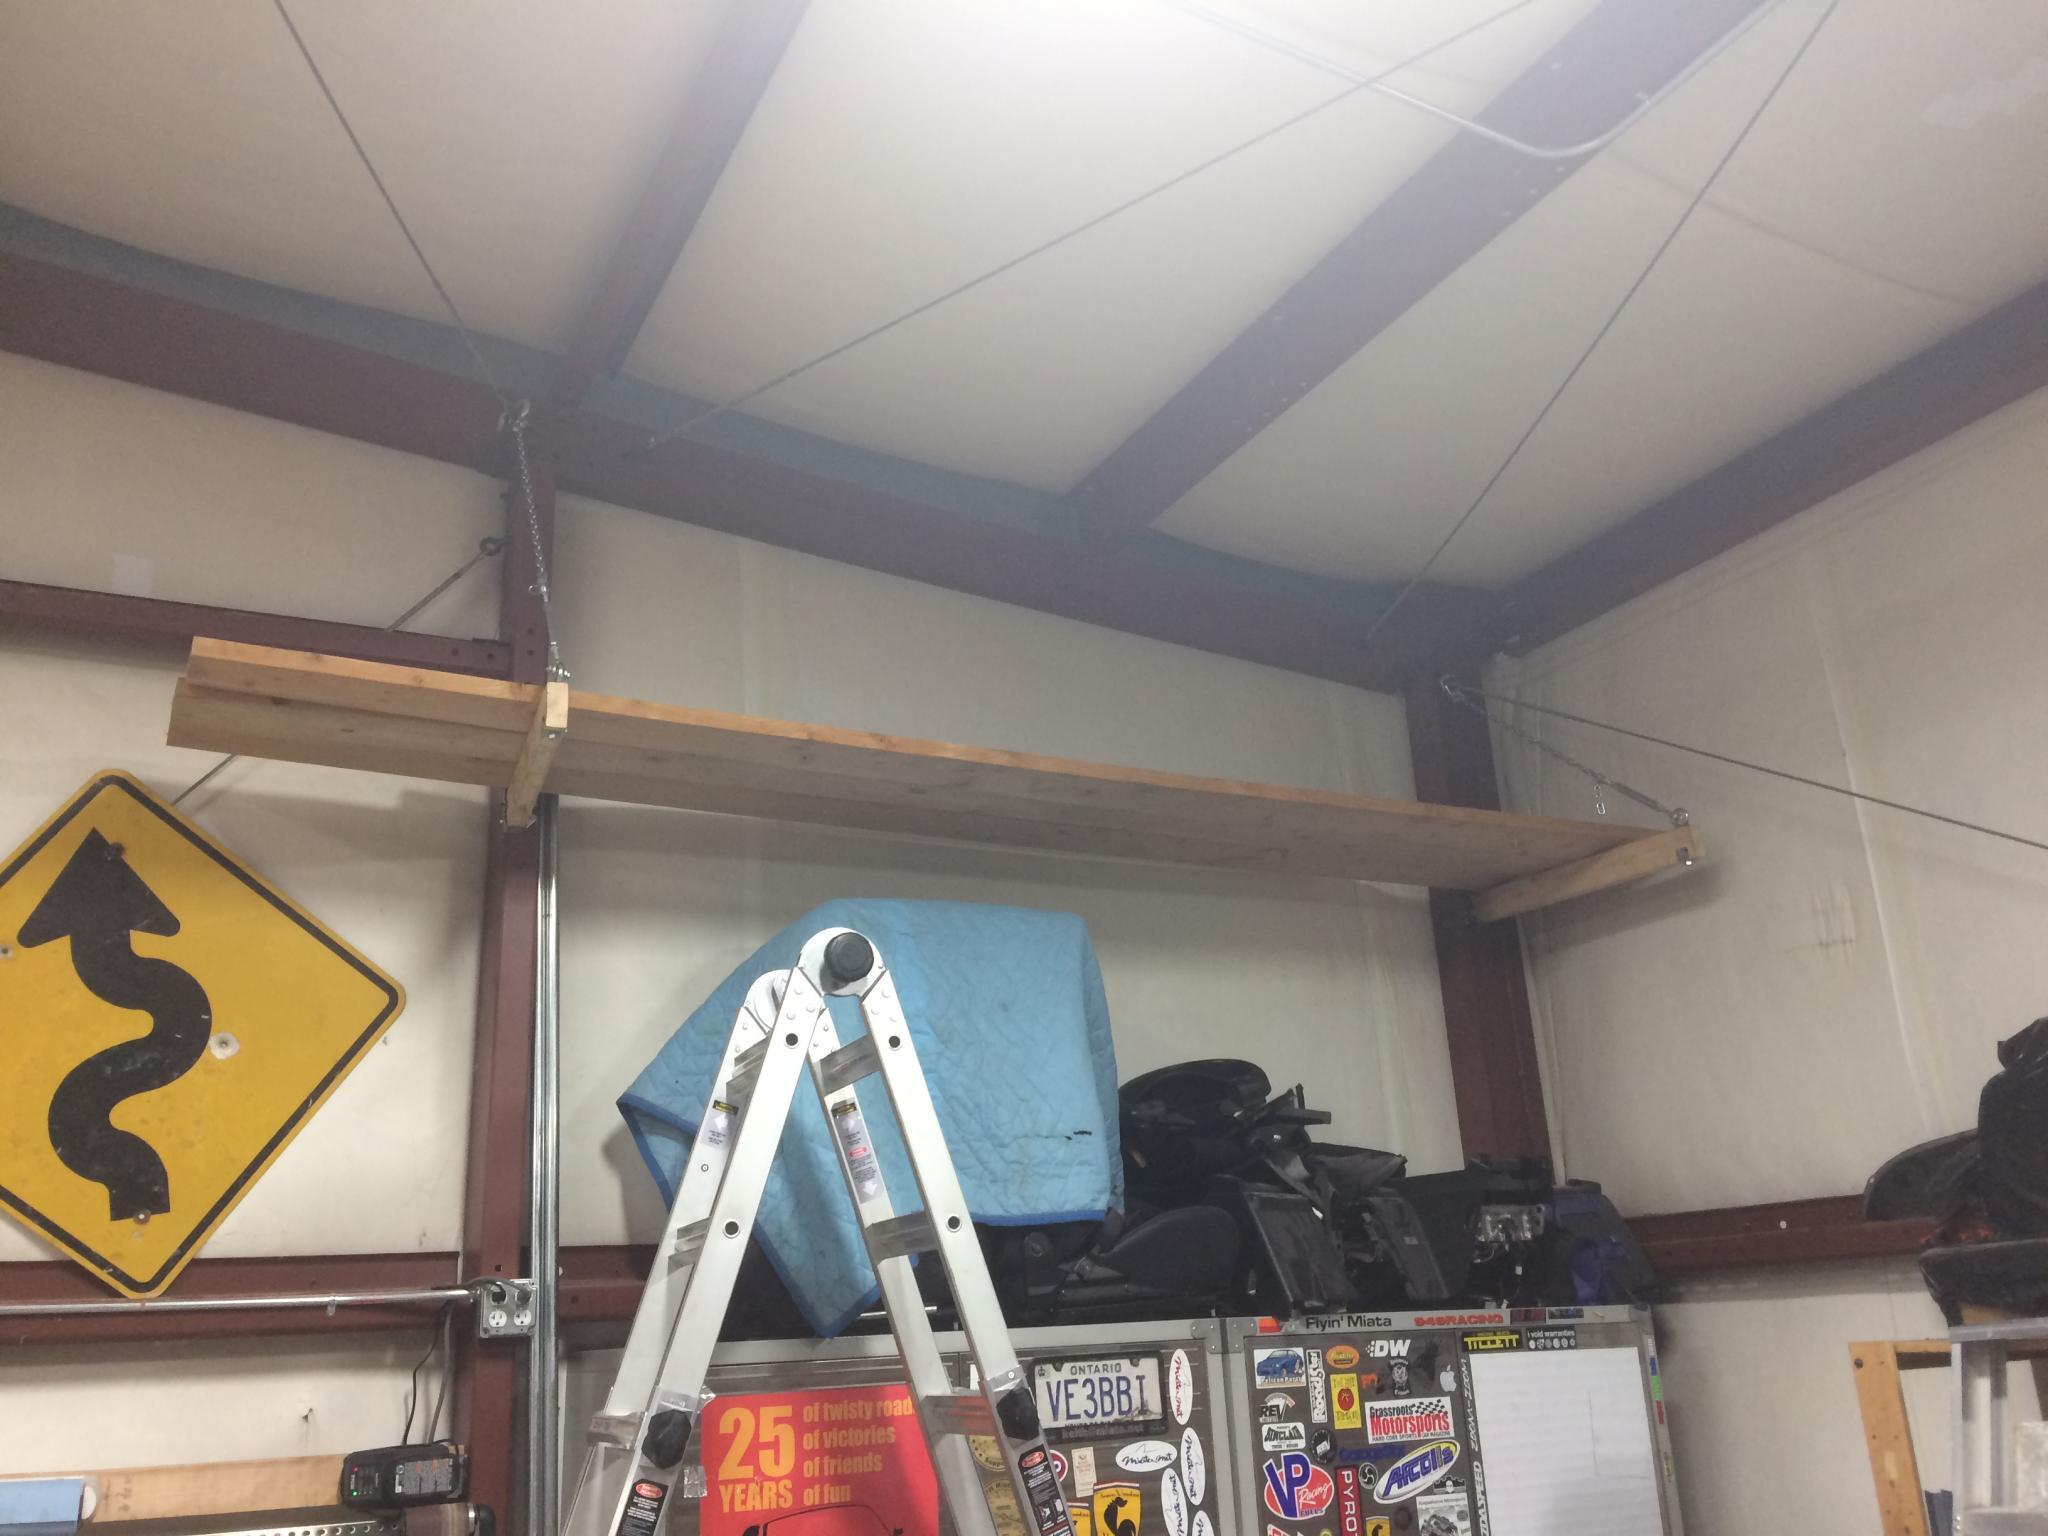
I also built a lumber shelf along the lines of my tire rack. I've been (literally) tripping over a pile of lumber since I moved in, and this gets it out of the way. The 12' 2x8s aren't attached, they just serve well as a base for the shorter stuff. There's one more project coming, then it's time for a concerted "put everything away" effort that will bring the shop to full function.

How do you hoist the wheels and tires up that far?
Also, where can I find that metal pegboard? I recently moved and worked on setting up my garage last weekend, I could use something like that to hang a bunch of lawn and garden tools.
I use a ladder and move them one at a time. Miata wheels never weigh more than 40 lbs or so, that's easy enough to hump around.
The metal pegboard is from Home Depot. They don't keep it in stock at my local store but you can order it in for free. Not as cheap as a chunk of plywood or the wooden pegboard, but it's fireproof.
I stopped by FedEx freight today and picked up a little something.
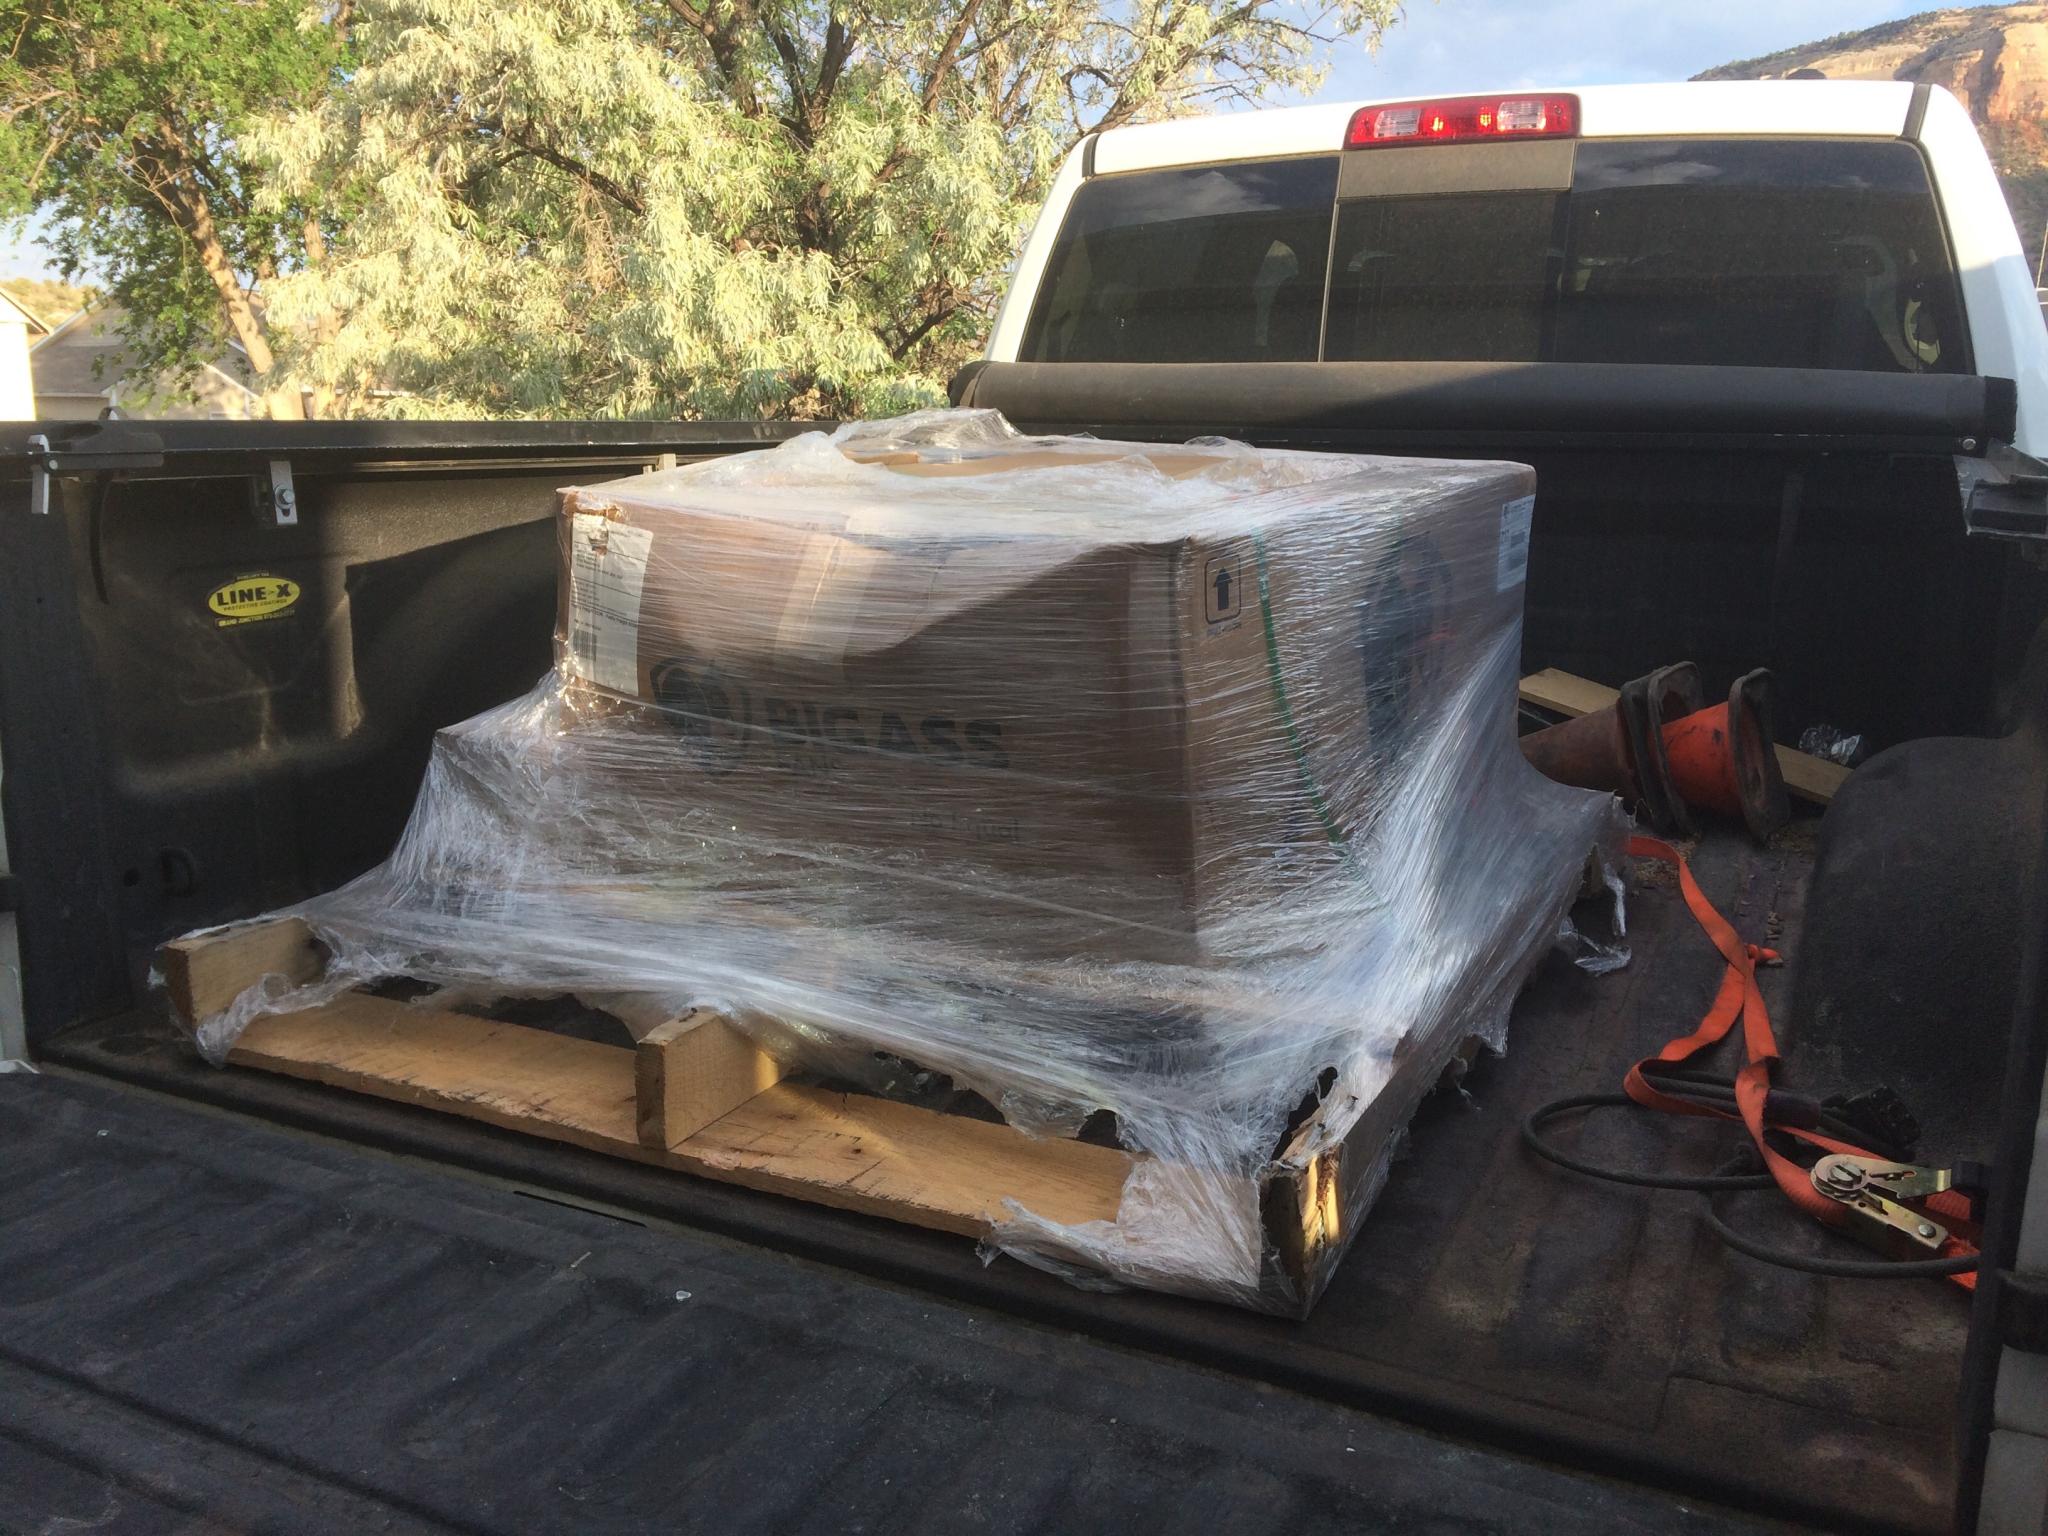
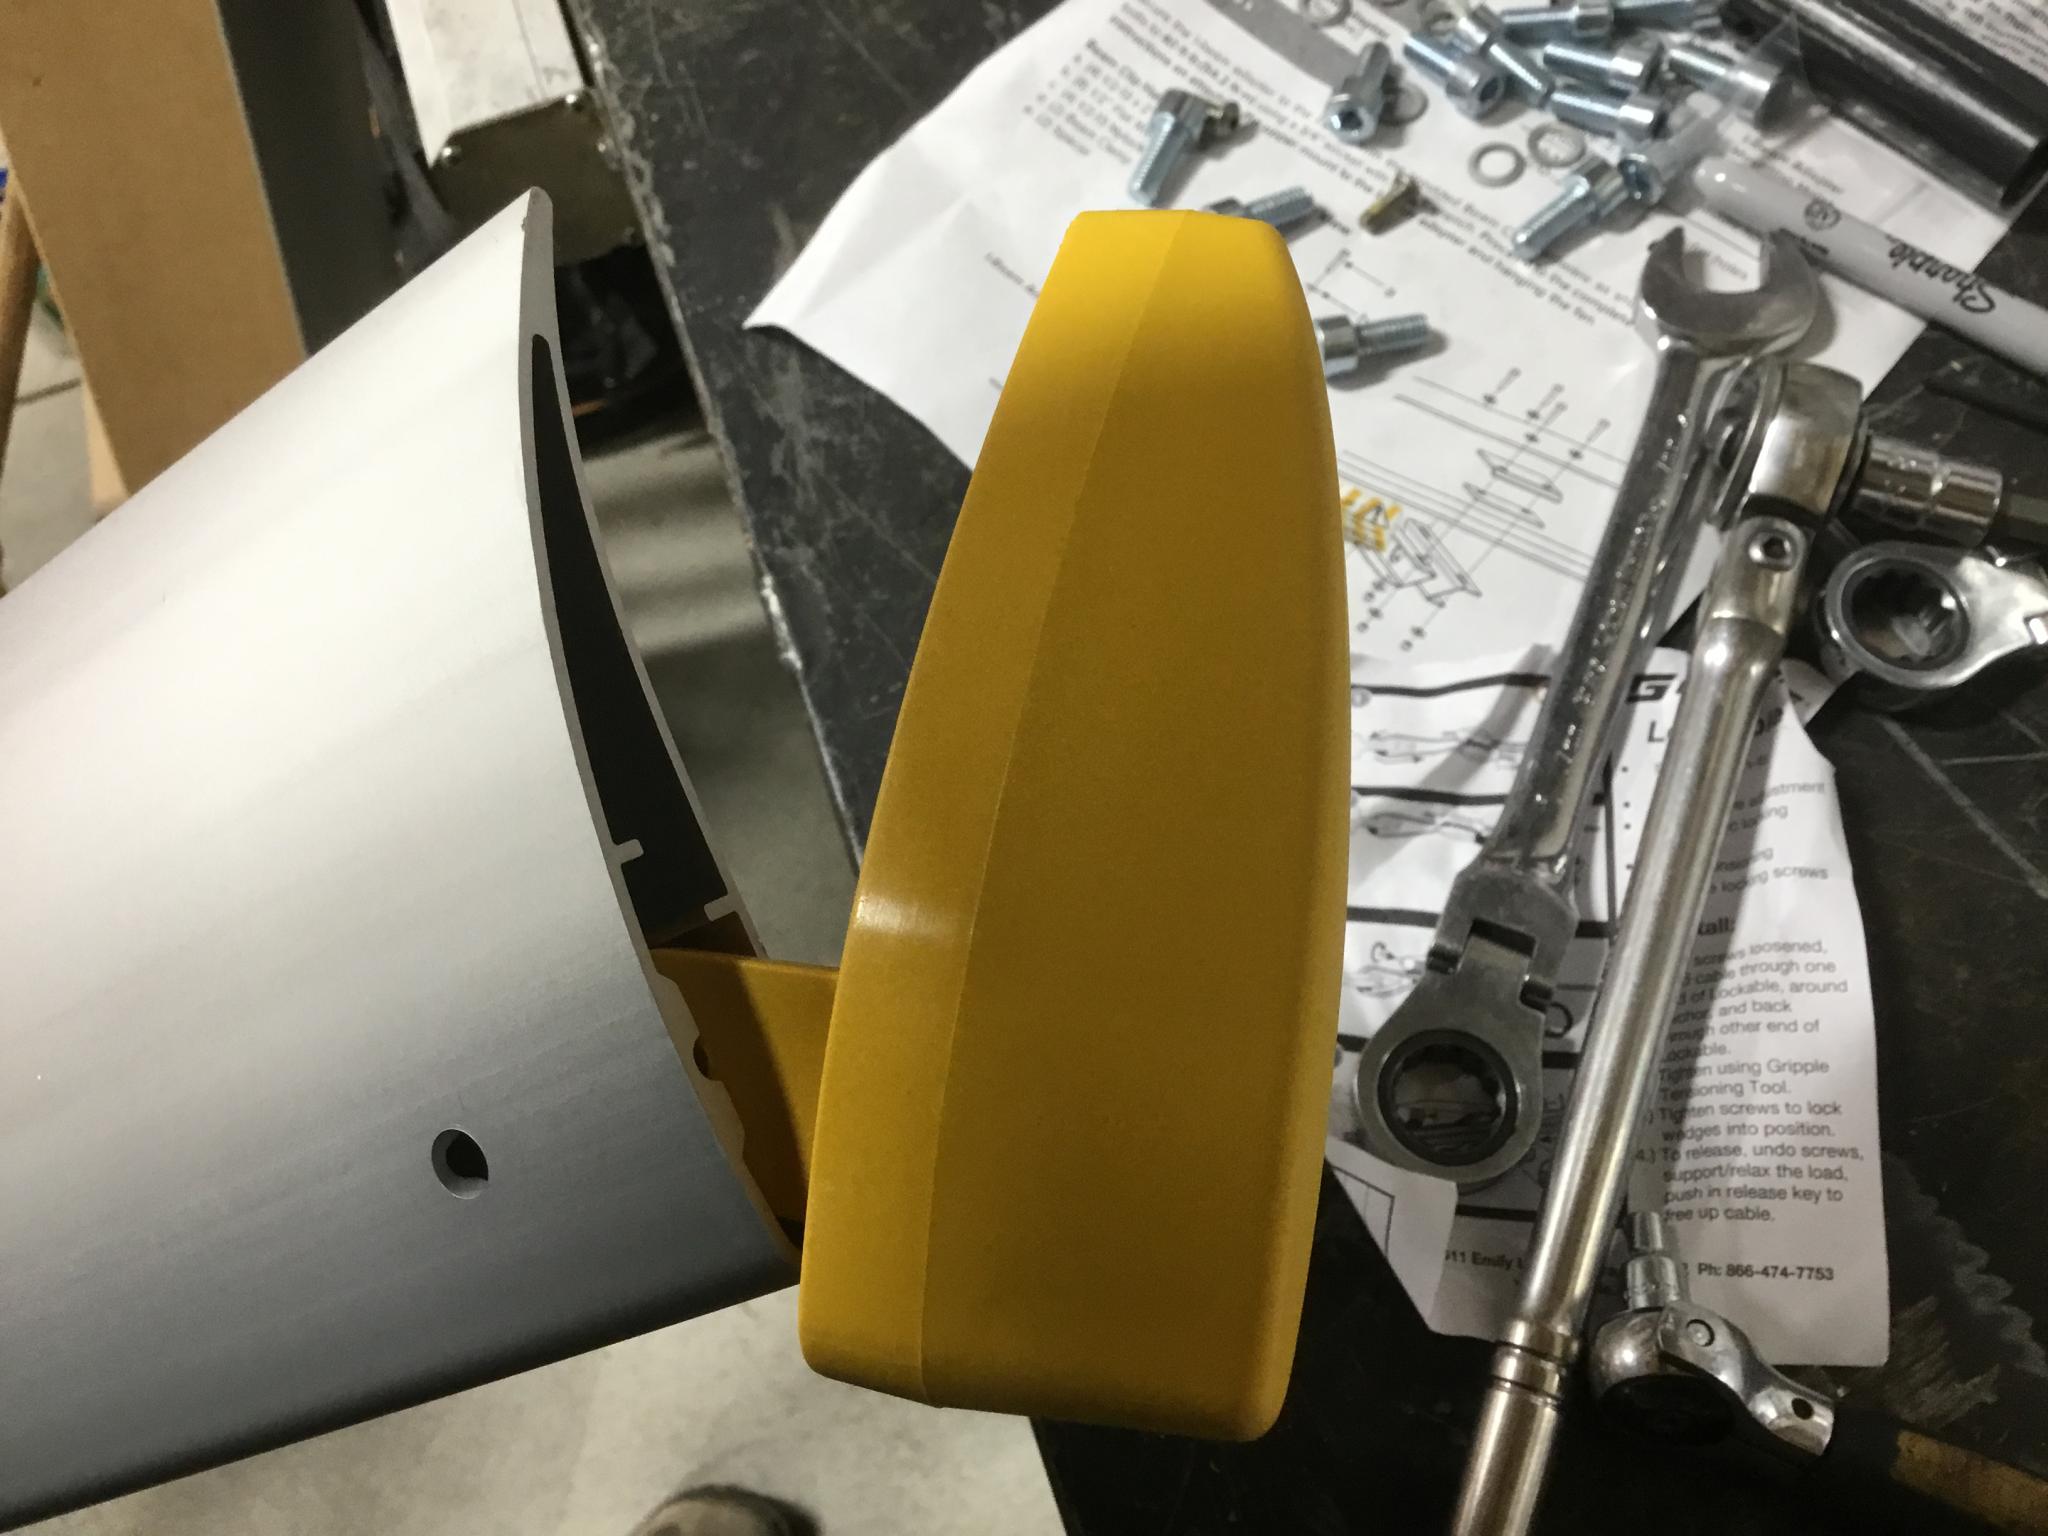
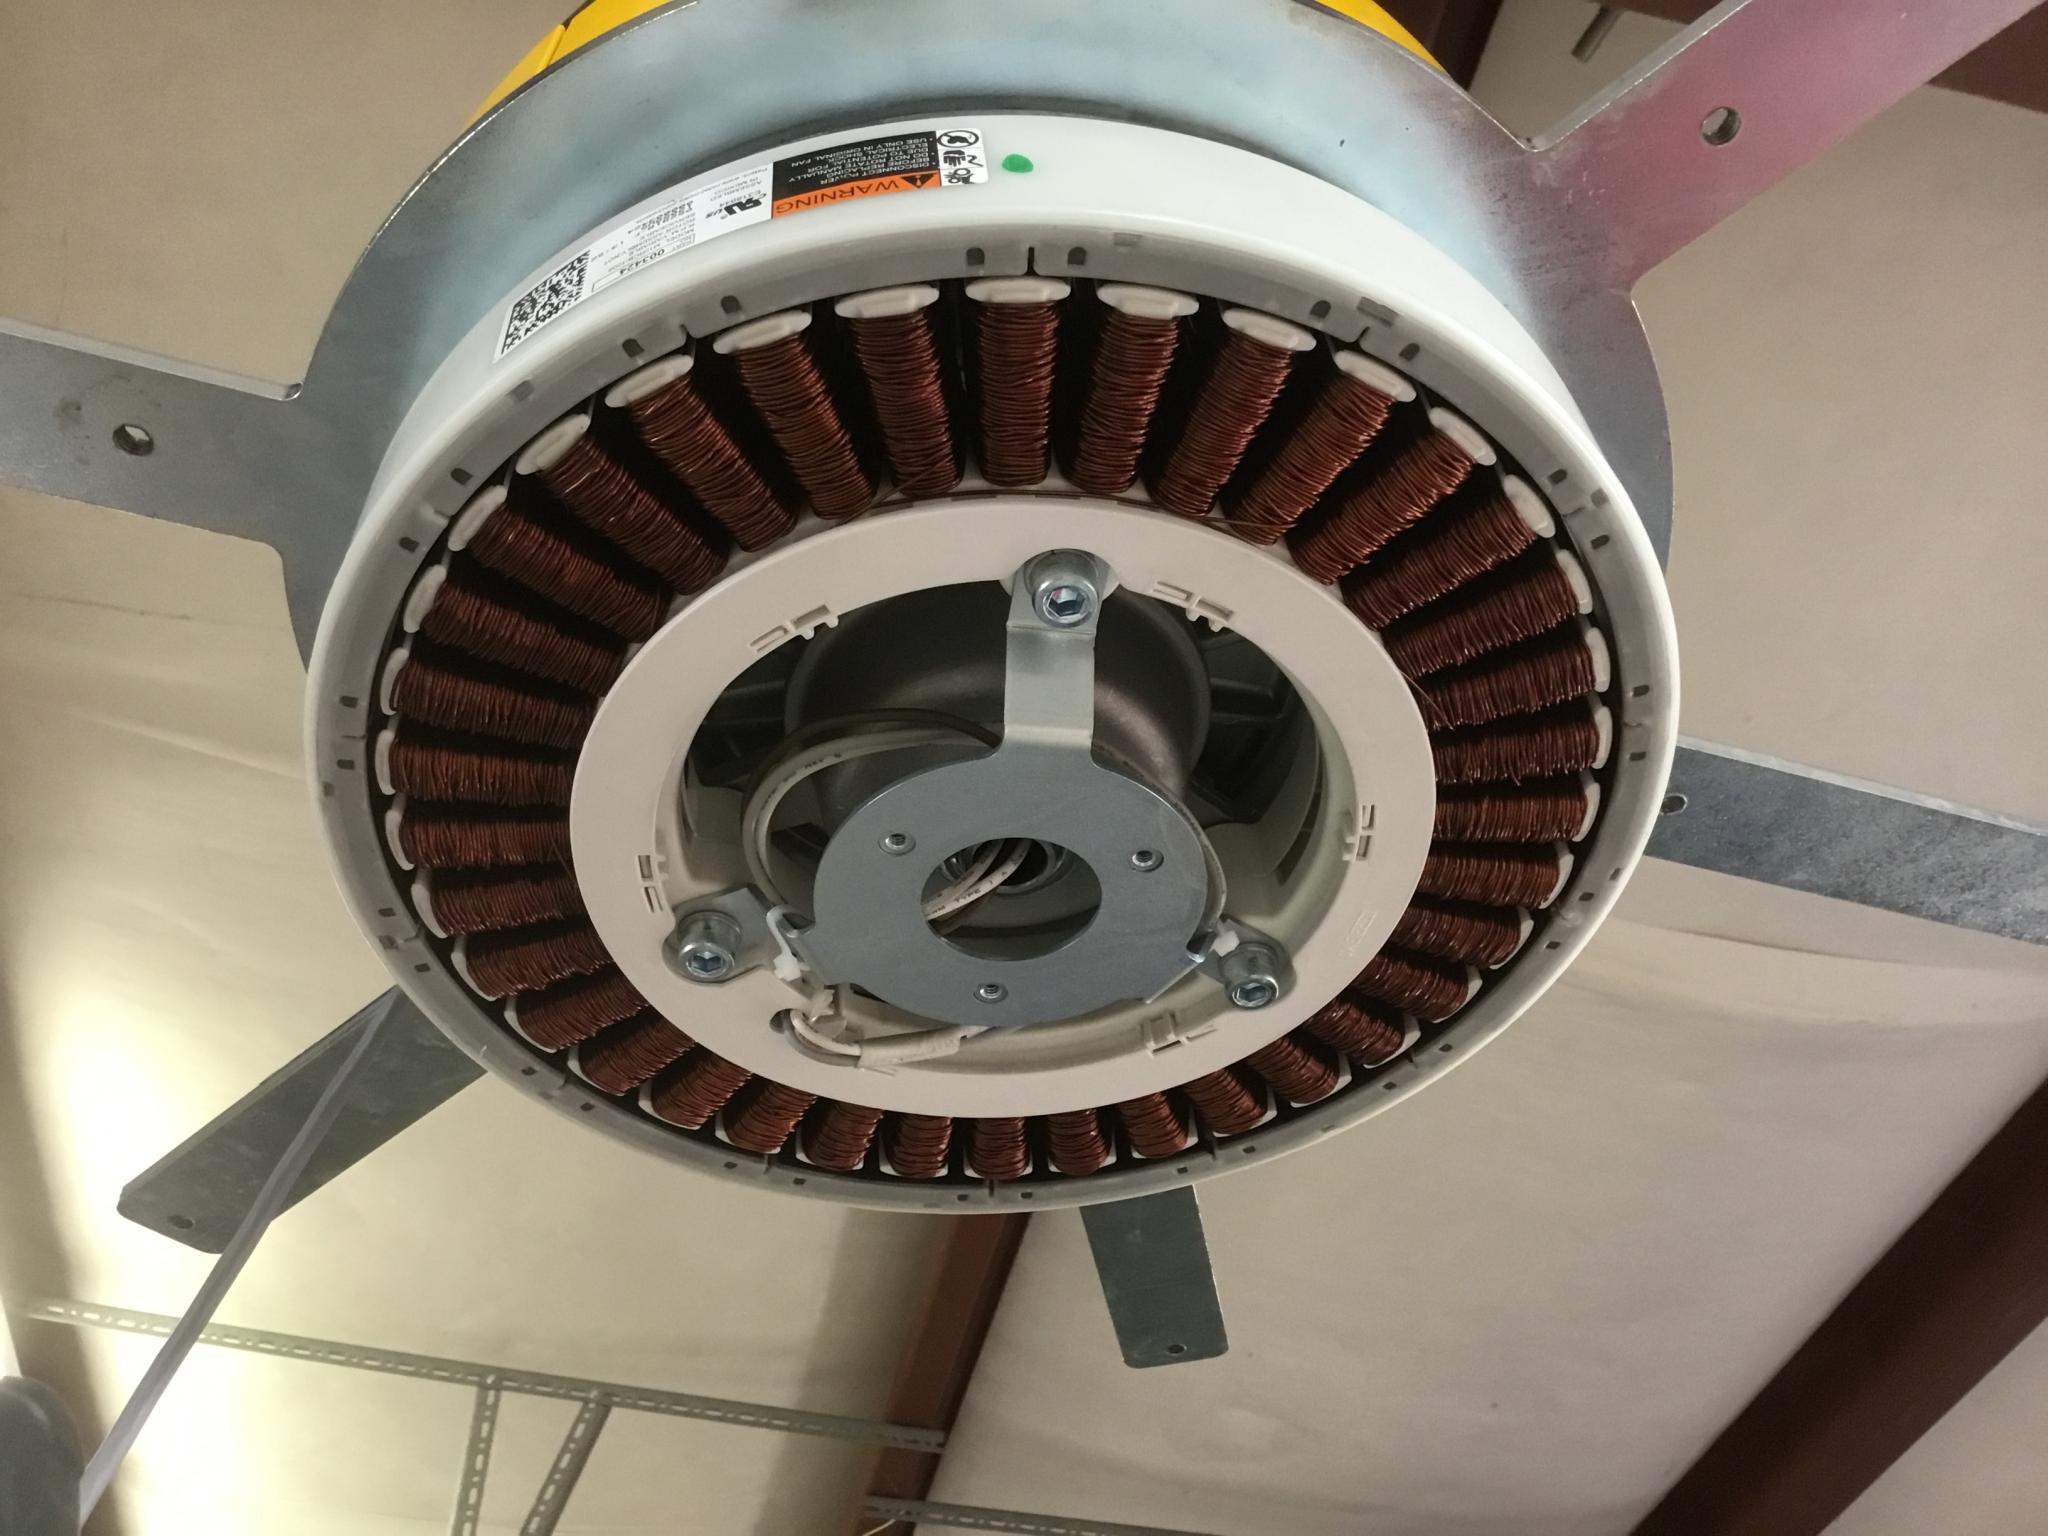
That's my new ceiling fan. It came on a pallet and was something like 165 lbs. And yes, it's a Big Ass Fan. Not cheap, but made in the US and it'll probably outlast me. Here's the motor - that's a 10mm socket for scale.
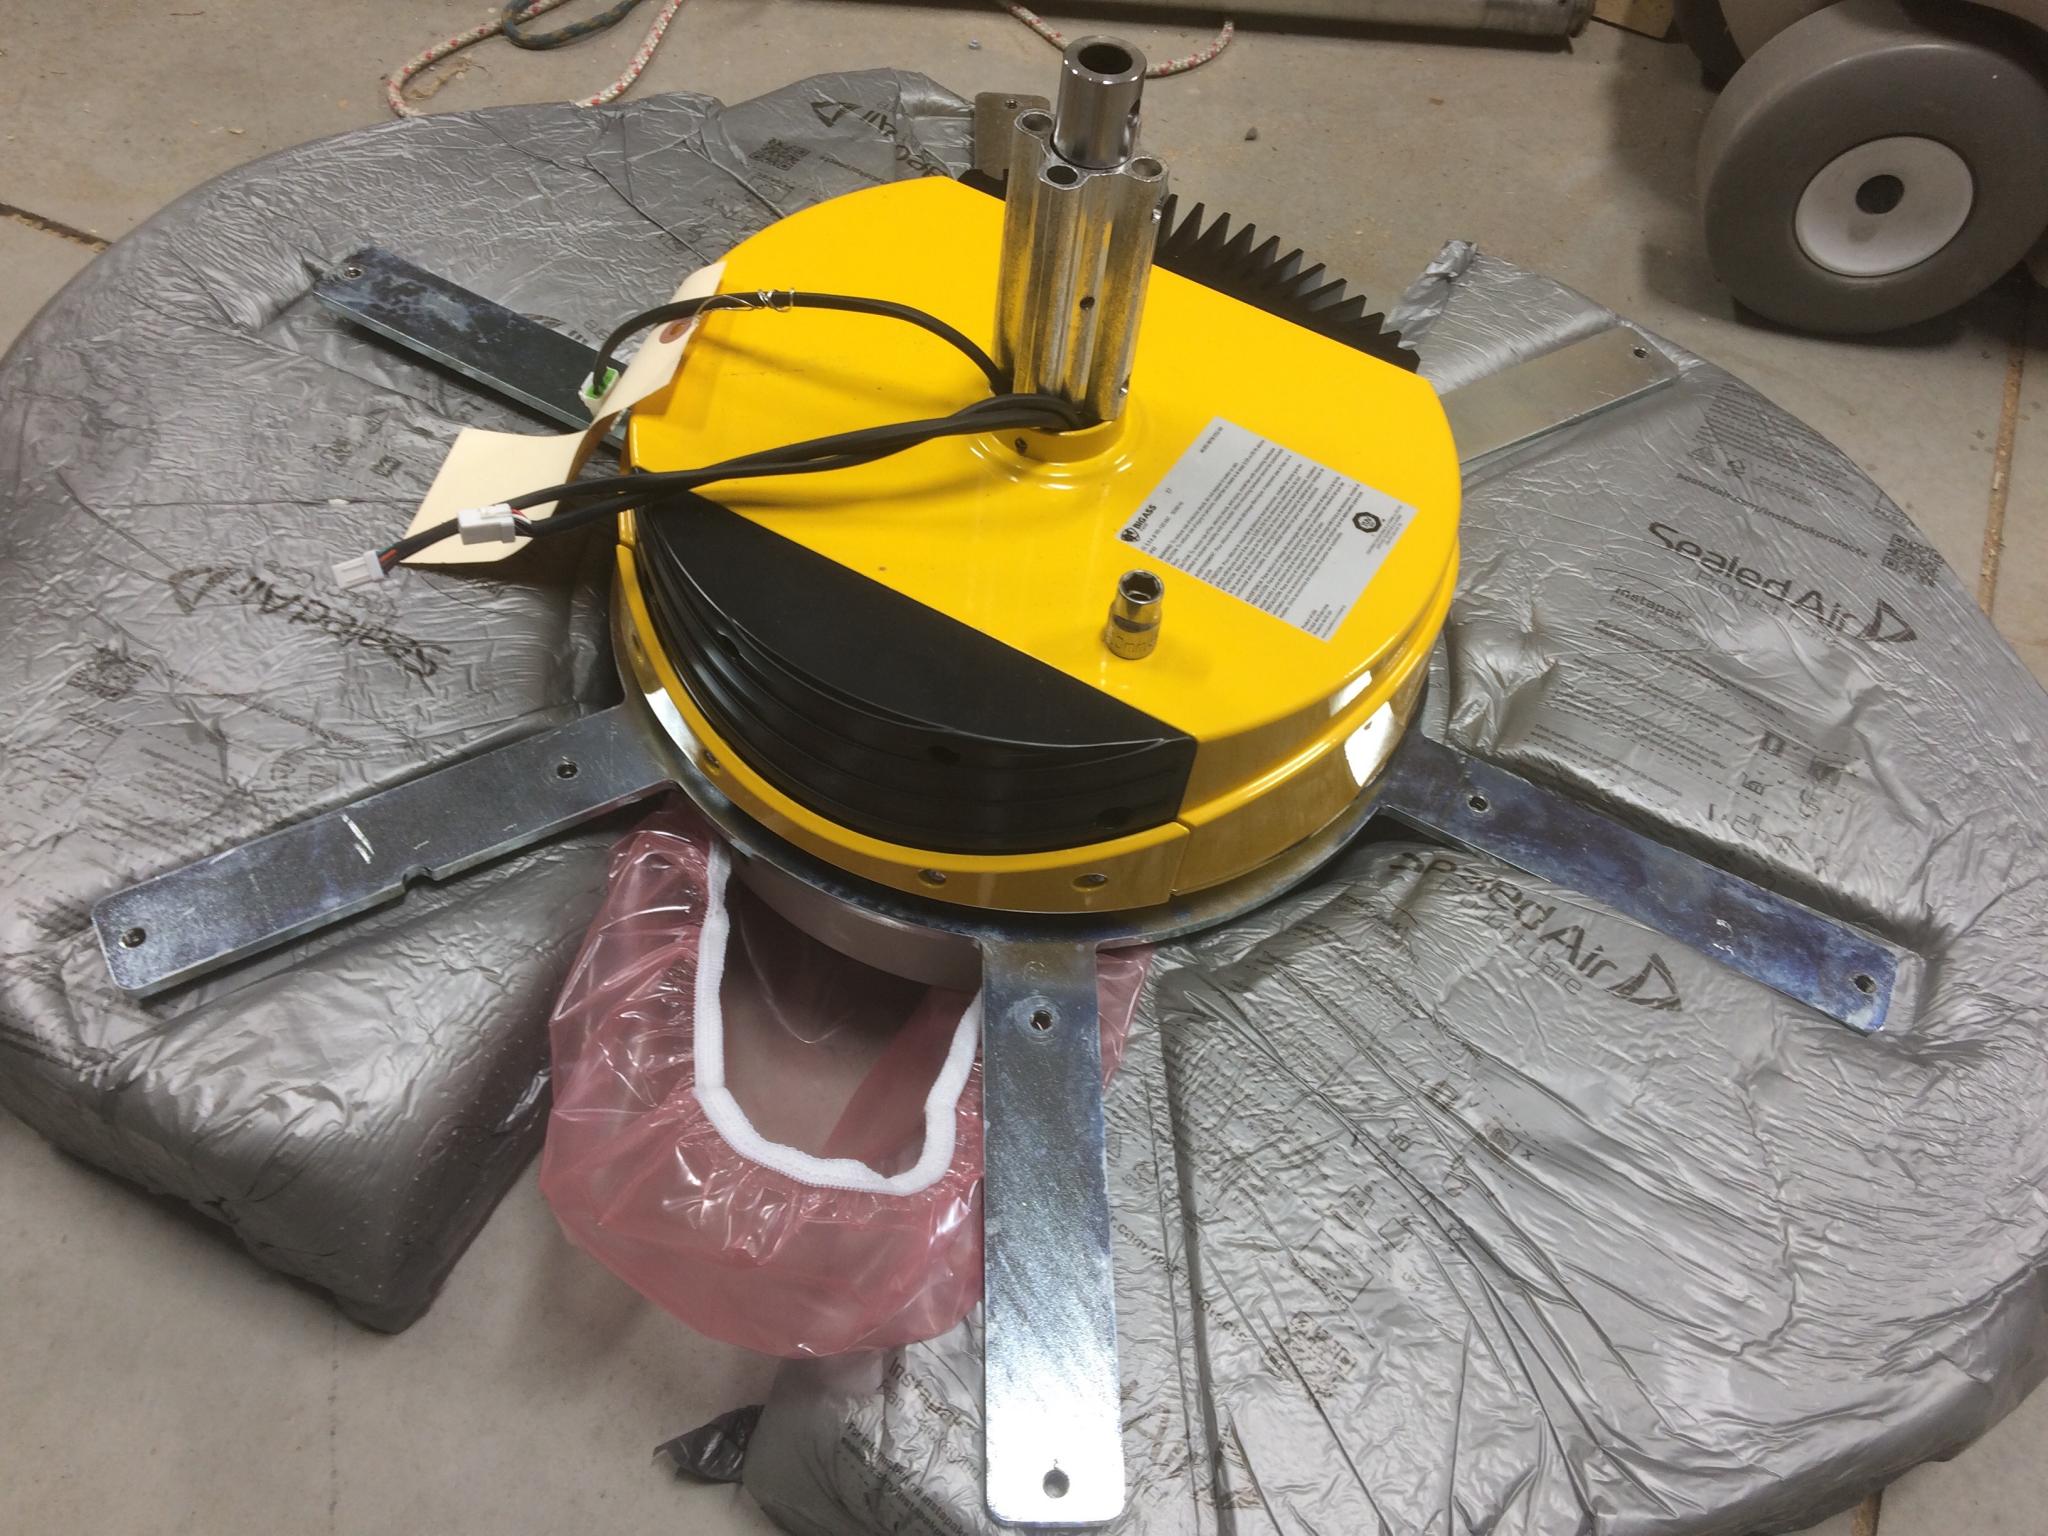
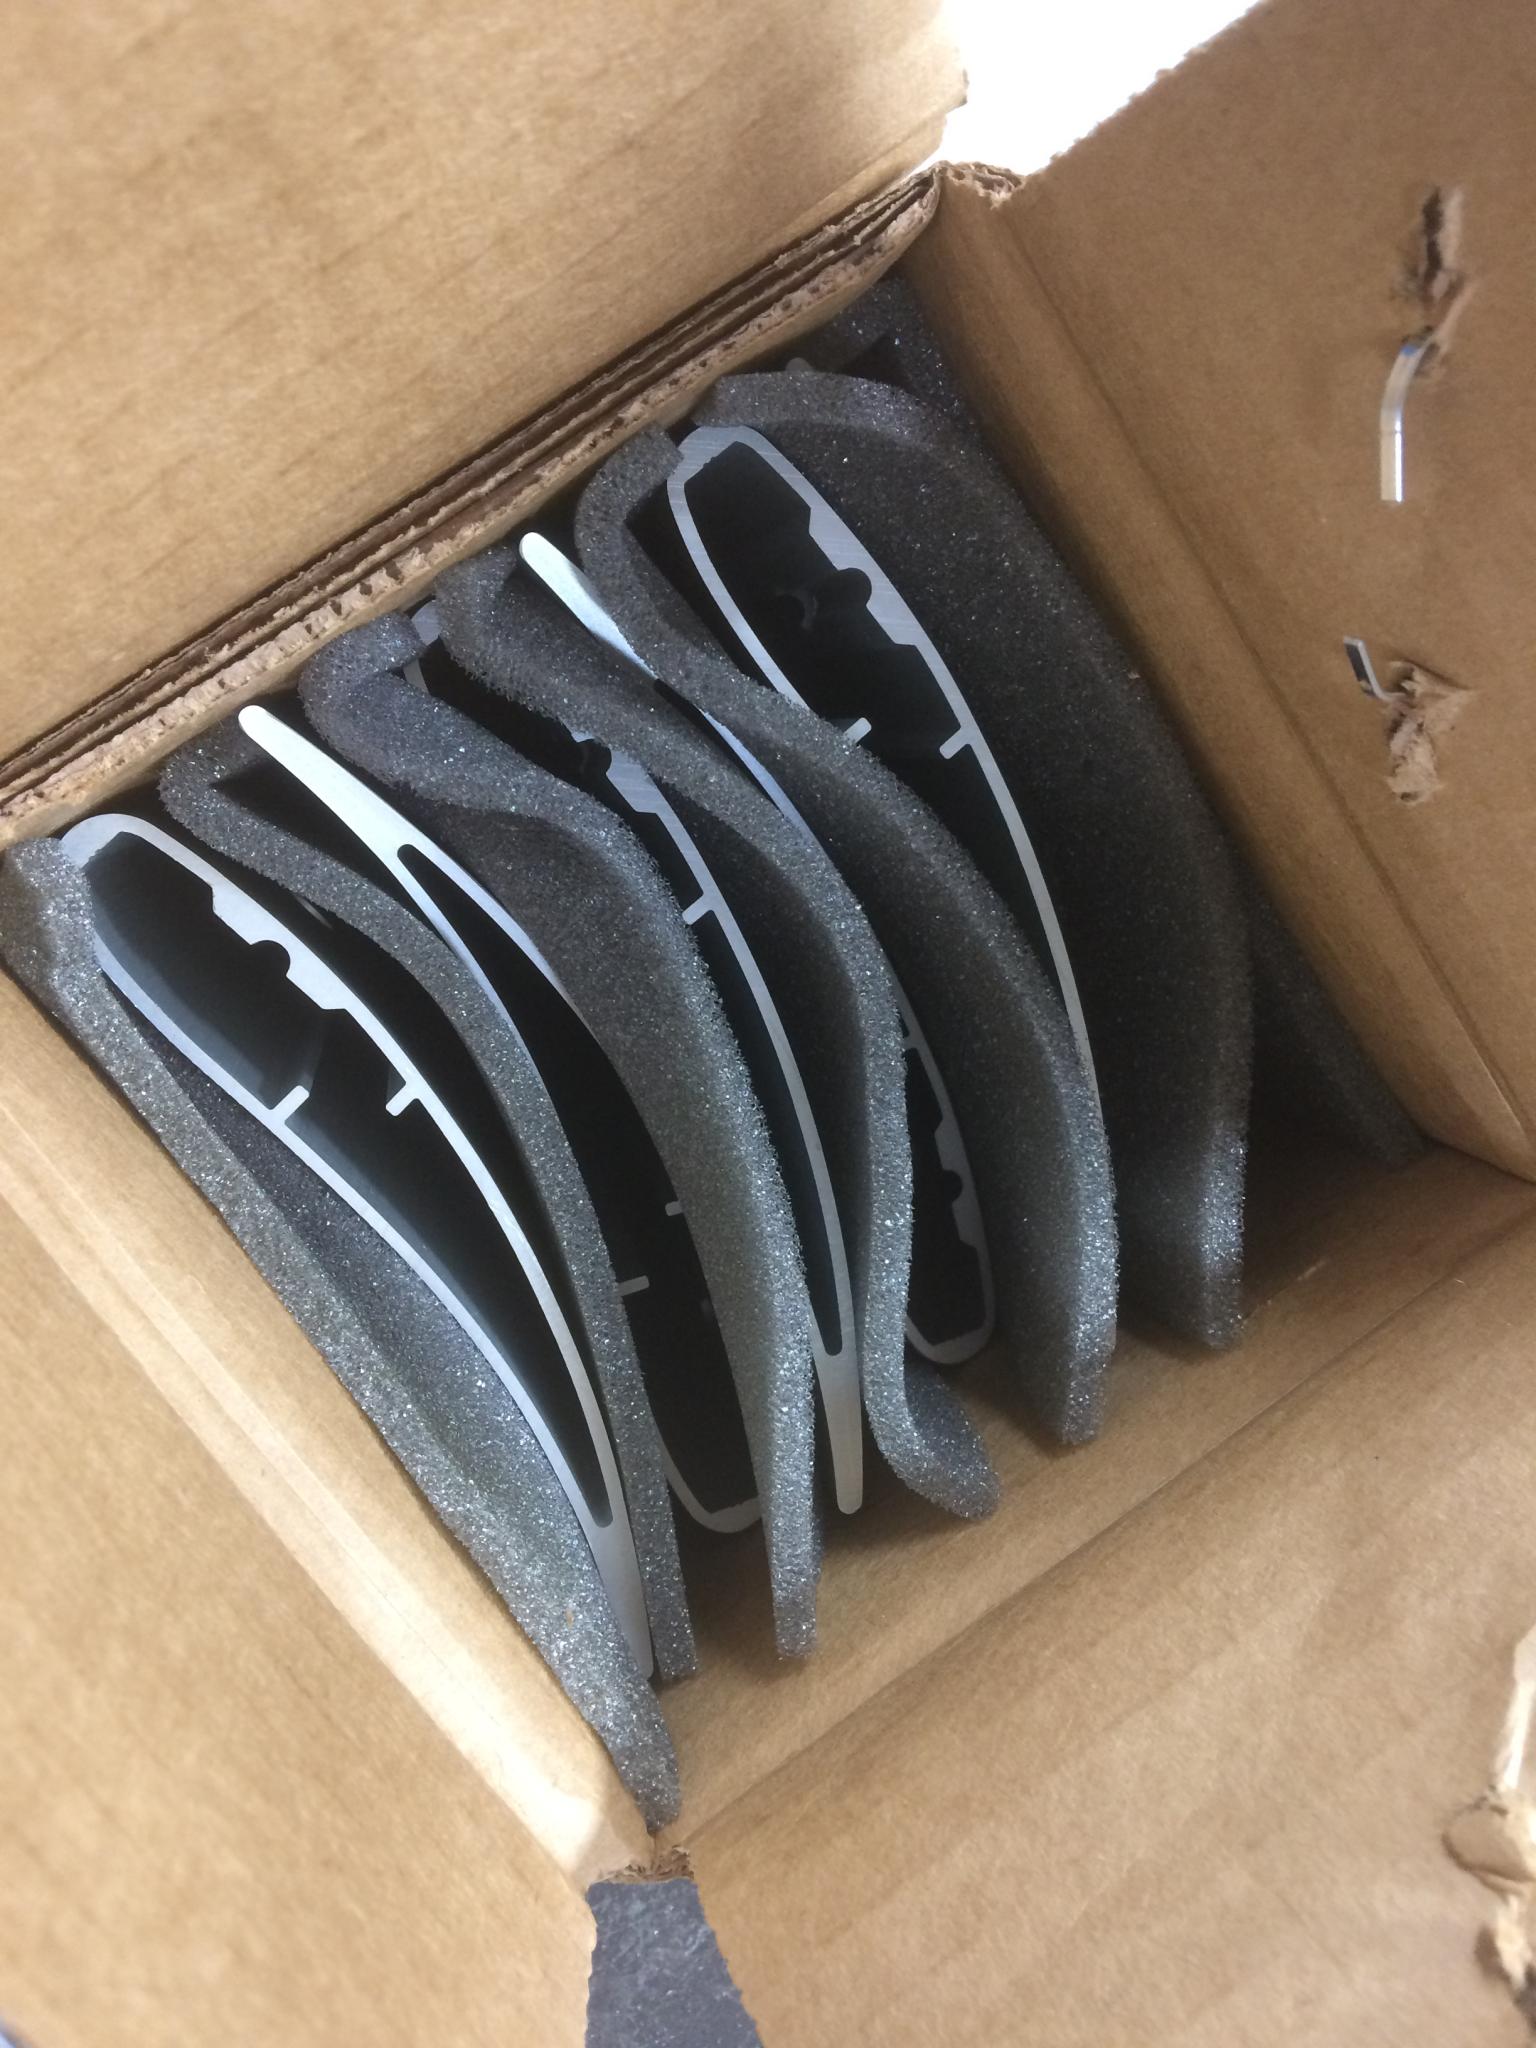
Check out those blades!
It's about 7' across and needs a certain amount of clearance all around. I'll have to offset it slightly from the center of the shop to ensure complete clearance from anything on the lift, but it should move enough air to make a big difference in the comfort levels. It's also well going to be well placed to distribute the cold air from the AC unit. Hopefully Saturday will be install day.
Are you sure those are fan blades or did they accidentally send you a box full of prototype Miata rear wings? :)
I am interested to hear your review of the Big Ass Fan. Seem like they are made well but definitely comes at a price.

In reply to Keith Tanner :
Keith a few days from now, "where the hell did I put that 10mm socket..."
(looks up at spinning fan...)
"Berk..."

In reply to Keith Tanner :
I like your welding bench with the shelf. Glad that worked out!
Yeah, thanks for that shelf idea.
The current new hotness in Miata rear wings happens to be an aluminum extrusion. I have a track day in a week, maybe I should make a multi-element wing out of the blades for the fan...
We have a couple of Haiku fans in the house - that's the home version of a Big Ass Fan. The difference between them and a typical ceiling fan is dramatic. They're absolutely silent, perfectly balanced and pull almost no power. Those ones are smart, too. They adjust their speed based on programming, motion sensors and temperature. The shop fan isn't smart but it's clearly built as an industrial unit with the expectation of a couple of decades of continuous life. The company is really good to deal with. So, yeah, they're spendy but you only pay it once. I looked around at alternatives and couldn't find anything that performed at this level.
When we moved out of the old house, one of the things I did before putting it on the market was to pull the Haikus down and replace them with more typical fans. No way we were leaving those puppies behind.
Anyhow, I'll document the install of the BAF tomorrow. I've already unpacked and inspected most of it, everything so far is beautifully made. I'm lucky in that I'll be hanging it from an I beam, that makes life easier.
Haiku is Big Ass
When Big Ass is in the home
Who’da imagined??
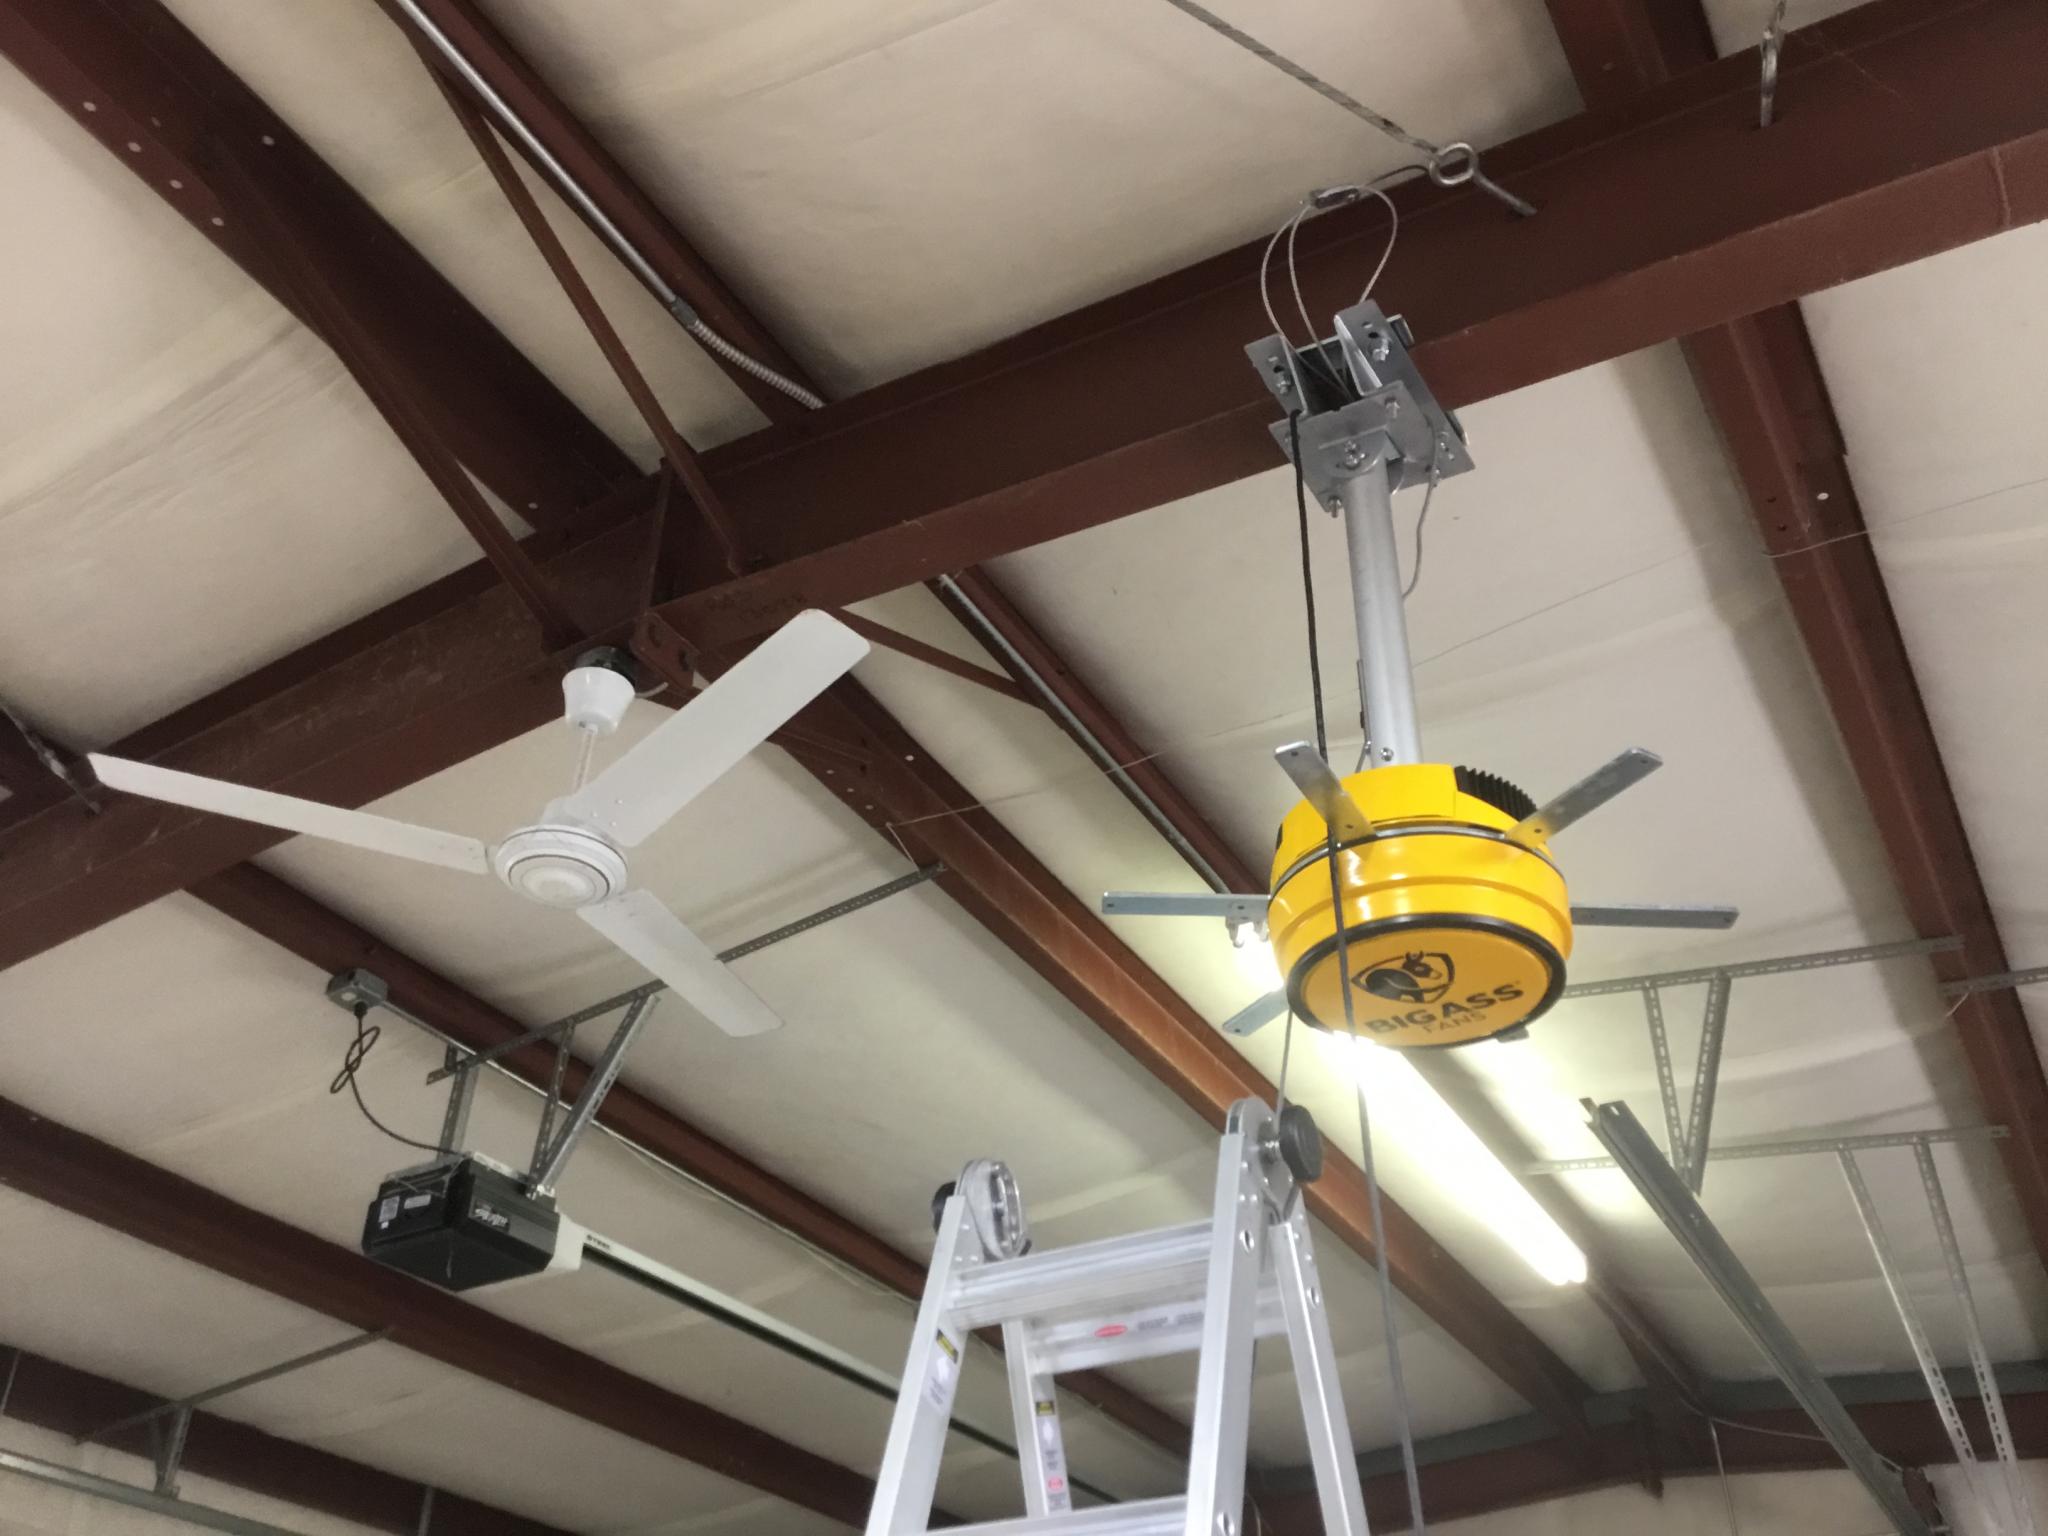
Fan is up!
As mentioned, the fact that I was installing it on an I beam makes life easier. BAF provided a really nice installation kit to clamp on to the beam. Usually you have to build your own bracketry out of 2" angle and bolt it from joist to joist.
It became obvious pretty early that my little E7 is the smallest of the true BAFs. Everything is oversized. Let's take a look at some of the details because it's just so cool.
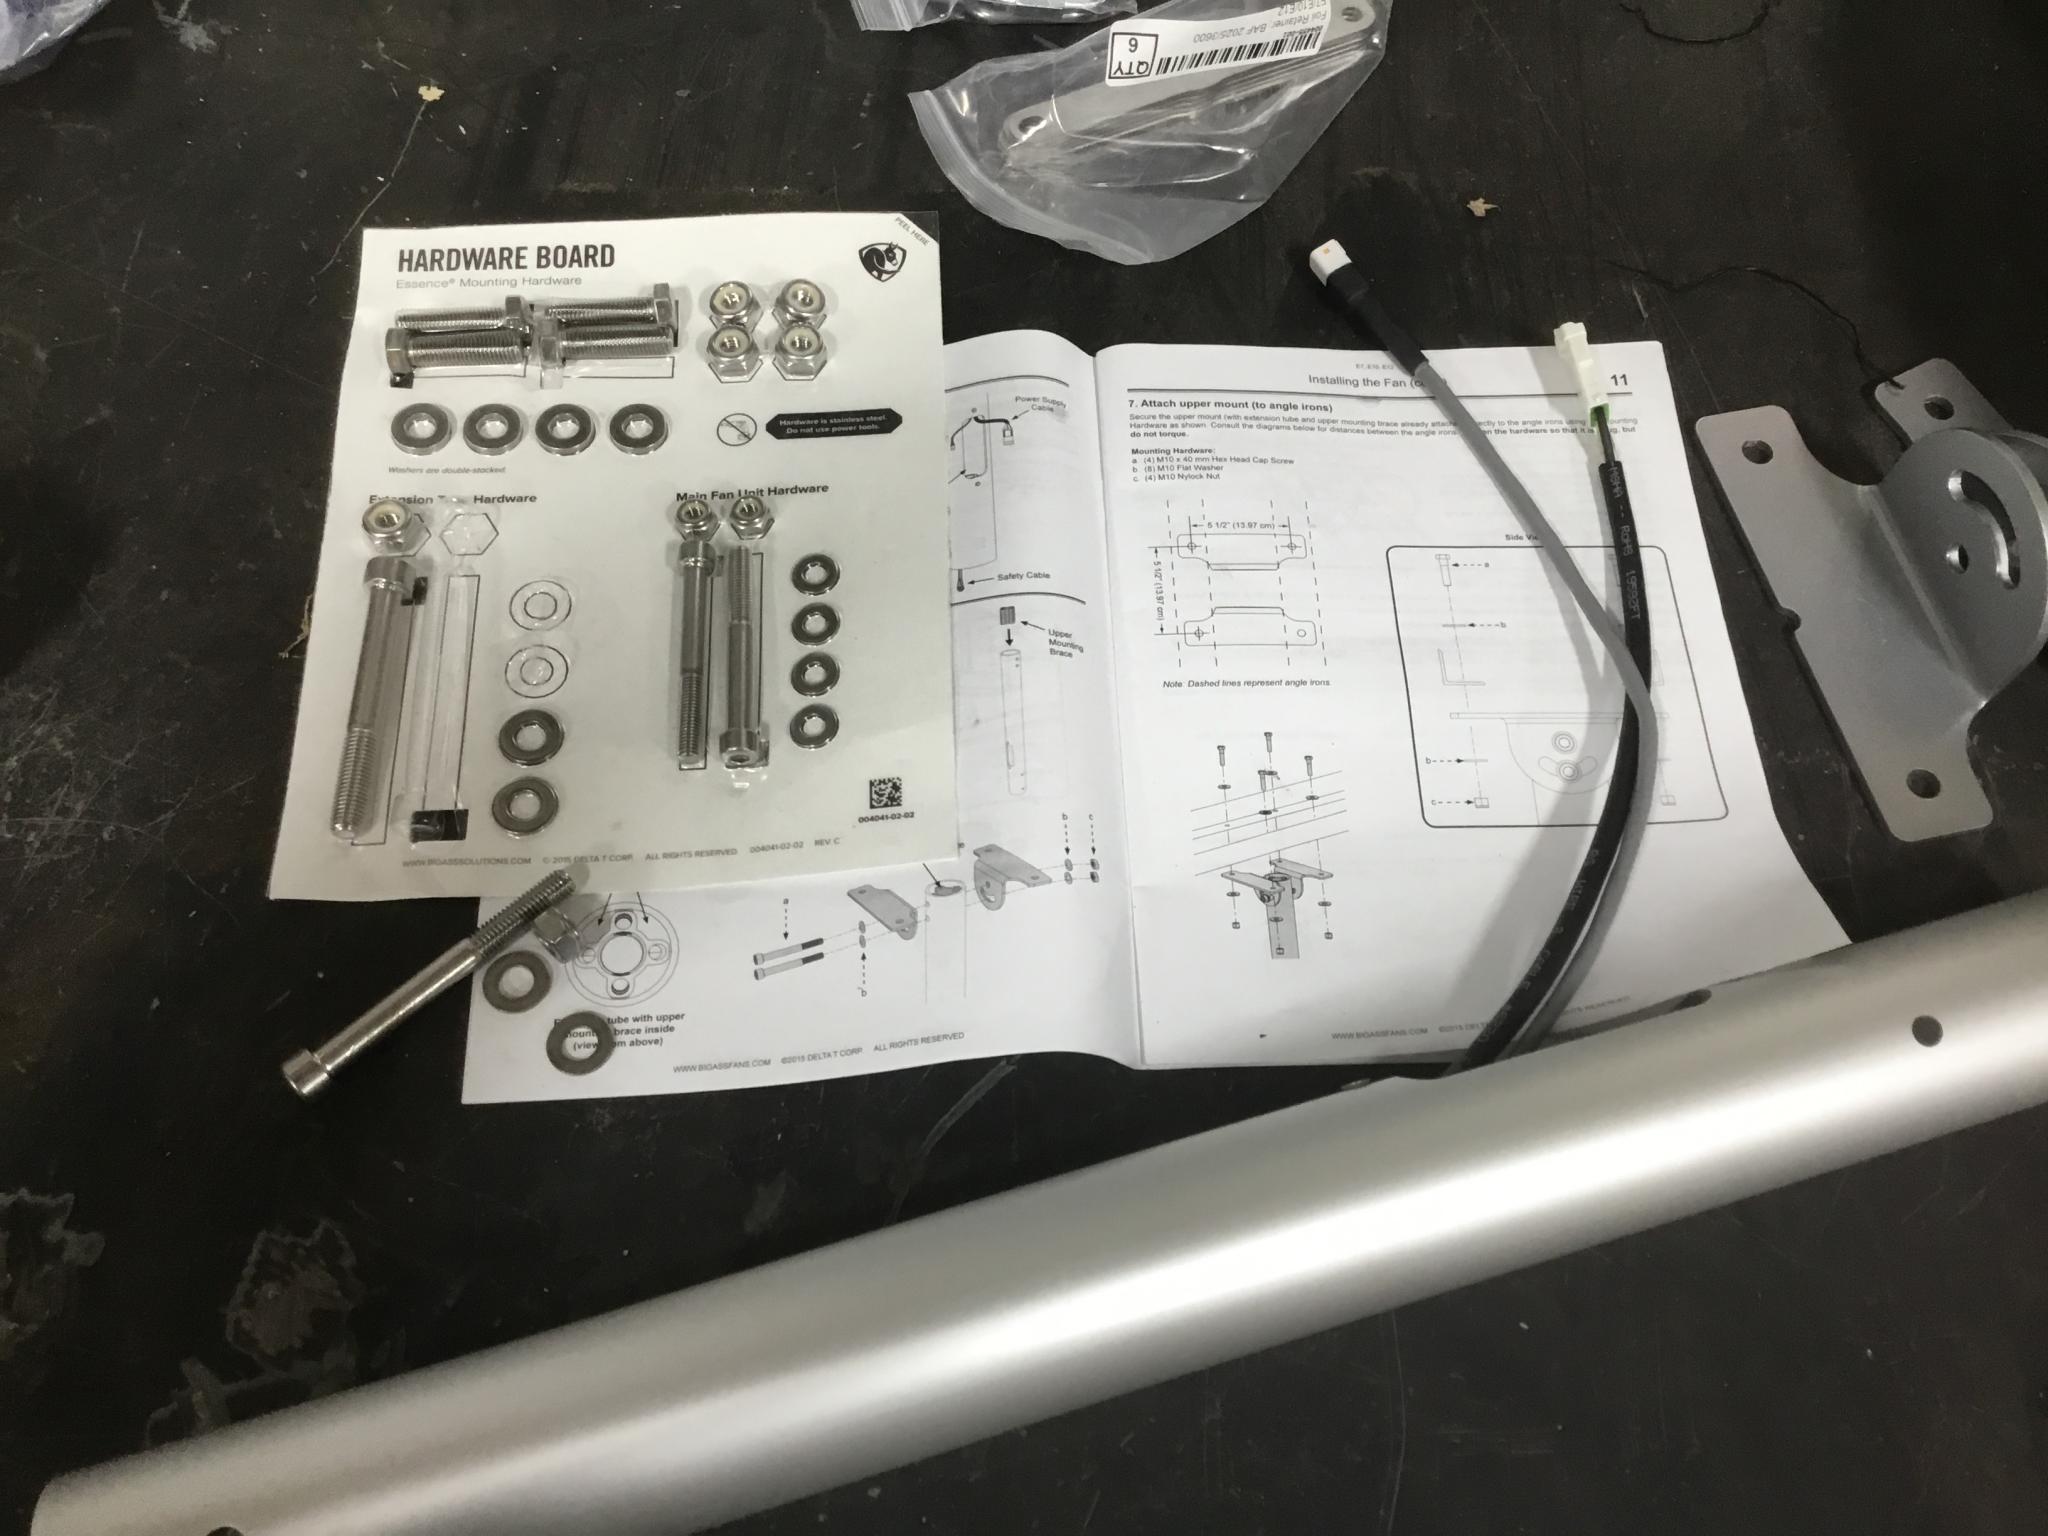
Check out how the hardware is packaged. Some of it was in bags but some is on this outlined cardboard. The Haiku fan hardware packs are all the fancy style. The brackets are all laser cut and powdercoated silver. The wires are the power and control wires for the fan running through the extension tube.
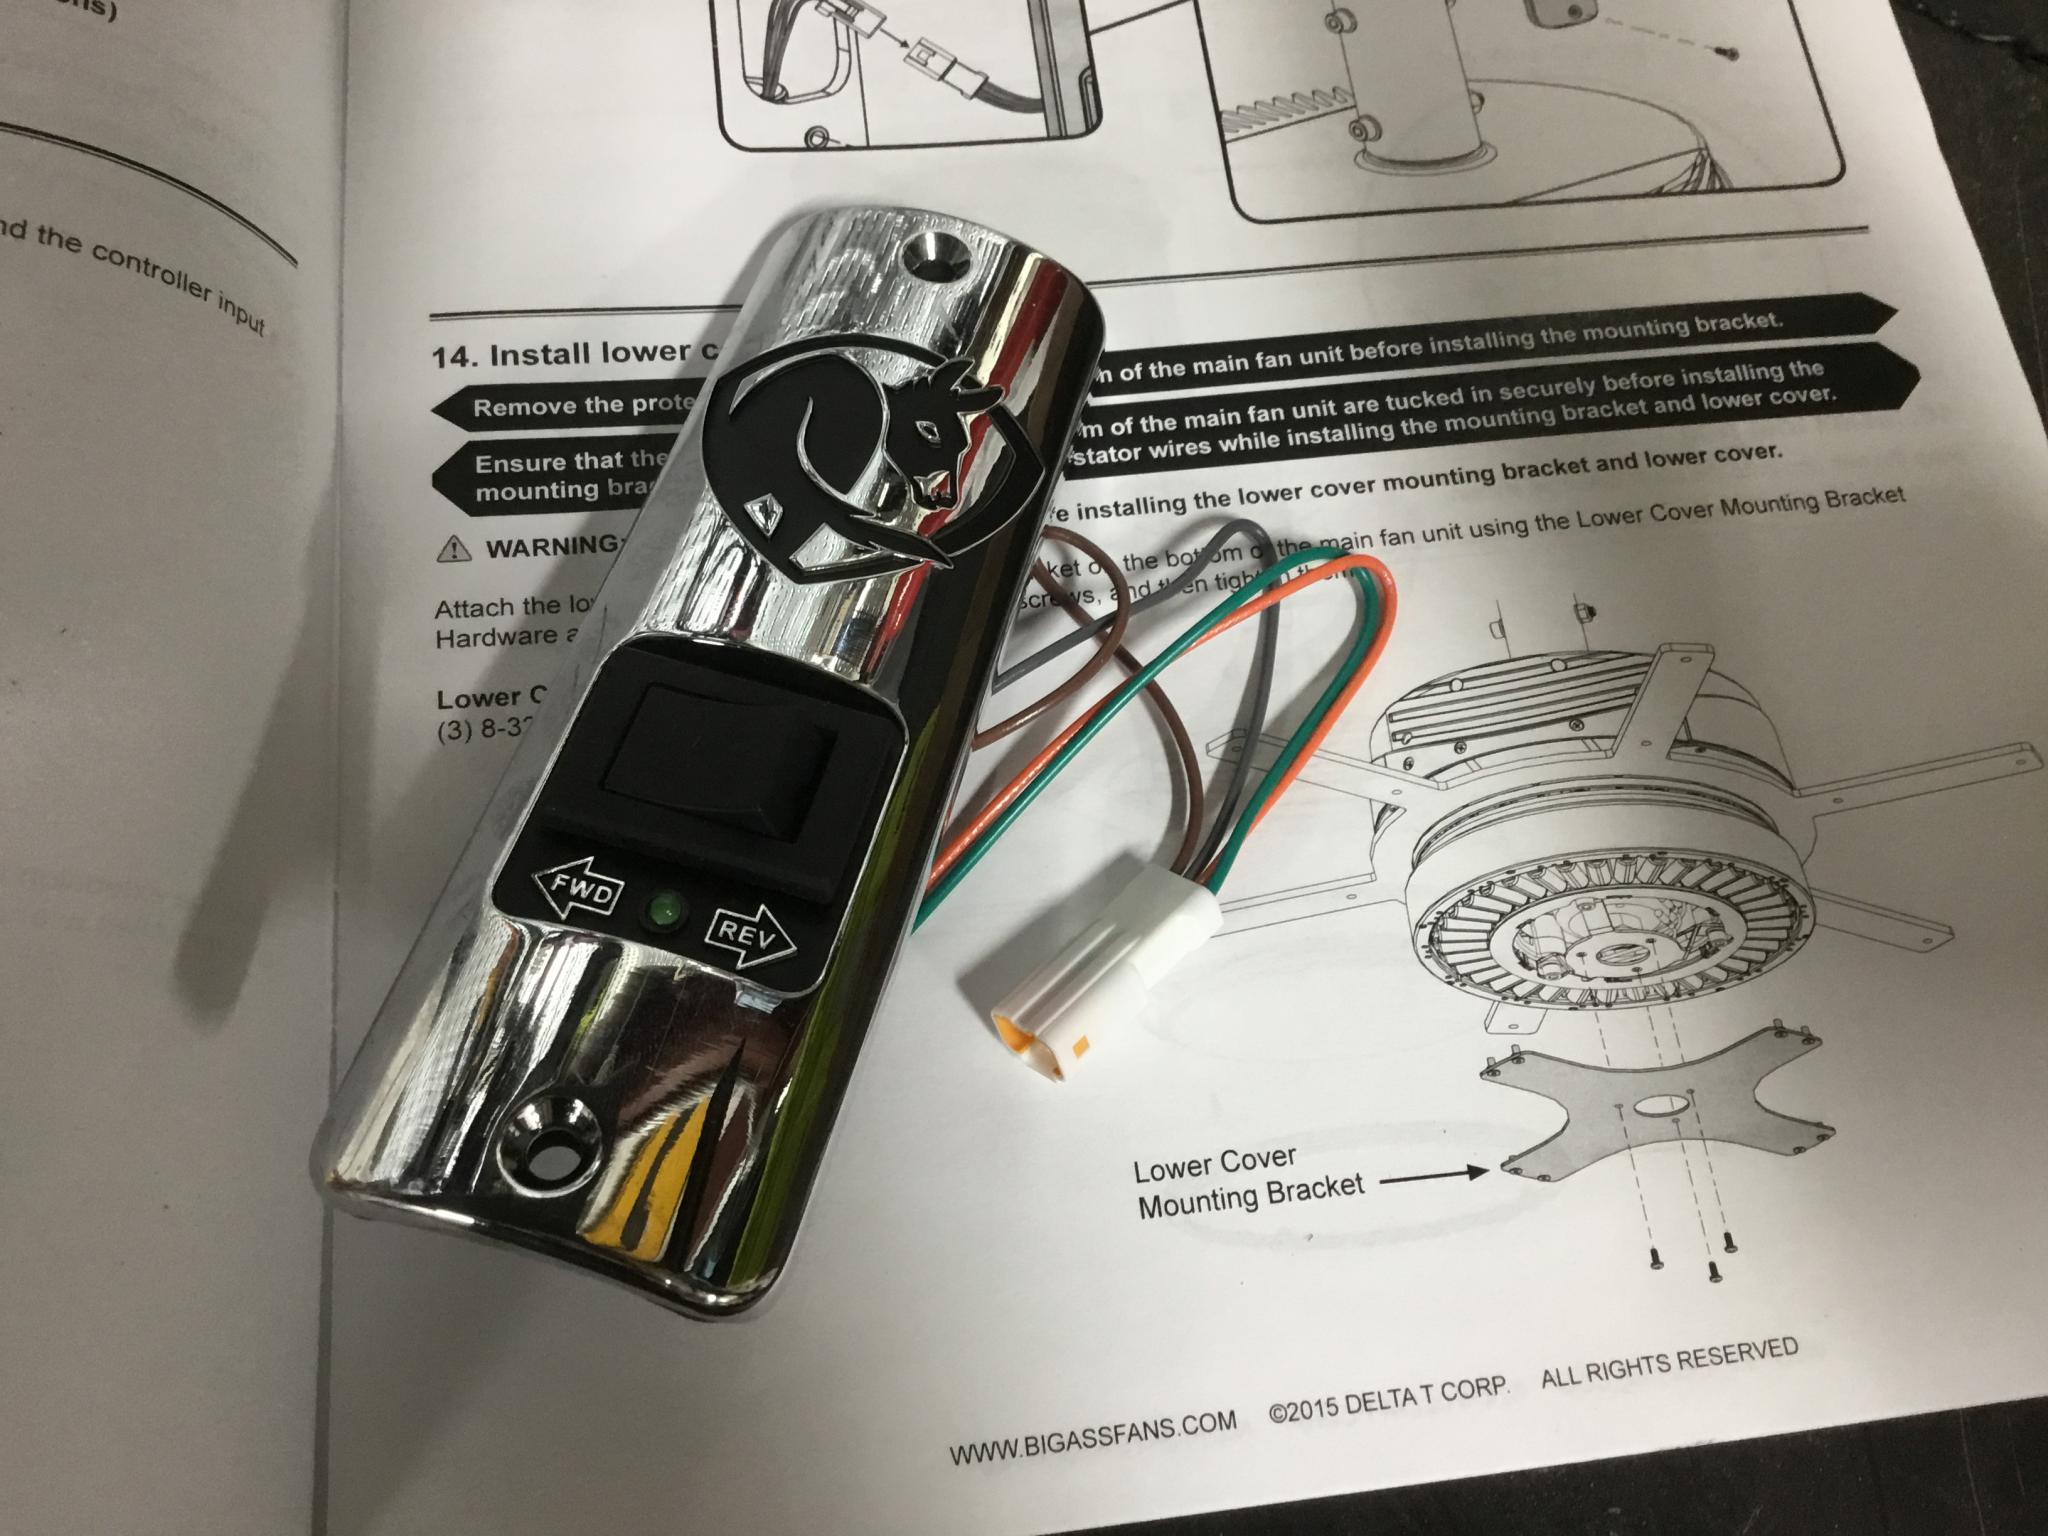
The blades are shaped like aerofoils, so this fan is obviously designed to spin one way only. Still, if you really want to spin it backwards you can. All you need to do is turn off the fan, get up on a ladder, wiggle between the blades and flip this switch. Convenient, right? A surprising amount of effort went into this switch plate.
Those aerofoils come with sexy little plastic tips.
With the I beam bracket installed, the safety cable run and everything loose enough for just a little wiggle room, it's time to install the motor. This is probably best done with two people, as it's heavy and all the parts are designed to have as little slop as possible. This means that everything has to be perfectly lined up and then it all just slips into place. Oh, and you can't hold it from the bottom. It was a bit of a struggle, but I got it done. Check this puppy out.
Putting the bottom cover on this revealed the only gotcha in the install. It had a plastic baggie with the three screws needed to attach a bracket, then eight to attach the cover to the bracket. But it wasn't until partway through that I discovered that they were different sizes. The smaller, more numerous ones would hold the bracket in place, but not very happily. Having them in different bags would have avoided this, but it was an easy fix once I discovered the difference. All the screws have threadlocker pre-applied, by the way.
Here's a size comparison between the old whonka whonka and the new bigness. I moved the new one over about 4' so it would clear a boxy vehicle on the lift. I can easily slide it along the I beam by loosening a few bolts if I need to fine-tune the adjustment.
I then underwent a fairly epic amount of wiring. Not just for the fan power - that was easy enough, I just had to amputate the rheostat control for the old one and I decided to put the fan on a dedicated circuit at the same time. I also had to run CAT5 from the fan to the control box, and took the opportunity to permanently wire the power for the AC unit and anchor another outlet that had been molested as part of the AC install.
Here's the control box. Push for on/off, turn for wind.
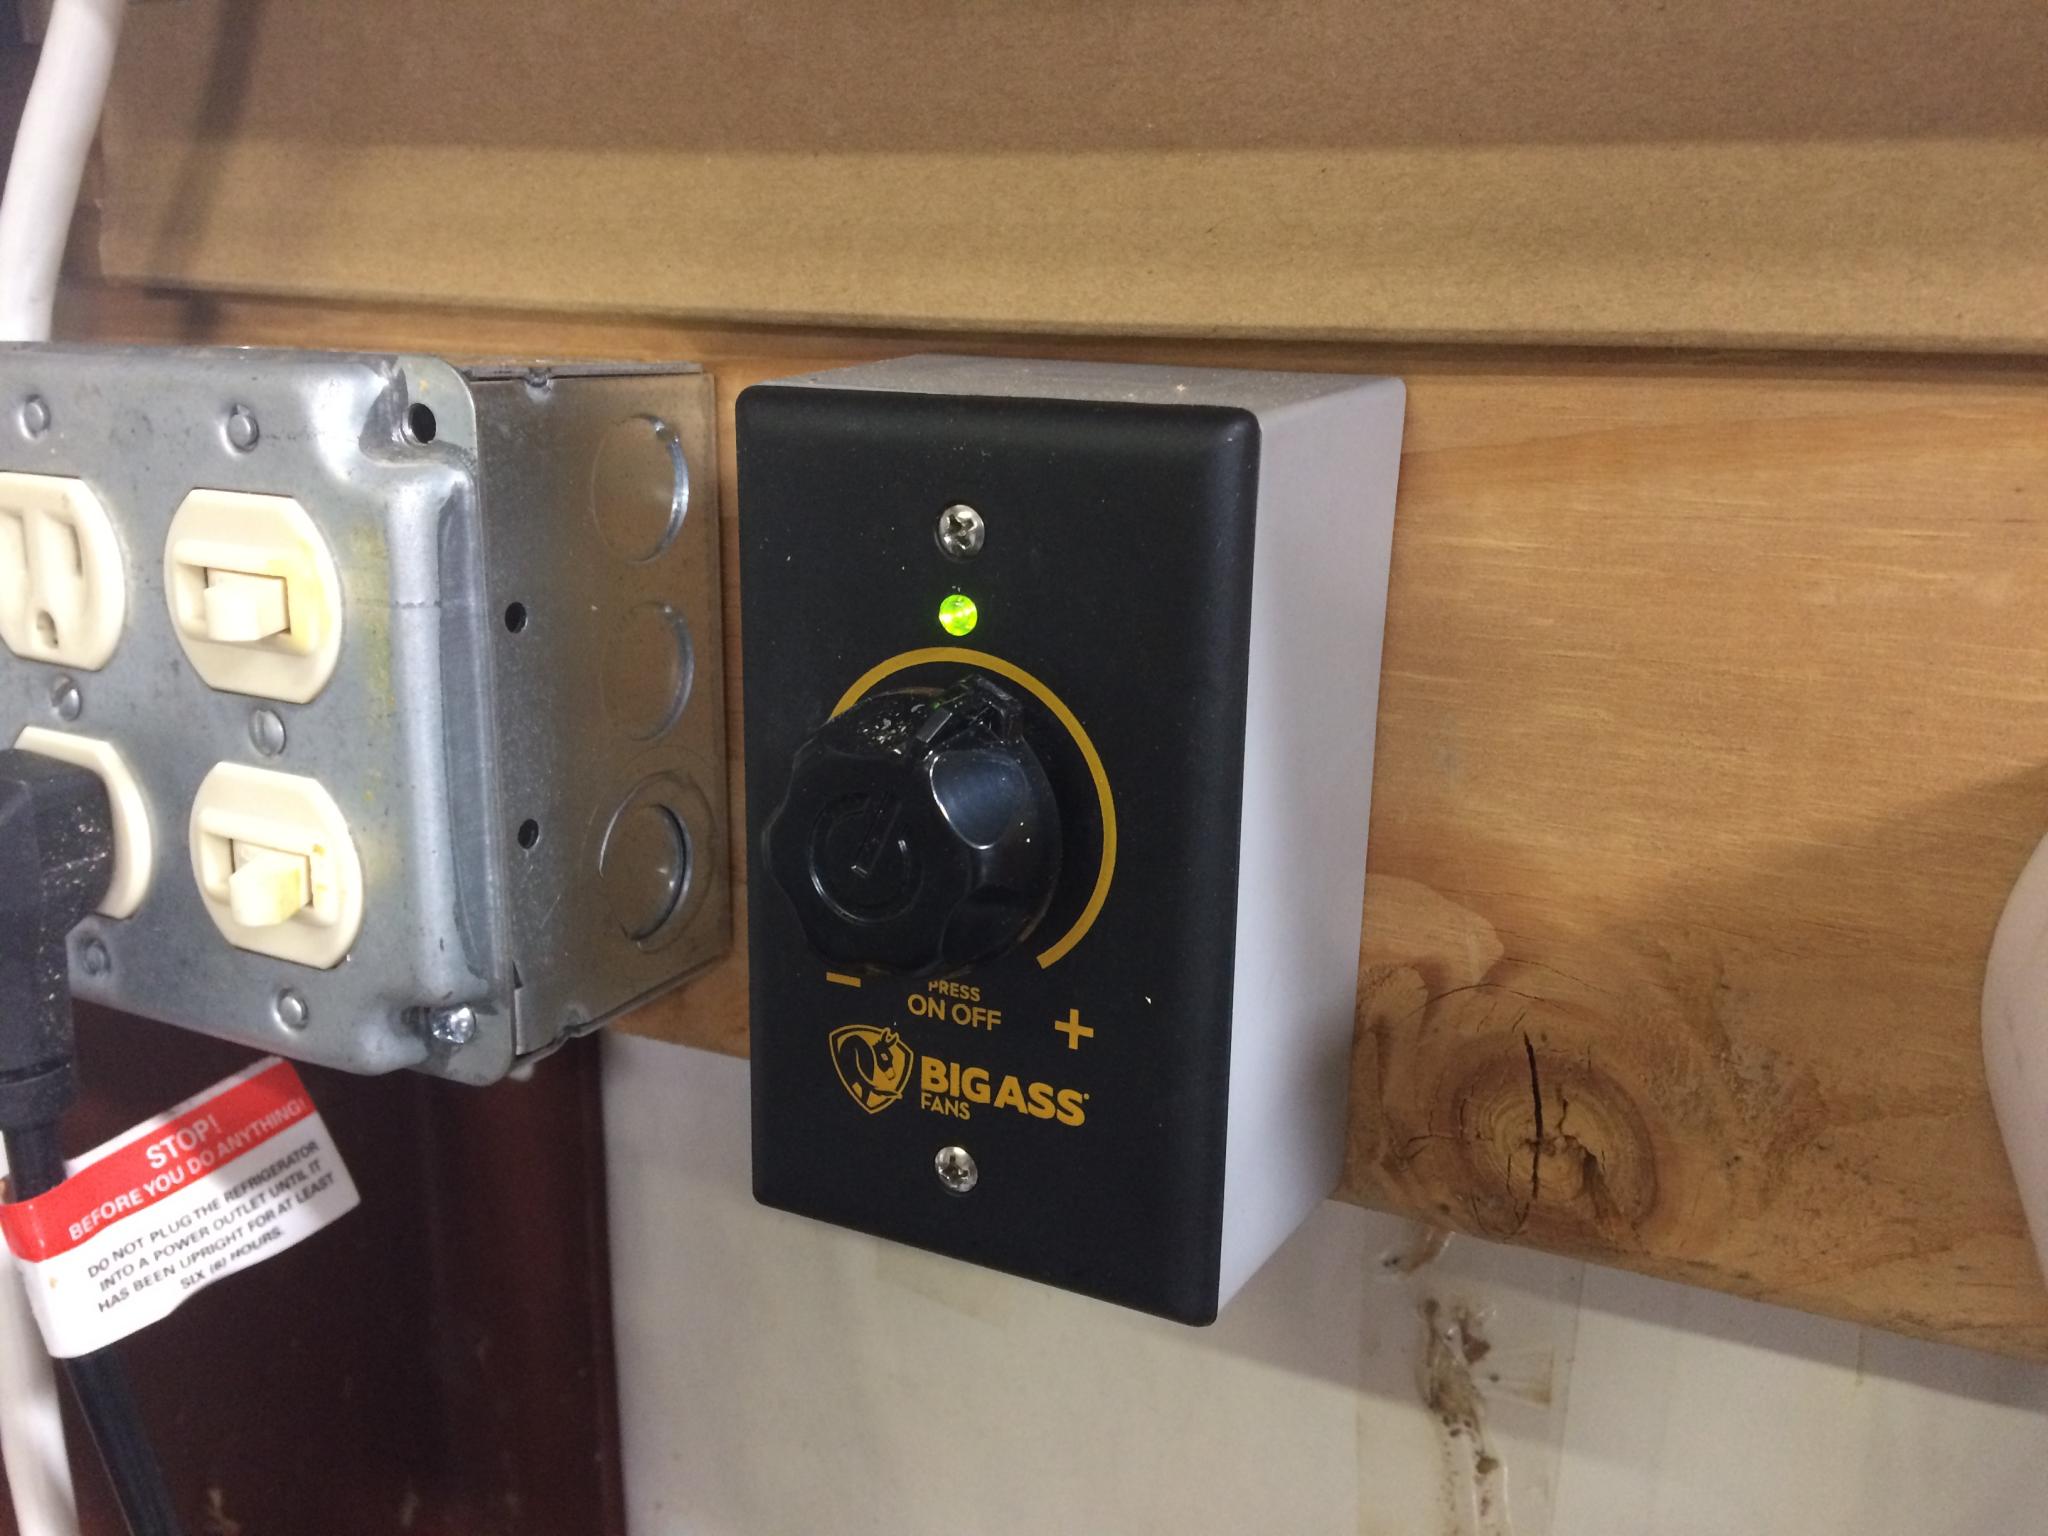
That big 2x8 I used as a support for the AC unit came in handy. The bar fridge is just below, so this has become the Keith maintenance station. AC, fan control, drinkies and the ubiquitous blue towels right beside a big pump bottle of citrus hand cleaner. The two switches are for an 8' light fixture immediately above (just changed it over the LEDs are part of this work) and the exhaust fan. This picture was taken before the AC rewire, that cord is now hidden.
So, after all that, how is it?
It was a hot day today. Probably 100F. I had the AC on and off a couple of times as I worked on wiring. It was easily 90F at the top of the ladder as I was building the fan - I did actually have a thermometer with me. As soon as I got the Big Ass Fan running, the shop was immediately more comfortable. Even if you're not standing underneath, there's just air circulation and the temperature is leveling out across the shop. I saw the temp at the lift start to drop - but more noticeably, I stopped sweating. It just felt good.
Aaaaaaaaaaahhhh.
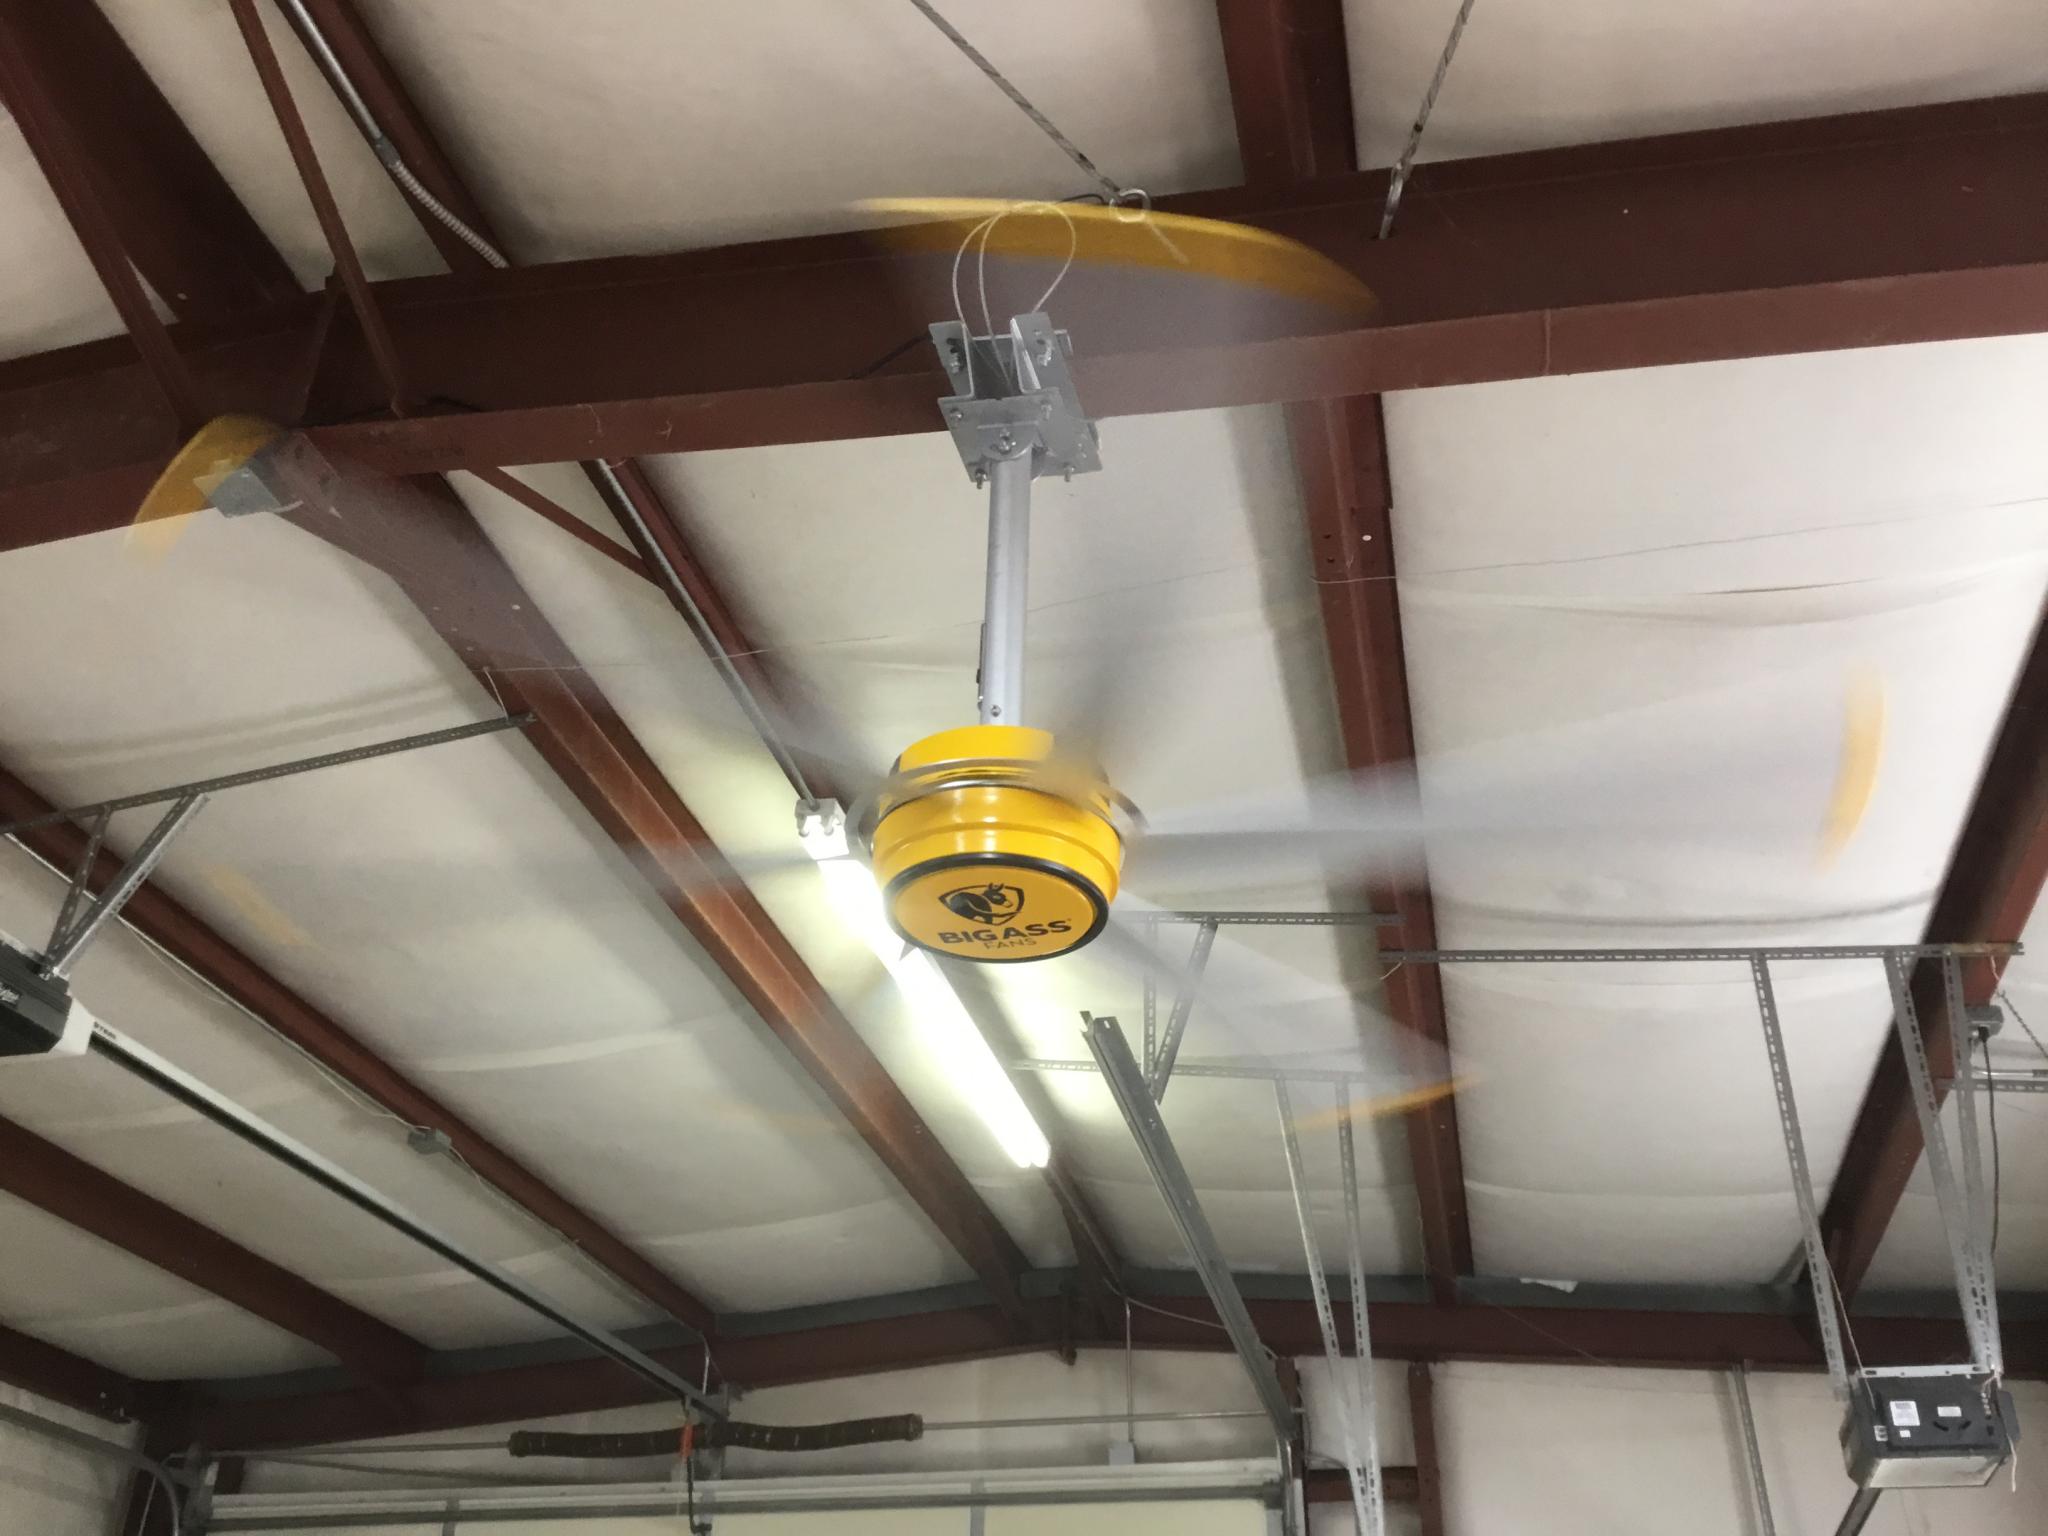
It's actually not that big, the motor is huge. As I mentioned, it's the smallest of the E series. I suspect I could just bolt longer blades on to it if I wanted. But it's big enough. It makes no noise at all and has no wobble. I did find a resonant frequency at one point that seemed to be flexing the bottom of the I beam and allowing the fan to swing - I can either avoid that speed or add some guy wires. The fan came with everything but the cable to do that. I'll keep my eye on it to see how likely or necessary this is. Adding a couple of small vertical braces from the top to the bottom of the I might do the trick as well. I've been running it at about half speed.
It's got odd startup behavior. The Haikus are a little twitchy at start as they get themselves combobulated and will sometimes bump backwards before starting. This one takes considerably longer as it figures things out - the instructions say it can take as long as 30 seconds. It probably took 10 seconds the first time then it got faster. Some sort of artifact of the digitally controlled brushless motors, I assume. I don't know enough to say.
Janel got tired of the heat in the house so she came down to visit. She set up a comfy chair directly under the fan, grabbed a Coke and watched the Formula 2 race on the TV. Mission accomplished!
After more experimentation, I think the fan wobble came from some seriously gusty outside air coming in through the garage door. Still makes it worth bracing the fan a bit more, though.
I own two of the Big Ass Fans, one is an 18ft job that's in my main workshop, puts out alot of air movement and drops the interior temp by 10 degrees compared to before, just from having it spinning between 20-30rpm. My 24ft fan hangs in the warehouse, and spins at 15-20rpm all day long for the past 2 years. No complaints from either one, and they only seem expensive compared to loud fans you can get at big box stores. When priced compared to adding additional A/C compressors, they were/are a no-brainer.
10/10!
~Peter
You'll need to log in to post.


