


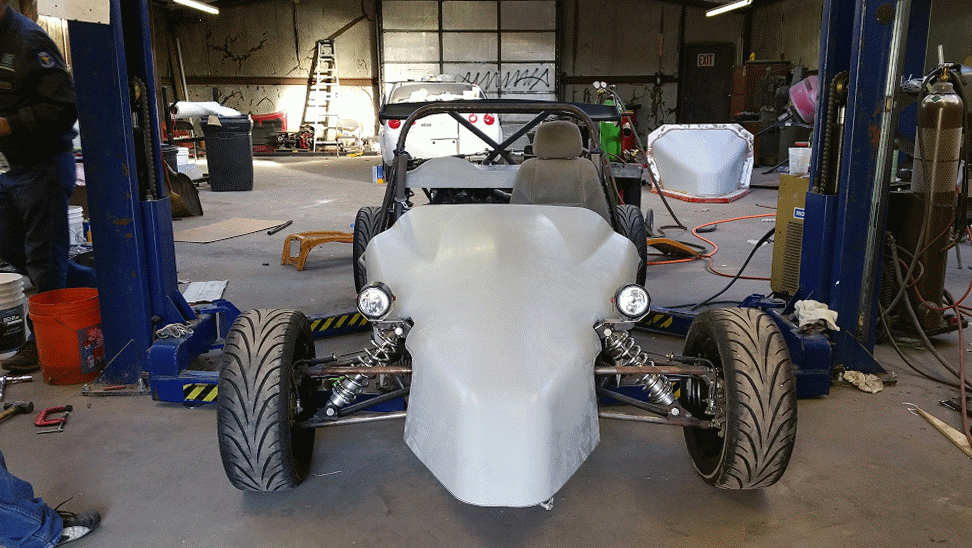
adoyle88 wrote:We then moved up, building the rest of the front of the frame. Jackson, my nephew and our future racecar driver, got a kick out of sitting in the car.
Seems like he is racing already.
Cool build

adoyle88 wrote:
Seems like he is racing already.
Cool build

Hey Man, great project!
Just tried to contact you via the forum and the email bounced. I'm just east of Dallas in Fate, ACVW guy and Challenger. Wanted to touch base, looking for a Beetle shell and machinist.
passatglxforme at yahoo dot com

In reply to VWguyBruce:
I sent you an email. Not sure why it bounced on your end.
I hope everyone is recovering well from their Thanksgiving feast and plentiful leftovers. My dad and I have worked ours off keeping busy on the car. We are hoping to have the car finished by the end of the year. Going to be cutting it close for sure.
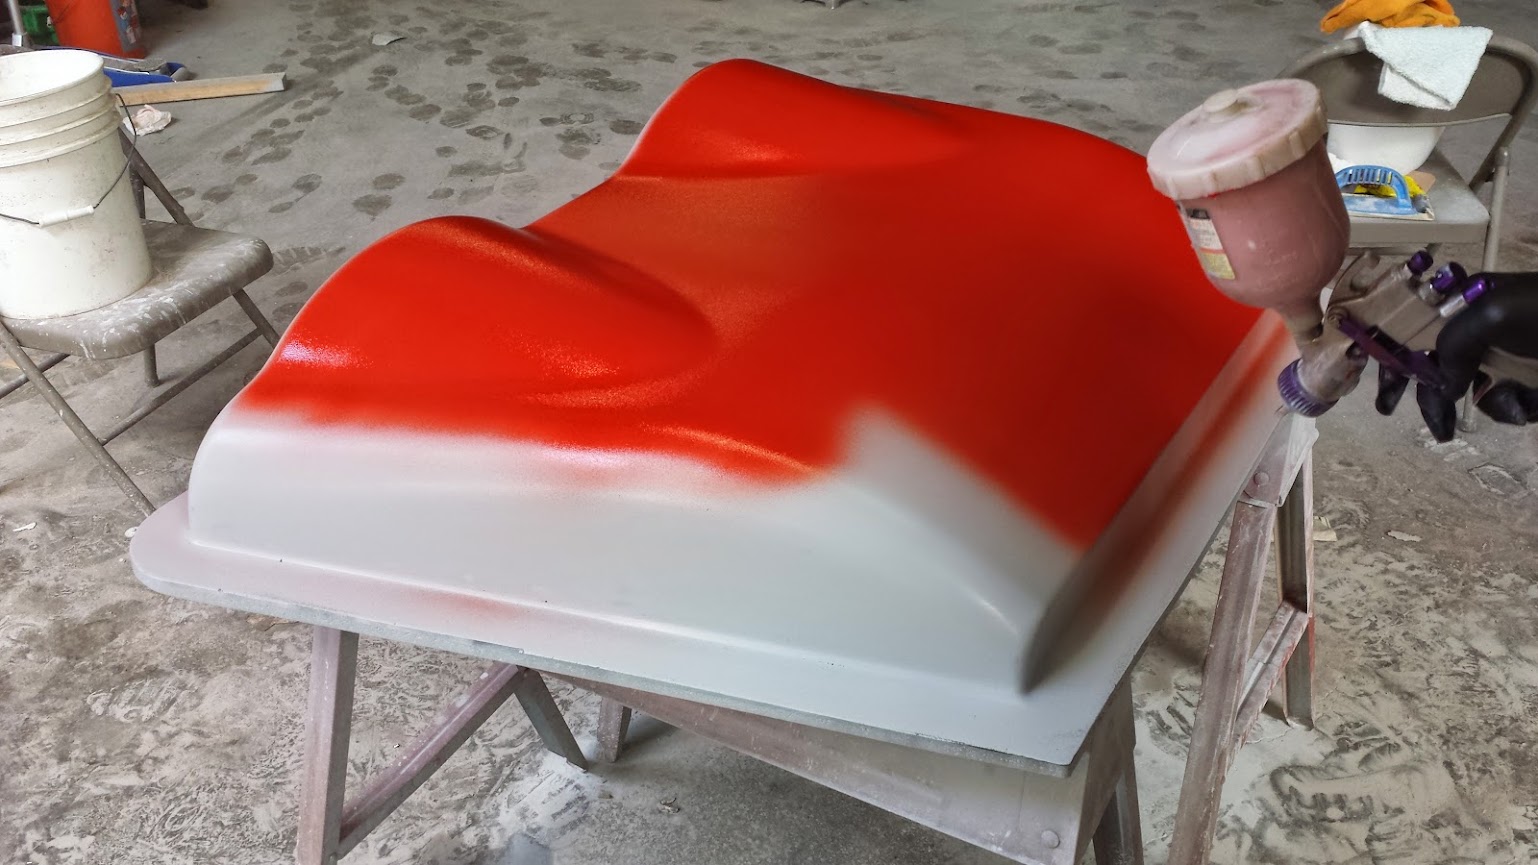
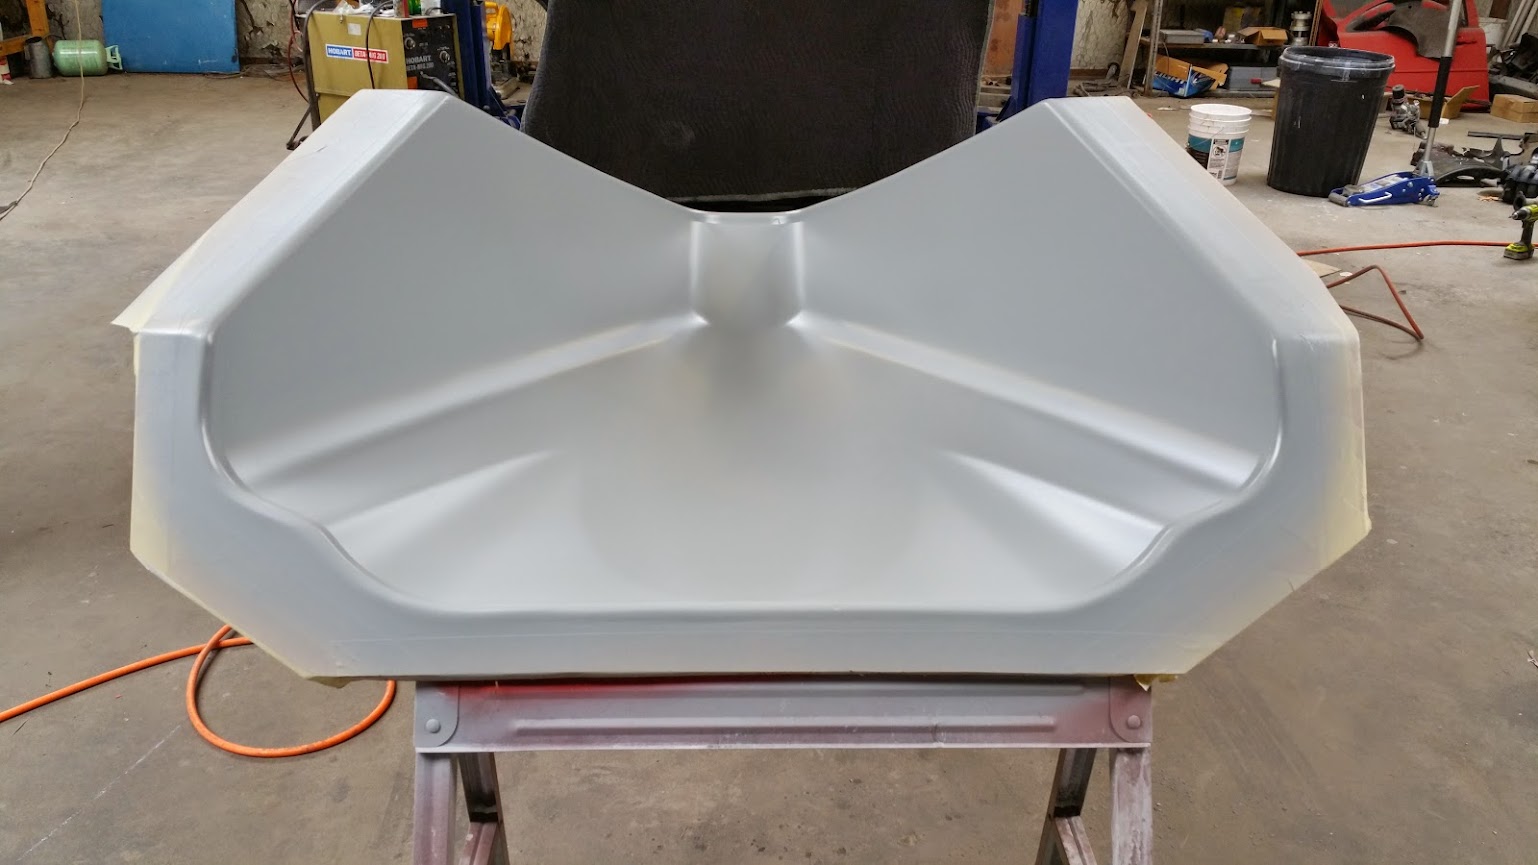
In my last log I finished with us waxing the primed and sanded nose plug in preparation for laying up the fiberglass nose mold.
October 7
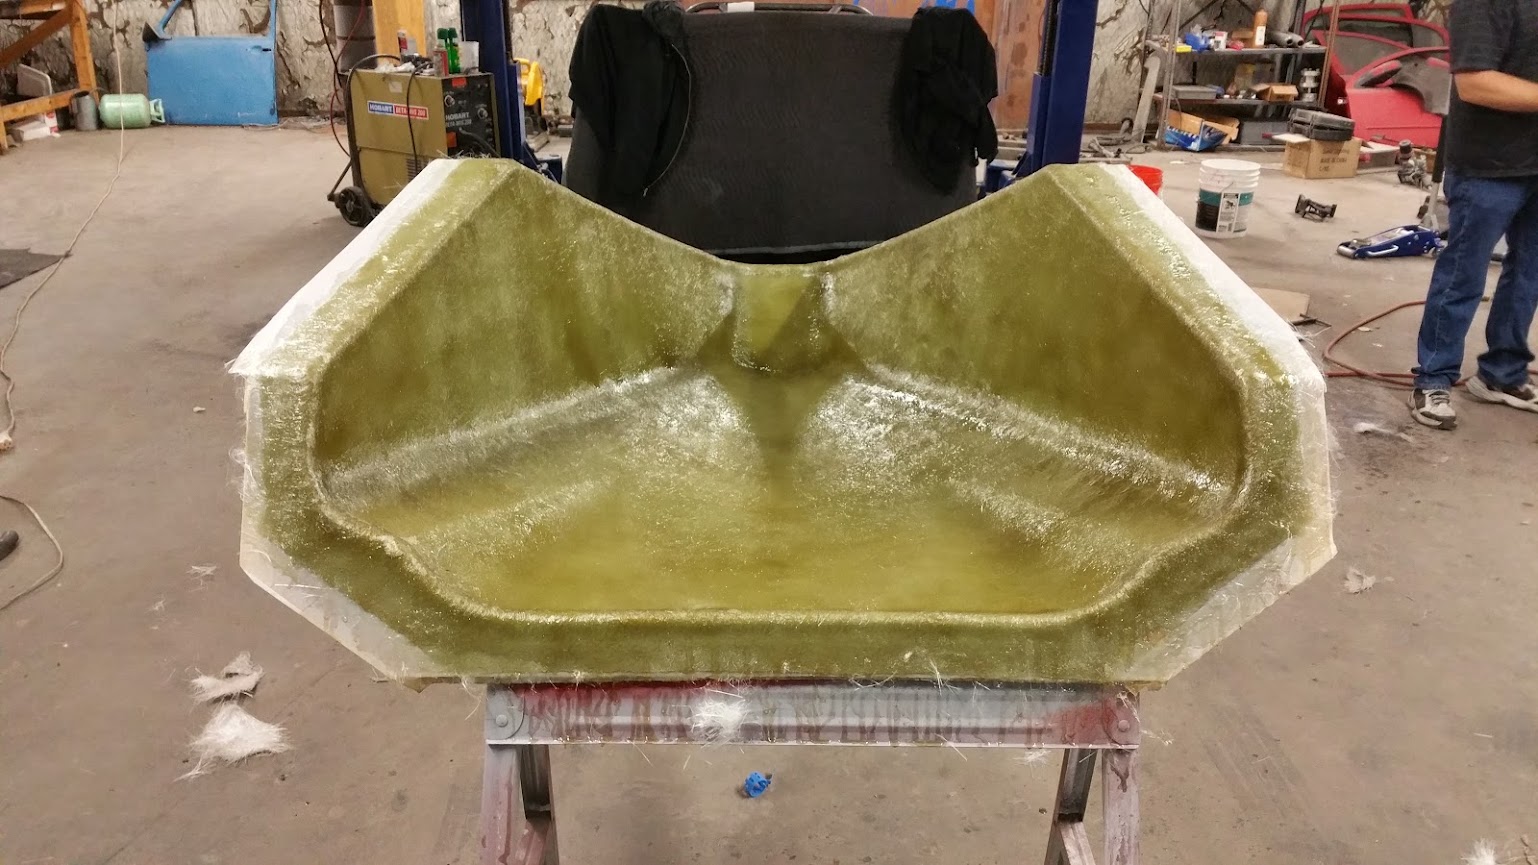
The first layer to be applied on top of the wax was a bright red tooling gel coat. This gel coat is tougher than your usual gel coat so that it can stand up to any tugging required when separating the fiberglass nose from the mold. Gel coat is pretty thick and can quickly ruin a gun if it kicks too soon so we sprayed it using a cheap Harbor Freight gun with a drilled out nozzle.
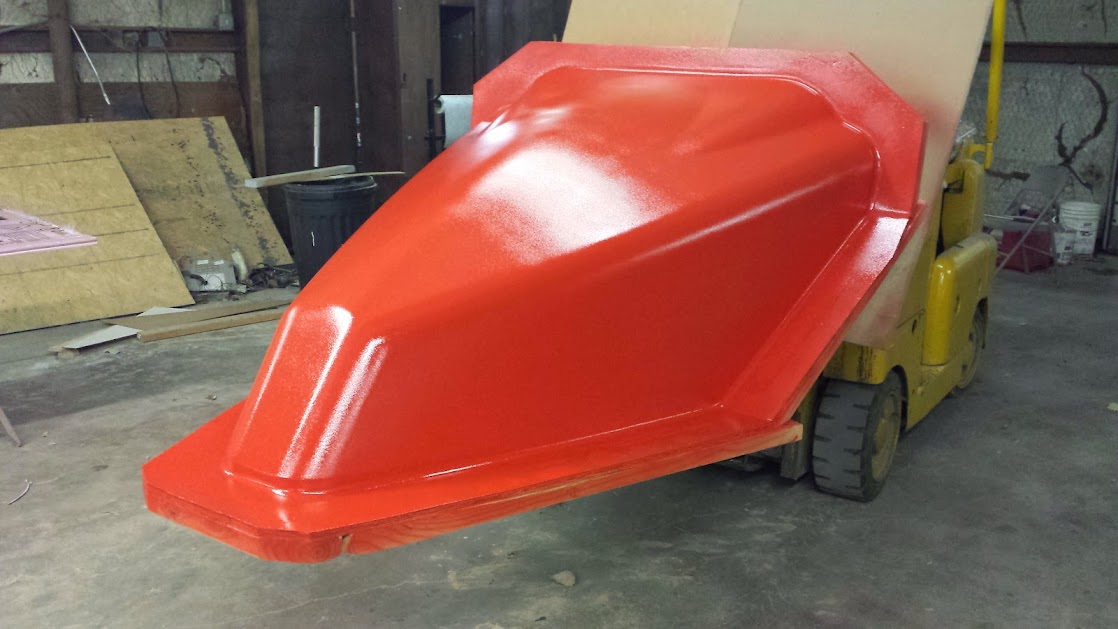
The outer texture doesn't matter so don't let the roughness bother you. The important surface is underneath, where the gel coat meets the plug, and will be exactly as smooth as the plug.
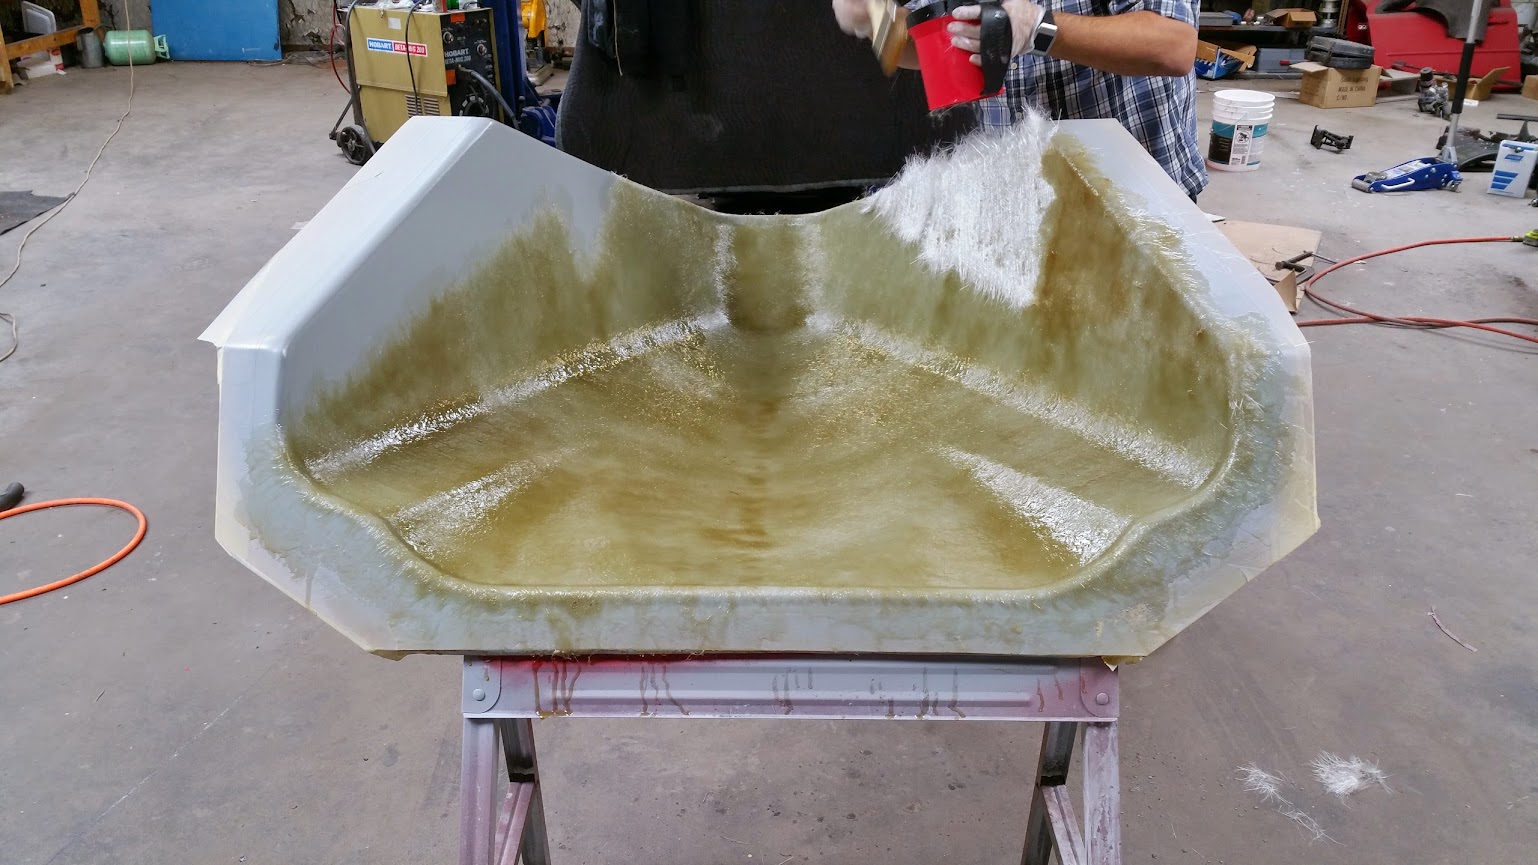
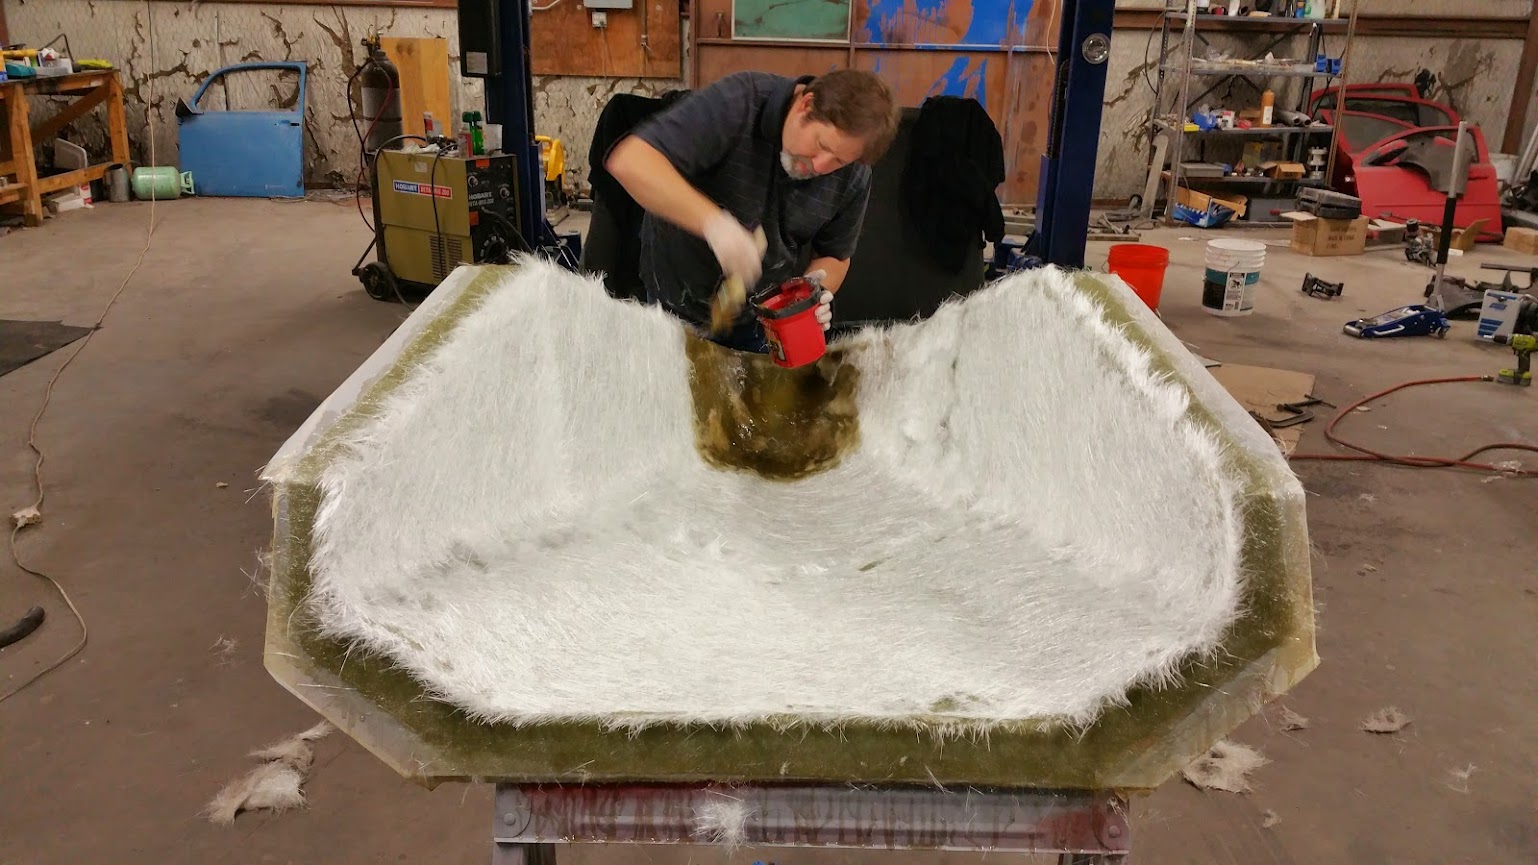
With this being our first real fiberglass project, we had a bunch of learning to do and probably made more mistakes than we even know. At any rate, we followed instructions from the internet and from our fiberglass guru Billy and had the first layer of fiberglass on in a few hours.
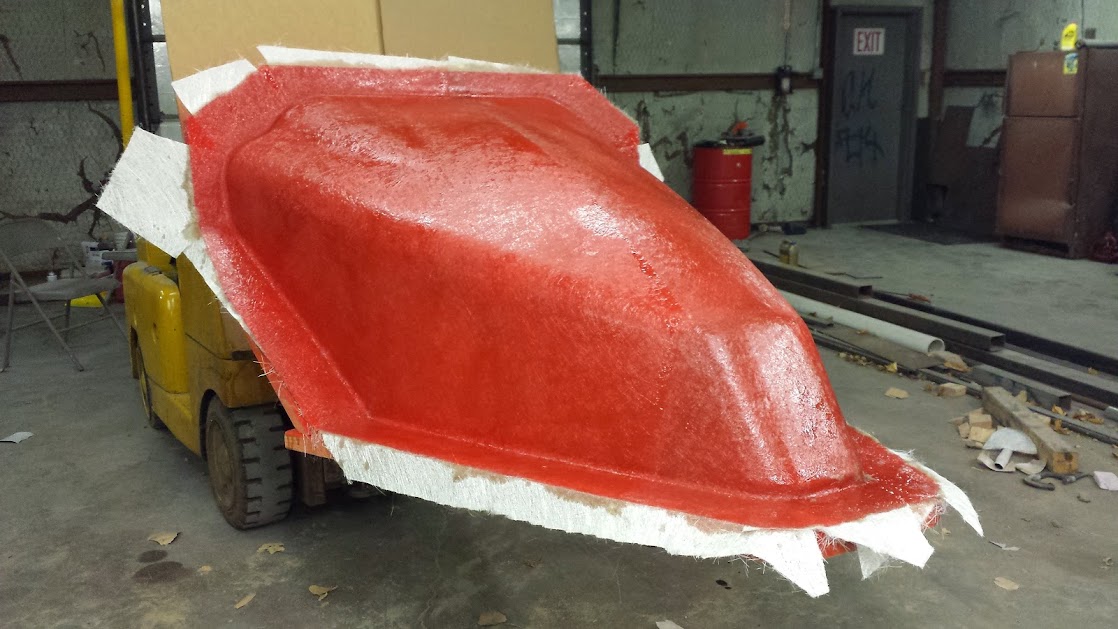
October 11
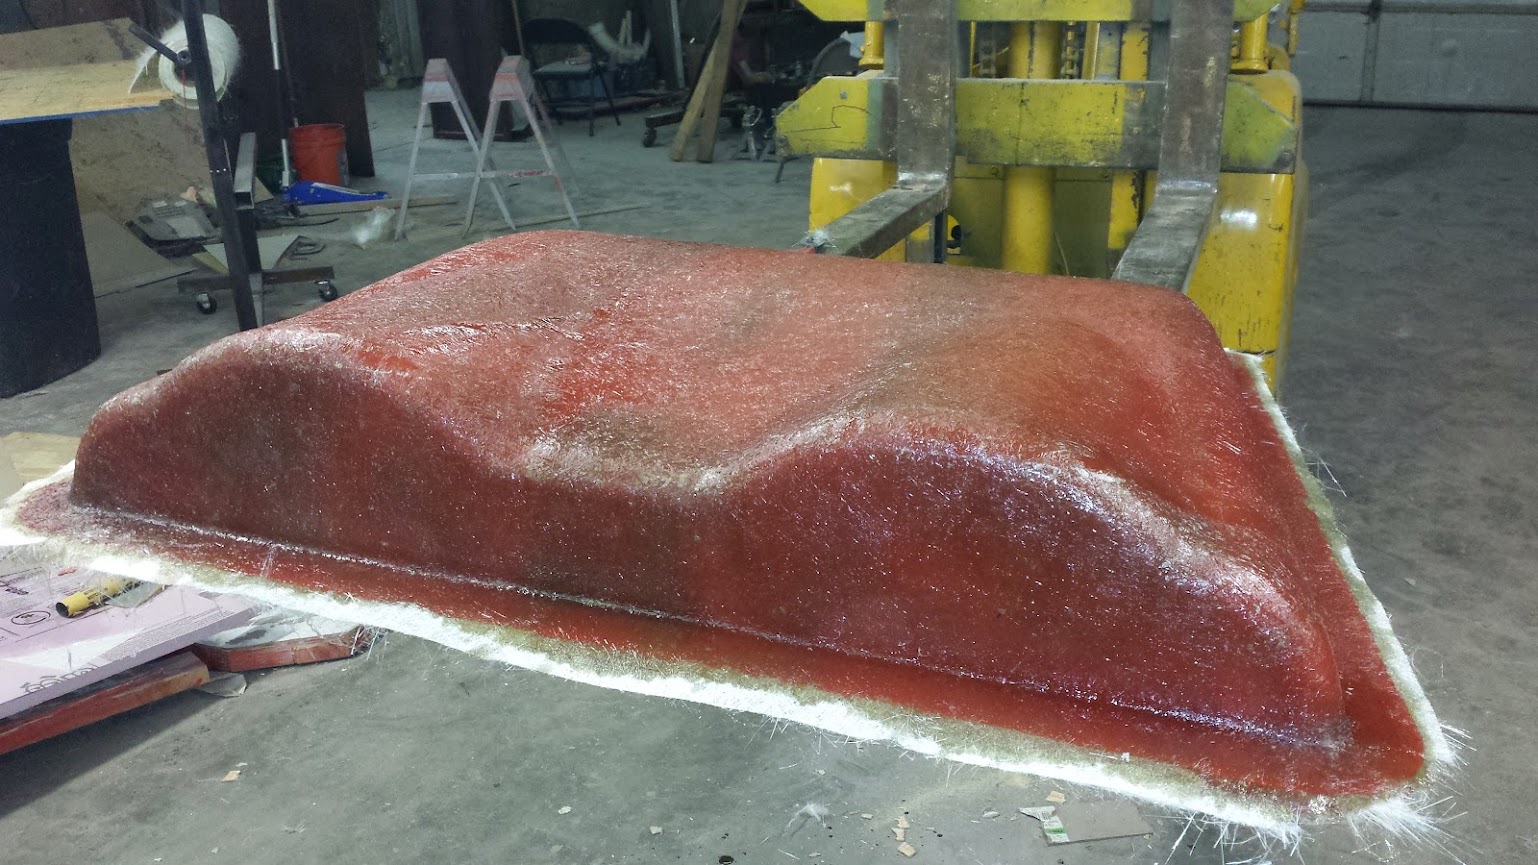
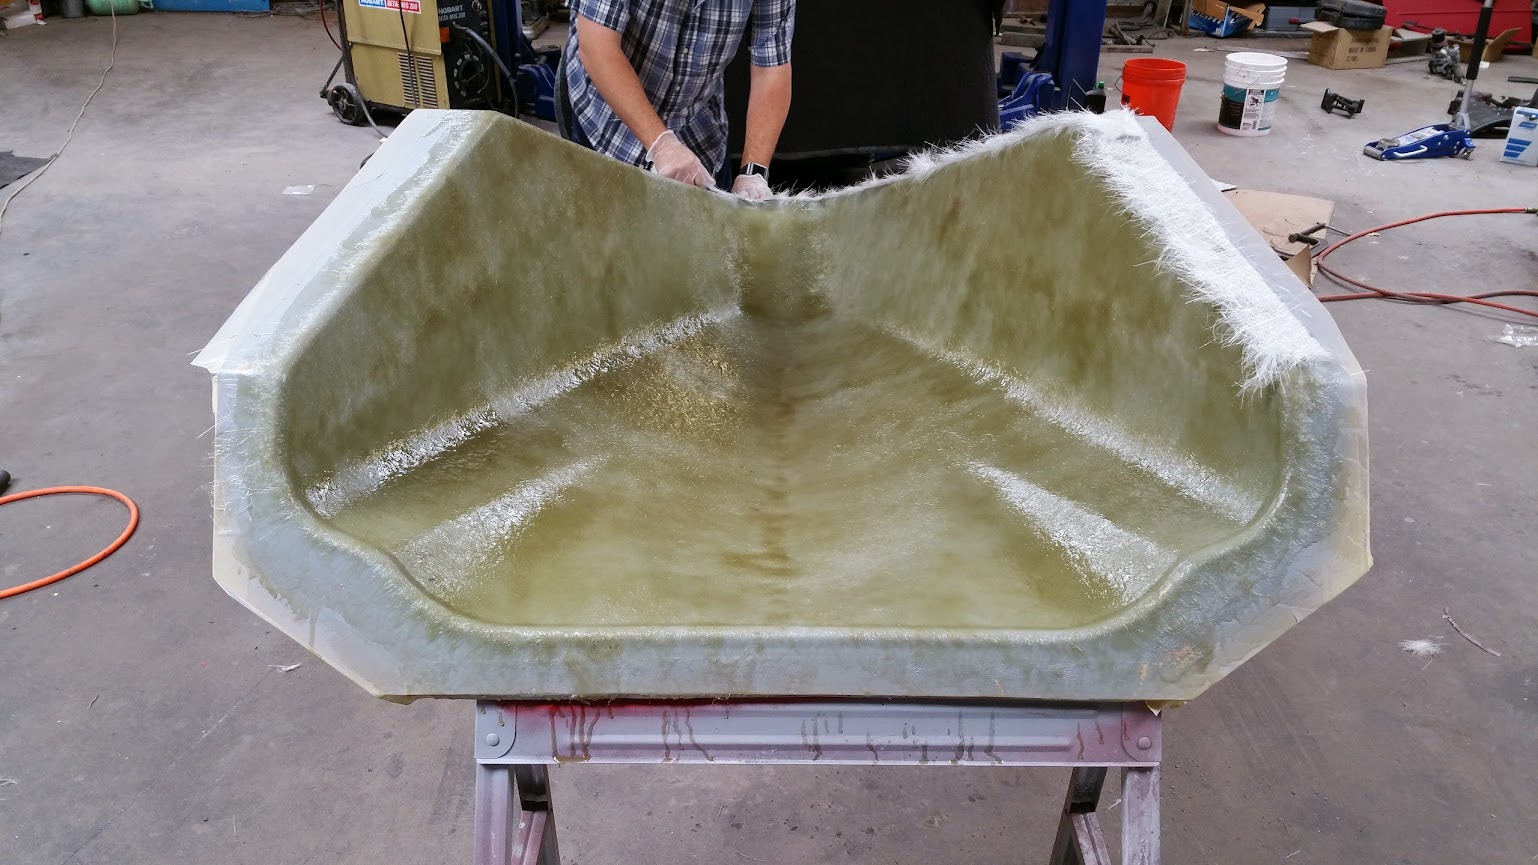
Over the next few days we added resin and fiberglass until we had four layers built up. We considered going thicker to make sure the mold would be tough enough, but we were assured that the aircraft grade vinylester resin we were using would be plenty strong enough at four layers. However, because of the size of our mold, it was suggested that we attach a metal frame. This would keep the mold from flexing while we work with it and, more importantly, would make it easier to pop the flexible nose out of the more rigid mold.

October 14
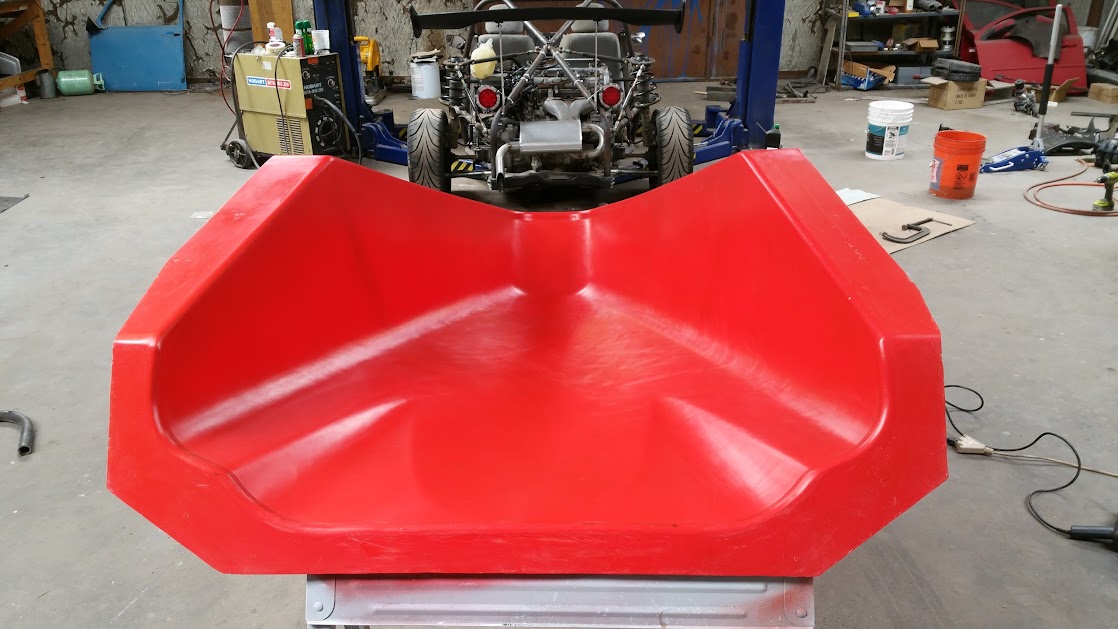
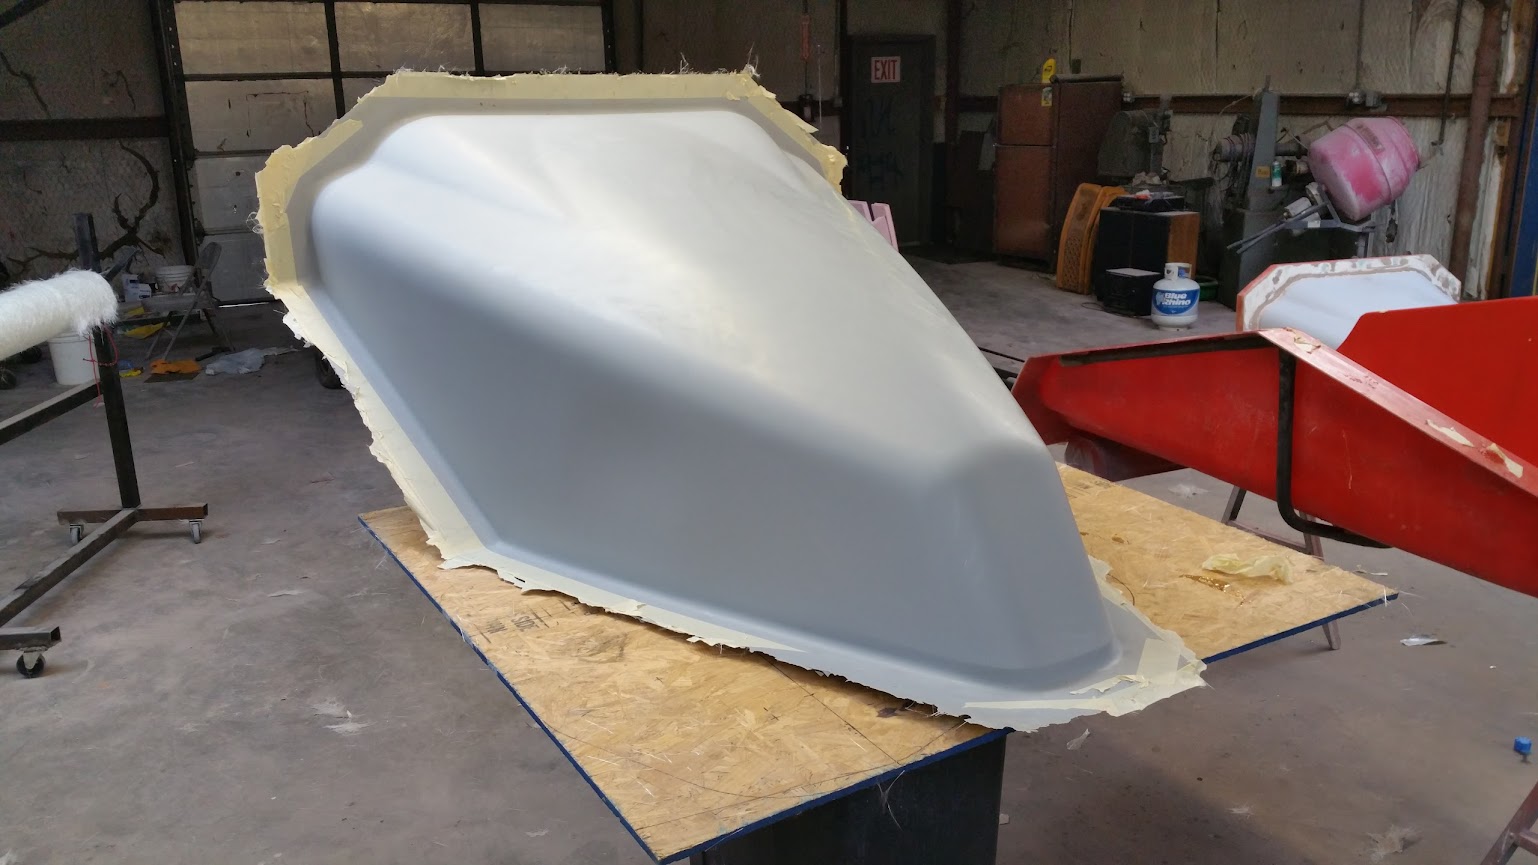
After letting everything cure for a while, it was time to remove the mold from the plug. We read horror stories online and heard personal accounts of molds sticking. We were told that the first use of a plug is always the most likely to stick. We had waxed it seven times trying to make sure that every part of the plug had a nice coating but up to this point there was no way for us to know.
As we worked sharpened paint stirrers between the fiberglass and the plug, we were happy to find that we had applied an acceptable layer of wax.
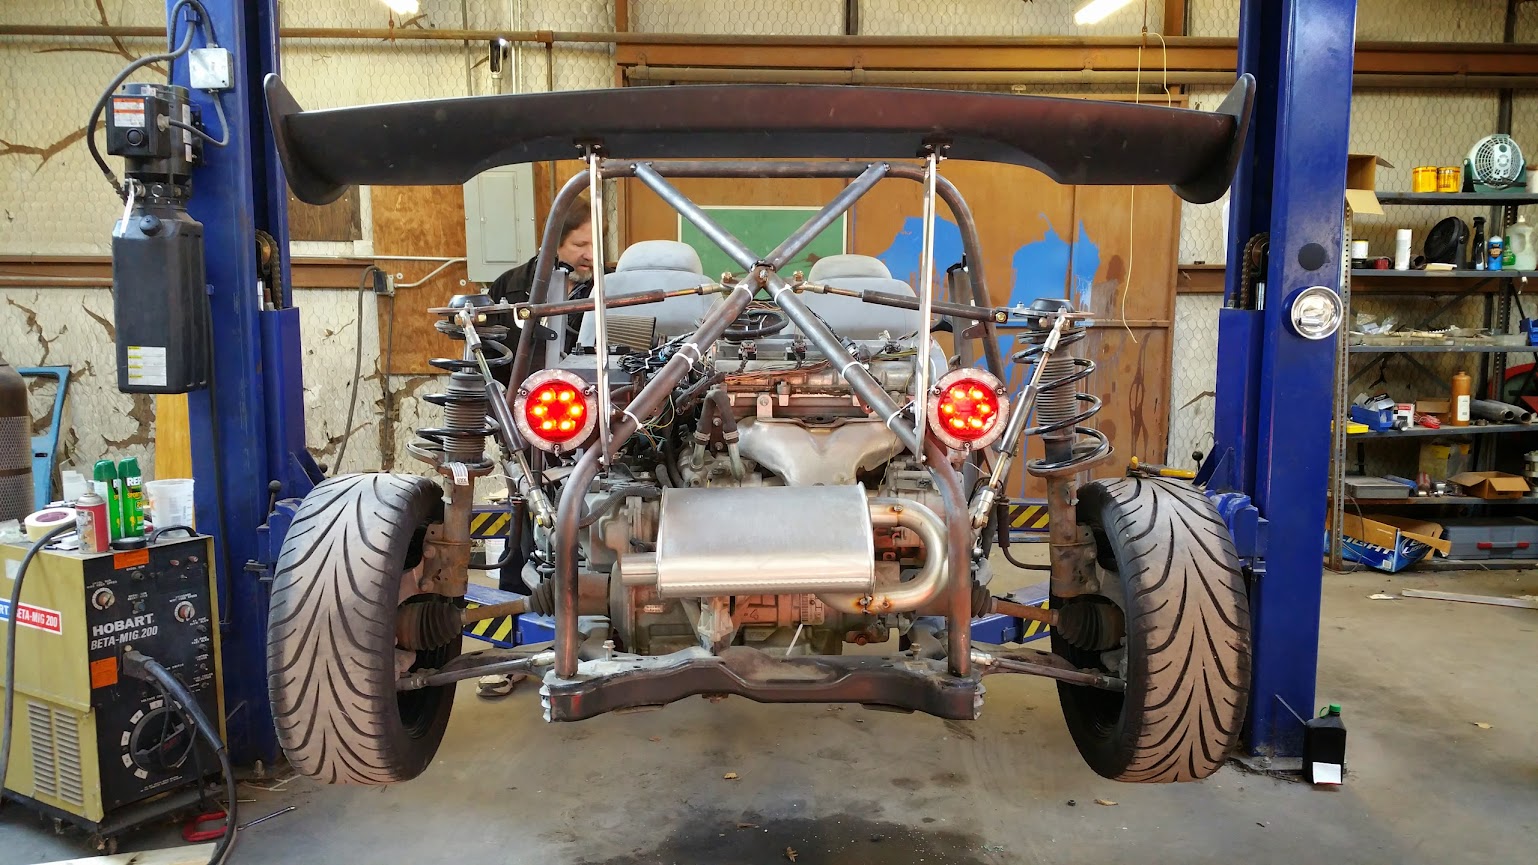
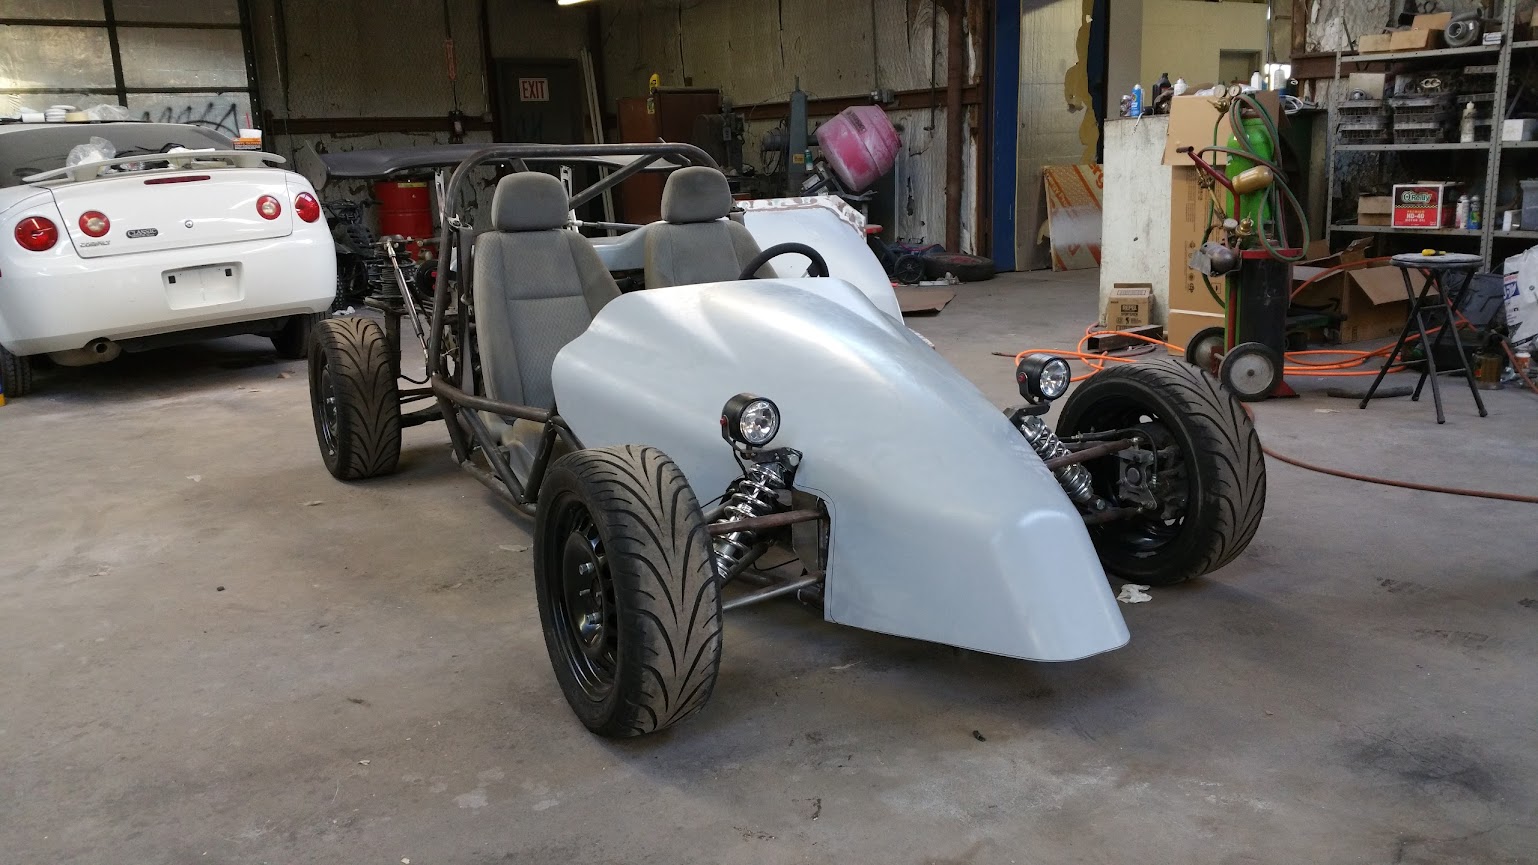
 This photo is from the future. You'll notice that we have tail lights and a rear spoiler. This was taken right before we started fiberglassing the actual nose. That's a story for a later post.
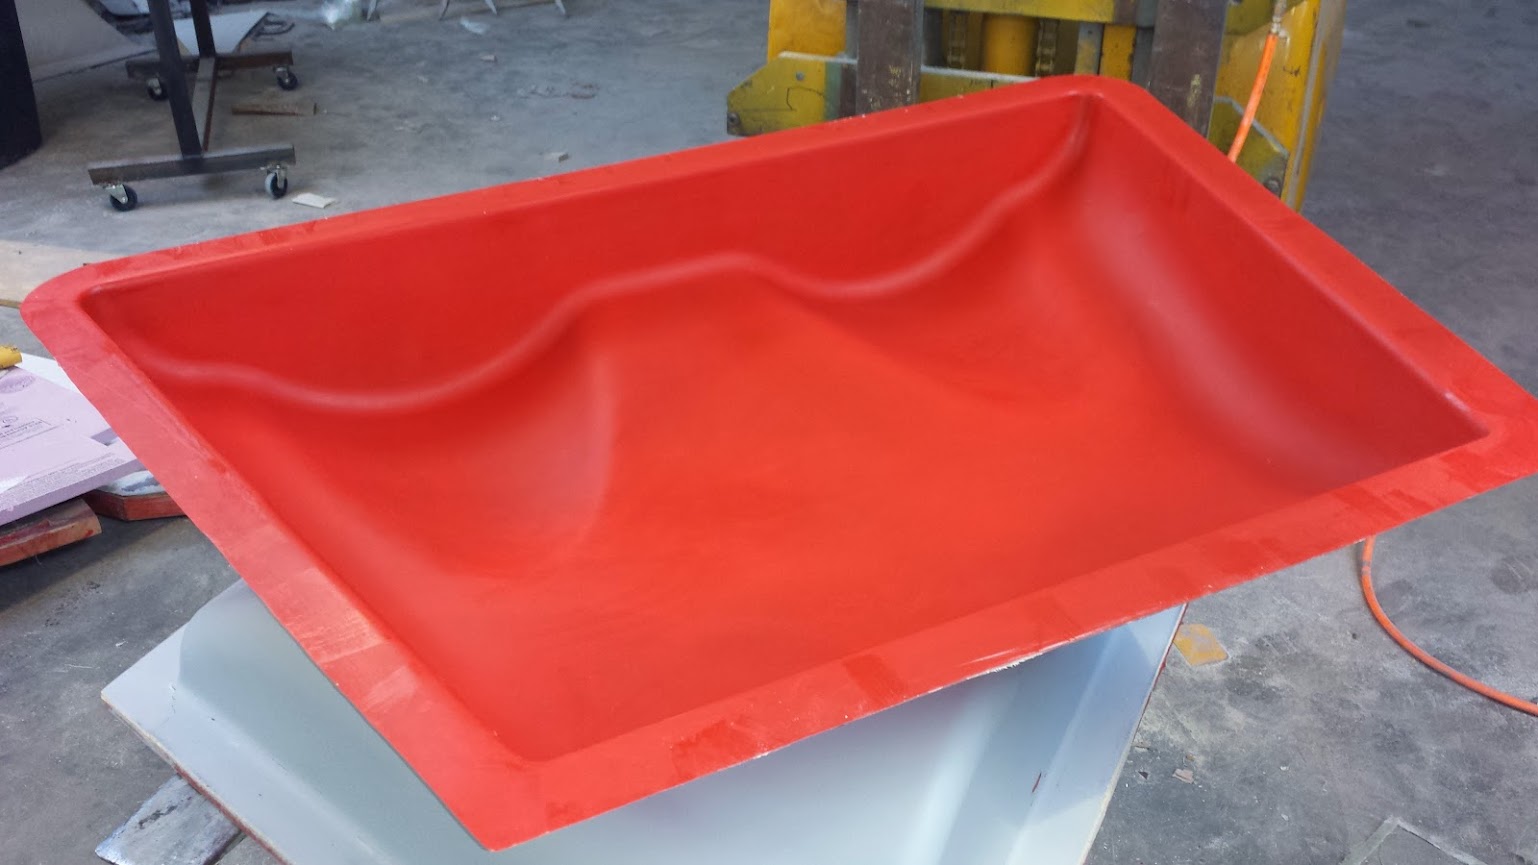
So our first mold was a success. There were a few places that needed a little bit of touch up but we were very happy with the results.
Awesome result.
I'll have to pick your brain some on the products you used. Off the shelf stuff didn't seem as rugged as I would've liked.

Looking good!

Just started reading this thread. Great build, nice work. I like that roomy shop too.

like like like like like LIKE![]()

Yes, very cool. Thanks for sharing.
To make the rear of the car feel a little more complete and to hide some of the less attractive parts of the engine, we decided to make a fiberglass cover that would mount just above the engine. You can see it under the upper tubes of the rear cage:
October 23
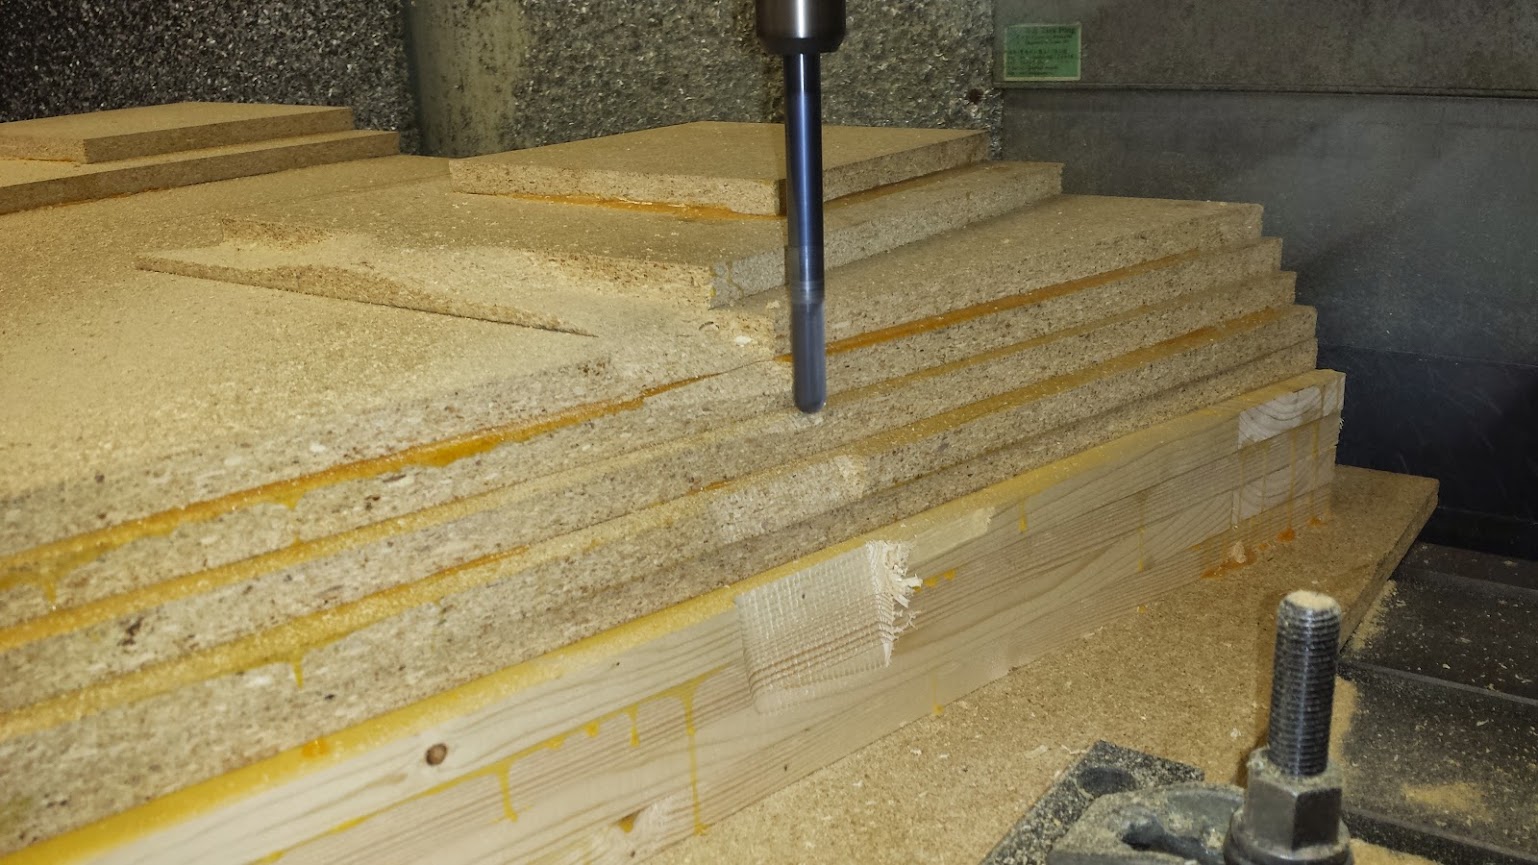
Just like with the nose of the car, the first step was to make a plug to pull a fiberglass mold from. We used a combination of 1x4s and sheets of particle board to build up the basic shape of the engine cover.
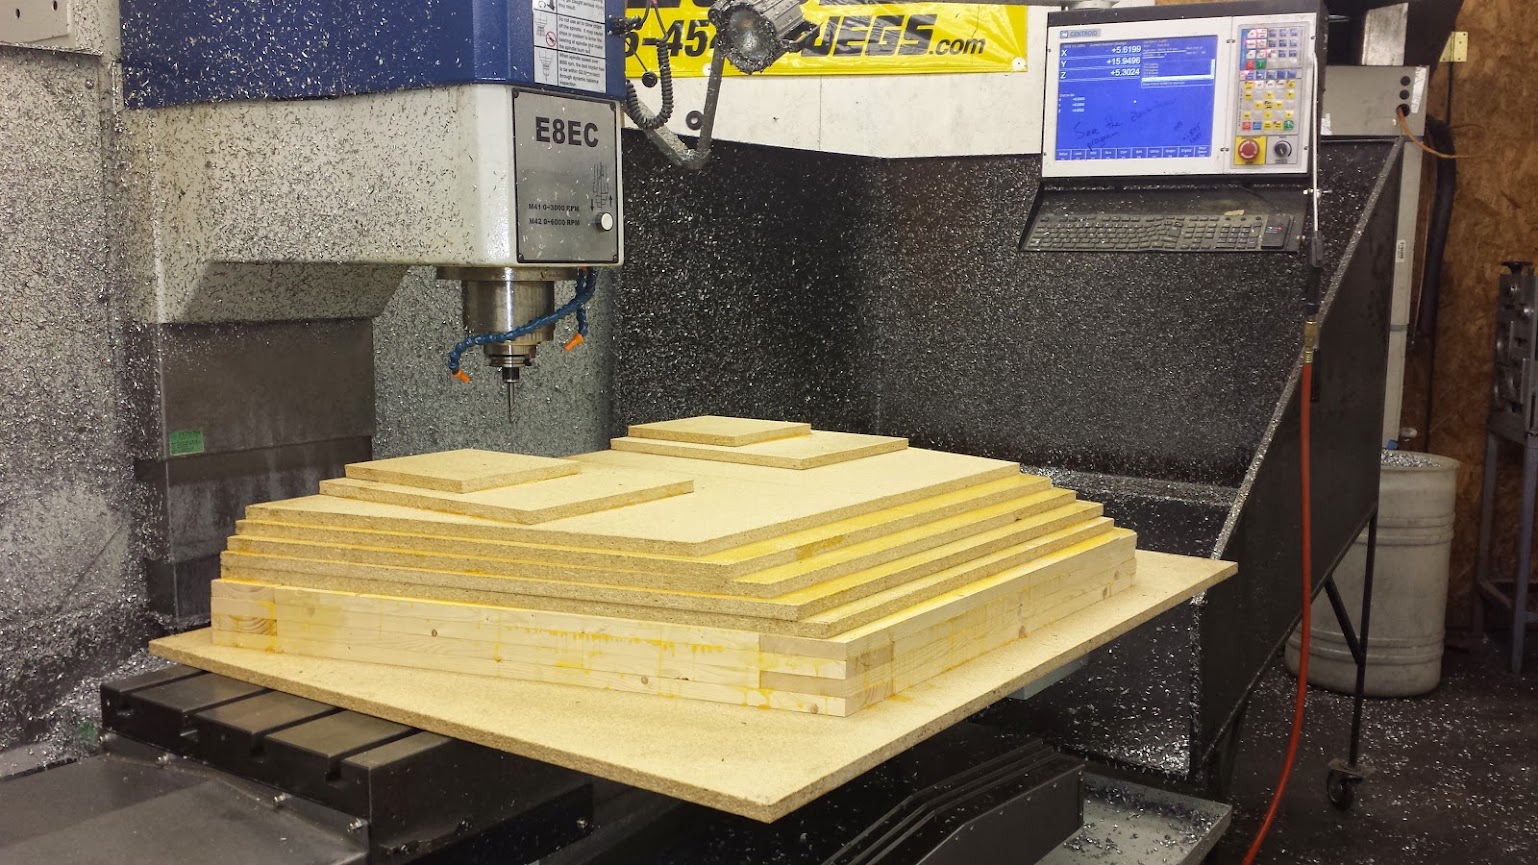
The engine cover was too big to machine all in one go so we did the forward half first. You can see we had to really hang the tool out even with our longest tool holder. The first few cuts were rough cuts to get material out of the way quickly. Later we did a much smaller cut with very little step over to leave a nice smooth finish.

October 25
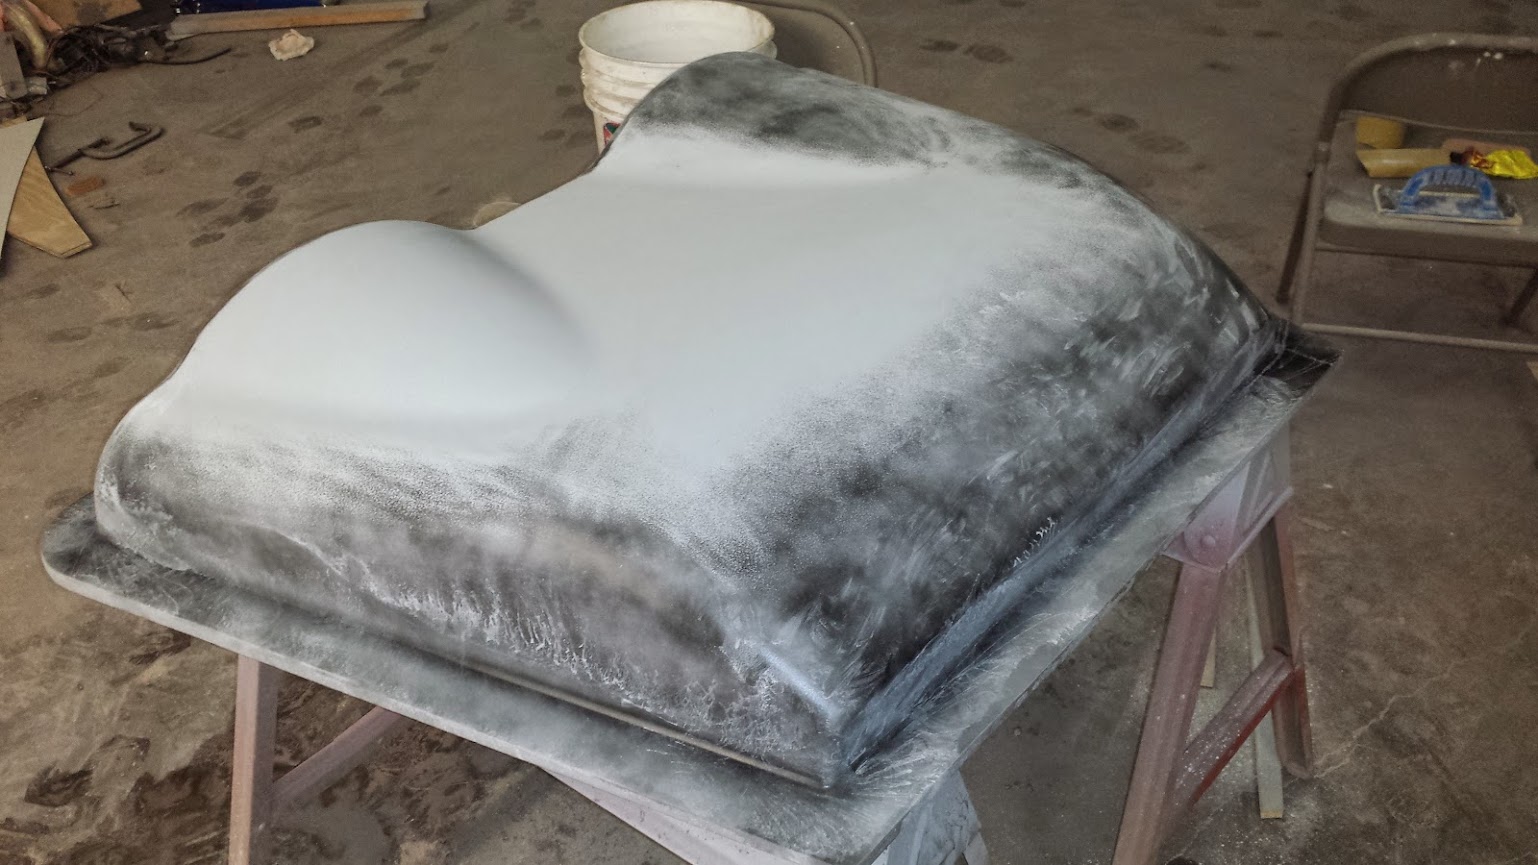
After doing the final cuts, we were left with a very smooth part, though here were a few larger pores that needed bondo. The next steps were to seal the plug while making it super slick.

We started off by brushing on a thick coat of high solids primer.

We block sanded this layer until the wood just started to show. After another coat of primer and another round of sanding, the plug was starting to look very good.
October 28
We applied one last layer of primer and spray painted a black guide coat. We wet sanded until all of the black was gone and the surface was perfectly smooth.
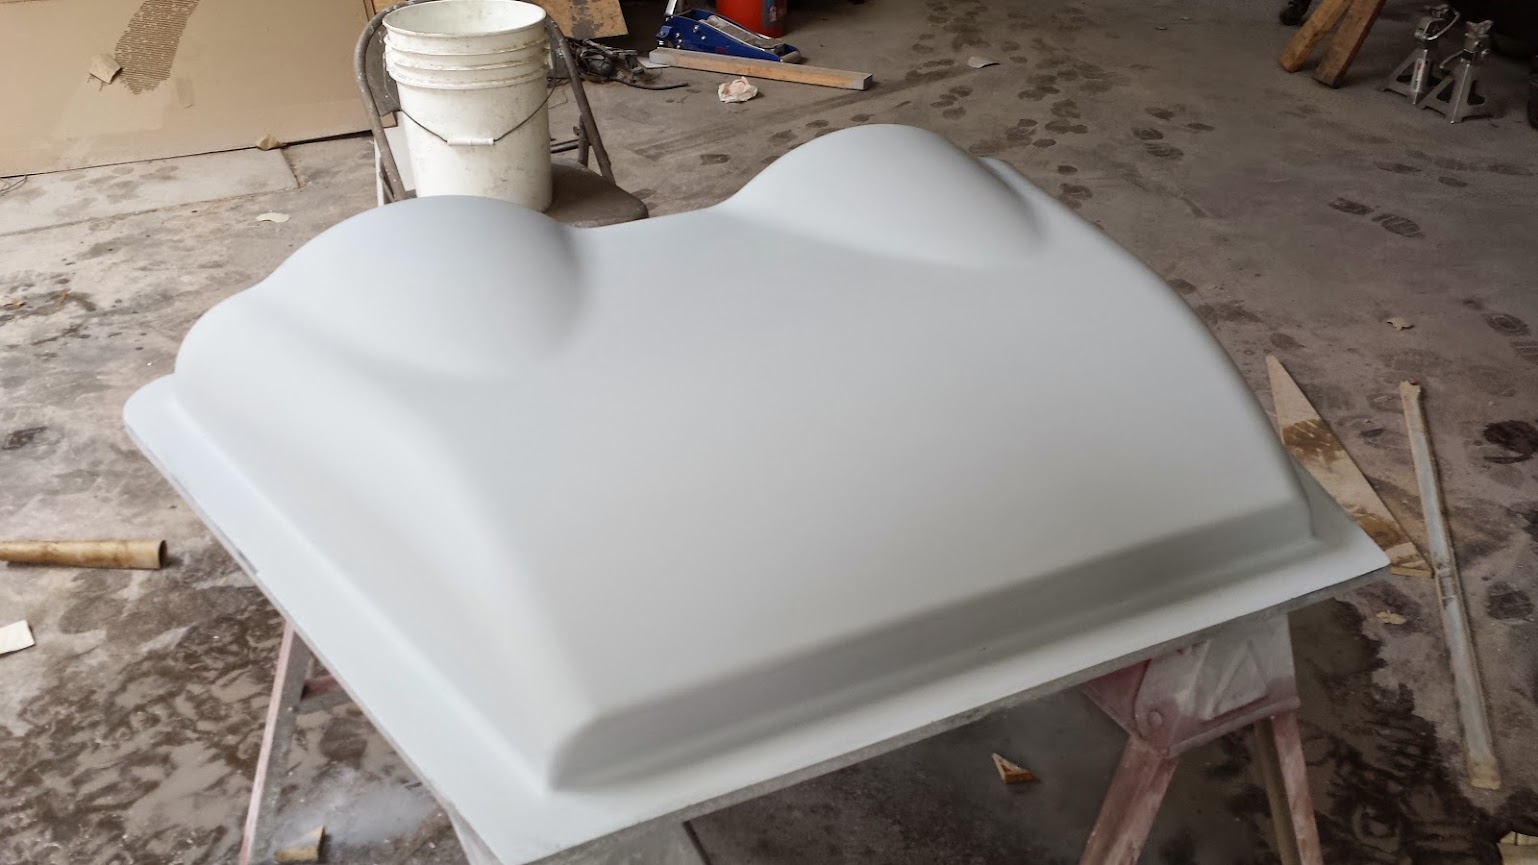
Stopping just long enough to snap some photos, we quickly continued on. After applying several coats of wax, we sprayed on the gel coat.
And then we immediately built up a few layers of fiberglass and went home for the night.
October 29
After 15 hours of curing we couldn't wait any longer. Using the same technique we used while splitting the nose mold, we had the engine cover mold off of the plug in no time.

Wow. Jealous of your tools and shop!!![]()

I can't even imagine cleaning up a mill after cutting particle board with it. I bet that's a huge mess.
Very cool project and well done!
November 12
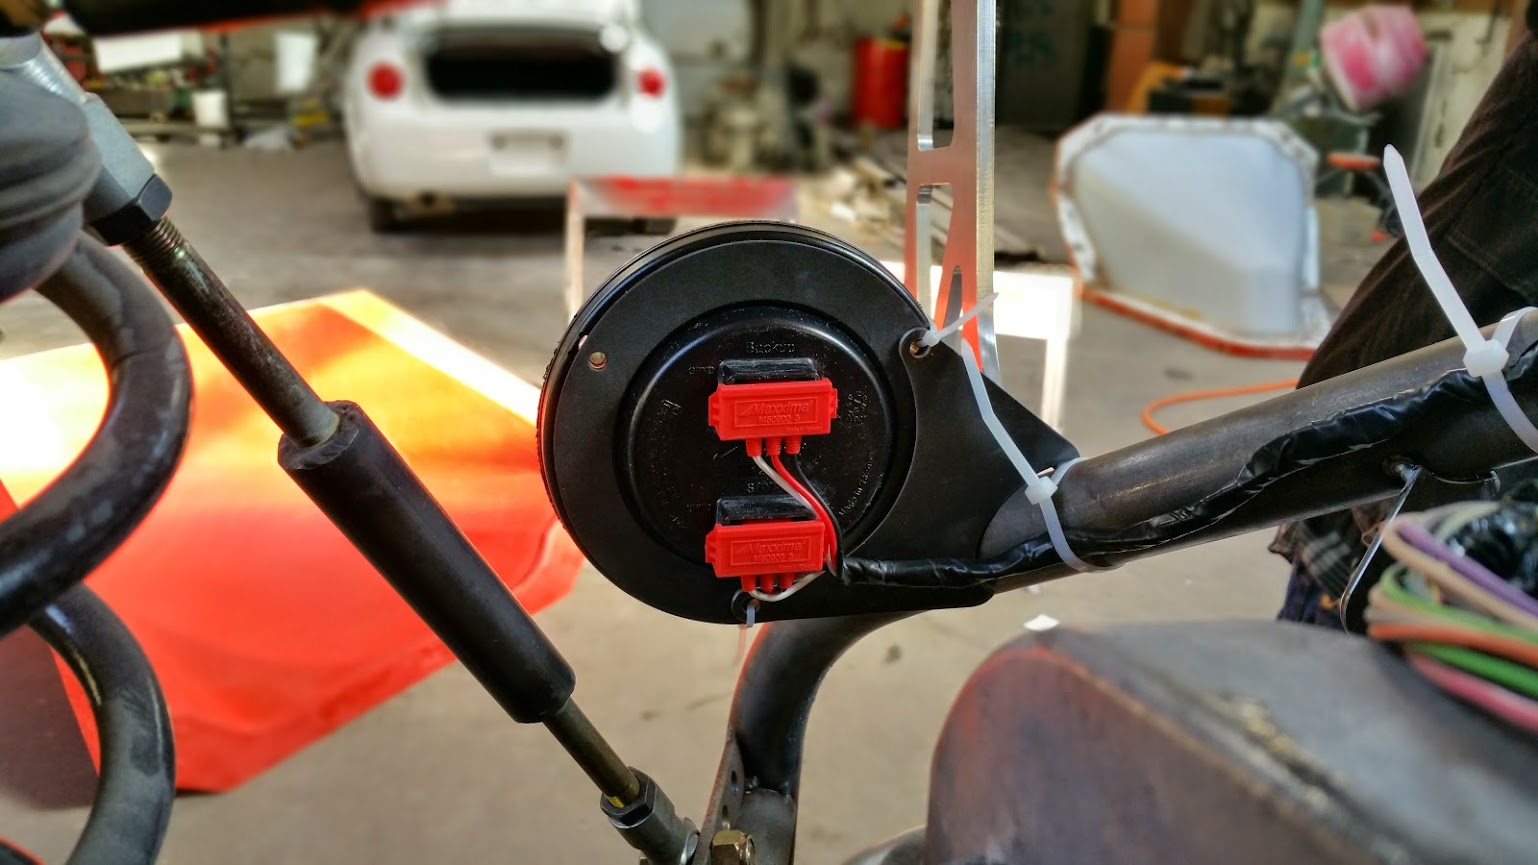
We found some LED tail lights on Amazon that were reasonably priced and had acceptable reviews. Once they arrived, we modeled them, placed them where we liked and drew up mounts. While cutting them out on the CNC mill, we also machined engine cover and rear spoiler mounting brackets.
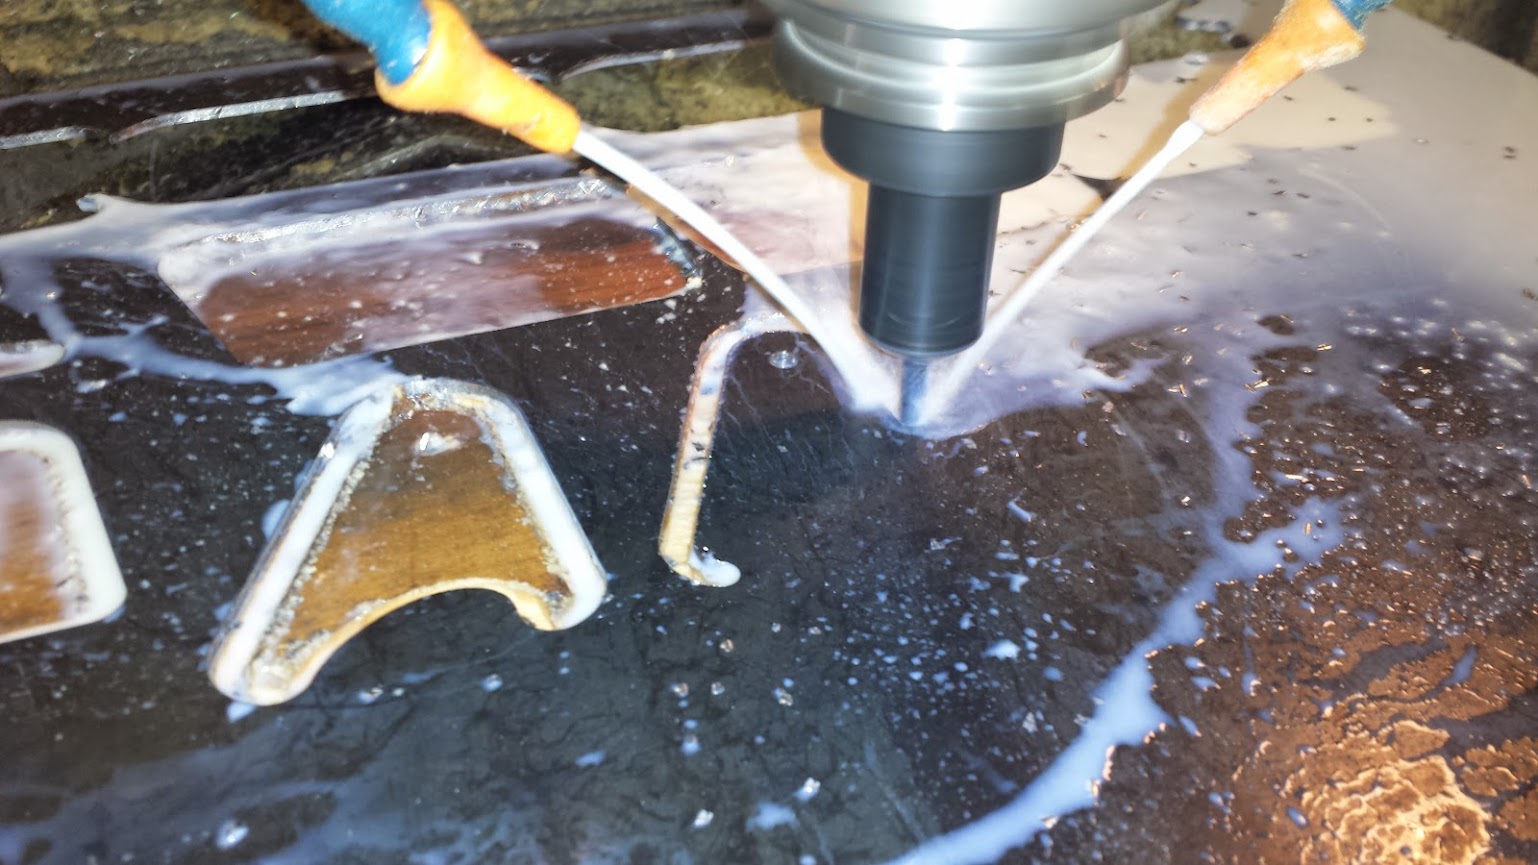

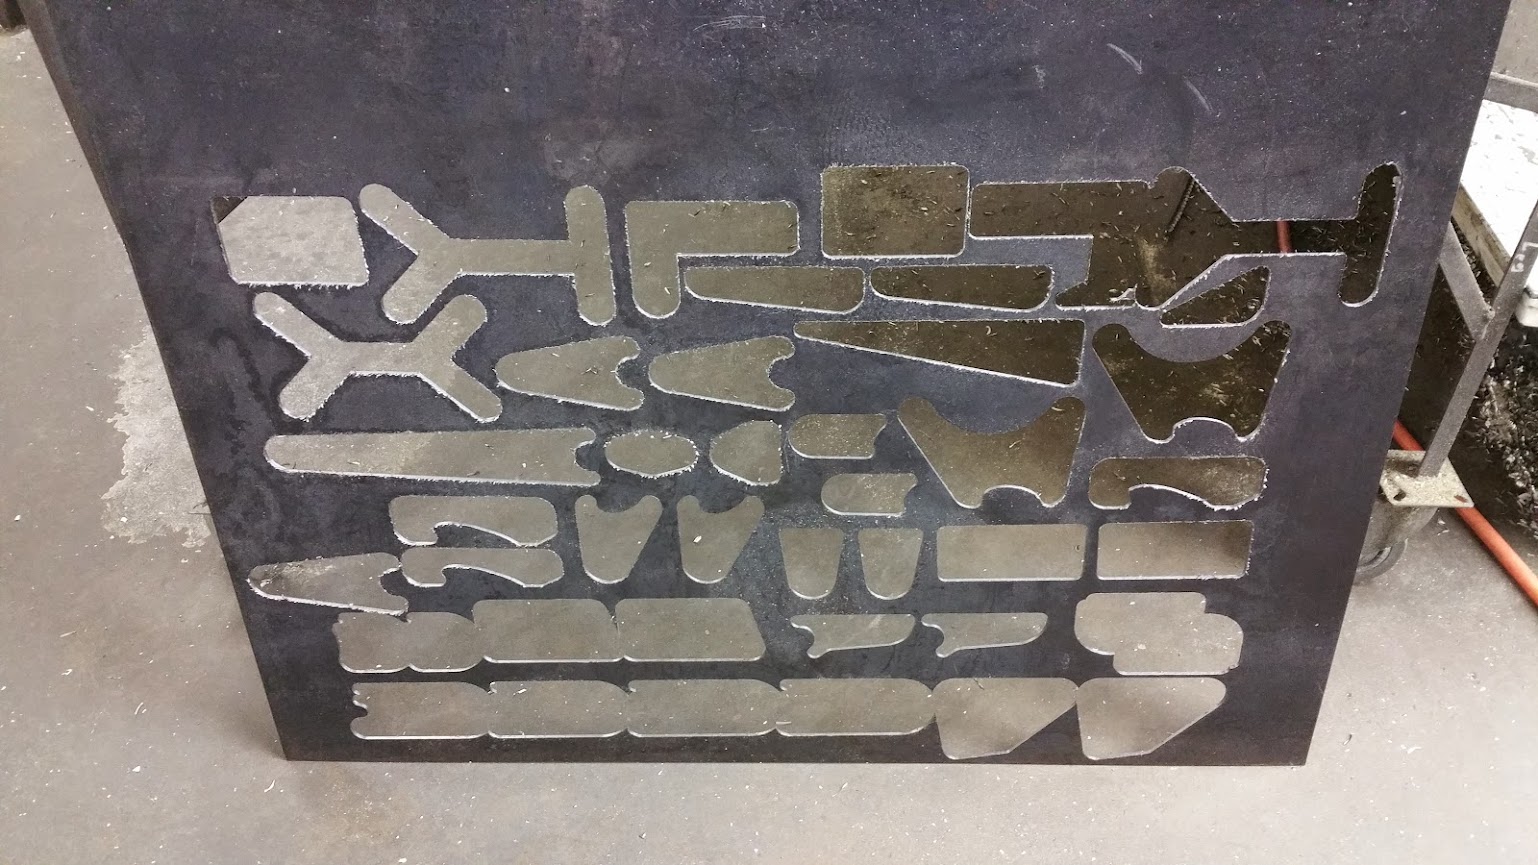
Below, you can see one of the 1/8 inch thick sheets we've been cutting pieces from. This really reminds us of how many pieces we've made throughout this project.
November 13
We tack welded the brackets into place and attached the lights temporarily to see how it would all look. It turned out great.


There have been several points during our build where we've had to step outside of our comfort zone. No task took us further outside of this zone than the fiberglass work. As I've shown, we completed the hood and engine cover molds without much trouble but in the back of our minds we knew that the most daunting step was making an actual part.
November 14
Laying up an actual part isn't that different from making a mold. The first thing we did was wax the mold several times. Then we put a layer of masking tape around the perimeter of the flange. With the border of tape, we wouldn't have to worry about the fiberglass and resin sticking to the edge of the mold.
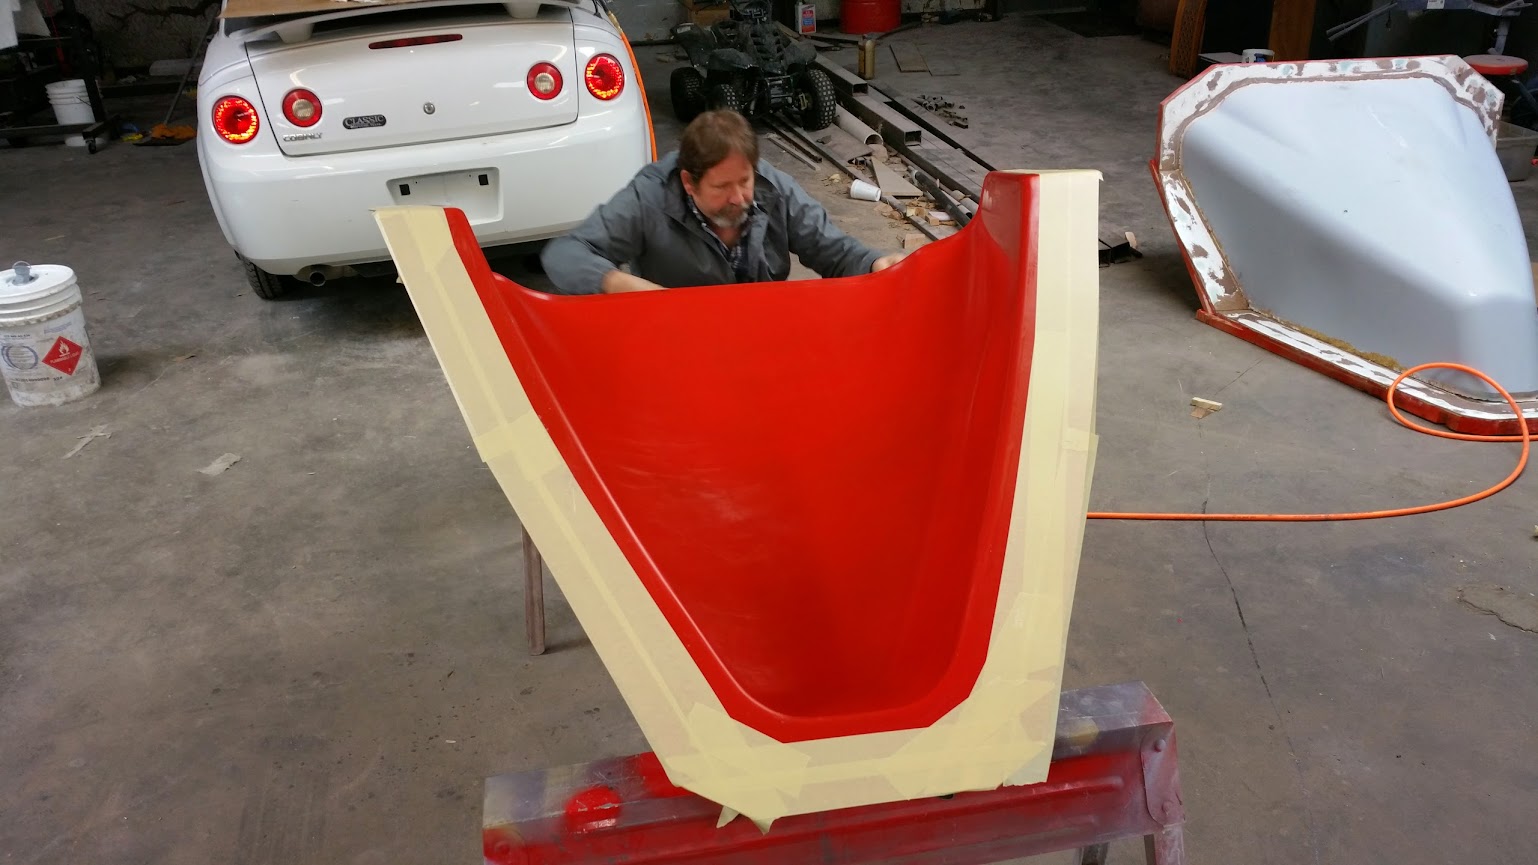
We weren't sure at this point what color we wanted the nose to be and we didn't feel like investing in colored gel coat. Instead, we used a sandable primer made for fiberglass work. You simply spray it onto the waxed mold as you would gel coat. Afterwards, you can sand and paint the surface just as you would a car. This was perfect for us.
November 15
After the primer had plenty of time to dry, it was time for the first of three layers of fiberglass. We made sure to do a great job of feathering the edges of each piece of fiberglass so that the nose would have a very consistent thickness. Also, we were vigilant to roll out every single bubble until the resin setup enough to prevent new air pockets.
We cut thin strips, leaving one of the long edges sharp, and laid them up on top as a flange.
While the first layer was still slightly tacky, we put on the next sheets of fiberglass, wet it all out with plenty of resin and rolled all of the bubbles out. We were feeling more comfortable and made it through the second layer in no time.
We moved on to the third and final layer while the second was still tacky. Everything went smoothly again and before we knew it, we were done laying up the nose.
November 16
It was tough to wait for the nose to cure. We wanted to just pluck it out and see how we had done. But we gave it 20 hours or so and then tried to pop the nose out. After pushing pieces of wood under the flange on one side, the whole nose popped free from the mold and lifted right out.
We wanted to see it on the car but it was late and we had lots of cutting to do to fit it on the nose, so we turned in for the night.
November 17
The next morning, we made templates of the edge of part lines and traced them with a sharpie. My dad put on some painter's coveralls and a mask and took an angle grinder to the brand new mold, cutting a little way inside of the sharpie lines, leaving some room for error. We slipped it onto the car and did a little more trimming to get it to fit properly. We liked the result.
Following the same procedure, we made an engine cover. In the photo, you can just barely see it between the seats.

This is awesome! With body work done and only needing one donor, have you thought about a run of kits? Bargain Ariel Atom?
What series do you hope to race in with this? You should bring it to the challenge next year and run exhibition just for fun, love to see this thing in person

singleslammer wrote: This is awesome! With body work done and only needing one donor, have you thought about a run of kits? Bargain Ariel Atom?
I agree totally, with all the work you have done to make those molds when you are done you could try and make them pay for themselves.
singleslammer wrote: This is awesome! With body work done and only needing one donor, have you thought about a run of kits? Bargain Ariel Atom?
We've been hearing the same suggestion from people we've shown the images to locally. Surprisingly, the more people we talk to, the more we find with an old Cobalt that they wouldn't mind disassembling to make a car like ours.
mbruneaux wrote: with all the work you have done to make those molds when you are done you could try and make them pay for themselves.
Since the start of this project, we've always planned to build one more car for me (you can see my white stick shift donor cobalt in the background of some of the photos). Now we are seriously considering making a few extra to pay for our cars (and maybe to pay for some hop up parts too).
Cool_Hand_Luke wrote: What series do you hope to race in with this? You should bring it to the challenge next year and run exhibition just for fun, love to see this thing in person
We don't really have a series in mind. We were just going to hit some autocross events and track days. I don't know how we'd be grouped, but if we do end up making some kits for our local buddies, we could have our own field of cars to compete against.
Our plans are to bring the car to the skidpad challenge in April and the 2015 challenge in October.
I like your car and build very much. Good luck with it.
The original plan was to attach the nose rigidly to the car with dzus fasteners and then cut a hole in the nose or make an access panel to get to the fuel filler neck. This would have been easy but would have been an eyesore. So instead of chopping up the nose, we decided to make the hood open on hinges.
November 19
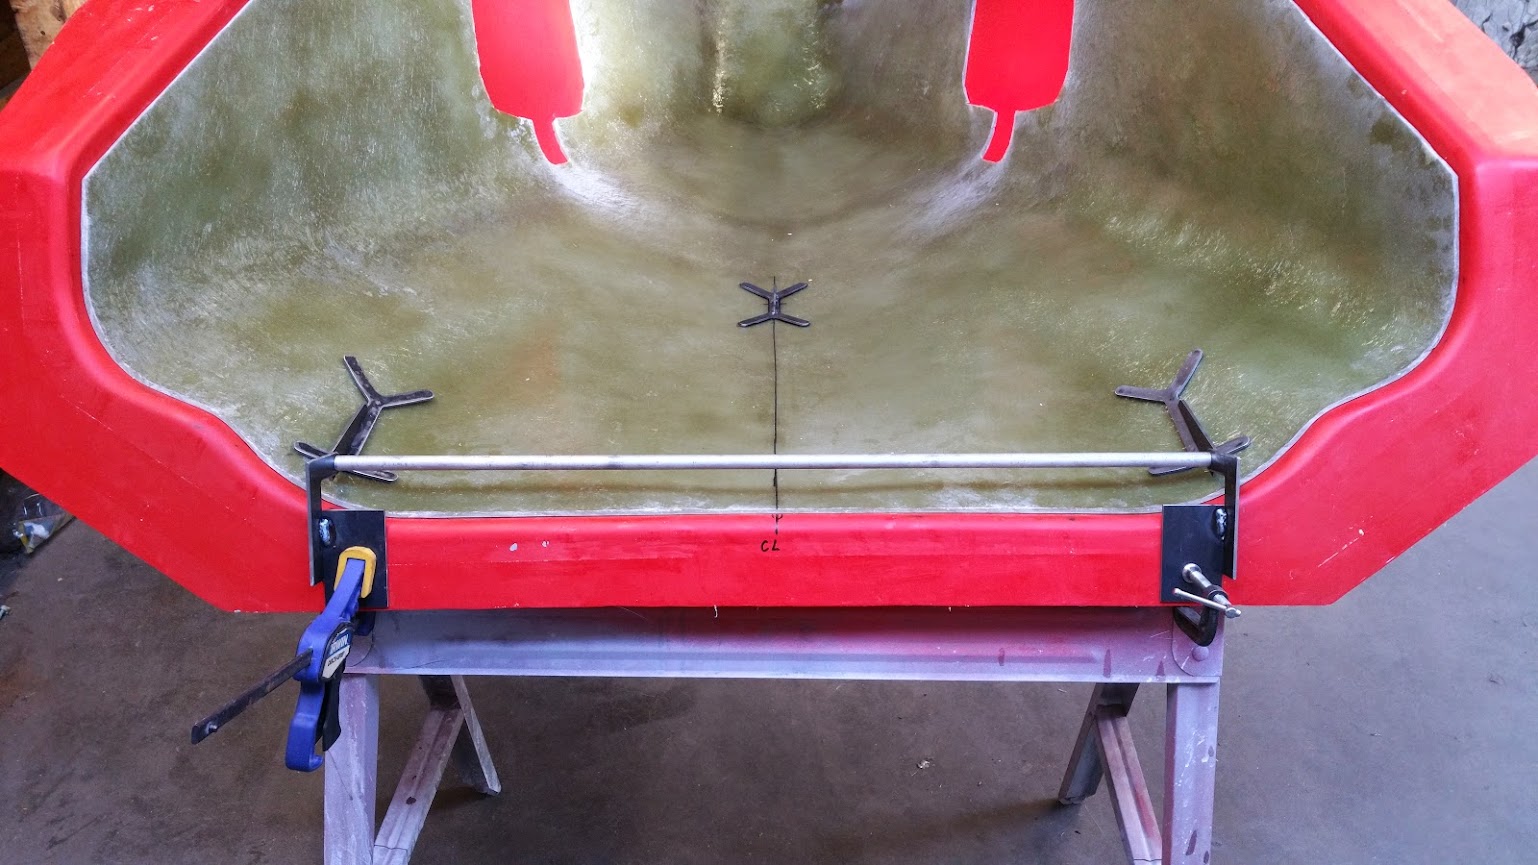
The tough part of adding hinges to our nose was getting everything lined up properly. Using our SolidWorks model, we designed and fabricated a guide that would hold the hinges the right distance apart and keep things square. We put the nose down into the mold, attached the jig to the mold and bolted the hinges into place.
We also decided to reuse the gas strut that originally held up the Cobalt hood. The mount out in the middle of our nose is the attachment point for the strut.
We draped small pieces of fiberglass over the metal pieces to hook it all together. Something we learned is that it would work better to have large holes cut into the metal strap. Without the holes, the fiberglass only bonds around the perimeter of the metal mounts. It feels strong enough, but it would be a lot stronger if the fiberglass was able to bond through holes in the metal.
After letting the resin cure all day, we used the nose as a guide to tack the other half of the hinges to the car. At this time, we also welded in an arm to hold the other end of the gas strut. We connected the strut and moved the hood up and down. It worked great.
In the next post I'll go over how we decided to latch the front of the nose down.

Depending on kit price, this thing looks like a riot to build and drive. Love learning from threads like this. Thank you for sharing with us.


With the hood swinging open on hinges, we needed a way to keep it closed. It would have been easy to bolt or pin it down but by reusing some components from our donor Cobalt, we were able to make opening the hood a little more user friendly.
November 20
First we looked at the latch used for the hood of the Cobalt. It could work alright, but it opens by a handle pulling a cable. On the other hand, the trunk latch is an electric unit that is actuated by a push of a button within the car or on the key fob. On top of that, the rear latch has a sensor that let's you know if you've left trunk (or hood in our case) open. No question, the trunk latch was too neat to pass up.
After disconnecting the hardware from the back of the donor, we mocked the pieces up at the front of our car to get an idea of how it would all fit. It looked like it would work well.
Next we bent up some simple mounts and welded the latch to the car.
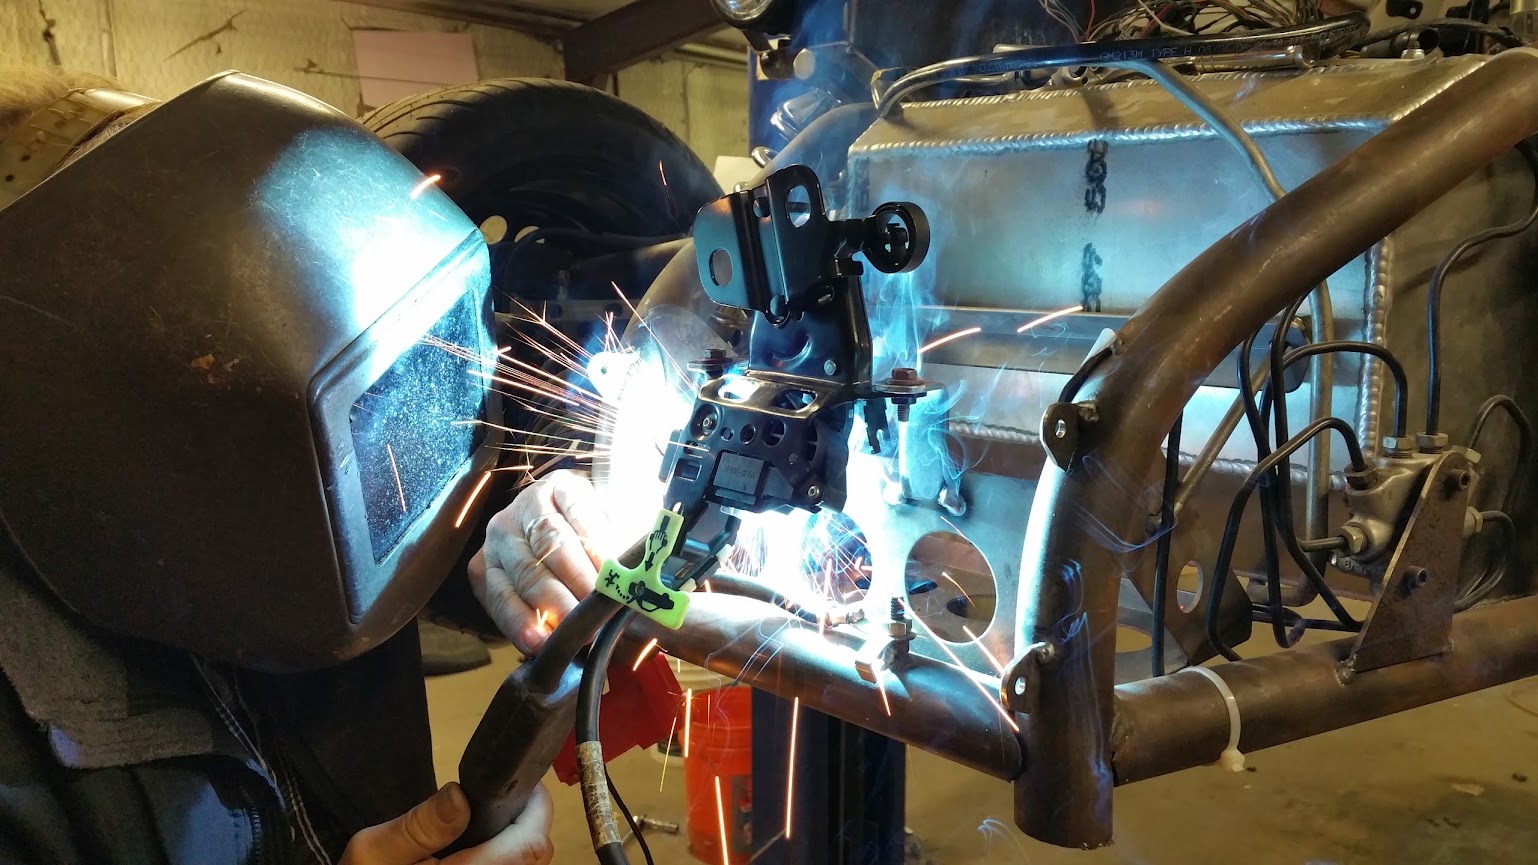
Notice the escape handle attached to the latch. It is conveniently located just withing reach when the nose is closed. This will come in handy if the battery dies and we need to unlatch the hood.
Above the latch you can see the back of the bracket that holds the metal loop. We needed to attach this portion of the mechanism to the fiberglass nose. We bent pieces of strap to match the contour of the inside of the nose, welded a mounting plate to the pieces and then fiberglassed it all in. Then we just had to bolt on the loop.
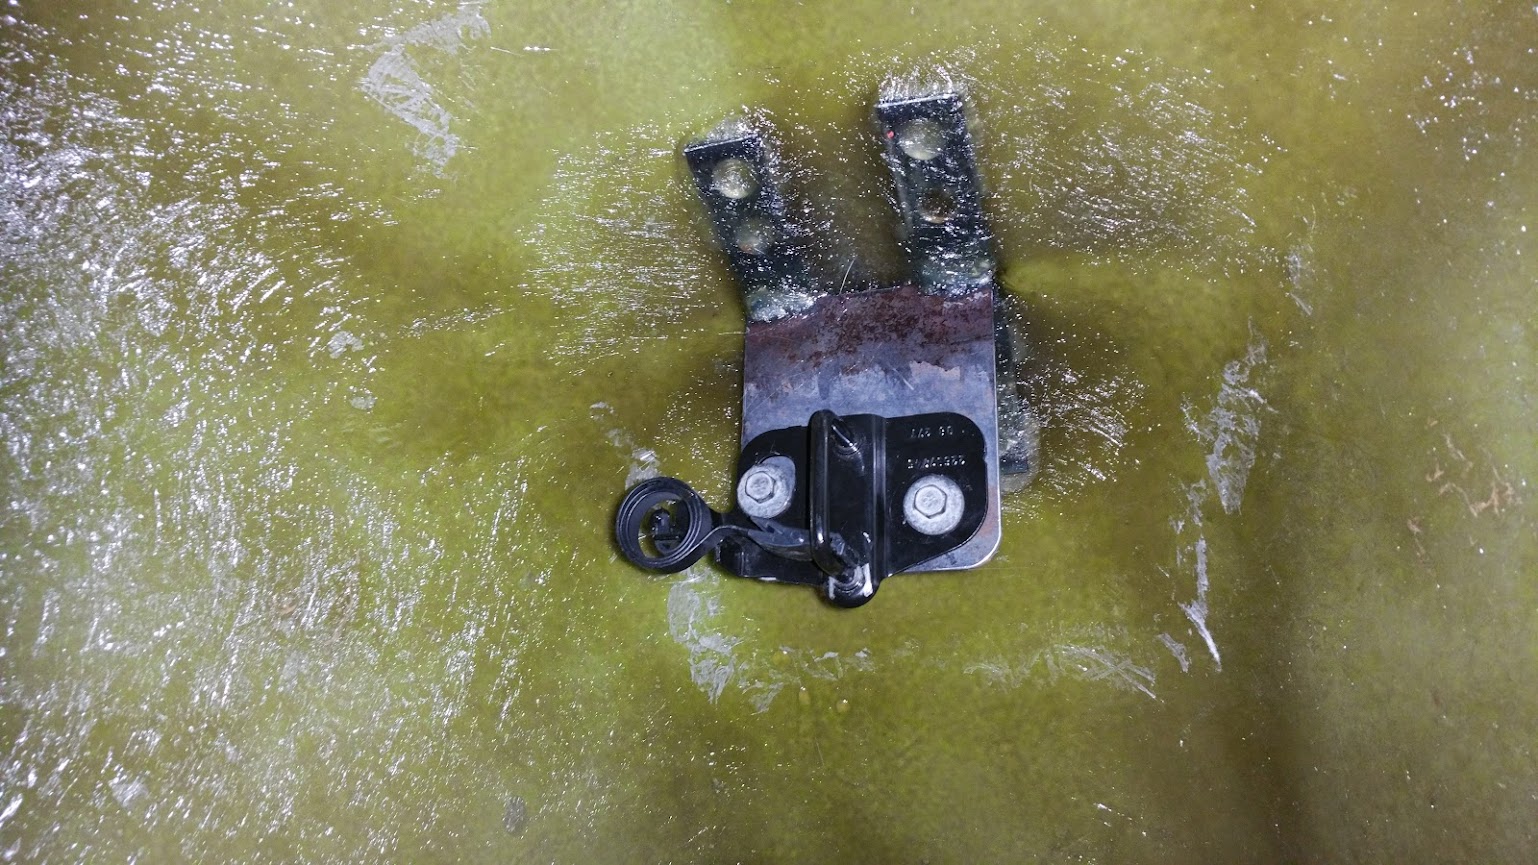
You can see we drilled nice sized holes in the strap this time. The fiberglass wrapped down into the holes perfectly and the connection looks very strong. The spring on the left side of the hoop helps lift the nose away from the latch when it is released. It also keeps the hood from dropping back down into the latch and locking back up.
With minor adjustments, the loop dropped down into the latch nicely.

Using all parts of the buffalo. Very nice build!
You'll need to log in to post.


