The car: a 1992 Volvo 240. 300k miles, a former rallycross car that ran in stock rear.
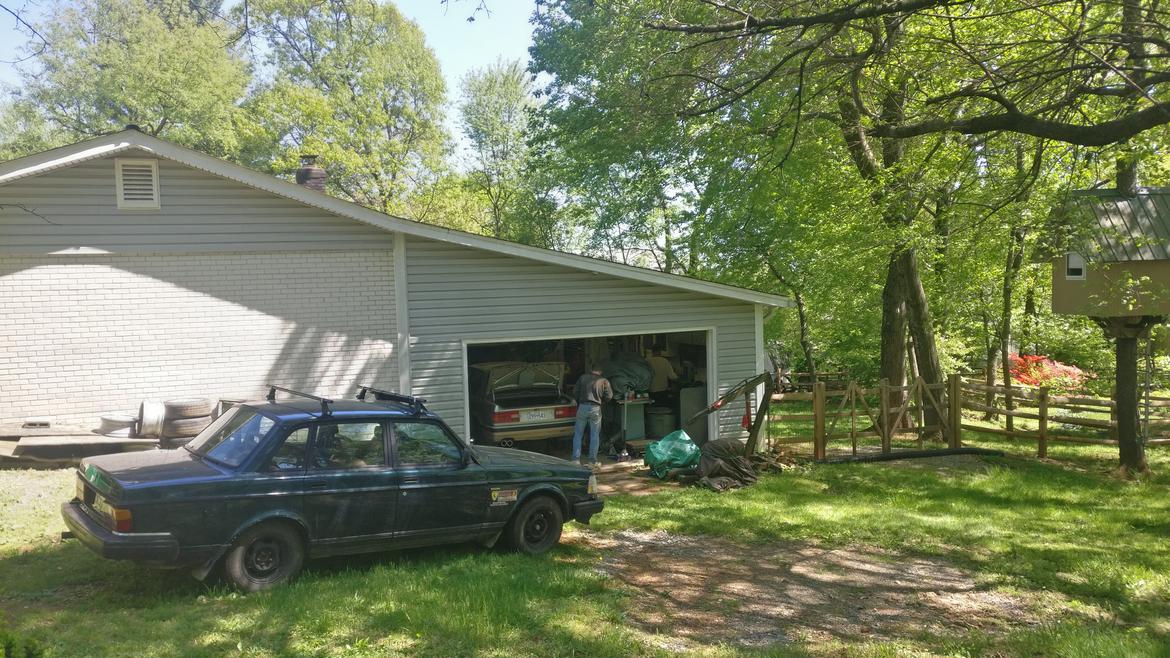

The car was mostly stock, only things done were:
- Bilstein HD rear shocks
- lights
- hoodpins
- AC "delete" (the lines were just ripped out, still had the compressor)
- motor was held in place by a motor cycle tie down wrapped around the drivers side strut tower and looped through the intake manifold.
Also, here's a pic me driving our current rallyx car:


First order of business was to get it registered (at the time the plan was to have this as a daily, so didn't want historic plates), which meant fixing a bunch of small things. The issues with the car when I got it were a leaky steering rack, non functioning coolant temp sensor, non function gas gauge, and an exhaust leak.
Exhaust leak was just a small crack on the exhaust pipe right after the header, or so we thought. Upon further inspection there was also a small section of the exhaust was rusted out, so I cut out the rusted area and welded in patches.
The gas guage issue was the sender on top of the tank. What should be a relatively easy job was not fun on a 300k mile car.
The coolant sensor is an ongoing issue. First step was to replace the sensor on the engine (which was clearly faulty based on the tests the manual gives you). After getting around some thread interference issues getting the new sensor in (honesty can't remember how this was fixed) the gauge now read a temperature, an improvement from before. But, it was reading really low (around 1/4 at full temp, even under hard driving). I don't know if this is the gauge itself, a faulty sensor, or a thermostat.
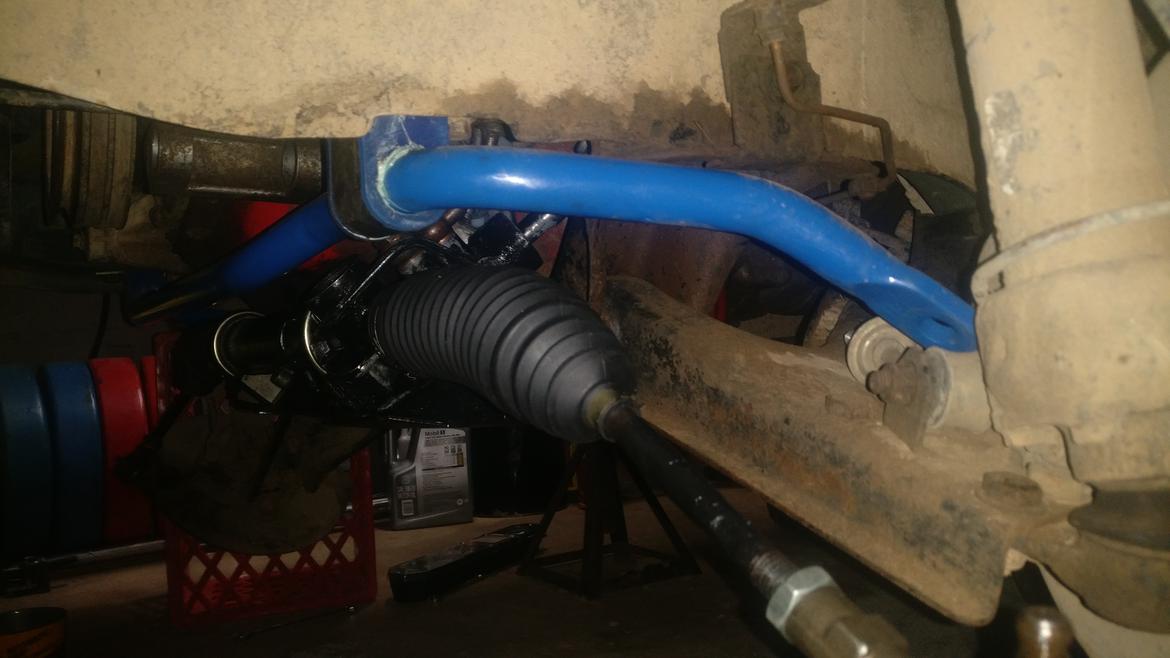
Last step before inspection was to fix the rack leak, a problem that has led to a many month long saga.
What I really should have done is just wipe it down before inspection, but I didn't want to risk it so I ordered a remanned rack. I get the rack in, lines and linkages hooked up. Bled normally with the engine off. Upon first start up everything seems fine, until after a few seconds the rack violently rips of my hands and starts pounding against the stop (keep in mind its still on jacks). Immediately I shut the car off. Looking under the car everything still seems good, didn't bend anything, no visible leaks. At this point I'm thinking that there's just bubbles in the system, so I jump back in, center the wheel and start it. It rips out of my hands again (I really tried to hold it this time). I shut it off and now realize that one of the boots is sagging, and I realized that the fluid was spewing out and collecting in the boot. The imbalance of pressure inside the rack was what was making it swing to one size.
We send it back to the remanned rack company, who said that the damage was so severe the rack would have had to have been taken apart for the damage to happen. Anyways, they somewhat took responsibility and offered to rebuild and return my old rack free of charge. I send that out and two weeks later I get it back and install it.
Upon first test drive the steering was tight in the center, and didn't return to center/self steer at all. I thought this was just stiff inners and tie rod ends so I drove it like that (even though it was pretty sketchy) for a few weeks. Issue never got even remotely better. Disconnecting the tie rods didn't resolve the issue, so it was definitely the rack. On top of that the rack still leaked!! My leaky rack was now leaky AND dysfunctional. Luckily it managed to pass inspection like that. Later, a phone conversation revealed that they "had never heard of an issue like this in years of service," yea okay sure.... But they offered to take a look so I sent it back.
This time around the rack feels better and doesn't leak yet (car hasn't been started or driven) but we'll see. Now onto more interesting modifications.
First major weak point on these cars I wanted to address was the motor mounts. I didn't want to keep the tie down obviously. Unfortunately because I bought a Volvo instead of a BMW the aftermarket is very lackluster, no one sells non rubber engine mounts for this car (atleast that I know of). Posts online of people adapting Ireland engineering e30 motor mounts (although they seemed to not hold up well in 240s) led me to the idea of using tougher UHMW motor mounts from condor speedshop. I got the 325i ones.
The passenger side one ended up being too tall, so we took it down on the lathe.

One of the holes on the metal piece between the mount and the engine had to be drilled out as well, although 300k miles had done a pretty good job on its own.

After driving the car with these, I will say that this was not my brightest idea. The mounts are just too stiff for a 4 cylinder. Whole car shakes at around 1500-2000 rpm but isn't too bad above that. It's liveable for a racecar, but is wayyy too much for a streetcar. Eventually I will rethink these but they will work for the time being.
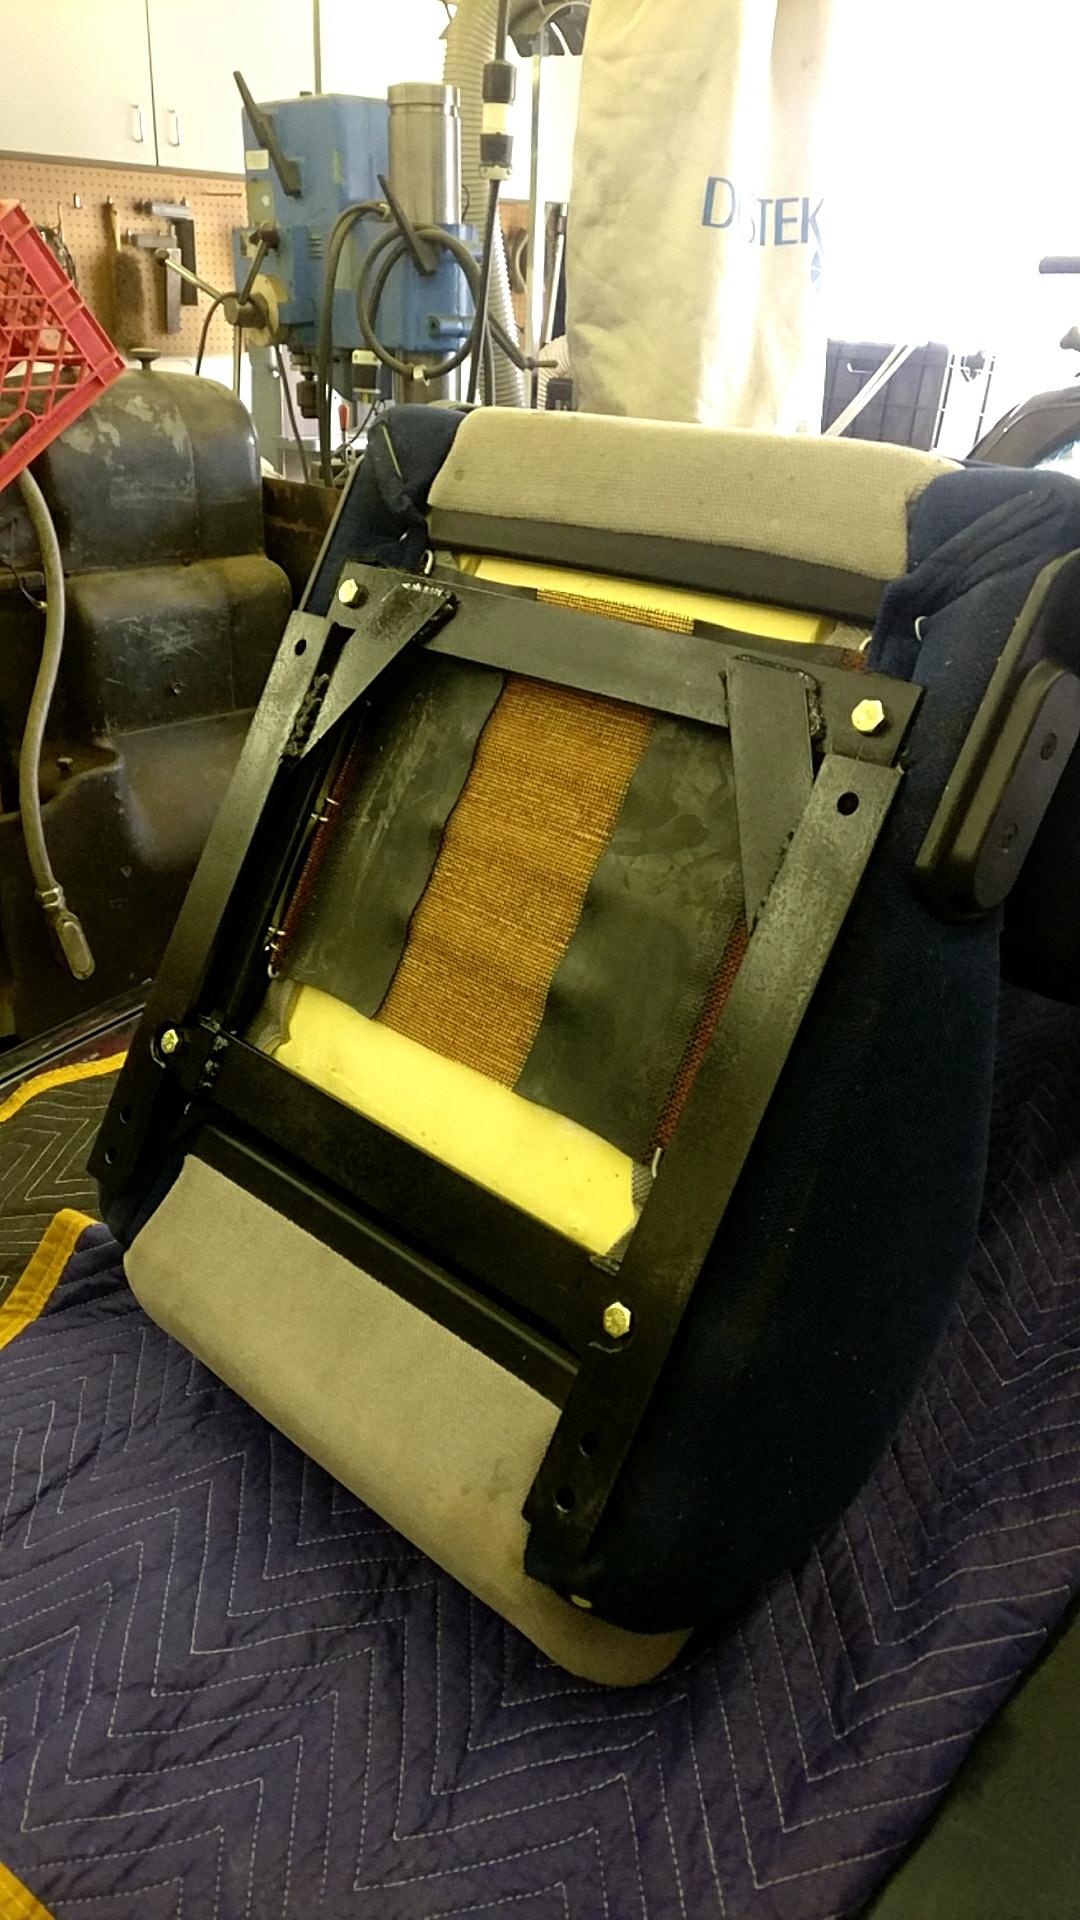
Next thing was to get a new seat in there, decided to throw in the sparco I had in the house (even though it will have to get replaced eventually). Fabbed up mounts to use it with the stock sliders.

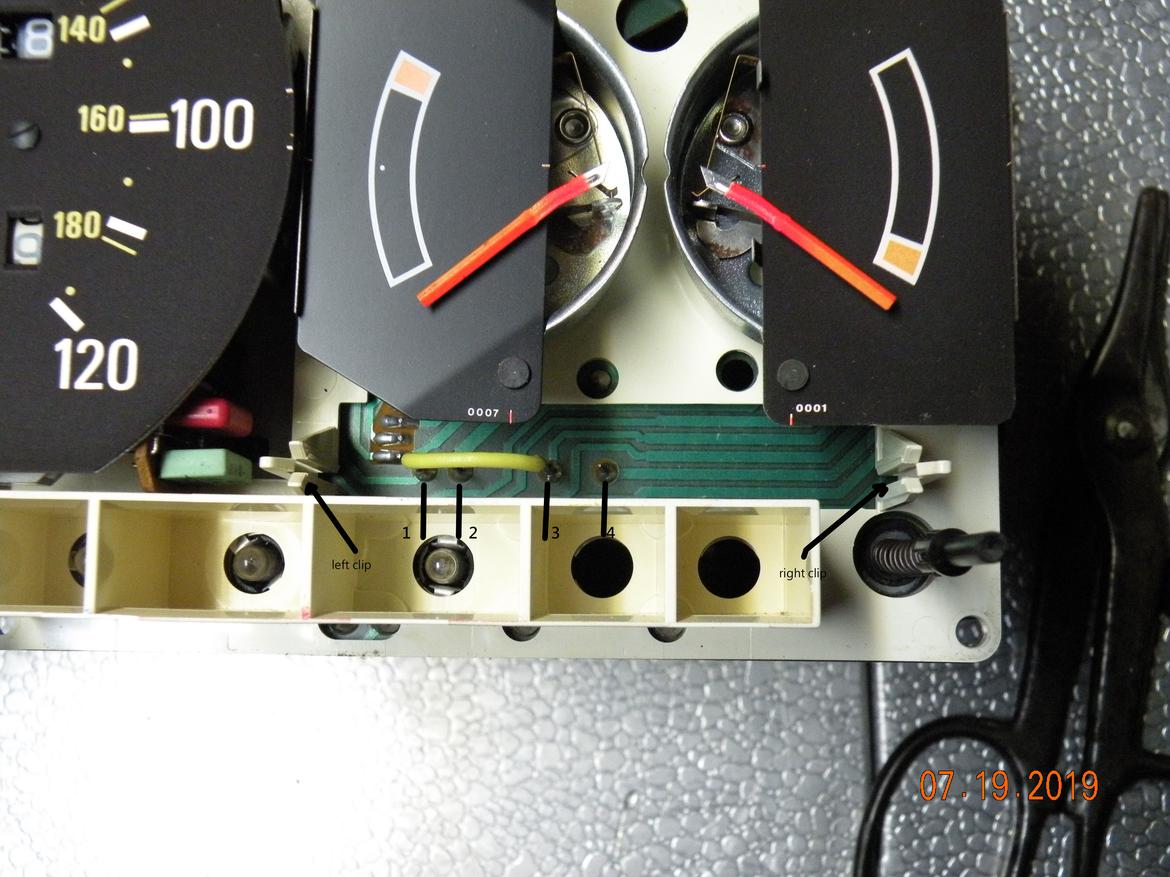
Your continuing temp gauge problem is the voltage stabilizer on the pc board in the instrument cluster. Best to bridge it out for real temp readings. IPD sells a kit for that which amounts to a short u shaped wire and instructions. I didn't keep the instruction sheet . I think I have a modified one on the shelf to check out. I will post later either way, with photos if the answer is yes. I have had frequent engine mount failures on the right side, mostly from the oil that gets on it when changing the filter, but also heat related. And trailer towing. Turbo cars had a heat shield on it. To alieviate the mount failures I added a torque strut from the right front of the cylinder head to the inner fender. Rubber bushed on the chassis end with an MGA gearbox mount, hard at the engine with a rod end due to heat/proximity to exhaust manifold. I does add quite a lot of NVH at low speed, but I haven't broken a mount in the 25,000 miles since the install
 Photos of that tomorrow. They are great cars with superb slippery surface controlability.
Is that the same thing as the temperature compensation board? Your post reminded me I bypassed it using the external wiring method from this: http://cleanflametrap.com/tempFaker.html. I also checked the gauge accuracy using the method in the manual (possibly involving a resistor on the coolant sensor wire? I forget) and it read a bit over the 1/2 mark on the gauge (although not 2/3 like it should). To me this didn't seem like the whole issue as it was only off a little, and driving temps were off by a lot. I just put in a new thermostat and will see if it's still off when I get it out of the garage.
I was considering a 3rd mount but avoided it mostly out of laziness. Think in the future one of those with poly or yoshifab HD rubber mounts would be best. Would appreciate some pics of how you did yours (especially the rubber part).
In reply to Nesegleh :
Yes it is the temperature compensation board. I just took apart one of my spare gauge packs and did a photo, so here it is for the benefit of others since you already know about it Remove the board from the clips, and join terminals 1 and 3, now have quick reading gauge. Should read well above 1/2 way when fully warmed up.
Somewhere along the way I also installed some 25mm IPD swaybars front and rear (stock is around 19mm iirc) with poly bushings. Car now handles slightly less like a pool noodle. Eventually, once the good shocks and matching springs come in I should be good to run rallyx with no sway bars, and just hook them back up for autocross.
Also got some torque rods ($100 worth of swedged tube, rod ends, and nuts)
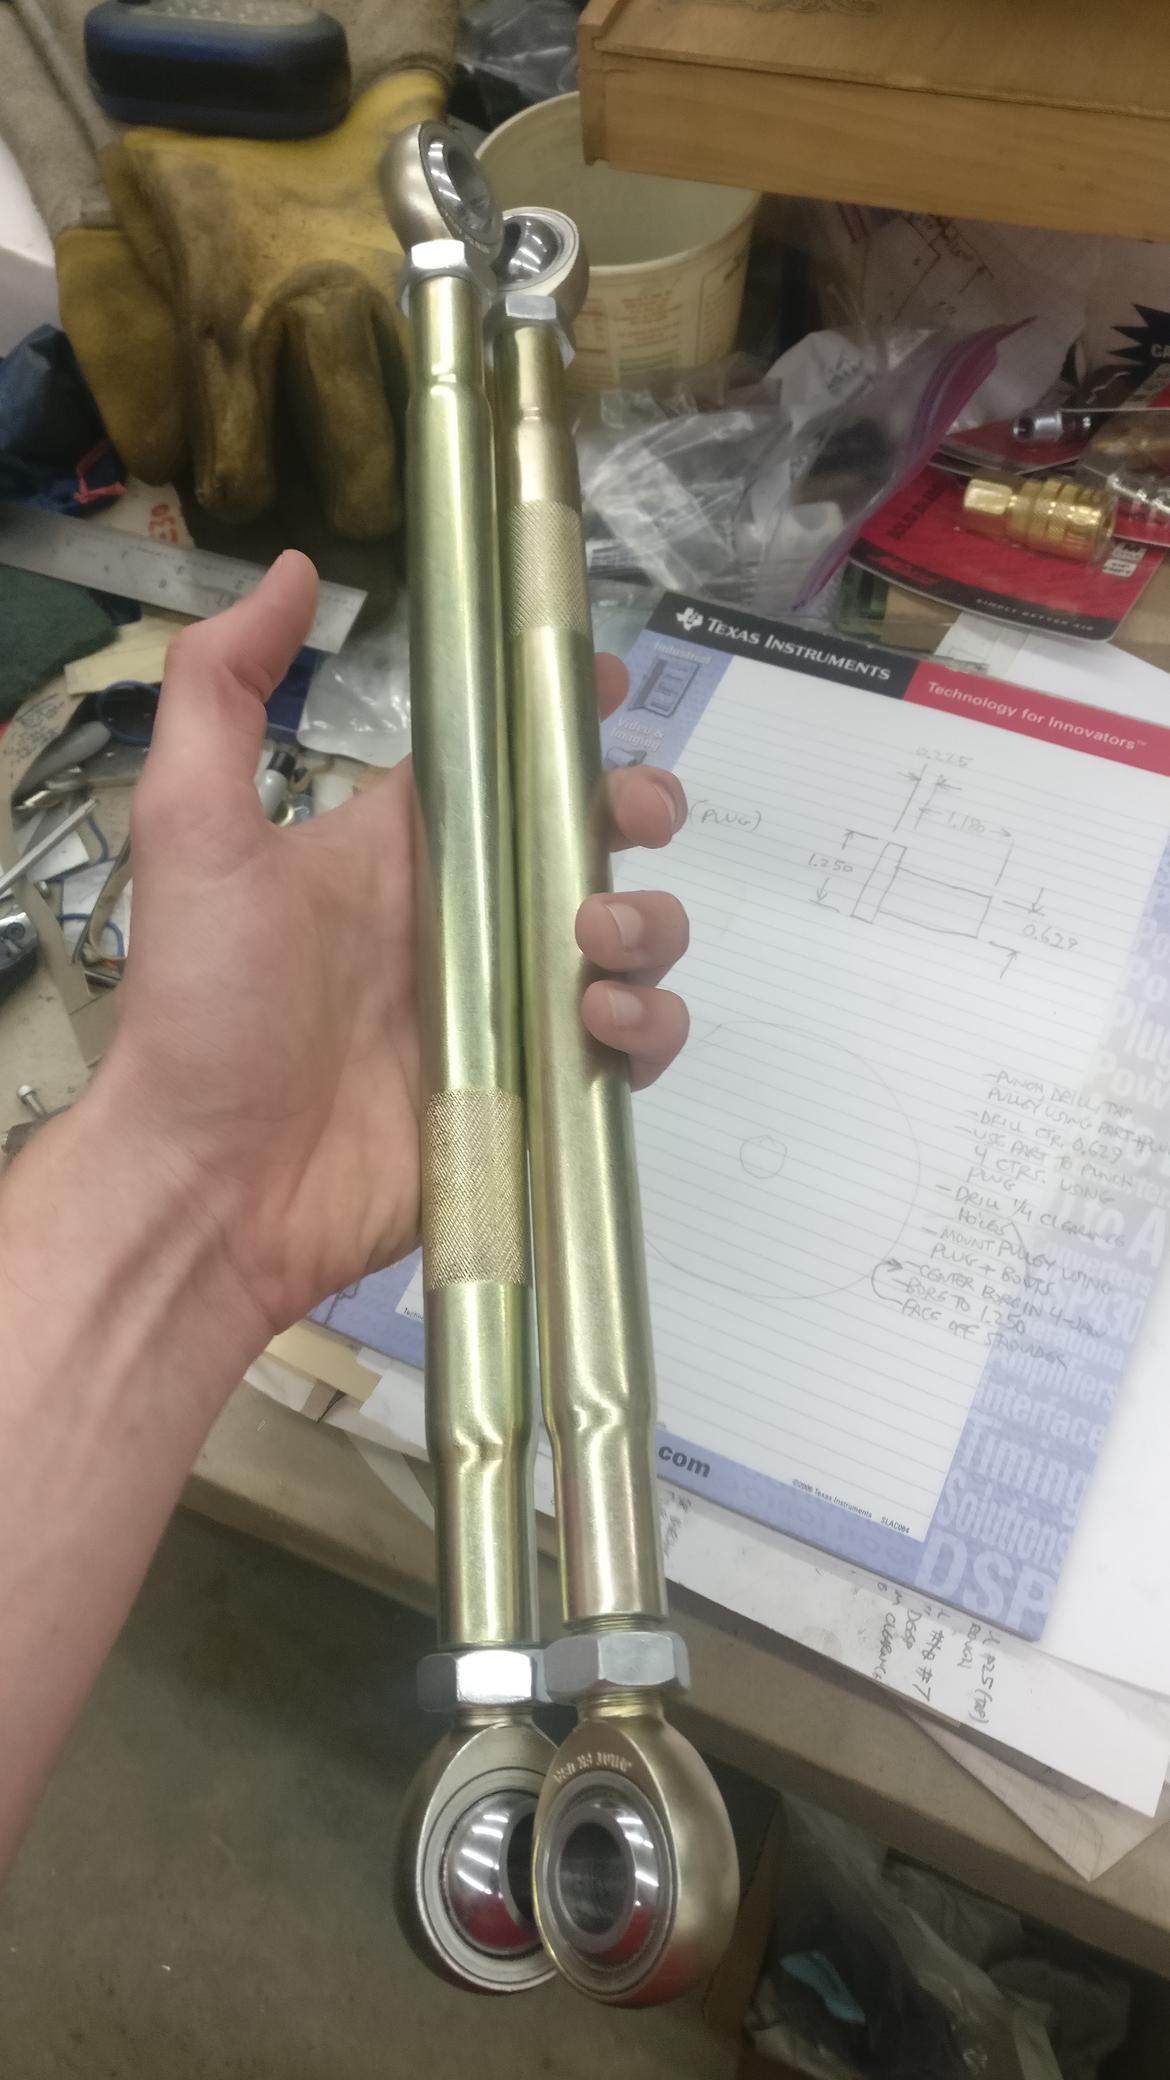
These won't be installed for a while as I'm going to fab some beefier chassis mounts for them at the same time (apparently the stock ones like to rip out). Hope they hold up as I really had no idea what I was looking for when buying the rod ends.
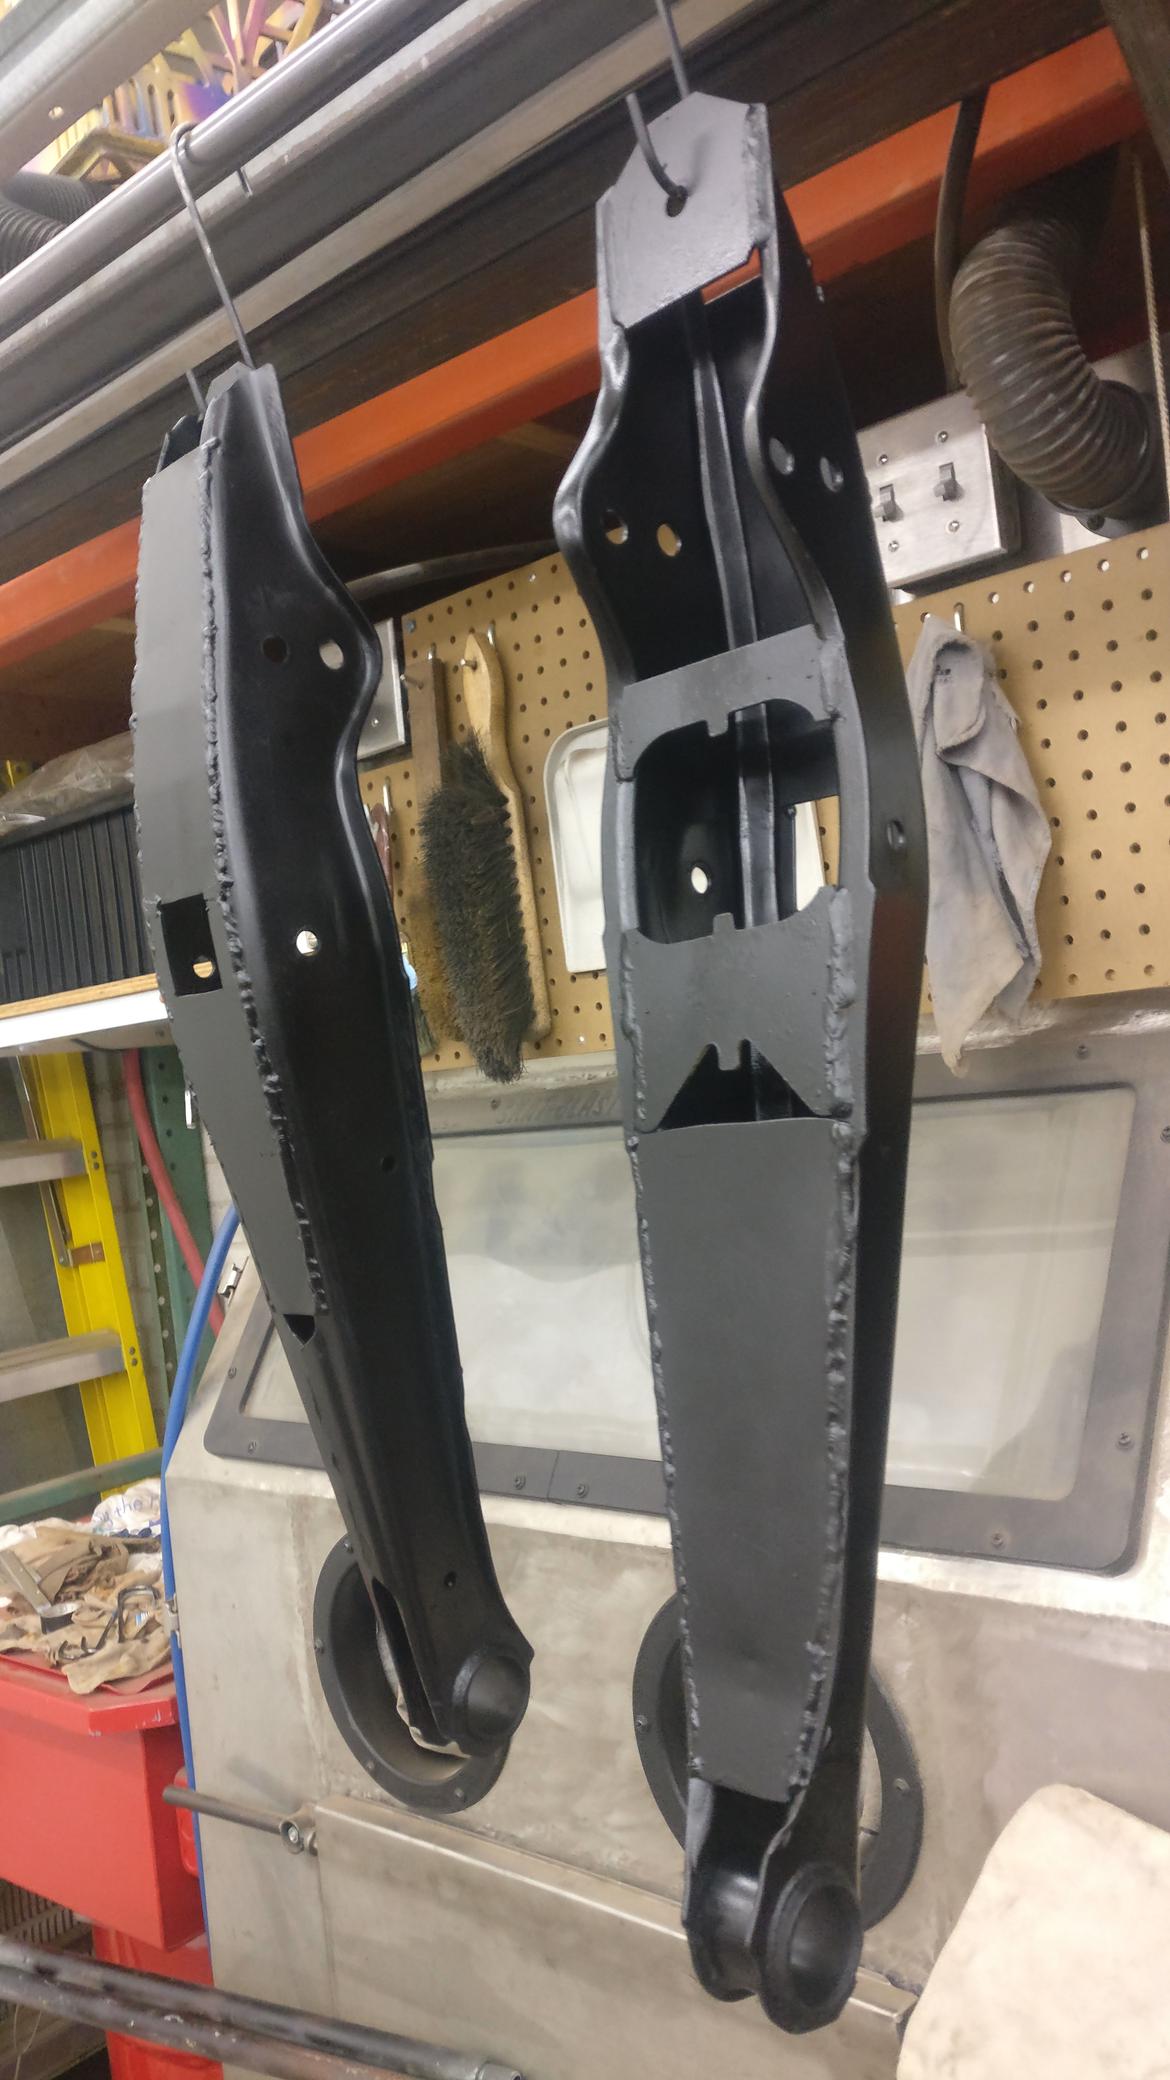
Next up was to refresh and start reinforcing the rear end. According to the internet the trailings arms like to twist and bend so, so I started by boxing them.
Scored some free .080" sheet steel and cutt out rear trailing arm reinforcements. All welded up:
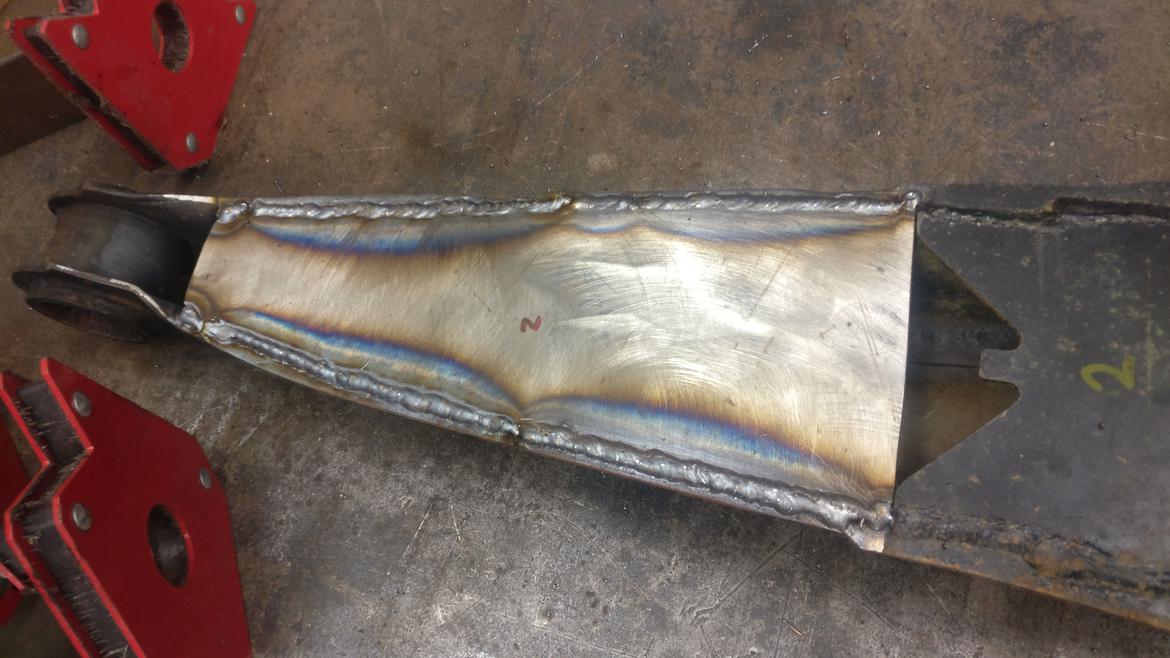

Followed up with a (terrible) paint job:
What you can't see in that pic is all the runs on the inside (you kind of just have to fire hose it because of lack of access).
In reply to TurnerX19 :
Looks sweet. Another thing to add to the never ending list :)
Finished up the rear with some poly front trailing arm bushings and poly panhard bushings from IPD. Left the torque rod bushings rubber because I have some adjustable ones waiting to go in and left the rear trailing arm bushings because they will be swapped when I put in a 4.10 rear axle. BTW if anyone has a 4.10 off a late model 940 or a very early model (like pre '82) rear axle that they're willing to sell please let me know. Side note: these bushings seemed ridiculously soft going in. I seriously though the front trailing bushing was going to explode based off of how much it was deforming.
Upon installation I ran into a clearance problem with the new trailing arm bushings. They were hitting the (pictured) reinforcement plate (these may be a late model addition, I'm not sure), blocking them from going up all the way into the slot. Ground through the rosette welds and air chiseled it out: problem solved!
Also threw some new Moog cc217 rear springs on while I was in there:
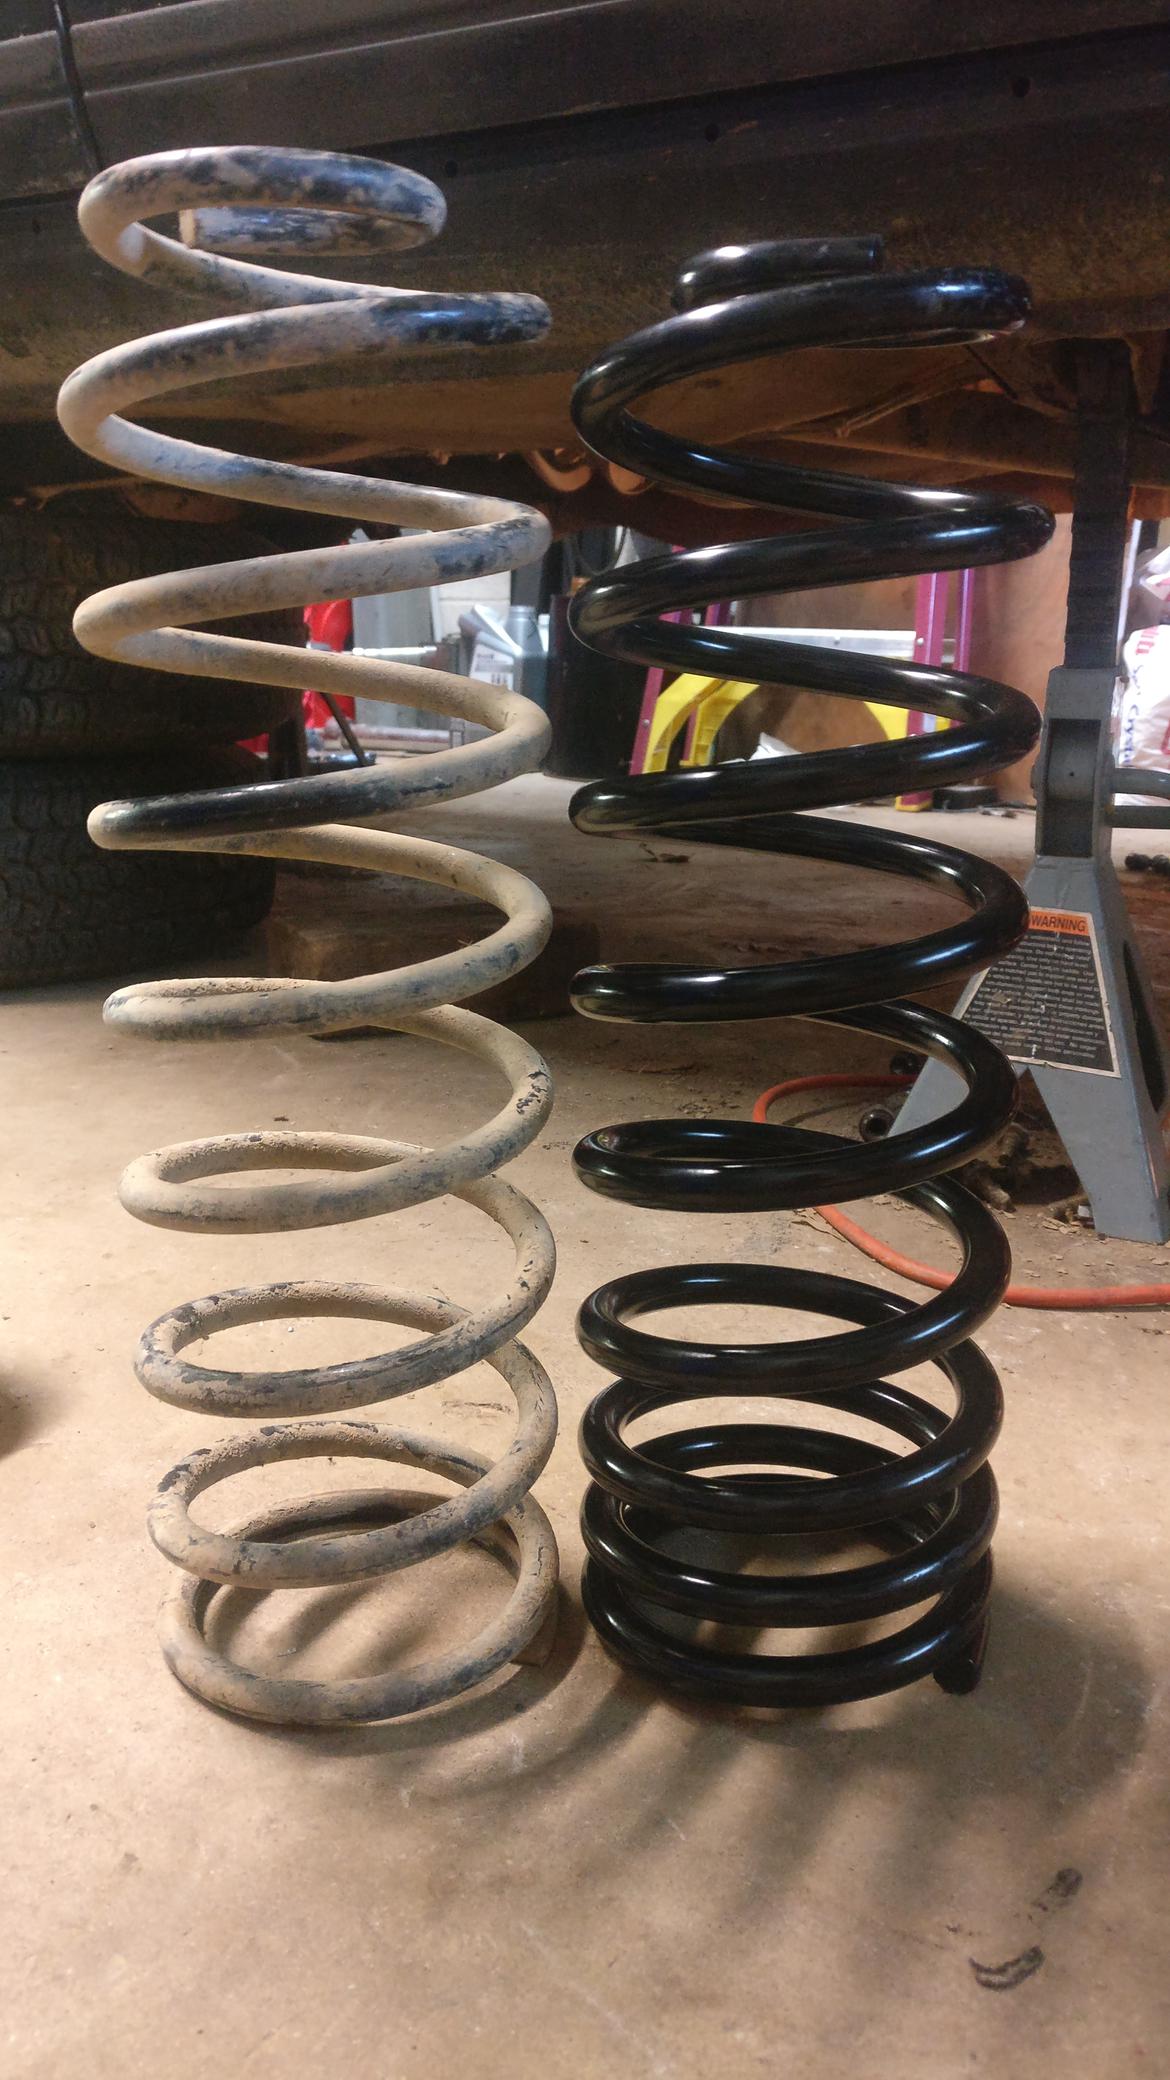
Exact spring rate is unknown (progressive) but moog lists them as 155 lb/in, up from like 100 lb/in stock (I've heard everywhere from 90 to 115 quoted on the internet). I suspect the Moog spring rate is at the end of travel as it seems high.
The stock springs where ~ .474" wire diameter, new Moog cc217's were ~ .570". Also left out the rear sway.
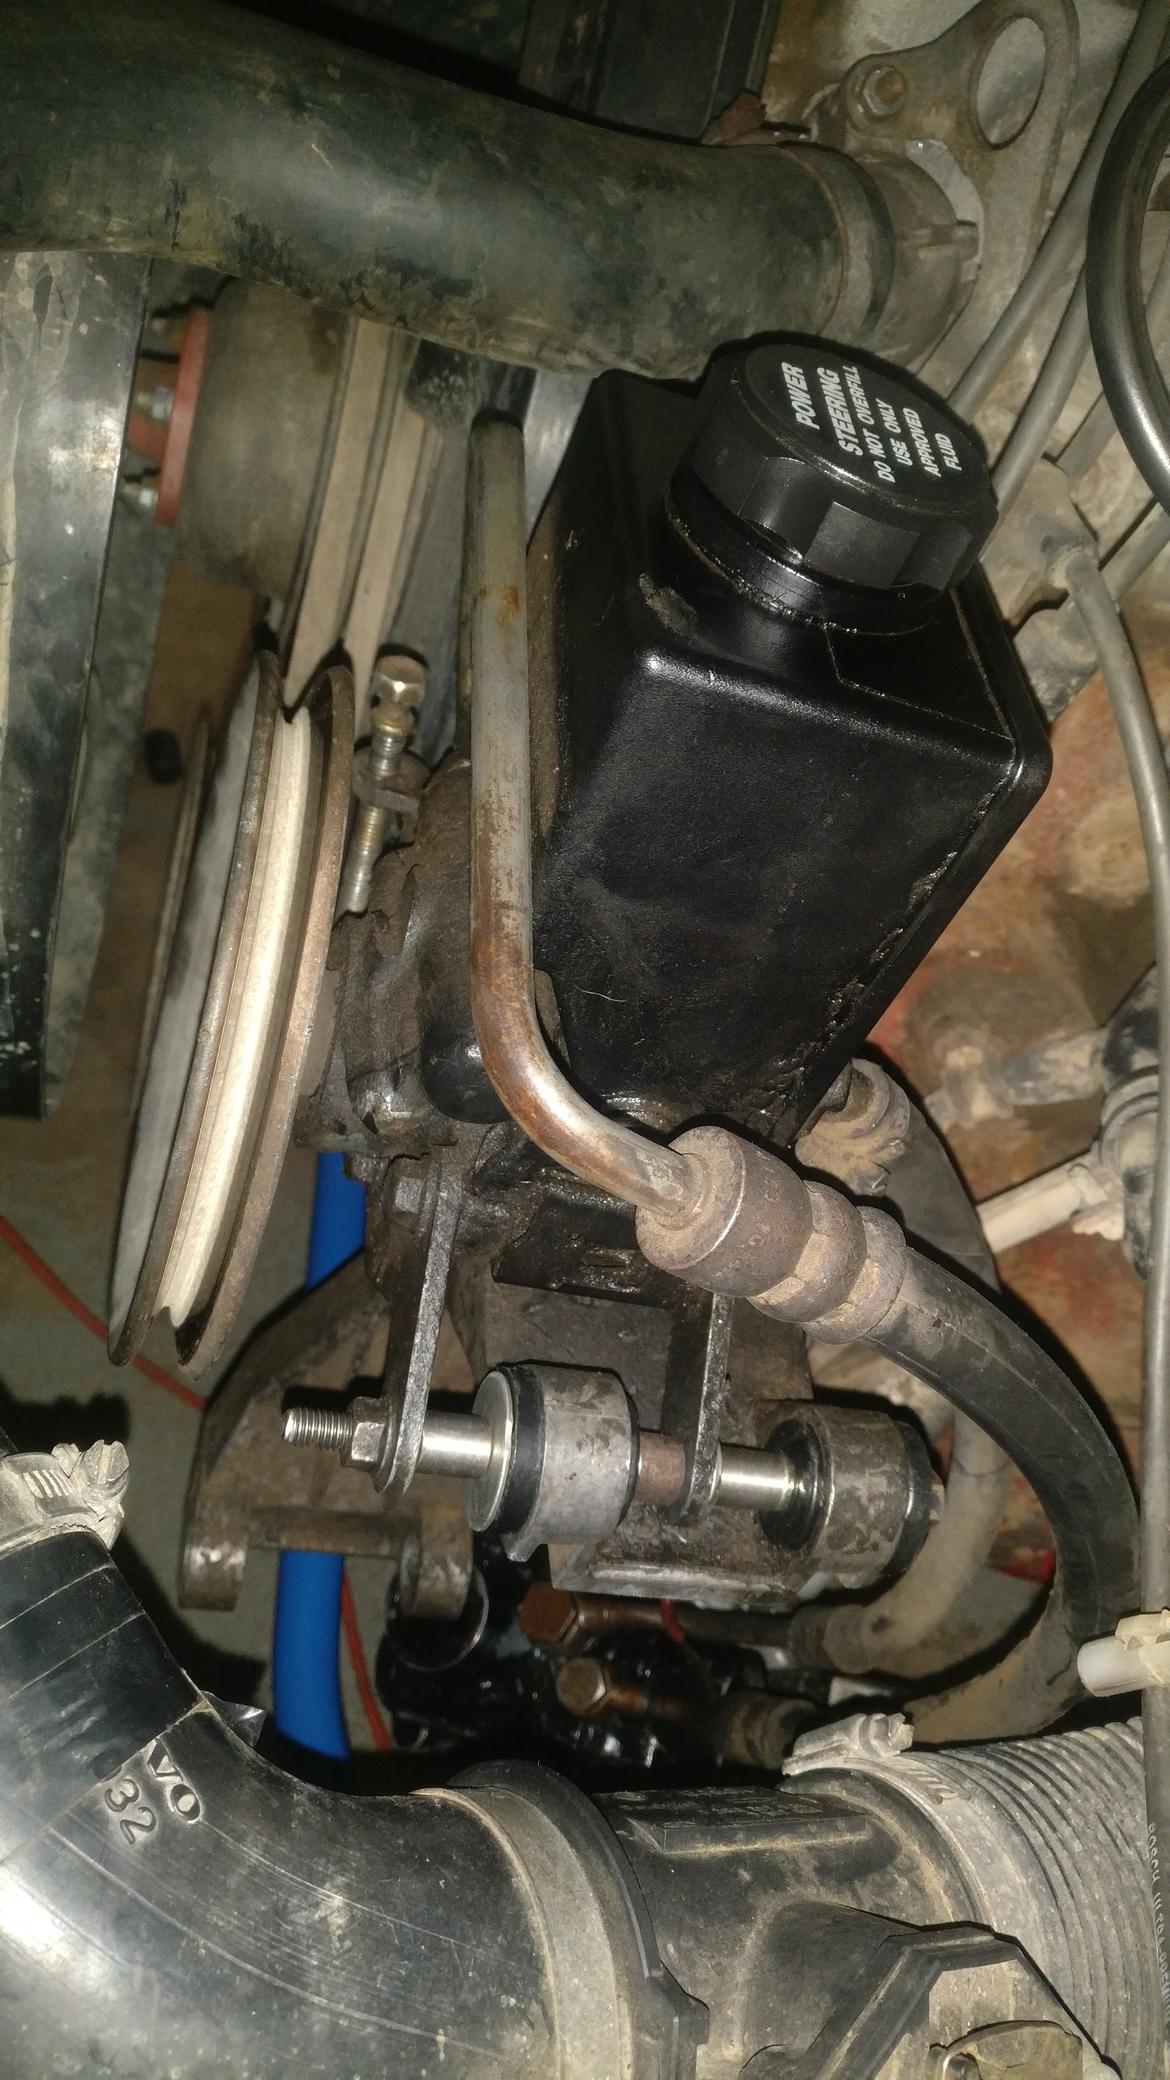
Got some smaller things done. Finished the a/c delete by removing the compressor. In order to get the PS pump into the same plane as the engine's pulley I just cut out some spacers (there's also one that you can't see in the pic):
After 3 trips to my local Advanced Auto I have confirmed they do not have a belt that will fit...
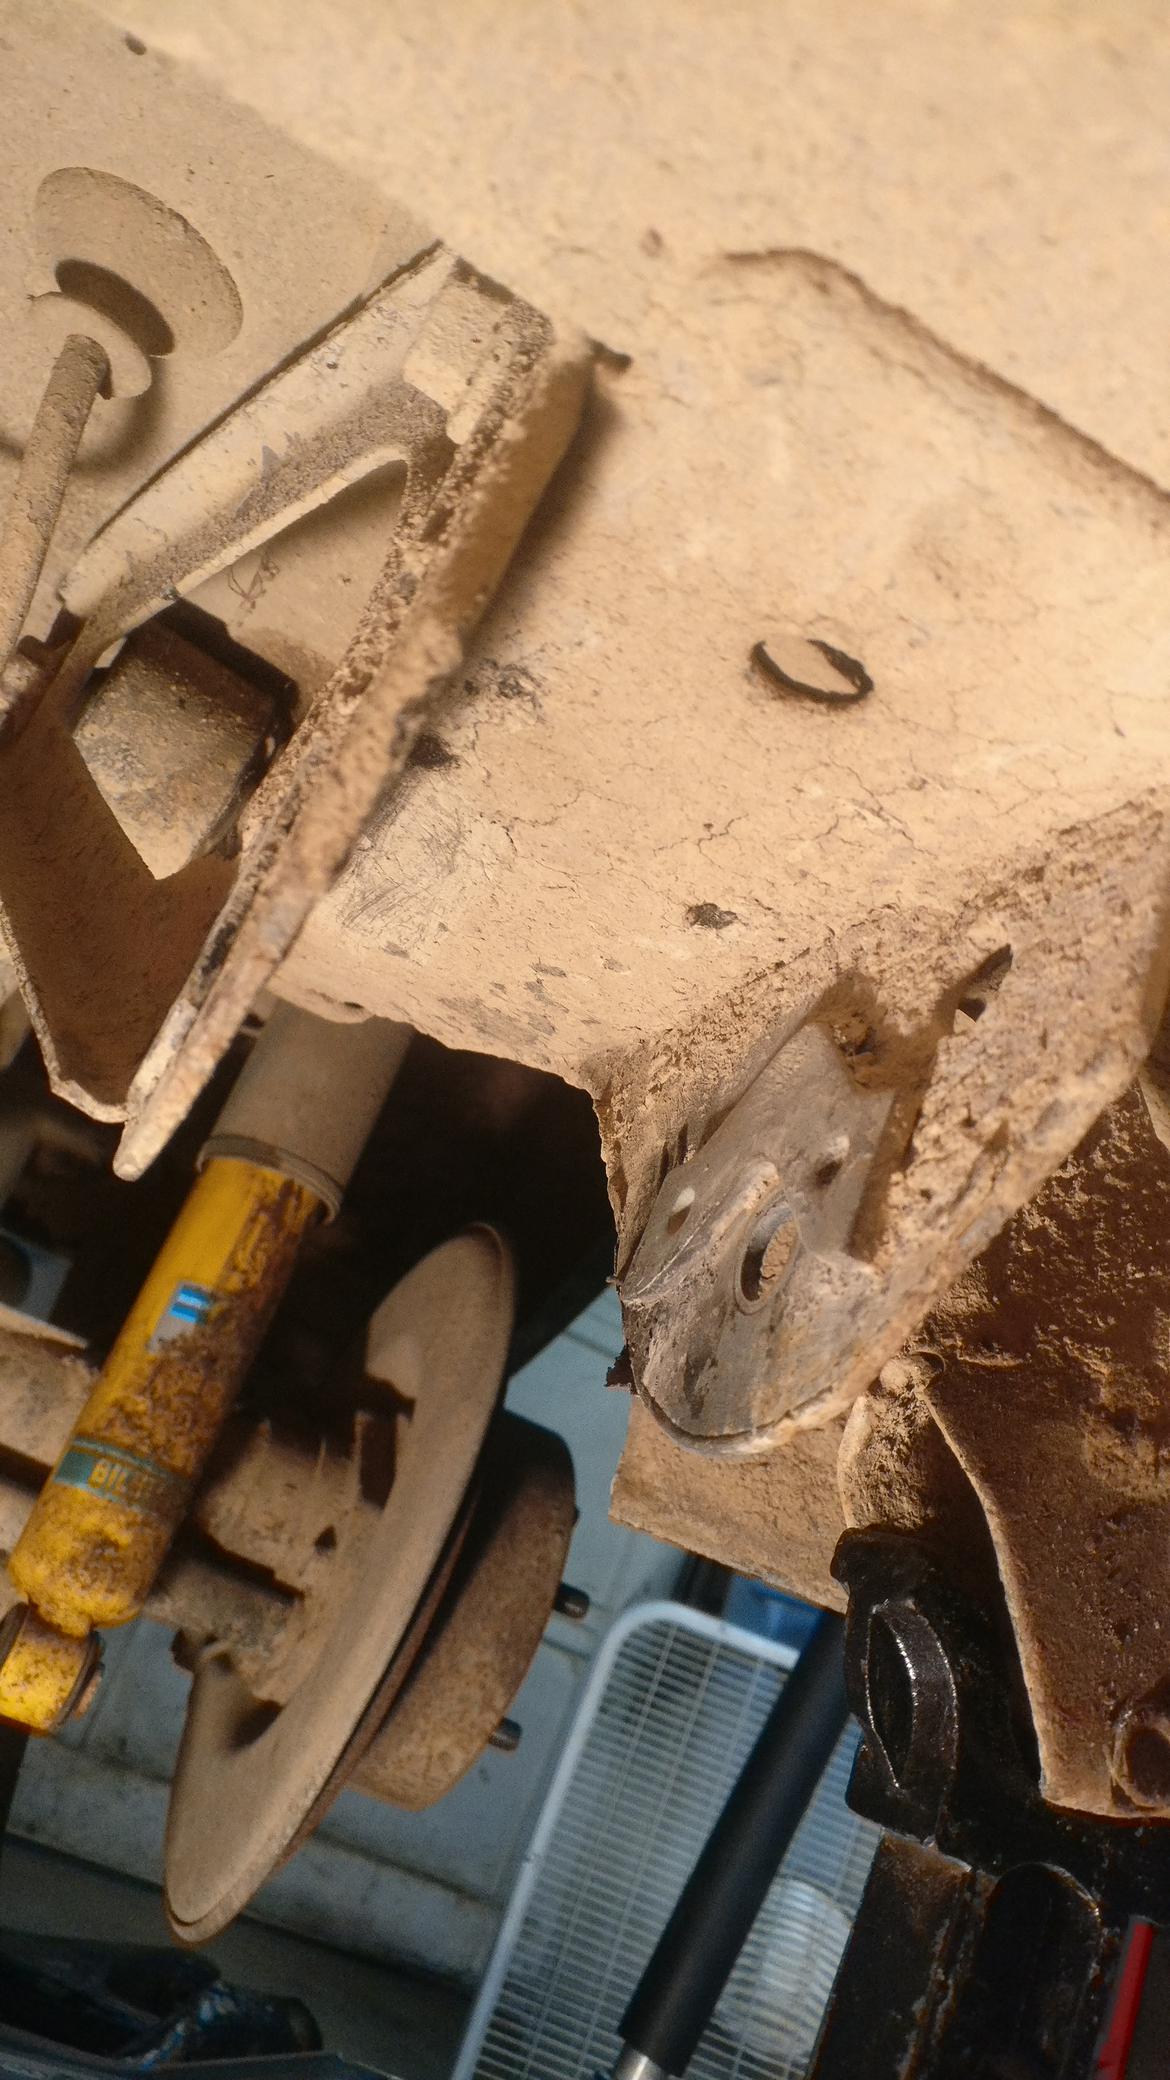
Also forget to mention I pulled out some safety stuff (weight) from the rear. Supposed to keep the gas tank from hitting the rear axle in a rear end collision, hopefully won't be having any of those on stage.
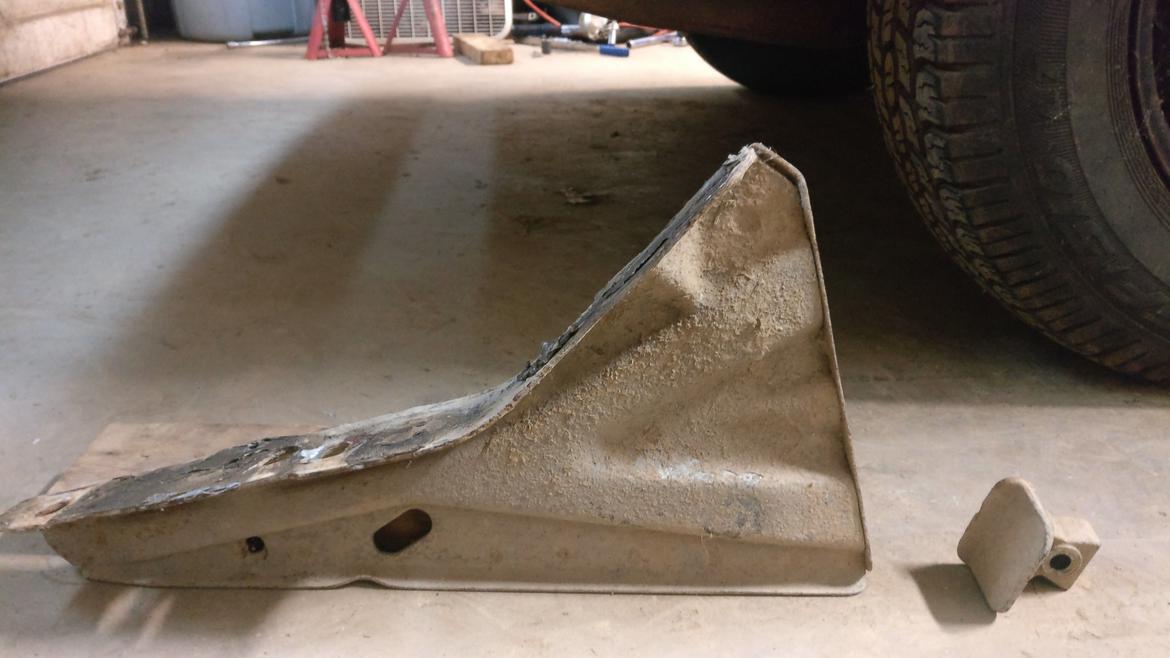
That larger piece mounts up with the gas tank, the smaller piece mounts on the back of the caliper.
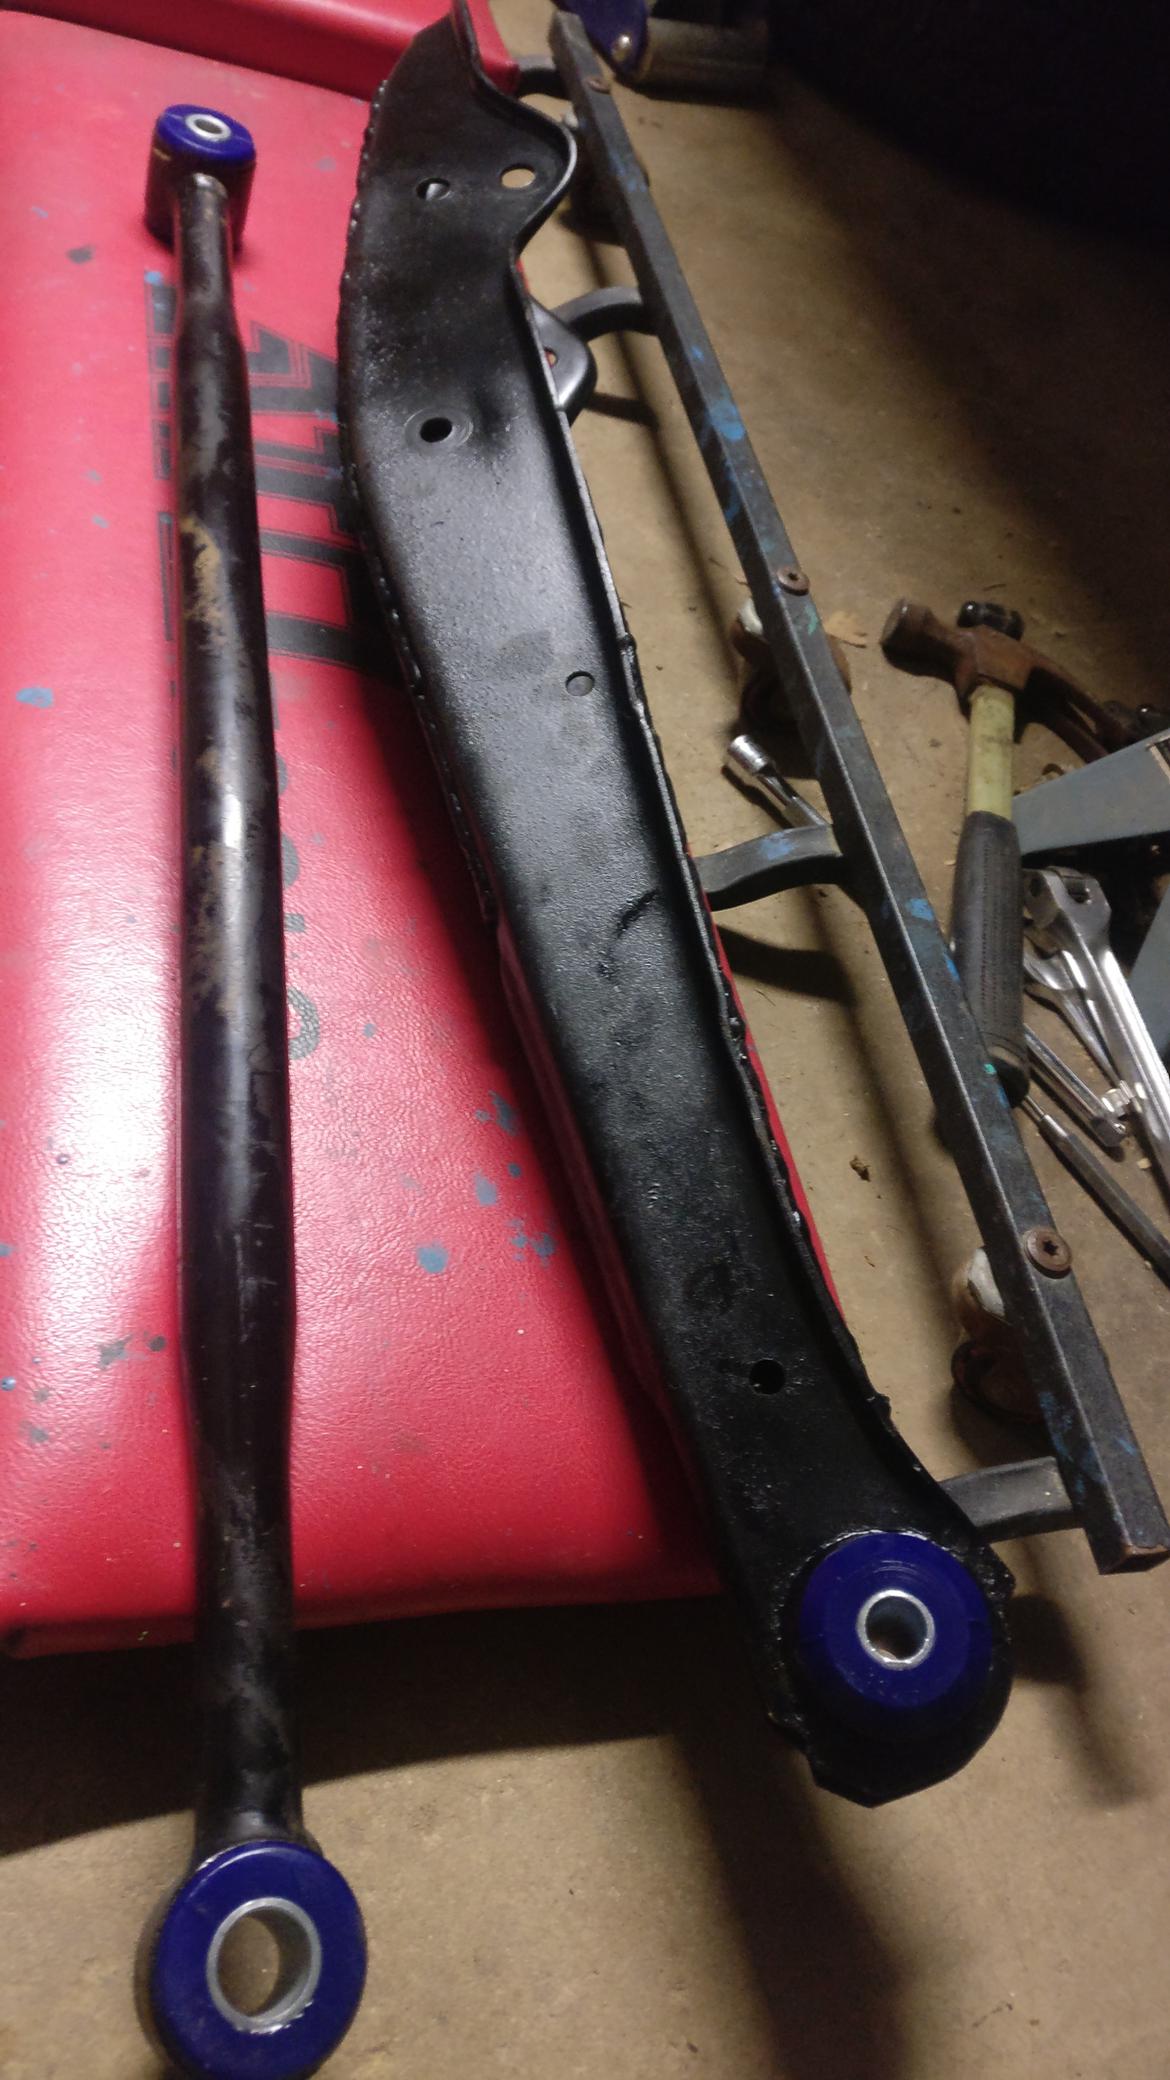
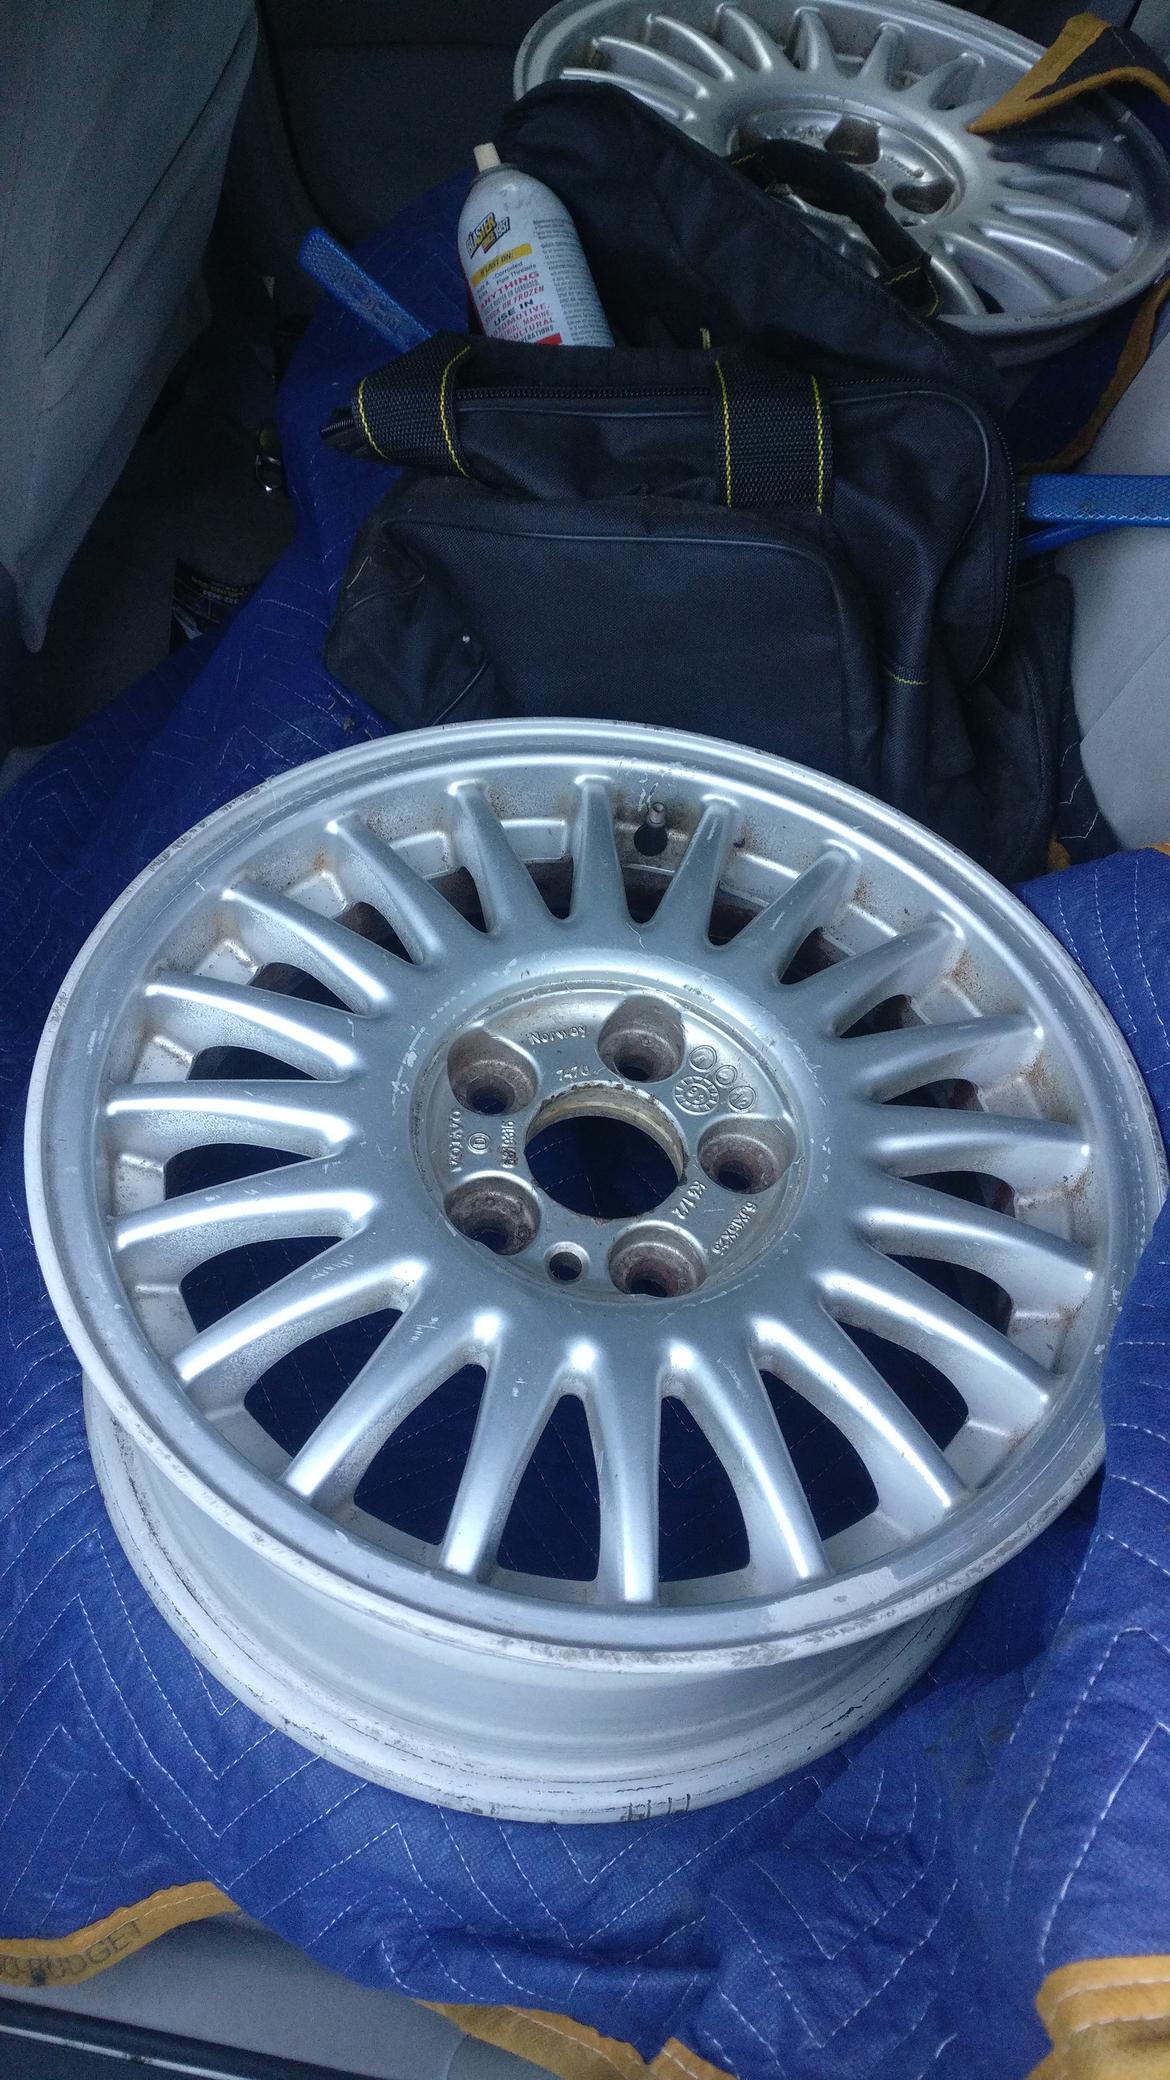
Few weeks ago I managed to get lucky when I messaged a guy about some wheels for sale on Craigslist. Turns out the guys is super into Volvo's and posts on turbobricks (Volvo forum) often. He also had a 240 that he wanted the trans from, but everything else was getting scrapped. Went over there for a Saturday and pulled some spare control arms, a steering rack (although it's leaking horribly), the indicator holder off the column (more on this later), and the set of wheels. Think I did all right as I got all this aswell as help pulling the stuff for $200 (wheels alone were listed for $250 on Craigslist).
The 15" alloy "aries" wheels:
Spare trailing arms + more wheels coming next trip.
well, you very well may have a rear-end collision on stage, just not with another car (and the gas tank hitting the axle won't much matter at that point lol).
Unfortunately for 240's with SRS the horn contact inside the column is in a slightly different spot than non SRS 240's. Momo designed their adapter for non SRS columns, so to have a horn you have to swap the piece housing the horn contact (a small cast piece that the wiper/headlight stalks attach to). The difference in the contacts is shown in the pic.

The top left is the SRS piece, with the larger horn contact (the metal ring). Smaller non SRS contact on the bottom left. Momo adapter on the right. Super easy swap once you get the piece, just pull the steering wheel and surrounding interior dash pieces, then plop it in.
Now I get to throw on this sweet Momo I splurged on. (I've actually had this since like the week I got the car, just haven't put it on because of the horn issue). Feels and looks awesome with this interior.

In reply to irish44j :
Yea I guess I could end up like this guy (skip to 1:30):
https://www.youtube.com/watch?v=lEsghTzv1Wk&list=WL&index=64&t=0s&app=desktop
I've started trying to strip the control arms I got to box them but they are covered in undercoating (I think).
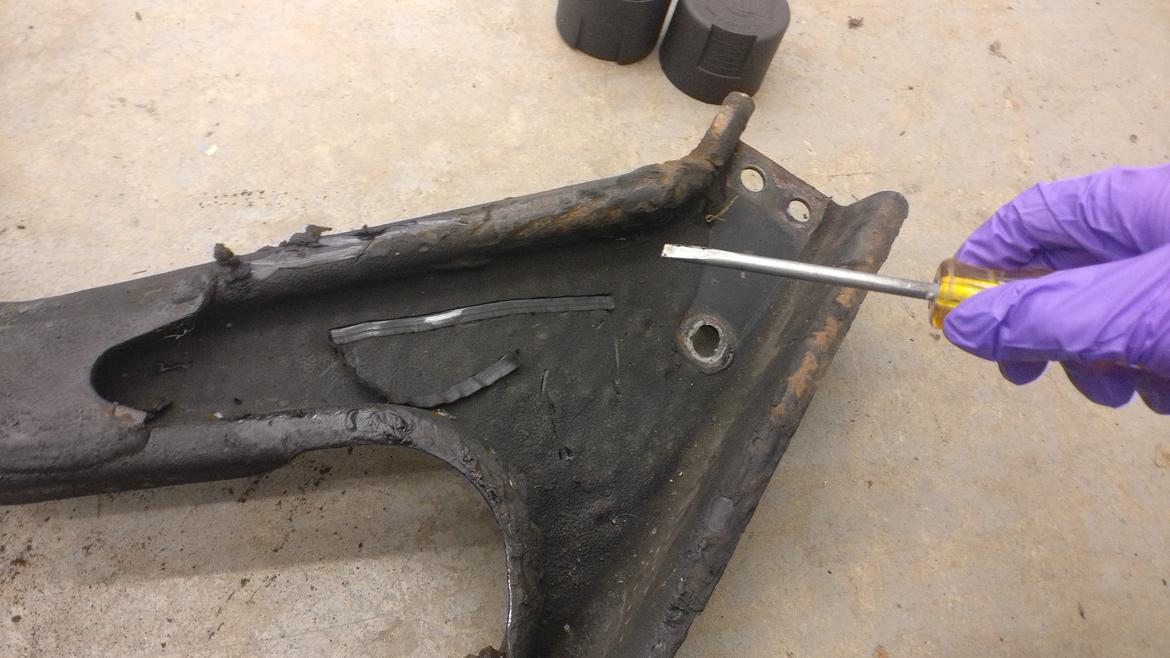
Anyone have any tips? I scraped them down as much as I could with a screwdriver/scraper then covered them paint remover, let it sit, and scraped it down, twice. It's getting some of it off but nowhere near clean enough for welding.
In reply to Nesegleh :
Try mineral spirits on the waxy stuff Volvo used on those control arms. It really did keep the rust away.
Nesegleh said:
In reply to irish44j :
Yea I guess I could end up like this guy (skip to 1:30):
https://www.youtube.com/watch?v=lEsghTzv1Wk&list=WL&index=64&t=0s&app=desktop
Most RWD rally crashes are hitting things with the back of the car, based on everything I've ever seen ;)
Nesegleh said:
I've started trying to strip the control arms I got to box them but they are covered in undercoating (I think).
Anyone have any tips? I scraped them down as much as I could with a screwdriver/scraper then covered them paint remover, let it sit, and scraped it down, twice. It's getting some of it off but nowhere near clean enough for welding.
Just go get some cheap HF wire wheels (don't use your dad's nice ones lol).


