1 2 3 ... 7
t25torx
t25torx HalfDork
9/9/14 8:47 a.m.

Yep, I'm back again with another modern classic I'm gonna try to restore and sell on for a profit.

I bought this 2001 BMW 525i for a paltry $1000 cash, it's owner had just had it's serpentine belt and tensioner replaced after a catastrophic failure, but it wouldn't stay running on it's own after the work was done. So they put it up on Craigslist, which is where I found it.

I had the Celica project still in the shop when I got this car, but it's been sold and it's time to pull this beast in and see what it's gonna take to set things right, and maximize selling potential.

So the car had to stay in the back yard for a little while and doesn't look the better for the short stay. I'll have to break out the shop-vac to get rid of all these leaves and needles. But that can wait.

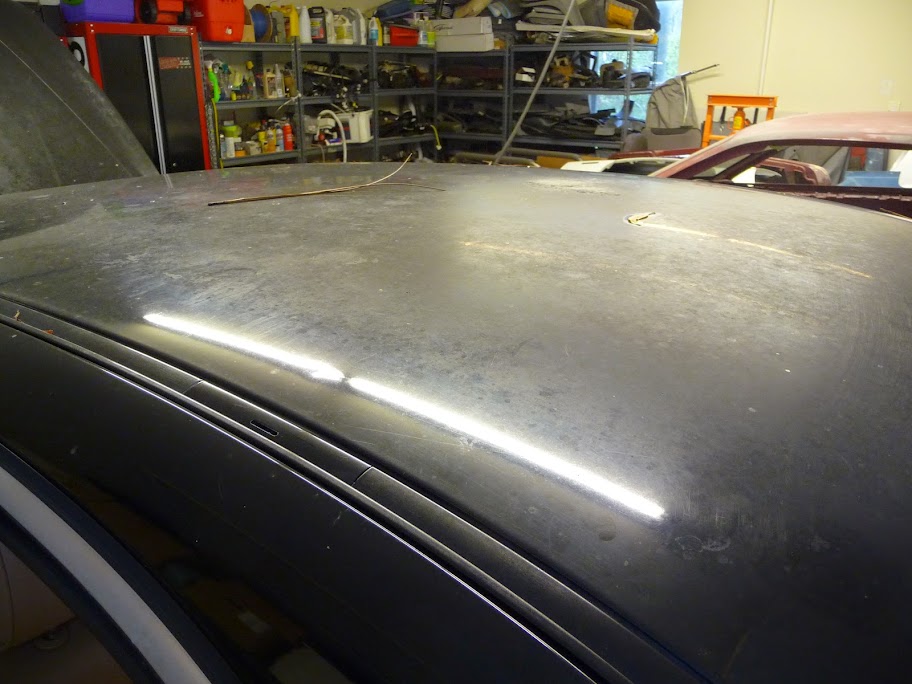
Going over the condition of the body it's got some rough patches. The hood and roof paint has gone flat and will need to be resprayed, as it's to far gone for a simple wet sand and buffing. The hood also has a nice dent in it where the belt tensioner broke and shot up, the windscreen washer supply lines are broke and the BMW roundule needs to be deep cleaned or replaced as it looks like it's coated in tree sap.

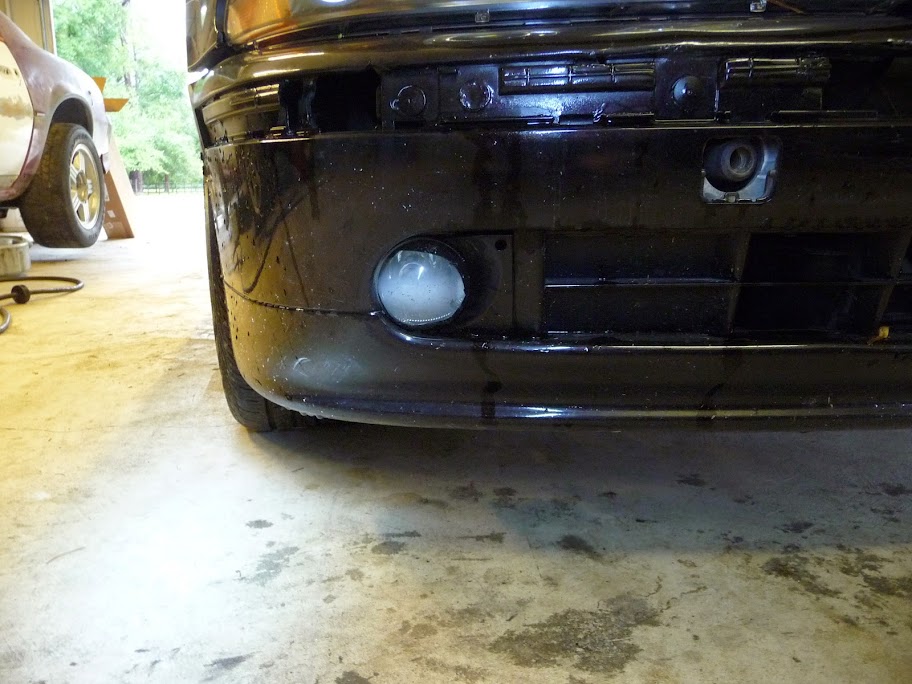
Going around front there's several things I want to correct here. It's missing it's trim moulding on the middle, and passenger side and also the tow hook cover plate. The left fog lamp gets hazy when it's damp out and has over spray on it from a previous paint job. The left headlight is missing it's trim piece that goes under it and is not fitted correctly, and finally the right headlight does not match the left one, and is just in poor shape.

Going around to the passenger side of the car the side repeater is broken and the paint is really scratched up, but nothing a good buff with some cutting compound won't fix. Oh and then the rear tire is letting me down.

Around back the left tail light housing is broke around one of the bulb bases and the light won't stay clipped in. and again the bumper is scratched and the clearcoat is starting to chalk up on top so it could do with a respray as well.

Finally on the drivers side we have this gnarly dent in the fender crease that's going to be a bish to remove. I might end up taking it to a Paintless Dent Repair place to see if they can pull that out.

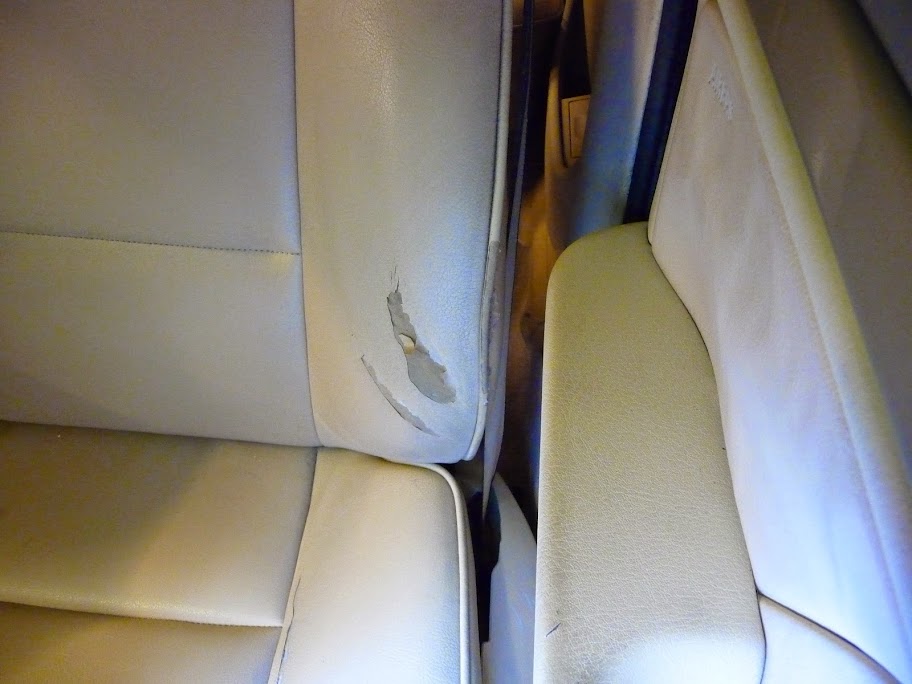
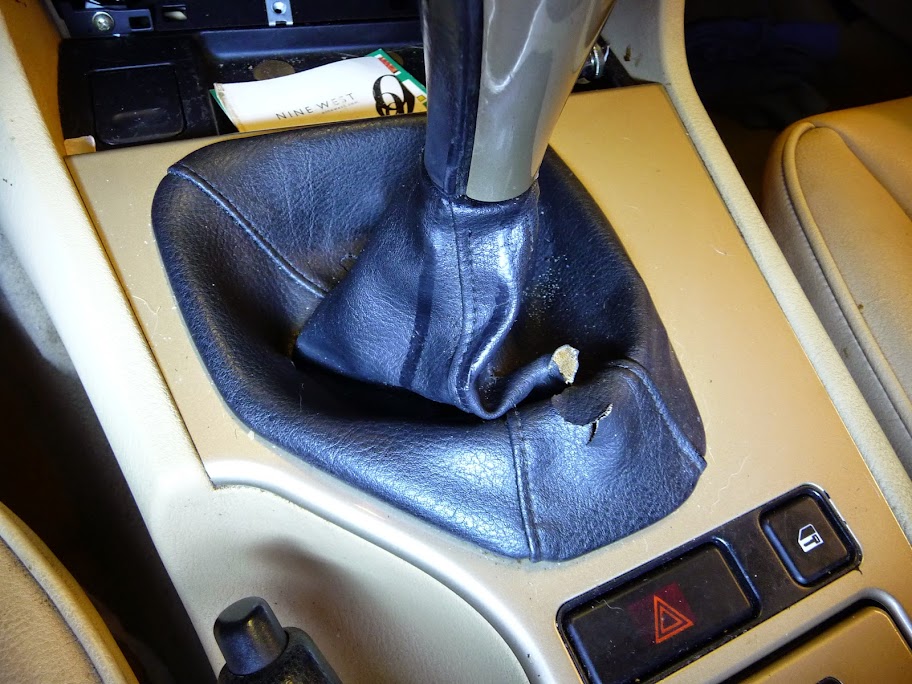
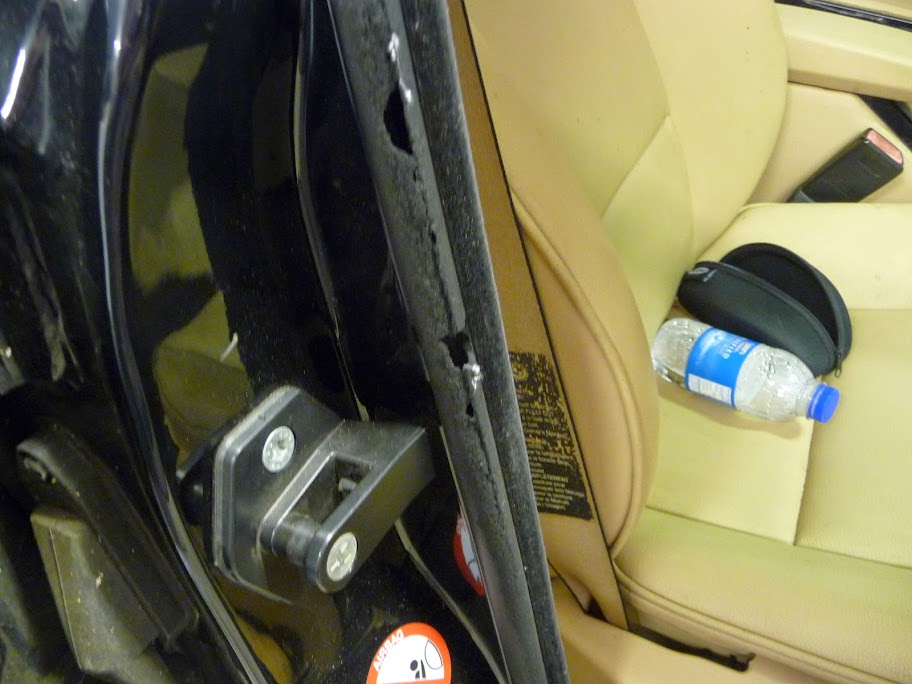
On the interior side, it's just as sorry a sight in some areas. Almost all the door trim behind the hand grabs will need to be repainted, as they are all scratched up. The shift boot is torn, and the shift knob itself doesn't look right. The center console has some rubber piece that is turning back into crude petroleum. The passenger side window switch is broken.The drivers seat is worn on the outer bolster and the switch trim is broke, scratched and falling off. All the body side door seals are worn through and not sealing good on all the doors. It's also missing the factory floor mats. Oh and the hood latch is broken and the release lever is no where to be seen. Oh and not to mention it's filthy and there are freaking fingernails in this thing.

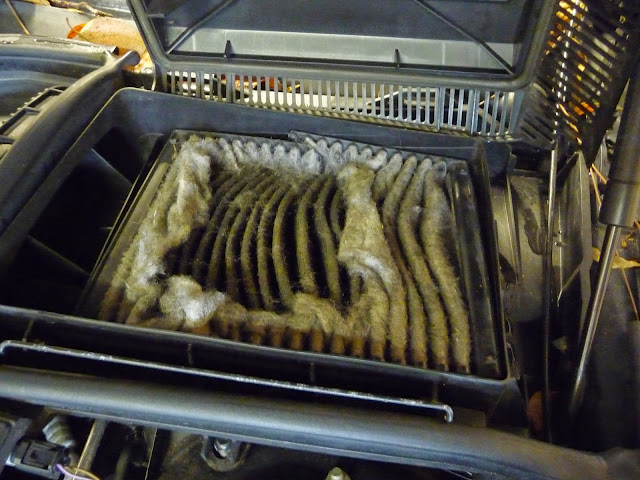
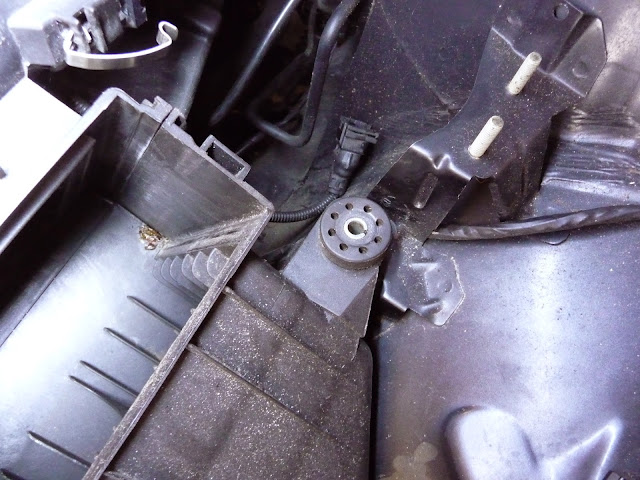
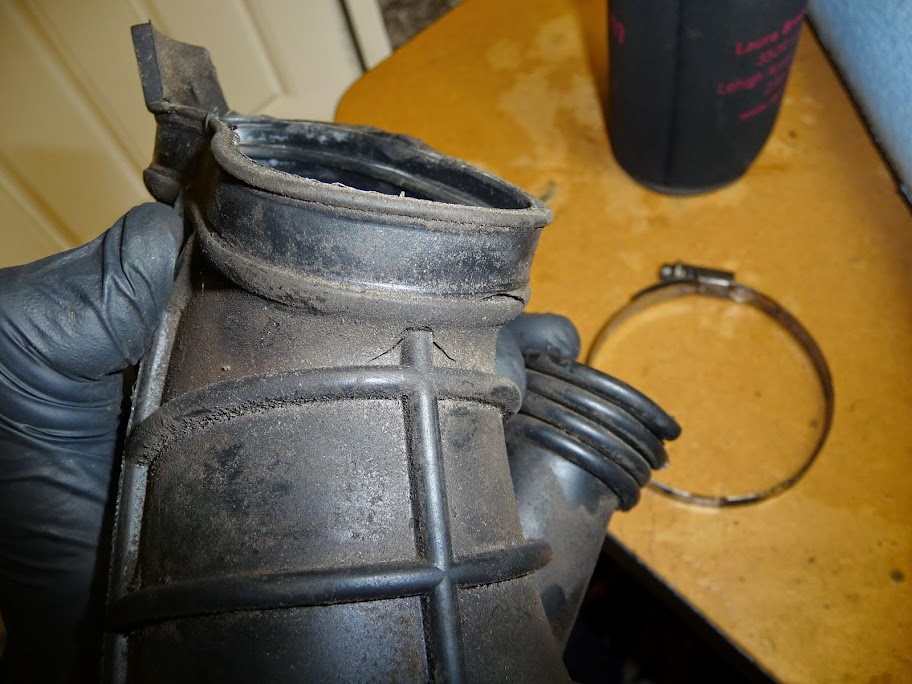
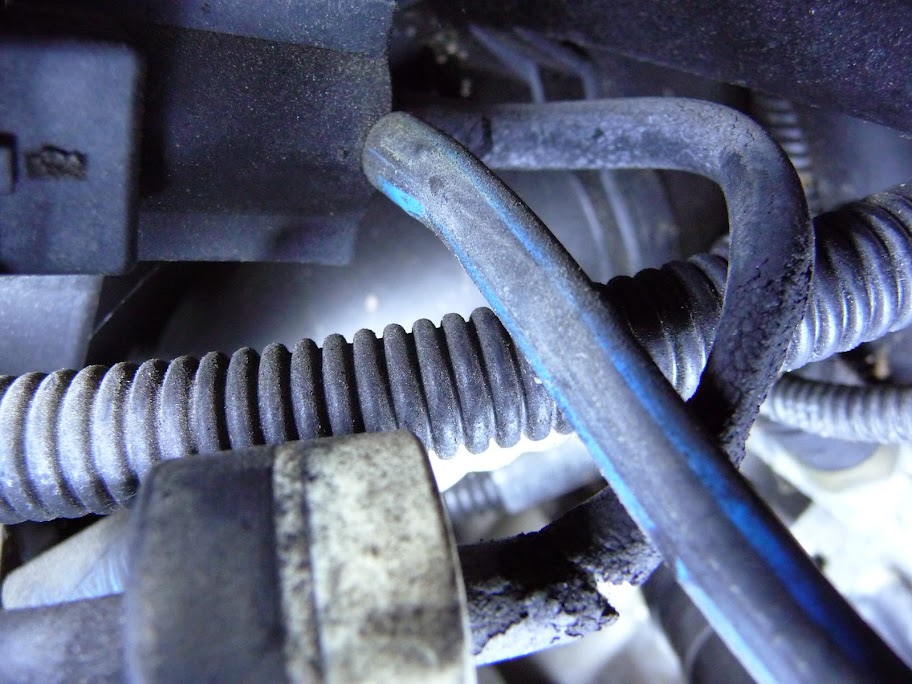
So that's about it for the cosmetic side of things on this car, I haven't even touched the real mechanical issues yet. So stay tuned for the next installment where I break out my spanners and try and track down that nasty air leak and idle issues.

wvumtnbkr
wvumtnbkr GRM+ Memberand Dork
9/9/14 8:52 a.m.

Moar!

dyintorace
dyintorace GRM+ Memberand UberDork
9/9/14 9:08 a.m.

Yikes! This one is going to be interesting to follow. Thanks for taking us along for the ride!

dculberson
dculberson UberDork
9/9/14 9:11 a.m.

Wow, looks like you have your work cut out for you. I'd rather be pulling engines than dealing with that mess! I look forward to reading about it though. ;-)

Harvey
Harvey GRM+ Memberand Reader
9/9/14 9:44 a.m.

That thing has been ridden hard and put away wet. Sounds like it has been hit on all sides at one point or another.

solfly
solfly Reader
9/9/14 11:38 a.m.

following, never caught one of these from the start

nderwater
nderwater PowerDork
9/9/14 11:43 a.m.

My E39 has similar interior issues - I'm intrigued to see how you can fix them yet still turn a profit.

SEADave
SEADave Reader
9/9/14 12:11 p.m.

I know they are fake, but those fingernails gross me out. In any case, I will be watching this. I was actually looking for an E39 when I got my E36, and I still like them lot.

Adrian_Thompson
Adrian_Thompson UltimaDork
9/9/14 12:20 p.m.

I'm seeing nickles and dimes, lots and lots of nickels and dimes. This should be a good ride.

t25torx
t25torx HalfDork
9/9/14 12:23 p.m.

And we're back from our short break.

The Mechanicals:

So right after I bought the car I hooked up my OBD scanner to it to see what all the Christmas lights on the dash were about. And I came back with a pretty laundry list of codes.

  • P0102 - Mass Air Flow (MAF) Circuit Low Input
  • P0171 - System Too Lean (Bank 1)
  • P0174 - System Too Lean (Bank 2)
  • P0313 - Misfire Detected with Low Fuel
  • P0455 - Evaporative Emission Control System Leak Detected (no purge flow or large leak)
  • P0500 - Vehicle Speed Sensor Malfunction
  • P1343 - Misfire Cylinder 1 With Fuel Cut-off
  • P1347 - Misfire Cylinder 3 With Fuel Cut-off

So most of these codes are related to mass airflow code, and that is mostly due to air leaks in the intake tract. The most obvious offender being a huge hole in the lower intake boot that connects to the throttlebody. Now to get to this piece is a little more involved than just a couple of hose clamps, so here we go.

I'm going to start by removing the near side cabin filter and housing. The lid is clipped on with a metal bar and then the housing is just clipped to the hose that runs to the cabin. Once the housing is out of the way you can twist the intake hose to remove it from the firewall.

Gross, that filter will need replacing. Filter box and intake snorkel removed.

Then it's time to remove the airbox and upper intake pipes.

Start by removing this crossover pipe.

Then loosen this lower intake pipe hose clamp.

Remove this 10mm bolt and the unit can now be twisted a little to help remove the MAF

Loosen the clamps on the MAF and remove the connector, my MAF connector was missing it's clip, so that will get replaced when it all goes back together. With the clamps loose, twist the box a little to free the MAF and remove it. Once the MAF is out of the way you can pull the airbox out.

Ahh look at all that room!. Time to get the rest of the intake pipes removed. one clamp and the top boot is out, looks to be in good shape, so that one will get reused after a good cleaning. The lower one takes a bit more fiddling to remove, the clamps are at odd angles and tough to get a socket onto. But I finally got it.

Here's the top section. Now it looks like it's supposed to be bolted to something, but it wasn't in mine so it pulled right out.

This little family of ants will have to relocate.

You can see how cramped it is to get to these 2 clamps.

Unit is removed and here you can see the tears and the whole side boot is torn off.

After that I checked out the other hoses around the area and found this on the back side of the engine. Also this vacuum port cover and hose going to the firewall could use replacing.

So that's as far as I can go with this now, I have to order the parts, I wanted to wait after I tore it down to make sure I didn't need any other parts.

While I was in there I grabbed a shot of the wonderful hack job of repairing the power steering reservoir someone made. They coated this thing in silicone and aluminium tape, sigh.

But this is actually looking to be most of the mechanical stuff to fix. THe ABS pump will need to be looked at since it won't turn off when the car is off, and the shocks are shot. so I'll be looking for a set of those, I'll need to find a used set if I want to keep the cost down since the Bilstiens are over $500 for the set.

So stay tuned as I try and hunt down all the parts to get this car in tip top shape.

wvumtnbkr
wvumtnbkr GRM+ Memberand Dork
9/9/14 12:59 p.m.

MOAR!

Harvey
Harvey GRM+ Memberand Reader
9/9/14 1:10 p.m.

The 525i at least is not going to eat you alive on running gear since it's basically the same 2.5 liter as in a 3 series. The E39 540i I would avoid.

t25torx
t25torx HalfDork
9/9/14 1:13 p.m.
wvumtnbkr wrote: MOAR!

ROFL... Hold yer damn horses. I got parts to order now!

HappyAndy
HappyAndy UltraDork
9/9/14 7:32 p.m.

So how much do think you can get for it once its all fixed up? I wish you well, but I suspect that you won't do better than breaking even on this deal. On the bright side, you'll have a sweet car to ride around in when your finished.

Mr_Clutch42
Mr_Clutch42 Dork
9/9/14 7:50 p.m.

I should drive one of these since some of you guys say that it's a great car.

t25torx
t25torx HalfDork
9/9/14 8:26 p.m.
HappyAndy wrote: So how much do think you can get for it once its all fixed up? I wish you well, but I suspect that you won't do better than breaking even on this deal. On the bright side, you'll have a sweet car to ride around in when your finished.

I am hoping for $4500 to $5000 once it's all put back right. Who knows I might end up liking it too much to get rid of it once I get done, I've always liked this body style.

jr02518
jr02518 Reader
9/9/14 8:53 p.m.

Starting at the front, in no particular order:

When you change the Power Steering reservoir change the hoses to the rack. One, or both are already leaking.

When you are changing the oil pan gasket, replacing the engine mounts and safety wiring the oil pump nut (spins 180 degrees of normal) the best way to get it done is by supporting the engine from on top and dropping the center cross member. Makes changing the PS rack hoses much easer.

Before you drain the 5sp. trans for the new ATF fluid confirm the fill plug will come out. The amount of fluid that comes out could be as little as two shots from Starbucks and look like a Moca Frap. The shift shaft seal cost almost nothing to buy, same goes for the trans mounts. The rear main seal is where all the ATF leaks from and destroys the Glibo. Removing the exhaust system makes these much easer to fix. Be grateful the cats you have to buy do not have to be Cali legal, we are having to confirm our cars run cleaner now than when they were first sold.

When you smell gas in the car lift the bottom of the rear seat. The inspection port on the passenger side has four screws. The plug for the pump has four connectors. The red/power lead might have heated/melted the surrounding plastic and gas will have pooled in the ring holding the pump in place. Yes, it scarred the crap out of me too.

When you remove the fuel filter from the car it might just be the one from the factory. The book on it's R and R is no lie.

I still have my E36, but yes less money.

Javelin
Javelin GRM+ Memberand MegaDork
9/9/14 11:52 p.m.

Lawdy, that's a harsh one! I wish you many lucks in this one (and pleeeeease don't need a spare car like the Celica).

Billy_Bottle_Caps
Billy_Bottle_Caps Dork
9/10/14 9:14 a.m.

Following this with great interest

trigun7469
trigun7469 HalfDork
9/10/14 10:08 a.m.
Billy_Bottle_Caps wrote: Following this with great interest

+1

Dusterbd13
Dusterbd13 Dork
9/11/14 7:37 a.m.

This should be fun to watch.

You going to keep a posted running budget?

Also, look into sensen for struts. Cheap and effective for a daily or aflipper

t25torx
t25torx HalfDork
9/11/14 9:40 a.m.
Dusterbd13 wrote: This should be fun to watch. You going to keep a posted running budget? Also, look into sensen for struts. Cheap and effective for a daily or aflipper

Yep, I'll keep a running tally of all I spend. Speaking of that, I just got through my first round of parts ordering and here's the budget so far.

I spent

  • $1000 on the car.
  • $14.36 for a power steering reservoir
  • $35.97 for the hood release cable (three pieces)
  • $13.99 for the lower intake boot.

Which brings us up to a total of just $1064.50 spent out of our $1700 budget for this car.

I'll be buying more parts in the days ahead, but this round should cover most the mechanical issues with the car (fingers crossed).

Harvey
Harvey GRM+ Memberand Reader
9/11/14 10:12 a.m.

Definitely interested to see how you make out. These aren't that tough to work on overall. Not as many gizmos as the E60s.

t25torx
t25torx HalfDork
9/14/14 9:29 p.m.

Welcome back! Got back from Orlando yesterday late and went to check the mail this morning. Look what showed up.

Huzzah, parts!

Time to get cracking on this motor. The lower intake was the first bit to go on. I made sure to position the clamps in a more user accessible orientation.

Then the rest was just the reverse of the removal. I got to looking at the resonance chamber and it looks like it bolts to the airbox itself underneath. But I can't get the chamber separated from the upper boot, so for now I'll have to settle with just one screw holding it in place.

Here it is all setup for a test run, lets see what kind of codes I get know.

I also replaced this rotten hose with some fresh hose from my stock of short pieces from other projects.

ahh, that's looking better.

it's a bit fiddly to get into place but I finally got it back there. This is on the back side of the engine facing the firewall.

Once that was done I moved on to replacing that old leaky power steering fluid reservoir. I first had to empty it out, so I raided the kitchen and found a turkey injector, perfect! Then I sucked the fluid out, unbolted the two 13mm bolts, and the hose clamps under the tank. I had a bucket handy for the rest of the fluid to drain back into.

Then it was time to remove the silicone from the old unit to get the clamp off it. I must have removed about $20 worth of electrical tape and silicone before I was able to get the clamp off. It was a very dodgy repair that shouldn't have even happened given the price of a new reservoir.

Everything was then cleaned up to go back on the car. While cleaning I ran across this wire loom that was broken and torn, so I cut a section of loom from my stock, and fed it over the existing loom.

Much better. Then the clamps were tightened, and the reservoir filled. There. starting to look better under here.

Stay tuned for the next update gents, this wasn't all I got done today!

ssswitch
ssswitch Reader
9/14/14 11:24 p.m.

Maybe I don't have a great idea of the engine bay's geography, but it doesn't seem like anything is close enough to that wiring loom to have chewed through it like that. The fan's a mile away from the new section of loom, and that nice smooth steel band on the reservoir isn't going to wear on it from vibration either.

Did it get so embarrassed by the silicone bodge job that it destroyed itself, or did whatever damaged the PS reservoir hit it too? Exploding tensioner shrapnel?

Nice choice of project, but I'm curious how many parts you'll be able to replace on this thing before it falls out of the price range of who I assume the average used-BMW customer to be. The bodywork (outside of the easy headlight polishing job) seems like it could be brutal... I feel like there's a lot for me to learn here, either to repair my own cars, or to look out for on future cars I'm inspecting.

1 2 3 ... 7

You'll need to log in to post.

Our Preferred Partners
pcX6p00GV5YjmLV31qQDS0XNDKMP4yMZKgTPX3YGAHpSotlxiw5brrzppC4Gx5bi