Another common brand you might find on CL is Hossfeld. They're more expensive than the JD2, but you never know what you'll find used.
Here are some links to some good articles on benders, bending and notching:
http://www.pirate4x4.com/tech/billavista/Bender&Notcher/Bender/
http://www.pirate4x4.com/tech/billavista/Bender&Notcher/Bender/
http://www.pirate4x4.com/tech/billavista/Bender&Notcher/Notcher/
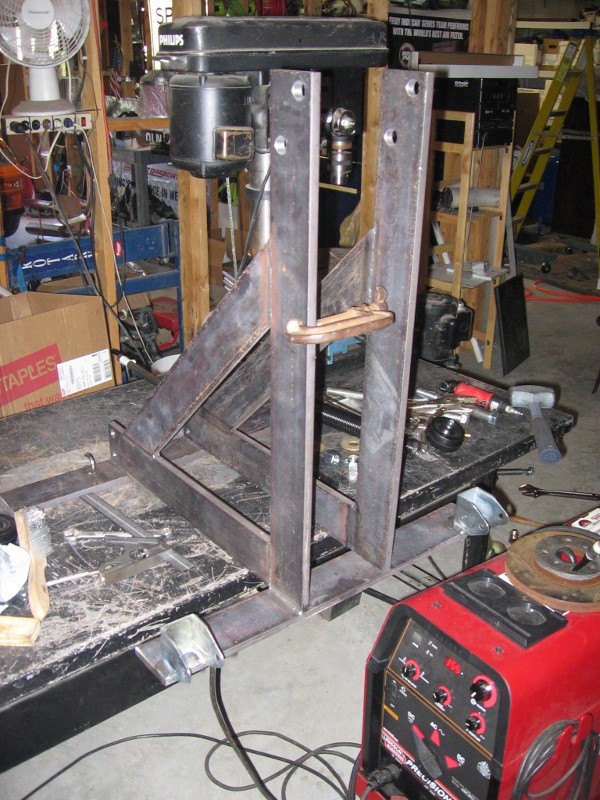
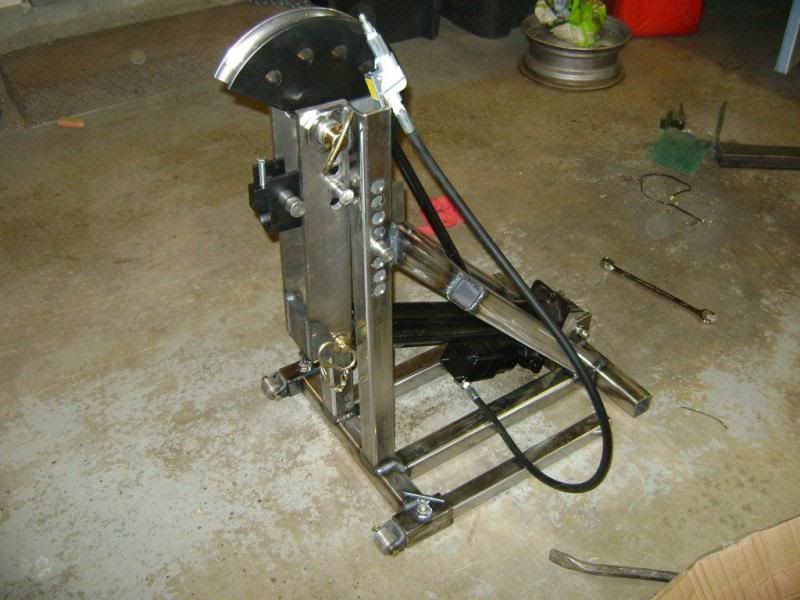
The design I've come up with. Mounts the JD2 Model 32 to the frame and uses a hybrid between the JD2 hydraulic and the Got Trikes hydraulic layout. I should easily get 90* out of a single setup.
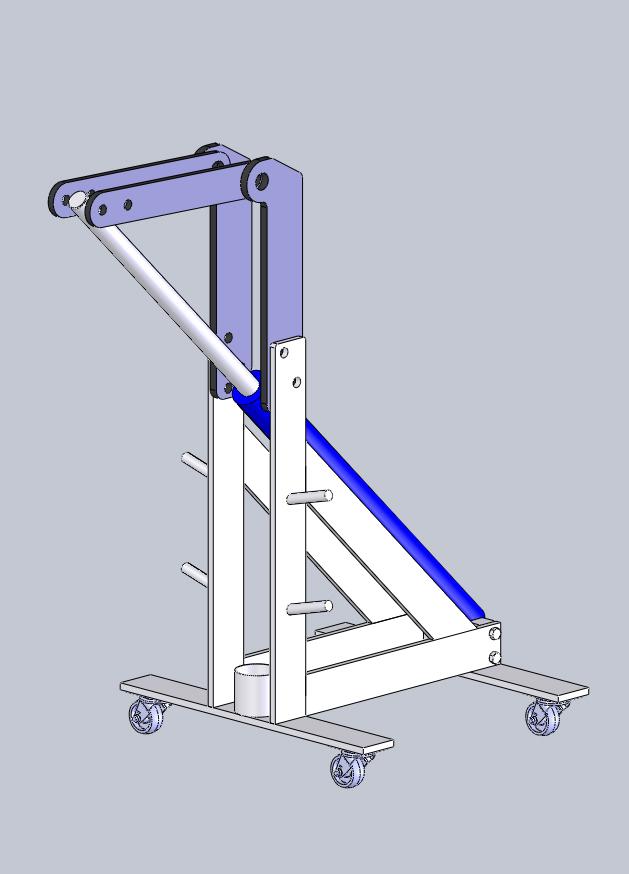
Dude. I'm pretty sure you're gonna need more casters.

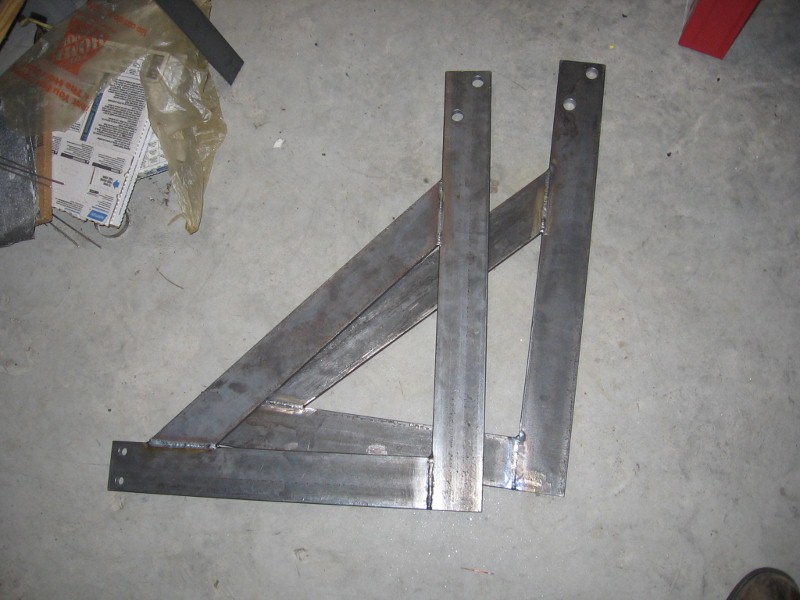
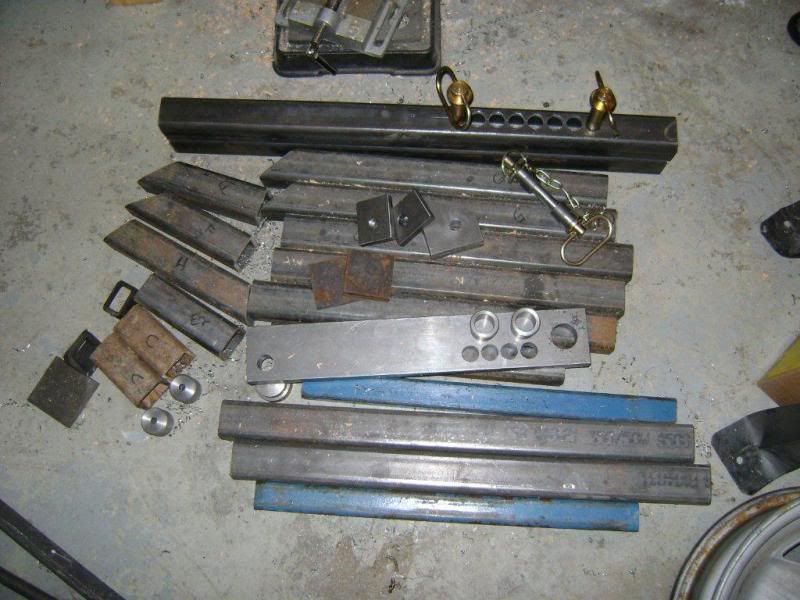
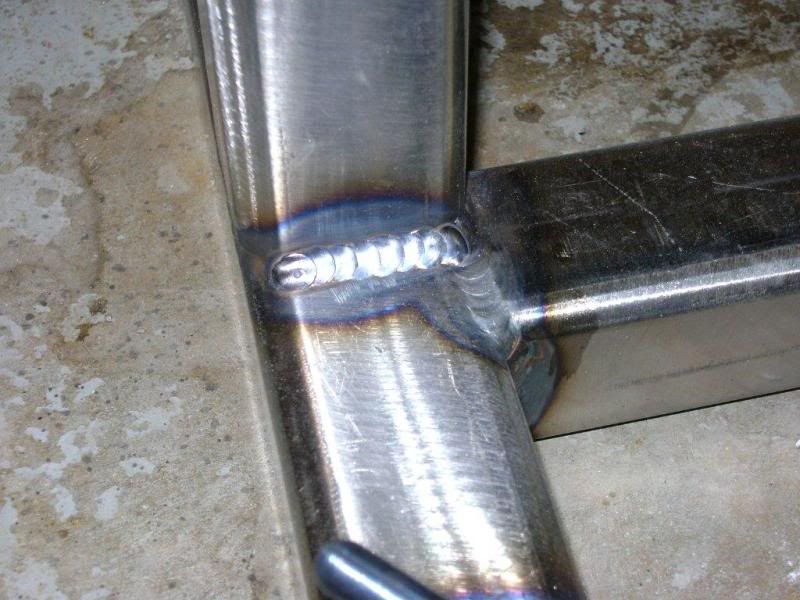
I bought the steel and went to dad's shop to cut and drill it on Tuesday. Machined the cylinder mounts (lower) and bushings/spacers (upper) after hours at work on Thursday and Friday. That meant I had pretty much everything ready to go by today. Long day of fabbing, as every weld needed 3 passes. I found the limit on the Lincoln Precision 185 TIG. It's rare that I do stuff this thick (1/2"), but if I did it more often, I'd have to get me a 250 amp MIG. Nevertheless, I got it put together enough for a test run...
The two side assemblies welded -
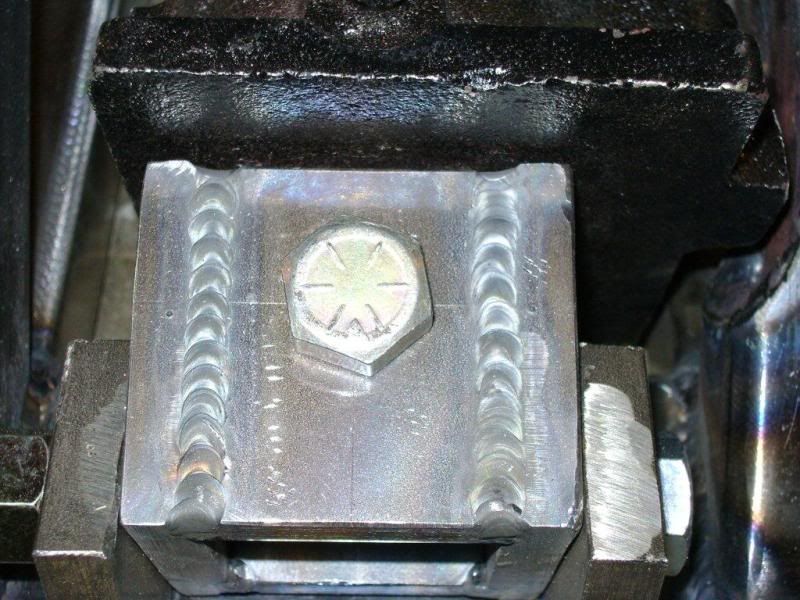
Bolted to the arms of the bender to set the spacing -
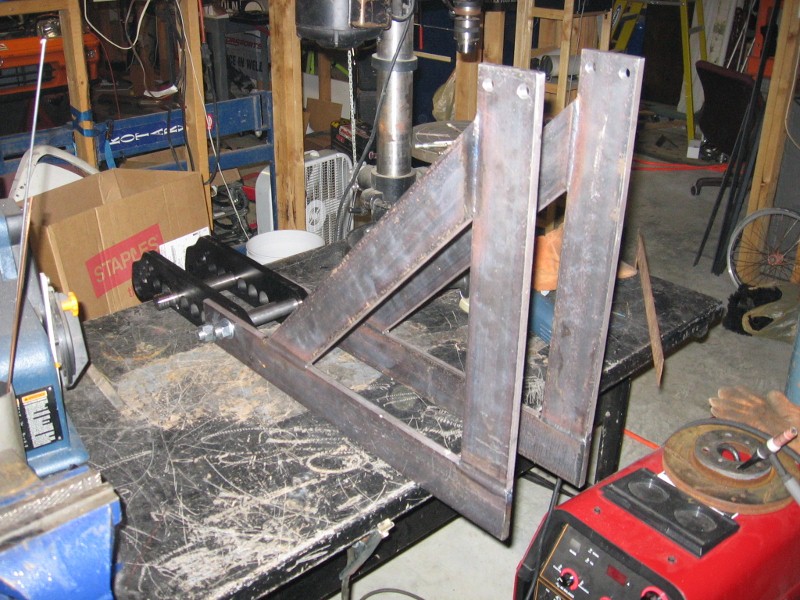
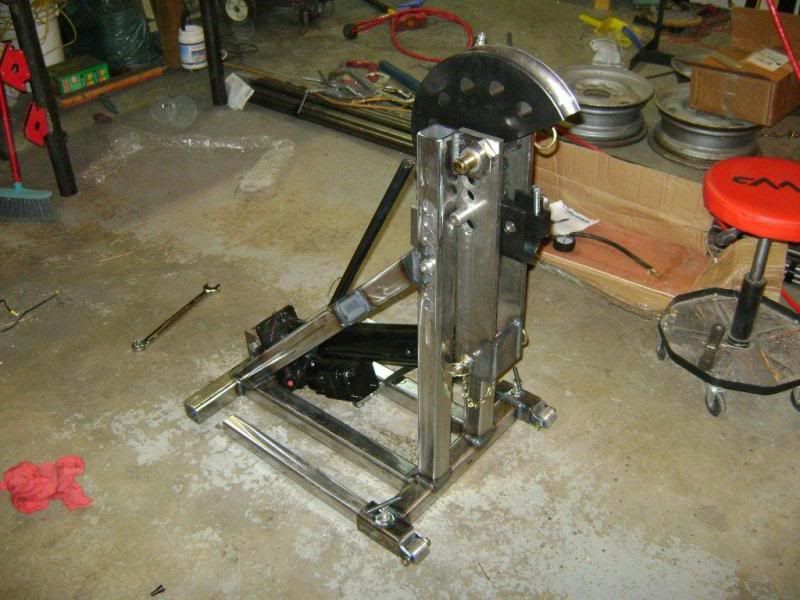
Legs welded on, so it will stand on it's own now -
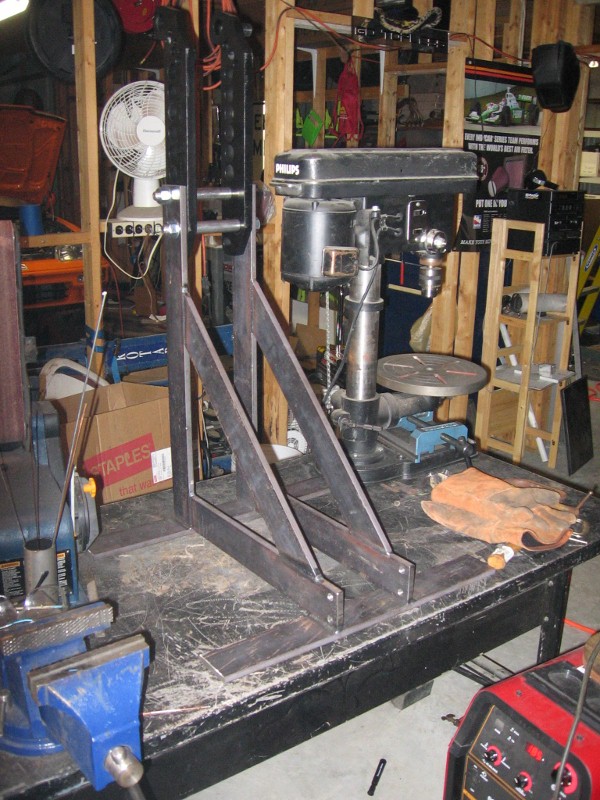
Cylinder hooked up and making it's first pass -
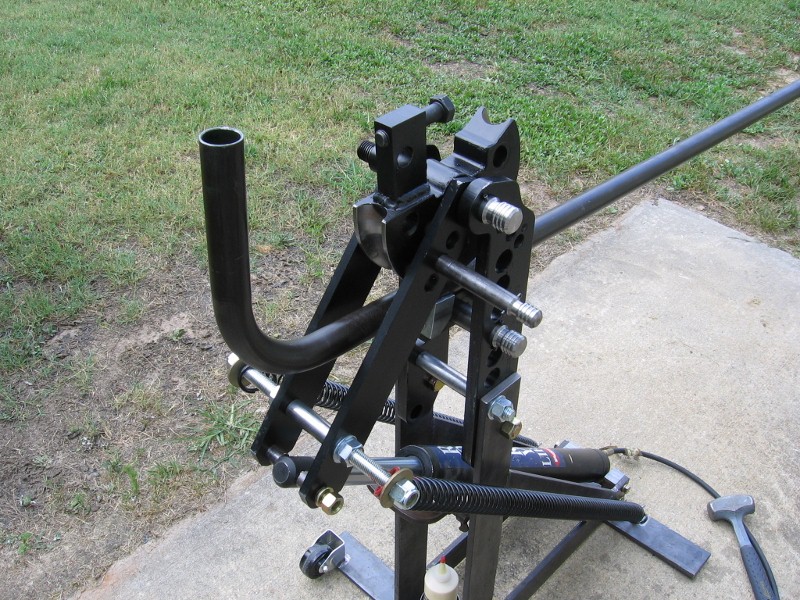
It won't quite do 90* yet. The cylinder hits that lower mounting bolt. That's what I get for not modeling the hardware. Should be an easy enough fix by just using two short bolts from each side, instead of the long cross bolt. That relies on just the one spacer to maintain the distance between the arms, but I don't see that being an issue.
Outfitted with tooling, just for kicks -
I still need to buy and mount casters, and figure out a spring return for the cylinder. I also am going to open up the lower mounts to make it a bit more forgiving and let the cylinder find it's hapy place better. Weld on the die holders and lube cup and paint it, and then bend some roll cages. :)

JoeyM
HalfDork
6/26/10 11:18 p.m.
Sweet! That's really nice. 
How much money so you think you have in the total setup?
Roughly $700 for the bender and die, and another $100 in steel. Even with the stuff I've still got to do, I'll be well under a grand.
Hmmm, I wonder if there's a market for less expensive dies, maybe made to order?
Not hard to sand cast aluminum, and I have the equipment to machine the inside curve ....
erohslc wrote:
Hmmm, I wonder if there's a market for less expensive dies, maybe made to order?
Not hard to sand cast aluminum, and I have the equipment to machine the inside curve ....
There's always a market for cheaper dies but I don't see it happening.
You need not only the die but the follower and the U-bend...and a profit for yourself.
jamscal wrote:
erohslc wrote:
Hmmm, I wonder if there's a market for less expensive dies, maybe made to order?
Not hard to sand cast aluminum, and I have the equipment to machine the inside curve ....
There's always a market for cheaper dies but I don't see it happening.
You need not only the die but the follower and the U-bend...and a profit for yourself.
I'd love some less expensive dies. OTOH, I can't figure out how to make them for less than the current price, and still pull a profit. Casting is a good start, but aluminum dies are pretty poorly regarded. Cast steel, with a machined hub, pin holes, and tube surface, would be a good start. You'd need to pay for the tooling, but that is probably the best bet on a viable, cheaper die.
More progress today, culminating in a bent tube!
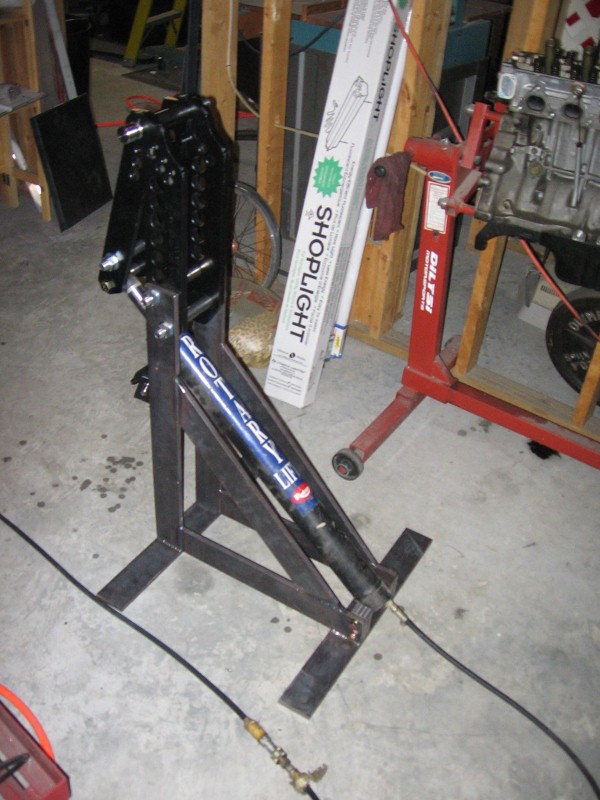
The springs I used are the 150# garage door springs from Home Depot. Not 150#/in, or 150# total weight, or any other useful spring information, but the springs they sell for lifting a 150# garage door. I initially tried them both (they are sold in pairs) but that wasn't strong enough. So I cut one in half and made 2 springs out of it. Incidentally, this leaves me with 1 spring that will make 2 if anyone is thinking of doing a similar build. Anyway, the springs had to be stretched a fair bit to be mounted. This was my first attempt -
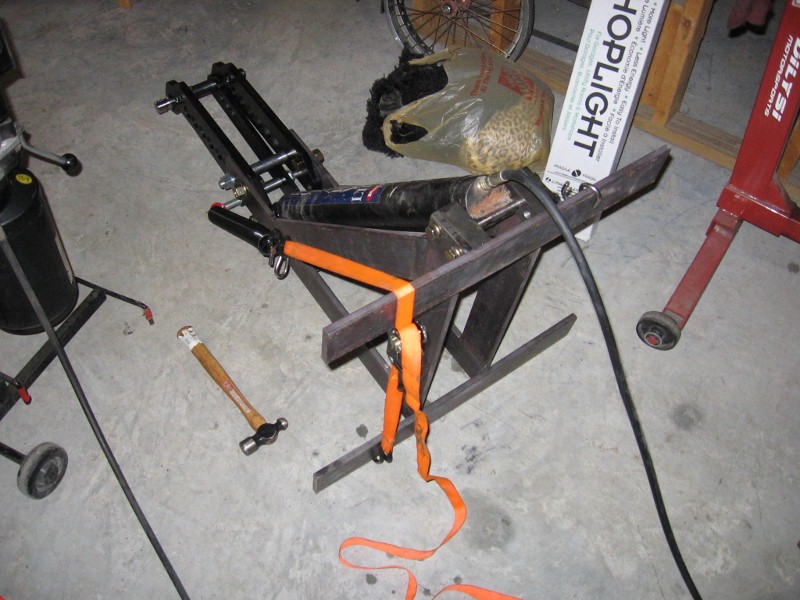
After breaking that ratchet strap, here is my second attempt. It went better.
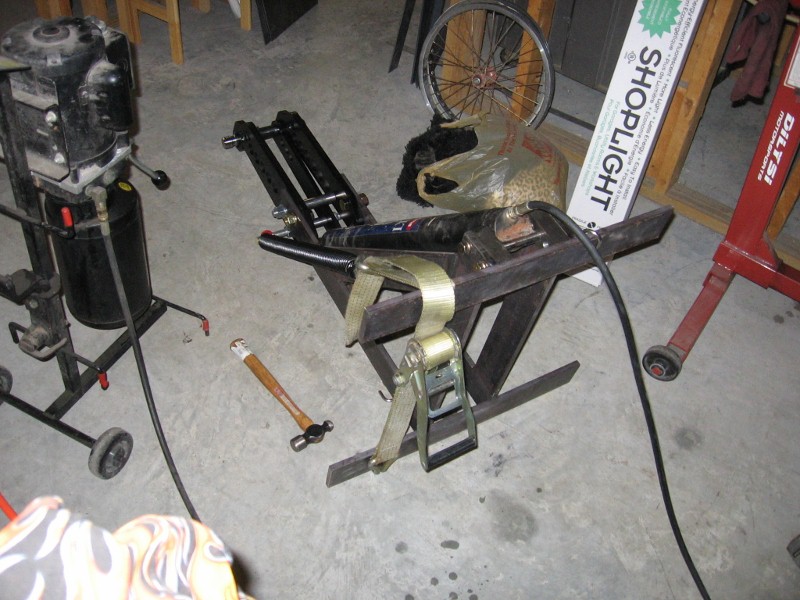
Testing the new shorter spring with it held just by the ratchet strap. It required minimal effort on my part to pull the cylinder back with the one spring, so I was confident that once I got 2 mounted it would be all good.
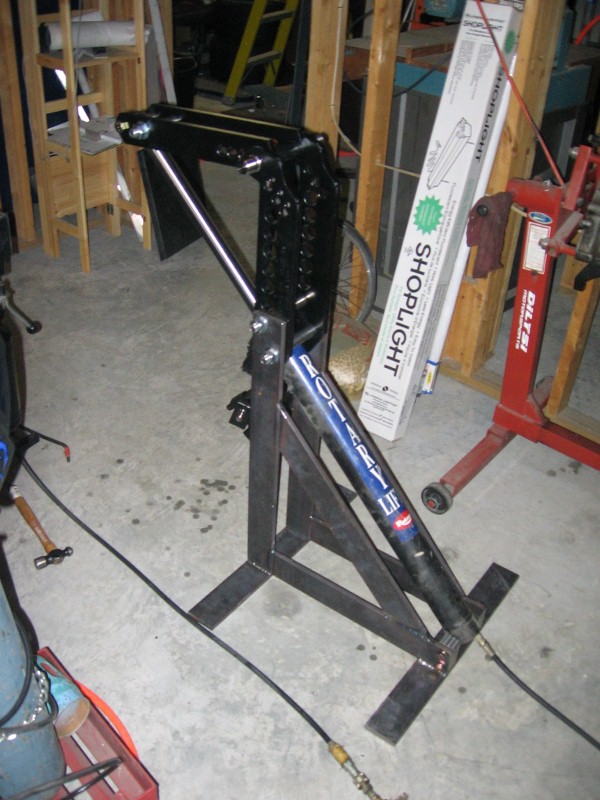
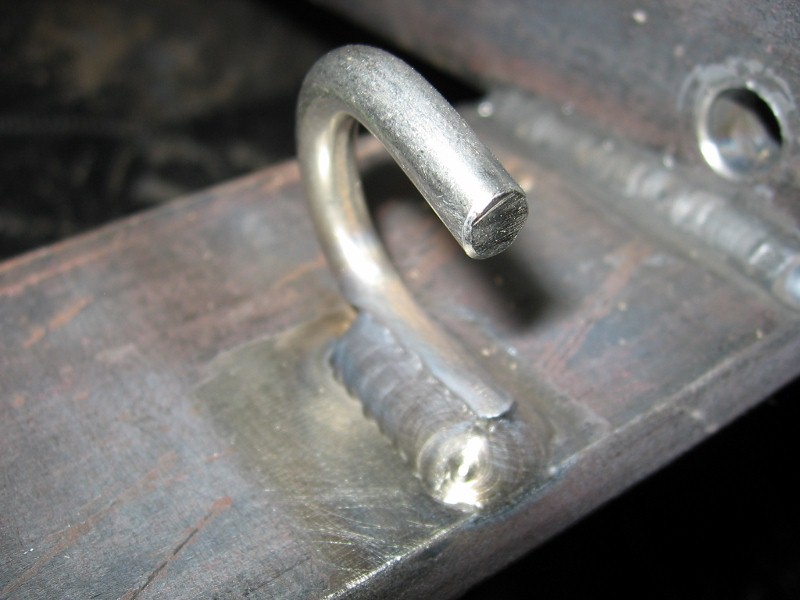
The spring hooks are simply a 3/8" Stainless S-Hook from Home Depot. I cut it in half to make 2 U-Hooks and then welded them on -
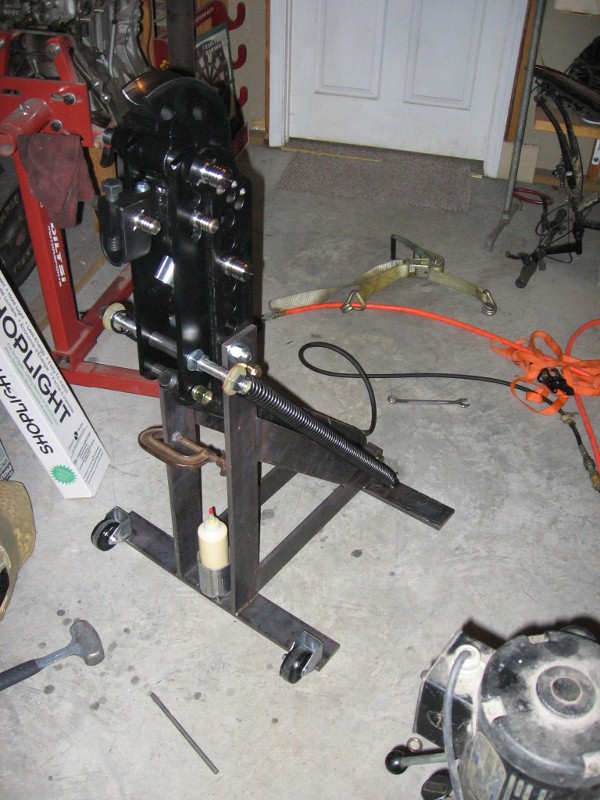
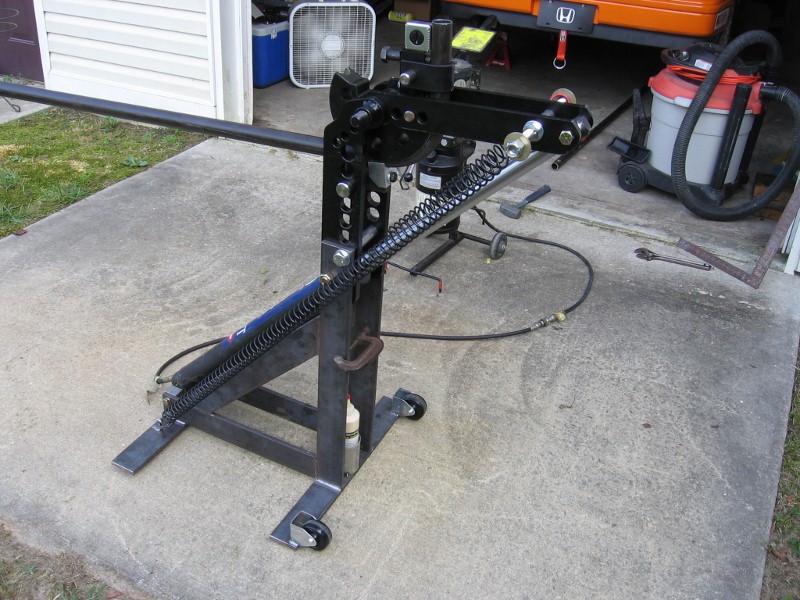
After being reminded that with casters, this thing was going to try to roll away from me, I remembered a trick that my dad and granddad have used on machines. I put 2 rigid casters mounted at 90* to normal. When the machine is in it's operating state, they are 1/4" above the ground. But tilt it back like a furniture dolly and they hit the ground and the machine becomes quite easy to move, steer, etc.
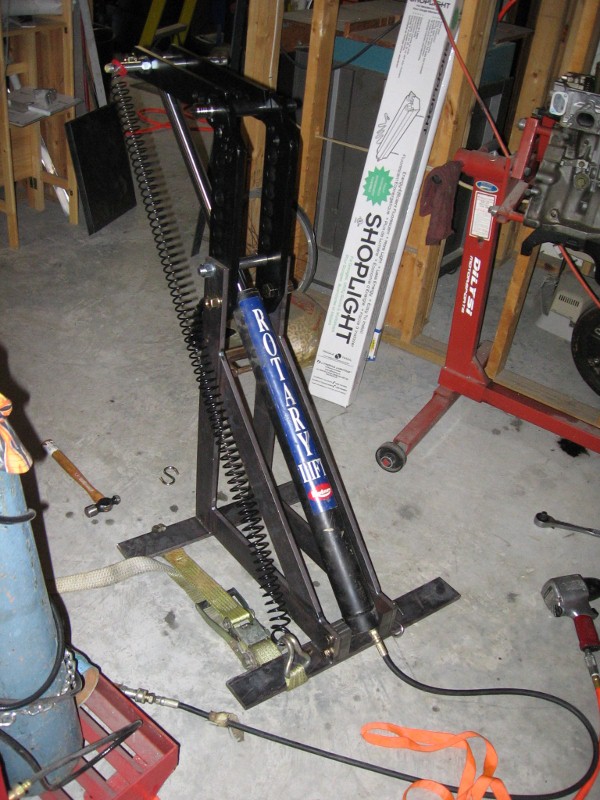
Springs and Casters mounted -
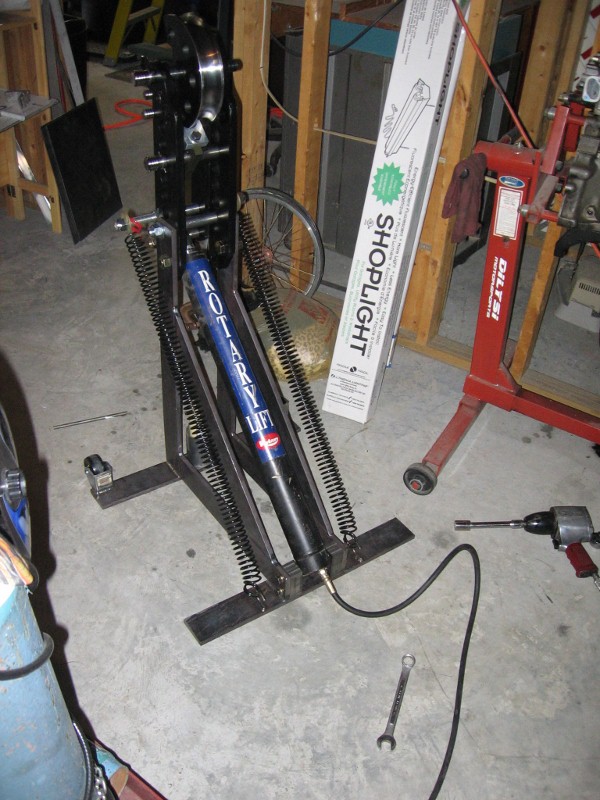
Another View -
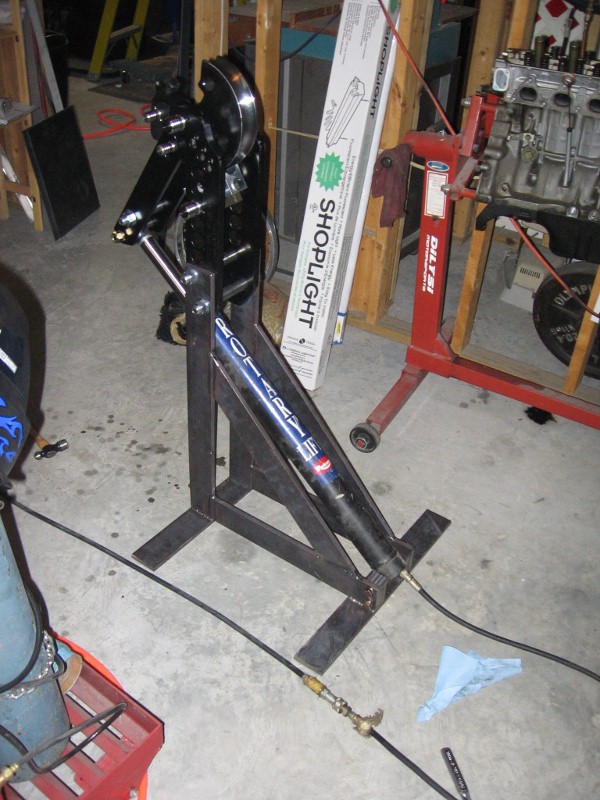
First test = Success!
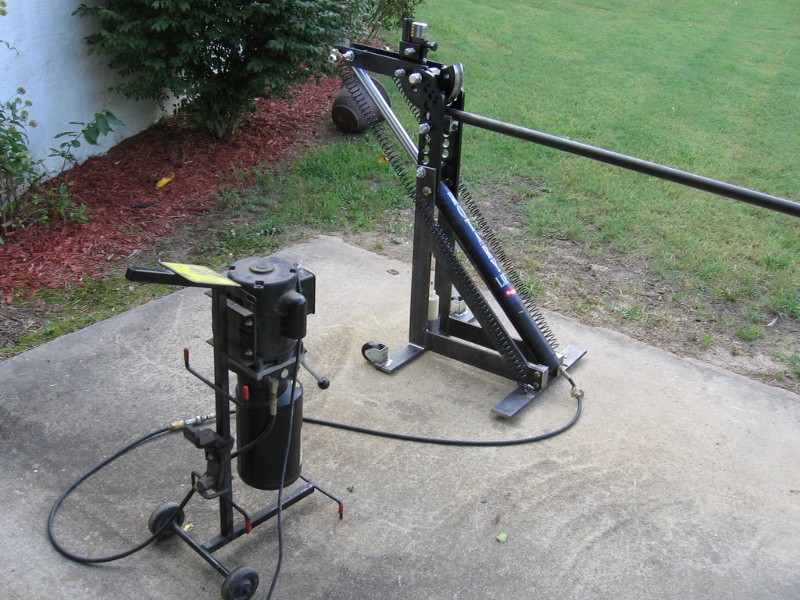
Again...
Again...
Video of the first test - http://www.youtube.com/watch?v=THSFWnf5B6Y
Those springs look scary! 
Other than that, lookin good. Nice fab work.
I was a little concerned until I looked at the ones on my garage door. These are no more stretched than those.
Why not go with two way cylinder? You've got the hydro power pack.
Try surpluss center for the cyl.
I've seen cheap homemade dies made from oak sandwiched with two 3/8 steel plates. But never made'em myself. I plan on a rotory table and a ball end mill but never tried it yet.
44
Yeah, I might upgrade to two-way at some point. I had this cylinder already, so "free" won out. I'm not sure what mods would be needed to the power pack to accommodate it. I'm sure it could be done, but right now it's just got one hose and the fluid travels both directions.
Ya it can be done but free is best. Add a little saftey and run a 3/16 to 1/4 cable thu the center of the springs leave enough slack so you can still go max stroke but the cable should catch the spring if something goes wrong.
44
44Dwarf wrote:
Ya it can be done but free is best. Add a little saftey and run a 3/16 to 1/4 cable thu the center of the springs leave enough slack so you can still go max stroke but the cable should catch the spring if something goes wrong.
44
Yeah, that's the plan. The springs actually came with safety cables, but I didn't feel like futzing with them while I was taking the springs on and off repeatedly. Once I pull it apart for a couple of small welding details (a bar to keep the cylinder from dropping too far if disconnected from the bending arm , plus a couple of die hangers) and paint, then I'll put the cable in during final assembly.
It's all fun and game untill someone losses and eye.
I just finished building a www.gottrikes.com tubing bender. It was FAR more work than I anticipated. Uses dies from www.pro-tools.com and I picked up the air/hydraulic ram from www.northerntool.com because Harbor Freight doesn't ship to Canada. I bought some conduit to practice bending before I take on the hoop for LL#2
That's never going to work unless you paint it or powdercoat it. Bling-bling, baby.
Two cans of Tremclad (Canadian equivalent of Rustoleum) in the wings.
Phase I: Build it
Phase II: ???
Phase III: Paint it!
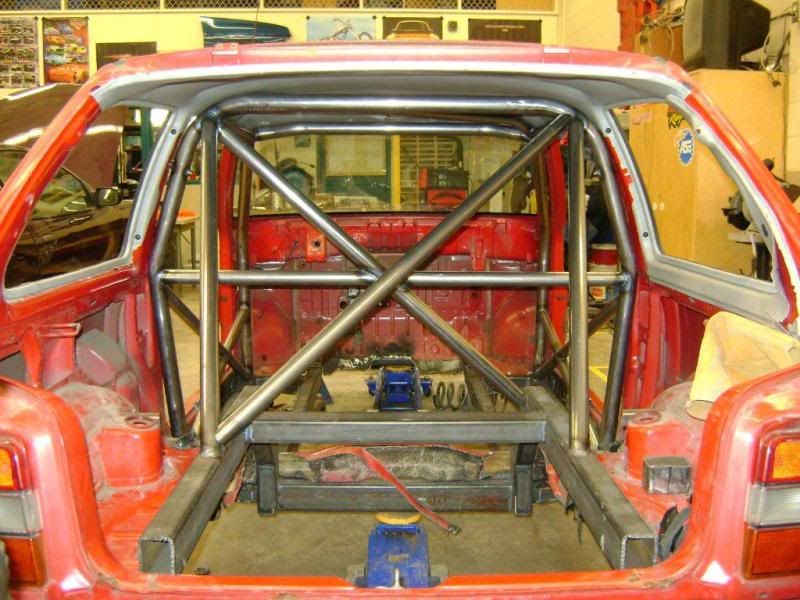
Just finished my first project using mine -
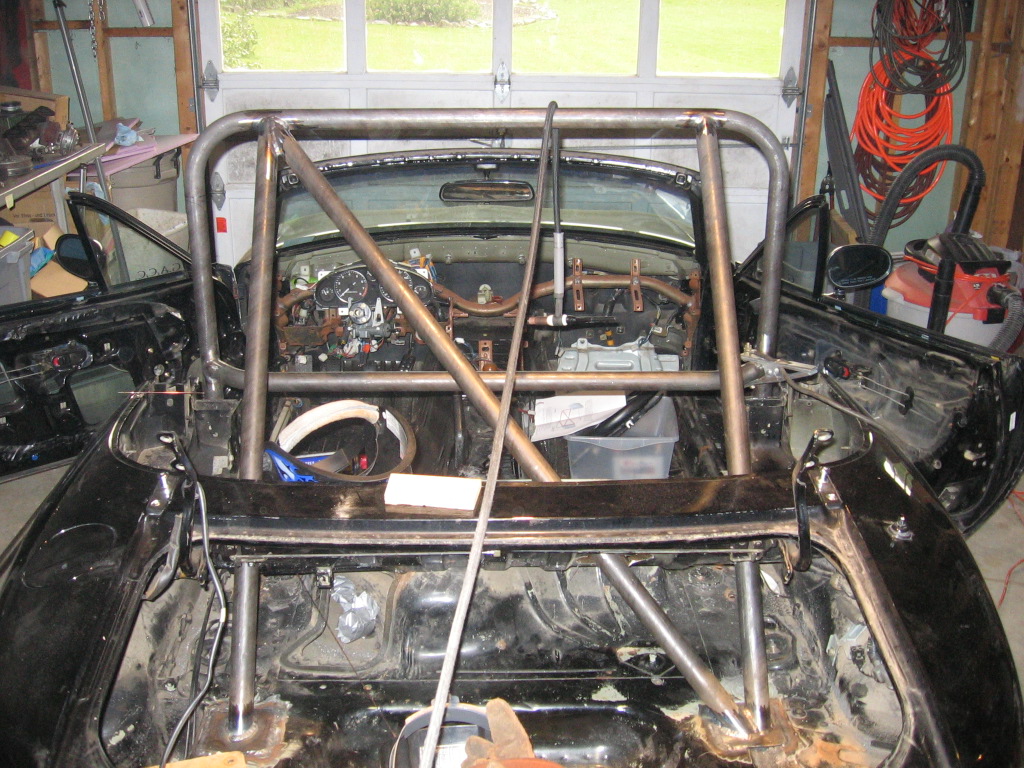
Next step - buy a MIG welder. TIG welding a cage is a torturous task.
DILYSI Dave wrote:
Next step - buy a MIG welder. TIG welding a cage is a torturous task.
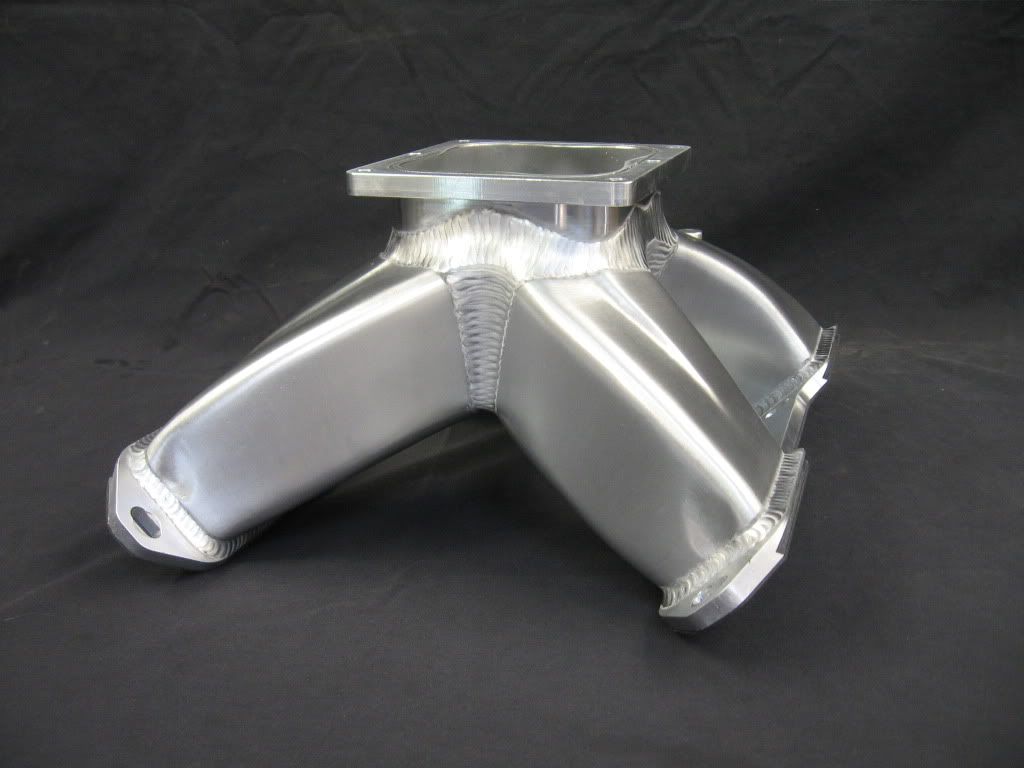
I had these tubes bent for me by a friend earlier this year. The cage and chassis are TIG'd. Indeed - torturous.
regardless, there are some dead sexy welds happening in this thread!!!
4cylndrfury wrote:
regardless, there are some dead sexy welds happening in this thread!!!
Sexy welds you say? http://www.pirate4x4.com/forum/showthread.php?t=835131