1 2 3 4 5 ... 8
volvoclearinghouse
volvoclearinghouse Dork
8/13/14 8:02 a.m.
mazdeuce wrote: You also really need to leave the windows down when you're parked. This makes a big difference. This was very common back in the day when people were either more honest or more afraid of being beaten for being dirty theives. Having the car be 90 instead of 450 degrees when you hop in is important when you have vinyl seats and babies.

When I drive my Corvair convertible, I always leave the top down when I park, and lock up valuables in the trunk. Or take them with me. My rationale is that it's so easy to break into these old cars (particularly convertibles) that door locks are more like privacy locks on a bathroom stall. If someone's demented enough to want to break into my car, I'd at least rather have them not bust a window, cut through the top, or bend the door. They can have the $1.60 in change in the center console, my $20 amplifier, and the $6 1/8" stereo cable.

volvoclearinghouse
volvoclearinghouse Dork
8/18/14 7:58 p.m.

My wife's side of the family was having a get-together this weekend...in Ohio...350 miles away...so, needless to say, nothing got done on the T&C over the past few days. However, it was a good learning experience for us, since it was our first long-distance trip with the baby and the dog. Baby was actually able to snooze in the car seat for 4-5 hour stretches, so we only had to make one prolonged stop each way for feeding and diaper changes. And Dog...well, she's a seasoned road-hound. All in all, a good little outing.

When we got back this afternoon, I was feeling restless, so I headed out to the garage with the freshly de-rusted gas tank, masked off the openings, and did this:

tc_gastank

Chrysler didn't paint these from the factory, but luckily its last 40-odd years in the desert left it fairly solid, so the shop that de-rusted it didn't have to put any goop inside to seal it or anything. My few coats of paint on the outside should ensure it lives a good, long life.

Grizz
Grizz UltraDork
8/18/14 8:21 p.m.

I will trade you my mothers Town and Country for yours.

I'm pretty sure she'd be open to it as well.

volvoclearinghouse
volvoclearinghouse Dork
8/19/14 6:58 a.m.

Does it look like this?

volvoclearinghouse
volvoclearinghouse Dork
8/25/14 7:15 a.m.

Hmmmmm....

BLOWER!

volvoclearinghouse
volvoclearinghouse Dork
8/26/14 11:14 a.m.

After waiting for 2 weeks to get the radiator and gas tank flushed out and sealed, and then spending a long weekend in Ohio with my "in-law" side of the family, and THEN enduring a raining Saturday that precluded working on the non-garaged Town and Country, by Sunday I was ready to make some real progress...

First, I replaced the sending unit in the gas tank (which I removed prior to sending the tank out to have it de-rusted)...

IMG-20140824-02280

With a new one!

IMG-20140824-02281

Next, I cleaned up and lubricated the strap that hold the gas tank into the frame, and installed it. But, of course, the original mounting J bolt broke when I took it off,

IMG-20140824-02282

so I had to source new ones. They come in pairs, since most of this generation of Mopars used two, but the wagon only needs one. So, I have a spare, for anyone else out there doing a late 60's C body wagon, if you need one...I'll sell it cheap!

IMG-20140824-02279

Now, to remove the old tank, I had to partially disassemble the rear suspension. I removed the rear leaf spring shackle, disassembled the brakes...

IMG-20140824-02277

And used the bottle jack from my F350 and some 2 x 4 to hold the axle out of the way while the tank came out...and went back in.

IMG-20140824-02283

After installing a new grommet in the fuel filler opening,

IMG-20140824-02284

I slid the cleaned and painted tank into its home.

IMG-20140824-02285

After attaching, but not fully tightening the tank strap, I inserted the fuel filler neck (also freshly painted) into it's opening and tightened the 4 screws that hold it in. Then I tightened the gas tank strap all the way.

IMG-20140824-02286

Replaced the rubber hose, and the little metal clip that keeps the hose joint together (presumably that's what it's for...) and, we have tank!

IMG-20140824-02291

There's a metal access cover that hides all this, and keeps road debris from getting thrown into the tank. After replacing that, I tackled the rear brakes. New shoes, cleaned and lubricated, honed the cylinder, and reassembled.

IMG-20140824-02288

And replaced the rear brake hose for good (cheap) measure.

IMG-20140824-02290

The rear end is back together, the fuel lines are cleaned out and reattached, and the car is back sitting on 4 wheels for the first time in weeks. It's a good feeling. Next up: Radiator installation.

volvoclearinghouse
volvoclearinghouse Dork
8/28/14 7:35 a.m.

Well, I was extra lame last night, and didn't take any pictures. But, imagine, if you will, me rolling an 800 pound propane tank from the garage to the house so the wife would have gas for her stone, to can vegetables on...

Then, imagine that our kitchen table actually split in half under the weight of all of our garden produce, so I had to clean up the mess and bring in a portable folding table until I could fix the kitchen table...

Imagine I had to work late, so I got home late anyway, so that I could flex half a day's worth of work on Friday so we could drive up north to bring our 11 week old baby to visit my 97 year old grandfather...

And then imagine, somehow, I still managed to install the radiator into the Town and Country, the lower radiator hose, discover the new upper radiator hose I'd gotten from Rock Auto didn't fit, and remove the valve covers and rocker shafts to soak in a tub and clean off the sludge.

AngryCorvair
AngryCorvair GRM+ Memberand UltimaDork
8/28/14 12:36 p.m.

it would take an active imagination to imagine all that. i got hung up on the folding table supporting all that produce.

volvoclearinghouse
volvoclearinghouse Dork
8/28/14 1:14 p.m.
AngryCorvair wrote: it would take an active imagination to imagine all that. i got hung up on the folding table supporting all that produce.

You're right. I really should have gotten pictures.

The folding table is one of those HD things from Lowes. They're like $30, 3' x 6' or so, and sturdy enough to survive many a LeMons race's worth of use. Sturdier, apparently, than our nice dining room table.

We got a LOT of produce this year. Holy crap. We're thankful for the harvest, of course, but we have vegetables enough to feed 4 families. And it all comes at once.

volvoclearinghouse
volvoclearinghouse Dork
8/29/14 7:26 a.m.

Heading to NY this afternoon to visit my side of the family...really wish the T&C were road-ready, but it still needs a few things and a few thousand miles of commuter- duty testing on my part before I'll haul off and drive it 5 hours with my family inside. sigh I guess it'll be the F350, then.

rotard
rotard Dork
8/29/14 7:50 a.m.
KyAllroad wrote: And the concern was mileage? Safety? Hmmmmmm Cool car but as an honest family truckster it'll want a LOT of work. Good luck.

Cars of that vintage aren't what I would call safe.

Adrian_Thompson
Adrian_Thompson PowerDork
8/29/14 9:02 a.m.

Somehow not seen this thread until now. YOu sir are awesome. Can't wait to see this thing dominating the roads. I love the thought of this with fully refreshed mechanicals but wearing it's patina with pride rolling down the road with baby in the back and dog hanging it's head out the back window.

volvoclearinghouse
volvoclearinghouse Dork
9/8/14 11:12 a.m.

Since I'm waiting on a few parts to finish the engine work, I decided to do something about those tiny tires the Town and Country came to me with. The previous owner had decided to take 15" steelies, paint them black, and wrap them in 205/60R15 tires. The stock size on this car works out to be something close to a 205/75R14, so these replacements just didn't have enough sidewall to them. They do, however, look pretty good on my Volvo wagon:

IMG-20140905-02324

Bolt pattern is the same (5 x 4.5) and even the old Dodge poverty caps look pretty sharp!

The 122 wagon had one pair of 205/75R14 in the back, and this car had the other pair:

IMG-20140905-02326

The 122 wagon's front tires were a somewhat-worn set of 165SR15's, which went on the front of the blue 4 door 122, and the nearly new 165SR15's on the front of the 4 door 122 went on the back axle. Volvo hubcaps round out the OEM look.

Then, finally, the four 205/75R14's went on the Town and Country:

IMG-20140905-02325

The wagon now sits higher, looks better, and will accept some proper 14" wheelcovers. Also, the 60-series tires that were on the T&C had a lower weight rating than these whitewall 75-series guys; the heavier duty tires on the big Chrysler give me a bit more peace of mind.

David S. Wallens
David S. Wallens Editorial Director
9/8/14 11:35 a.m.

I like big wagons.

volvoclearinghouse
volvoclearinghouse Dork
9/8/14 2:03 p.m.
David S. Wallens wrote: I like big wagons.

And you cannot lie.

Richard Nixon
Richard Nixon SuperDork
9/8/14 2:09 p.m.

Huh. I would have thought that would have come with 15s stock.

volvoclearinghouse
volvoclearinghouse Dork
9/9/14 7:52 a.m.

Yeah, 14's stock. About the only thing you saw 15's on in the 60's were huge, heavy yachts like the Imperial, or sports cars/ imports. Of course, if I decide to put disc brakes on the front, I'll probably have to go back to 15" wheels. We'll see. The drum brakes on this thing are really freaking massive. Like 11".

mazdeuce
mazdeuce UberDork
9/9/14 7:55 a.m.

The drums on my wagon are the same way. Big enough to curl up and take a nap in. Feel isn't spectacular, but they will give as much braking as the tires can handle. These are still very much 'plan ahead' type of drivers.

volvoclearinghouse
volvoclearinghouse Dork
9/15/14 11:26 a.m.

Many steps forward, one step back.

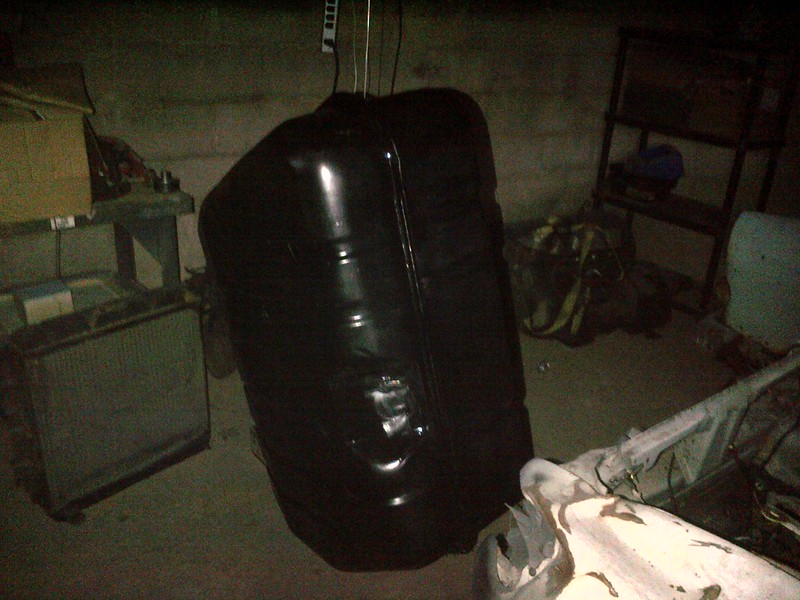
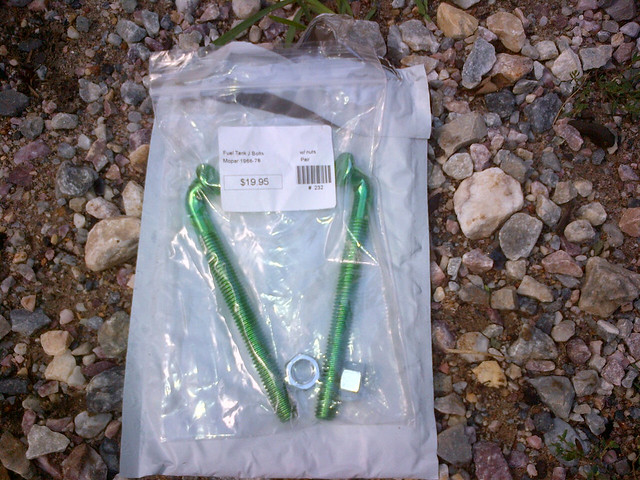
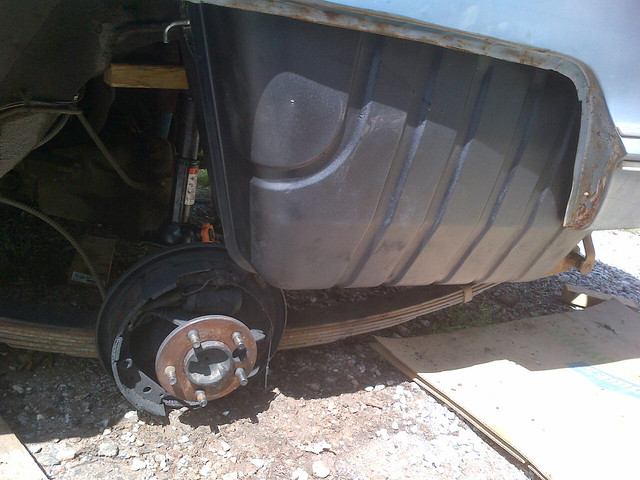
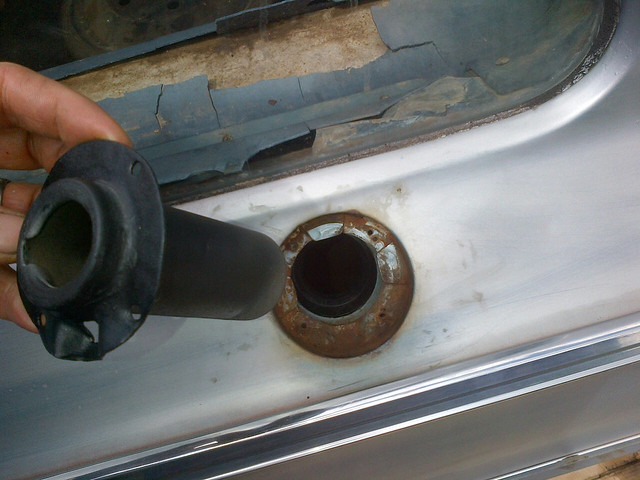
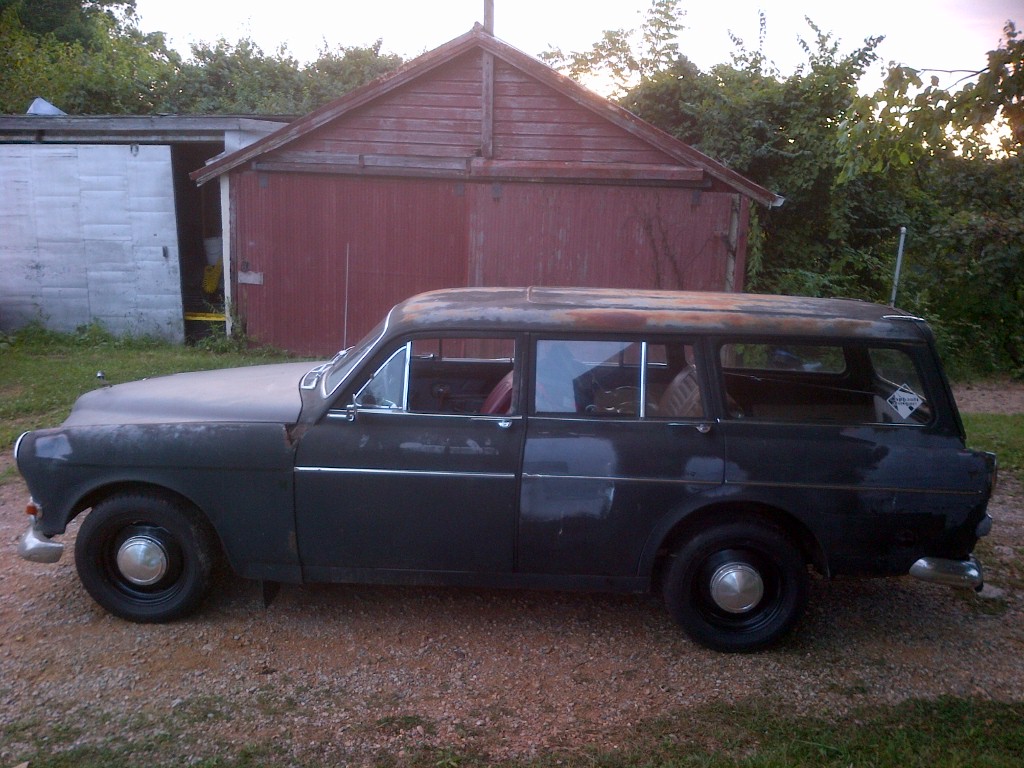
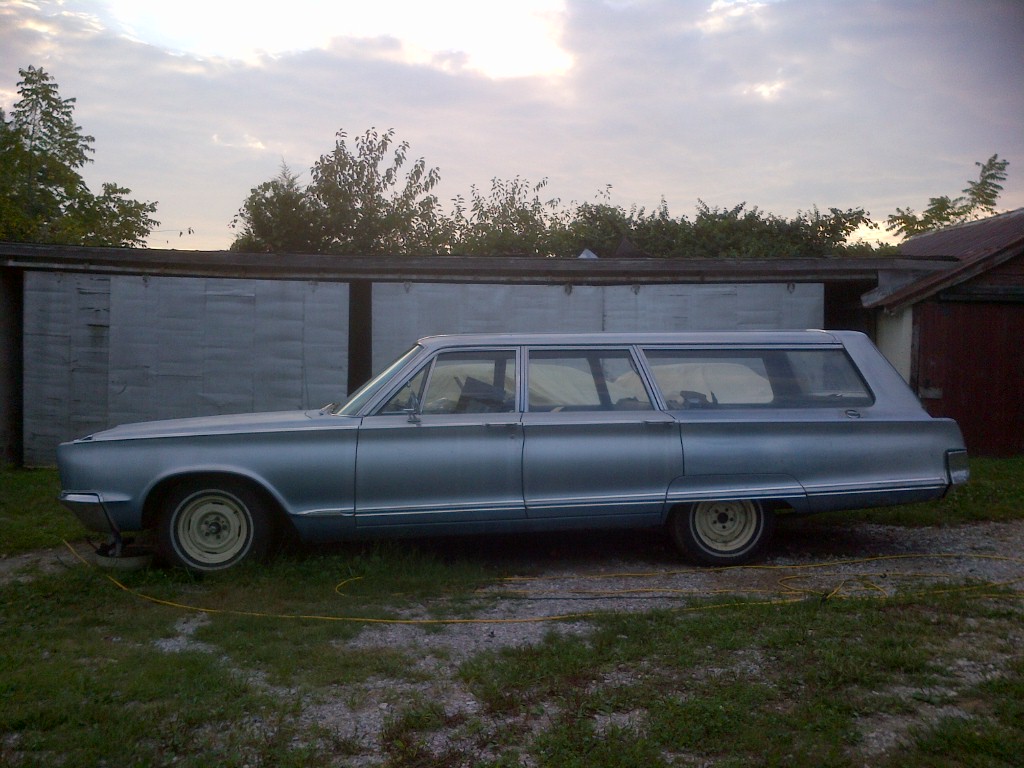
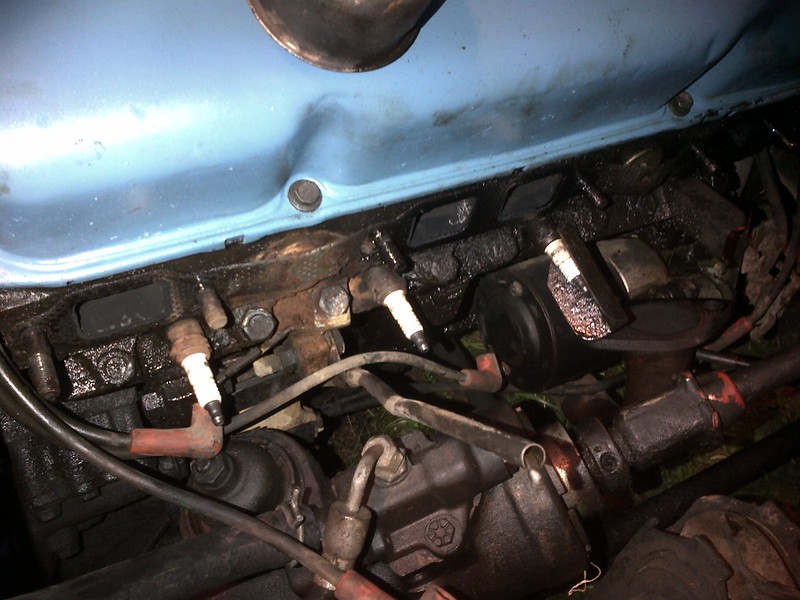
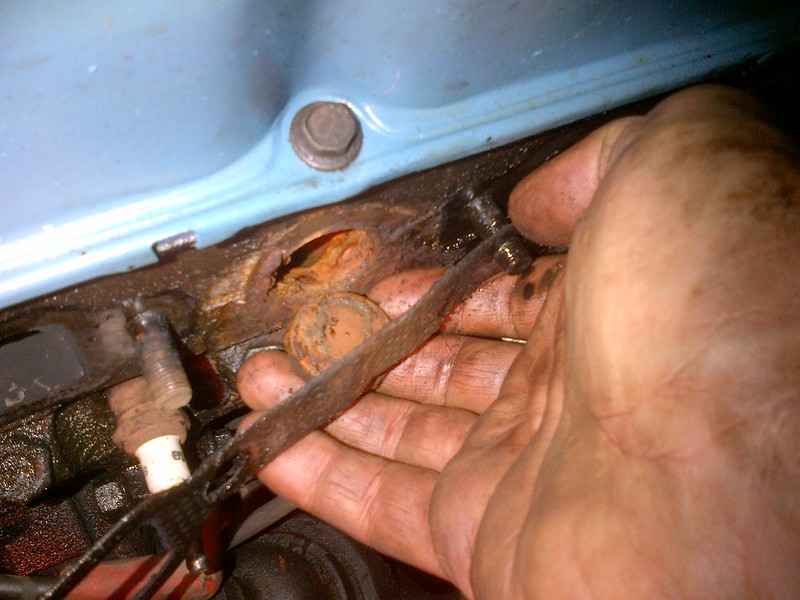
Progress has been a bit slow on the wagon since the gas tank and radiator install. I have this:
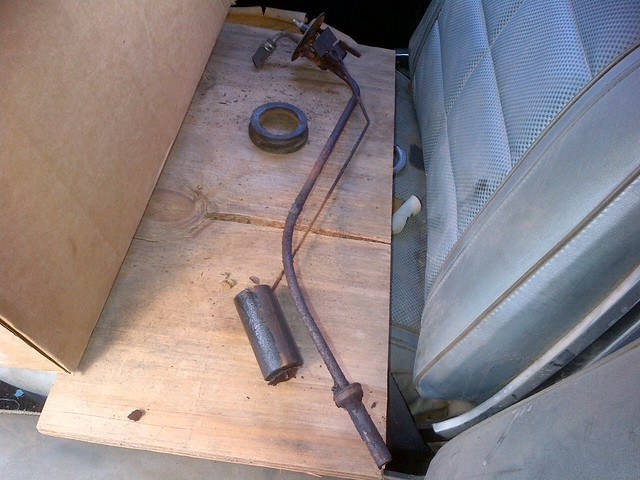
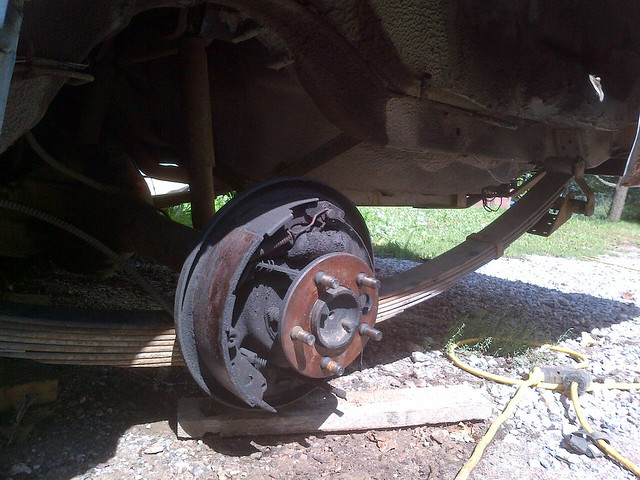
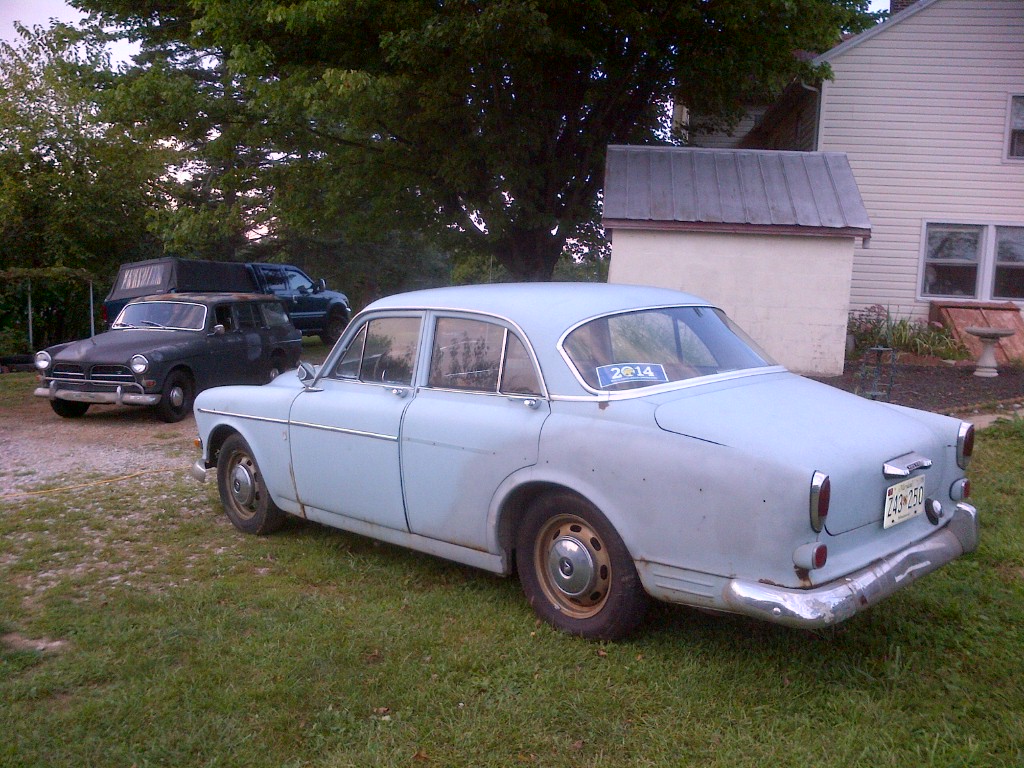
IMG-20140913-02340

And this:

IMG-20140913-02356

To thank for that. But this Sunday, when the sun was out and the temperatures were in the Goldilocks zone for outside car-workin'-on, I managed a few hours of good progress.

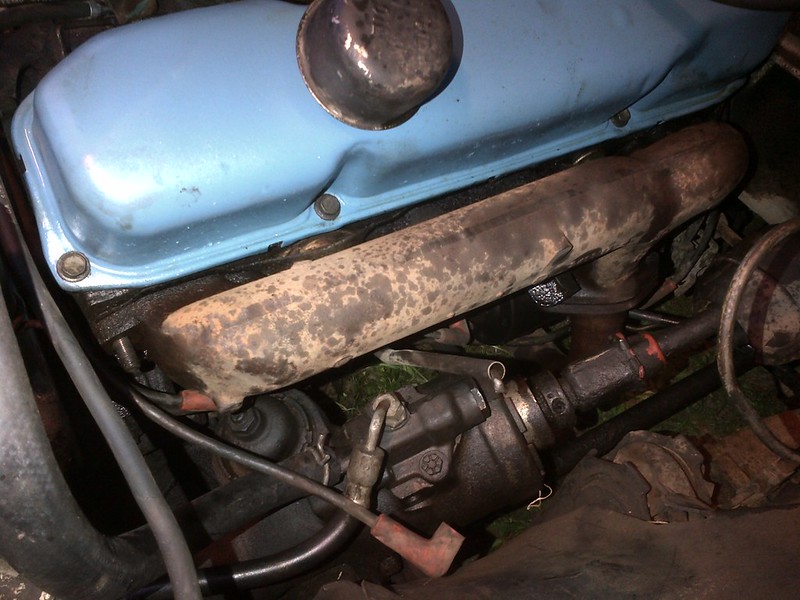
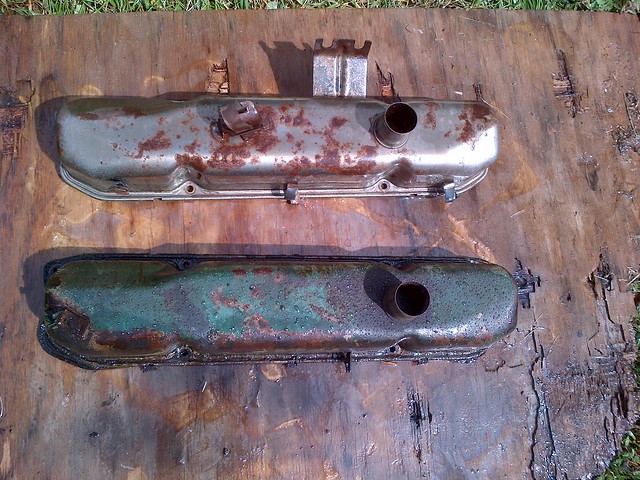
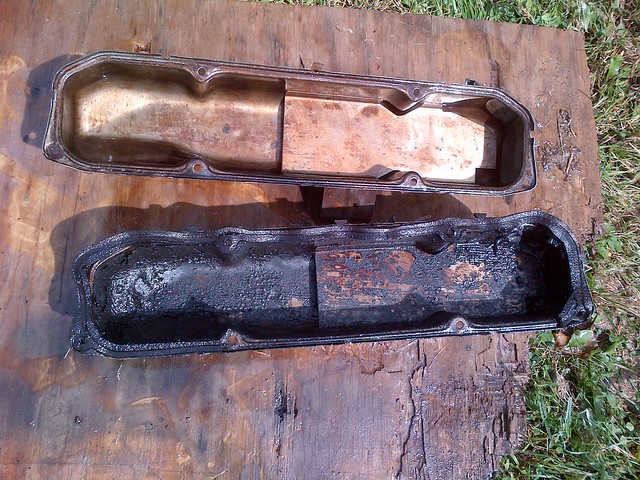
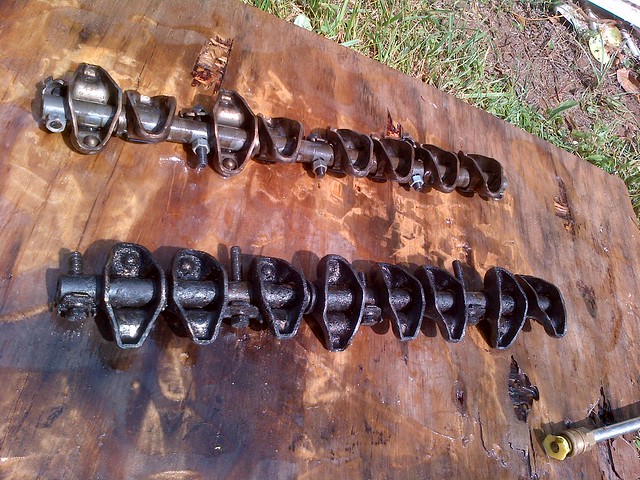
Chrysler was known for many great engineering achievements in it's time, however, relatively mundane tasks seemed to escape their competence. I have never, for example, seen a Chrysler engine that did not leak oil from the valve covers. The 383 in this Town and Country was no exception. And when I removed the valve covers to install a set of fancy, high dollar Moroso synthetic rubber gaskets, I found the valvetrain encrusted in thick black gunk. The valve covers and rocker arm assemblies soaked in solvent for a week, and then I blasted them with the pressure washer. Some amazing before/ after shots:

IMG-20140914-02361

IMG-20140914-02362

IMG-20140914-02363

Then I attacked the engine with a shop vac and a toothbrush (an old one, not the one I currently use for dental hygiene) to get as much crud out of it as possible. This interesting apparatus, made from plastic pipe, rubber hose, shop rag, and electrical tape enabled me to reach deep within the engine to suck out loose sludge.

IMG-20140914-02364

I decided against using solvents in the engine to break up the sludge, not wanting a deposit to become dislodged and find its way into a small oiling passage. Over time, frequent oil changes and long, high speed drives should remove the sludge remaining. I drained out the old oil, which didn't look terribly bad, and the oil pan, from what I could see, wasn't a sludge-encrusted mess.

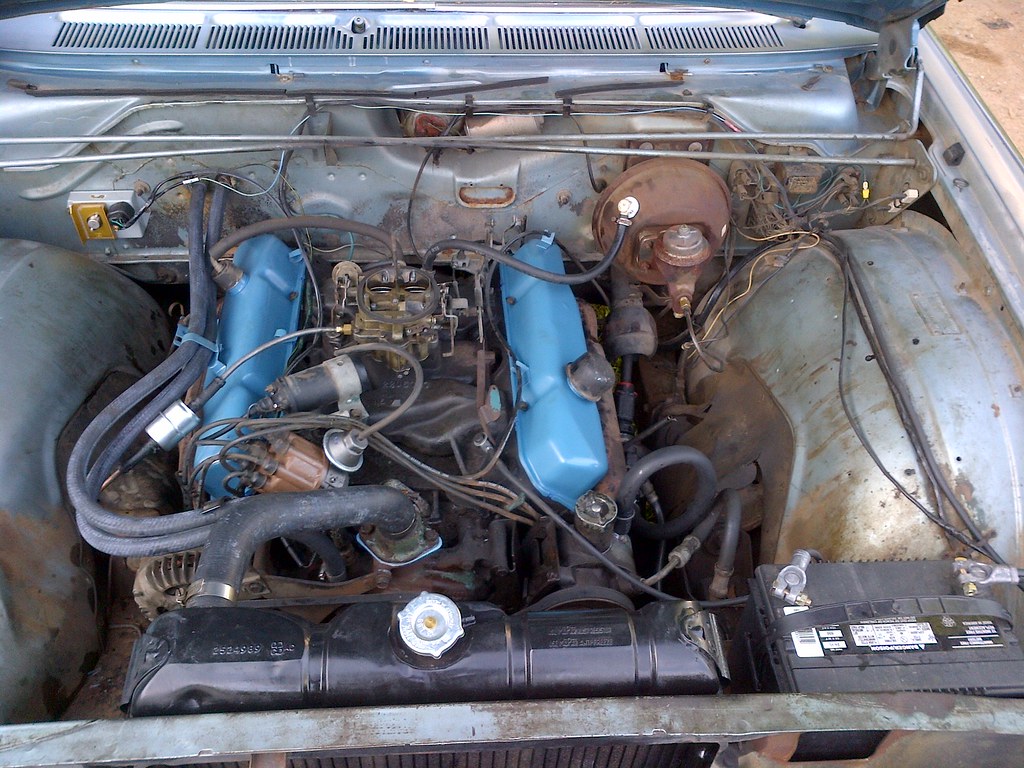
I did a bunch of other stuff to basically replace rubber parts, clean things, and get the engine back together. I painted the valve covers, and the engine's starting to look rather good, now:

IMG-20140914-02367

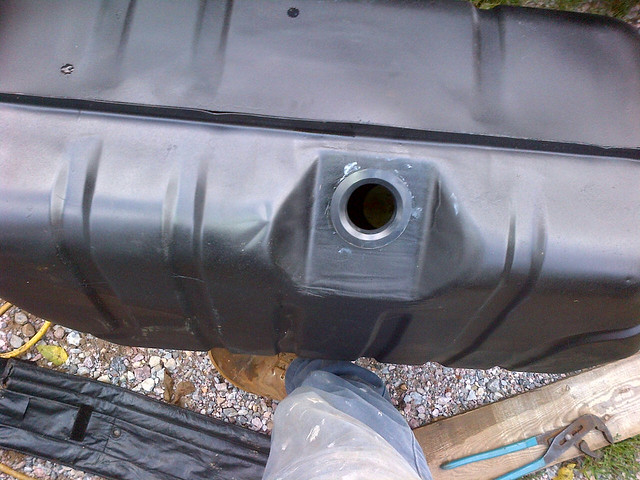
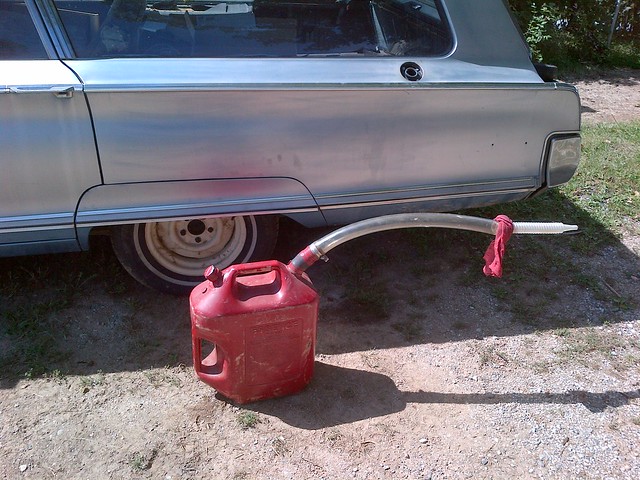
A little gas in the tank, courtesy a slightly-modified LeMons fueling rig...

IMG-20140914-02365

And, hey, it's getting dark, let's fire this thing up! Wait, why won't it start?

After several minutes of cranking, backfiring, and general "WTF"ing on my end, I decided to crack the valve covers open and make sure everything was OK inside. With the coil wire removed, I cranked the engine at the solenoid, and all the valves were doing their happy dances. So...what's the matter? I did finally get the engine to start and run, but it sounded horrible- like it was running on a number of cylinders not equal to 8. Or even 7.

Somewhere back in my head I remembered futzing about with the car one day a few weeks back and accidentally bumping off a couple of spark plug wires. Sure enough, when i checked the cap...#8 and #2 wires were switched.

We all know what happens next, right, Crank, vroom, etc? Which it did. Horray! And then, once the thermostat opened...wait, why is it spraying water everywhere?

Oh.

One of the freeze plugs behind the exhaust manifold on the left side of the engine was spitting out water. Guess what the next project is going to be?

Timeormoney
Timeormoney Reader
9/15/14 12:32 p.m.

outstanding build

4g63t
4g63t HalfDork
9/15/14 12:50 p.m.

SWEEEET you on the drydock www.cbodydrydock.com

volvoclearinghouse
volvoclearinghouse Dork
9/17/14 7:31 a.m.

I had exactly 1 hour last night between going for a walk with Mrs. VCH, the dog, and Baby VCH, and when dinner was ready. (Mrs. VCH needs a walk occasionally to get the blood moving and replenish the Vitamin D...and the dog needs it to run some excess energy out of her...and the baby, well, she's just along for the ride).

I decided to take on the driver's side cylinder head freeze plug leaking issue. Here's what the situation looked like:

IMG-20140916-02369

See that freeze plug sort of poking out from behind the exhaust manifold gasket? That's the leaker there. It's right underneath the second-from-the-left most valve cover bolt. So, the exhaust manifold had to come off.

I would just like to add here, although I'm sure I've said this before, it bears repeating: I LOVE working on cars that spent their whole lives in the desert. Do you know how long it took me to remove the exhaust pipe from the manifold, and the manifold from the engine? Probably about 20 minutes, and that included running back and forth to the garage to fetch tools. Nothing was rusted on, everything came off with a little squirt of PBlaster and simple hand tools. If this had been a northern car I would have had to break out the torches, the breaker bar, let it soak overnight in penetrating oil, curse, shout, bust 3 knuckles, and then grab the angle grinder and cut the stupid thing off. I would now be surfing eBay for new parts, rather than typing this.

/digression mode off

So here is the 383 with it's left exhaust manifold off:

IMG-20140916-02370

Again, the two freeze plugs are buried there under the gasket, directly beneath the two valve cover bolts. Look at that back freeze plug for a minute. It wasn't leaking, but...W-T-F??? That's no freeze plug. It looks like a transom plug for a boat. Somehow I doubt that rubber plug has a Mopar part number on it...

After removing the gasket, I was braced for a long, drawn out fight with a rusty, leaking freeze plug. Oh, wait...

IMG-20140916-02371

It popped right out! OK, "popped" isn't the right term...more like "fell". I cleaned out the mating surface on the head, and then dug the transom plug (mentioned above) out with a flat bladed screw-driver. The old freeze plug actually wasn't badly rusted, and the fact that it had a "Dorman" P/N on it leads me to believe it was previously replaced and likely poorly installed. Off to Rock Auto for two new freeze plugs, an exhaust gasket, a manifold gasket, and another refrigerator magnet.

Ah, it's 7:30, time to come in for dinner! On the menu tonight: Liver, ginger vegetables, and Quinoa. And one of these:

AaronBalto
AaronBalto Reader
9/18/14 12:59 p.m.

I love this thread, and I can totally emphathize with the Automotive ADD. Keep wrenching and posting!

volvoclearinghouse
volvoclearinghouse Dork
9/19/14 6:43 a.m.

In reply to AaronBalto:

Thanks for the encouragement. I just ordered the freeze plugs and exhaust gasket set from Rock Auto, but they won't be here for a week or so. :-( Also, the freeze plugs R/A listed for the cylinder head were wrong. I was suspicious, and then checked when I got home. The 383 head wants 1.250 plugs; R/A specified something...well, not that. Found out the Dorman part number I needed was 555-024. Luckily Rock lets you search by P/N, too. And, of course, it was less expensive, with shipping, to buy a bag of 10 of them rather than just two.

Anyone need any 1.250" freeze plugs? Cheap!

volvoclearinghouse
volvoclearinghouse Dork
9/21/14 6:11 p.m.

Rock had estimated parts delivery on September 26th, but guess what showed up yesterday? Yep. One exhaust manifold set, in a comically oversized box, and the freeze plugs - plus a LH thread lug nut for the left rear wheel, which only had 4.

With no leaks from the engine, and all the nuts in place, how can such a car not be great?

Now I just need a minute to put it together...

1 2 3 4 5 ... 8

You'll need to log in to post.

Our Preferred Partners
IiIZtfhyuEjgGofDxDeRVYxAkB7fTj1pD8KmH0dNKypq7EwrcHuJYJRBVPMjYwuK