Specifically, how does one build a template/make the right cuts/etc. for a new exhaust pipe?
The Rallyx Bentra needs a new midpipe. At the same time we would like to replace the flange on the bottom of the header with a v-band. Possibly the same with the flange at the back, but that one is a lot less critical. There will be a small flex pipe in the system that could account for some small misalignment, but I'd like to be as accurate as possible.
Surely there is a trick to doing this the right way?
We have a cutoff saw, tailpipe expander, a crappy mig*, and the parts we need. Anything I a missing?
*crappy mig only used to tack it together. When its done we will unbolt and bring it to work to use either a good mig or a tig.
I typically start from the engine and work backwards, or if making a junction between two sections work from whichever end can move the least. If you can make good, square cuts you should have no problem tacking things together as you go.
A good chop saw should would for those 90’s. Make damn sure it’s dead nuts 90° when cutting in the middle of a radius. Otherwise the pipes end up a different inside diameter.
Not much of a trick to any of it, just lots of careful, tedious cutting, checking, recutting, rechecking, trimming, tacking, cutting apart...
Wrap a zip tie around your tubing to mark cuts and make sure they're perpendicular to the centerline of the bend.

NOHOME
UltimaDork
1/30/18 3:46 p.m.
figure out how to make cuts that are perpendicular to the tube when cutting a bend. Otherwise you wont have a round end to weld to the next bit.
Have a piece of 90 or 180 bend that you have marked off every 10 degrees or so. That wil help you get around corners knowing where to cut.
Oh....and most important, turn the car on its side cause it sucks to do this while laying on your back!

Pete
Use as many simple angles as possible ie 15, 30, 45, 60, and 90 as these are the most common bends you'll find. I tend to work back to front as your downpipe is a constant this has bitten me once or twice on stuff that had multiple banks. Save all your mistakes they make good visual aids for next time. Blue painters tape works well to hold pipes together while you look at the assembly and for tacking high heat PEX tape has become the "cool" thing in fabrication but the stuff is expensive. A few pieces of TIG rod can help you with complex angles, bend it where it looks right and measure on the bench.
The $90 bench belt sander from Harbor Freight is worth its weight in gold when you inevitably cut your last stainless 180 slightly off center because you ran out of beer and can no longer focus, as is a deburing tool.

A while back I bought a "kit" from Speedway for about $150 shipped that comes with 4 mandrel bends each of 45, 90, and 180s, plus 4 lengths of 48" straight tube. 16 gauge mild steel.
I have been working my way through it for a couple years. It's so cheap, I just do trial and error. Then I run it for a while and see if I like it before I finalize it in aluminized. Or just decide to run it until it rusts out. I wish I could find an exhaust paint that works, but I haven't so far.
My secret weapon is a Lisle exhaust tubing stretcher. It's pricey, like $100 with an extra mandrel to let me do bigger sizes of tube. And it requires a fairly kick-ass impact wrench to run it. But I can make any point on the mild steel tubing into a slip fit, which is so, so nice for trial and error; I can slip the joint to rotate and lengthen/shorten for final alignments on the car.
For a while, I didn't even have a band saw. I just marked the line with tape, hacked it off with an angle grinder, and cleaned it up with a bench-top disc sander. Obviously I'm not making my own headers here, but the rest of an exhaust system isn't rocket engineering.
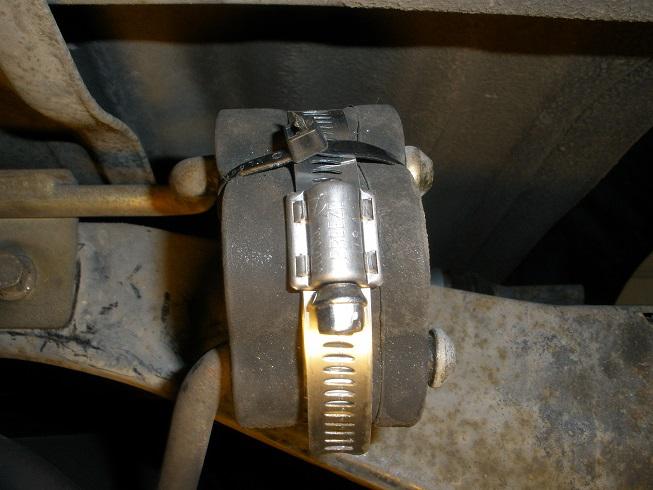
I have never messed with a v-band and I probably wouldn't be able to get one lined up good enough to clamp. I have been using ball/socket clamps with a little Permatex for header outlets and they are awesome. Sometimes though, for the clamp flanges I find I need to use the special exhaust bolts with the spring keepers, if the headers keep rattling the nuts off regular bolts. Usually I don't need them, but I have on a V8 that I rev to redline over and over at the track.
Also, stainless band clamps seem to work just great over a slip joint with a 1.5" overlap. I coat the tubes up with exhaust anti-seize before I slide them together and put the clamp on, and it's no problem disassembling them months later.
I think it's smart to use a little flex insert in a tube that will get lateral stress regularly, but otherwise I don't mess with it.

plain92
New Reader
2/6/18 4:48 p.m.
Of course each one is a one-off and your first try won't be as good as the next but I find it's good to get the car as high up as you can (safety) and do all the fit and tacking in place on the car. In other words just bolt the flange to the header and start making Legos pretty much. Sharpie, masking tape, wire cup wheel, a specific 4 1/2" grinder, thin cut discs, flap wheels, a 10" or 14" chop saw if you don't have something nicer, belt sander, face shield and/or masks are all good to have.
Tack enough so it holds itself and you know exactly where it will be (install new engine/transmission mounts beforehand) then unbolt it and weld up the front section. I've used 3 bolt 2.5" stamped flanges with grade 8 7/16" fine thread bolts with lock washers and copper anti-seize before if you aren't using v-bands. The ball socket or ball and spring work good too. Ordering overlap or expanded tubing makes lap welds much easier than butt welds both in terms of fitting them and not burning through or leaking as easily. If you are comfortable with using a green/blue/whatever 80 grit, 120 grit belt sander to lightly resurface all the flanges it is standard practice in my book. You don't need to hand polish this stuff but even a cheap painter's sanding block will easily help you detect whether the flanges are warped at all. 'Sandpaper glued to glass' used to be or is in some old service manuals for some stuff, also not necessary here but neither is 'milling' every flange.
It's up to you if you want to go out the wazoo with heat shielding products, fiberglass wrap, high temp paint etc. I don't mean to be demeaning, if you can afford it your feet and trans tunnel will surely thank you. Having a flex pipe section or ball socket(s) and firmer than usual exhaust hangers is also a good idea, where cabin noise is directly related to exhaust hangers at least a little. If it ends under the car it will be much louder, and if it extends out from the bumper line it will be directional noise in other words side or rear exit etc.
This is actually a bit noisy at a certain idle, I do not think I would recommend it for a street car or daily:
I've only done it twice with welding up from mandrel bends. I made a Y pipe for a LS conversion and I made a 3" stainless exhaust for a Torino.
Eyeballing is the most important step. Also, I have a ponytail. I have a supply of ponytail bands in my toolbox. I have found ponytail bands to be instrumental in the eyeballing process, as their elastic yet non-grippy construction means they generally will form a perfect circle in a bend, and you can use them to eyeball where a cut should be. I'd then use a Sharpie to mark both sides of the band, and cut between them. No chopsaw for me, I get to use a porta-band and/or a reciprocating saw.
One more vote of confidence - I taught myself to weld with a cheap stick welder, a hacksaw, and an assortment of pipe & mandrel bends from Summit. I fabbed a simple side exit exhaust for my turbocharged Volvo in no time. I did spend a lot of time measuring, cutting, and fitting each section as I tacked it all up, but it ended up being a thing of function (<-- note that I didn't say beauty.) I used a short flex section where the pipe transitions under the car, and welded up the v-band connections and O2 sensor bung. The welds look awful, but it's worked for five years now, breathing fire and all.
It's hard to screw this up - and if you do, you use all the same tools to correct the problem.

tuna55
MegaDork
2/7/18 8:48 a.m.
I did one, and it went pretty OK. It's not perfect, but it's just an A->B DD. If I did it again, it would be very good. It took a night or two, and I made it from leftover mandrel bent scrap. I eyeballed, tacked, and just laid it out. It's really not that bad. BBQ paint does a fine job of protecting the result.
Hope this isn't a thread jack, but what paint did you use, and how did you apply it? I've tried 2 different kinds and done all the recommended prep & cure steps, and the stuff still flakes off in three months.
tuna55
MegaDork
2/7/18 9:20 a.m.
JBasham said:
Hope this isn't a thread jack, but what paint did you use, and how did you apply it? I've tried 2 different kinds and done all the recommended prep & cure steps, and the stuff still flakes off in three months.
Whatever brand BBQ paint they had at Lowes. I cleaned it with vinegar I think, and not that carefully. I painted everything from the cat back and it's held up pretty well as far as I can see.

Vigo
UltimaDork
2/7/18 10:18 p.m.
Malibuguy does nice exhaust work in his shop, may want to msg him if you're still looking.
https://grassrootsmotorsports.com/community/malibuguy/
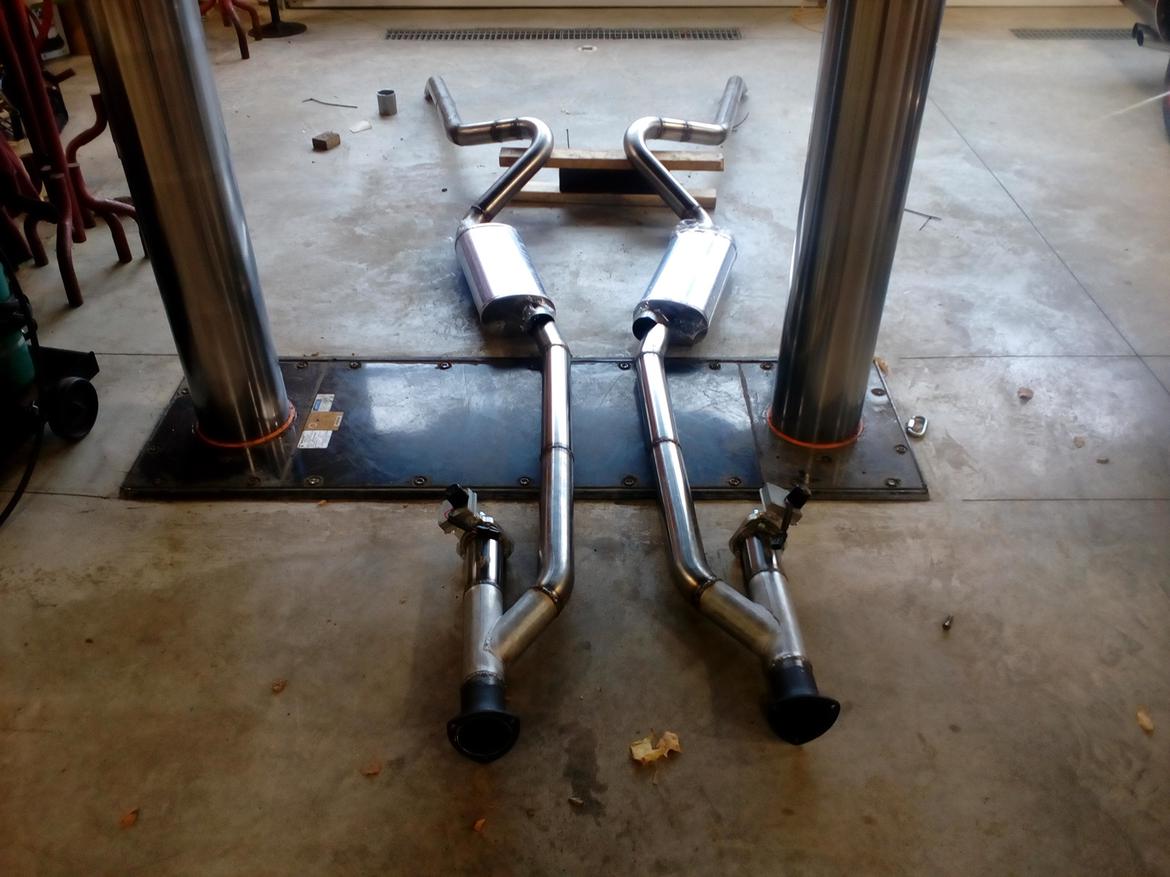
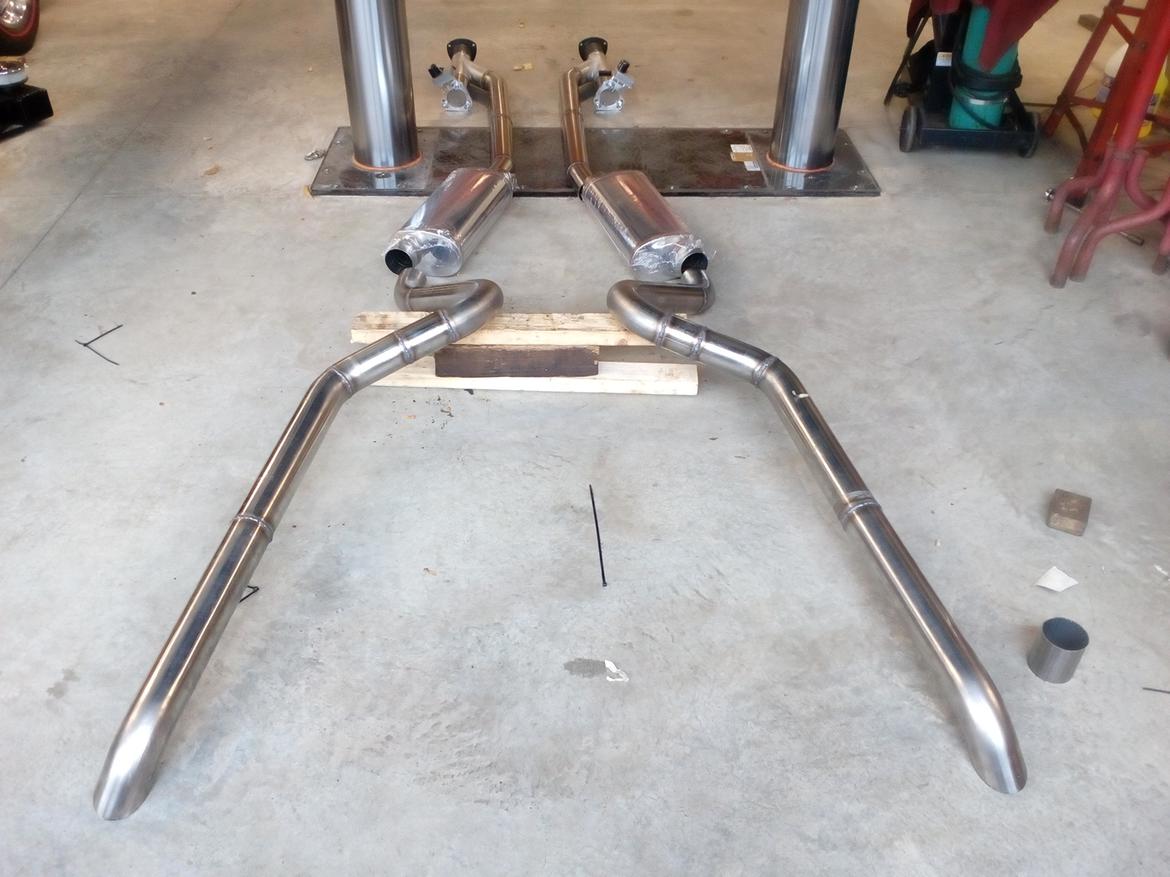
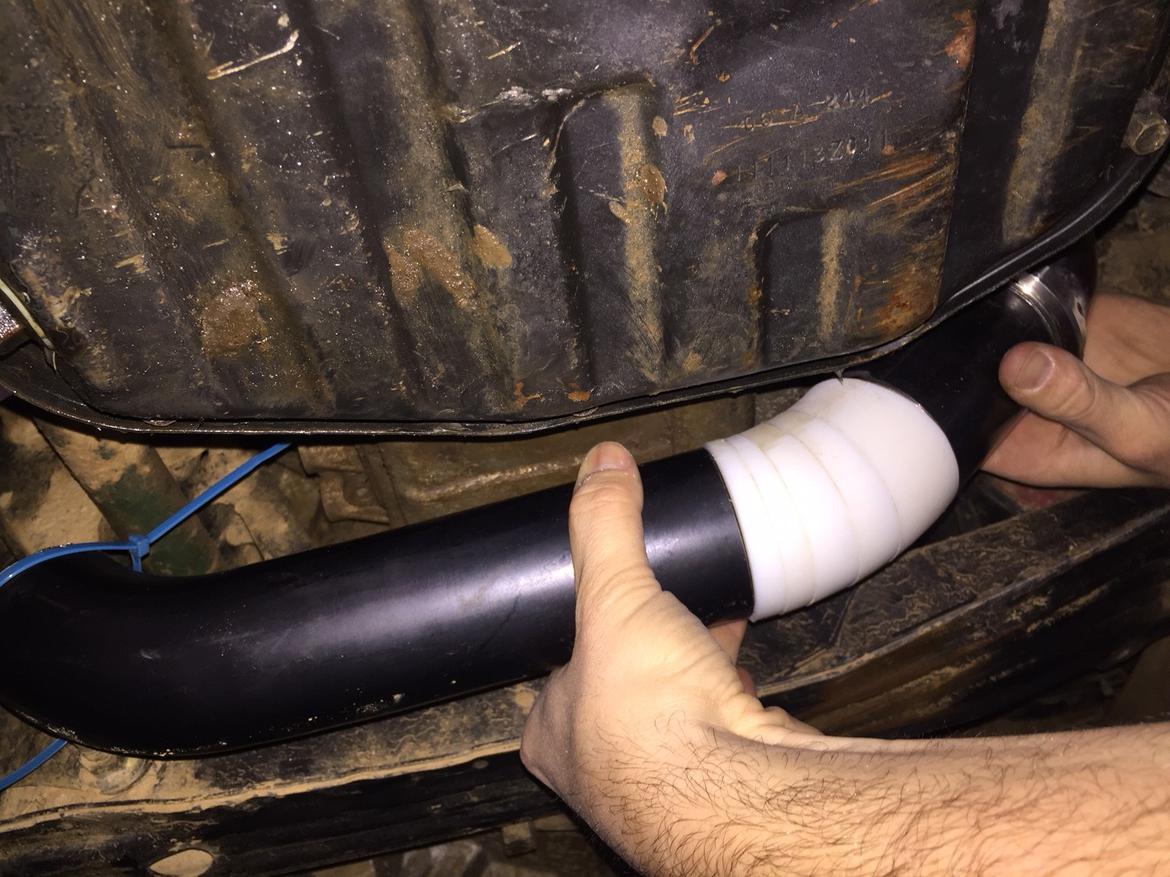
Progress. You can see a piece of the complete POS mid-pipe section that was on the car previously.

I made myself a wonderful tool to help with nailing the bend angle cuts. I'll share more on it later.
Did my first one this weekend. Will build the turbo downpipe this weekend. The back "Y" is a Stainless Steel Bell system, I had to go from the middle of the car to the tight space between the engine and frame. Not as pretty as the welds done by Bell, but it is all stainless steel. Chop saw, sander, good mig is all you need. Just go piece by piece and take your time. I probably fit this 5 times until I had the final pieces in place. You don't have to put car on the side if you can just remove the body..... I knew this was going to be 100 times easier if I did it now and not when the body was put back the frame.
kb58
SuperDork
2/15/18 11:06 p.m.
Phfff, I thought this thread was going to be about header fabrication. You know, real fabrication :p
plain92
New Reader
2/16/18 12:14 a.m.
Good job ProDarwin that looks great. With that v band you can start selling them for $700 a pop and I bet it only took a couple hours to make, just add a little high tech extreme performance coating bbq paint from OSH and you'll be set.
ProDarwin, I gotta build a midpipe and tailsection this weekend, so if you can give me a hit about your angle cutter, I'd love to hear it.
Byrneon27 said:
Blue painters tape works well to hold pipes together while you look at the assembly and for tacking high heat PEX tape has become the "cool" thing in fabrication but the stuff is expensive.
Do you have a link to the PEX tape? All I can find is heat tape for PEX, not a heat resistant tape.
plain92
New Reader
2/16/18 3:34 p.m.
Hey ProDarwin that is awesome! I don't use CAD, mainly because it isn't in my job and for any given one small project it's a big investment to start designing things on the computer, but you did both the design and execution on both ends which is a rare talent all in all. Pardon my meandering but some folks are totally clueless on one or the other or backwards on both...
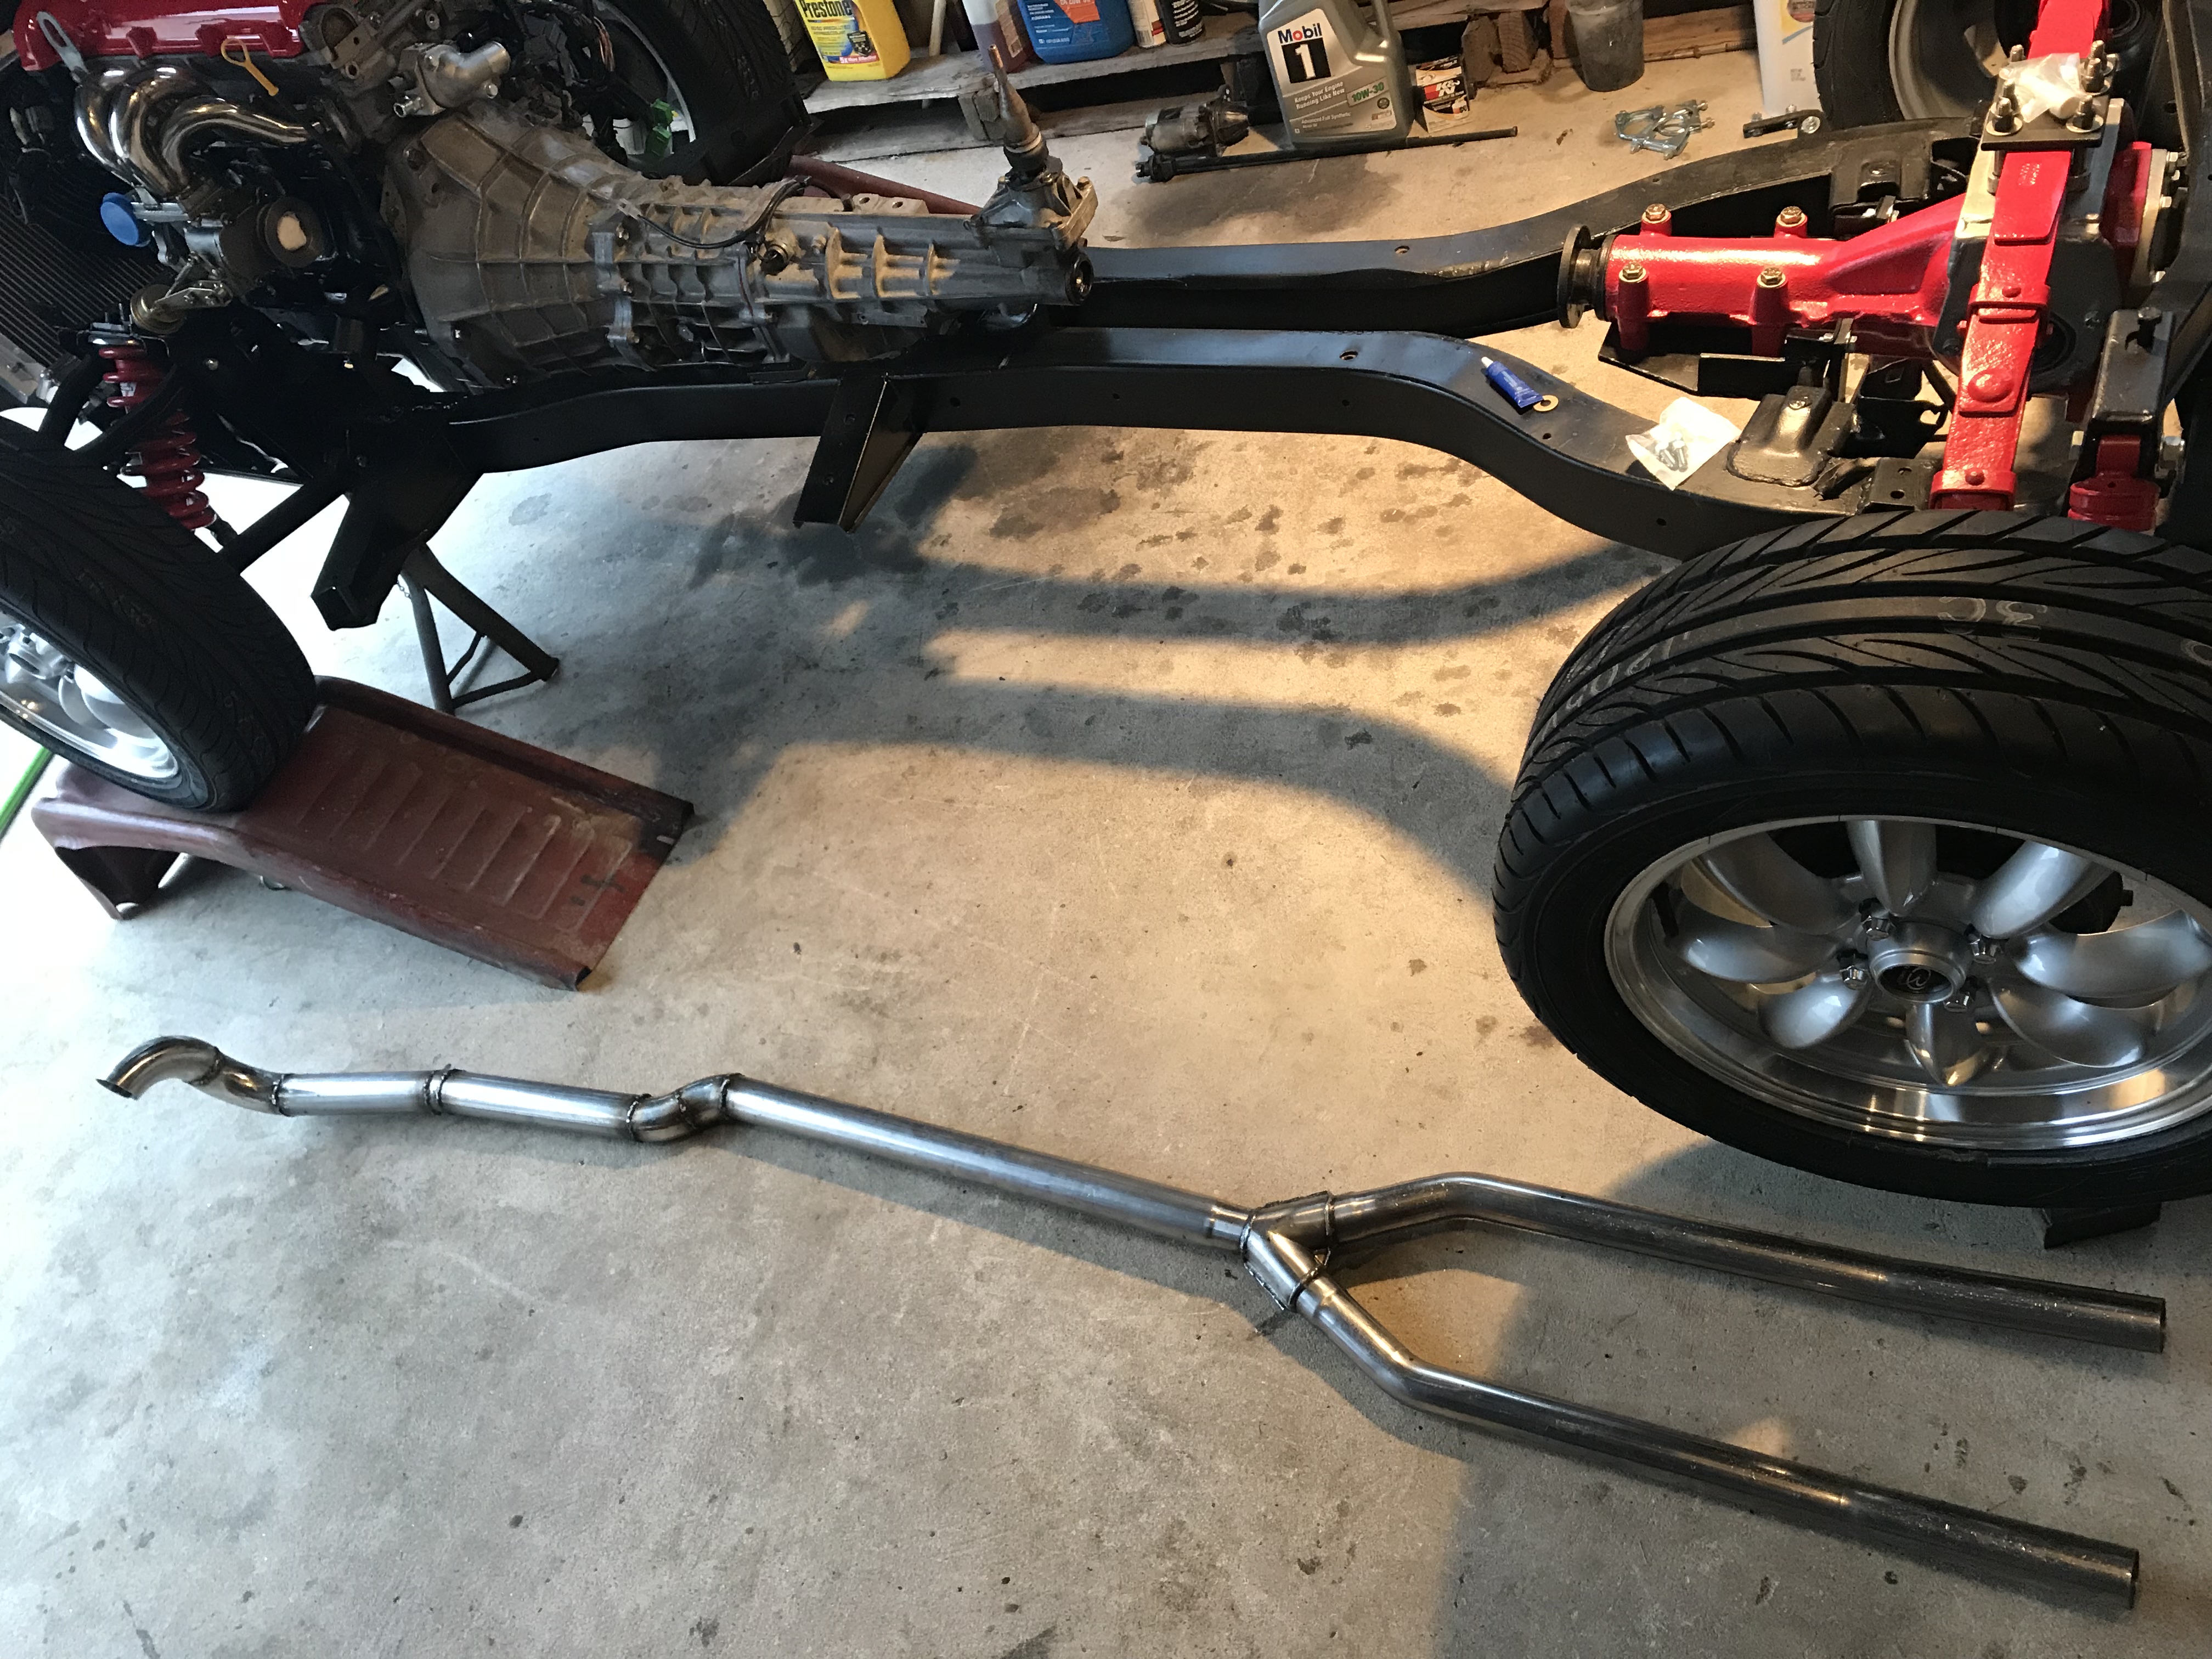
In use: trying to get the bend right after the header tight to keep the exhaust tucked as high as possible (because rallyx). Last exhaust dipped below the crossmember a bit and got smashed to bits.
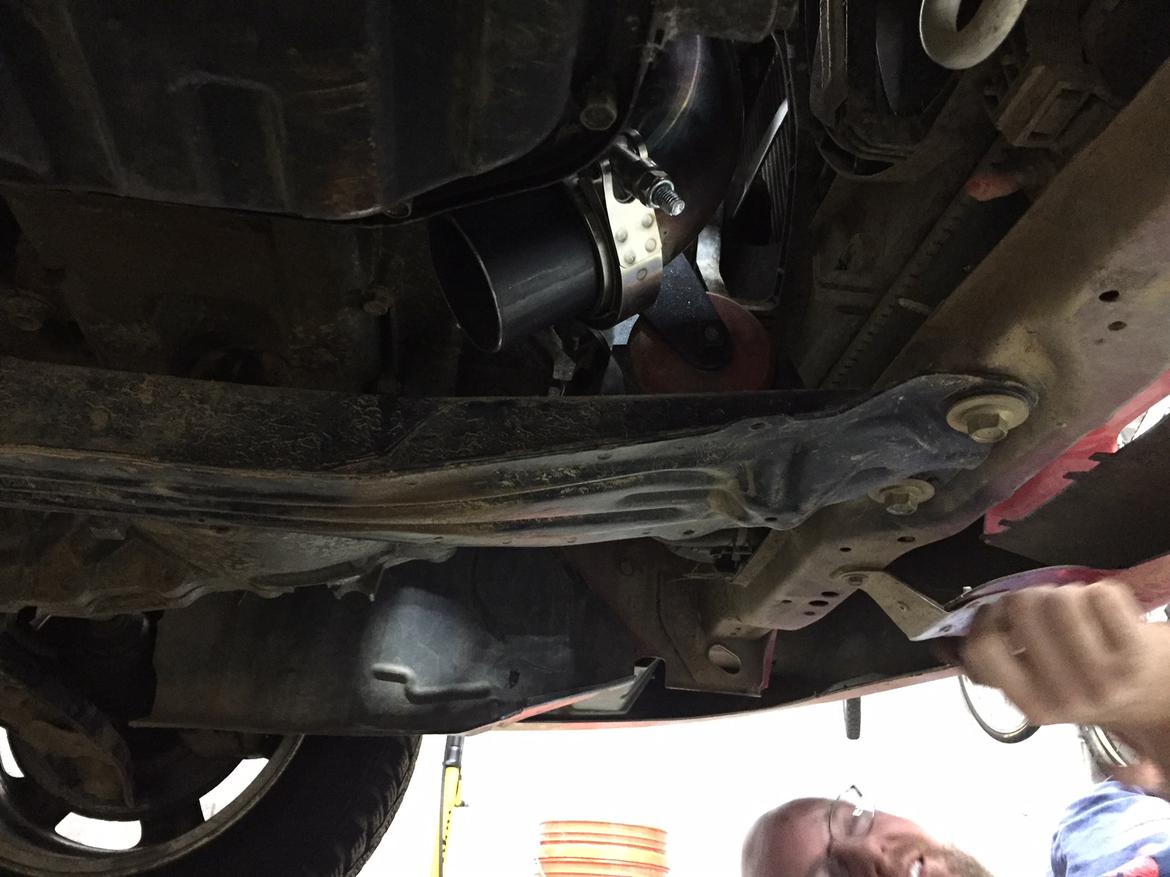
Wow, that is an unflattering view of my face.
plain92
New Reader
2/17/18 11:07 a.m.
What an intelligent design!