


http://turbocharged.com/catalog/compmaps/fig13.html

edit after reading your other thread... that first link (where the image came from) has all the other "trim" plots once you measure it

http://turbocharged.com/catalog/compmaps/fig13.html
edit after reading your other thread... that first link (where the image came from) has all the other "trim" plots once you measure it

In reply to sleepyhead :
Not gonna lie, i have no idea what im looking at there.....

Its a compressor map.
Engine air flow along the bottom. Pressure ratio along the left. Islands of efficiency and lines of compressor wheel speed across the plot. you would love to be right in the middle of the islands, but reality says you wind up across the surface mostly from bottom left toward top right. NEVER go to the left of the surge line on the chart!!!
Takes a little bit of math to figure out where you are going to be and there is adifferent map for every compressor out there in the world.
some background slides...
https://www.turbobygarrett.com/turbobygarrett/compressor_maps
sleepyhead said:some background slides...
https://www.turbobygarrett.com/turbobygarrett/compressor_maps
When I stop for lunch today that looks like it's going to be some awfully good reading
Challenge budget so far:
current challenge budget: 445.90
recoup total: 800
what my weekend looked like (in technicolor):
Friday night:
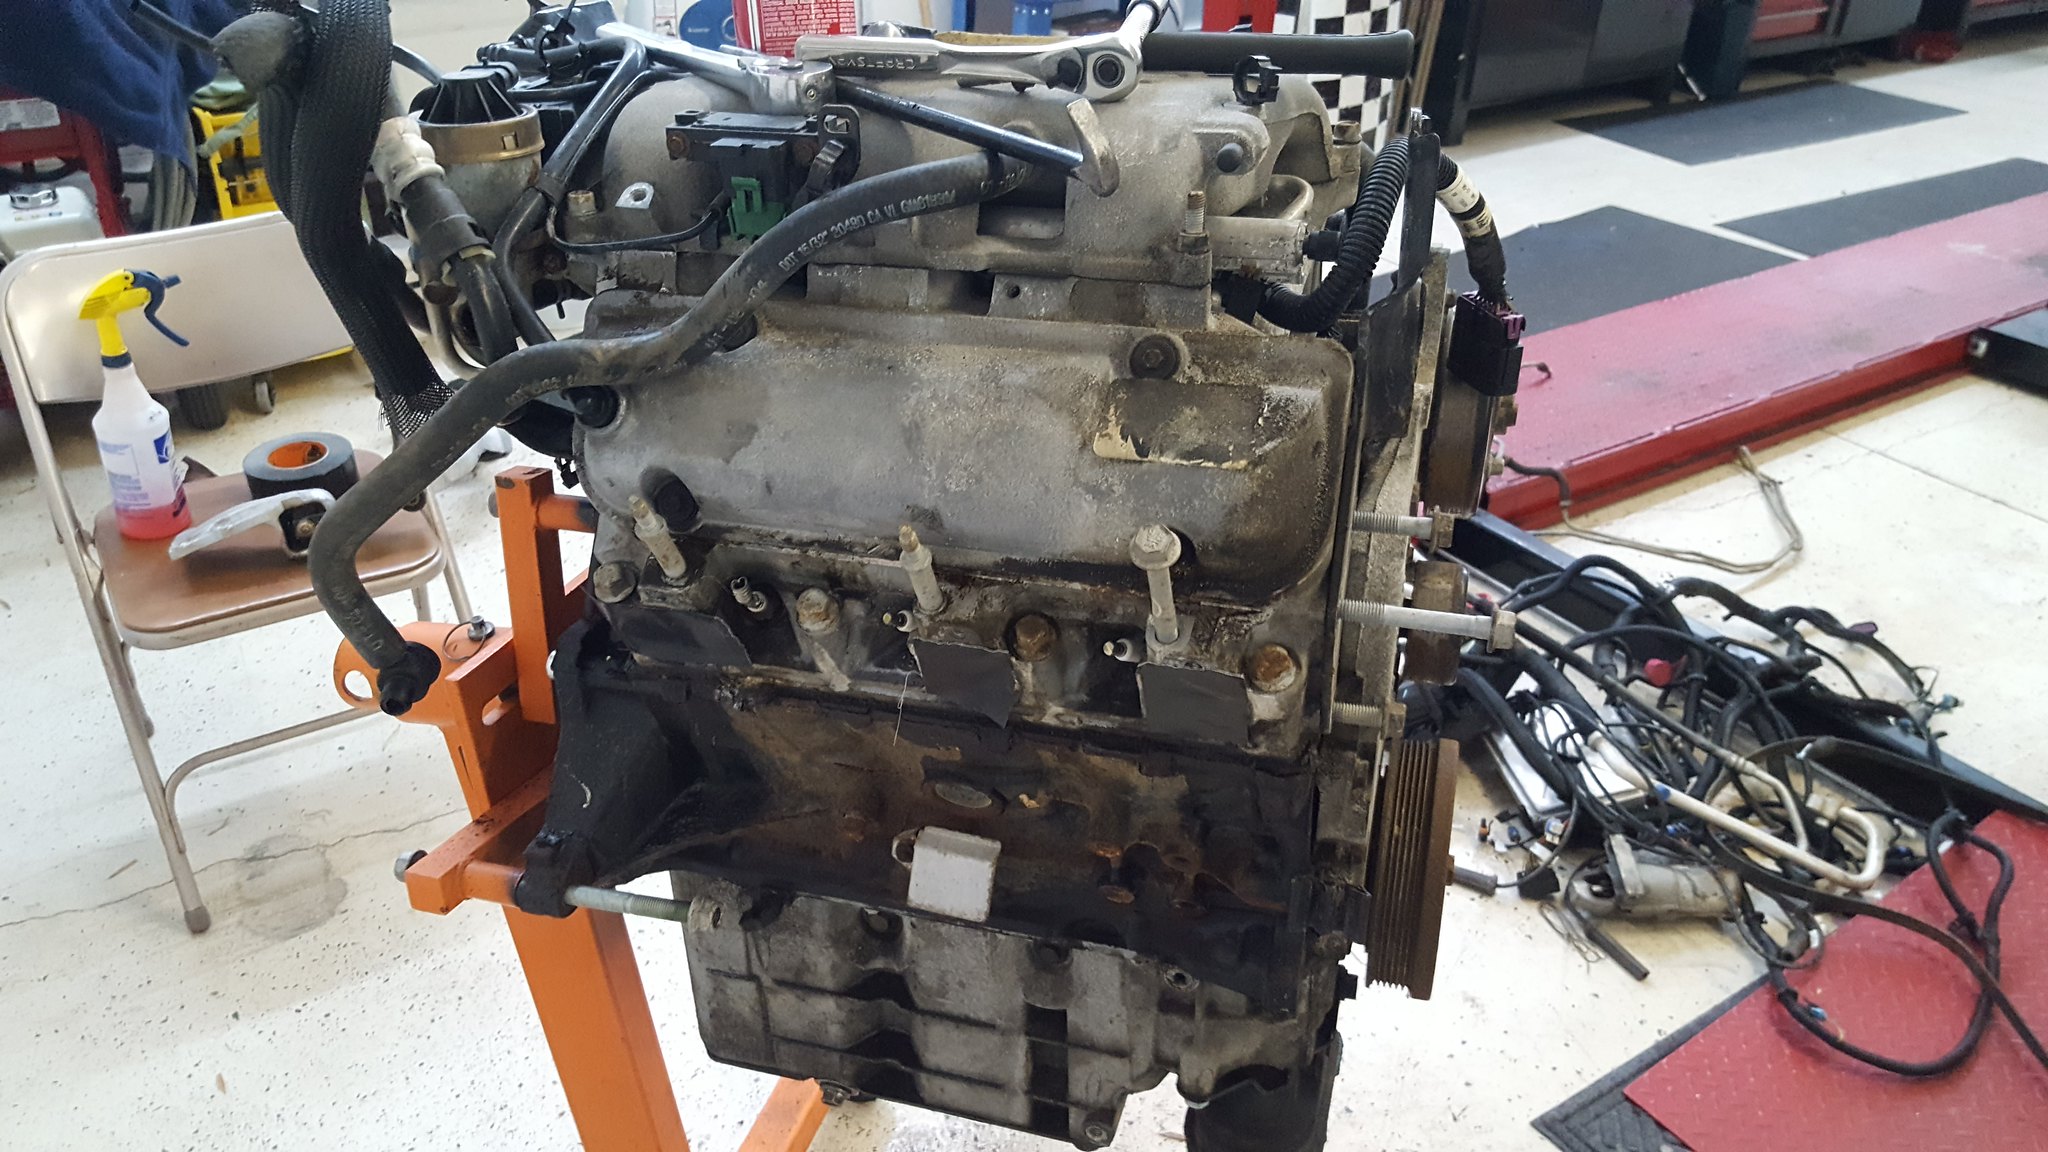
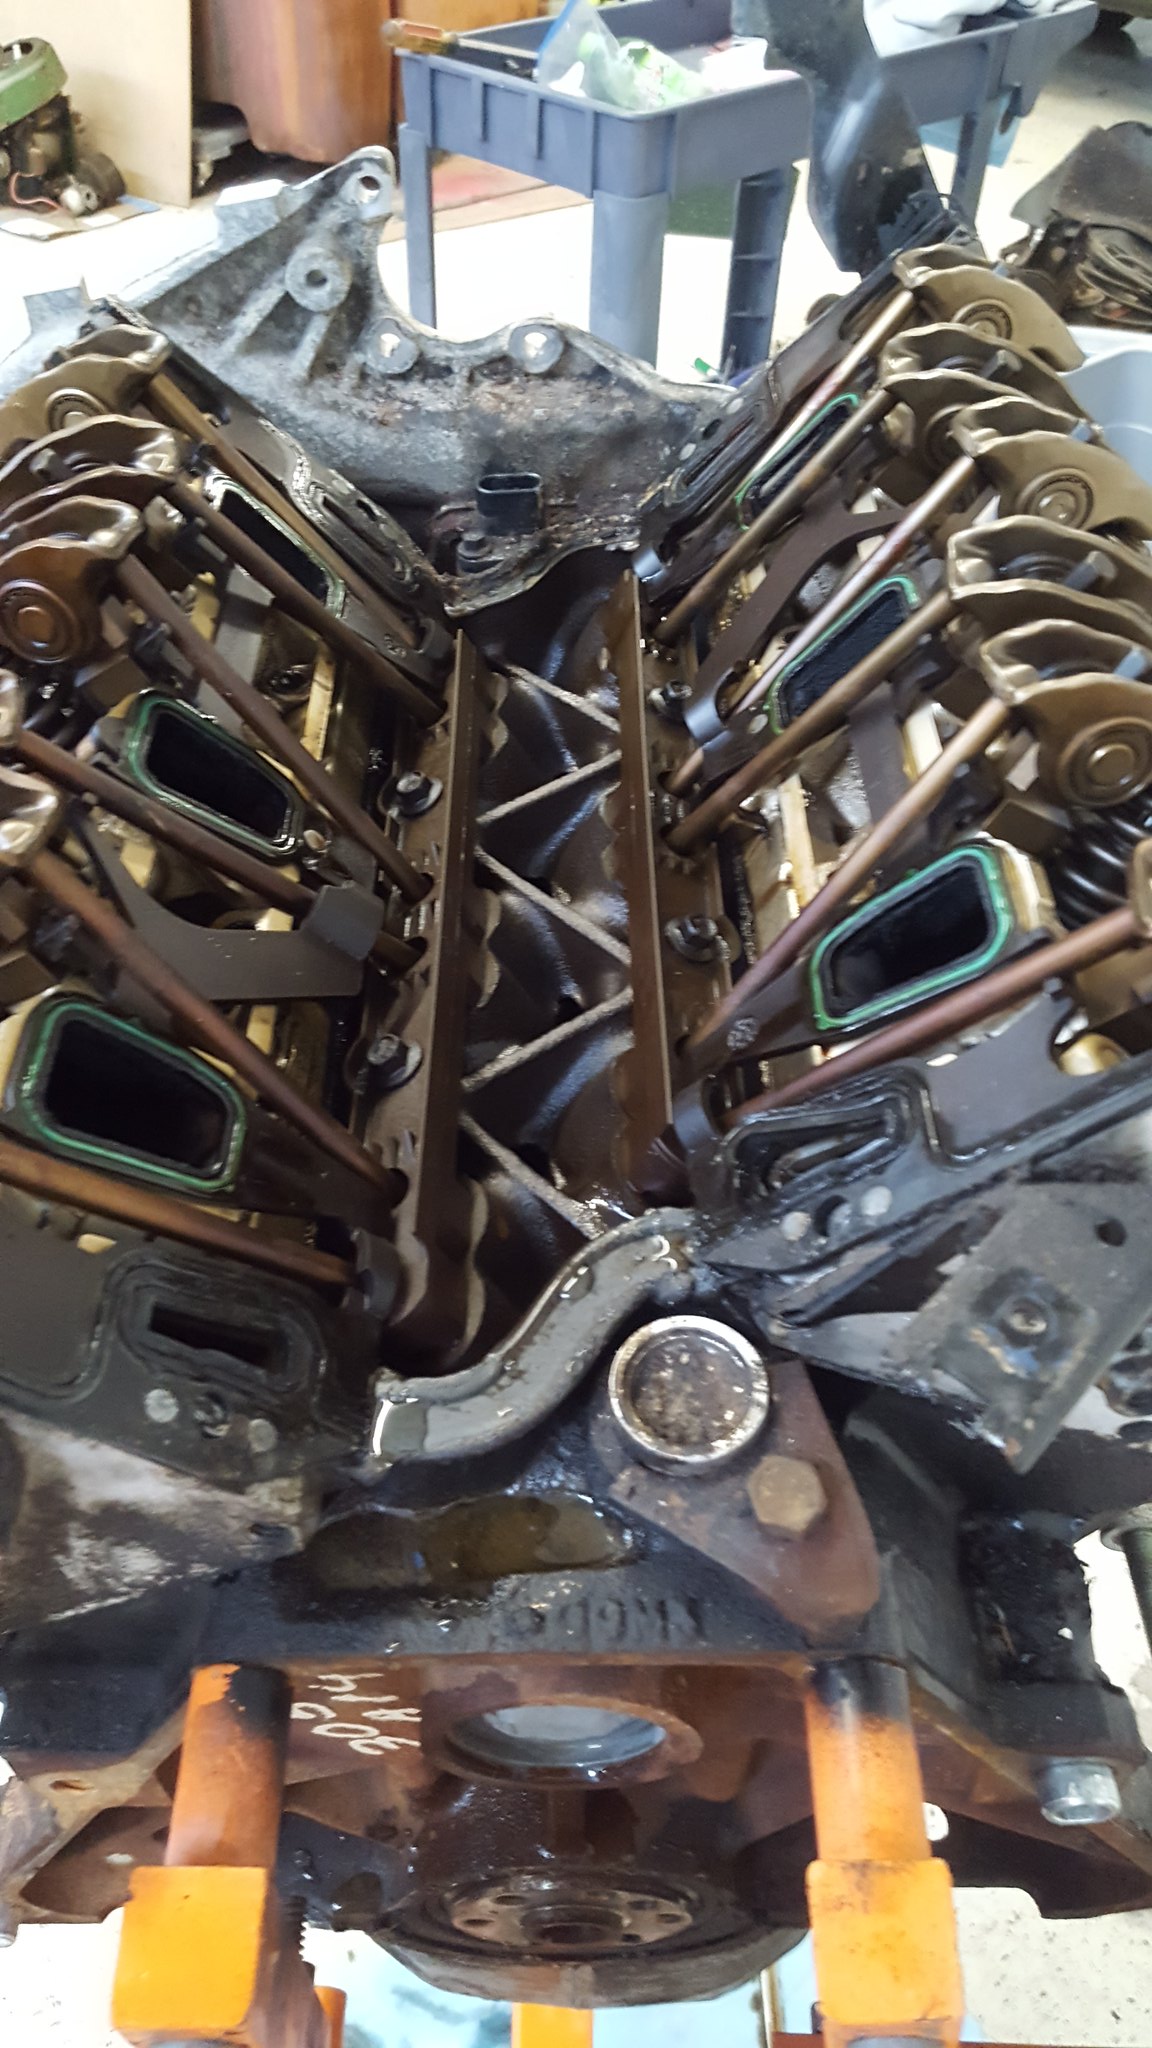
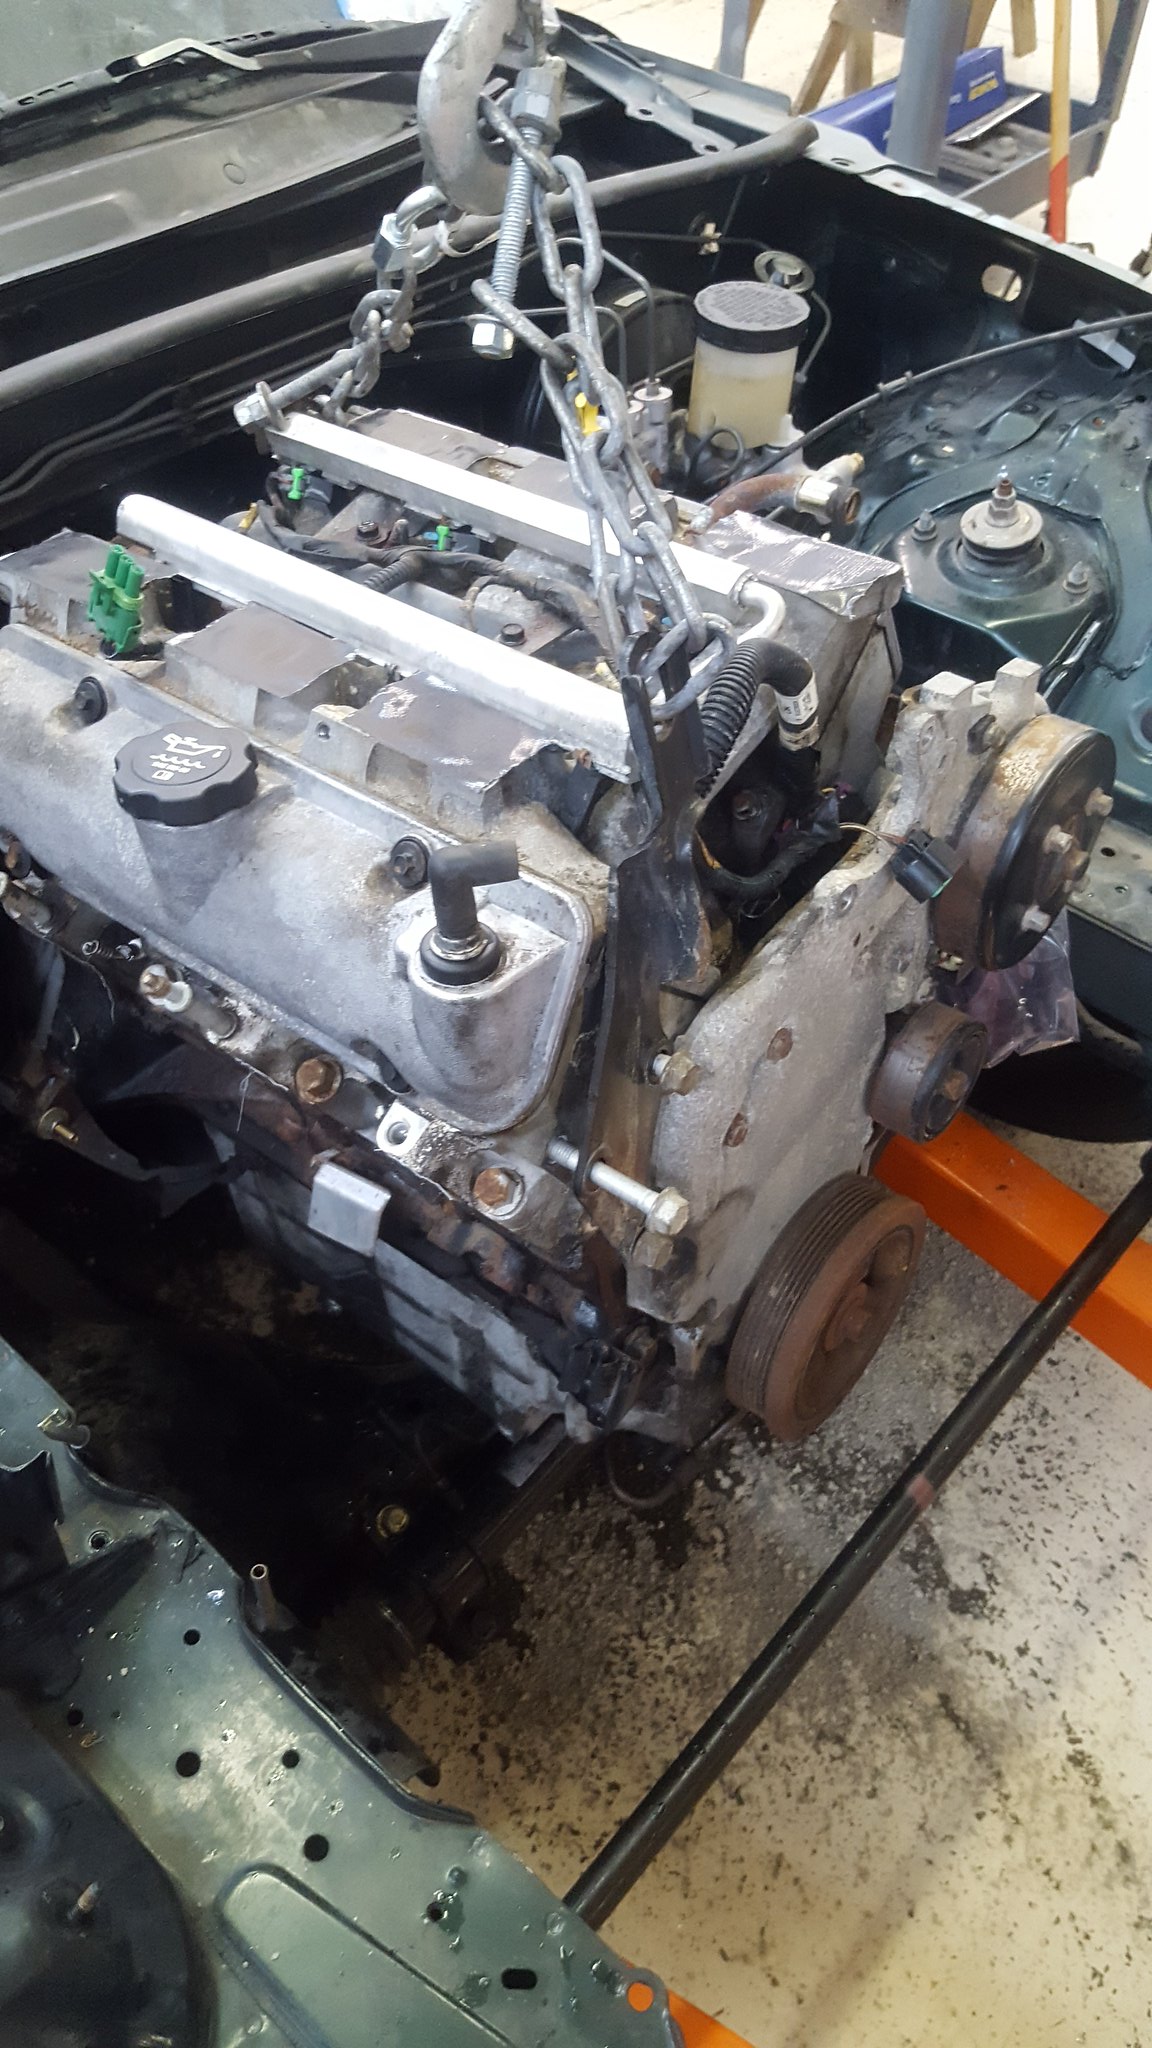
stripped down the 3400 to a longblock, and investigated ways to execute the intake flip.
 20171208_195704 by Michael Crawford, on Flickr
 20171208_195659 by Michael Crawford, on Flickr
 20171208_205216 by Michael Crawford, on Flickr
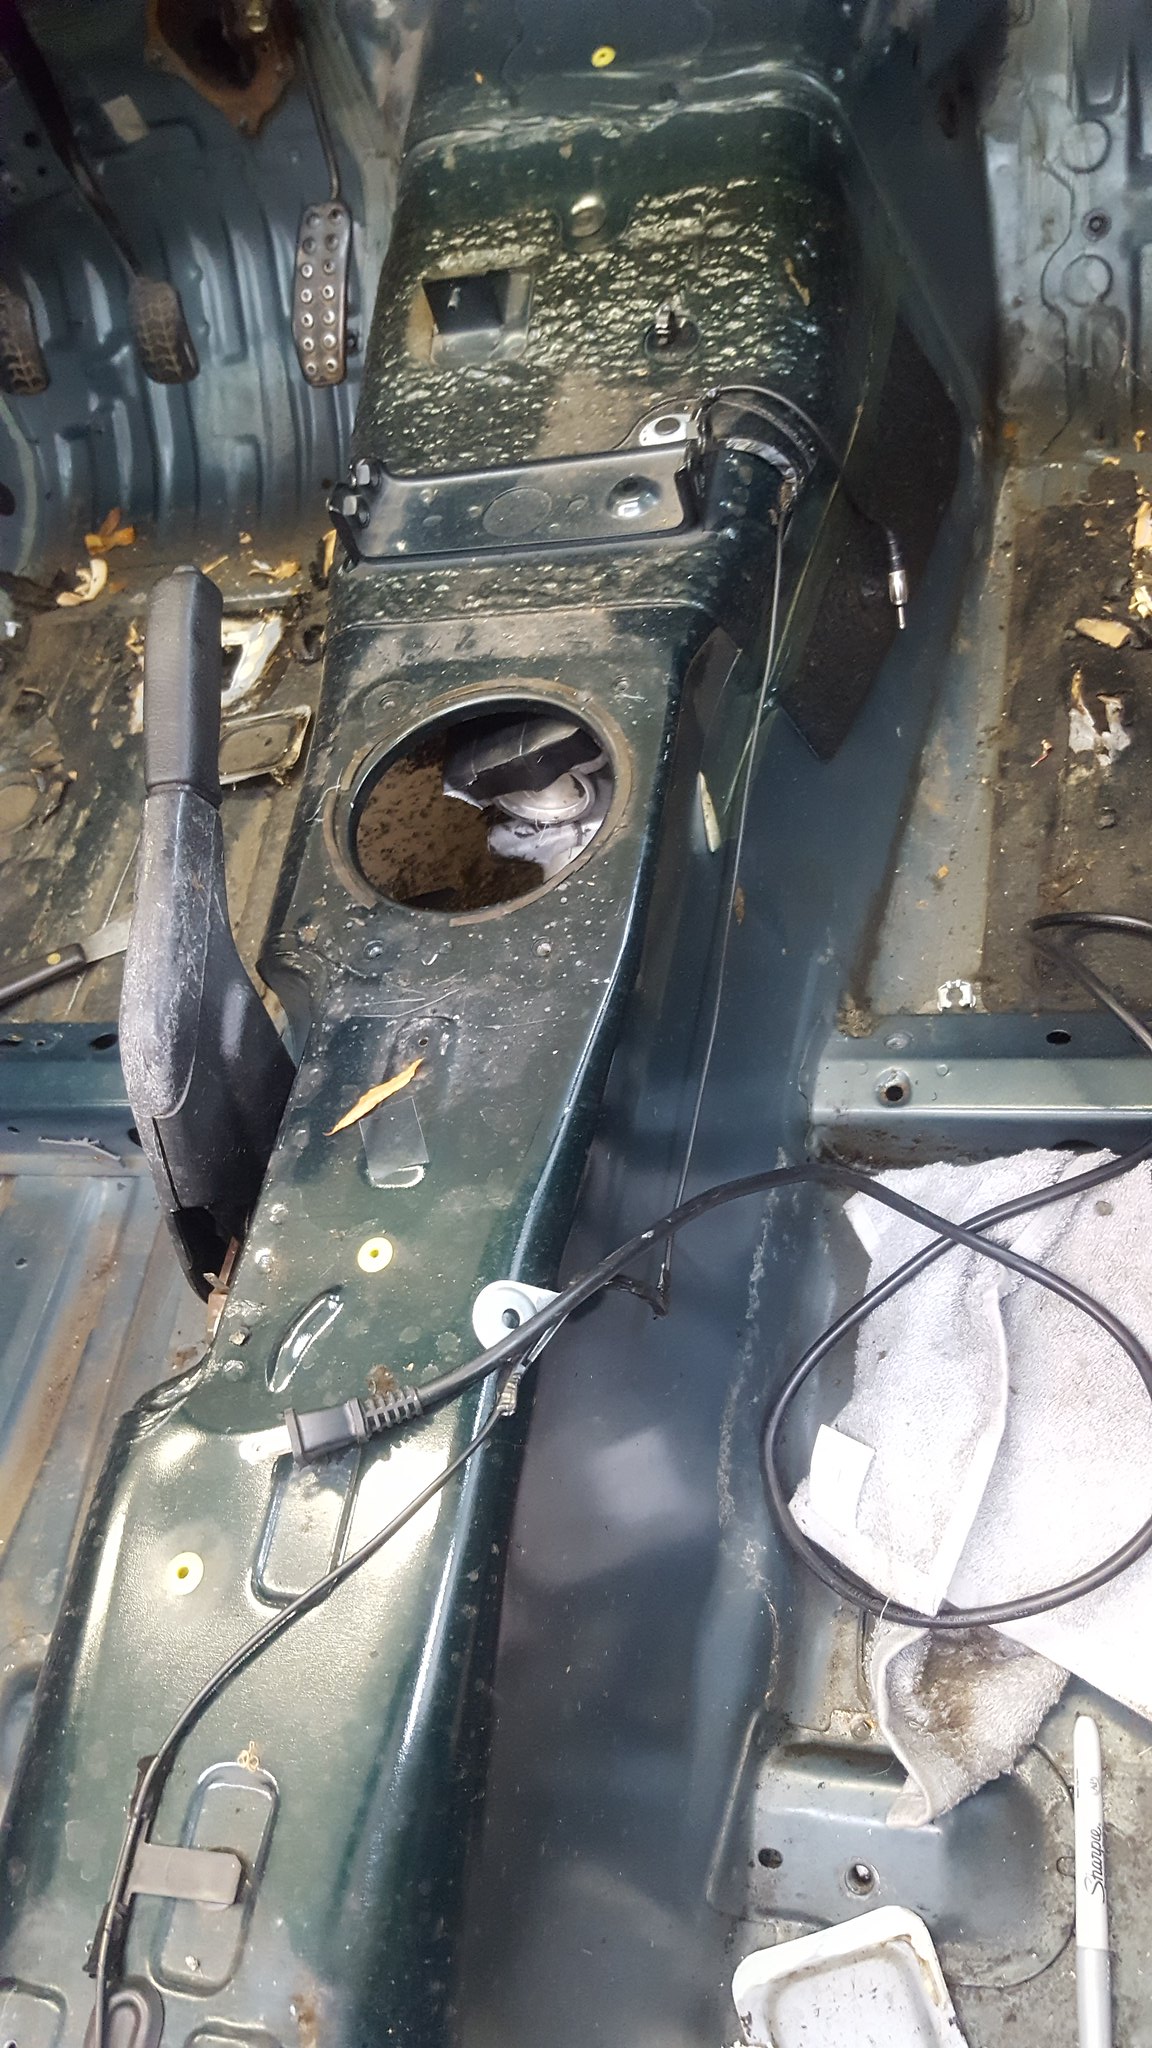
saturday we put the lower intake back on in factory location to block the engine off from E36 M3 falling it in. bolted a chunk of 2x4 to simulate a thermostat housing, and tried to make it fit.
 20171209_142634 by Michael Crawford, on Flickr
had to pull the one lift point off, and decided to mount the trans at the same time.
 20171209_150229 by Michael Crawford, on Flickr
slid it all in as a package to see what we had. Pics of where it stopped moving down and back. We called it quits to think.
 20171209_153538 by Michael Crawford, on Flickr
 20171209_153608 by Michael Crawford, on Flickr
 20171209_153622 by Michael Crawford, on Flickr
 20171209_161812 by Michael Crawford, on Flickr
 20171209_161809 by Michael Crawford, on Flickr
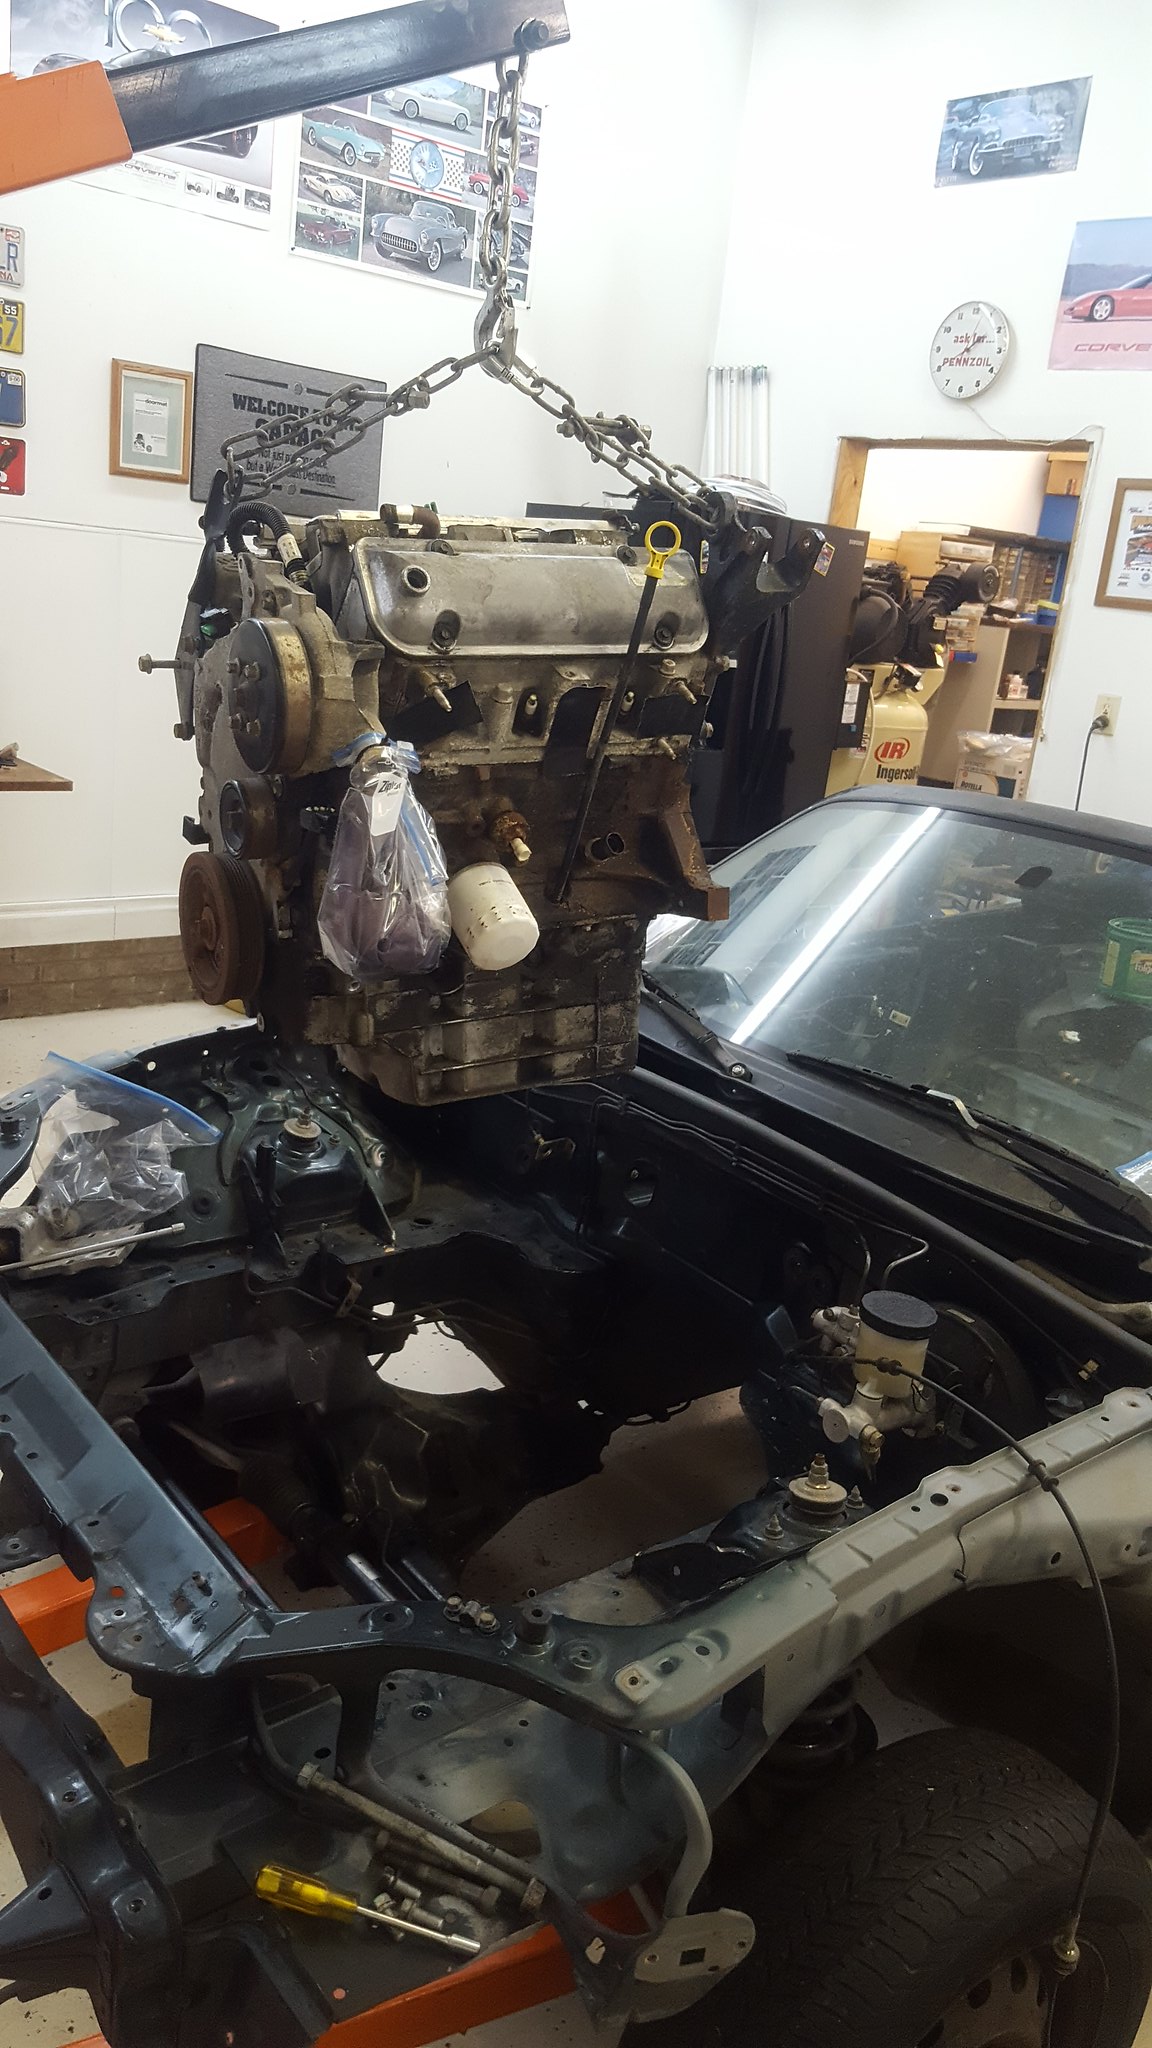
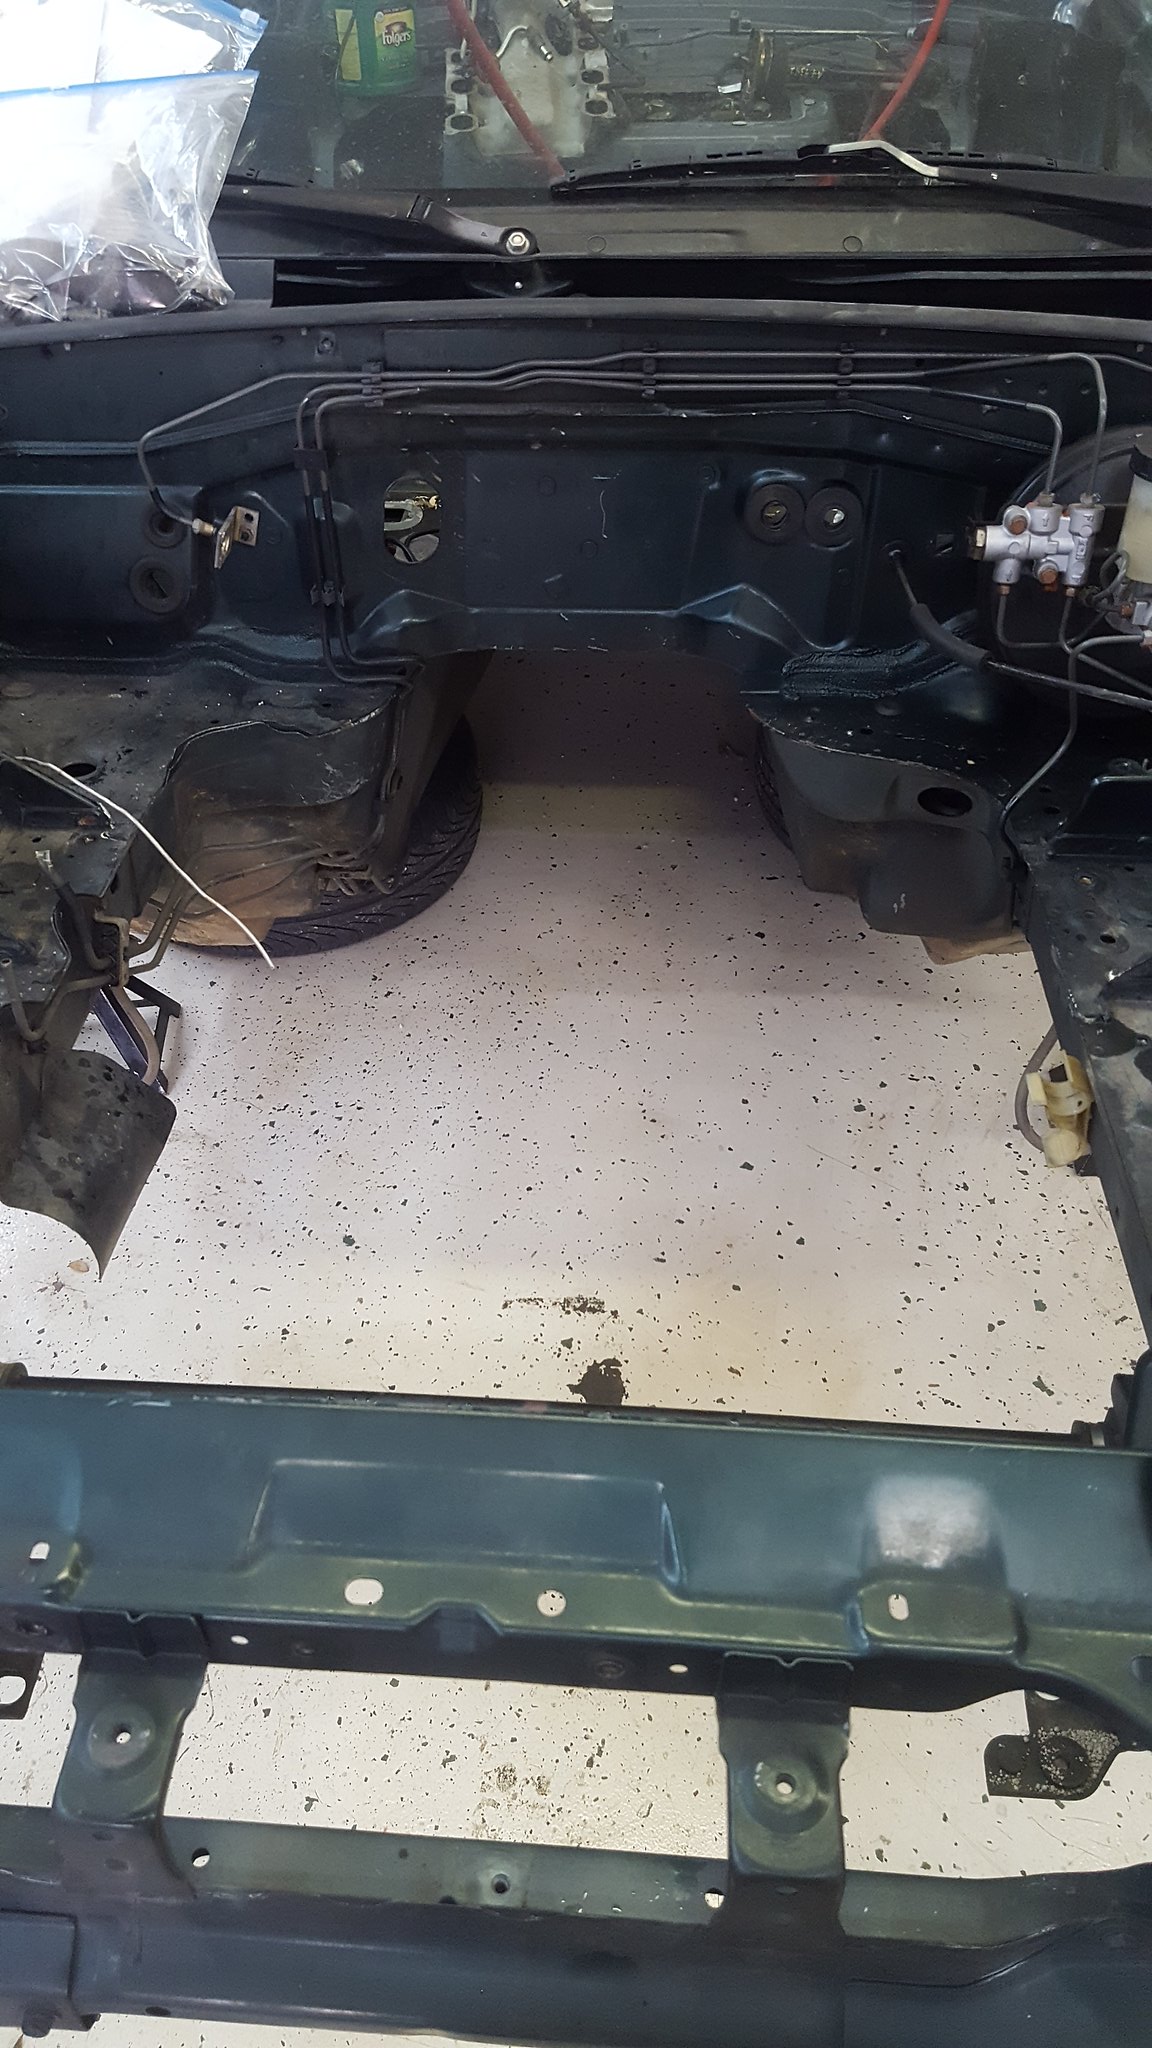
after playing around with the engine, trans, tape measure, chinks of metal and wood, etc for almost all day. i decided to take the approach mentioned earlier over on the main GRM forum of going in from the bottom. there's just not enough space or clearance to go in from the top due to protrusions and obstructions. but in from the bottom gets the engine EXACTLY where i wanted it relative to the crossmember, and i think there's enough real estate that everything will fit with very minimal firewall surgery. also, building the motor mounts outside of the car should make things far easier for me. more real estate with better access to see all sides. much simpler than the AMC when i built those mounts.
heres where i stopped for today (mostly. i cleaned up and put things away, as tonight is family movie night.)
first up, step one:
 20171210_133554 by Michael Crawford, on Flickr
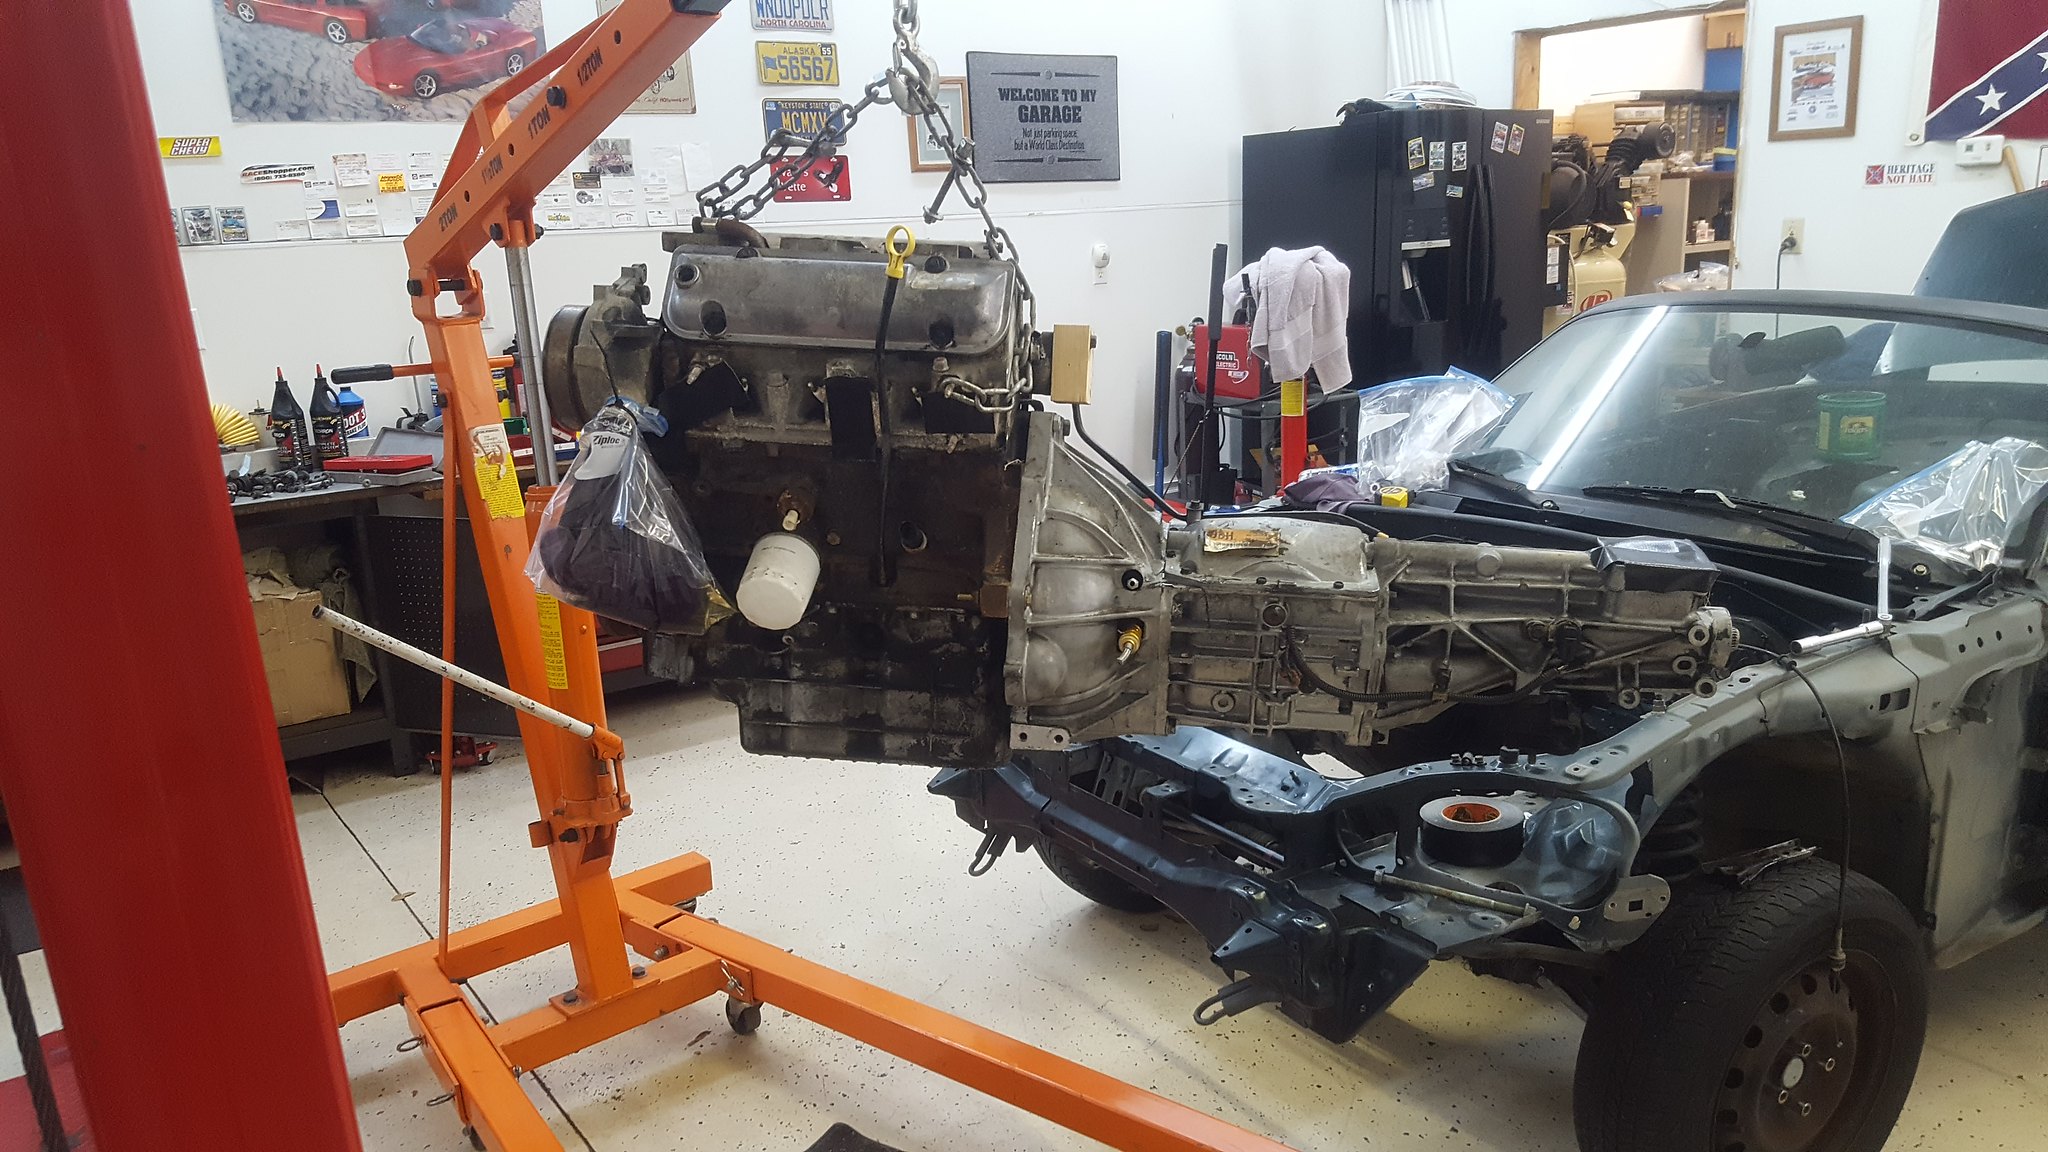
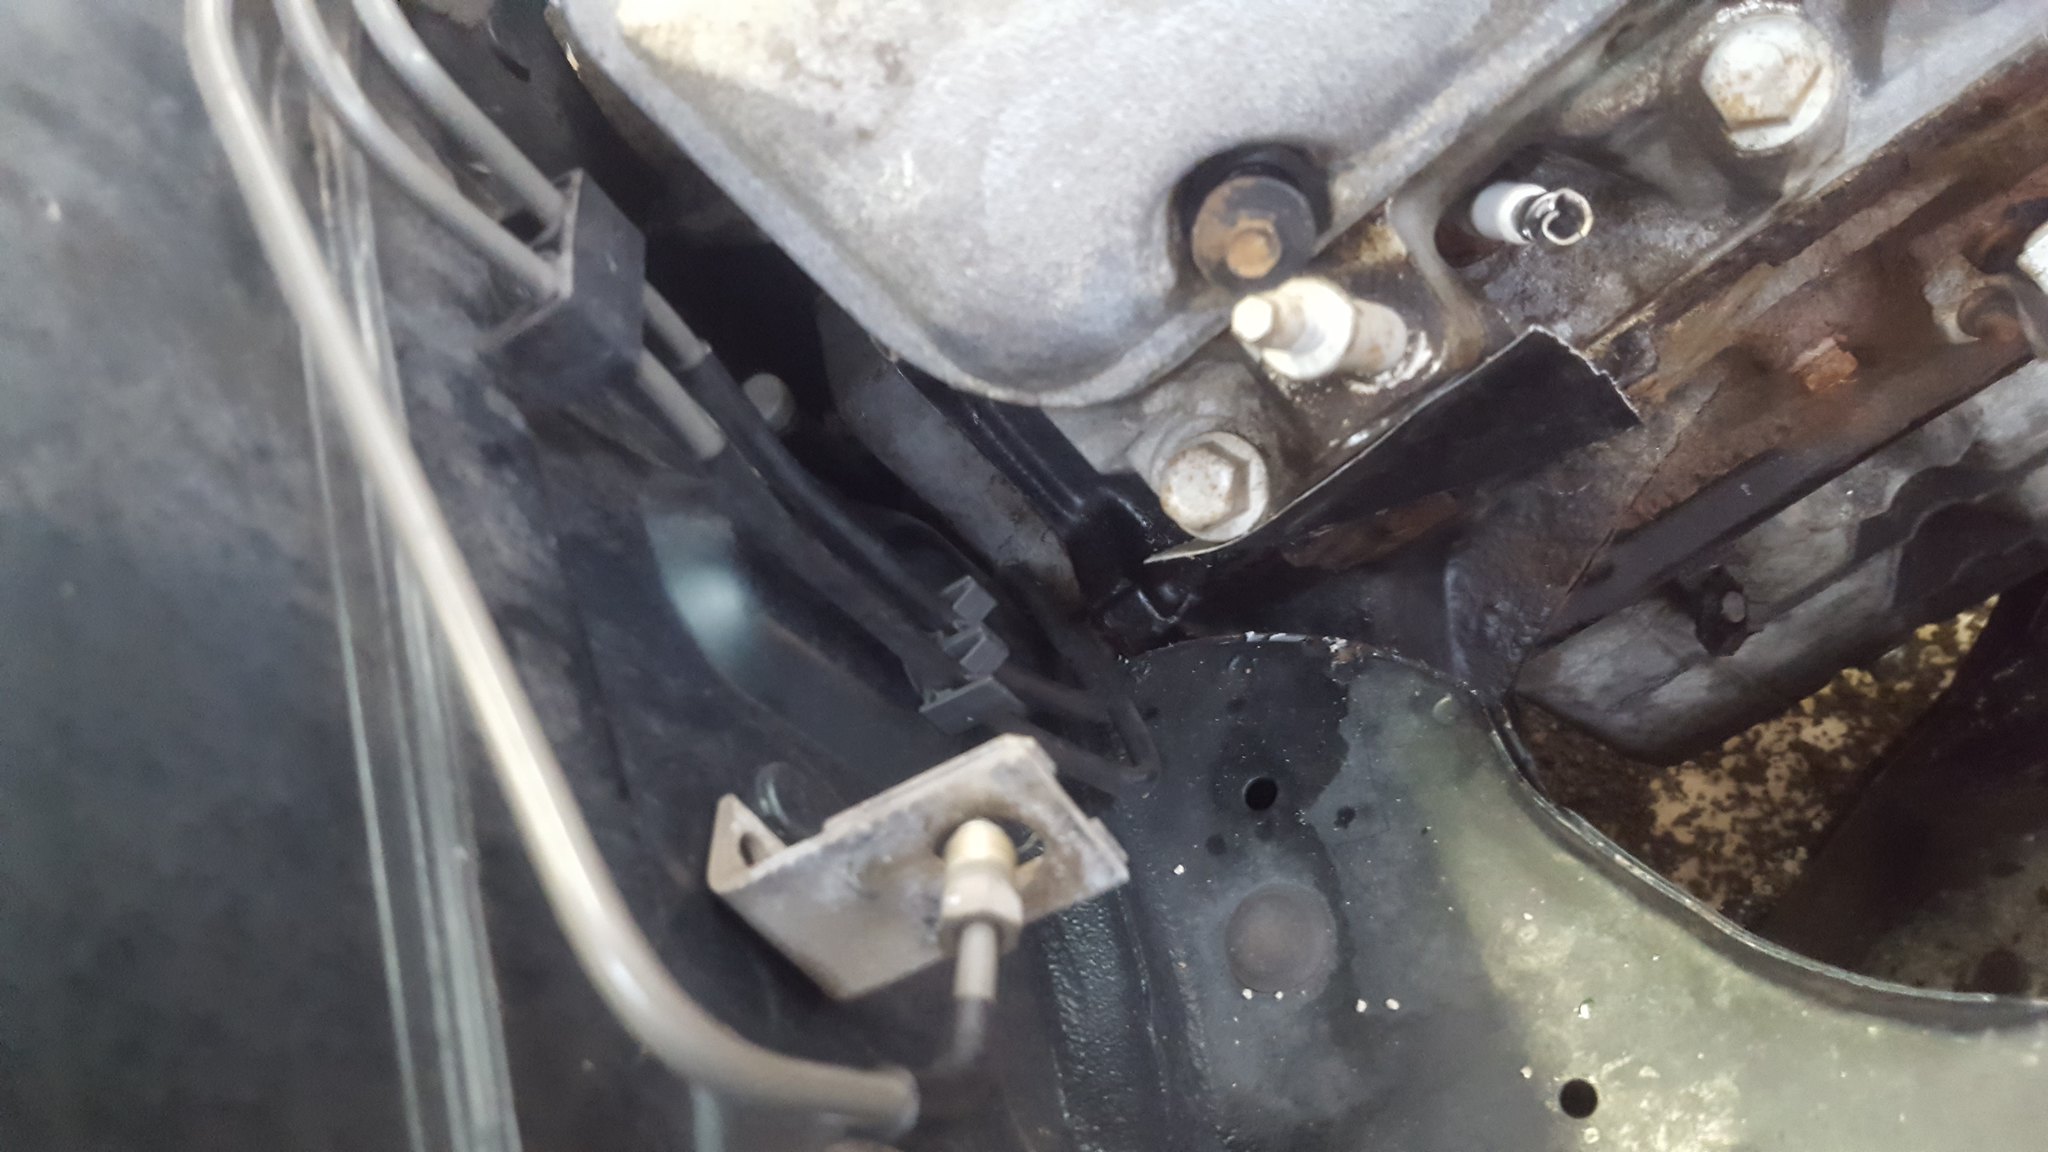
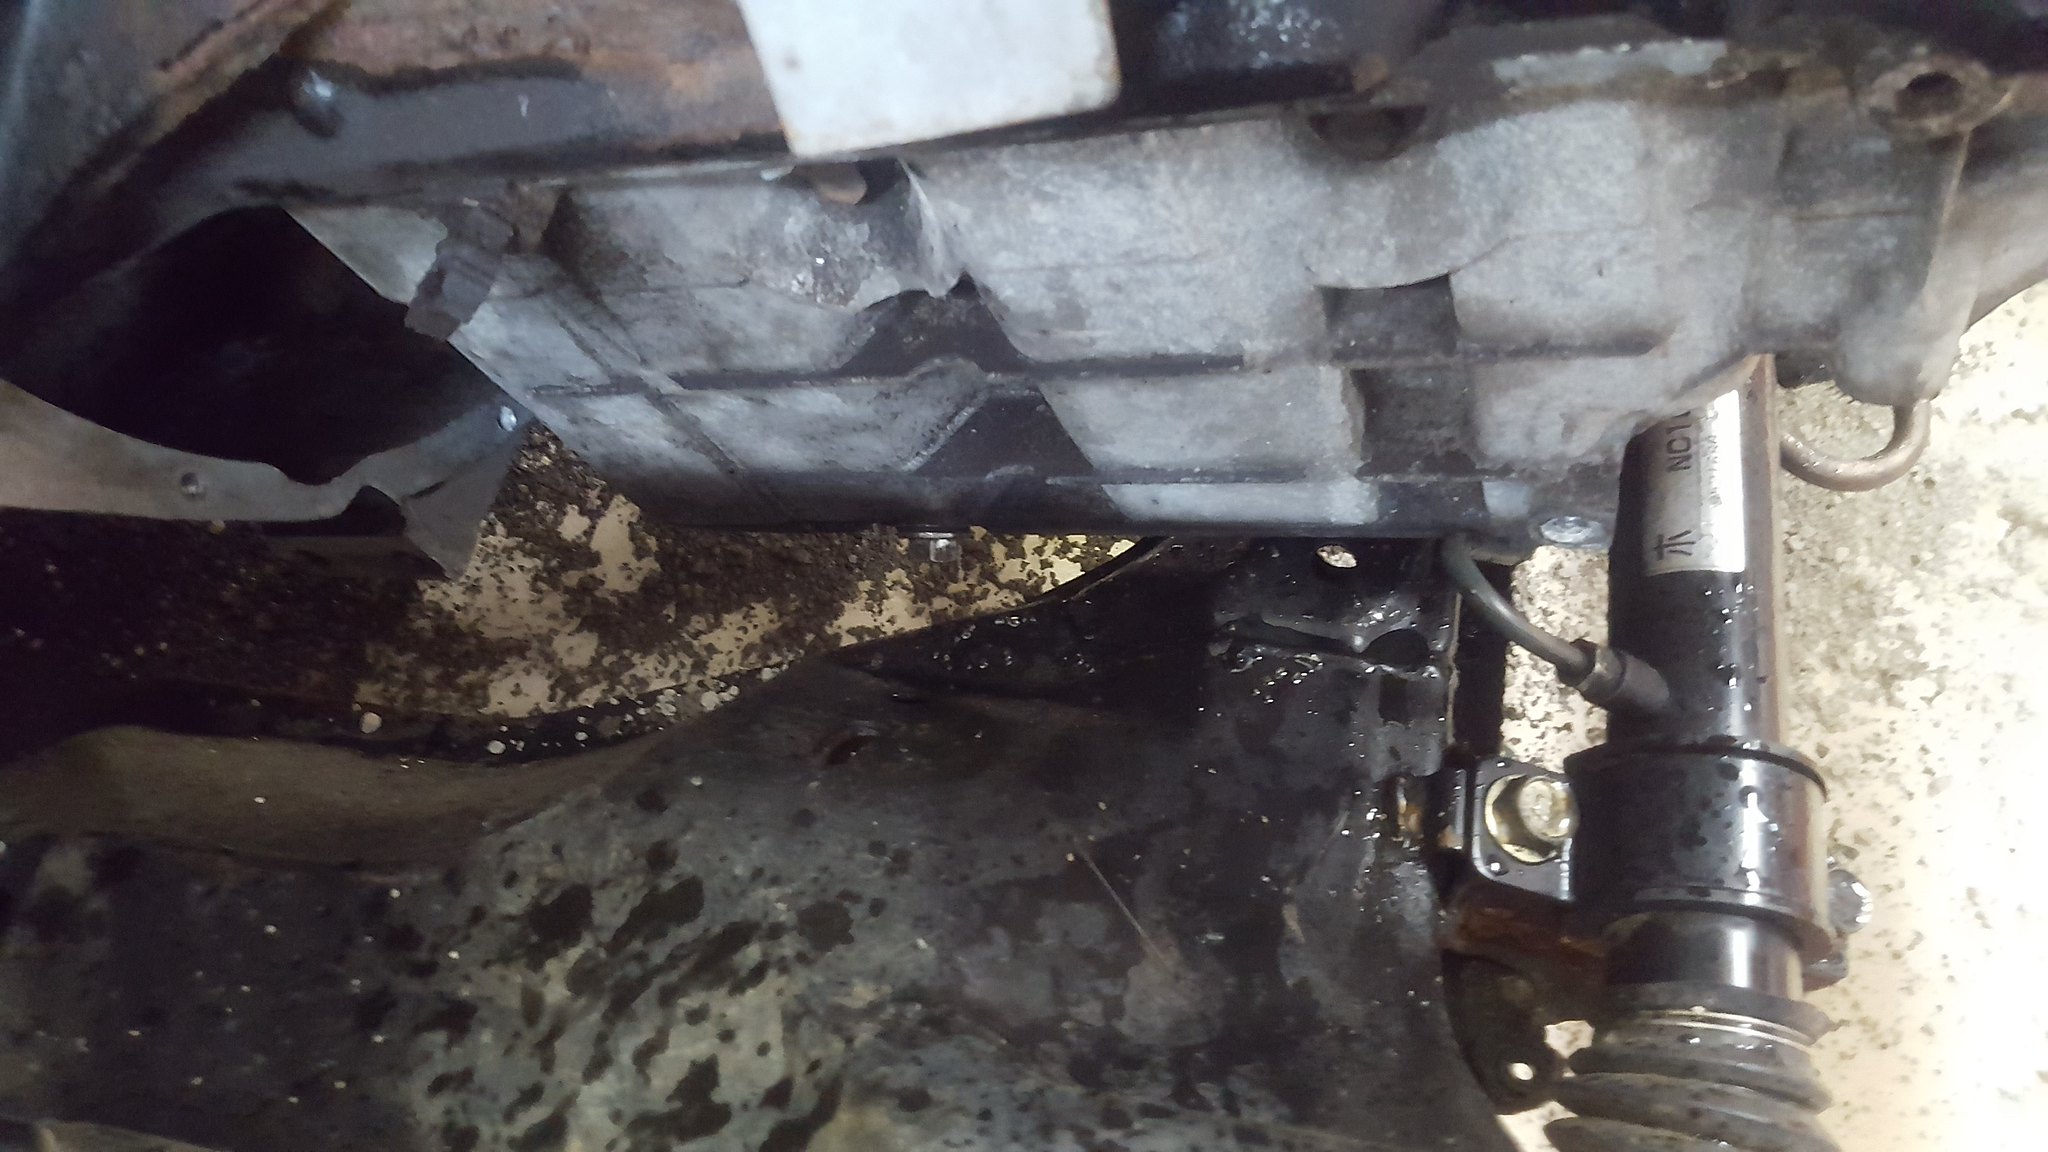
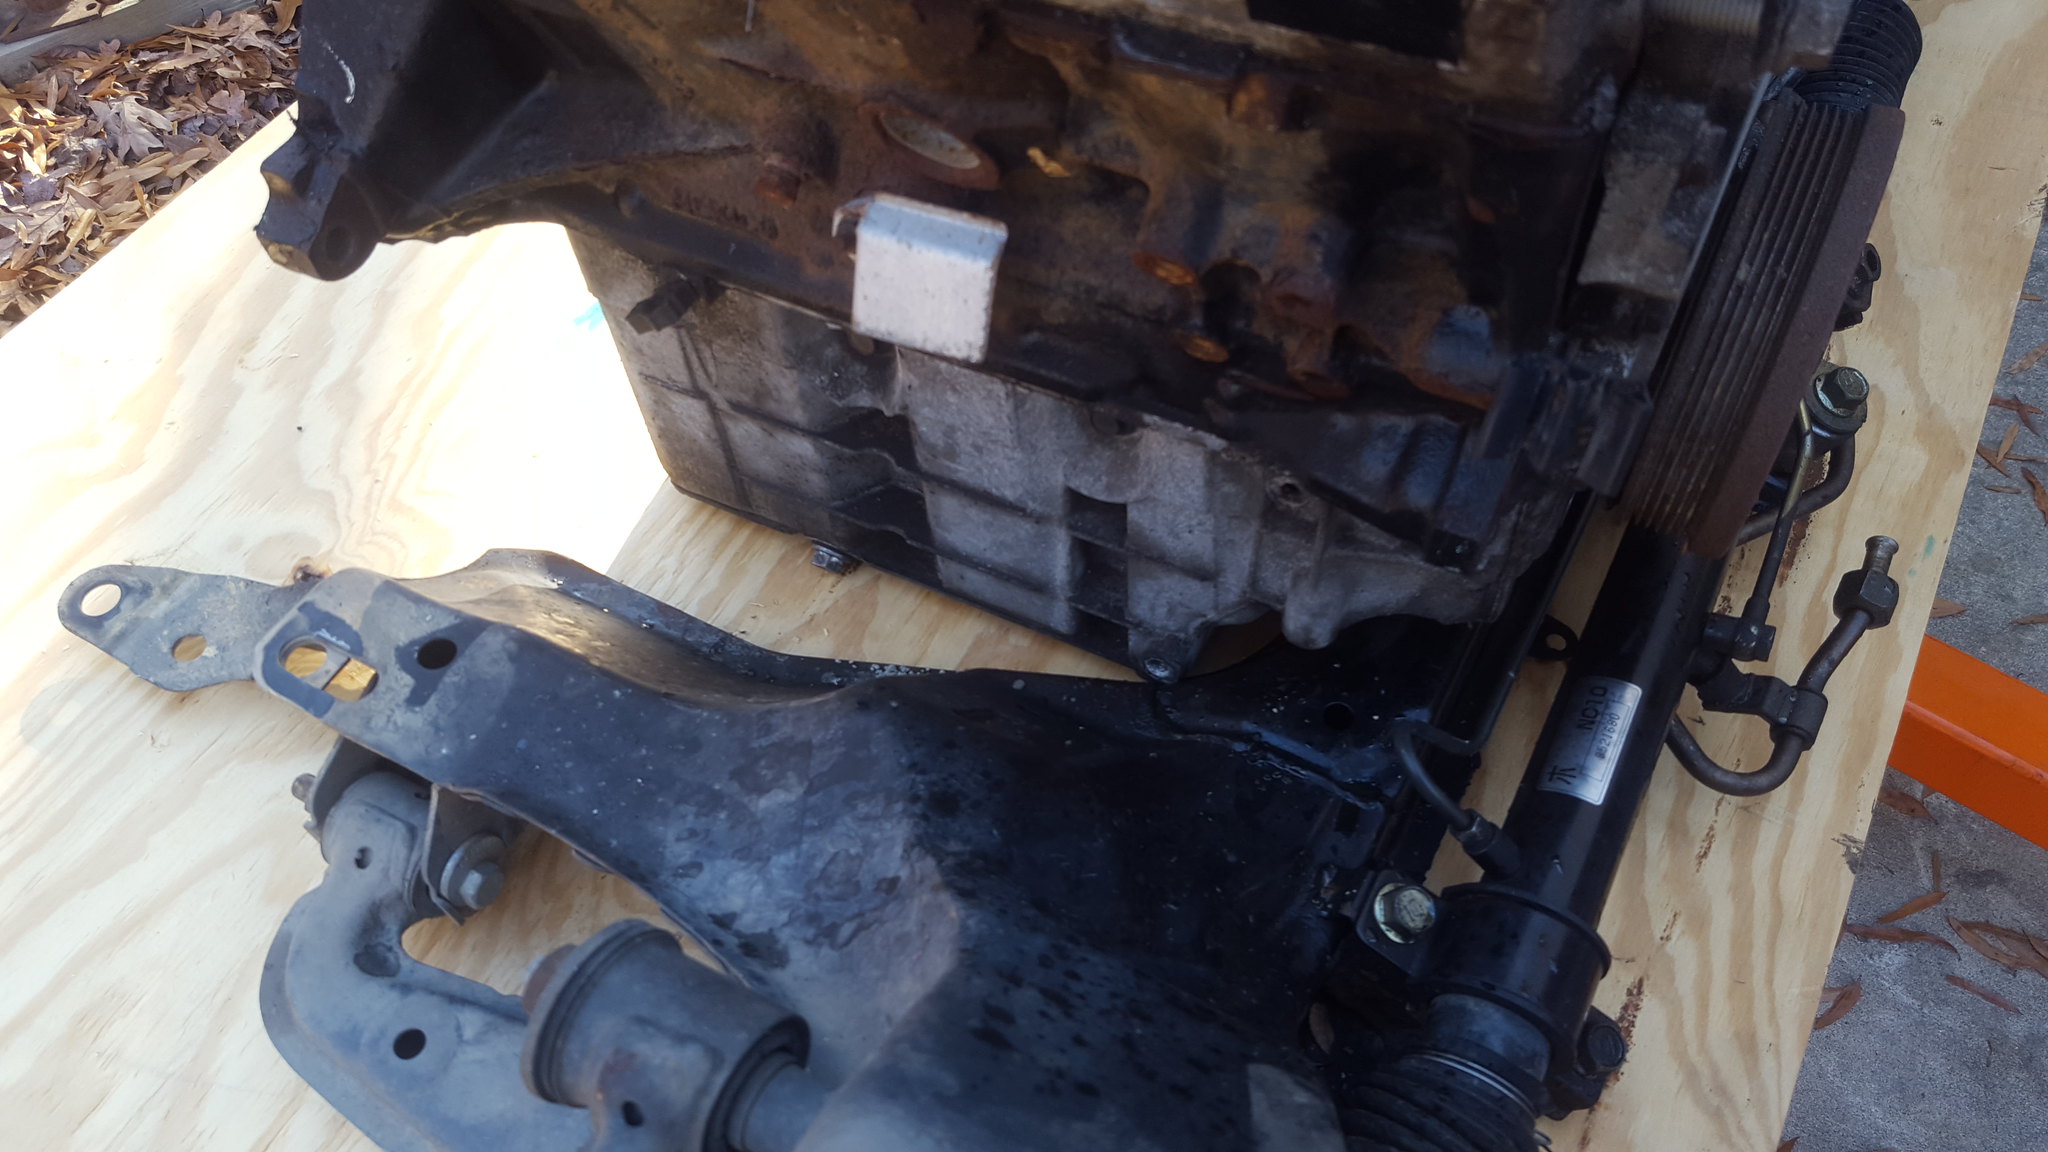
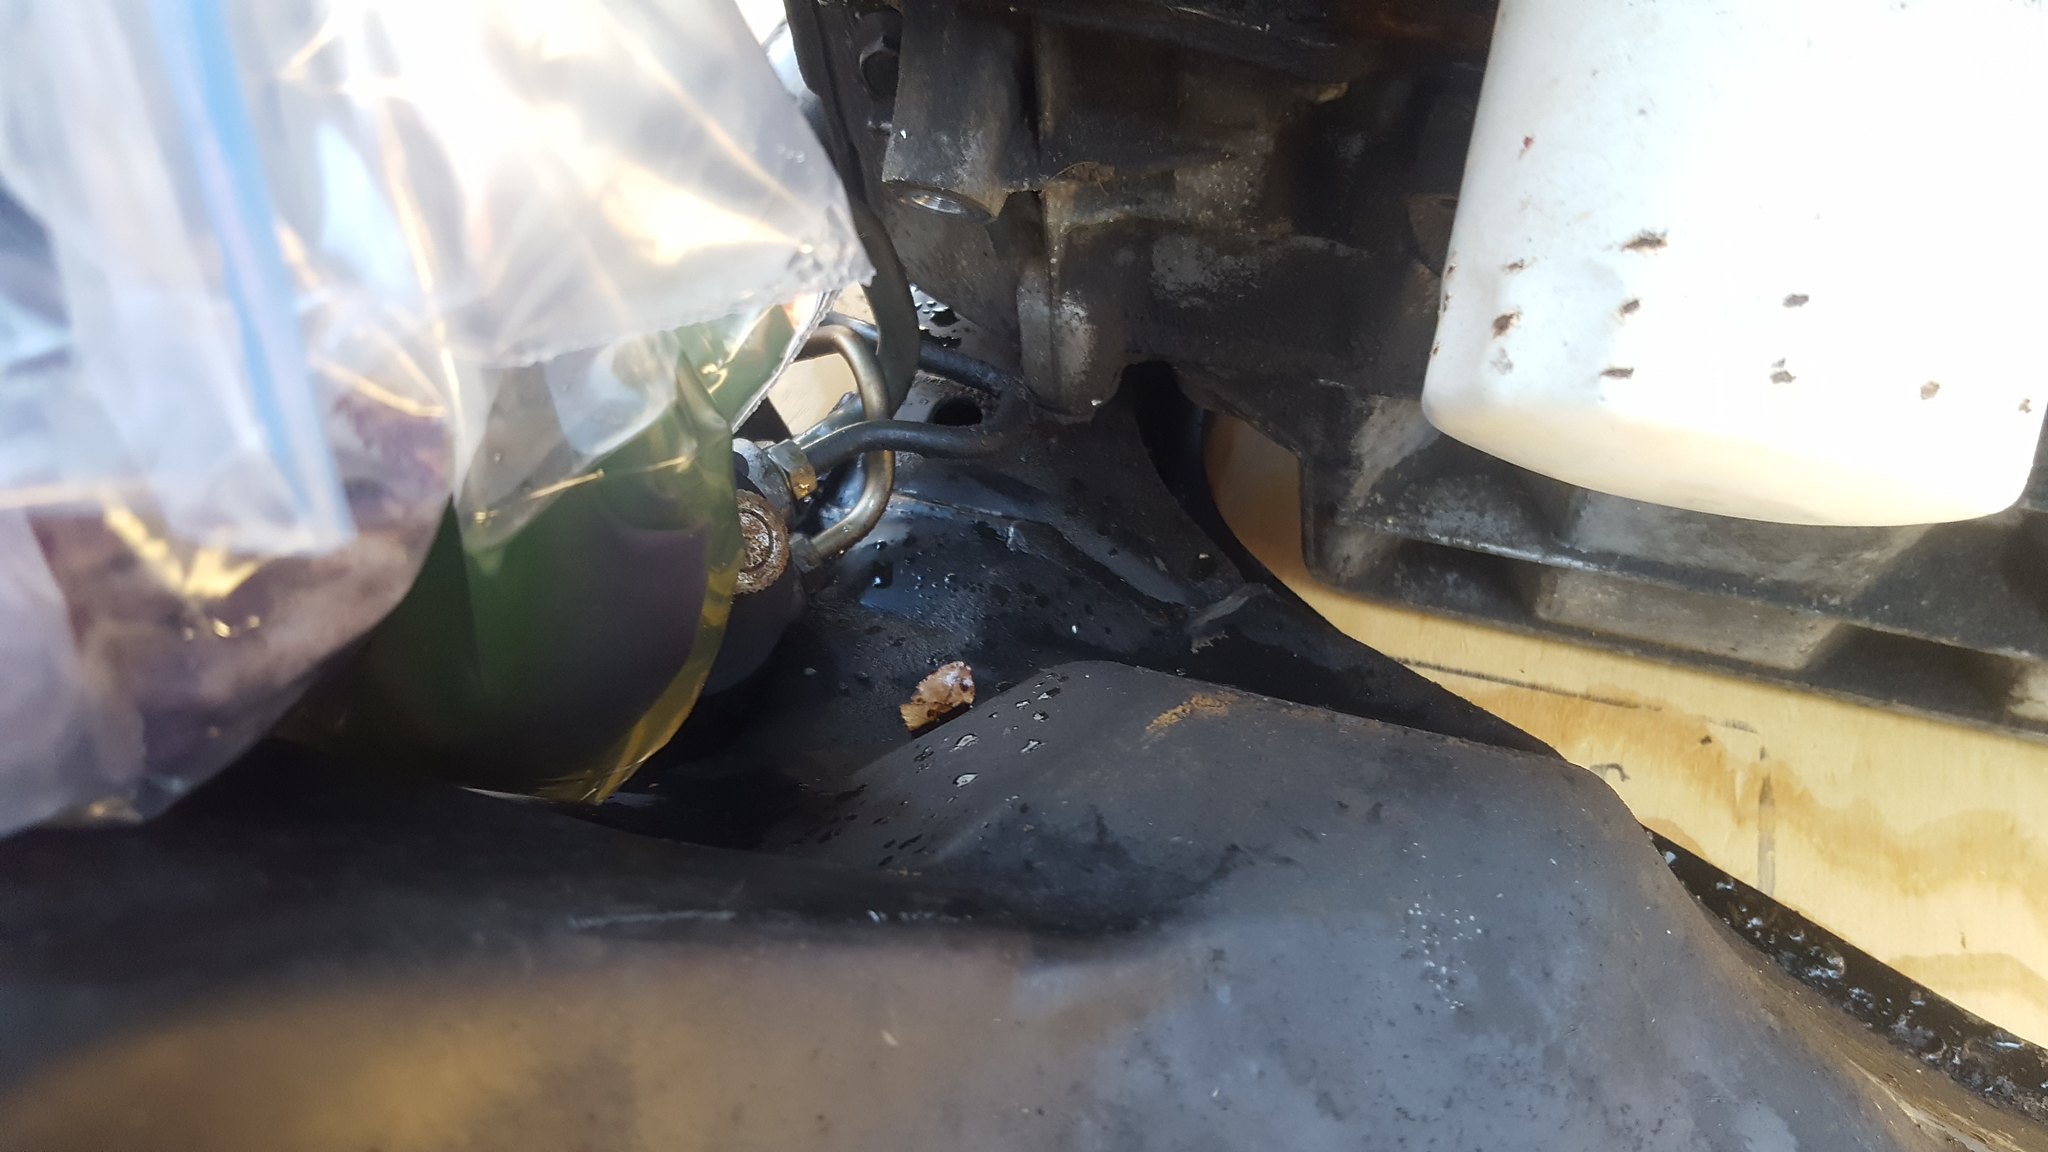
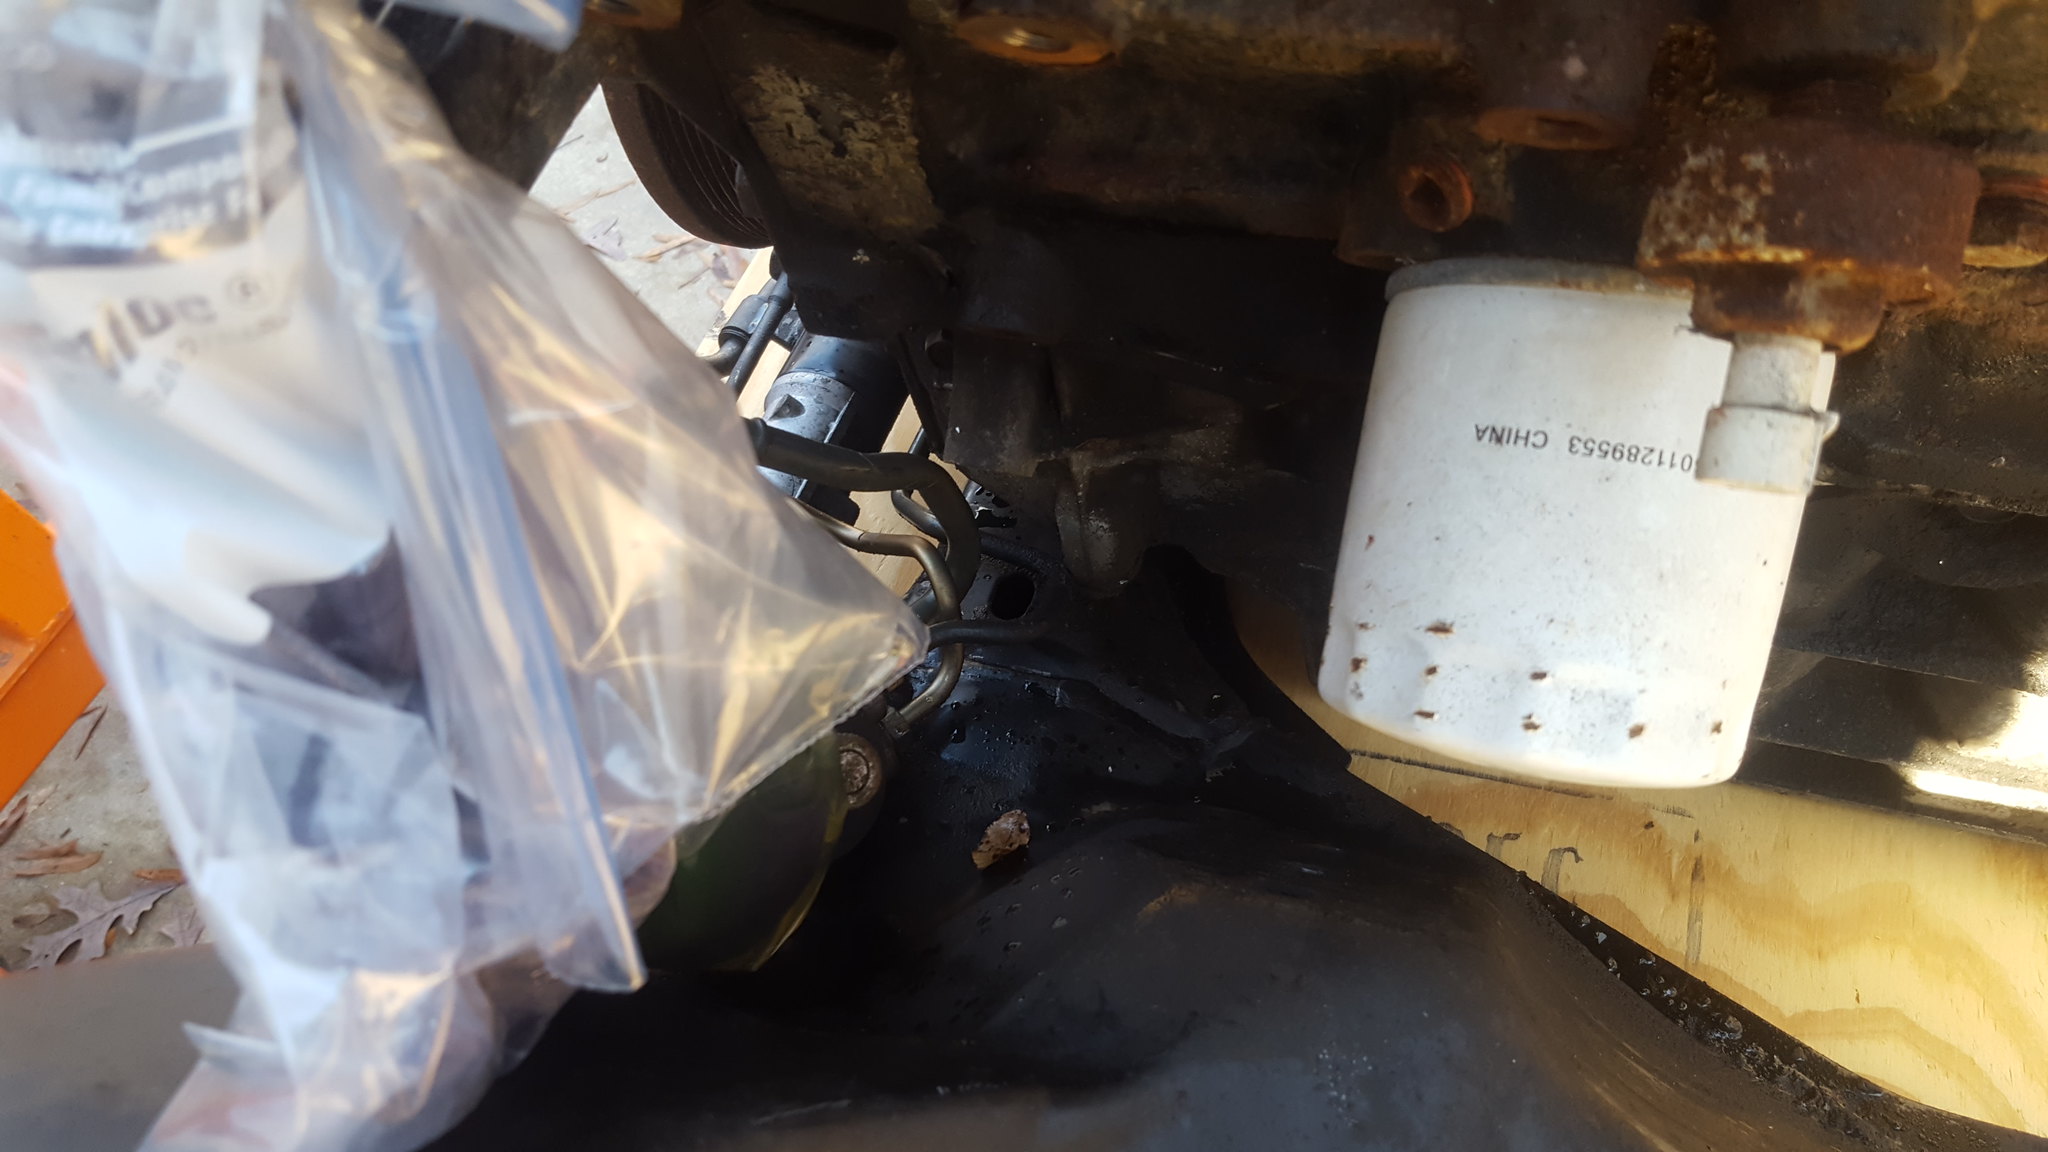
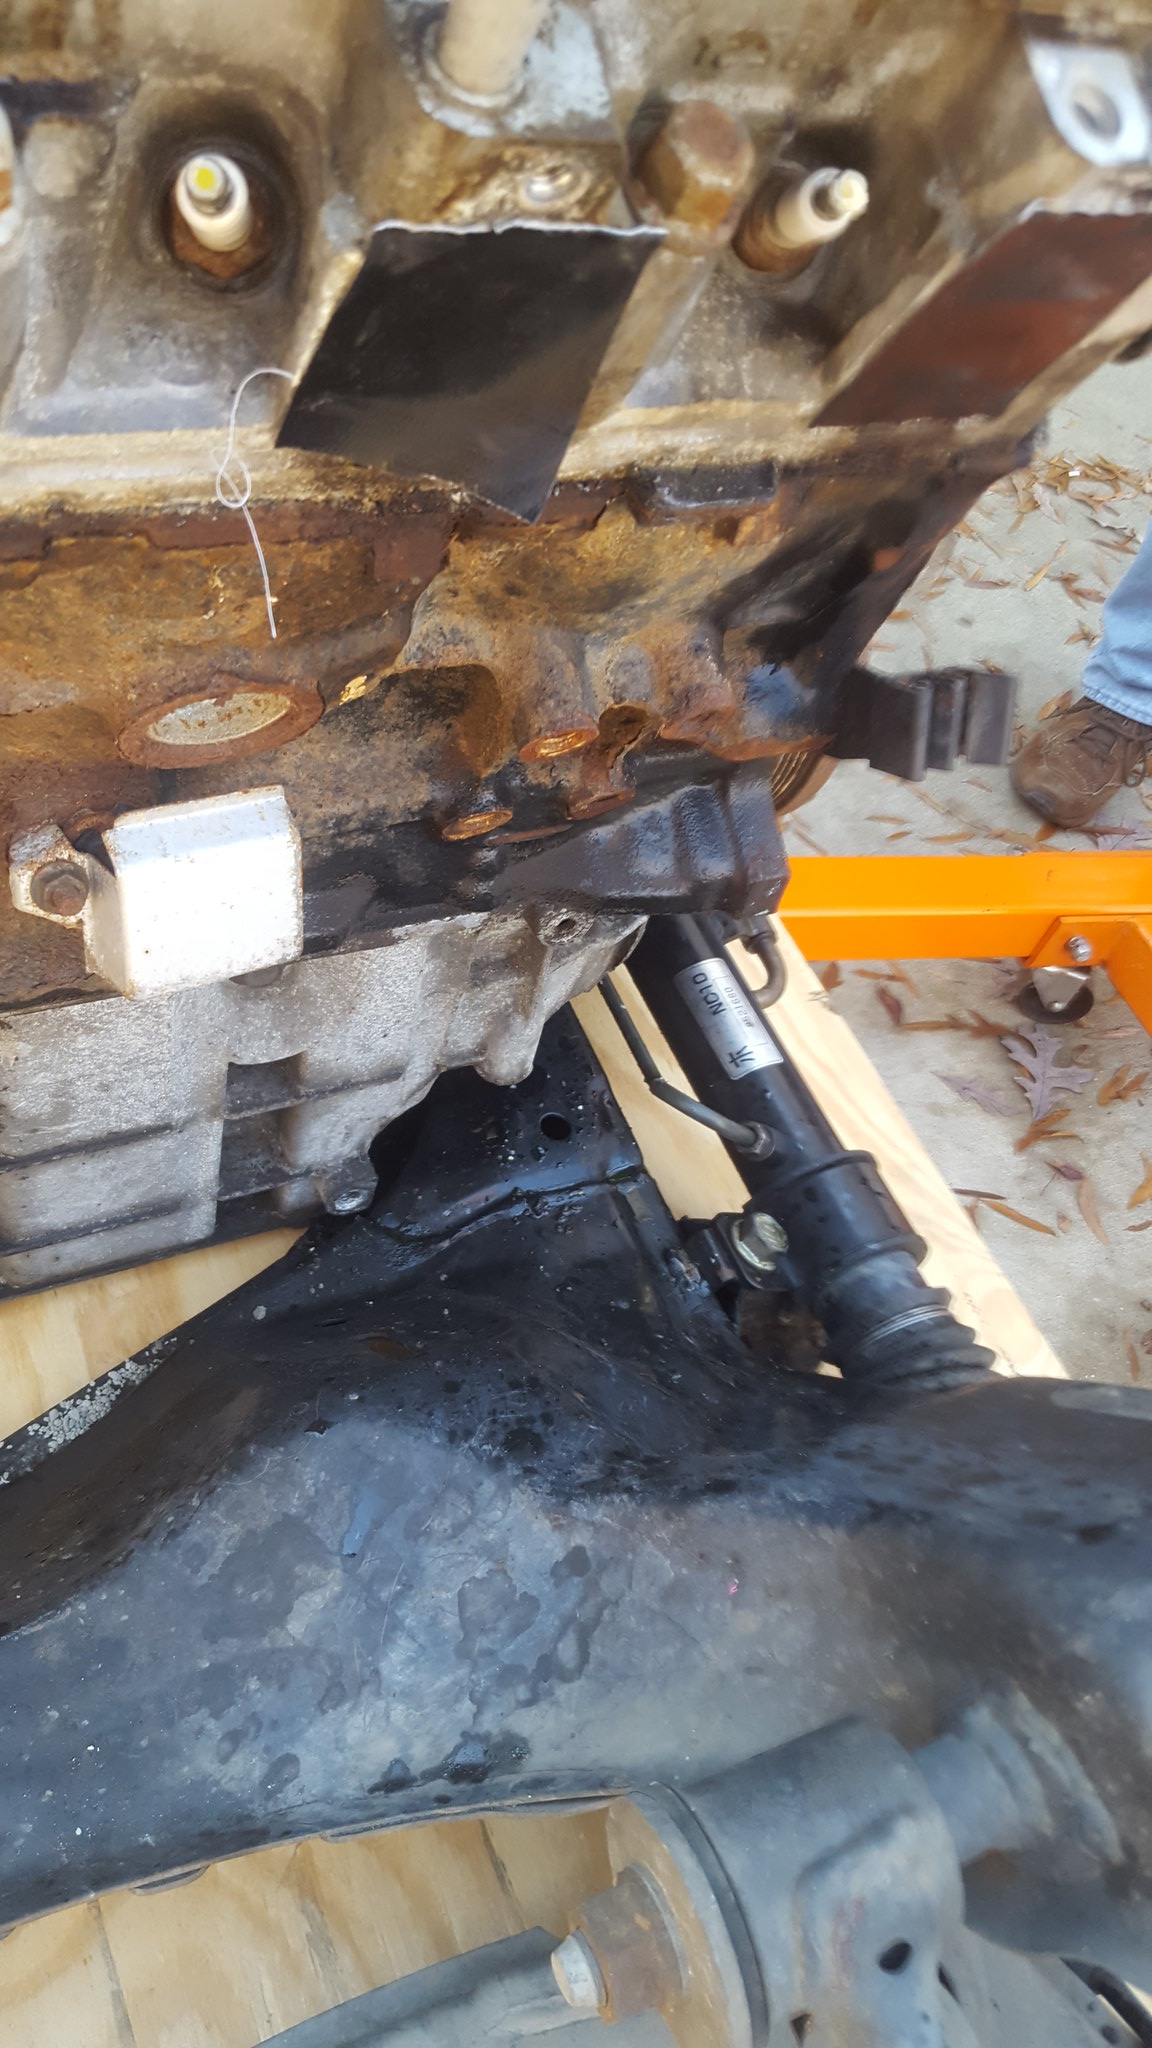
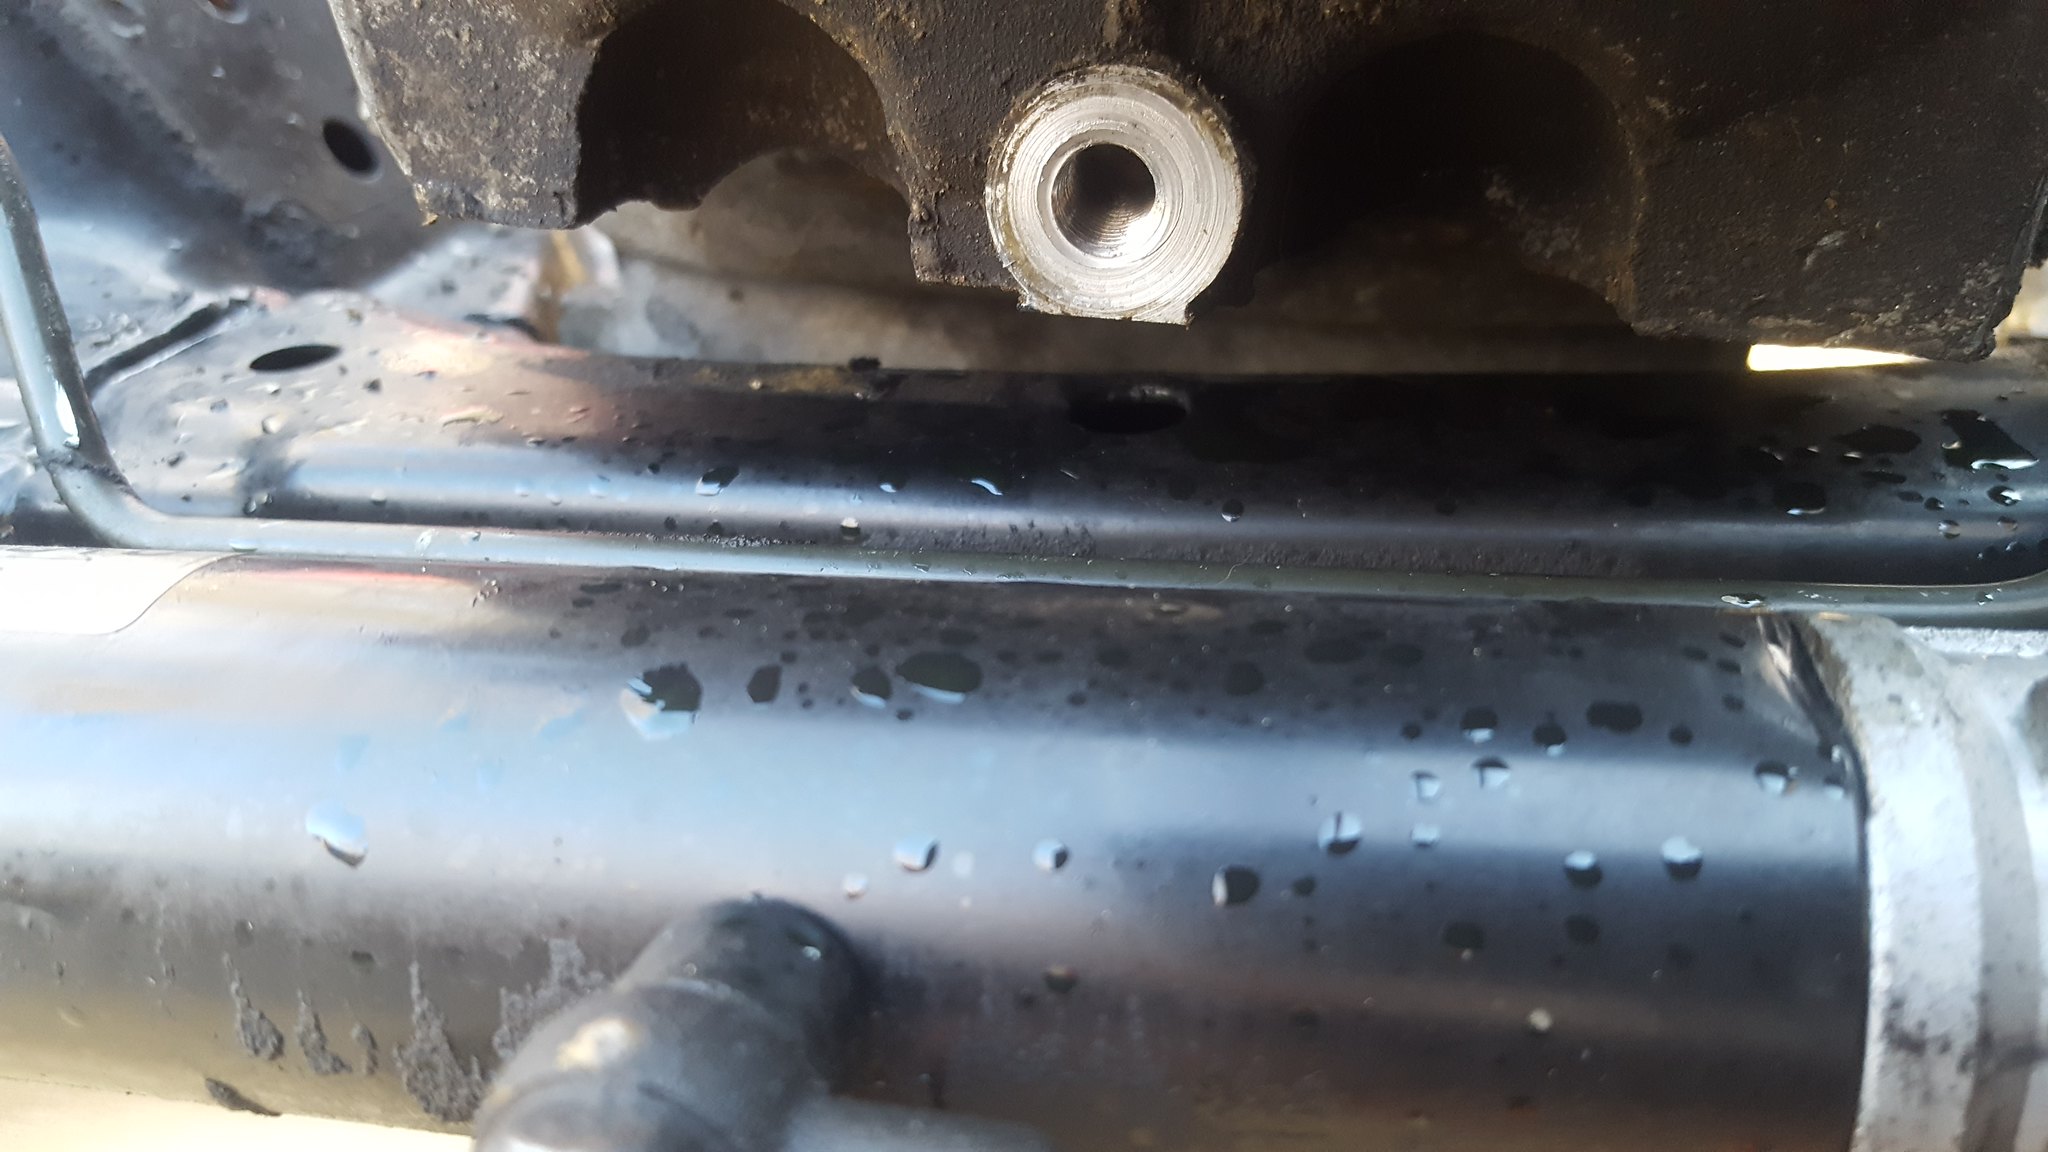
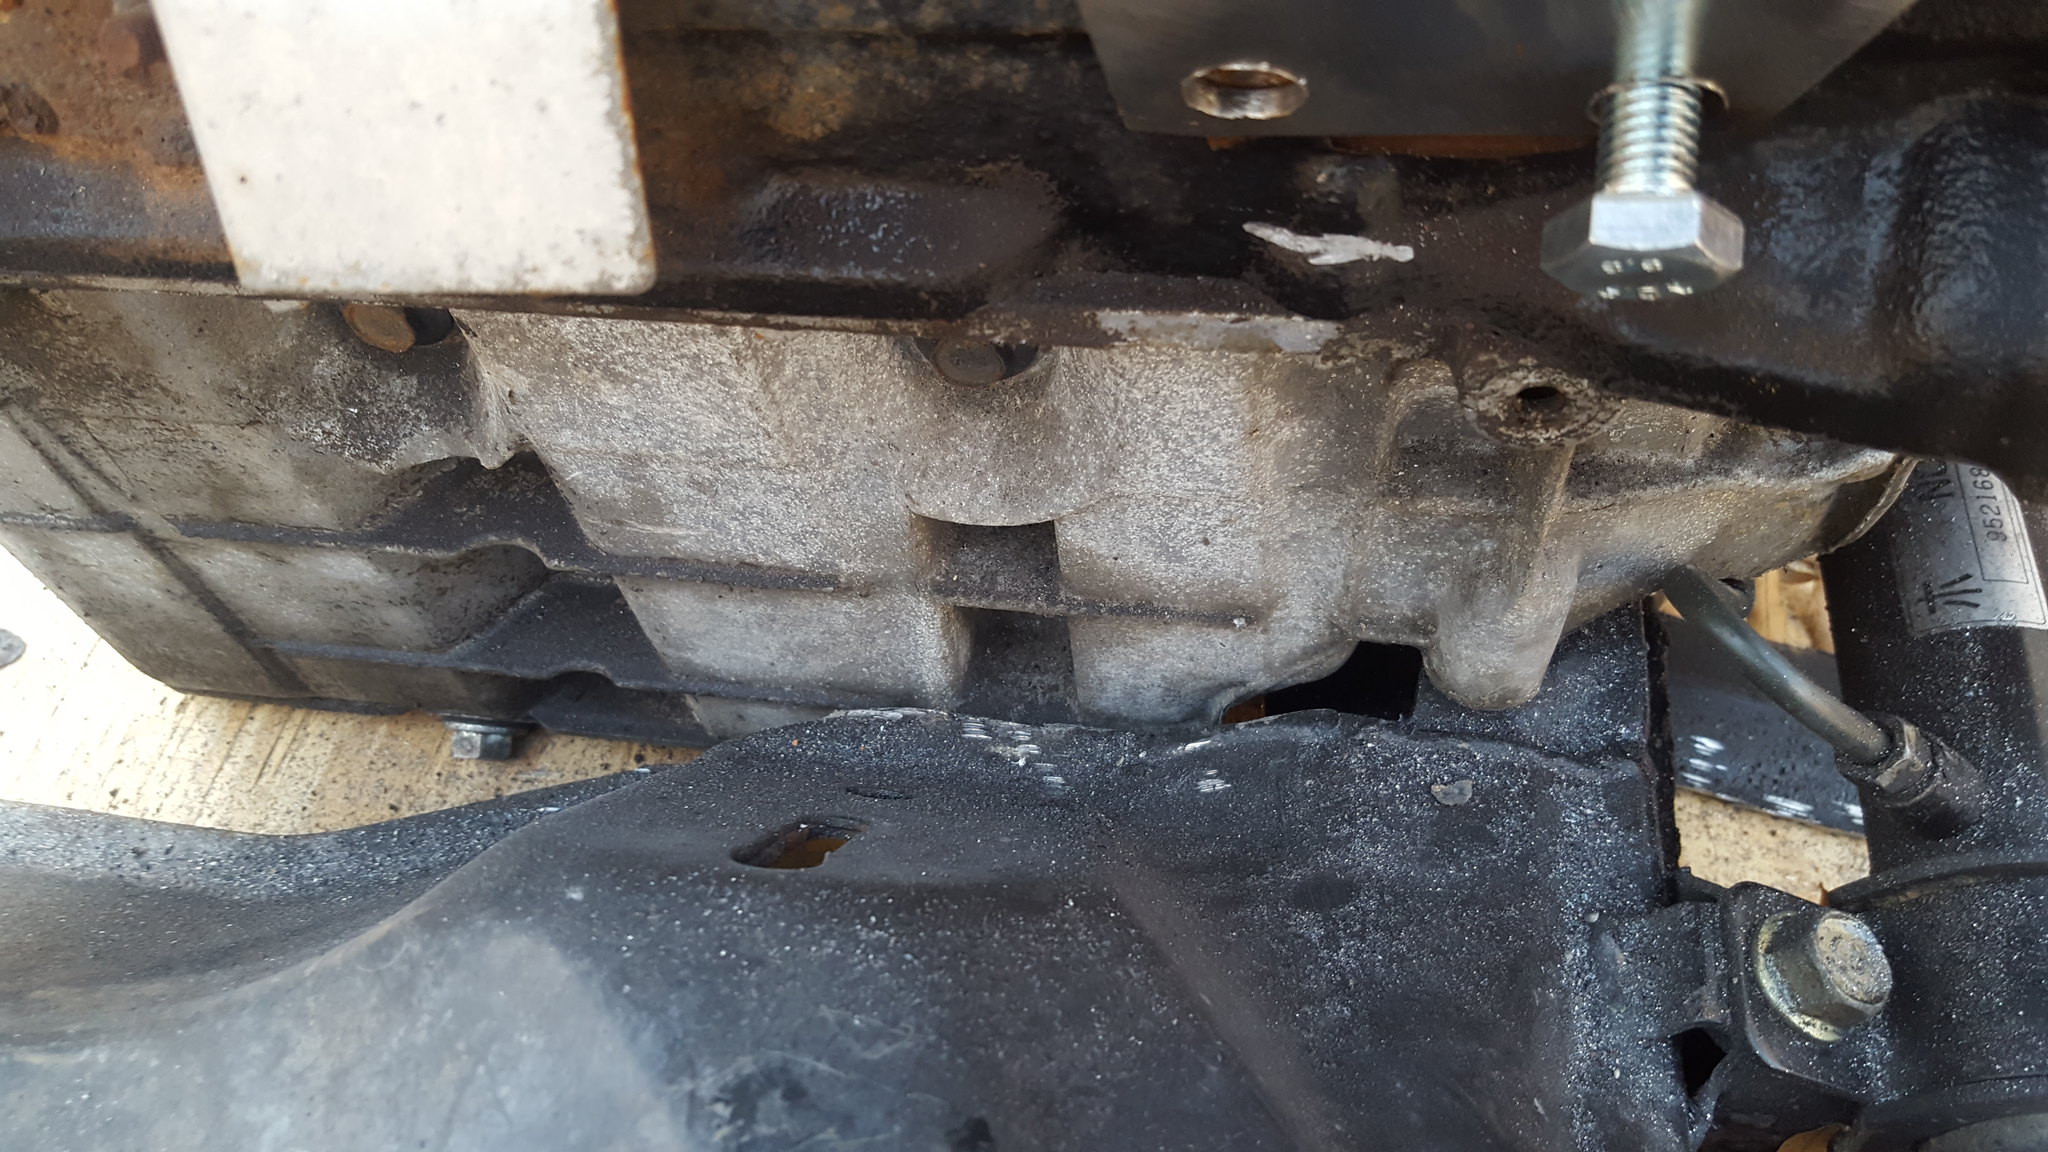
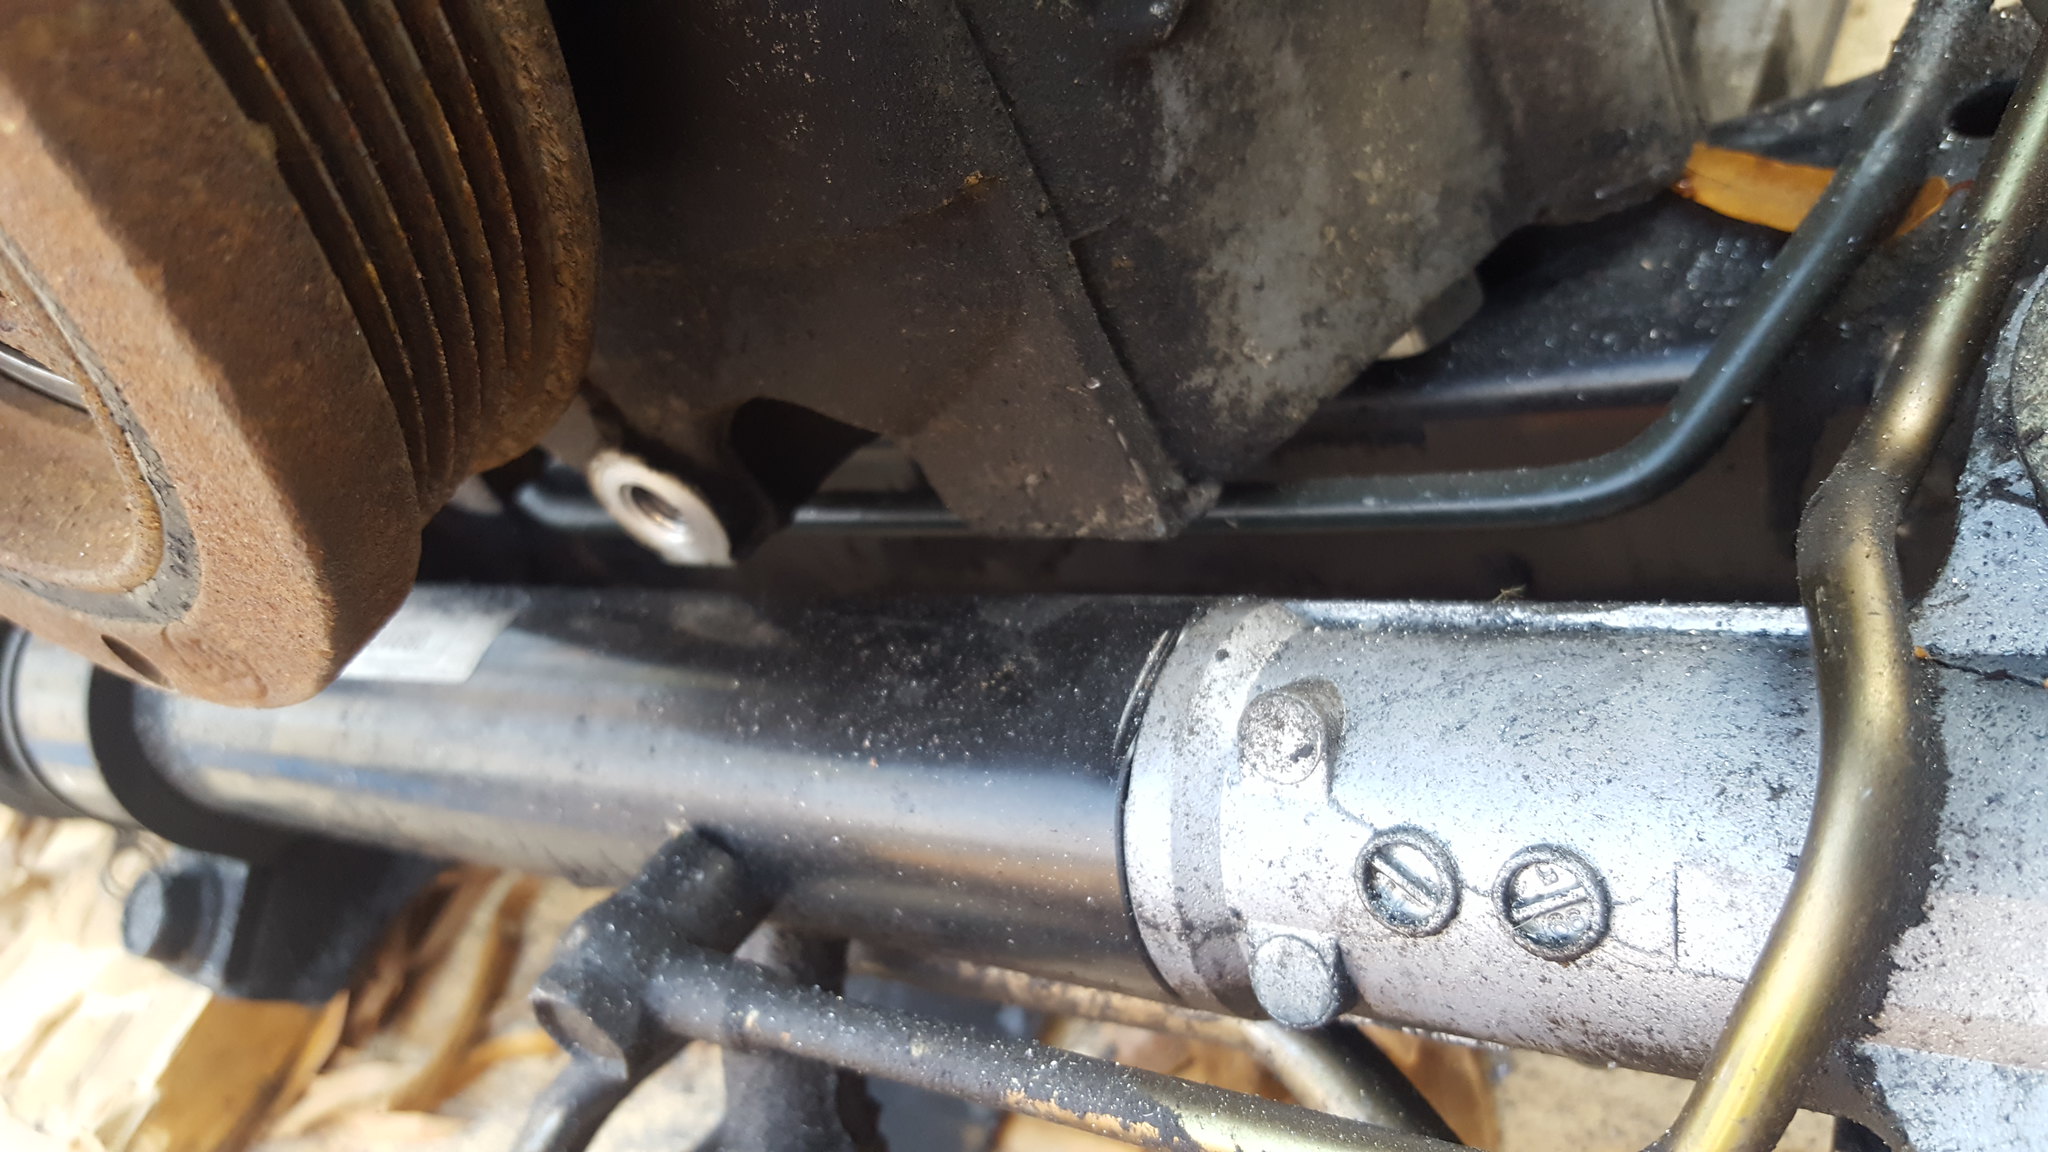
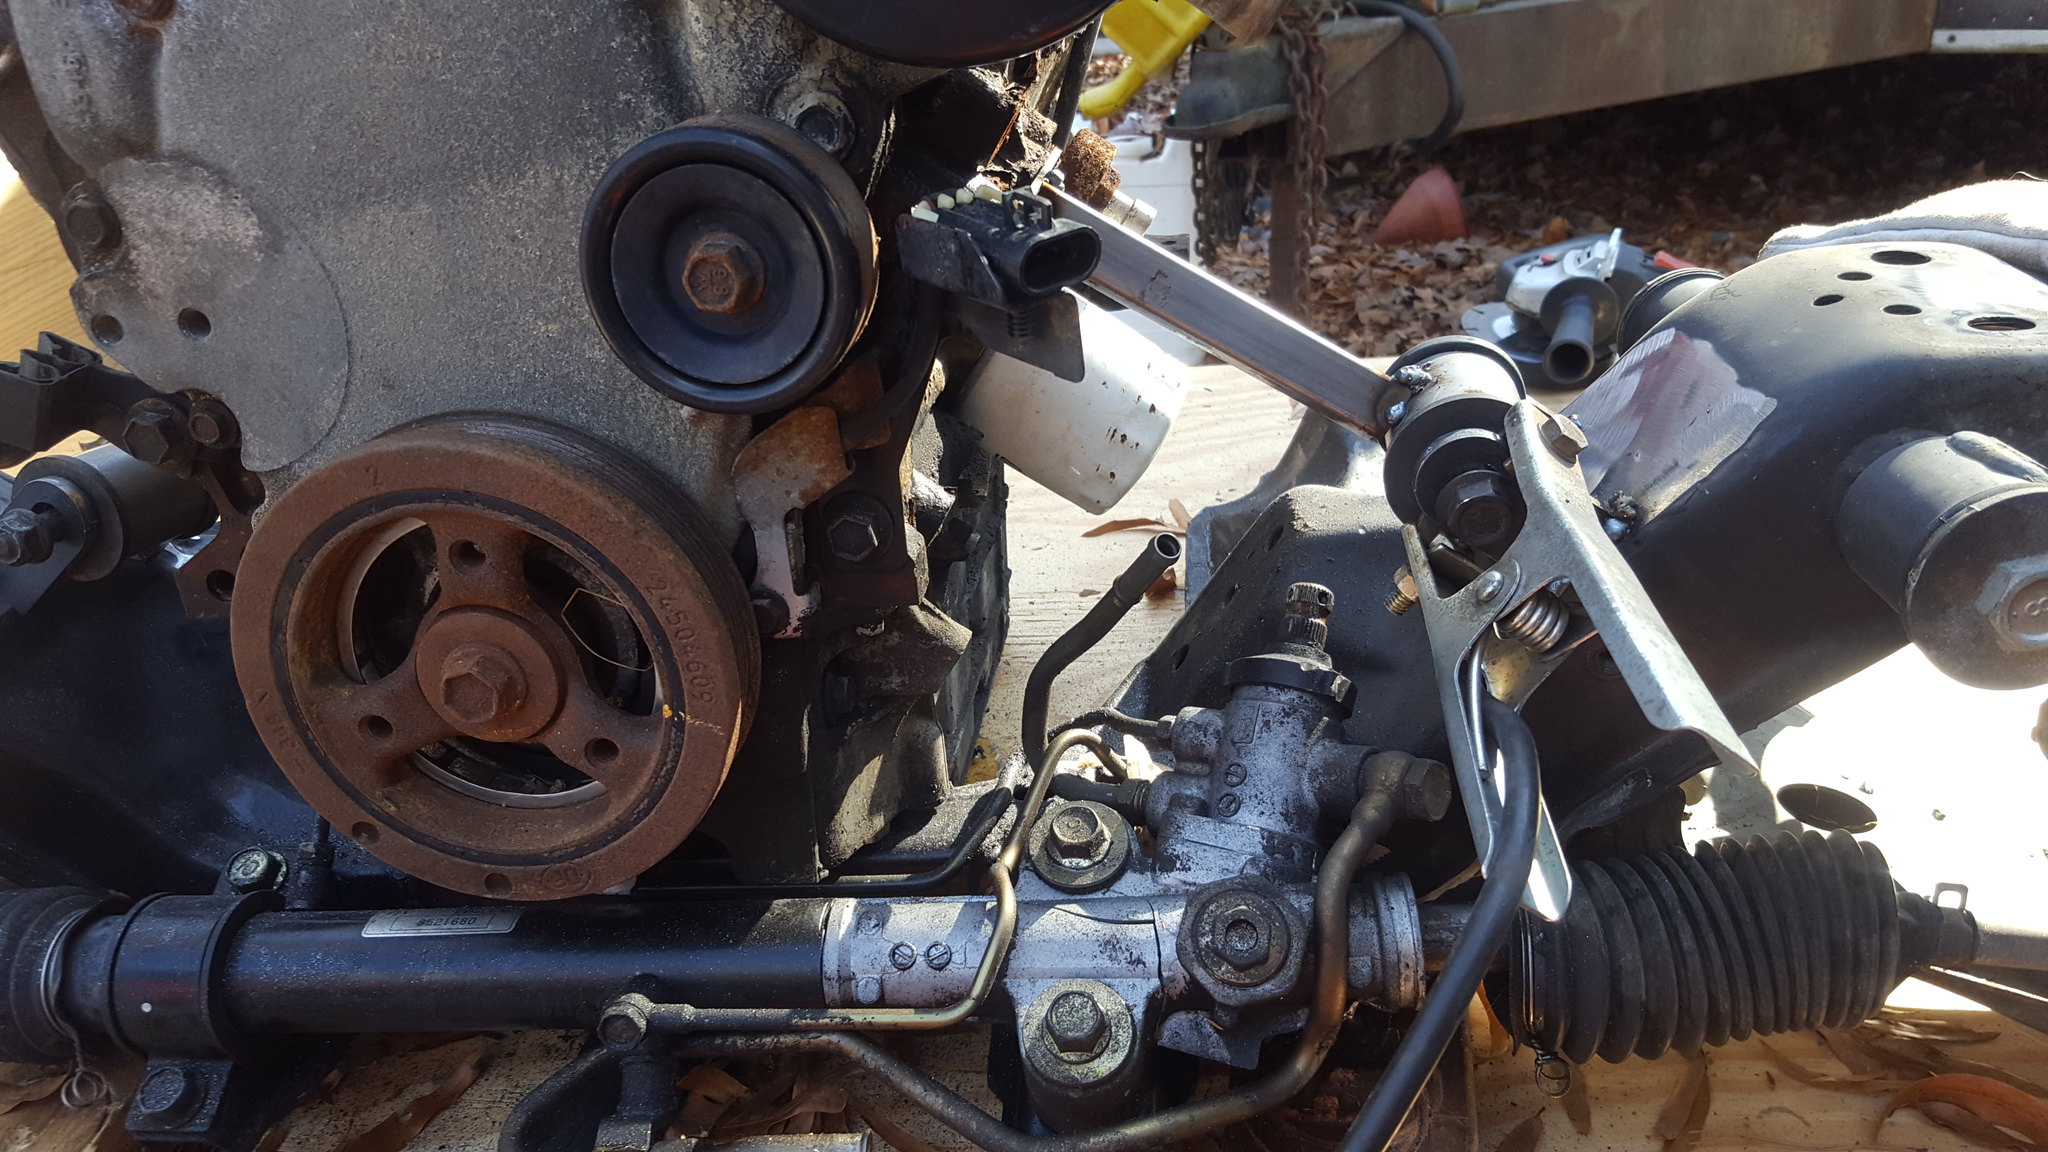
step two is sit everything where they are happy being around each other with no cutting or modifications. the flat flange is kissing the oil pan, theres a threaded boss kissing the crossmember, and a power steering hardline is hitting the pan on the drivers side. additionally, with notching the horizontal flange, grinding the boss off the oil pan, and depowering the rack, i should be able to get the engine an inch more forward of the firewall, as well as about 1/2 inch lower. this will make the pan the lowest spot of the drivetrain bu about 1/4 inch or so. but will give me more clearance at the firewall, bellhousing, etc. all a win, assuming i build a bash plate for the pan.
here's a picture dump. next up is to figure out what design of engine mounts to use. im seriously thinking about heim joints for adjustability.
 20171210_140904 by Michael Crawford, on Flickr
 20171210_140939 by Michael Crawford, on Flickr
 20171210_140921 by Michael Crawford, on Flickr
 20171210_140913 by Michael Crawford, on Flickr
 20171210_140947 by Michael Crawford, on Flickr

Berk yes!
Sometimes it works out!
I am sooo happy it fits that well. It looks kinda like my car now.
Great job!

I’m going to have so many engines at the challenge again next year. Had 3 there this year
In reply to Patrick :
Hopefully we make it this year. Loooong way to go.
Wv: not set in stone yet, but definitely workable. Figuring out engine mounts in my head now. Should have taken more pictures.
Also: did you know that a 2wd suburban reat shock is the exact same dimensions as a nb miata front shock? And that they are bilsteins? Now to figure out how to cut a circlip groove....
I love your imagination, determination, and a whole lot of other ations. I think once you get past the engine install, the rest will fall into place. Good luck on the G-Mata.
In reply to Dirtydog :
Hardest part for me is locating thing in space. The rest is just connecting the dots.
Just did some searching for the 3.4 swap. It's been done, but can't find how to do it. On an old Miata site, it was mentioned knocking the firewall ears off and removing some tabs. But this was done using the Camaro version of the 3.4, don't know if the oil pan makes a difference. Someone mentioned using spacers on the frame ala 4x4 trucks. Don't know beyond my scope.

Dusterbd13 said:In reply to Dirtydog :
Hardest part for me is locating thing in space. The rest is just connecting the dots.
I wish we were closer - I excel at packing 10lbs of E36 M3 into a 5lb bag, but can't fabricate my way out of a wet paper one.
So, internet stalkers:
Finally found a write up on this. May be the only finished gm 60 degree v6 swap into a miata in existence.
http://www.cardomain.com/member/evilmiata/
Anyone know how to get ahold of this guy now? Id really like to pick his brain a bit. He went about it a bit differently thathan I plan to, id id like to figure out why.
Dusterbd13 said:So, internet stalkers:
Finally found a write up on this. May be the only finished gm 60 degree v6 swap into a miata in existence.
http://www.cardomain.com/member/evilmiata/
Anyone know how to get ahold of this guy now? Id really like to pick his brain a bit. He went about it a bit differently thathan I plan to, id id like to figure out why.
I sent him a pm on 60v6, he hasn’t been active since 2012 though.

Just tuned in to this thread. Very cool. I love that you are actually doing it and not just talking about it.
I will be following along.
Boost may not happen for 18, but nitrous is a definite assuming that we can get it built and tested before September.
This is a great time with my dad. Whatever happens its well worth it.
This engine placement is kickingmy ass.
Attempts #3&4 failed. Next time....
Dusterbd13 said:This engine placement is kickingmy ass.
Attempts #3&4 failed. Next time....
I'll reiterate our conversation we had offline for others who are following along....
Get your subframe plates where and how you want them. Bolt plates onto engine. Connect with metal, tacking it in place. Final weld off the car.
We did a through hole into the subframe. Put a plate on top of a hockey puck. Ran a bolt through plate, through hockey puck, and through subframe. Bolted a plate to the engine. Used some 1x1 box tubing to connect.
Thats what i spent most of the day today doing. Except when i put it back togeter i had the engine roughly 6 inches furthe back than could fit while retaining the firewall.
Im sneaking up on it. Ran out of time today (and for the next few days), but can see where i went wrong.
I need to clearance the crossmember, and the wings at the back of the engine bay, then remake the mounts.

look at Compitition Enginering catalog on line for there motor mounts they may have something that tickles the brain or another street rod site even speedway has a dozen different looks.
Challenge budget so far:
previous challenge budget: 445.90
recoup total: 800
new money:
75 for 15x6 stock nb wheels
37.72 gasket kit for 3400 from ebay
200 for ½ spec miata cage (main hoop, rear downtubes)
traded stock trans for replacement steering rack cause ours is busted
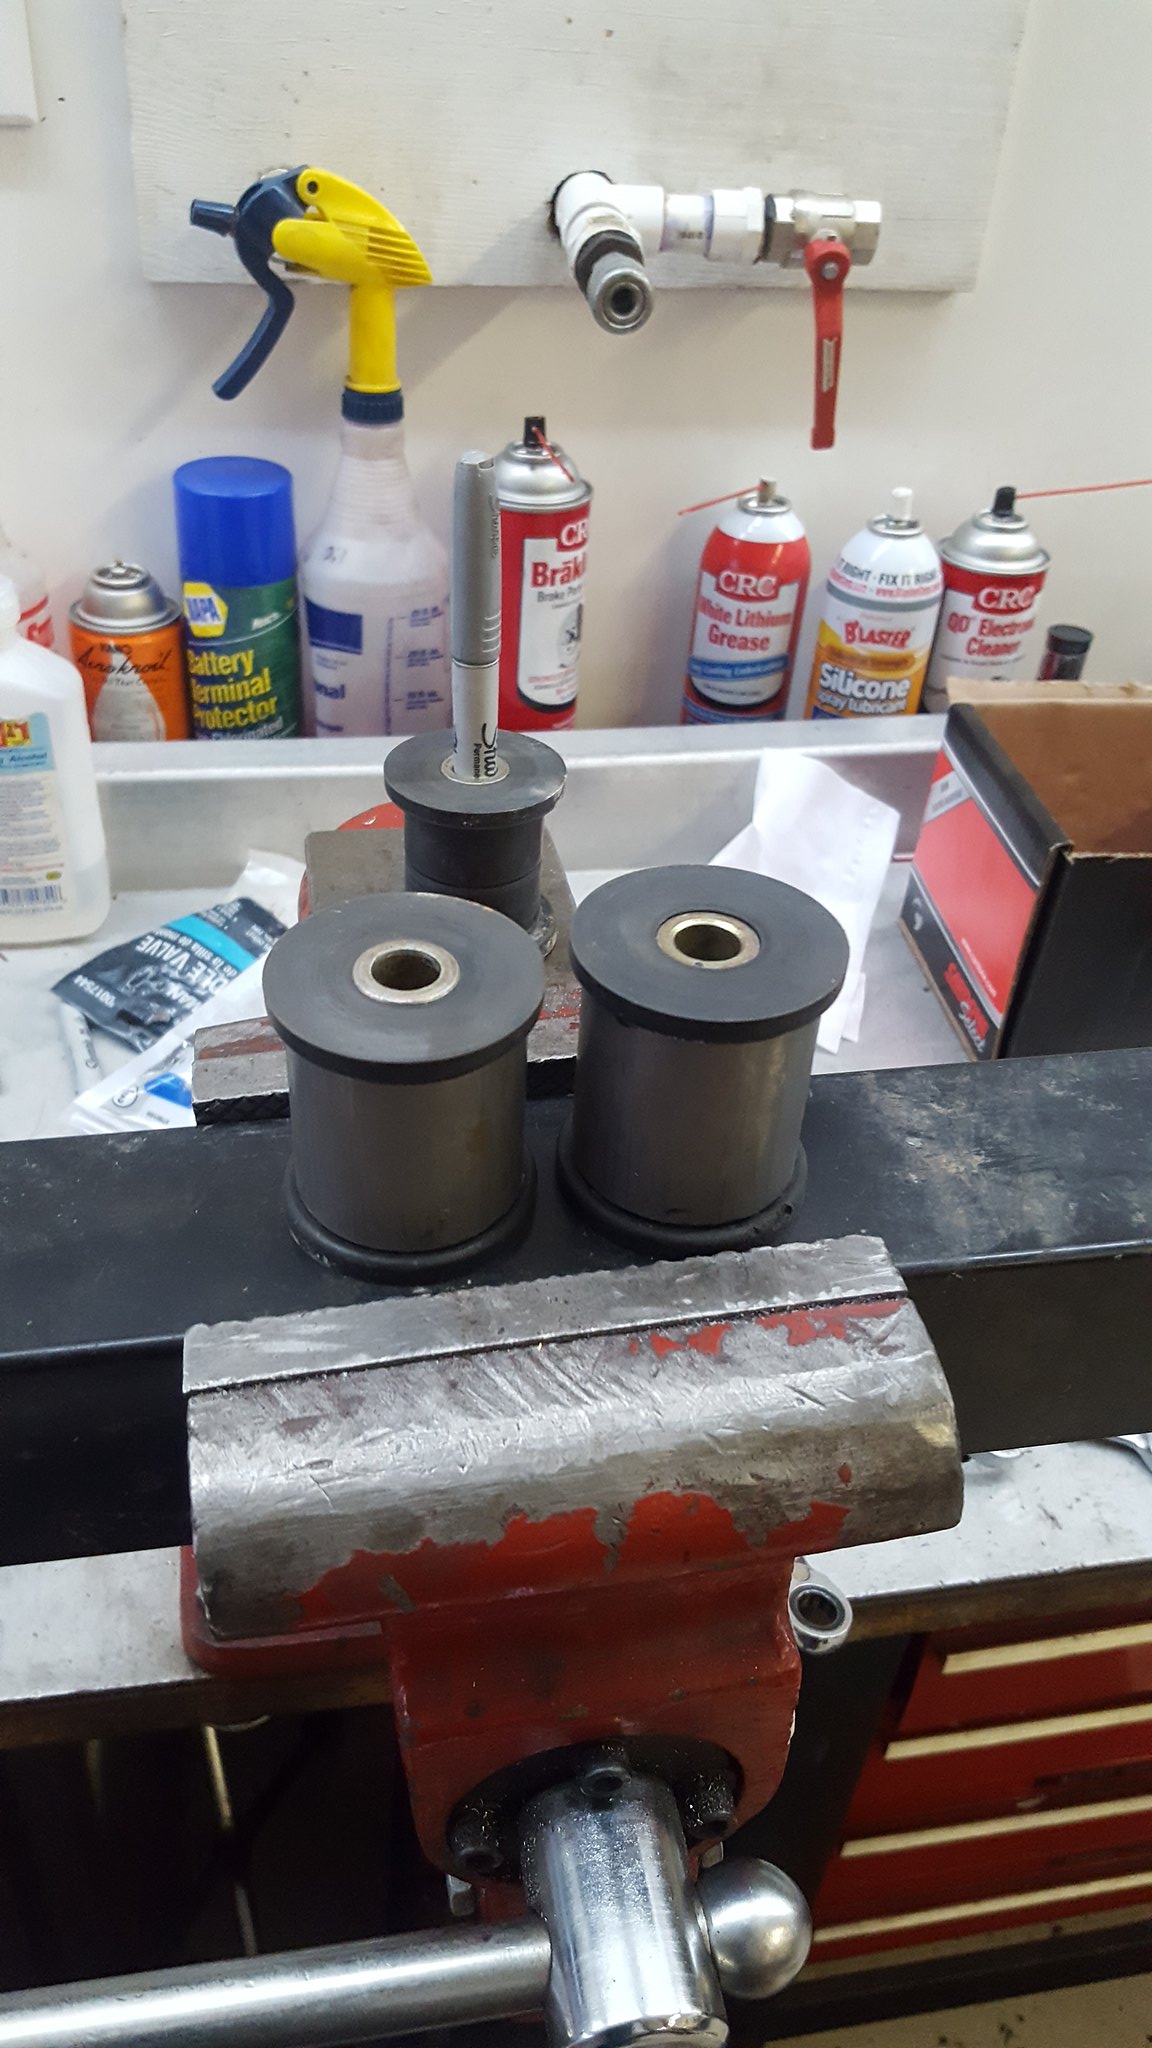
found some poly bushings and sleeves I a ziplock baggie in the bottom of my gauge box. No idea what they are from, or where I got them. But they fit inside some scraps of roll cage tubing. 2.00
bought a new spool of welding wire: 20
new total: 780.62
ok, when we left off, I had dropped out the crossmember for making the motor fit. I thought I had it sorted out via pictures, so I set the crossmember up on the sawhorses, and made engine mounts. While going through my quickly expanding gauge collection, I found a ziplock baggie of miscellaneous poly bushings. Couple sway bar end links, some mount bushings, bumpstops, and I think 4 control arm bushings. Couldn't tell you what this stuff is from, as I haven't been to the bottom of that box in years. Leftovers from something. But the “control arm bushings” fit inside the scraps from last years roll cage build. So im using them.
 20171216_101933 by Michael Crawford, on Flickr
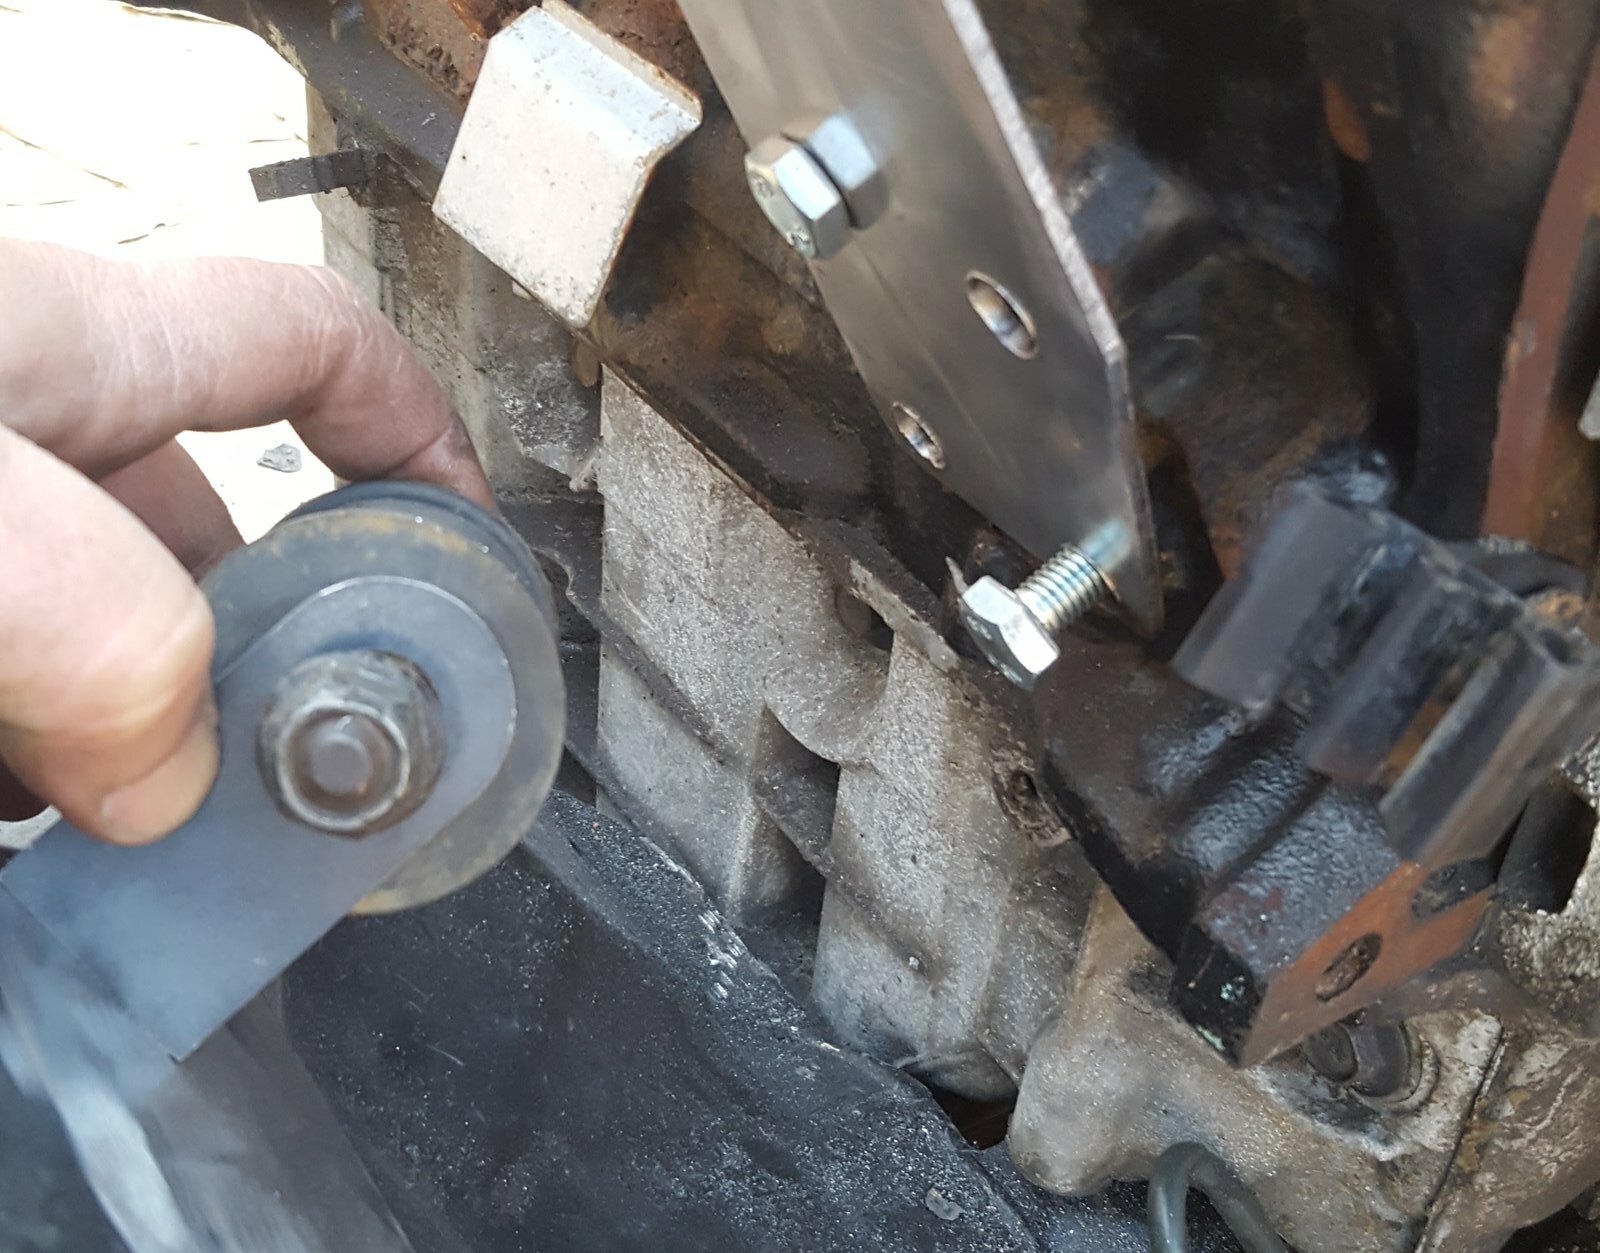
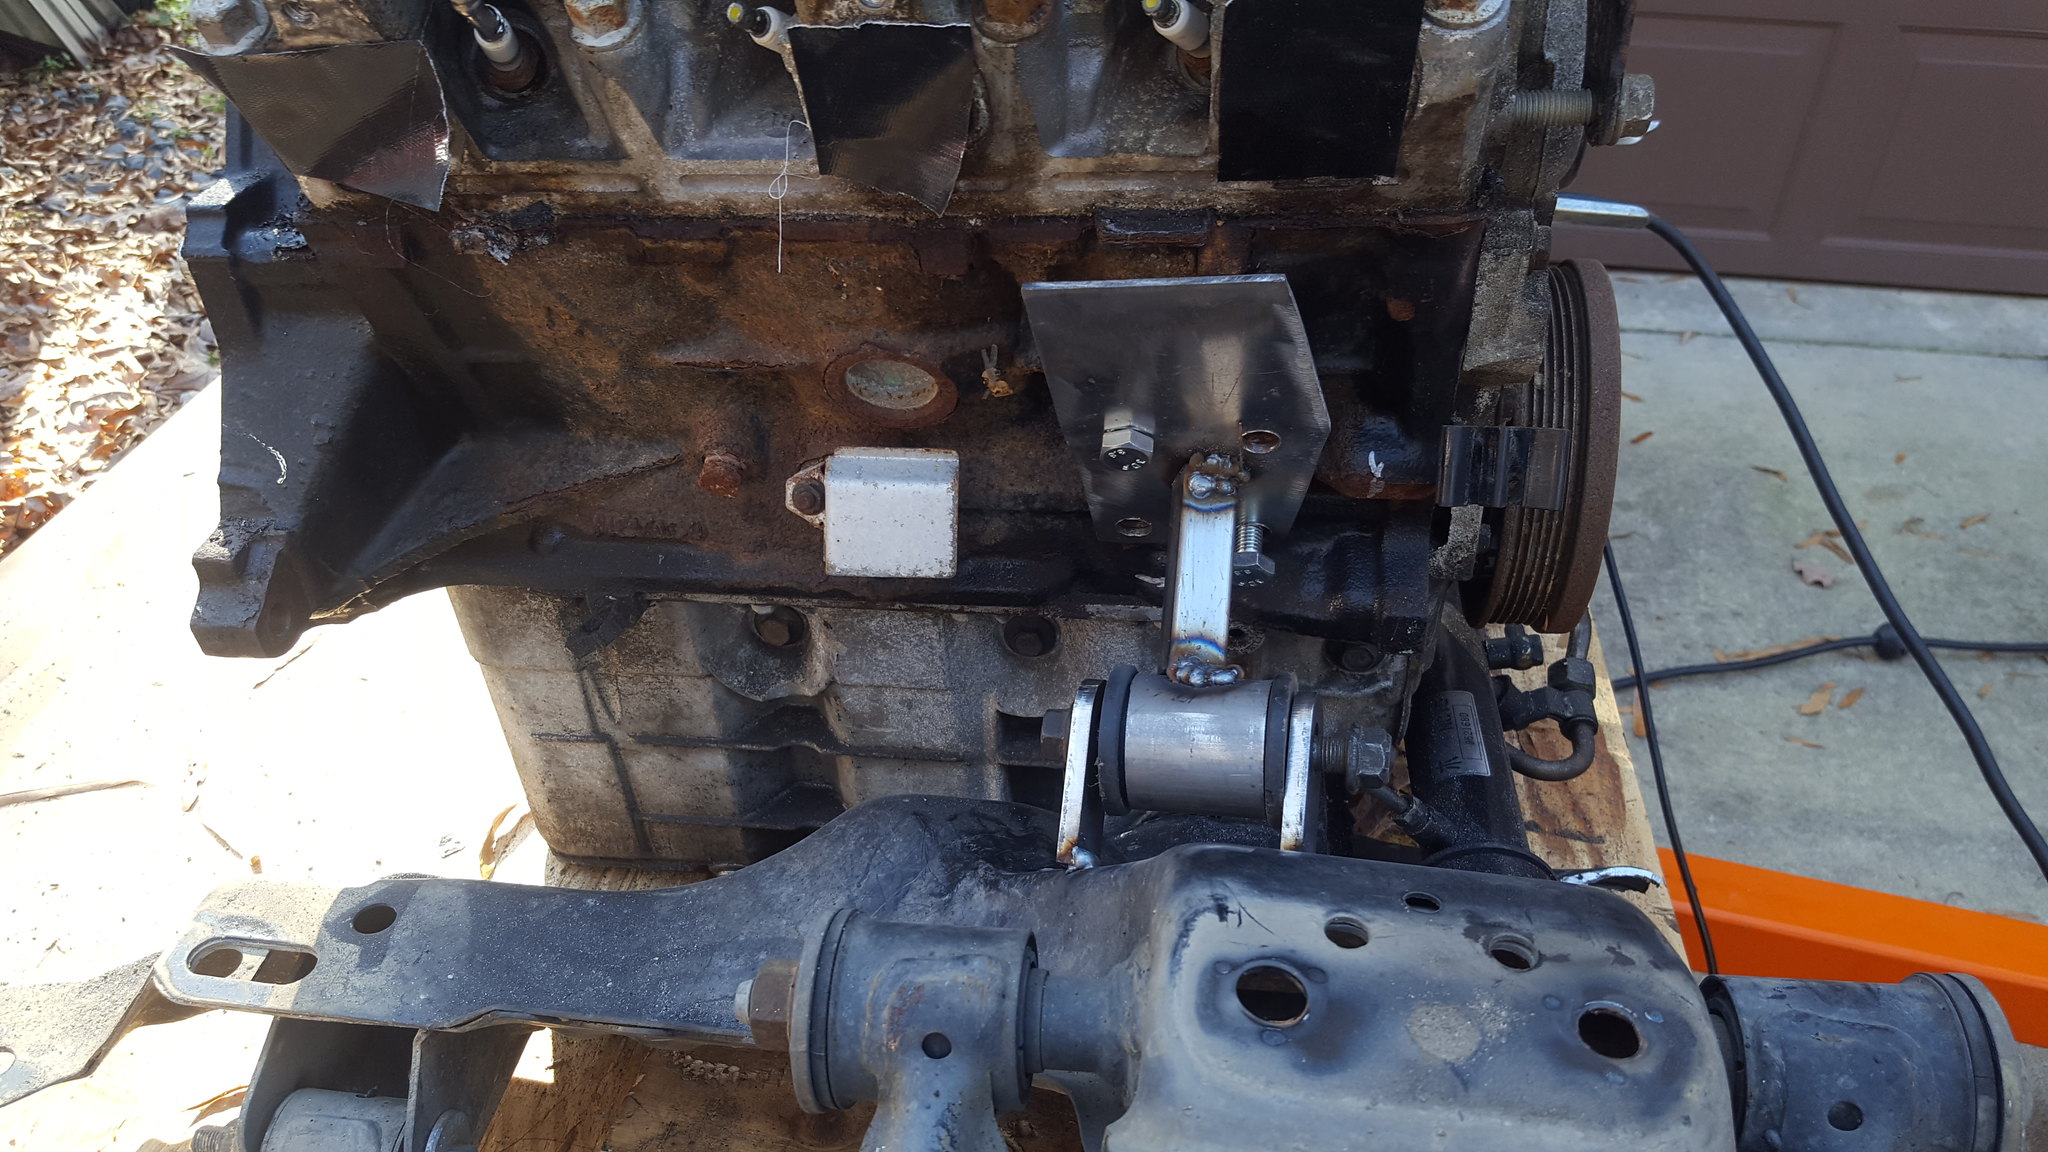
went ahead and made some 1/8 plate that mount to threaded bosses in the block, and then some tabs to weld to the crossmember.
 20171216_111618 by Michael Crawford, on Flickr
to get the engine where I thought it needed to be, I notched the crossmember by an inch or so, and spaced things with various nuts/bolts/chunks of wood.
 20171216_111445 by Michael Crawford, on Flickr
 20171216_111434 by Michael Crawford, on Flickr
I then tacked the tabs, the tube, and the plates all together. Didn't fully weld because I wanted to confirm clearance.
 20171216_114929 by Michael Crawford, on Flickr
 20171216_131329 by Michael Crawford, on Flickr
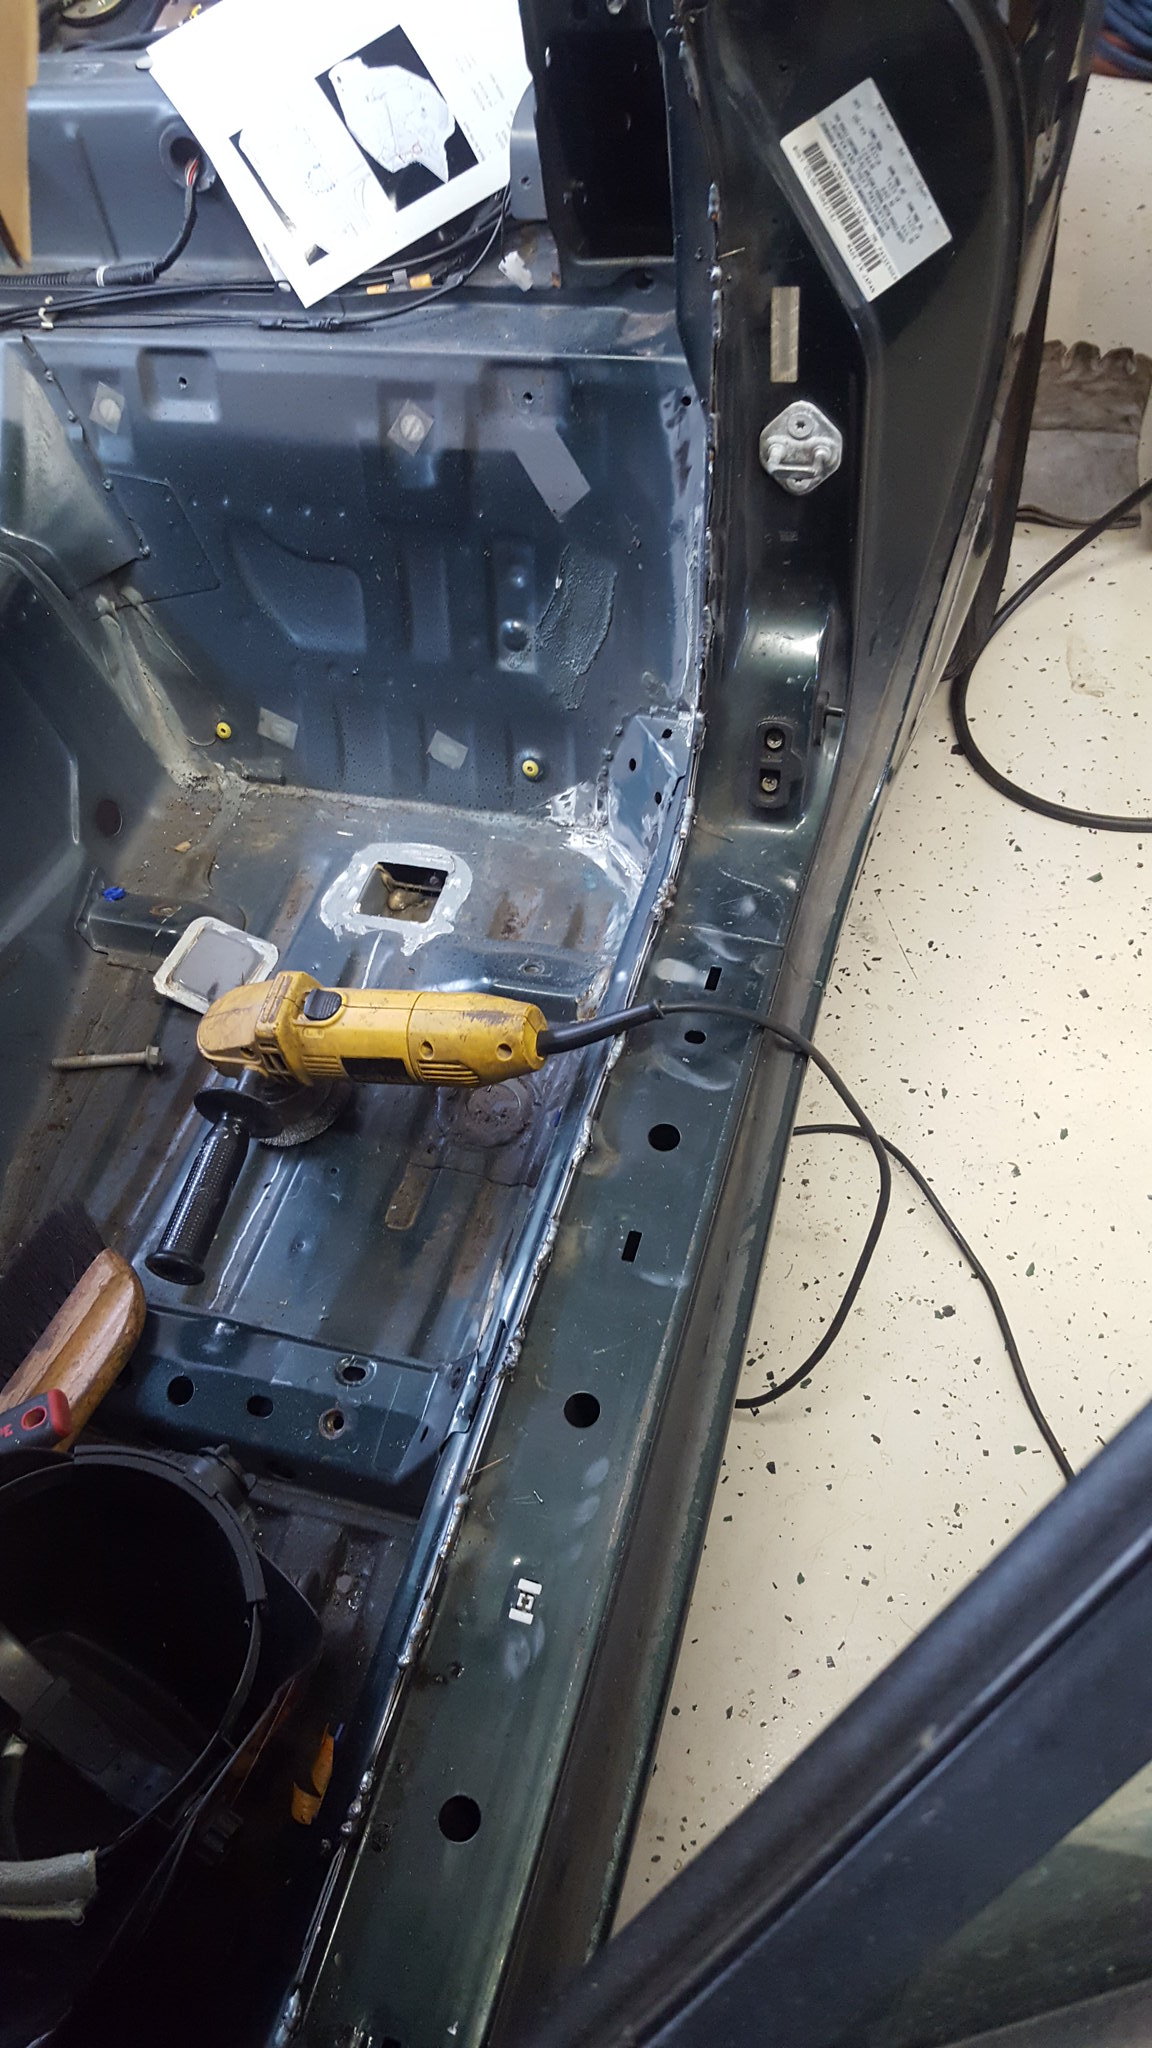
while ive been obsessing about drive-train placement, crossmemeber strength, etc, dads been seam welding per the flyin miata recommendations. Hes having a good time, and this is his first time doing sheetmetal with a MIG. Hes now got almost all of it done and ready to go outside for grinding down, seam sealer, and paint.
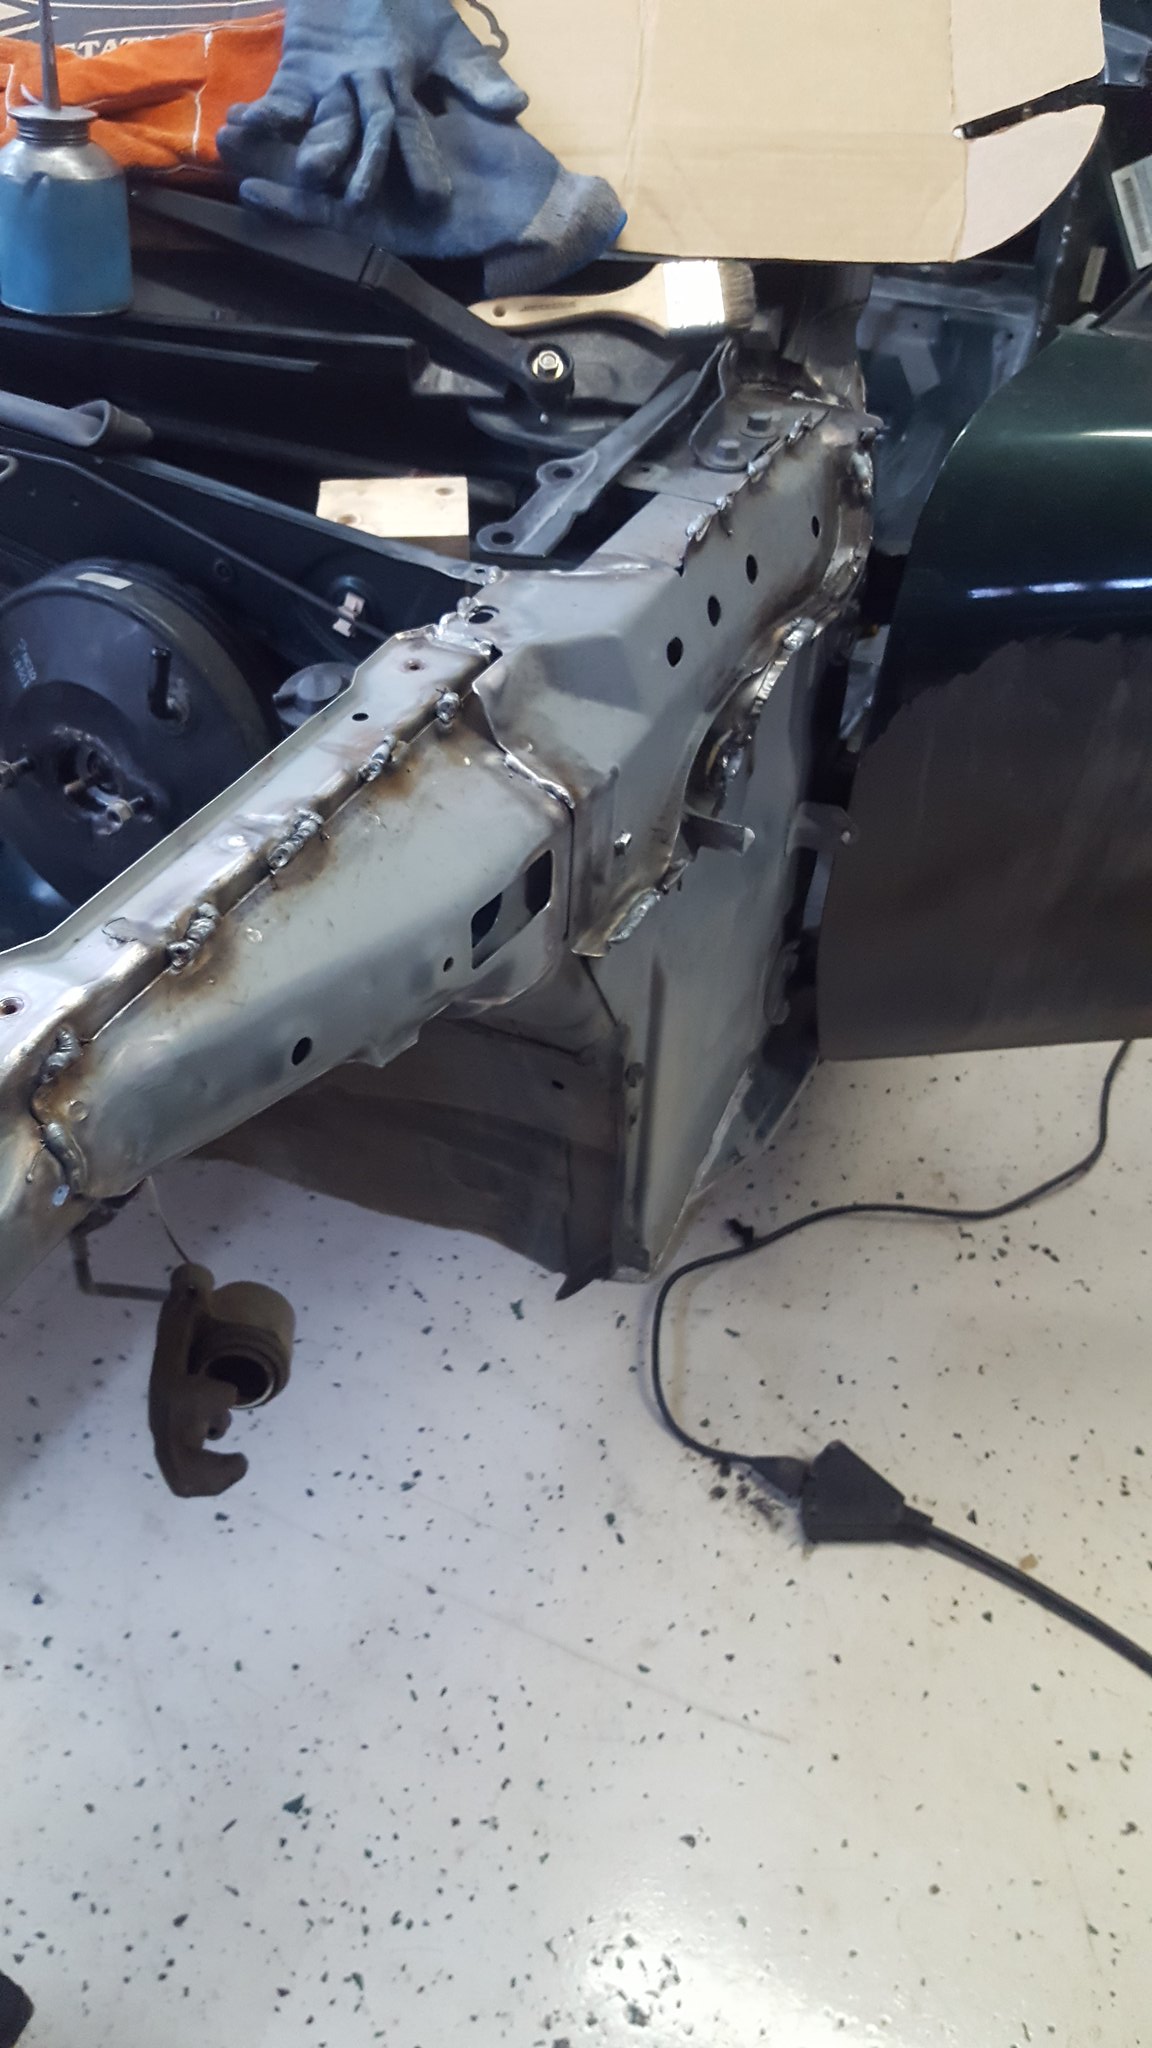 20171216_084910 by Michael Crawford, on Flickr
 20171216_084916 by Michael Crawford, on Flickr
 20171216_084905 by Michael Crawford, on Flickr
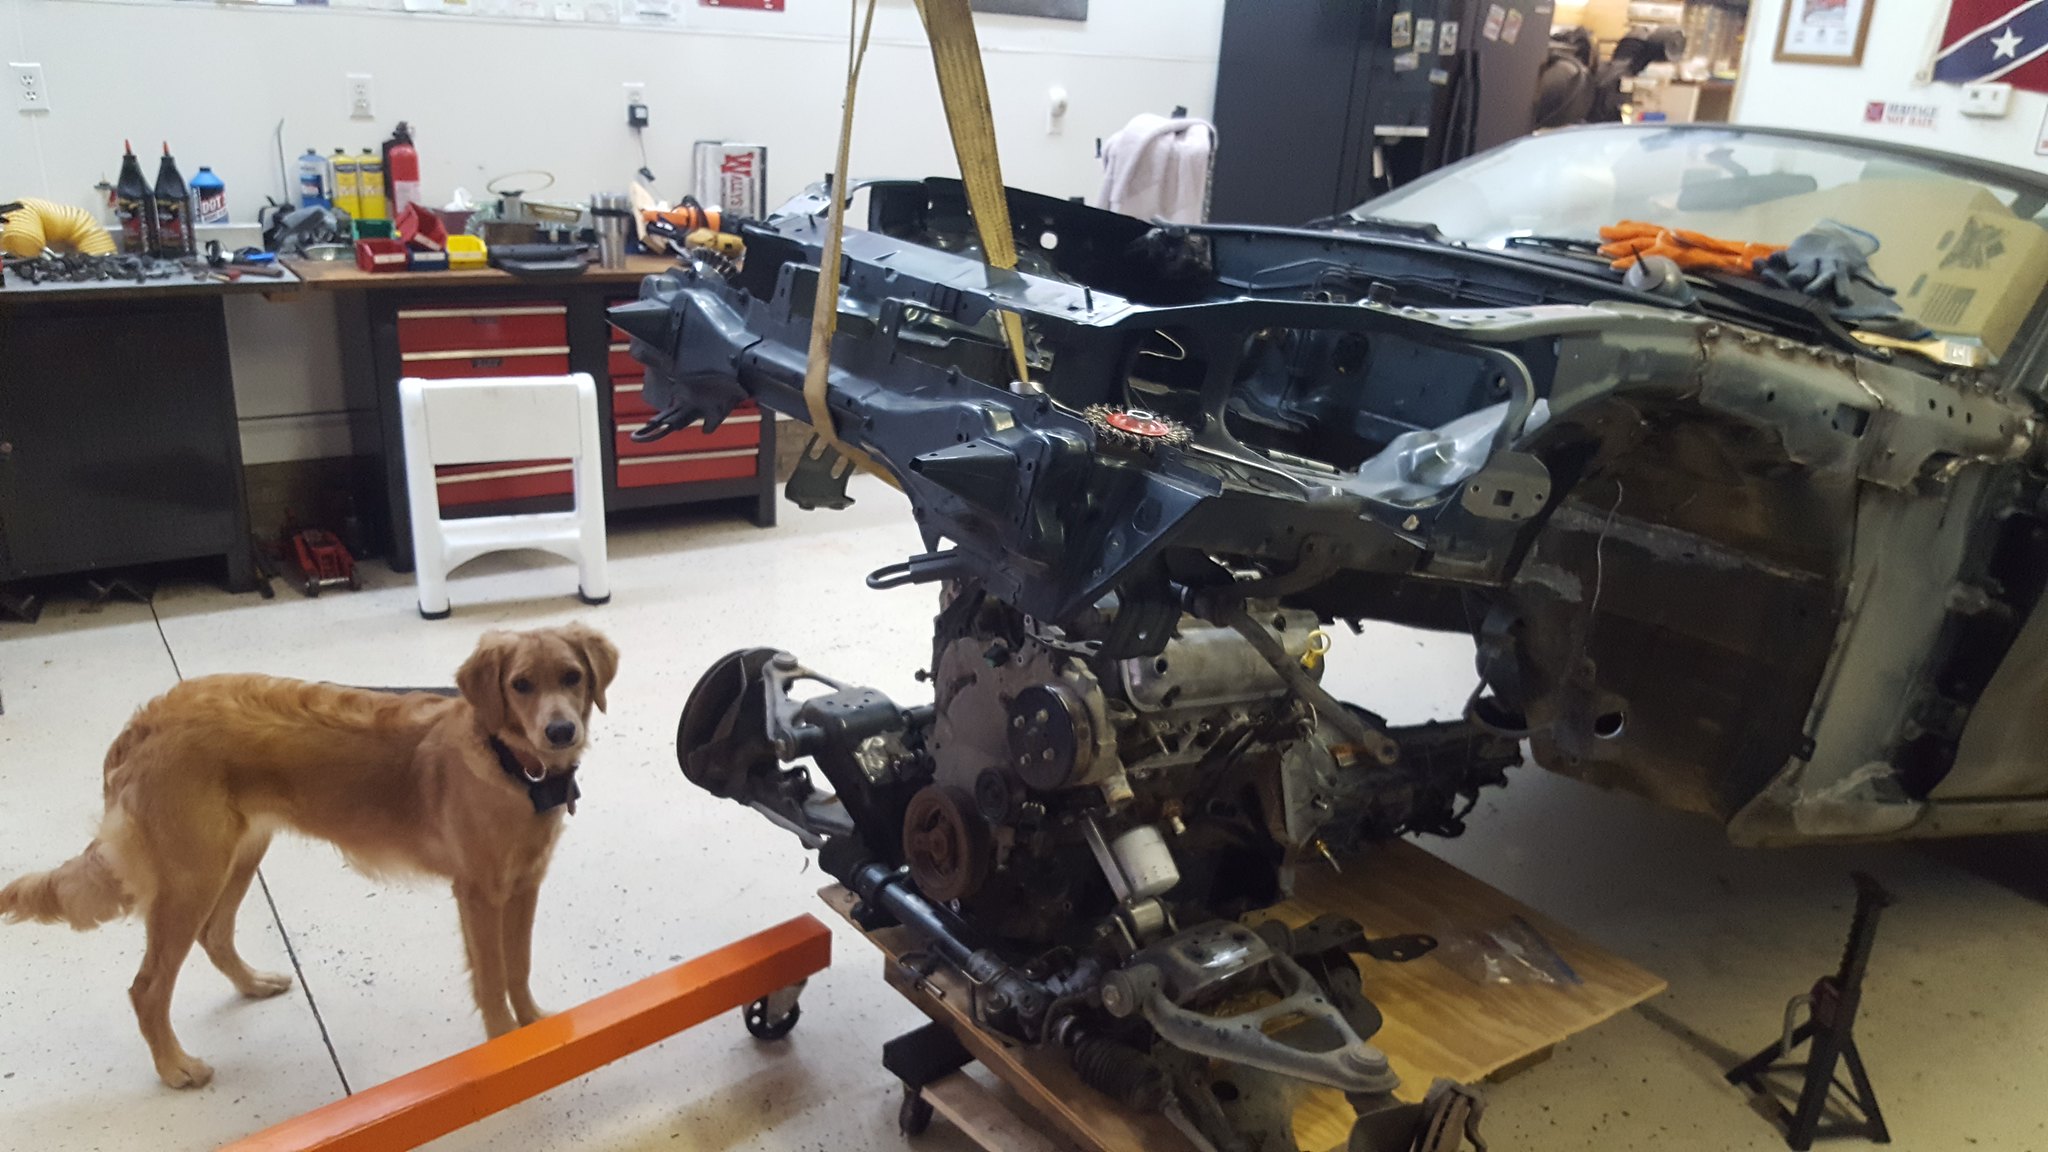
we then jockeyed things around, put the engine and trans on a sheet of plywood on 6x6 chunks on refrigerator dollies. We wrapped a tow strap around the front of the car and hooked to the cherry picker, and went to see how it worked.
 20171216_141337 by Michael Crawford, on Flickr
it did not go as planned. We fouled the ears on the firewall, and the engine was about 6 inches behind the plane of the firewall. No bueno. So we pulled it all back apart, and used the portaband to chop the ears out of the engine bay, and knocked the motor mounts I spent all day building apart. When I get back from the in-laws this weekend, were going to try test fitting again. Dads also starting in on the 2x2 framerail reinforcements, as well as the prep for the ½ cage.

" and the engine was about 6 inches behind the plane of the firewall. No bueno"
I thought engine setback was desirable.....what am i missing???
shifter would have been mounted in the trunk, and there would be nowhere for legs. just too far back.
once its hwere i want it, it will still be set back further and lower than the factory engine for better weight distribution.
im also trying NOT to cut anything more than just a little. especially the firewall.
You'll need to log in to post.


