
So, the GDub has mounts that are shot - Im convinced the rattling Im getting at idle or going over RR tracks and potholes is the motor/trans rattling on something from either toasted rubber in my motor mounts, or in the subframe/steering rack. I can buy some Urethane mounts for ~$55+ each, or I can buy some 70a liquid urethane from McMaster Carr for $35 and have enough to fill at least all 4 motor mounts if not the rack and subframe mounts too - added bonus that the firmer mounts will be moar sportyor zomfg torkpowah y0!!1!
My question is, has anyone here done it? I have read a dozen posts on Infiniti/SR-20 boards about how you CAN do it, but few actual "Heres how I did it and how I felt about the outcome" threads. How did you do it? Did it work? I need to do something soon, not only because THE RATTLING IS DRIVING ME EFFING CRAZY, but also because, apparently, driving around on toasted mounts is detrimental to Infiniti transmissions. As much as I wish my slushbox would die a grizzly and spectacular death, my S12 Silvia desires would tie up my funding for a trans swap, so I need her to hold on a few more years till a new DD is in the budget...
I have liquid urethane filled mounts on the MX6. I believe it's the 70A stuff. HUGE improvement over stock, but to be quite honest, i wish i had gone harder.
That said, we're talking about two ENTIRELY different motors here.
I would fill them in your case. Vibrations aren't bad at all.  (Probably worse on my car that idles like a diesel.)

4cylndrfury wrote:
So, the GDub has mounts that are shot - Im convinced the rattling Im getting at idle or going over RR tracks and potholes is the motor/trans rattling on something from either toasted rubber in my motor mounts, or in the subframe/steering rack. I can buy some Urethane mounts for ~$55+ each, or I can buy some 70a liquid urethane from McMaster Carr for $35 and have enough to fill at least all 4 motor mounts if not the rack and subframe mounts too - added bonus that the firmer mounts will be moar sportyor zomfg torkpowah y0!!1!
My question is, has anyone here done it? I have read a dozen posts on Infiniti/SR-20 boards about how you *CAN* do it, but few actual "Heres how I did it and how I felt about the outcome" threads. How did you do it? Did it work? I need to do something soon, not only because THE RATTLING IS DRIVING ME EFFING CRAZY, but also because, apparently, driving around on toasted mounts is detrimental to Infiniti transmissions. As much as I wish my slushbox would die a grizzly and spectacular death, my S12 Silvia desires would tie up my funding for a trans swap, so I need her to hold on a few more years till a new DD is in the budget...
Find my GSL-SE build thread, I talked about this very thing!
Edit:
"Now, as discussed, DIY poly motor mounts:
Polyurethane rod from McMaster Carr. I used a 90A durometer rating, on second thought that feels a little rough. We'll see. If I was to do it over I'd try the 80A poly (part number 8784K943*). 6" makes three sets, which you could resell if you wished.
Washers matching the diameter of your poly. I went with part number 96582A389, as you need 4 for each set of mounts you're making. These are potentially locally sourceable, but I wasn't able to find them.
Two bolts, M10x1.25 80mm long. Was able to source these locally. Probably a good idea to get Grade 8 or higher...
Washers and self-locking nuts to match, if you're not reusing the original nuts and lockwashers.
Drill a hole large enough to fit your bolt through (make sure it's centered). Assemble parts (bolt, small washer, large washer, poly, larger washer, small washer, nut). You'll need to disassemble a bit to install them, should be pretty self-explanatory, just make sure the large washers stay next to the poly mount itself.
That's it! Way cheaper than the $100 people want for FB motor mounts, AND you've got enough poly for a few more... "
Note these are for making poly mounts with the bolt running through them. If you want to replicate the factory mounts but in poly, you're going to want a casting compound and some sort of setup to suspend a two bolts with a washer away from each other while it cures.
Those rods are pricey...
My plan was to jig up the mounts on some melamine/MDF board with the bolt and a bushing centered in it, and cast the liquid stuff into it with an open face. Maybe some mold release on the melamine to keep it from sticking. Let it set up overnight, in the morning...bingo, insta-mount. The liquid stuff is only $35 or so.
I've done the window weld method to fill in the gaps of factory mounts. It is more of a supplemental stiffening rather than complete replacement. I just taped up one side and pumped it in from the other with the caulking gun. Let it set overnight and it's ready to go. I don't know what durometer window weld is supposed to be but it is cheap and easy.
edit: Here's a decent looking 'how to' with results. I didn't read through the whole thing though: linky
quicky check on 3m window weld...
hardness (shore A) 55-60

Josh
Dork
4/6/12 6:17 p.m.
I used the 80 shore A pourable urethane from either Grainger or McMaster (cant remember) in 3 out of the 4 engine mounts on my SE-R in maybe 2002 or 2003. I thought it was great! I just taped the back side up with duct tape and poured the compound in over the existing rubber (I cut out where it was brittle or damaged and made sure it could fill in solid behind). The mounts were holding up just fine in 2007 when I sold the car. I think it cost me about $25 to do 3 mounts, as opposed to the $200 or so that full poly mounts were selling for at the time.
Josh wrote:
I used the 80 shore A pourable urethane from either Grainger or McMaster (cant remember) in 3 out of the 4 engine mounts on my SE-R in maybe 2002 or 2003. I thought it was great! I just taped the back side up with duct tape and poured the compound in over the existing rubber (I cut out where it was brittle or damaged and made sure it could fill in solid behind). The mounts were holding up just fine in 2007 when I sold the car. I think it cost me about $25 to do 3 mounts, as opposed to the $200 or so that full poly mounts were selling for at the time.
Thanks, thats the stuff I was looking for. I think Im gonna go with the 70a castable urethane from Mcmaster Carr after a bit of reading - it seems like that will give me the best firmness without being overly harsh about transmitting vibrations into the cabin...this will be my DD after all...thanks guys!
noddaz wrote:
quicky check on 3m window weld...
hardness (shore A) 55-60
true, but it would only be used for filling the voids in an existing mount, not as a replacement for the existing bushing material.

e_pie
Reader
4/9/12 9:41 a.m.
I need to get around to doing this on my car this summer.
http://www.drhess.net/The_Beast.htm#Urethane%20Motor%20Mounts
wow, thanks Hess...lots of good stuff there too besides just the mounts...thanks for sharing!

I have made custom mounts and factory replacement mounts for several applications using the casting urethane from McMaster-Carr. For all of the mounts I did my best to make the forms water tight. The urethane is thick before mixing the two parts and gets very thin quickly. Get the longest working time available, because you will find something keeping you from working as fast as you hope. Basic masking tape works well for the backside of most forms, but aluminum foil works well for odd shapes. Both peel off the cured urethane very well. Locating central sleeves is the biggest challenge to making the forms. For custom mounts I use steel tube as the outer body and inner sleeve and make double shear mounts, with the outer body welded to some sort of attachment bracket. For factory round/double stud mounts, I would suggest bonding some washers in the middle of the mount, possibly with some sort of interlocking mechanism to prevent tear out. Urethane does not withstand tension quite as well as the original rubber. For very hot location (right next to exhaust), I have used silicone casting compound, but it has some chemical limitations that urethane does not.
Steve
since I've been thinking about this for a while, how would you guys suggest re-making these motor mounts in the castable urethane?
-
cut out most of the rubber, leaving just enough to hold the sections in place and then cast the urethane in there or
-
just fill the gaps around the rubber parts and maybe cast some urethane around the outsides of the rubber

Josh
Dork
4/9/12 5:32 p.m.
It looks like that's a sandwiched mount, in which there's no mechanical connection if the rubber tears or separates. Since I wouldn't trust the adhesion of the pourable urethane over whatever the factory uses to keep the mound from separating, I would just fill in the holes and leave all of the factory rubber. I did option one on my mounts, but they were an encircled bolt-through design that didn't depend on adhesion to stay together.
Are there any other useful projects for the rest of the can of urethane? I'm planning on doing my motor mount after the next round of autocrosses and it's just not going to take much to fill the tiny mount. There has to be something else I can do with the extra.
Josh
Dork
4/10/12 7:09 a.m.
mazdeuce wrote:
Are there any other useful projects for the rest of the can of urethane?
No, I can't think of any.
steering rack mounts also are a common failure point for rubber mounts in G20s, not sure how they are in your application.
My '95 Corolla had a 2 piece crank pulley where the hub and the outer ring were separated by a rubber ring. That ring was there to dampen vibrations on the crank. Over time it shrunk and allowed the 2 pieces of the pulley to separate. Id think that the urethane would make a great replacement there as well.
Tried doing it once, it's a messy, time-consuming job and the two urethane molds popped out not long after installation. IMO it's worth it to pay for aftermarket mounts.
You might also want to look into engine shock absorbers, you'll probably have to fab them up though, using bicycle shock absorbers. Just be sure to use strong attachment points, lifting hook attachment points on the engine are handy places to bolt them to.
Whellp...finally decided after months to dig into this stupid mount issue. I decided to start from the bottom. The engine crossmember has a front and rear mount. I figured that if the engine wants to rotate on its cranks axis, that the front/back orientation of the lower mounts would have the biggest bang for the buck.
so I pulled off the crossmember, and sure enough, the front mount is toast
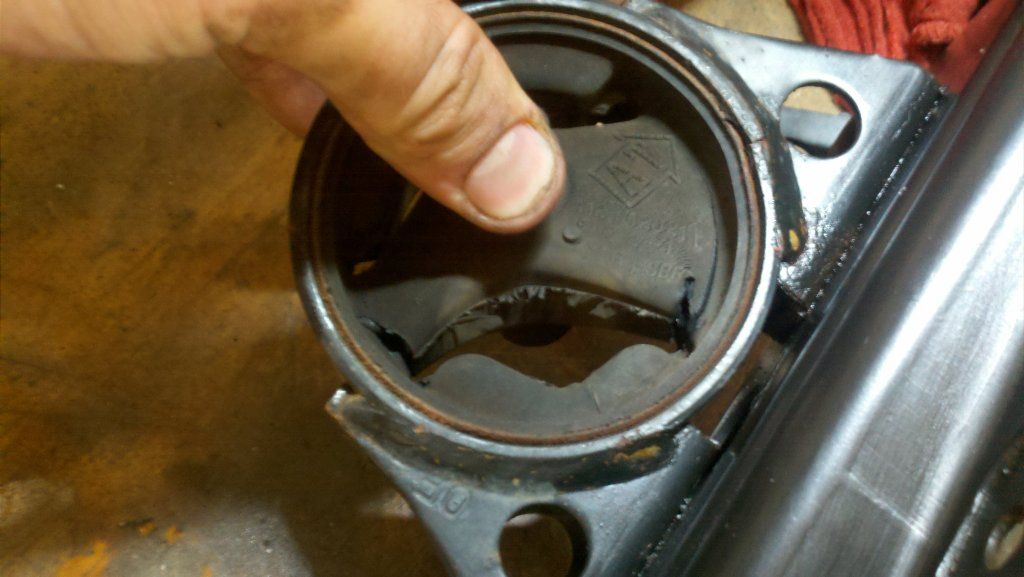
I had a buddy with a few tubes of some Toyota Gasket material, supposed to be tougher and denser than window weld, so I thought Id try it for the pricey cost of free (to me anyway).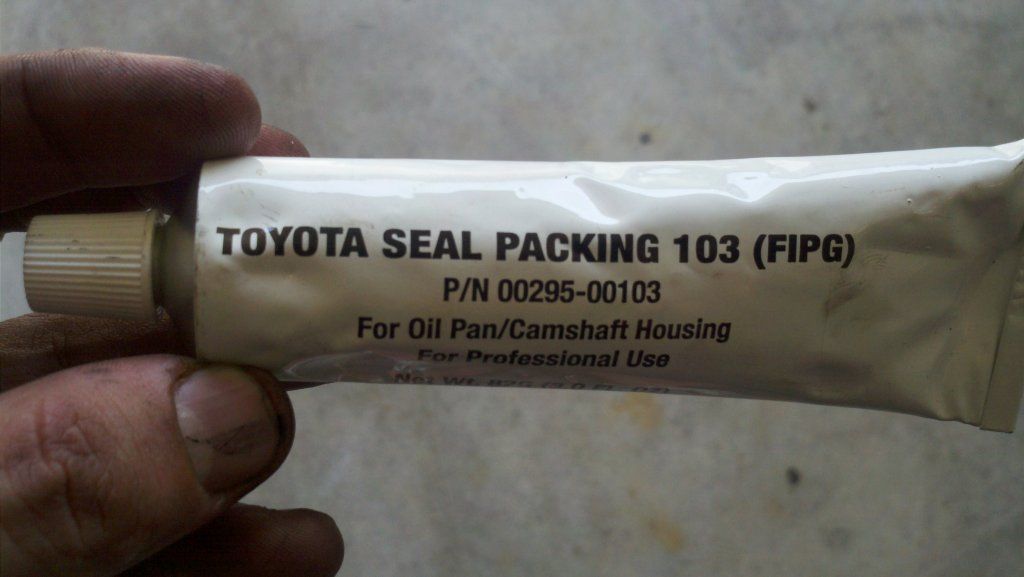
And after about 3/4 of a tube per mount, they are full, and curing.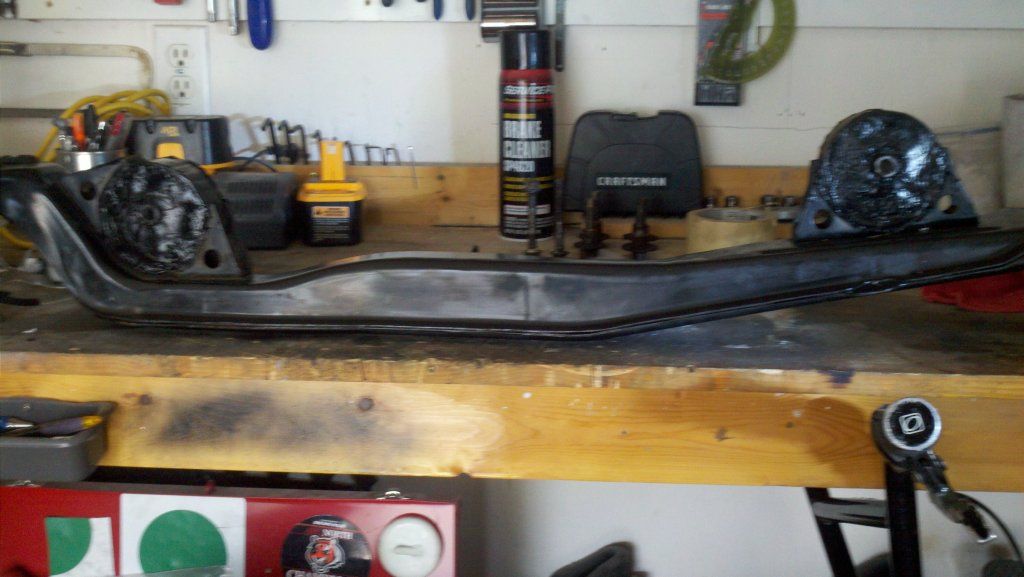
I guess Im a little concerned that this stuff will never fully cure in the middle (though I left the toasted mounts in there to reduce the amount of goop used, and hopefully help it cure faster). Im gonna give it a t least 24 hours to cure (about 5pm today). If its not set up by then, I guess I will put a space heater in front of it and see if some heat will cure it faster. This is my DD, so Id like to keep downtime to a minimum.
I have a manual G and i used hockey pucks. The rubber on mines was totally gone so i just trimmed the remaining rubber. For the rear ... jb weld on the outside of the puck, pressed it in and drill a hole for the bolt. The front on mt cars are different so i had to trim/cut some off the puck. You can drill a couple of holes around the frame of the motor mount for screws to keep the puck from sliding out but the jb weld seems to hold it in place for me...
If anyone is interested, Toyota Seal Packing gasket material doesnt cure in 24 hours when its applied an inch or so thick. Ive been googling the crap out of the stuff, and it appears it will cure faster with some heat. A few minutes with a LPG hand torch once an hour for 3 or 4 hours last night made a marked improvement. The G is still down at the moment, but I think I will be able to reinstall the subframe tonight. Im excited to get the firmer mounts under the engine, and see if Ive eliminated the annoying bbrrrrrrr noise from something vibrating against the firewall I got on startup previously.
Josh wrote:
I used the 80 shore A pourable urethane from either Grainger or McMaster (cant remember) in 3 out of the 4 engine mounts on my SE-R in maybe 2002 or 2003. I thought it was great! I just taped the back side up with duct tape and poured the compound in over the existing rubber (I cut out where it was brittle or damaged and made sure it could fill in solid behind). The mounts were holding up just fine in 2007 when I sold the car. I think it cost me about $25 to do 3 mounts, as opposed to the $200 or so that full poly mounts were selling for at the time.
Have you tried to make urethane mounts or fill in the stock mounts for the volvo?
I first did the windoweld mod with my aw11 mr2... my stock mounts where in good condition when I did it... and if I had another mr2 and could only do one mod the windoweld would be it...
I did it again with my front mount on my neon ACR... that mound was TRASH but between that and working onj the bobble strut that firmed up the engine real nice...
Well, just to update, the stuff worked, although Im not 100% sure its fully cured (still feels squishy sort of if you press laterally on the mount). The noise is gone, and the trans seems to drop into gear without the thunk it had before. Im pretty stoked that I was able to do this in the garage, with hand tools. Ive never really fooled with mounts or subframes before, so I am really feeling pretty good.
I plan to pull the uppers (left/right mounts between the block and the chassis) and actually fill them with urethane, rather than the window weld gasket stuff.
One odd thing, now on startup Im getting kind of a funky sound out of my starter (I think). When I start the car, after it turns over, and starts to run, and then I release the key so it drops from "start" back to "on" position, the noise sounds kind of like a weird rubbing or maybe chattering sound, for just a second...like the starter motor doing something odd when its winding down after the start.
Does that make any sense to anyone? This was late last night after reinstalling everything, I started it maybe 2 times, took it around the block, and then parked it so I could get to bed. The noise happened both times. My G was not started for about 4 days, so Im not sure if that has anything to do with it, but the sound is a little concerning. I guess for a car thats almost old enough to drive, it has a lot of weird noises, but this one is a little weirder.
Could something be out of alignment enough to cause the starter to no longer be aligned properly? Like if Im a few degrees off with these new mounts, the engine/tans/starter are out of sync now somehow? Id imagine the bolted joint between the engine/trans is stout enough that its not likely to move any, maybe Im just being paranoid.


