I went with www.deltacam.com in Tacoma, WA. It's best to call as i didn't have much luck emailing them. Reground cam, resurfaced rockers, and shipping back was about $135.
They are also more active on FB if you want to see more of their work.
https://www.facebook.com/DELTA-CAM-CUSTOM-IMPORT-HEADS-112999598718880/
https://www.facebook.com/pages/Delta-Cams/129473253797233
Thats CHEAP. gonna have to look into that for the challenge car....
I love reading about your adventures every time you post. Thank you for sharing!
Glad you like it. Its been an interesting journey of learning to road race with lemons plus consistently fixing and modifying things.
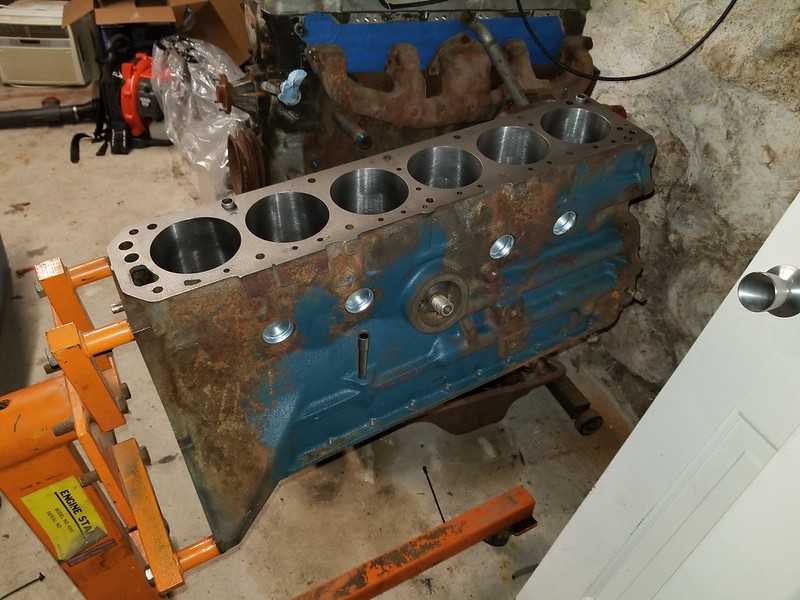
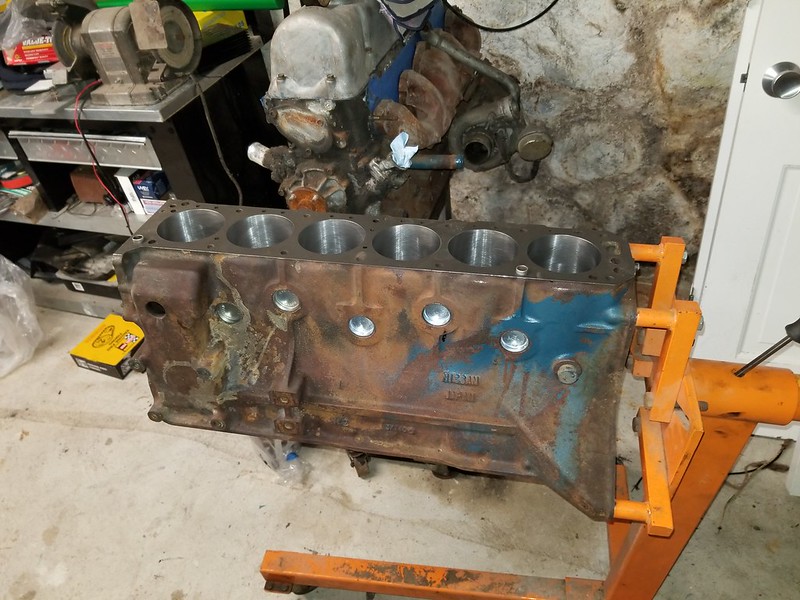
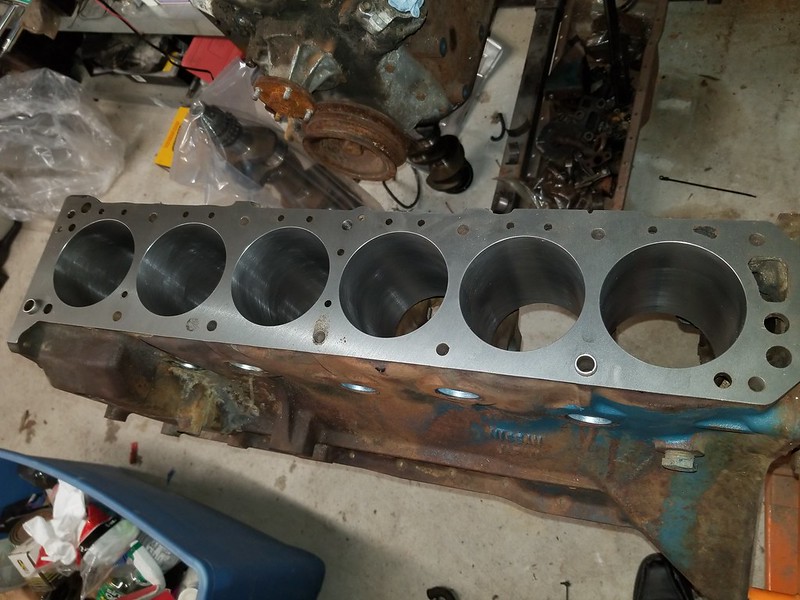
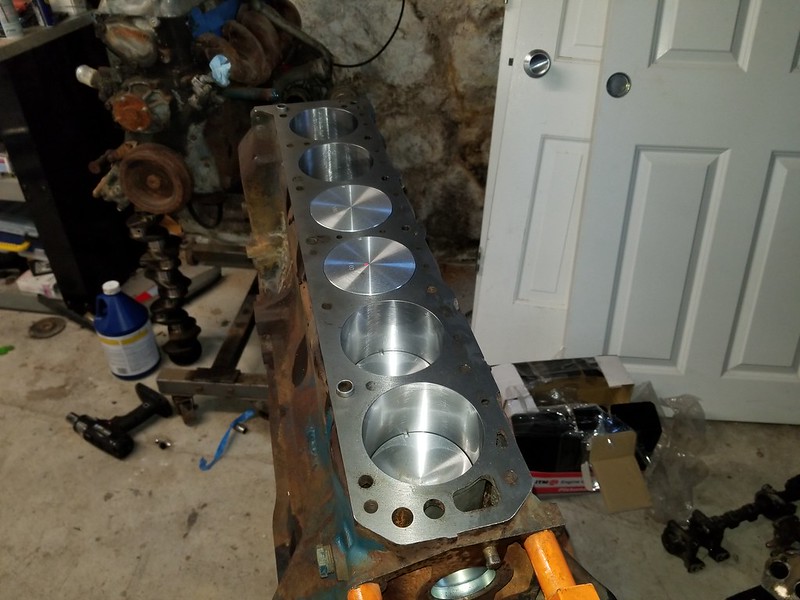
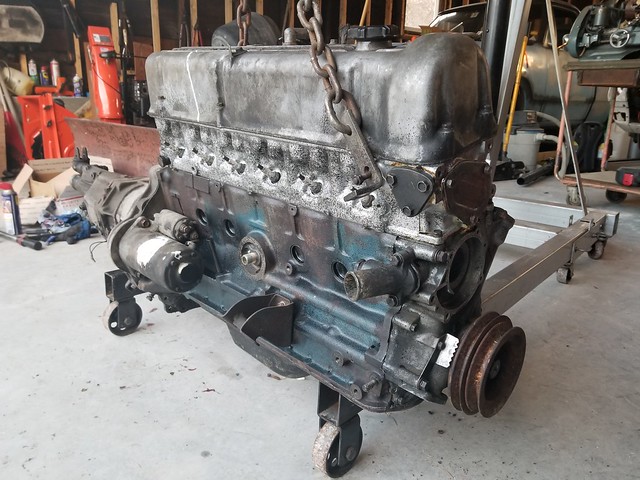
Picked up the engine from the machine shop. Block cleaned up way better then I expected. I had no idea there was blue paint on it! Its bored +.040 and decked just enough to clean up most of the rust.
Crank polished up nicely but the rest of it still looks terrible since i didn't have it blasted.
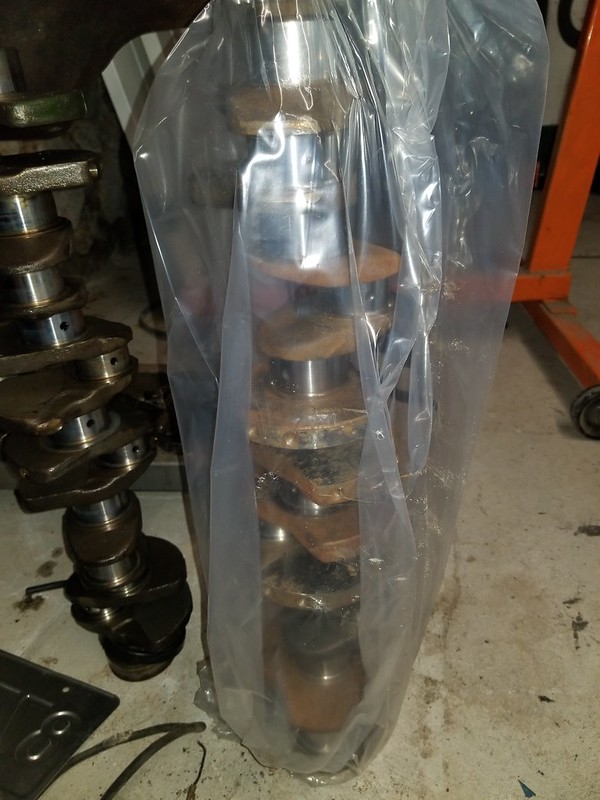
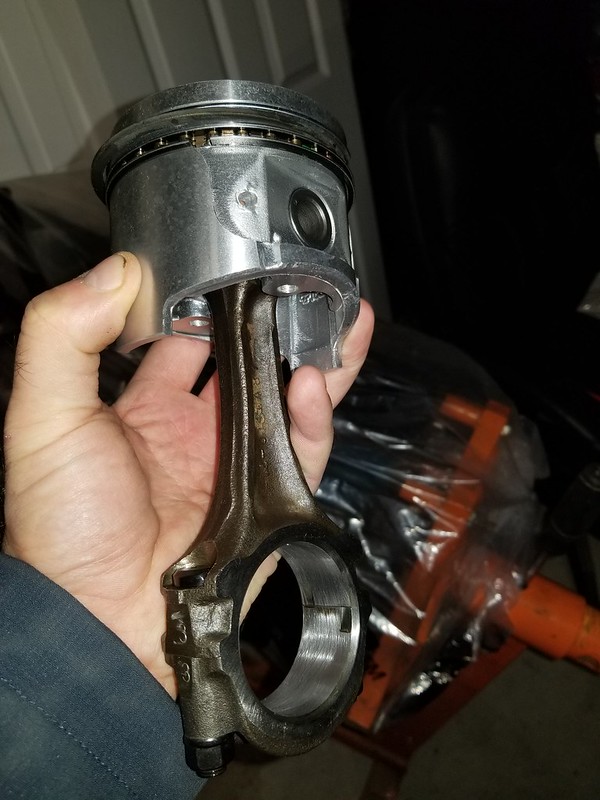
One thing i did splurge on was adding ARP rod bolts and having the rods resized. Little piece of mind since we plan on revving it to almost 7000 RPM's
Great thread, thanks for sharing!

I was hoping to pull the P90A head from the other Datsun so I could start going through it but I’ve had zero motivation to go outside. It’s been stupid cold out and now we are expecting a snow storm later this week. To avoid working in the cold I dug out a spare 240z E88 cylinder head that I got from the red Datsun (from page 8) I’ve had kicking around to see if it might be usable. It turned out to be an early E88 head with the smaller combustion chambers and partial quench pad which is better then the later version. It looked usable if cleaned up but after thinking about what I’d need to do to make it work I ruled it out. First issue was the combustion chamber still had poor quench. I could have the head milled a lot but that would also reduce the combustion chamber volume bumping up compression way higher then I want. Other option would be welding up the quench pads then having it machined flat but I don’t trust my welding abilities that much. This head also has small valves and would need to be drilled and notched for the EFI intake manifold.

Since I ruled this head out I listed it for sale on a Datsun FB group and sold it for $250. I then used that money to buy another P90A head on ebay for $150 shipped. Saved myself spending a day working in 2 degree weather pulling the other head plus I made $100!
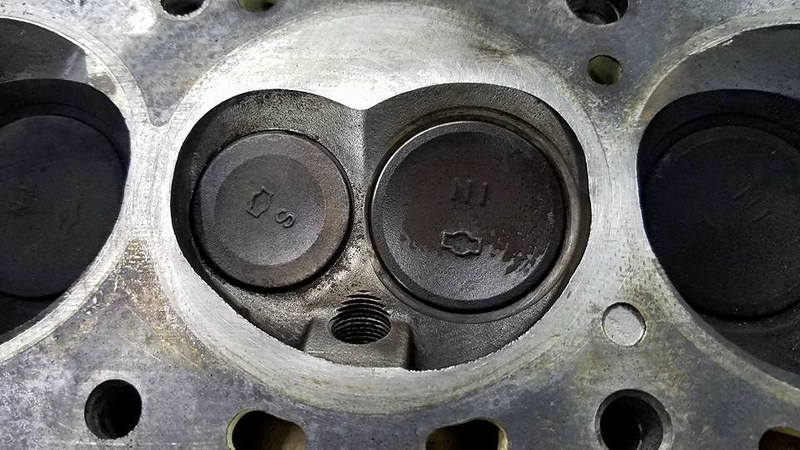
Pic of the P90A chamber for reference.
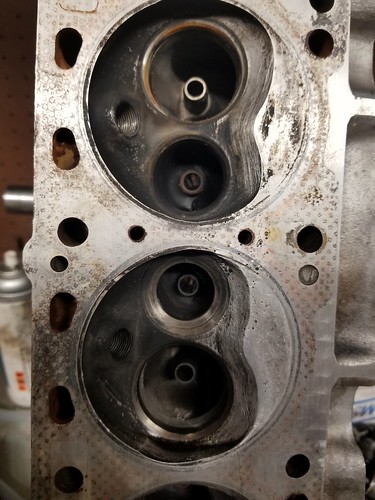
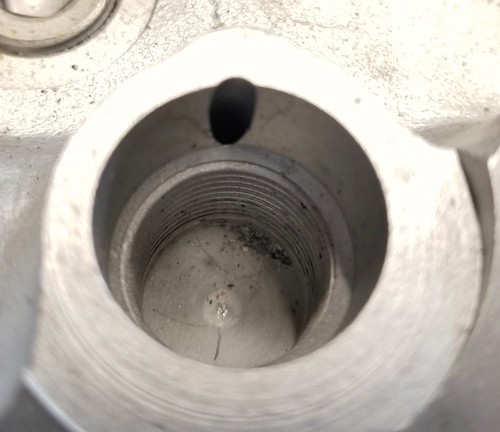
Well the Ebay head turned out to be junk. Supposedly it came off a good running car but when i went to disassemble it I found a bent intake valve.
Well maybe new valves will fix that. Decided to keep going and found the exhaust valve seat on that same cylinder had been replaced. Then I noticed that they never cut it correctly and the opening was way smaller.
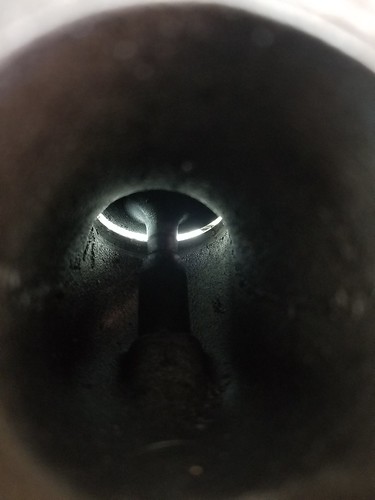
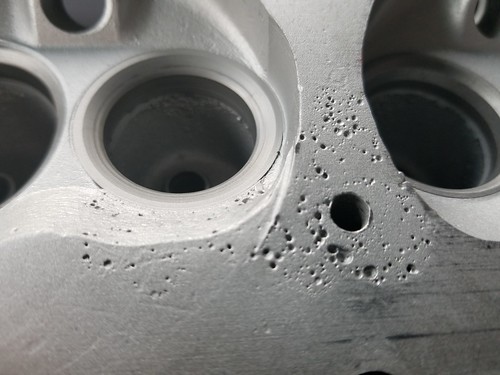
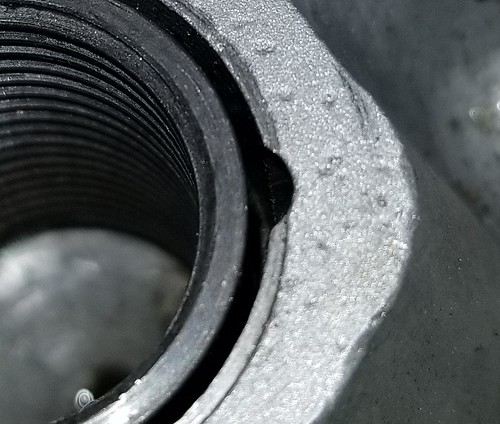
Even worse it looks like when they installed the seat they had to weld up and reshape the chamber except they did a poor job. After cleaning it up you can really see how bad it is.
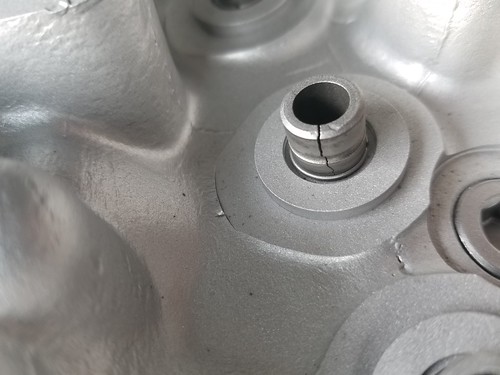
Oh and the top of the guide is cracked too.
I contacted the seller who is going to refund all my money. Guess I'll have to dig out the parts car and pull that head.
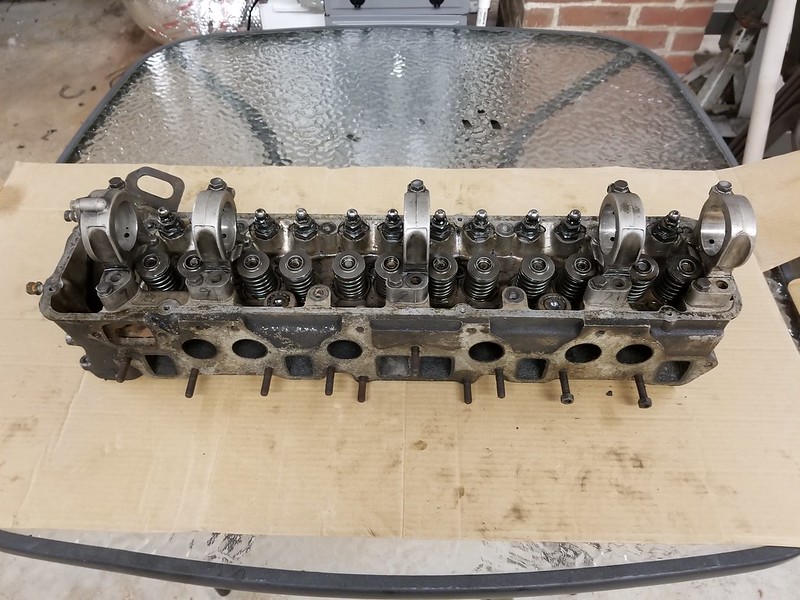
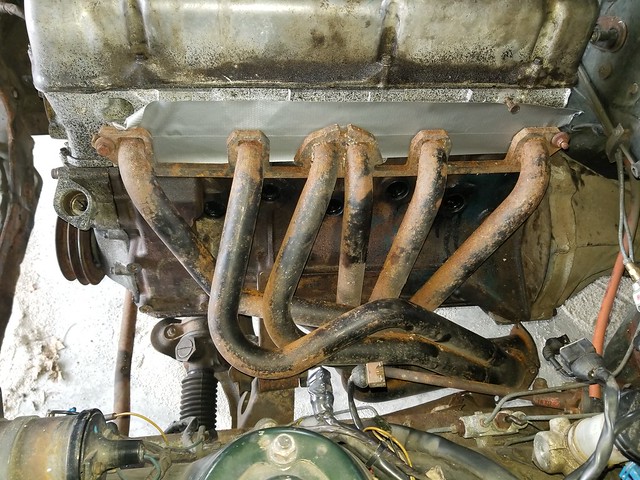
Plan B. It was finally above freezing so I went out last night with a flashlight to pull the head of the burnt Datsun. Pulled the valve cover and it looks pretty much race ready.....
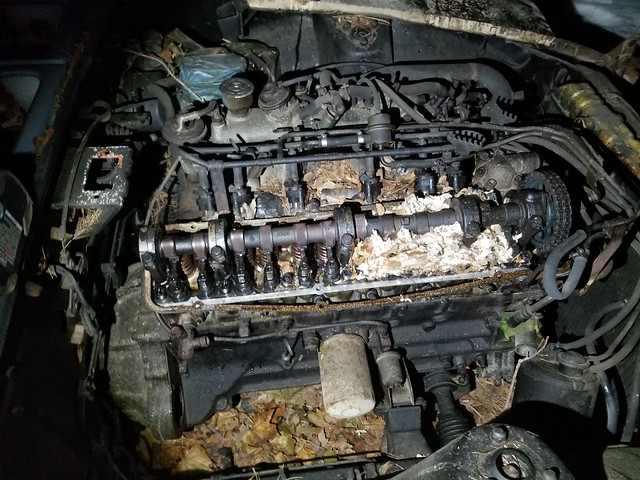
Ignoring the burnt wood, rusty cam, and big mouse nest I grabbed my electric impact gun and pulled the head and everything else in one large chunk. In case you are wondering yes that is as heavy as it looks.
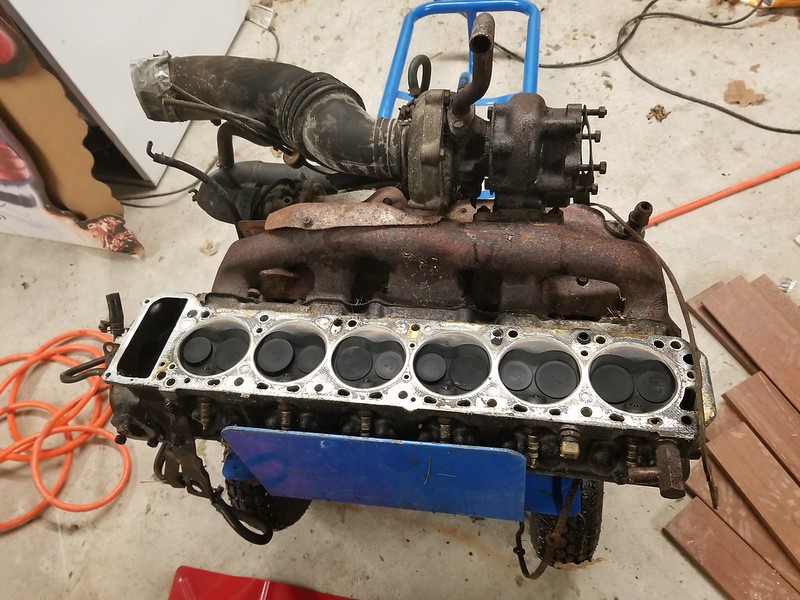
Other then being disgusting it looks like it should be usable.
That is both disgusting and exciting.
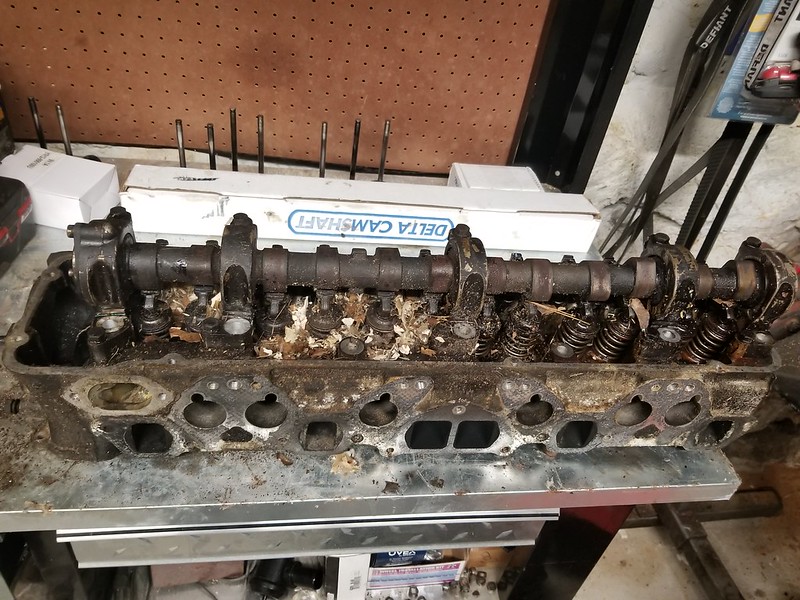
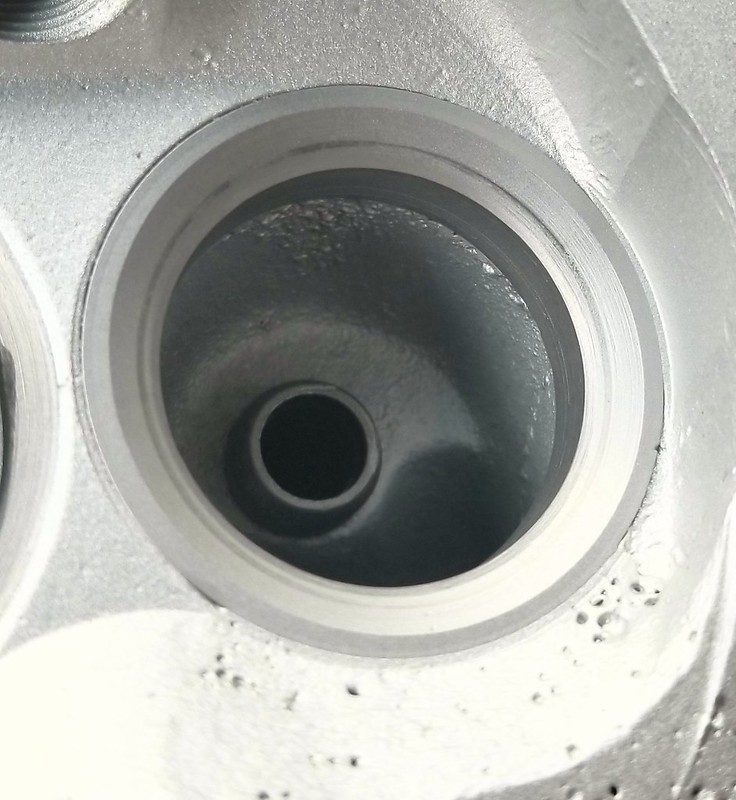
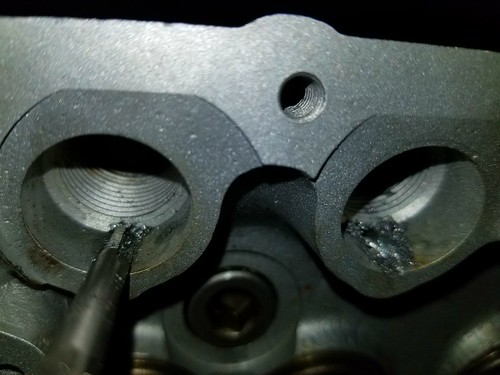
Disassembled the head and cleaned it up the best I could. Before dropping this one off at the machine shop i decided to do some porting. At first I was just going to blend the seats into the ports but ended up doing a little bowl work and cleaned up around the guides.
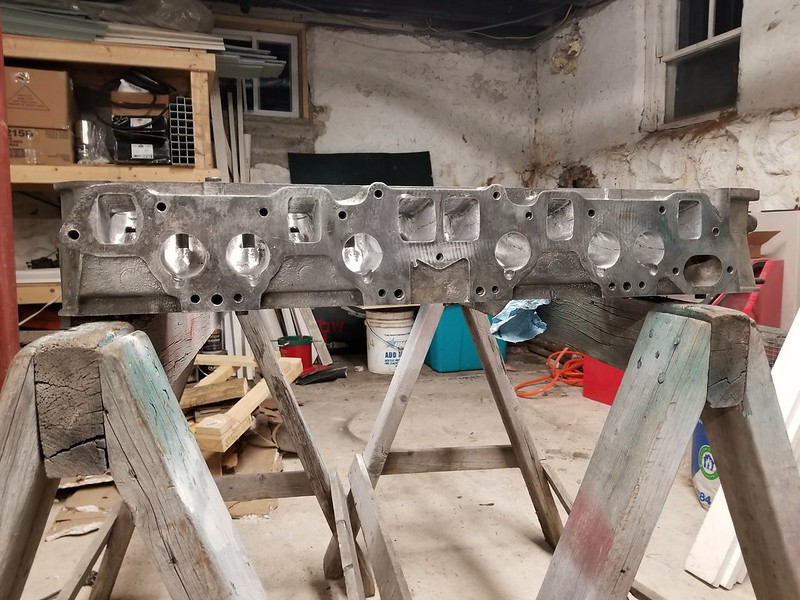
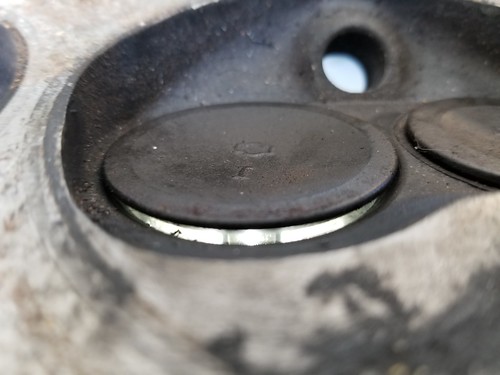
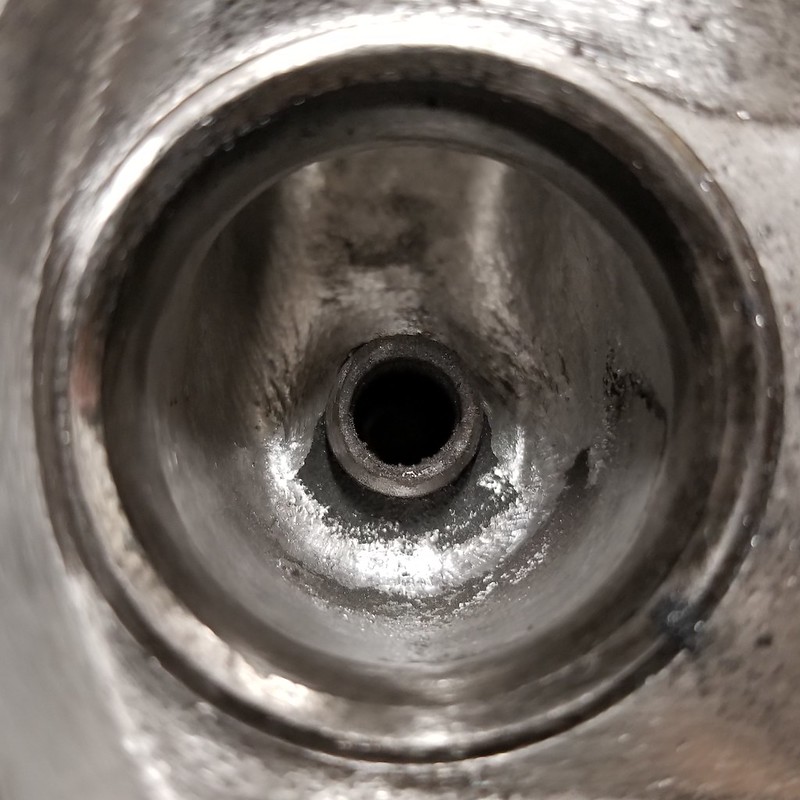
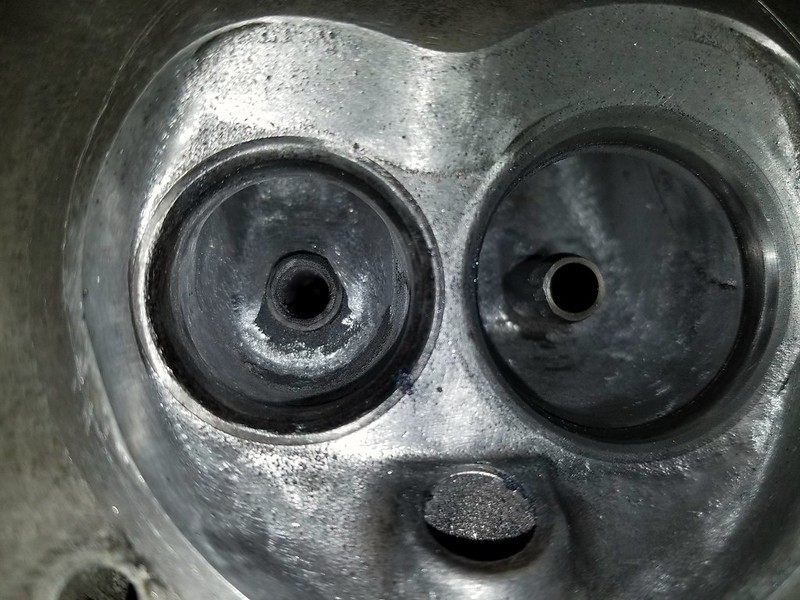
The exhaust needed the most work. From what I've read the port only flows about 50-60% of the intake. Here are some pics of the old head to compare. You can see the shelf around the guide.
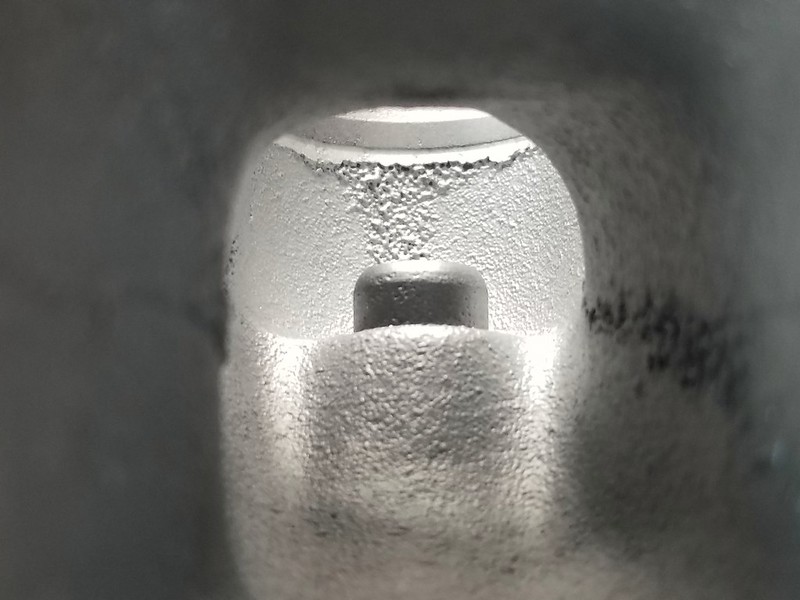
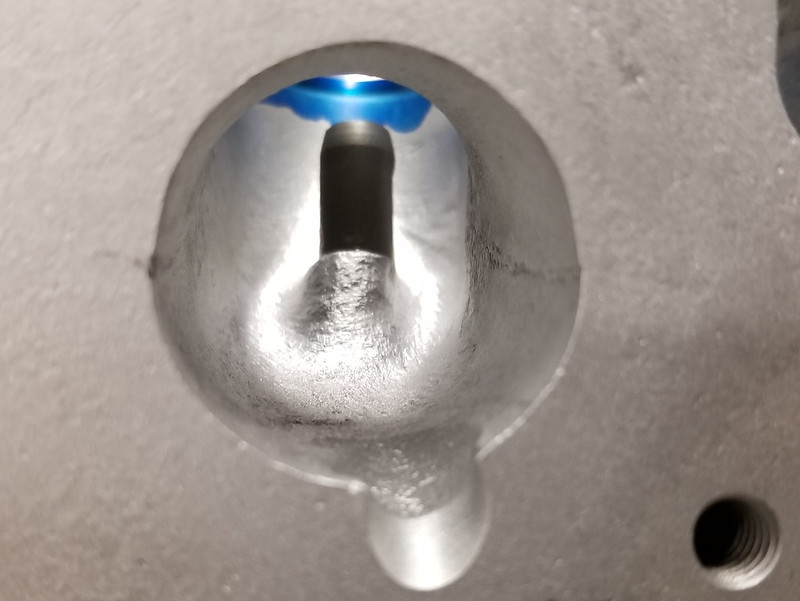
It was tricky getting around the guide. None of my cutters or sanding rolls wanted to fit so this was the best I could do before I gave in and ordered a smaller ball cutter.
I also unshrouded the valves the best I could. Looks like I could have gone more around the exhaust port but this chamber was a little more offset then the others.
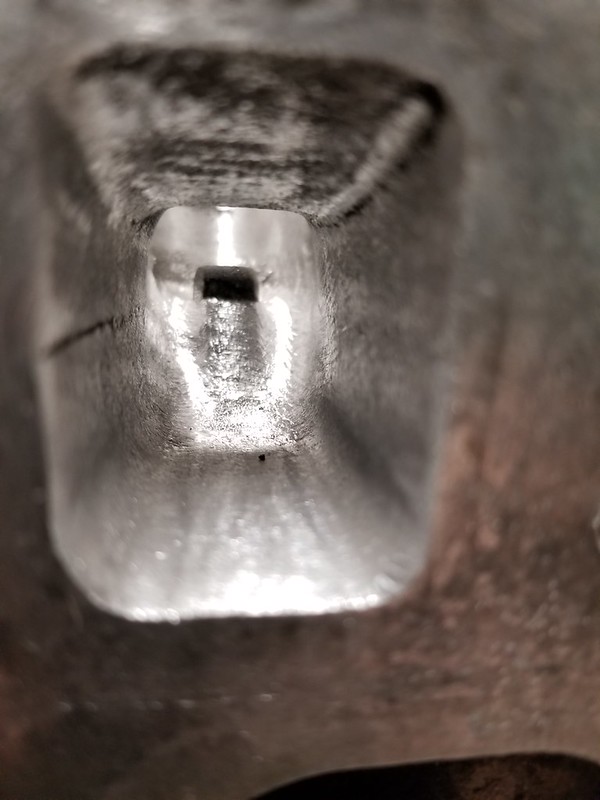
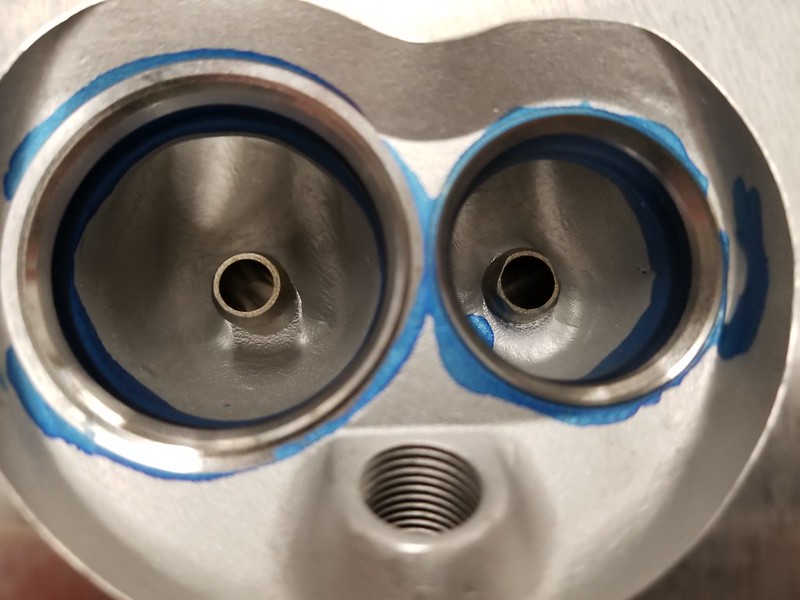
Intake ports didn't look too bad. Cleaned up around the guide a little, blended the seat and short turn radius, then smoothed out the rest of the port. I didn't do any gasket matching since the manifolds were both smaller then the ports on the head and the gasket was way larger then the head ports.
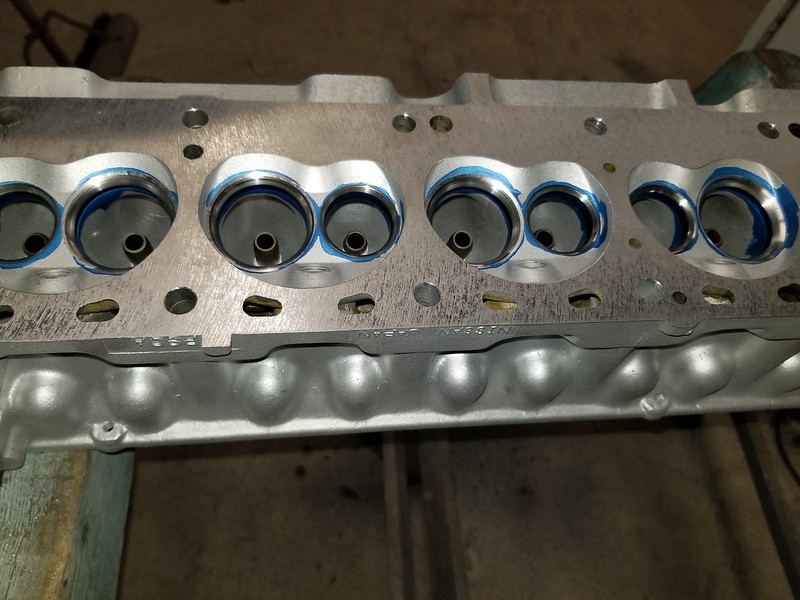
Here it is after I got it back from the machine shop. It was cleaned, blasted, cut .060, and had a 3 angle valve job.
In reply to mikeatrpi :
I was actually just reading that thread. We've never had cooling issues in the past but the new engine will have higher compression and make more power. I'm nervous about drilling and tapping the extra ports into the head but i'm going to look into it more. One thing that was mentioned was looping the heater core line could cause the rear of the head to run hotter. Pretty sure that's how we are setup now so i'm going to block off those lines to get more coolant flow through the head.
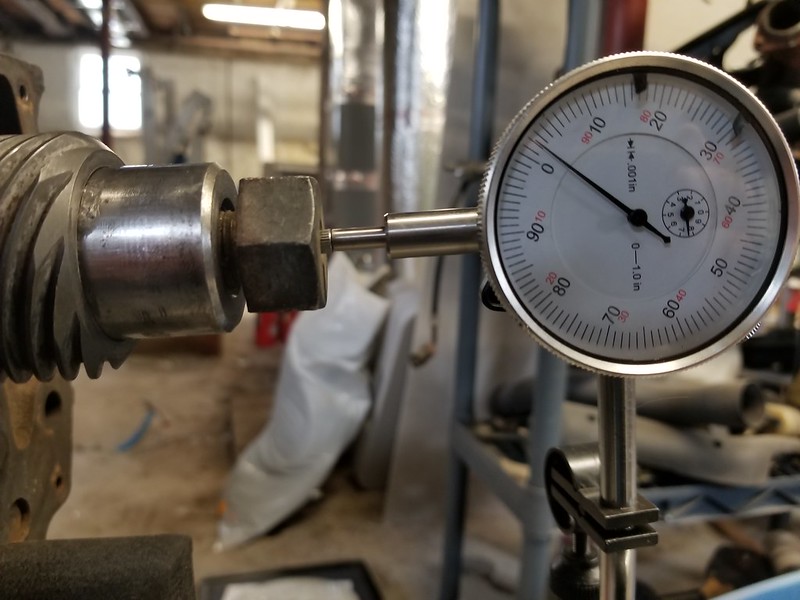
Over the weekend I finally got the short block together. I checked bearing clearances with plastigauge and they all came back great. End play was .002" which is a little tight but within spec.
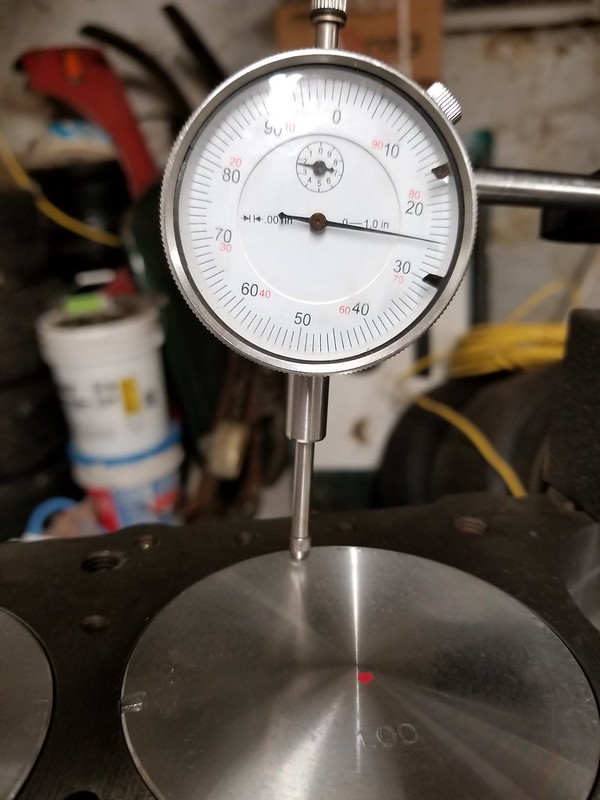
Now with the flat top pistons I knew they had positive deck height stock and after having the block cleaned up they are 0.025-0.026". I think the head gasket that came in the rebuild kit will work ok but I need to double check my clearances. Uncompressed its .067". As long as it only compresses about .010 I should be fine.
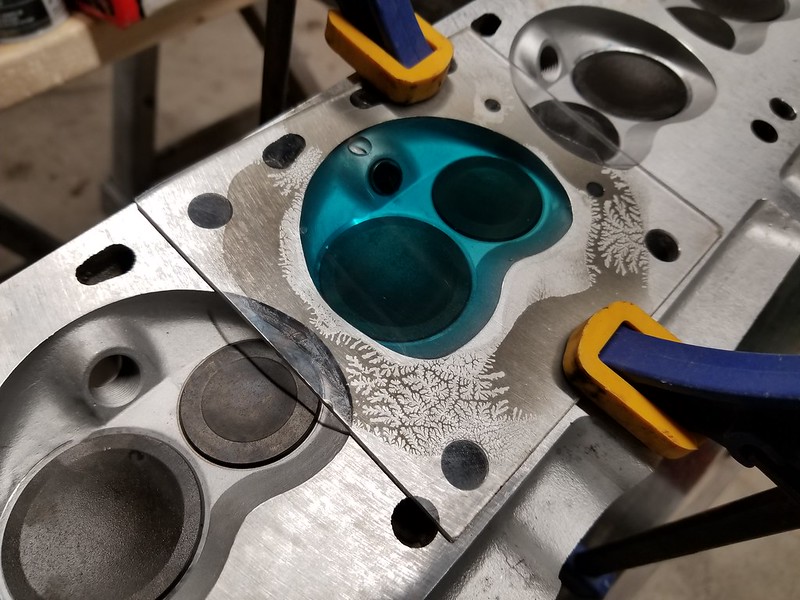
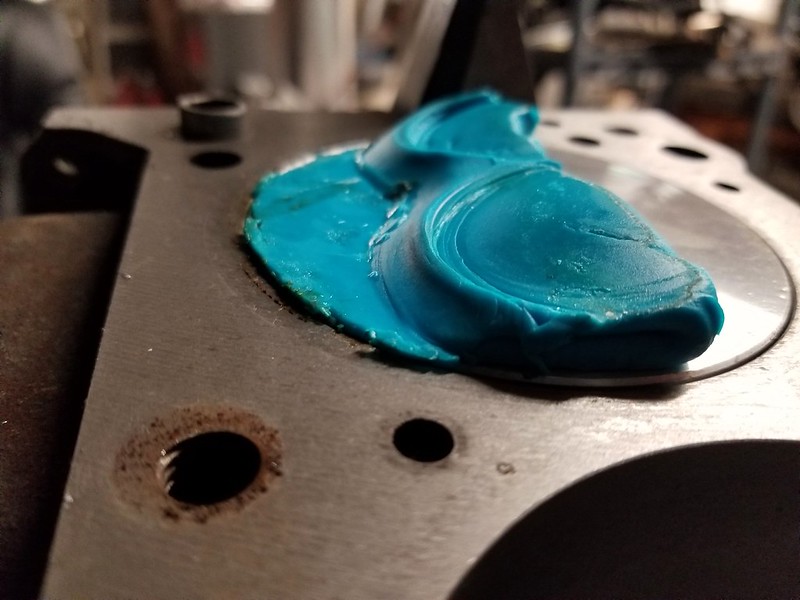
After unshrouding the valves and taking 0.060 off the head I was curious where the size of the combustion chambers ended up. Stock is 54cc and mine are now 49cc's. Little bigger then I hoped but not bad. For the liquid I used water, drop of dish soap, and blue food coloring.
Next I installed some light test springs and the cam then checked the rocker arm wipe pattern. I had no idea where this was going to end up. Valves are 0.080 longer and the cam was reground. Normally with the reground cam I'd have to buy taller lash pads. Stock pads are 0.118 and the recommended ones for the cam are 0.160-0.170. With the longer valves and stock pads I should be about 0.040 too tall and the wipe pattern will be too close to the valve side of the rocker pad.
When I checked the pattern I figured it would be going off the edge of the rocker but wasn't too bad. To fix this I'm going to shim up the cam towers about .040 shim and see if i can center it or even cheat it closer to the other end of the pad. Where the cam wipes on the rocker arm effects its ratio. I measured and if I left the pattern as is the valve only opens .407 which is a rocker ratio of about 1.3 (cam base circle of .313). Centering the wipe pattern should give me the stock 1.5 ratio and .470 lift.
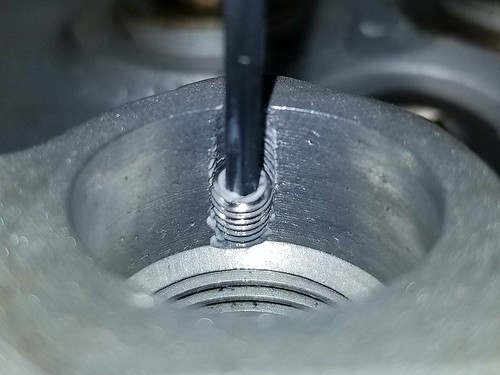
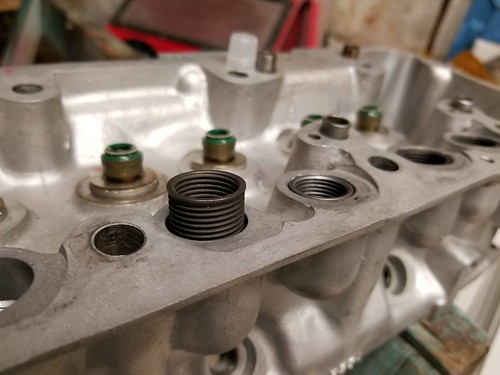
While waiting for the cam tower shims to arrive I focused on installing all the threaded inserts to convert from hydraulic lifters to solid. I had only mocked up 2 before when I noticed an issue with the oil port not being completely covered.
Here is where the old lifter threads in. It's only threaded halfway down and you can see the oil port.
When I installed an inset and solid lifter you can see where the port was not completely covered. These ports feed off the same ones that supply oil to the camshaft. Since I don't want to loose any pressure to the cam I want to make sure these are blocked off.
I thought about using an epoxy to block off the ports but that sounded like a bad idea. I wanted to install a thin washer under the lifter but I couldn't find a size that would work at my local hardware store. There were some that I could drill out but I needed a 18mm drill bit which the store didn't have either.
Solution I came up with was tapping the hole for #10-32 stainless set screw. Tap and screws were also under $10. Probably over kill but I'll sleep better. Only down side was had to disassembled everything so that I could clean out the metal after.

After the set screws went in I installed the inserts with some locktite.
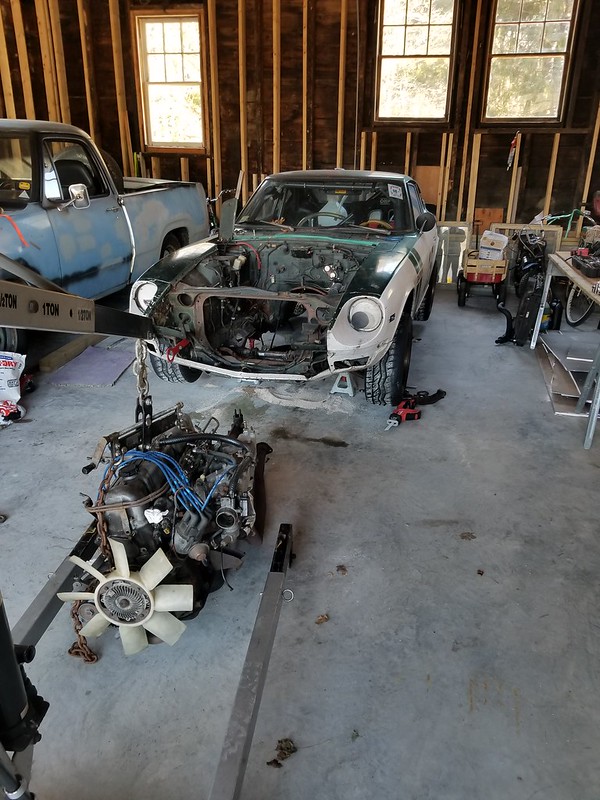
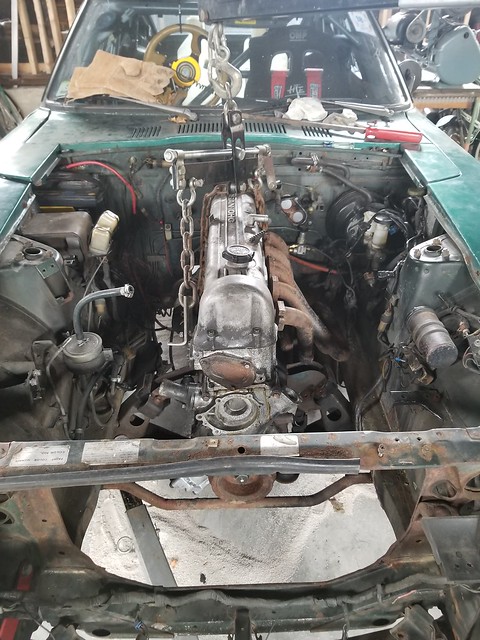
Last weekend I got together with the rest of the team and pulled out the old engine. Everything went smoothly and we had it on the floor in under 1.5 hours but we did find a couple other problems along the way. When I went to remove the driveshaft I noticed it was extra clunky, not just Z car clunky. Turns out the rear driveshaft flange bolts has all backed out and i was able to remove them by hand. We're lucky we didn't loose the shaft on track. Next we found the motor mounts were trashed. They were replaced after our first season but have not held up well. Engine was moving around so much that when I went back and looked at the radiator there were some heavy marks from where the fan hit it.
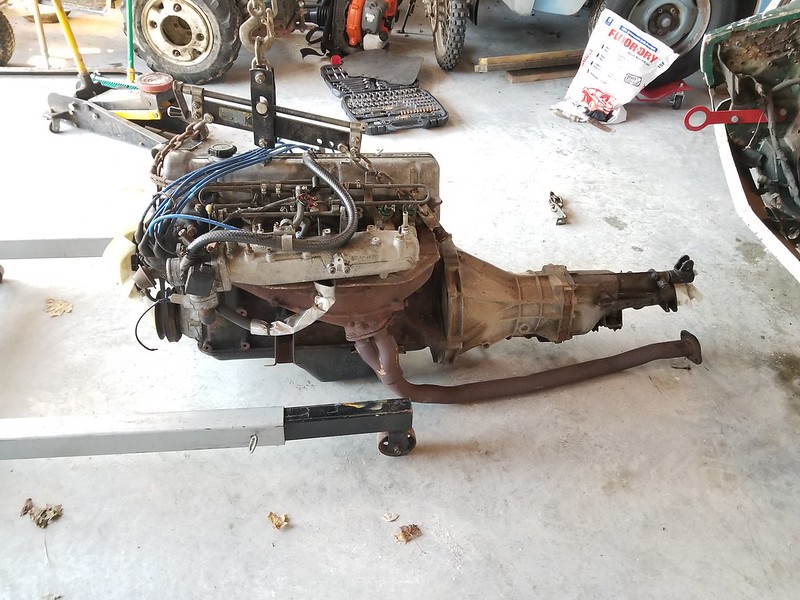
Once it was on the floor we pulling off all the accessories and I dropped the oil pan to take a quick look at the bearings. I only checked one main and rod bearing and they looked great. Once I get it on a stand I'll check the rest because all that metal had to come from somewhere.
Last week I bolted down the head to check piston to head and valve to piston clearance. Valves had plenty of room but piston to head was tight. The playdough was too thin to measure but I was able to fit a .028" feeler gauge between the block and head. I was hoping for a min of .030" and at .028 I'm afraid of the pistons making contact with the head. Also I was reusing headbolts and 3 of them felt very soft when torquing them down.
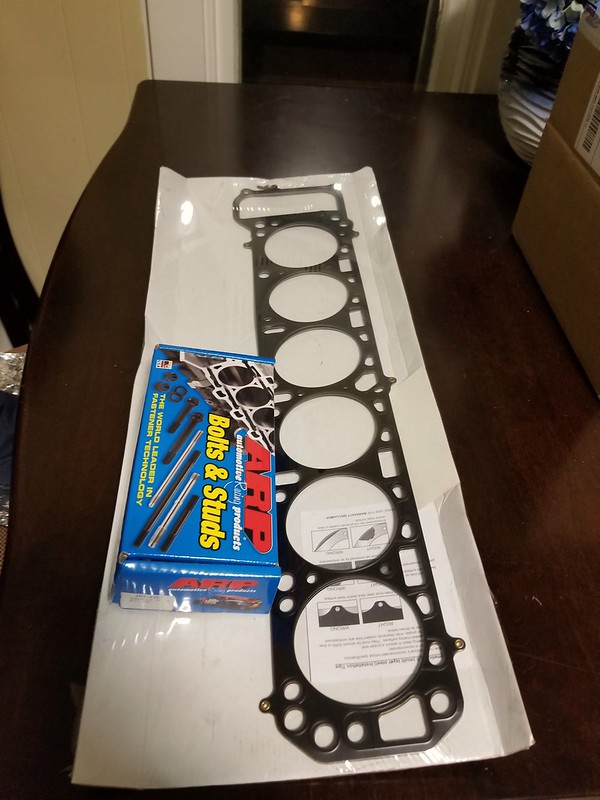
Since there are no cheap off the shelf gaskets that are thicker and stock head bolts are kinda pricy, I ended up ordering a cometic .060 gasket and some ARP studs. Really didn't want to spend the money but didn't want to chance it. At least I saved money by not needing to buy lash pads and retainers.
Before I assemble the engine for the last time I really wanted to know if there was anything wrong with the old engine. There had to be a reason for the metal in the oil and dropping oil pressure. Bearings and head all checked out but when I removed a piston the top ring came out in pieces. Pulled the rest of the pistons and all the top rings were shattered.
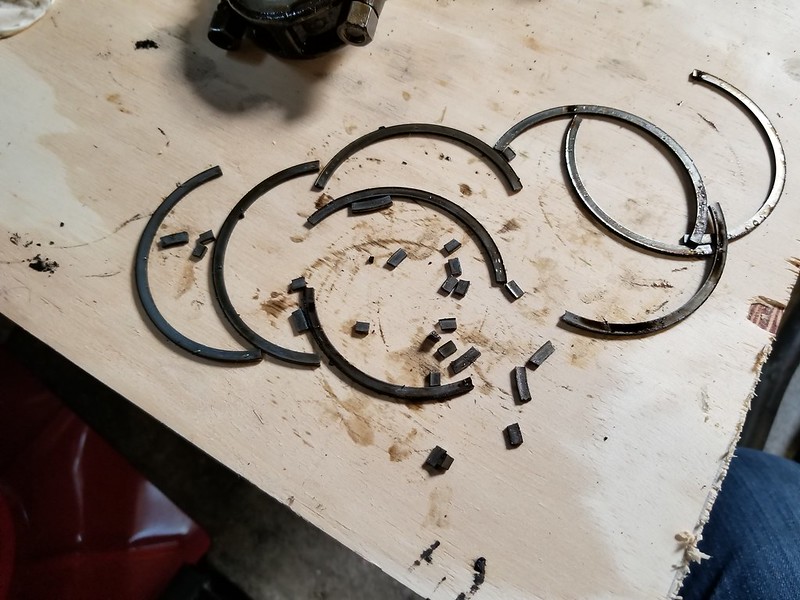
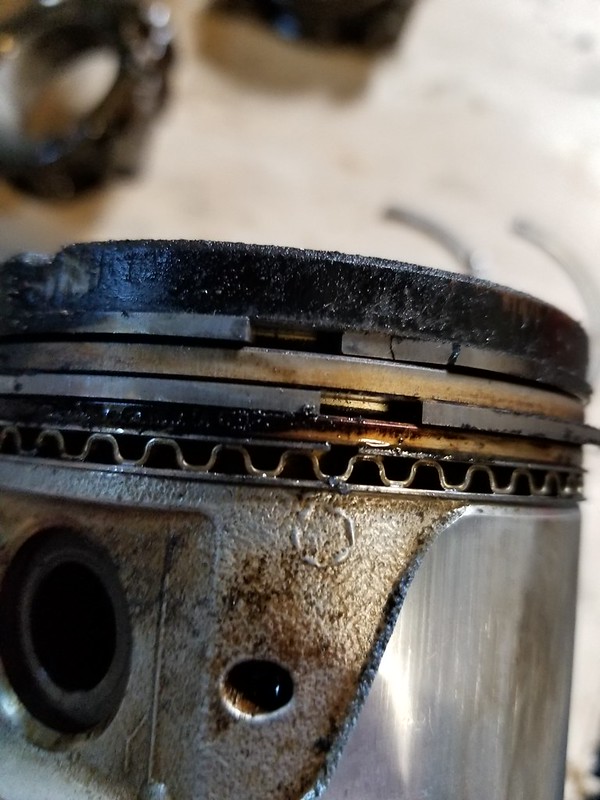
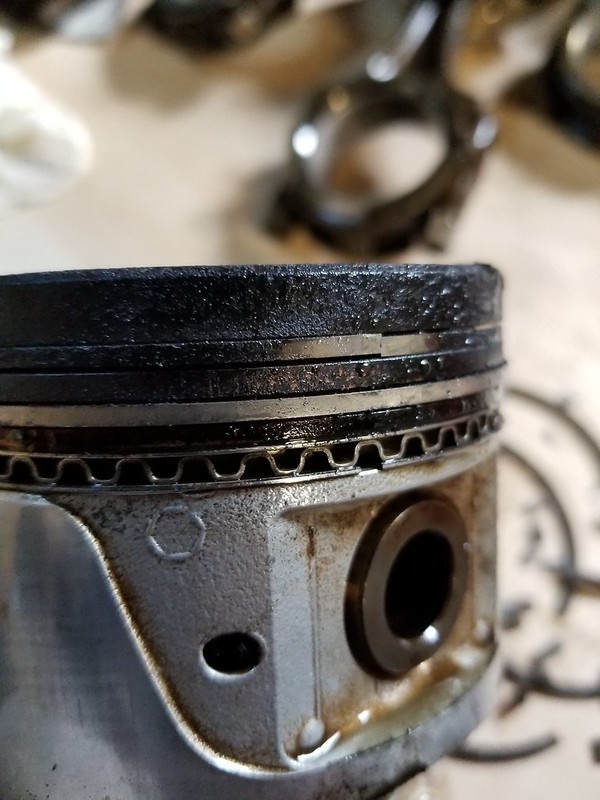
Since there were no signs of detonation i'm guessing the stock ring gap wasn't enough for the heat from racing. When the ring gaps closed up from the heat the rings have nowhere else to expand and they shatter. Usually when this happens it breaks the piston too so I guess we got lucky. I think this happened the first race of last season since that's when we found all the metal in the oil. We also did 2 more races after that by running 20w50 and Lucus, lol. After finding the broken rings I've decided to pull the pistons from the new engine and open up the gaps since they were set to oem specs from the machine shop.
Good find on the pistons- that'd be terrible if it happened to the new motor.
When's the first race with the new motor?
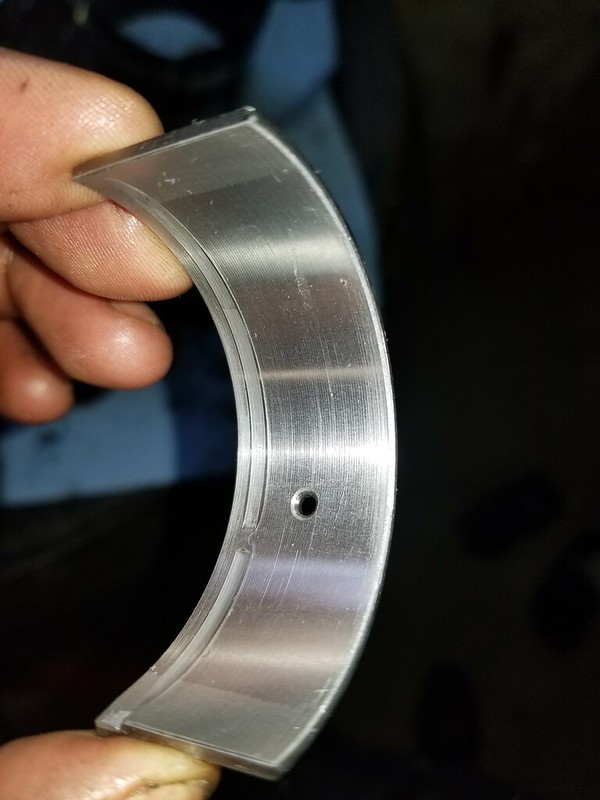
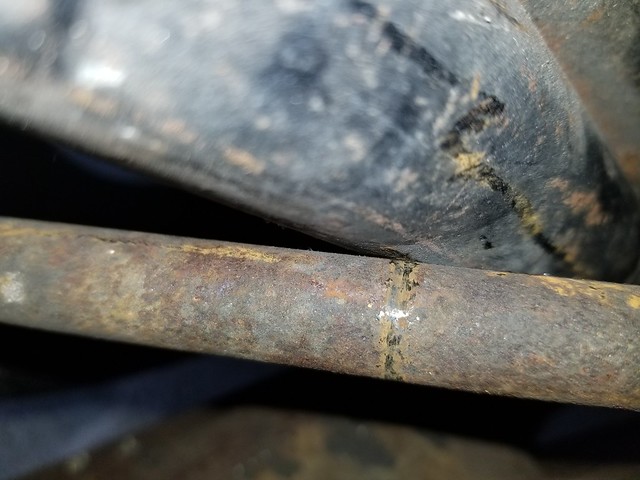
Our first race this season is May 12-13 at New Jersey Mostorsports Park. We still have a ton of stuff to get done on the car and I'm starting to get nervious. Had a couple minor set backs on the engine again. While installing the pistons again after regaping the rings my ring compressor broke dropping the little tool that winds it up down a cylinder and hitting a rod journal. I felt around it and thought it was fine but was very wrong. Turned the engine over and it stopped. Then turned it the other way and it stopped again. The tool ended up putting a slight nick in the rod journal which caused the grove in the bearing. looks worse then it really is. I've since polished it out and and i'm waiting on another set of rod bearings. Also the rear main seal kit was missing the shims for the side seal in the cap so I had to order another.
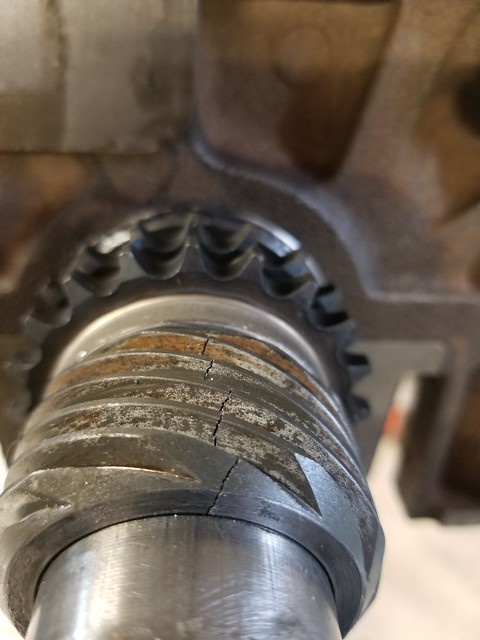
I also cracked the distributor gear while pulling it off to replace the timing gear. Grabbed the one off the old engine but still not a good weekend.
Engine is all back together.
I did hit a snag when installing it because I installed the motor mount brackets on the wrong sides. I forgot it that it should tilt toward the passenger side and was scratching my head as to why the header wouldn't fit.
Incorrect
Correct

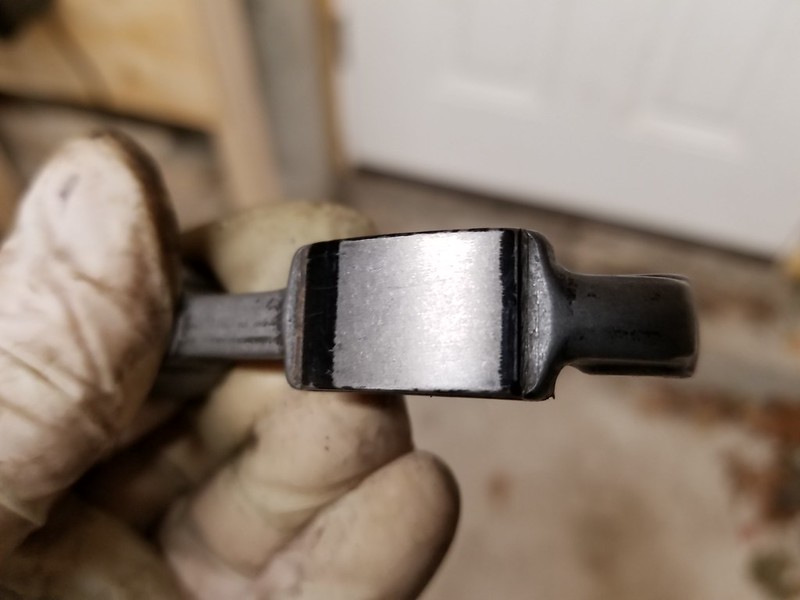
Header fits a lot better but still hits the steering shaft. Hammer should take care of that.
Are you sticking with stock motor mounts? (Looks like yes in the photos)
Is there any benefit to going with something stiffer?
We ordered new mounts but they are at my teammates house 60 miles away so I tossed the stock ones in for now. We keep tearing the stock ones every season and noticed the fan has been hitting the radiator. At some point I might buy the Silver Project poly mounts or make my own. Only down side might be more vibrations and driver fatigue?
Turns out the only chance we have to get the car on a Dyno is tomorrow instead of next week. None of us have had a chance to touch the car in the past week so we are now rushing to get it back together. We have put off installing the header for now since we don't have time to fabricate a new exhaust system. Also I ported an intake manifold which is not ready either since it needs some finish work and I found a couple of broken off injector bolts. So power will be down some but I hope we can get the AFR where we want it then see what it does.
Last night we managed to get the stock manifolds on and one new motor mount. Everything fought us and we have to take the manifolds off and a few times because gasket bolt holes didn't line up. Also the battery and jump pack were dead so we didn't get to prime the engine. Tonights list is install the rest of the wiring, fuel lines, coolant hoses, 1 motor mount, brakes, fuel tank, muffler, and charge the battery.
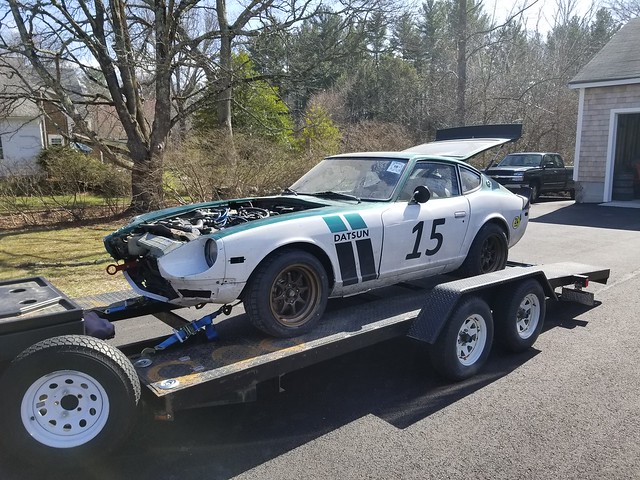
After dealing with a bunch of small issues we finally got the car running and on the trailer Saturday afternoon. Lessons learned: always fill the oil pump with oil before installing so that the engine will prime, coolant temp sensor and cold start injector sensor plugs are identical and should not be mixed up, distributor shaft needs to be installed a certain way and not eyeballed if you want the distributor to be installed in the correct spot, and there is something off with the starter or wiring that maybe we can fix later.
Strapped the car down on the Dyno and made some easy pulls under load to break in the engine and seat the rings. Surprisingly air fuel ratios were ok and we only had to tweak the idle adjustment on the AFM. Set base timing to stock then made a couple full pulls slowly bumping timing up till power stopped increasing then backed it off a degree or 2. AFR's were still safe at 12.8-13.2 under load. Numbers are lower then I hoped but still happy with the power we gained up top. Ported intake, header, and exhaust should hopefully help in the future.
Red line is last year's numbers, black are for the new engine.
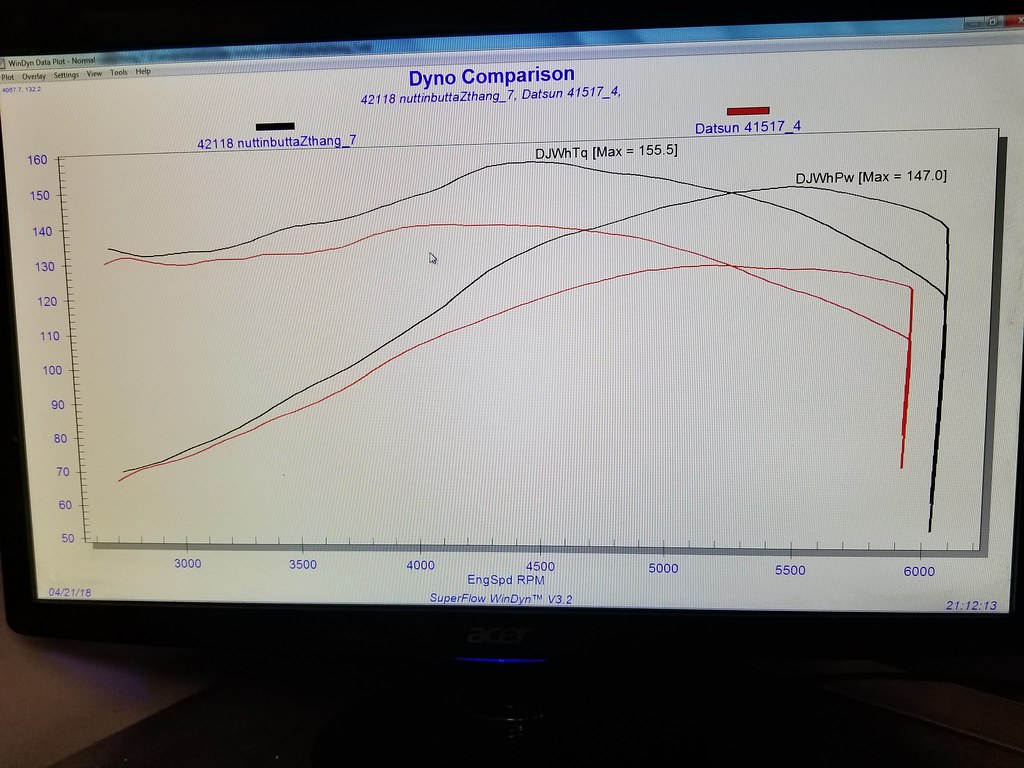
One thing I noticed is that on some pulls it shows the AFR going to 10:1 at around 5500 rpms. I think we might be maxing out the AFM or the computer has a fail safe to go rich. That might explain the power drop off at 5500. All the graphs looked consistent even though I only saw the rich spike a couple times. Nice thing is that even with the cam it still made more power everywhere.
Nice work! Always an accomplishment to get something put back together and on a dyno. What number were you hoping to see?
I lol'd at the dyno operators spelling of your team name :)


