


Our $500 Volkswagen Fox came with legal safety gear, but only barely–its time spent outside in the Florida sun had done a number on the fabrics, meaning that while the date codes were correct, the condition of our seat, net and harness would have never passed tech inspection. Plus, we weren't super comfortable with the included equipment, anyway: The seat had no halo to restrain the driver's head, the harness was only a 5-point design, there was no center net and most importantly the car had no fire system (a recent 24 Hours of Lemons requirement).
We've balled up our cars before–see our Lemons Miata as one example–so we're big believers in installing as much safety gear as possible. We're fans of installing it correctly, too, which is why we called Stable Energies Motorsports. In addition to selling every piece of safety equipment under the sun, the company is staffed by knowledgeable racers, and after hearing about our car, our driver roster, and our goals, they sent us a big 'ol box of safety gear for the Fox. The first step: Installing the race seat.
Let's Get Situated
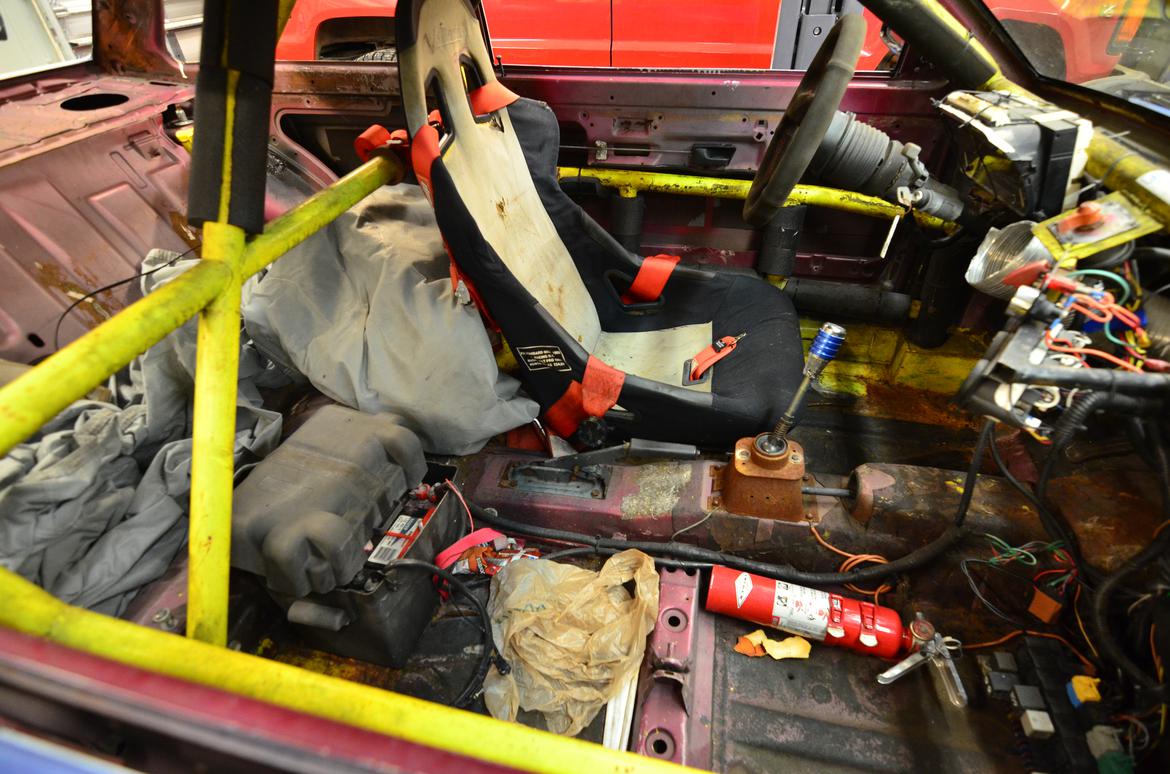
Stable Energies recommended the OMP HTE-R seat, so that's what we chose for our Fox. At $959 at the time of writing, it's not the cheapest option, but we think it was worth it: It offers the halo head protection we desired, as well as an FIA rating meaning we wouldn't need to install a back brace. We'll leave the back brace or no back brace argument for the internet to decide, but let's just say we don't like having a big steel tube aimed directly at our spine and prefer to use a seat that doesn't require one. This seat is also fire resistant–a feature that at least one popular budget-oriented aluminum race seat brand doesn't have. (Yeah, we learned that lesson the hard way).

A race seat is only as strong as its mounts, so we turned our attention to the Fox and took inventory. Things were… not great. In order to fit the last race seat and its sliders, the team had cut most of the factory seat mount–-and the factory strength—from the driver's floor, then used long, bent, mismatched bolts to mash it all together. The stress cracks that had formed around these mounting points told us all we needed to know: We needed to start fresh.


So we did, cutting the entire factory seat mount and rails out of the car to return to a blank slate.


We took a slight detour and stripped all the sound deadening out of the car while we were working, too. Yes, this step is labor-intensive, but sound deadening is heavy and flammable. Removing it from your race car is a win-win.

After a few hours of cutting, grinding, and chiseling, we had returned our Fox's driver's seat mount to a bare floor, and a blank slate.

Next, we popped our new seat into the car to test fit. Was the driver comfortable? Did the seat fit well? Was ingress/egress easy? The answer to all of those questions was "yes," so we continued installing the seat in the car.

Of course, we'd just spent hours removing strength from the floor, and we weren't about to repeat the mistakes of the previous owner. We grabbed a bunch of 3/16" plate steel, then created a sturdy, flat mounting surface for our seat. Notice that it spans from door sill to tunnel, and also ties back into the factory seat mount slider attachments.

Next, we welded everything in place.

With the sound deadening removed and a new floor created for our seat, we masked off everything in the interior and sprayed it with white spray paint. There are more-thorough ways to paint an interior, and there are paints that will last longer, but for the 24 Hours of Lemons this was already overkill. Why bother painting? We're big fans of bright, clean, shiny interiors. They make it easier to spot leaks, dropped bolts, cracks, and other problems. Plus, white is an easy color to touch-up later.


Next, we needed to actually mount our seat. We used universal seat brackets from Stable Energies Motorsports, then simply drilled our new floor. After a few grade 8 bolts were installed, we were ready to bolt the seat in. Note that we installed the eyebolts for our harness with big fender washers while we had the seat out.


Success!

The Rest
Now that the seat was in the car, the hard work was over and we could install the rest of our safety gear. We threw the entire Stable Energies Motorsports catalog at the car, choosing quality components that would be easy to use and hold up well without breaking the bank. For example, we chose a flat Five Star Wide Angle Racing Mirror to give our novice drivers plenty of visibility without having to adjust to driving with a convex or Wink mirror.

Of course, we didn't skimp on safety, either. Though window nets and center nets aren't required for the 24 Hours of Lemons, we chose to install them anyway. They're cheap insurance, and we'll take every advantage we can in a crash. Throughout the installation, the crew at Stable Energies was answering our questions and pointing us in the right direction.


Fire Fighting
Seat, harness, nets, mirrors, check! We were well on our way to passing tech, but there were still two more to-do list items: A battery cutoff switch, which we'll discuss in a future update, and a fire system. There are hundreds of options on the market these days, but for this car we wanted reasonably-priced and dead simple. Stable Energies Motorsports had just the system, recommending the OMP Sport mechanical system. At just $389 for the complete kit it's an amazing deal, and includes everything necessary for installation. We installed six nozzles in the car, with five pointed at the driver and one under the hood. What's the logic for that? We figure if a fire starts, it'll be easier to find another $500 car than it will be to find another driver.

We mounted the bottle in the trunk, then simply bent the tubing by hand to route it through the car. We mounted two pull-handles to activate the system: One on the tunnel for the driver, and one on the rear parcel shelf where corner workers can easily reach it.

After a few days of work, a few thousand dollars, and a few dozen phone calls asking for suggestions, we'd successfully made our Fox safe enough to pass tech. Of course, we still hadn't driven it more than a few feet. In our next installment, we'll cover the journey from driving in a parking lot to driving on track.
View all comments on the GRM forums
You'll need to log in to post.


