


Our rationale for upgrading our Mazdaspeed3 project has been relatively simple, but also quite subjective. Our goal is to improve or magnify the things we love about the car—or correct some of its shortcomings—without creating any new compromises. While that’s easily expressed, it’s not always so easily pulled off. Our latest fine tune was to replace the stock brake pads. While the MS3 has good brakes from the factory, heat was prone to making them rather inconsistent. They didn’t fade quite as badly as many stock brake setups we’ve encountered, but once they got hot, it felt like you were hitting a brake pedal in a different car each time you applied it.
Our solution came in the form of some EBC Yellowstuff pads. These are specifically formulated to work within a very wide range of temperatures, and EBC promotes them as a nearly universal solution for street, autocross and even track day use. It’s pretty impressive when one pad can work in such a wide range of applications. While throwing a set of pads on a car is usually a quick and simple undertaking, doing so on the MS3 was a profanity-laden, blood-soaked orgy of frustration. Well, it wasn’t actually that bad, but a few niggling factors combined to make this pad change a bit tougher than others. Heavy front calipers, short brake hoses and those infernal screw-in rear pistons make for slow going, but it’s still a project the home mechanic can tackle with some patience.
Hopefully our step-by-step guide helps as well.
 1. Start at the front. Well, actually, start by properly lifting the car and securing it on jackstands. Then, remove the wheels and prepare to brake dance.
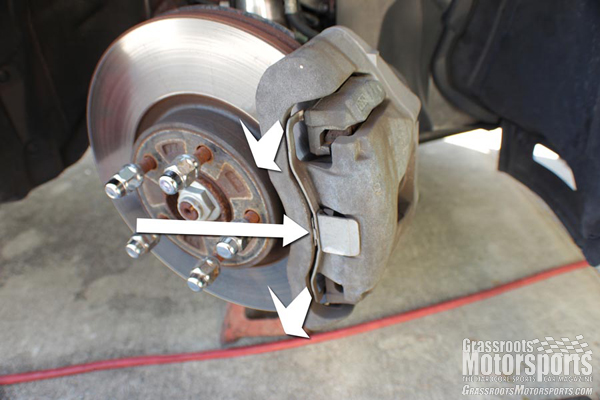
Start by removing the anti-rattle spring. Throw a towel over the spring before you pry it out because it’s under a tremendous amount of tension. You don’t want to lose an eye. Pry up on the center of the spring and pry out on the ends with another screwdriver while prying up on that center.
1. Start at the front. Well, actually, start by properly lifting the car and securing it on jackstands. Then, remove the wheels and prepare to brake dance.
Start by removing the anti-rattle spring. Throw a towel over the spring before you pry it out because it’s under a tremendous amount of tension. You don’t want to lose an eye. Pry up on the center of the spring and pry out on the ends with another screwdriver while prying up on that center.
 2. Once the spring is out, remove the two bolts that hold the caliper to the bracket. You’ll need a 17mm wrench or socket.
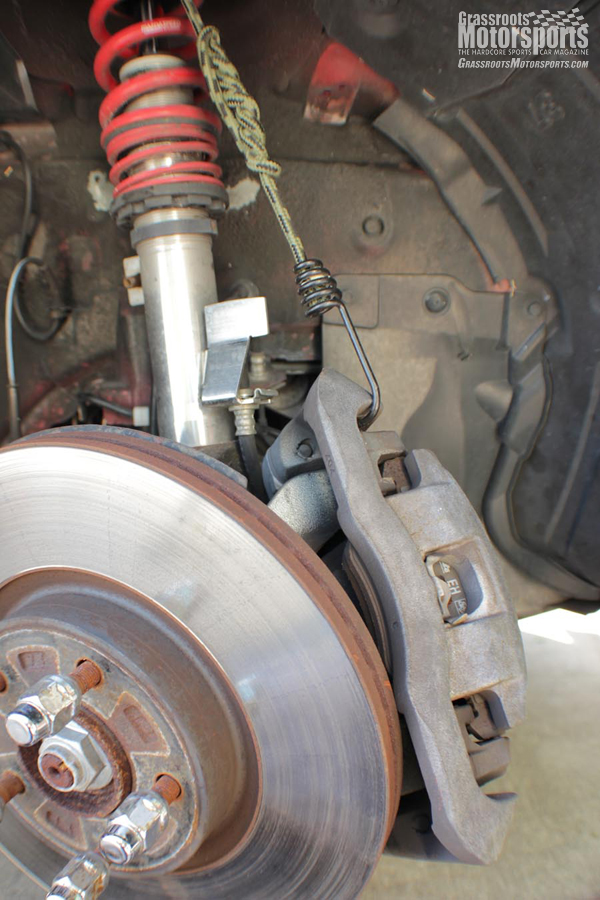 3. When the caliper is loose, hang it from a bungee or wire. The front caliper is quite heavy, and the brake line is quite short, so have your hanger ready to go.
 4. With the caliper loose, remove the old pads and compress the caliper piston back into the caliper. You can use gentle pressure with a clamp or brake compressor to ease the piston back in. We always use the old pads for compression so we don’t damage the new ones.
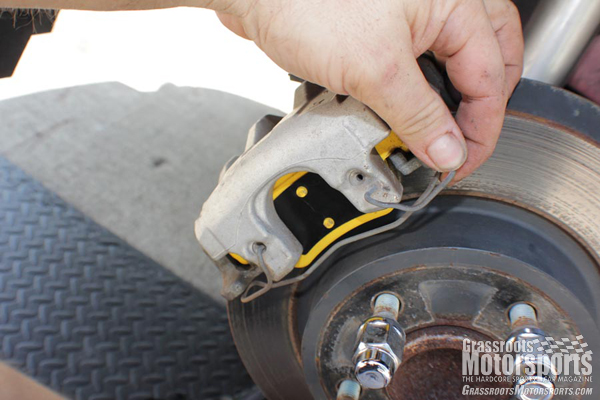
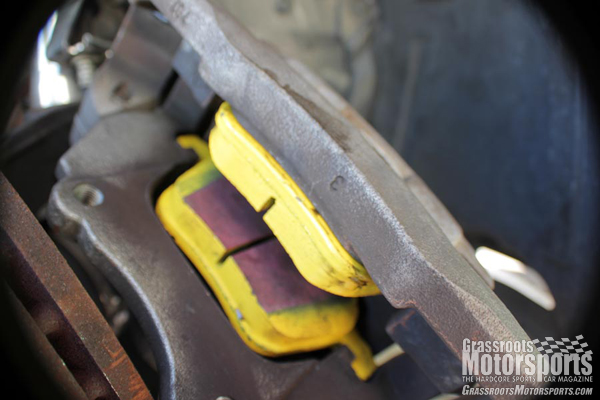 5. Speaking of new pads, we used EBC Yellowstuff compounds, and this is the step where you put those in. Once you guide them into place in the caliper, you can bolt the caliper back onto the bracket and reinstall the anti-rattle spring.
And that’s it for the front. It sounds easier than it actually is, however, as the heavy caliper, many sharp edges and tight clearneces combine to make the job a little tricky. Just go slow, and have some Bactine on hand. Now we can move to the rear….
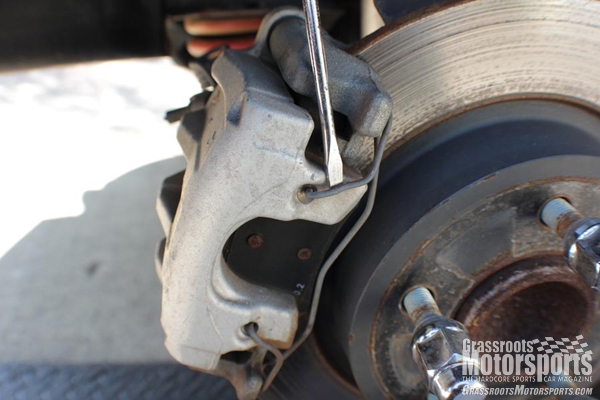 1. There’s an anti-rattle spring in the rear as well, but it’s not quite the eye-remover that the front one is. Gently pry it out and set it aside.
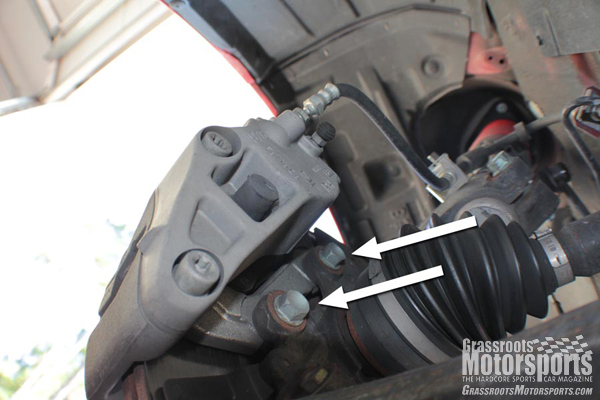
 2. With a 14mm wrench, remove the two bolts that hold the caliper to the bracket. You’ll need flexible fingers for this part.
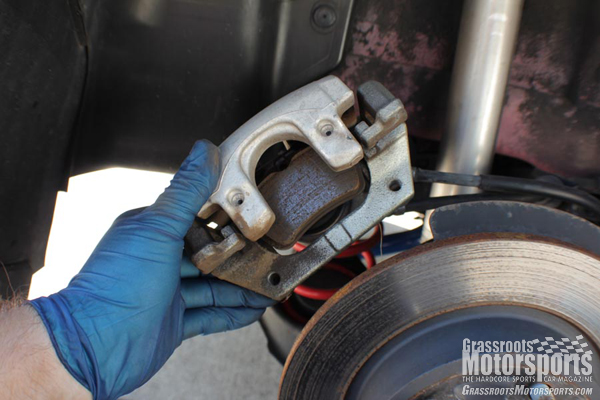 3. Once those bolts are out, you can lift the caliper off the rotor. At this point, if you haven’t released the parking brake, you have little chance of getting the caliper off no matter how hard you try—or so we hear.
The brake pads will probably fall out at this point. If not, simply remove them now.
3. Once those bolts are out, you can lift the caliper off the rotor. At this point, if you haven’t released the parking brake, you have little chance of getting the caliper off no matter how hard you try—or so we hear.
The brake pads will probably fall out at this point. If not, simply remove them now.
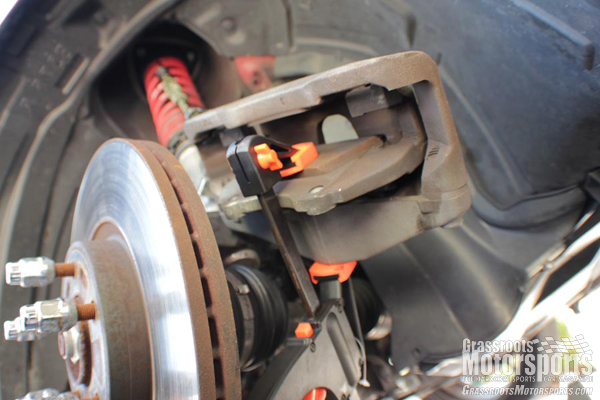
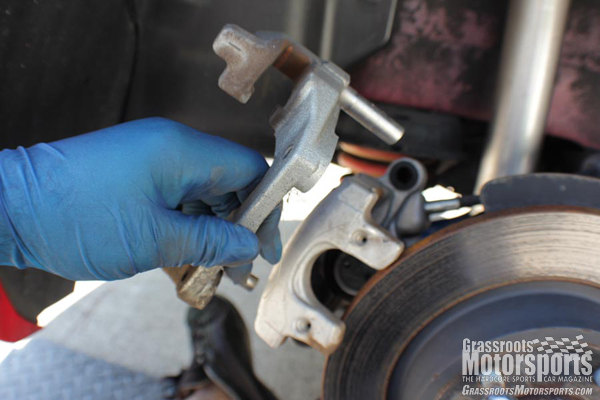 4. At this point, the sliding carriage that allows the caliper to “float” can be removed and the sliders can be wiped clean. Removing the carriage will also create some space for the next step.
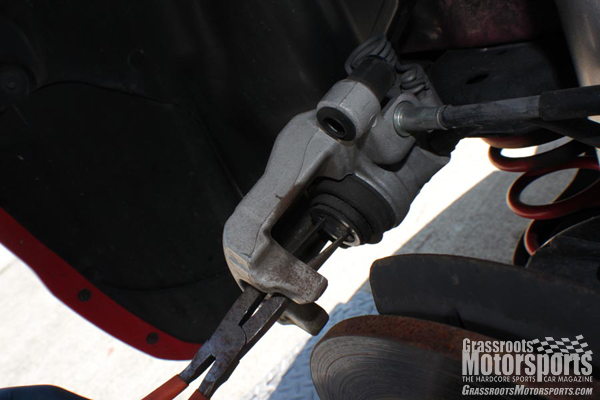 5. Technically, this is not the right tool for the job, but it works fine if you’re patient. The rear pistons need to be rotated clockwise as they’re compressed. You can use a special tool for this called a caliper cube, or you can use a pair of needle-nosed pliers. Apply gentle pressure as you twist the piston clockwise, and it will slowly retract into the caliper.
 6. Once you compress the piston enough, you can reinstall the floating bracket, install the pads (like in the front, we used EBC Yellowstuffs in the rear—it seemed to make sense), and reinstall the caliper. Those bolts are just as hard to get in as they were to get out, possibly even moreso.
 7. With the caliper back on, you can reinstall the anti-rattle spring, put the wheels back on and drop the car. Remember, before you lower the car, give the brakes a few pumps to take up the slack in the calipers—unless you want to watch it roll into your garage door.
View all comments on the GRM forums
You'll need to log in to post.


