All right, it’s another Miata. But who can blame us? For almost 20 years Mazda’s iconic little roadster has been the standard against which fun performance cars from around the world are measured. The Miata is ready to do the job in a variety of roles, from top-down touring to flat-out handling—heck, it even makes a decent commuter.
One thing the Miata doesn’t have, however, is an abundance of power. By some standards, they’re downright slow in a straight line.
We’ve tried a bunch of bolt-on speed parts on many Miatas through the years, often scoring the 10 or 20 additional horsepower needed to make the car a bit more fun. We can usually boost rear-wheel power from a little more than the stock hundred to somewhere near 120.
While this seems like plenty for a two-seat roadster in the 2200-pound range, we’ve never really reached the full limits of the chassis. We just had to find out what happens when a Miata goes one louder.
There are literally dozens of ways to apply forced induction to a Miata, and we figured that as long as we would be doing the job we should make sure the final result would suit our needs. The first step in that process was harder than it might seem—determining what our needs were.
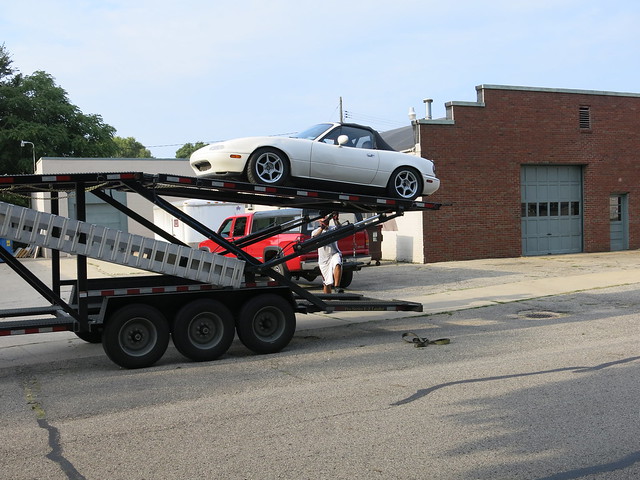
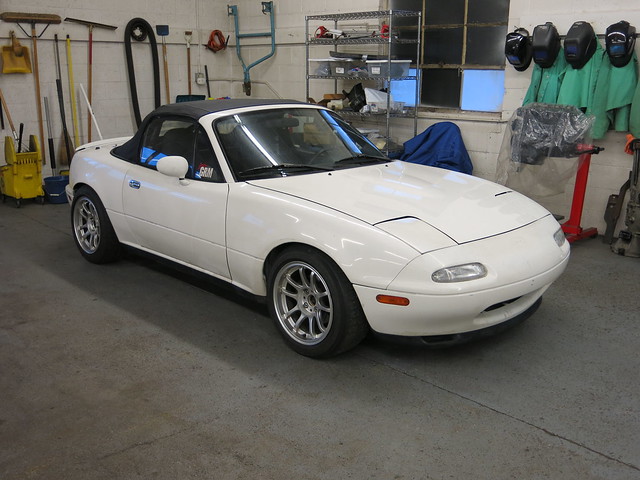
The Trooper

For about a year now, we’ve had this 130,000-mile 1994 Miata that’s fitted with the moderately desirable R package. Up to this point it’s only required regular maintenance. The car has taken us to an SCCA Solo National Tour event and easily handled an Evolution Performance driving school weekend.
We had a dream for this one, however: embarrass Corvettes and Porsches in SCCA’s Street Modified 2 class. As such, adding more power to the Miata was pretty high on our list of priorities. We figured that we’d need at least 220 wheel horsepower to give our Miata a fighting chance against the local competition, although we would still be giving up a bit of power-to-weight ratio to the displacement hogs. Ultimately, we’d like to see closer to 300 horsepower as the car is developed.
The argument of superchargers versus turbochargers has been going on forever, and everyone seems to have a favorite. We’ve noticed that while supercharger kits that use a large housing like the Eaton MP62 promise a mountain of torque at very low engine speeds, the dyno plots that we’ve seen for turbocharged Miatas show more peak power while offering nearly as much torque. We further hypothesized that the linear manner in which an appropriately sized turbocharger delivers power would keep us from lighting up the rear tires upon throttle application, making the car a little easier to drive.
Once we had carefully analyzed our options, we were confident that a well-engineered turbo setup would be the best combination for our particular goals. We started our investigation into what would make the ultimate Miata setup by rereading the “Turbocharging Performance Handbook” by Jeff Hartman.
As we see it, a turbo system consists of three major subsystems and about three million minor components. Since it can be hard to plan for all of the minor components—hoses, clamps and the like—until you’ve got some of the subsystem components to measure, we started looking at the big parts: the turbocharger itself, the software needed to control it, and exhaust hardware including the manifold and downpipe.
We started our research with the turbo, and there were a couple factors in play when we started the selection process. One of the key features that we wanted was a ball bearing-supported center section. This is a clear example of technological improvement over time, as few would argue that ball bearing turbos aren’t better in every measurable way than the ones that simply use bushings to support the turbine.
The use of bearings allows for quicker spooling due to reduced friction. It might seem like splitting hairs, but when the center section is spinning at well over 100,000 rpm, a little bit of friction can create a lot of heat and vibration. Reducing this friction and vibration also extends the life of the turbocharger. Desiring this one feature narrowed the field of eligible turbochargers quite a bit.
We started crunching numbers to determine which turbocharger was best suited to our goal of 220 horsepower at the wheels. Math students and engineers can obsess over the minutiae of compressor maps, volumetric efficiency and mass airflow, but we took a shortcut when we discovered that most turbo manufacturers offer some sort of helpful guide that matches their wares to the intended application. This helped quickly narrow our choice to the Garrett GT2560R.
This unit met our goals since it’s small enough to be quickly spooled by our 1.8-liter engine and provides enough potential airflow to make upward of 300 horsepower. Garrett recommends this turbo for engines between 1.6 and 2.5 liters and horsepower levels from 200 to 330; in fact, they note that it’s original equipment on some versions of Nissan’s SR20DET engine. The “R” in the turbo’s designation indicates that this unit features the ball bearing center section that we wanted.
This unit’s ideal geometry and durability made it worth the $900 street price. Now that we’d chosen an actual turbocharger that was up to the task, we began to think about the other components.
Master of Puppets

It was time to devise an engine management strategy. This subject could easily fill tomes by itself, and there are several good books available on the subject. We were already convinced that a full standalone solution was our best bet, but we certainly didn’t want to rewire the whole car in order to run a turbo.
Luckily for us, a few widely supported engine management options were already available for the Miata. We were particularly impressed with the capabilities of the Hydra Nemesis ECU, which can run some pretty high-end functions such as water injection and launch control when properly configured. We were also attracted by the nearly complete plug-and-play nature of the system; by retaining the factory sensors, the setup would in theory be as reliable as the original setup. At a hefty $2000, this wasn’t the least expensive option, but it was most likely to meet our needs through the life of our project.
At this point in the research, we began to notice some parallels between the kit that we were designing and some of those already on the market. In fact, the exclusive North American distributor for the Miata version of the Hydra Nemesis also manufactures their own turbo kit for the same car—one that also uses our desired Garrett GT2560R turbocharger.
Okay, we’ll admit to a case of sticker shock at the $5295 price tag for Flyin’ Miata’s FM II Hydra turbo kit. However, we soon started to realize that it was a true ready-to-go option. In addition to the turbo, manifold, Hydra Nemesis ECU, wideband oxygen sensor and 550cc injectors, the kit also included every nut, bolt, wire, hose and clamp we needed. Plus, they had been developing this kit for nearly 20 years. It was time to call the guys at Flyin’ Miata for a reality check.
You’ve Got Another Thing Comin’

Admitting that we might not be able to develop a better turbo system than Flyin’ Miata was a bitter pill to swallow, although we were encouraged by the fact that we’d both reached some of the same conclusions. When we added up the costs associated with the essential components, it became clear that we weren’t likely to save much money by sourcing our own parts.
We had already spent nearly $3000 before even scratching the surface of our lengthy parts list, so a complete kit for just over $5000 wasn’t nearly as expensive as it had first sounded. As much as we wanted to go with a hardcore DIY solution, we couldn’t justify spending the same or more money for identical components. Plus, we hadn’t even considered fabricating piping or sourcing an intercooler. And then there were the necessary fuel system changes, blow-off valves, hoses, gauges and more.
Based on Flyin’ Miata owner Bill Cardell’s reaction, it seemed that we weren’t the first bunch of big-thinking engineer wannabes to draw this conclusion. Flyin’ Miata has a policy of unending support for their customers, whether they’re using an official FM kit or FM components in home-brew solutions. This has provided Bill with a unique view of the DIY versus kit argument.
Bill believes that the FM II kit is the most reliable, easiest to install and most powerful solution. To prove it, he proposed a challenge: He claimed that he could install his kit in a single weekend, generating double the factory horsepower. He was so confident that he agreed to perform the installation with Flyin’ Miata employee Keith Tanner in front of cameras and witnesses at the 2008 GRM Speedfest at the Classic Motorsports Mitty. We found it impossible to say no.
To prepare the car for life under pressure, we first took care of some basic maintenance, installing a fresh timing belt, water pump and spark plugs along with wires, brake pads and a grip of gaskets here and there. We also went ahead and installed the race seat and Hard Dog Hard Core single-diagonal roll bar that had been sitting in the garage, thinking that our little Miata had some open track events in its future.
While none of these steps were necessary, we were going to need them soon enough. We also took this opportunity to replace the clutch and flywheel; since we were about to double the factory horsepower, we thought replacing the stock clutch would be prudent.
The only kit-related preliminary work that we did was to drill, tap and plug a fitting for the oil return in the oil pan. While this wasn’t a difficult step, we reasoned that it should be done somewhere more sanitary than the Road Atlanta infield.
Speedfest was soon upon us, and before we started turning wrenches we visited Balanced Performance Motorsports, located near the track in Sugar Hill, Ga. Once there, dyno tuning guru Ed Senf verified our Miata’s overall good health; we measured 113 horsepower and 104 lb.-ft. of torque at the rear wheels.
Now that we had a baseline established, we could get started. We headed back to the track and set the Miata on jack stands in our tent. The Flyin’ Miata crew soon arrived and almost immediately set to work.
Iron Men

Bill and Keith could work on a Miata with both eyes shut and one hand tied behind their backs, and the team quickly drew a crowd of eager onlookers. The duo dealt well with the stream of distractions, simultaneously answering questions, spinning wrenches, and reciting chapter and verse of Miata wisdom for nearly every problem.
Work on the Miata officially started Friday afternoon with Keith removing the factory fuel injectors and replacing them with low-impedance 550cc units sourced from RC Engineering. The Flyin’ Miata kit uses wiring adapters for the tie-in, so there was no need to splice the factory harness.
At the same time, Bill removed the factory ECU and replaced it with the Hydra Nemesis unit. By using the factory harness, the only wiring work that remained was to accommodate sensors that weren’t otherwise present in the Miata.
The Hydra ECU, for example, uses an internal 3-bar MAP sensor so the factory MAF sensor can be removed. This MAP sensor receives its signal from the intake manifold, so there’s a very important hose that carries that signal between the two components. Like an automotive carotid artery, this hose carries the pressure signal from the heart to the brain, allowing the ECU to keep the engine under control during boost and vacuum conditions. This hose must stay clear of damage and obstructions, and Bill’s experience definitely helped to steer it from harm’s way.
Less than four hours after turning the first wrench, the car was running with its new Hydra ECU and larger fuel injectors. At that point, we knew that the engine and ECU were communicating successfully.
Bill connected his laptop to the ECU via a serial cable and performed the initial setup. We then used the Hydra’s datalogging feature to gain valuable insight into the operating conditions of our engine. We could see the critical operating parameters on screen and adjust these settings on the fly. With this valuable intelligence gathered, activity stopped in time for everybody to grab some evening refreshments from the Moss Motors Pub.
Hair of The Dog

Work began at 11:00 the next morning. With a full day ahead, Keith was ready for business as he began removing the factory intake and exhaust plumbing.
Once the driver’s side of the engine bay was nearly bare, Keith marked a space of about two and a half inches along on the flange of the frame rail. “I hope you aren’t squeamish,” he told us as he prepared a reciprocating saw. “This part is hard on the owners sometimes.”
In practice, it wasn’t bad to see at all. In fact, it made us pretty glad to have experienced professionals on the job; if we’d been marching to our own beat, we might not have known that spatial allowance was necessary. While working in that area, Keith also mounted the oil supply line to an unused factory oil fitting on the block. Soon after, the new downpipe and wideband oxygen sensor were put in place and connected to the rest of the exhaust.
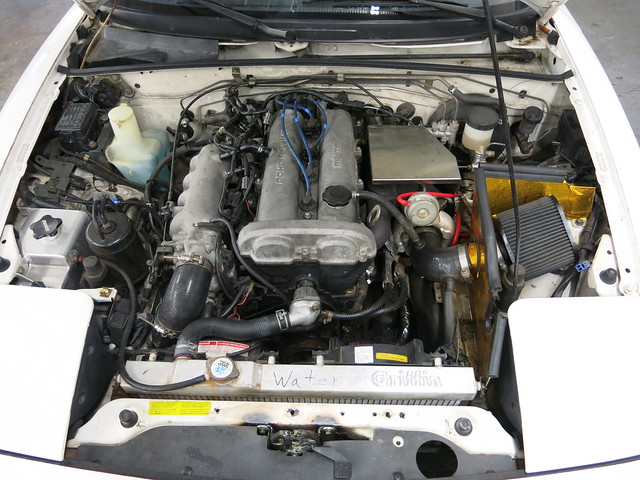
Meanwhile, Bill had been preparing the turbocharger and exhaust manifold by installing the water and oil lines along with their heat sleeves. Seeing the heat sleeves in place reminded us how it’s the little details that can make a fully developed kit worth the coin.
In a relatively short time, the whole turbo kit was ready to be installed on the engine, and the guys used a two-man approach: Keith applied leverage to the engine, giving Bill enough room to plug the whole assembly onto the exhaust manifold studs—there was just enough room thanks to the slot that Keith had cut away. Once the turbo and its manifold were on the engine, the rest of the sensors and lines were secured.
Next up was the wastegate actuator. This item prevents damage to the engine or turbocharger itself by controlling the turbocharger’s boost level. When the pressure reaches a predetermined level—6 psi initially in this case—the wastegate actuator bleeds off turbo pressure. Once the installation is complete, the ECU manipulates the signal sent to the actuator, allowing additional boost pressure into the combustion chambers.
We had most of the hard parts installed by lunchtime, giving us time to enjoy the event a bit and meet Bob Bondurant, who was in our booth for an autograph signing.
I Wanna Rock

After we enjoyed some of the finest gyros the Road Atlanta infield had to offer, work began on the intercooler and its associated piping in the front of the car. There were a few plastic undertray bits to be snipped here, as well, but we think the large-diameter piping was very much worth a bit of trimming. Keeping this piping as short as possible and using a highly efficient intercooler affords the FM II kit very quick response to throttle inputs. While that might seem like a simple rule of thumb, we’re pretty sure it would have taken us a couple tries to get it fabricated just right.
The kit was almost complete by this point, as Keith buttoned up the compressor inlet and air filter while Bill finished the interior bits like the boost gauge. There were some seemingly trivial details left, like installing a check valve which would prevent boost pressure from being applied to the charcoal canister.
Before we were even hungry again, we had the car put back together and were double-checking our mechanical, fuel, water, oil and air connections. Failed connections on a turbocharged car can have severe consequences—an inaccurate signal or loss of lubrication can quickly turn an engine into a boat anchor.
Once we were confident that everything was properly connected, it was time to crank over the engine and check for leaks. Finding none, we began consulting Bill’s laptop for further proof that the installation was a success. The on-screen Hydra interface was easy to read, providing a great deal of information and allowing ample control over operating parameters.
Since we had seen the settings of the car before the turbocharger was installed, we were prepared to make adjustments to the preloaded air and fuel maps. However, using the wideband oxygen sensor allowed the Hydra ECU to auto-tune, making small changes to its own program in order to improve performance. Like a cross between SkyNet and WOPR, the Hydra ECU can teach itself to keep a car running correctly. Even with all of the technology at work, we kept a sharp eye on our air/fuel ratios as we took the car out for some road testing.
Holy Driver

Once underway, we found that even with the baseline 6 psi boost levels, the FM II kit had completely transformed our Miata. A squeeze of the accelerator generated immediate, progressive thrust, making our car feel a bit like a half-scale Corvette. No stalls occurred, and even momentary stumbles were few as the system adjusted fuel trim settings to keep air/fuel ratios in check.
As seamless as the turbo seemed from the driver’s seat, experience allowed Bill to pick up on some abnormal symptoms in the datalogs taken during acceleration. To achieve a healthy, engine-friendly air/fuel ratio, the ECU needed to hold open the fuel injectors longer than Bill typically encounters. While not immediately threatening, noticing this issue before it caused further trouble is a valuable benefit of the Hydra’s datalogging feature. With the base tuning complete, we called the job done around 6:30 on Saturday evening.
On Sunday morning, we caught up with Bill Cardell and Ed Senf back at Balanced Performance. Under very similar weather conditions two days earlier, our stock 1994 Miata made 113 horsepower at the wheels. In the short time we had to evaluate the car since the installation, we were sure that power had been increased dramatically. Still, doubling the horsepower was a tall order that only the dyno could confirm. We were also eager to see the torque spread, since the car now delivered such a big-block feeling.
We simply stood back and watched as Ed took the first measured run. A dyno cell can sometimes make even the most tepid car sound aggressive, but the turbocharged Miata was all thundering bass rhythm and shrieking turbo melody as it belted out 224 peak horsepower. Awfully close, but not quite a slam-dunk.
The oxygen sensors showed a healthy, perhaps even conservative air/fuel mix. Of course, Bill had taken datalogs of the initial run, so after a quick analysis and a bit of a timing advance we ran the car again.
We repeated this process for the next half-hour, making one adjustment at a time until we felt we’d found the sweet spot—an impressive 238 peak horsepower thanks to 11.5 psi of boost pressure. Torque was, as we suspected, abundant, as the dyno measured more than 200 lb.-ft. from 3200 rpm to redline. Touché, Flyin’ Miata—challenge met and mastered.
Once the dyno had confirmed the feat, we gathered up everything and hustled back to the Mitty to catch the last bit of racing for the weekend. The car stood on display for the rest of the day, allowing spectators to check out the results.
Heading Out to the Highway
Perhaps the ultimate test came at the end of the day: We simply packed up the Miata and made the seven-hour drive home without one hiccup.
We enjoyed trouble-free cruising as we adjusted to this wholly different driving experience. The car’s turbo sounds are loud, taking that metal symphony everywhere it goes.
What’s a Miata like when it’s one louder? About twice as good as a Miata that only has half the horsepower.
This article is from an old issue of Grassroots Motorsports. Get all the latest how-tos and stories for just $20 a year. Subscribe now.


 " />
" /> " />
" /> " />
" />


