A lot of people talk about installing a junkyard supercharger. Quite a few even start to do it. But then reality kicks in, causing many of these projects to stall out and remain unfinished.
We’ve put together junkyard turbo setups before–witness our Miata endurance racer–but wanted to jump in with a DIY supercharger build of our own. We wanted to find out what’s involved, where the stumbling blocks are, and what it takes to finish and succeed. We used a Miata for our build, but every step of our project can apply to just about any other car.
Before we started, we spent quite a bit of time combing the internet looking at forums, build threads and commercial supercharger websites. We wanted to glean as much knowledge as we could to home in on a specific plan for our project. Not surprisingly, some of the information was misleading or just plain wrong. But we averaged what we read, seeing enough common themes to put together a recipe for our setup.
Here’s where we landed: We’d use an Eaton M45 supercharger mounted on the driver’s side of the engine, aim for 6-7 psi of boost, and hope for about 140 horsepower to the wheels. That’s a fairly docile setup in this age of huge boost and huge power, but it’s still much more potent than the roughly 100 horsepower that our stock Miata made at the wheels.
Our quest for the blower took about a month of casual junkyard and internet searches, but we finally ended up with an M45 from a Mercedes-Benz for $100. The pictures tell the story about how we went from a supercharger on a table to a much quicker Miata.
We’re presenting a somewhat condensed version of our build here in the magazine. To see even more detail, hop on our website and head to the Builds and Project Cars forum and look for a thread titled “Is the Answer a $100 supercharger?”

Here’s where we started: an Eaton M45 supercharger unit purchased locally on Craigslist for $100. We believe it’s from a 1998-2004 Mercedes-Benz C230 Kompressor. We were lucky to find one that looked perfect–maybe even freshly rebuilt.

We positioned the blower in the engine bay of our 1992 Miata to get a rough idea of the fitment and packaging issues we’d be facing. Blocks of wood held the supercharger in place while some 2.5-inch tubing gave us an indication of the hood clearance between the inlet and outlet. We jockeyed around things until they looked about right, then took some measurements.

We were fortunate to have a spare engine that we could reference for mock-up. Using measurements taken from our in-car mock-up, we started working on the brackets. We chose to drive the blower from the Miata’s air-conditioning pulley. Here we’re checking the alignment of the pulleys–we don’t want a belt to slip or get tossed. Some preliminary math said that our pulley setup might yield as much as 8-10 psi of boost–a bit more than we desired. Rather than worry about our pulley ratios at this step, we decided to wait until our test drives and dyno tests.

In addition to keeping our belt in line with the pulleys, we had to keep it tight. We picked up a belt tensioner from a GM V8 (Napa part No. 38159; retail price $35.12), then mounted it to a Mazda casting designed for the power-steering pump. (Our car has manual steering.) We also bought four belts from Napa that looked to be roughly the right length. We kept the one that fit best and returned the other three. Belt cost: $15.90.

Before finish-welding any of our brackets, we made several test fits in the engine bay. We had to cut some of our tack welds and slightly reposition pieces along the way. This picture also shows the inlet/outlet adapter that we made for the blower. Although we could have hand-fabricated a mounting plate using hole saws and die grinders, we took a high-tech approach this time and drew up a plate in CAD using SolidWorks. We had access to a two-axis CNC plasma table that we used to cut the plate.

Our goals kept us focused on delivering a good enough setup rather than a perfect one, so our brackets ended up a bit ugly. We can make them better later.

We struggled for a while to determine an elegant way to fabricate the supercharger outlet. We needed something that would fit, would be possible to fabricate, and would flow air efficiently. Our research told us that the outlet didn’t need to flow as well as the inlet, so we compromised elegance for a rather crude outlet that would fit and be possible to fabricate. We were prepared to remake this part if it proved to flow too poorly. We decided on a curved shape leading to a squared-off end with a 2.5-inch tube. We formed it out of 14-gauge steel, tacked it together, and test-fitted it to make sure it would clear the hood.

We struggled even more on the intake side, knowing that flow mattered more here. After trying several potential solutions, including using pieces of cast-off exhaust tubing from other cars, we realized we could probably make something work with a U-bend. We ordered a 2.5-inch U-bend from Summit Racing (part No. SUM-623031; retail price $18.97) and got to work. Our first step was to cut the U-bend flush to fit onto our mounting plate.

We had to work the U-bend so that it matched up with the inlet of our mounting plate. For this job, we used a hammer and T dolly. A little cutting and welding along the way helped create the shape we needed.

With the initial piece ready to go, we started cutting sections of U-bend to make the rest of the inlet. We progressed one section at a time, test-fitting each iteration to the car and adjusting as necessary.
We test-fitted and tack-welded the sections into place until everything looked good. Then we fabricated a mounting flange from 1/8-inch steel, drilling its opening with a 2.5-inch hole saw.

The final test fit proved we were ready to move on. We’d decided to mount a stock Miata throttle body to the inlet side of the blower. All we had to do next was finish-weld the inlet/outlet adapter and mount a tab for the throttle cable.

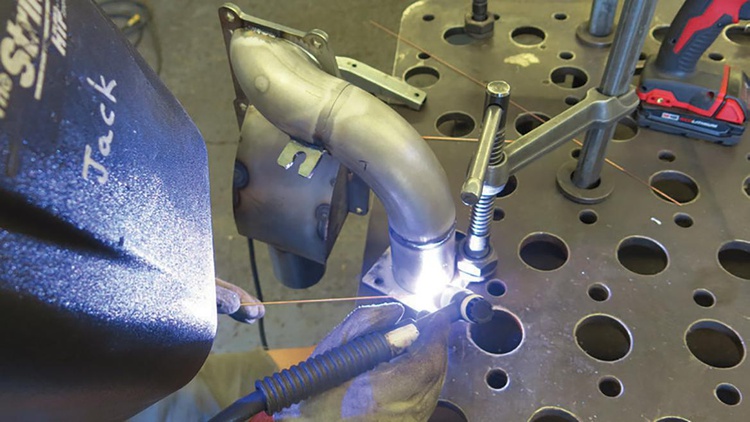
Thanks to a previous Craigslist purchase, we had a pile of 2.5-inch turbo tubing and a K&N-style air filter. We used the silicone ends, along with some additional 2.5-inch steel tubing, to fabricate the connections from the blower to the inlet manifold. A stock throttle body on the intake manifold became our tubing adapter; we figured that was easier than fabricating a new adapter. As for its throttle plate, we just removed it.

We had previously installed a MegaSquirt Plug-N-Play ECU in the Miata, and its base tune already had some boost compensations. Time to test-drive the car. Honestly, the first outing was pretty disappointing; the Miata didn’t seem much faster. However, the base tune was very conservative, especially the timing retard under boost. Following each test drive, we looked at the data logs and made the tune a bit more aggressive. Then we headed back out, pushing the car a little harder than before. After five or six drives and adjustments, our disappointment had turned to deep satisfaction. The car felt quick.

We spent an hour on the dyno to get some solid data and finalize our tune. Our first pull showed 6 psi of boost and yielded 147 horsepower at the wheels and 130 ft.-lbs. of torque. We were ecstatic as we’d gotten lucky that our pulleys gave us just the right amount of boost and we’d gone beyond our 140-horsepower goal. With a little more tuning, we landed at 153 horsepower and nearly 135 ft.-lbs. of torque.

The graph shows it all. Our Miata gained about 55 horsepower and 45 lb.-ft. of torque. We’re sure there’s more power to be extracted if we wanted to chase it, but honestly, we’re so happy with the results that we may just call it good enough.
Did We Really Supercharge a Miata for $200?
The short answer is we did it for a little less: We paid $100 for the blower, $35.12 for the idler, $15.90 for the belt, $18.97 for the U-bend, and $3 for some hardware. That’s $172.99, combined with about 40 hours of work in the planning, fabrication and installation. We’ll admit we’ve got a lot of experience, a pretty good stash of used parts, and a well-equipped shop to work in.
Without all of our advantages, we think this could still be done for about $400: $100 for the blower, $35.12 for the idler, $15.90 for the belt, $18.97 for the U-bend, $75 for a laser-cut manifold base plate, $36.99 for a K&N air filter, $100 for an eBay turbo hookup kit, and $15 for hardware. Add in a tunable ECU like a MegaSquirt ($300-$1200-plus) and the whole project moves to the $700-$1500 range. Fifty horsepower for $200 is possible, but even at $1500 it’s still a pretty good deal.
Read more of the series:
Salvage Yard Supercharging: Adding 50 Percent More Power for About 200 Bucks (This Article)
Salvage Yard Supercharging: Installing a Used Intercooler


 Photography by Carl Heideman


