


In reply to MadScientistMatt :
Yes I use a bit of pipe with the Proper Install tool as well.
Greg

In reply to MadScientistMatt :
Yes I use a bit of pipe with the Proper Install tool as well.
Greg
In reply to slantsix :
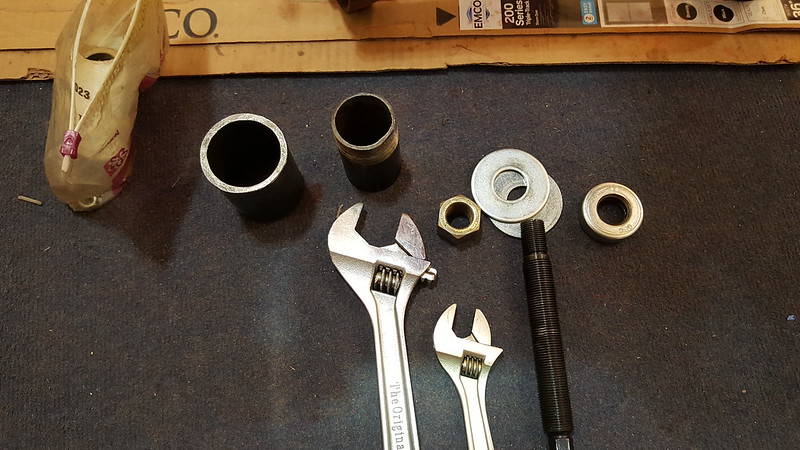
this is how I would go about things:
 20180426_201223 by Hyperpack, on Flickr
 20180426_201231 by Hyperpack, on Flickr
 20180426_201256 by Hyperpack, on Flickr
 20180426_201730 by Hyperpack, on Flickr
Notice the "Pipe"
Greg

COMP Cams makes this installation tool for about $40.
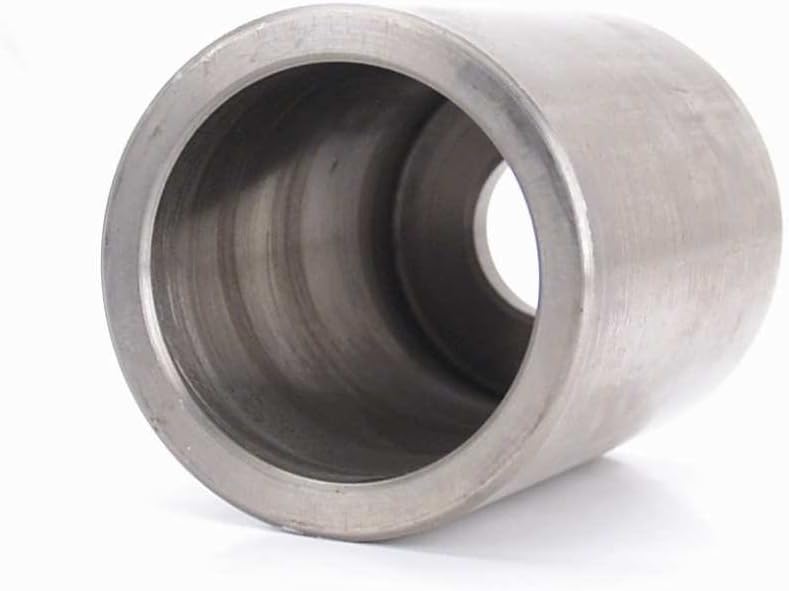
Or you can grab a pipe fitting that's about the same shape for a tenth of the price.

After several repeated attempts to sand the inside of the timing sprocket large enough to be just right, I finally grabbed the carbide burr I was using to port the head. Now the timing gear will slide on by hand, which may have been a bit too much, but it's more or less firmly in place and doesn't have any runout I can find.

Should be fairly sound once the damper is bolted on. I think I stopped honing this one just in time.
Yes it looks like that tool will work fine.
the Lower timing gears and the damper for the Slant are a press fit like B/ RB Engines - the LA Engines are not a press fit so they all have the bolt to hold things together on the bottom end.
With a proper press fit the slant does not need the bolt in the crank once the engine is buttoned up, however you could always run one for extra insurance.
Greg
Again, a single part that I wasn't quite sure with has held up the build. There's a trick to degreeing the cam that requires removing a dowel pin from the block to move the head over one cylinder, letting you see the last piston. The standard procedure to remove a dowel pin is with a Vise-Grip and some prying, right?

Unfortunately, that left me with a dowel pin still in the block that wasn't any good for locating the head. So, what's the nonstandard procedure for removing a dowel pin?

Use a die to cut threads on it for a nut?

And a torch...

Unfortunately, the nut wouldn't stay on the threads well enough to pry the pin out, so it's time to weld the nut on...

Oops.
Maybe that big drill really is the answer to everything...
Cobalt drill bits, buy more than one....
Good call on the cobalt bits. Were you thinking drilling the whole thing out or drilling, tapping, and pulling it?
To avoid changing the hole, I would start a small hole, then go up in size until you have a thin shell left. The thin shell of the pin you should be able to then remove. You have already tried pulling, so you might have to now do a lot of drilling. You can clean up the hole with a ream. Mcmaster Carr will have drills, reams and pins. I recently did something somewhat similar for a door hinge, the pin was broken in 3 pieces and each piece was completely seized. After I finally got the pieces of the pin out, I measured the hole and ordered a ream and pin. Now the door doesn't sage, but that did add bunch of work...
Finally managed to get the dowel pin out, and the hole is intact. First, I used the carbide burr to grind the top flat and put a center mark in the pin to guide the drill.

Next, I drilled it with a 3/16" cobalt bit - thanks for the reminder on cobalt, Ted!

Then I grabbed the next size drill bit (7/32" - it's a 1/4" pin). One pull of the trigger and what was left of the pin came out.

Now I can degree the cam.

In reply to MadScientistMatt :
It sounds like you guys don't understand the need for ZDDP supplement. Oil used to have a zinc and potassium supplement in it. It protects sliding surfaces like camshafts and gear drives. When Catalytic converters came into use, the Zinc and Potassium plugged up the converters. So they pulled it out of the oil. That's why modern engines have roller cam lifters etc.
Those of us with older cars simply buy the supplement. Or you can chase around and look for old style oil in Tin cans.
I'm sorry if that comes across a little snarky. It wasn't my intent. Please use a ZDDP supplement though. Your engine will appreciate it.

In reply to frenchyd :
They actually pulled the ZDDP for emissions reasons (not just because the converters plugged up) and it wasn't necessary on modern roller cam engines which had been in use for decades before the ZDDP change.
In reply to Stefan (Forum Supporter) :
As long as we agree ZDDPis good for older engines.
I'm aware of the issues with current oils and will definitely take that into account with whatever is used for break in.

Look for Motorcraft Diesel oil, it is available in 10W30 and 15W40 and is pretty inexpensive at $30/gallon retail.
It meets Ford spec [whatever] for the new Diesel engines. What is interesting is that it does not meet any API or other oil spec!
It should be good for solid lifter engines because of the high phosphate content (1000ppm?) and, being for new Diesels, should be low ash, so less carbon deposits.
In reply to Pete. (l33t FS) :
But don't new Diesels have converters now? Isn't that why DEF is required?
The reason I was removing the dowel pin: It lets me put the cylinder head on there, one piston off. The #6 rod and piston are in place, without any piston rings, for this test.

This will let me use the head and a hex key as piston stop.

Now I can check to see if the pointer is accurate for TDC. Turns out it was spot-on, but it's the only way to know for sure.

Now that I know that zero is really zero, I can tape on the degree wheel that I printed from this site. You'll notice it's also marked with when the valves open.

In reply to MadScientistMatt :
Clever.
I'm lazy I'd just bolt a strap of steel across the deck with a bolt in it to find Top dead center.
If the head is on them I use a dial indicator.
Unfortunately, I can't seem to find my dial indicator. I got that secret from Doug Dutra's book on rebuilding slant sixes, can't take credit for it myself. It will also let me use the valve gear to find when the cam lift starts... that's next.
frenchyd said:In reply to Pete. (l33t FS) :
But don't new Diesels have converters now? Isn't that why DEF is required?
They have converters, maybe they aren't poisoned the way gasoline converters are? I found it curious myself.
anyway, I was wrong. It's $30 for 5 quarts, not a gallon.
Since I couldn't find the dial indicator, I put the rocker arms on, set the rockers to where the push rod would just barely spin with the valve closed, and checked for the point where the push rod would stop spinning as the valve opening / closing point.

Turns out installing this cam apparently was ground to the right specs to begin with - but now I know. And the first time I had the timing chain lined up wrong, which is corrected. Now to get the pistons in there.
I used a piston to push the rings into the bore so I could check gap with a feeler gauge.


The piston rings were all gapped almost exactly 0.014" out of the box. Fine for a naturally aspirated build - but to deal with the extra heat, I filed them to 0.021".

Then I installed the pistons with a compressor...


I also put in new ARP rod bolts and checked the rod bearings with Plastigage, but it looks like I didn't have any pictures there. Got them all in now.


One of the members of slantsix.org had made a few crank scrapers. This one needed a little trimming at the far front and back to clear the counterweights.


It's a good idea on at least one cylinder to check the ring gap at 3 positions, in the cylinder bore, near the top at about the middle and near the bottom. The gap should be close to the same at all 3 positions.
A good crank scraper will need a little trimming, it should fit close.
When you degree a cam, you have the option of moving the power curve up or down the RPM range a little. If you advance or retard the cam a few degrees. If the cam is ideal for what you want then you should set it exactly per the cam specs.
Many of us are waiting to see how this works when finished, good luck.
Next steps are getting the timing cover and related parts on. There's an oil slinger that goes in front of the crank sprocket. After 50 years, the oil slinger was looking rather oily.

Here's what it looked like after some wire brush clean up.

It just slides onto the crank snout.

Hammered a new front main seal into the timing cover, sometimes using a pry bar as a punch. I put a bead of RTV on the sides of the seal so I could seal the seal.

One recommendation in Doug's book is to RTV the timing cover gasket to the block but not the cover itself.

And it's on.

After seeing the Grüne Hölle thread, I'm wondering if I should at least put a basic baffle in the oil pan before reinstalling the pan, even if I won't be doing a complete oil pan redesign.
Before working on a baffle, I wanted to check the condition of the oil pick up. It has two halves crimped together, with a screen in the middle. I'll see if I can pry it open and find all the trash in it.


Sure enough: It looks like I found all the trash in it.

Large Solo cup for scale:

Getting ready to blast them with some brake cleaner:

And finished cleaning in a sink.


Looking at that stock oil pan, I'm not sure I want to put as much time or welding skill into mine as what Greg did with slicing and dicing multiple pans, but there has to be some room for improvement. Time to get my favorite rapid prototype development material.

Yeah... a baffle like this ought to do something to reduce oil slosh with minimal work. Now to make this out of metal...
OK, let's see if we can get two slant six oil pan builds on the front page! First I need some sheet metal for the baffle. I was thinking of using a bent fender we had sitting around the shop, but it wasn't large enough. So, I picked up this cookie sheet for $10 from Wal-Mart.

This is actually the second time a piece of Wal-Mart bakeware has found its way onto the car. The first is the sump on the fuel tank. So, first order of business is to get the label off and trace the cardboard mock-up with a Sharpie.

This pan is actually two layers, so the cut I need to make is to cut that raised lip off the side so I can separate the two halves.

Got the two halves apart. For some reason, there seems to be a bit of Mylar in between the two parts, which did not come out in one piece.

Cutting out the shape with an aviation snips.

And it's cut.

Rolled into the pan:

It also needs a lower baffle. Here are things taped together and mocked up for checking fitment. I ended up trimming the lower baffle.

Close up of the lower section, cut from some of the lower half of the pan.

The oil dipstick comes in at a point indicated by a bump on the side of the pan. I cut a small notch and hammered a bit of a curve in there to ensure enough clearance.


Next step will be welding this in.
You'll need to log in to post.


