
I decided to widen the plug for the "bubble" portion of the upper air box. Previously I had 21-ish mm between the bellmouth and the wall...but I really wasn't comfortable with that distance so I decided to widen it another 19mm just because I really don't want to have to re-make this piece later because its causing an airflow restriction. This did necessitate tapering the rear portion of the plug to match the lower airbox angle and I do still have to do some type of final coating that will release the finished piece easily, but with luck I should be ready to thermoform this weekend if I can find someone with a powdercoating oven....and assuming I get around to making the vacuum box and 'glass frame.

New toys that came in yesterday. Time to update the handling a bit in this poor 55 year old car. Street or Track coilover suspension featuring adjustable strut rods, tubular upper and lower control arms, Bilstein shocks with shaft mounted bump-stops and tha various bits and pieces that are needed to put it all together(though I think I may be missing a couple bolts for the strut rods to bolt to the LCAs). As soon as I get some tires from my front wheels(4-lug to 5-lug stuff) I'll be able to install these. Say goodbye to rubber bushings.
Front suspension is in! One step closer, but still a long way to go.


This picture I took just because it shows most of the birdcage the front end has become between the outer fender braces I fabbed, the shock tower/monte carlo bar bracing, extra cowl bracing and the ties to the torque boxes.


After quite a bit of steering column rebuilding issues, I finally got my steering setup functional. Its a stock type drag link and inner tie rods, Shelby GT350 type pitman arm with roller bearing idler arm, and a Baer bump-steer kit.

For the steering shaft, I did away with the one-piece integral shaft going into the box(16:1 ratio) and added a U-joint(had to be done to actually install the box with the headers being what they are):

To support the shaft in the bottom of the tube, I used what I think is some type of router bit guide....ball bearing with the correct inner and outer diameter:

The rest of the column itself is stock bits and pieces, but I went with a 14" GT350-type wood steering wheel:

The linkage was an interesting adventure to get it working...the Shelby pitman and idler arm are 1" longer than the regular ones, which combined with by slightly canted crossmember(which I did to clear the oil pan) made for some rubbing of the inner tie rods:

So I had to shave the crossmember down a touch with a flap wheel to mae sure everything cleared. In the end though its all working and steering is nw functional:

At full lock though the oil pan is too close for comfort to the drag link. I am going to need to revise my driver's side engine mount plate to lift that side of the engine just another 3/16" or so...or alternatively modify the drag link itself to be more like a 67-69 drag link with a dip in the middle.
As for steering effort...at a dead stop its a bit stiff...about what you would expect if you de-powered a PS rack(the correct way, not looped lines) but considering that I do zero parallel parking I just don't think its going to affect me at all, once rolling even 1 or 2 mph its fine.


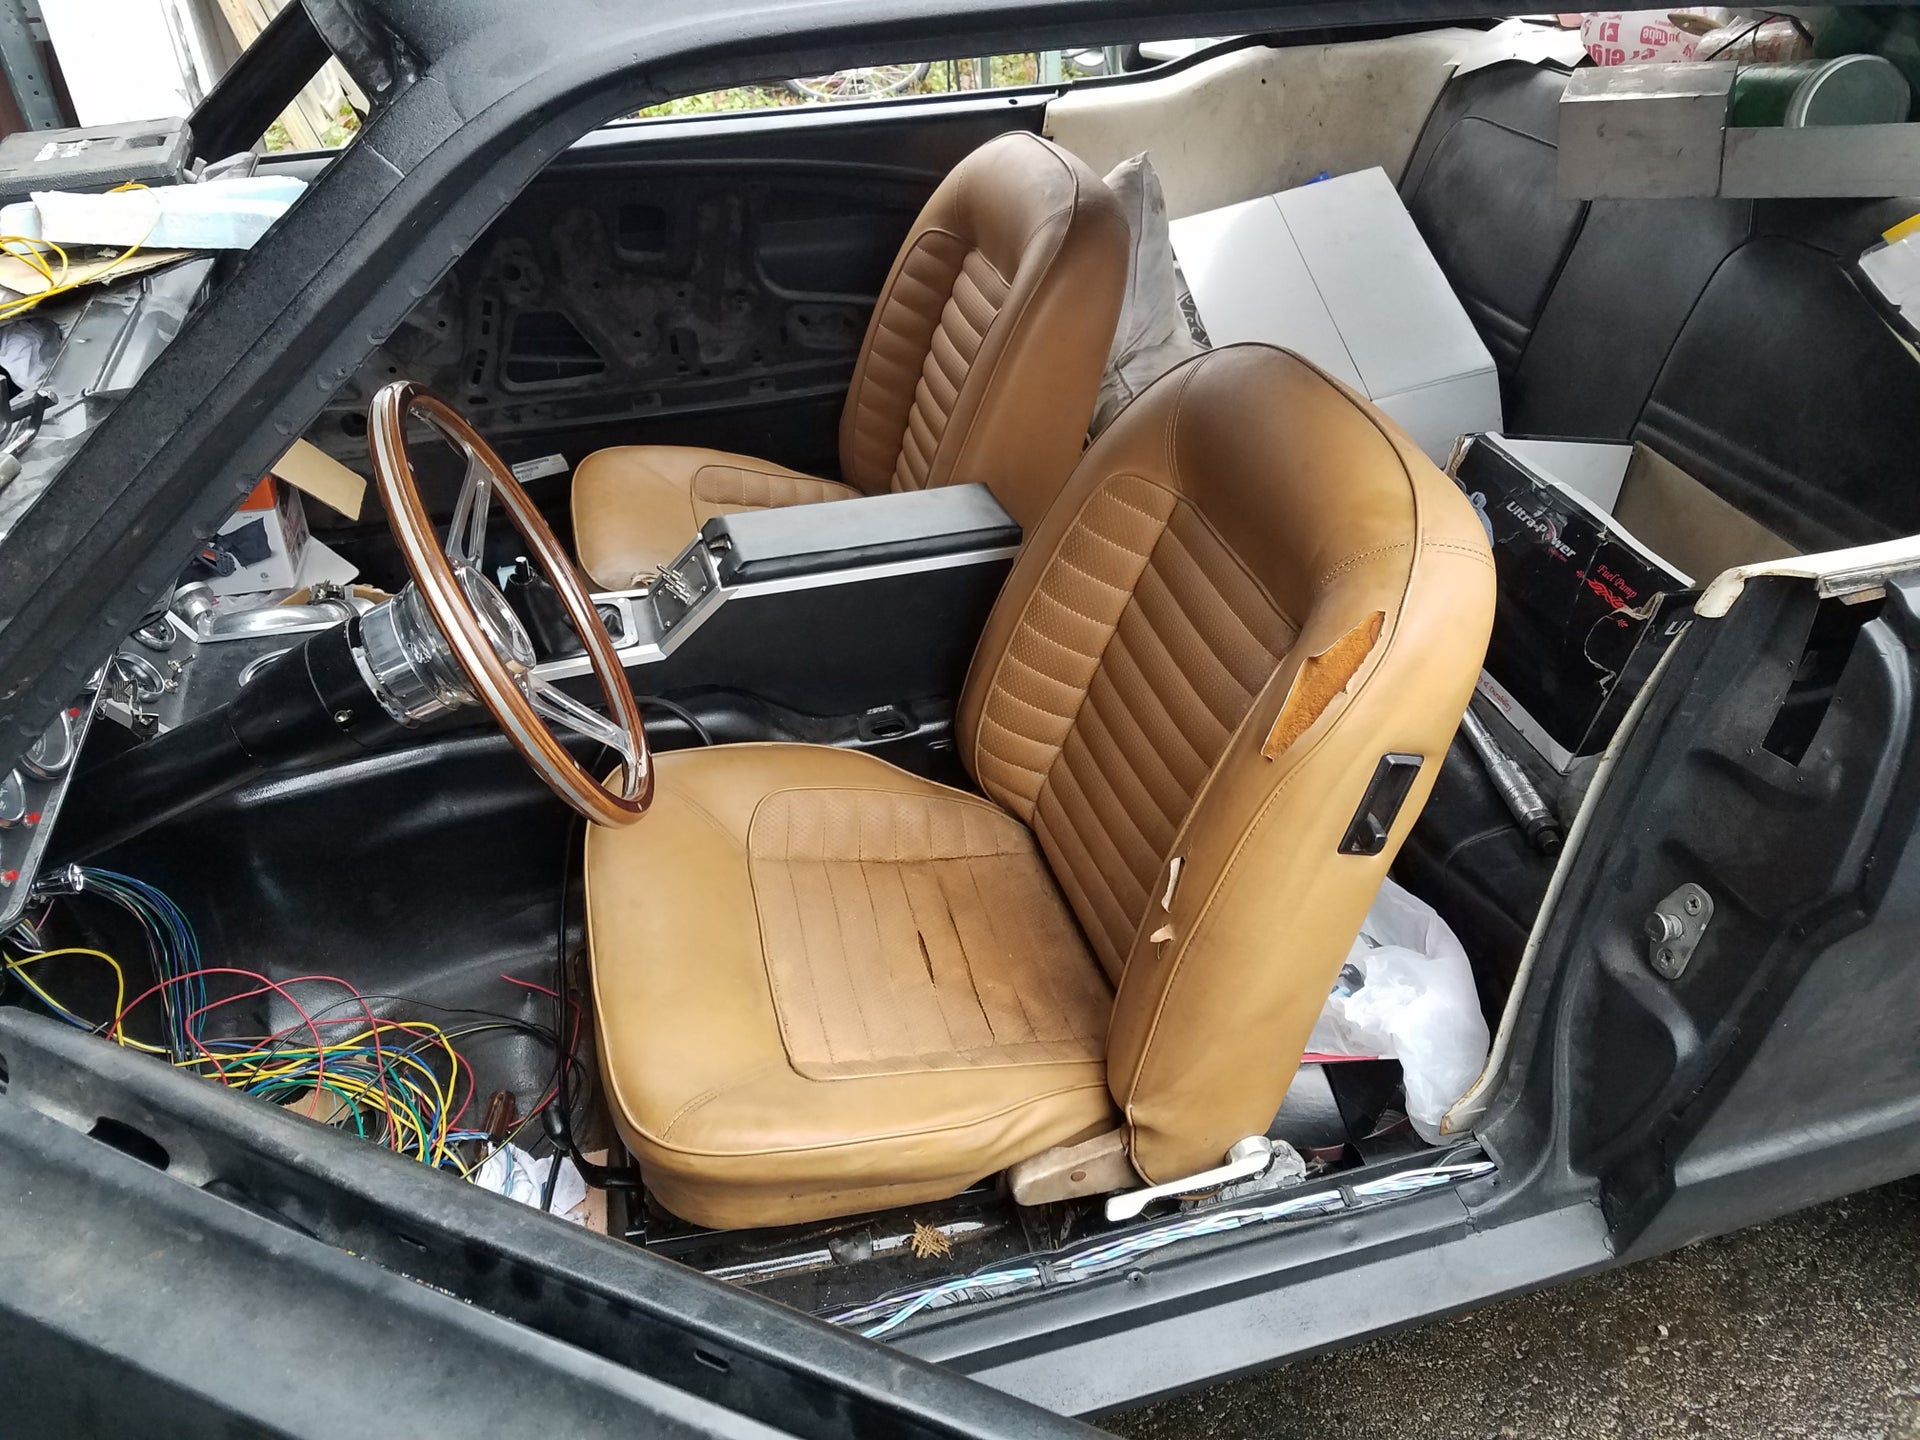
After months of searching I finally found a set of MK1 Capri seats to put into my classic mustang, so I modifed the driver's seat as needed and swapped it in. I do still need to unbolt the horrid headrests and restore the seats themselves. I ended up having to cut down the seat frames by 1" to match the factory seat height(though I guess I could have gotten away without doing that since I dropped the seat pans by 1.5" already, there is no such thing as too much headroom in a smaller car)
Finished the passenger side and removed the headrests...now they look like they belong(aside from color anyway)

NOHOME
MegaDork
1/3/22 8:47 p.m.
I would be tempted to add one more tube to the engine bay brace.

In reply to NOHOME :
Yeah, those particular braces were inspired by a combination of Miata fender braces and Boss 429 Mustang outer shock tower reinforcements. That particular tube is intended to transfer load from the shock tower to the rocker/torque box area(curved to ensure enough tire clearance at full compression). You are probably correct it would be better off with an extra tube there though. Next time I pull the braces I will consider it...its a shame though, then I have to mix up a new batch of epoxy primer and acrylic enamel, so it would have to coincide with when I do those areas that were missed because the rotisserie mounting points covered them.
Just got done reading this. All I can say is wow.
In reply to Professor_Brap (Forum Supporter) :
Thanks!. I used to be big into Neons as well, built a few 2.4 Turbo engines and for my last Neon related project I used a 2.4L block in a 77 Celica converted to RWD with a Jeep Liberty bellhousing, used a 420A head and flipped some SRT-4 pistons on the rods to account for the swapped intake/exhaust ports so I could get the manifolds pointed the way I wanted since it was a budget build and I used a SRT turbofold and stratus intake manifold so I have a soft spot for all kinds of turbo dodges. This Mustang project has stretched on a lot longer than I wanted, but I guess its not a surprise when I am having to stop and make all kinds of stuff from scratch, but thats what makes it fun...the bolt-on stuff is a lot less fun

This weekend I set myself the goal of getting a better fit an finish for the tail light panel area than the factory did. The early 1965-1966 Mustang was a cheap car....no doubt about it, it was a re-bodied Falcon, as such there are certain areas that just don't look very well done. For me the gaps at the side of the tail light mounting areas and the bevel below them is one such area...the whole thing(including the tail lights themselves) looks like an afterthought...unlike the later years. So first things first...getting rid of the side gaps.

Fabbed up a new patch panel that closes the gaps down to a reasonable amount.

Which of course means some of the old metal needs to go.

I cut the bevel away here because I want a flat surface behind the panel to work with when I make my new tail light housings.

I cut down piece of square tubing does the trick to hide the rest of the bevel.

This is a prototype tail light bezel a friend 3D printed for me after I drew it up. The finalized version is a bit shorter...and of course there will be 6 of them(3 for each side). I will be using sequential LED lighting behind the tail light panel that were designed for a '67 Mustang

The general look I am going for(keep in mind the quarter extensions are not fastened in place...the actual gap between the new tail light panel and the extensions is 1/8" or so. I also need a new MIG welder before I finish welding everything up...this 20 year old Chicago Electric is just too broken down these days to continue for much more than tack welds

For reference...this is the stock(ish) fitment of the tail light panel area and why I felt I needed to change things.

And this is the inspiration behind the modifications in general...this is what the original prototype car for 1966 looked like. The separate bezels just look so much better that what actually made it to production...as does the lack of a bevel below the tail lights(though the side gaps were still there)
I re-assesed the tail light panel project and changed some things:

First, changed the panel to a creased version from flat...the bezels just didn't look right with a flat panel(also added an "aircraft-style" fuel filler instead of a gas cap...much lower profile). I also decided to add a rollover valve here underneath the 1/4 panel extension...serves as a vent since the fuel filler is not vented. At some point I will add a charcoal canister in-line.

I did have to cut up the new tail light panel a bit to correct a "flattening" effect as the panel reached the quarter panels. I did this as I started building tail light bezel "buckets".


I designed these "buckets" in such a way that I can either mount the bezels(and lenses) either flush, or protruding up to 3/4" depending on the thickness of the gasket I choose to use...and changing the look is as simple as swapping the gasket, which is honestly more time consuming than you would think since I had to cut down and modify '67 tail light housings:

Still a ways to go to finish the tail light panel, between more bucket work,housing work, body work, etc I probably have another 3-4 days worth of work on it.

The bezels fit the new buckets very nicely...sitting in there flush for the moment, but I can set them anywhere from 1/8" recessed to flush to 3/4" proud depending on the thickness of the gasket I use.

Basic bodywork nearly finished, the end of this side project is in sight finally.
Interesting - that taillight mod looks like you might fool people into thinking they came from the factory that way!

wawazat
SuperDork
3/29/22 3:50 p.m.
I see you here and I see you on Vintage Mustang Forums. I love my Street or Track stuff. Shaun is a good dude!
wawazat said:
I see you here and I see you on Vintage Mustang Forums. I love my Street or Track stuff. Shaun is a good dude!
Yeah, Shaun is always super helpful when I ask for advice. At some point I will get his rear coilovers as well, if I don't keep getting sidetracked by side-projects like this.
As for the look being able to be mistaken for factory...that was the goal, I took basic inspiration from the 1966 prototype car:
I'm looking forward to your thoughts on the front suspension ride quality on the street. I am working with a similar suspension setup but decided to refresh the rubber for now. This build continues to impress!
wawazat
SuperDork
3/29/22 6:05 p.m.
I've driven on my Street or Track front end stuff and rear shocks and have been really happy with them. I'm using rear mono-leaf composite springs and have been happy with them as well. I wasn't ready to do a 3 link after doing 4 wheel brakes, front coil overs, R&P steering, and adjustable strut rods plus TKO600 though not from Shaun. This driving season should be pretty good.
Wicked93gs said:
In reply to Professor_Brap (Forum Supporter) :
Thanks!. I used to be big into Neons as well, built a few 2.4 Turbo engines and for my last Neon related project I used a 2.4L block in a 77 Celica converted to RWD with a Jeep Liberty bellhousing, used a 420A head and flipped some SRT-4 pistons on the rods to account for the swapped intake/exhaust ports so I could get the manifolds pointed the way I wanted since it was a budget build and I used a SRT turbofold and stratus intake manifold so I have a soft spot for all kinds of turbo dodges. This Mustang project has stretched on a lot longer than I wanted, but I guess its not a surprise when I am having to stop and make all kinds of stuff from scratch, but thats what makes it fun...the bolt-on stuff is a lot less fun
Fun fact I have seen that car in person. I know who you sold it to.
Professor_Brap (Forum Supporter) said:
Wicked93gs said:
In reply to Professor_Brap (Forum Supporter) :
Thanks!. I used to be big into Neons as well, built a few 2.4 Turbo engines and for my last Neon related project I used a 2.4L block in a 77 Celica converted to RWD with a Jeep Liberty bellhousing, used a 420A head and flipped some SRT-4 pistons on the rods to account for the swapped intake/exhaust ports so I could get the manifolds pointed the way I wanted since it was a budget build and I used a SRT turbofold and stratus intake manifold so I have a soft spot for all kinds of turbo dodges. This Mustang project has stretched on a lot longer than I wanted, but I guess its not a surprise when I am having to stop and make all kinds of stuff from scratch, but thats what makes it fun...the bolt-on stuff is a lot less fun
Fun fact I have seen that car in person. I know who you sold it to.
Really? I was wondering how that project was going, I know I had given him a lot of "future upgrade" pieces along with it. DO you know if he ever installed them? I know the dual mass flywheel causing driveline vibration was my biggest issue.
In reply to Wicked93gs :
He has been working on it some. I do know the driveline vibration is no longer there.
Been playing with the reproduction front valance. I wanted a lower grill area for better airflow...one that looked a bit better than the fiberglass GT350 pieces.


My valance modifications are ready to be welded and tweaked...added buckets for fog lights instead of the factory turn signal housings(plan is to hide the turn signals(will use a sequential LED strip) behind the grill and paint them with nightshade paint to make them invisible when not being used). Also went to the effort to "correct" the gap the factory leaves underneath the bumper...just a bit of aggravating for me so I might as well get rid of it.
In other news...my rear coilovers, 3-link, and watts-link came in, the matching rear suspension to my front suspension:

I will probably start on it next week. I don't want to weld on my axle housing until I have the alignment bar and the shortening kit so I can make sure to be able to straighten the tubes if they end up warping when I weld the brackets on(or I should say if they end up warping out of acceptable tolerance...they always warp to some degree or another no matter what)

After a series of events caused me to deviate from the normal install procedures...I finally got the rear coilovers/3-link/watts-link setup installed. It does still need some dialing in but there is hope for this thing to be able to take a corner now.

Minilites make everything better! 17x8 in the back, 17x7 up front. Should have rubber on them by Friday. Getting exciting....at this point the only mechanical parts I have left to buy/build are the center chunk, the driveshaft, the rear brake setup, and the brake booster/lines....I do have a certain amount more re-fabrication to do, but the time I can return to wiring is soon approaching


