1 ... 5 6 7 8
NOHOME
NOHOME MegaDork
3/17/22 12:56 p.m.
metty said:

looking great man! 

i am in the early stages of doing a 1970 MGB-GT myself, i have a free LNF/AR5 that will probably be stage 2...

what HVAC box did you use? i saw you mention vintage air early on but i didnt see a PN or anything.

i am thinking about cutting out the factory heater box on mine an putting something like this in the middle underneath, then ducting to the defrost vents 

https://www.ebay.com/itm/254629202758?_trkparms=ispr%3D1&hash=item3b49154b46:g:AQoAAOSwItZhaOTC&amdata=enc%3AAQAGAAACoPYe5NmHp%252B2JMhMi7yxGiTJkPrKr5t53CooMSQt2orsSg3Ye8yTWgOW7pmE1t838dsZ9M%252BQK1VrjpB6CjZLIyz3hqzA0wo3sDhNiVRXuCZMdRH33plo6aEj8K2c9imufqZNry1uogBRGhmowxPjOn4wOTzmXu9dDRNJELs96JuycEKWHG66V%252BMytX%252FwIr1qhrMg51fx82HfKHFzYTiCuuIyObbfMgluuBgZENGXhQb9ChEV9nCTGL%252BHKnDvgTaHdd3dzX2BrmObg0pyi3nET16yQLBbWEFs4zdc8pD2Ar5oT10DuuHEypmoeL0GGoFXx13iLeQi1SknvYuUl6n4yb9mW2L6gBVgsYx07CPK92iIMjrrmH8FE9dz2WmdY4gNOPl56HEZVboexBOBn1jXFhjTvX%252BZ3uE%252BmVM7%252BXBeXWQbnRyiOKDksNSslTcQOWPp1L4Owa1nvAe6iZrsD12LD6sw5qrzAdT5w3xO5kmQTNOYDK39vSdgqUx6dvvo334Dpyw%252Ff1Ggm7hwQlx1Wbdn9F0S%252FMIOppZhCAEedSig4OEVDOIs3IHkwgDBaUe8BMVooLoXvJEkTKZ4gptcX5YNOnQMleh0VoaruudPjOtQZ%252BMjhsY%252FN0e5Ih4DERrY%252FLKggdL01st2QdpGjtoR1LXatHL9iYwmjPXwsTDpWUcT%252FJfnsUY6A2aErZ2VEbTxC85g1jAVievrUhfVPuCLjs9DQ1vvv5KuEWc8O9gj27FR072wWVjFbs2%252BJvr5QB%252FVC6t2w42GtxR09ypRiGGWUw6n9OxlJ6y8hRvJnWCLng%252BDTA6kX1FUi%252B0MHUhPRxdcudpZYpMpDtX%252BopC7CK%252FQclI89GdYEZtINzyo6rYCszwLSf%252B4F8aek7inYZvyOhOLR8CDs4g%253D%253D%7Cclp%3A2334524%7Ctkp%3ABFBMiJ3z-fJf


I gave serious thought to doing this to my MGBGT as an alternative to selling it. Other than I could not see it going under the hood without a bump of some sort, it was certainly doable.

I liked the fact that for the near term at least, the stock rear suspension could be left in place. I was also considering using the auto box that came on the back of the LFX so as to make it as OEM predictable and serviceable as possible.


Edit. I see you said LFN not "X" so not comparable. I think you speak of a 4 cylinder.

autocomman
autocomman Reader
3/18/22 1:58 a.m.

The LNF is the 4 from like a solstice.  The LTG would be cool cause it's been used in a ton of stuff.  Tired and true and pretty good little motors with average 250hp outa the box with 300 on tap with a tune.  The LFX would be cool to see In things definitely and I think I mentioned that a few times on other pages.  I have a Buick TourX as my daily, the LTG is sweet.  Great power, 30+ mpg if I drive 70 and 29mpg at 80mph.


HVAC is a vintage air mini.  They have a mini and compact, both very similar in size, the blower and ports in a different spot for each.  It bearly fits, I mean bearly and you can see how I had to mod the dash to make it really fit.  Remember if you go with a standard under dash/above the passanger foot well it most likely won't have a heater.  Also, all the factory vent doors and what not will be sealed off on this, just no room for em.  Also I'm gonna have to relocate the floor vents somehow because with the console and how I did it, it will just trap all the heat in there.  I'm gonna try my best to shove the ECU in there under the HVAC.  Either way I need to cap the floor vents and drill to add hoses or something so they vent out the sides of the console or something.  I wish the L67 used the gen 3 ECUs, for packaging reasons anyway lol.  This Gen 2 ECU is huge.


I also got my tail shaft bushing puller, went to use it and well it's way too big. Apparently I ordered the 161 and not the 160... Oh well, ill return this and get the other one.  Fuel lines are buttoned up, cut the length of the wiring harness under the hood so I'm going to start pinning that probably this weekend. At this point it's finish the oil filter plumbing, wire it up the fire it up

metty
metty Reader
3/23/22 8:53 a.m.
autocomman said:

The LNF is the 4 from like a solstice.  The LTG would be cool cause it's been used in a ton of stuff.  Tired and true and pretty good little motors with average 250hp outa the box with 300 on tap with a tune.  The LFX would be cool to see In things definitely and I think I mentioned that a few times on other pages.  I have a Buick TourX as my daily, the LTG is sweet.  Great power, 30+ mpg if I drive 70 and 29mpg at 80mph.


HVAC is a vintage air mini.  They have a mini and compact, both very similar in size, the blower and ports in a different spot for each.  It bearly fits, I mean bearly and you can see how I had to mod the dash to make it really fit.  Remember if you go with a standard under dash/above the passanger foot well it most likely won't have a heater.  Also, all the factory vent doors and what not will be sealed off on this, just no room for em.  Also I'm gonna have to relocate the floor vents somehow because with the console and how I did it, it will just trap all the heat in there.  I'm gonna try my best to shove the ECU in there under the HVAC.  Either way I need to cap the floor vents and drill to add hoses or something so they vent out the sides of the console or something.  I wish the L67 used the gen 3 ECUs, for packaging reasons anyway lol.  This Gen 2 ECU is huge.


I also got my tail shaft bushing puller, went to use it and well it's way too big. Apparently I ordered the 161 and not the 160... Oh well, ill return this and get the other one.  Fuel lines are buttoned up, cut the length of the wiring harness under the hood so I'm going to start pinning that probably this weekend. At this point it's finish the oil filter plumbing, wire it up the fire it up

yes, ecotec turbo 4 from a solstace GXP. 

i have found a number of under dash boxes that have both an evaporator and a heater core. after finding more rot in the factory HVAC "tower" under the dash, ive decided to chop it all out and start over with something more modern. 

i will lose the fresh air vent but it sounds like you gave that up as well?

autocomman
autocomman Reader
3/25/22 2:13 a.m.

Yeah, if you want fresh air, crack the vent windows or roll em down.  No more fresh air vents or floor vents, all sealed up.

Clutch line done.  Oof, had a line made, the 90 degree fitting hit the tunnel.  I couldn't bent it, i tried.  So I had to get bits to make a line.  A 120 degree fitting, and it clears well.  New pro 5.0 shifter, fits better all around and feels better of course.  Need to shave the side of the ring to prevent it hitting the tunnel.  Also swapped out the tailshaft bushing, again.  Still couldn't get the yoke in.  I know I pressed it in the first time, this time I smacked it in with the tool.  Either way, the housing must have been squeezing it just enough to keep it from going in.  So an hour with bits of a worn sanding belt to slowly hone the bushing, and It now goes in.  It needs just a bit more to fit right but its almost there.  Oiy....

Wiring.  Hehe, its what I do.  I already found 2 colors I forgot to order.  :-/  What ever, ill order the colors.  Found locations for the fuse boxes.  Its getting 2, one for the EFI, one for the chassis.  So I pulled a few wires tonight just to feel like I got something done.  Normally the wiring is all under the car, but im not a fan of that.  Rear harness will sit slong the RH side of the tunnel and to the back.  Drilled that hole in the cross brace for the trunk floor for a pass through.  The main battery cable will run under the car on the opposite side it would usually be on, so the left side as thats where the starter is.  The battery will also be moved to the driver side as well.  Ordered a 26G battery.  G is for golf haha.  Yeah, a golf cart battery.  the standard size if your going with a single 12v is a group 26.  The golf cart battery was almost half the price, and this one is 12v, 450 CCA, its totally fine for the application.   Only difference is a bit less power than the car version, and different terminals.  I wanted to fire it up this weekend, but there is just too much wiring to do still.  So this weekend I will at least crank it over and get oil pressure, get the clutch bled as well.  Ill start on a plate to mount the ECU as well.  So yeah, getting close.

Cooling system.  I painted the brackets, and eff me I gotta sand em and do it again.  VTO engine paint sucks, runs and fish eyes.  Brackets though I used rustolem semi gloss, same issues.  They are primed and clean, fish eyes and runs.  Im so unhappy with this.  The spray any direction rustoleam is such a pain.  Ive had more cans Ive had to toss that were still half full because they clog cause you cant turn em upside and clean the nozzle.  Or you get bad results like this becuase the nozzle wont atomize properly.  Duplicolor engine paint is the only thing I can spray consistently and get good results.  So gotta sand out all the defects and repaint em.  Then I need to order some aluminum bends for the upper hose.  Gonna get that all mocked up and have a buddy weld up the snake that needs to be the upper hose.  I dont wanna deal with using/sourcing multiple hoses and coupling them together.  And I forgot to drill the lower intake for the temp sensor.  So the temp sensor will go in a heater hose.  The heater lines have constant flow from the factory, this will get an H pipe to insure that continues.  And the outlet will have a fitting spliced in with a 1/8 NPT hole, for the gauge temp sender.  Im not pulling the whole damn intake back off for that.   

Fuel lines finally done.  Got an 'industrial' 1/4 NPT - 3/8 barb.  Cut off 2 of the 5 barbs and it fits great.  Its return fuel, so a hose clamp will be fine.  Besides, yoru not gonna have fun trying to pull that hose off the barb anyway.  If you need to remove it, it will be a loosen the hose clamp and wrench the fitting out.  Not a big deal really.

Lastly, I have to plug the EGR hole in the intake.  Prolly gonna cut the original off, see if I can just weld it closed with the end of the pipe still in there as its what seals it all up.  I can get a machined O-ring plug for $30, plus shipping, but thats more money and will prolly be $50 by the time I get it...so eff that.  If this leaks then i might.  But for now, this should be fine. 

Pics...


metty
metty Reader
3/25/22 11:06 a.m.

sorry to pepper you with questions about a semi not exciting part of the project, but are you going to put a blockoff plate where the blower/heater core was in the engine bay? im about to weld in a panel there on mine and seam seal it...


also, what are your plans for the dash? recover it? debating doing mine in matte wrinkle black after i strip off the foam

autocomman
autocomman Reader
3/25/22 3:47 p.m.

No worries, not much of this car isnt getting some kind of attention.  The lower heater section into the passanger compartment will get a flat plate and dum dum to seal it up, screwed in like the heater box was.  This is where the engine wiring bulkhead will go and pass into the passanger compartment.  The original defroster duct plate will be sealed up, and one of the holes grommeted and sealed for the engine wiring.  That way its wasy to remove the wiring is need be, and the engine can just be unplugged from the engine compartment via a couple deutsch HD30 connectors.  The round hole for the air intake into the heater box I will just order up a round piece of sheet aluminum and paint it, 4 sheet metal screws, sealer, done and done.  

The dash, I knew at the beginning the dash pillow cover needed to go, I do not like em.  So I stripped the dash.   I also did this as it needs 3 vents installed for the HVAC, and it would not look right with underdash vents or vents shoved into the pillow cover.  It needs a lip as well, an eyebrow at the top to cover the studs that mount it to the car, and to make it look finished.  And the eyebrow helps keep glare from the gauges at night from showing up as reverse upsidown headsup display.  I want the eyebrow to be similar to the original.  I had many thought about how to do this.  And while I could spend hte time and fail a few times and maybe be happy with the end result, I dont have the expirance with sheet metal, fiberglass etc to do this right, easily or possibly cost effectively.  So I called up a guy who I worked with on a previous project.  A pretty high end upholstery/interior shop.  I got quoted a heafty number to do what I want to do.  He knows what I wanna do and how to do it.  So thats what will happen.  How he does it I dunno.  But if the end results are good and will survive long term, im happy.  And I know hes got the knowledge to do what I need.  I actually messaged him today to findout turn around time and when I can bring it down, so hopefully that will happen soon.   Gauges all stock, tach modified wit a modern board, speedo lubricated and it will be driven by a speedhut GPS speedo drive.  Temp gauge swapped out for one with more range.  Too much range but at least it wont sit on the hot end under normal engine temps.  I can always switch this easily if I want to. Deleted the heater fan switch, and the brake warning light.  Headlight switch now on the console next to the hazard switch.  Wiper switch is a stalk on the column.  Dunno if Ill keep the dash dimmer control, I have to see if mine works, Ill probably keep it.  Also stock turn and high beam indicator, and an added check engine light.  Ive done nothing to the dash yet.  I have to weld up all the holes and get it ready for dude.

autocomman
autocomman Reader
3/25/22 11:00 p.m.

Oil line tightened...had to pull the motor mount, use a crows foot and a wrench and I was able to tighten it up.  Battery installed, juuust fits, but fits.  Cables run, motor spun over, oil pressure built up.  Im pretty happy with that.  Workin on the spread sheet for the connector pinout.  Lots of wiring to do.


autocomman
autocomman Reader
3/28/22 12:39 a.m.

More wiring done.  Engine side is done, ECU side is done with its stand alone fuse/relay box.  This is 2 engine harnesses for the length I needed.  I was also able to get the entire engine harness in a 47 pin HD30 connector with 2 pins remaining, not too shabby.  And yes, once its fired the looming wil be completed.  Working on the chassis side now.  Plan is to fire it up next weekend, and I think thats a legit goal now.  Though im pretty sure it wont fire with how the ECU is setup right now.  I had a buddy change it, but the V6 ECUs dont have an obvious way to disable VATS like the standard LS ECU does.  You have to set a few things and turn off certain codes and it will be disabled.  I ordered HP tuners as well.  Something Im finding I need for work, and well something I will be using for this.  Moving on...


This is what these factory harnesses look like under everything, not very neat at all haha.

metty
metty Reader
3/28/22 12:51 p.m.

Looking good!

autocomman
autocomman Reader
4/3/22 1:35 a.m.

When the shoes fit....teh hotness

Also...the video is not the first attempt...i stopped filming because of issues.

First off, I forgot to plug in the main harness, yeah.  Its kinda hidden behind the intake tube and I just didnt see that haha.  Second I had a bad ICM, I had 2 of them.  Had no RPM, so after swapping that, we had inj pulse and spark.  Then I somehow forgot to add the cranking signal wire to the ECU, 12v when in the start position.  Lastly, there was some debate on which wires require IGN power to make it go.  You need not only C1 19, you need C2 24.  Why?  I dont know.  But it wouldn't run otherwise.  I thought Id have issues starting it because of VATS/Passkey/Passlock blah blah blah.  There is no Off switch in the software for the V6 computer.  Early ones (98-00?) dont have this issue, some later ones require switching VATS from serial to PWM and turning off 3 codes, some cars still wont run...what ever.  The V6 ECU looks like the standard 411, but its waaaaaay different in its OS and hardware.  Its pinned completely differently than a typical LS ECU as well.  Anyway, thats that.  Quite a milestone here.  I never tire of hearing that first fire.  

Now I have to take half of it back apart.  Gonna yank the lower intake to drill the hole for the temp sensor, plug the coolant passages into the blower/throttle body, and to carve out the channel for the coolant crossover to increase the flow to compensate for the plugs im going to put into the manifold.  All in all this will all be much easier before I fill it with coolant, hence removing the lower intake..  Getting the flanges flat on the headers was an issue too.  One wasnt a problem, the one I bolted down when I welded it, the second one I did....The first one I didnt bolt down.  Well so much had to be taken off to get it flat enough to seal up it changed angles slightly.  So I need to slightly modify the crossover pipe.  Not a huge deal, just another thing to do.  

But Im happy.  I can continue on wiring, getting things secured and where they need to go.  Now that it runs I can make those small modifications to the EFI harness permanently, and button it all up.  


https://youtu.be/kyM6GhU16_c


GM > MG
GM > MG New Reader
4/4/22 12:40 p.m.

Great stuff there, really making the progress now. She will be on the road soon.

Question for you since your deep in the MG mod world: I have a Fuel Cell so I'm using eternal pump. I was thinking of using the spare battery location for it since I'm only running one.

Whats your thoughts?

RoddyMac17
RoddyMac17 Reader
4/4/22 1:06 p.m.

 I was thinking of using the spare battery location for it since I'm only running one.


Moss' FI kit does something just like that using an Edelbrock set up.  I priced out the Edelbrock bits and noped out of it.  I'm sure it works very well, but for the time being I'm sticking with metered fuel leaks on my B GT.

Edit:  Link for the Moss kit:  https://mossmotors.com/media/instructions/366-355_inst_web.pdf

autocomman
autocomman Reader
4/6/22 1:03 a.m.

I mean you can put the pump where ever you want.  The extra battery area is a good location for what ever the heart desires.  I also like the corner butt cheek where my fuel filter is, but that may not work if your doin a fuel cell.  And im only crazy deep in this MG, lol....I have a 59 bugeye sprite that I turbod 1275 for, but its on stock suspension with late disc brakes lol.  

Motivation level up today.  I had a rare few hours in the afternoon where I wasnt working.  And even though I got it fired up over the weekend, looking at the whole scope of it, its still a lot.  But after a few days and some clarity I have a game plan.  First off the dash.  It needs to have that top section built up.  Someone else will be doing that, and I wanna get it to them ASAP.  To do that I need to have the fabrication done.  While thats out I can finish up the wiring which still has a long way to go.  Then when the dash gets back hopefully Ill be ready to build that out and install it.

So, cut holes in dash, weld in patch panels.  Switches were slightly recessed so I had to cut around all that.  The HVAC takes up a ton of room.  I wanted more space between the center vent and the unit, but its tight, real tight, not sure how the hosing situation will work but Ill make it happen.  Need to smooth some welds down more, my flappy disc is all flapped out so I gotta make a harbor freight run.  The hole to the right of the gauges needs to go as well.  Its for the dash dimmer control.  But it was next to padding before so it didnt look like it was in no mans land.  Now it does, so that will be either deleted or relocated.  With LEDs in the dash that stock control wont do much for dimming, it really needs a PWM control.  Anyway, it looks sooooooo bitchin!  Seeing it in there even without the center console, dude.  Dude!!  So stoked! 

So yeah, some more metal work on the dash and it will be ready to go.  Ive been sweatin this a bit, and it came together in only a few hours.  Then wiring, then dealing with the intake and plugging the coolant passages, porting the crossover passage and adding the temp sensor for the gauge.  Then the radiator mounts, then upper and lower hoses, then the exhaust fittament (needs a little tweaking)  Then I can properly run it, warm it up etc.  Im not gonna even try to plan any farther than that right now.  Some point in there I need to measure for a driveshaft too.


autocomman
autocomman Reader
4/11/22 12:48 a.m.

Dash done.  Pretty damn happy with it.  Gonna try and get it to the interior dude next Saturday, 3.5 hours round trip for me...wanna avoid loosing a work day to do it.  Other than that, I gotta get back on the wiring.  Little upset over my lighting situation.  The chrome on one tail lamp is near perfect, the other is pitted...new ones are 90$ each.  I already bought lenses and gaskets, now I gotta buy the whole damn assembly.  I cant get just the lamp sections, the newest used ones are 42 years old  now, so not worth getting new ones.

Front turn signals, one is fine, cleaned up ready to go, the other eh, its got a little pcb inside that holds the contacts.  This isnt one I can just swap out with bits from the parts store like I usually do.  The PCB and the contacts are uniquely shaped and have unique tabs to locate them.  It fell apart on this one.  Im hopin I can just steal the bits from one of the tail lamps and rebuild that turn signal.  I got the housing pretty straight so reusing it shouldnt be an issue.  The chrome and lenses cleaned up real nice on those.  


autocomman
autocomman Reader
4/18/22 1:25 a.m.

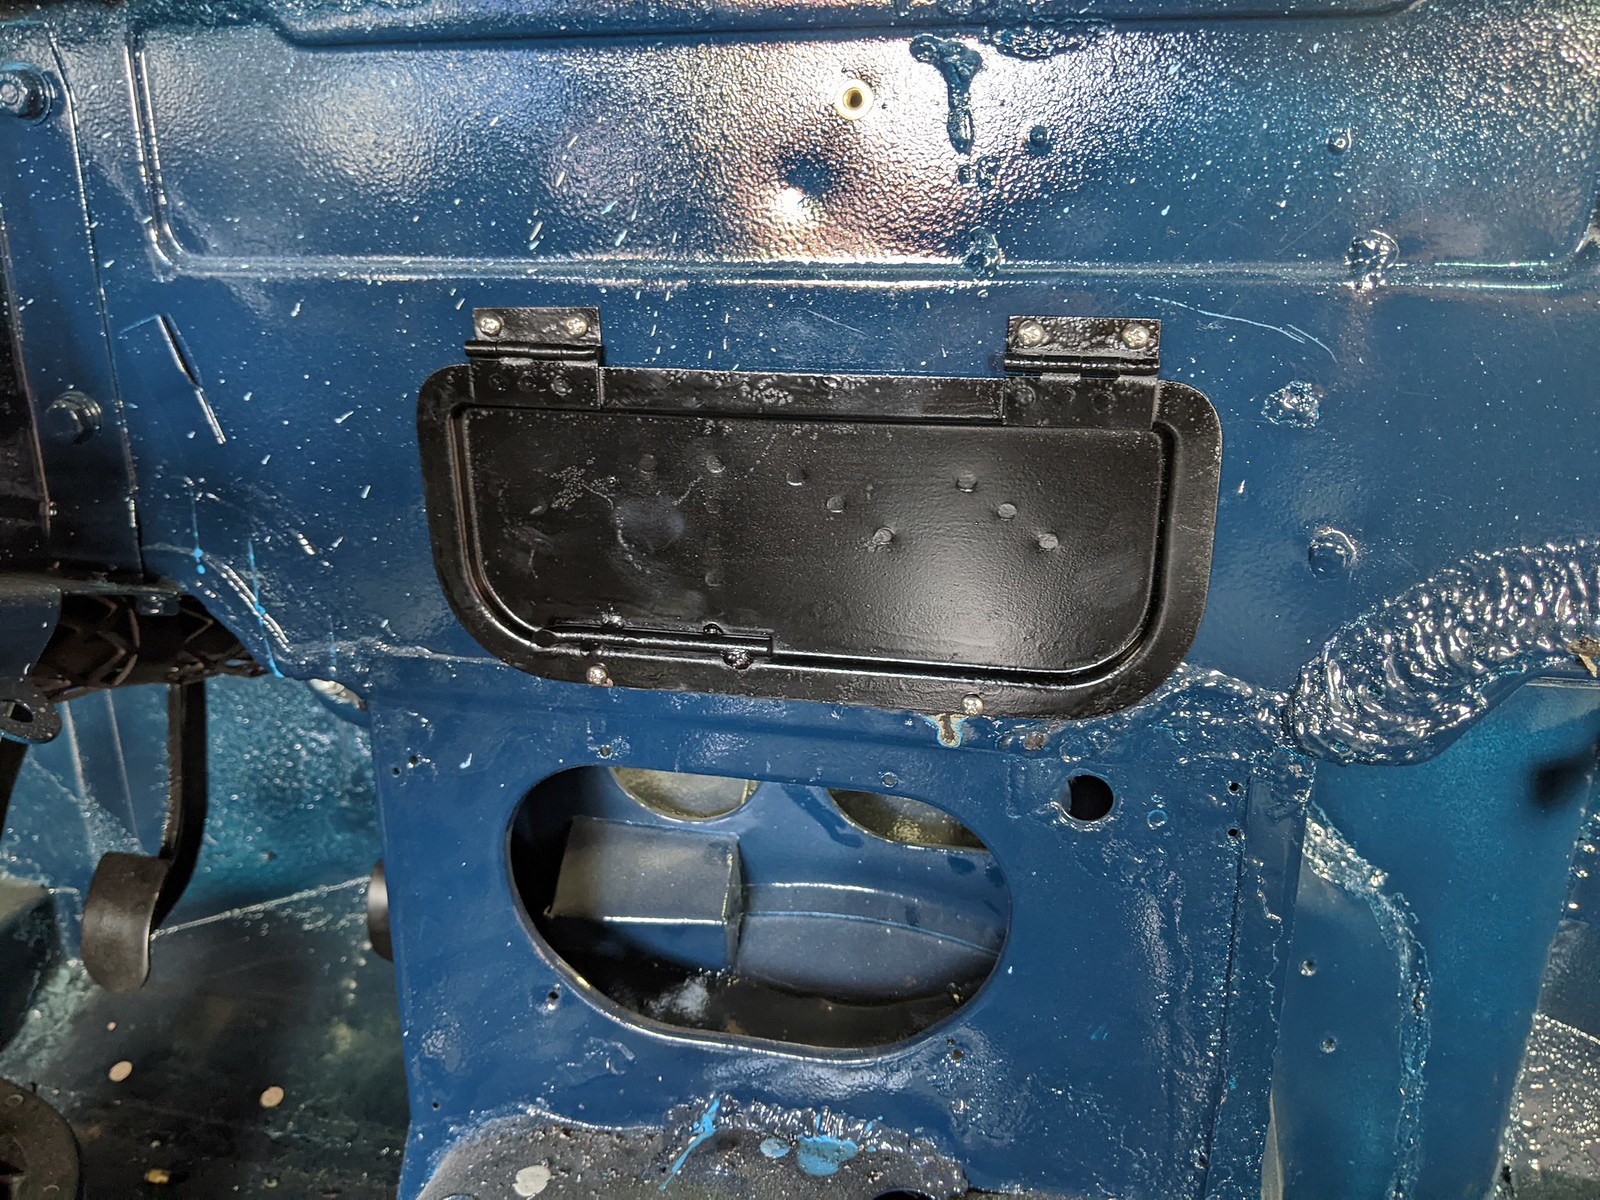
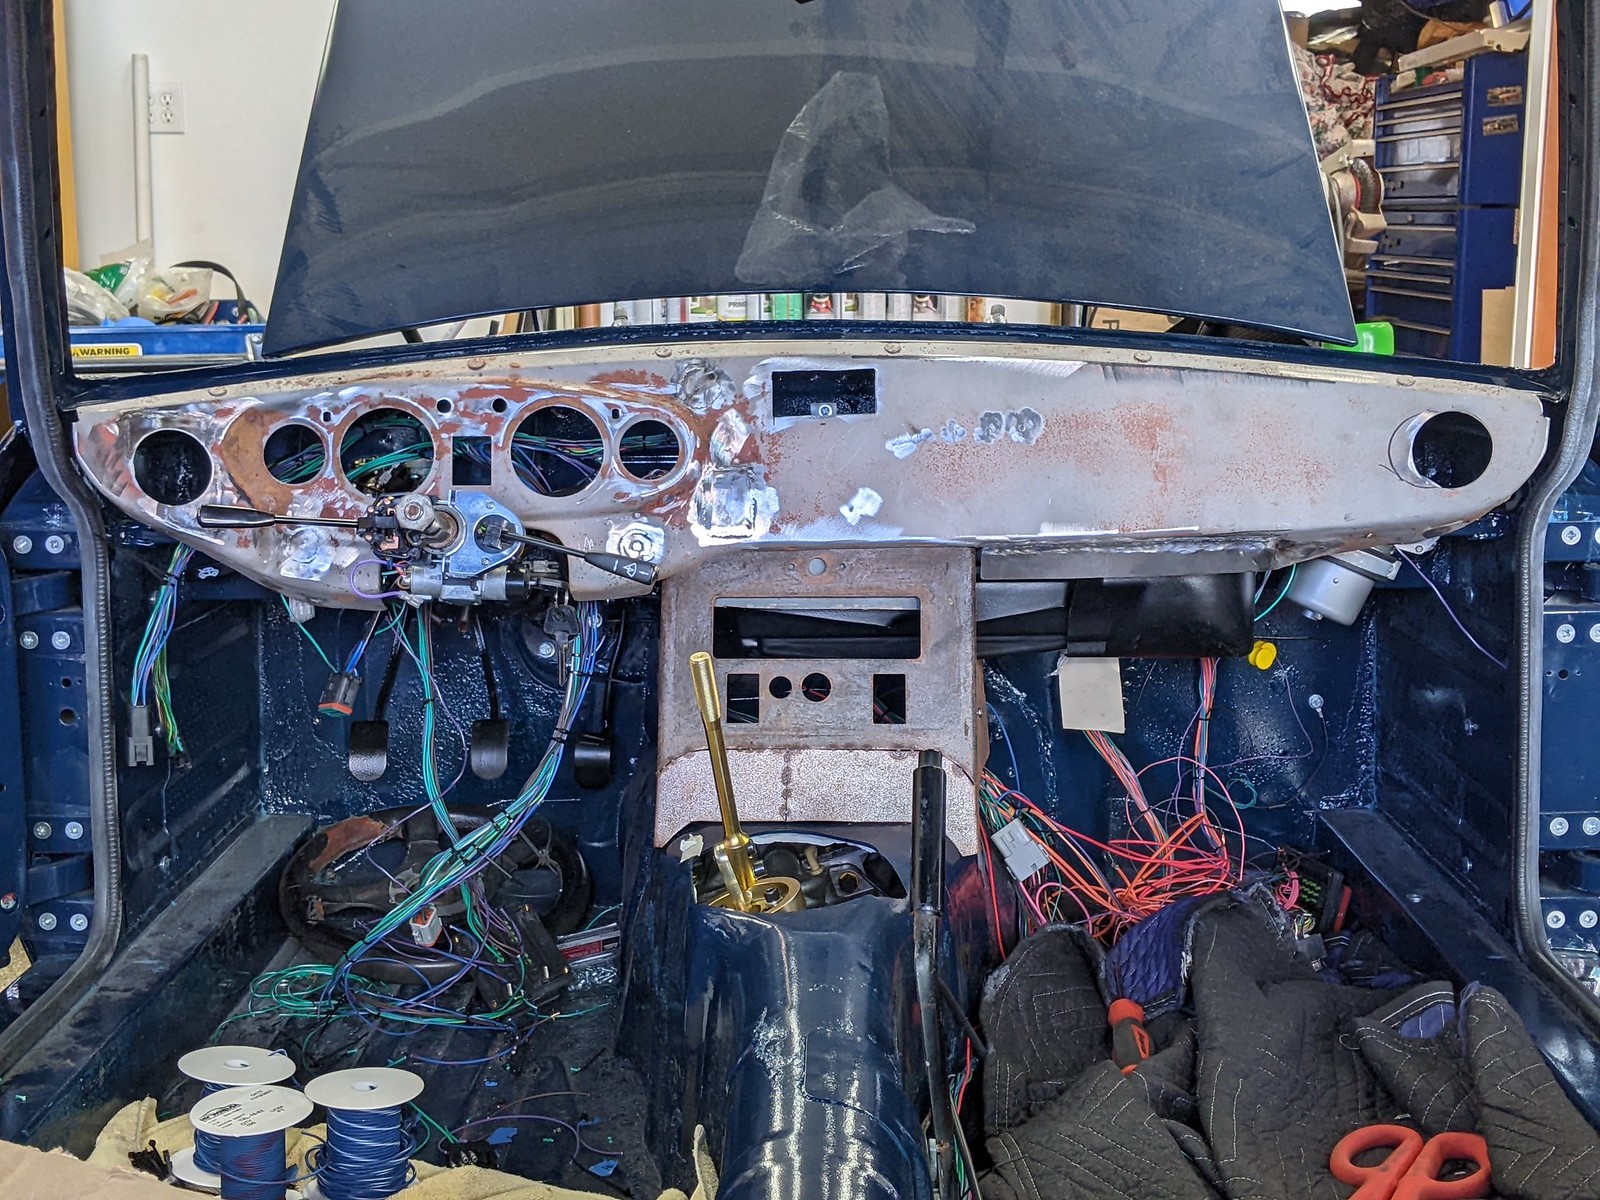
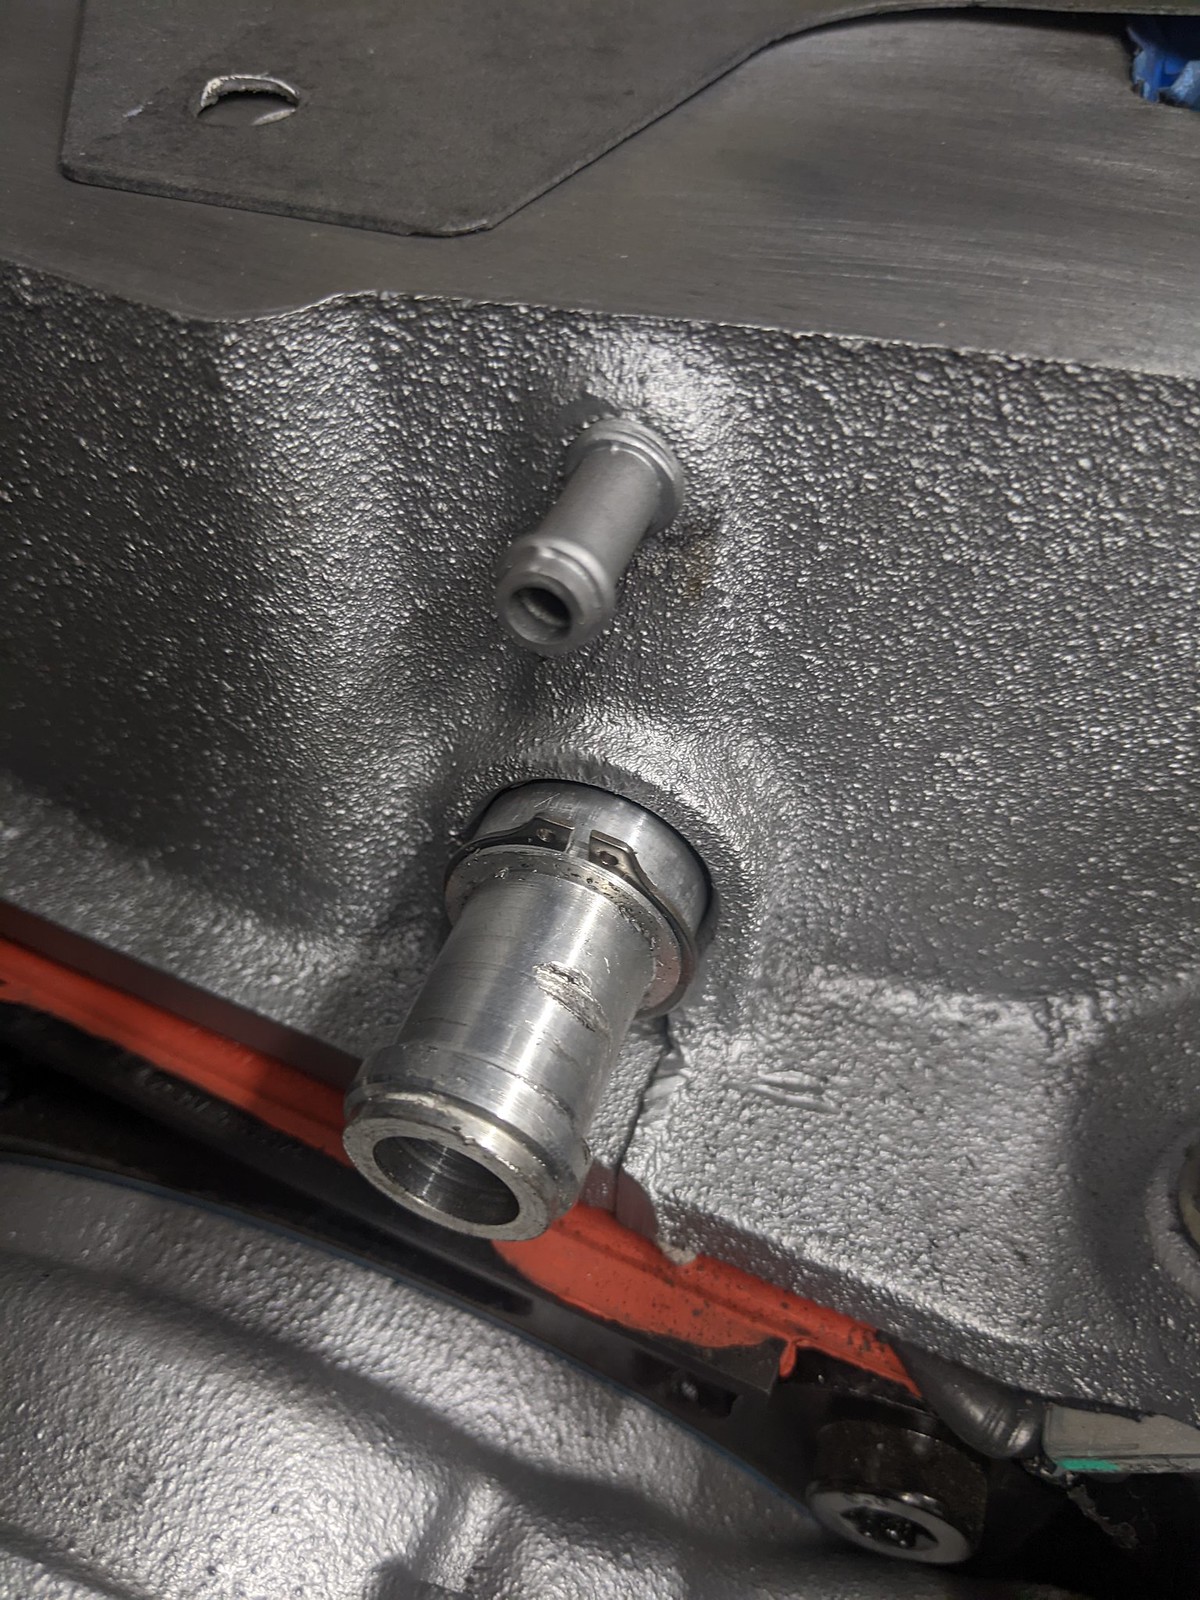
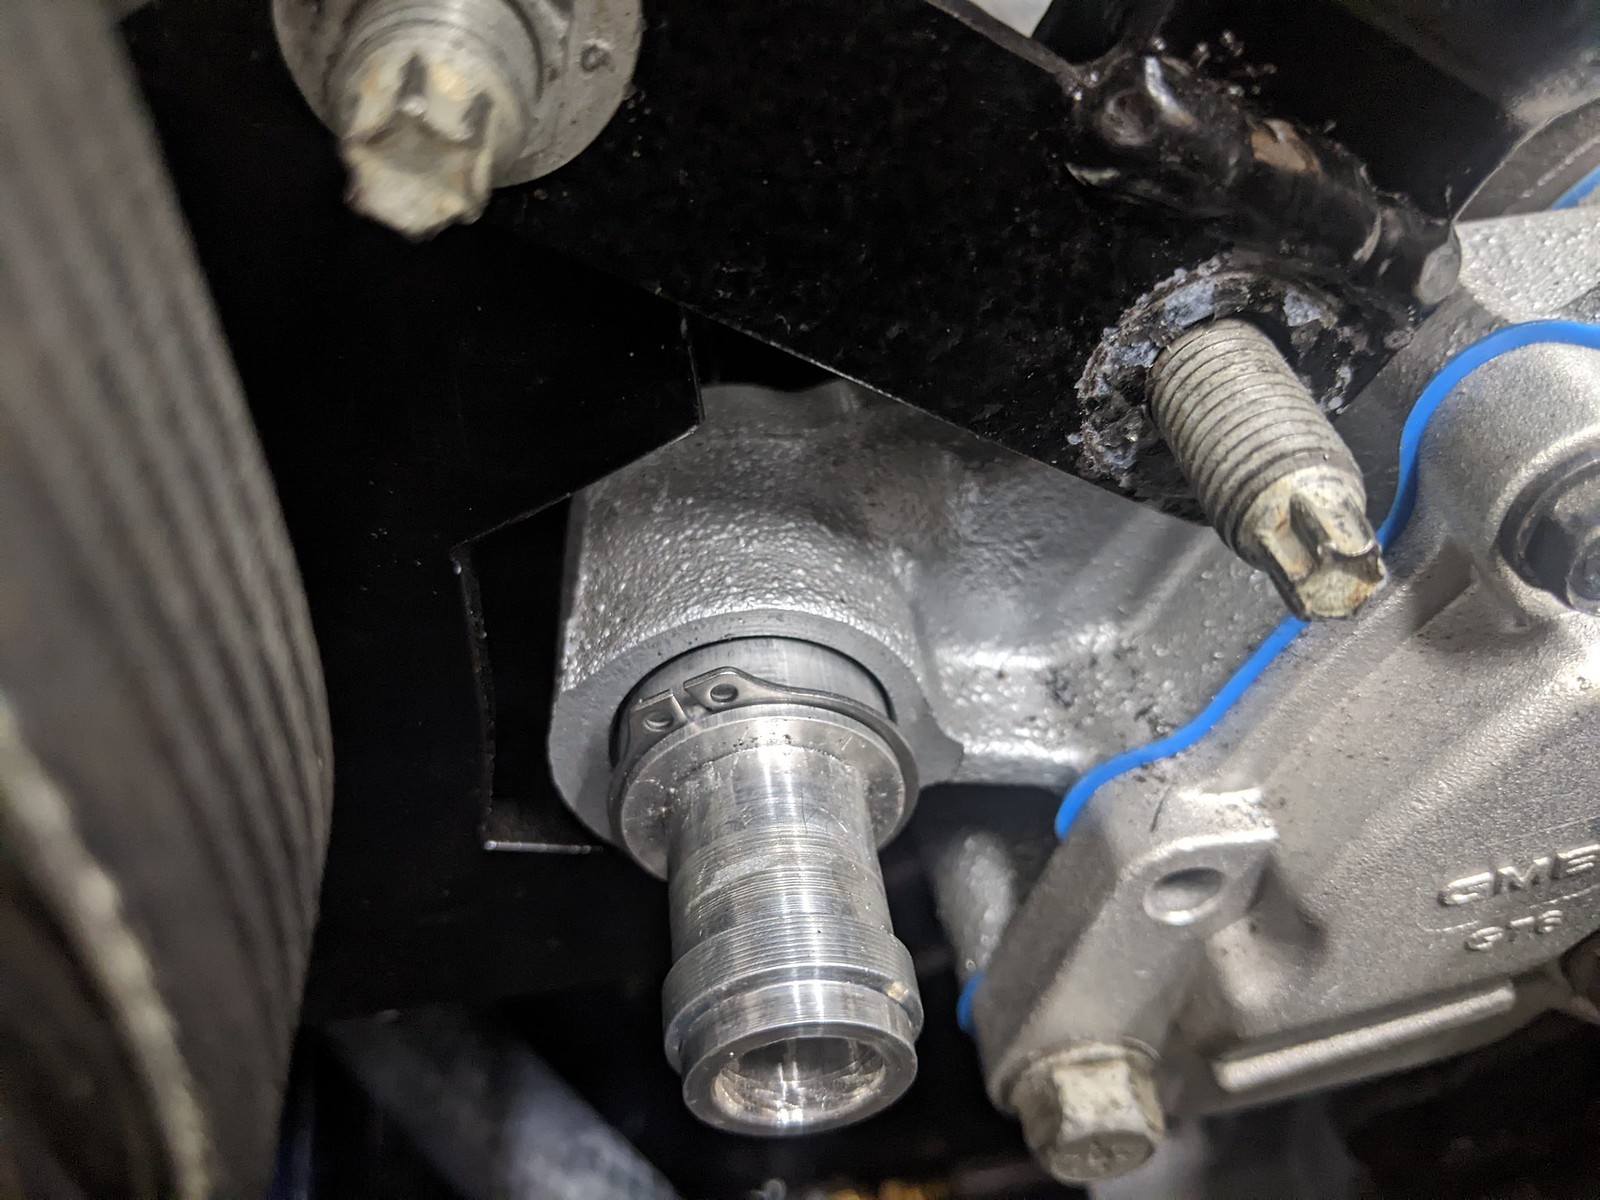
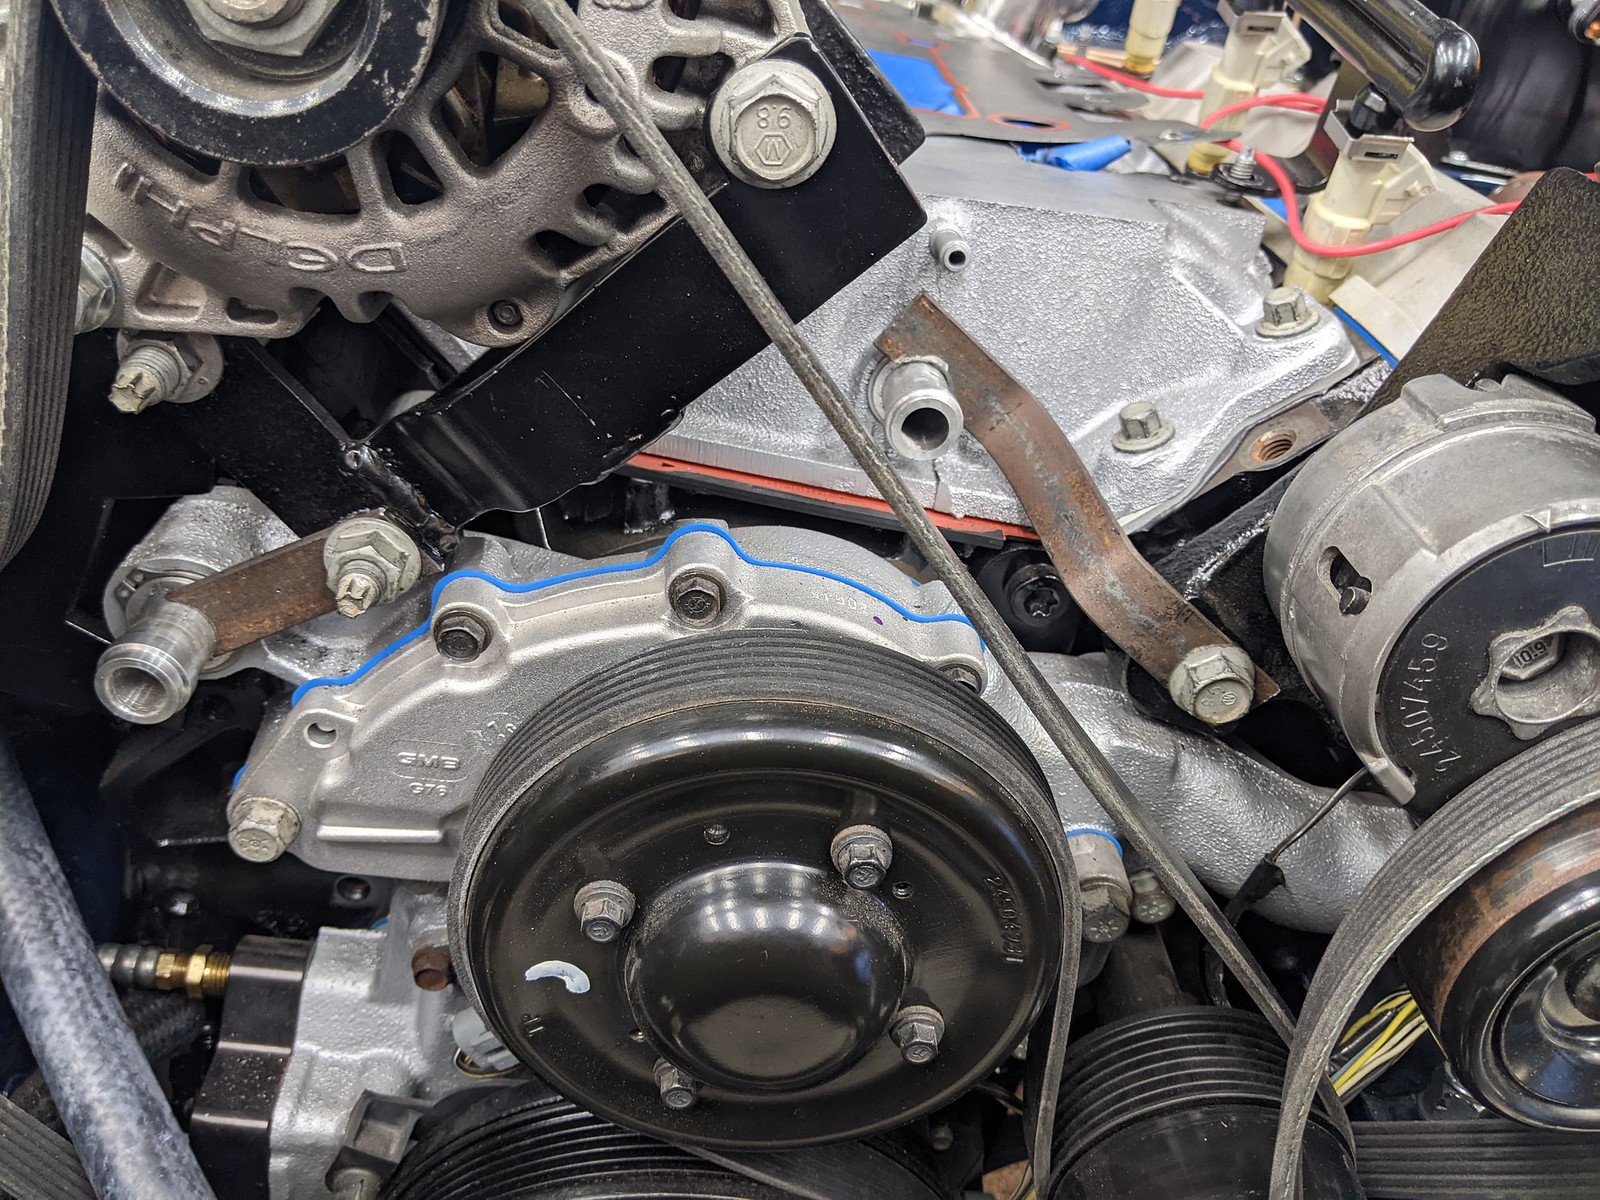
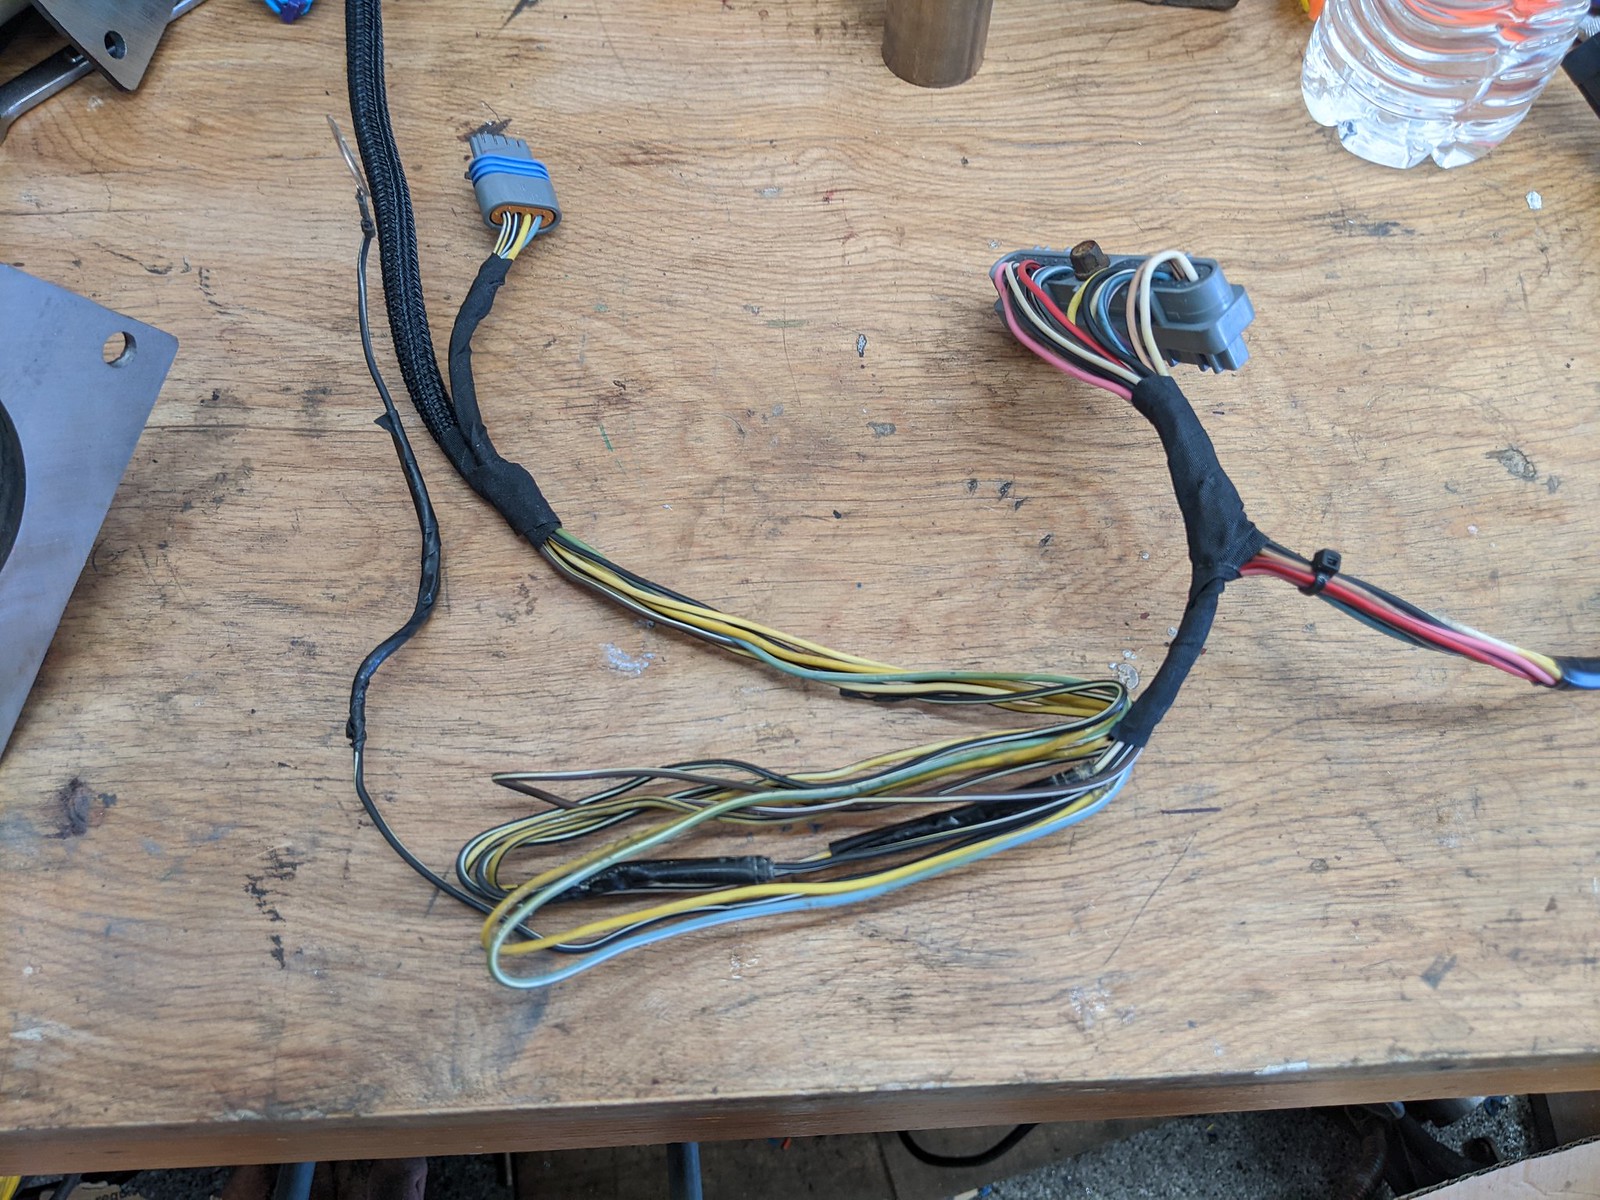
Progress has been good, finally.  Steady and smooth.  Im actually enjoying working on this beast at the moment, even with everything left to be done.  Wiring is coming along nicely.  Heater block off plate finally made.  Just need to punch a hole for the engine bulkhead connector.  Gonna leave the plate natural, not paint it.  This way I dont have to worry about it being scratched.  Ill just clean it up and clear coat it.

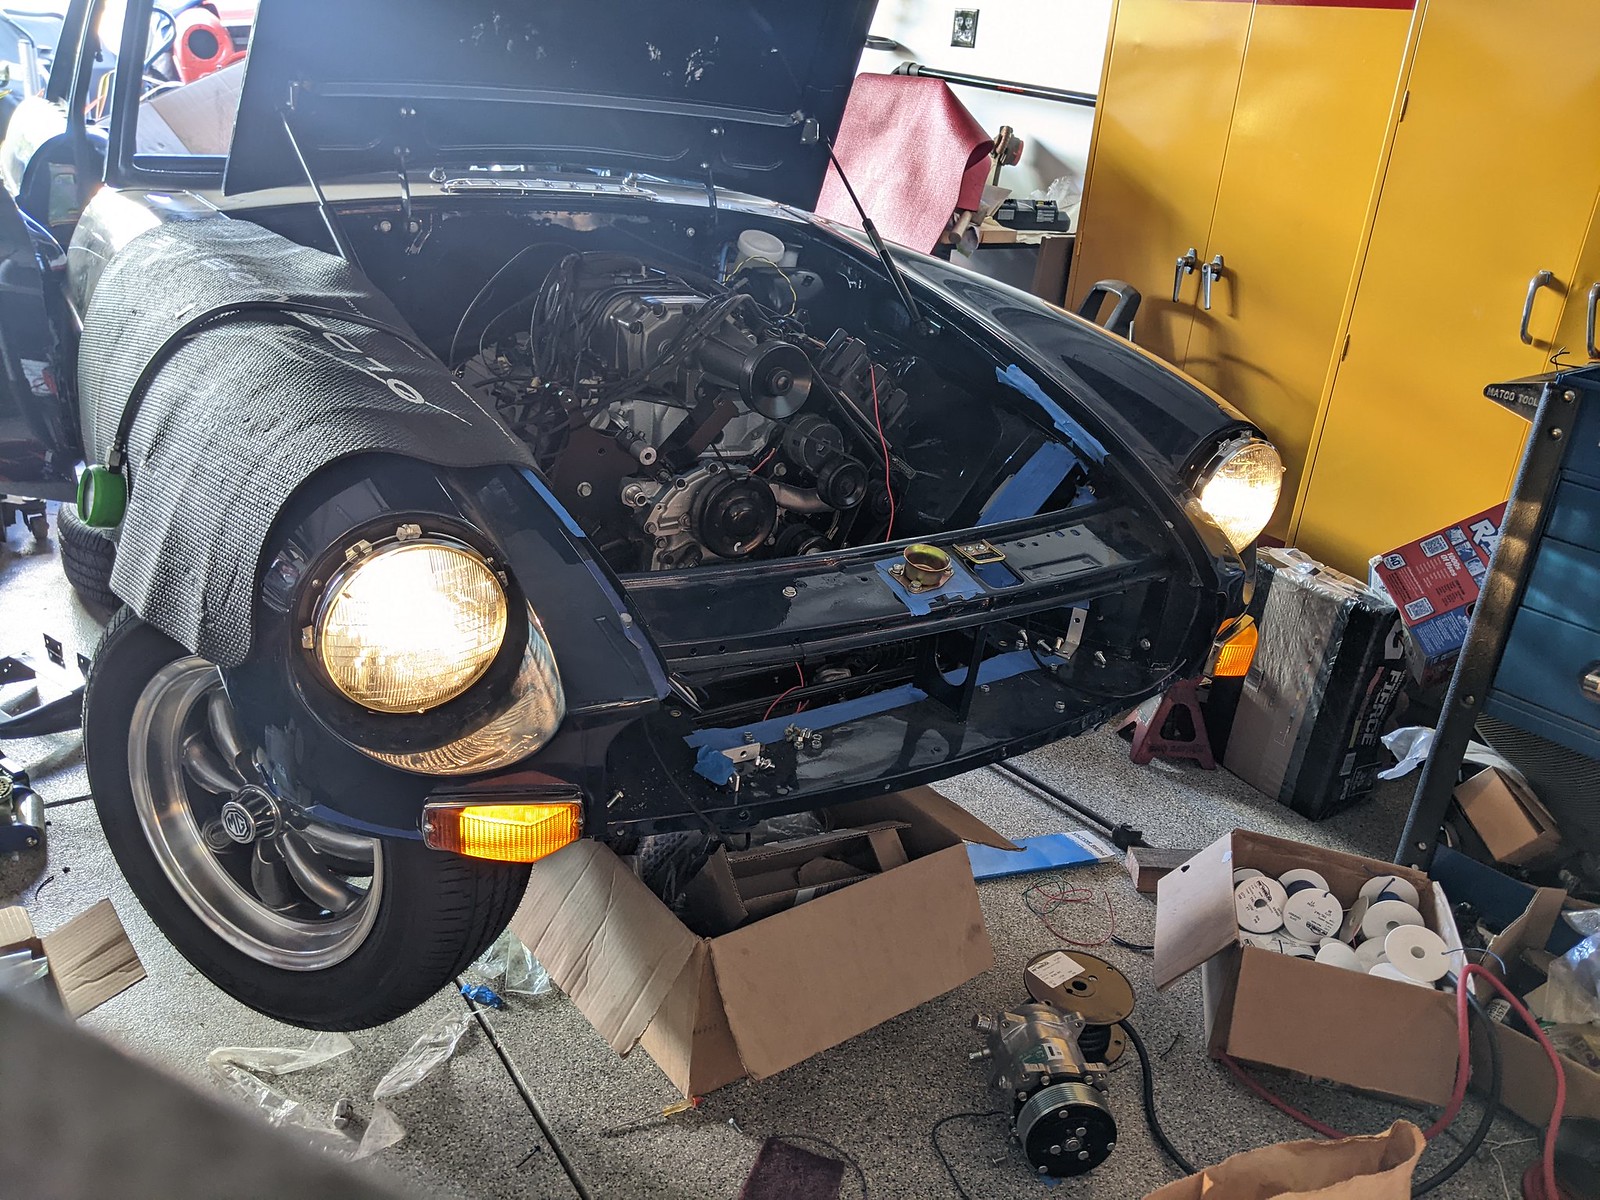
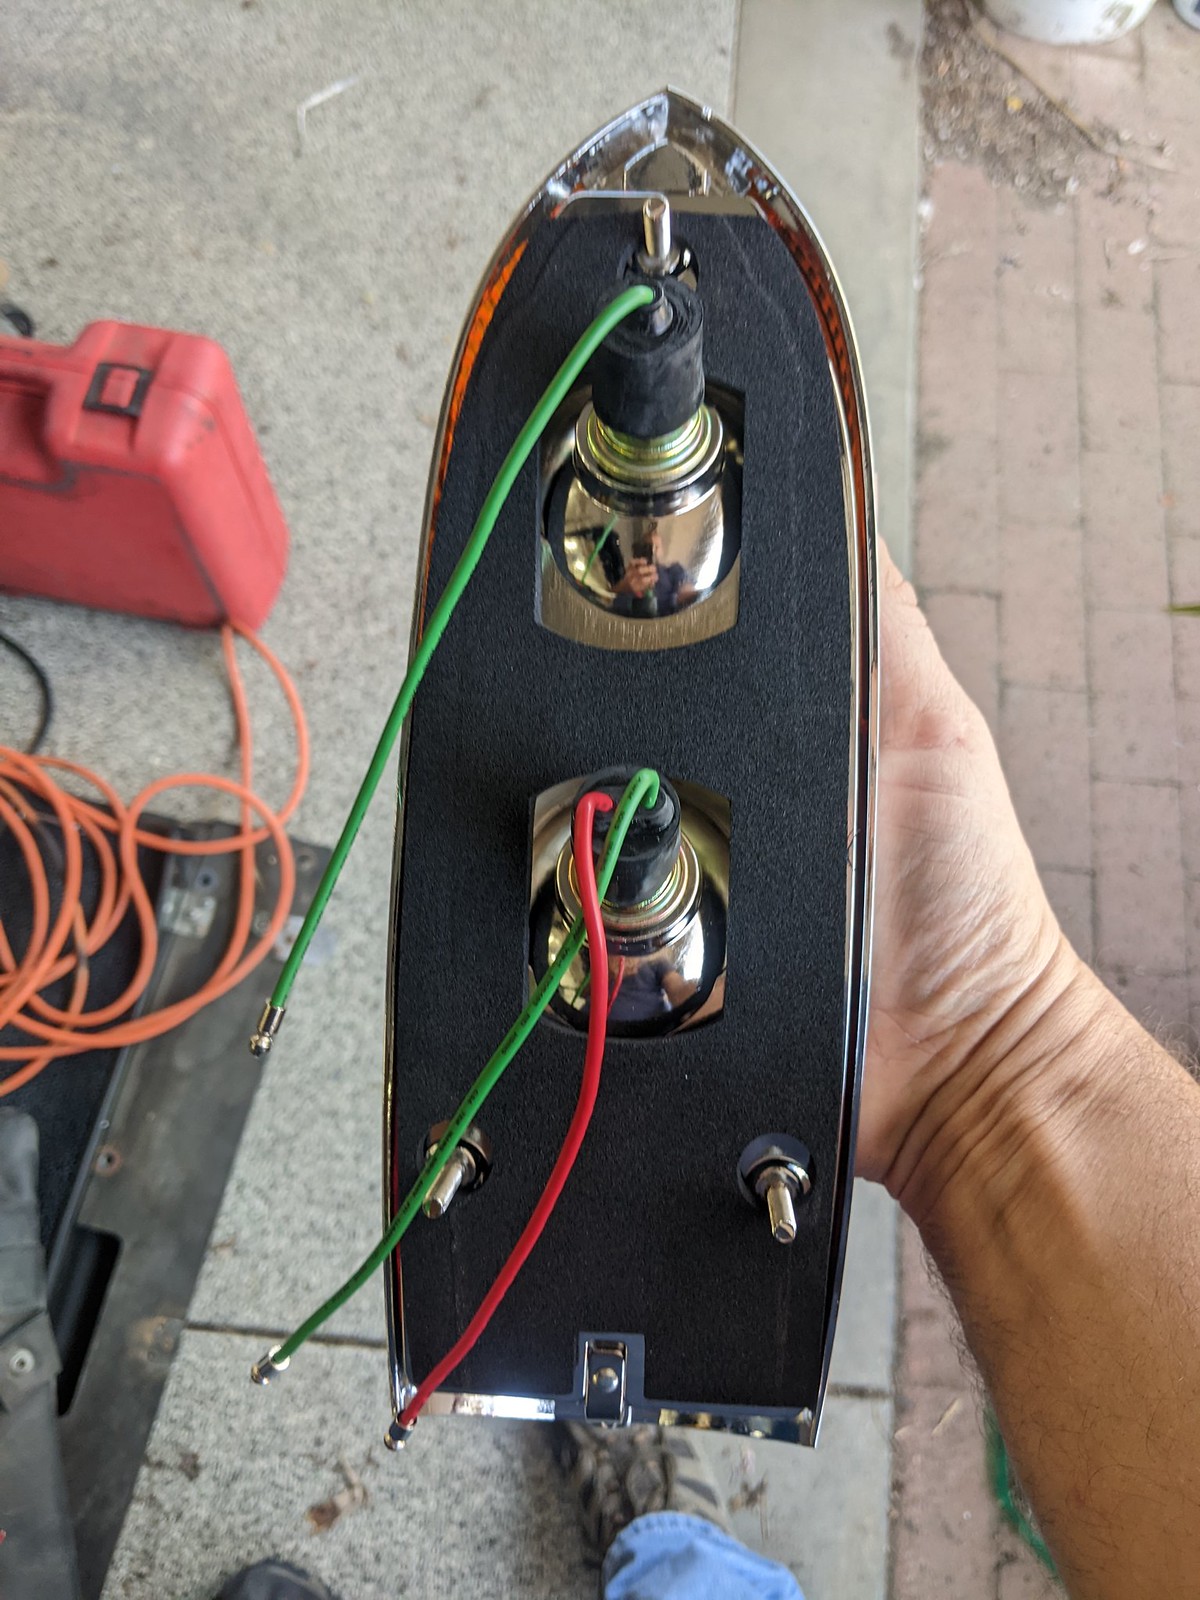
Front turn signals I ended up stealing a pigtail from the original tail lamps.  Cleaned up the lenses and surrounds, they came out really good.   The tail lights...I didnt wanna buy new ones.  I bought new lenses when I started the project.  But the chrome was too badly pitted...so I ended up just pulling the trigger on new ones.  I went with the older style tail lamps.  More rounded, more flush, and about $100 cheeper.  Basically all moss parts.  Well, fit is ok, just ok.  Left side fits better than the right, the right needs a little tweaking.  Also the light to body gaskets it came with, moss ones were nice and thick, but not cut properly.  The ones I got from rimmer bros, thinner, are actually cut correctly.  Effin aftermarket garbage, all of it.  At least the lenses are Lucas, but even so, eh.  It is what it is.  They look good in the end.  They are stuffed with LED bulbs as well.  Headlights id love to do LEDs from vintagecarled, but a pair of sealed beams will cost almost nothing, so thats what it will get.  Also had to basically rebuild the hazard switch with some bits from the replacement.  The new one had round pins, but it had the light up rocker.  I had no connector for the round pins (later car connector)  The correct one has typical flat spade quick disconnects, but had a solid plastic rocker, no light.  Well all my junk has to light up haha.  So mix and match, cleaned up all the internal bits and made a 'new' switch.

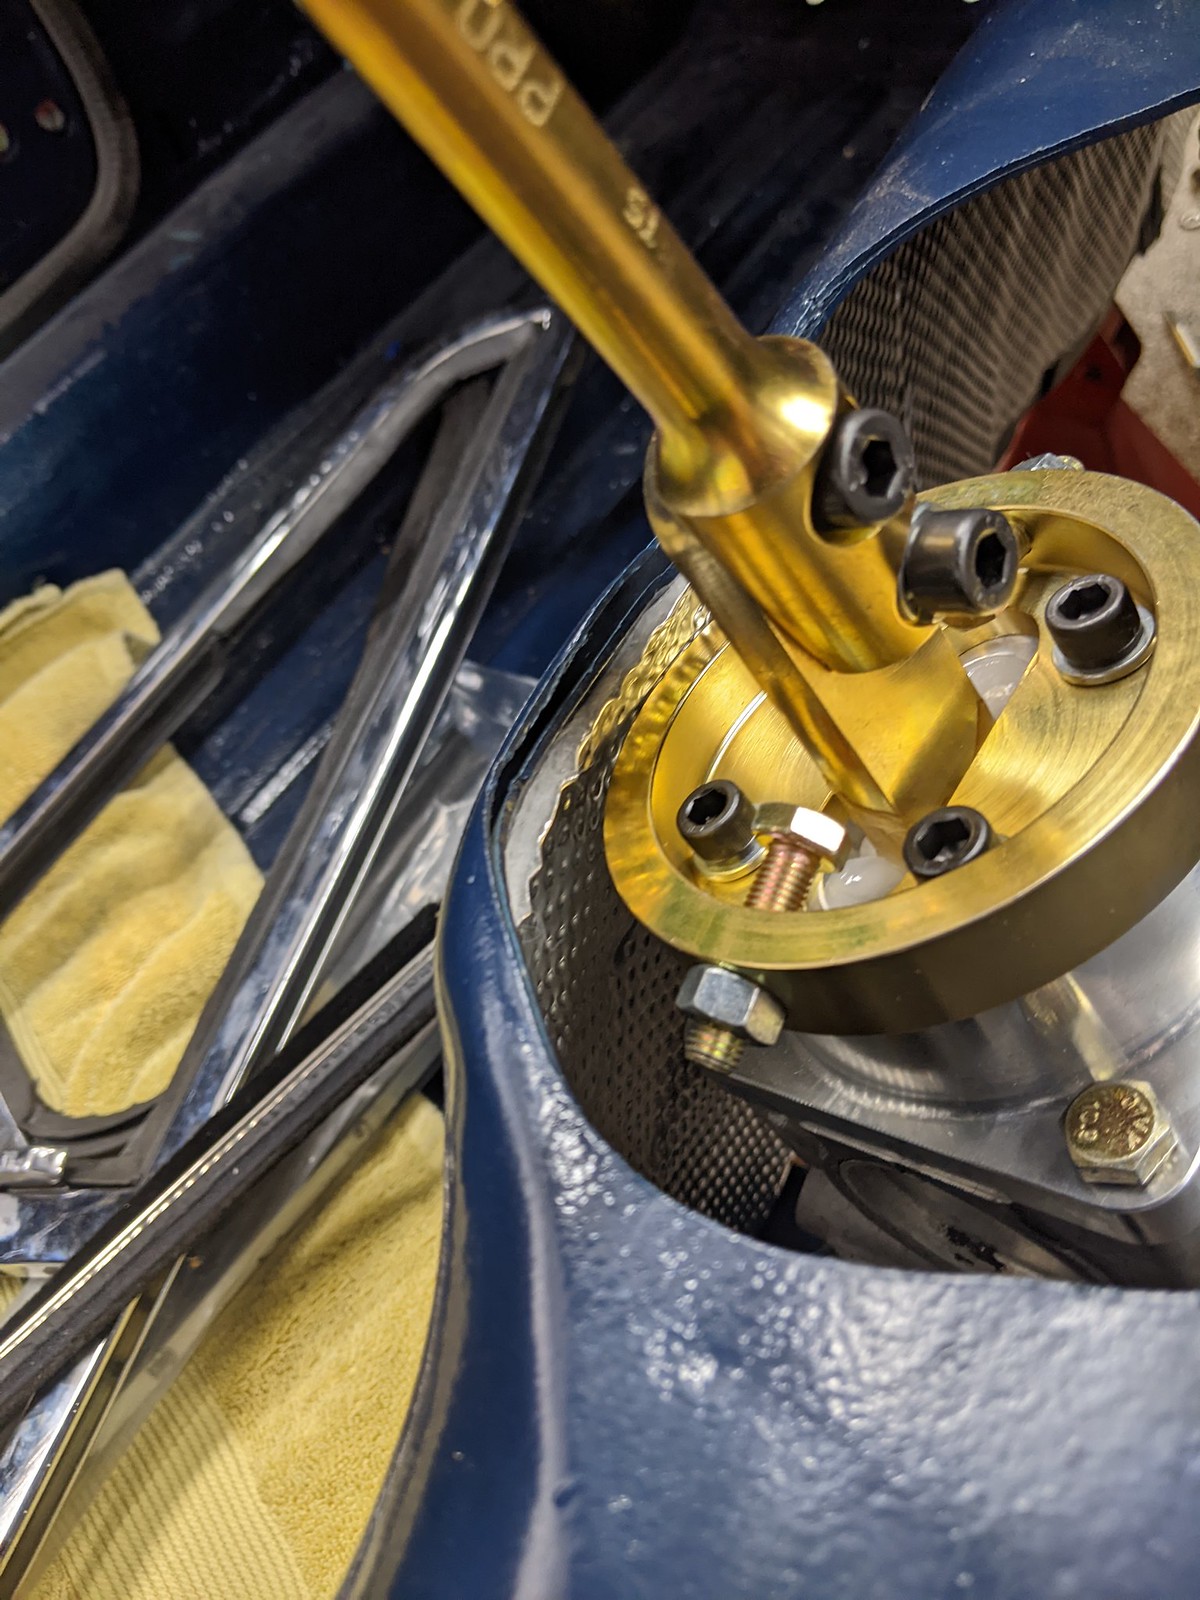
Dash has been dropped off at the interior place to have the eyebrow built.  Just gotta keep moving on the wiring and get that all squared away.  Need to make an ECU mounting bracket next. 

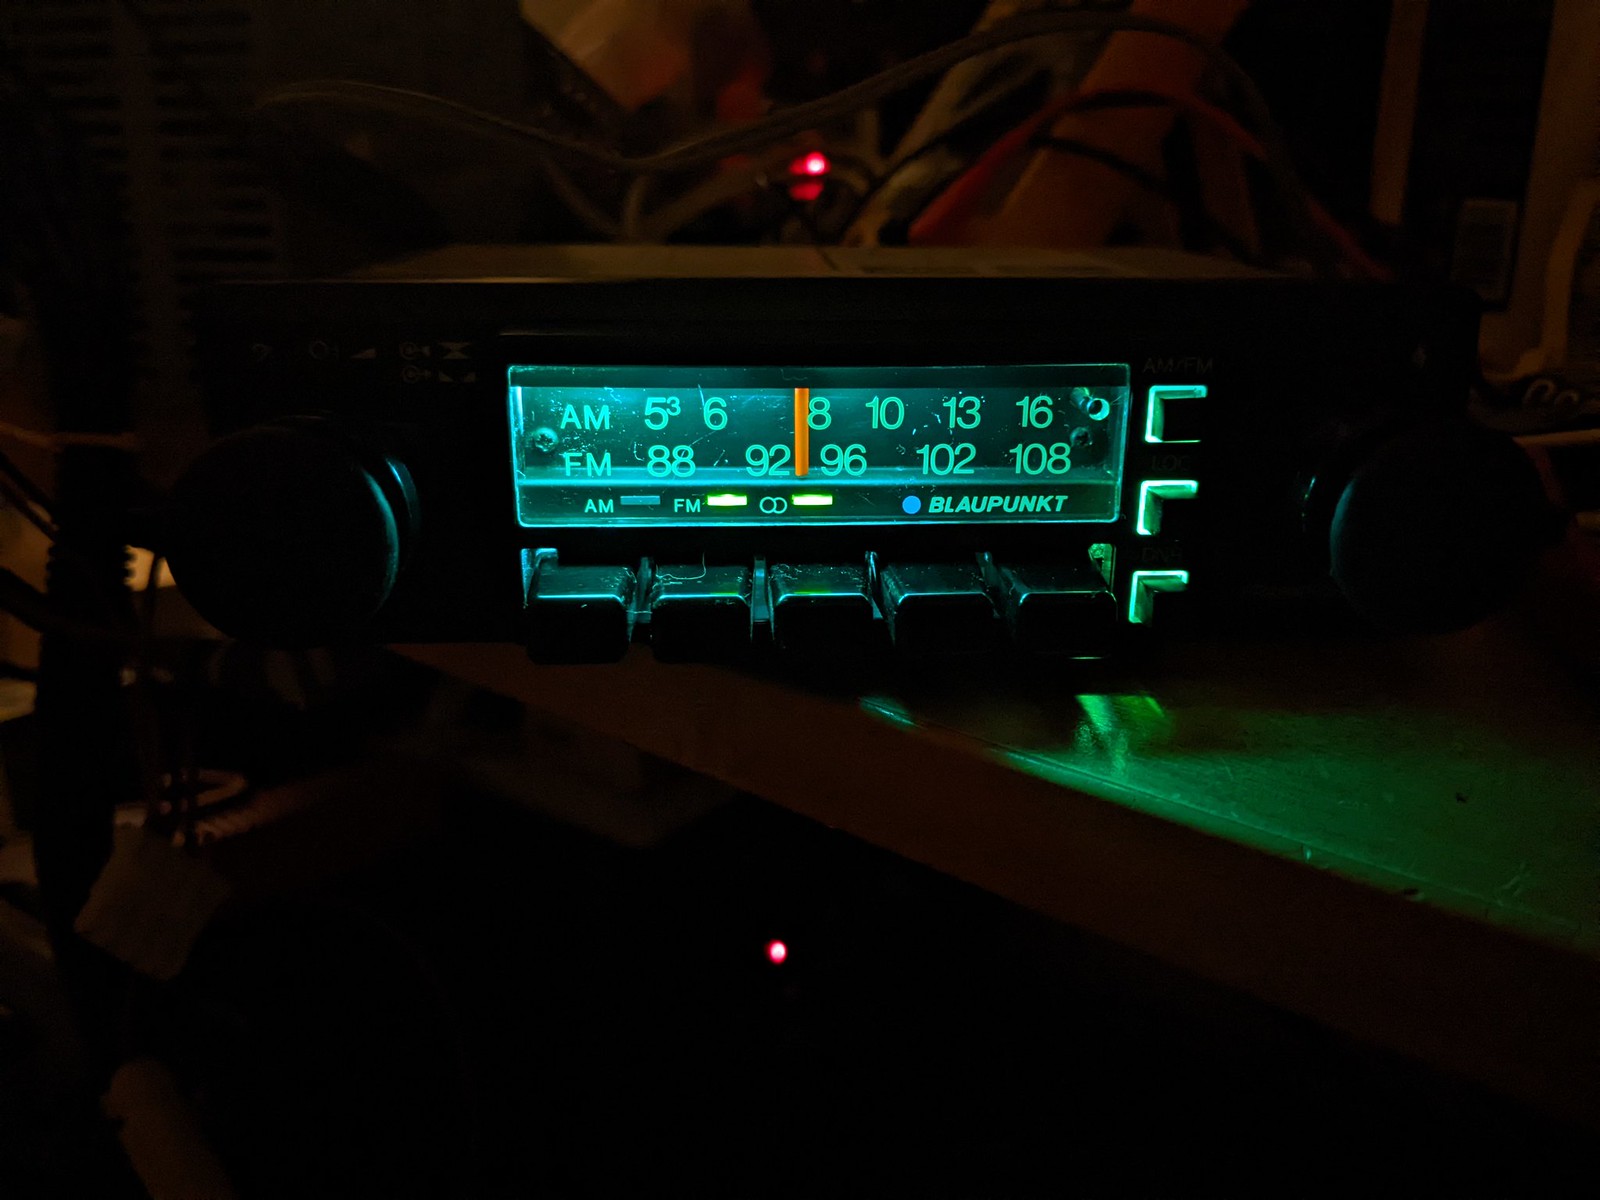
Also, after hours and hours and hours, days and days looking at vintage car radios on Ebay, I pulled the trigger on one.  This is one of the harder decisions for me.  First off, Im an audio guy, has to sound good.  Second, I cant just put a modern headunit in this.  It will look completely out of place, has to be a shaft radio, and not a digital one.  Speakers I dont want to cut new paid for interior panels to fit either.  And while I prefer a sub and amp to power everything, well we are gonna keep it a bit more skimmed down.  I settled on finding a vintage Blaupunkt.  Back in the day their headunits were high end.  Now I think its a Chinese company that bought the name and they basically make junk.  It also had to be stereo, and I have to be able to add a bluetooth streaming function.  I ended up with a console from a late MGB which has a mid 80s Japaneses made Frankfurt.  Manual tuner, not digital, but 4 channel, with bass and treble controls, not just a tone control.  No tape deck either.  I dont have it yet but it has a DIN plug, though im pretty sure there is no audio input on this one.  Its most likely an amp hookup, should have all 4 channels and a remote/ground in the DIN plug.  It does have a 16 pin 2 row connector though, not a DIN type connector.  I have no idea what it is, maybe for an external tape deck?  Hopin I can find some info on it and use that as the input, otherwise Ill have to get more creative.  Also I hope the near 40 year old radio works, I bought it untested.  I will do a hidden antenna probably in the cowl under the cowl vent opening.  Plan is 2 small speakers, probably 3.5s, but if I can fit em 5.25s in the sides of the console.  Ideal location?  No way haha, but it will work.  Only other option would be under the dash pointing at the floor, with a set of carefully placed tweeters to preserve some kinda of sound stage.  In the rear, 6x9s in the side panels.  Since I have to make the sail panels, and the lower bits as well I have no issues leaving space for speakers in panels Im making.  Also I have some tricks to make a clean looking grill.  When I was as Icon I was the one that came up with the stainless mesh behind the panel idea, a very clean way to have a transparent covered speaker that doesnt look totally out of place with a modern grill.  

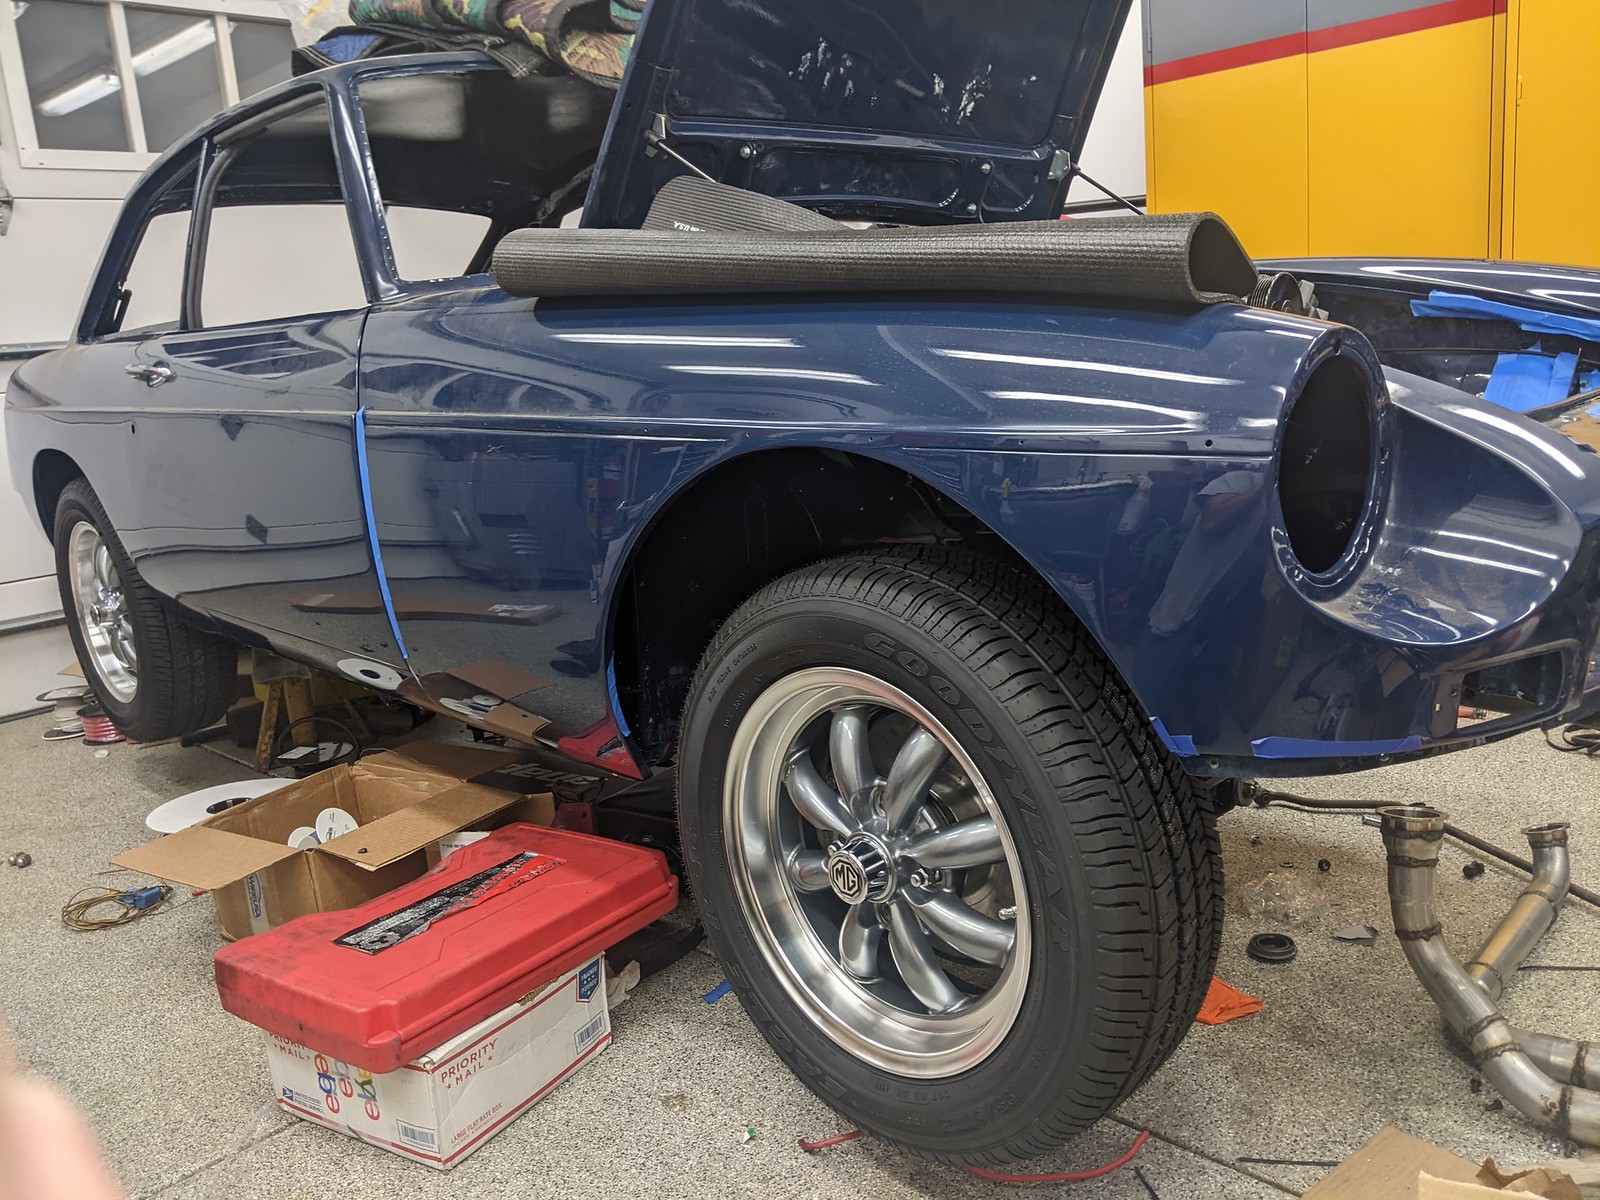
So thats this weekends update


Crappy fit seals from Moss that came with the lights

Decent fitting seals that were from Rimmer Bros

autocomman
autocomman Reader
4/25/22 1:05 a.m.

Well got the radio, it works.  Works really well, no scratchyness in the controls, tuner is super sensitive as well.  No regrets about it.  Cleaned it up, swapped the soldered in micro bulbs for some LED's and its done.  Decided against attempting to put an AUX port in it for 2 reasons.  1st, I cant find a model number let a lone a diagram for this thing, like at all.  Nothing.  The volume pot is stacked with like 6 other pots, Volume, bass, fader, balance, on/off.  Complex.  Secondly, its attached with what looks like 30ga wire, if that.  I just dont wanna go down that hole and ruin it.  So, antenna bypass FM modulator.  This actually plugs into the antenna directly.  Its as direct of a signal as you can get without making a proper AUX connection to the preamp.  Then a JL marine bluetooth receiver.  Too expensive for what it is, but they work well and they are quite.  Cheep ones can be noisy wit the engine running.  Ive had em pick up all kinds of weird noises on EFI cars so I didnt wanna go down that route.  I gotta say, a bench test im pleasantly surprised with the quality.  2 things to note, the gain must be adjusted on the modulator, and you cannot max the volume on your phone as you normally would.  Its a max it out, back it off 2-3 clicks.  Do this and it doesnt distort.  Speakers in the rear will be JBL GTO939 for their good bass response, adjustable tweeter and 94 dB sensitivity.  Wont take much power to drive em.  Front are yet to be determined.  I also pulled the trigger on a period correct Blaupunkt amp.  Untested, but im not too worried.  BQA-120, 30x4 amp.  That should be quite an improvement over the headunits 4-6 watts.

Electrical stuff is going well.  Rear section just about done, front section probably 75% there.  We have lights and wipers, thats most of what in this car aside from the engine.  The ECU is mounted, I can still remove the connectors form the ECU without unbolting everything.  The ECU side of the harness is installed and done.  The console design too, oh man.  I mean, dude.  So happy with it, sooooo happy.  Got some metal work to do to make it all flat and happy, but dude!

Then the intake.  Pulled it to do a few things (this is why I hadnt been in a rush to do the cooling system)  I forgot to install the temp sensor for the gauge, so I did that.  And I wanted to plug the coolant passages into the blower/throttlebody.  When you do that you should also port the crossover section in the back of the manifold to compensate for what you plugged up.  

So yeah, thats about it.  Progress has finally been moving forward at a good pace and im happy with how things are coming out.


autocomman
autocomman Reader
5/4/22 1:12 a.m.

Well intake is back on, coolant holes plugged.  Wont put the blower back on till the system has been filled and pressure tested.  Also started the hoses.  Welded up the upper pipe, started on the lower, also bought 4 different hoses by eyeballing em to see if I could get a hose that would fit decently enough and not be pressing on the inner fender for the lower.  But there just isnt any room.  If I knew better I would have clearance the inner fender previously.  But a solution is to take the 1.25" pipe I have and expand the end to 1.5 inches and just cut a short piece of hose.  So i got an expander, and after bearing on this stainless with it, then went ok maybe ill try expanding half the amount first, I proceeded to completely destroy it.  So that will be sent back.  I dug around and found some 1/5" tubing, and 'persuaded' the end down to almost 1.25 inches, enough to weld it cleanly.  So the lower hose will be done.  Started on the HVAC lines too, but no pics yet.  Getting the condenser mounted up and the belt back on all that in before I commit to any more plumbing.

Not sure about the console though.  I will need to cover it in vynal so it will need to be near perfect so you dont see any imperfections.  And well, its a wobbly warpy mess.  I tried to clean it up and did pretty good.  But its thin sheet metal.  Has to be so the switches snap in properly.  I dont know if this will fly.  Smart Mark goes I should download fusion 360 and figure out how to CAD it, and have a place like send cut send make it.  I dunno yet, kinda putting it on the back burner for now as it doesnt have to go in till much later.

Lastly audio.  Rear speakers I have a template made to put em in how you see in the pic.  This area is no mans land in a GT, no covers, it just kinda exists.  It will fit these speakers pretty well.  I also splurged and picked up a 120 watt Blaupunkt amp from the era.  This is from like 91 92 maybe?  30x4 watts, plenty for this setup.  $35 sold as parts or most likely non working because 'i dont have any way to test it'.  So when I got it, I hooked it up to a power supply and my phone via an RCA cable and yeah, didnt work.  To make a long story short, the internal line in circuitry requires grounding through the audio inputs.  So either through the DIN connector or the RCA outer ring.  Took me 3 days, and many many many or poking at it, testing components and screen shoting a circuit diagram from ebay, not even a schematic as I couldnt find one.  Once I figure out how it was setup and the grounding issue because obvious, I grounded the RCA outer ring and it works just fine lol.  So if I had just hooked it up to the radio with a DIN cable it would have worked and I would have saved myself many many hours.  Whatever, learning experience as my electronics skills are lacking, go figure haha.  So I now have a proper vintage Blaupunkt audio system that doesnt look out of place.  Happy Mark

I also got about 80% of the aliens wont steel my thoughts material installed ;-)  Used Noico because I have a hard time with the Dynamat price point.  The Noico is a bit thicker than the Dynamat at 80 mil where Dynamat is around 60mil.  Dynamat is good stuff, probably the best out there, the right thickness to form well over things, good backing, just good stuff.  I just have a hard time pulling the trigger on it

autocomman
autocomman Reader
5/9/22 12:49 a.m.

Well destroyed a tubing expander.  Quality equipment I tell ya.  Gave up and took a piece of header pipe at 1.5" and slowly pounded the edge to get it tight enough to weld it to the 1.25 pipe.  Lower hose done.  Condensor mounted, radiator installed, A/C lines in progress...now for heater hose fittings.  I made these sweet nipples on the lathe a long while back.  Didnt realize at the time that Id have to do something to keep them from getting pushed in too far.  I was gonna remake them and make sure I left a flange on them so they wouldnt go in too deep.  But the bigger one is a 1" diameter.  I have 1" round stock.  So I wasnt gonna get more to remake just one fitting.  Nor did I really want to remake them.  So I tossed em back in the lathe, cut groove in em for some sweet nipple rings.  Then get creative and made some bitchin nipple clamps!  Gonna clean and paint em, but that went way easier than I though it would.  And since I had the lathe out I made up spacers for the cooling fans and some other bits as well.

Also ordered a DIN cable for the radio/amp.  Oiy thats a mess.  First off the cable was 30$ plus shipping for a total of 41$  Stupid money.  I pulled back the covers and well the soldering was a mess.  So I had to fix that.  I also had the wrong gender on one end.  And after hooking it up and it not working right, I found out the 7 pin output on the radio isnt pinned the same as the 8 pin input on the amp, because what ever.  So Im waiting on an 8 pin din plug to correct that now.

Also got a tubing bead roller, so I should be able to finish fill and pressure test the cooling system here pretty soon.

V6Buicks
V6Buicks Reader
5/9/22 9:33 a.m.

Awesome solution for the heater fittings!

autocomman
autocomman Reader
5/9/22 10:30 p.m.

In reply to V6Buicks :

Thanks dude.   I saw fiero guys tapping em and modifying the thermost housing.  I just didn't want do that.  And not much meat to tap.  So copied the dimensions of the original plastic elbows.  Came out really damn good.  Routing of the hoses though is a bit tricky.  Lots of crap going on in front of the engine

autocomman
autocomman Reader
5/16/22 1:05 a.m.

Still making steady progress, parts getting installed for the last time feels really nice lol.  Heater nipples done and secured, blower reinstalled and plumbing continues.  Bought a tubing bead roller.  Made quick work of the tubes, after completely disassembling it and greasing everything in the roller.  Pressure tested the system at 16psi for 30 min, not a leak (sweet!) Cleaned up the tubes and clear coated them.  Prolly gonna just wrap the upper tube with header wrap.  Its gonna be 200 degrees, and its too easy to bump your arm on if you go in there, that hurts, ask me how I know.  Powder coating doesnt help that. 

Also got the ignition harness length adjusted and wrapped up.  , Driveshaft is all new.  Rear flange too.  Datsun Subaru flange for a 1031 Ujoint.  So all 1031 joints, and a 2.5" I think tube, maybe 2.75, Cant remember, Its beefy.  Continuing on the plumbing.  If I didnt do A/C, it would have been done, but A/C adds quite a bit of the headache.  A/C lines are mostly done, they will drop under the compressor and attach to the inner fender down low with the heater hoses.  But I need to get the heater hoses clamped to the A/C bracket to keep them away from the belt.  The belt is the biggest issue.  Going down and under for cleanliness, and because if I didnt they would end up completely through the belt.  And if I wanted to pull the belt off completely, then id have to pull the hoses.  No bueno.  So careful bracketry and clamping is happening and so car its not too bad.  Just working one end to the other.  Thats about it.  Goal is finish plumbing before anything else.  Because once thats done, I can deal with the exhaust.  In flattening one of the flanges it moved the header a bit which ment the crossover pipe needs just a little tweaking.  Then I can pull the headers, get some paint on the flanges and wrap them.  Install for the last time and then warm this bastard up!


dculberson
dculberson MegaDork
5/16/22 10:13 a.m.

That's some tidy looking work there - looking great!

autocomman
autocomman Reader
5/23/22 8:51 p.m.

Well heater hoses and A/C hoses wrapped up.  Waiting on some heat sleeves for where they get close to the exhaust but they are done.  Double checked the compressor had oil in it while I had it off.  I do wish the plumbing there was a bit cleaner, but with 10lbs of crap in a 5lb bag its tough to get things to lay out how you envision em.  Also wish I did a different bulkhead, but with space, options were limited.  This is what happens when you dont fab everything up completely before paint ;)  But its clean, and everything is secured so nothing is gonna move, chafe or loosen up.  The compressor will come off with the hoses attached so you can get to what ever under it without discharging the system. 

Wrapped the headers and crossover too, just gotta grab some longer bolts and they are ready to go back on.  I hit the headers with some bbq paint, 1200 deg, should keep the flanges looking good.  Clutch bled easily as well, no leaks and feels ok.  Im thinkin if things dont get too wacky this week I may be able to run it round the block this weekend. 0.o


V6Buicks
V6Buicks Reader
5/25/22 10:38 a.m.

I so love how this is turning out.  Great work!

autocomman
autocomman Reader
5/31/22 2:20 a.m.

Well missed my goal of getting it around the block by the end of the month.  Had to work Saturday, unusual for me but eh it happens.  I did get it warmed up, fans cycled, well one anyway.  Gotta check the settings to see why they both didnt come on.  Motor sounds good.  Belt tracks perfectly, ive got no complaints so far.  I will have to do some more heat treatment though.  Inner fender under the header on the drivers side gets rather toasty even with the wrap.  What Ill prolly do is make an aluminum plate and wrap the top with the dei tunnel shield, then bolt it onto the fender instead of just sticking it right to the inner fender.  And Ill have to do more to the floor as well as it got pretty toasty, but I knew Id have to do that anyway.

Somehow as well I need to redo the steering shaft.  not long enough.Im sure it has to do with where the engine is sitting.  Longer shaft will push the upper ujoint farther up which is where it needs to be.  What sucks about this is the upper joint is a 48 spline to 48 spline.  Not sure I can get a solid 48 spline universal shaft to cut down and make the rack end a DD.  I may have to shell out for another u joint, 48 spline to DD and just get universal 3/4 shaft.  Not happy about that, these stupid u-joints are NOT cheep.

Also got my audio stuff squared away, minus front speakers.  All (mostly) vintage Blaupunkt.  Im supper happy with this.  I powered it all up on the bench and it sounds damn good, even with the speakers just sitting there.  This is gonna be killer in the car.

But before I drive it I wanna get the intake tube powder coated.  I need to reconfabricate the throttle pedal to get more throw, the heat shields etc etc.  Lots I can still do.  But it was nice to hear it fire right up and blap the throttle a few times.

https://youtu.be/mkZUXg1RrxA

1 ... 5 6 7 8

You'll need to log in to post.

Our Preferred Partners
eJ8uR1AjLIWuVA4sMhSufYUkyJlIOI9G9nv4GQxgSGyyo8hHb1BvYByDTMD87cyH