1 2
Toyman01
Toyman01 GRM+ Memberand PowerDork
8/11/13 3:38 p.m.

I like old machines and tools. You might have seen the build on the 1947 South Bend.

Along those lines, I have been looking for a large shop air compressor and I came across this.

It's a 1971 Quincy 325 ROC 13. It's capable of 18.6 cfm @ 175psi and rated for 400-900 rpm.

It came with a 10hp 3 phase motor that I can't use and I took a gamble when I bought it because I never got a chance to see it run. My plan is to get it running and put it in service in my shop. I'm tired of waiting for my little 2hp compressor to catch up.

Toyman01
Toyman01 GRM+ Memberand PowerDork
8/11/13 4:01 p.m.

The first challenge was to get it off the trailer. My best guess, it weighs in at around 500 pounds. Novaderrik offered the suggestion of disassembling it and unloading in pieces. My engine hoist wasn't tall enough to lift it down, so that's what I did.

I had to put my engine hoist on the trailer to get the pump and motor off of the tank. I bet the pump weighs in at 200+ pounds.

Next on the agenda was finding a motor. The pump has a 5hp rating and since it only turns 400-900 rpms I wanted a 1725 motor to keep the drive pulley a reasonable size. I settled on a Baldor 5hp 1725 motor off of Ebay. Brand new, made in the USA, and shipped to the door it was less expensive than the Chinese motors that Northern and HF carry.

A little goesintas and I came up with a drive pulley size of 5.75. That should give me about 600+- rpms at the pump. I'll loose a few CFM, but since I'm dropping the air pressure from 175 to 125, I should get at least some if, not most, of it back.

I mounted the motor yesterday. Since the original motor must have been slotted and the new one wasn't, I had to cut slots in the 1/4" mounting plate for belt adjustment. That was a PAIN and I'm not going to show picture of them. They look like crap.

At any rate, it's on there.

A little hot wiring and I fired it up. Here's some proof. https://www.youtube.com/watch?v=EwTBQZtNsic

That loud clacking noise was worrisome. I was afraid it had a rod bushing or bearing failing. A trusty screwdriver stethoscope traced the noise to the check valve at the tank inlet. The pump is building 10psi of oil pressure and the crankcase is as quiet as a tomb. No rattles, no knocks, just a little clicking from the valves in the head.

Toyman01
Toyman01 GRM+ Memberand PowerDork
8/11/13 4:29 p.m.

The pump is making air like no tomorrow. I'm ecstatic so far, but...

The next challenge was figuring out the rats nest of plumbing on the back of the pump. I wasn't even sure what it did. It was research time. I enjoy that as much as fixing things.

It turns out that this compressor is set up for dual control. You can run it with a normal pressure switch. It will pump up to pressure and shut off. Or by turning the valve on the back of the pump it will run using the unloaders at the top of the head. The pump runs continuous and the unloaders will make air or dump, depending on the pressure. The good news is all the parts are there. The bad news is, none of it works.

I started pulling it apart to find the problems.

Problem #1:

This is supposed to be a rubber diaphragm. It now has the consistency of really crappy plastic. This is what drives the unloader plunger. No flexibility, no plunger motion.

Problem #2:

There is a three way check valve that diverts air to the unloaders depending on whether its pressure controlled or unloader controlled. The rubber parts in it were just as bad off as the diaphragm. The good news is, that part is available, the bad news, it's stupid expensive. It might be getting re-plumbed to just pressure control. We'll see.

Problem #3:

It's nasty in the top end. At this point I've ordered a tuneup kit for the top end. It comes with all the gaskets, diaphragms and springs in the head. It should be in this week and I'll be pulling all the valves, cleaning everything and putting it back together. The unloaders have to work so they will dump head pressure at shut down. Getting them fixed will be a priority.

In the meantime, I've decided to paint it while I'm at it. It will end up the same color as the lathe.

Toyman01
Toyman01 GRM+ Memberand PowerDork
8/11/13 4:32 p.m.

I screwed up the thread title if one of the board gods would like to fix it. One of these days I'll learn how to type...and proof read.

fasted58
fasted58 PowerDork
8/11/13 4:36 p.m.

Could you make that diaphragm from rubber and or steel sheet?

Toyman01
Toyman01 GRM+ Memberand PowerDork
8/11/13 4:38 p.m.
fasted58 wrote: Could you make that diaphragm from rubber and or steel sheet?

I could, but they come with the tuneup kit. I've got plenty to do between now and when they show up.

mikeatrpi
mikeatrpi Reader
8/11/13 6:06 p.m.

Love it! Are you going to plumb the garage for air?

44Dwarf
44Dwarf SuperDork
8/11/13 6:14 p.m.

I never bothered to try my unloaders i've got same compressor with a 5hp single phase motor no problem starting under load my switch turns on at 100psi and off 140psi my tank uses a T&P valve from a water heater that cracks open at 145psi. the tanks orginal valve was damaged and i choose the $12 T&P valve over the high $$ presure only.

Toyman01
Toyman01 GRM+ Memberand PowerDork
8/12/13 6:41 p.m.
mikeatrpi wrote: Love it! Are you going to plumb the garage for air?

The shop was plumbed for air by the PO. The only thing I will probably do is add a reel hose to the outside so I can air tires without opening the door.

SilverFleet
SilverFleet SuperDork
8/13/13 7:47 a.m.

Very cool project. Now you make me want to buy a bigger compressor. Mine has no capacity and takes forever to fill up.

noddaz
noddaz GRM+ Memberand HalfDork
8/13/13 4:04 p.m.

Fantastic. I like it!

Toyman01
Toyman01 GRM+ Memberand PowerDork
8/14/13 5:19 p.m.

Santa stopped by today in his brown truck.

Toyman01
Toyman01 GRM+ Memberand PowerDork
8/14/13 5:19 p.m.

I hope to get it up and running this weekend.

ClemSparks
ClemSparks PowerDork
8/15/13 12:25 p.m.

Nice!

I'm about to regain possession* of my '65 Champion two stage compressor. What kind of resources have you found helpful (parts places, etc) in your re-do?

(*A friend has been housing/using my compressor for a couple years while I had no place to store it...now I have a place and he's moving).

Cuda
Cuda Reader
8/15/13 12:31 p.m.

Serious question. Is there a risk of tank failure on a compressor that old? I have always worried about that.

Toyman01
Toyman01 GRM+ Memberand PowerDork
8/18/13 8:31 p.m.

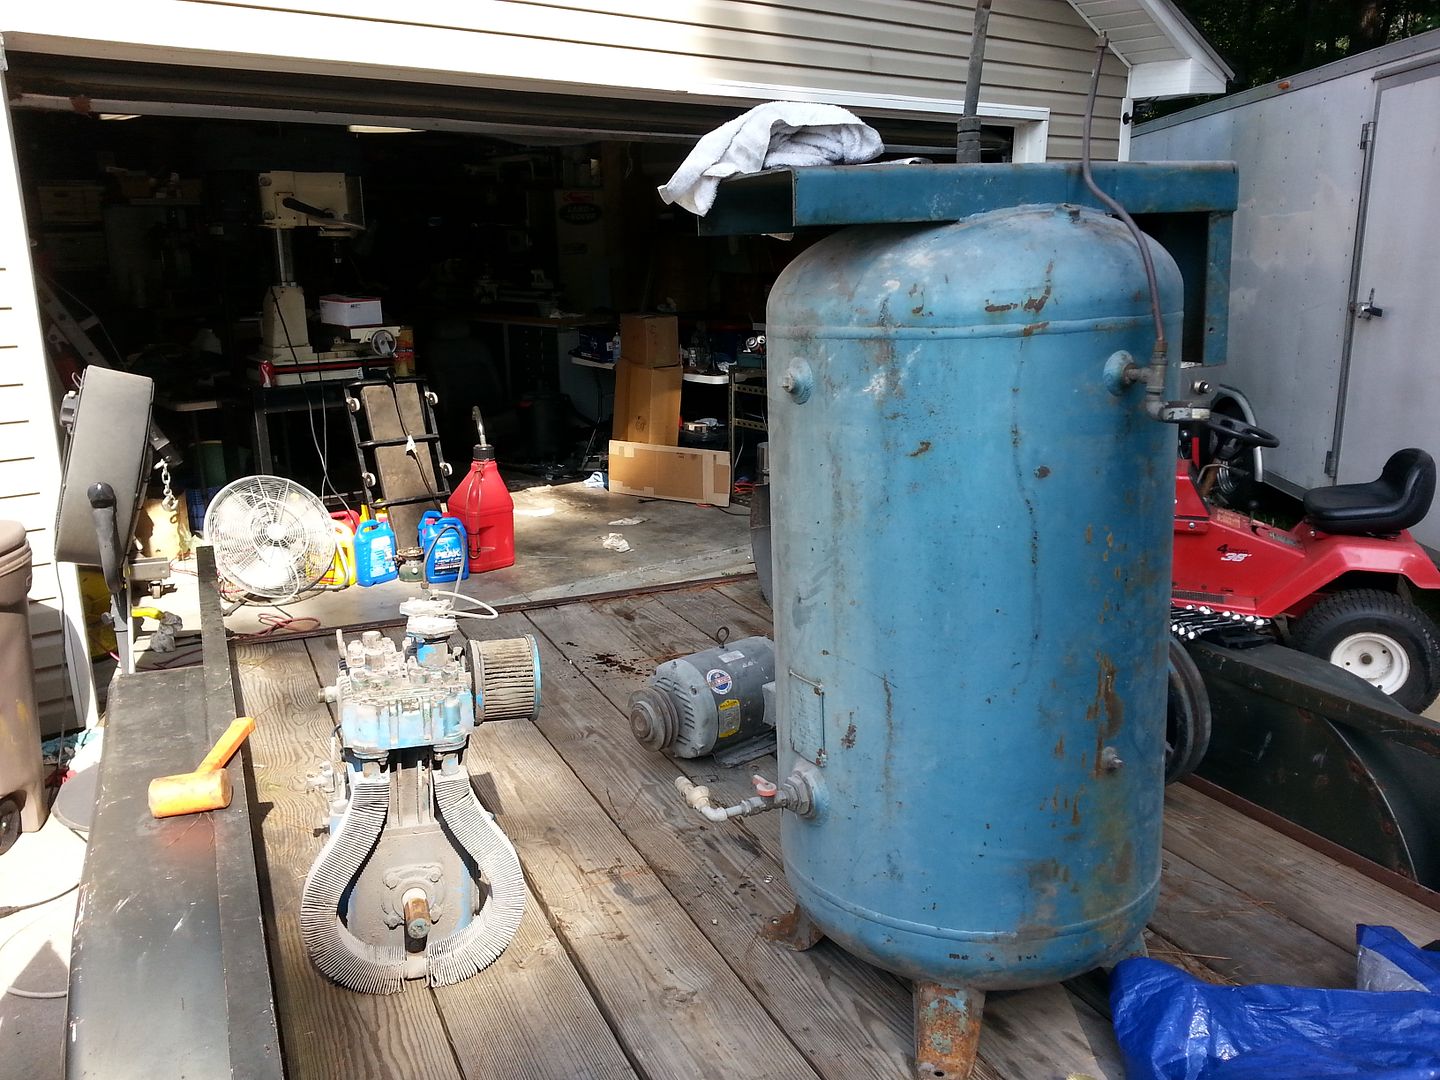
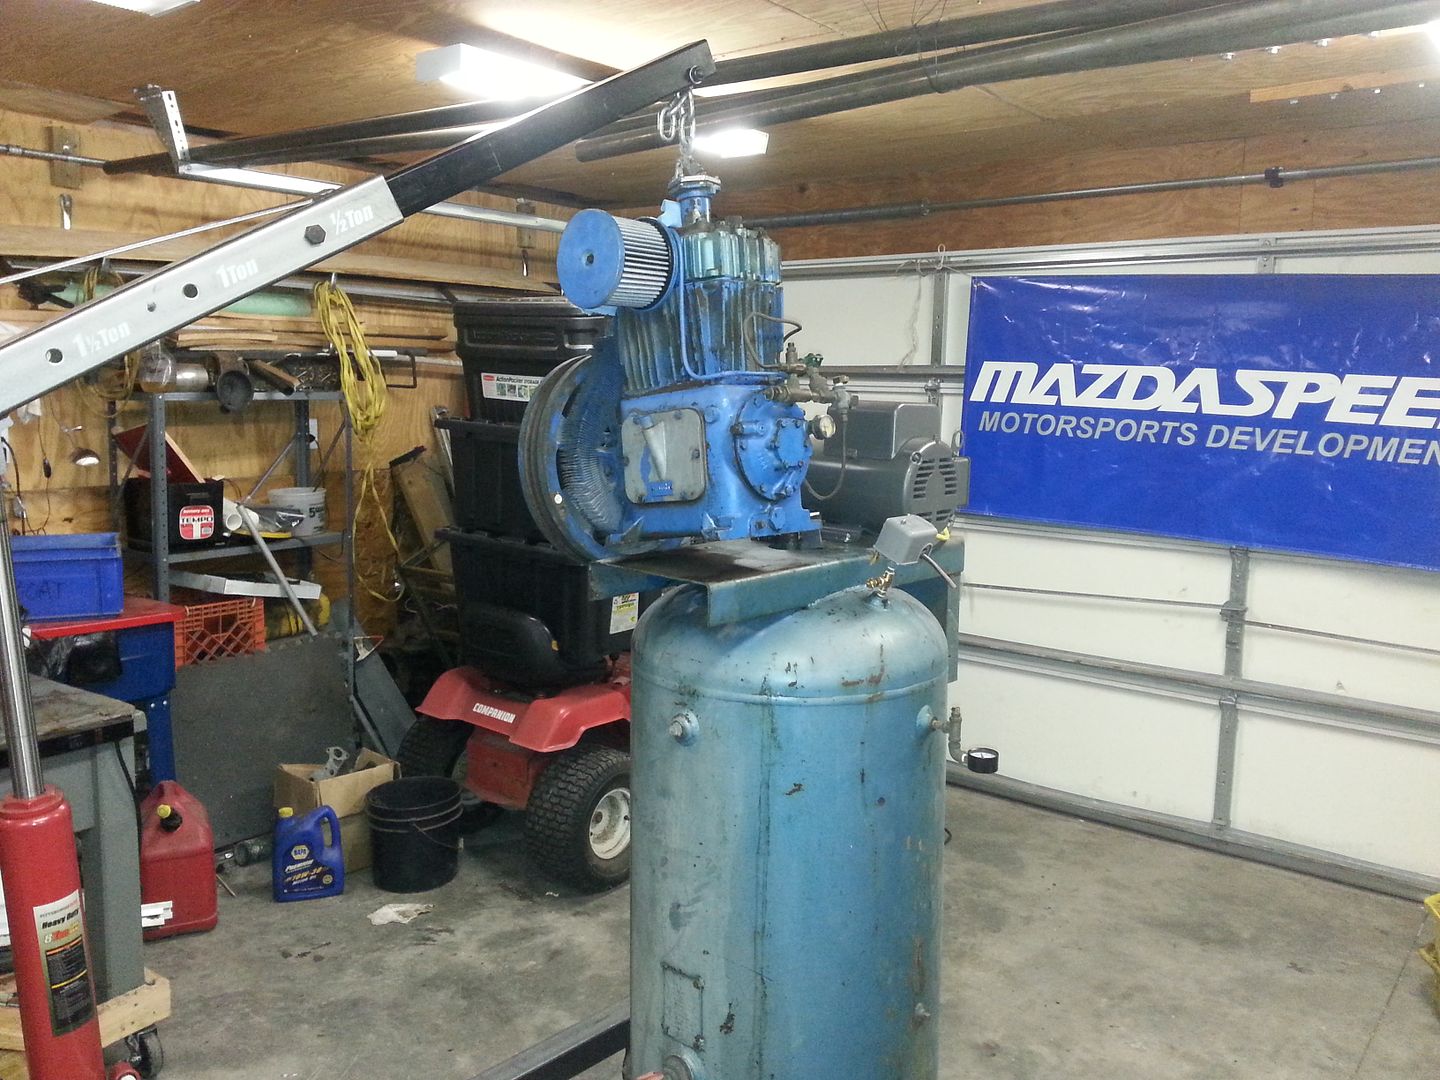
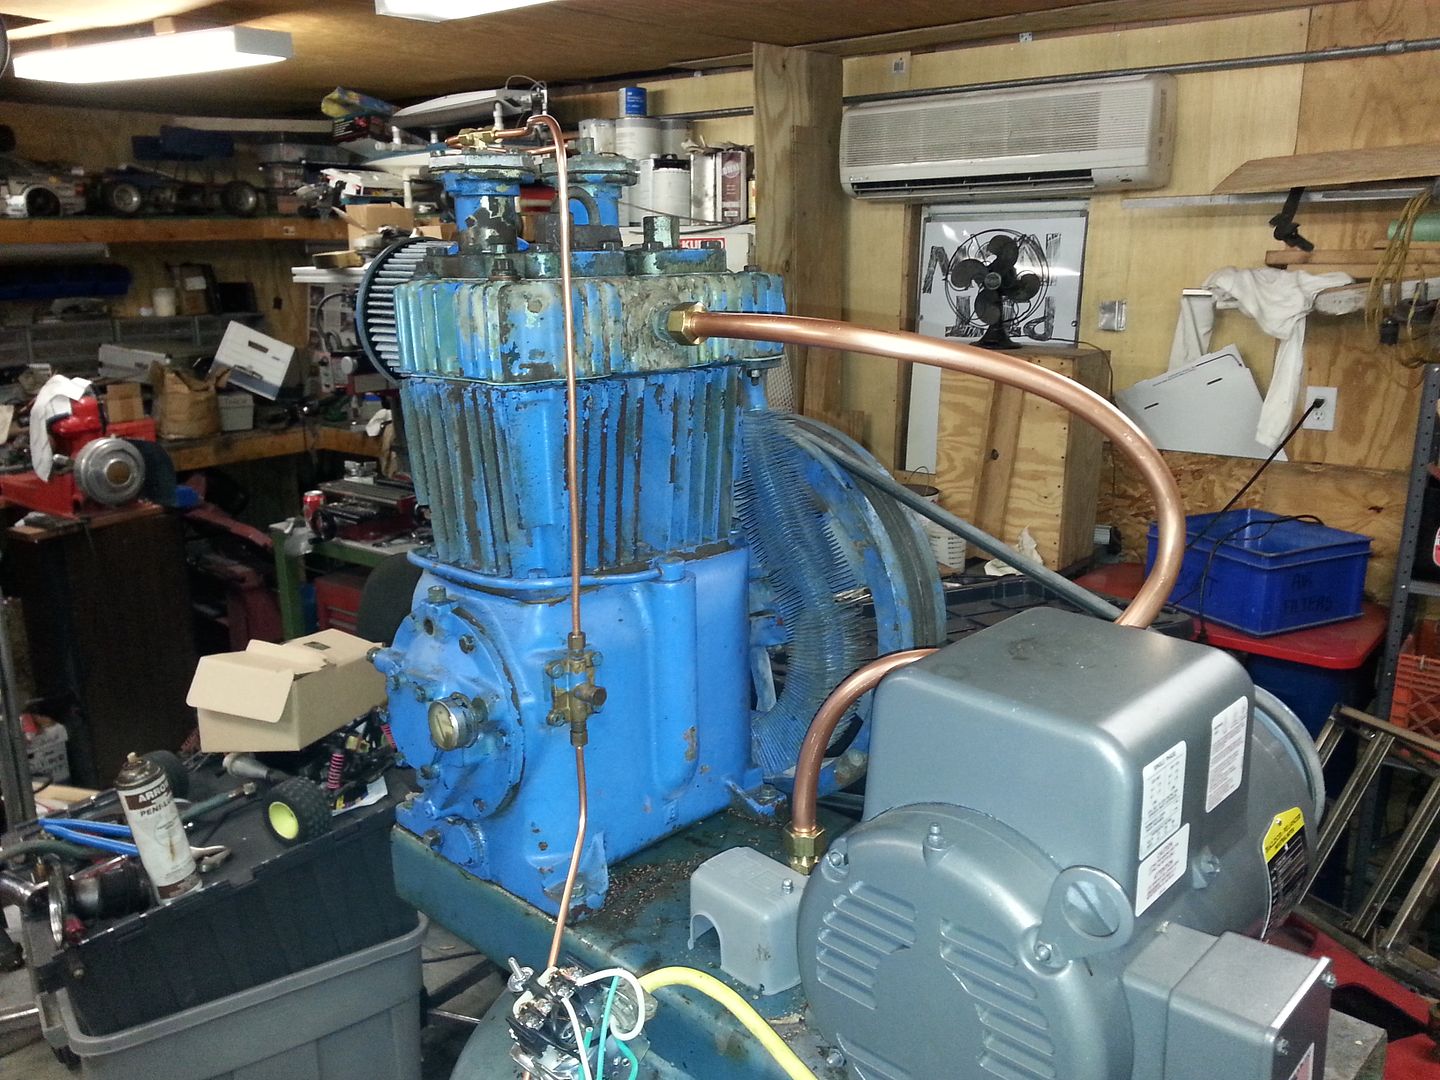
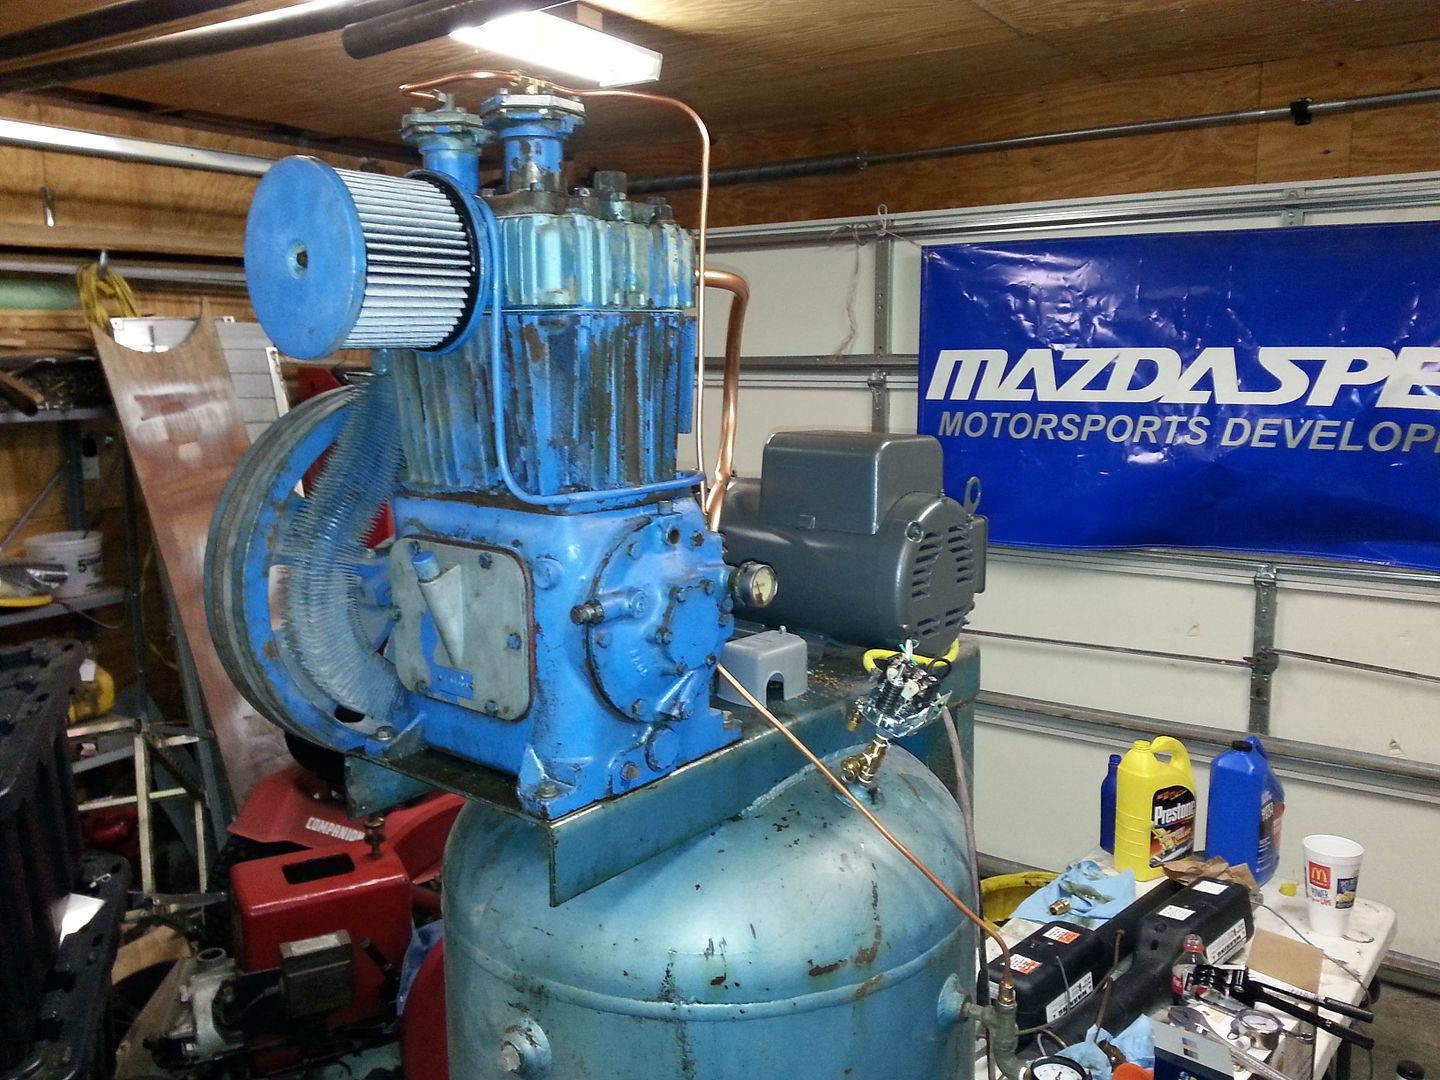
I haven't had much time to work on the thing, but I did get to it today.

Here are a couple of answers first.

Clem, the parts came from http://www.compressorpartsstore.com/. This is the first time I've ordered from them, but they were pretty fast about getting the stuff out the door. Their prices were better than anyone else including Quincy and Ebay. As far as info, Google is your friend. There isn't a compressor forum that I can find. I did find a guy on YouTube that has some pretty good videos for the Quincy owners. Mostly it's a lot of digging.

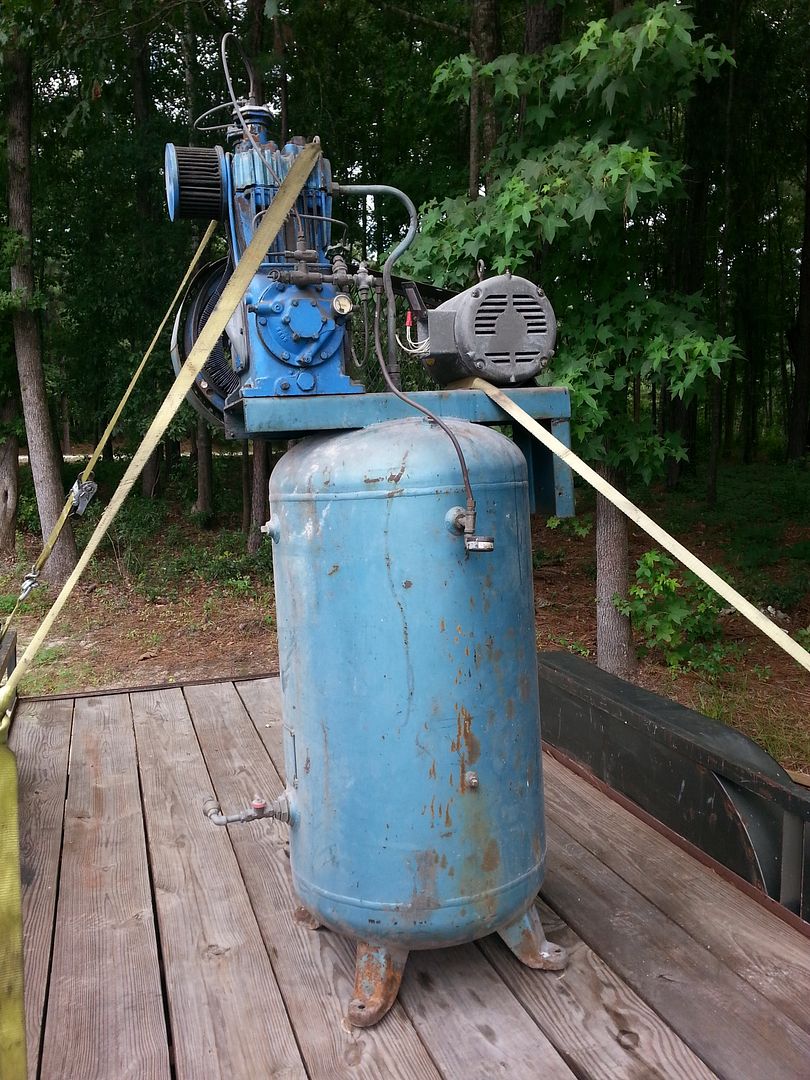
Cuda, There is always a risk of tank failure. I'd probably trust an old tank as much as I would a new one though. It was pressure tested to 300psi when it was new, it has no damage that I can see and I'm only going to run it at 125psi. I'm confident it will be fine and it will be sitting behind my shop rather than in the same room if it isn't. If I was going to run it at max pressure, I'd get it hydro tested.

On to the update.

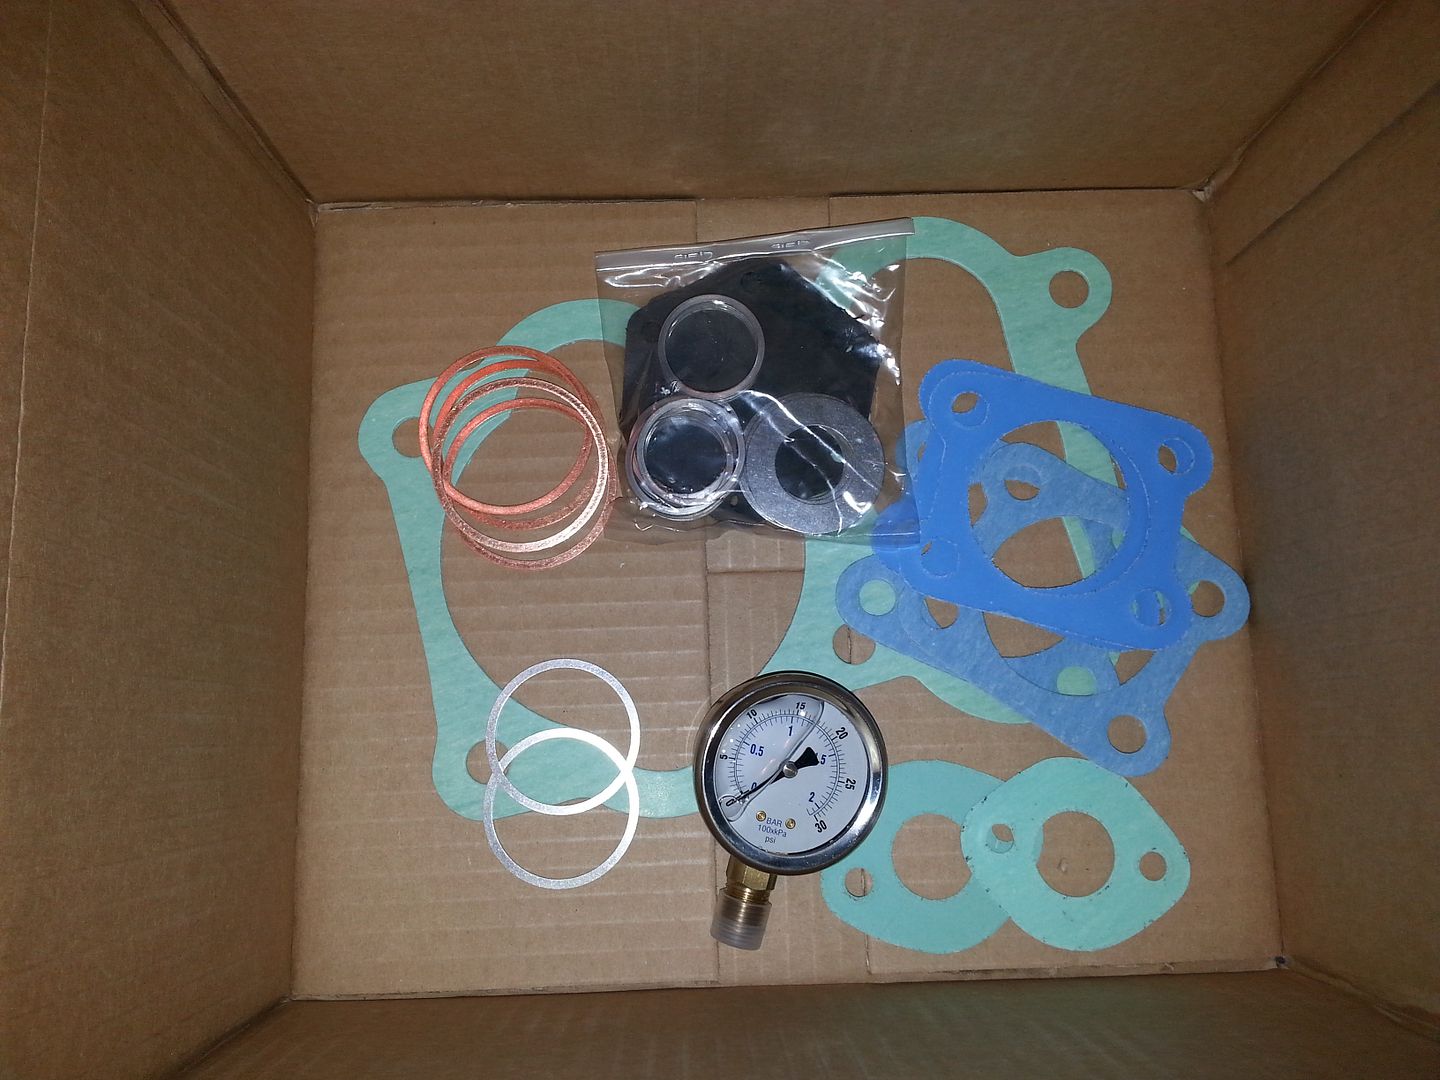
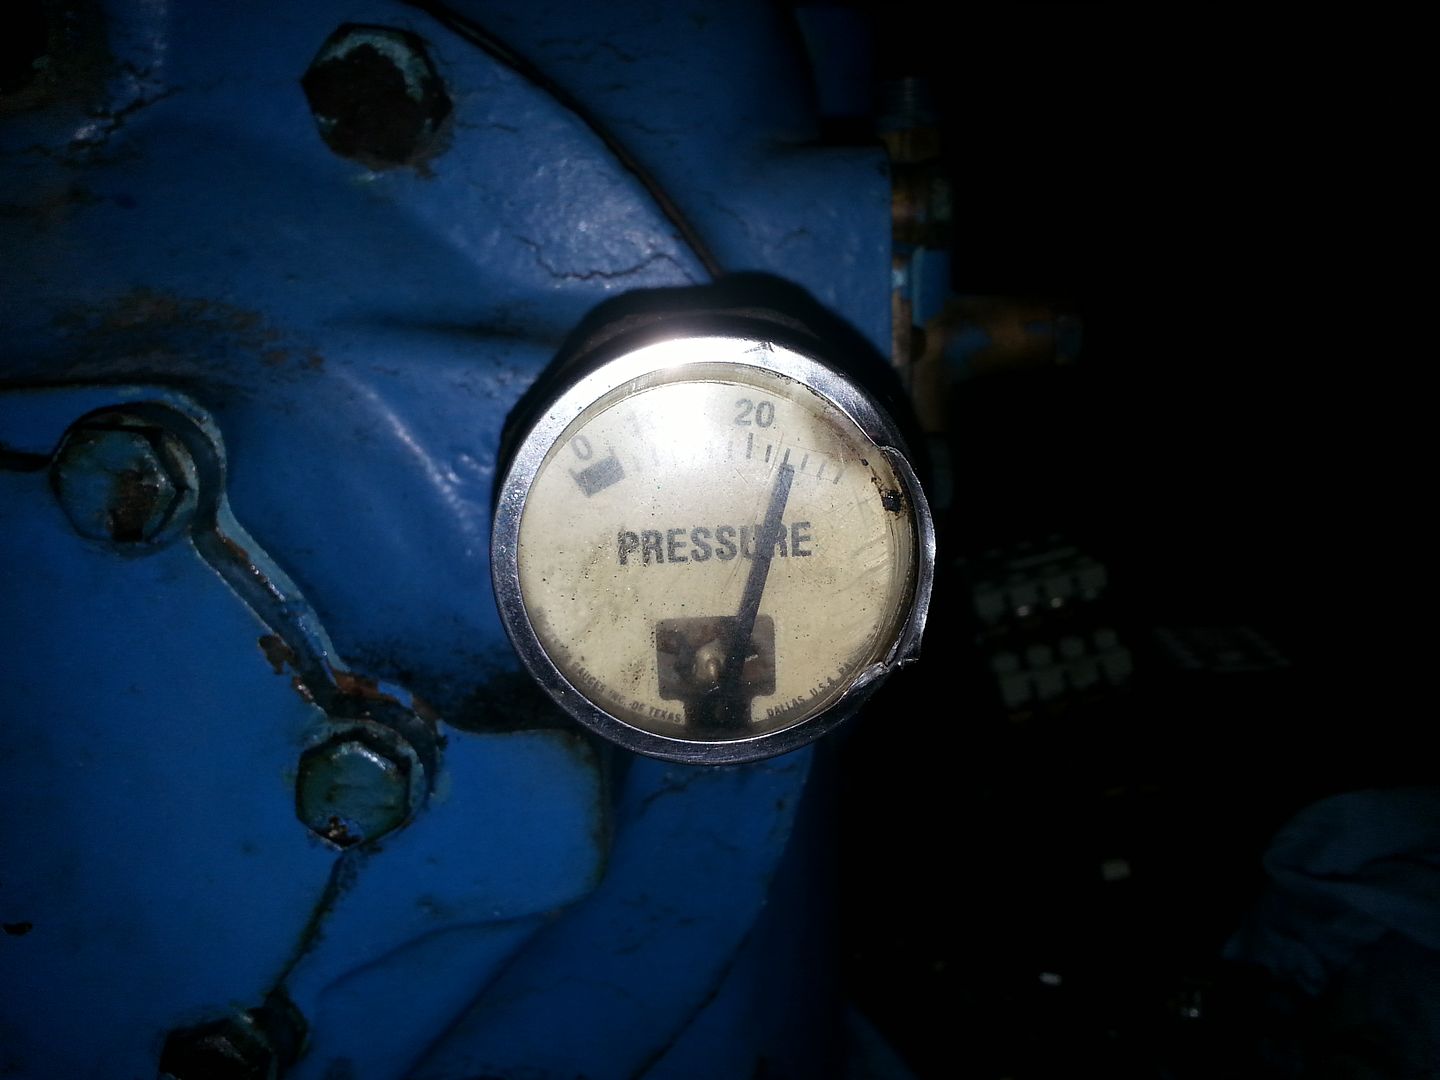
I got all the holes in the system plugged, installed a gauge and fired it up. It made a whopping 40psi and quit pumping. I could hear air leaking so I started tracking down the leaks. This is the worst and it's going to require ordering more parts.

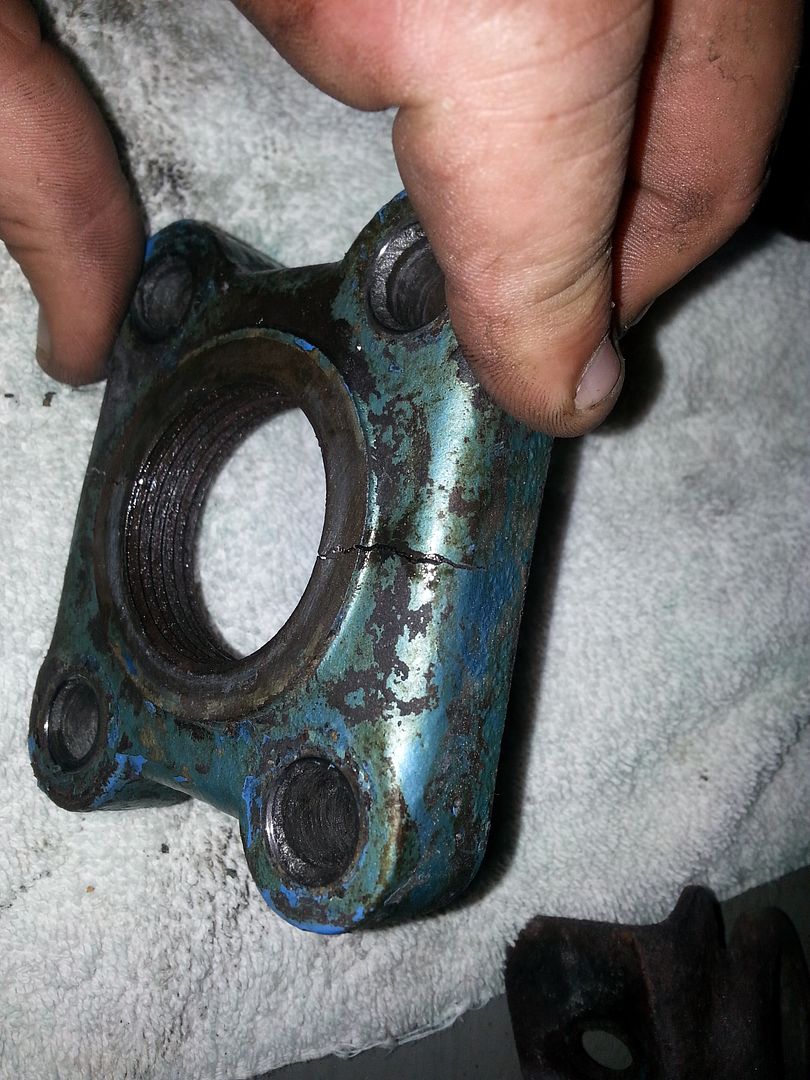
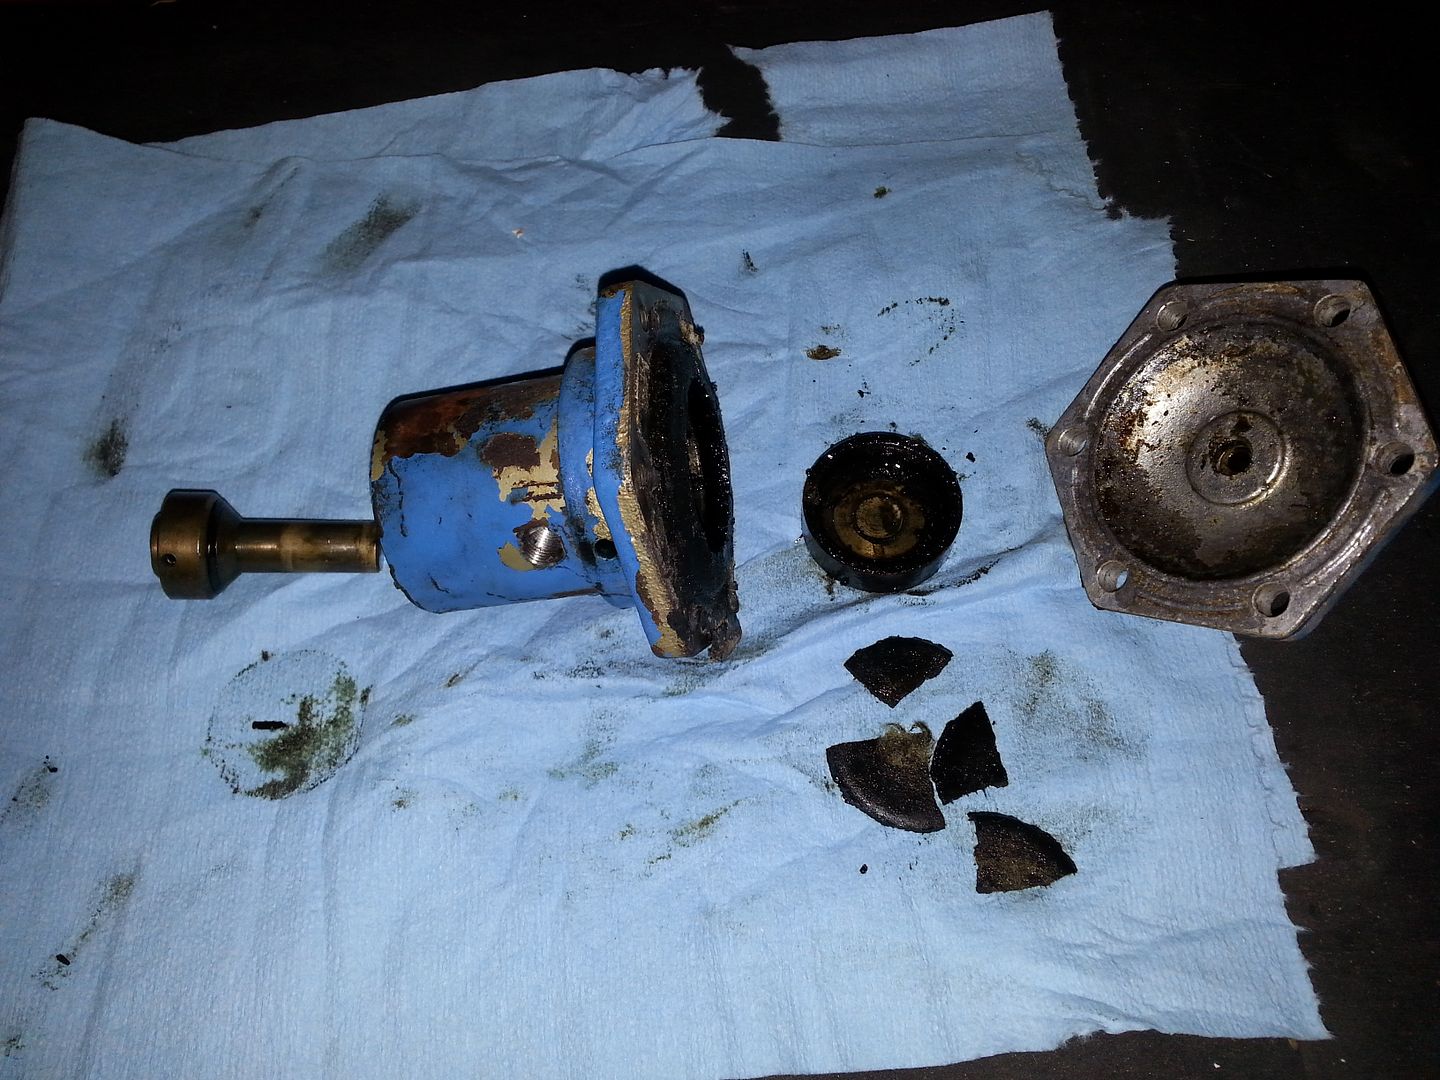
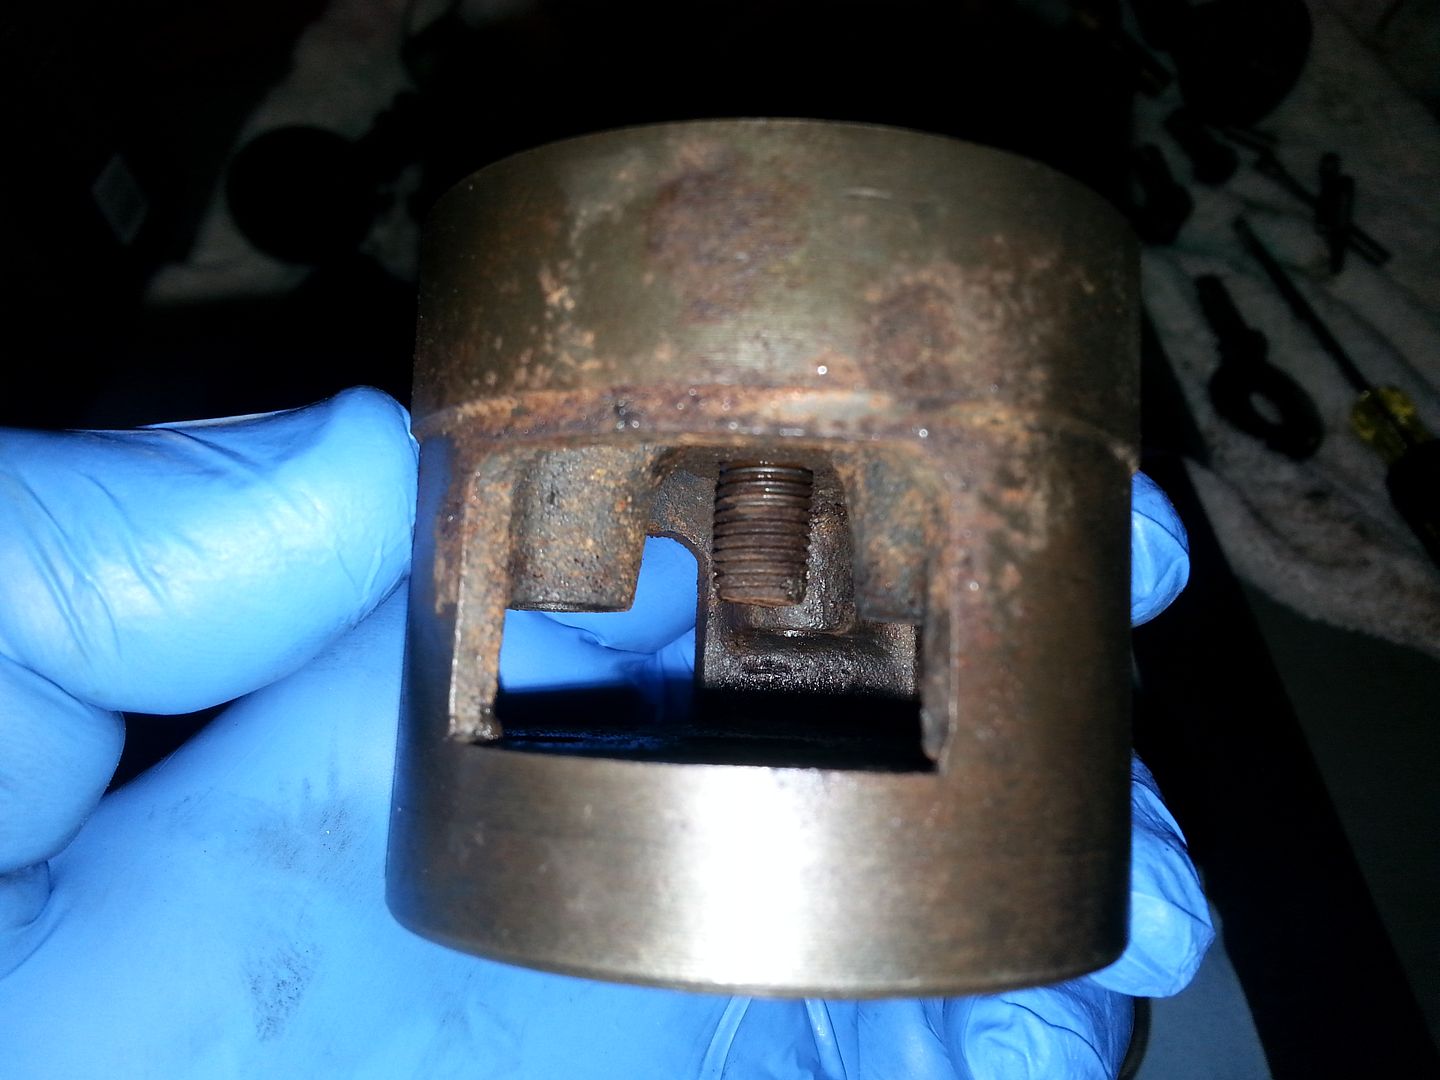
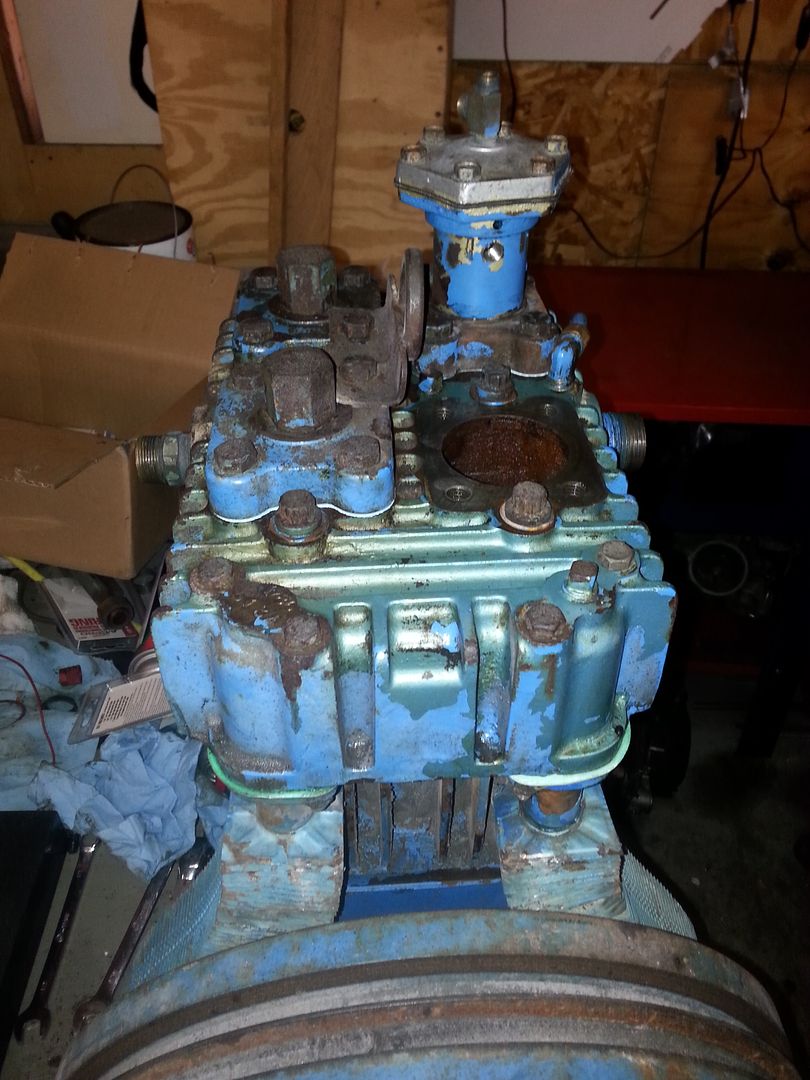
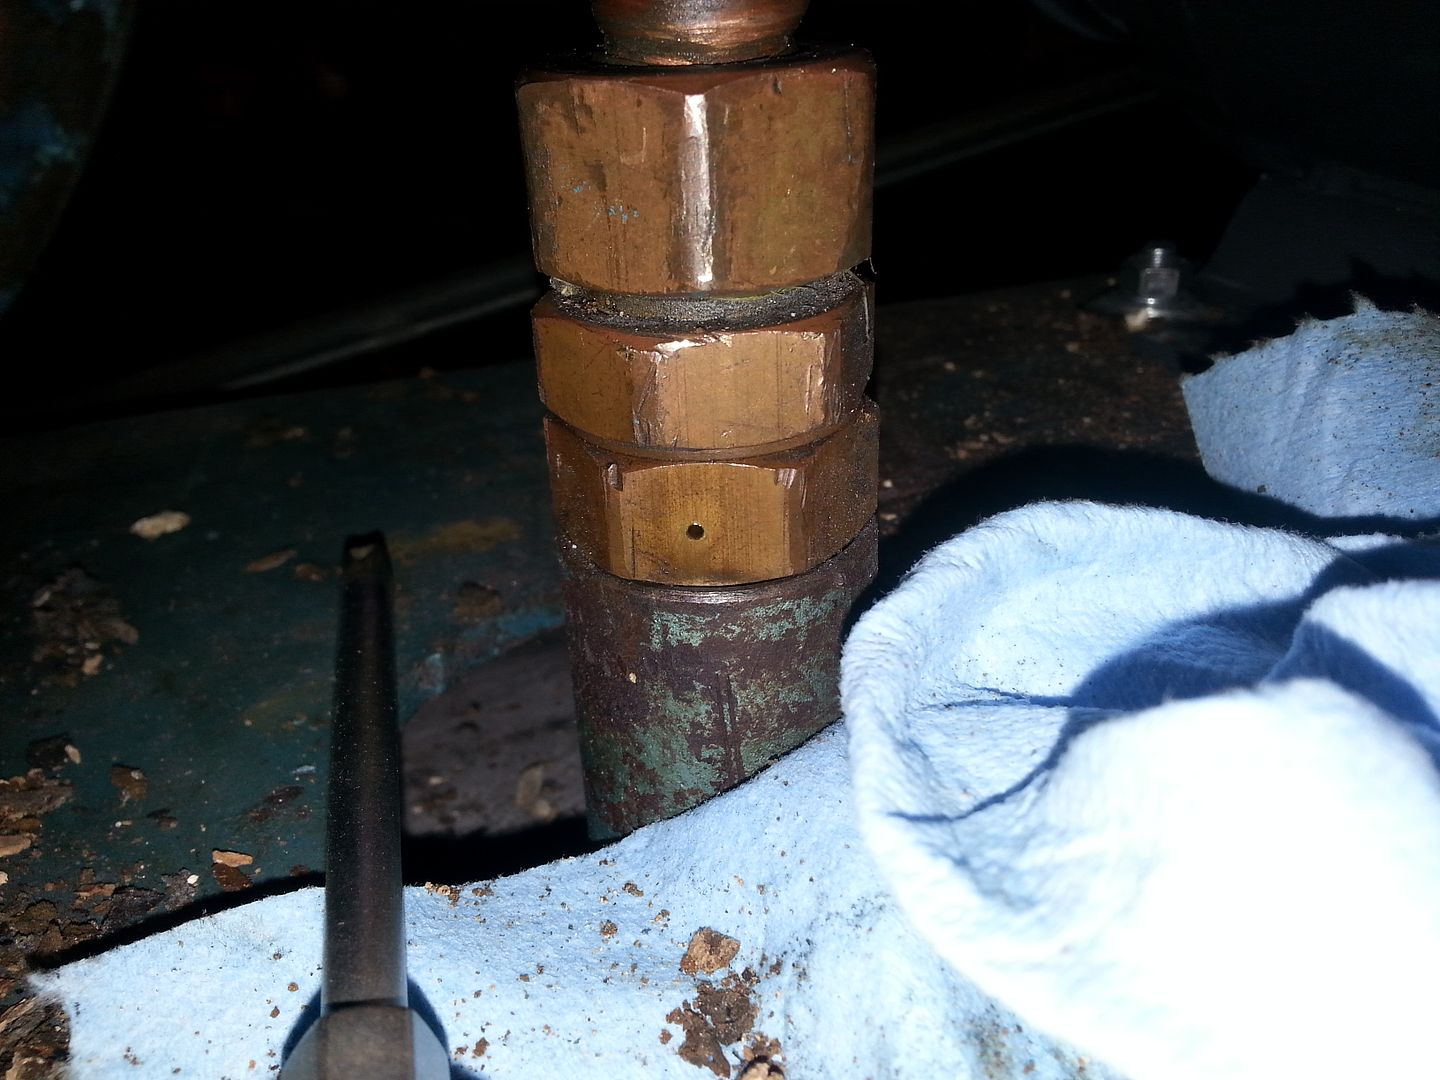
This is the base for the unloader on the high pressure cylinder. I pulled it off and pulled the valve assembly while I was at it. They look pretty ugly.

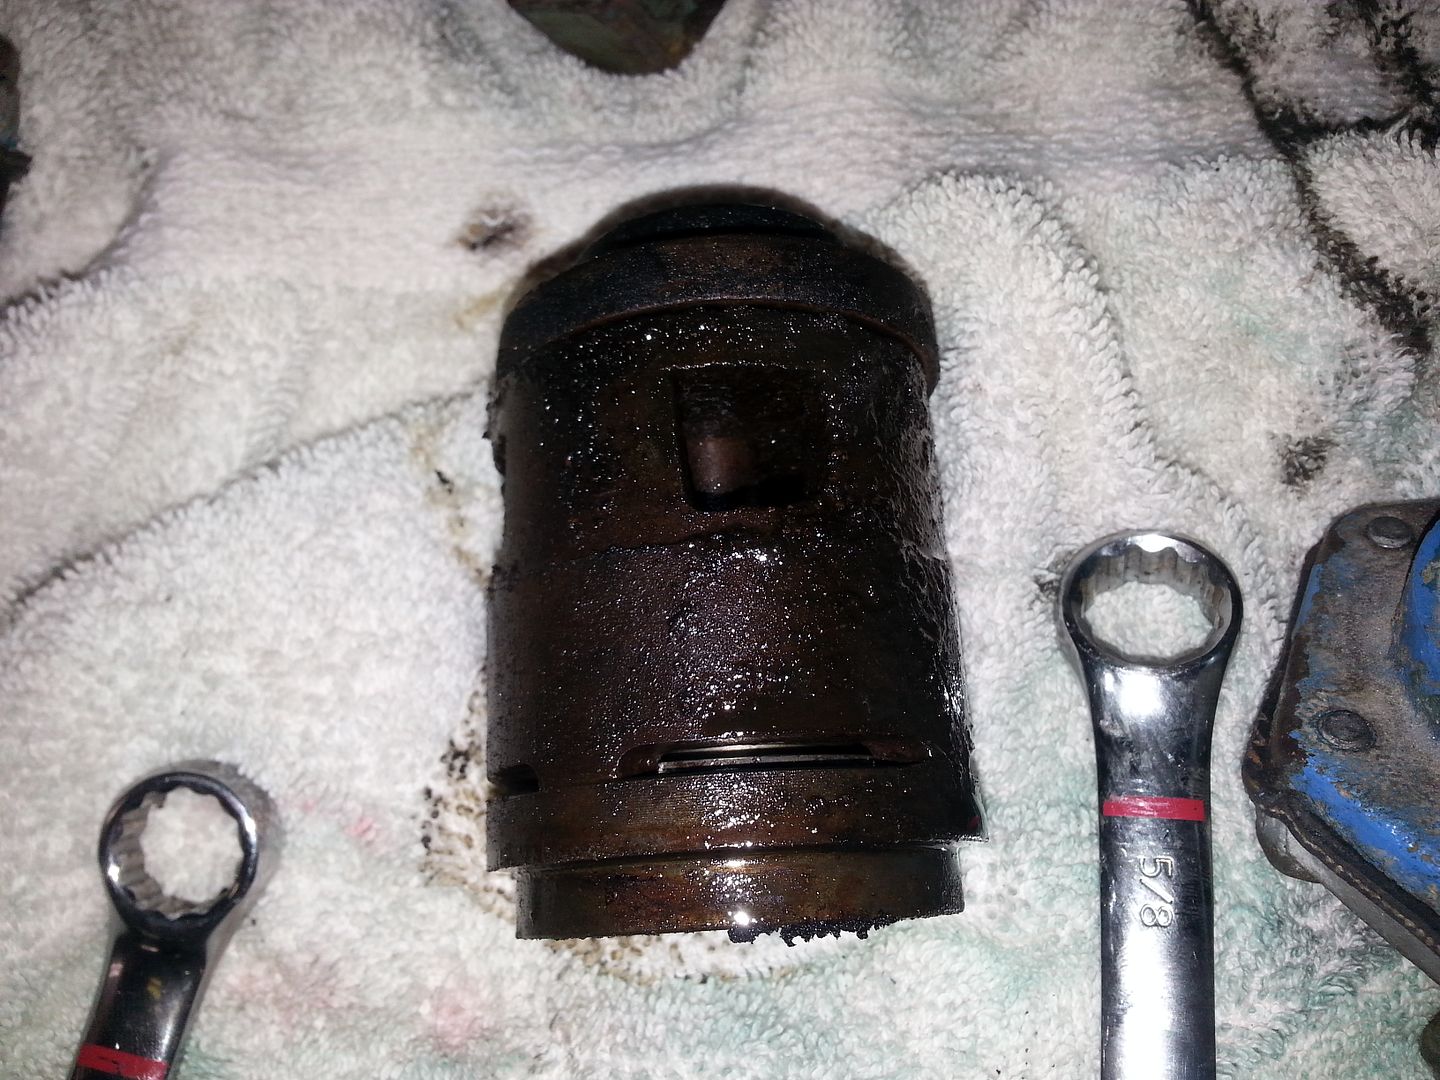
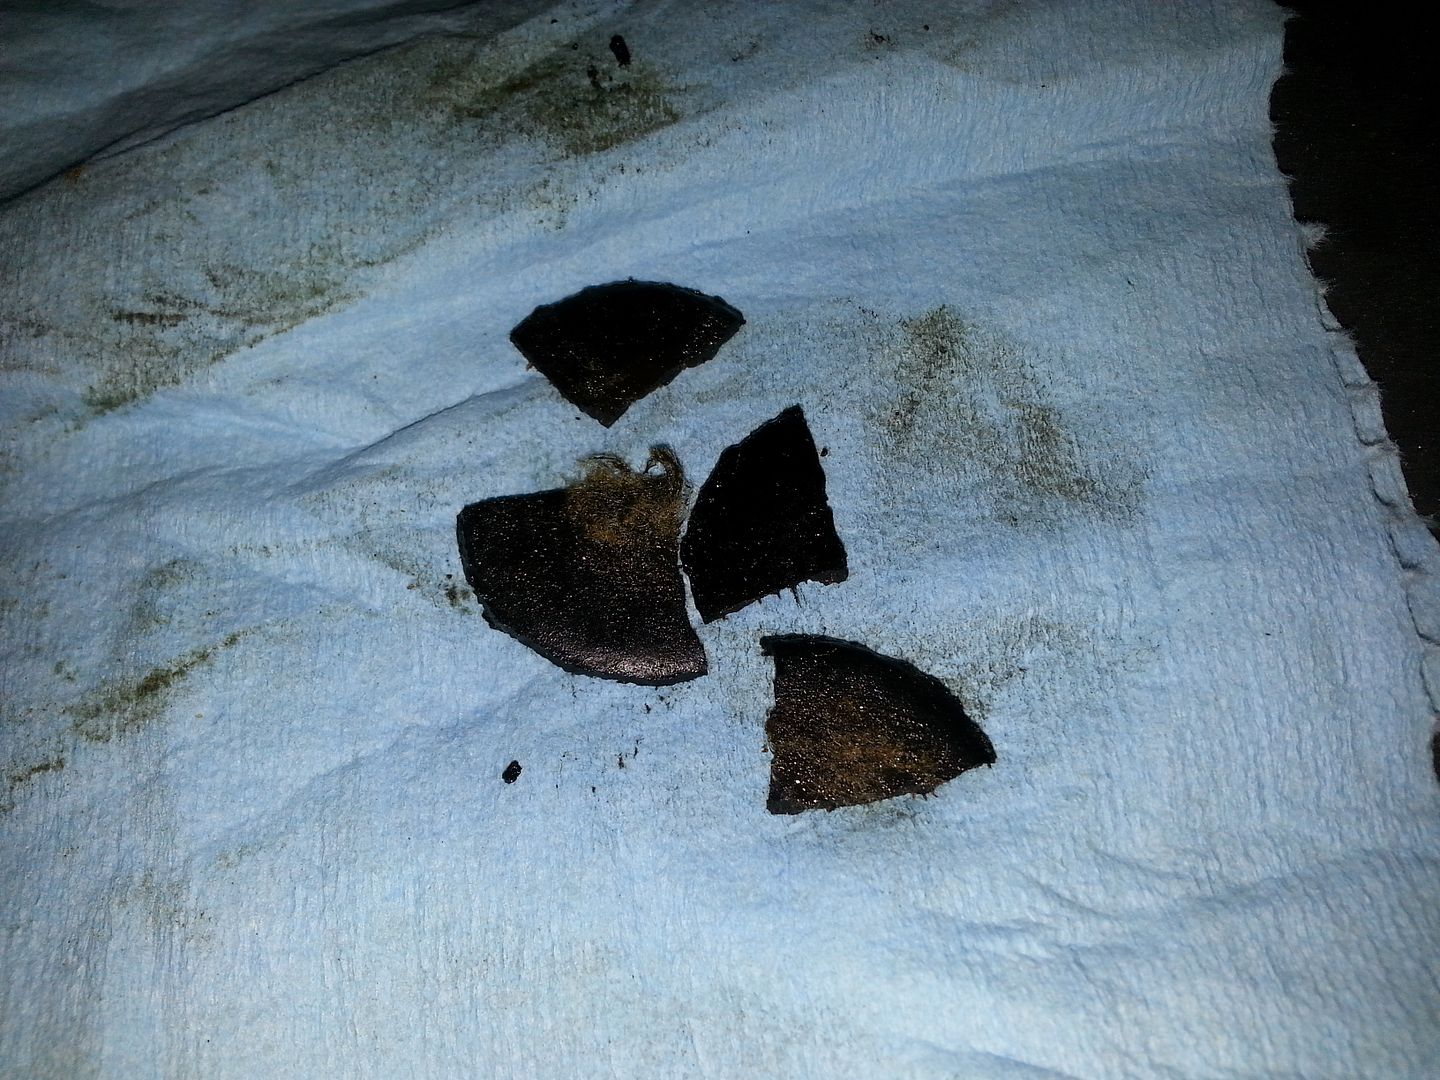
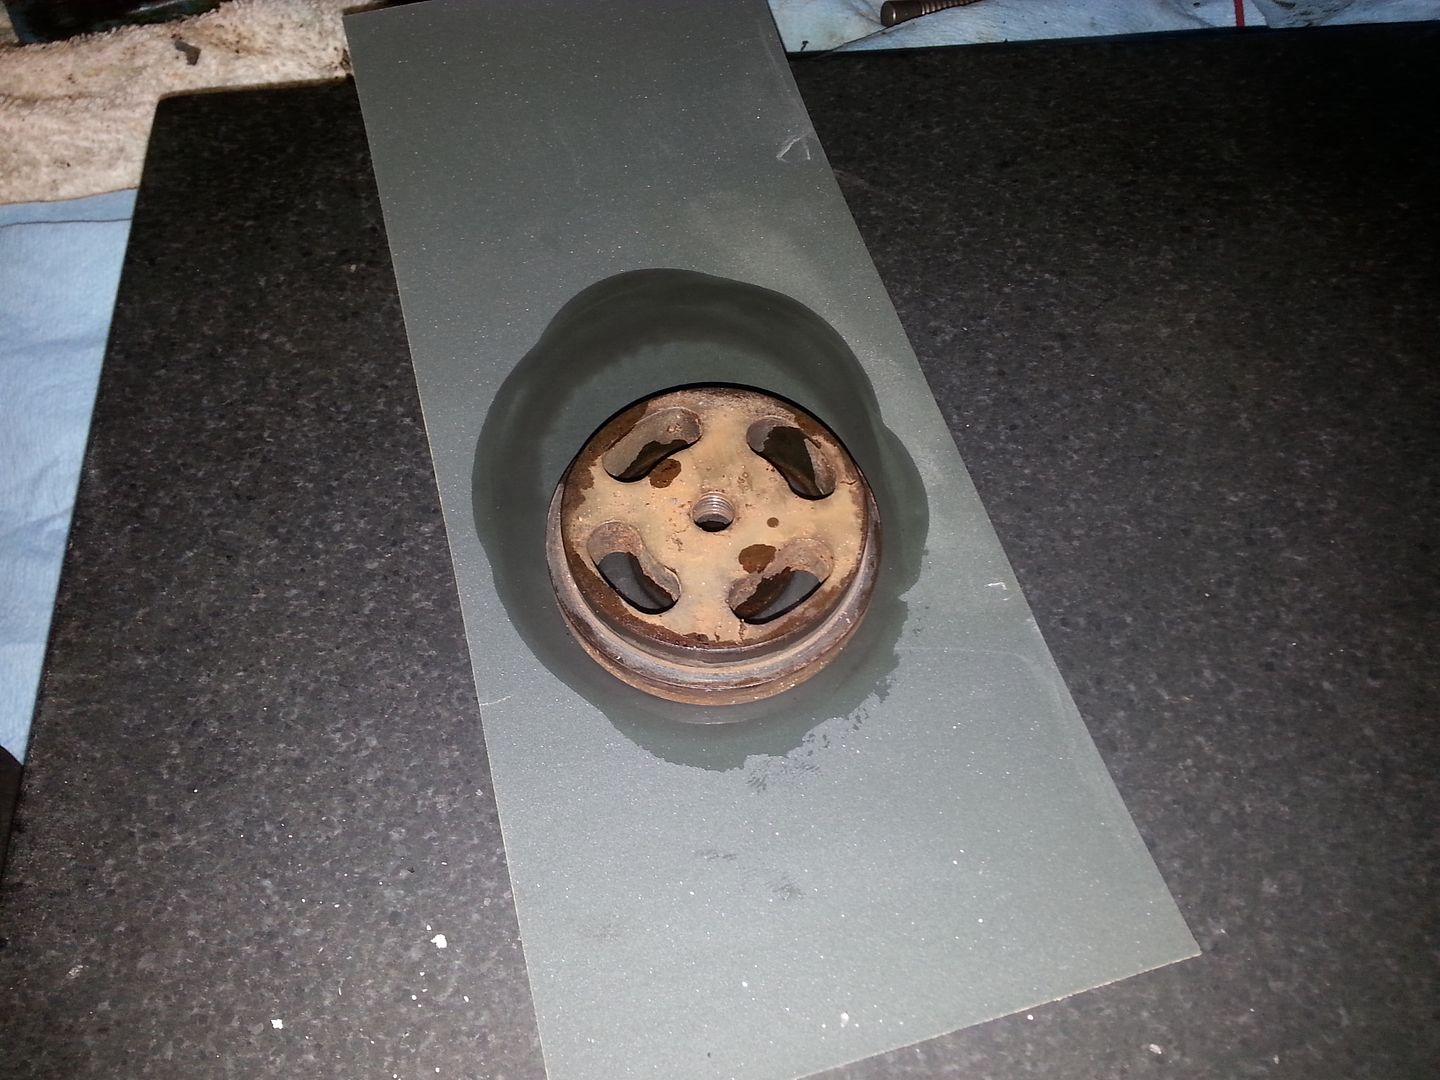
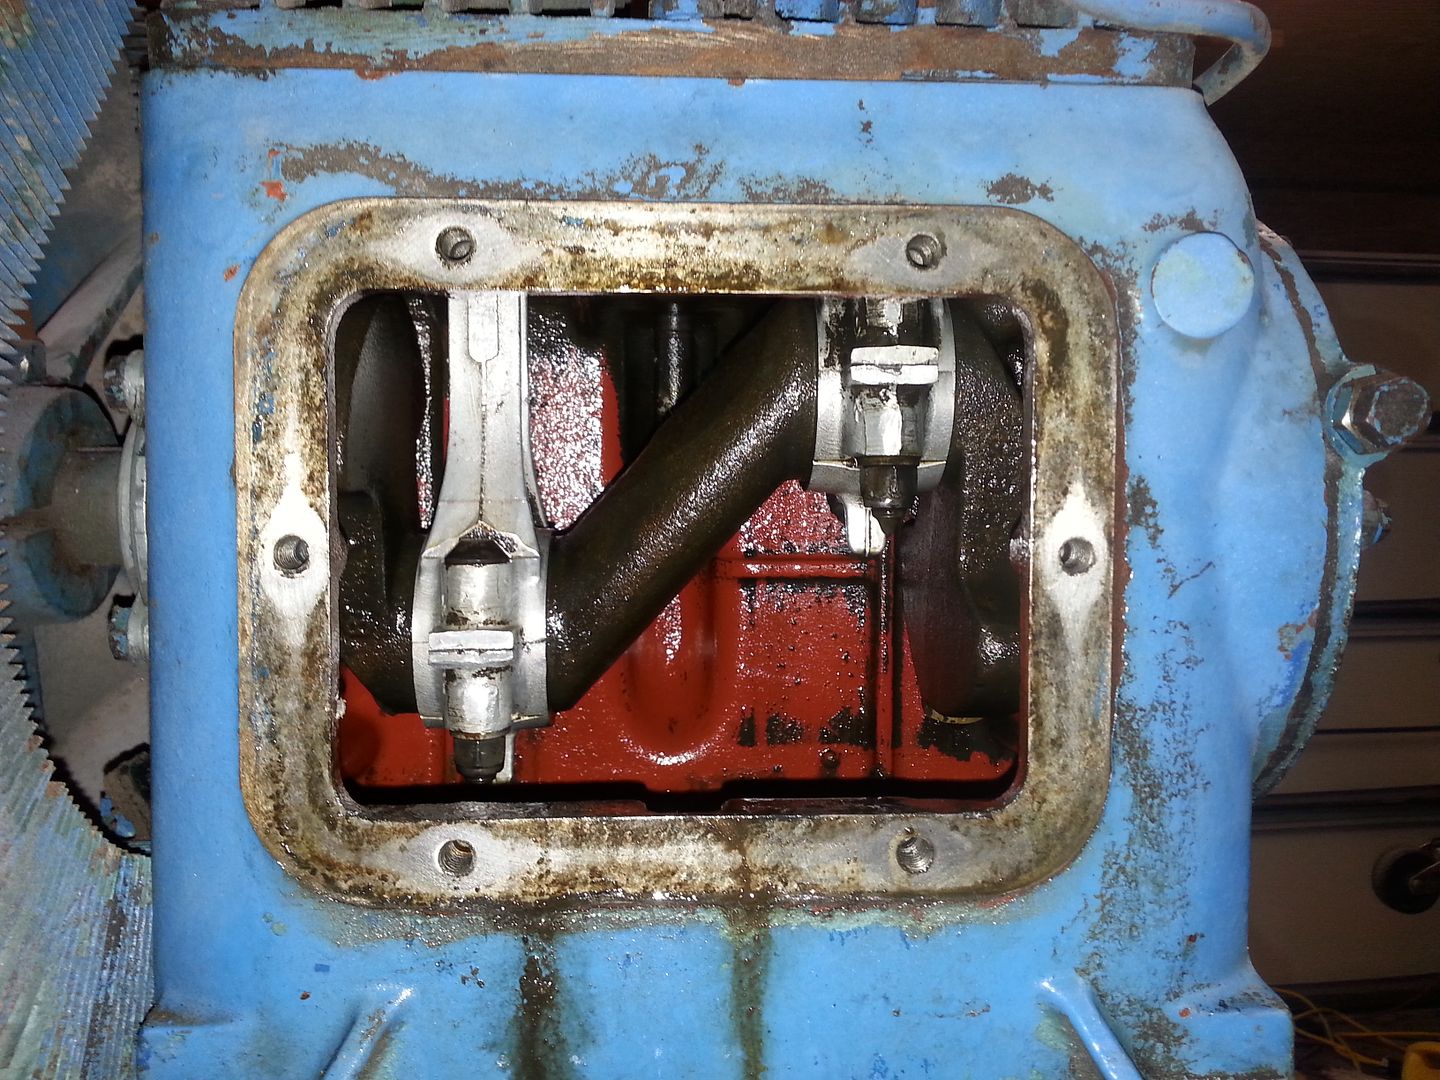
I went ahead and pulled all the valves, both high side valves were gross, the low side weren't too bad.

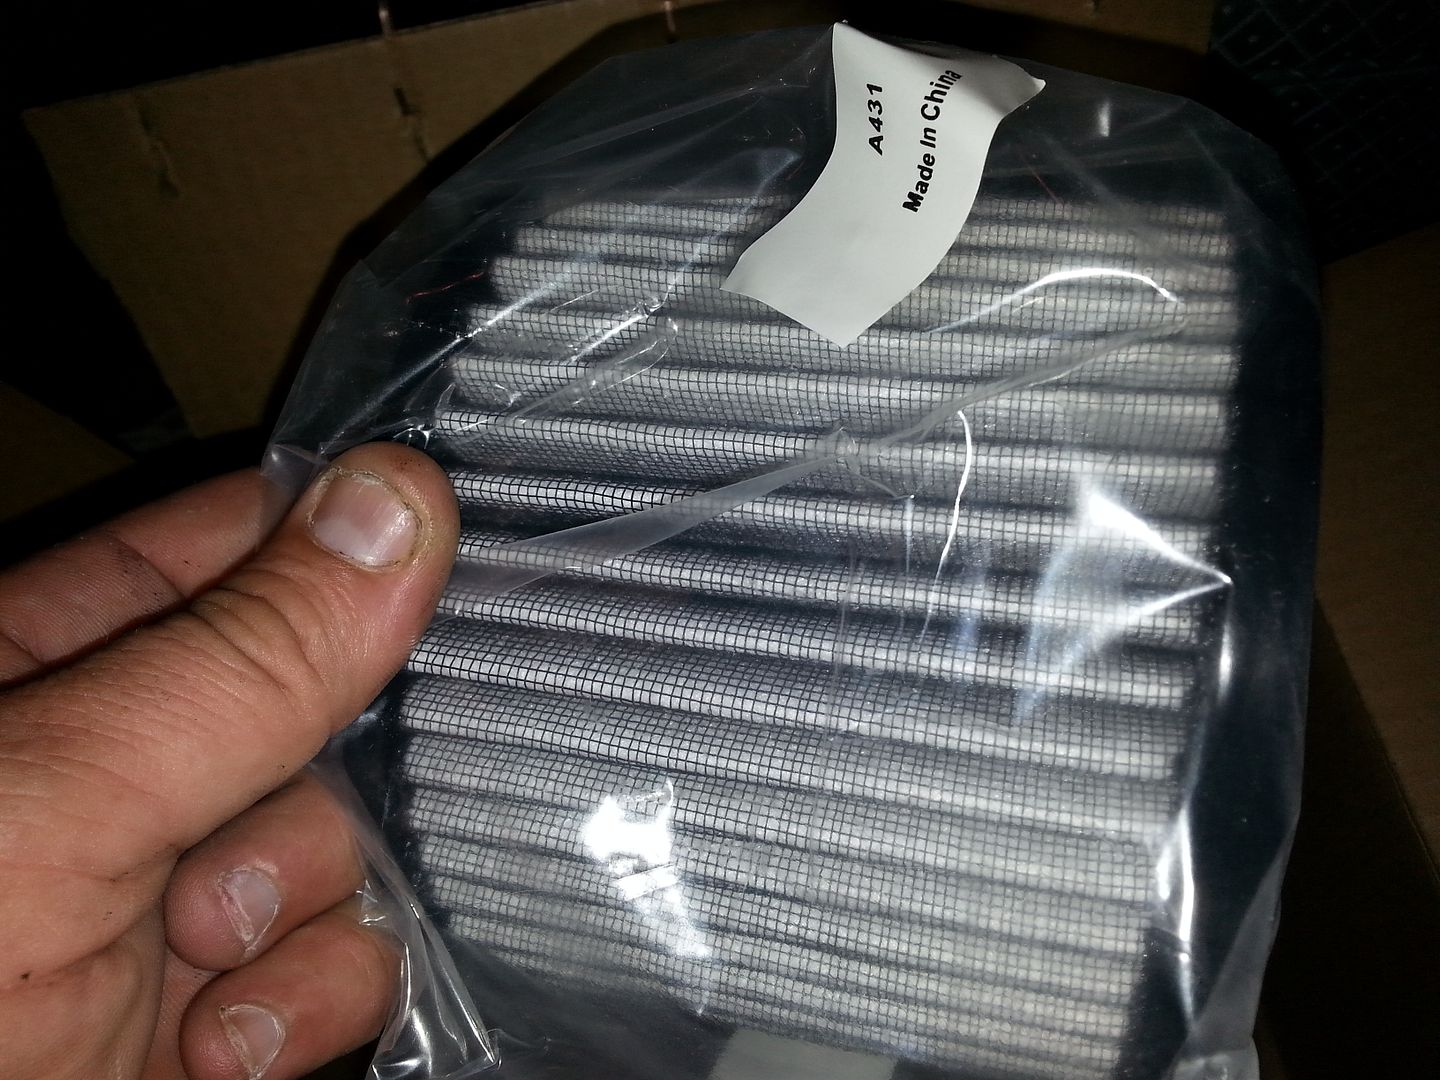
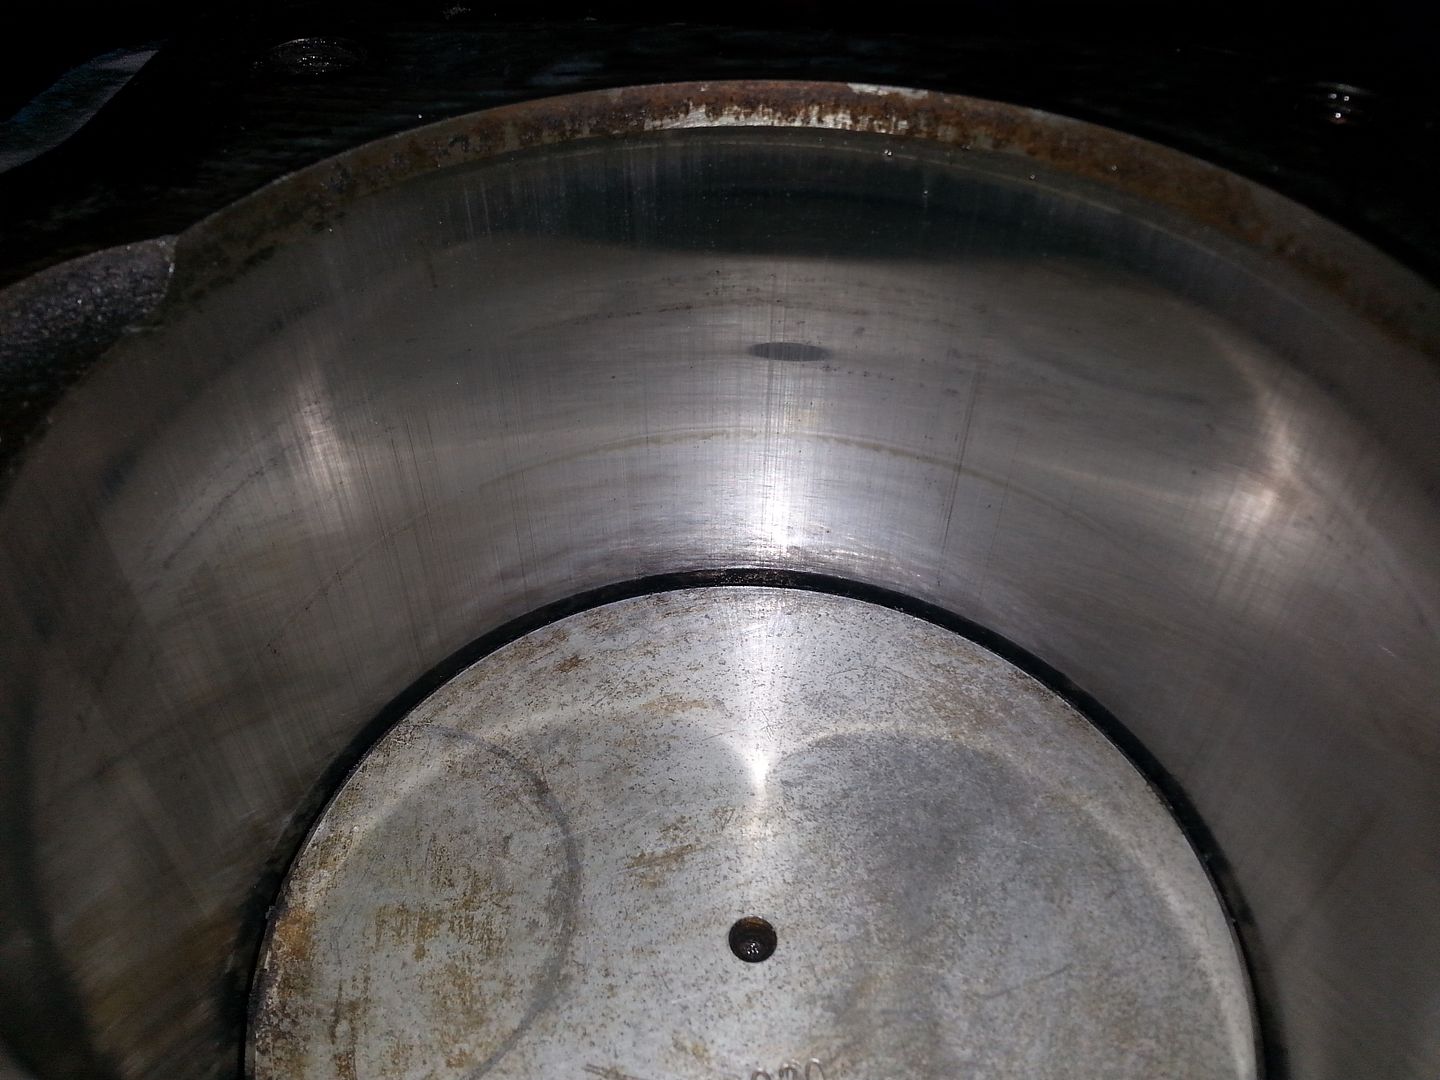
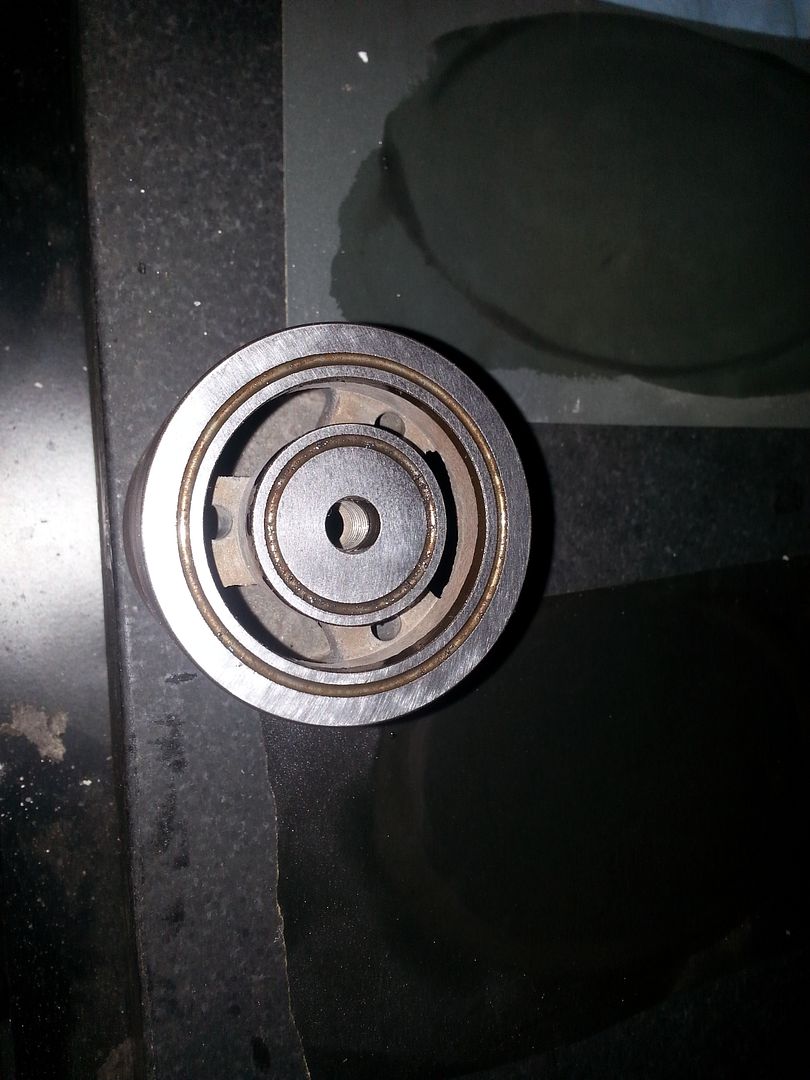
Quincy doesn't use reed valves like every other compressor I've ever worked on. They use what looks like a big washer. There is a new one in the below picture. The old ones were in pretty bad shape. It rides in the cylinder looking thing.

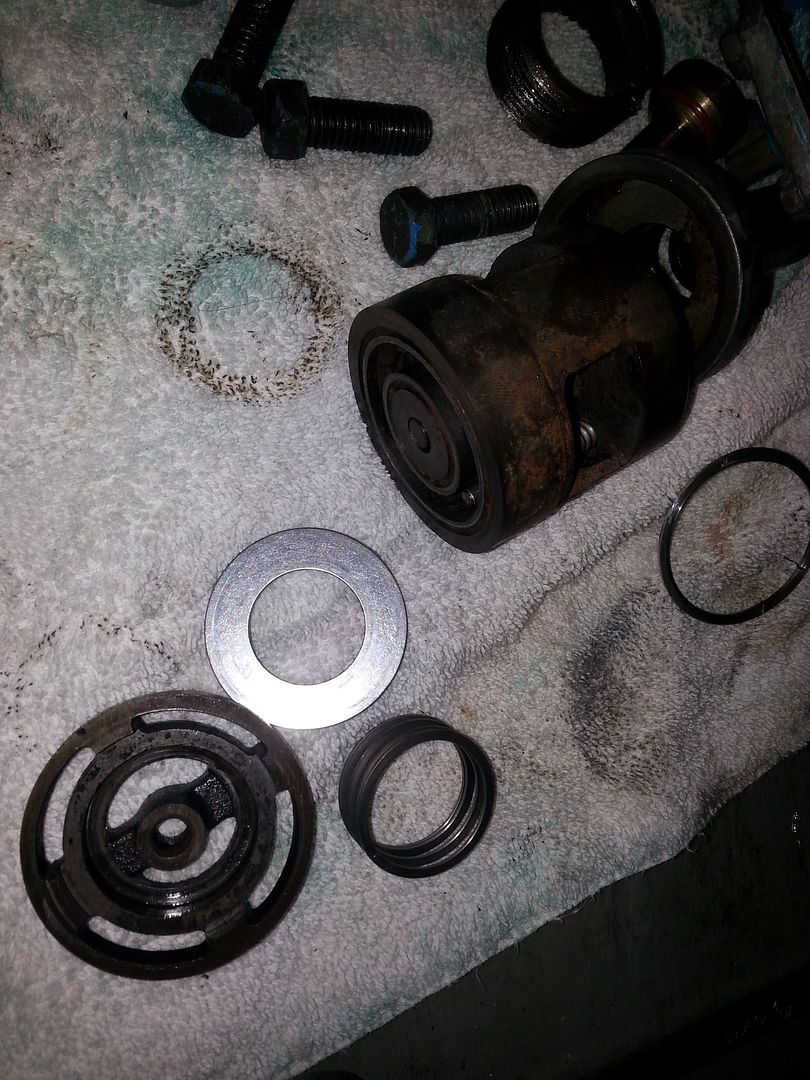
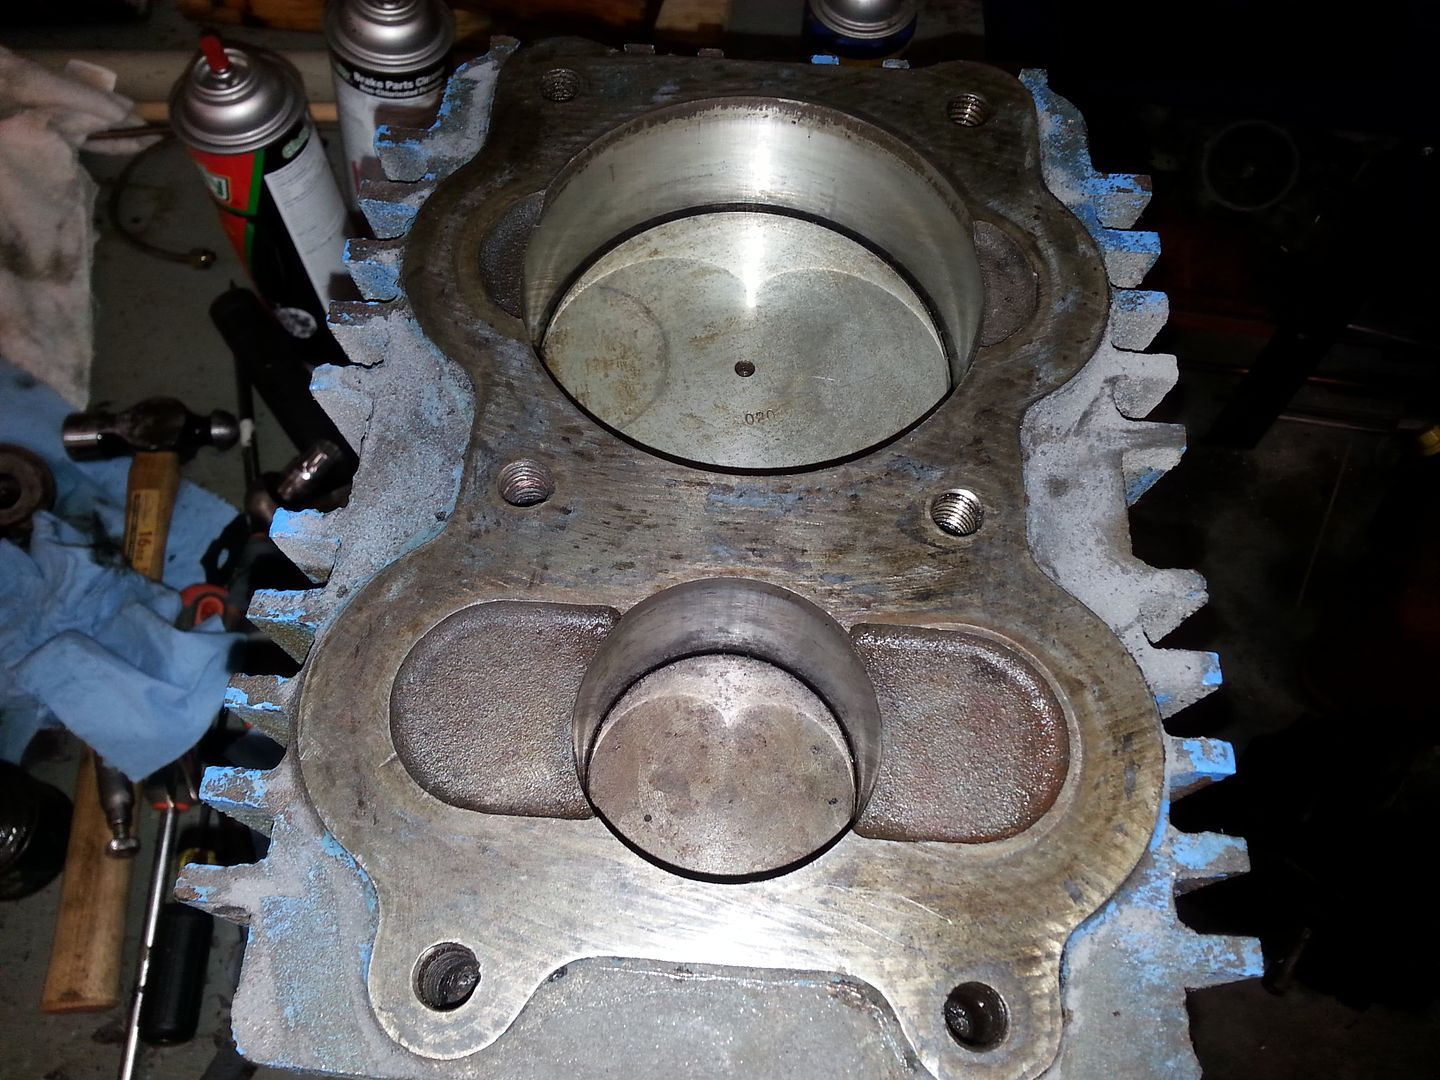
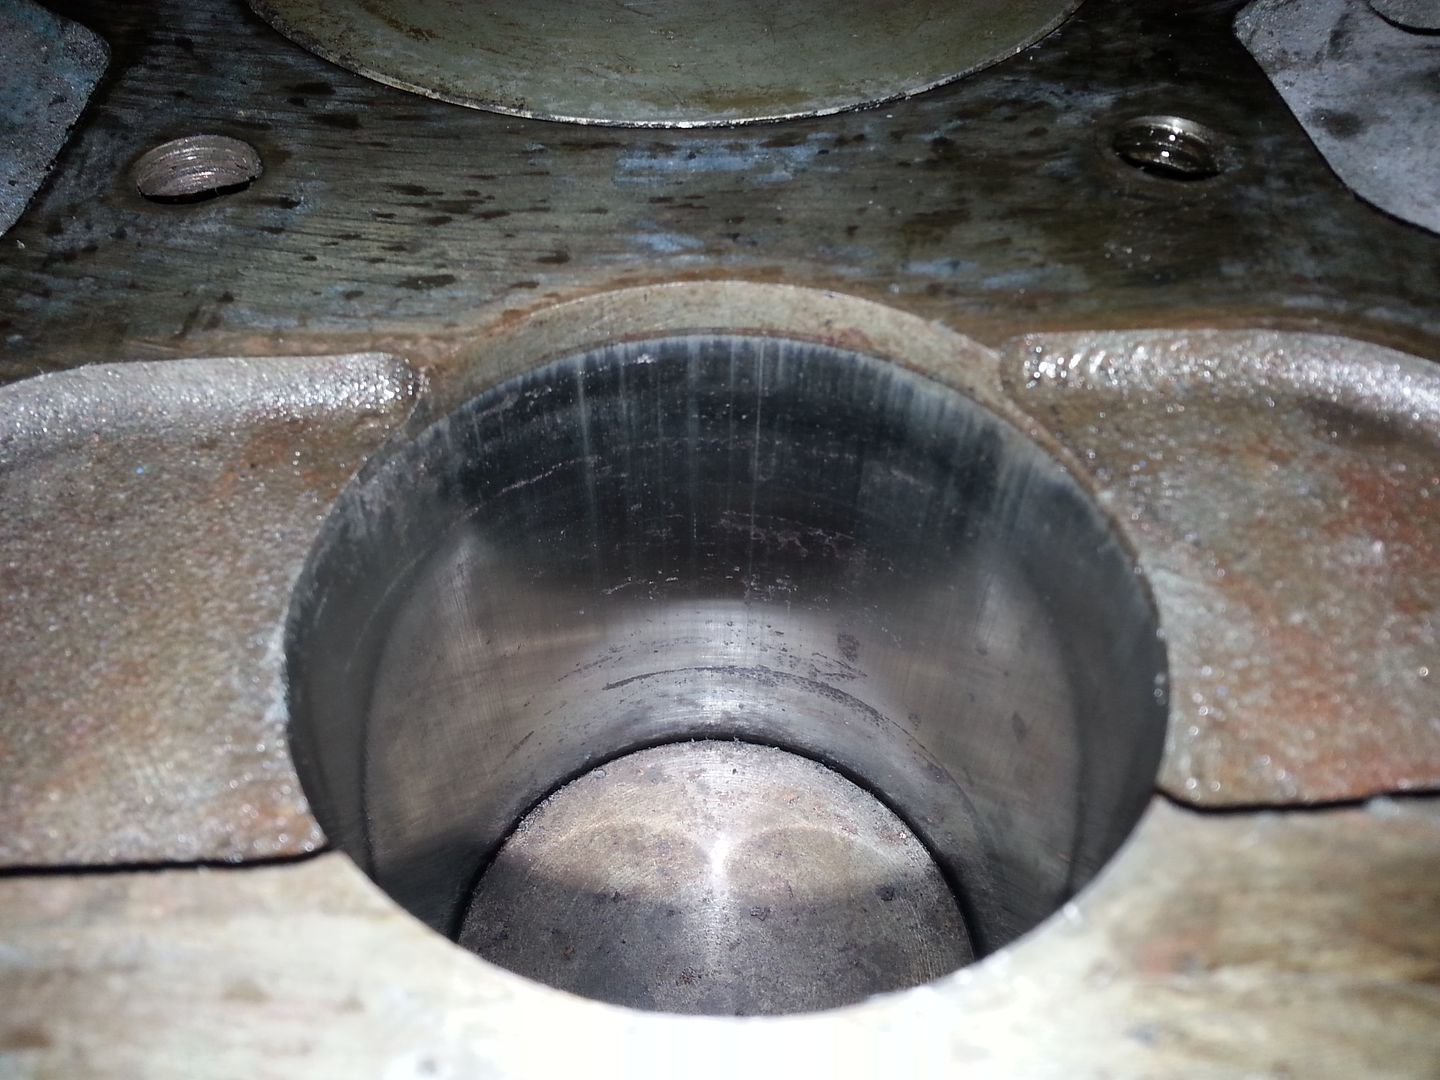
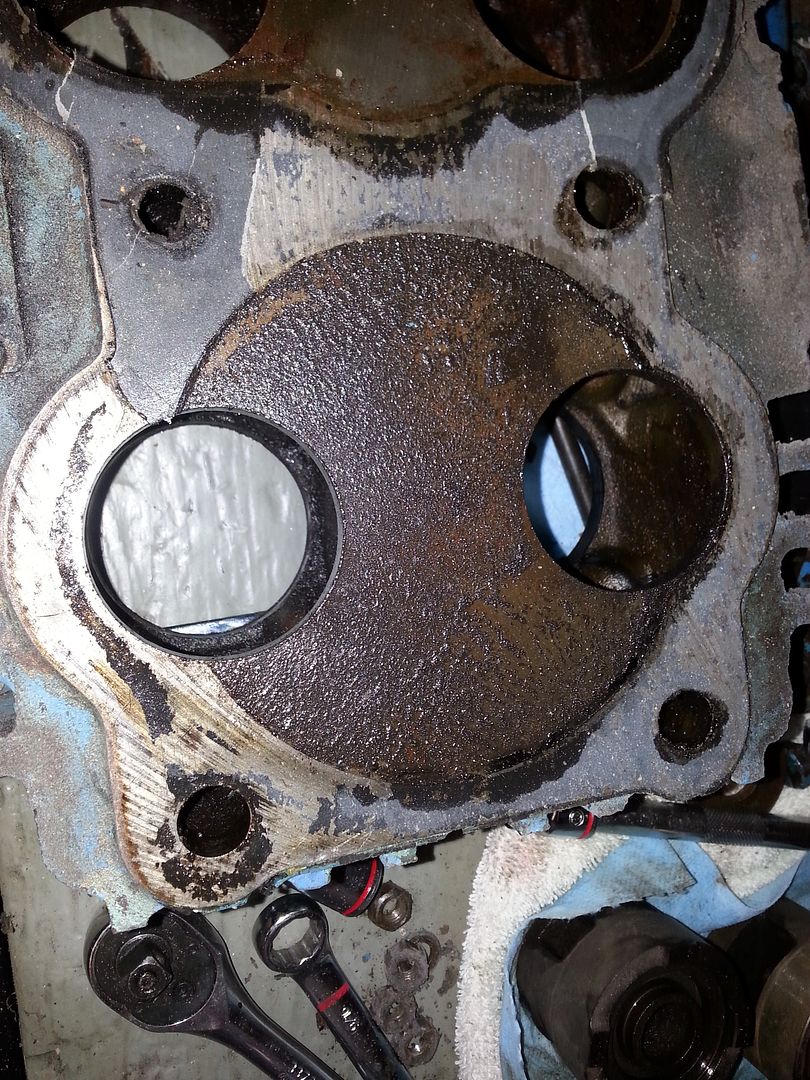
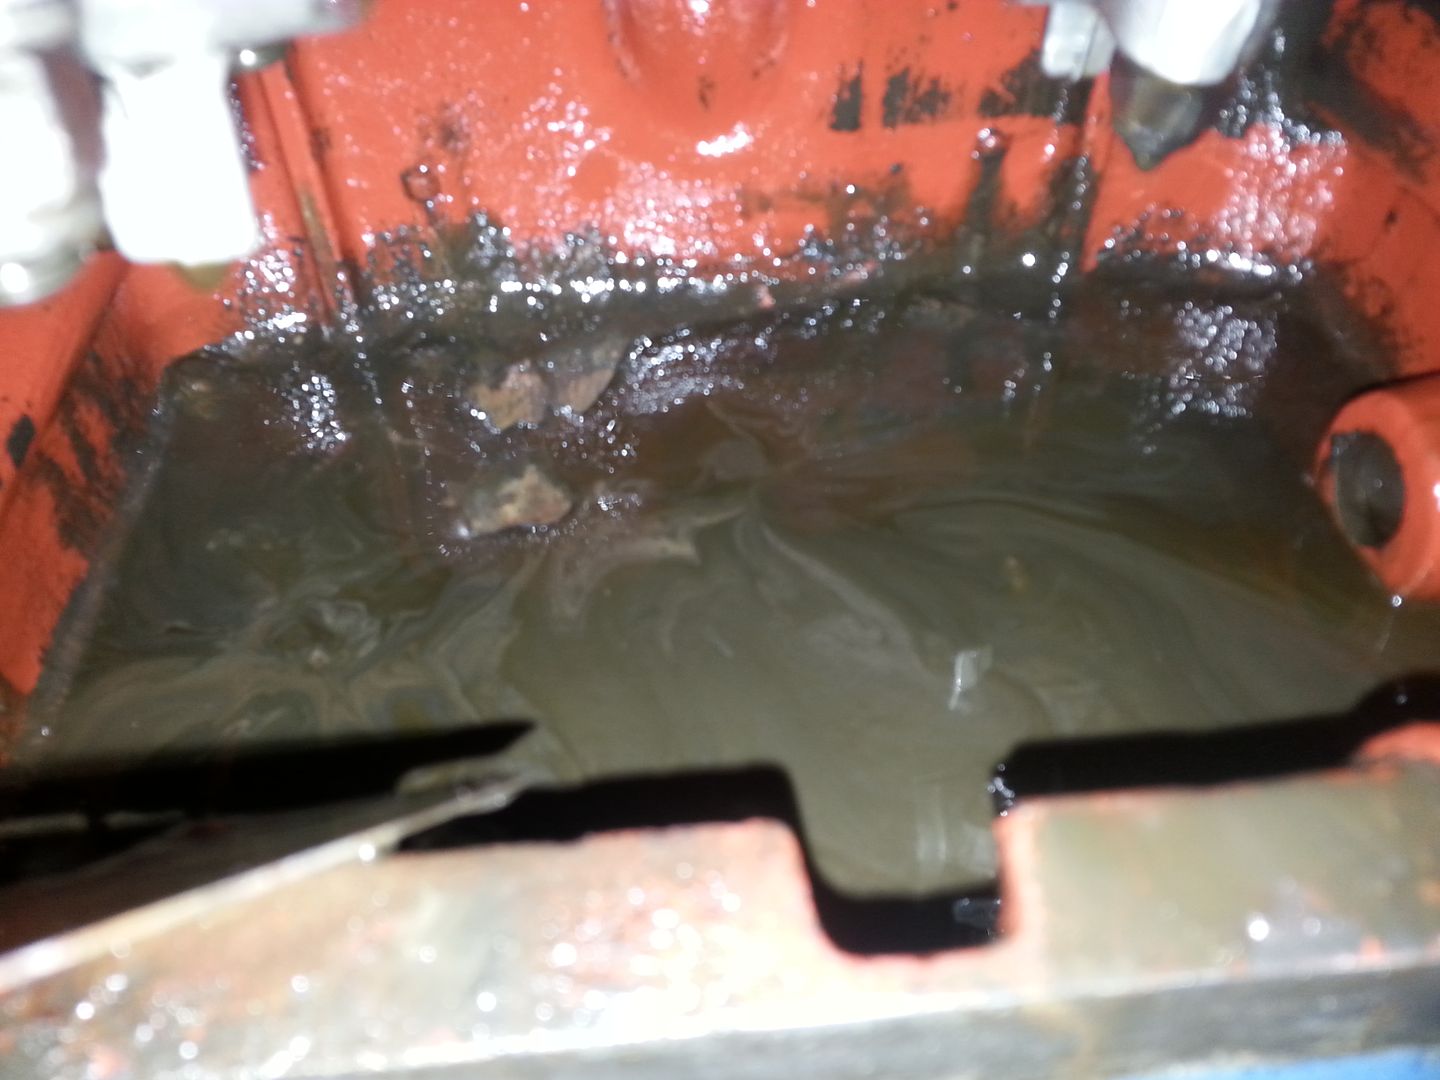
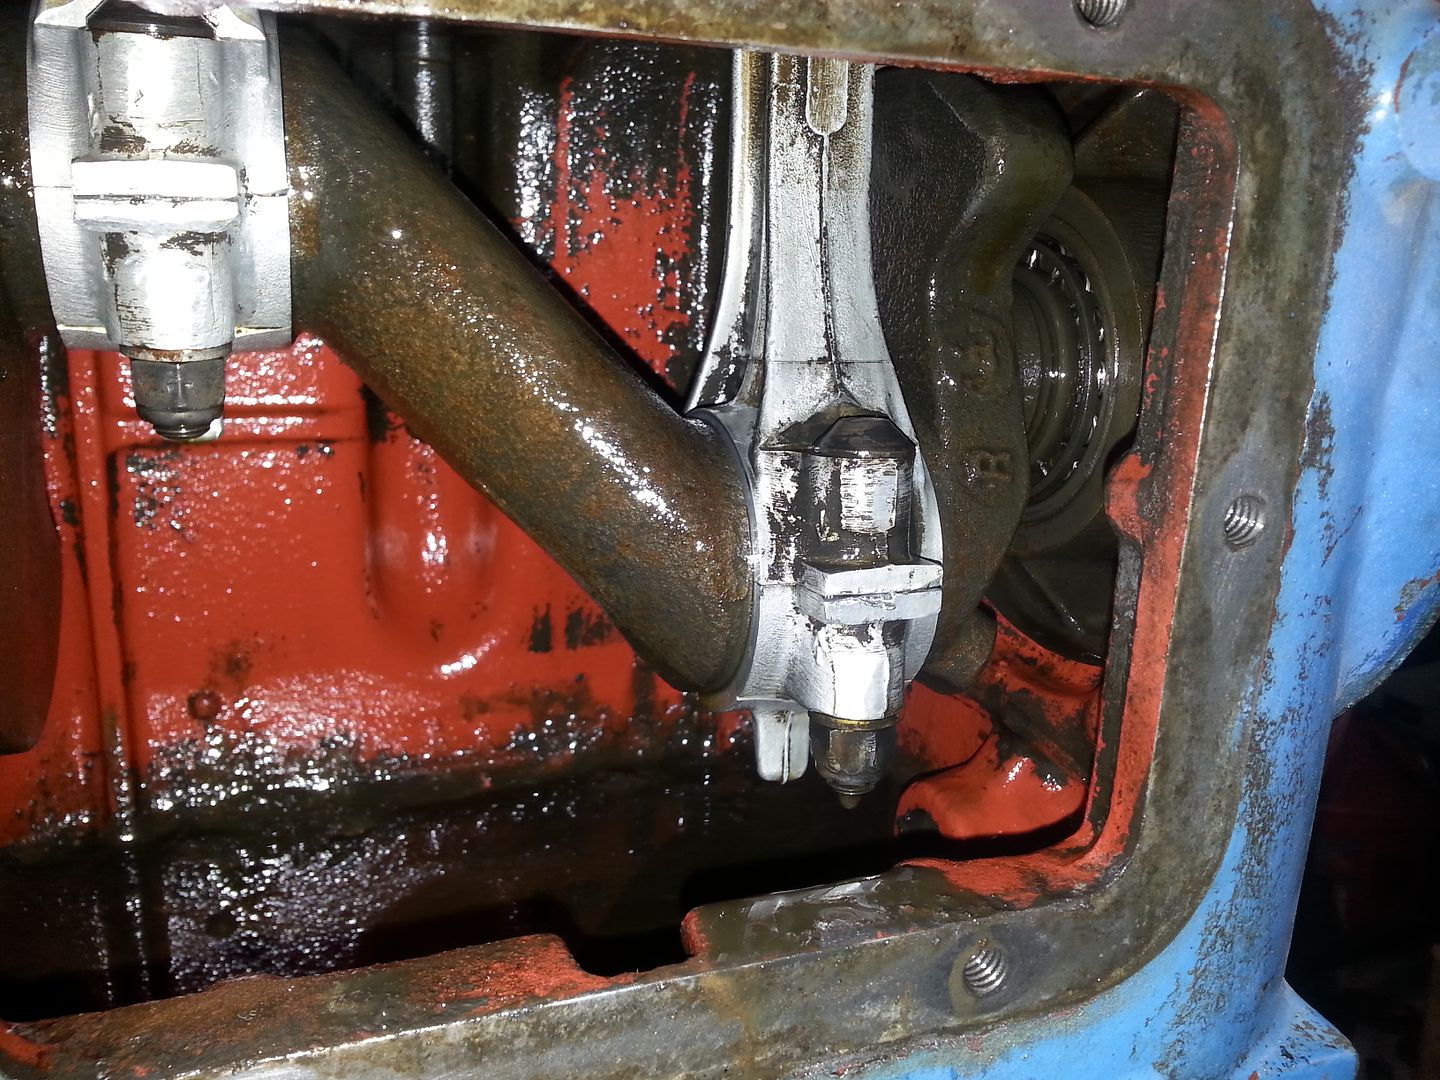
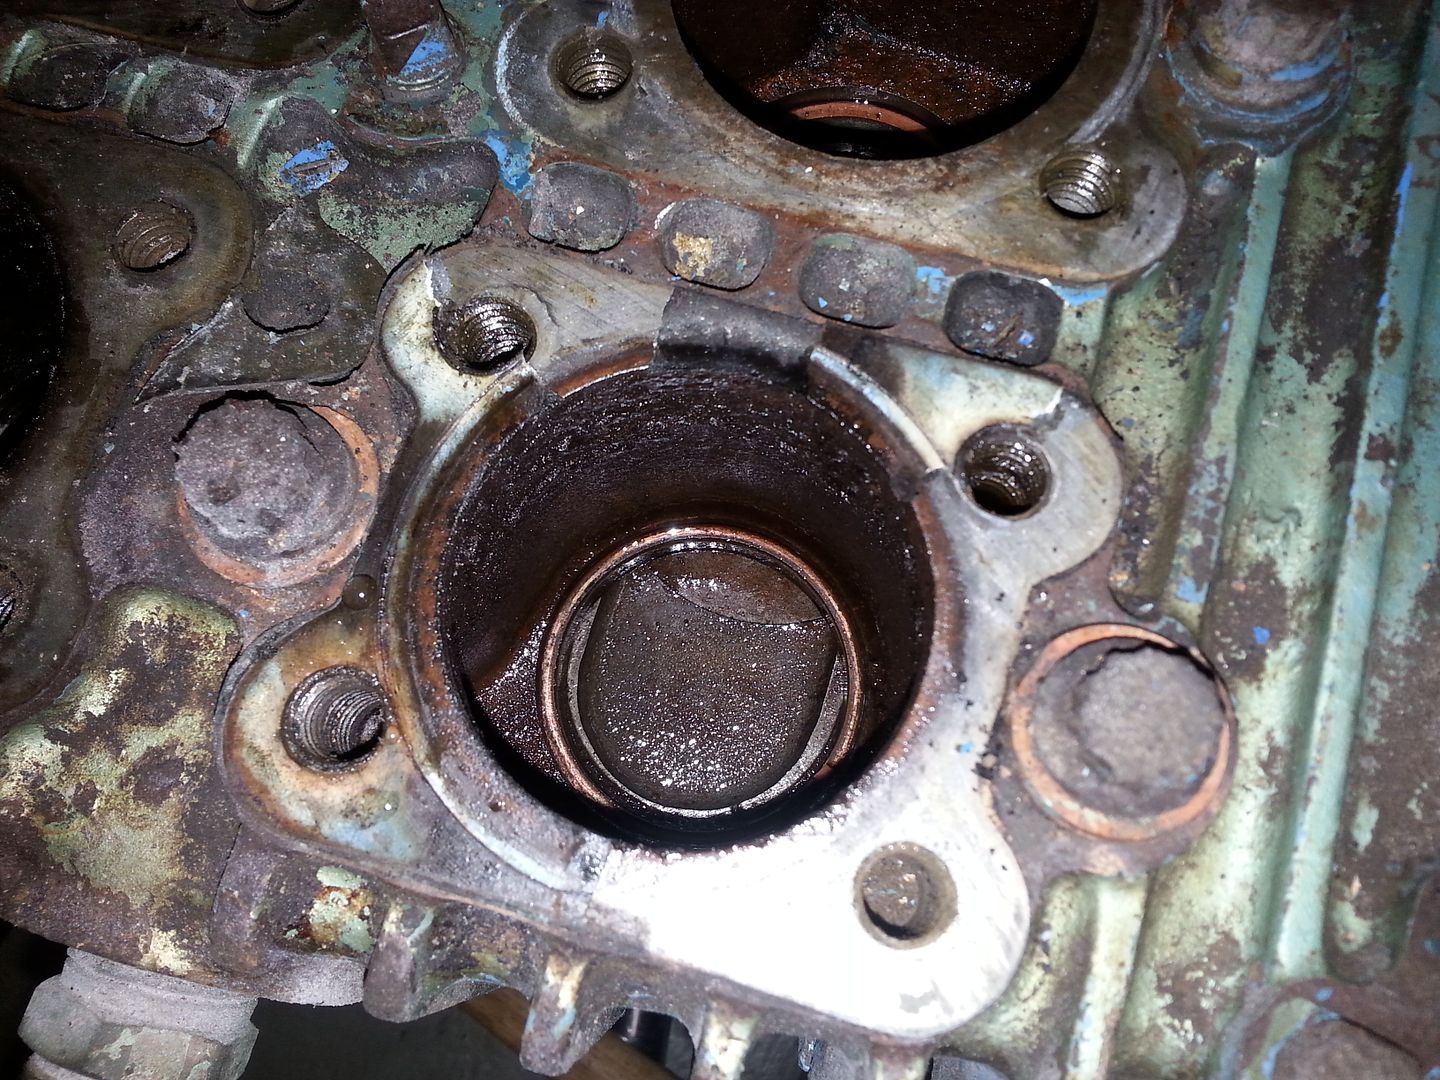
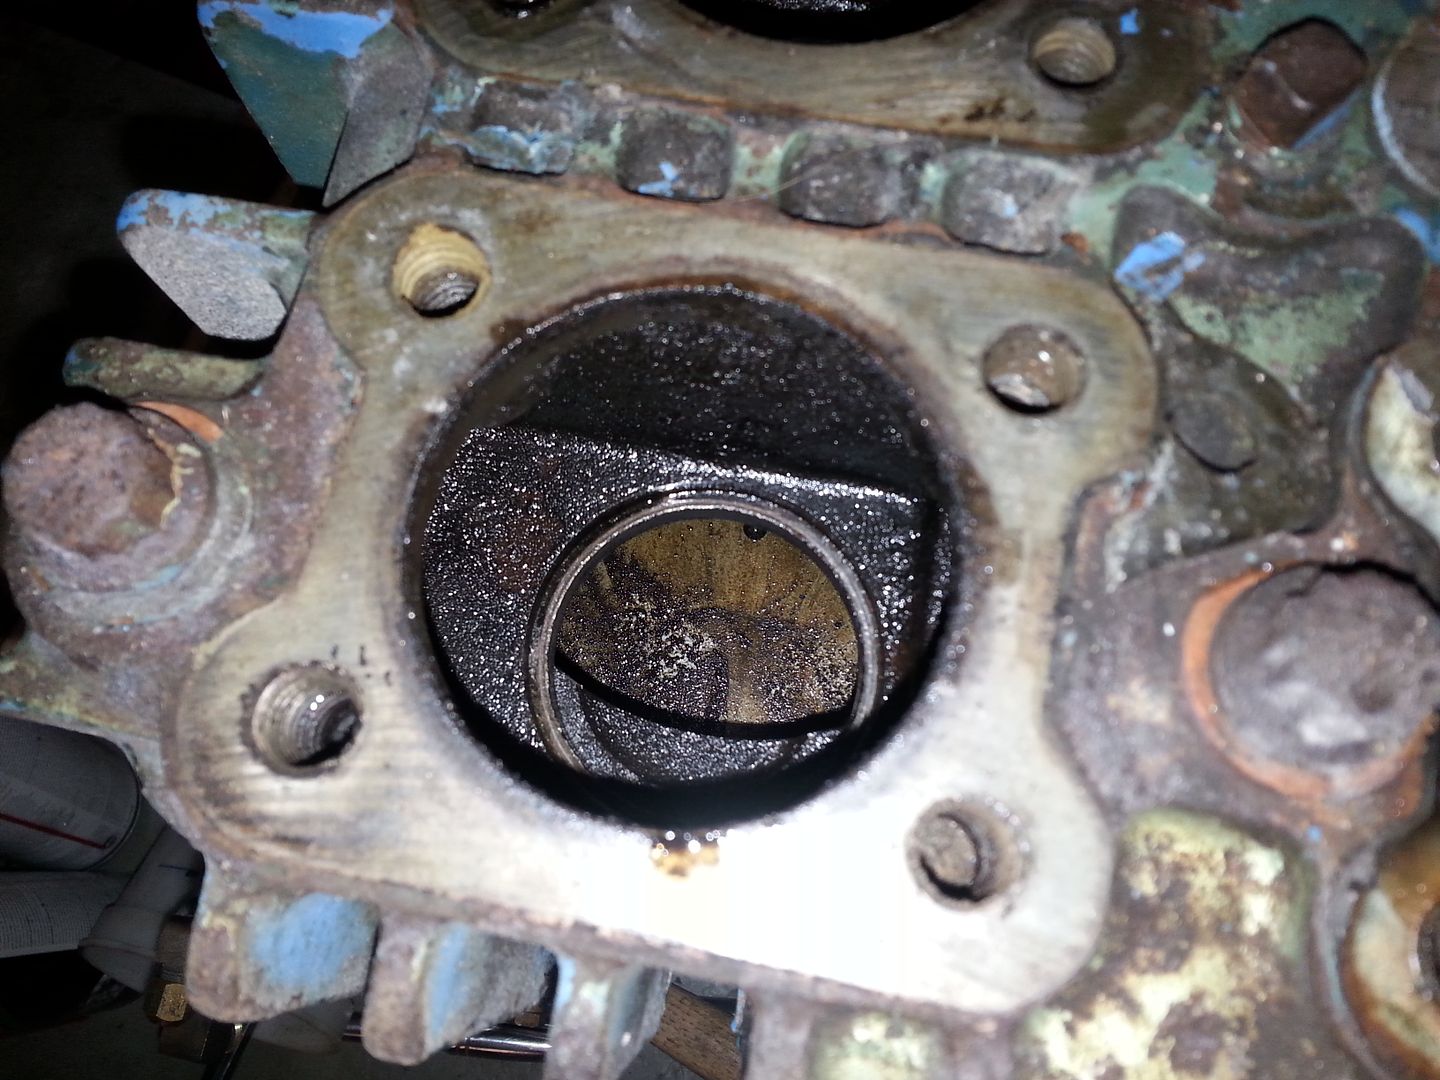
These pictures are looking down at the top of the pistons. As you can see, everything in the top end is nasty and will have to be cleaned.

High pressure cylinder:

Low pressure cylinder:

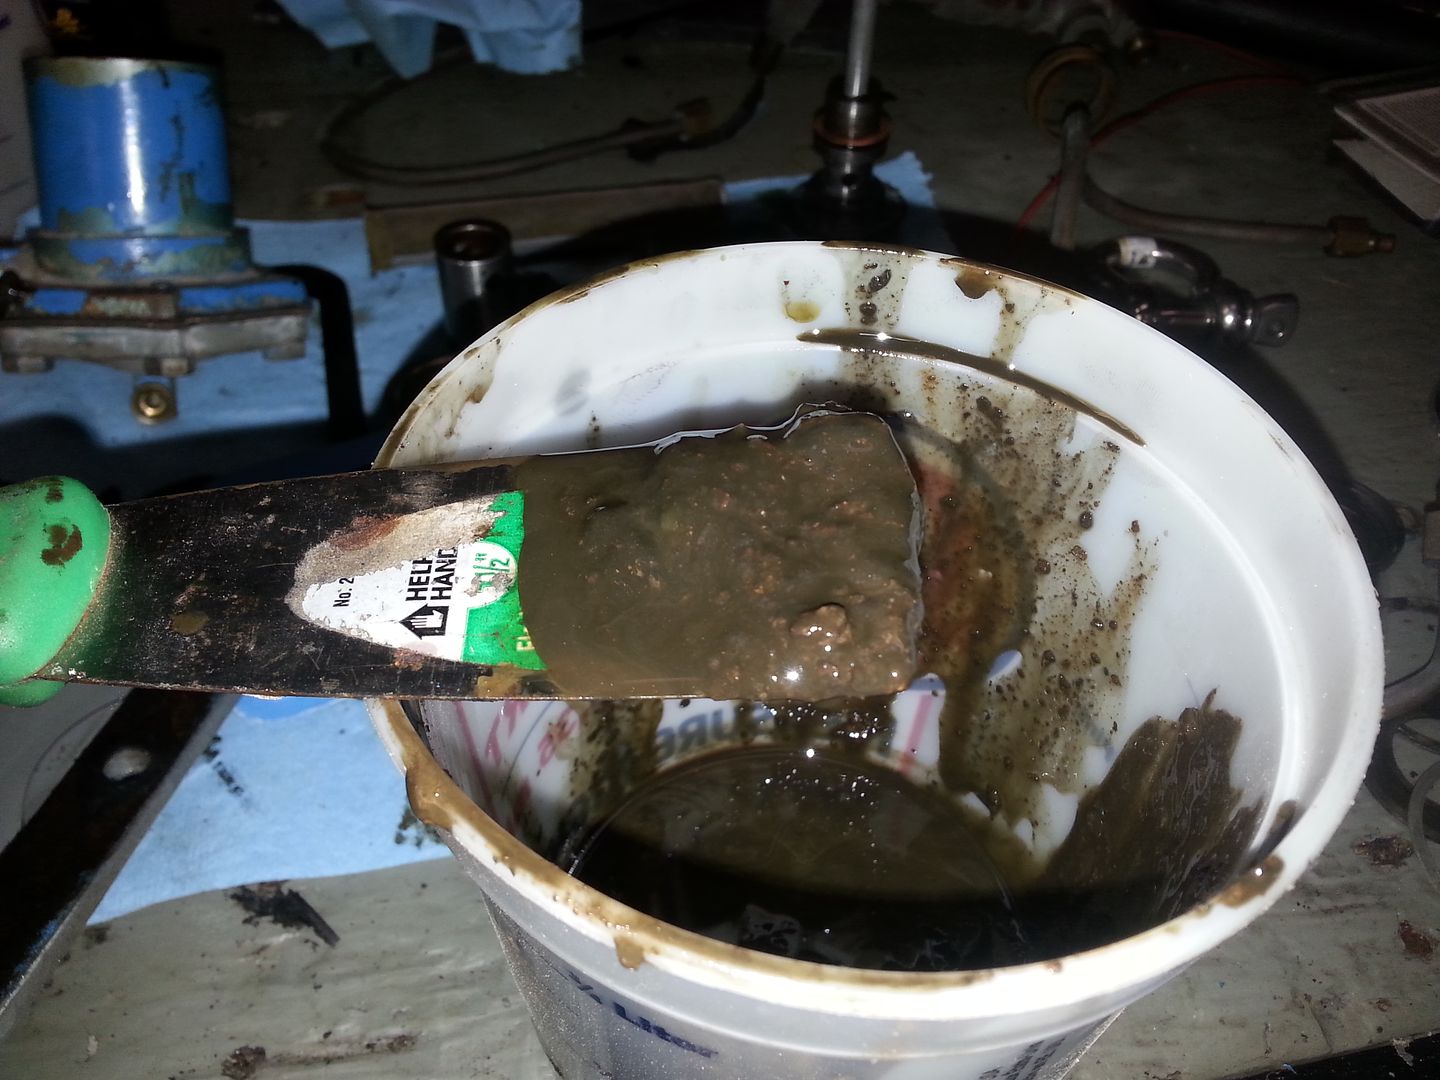
My only other problem is oil pressure. No matter how I adjust the pressure relief valve, I can't get over 11psi. I need it to be 18-20psi for the unloaders to work properly. A little digging on the internet gave me some places to look for problems. I did pull the pump cover to make sure all the vanes were moving free and to make sure the reversing valve assembly wasn't stuck. No pictures of that yet, but I'll get some when I go into it next time to find where I'm loosing pressure.

More updates as they happen.

fasted58
fasted58 PowerDork
8/19/13 8:20 a.m.

Nice, those valves look industrial grade. Work that seat face on a lapping plate w/ compound, it'll come out factory new. If any deep scratches put on surface grinder and relap. I prolly done over a hundred of 'em, very durable.

Nice score btw.

Toyman01
Toyman01 GRM+ Memberand PowerDork
8/20/13 9:19 p.m.

Update time again.

I spent a couple of hours working on the valves this afternoon. Good news and bad news. The good news is most of the valves look like they will clean up as good as new. The bad news is one of them is damaged.

The base of the valve where the washer and spring reside is supposed to be attached to the valve body with a stud. One of them is stripped and has been for a while.

This is what it's supposed to look like.

I originally thought the stud had just screw its self all the way into the body, but it was pushed through the threads instead.

One disadvantage to these compressors is parts are expensive. The cracked valve cap above is $50, the valve body is $60. The good news is I'll probably never have to buy another one. My kids won't either.

ClemSparks
ClemSparks PowerDork
8/21/13 10:54 a.m.
Toyman01 wrote: One disadvantage to these compressors is parts are expensive. The cracked valve cap above is $50, the valve body is $60. The good news is I'll probably never have to buy another one. My kids won't either.

For me...just the fact that you can buy parts for it at all makes it a worthwhile pursuit. There's not much you can buy anymore that'll still have parts available in 10 years, let alone 42.

Toyman01
Toyman01 GRM+ Memberand PowerDork
8/22/13 6:32 p.m.

Update again.

I had considered not pulling the head and just cleaning it out the best I could. The crap in the valve chambers is about the consistency of oiled sand so the head had to come off. I didn't want that junk to end up in the rings or score the cylinder.

The kit I ordered for it came with a head gasket so at least I won't have to order one of them.

The cylinders aren't perfect, but they aren't too bad. I'm not going into it beyond here.

Just about all the surfaces inside the head were coated with this stuff including the tops of the pistons. After scrapping it off, I'm glad I pulled the head.

Now for the rest of the parts to come in. Then we will start putting it back together.

Toyman01
Toyman01 GRM+ Memberand PowerDork
8/25/13 4:34 p.m.

Update again.

The head is cleaned and reinstalled.

I also lapped three of the valve bodies, reassembled and reinstalled them.

Now I just need the rest of the parts to show up so I can finish assembly.

It would probably help if I would get off my butt and order them.

Toyman01
Toyman01 GRM+ Memberand PowerDork
8/27/13 6:40 p.m.

Still no parts, but I did get a little done today.

I set the compressor back on the tank and got it bolted down.

Then I changed the oil. It was all going well until I heard a plop into the bucket. The stuff in the bottom of the crankcase was a blackish sludge. So, off came the inspection plate on the side of the crankcase.

This is what covered the bottom 1/2 inch of the crankcase.

What lovely goo. All else looked pretty good. No rust in the bearings that I could see, no chunks of metal, just this goo. My guess is it's a mix of old oil and water with a little orange paint and rust mixed in for good measure.

The oil pickup was half buried in the slop. That might be what was causing the low oil pressure.

Some more photos.

More as it happens. It looks like my parts won't be in until next week.

Toyman01
Toyman01 GRM+ Memberand PowerDork
9/5/13 10:00 p.m.

The new valve is installed with the valve cap. The crankcase is clean, oil changed, and pumping like it's supposed to. Oil pressure is set to 22 psi so the unloaders are working like they are supposed to.

The PO apparently half assed the unloader system. Rather than fixing the things, he just drilled a small hole in the tank check valve to bleed off head pressure when the compressor shut down. I drilled and tapped the hole to plug it with a screw, but the line leaks so I'm just going to replace it all. I'm going to do away with the check valve while I'm at it. The Quincy compressors don't need them as long as the unloader system is working properly.

Not many pictures this time. I forgot to take them.

Toyman01
Toyman01 GRM+ Memberand UltimaDork
9/23/13 7:37 p.m.

It's been a while, but another update.

Tonight I re-plumbed the the copper tubing.

The 3/4" was a PITA. Even filling the tube with sand didn't help. It's in, but it's ugly. I'm going to have to buy a 3/4" tubing bender to fix it.

The 1/4" wasn't a problem. Replacing a couple of the fittings let me tighten it up so the tube stays close to the head.

Best of all, it doesn't leak anymore. From empty to 130psi takes under 5 minutes. I'm looking forward to not having to wait on a compressor to build pressure.

I found out some of the history about it too. This compressor was originally bought by the Western Auto in Mt. Pleasant, SC in 1971. They used it until the store closed in the 80s.

Next up, take it all back apart and paint it so it looks pretty.

oldmachinenut
oldmachinenut New Reader
9/1/17 9:57 p.m.

I recently purchased a Quincy 325 roc15 pump and this thread has been helpful with my tear down and prep for overhaul. I have a question for Toyman, do you still have the valves you removed to make your compressor start/stop operation only? I tried to send a private message but it would not post.

Thanks Bill

1 2

You'll need to log in to post.

Our Preferred Partners
LQuiPEtvl1v2kalm3exbLmtus4VxvKJO7WbEafAOrmyUFrUdUaUC4AqX0cM8bIR7