1 2 3 4
splitime
splitime Reader
1/7/13 9:40 p.m.

Please provide more info about the radiator, I haven't had much success with a few looks around for a similar size (20x18) and do you have anymore specifics on the new fuse setup beyond what is in the thread?

I have to do my radiator (just got it out tonight) and should probably just go ahead and do the fuse box....

<-- new '78 spider owner who is going bumperless... but really likes your chrome ones.

Raze
Raze SuperDork
1/8/13 2:03 p.m.

In reply to splitime:
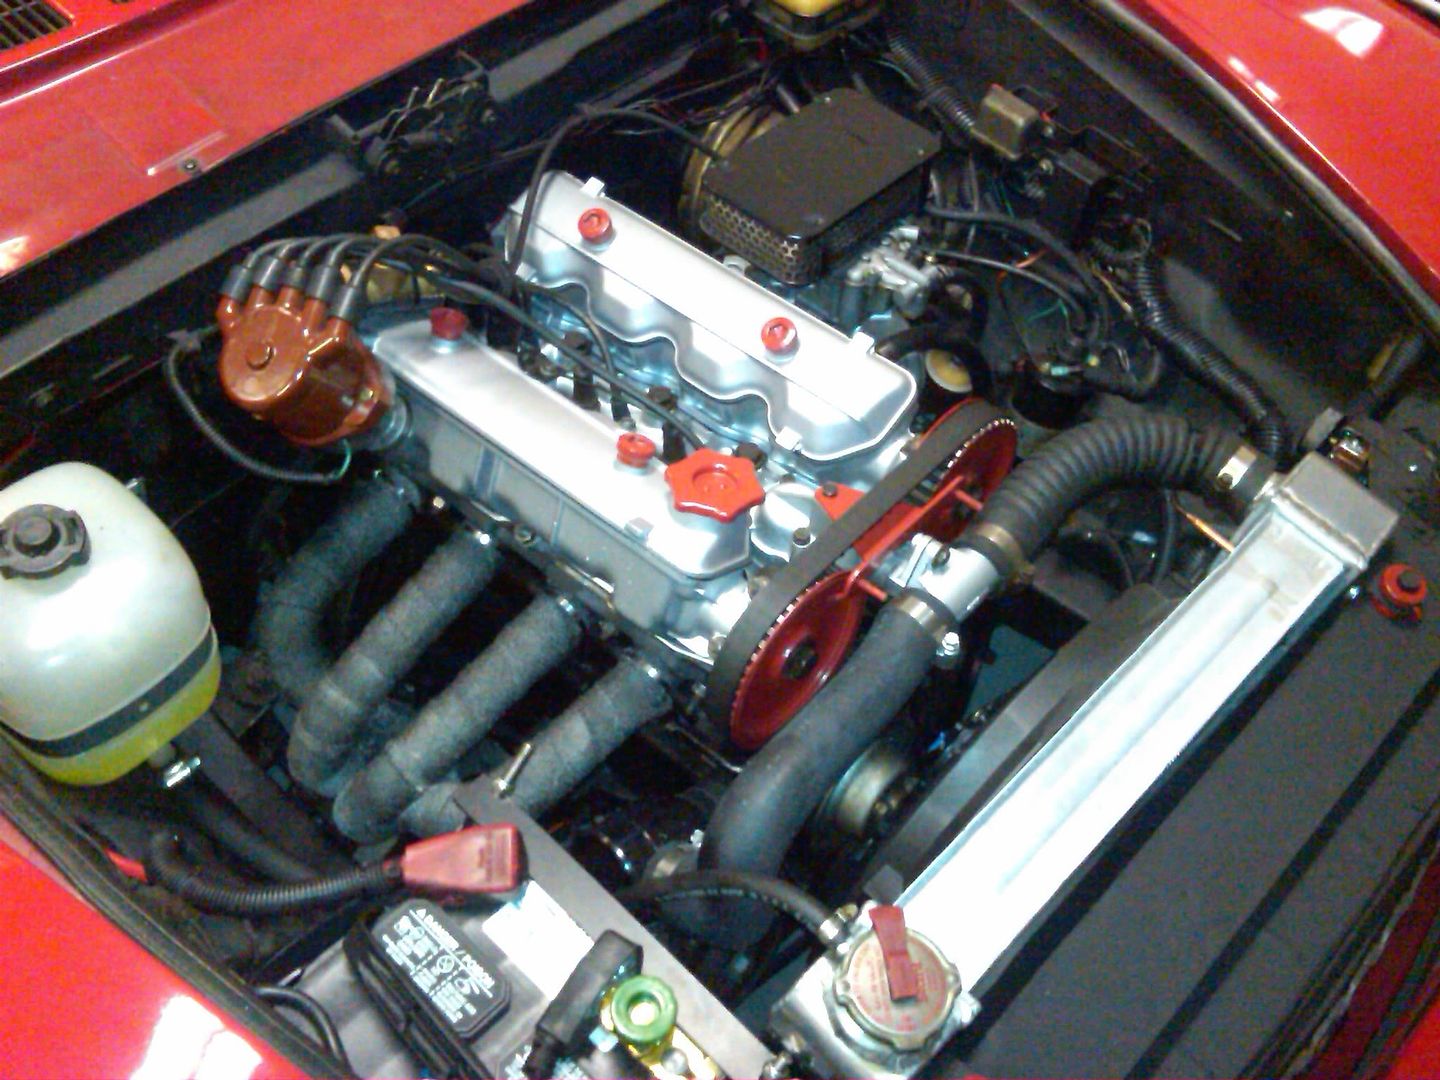
Radiator:

Sure thing! I made up a thread over on FiatSpider.com after I finished the install documenting the steps. Now, you 'could' go buy the kit from Mark Allison at Allison Automotive, or if you wanted to the legwork yourself you could follow this process:

1) Start with an aluminum radiator 22x19x3 from Speedway for around $135 shipped.

2) Then get a piece of 1/4" plate steel cast off from a local metal supplier $10, cut 4 4" long 2" wide strips, bend at 90 degree angles, drill holes.

3) Get mounting bolts and washers for the radiator, some later sheet metal screws from hardware store ($10 all in), and 4 1.25" radiator support bushings that have washers in them - two piece for above and below the bracket so you isolate the radiator from the car ($10)

4) Finally get some 0.75" OD steel tube, 0.5" ID should have a thick enough wall, you have to get 4 female-female connectors to attach to the stock sway bar studs that extrude from the frame, these connectors need to fit inside the steel tube above since that's what will now be taking the load of the sway bar bracket. You also need some threaded rod, same pitch as the stock sway bar bracket studs. Reuse the original washers and nuts. Due to the angle of the frame at the bracket attach points, you will need 2 longer and 2 shorter tubes, the longer should be around 1.5" and the shorter 1.2", that should drop the sway bar enough to clear the radiator. You can get all this stuff at Grainger, McMaster-Carr, hardware store, online, etc for less than $20

5) Now the fun part, as I called out in my other thread, you will need to cut off the old mount tabs because they are spot-welded (upper) and the lower on the older Fiats, the later models bolt on/off, and I tapped the air flow flanges on either side toward the front of the car to get the radiator right up against the front cross-member. Finally you have to grind out the edge of the lip of the top radiator cross-member. You don't have to take off much, and don't go in too deep. This member is spot welded so you're just taking off lip, nothing structural.

6) Drill upper mounting holes, see the pictures but you'll need to drill holes for the large sheet metal screws to hold the uppers in place. The bottom holes should work with existing holes, but you might have to make some new ones worst case as there are slight variations in the lower cross member between early and later spiders.

If you've done it right, you should be able to reuse all hoses if you have an internal or external t-stat and you can reuse your old radiator cap.

7) The next thing you'll need is a slimline electric fan and an adjustable thermostat with thermo-probe. I'm using a 14" slimline straight-blade fan, the s-curved are too thick (2.5" vs 2" for the straight blade fans), Check Amazon for 14" slimline fans (should be under $40 shipped), and then get an adjustable thermostat and don't forget a fan mounting strap kit

All told you should be able to do the full conversion for less than $250 and a couple of hours of work. Considering a 'new' copper radiator is $300-400 and will go bad inside of a few years, and Mark's kit is about $350, the only real difference is sourcing the parts or letting someone else do it for you, but once you have it converted to aluminum, you'll never have to worry about cooling again.

Fuse Block:

I followed Matt Webb's Mirafiori article on swapping in an ATO Fuse Block

But I also had a writeup that covered some things Matt's article missed: http://www.fiatspider.com/f08/viewtopic.php?f=6&p=99451 and http://grassrootsmotorsports.com/forum/grm/rewired-the-fiats-fuse-block/31265/page1/

The biggest thing is creating Y-splitters for the fuses since the old barrel fuse block had single side and multi-sided connectors to the fuses, examine the original fuse block to understand exactly what I'm saying.
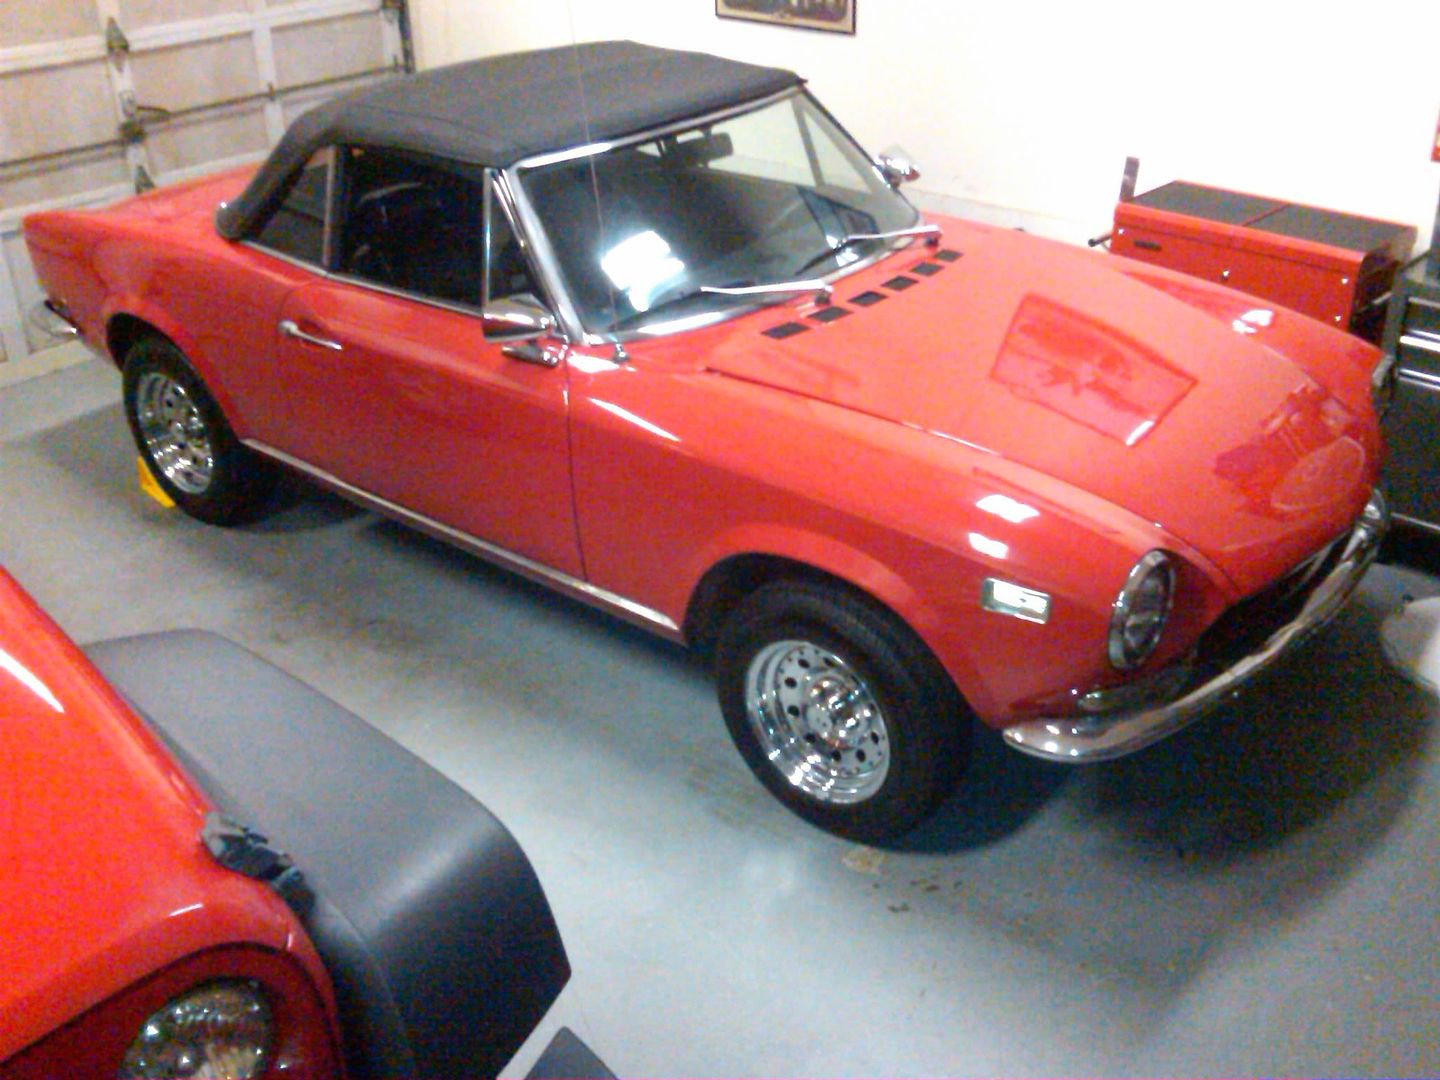
Bumpers:

On the later big-bumper cars you'll shed a ton of weight, literally it's something like 75-100lbs if memory serves and they provide little if any real crash protection since the car itself is made of such soft steel and didn't get additional reinforcements. There are conversion kits that are expensive, OR, if you can source some old bumpers, don't mind welding sheetmetal and can do some painting you can modify everything you need, or else make brackets with the existing holes in the facia without having to patch and paint.

You hit the nail on the head though, I specifically sourced an earlier car for the chrome bumpers, I just like the way it looks better. bumperless can be made to be real good looking too, especially if you get the lower valance, or the Abarth Rally style one on a lowered car with wider wheels/tires. There are conversions for turn signals and other things to blank off the holes in the big bumper cars. I think one of the better options is to put the black rubber bumperettes with turn signals in the lower outter holes. That cleans up the front end pretty good unless you want to convert to chrome.

splitime
splitime Reader
1/8/13 10:29 p.m.

Thank you much. The biggest part for me was even finding a darn radiator in the right size. I was struggling.

The bummer for me is Marks kit would be over 400 to my door, so I'd rather make something work myself.

Really appreciate the write up and links. I'll make good use of them. Have just began the cleanup of mine to get it ready for real use in spring.

Already front bumperless (will do the rear once I'm on the road and run the gas tank almost empty), front spoiler in garage. Test fitting some interesting wheel options (http://i295.photobucket.com/albums/mm133/splitime/Fiat/IMG_0653_zps556c82ef.jpg). Have rebuild kits for brakes/engine gaskets etc.... Removing remenants of AC system, removing smog/airpump components. Considering making my own manifold for a dual carb setup, also thinking maybe its time to learn how to make a header.

It should be an entertaining winter.

crankwalk
crankwalk GRM+ Memberand New Reader
1/11/13 4:11 p.m.

I love what you have done to this thing! I see you are right down the road from me as well. I'm up in north Cobb. Bumpers and engine bay really did a lot for this thing.

Raze
Raze SuperDork
1/11/13 9:40 p.m.

In reply to crankwalk:

Thanks! I'm hoping to get it out to Caffeine and Octane next month, if you've never been it's totally worth getting up early on a Sunday (1st of each month) and heading up to Alpharetta, its wild.

Raze
Raze SuperDork
1/11/13 9:46 p.m.

Header Wrap

Well since my Fiat has a set of Pace Setter Headers on it, it no longer retains the factory heat shield that helps prevent your battery from melting. I made a heat shield around the battery, and painted the full exhaust with ceramic header paint soon after I bought it, but damn is it hot. I finally decided it was time to take care of this little problem, and for $20 off of Amazon I got some black 2"x50' fiberglass header wrap with 5 stainless steel zip ties. Basically it's just like the DEI stuff but it's already been painted (not as good as Amazon depicts), but for $20 ready to go on out of the packaging looking half decent I figured it was worth a cheap shot:

ddavidv
ddavidv PowerDork
1/12/13 6:28 a.m.

Can't tell from your pic, but it looks like you made a battery bracket. The original was actually a metal heat shield that sort of did what you're trying to do there.

You could always put it in the trunk like they did on the 1800/2000 cars.

Raze
Raze SuperDork
1/12/13 3:49 p.m.
ddavidv wrote: Can't tell from your pic, but it looks like you made a battery bracket. The original was actually a metal heat shield that sort of did what you're trying to do there. You could always put it in the trunk like they did on the 1800/2000 cars.

I bought a universal from Southwest Speed that was made for a smaller more modern battery. I modified it heavily and bolted it to the inner fender with fender washers. I also built a heat shield like the original design to fit it. The original battery bracket front lower post was gone (rust) and I only recently came upon the j-hooks and original aluminum hold-down bracket in my buckets of parts that came with the car as they were tucked in a box with some suspension bits. The heat shield I fabbed up prevents the battery plastic casing from even getting warm, but if I was changing ignition timing with the dizzy my hands would only be good for a few seconds before it would feel like they were getting burned, even from 6 inches away. I had the opportunity to run the car today and MAN WHAT A DIFFERENCE! I can barely feel the heat with my hands at the dizzy, and I accidentally brushed a header with the side of my hand, nothing, I mean it was warm, but otherwise nothing. The one downside was the damn wrap smoked like a chimney for 5 minutes, but I got whatever needed to burn off all off and now no smoke, no funky smell, and more importantly, less heat!

Raze
Raze SuperDork
1/12/13 4:15 p.m.

Damn Speedo

So the speedo stopped working last summer and I removed the cable and sure enough it had snapped which is fairly common. It also looked like the original or at least 20 years old given the state of the sheath and end fittings. I replaced the cable, took it for a drive, and within 2 miles the speedo stopped working, I didn't pay much mind as I didn't have much time for the car this fall but with the time I've found recently to fix the floor, redo the interior and get the header wrap on I decided it was time to figure out where the problem lay. I pulled the cable and attached a drill since that will tell me if the cable and the speedo are good, and blam 60MPH with the drill spinning, so the problem is the speedo drive assembly on the transmission.

This presents a unique challenge since the only 'normal' way to get it out for replacement is to drop the trans. Alternatively, dropping the driveshaft and undoing the trans mount and loosening the engine mounts to 'make space' keeping it all in the car is another method, but I don't know have alot of confidence in this since I don't like wiggling heavy parts in a car on jackstands with me under it. Third option is to make an access door. Needless to say after I finish I could weld it back up. I'll keep you posted on what I end up doing.

Raze
Raze SuperDork
1/14/13 6:08 p.m.

Sideview Mirrors

I have a set of Vitaloni Baby Turbos which are ok, but really meant for later cars with less chrome. I found some cheap online sideview mirrors that look ok, work ok, and don't need me to drill new mounting holes:

oldtin
oldtin UltraDork
1/14/13 10:05 p.m.

Your 124 is looking great. I'm really trying to focus on the existing fleet and saving up for a baby exotic, but these build threads get the ADD kicking into high gear. Just looks like fun.

splitime
splitime Reader
1/16/13 4:33 p.m.

You've inspired me to remove the side door/fender bump trim also. Keep updating :)

JThw8
JThw8 PowerDork
1/17/13 7:37 a.m.

Loove it. It's really looking great.

I hate to be negative but you've done such a great job of getting it back to a vintage look and well....those wheels....they just don't work.

Not to sound self serving with that comment but if you are looking for something more appropriate I have a few sets of Fiat wheels in search of a car.

First set appears to be an old set of Westerns or a copy. 13x5, tires are junk. They should clean up pretty nice. I just took these in trade on a set of wide steelies that a friend needed for the car they are on so I have to inspect them and get some more info.

2nd set I'm not entirely sure I want to part with, but I dont know that I'll ever have a car worthy of them either. Real, not reproduction, CD30s from the Abarth 124s. Not perfect, but they clean up nice. 8lbs each. Not recommended for track use because they are magnesium and it gets brittle with age. Fine for street use and I autocrossed on them from time to time.

But enough of that, I really wanted to say I love what you've done with her, making me wish I had another 124 now.

Raze
Raze SuperDork
1/17/13 9:52 a.m.

In reply to JThw8:

Seriously!? I've been dreaming about a set of CD30s! I know the wheels don't do the car justice, if you would be so kind as to send me some more pics off-board, we should talk.

ransom
ransom GRM+ Memberand SuperDork
1/17/13 10:07 a.m.

Awesome thread. Kudos for a steady stream of smartly done updates. You seem to be very good at focusing your effort in the right places.

Also, put me in the "like the chrome bumpers" camp.

JThw8
JThw8 PowerDork
1/17/13 10:12 a.m.
Raze wrote: In reply to JThw8: Seriously!? I've been dreaming about a set of CD30s! I know the wheels don't do the car justice, if you would be so kind as to send me some more pics off-board, we should talk.

Let me get them cleaned up and get some good photos. I hate to get rid of them, because I'll never find another set but they belong on a nice vintage 124, not my Yugo ;)

Send me your email addy to jim at misfittoysracing dot com and I'll get you the photos as soon as I can clean them up. They were powdercoated silver about 8 years ago and its held up well so they actually clean up very nice.

splitime
splitime Reader
1/17/13 10:30 a.m.

Just to jump in... as JThw8 will probably pick up those cd30s... I'd be interested in details on those others, the Westerns/copies 13x5s.

JThw8
JThw8 PowerDork
1/17/13 11:14 a.m.
splitime wrote: Just to jump in... as JThw8 will probably pick up those cd30s... I'd be interested in details on those others, the Westerns/copies 13x5s.

I will get you details as soon as I have them, they are supposed to be delivered to me in exchange for the steelies this weekend.

crankwalk
crankwalk GRM+ Memberand New Reader
1/17/13 11:15 a.m.

Those cd30s would set this car off pretty nicely.

JThw8
JThw8 PowerDork
1/17/13 11:23 a.m.
crankwalk wrote: Those cd30s would set this car off pretty nicely.

They look great on a 124, might have to paint the hood black and go with the full Abarth Rally look though :)

Then again they look hot on just about any Fiat

They even dress up a Yugo

They are one of my favorite wheels of all time. They are being reproduced now but still only in 13" and over $1000 for a set of reproductions. I wish someone would repop these in a 15"

JThw8
JThw8 PowerDork
1/17/13 6:05 p.m.

Gave em a quick clean for you. I'll shoot you a PM to discuss.

This one has some chipping in the rim as you can see at 5:00 and 6:00 position. Holds air fine, just cosmetic

Raze
Raze SuperDork
1/19/13 7:16 a.m.

Stay tuned for an update, it should be pretty obvious based on previous posts, but I'll be doing some minor wheel repair

crankwalk
crankwalk GRM+ Memberand New Reader
1/19/13 8:52 p.m.

Sweet!

ddavidv
ddavidv PowerDork
1/20/13 6:31 a.m.

Are those CD-30's powder coated? Because they sure as E36 M3 look like the set I had re-done years ago and never used.

JThw8
JThw8 PowerDork
1/20/13 1:32 p.m.
ddavidv wrote: Are those CD-30's powder coated? Because they sure as E36 M3 look like the set I had re-done years ago and never used.

And sold to me....yes, they are your old set :)

1 2 3 4

You'll need to log in to post.

Our Preferred Partners
eNQLcD2VHGsP1D0VVIBqaVb0CZEyR08l8ABB52w2w8MGZtX0uSkjweuGDX83PQfM