1 ... 3 4 5 6 7 ... 39
JoeTR6
JoeTR6 Reader
11/10/15 1:51 p.m.

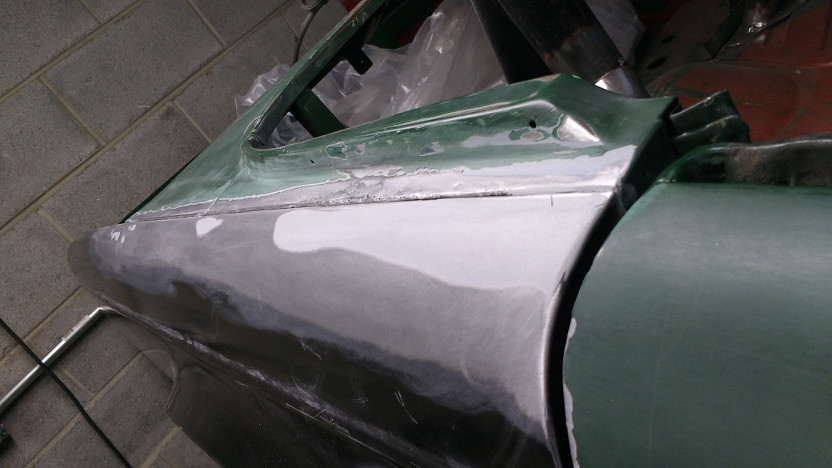
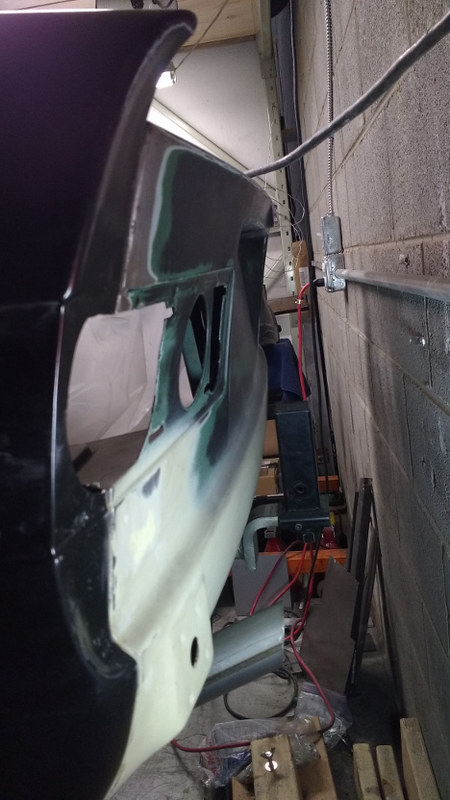
I took a little break from the project, but started on the next phase on Sunday. That would be final panel fitment before getting the frame/tub painted. There was a small 1"x1" rust-through area in the back inner fender panel around the taillights that got patched. I tried fitting the right rear fender and remembered how poorly the newer BMH panels fit. It might be the 1976 tub that is off. Or both. If I start bolting at the front and work my way back, bending the fender to match at the top as I go, I can make it fit. I can't think of a good way to make it line up statically. The fender is also a little beat up (front-top corner got bent) and will need some filler. Bodywork can really eat up time.

I also need to decide on the routing for my fuel injection harness. It makes the most sense to repurpose the two 1" holes where the a/c lines ran through the footwell on the passenger side. They're patched, but I didn't completely tack them in yet. This is a horizontal surface, so may be more likely to leak water into the car unless I can find some grommets with boots on them or apply RTV liberally inside the car.

JoeTR6
JoeTR6 HalfDork
11/14/15 6:59 p.m.

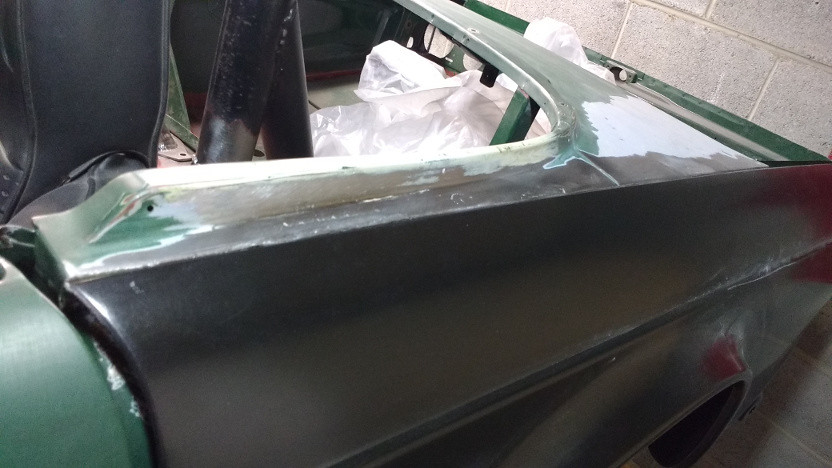
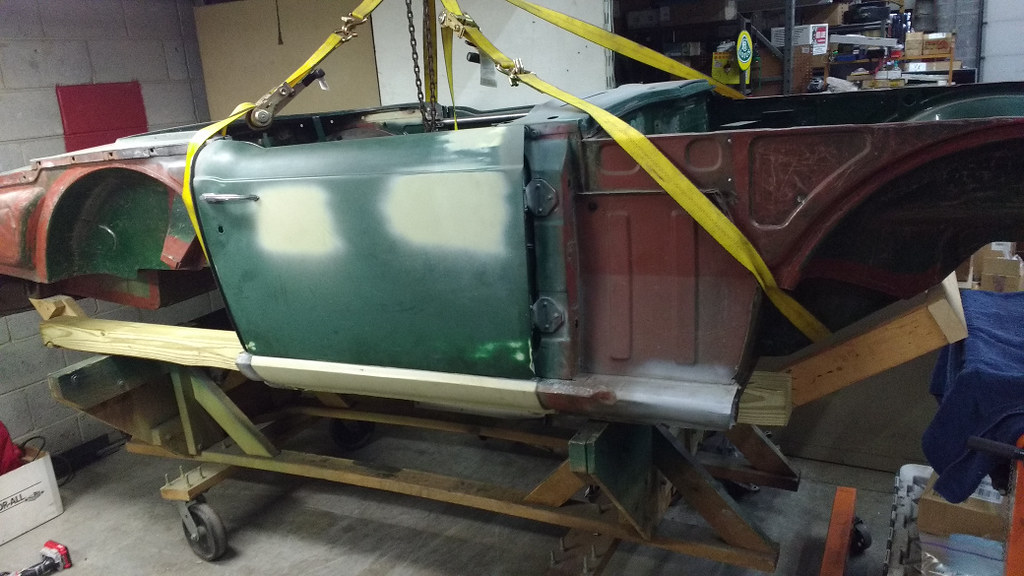
I got the rear fenders fitted up today. The right one took some adjustment, some welding, and some more adjustment. And by adjustment, I mean tapping with a body hammer. I used a little filler to cover the worst of my mangling.

The left side fits much better. I can pretty much hold it against the shell and bolt away. I cleaned off some filler from a much older repair, then added some weld to make sure it would last. It's going to take some filler on the tub.

The rear valence lines up better than I remembered. This is the worst side, so I'm no longer tempted to replace the rear valence.

The door gaps are still a bit wide at the top. At this point, I need to put all of the weight back in the car to close the gaps. If it's still too wide, I can add shims in the rearward body mounts to close them up. That can happen after painting.

NOHOME
NOHOME UberDork
11/14/15 7:06 p.m.

Even "Good: TR6 door gaps are pretty bad!

JoeTR6
JoeTR6 HalfDork
11/14/15 7:23 p.m.
NOHOME wrote: Even "Good: TR6 door gaps are pretty bad!

LOL, yes. At least my doors don't stick out at the bottom rear corner like some I've seen.

I remember riding in my brother's TR6 many years ago with my arm hanging over the door. We hit a bump, and when the gap closed it pinched the hell out of my arm. So in some ways, the bigger gap could be necessary because of chassis flex. I'm hoping the roll bar cuts down on that somewhat.

JoeTR6
JoeTR6 HalfDork
11/15/15 7:58 p.m.

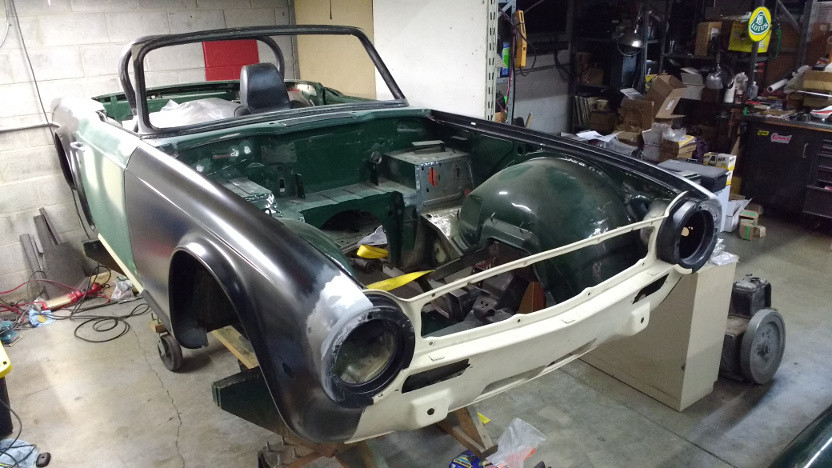
Today I mounted the front fenders and rolled (hammered actually) the wheel arches to clear wider tires. I'll probably run 225-50R16, so they are shorter but much wider than the original size. The rear fenders don't need to be rolled. I also cleaned up the exposed edge to be smoother as all of the fenders were a bit wavy and sharp in places.

I hadn't fit the scuttle vent lid, so finished that. There's no way the rubber seal I bought from a vendor will fit under the lid without jacking it up over 1/8". Some closed-cell insulation stuck on the bottom of the lid should work fine. I also hung the gearbox mount to more accurately locate the exhaust. It was welded together on the bare frame, and I wanted to ensure my measurements of the floorpan location were accurate. It's a little close, but fits.

Finally, I removed the patches for the A/C line holes to pass the Megasquirt wiring harness through. These are a little big (1 1/4"), but I should be able to find a boot/grommet that works.

With that, I think I'm done. Powdercoating the frame is next. I also have the front hubs to get magnafluxed and a short block to build (or have built by someone who knows better what they're doing). Hopefully anything I forgot to do pops into my head before next weekend when the final teardown begins.

JoeTR6
JoeTR6 Reader
11/20/15 8:54 p.m.

OK, so I'm not quite done. I decided to improve the door gaps on all four fenders near the top (above the accent line). The door is fine, but the rolled edge of the fenders is not very even. I experimented with an old fender and was able to lay a bead of weld on the edge that looks pretty good after grinding. I did the right side fenders tonight, and they are certainly better. A thin coat of filler should hide any imperfections. The rear fender curvature was a little shallower than the door, so I fixed that as well. Now that side has "good" door gaps.

The plan is to finish this tomorrow and get the frame separated next weekend in preparation for powder coating.

wheelsmithy
wheelsmithy GRM+ Memberand HalfDork
11/21/15 8:43 a.m.
JoeTR6 wrote:

Looking Great! One of my all time favorite cars to look at. Updates are always appreciated.

YoloRX7
YoloRX7 New Reader
11/21/15 2:30 p.m.

Looking good!

JoeTR6
JoeTR6 HalfDork
11/22/15 5:39 p.m.

Thanks, guys. I'm really looking forward to seeing this thing with good paint on it.

Today I did something I considered doing at the start of this project.

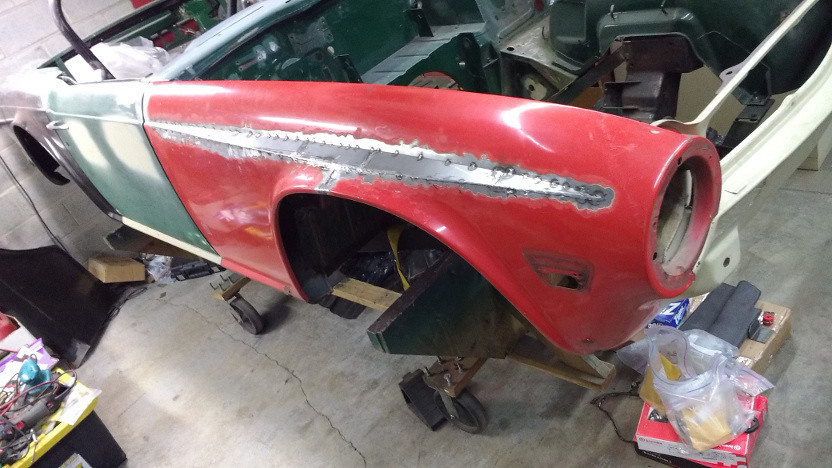
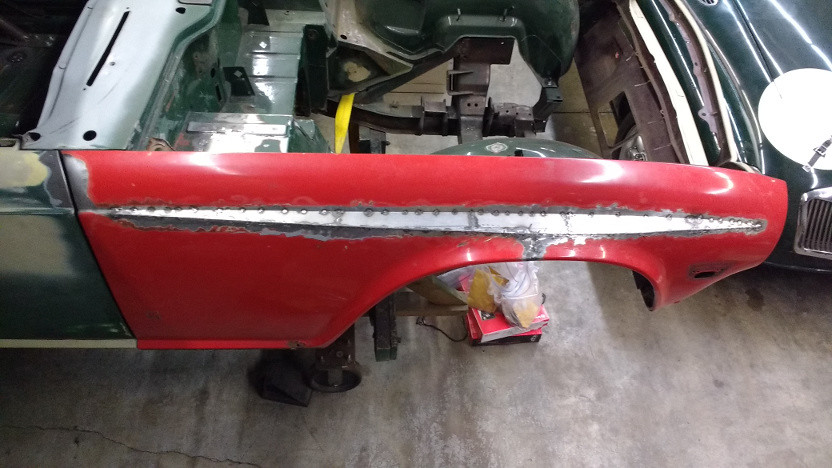
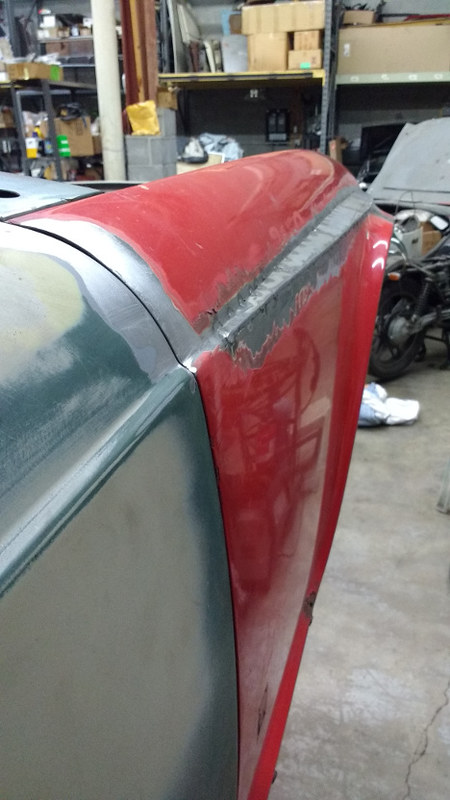
This is my practice fender. I've been practicing welding and dent repair on it lately, but made the cut over a year ago. I finally decided to weld in the flare. It's hard to tell how this would look with paint, but I think it would be OK. This adds 1.5" in width at the wheel arch peak. Any more would distort the fender too much. The flare slopes down about 16 degrees to almost match the accent line.

Here's another angle.

There's almost 0% chance that I'll do this with all four of my brand new fenders, but I may look for some used ones and try to make a complete set. If anything, they could be used as molds for fiberglass.

Dusterbd13
Dusterbd13 UberDork
11/22/15 6:34 p.m.

If you wonder what it would look like with paint, use gloss spray paint. Good enough for proof of concept.

NOHOME
NOHOME UberDork
11/22/15 6:50 p.m.

I like the fender treatment. Might consider that for the Molvo if need be.

JoeTR6
JoeTR6 Reader
11/28/15 7:38 p.m.

I'm heading down to the shop tomorrow and wondering if it's time to pull the frame out and call it good. A few things are still on the list, mostly related to converting the '76 tub to a '72. But these aren't affected by the frame and can be done later. My plan is to pull the body shell tomorrow after removing the fenders and do some small welding jobs on the frame. Then it's off to have the frame blasted and powder coated.

The machine shop that I wanted to build a short block and do some other stuff is moving out of the area, so I also need to find a replacement for that.

TRoglodyte
TRoglodyte SuperDork
11/28/15 8:25 p.m.

I know of a rebuilt TR6 motor on the stand for sale. Reputable builder, pm me for details.

JoeTR6
JoeTR6 HalfDork
12/7/15 5:32 p.m.

The frame is done and is getting powdercoated next week.

I'm working on a much lower wooden dolly that will allow the frame to be rolled onto a trailer. That's also how I plan on getting the body shell to the media blaster and paint shop, but on the spare frame. I realized this weekend that the bent spare frame will require some straightening before I bolt the body shell to it.

JoeTR6
JoeTR6 HalfDork
12/12/15 4:28 p.m.

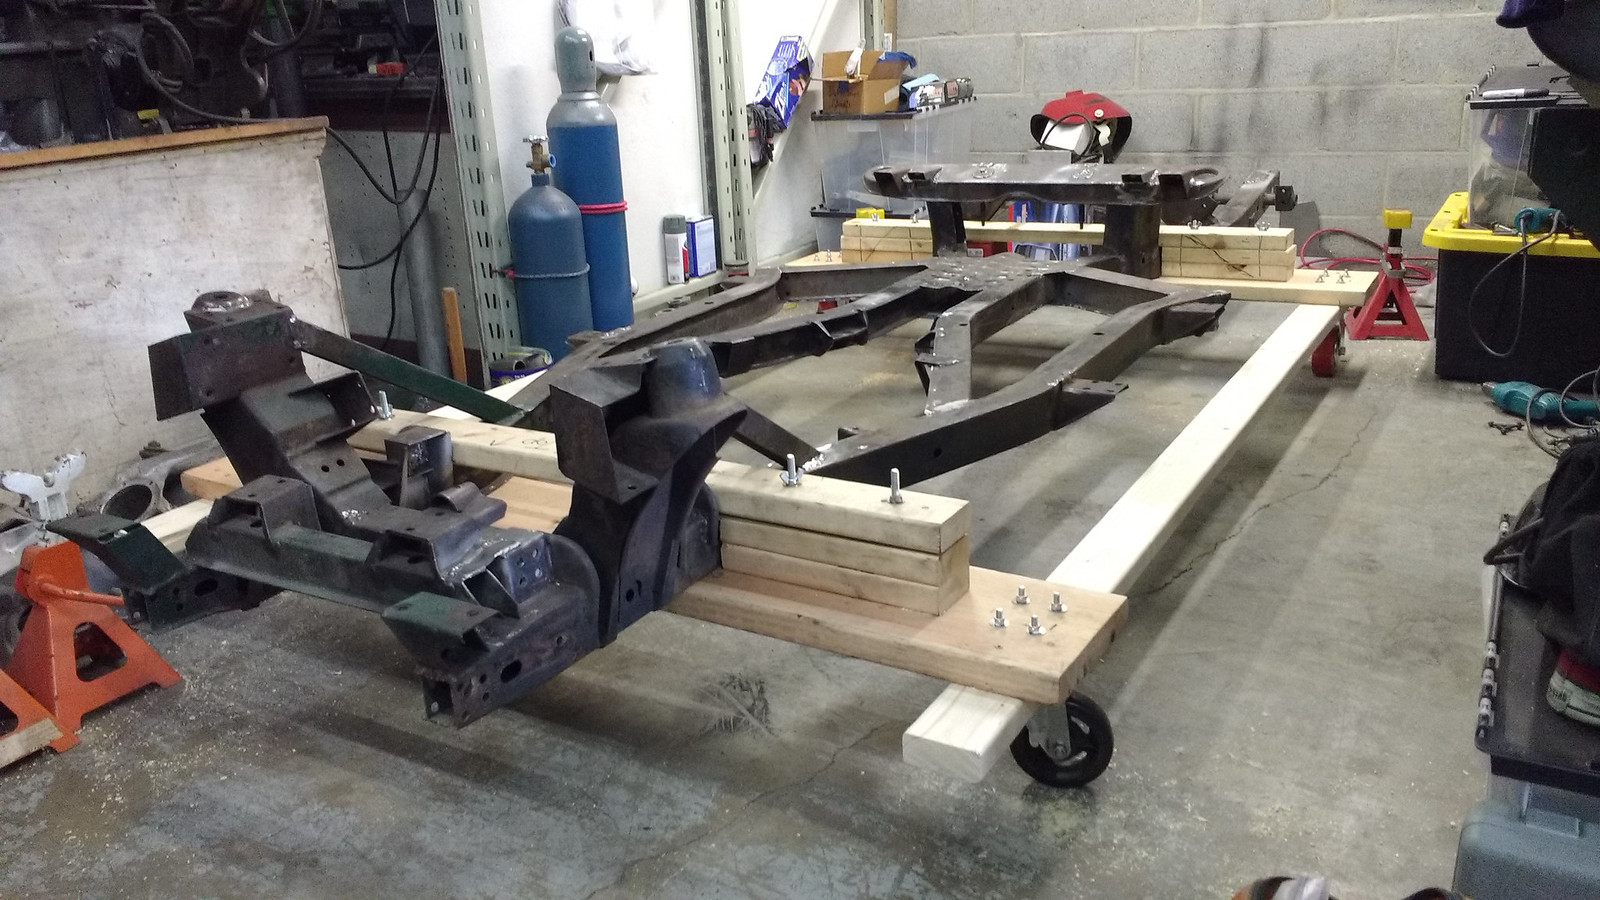
Today's small accomplishment was finishing the transport dolly. It should be sturdy enough to take the weight of the frame and the entire shell for when it goes to the paint shop. For now, it should make transporting just the frame easier.

I also took a whack (several really) at straightening the spare bent frame to use as a paint dolly. The driver's side frame rail is bent upwards about 3 feet from the front. A 5 lb. hammer made lots of dents, but didn't do much to change the bend angle. So I cut the sides and top of the rail and drove wedges to bend it. The shock tower is still hitting the body on that side, but the floor mounts are still about 1/2" from contact. It may be easier to simply cut the tower off at this point.

JoeTR6
JoeTR6 Reader
12/19/15 5:39 p.m.

The frame is done, but I can't pick it up until Monday. In the mean time, I've been working on getting the tub ready for paint. To gain access for grinding some welds done for the roll bar, I pulled the bent frame out and settled the tub directly on my wooden dolly (leaving tension on the chain hoist). Basically, the dolly was steadying the body shell and acting as a safety. I cleaned up the welds on the differential well and straightened/closed up some body seams.

My intention was to straighten the spare frame while it was sitting on the floor. berkeley that, it's too far gone. The new plan is to buy two 8' long 4x4s and set the floor pans on them. I can add some supports in the rear to brace the back part of the shell, and I already have some hefty door braces. It would take some work to brace the front, but it doesn't seem to weigh enough to hurt itself during transport, even with the fenders bolted on. So I'll do that tomorrow and chop up the bent frame. I might keep the differential crossmember just in case.

wheelsmithy
wheelsmithy GRM+ Memberand HalfDork
12/19/15 5:57 p.m.

So, referencing the title, is this to be a street modified autocrosser? Regardless, magnificent work.

JoeTR6
JoeTR6 Reader
12/20/15 7:22 a.m.
wheelsmithy wrote: So, referencing the title, is this to be a street modified autocrosser?

That's basically it. I didn't want a trailer queen, but something that could be driven to an autocross and have fun with. For a goal I'm using SCCA FSP as a ruleset, realizing that some Mk. 1 VW Rabbit with a 16v swap will take my lunch money. Street Prepared uses bolt-on mods, so the car can be put back to stock if need be.

JoeTR6
JoeTR6 HalfDork
12/21/15 5:04 p.m.

Here's my new wooden frame for painting the body shell.

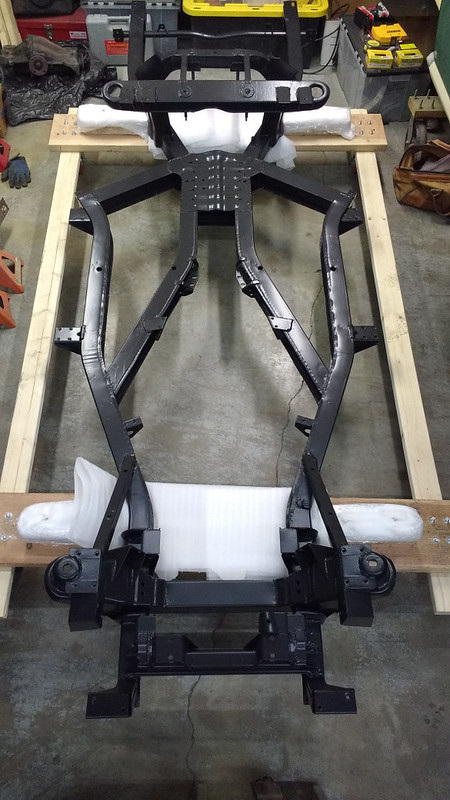
I got the frame back today. It looks too nice to cover. I haven't looked in every nook and cranny, but the coverage appears really good. My goal was to bolt something on the frame by the end of the year, and the shocks are ready to go.

CrookedRacer
CrookedRacer New Reader
12/21/15 6:08 p.m.

In reply to JoeTR6:

I just had to turn my iPad vertical to gaze at this... like a centerfold in more ways than one...

frenchyd
frenchyd Reader
12/22/15 9:38 p.m.

In reply to mightymike:

Anglo/American swaps are all too common. In the past with limited choices of British motors for real power you needed to accept American' V8's or V6's. and accept the scorn of the purists. However there is a alternative that will keep the car all British..

Jaguar V12's It will easily fit anyplace that had a six cylinder engine.. It is only 22 inches wide (add 3 inches per side for stock exhaust manifolds, and 25 inches tall from the bottom of the oil pan to the top of the intake.
Power wise stone stock the later 6.0 engines have 318 horsepower with a near flat line torque figure of 355 ft.pds. The earliest engines of 1971 started out with a mere 242 horsepower in the carbureted form.. That however can be easily improved but the torque is still awesome..

In stock form the engine looks nasty and complex looking.. However remove the pollution hoses, Power steering A/C, etc. and air conditioning and suddenly the engine becomes slick, clean, and extremely pretty.. Transmission choices abound.. The earliest ones (up to about 1978) came mostly with either the Jaguar 4 speed or the Borg Warner automatic (yuk!!!) However in mid to late 1978 the transmission was changed to the GM Turbo 400 and not any turbo 400.. The extreme duty one used in ambulances and tow trucks behind big Block 454's The coolest part of that is the locating dowels are the same ones used in Chevy 4 speeds..

Now you can buy the kits (expensive) to swap a T5 transmission or do a little work yourself and adapt a 4-5-or 6 speed transmission..(5 gear is overdrive, 6th gear is double overdrive)

Here is the really good news.. I've bought complete Jaguar V12's for as little as $50 However the going market price is closer to $300 to $500.. (That's as low as $1.06 per horsepower) Since wrecked and damaged Jag's often sell for that money it makes sense to buy a whole car (rusty or not) take the engine, transmission, gauges, computer, (if you want to run FI) etc.. and sell the rest for scrap.

There is a myth the V12's are troublesome and prone to failure. Not true! Most failure comes from owners who fail to read the operators manual and follow it.. Take one apart and you will be amazed.. you will swear the bottom end is designed to be in a 5000 horsepower top fuel dragster. The factory ran the V12 up to 7800 RPM with no trouble.. The pieces are extremely strong and well made. Aluminum block, heads, water-pump, intake, etc.. make it 30 pounds lighter than the previous Jaguar 6 cylinder.. While it is heavy some of that weight comes from the giant ambulance sized alternator, and a starter that is twice as big and heavy as the later gear reduction starters.. You could probably get the weight down 80 pounds with care.

There are several sources selling hop up parts for JAG v12'S AJ6 engineering has a complete web site about V12's Rob Beere is a good source for parts to make up to 750 horsepower, Kent cams sell new cams, Isky and Crower will regrind your old one..

JoeTR6
JoeTR6 Reader
12/25/15 6:05 p.m.

I'm at a turning point on this project. The frame is getting put back together and the body shell is ready for paint. Up till now, I've been doing stuff that is in front of me because the order didn't really matter much. Now it starts to become more of a concern. I came up with a long list of things to do to help me organize stuff and minimize how much time is spent waiting for parts. First up is stripping and powdercoating suspension pieces. I also need to get fuel/brake lines on the frame because it will never be any easier.

I'm looking forward to working with clean parts rather than rusty crap. Unfortunately, there's still lots of small rusty, greasy dirt caked parts that need cleaning.

JoeTR6
JoeTR6 HalfDork
1/2/16 7:40 p.m.

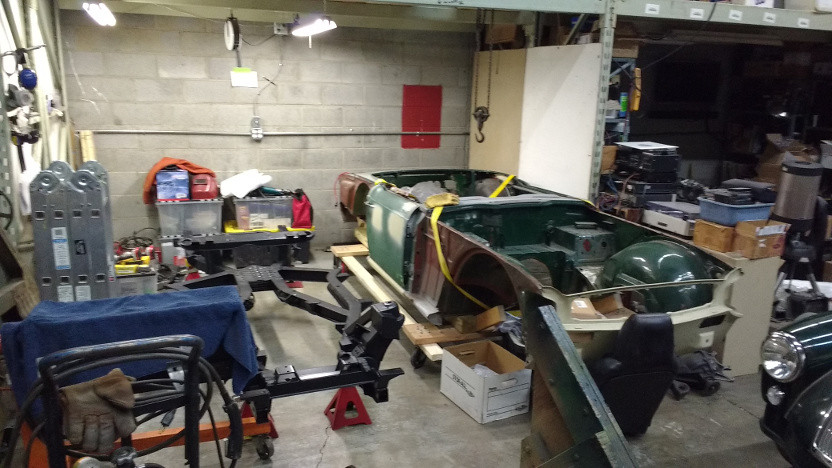
This is where things stood last weekend. The body is on the paint dolly waiting on the frame.

Since then, I've been media blasting and power coating suspension pieces. I blasted the aluminum trailing arm castings and checked for cracks. The hub studs (holding the hubs onto the trailing arms) on these were in remarkably good shape, but I heli-coiled them with course threads to replace the 5/16" fine thread studs originally used. Assuming I round up all of the hardware, the frame could be sitting on a suspension as early as next weekend.

Meanwhile I'm rebuilding a gearbox with a J-Type overdrive. This does me no good for autocross since it only has overdrive in 3rd and 4th and engages a bit too slowly. Since this gearbox weighs 25 lbs. more than the late 4-speed I also have, I'll probably just keep it for use after this car is no longer a serious autocrosser.

That raises another thing that I need to decide upon. Should I keep the doors with side impact beams that add approximately 30 lbs. to the car? I have slightly rusty 1972 doors without the beams. The beams are below the bumpers of most SUVs, and I'm uncertain how effective they would really be anyway. OTOH, I'd hate to find out how much they were missed.

Jerry From LA
Jerry From LA Dork
1/3/16 11:41 a.m.

I think if you can solidify the car's exact mission, choices like this will become more obvious.

Apexcarver
Apexcarver PowerDork
1/4/16 8:23 a.m.

Hey Joe, does the rollbar you are going to use have bars that come down across the doors at all? Can it? If it can, it might be a good way to retain safety and add a bit more torsional rigidity. (and you can then use the beamless doors without worry)

Every bit still helps in a crash, but its how comfortable you are with the risk. (and knowing how people drive around here...)

1 ... 3 4 5 6 7 ... 39

You'll need to log in to post.

Our Preferred Partners
bn3VtGatA0PSlbtJFRYi37RReUbVlN1pzciwFWLEx7rvU6hTwuIVUiJxfyYBXh5r