


Sweet! What's left on the capri?

Sweet! What's left on the capri?

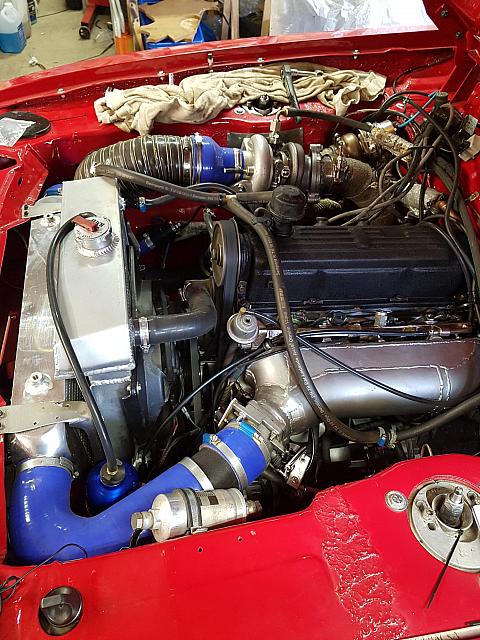
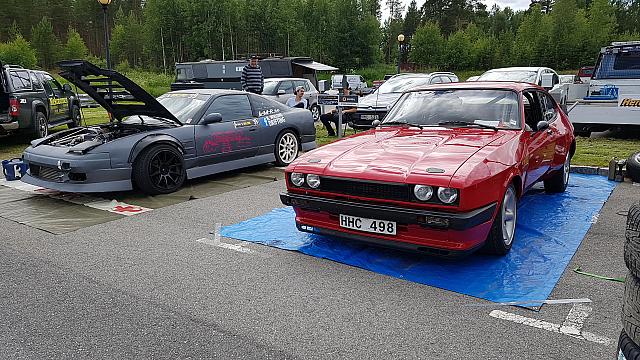
Well, the Capri was running nice in October 2015, when winter set in. But after the dyno run, I thought it was time to get going on the intercooler - I had a larger one on the shelf. Just had to make room for it, and pipe it up...
A friend had used the same model intercooler in his Capri, so I knew it should "fit". Actually, it wasn't that bad.
.JPG)
.JPG)
Some details left to do, but almost ready!
With that done, I focused on the rear brakes. They felt a bit small (blueish signs of overheating after the track days), I run a very near 50/50 weight split and the rear brakes need to work more that you'd think. Sierra Cosworth (or Scorpio 24v estate...) vented 273 mm dics was the "easy" upgrade but I really don't like those calipers, the parking brake always jams, sooner or later. So I found a set of alloy VW Golf R32 calipers instead.
But they are clumsy, and will not fit under 15" wheels... So I had to change the plan, and go for the Ford calipers anyway.
In theory a bolt on thing but only if you have the "large" caliper mounts/bearing housings from the cars that had 273 mm discs. Suddenly, a used set was impossible to find. I gave up looking and found Anembo Engineering, who makes new ones in alloy. Not cheap but considering that you get new wheel bearings, and you save some weight, the deal is not that bad (actually quite good).
 (Medium).JPG)
New calipers were ordered and I refurbished some caliper carriers I had saved from earlier findings.
 (Medium).JPG)
Not super racecar, but the 20 mm larger disc and vents should mean they can take a bit more heat.
Next issue I started to work on, was getting a speed signal into the Megasquirt engine management system. Two reasons; 1 - to get some kind of accurate speedo 2 - I had found an MGF electric power steering column (EPAS), that I wanted to feed an adjustable speed signal to vary the degree of assistance.
The MS can read a speed signal from the gearbox and output a "tweaked" signal, to calibrate the speedo and hopefully also provide the power steering ECU with a variable signal.
But I want to keep the Capri gauge cluster, so I have worked on modifying one to accept the electronic speedo from an early MkIII Granada (or Scorpio as we call them). Thanks to great support from people on Capripower, I had an extra cluster or two to work with :-)
You need to be quite evil with the poor cluster...
In parallell I worked on the EPAS fitment, for some hours... To start with I only got the column itself, so step one was to see if it would fit at all, physically.
When I thought that was promising enough, I started to look for the other stuff. Wiring, ECU, steering joints...
ECU's were available on Ebay, but the wiring was harder to find. Eventually I found a seller, in the UK, but that was a complete MGF loom! At least I got some nice wiring stuff and a good fuse box for future use.
Steering joints next, the MGF has a 3/4" 48 spline end, Ford 9/16" 36 spline. Carbuildersolutions had a conversion joint, and a rather decent collapsing shaft. That almost worked, but since the MGF column is shorter than the Capri column, a section was missing.
The 3/4" 48 spline was a bit of a problem, I could get shafts easily but also needed a slim female section (who doesn't!) to fit it between the pedals. I fnally found some at EMPI (VW place) in the US - lucky I spent the new year holidays over there!
I didn't take enough photos on the process itself, but after a lot of cutting and building, it is finally there in the car.
.JPG)
.JPG)
I managed to fit the Capri ignition lock and switchgear, so I hope it will look stock when all is finished.
So far the mechanicals. But the electronics need to work too. The Corsa and Agila EPAS units are very popular with loads of cheap controllers, but for the MGF it's not that easy. But there are some good sites on diagnosing these, so I found out some info on the signals needed. 1000-3000 Hz for engine speed, and 100-250 Hz for road speed.
So, I thought a small 555 timer circuit would fix that.
.JPG)
Benchtesting, it worked great.
In the car, worse...at first, I had mixed up the speed and rpm signal, and then something else happened, the smoke escaped from the 555. Not sure what happened, could have been a wiring issue.
Well, I found a company selling MGF controllers at a decent price (not cheap, but OK). I don't have the time to develop my own controller (again).
The bought one showed up and is really compact. Everything is in the adjustment knob.
 (Medium).JPG)
Now, this still didn't work great. The EPAS ECU would startup, but as soon as it had to work with any resistance, it turned off. I tried zero-calibrating the torque sensor but it didn't help.
Power Steering Solutions that sold the controlled, helped me with some ideas and we soon came to the conclusion that I had the wrong ECU. There are two versions, mine is the later one (adjustable column) and the ECU was for an early column (fixed). Doh!
I found a later ECU in Sweden, at a good price actually, so a bit of luck there.
With the correct ECU, it all works perfectly - at least in the garage. Now I can turn the wheels just using the steering wheel hub! I just hope I get teh speed sensing function to work as well - but if not, the manual adjuster will come in handy.
I also did some work on tidying up the fuse/relay central.
 (Medium).JPG)
 (Medium).JPG)
The EPAS ECU will live under the fuse/relay centre, under the glove box. Easy accessible for future checks.
I also put the instrument cluster together, converted to LED lighting. I choose blue, to match the boost and voltage meter. I hope.
 (Medium).JPG)
 (Medium).JPG)
Bad photos but in reality, it looks good.
This post means I'm more or less up to date on the Capri. I still have to fit the intercooler permanently (some paint touchup to do), and the wiring for the EPAS and engine management needs to be put back into place.
I thought I would upgrade the front brakes (again), with another approach, using BMW 540 calipers but I'm not sure I have the time - the season here usually starts in beginning of May when the snow has melted and the roads are clean. That's less than a month away!
Gustaf


![]()

therealpinto-
I see you are using coilovers on the rear (i do see the IRS), are you using the factory shock housing st the top? I'm looking to convert to a 3-link, and was wondering what kind of reinforcement the top shock mounts will require
Well, I did use the factory shock turrets but later built new ones, for a better motion ratio.
The stock turrets were only marginally strenghtened, they are really beefy from the start. Plus, if you look at the shock loads that the shocks put into the body, they need to be.
But every car model is unique, some will need reinforcement to take more loads.
Gustaf
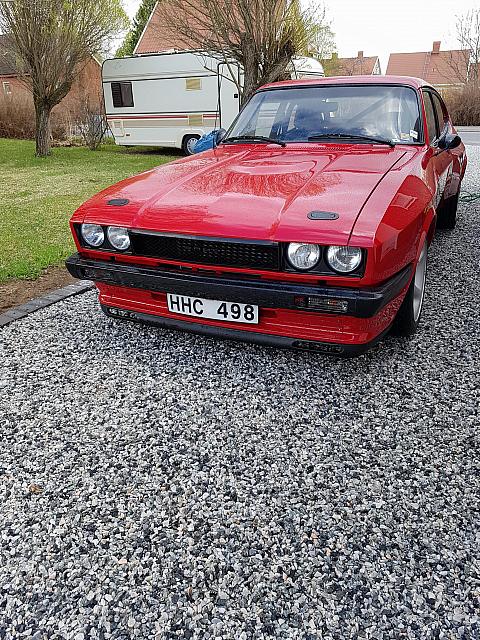
So, a month later, the car has seen the sun for the first time this year! With no front brake upgrade...
From the outside it looks the same as last year though.
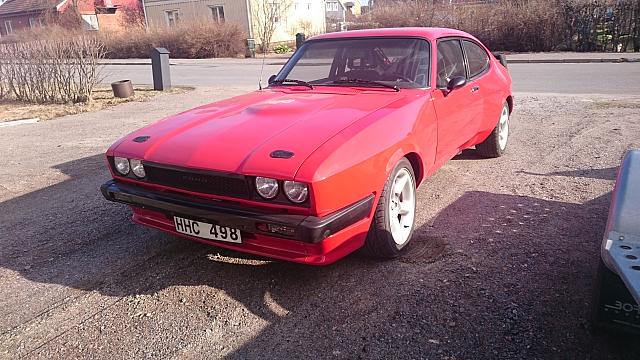
Still with the garage dust on it.
This was mostly a test to see if everything would work, I still have to properly put the ECU and fuse central back where it should be. But the car fired up (when I remembered to plug in the coil pack again), the new IAC (Bosch 2-wire) seems to work fine. The brakes need another bleeding though.
But the two most exciting things was the power steering, and the speedometer. Both seem to work! The power steering has a small play when stationary but once on the go, it's not a problem. For now, it is not hooked up to be speed sensitive, just adjustable through a knob. But it works quite nice. Maximum assist is great for parking, and mid range seems good for town driving.
The speedo also works, just has to be calibrated through the MS to show the right speed :-)
Gustaf
Thanks for the feedback on the shock turrets, Gustaf
Glad to help!
On May 15th I went to the first track day of the year. Only on the street tyres but a bit of sideways action has never hurt, right?
I do like the power steering, it makes the car easier to handle but it still has plenty of feedback. The speedo works OK, it's not spot on but miles (or kilometres perhaps!) better than before.
Another nice thing was that I got to share the track with a brand new Focus RS. The guy drove 2000 kilometres the week before to pick the car up from an RS dealer, and swiftly proceeded to take it on track. That's the spirit! He had a great time and will be back :-)
Some video i dribbled together also.
https://www.youtube.com/embed/n9KZZk4fBUg
I now have some small issues to fix on the car, the crankcase ventilation condensation tank is leaking a bit. Annoying!
Regards
Gustaf
With the Nissan Primera endurance race as a top priority for a while, the Capri has mostly been waiting patiently. But there was a test&tune day coming up at a dragstrip nearby and I decided to give it a shot. The prep work was rather quick, just added the door bar to the roll bar and put on the drag radials.
Small issue - I had readjusted the rear camber since I used them the last time (7 years ago?) and now they would rub on the coilovers. Well, nothing that a 5 mm spacer can't fix.
I haven't driven the car on the dragstrip since before I started the body transformation. I was quite eager on seeing how the remap and added boost would change things.
First run was mostly a test to see if stuff worked. It sort of did but I just took the car down the strip. Second run I tried a bit harder, but a rather bad start with bogged down 60-foot time. More revs needed, and more boost added. Now I was in the 13's but still problems with bogging. I continued to turn up the boost and launch rpm's, the trap speed increased to a bit above 170 km/h but the bogging kept on. One run I blew off the wastegate hose, so I just went agains the boost cut...
Last run was the best, 13.093 and 176 km/h, 60ft at 2.131. That's still miles off the 11.99s and 180 km/h that is my personal best. But then I had the larger turbo...
Still, I have the feeling that something is off. I swapped the intercooler after the dyno session in October 2015, and the VE might have changed enough to upset the tune. Or, the (Chinese) intercooler just flows really bad...
I spoke briefly to my tuner during the day and we will think about what can be done. I did a quick street log today but it doesn't show anything strange. But I didn't dare to do a launch control start on the street - that's what I really need to log, I guess.
Some pictures from the day;

Waiting in the lineup. Yes, that's and Audi Avant behind the Porsche 911 turbo (10-second car...no, not the Audi).

Even time for a selfie! Dragracing is a game of waiting...

If nothing else, it looked rather nice in the lineup!
Gustaf
The weekend after the dragrace, I went on a track day. Actually, I am organizing the day so it would be rude not to show up. In the morning I thought that instead of spending time loading the car on the trailer, I would just drive it to the track. It's only a 45 minute drive and I was short on time for the day.
The driving went largely as last time, low grip but high fun. I'm starting to get to grips on the drifting thing. And, I have noticed that I bought these street tyres in 2009, that might be why I'm low on grip :-)
I had made a slightly overdue oil change and stupidly forgot to bring oil, and had to borrow some since the level was slightly low.
Then I decided to just go for a final round. I entered the track right behind some quite potent Subarus and noticed a funny smell - they must be running on E85. Erm, no, that's my coolant leaking!
I burst the hose from the intake to the heater, right behind the head :-( Great, wise choice not to bring the trailer...
That sort of threw off the entire planning for the day. Hitched a ride home in a Supra, got the trailer and went back to collect the car. Then, the morning after at 5 am, took the taxi to the airport for a weeks work in Holland.
During the week I planned my next steps. Fix the coolant hoses, and swap in the larger HX35 turbo again. But first do some logs with the small turbo and wastegate shut, to see if the boost issues may be wastegate related. They seem not to be, since boost builds equally slow with the wastegate blocked off.
So, yesterday I slotted in the HX35. More or less bolt on, just had to modify a charge pipe. The true issue is that I have too little time for remapping. I had some old tune files from the last time I ran the HX35 and I used them as a base line. As expected they were a bit rich but better to start that way.
Now it is reasonably tuned at 1.7 bar, some work to do still but I think I will have everything set in time. The race is July 15th-17th but I wille be on vacation the weeks before, so the car really needs to be prepared by the end of this week.
Gustaf
I love this thread
Thanks!
Yesterday I went out to adjust the last bits of the map. Now I am pretty close to "right" at full load, AFR around 12 and the row about is rather rich, meaning some boost spikes should be harmless in that sense.
I also adjusted the launch control a bit more aggressive (less fuel added, more sparks removed) so it builds boost a bit quicker. The flat shift also performs a nice "bang-bang" sound when shifting. Very important.
Since this was my last real tinkering time before the race, I washed the car up and I just have to load it up on the trailer, and load the tools for the race, when the time comes. Really strange to have the car "ready" two weeks before the race!
Gustaf
So here's the story...
I went up to the local race with my old buddy Tomas (the blue twin turbo Capri). He's btw hooked on building a Super 7, something that I of course applaud.
First run gave a similar bogged start, we tweaked some settings and swapped to the ET Street drag diagonals. Next was no better really, and I also missed 3rd or 4th gear. More adjustments (higher launch rpm) but we still had the bogged 60ft times.
Now we took a deep look into the launch control settings. We decided to add less fuel on launch. The version I used before had another way to control how much fuel is added when launch is active so this was mostly guesswork. Now, we started to build real boost.
Holding it long enough would give around 1,5 bar stationary before I let go. That should do it!
Now we had boost in the 60ft but less grip - wheel spin all the way. But we were moving in the right direction and actually did a high 12s run again.
For the last qualification round I lowered the tire pressures in the ET Streets and hoped for a good launch. Disaster. Grip, then snap, something in the drive line broke.
I towed the car home and worked as a speaker for the rest of the weekend.
Some investigation showed that was broke was the one thing I thought never would...
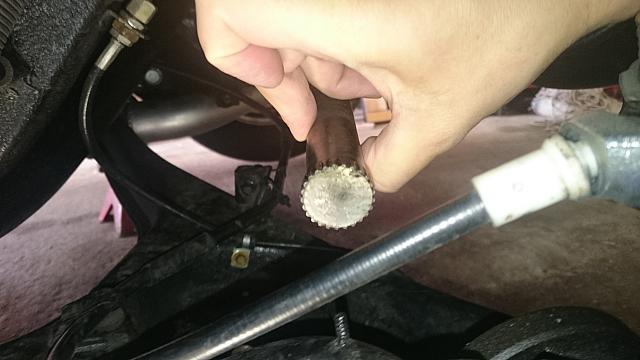
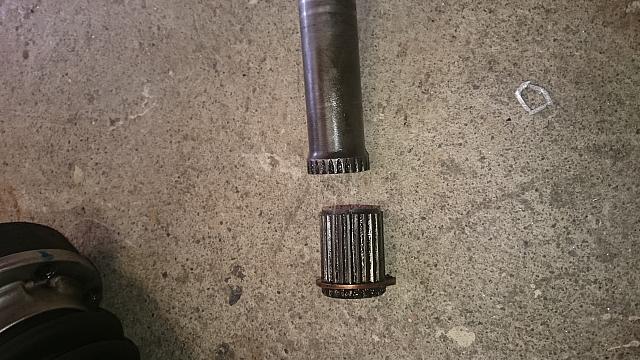
One of my specially made steel drive shafts.
It has snapped clean, of course at the snap ring groove. I had some wheel hop in the launch before but I'm really surprised. When the shaft broke, it also killed the inner CV joint.
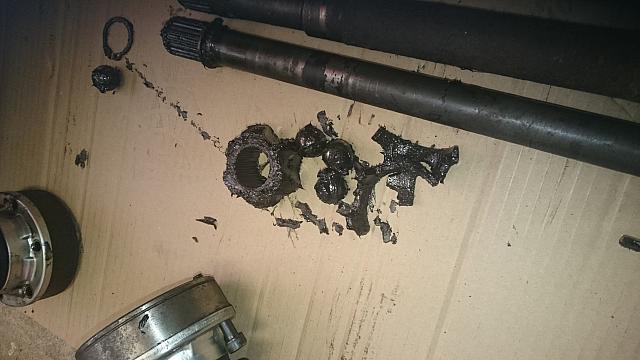
This was bad news, mostly because there really is not too many options to make these parts "better". I have spoken to the supplier of the drive shafts, and they have changed their process a bit so newer ones may last a bit better. But he suggests upgrading to the larger 108 mm CV joints. Now, that is an option and might be what I end up doing. But they need some kind of adapters to fit the 7" Quaife differential and I need new outer stub axles.
I have also considered quitting dragracing. There is no point in trying to race a car that does not hold together if you take it to the max...
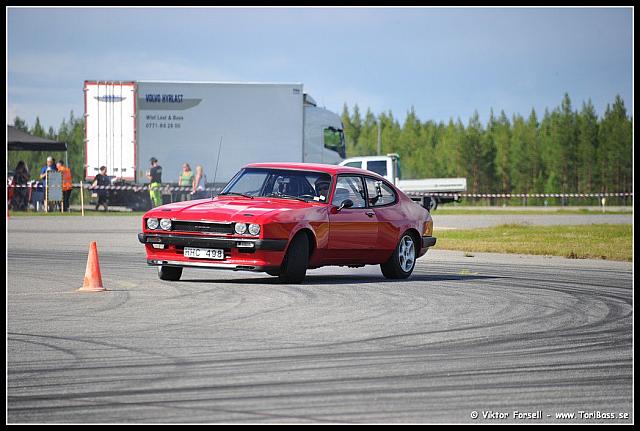
Anyway, I borrowed a standard driveshaft from a friend to be able to drive the car for the rest of the summer. And photographer Richard captured a nice start:
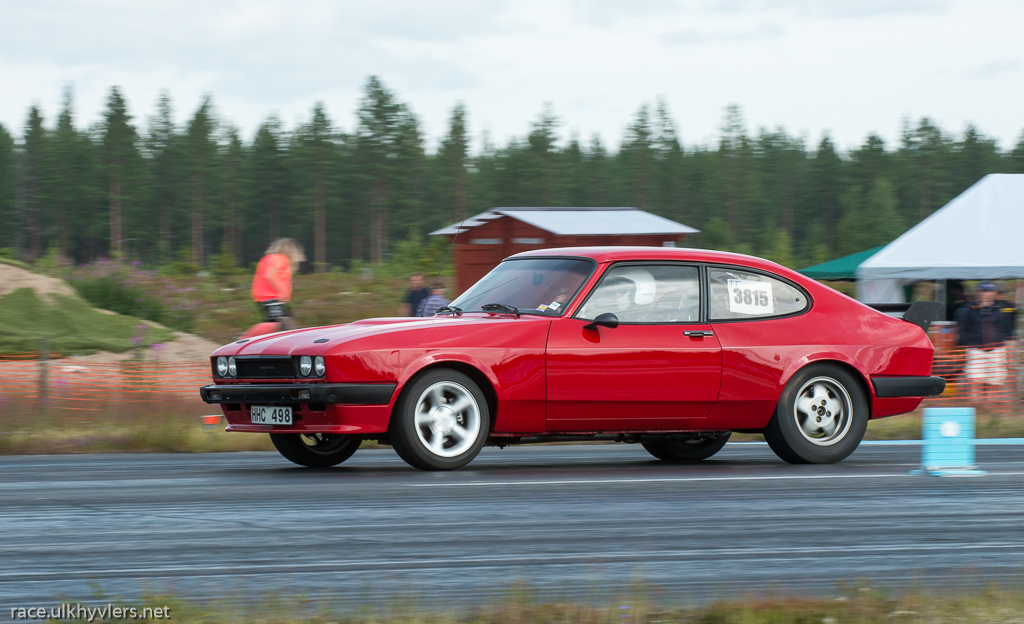
Check out the others at http://race.ulkhyvlers.net/dragrace/Skelleftea/goldtown-2016/
Gustaf
Next up was the "Motor Week" in Lycksele. That's where I premiered the car in 2014 and I felt it would be nice to bring it again.
The night before I left I made a quick solution for sending some cooling air flow to the alternator. We had a hot spell again and the charging voltage had a tendancy to drop a bit after some time. I blame overheating of the alternator - it really is a bit close to the exhaust.
I started with a regular show, a wide mix of "classics".
Toribass have gathered some photos; http://motorveckan2016.toribass.se/#collection/6
Next up was a drifting competition. This year they opened up for a "run what ya brung" practice session and I thought it would be fun to drive a bit. Now, the organizers treated us much as the competitors, and a bit unexpectedly the car was issued a proper log book.
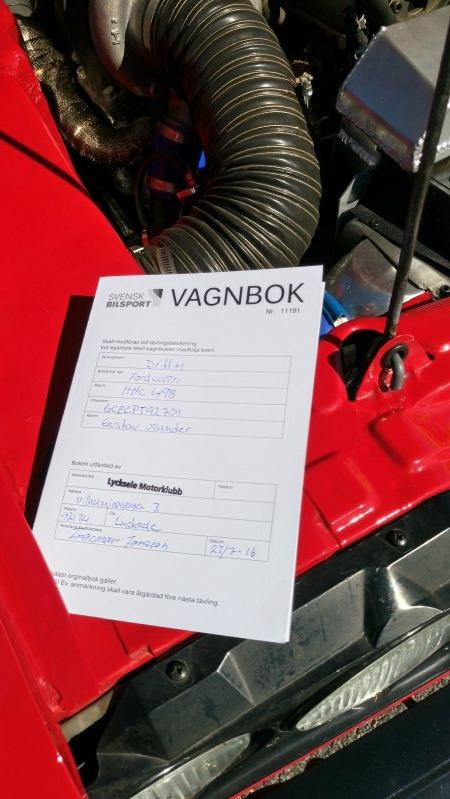
Formally we had 45 minutes between 3 and 3.45 to practice but during the drivers meeting we were asked to do the entire competition, if we wanted to. They didn't have to ask me twice :-)
The idea to drift came rather late and I didn't have too much time to get some proper drift tyres. But I borrowed a set of wheels from a friend, destined for his Capri eventually. They had some remoulds, 195/65-15 - a bit high but the ET was right and they were worn enough not to be of any use for a road car.
The last time I really tried drifting (might have been in 2008?) I realised that it is hard. This time it was confirmed...or maybe it's the car. Or me. The first round I spun out 3 times during the short lap. But I lingered on and tried to find the flow. A tight track like this is not ideal with a rather laggy turbo.
As the hot spell continued, I drank like a camel in between the rounds and it also meant teh car had to cool down a bit. So there was not too many practice rounds before the qualifications started.
Soon my target for the qualifications was to make at least one round without a pin, to get some points. A spin equals zero points :-( The third and last run was rather mediocre but at least I didn't spin so I scored 2 points (a normal decent run is perphaps 20 points!).
The eliminations were not any better and I did a "stop slide" so moving on was out of the question. But that was expected - I'm a bit fuzzed though that the Audi who beat me, tore a drive shaft and could make the next round.
The GoPro captured some of the runs. I'm not easily ashamed so here is the video: https://www.youtube.com/embed/oTUris7kfcI
It was fun to compete and the car drove off by it's own power, with no damages. So that's sort of a win. I even didn't end up in last place! 13 out of 16 or so I think. I'm sure I can improve on the car bu doing more adjustments to the suspension settings. Now I just stiffened the rear shocks a bit.
When it was time to head back home from the camp site, the starter didn't even clik. We tried jumper cables but I was pretty sure that it was not a power fault (the voltage meter indicated a rather healthy voltage). I called in some friends to push start (always interesting in an injected car with aftermarket EFI), and then I had to keep it running all the way home, a 2,5 hour journey. But that worked fine.
The starter is completely dead, so I have just ordered a new one.
Gustaf
Katarina "Polymoog" has got her drifting photos up now:

More at www.polymoog.se
I fitted a new starter and now the car turns over like never before. Happy about that!
Gustaf
I haven't done much lately at all, to the Capri that is. A new puke tank for the radiator was done a couple of weeks ago though.
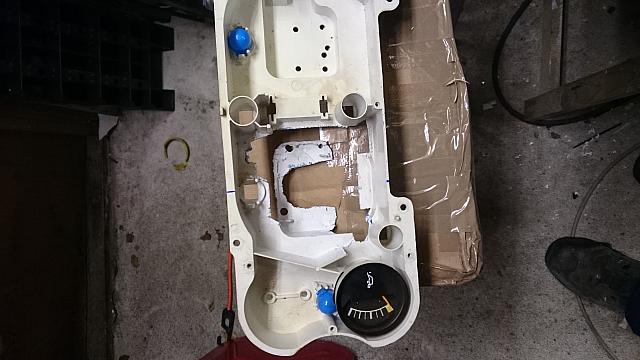
Next up was instrumentation. The Granada/Scorpio speedo I setup this winter didn't work out great in the long run. The scale is not spot on and the needle floats a bit.
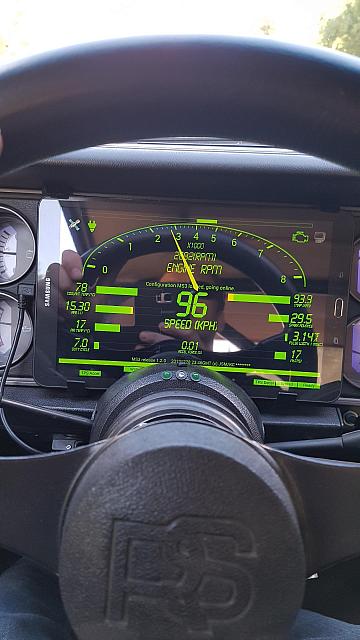
So, I decided to check out solutions for a tablet connected to the Megasquirt. You can design your own dash and also datalog with no computer on board.
I struck a deal for a cheap Samsung tablet and by pure luck it fits the Capri dash pretty good:
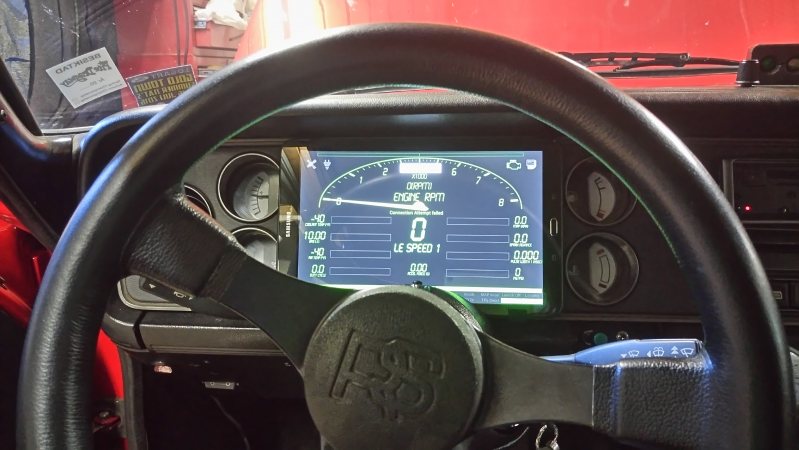
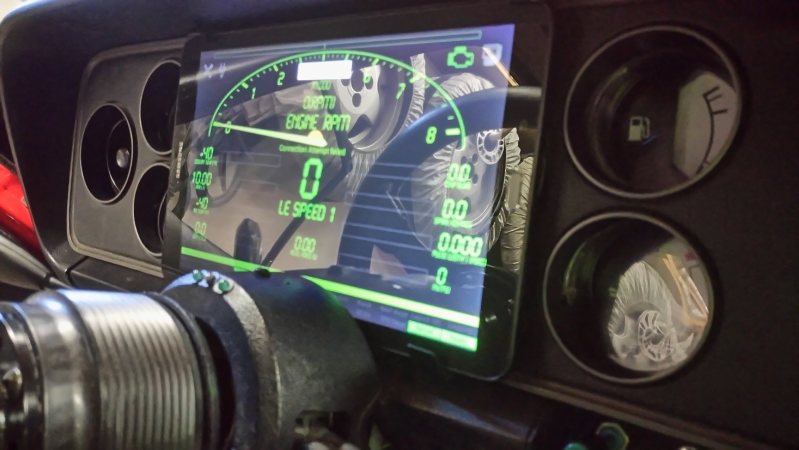
I couldn't find a generic mount that would work but I made my own that screws on the backside of the dash panel. Pretty stealth. The tablet covers the speedo (as planned) and the tacho (acceptable) but also the turn signal and high beam indicators. They are a legal requirement...
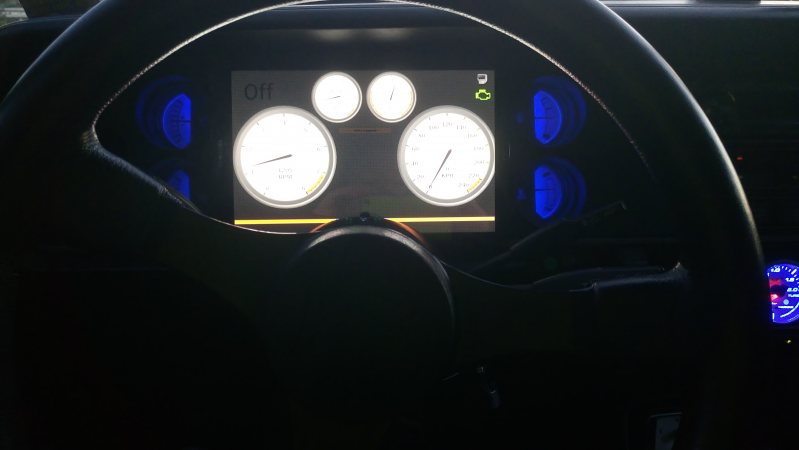
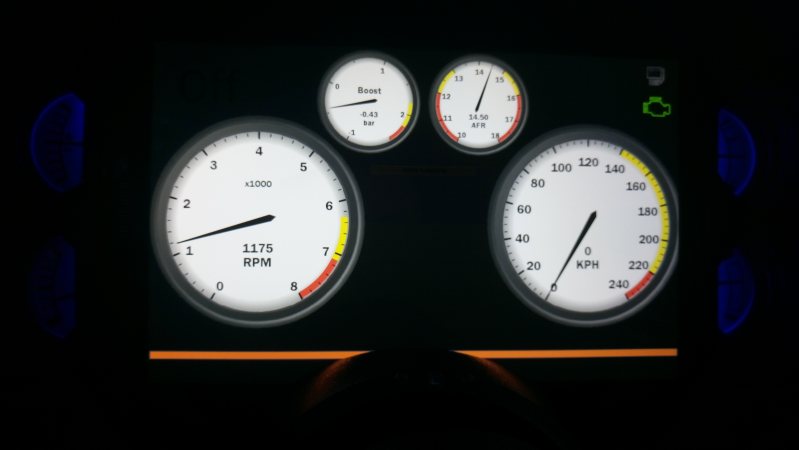
After giving it some thought, I put 5 mm LEDs in the column cover. I had a partly broken one and it needed to be shortened anyway to make room for the tablet. This turned out pretty nice (I just soldered wires to the bulb holders to feed them).
Today I have made a test drive with my own dash design (you can swipe between 4 different ones) and it works really nice. Apart from the fact that the speedo does not show the correct speed when the VSS is used (GPS works fine). Probably just a configuration error.
The tablet connects to the Megasquirt with Bluetooth, I got a module that is soldered into the MS. Now I can also tune wirelessly with the laptop, pretty nice :-)
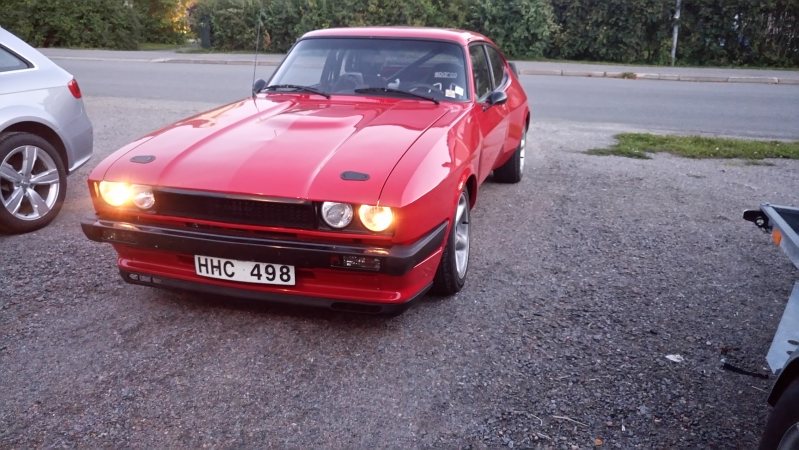
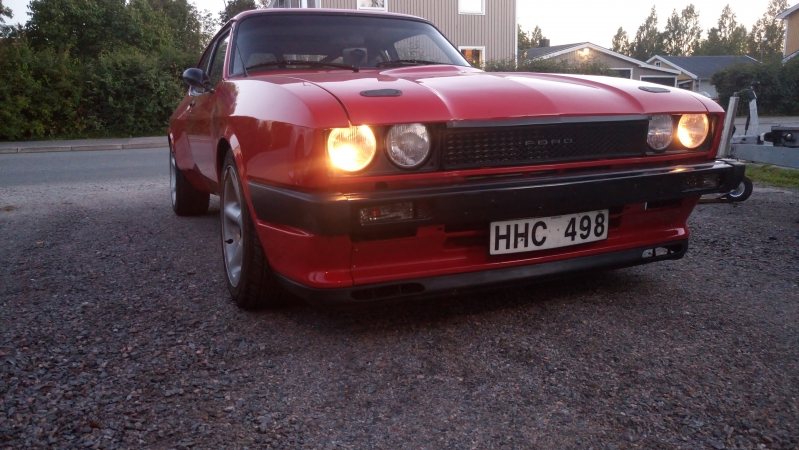
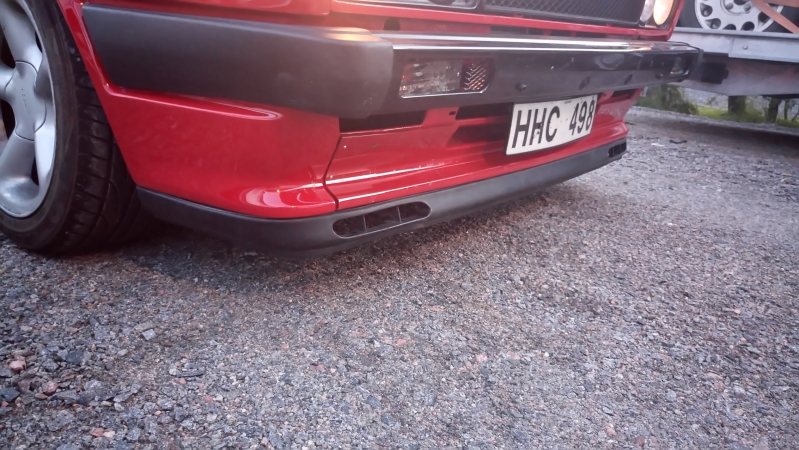
The next upgrade was purely cosmetical. A long time ago I saw pictures on a yellow X-pack with a Laguna splitter. I have planned that for years but last winter I found one and now it is finally on.
The shape is pretty much correct from the start, just needs to be shortened a bit. I used rivnuts and M4 screws to fit it.
Gustaf

Looks great! ![]()
Interested to hear more about your dash setup... any links for good info?
Thanks!
There is more info on Shadow Dash here: http://www.tunerstudio.com/index.php/shadowdashmsmenu
It's available through Google Play now also. In the MS-extra forums, there are some threads too: http://www.msextra.com/forums/viewtopic.php?f=133&t=46932
The alternative, RealDash, is here: http://www.realdash.net/
Both can connect to an MS using a USB cable, or by Bluetooth, either using a serial-to-bluetooth adapter or the way I did it, with an on-board Bluetooth thingy.
I have worked more with Shadow Dash and you can sort of design your own dashboards using pretty much any sensor or signal that MS handles, also some calculations, and then also use the tablet on-board accelerometer and GPS. So pretty versatile.
Limitations may be that not all tablets have good visibility in a car, some might not like the environment with vibrations and so on. Using Bluetooth, there will also be a bit of a delay on startup when the tablet connects and syncs up.
Gustaf

What a fantastic thread!!! You built an amazing car over a few decades, I'm truly blown away by the ingenuity of getting around problems, bravo!!!
Thanks!
I like to think of this car as my mentor, sort of. It has basically tought me most of the things I know ;-) Or think I know. Or perphaps things I know I really should learn more about.
Gustaf
Well, this driving season ended a bit earlier than planned.
The last real outing was a local meet but as that is a "show and shine" thing it's not really my cup of tea. It's nice and all but cars should be moving about, not standing still.
After that work sort of took over and the I went to the US, and the SEMA show. High quality there!
When I got back home we suddenly had 1 meter of snow so the only driving I did was out of the garage to fit some winter tyres to one of the daily drivers.
But to the point; Already during the summer (after the drift event really) I started to think about building a new engine for the Capri. I wanted to gain more driveability but not necessarily add more power.
The basic concept will be mostly the same but with more compression and hopefully a better flowing head to give a more responsive engine - not necessarily with more power than before.
Specification: 205 Pinto block DP Pistons in 91,5 mm bore, 38 mm flat tops (should give me around 8.5:1 CR) YB rods RWD YB oil pump and spray bar YB sump with wings, and trap doors Pinto crank TTV steel flywheel to take 240 mm YB clutch Fluidampr front pulley, multirib
Head (not decided on carb or EFI casting yet) with slight port job Paul Ivey/REC valves (REC 882 inlets 1.800”/45.7mm, REC 297 exhaust1.500”/38.0mm) Kent FR34 camshaft
"Swedish plenum" intake, YB trumpets fixed to Pinto flange Pulse split exhaust manifold 60 mm wastegate
Turbo will probably be the HX35 at least for now to see how it spools. I have the old Mitsubishi TD04-16T on the shelf but it might be a bit small - and I have a Mitsubishi 19T that I might try.
At the moment the block is back from the machine shop from a rebore and they have just gotten a head to fit the valves to.
I also plan on upgrading the rear end to 108 mm CV joints and new, beefier steel drive shafts. I have all parts except the drive shafts that will need to be custom ordered. I have just mocked up the CV joints to check the drive shaft lengths.
Before pulling the "old" engine I decided to do something I have planned for a long time, move the alternator to the intake side - the cold side. I built the exhaust manifold a bit tight to the alternator and I have had some issues with heat - mostly fixed by running a vent hose to the alternator last summer but that felt like a band aid.
It took some effort, but finally...
 (Medium).JPG)
 (Medium).JPG)
 (Medium).JPG)
I made a kind of drop plate that takes a slightly modified Capri alternator mount (the old, alloy one), fitted with nylon bushes. I could even use a standard Capri adjuster arm :-)
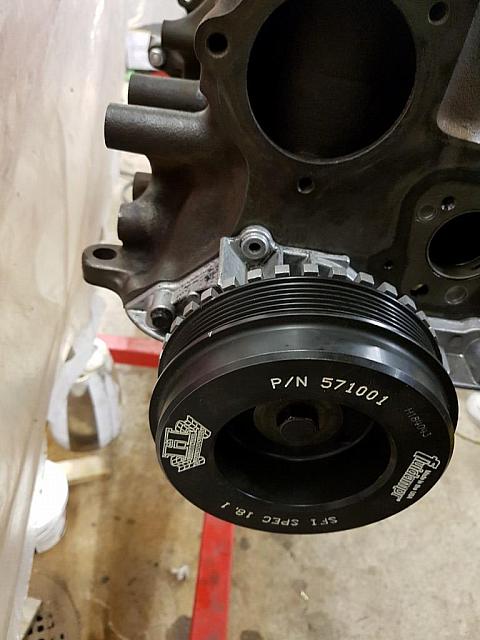
Another upgrade test fitted on the "old" engine is a harmonic balancer, from Fluidampr. It is listed for a Ford/Mazda 2.5 V6 but almost fits the Pinto. Some small fettling and then I had my friendly water cutter make a suitable trigger wheel.
 (Medium).JPG)
 (Medium).JPG)
Ever since I removed the large rubber damped Pinto EFI pulley I have had a strange vibration in the engine, hope this will cure it.
Next sensible modification is more brakes. The 280 mm kit I have been running (Mondeo/Cosworth 4x4 basically) has worked pretty good except for the fact that my standard parts store brake pads have been fading on track. But not filling the 15" track wheels (or the 16" street wheels) with all the braking I could, has been annoying. You might remember I have started two separate tracks here, first Brembo 4-pots (Alfa 166) and Peugeot 406 discs, but I stopped that when I realised that I would need to change too much.
Instead I started working at a set with Focus ST170 (300x24 mm) discs, that mount outboard like the Mondeo, and some BMW calipers. The choice was E34 540 sliding calipers - they take the same pads as the M3 E36 meaning that pad compounds are plenty. I finally test fitted it all with the correct brackets.
 (Medium).JPG)
 (Medium).JPG)
 (Medium).JPG)
The brackets are just having the paint cured and then it will be permanently (?) fitted. I have a good feeling about this and the Brembo kit will be on hold for the next Capri :-)
Gustaf

I am completly in awe of what you have done over the last 20 years. Your technical ability is way way beyond mine so I really hate to offer suggestions but I"m going to anyway.![]()
Driveline and rear axle breakages. You seem to have ongoing issues with the 7.5" rear LSD. Can you source an 8.8" rear diff with clutch plate LSD from a US spec Ford Explorer? It would mean new axles again, but you need to do that anyway. The clutch plate isnt' as good as your Quaif you paid big money for, but a)I assume your Quaif has good resale value and b) There are lot's of real LSD options for the 8.8" housing.
Engine. Whiles it's awesome to see what you've managed to do with a trusty old Pinto, you're always going to be fighting the head, and it's heavy. Can you either find a YB head, or, and this is a big departure. What about picking up either a Zetec or even better a Duratec? Both have been made in their millions and are there are probably far more around for less money than Pinto parts these days? I realize it would mean new intake, Exhaust, sump etc. But if you're building a new engine anyway, why not?
Again. I really really respect what you've done with the car. It's one of the best looking X pack conversions I've seen and you've done a stunning job with the whole build. There must me something in the water over there, either that or those long winters, but you Swede's are completely nuts in the best possible way.
How far North are you? the only time I've been to Sweden was 08 to pick up my then new Volvo in late June. the sky never got completely black even at 2 or 3:00am. I thought English winters were bad growing up with dark by 3:30pm, what's it really like where you are?
Great work, thanks for such a well documented write up.
For some reason I have forgotten to reply to this. Will try to make it up :-)
If I would do the rear suspension again, I would probably build a live axle based on a 8.8". I have thought about other IRS diffs (BMW, Ford 8.8) but all of them means construction work and I have been trying to avoid inventing too much stuff again. Hard to believe perhaps...but. Anyway, the Quaife differential itself and the 7" (I'm still on the small diff) ring/pinion seems to be a non-issue so far. An update will show what I did with regards to the CV joints.
Engine wise, I had a long think about that. Both Zetecs, Duratecs and others crossed my mind. They all have their merits but for some strange, masochistic reason I like the old Pinto. Part of it is that I know the engine and I have all things around it worked out. Swapping to another platform would probably have meant more than a winter in the garage and I really wanted the "new engine project" to be just one (1) winter. I'm not ruling out a swap later on though. In my mind a Duratec is a favourite or even a 2.0 or 2.3 EcoBoost. There's something appealing about a crate engine with 300 solid bhp out of the box.
Winter, yeah, I woke up to minus 28 degrees C this morning. I'm about 700 kms north of Stockholm so it's quite far north - but still more to go. The darkness is an issue in most part of November, December an January. We sort of have daylight from say 10-10.30 AM to around 2 PM. You get used to it a bit...and in some way, even if it's daylight from 9 to 3 it's still dark when you go to work, and when you go home.
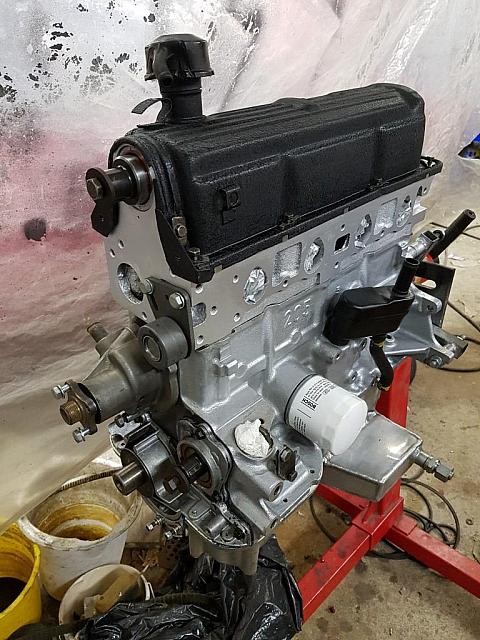
Over to engine build recap;
In January 2017;
With the family heading off for a ski tour I got some hours in the garage tonight and tore the old engine apart.
Cam looks great, bores look great and so does the pistons.
But when I took out the crank and piston/rods, everything was not as nice.
Big end bearing 1 had some light lines:
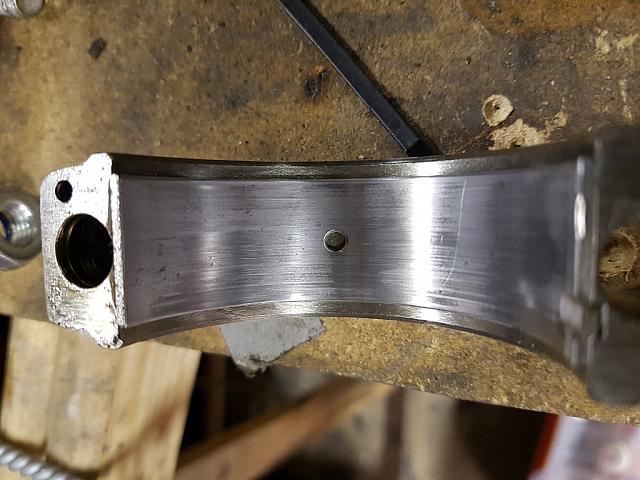
Number 2 was worse:

The crank has lines that are quite large, can clearly feel them with the nail and finger tip;
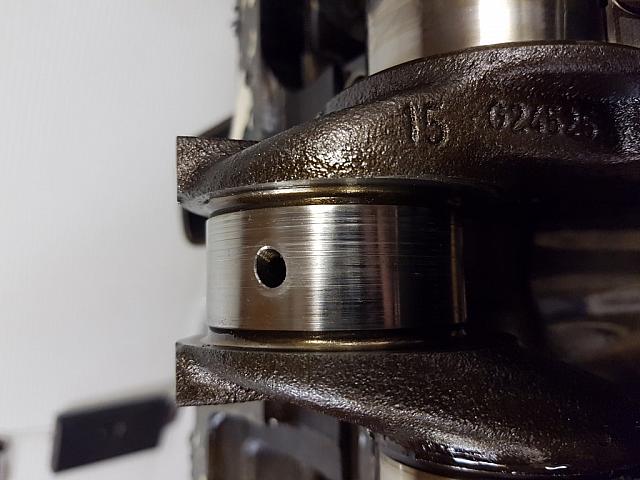
OK, so I guess I won't be using that crank then. Pity, since it is doweled for the flywheel. I have another EFI crank (from the block I will be using) that looks fine so I'll probably use that, and get it doweled instead. The other option is a YB crank a friend has, that is ground undersize. But using that means I need to get a YB flywheel too (I already have a nice TTV steel 6-bolt flywheel for the 240 mm clutch).
I know that the engine has been started (but not driven) with too little oil once - a mathematical error or my part :-(
I hope that is what caused this. Since I fitted the big winged and baffled sump I have been keeping an eye on oil pressure on track and don't can't remember it ever falling noticeably but I'm not really sure before that. It was so long ago I don't remember. But I do think I need a low oil pressure light together with the mechanical gauge now. Just need to find a switch that triggers early enough.
Oh, and the family turned around after 60 kilometres - engine fault light on the Kuga. Let's blame the minus 25 degrees centigrade :-(
Then in February 2017;
Ok, the machine shop has finally released the head so I can get going again.
I cc'ed it now and I get 50 cc chamber volume and that calculates to 7.7:1 CR if I'm right (using a 1.4 mm head gasket), b*gger. I must have made some mistake when I made the calculations for the 38 mm compression height (they sit 2.4 mm below the deck face according to my notes).
Decking the block 1 mm would give me 8.38:1 and that is somewhat closer to the 8.5:1 I was aiming for.
I could skim the head a bit more (now it's just had a slight surfacing) too I guess.
However, I found a set of 1 mm longer YB rods, perfect!
On to March 2017:
The pistons was the first thing to be ordered and they arrived nicely packaged:

Then my spare 205 block was cleaned up and sent for a fresh rebore to 91,5 mm.

To get further I wanted my old rods from the other engine so it had to come out.
That's when I found out about the "challenged" bearings handled earlier. Anyway, I could trial fit the pistons in the engine.

This was when the thought process on CR started, but before making decisions I needed the head sorted. So it went off to have the big valves and K-liners fitted.
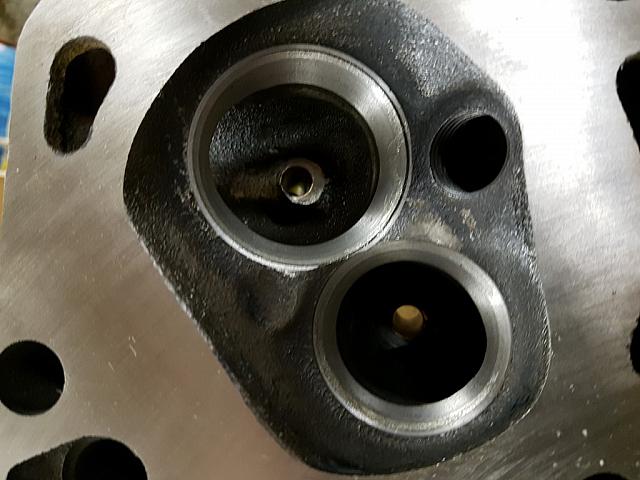
These pictures are before blending the valve seat/throats etc. The head is ported earlier by me, I think I ran it in the first turbo engine I built back in 1999 or so. I gapped the rings, I got to borrow a very nice toolkit for doing that:


Well, I ordered the Maxxpeedingrods longer conrods and they promptly arrived, rather quickly. Looks good to me.
I trial fitted one, plastigaged the bearing clearance (checked out OK) and checked that the piston would be 1 mm further up in the bore. Everything seems nice and dandy there.
Next up was actually fitting the crankshaft, "permanently". Plastigaged clearances there too, and they are also in spec.

Next up was fitting the rods to the pistons and the circlips always fight me a bit. But...

First went in fine, the second one not so much so.
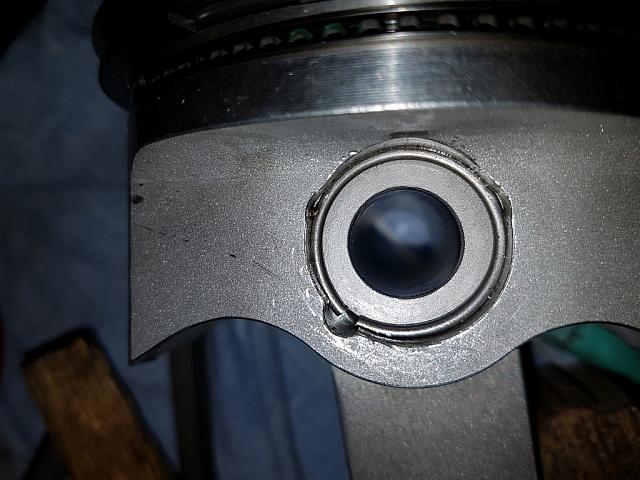
Not that easy to see but it won't seat entirely, the clip gap is almost half of the first one and it does not sit all the way in the groove.
The wrist pins are specced at 53.30 mm and I measure them at 53.35 mm. The manufacturer say they are in spec and it "should" work but I'm very doubtful. The wrist pins have a chamfer but it is around 22,23 mm where it ends and the clips have an inner diameter of 21,77 mm when seated.
DP said I might try to shorten the pins but I preferred deepening the chamfer a bit instead, seemed easier to me.
While waiting for more info from DP, at least I have managed to fit the new cam bearings.
DP got back to me on the chamfer idea and agreed, so I went ahead and fifex that. I double checked the pin fitment with DP and we are both happy.
Satisfied with that part done, I put the pistons and rods into the block. Almost a pity to hide the nice parts inside an engine :-)
April 2017 came:
Work has progressed a bit since I updated. I got the bottom end together and double checked for valve-to-piston clearance. Establishing TDC...

Marking the pulley;
Setting up the cam timing...

...and playing with clay.

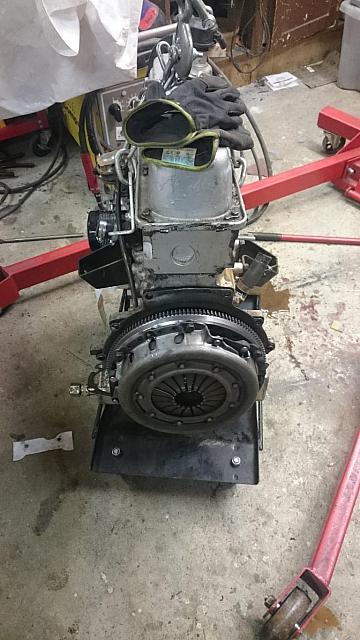
All good there. So I painted the block and head, and put it all together, for the final time (?).
On the following Monday the engine was mounted in the car and I put the gearbox and propshaft in.
May 2017:
Well, of course it turned out that "early May" was a bit optimistic. Things happened as they always do and then there was some feature glide on sorting the coolant hoses (something about "doing it right").
Then there are always the small niggles of things having to be mounted in a proper order, a throttle cable that you're not satisfied with and so on.
But finally, a Saturday came and it was time to turn the key - of course after priming the oil system with an old dizzy and a drill. Not really a successful startup though, as my new trigger wheel gave erratic signals. I kind of suspected that with a "lip" in steel quite close to the trigger wheel. That will have to be trimmed, but in the meanwhile I reverted back to my old alloy front pulley that worked fine last year.
It still did and now we had a normal start. 20 minutes at 2500-3000 rpm to break in the cam, retorque the head, check valve clearances and it is officially a runner!
Initial feelings are that is seems to run rich - migh be that it is more effective with the higher compression ratio? I have only driven it around the block yet but it runs rather smooth and seems willing to boost as well.
I need some more time to retune and then drive it a bit more before trying some power. Not really sure how long of a break-in period it really needs, opinions?
June 2017:
I've been driving a bit more. It is indeed rich, I have done some autotuning on cruise loads but need help from a friend to start looking at boost.
Another issue is that the engine coolant temp will fall when driving, it almost seems like the thermostat is not closing. As I cruise around 100 km/h on the freeway the temp goes down to around 73-77 degrees C. I have an 82 degree thermostat (QTH371) fitted.
I'm starting to think that the water cooling for the turbo may too big of a bypass so I might temporarily block that. I have used the takeoff on the thermostat elbow (Pinto EFI) to feed water to the turbo, and it is returned in the top tank of the radiator. In my mind that mimics the YB coolant route but I may be wrong.
More "old news" to come :-)
Gustaf
I will continue with what happened in 2017.
First half of the season was very much spent working with the water temperature issues. I tried several ways of connecting the turbo water cooling.
The first version was taking the feed to the turbo from before the thermostat, and then returning the water to the radiator top tank. This is sort of how the Sierra Cosworth handles the water cooling. But I still had the over cooling issues.
Next I tried to take the feed from a plug in the coolant gallery next to cylinder number 3, and return to top tank. Same problems. The final (?) solution was to return the water to the pipe leading into the water pump, from the heater matrix. This seems to work. My best guess is that the other solutions would lead too much water past the thermostat, so even a closed thermostat would reduce the flow enough.
Another thing I decided to sort, that had been a long term plan, was oil pressure, or rather the lack of an oil pressure light. The Capri's with 6-pod dashes have a very reliable but non-accurate mechanical oil pressur gauge, and no warning light. A bit scary in a "built" engine.
So I rewired the brake warning light, into an oil pressure light. But I added a LED strip to the top of the dash to make it a bit more intimitading:

Not content with that, I have wired a summer too, that sounds very annoying when the pressure drops. It is switched though, only meant to be "on" when racing...
Just as last in 2016, I went to the "Motor Week" in Lycksele, a 2 hour drive from home. That's a whole week camping with motor-related activities.
On the trip there, I made some last minute adjustments to boost and mapping. Starting to like the dash...
The main event for me was the drifting, I like driving and not just shining the thing.
Another thing that was the same this year, was the tire miscalculations. I had ordered some new rubber that would mean I had some decent tires to drift, but they did not arrive in time. So once again I had to use my friends old remoulds, they are really too high and soft for drifting but what do you do?
With the new engine and smaller turbo the car was a bit easier to handle and I improved my scores by a factor of 10! Still last though. But my car was the only street car, driven there and back!


That was a good day out, all in all. I just had to leave the proof on the car for the rest of the week:

This year we had a spot well tucked away in the camp site. But it looks pretty good there too.

(photo taken at something like 11 pm btw)
When I got back home, I started researching where my new wheels and rubber were. After a week of chasing deliveries it finally worked out!


That's XXR 537's in 16x8, ET20 so they work less spacers up front, and fills the rear arches a bit better. Tires are Yokohama Advan AD08R, a very good "almost R-tyre" that we use on our endurance racers.
Gustaf

The new shoes look fantastic. You have amazing patience with this project and the results really show. Interested to hear your final solution on the axles?
You'll need to log in to post.


