


I have seen an E30 with a locked diff.. I can't say it was a pretty sight

I have seen an E30 with a locked diff.. I can't say it was a pretty sight

In reply to irish44j:
If only the same could be said for the 240

mad_machine wrote: I have seen an E30 with a locked diff.. I can't say it was a pretty sight
Local RallyCross beater E30 with welded diff...

Doesn't look too bad to me ![]()
well.. I will admit, the E30 I saw with the welded diff was a road car and also had an S52 in it from the M3 E36.. so anytime he got on the power the car either wanted to go straight or completely sideways.
I imagine on the dirt it is better... but I think I would still consider a plate style LSD over it

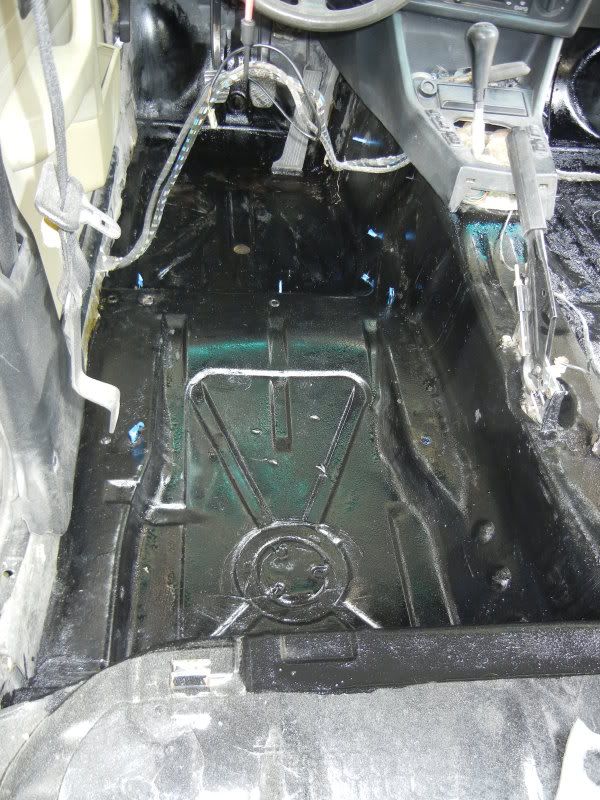
Got around to patching up the small rust holes successfully and decided to clean out everything and do the bedliner interior. I was going to get Herculiner, but happened to come across some Rustoleum bedliner at walmart, which was less than half the price. Worth a try, since it's not like I need "the best" or for it to take massive abuse like a truck bed will.
Anyhow, did the entire floor pan and the accessible transmission/driveshaft tunnel area. Driver's side came out great (just scuff-sanded the original paint). Passenger side, which I had previously done with POR-15, not as good. Apparently this bedliner doesn't like POR-15, because I started getting the "crinkling" as it pulled up the POR-15. stellar.
In any case, still turned out ok and not going to worry about it for the moment. Passenger side will probably get a re-do at some point.
The Rustoleum stuff seems tough enough for my purposes, and does have good texture like any other bedliner (I used herculiner on my old XJ). For $35, not bad. The whole interior took only about 10% of the gallon can I got too, so plenty more to use :)
not the best pic, but here it is on the driver's side
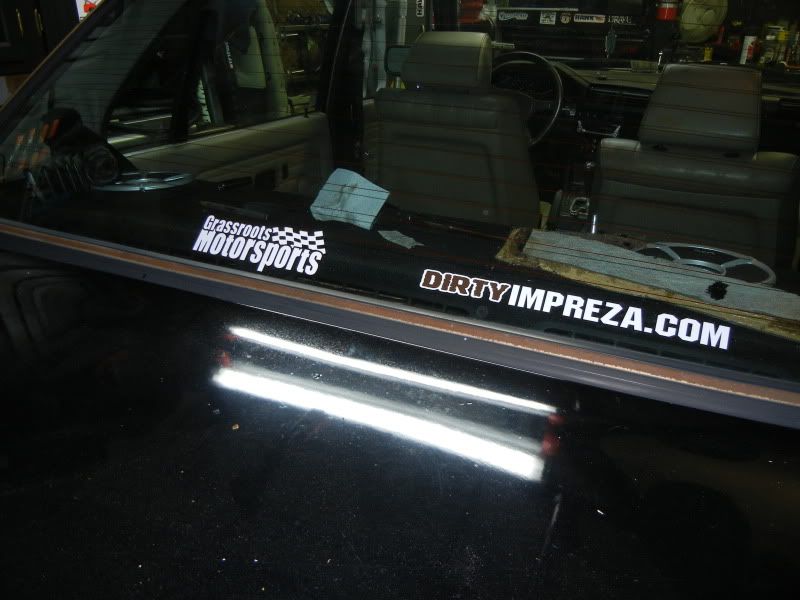
this should confuse some people driving behind me....

Same stuff I used on the floors of my old e21, coolant will peel it but other than that it's pretty tough.
nicksta43 wrote: Same stuff I used on the floors of my old e21, coolant will peel it but other than that it's pretty tough.
good to know. if I have coolant on the interior floors I'll have bigger problems to worry about than the paint peeling, lol.
Yea had a leaky heater core.
Had the afternoon free today, so decided to do some minor projects. I know that these aren't terribly interesting to look at or read about, but I'm trying to keep track of even the small stuff - first so I know what I've done, and second because who knows which of these small things might be of interest to other people....especially with me doing it on the cheap and improvising alot.
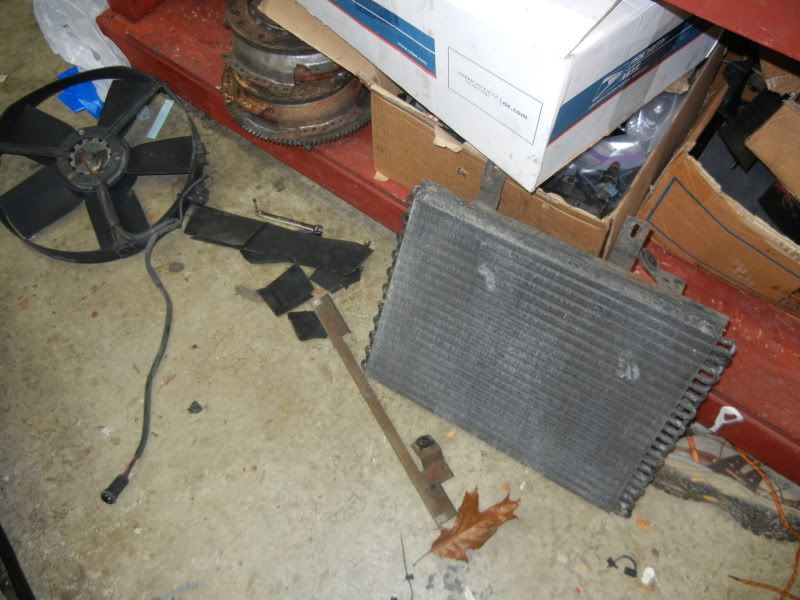
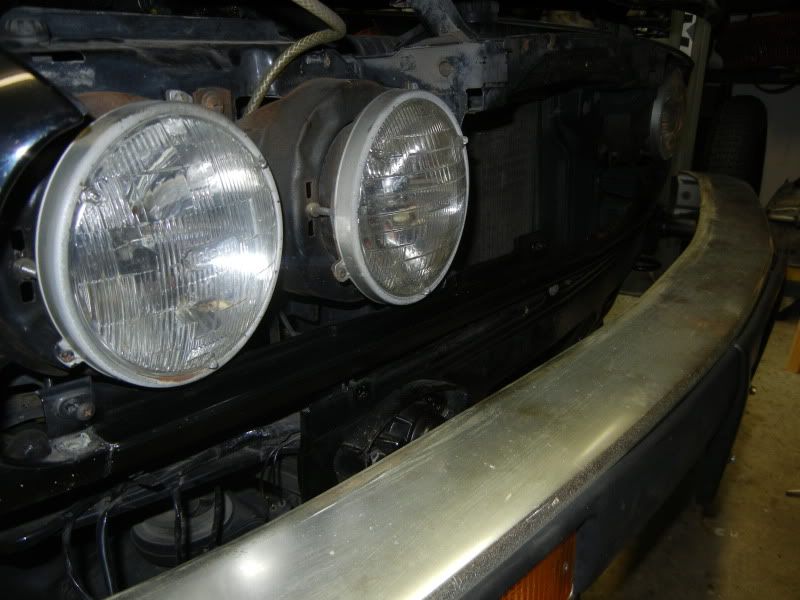
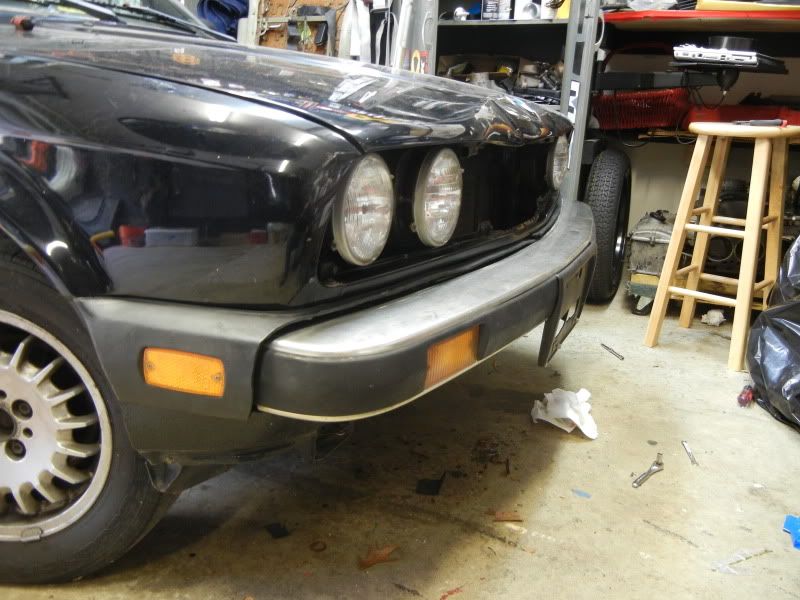
This car had hit a small deer previously, so the front of the hood has a dent (looking for a replacement hood), the grilles were broken, and the lower grille support bar was bent and the paint cracked off, with rust starting.
Basically, several small projects at once today. Took the grilles and support beam off, and that made it easier to take the A/C pusher fan and the A/C radiator out. I'll eventually put the fan back in (as an auxiliary) but I need to fab up some kind of mount for it. Also need to check to see if it actually works.
Nice to get some junk out of the nose of the car, even if it's not all that heavy.
also straightened, sanded down, and repainted the support bar. very exciting I know...
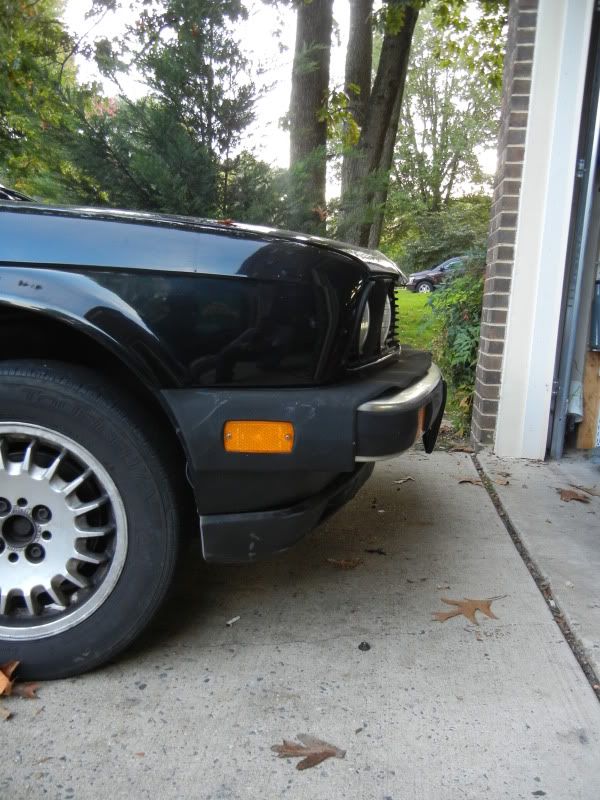
Since I had previously tucked the front bumpers, now the rubber "spats" that covered the gap when the bumpers were out were pretty much covering the entire top of the bumper. Looked fine, but why not do a little project. I took the entire pieces off, marked some cut lines, and trimmed them back about 2-3" all the way down, and around the sides (using metal shears, an angle grinder to bevel the edge a bit, and a palm sander to smooth it out. Also repainted them with rubberized bumper coating leftover from doing a buddy's pickup truck a while back. Anyhow, minor thing, but looks better IMO, and was free so why not...
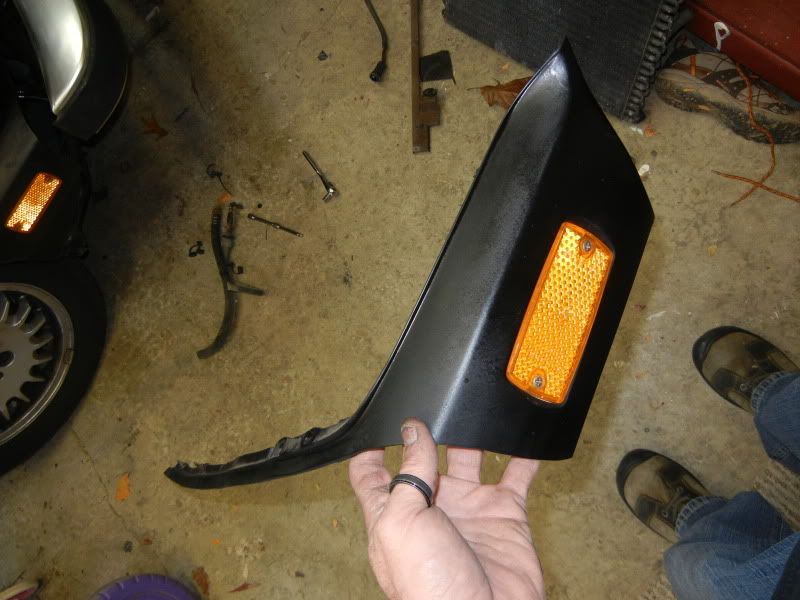
before trimming:
just a quick comment: one thing I've noticed when working on this car is that everything that needs to be accessed to remove parts, panels, etc is intuitive in it location. No tricky latches or strange attachments (like in alot of late-model cars). Also, for a car that is 26 years old it's amazing that all the original trim hardware (both plastic and metal) is in good shape - not rusty, doesn't break when you remove it, and are all simple to get out. I've always hated the trim/panel attachments on my nissan, subaru, toyota, etc.....brittle plastic crap holding things together and bolts that are solid rust after 1 year. They don't make 'em like they used to, I gues....
I thought the same thing when I blew apart the e21
so, a few evening projects since the kid and wife are in bed.
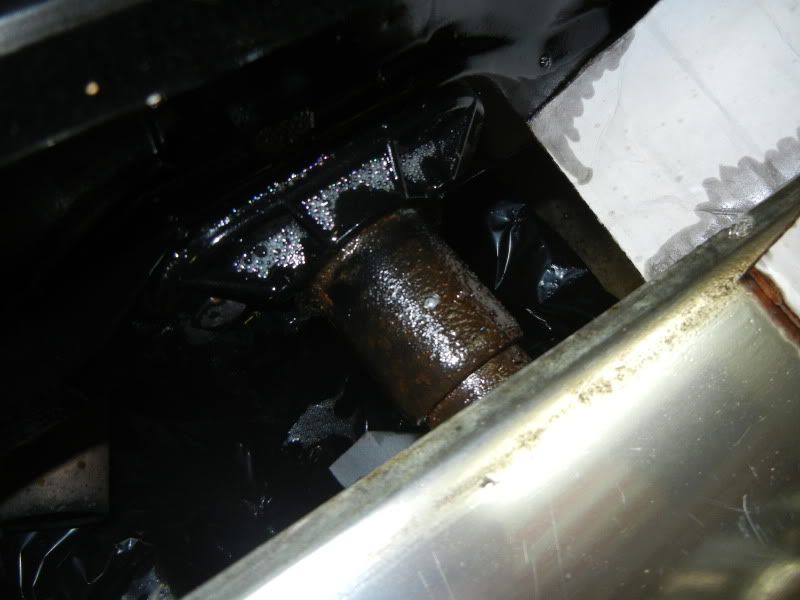
First, tucked the rear bumper. Since it's damn near impossible to get the rear pistons out of the chassis had to do this one on the car. Knowing from the front how messy it was going to be, I put together an "anti-mess" setup that worked not too badly. Consisting of a milk crate with a garbage bag in it, and some cardboard cut and taped to basically deflect all the piston oil spray into it rather than all over the garage. And a small hole for the drill.
Worked like a charm, with minimal mess!
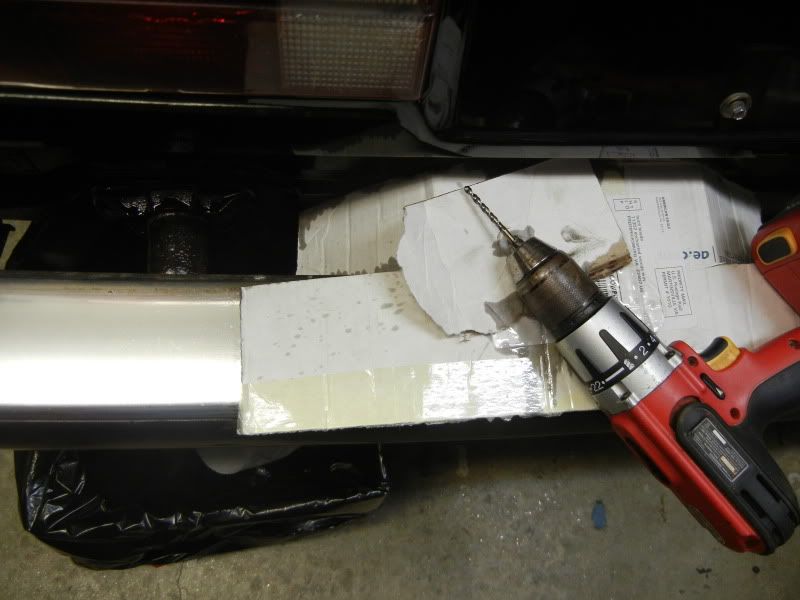
the contained mess
tucked. will probably trim back the black gaiter like I did in the front, but it reeks of hydraulic oil back there at the moment so I'm going inside....


Once inside, time for a nice easy project watching tv and sitting on the couch. With the wife eying me to make sure I am not doing anything that will make a mess, lol.
So of course there is the tail light bulb blank where the euro models get the rear fog light. I was originally going to get this all wired up and functional, but dont' really feel like it at the moment. So for the time being I just set it up spliced into the brake light line, so when the brakes are applied I'll have two sections of the tail light light up rather than just one. Got the extra spring clips from a spare/beat-up set of tail lights sitting in one of my parts boxes....
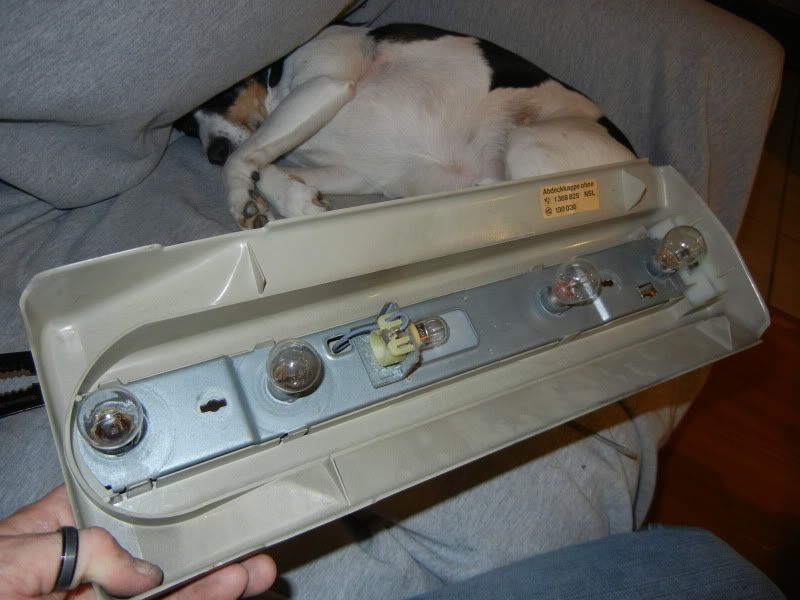
I'd get a pic of them lit up, but the car battery is dead. I'm not sure why, it's been dead every day this week and have had to jump it. Car has a new alternator and the battery is less than a year old, so my guess is that I have a drain someplace, which is going to be an epic pain in the ass to figure out. A project for a really boring winter day....until then I'll just pull the negative terminal to keep the juice alive...
I found that with my E36 everything is very logically placed as well. Sadly, many of the connectors are not as robust as those on the E30

Even the E39 is pretty good about component placement. The problem is that each generation packs more stuff into the same amount of space, which in most cases increases the time it takes to dig down to what you're actually after. Still, routine maintenance stuff is blissfully simple.
I haven't had too many problems with broken plastic bits, but others have. I suspect I may just be more accustomed to how to avoid breakage from years of taking apart BMWs.

I have been inspired to keep my 85 318i and sell the Subaru after the h6 swap is done.
(This decision is subject to change in accordance with a waning gibbous)
Taiden wrote: I have been inspired to keep my 85 318i and sell the Subaru after the h6 swap is done. (This decision is subject to change in accordance with a waning gibbous)
lol....no reason you have to choose. My wrx is my daily driver and autocrosser (and winter car)!
no real work today.....yardwork and football.
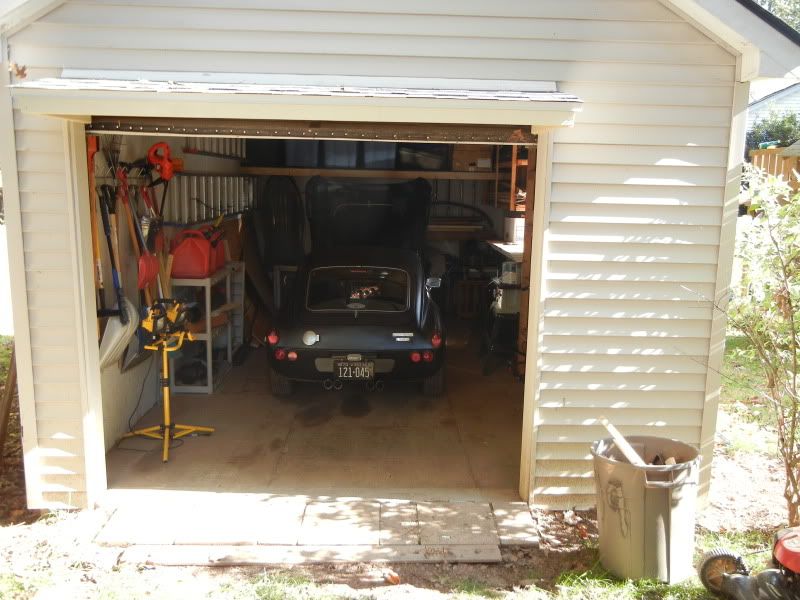
did get the black fleet out in force this morning as I prepped the triumph to go into its backyard hibernation for the winter
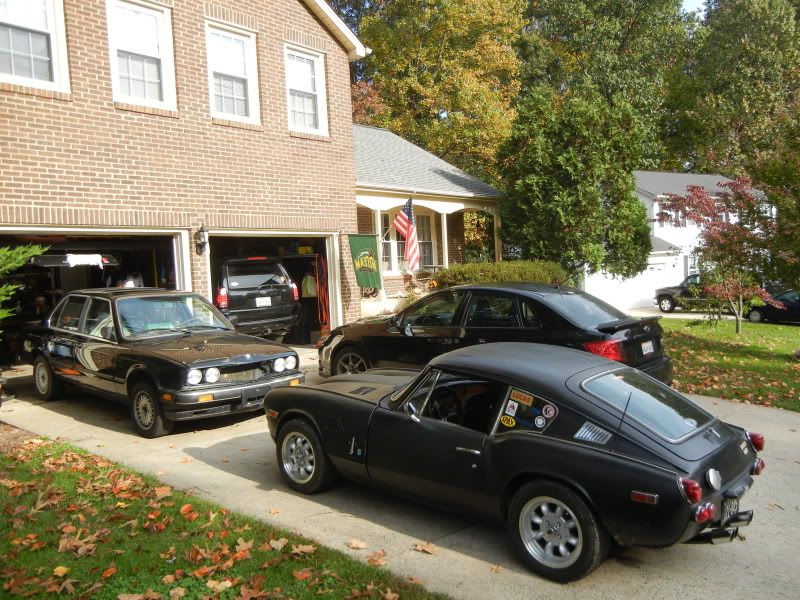
forward-hinging hoods, FTW!
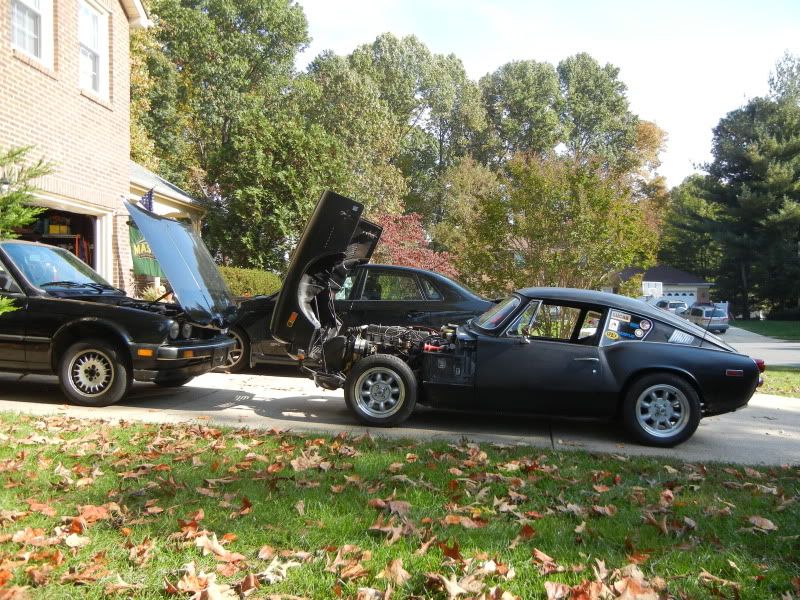
into hibernation. This winter will be BMW time
I love forward hinged hoods... now you need a Classic Saab 900 to go with that theme
I love the tucking the bumper thing. I see bumper struts on the 240, that is so happening.
![]()
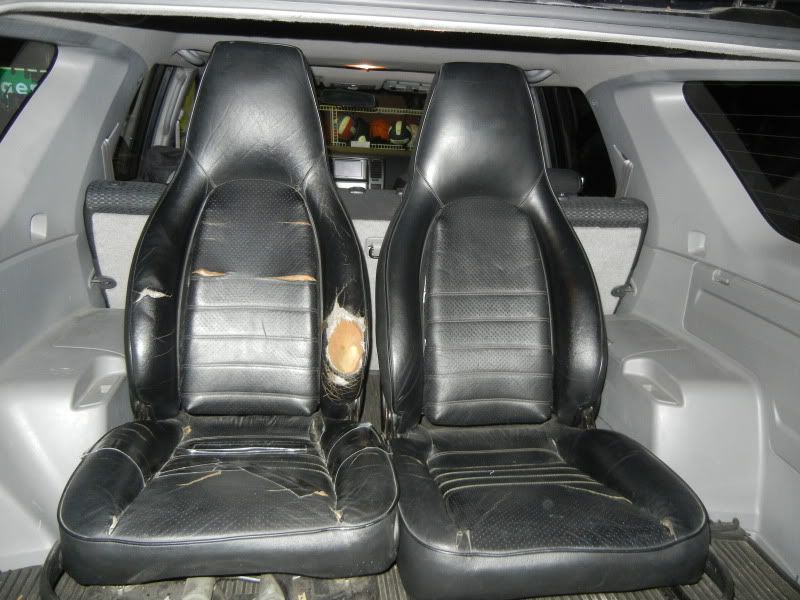
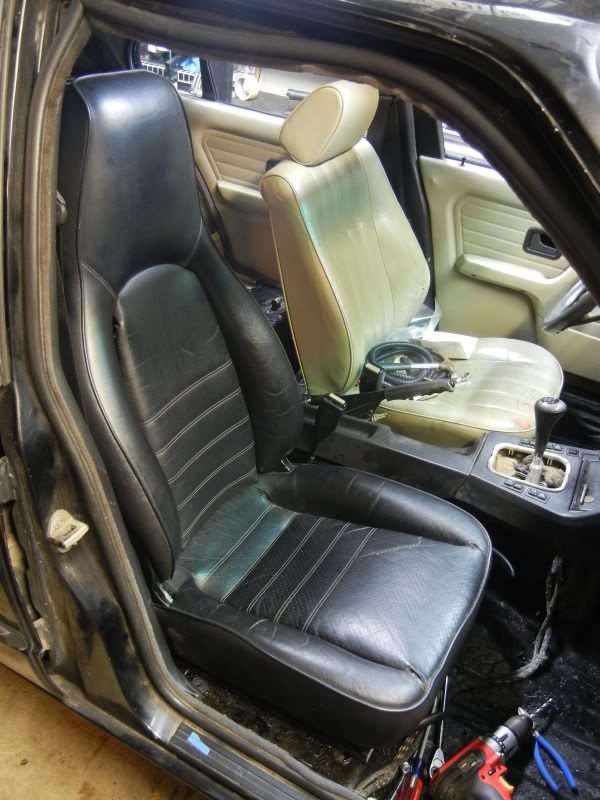
After a good bit of looking around, stumbled upon a good CL deal on a pair of seats out of a Porsche 944. As you can see, one of them seems to have been eaten, and the vinyl is quite cracked on both (especially the driver's side), but mechanically they're in perfect shape - all controls work perfectly, rails slide smoothly, and the driver's seat power controls are functional. And damn they feel so solid and strong compared with the BMW seats.
Also I'm quite certain Porsche/Recaro designed these seats using a model who has exactly my body size, because I dont' think I've ever sat in any car's seat that fits more perfectly.
To fit these in the e30, I'll have to rig up a way to make the track/bolt width 1" wider, but that shouldn't be difficult since the entire track assemblies unboat from the seat (another great feature of these seats). Since these are gonna get dirty and beat-up anyways, I'm in no rush to reupholster them, will just get some decent covers for the time being.
All in all, even as beat-up as they look I'm extremely pleased with this pick-up!
so for today, a test-fit and figure out how I'm going to mount these. As figured out earlier, the Porsche seat tracks are 16" spread while the stock BMW seats have a 17" track width. Another issue is that the Porsche seats sit VERY low. When sitting on the floor where the OEM seats were, I feel like I'm a gramma trying to see over the dash.
So, in true grassroots style, let's see how we can kill two birds with one stone. Luckily sitting around the garage are some old Thule roof rack bars. Just the right size and very strong, they'll do. Plus they'll raise the seat about 2" or so.
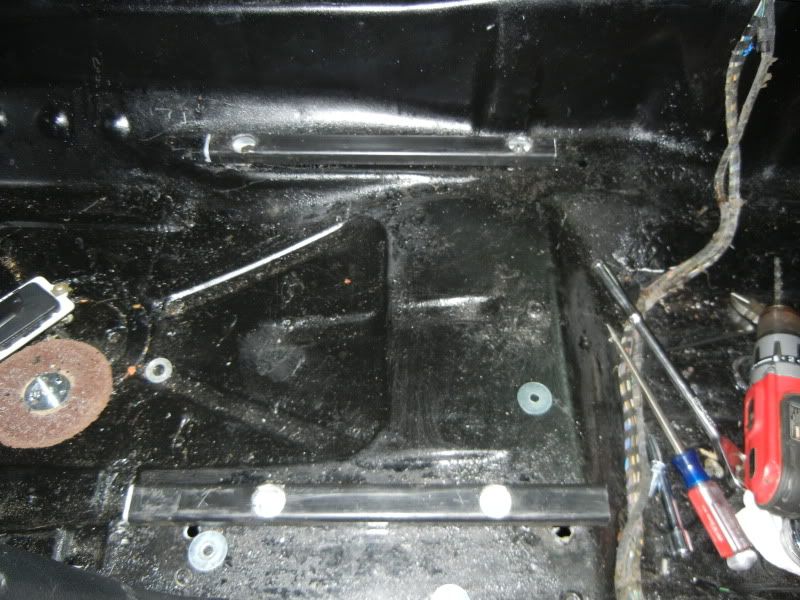
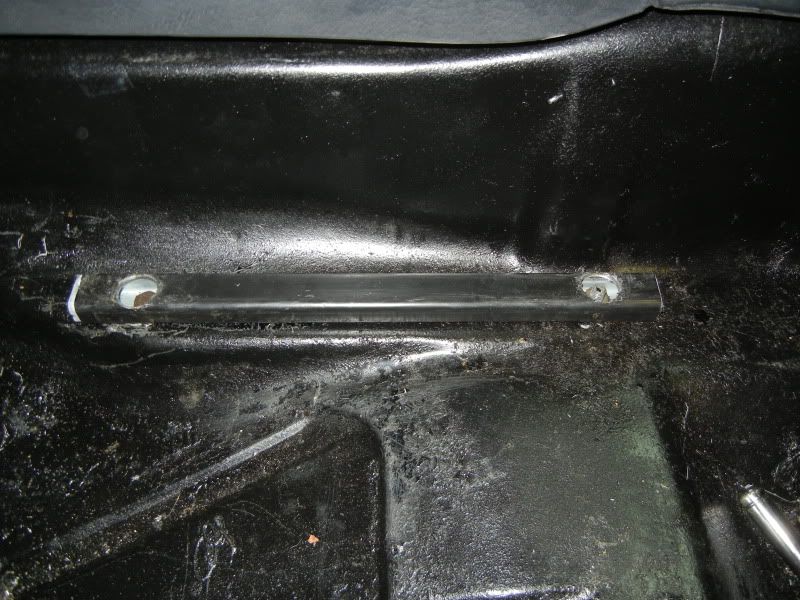
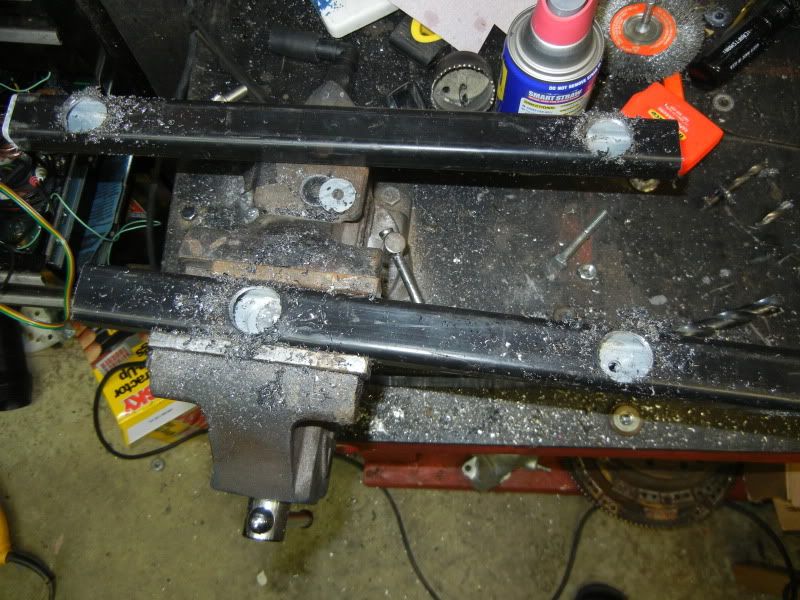
First I figured out where to mount them to be appropriate for the Porsche rails. I decided to use the OEM inner bolts (near the driveshaft tunnel) for my inner mount, and for the outer I would go 1" in from the OEM bolts. Will have to seal the holes up later. SO that I could crank down the 17mm head OEM bolts, I opened up some holes in the top of the bars just big enough to fit my 17mm ratchet, and then drilled the holes in the bottom to match up. The result is two rails bolted to the floor.
For the outer rails, I through-bolted them into the floor and will order some backing plates to give some extra strength. The nice part about the Thule bars is they are big enough to fit a box-end wrench inside to hold the nuts that the new seat bolts will connect to...a plus. Ideally I'd just tack-weld the nuts in there, but lack of a welder makes that difficult, lol.
Another issue: The porsche seats have holes to bolt up the BMW female seatbelt receptable (even the same bolt is used) on the inside, but there is no matching bolt on the outside for the belt-side bottom anchor, which bolt to the BMW seats. Will have to figure something out, but will likely bolt those into the floor with a backing plate, since there is room to do so.
Another issue: The porsche rails are very narrow between the "U" profile. No decent-sized bolt will fit in there and still allow a socket or wrench to get to them. As a solution, I got on McMaster-Carr tonight and ordered up some grade 8 Allen bolts that will fit much better, and will allow me to just use a big allen wrench to tighten them down without interference.
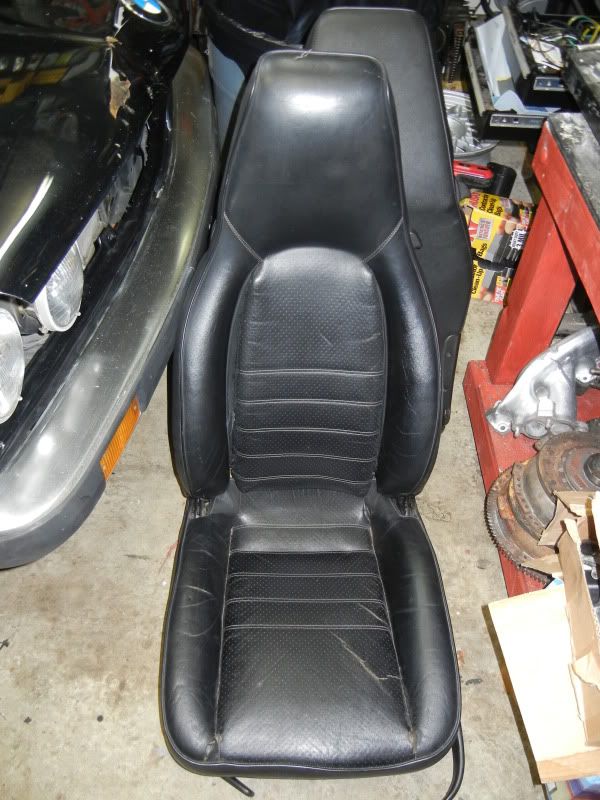
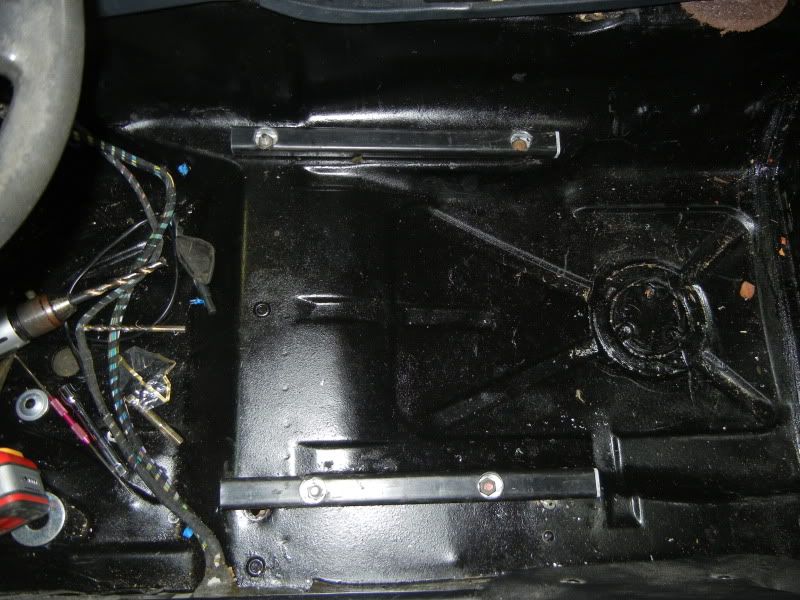
So that's it for now. Passenger seat test-fitted. Some pics:
the rails. I'll seal up the original mount bolt holes. I hammered them out, but now that I see the clearance I could have just left them in and used them as guides for the Thule rail. Oh well, will do so on the driver's side.
profile
the result
minor stuff tonight as I wait for the seat bolts and a bunch of suspension stuff due in tomorrow..
First, made the support rails for the driver's side seat
Installed
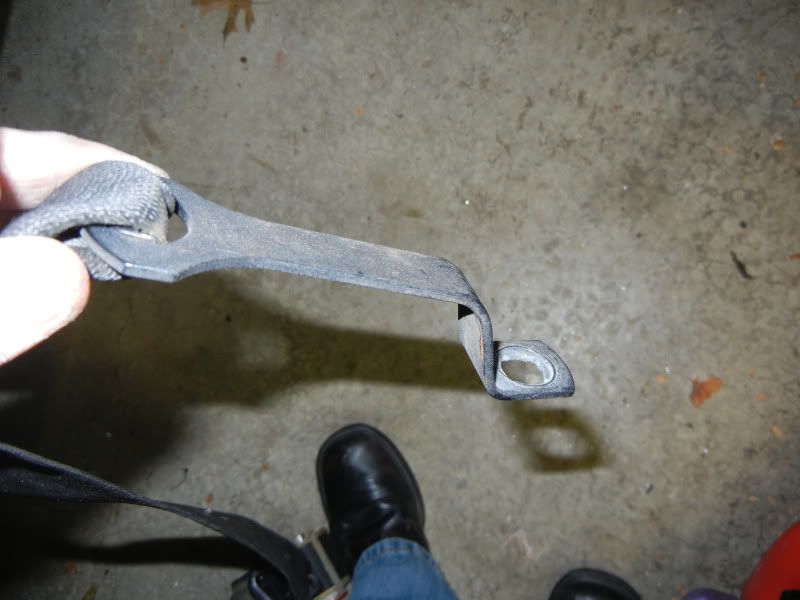
now needed to figure out the seat belts. On the BMW the outer bottom seat belt attachment bolted to the seat. On the Porsche seats, no such attachment exists, so either I'd have to have a bracket welded onto the seat frame (neh....) or bolt it up elsewhere. Luckily, the retractor is located in the lower b-pillar, so decided to just use the same bolt (in a longer length) and bolt the outer seatbelt end to the same place, since I already know its reinforced.
Problem: the BMW seatbelt end has this S-bend bracket, which of course is backwards of how it needs to be to fit well without having the belt twisted. I decided on somthing like a seatbelt, where my life is at stake, I did not want to re-bend the bracket the opposite way, which would weaken it. Plus, it was too long and would sit up higher than the seat anyhow.
Also doesn't help that the springload in the passenger's belt retractor is no good...
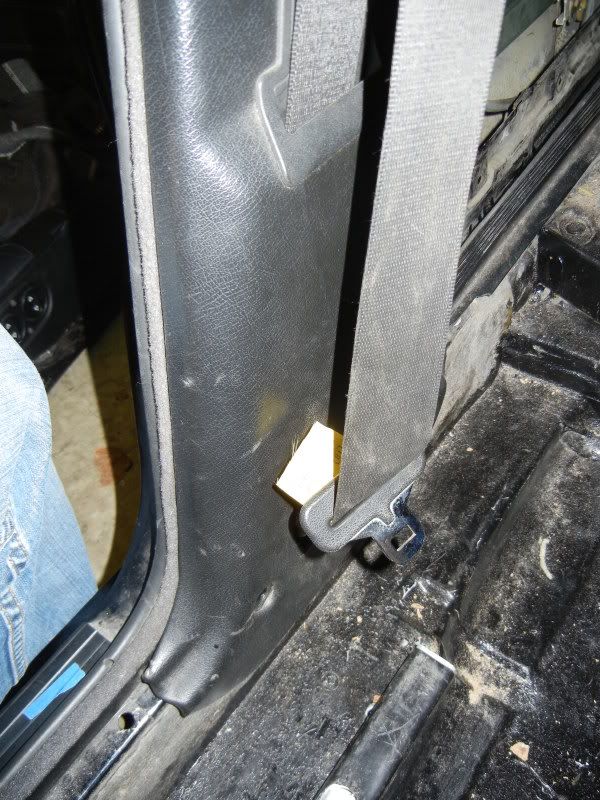
Solution: Since the rear seats are out and not going back in, and I don't need the rear seatbelts. Luckily, the rear seat retractors bolt right up in the same place as the front ones, though the belt guide is slightly different. Looks like it will work fine though.
Also, and even better, the lower belt end uses a standard L-shaped bracket. Exactly what I need to bolt it directly up in place, keep the belt un-twisted, and at the right height. Done and done.
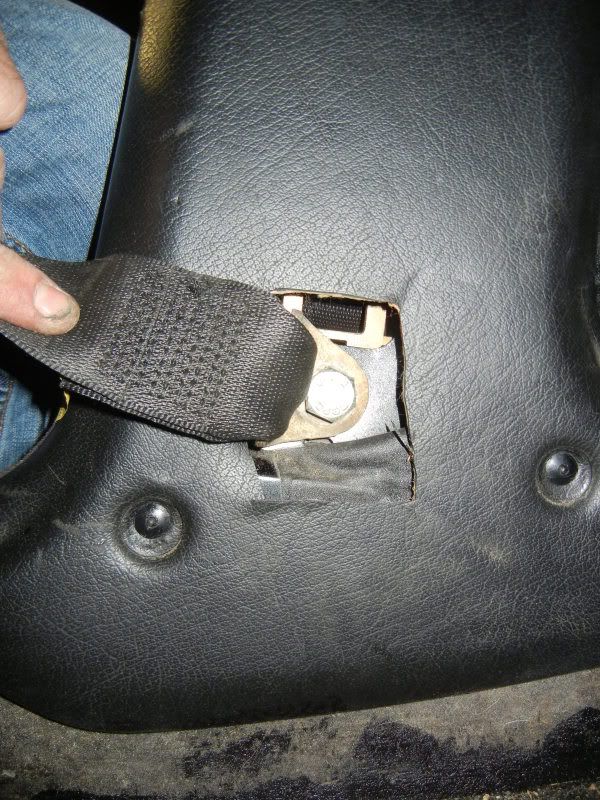
I just cut an access hole in the b-pillar trim. I have an idea about how to make it look cleaner, a more elegant solution.....we'll see if it works out at a later time.
In the end, the belt is at just the right angle and placement, so pretty pleased with this improvisation..
Hey, do you have an extra OEM battery relocate setup? My battery is a tad too wide, and whenever I get wheel hop my distributor slams into it, putting the cap off center, snagging the rotor and making it explode. It was funny the first 7 times, but I figure I should just stick the battery in the trunk now. The battery is brand new and awesome, but it's about 1" too wide.

Really cool build. I've got 5 years and many K's into my e30/S50 powered track car. I couldn't bear to to subject it to rally abuse. I dream of picking up another e30 to keep basically stock and rally the crap out of. Until then, I will live that dream through you. How soon do you plan to get it on a course? Good luck with it!
Taiden wrote: Hey, do you have an extra OEM battery relocate setup? My battery is a tad too wide, and whenever I get wheel hop my distributor slams into it, putting the cap off center, snagging the rotor and making it explode. It was funny the first 7 times, but I figure I should just stick the battery in the trunk now. The battery is brand new and awesome, but it's about 1" too wide.
I don't have an extra one, sorry. I have the wires for it that I plan to use this winter to relocate mine. I've seen a few of them for like $20 on revlimited.com classifieds recently, though.
or you could just get a smaller battery, ![]()
You'll need to log in to post.


