big update today!
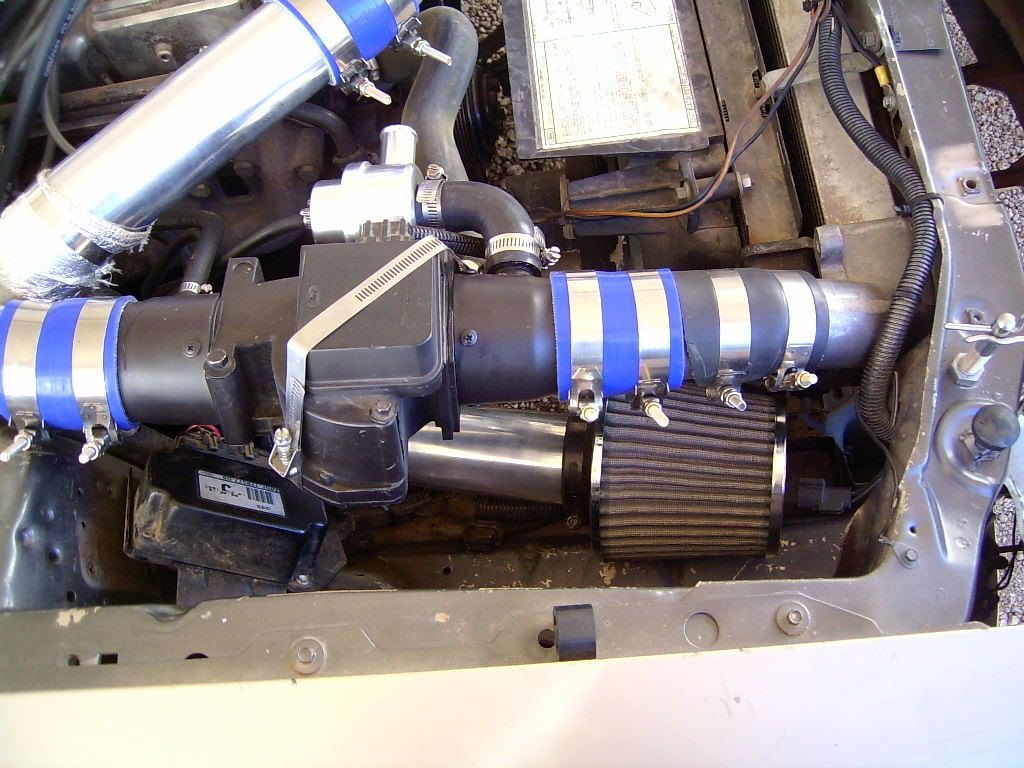
ok, so first off, everyone who owns a car with one of those Vane Air Meters, should buy a wide band 02 and install it. my car is mostly stock. stock fuel system, stock turbo, stock head and cam. my real world mods list is an upgraded pump, a bottom mount inter cooler, and a cone filter. once i installed the 02 bung, and put the sensor it and what not, i got a chance to drive the car some. the fuel enrichment was so far off it was off the gauge. idle AFR was 13. cruiser AFR was 11. under boost was more like 10 or less, as it wasn't reading half the time. now, the VAM is adjustable, you can remove the cover and adjust the spring resistance of the metering door. usually its 3 or 4 notches off. mine was 15. FIFTEEN. now i have 11.5-12.0 AFR under full boost, 14.8-15.0 cruise AFR, and 15.9-16.5 idle AFR. and my gracious does it run better! it idles smoother, it comes off boost without stalling (an issue i have been trying to fix), and it uses FAR less fuel. so, if you have a VAM vehicle from the 80's or 90's, get yourself a cheap WB02 and check your fuel enrichment, as ill bet its way off.
now, on to the update.
i showed you all the seats i cleaned up and dyed back to original color. well, it was time to put them in:
 Out with the old...
 My little helper, Hannah!
 new upper back seat
 new passenger seat
 new driver seat
 all done. you can kind of see the new window/seat switch plate in the middle, as well as the refreshed door panels. its not perfect, but it was about a 3 interior, and now id call it a solid 8. a new dash cover, new carpet, and new door/glass seals would make it perfect. i also removed all the old window tint from the 1/4 windows and rear glass. i HATE tint, in all forms, especially old bubbled purple tint from the 80's. oh, and also, if you smoke inside a car, i hate you, too. you wouldn't believe the color of the THIRTY terry towels i used to clean the glass and all the plastic panels. it was this medium yellow/brown color (yeah, that's in your lungs, good luck with that). the car smalls a LOT better though, i must say.

so, this is the outside, and this is as pretty as its going to get. next year i may paint the car, and when i do, it will be all the tan color of the fenders. but for now, im happy that its straight and mostly rust free. and its a damn sight away from this:

this is the finished product of the engine bay. i installed a fan controller for the radiator fan, and finished up some other odd and ends. i also fixed the drivers window regulator today, which is something i have pictures of, but I'm happy it's done.

im down to 7 things on my "hit list". i need to drop the tank, and fix the fuel level sender. i have a set of tires to install. i have a nice factory FMS spoiler to go on it. its needs an oil change. i have a tiny hole to weld up on the exhaust. theres some other things, but ill get to them when i get em done!
-J0N


 [/URL]
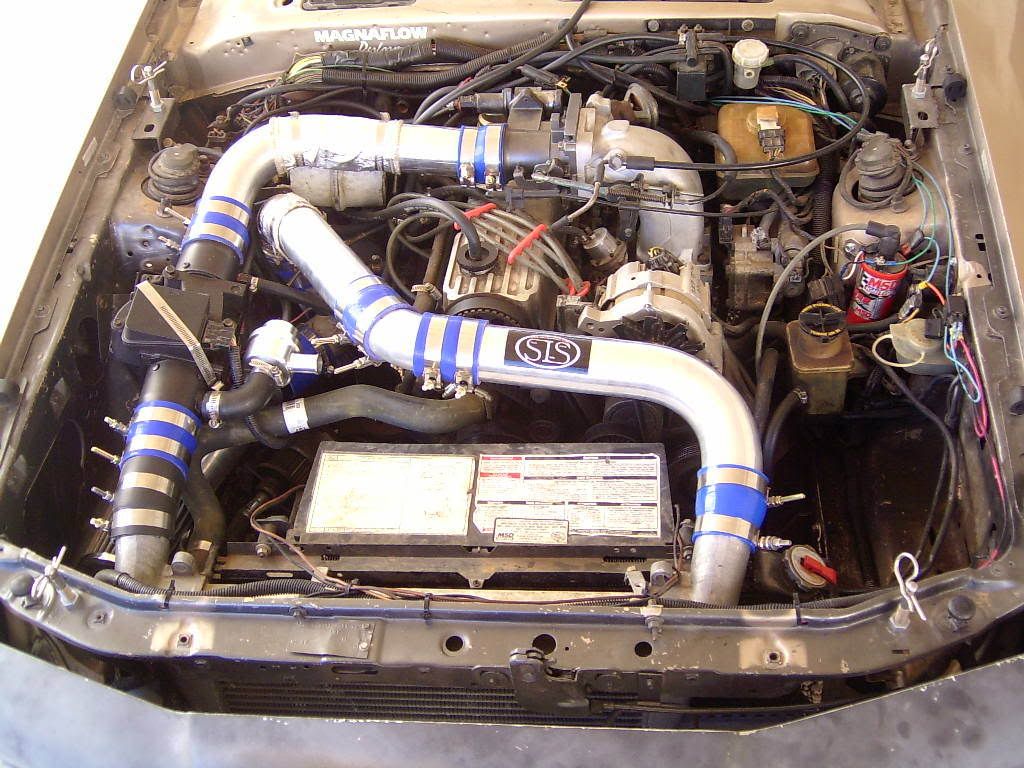 [/URL]