1 2
krautastic
krautastic New Reader
3/13/18 9:53 p.m.

Sharing my build in the hopes that people find it interesting and useful. 


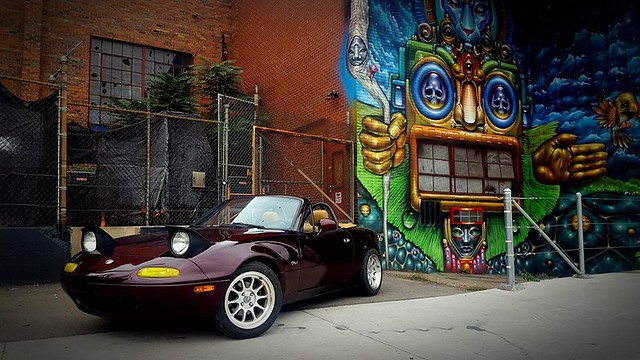
Hi, I'm Dan and I'm an alcoho- car fanatic. I've been an SCCA member since 2009, started autocrossing my genesis coupe, then moved on to a 94 miata, then bought a supercharged miata, which I parted out and gave its organs to my first real build. My 1995 Merlot M edition miata. That car sports a Flyin Miata Ubercharger, rx7 intercooler, civic half radiator, coolant reroute, lightweight flywheel, racing beat header, racing beat resonated catback, megasquirt MSPNP2. It's 227whp/193wtq at 9psi. Awesome car, but its my sunday driver and it was basically composed of bolt ons.


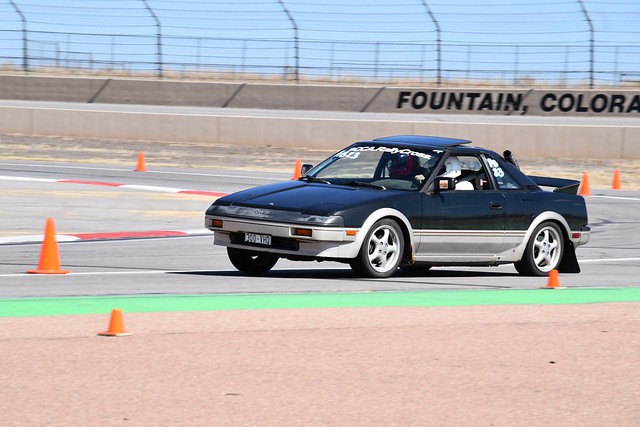
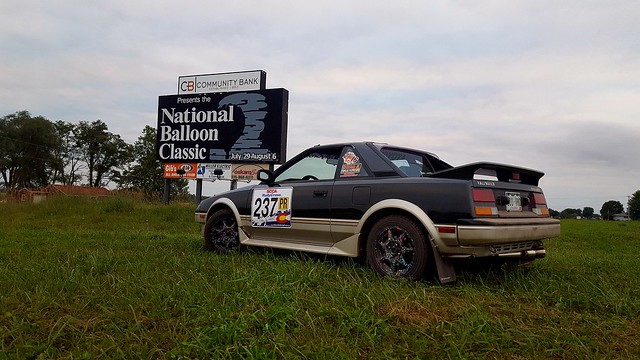
After buying the original supercharged miata that would later get parted out, I took some time off from racing because the local autocross scene was getting... not fun. A friend invited me to rallycross and I was hooked. So I bought an 91 325is and broke it after 2 runs. I hated that car. Terrible steering wheel, terrible seating position, uninspiring motor (powerful, but just didn't seem eager). So I bought 1986 Toyota MR2 that was probably in way too good of shape to race on dirt.

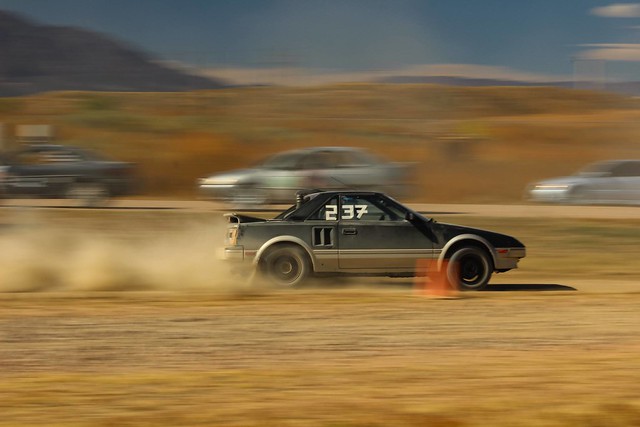
I raced the mr2 for 2 seasons of rallycross. In Prepared RWD I took 1st place at the 2016 Central Rallycross challenge, and later that year battled for 1st at rallycross nationals losing to another local colorado rallycrosser in his Toyabaru by .7s. The motor was extremely tired, and smoking at high rpm. It wouldn't pass emissions. In 2017 the SCCA made a rule disallowing cracked windshields. Between a tired motor and an illegal windshield, the car sat. I needed a new motor. I bought a spare 4AGE and got ready to rebuild it and turbo it. I spend lots of time in the research stages of projects. During that research, I realized rebuilding and turboing the 4AGE was about a $2k prospect and the motor might only last 2 more seasons (mid/rear engine cars need really good filtration, especially at the very dusty colorado venues). 

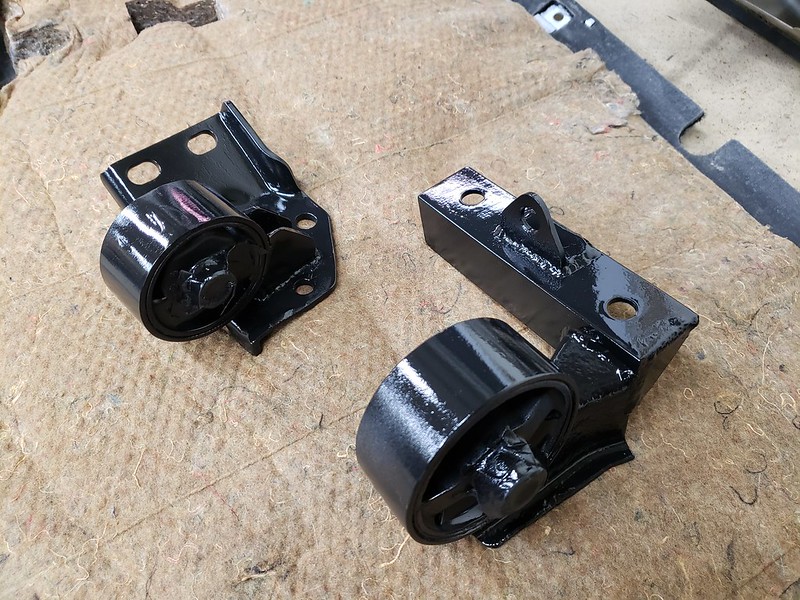
So, I decided to instead do a V6 swap. Toyota OEM reliability, and they're a dime a dozen at the junkyard. 1MZ it is. But, I wanted the extra power, so I decided to pick the 1MZ VVTI from a 2000 avalon. VVTI power bump, cable actuated throttle body, A/T ECU but supposedly isn't affected by the codes generated. S54 transmissions from the Mk2 NA MR2's have axles that are compatible with AW11 hubs. Also, it uses the C52/C56/C60 LSD's, which is great because I had bought an LSD for the AW11's C52 transmission.
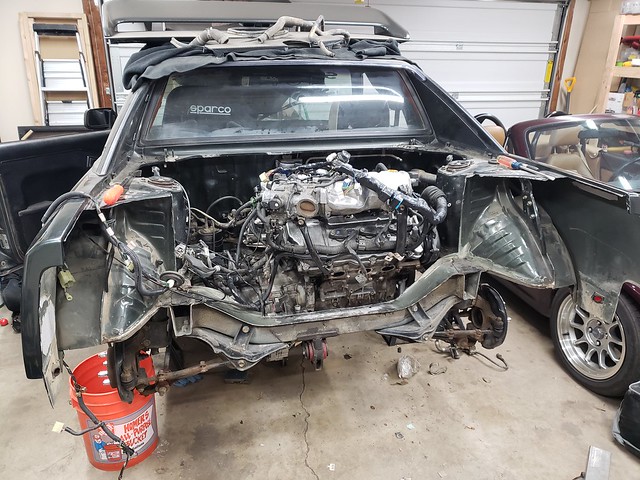
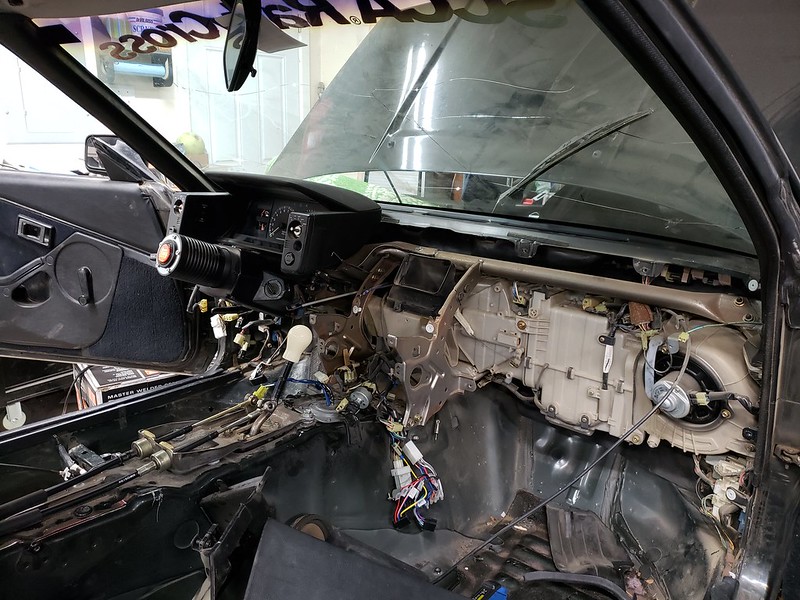
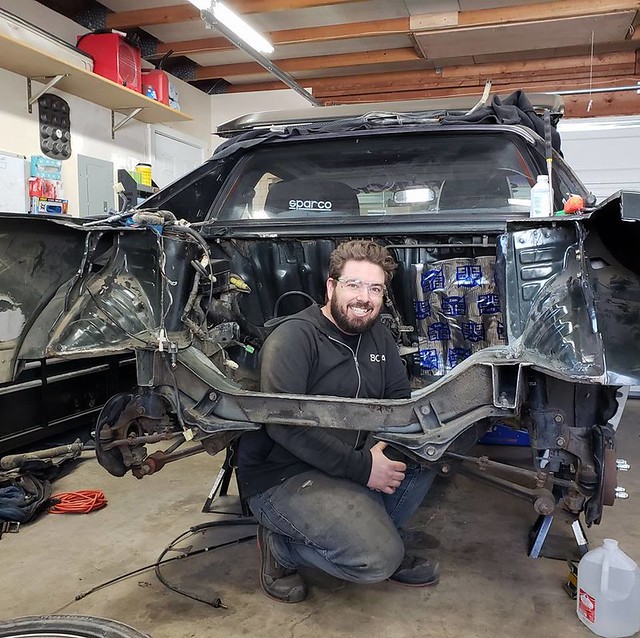
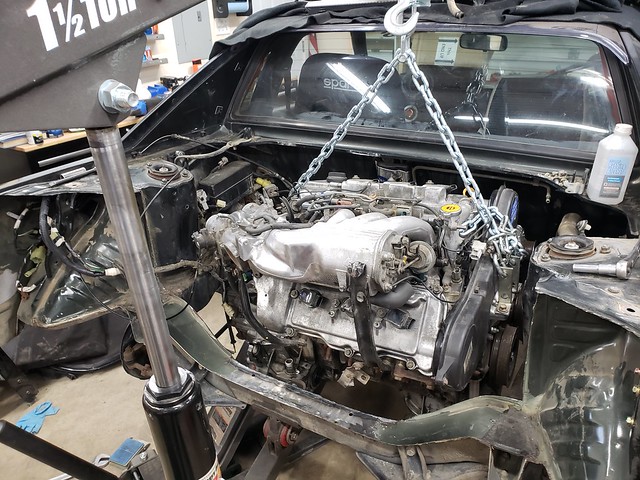
Out with the 4AGE:

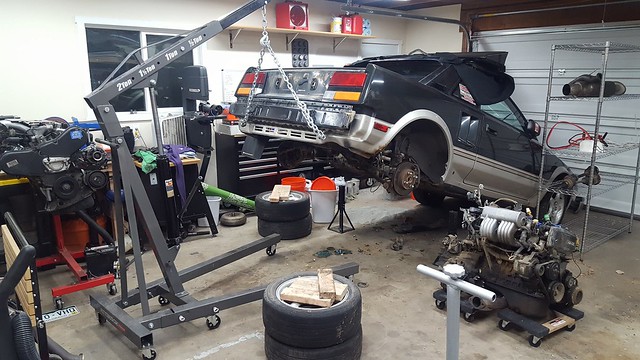
So much room! Yet... not enough...

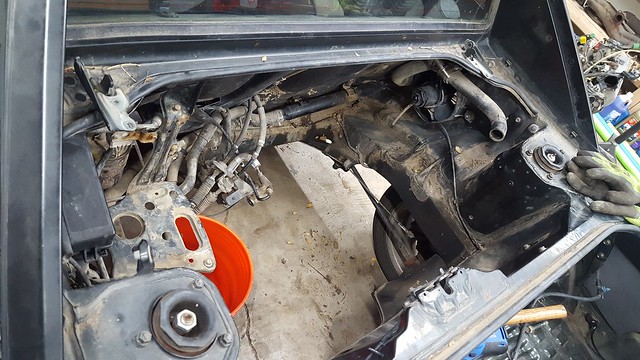
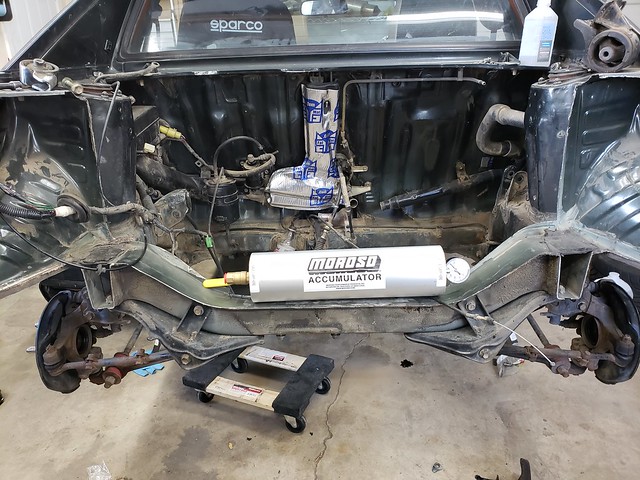
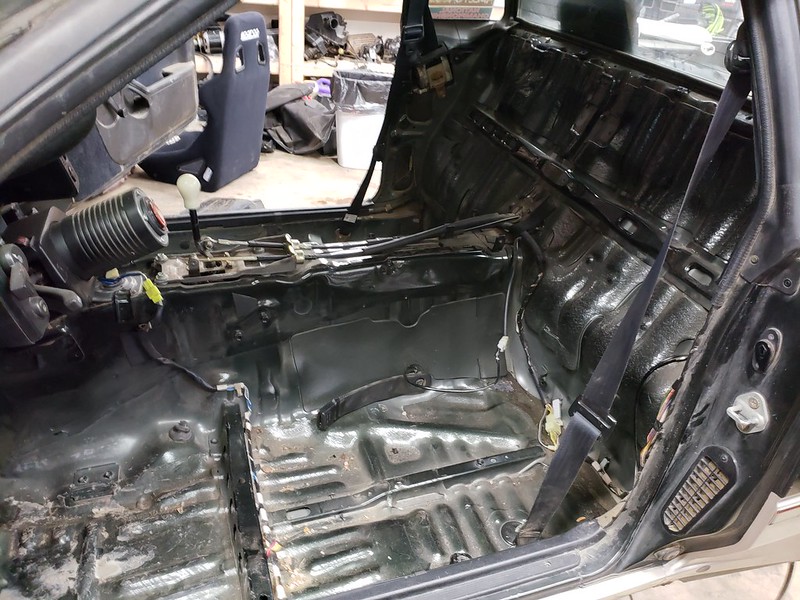
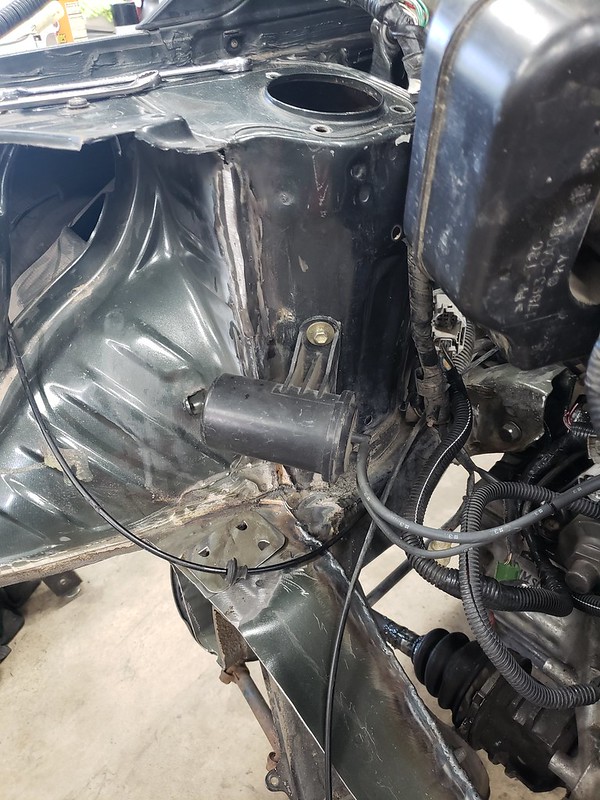
Those that V6 swap AW11's talk about how cramped the motor is in the engine bay. Want to change the spark plugs? Drop the motor. Accessory belt? Drop the motor. Alternator? Drop the motor. Check the dipstick- drop the motor. Ha. Kidding. You actually cut an access hole in the interior so you can pull the dipstick out. So, knowing this, and knowing the car was going full race car, I read the rules and realized I could remove non-essential components. So, being a race car, I decided a trunk was a very non-essential item. So I started cutting out sheet metal.

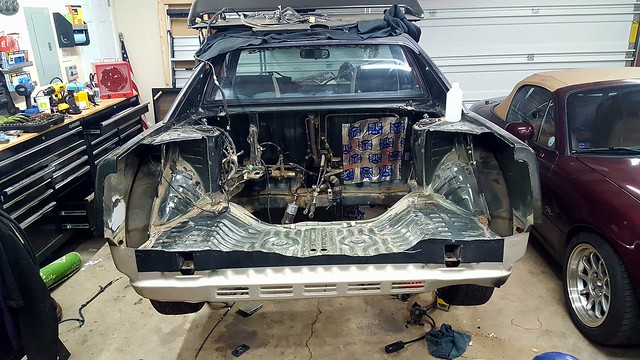
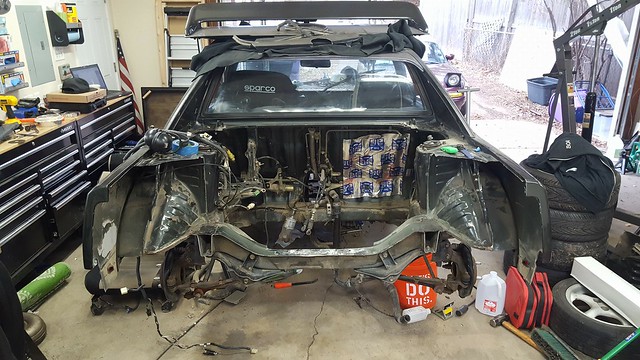
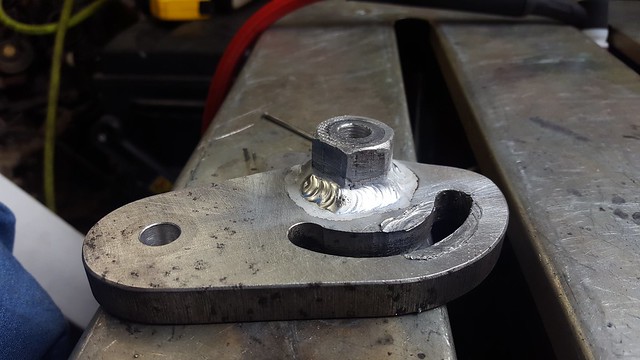
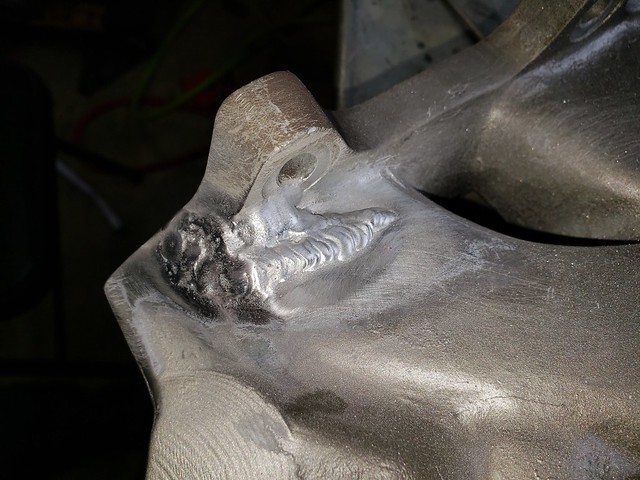
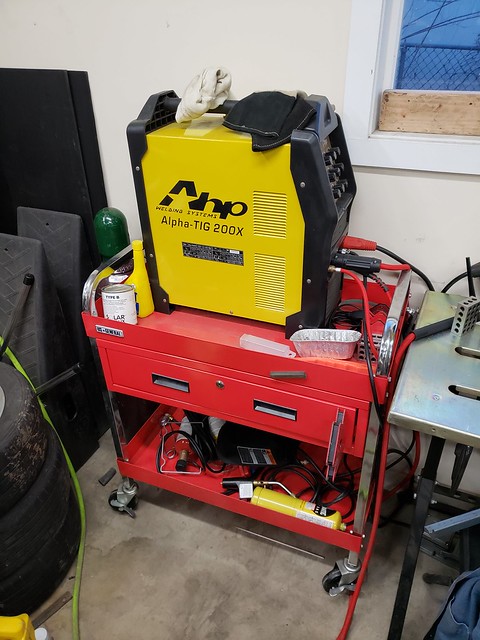
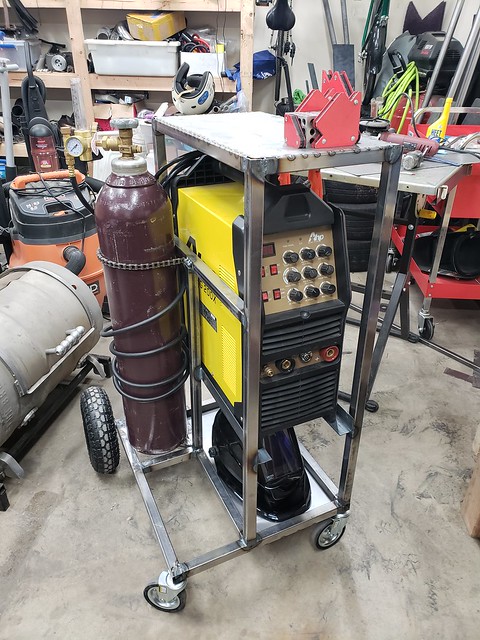
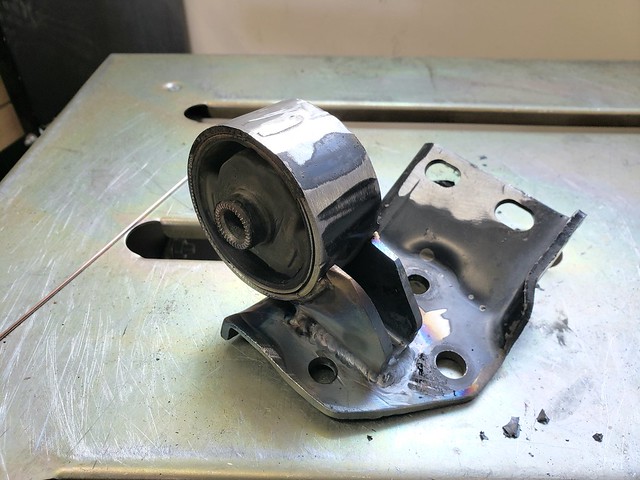
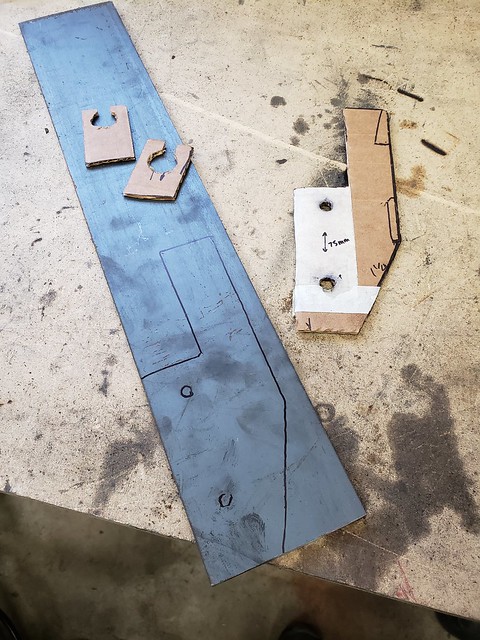
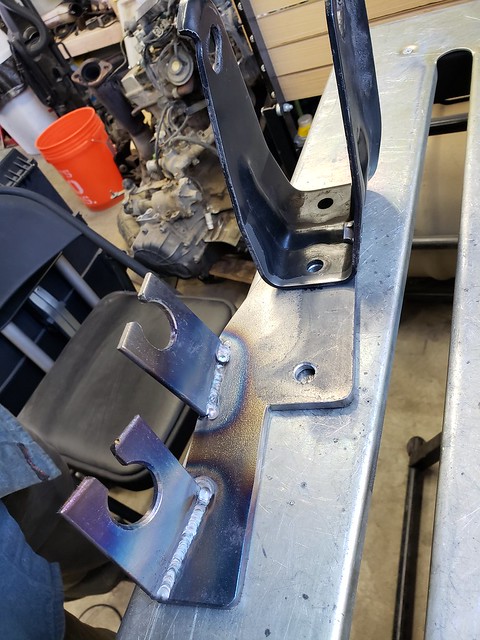
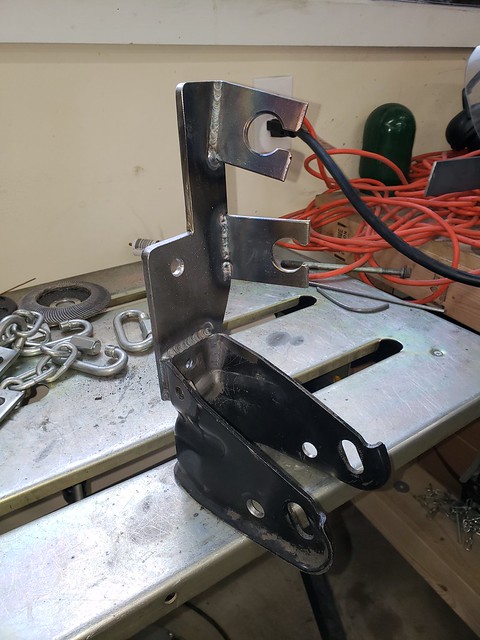
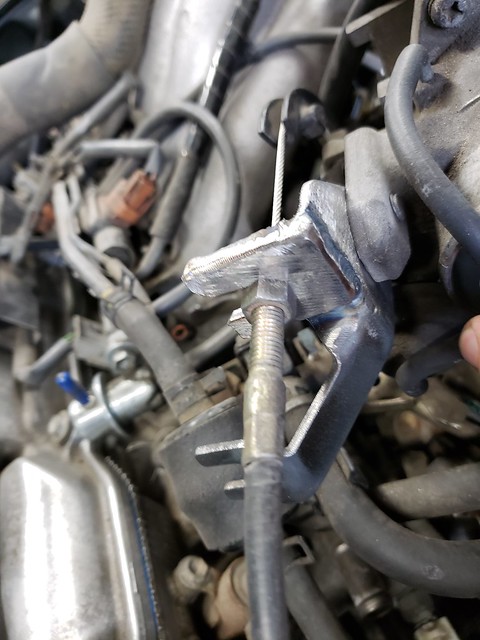
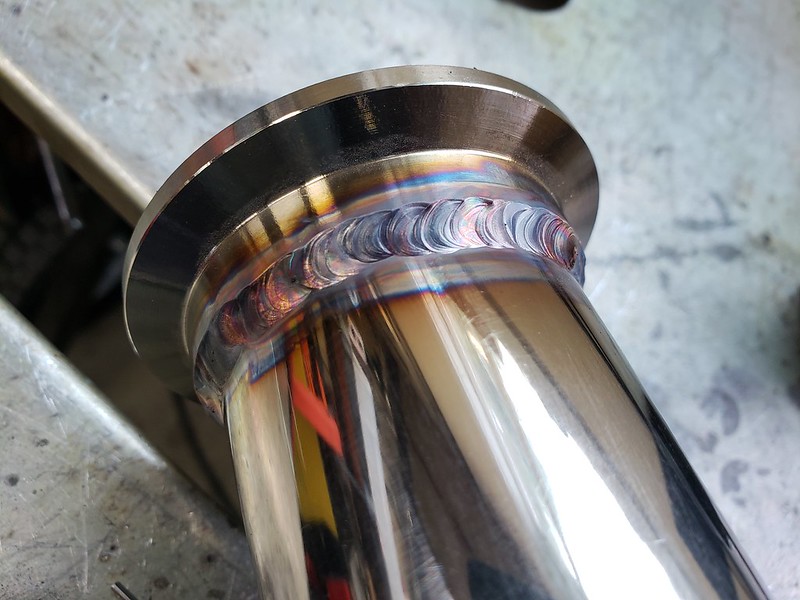
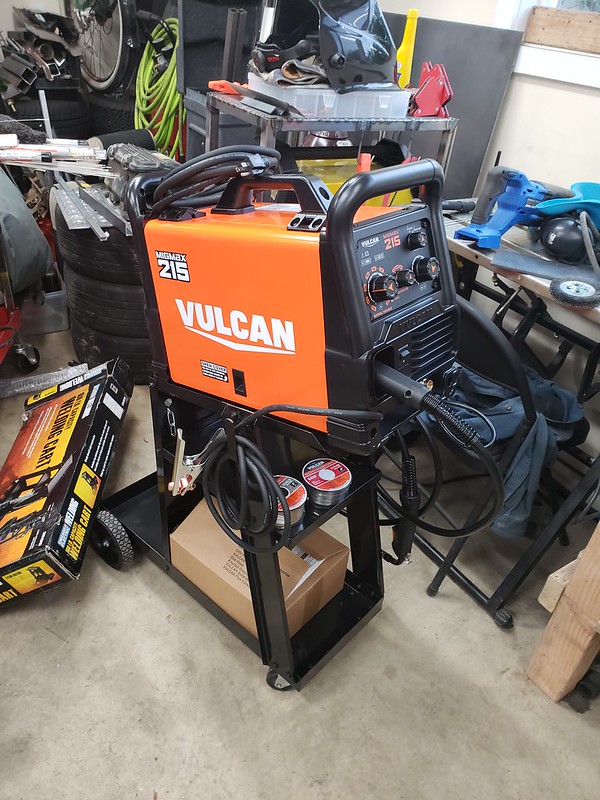
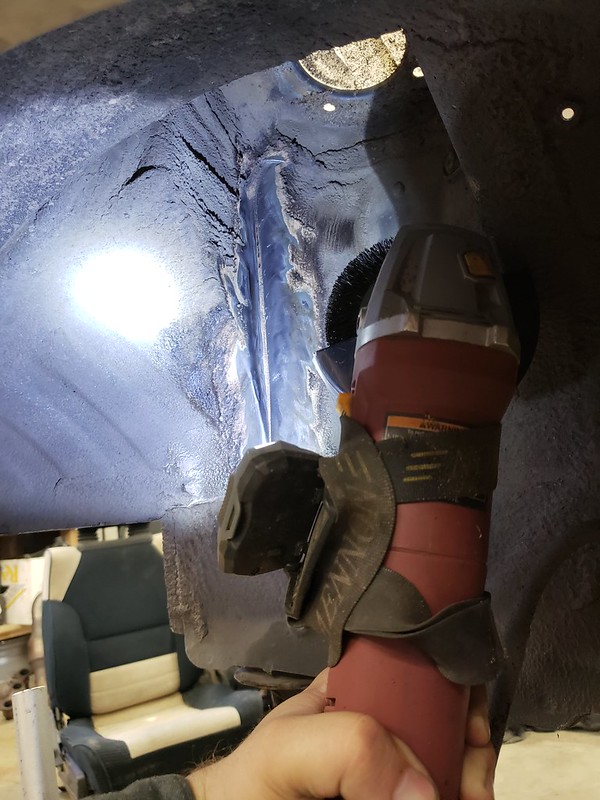
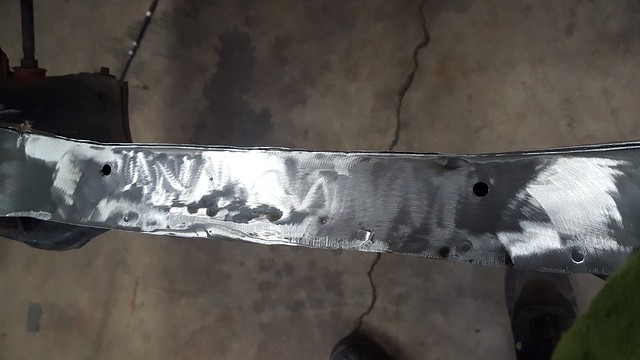
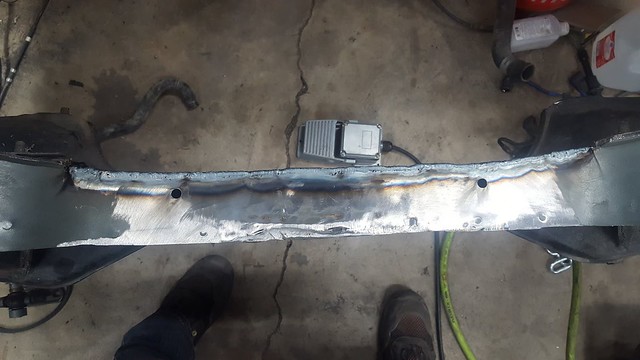
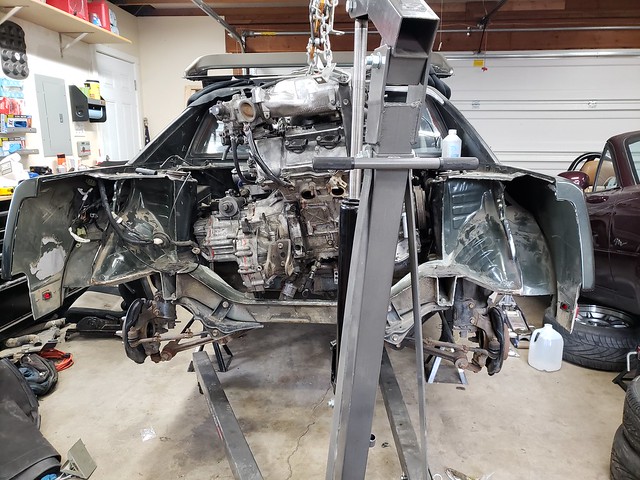
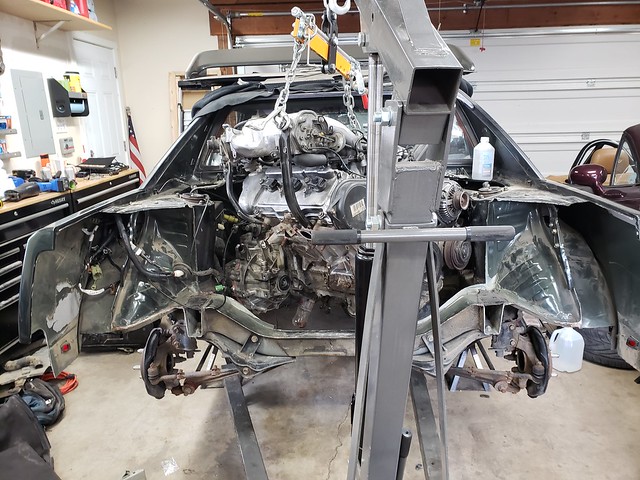
Per the rules I'll need to reinforce the chassis, so I will be putting in a bolt in tube crash structure. This will allow the structure to be unbolted and the entire engine lifted out the top (when it needs to come out, which should be less with all the increased maintenance access). I'll need to reattach the plastic bumper skin and lights as well to remain legal. The tube structure will also help with the need to add a skidplate. One of the first things I had to reinforce was that big seam of metal I had cut out along the length of the subframe. I am not the best tig welder by any stretch, but sometimes I can glue metal together.

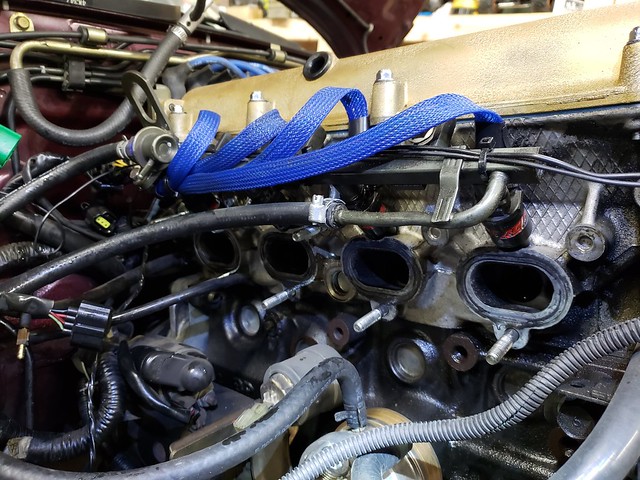
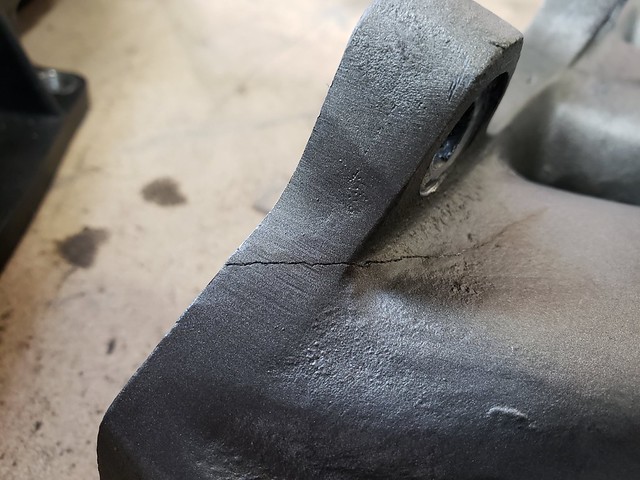
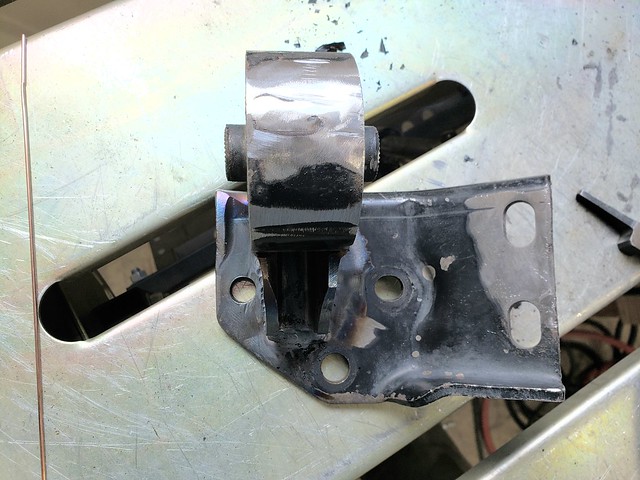
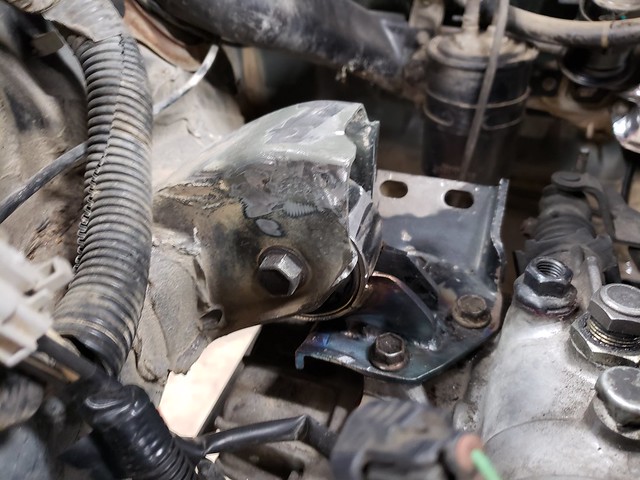
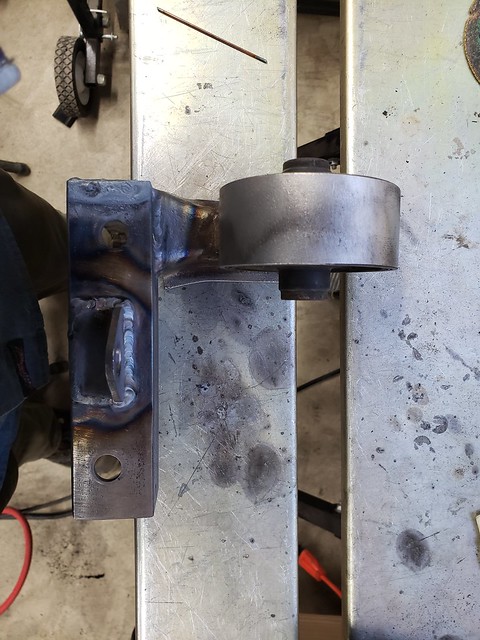
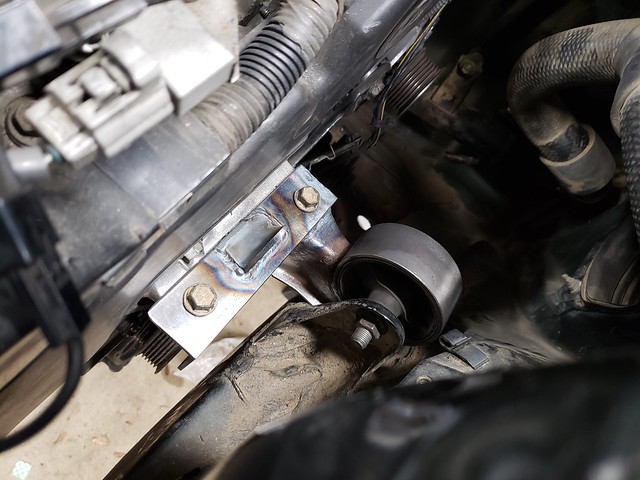
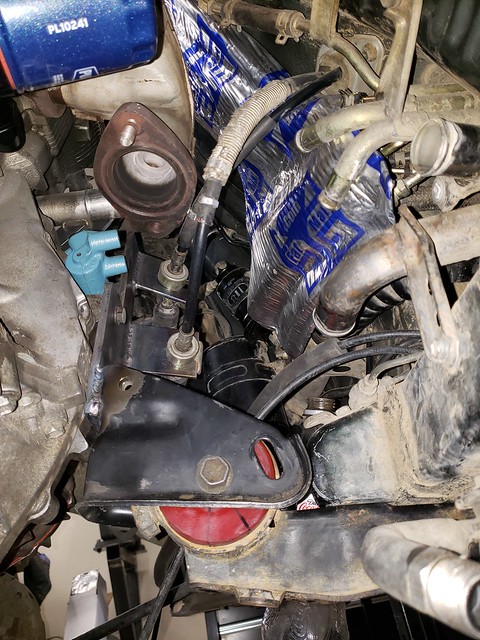
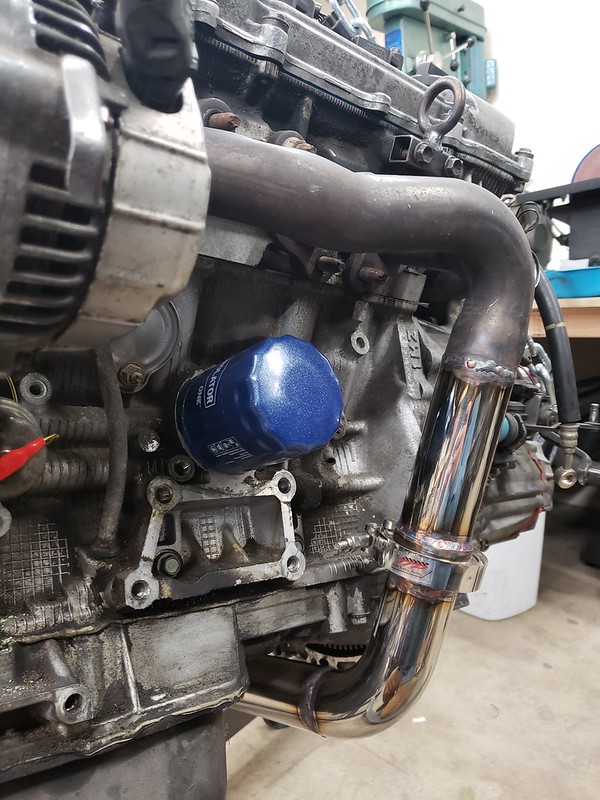
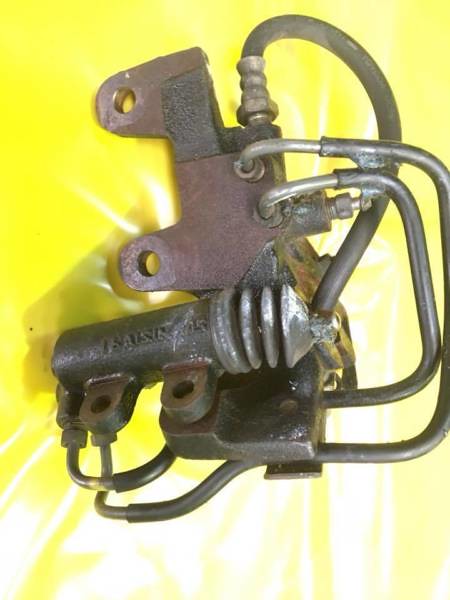
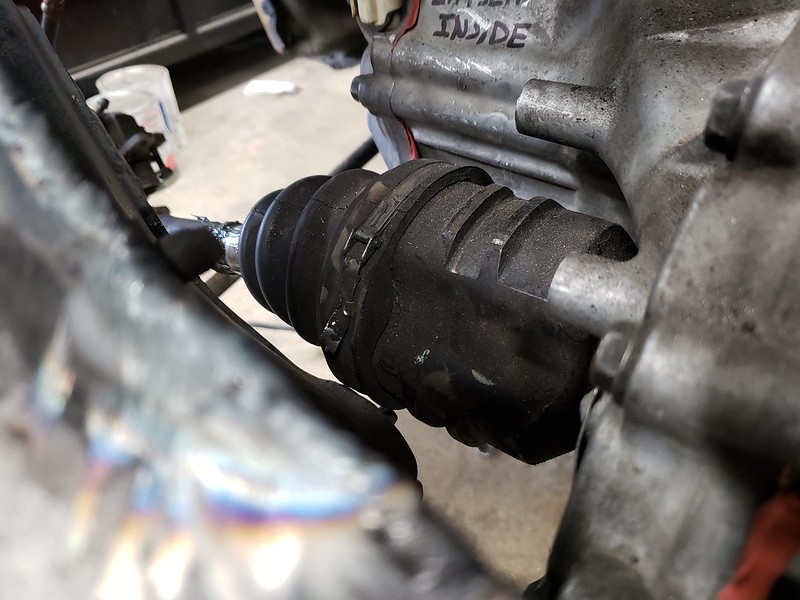
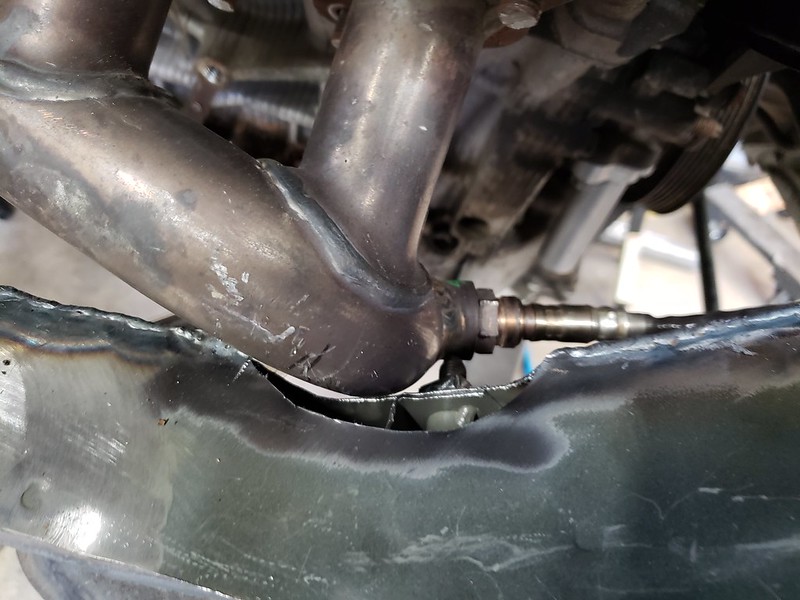
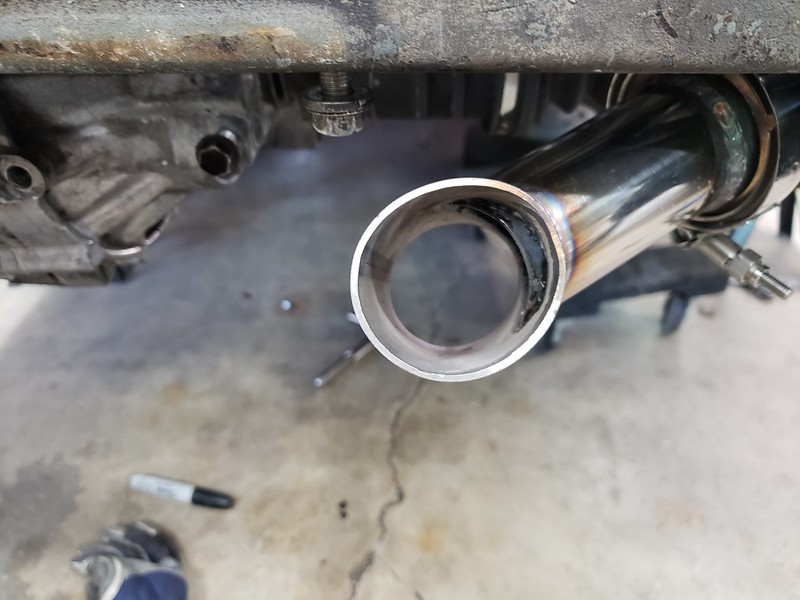
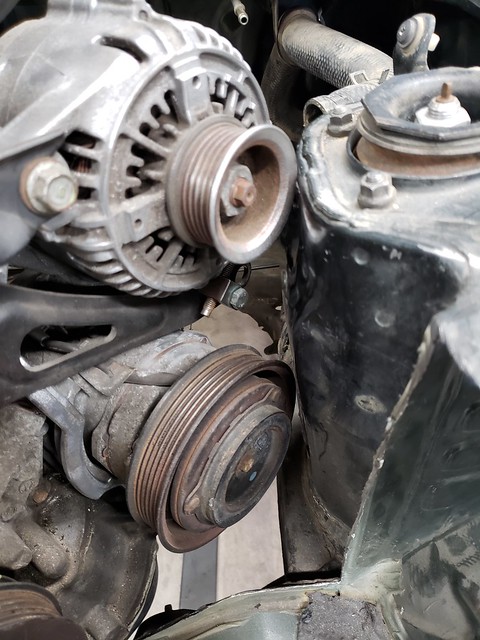
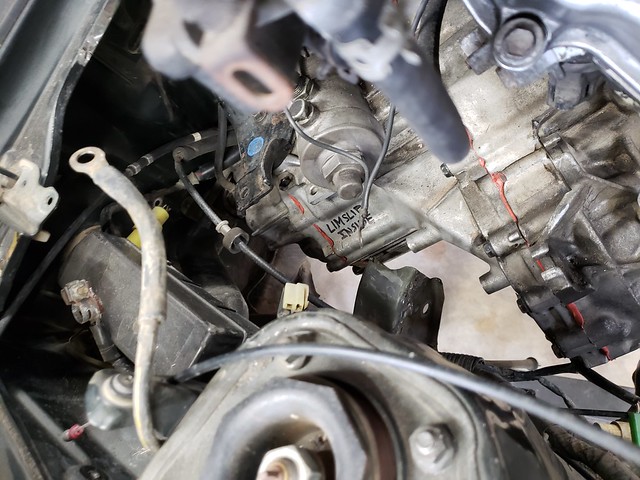
Oh yeah, exhaust. I'm doing something weird and I hope it won't hurt performance too bad. There's clearance issues with the rear bank to the engine mount. Also the engine likes equal length headers. So, I'm using two front bank exhaust manifolds on either side of the motor. I'll cut the precat off (my donor was a california model and had 3 cats vs the normal 1 cat) and create a new y pipe with v-band clamps to gain some clearance.

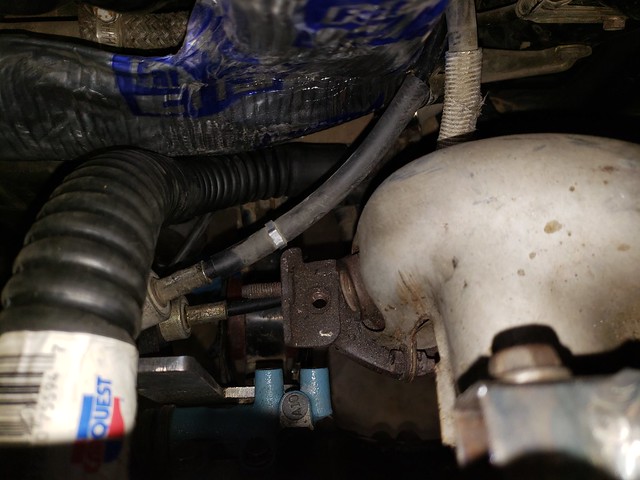
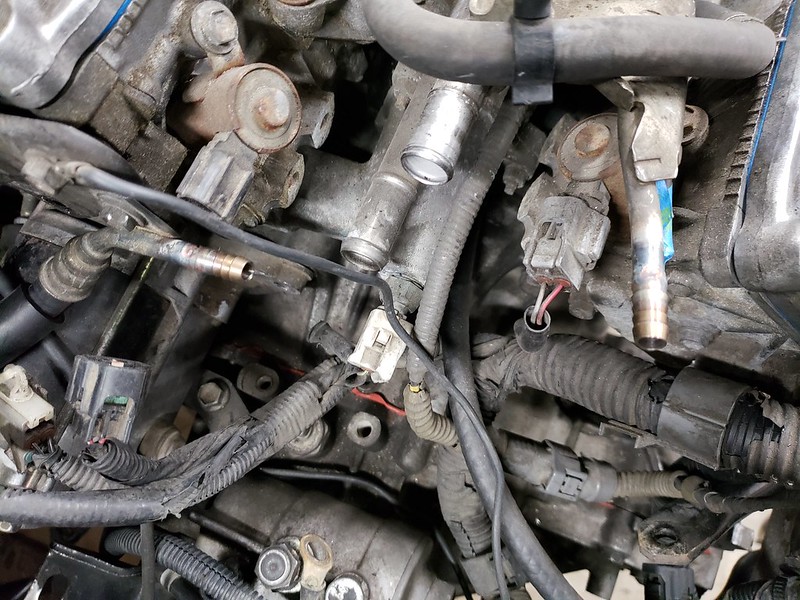
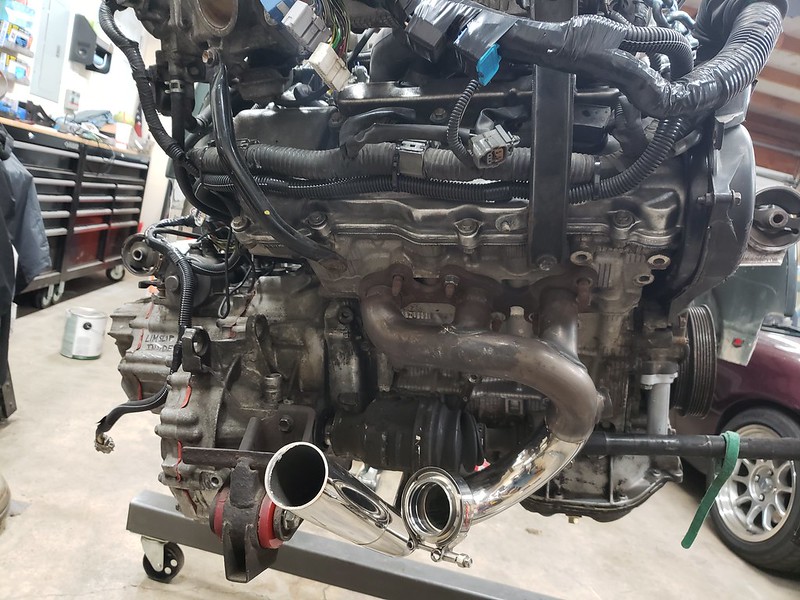
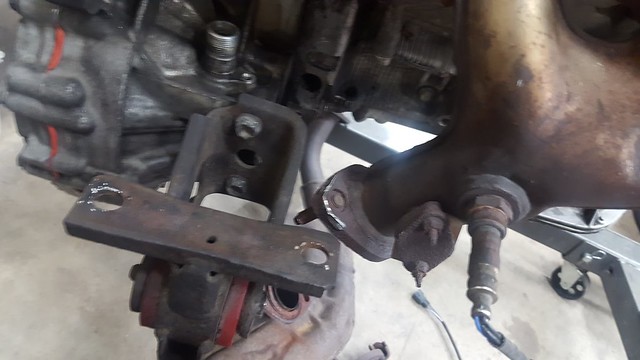
Rear exhaust manifold is very close to the motor mount

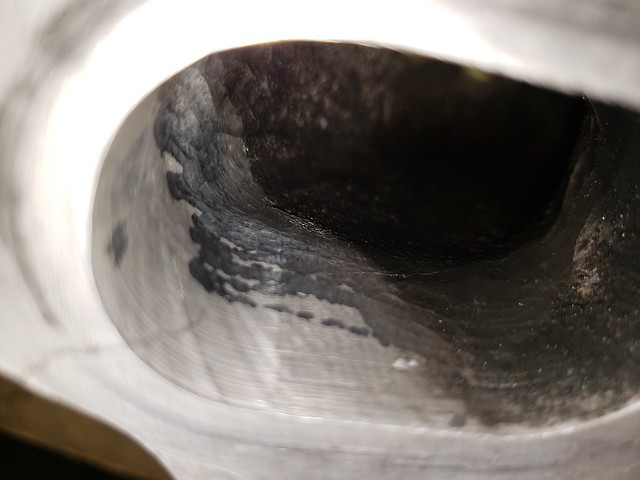
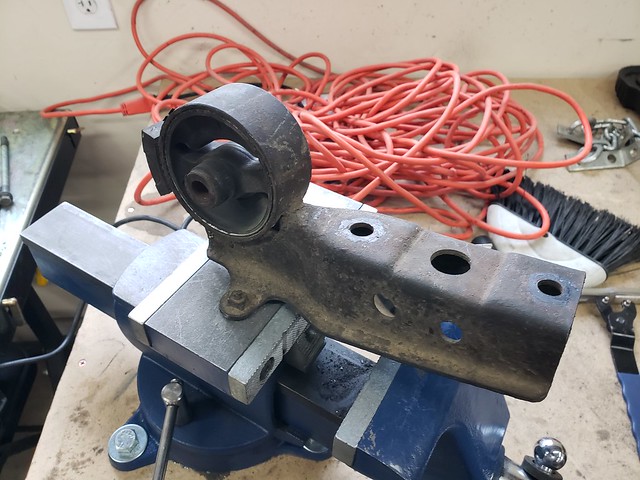
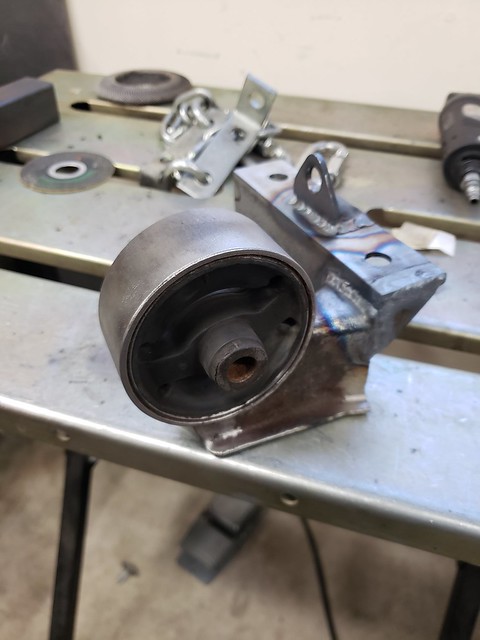
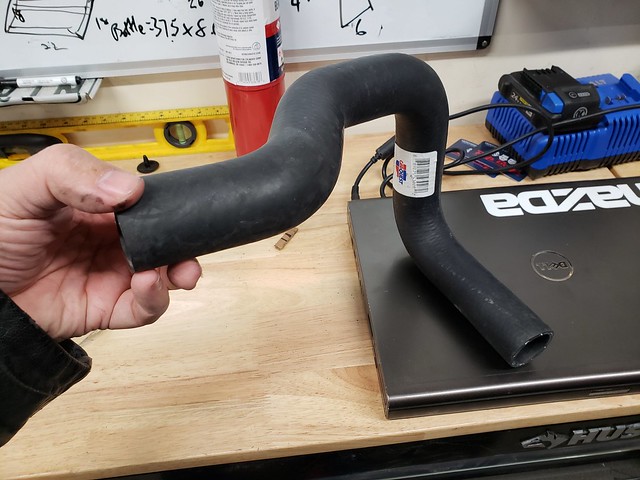
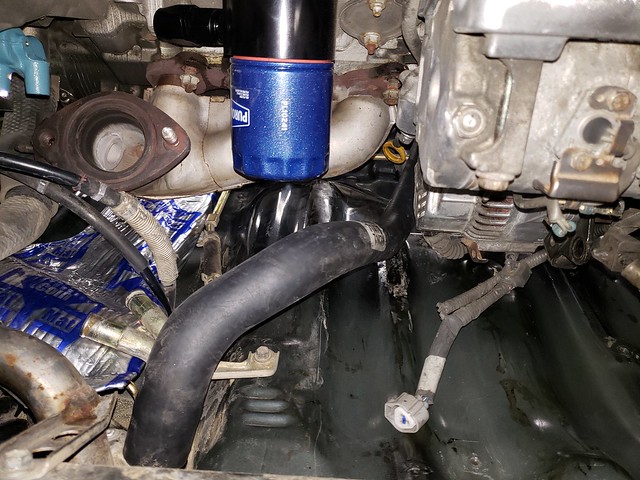
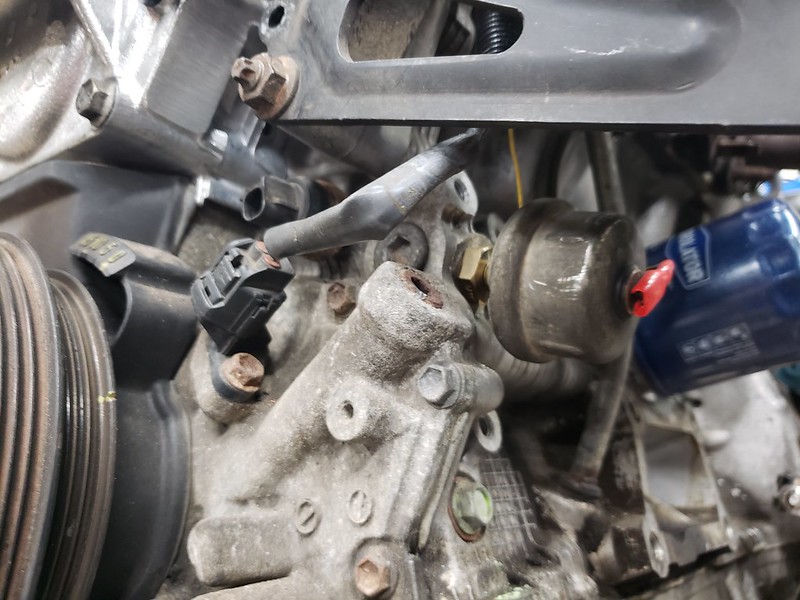
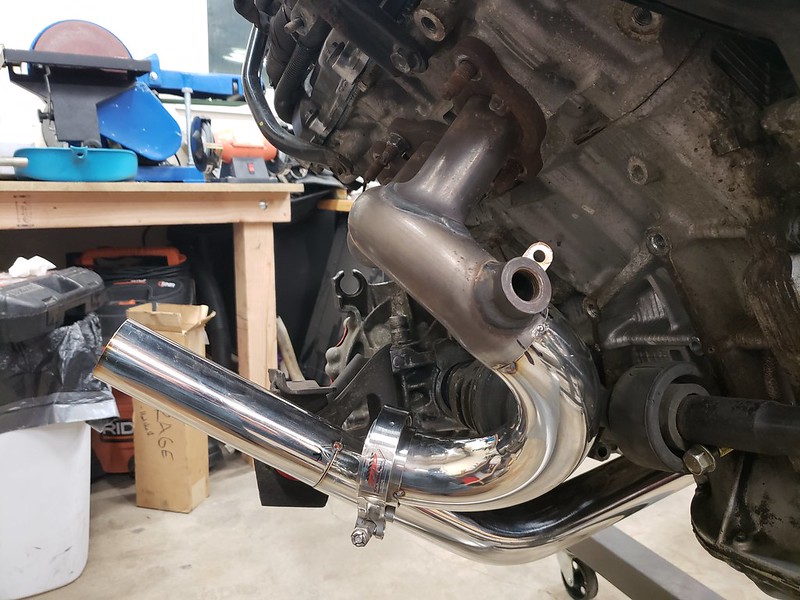
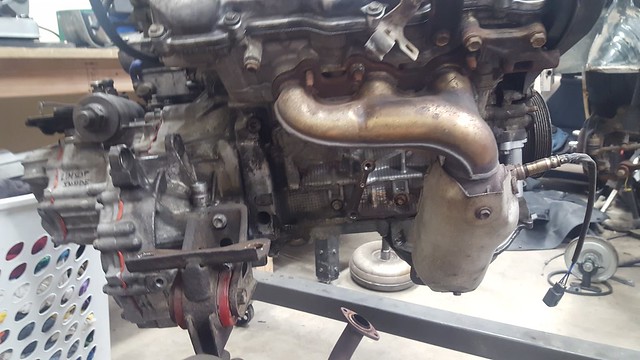
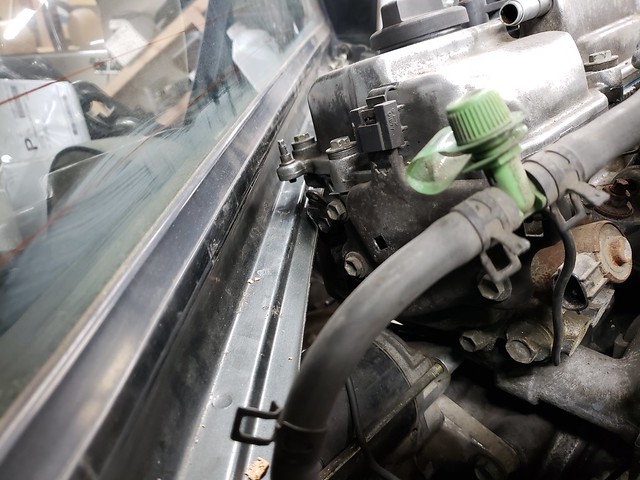
Heres the front bank exhaust manifold 

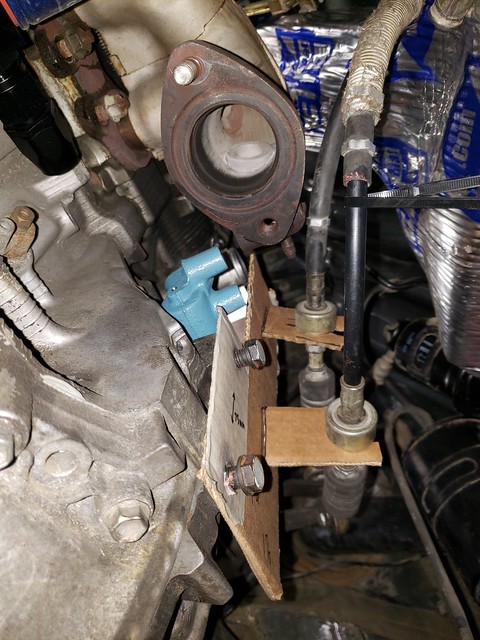
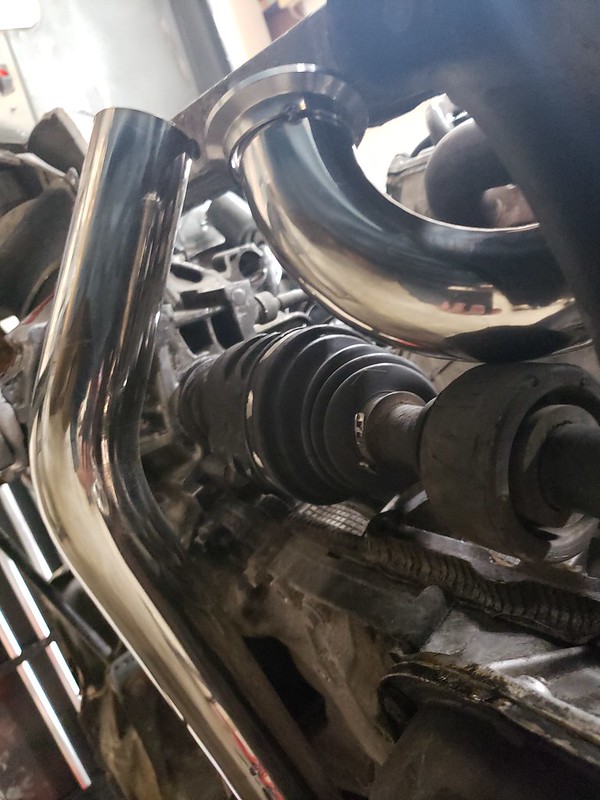
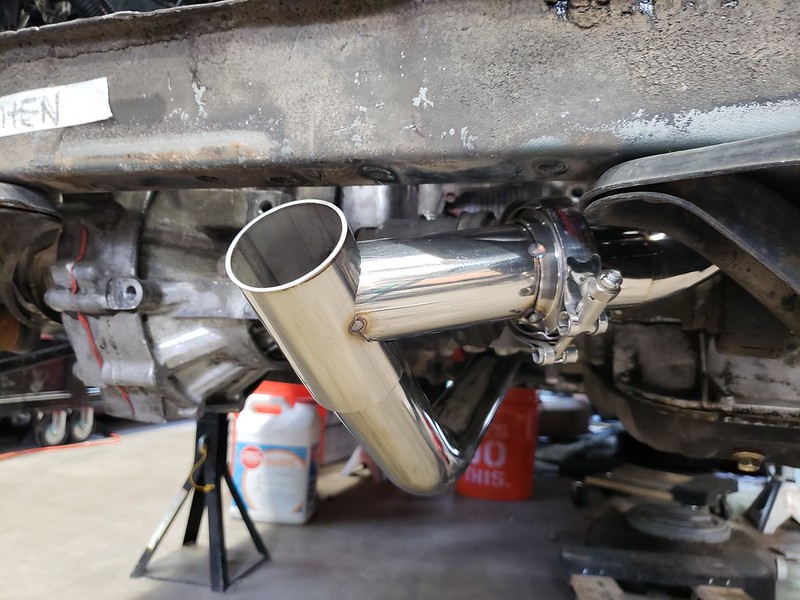
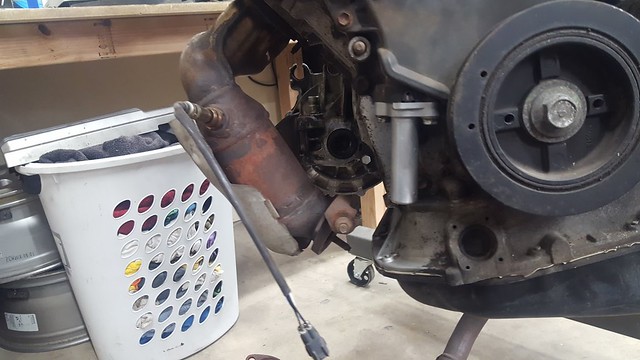
The exit angle will be good once the precat is cut off and replaced with piping. It should easily clear the axle


Anyway, it's been a longer than expected project to get to this point, and there was plenty of steps before getting to this point, but this post has rambled long enough. I have the motor prepped with transmission and a proper tune up. Wiring harness was completed last week. In the coming weeks I'll be working on engine mounts, chassis bracing, and exhaust.

edizzle89
edizzle89 Dork
3/14/18 8:20 a.m.

as a previous AW11 owner, there isn't one thing about this build i dont like

mazdeuce - Seth
mazdeuce - Seth Mod Squad
3/14/18 8:24 a.m.

This is awesome. Mad respect for rallycrossing one of these well. I've done a handful of rallycross runs in one and am always surprised at the quickness with which they go from "I've got this" to "I'm backwards". 

krautastic
krautastic New Reader
3/15/18 10:42 a.m.

Thanks guys!

I haven't actually looped the car (yet...). Must be my ultra precise alignment of never putting it on a rack no matter how much I've done to the suspension haha. It got aligned a long time ago, but the rear toe rods are rusted frozen and I never bothered to go back after doing the bushings. I think the LSD might actually make it a bit more unstable and tail happy, but power on oversteer is one of those things you'd like to control with a RWD car, and currently adding throttle makes the car pretty much shoot straight (usually).

If you want to check out some videos of the car in action, here's a few. I'm going to miss that snorkel induction noise behind my head. The 4AGE is a great sounding motor:

https://www.youtube.com/watch?v=SXZwzgOJxjg

https://www.youtube.com/watch?v=gf94p2QFxWc

Robbie
Robbie GRM+ Memberand PowerDork
3/15/18 10:50 a.m.

Awesome.

java230
java230 SuperDork
3/15/18 10:53 a.m.

This should eb fun! Following along as a sw30 owner....

Crackers
Crackers Dork
3/15/18 10:57 a.m.

I once spun an AW11 630° on a wet freeway on ramp at only 3/4 throttle. I was stopped against the curb before I even really had time to do anything. 

Snap oversteer isn't really an adequate description for how quickly they let go when they do. 

Sad thing was it was pretty much a straight ramp. 

I wonder how much the extra weight will effect it. 

badwaytolive
badwaytolive New Reader
3/15/18 11:15 a.m.

Good luck!

Subscribed...

krautastic
krautastic New Reader
3/18/18 9:23 p.m.

Not as productive a day as I would've liked. And saturday was booked solid with other things. Got the fuel tank reinstalled along with a new fuel filter, ran the lines for the evap. I did test fit the motor and learned that it is a very delicate dance to get it in without snagging everything. I'll get pictures of that later. 


I did take care of doing things you can only do when the motor is out of your car. Like owner in the engine bay:


And acting like a ghost is driving your car:


GIRTHQUAKE
GIRTHQUAKE New Reader
3/19/18 6:34 p.m.

Yeah, another resident of snap-oversteer city BRUH. I love the V6 swaps, and I highly reccomend you get in touch with Paul Woods for some assistance- you might need to do some minor strengthening to the rear trailing arms, but I might be thinking of something else.

What are you planning for suspension? The shock/strut gold standard replacement is the Eibach coils with Koni yellows, but for rallycross you'll probably want to go for a full upgrade to coils.

krautastic
krautastic New Reader
3/20/18 10:50 a.m.

Paul Woods is doing the wiring harness. Haven't read of any body talking about strengthening suspension. The car has koni inserts already, with stock spring rates. The oil pan looks like its going to be a little lower than the 4AGE, so I may look into doing a small suspension lift. Either reweld the tabs lower or do something with the top hats. There's rally coilovers available for these cars, but they cost the same as the total investment I have in the car + swap. I was thinking of doing modifying the strut housings for coilovers and then using the 46mm bilstein inserts, but they disccontinued those. I think they are still available from shops in the UK though. So far the konis have held up fine and I have poly bushings everywhere to replace the tired rubber bushings that were on the car. I haven't had any large problems campaigning the car this far that many others talk about (like wheel bearings).

krautastic
krautastic New Reader
3/20/18 10:58 p.m.

Above I talked about test fitting the motor. Here's what was involved in that ordeal... Y'know, in case some other person chops off the back end of their MR2...

I tried to go straight in the first time, barely clearing the strut towers, but the diff hump catches on the subframe:

So instead you have to angle it in...

But its still tight...

If I had kept the battery tray in place, the transmission would have never passed through. Even still, there's a number of things sticking out of the transmission that will catch on the driver side chassis mount as you try to drop in.

The front bank valve cover wants to catch on the window sill... you have to tip the motor and slip under here while dragging the oil pan on the subframe:

Eventually it does fit into place. I started mocking up items for my motor mounts and figuring that out, but I'm going to save that until I have all my motor mounts figured out and do one post. It did give me a better idea of what I will need for coolant hoses and that the throttle cable bracket will need slight modification.

[/url]


Bill Strong runs a 1mz/3mz hybrid in his mk2 MR2 endurance racer. He says that you'll toast a 1mz motor in the matter of minutes on track because it has a terrible sump design and drain back design. He also states he has no issues with oil temperature. The solution is an oil accumulator (3qt's in this case). Without the need of an external oil cooler, and to minimize connections that can leak, I went with a moroso 23675 oil filter plate which has a single inlet *after* the oil filter. That means that the pressurized accumulator would be fighting the oil filter's one way valve and the oil pump if it tries to empty. That means it should be guaranteed to only flow into the engine when oil pressure drops. Some people cram the accumulator in various places, but I'll be putting mine back where the rear strut bracing is going.

I have two options, run the oil line down under the motor (next to the front bank's exhaust manifold running under the motor). And yes, that's an AC compressor. I'll be stripping the car down quite a bit, but working heat and AC is a requirement for now. Where we run it can be very cold in the mornings and ungodly hot in the afternoon. There's something to be said about racing when you're body is well rested and comfortable.

Or run the line up and over the transmission


It looks like the actual line length would be fairly equal between the two, it seems going over the trans would be better for heat and protection of the line, so at this point I think I'll be going over the transmission. One thing I need to figure out is where I could put an oil pressure sender. No real info on areas I can tap on the block for a sender. One option could be to drill and tap the oil filter plate, but then I'd be measuring the pressure behind the filter... I could also insert a T adapter on the accumulator line which should read the real effective pressure of the motor (including at engine startup when the accumulator is filling).

Coming down with a cold, but hopefully I can get some work done on the car this week. Sunday is the first rallycross race of the season and will likely be borrowing a mod-front neon (we combine mod front and mod rear into Mod-2 for local points, so it'd count for season points).

krautastic
krautastic New Reader
3/26/18 3:53 p.m.

No progress on the MR2 the last few days... ever since completing my miata, it's had a real nasty vibration from 3000-4200rpm. It wasn't there before the supercharger (flyin miata ubercharger), and I've tried a number of different things to locate the vibration. It's got a new support strut under the intake manifold, and I've tried two different blower assemblies, among a ton of other items that I thought could cause it. I pulled the car into the garage thinking "let me look again and see if I can find it..." Instead I found that the front two intake manifold studs were gone. Now, this vibration is so bad, I've vibrated the oil cap loose, and a number of other bolts. So I thought the nuts vibrated loose, and then the studs... Nope... they broke off:

So, I ordered some ARP studs. I went to the local Harbor Frought and got some left handed drill bits and bolt extractors. The left hand drill bit was ground for right hand drilling with left hand flutes... So after grinding it the correct way round, I extracted the broken studs.

Oh did I mention that to install the supercharger they recommend a really thin smear of siliconcarny and that it's almost always impossible to break the supercharger free of the intake manifold? In the past I've been able to load up the tensioner and pop it loose. This time though, I just spun the nut free of its welds... So, I had to fix that first. I added weld all around the base of the tensioning nut. Lots of oil had gotten under the nut, I probably should have used a torch to burn some of it out.... Anyway, there's some shmoo in the welds, but they seem plenty solid:

Going to reassemble everything, I noticed the intake manifold was cracked... That's the bottom mounting ear under cylinder. Probably because the two studs above it vaporized. I've never repaired a cast aluminum piece. It started off well, but it got real weird where the weld is globbed on. It was acting like I was dipping the tungsten, the arc color would change to bright green and it would sort of pop. I had cleaned the area and used a torch to burn off as much oil as I could (and preheat the area), but it sure seemed like something was gassing out.


if you have kids or sensitive family members, have them avert their eyes:

Anyway. It's repaired, and the miata is back on the road. While the intake manifold was out, I swapped the AWR/Supermiata passenger side engine mount out, and swapped with a mazdacomp motor mount. The 3000-4200rpm is basically gone. There is a vibration when decelerating and letting the rpm fall through 3700rpm. I'm starting to wonder if its something to do with the supercharger case being bolted down at the front, but having a ton of assembly length hanging off the back. While the S/C case should be very stiff, the miata motor is pretty noisey around 3000rpm, which might be putting in a vibration/wave into the assembly like a diving board.


The first rallycross race of the season was yesterday. The MR2 is far from finished so I got a codrive opportunity in a Mod2 Neon.

This thing was wild. I never got the hang of driving it, but still laid down a screamer of a lap. Unfortunately, a welded diff, oversized tires, quick ratio steering rack and negative offset wheels make the car a bit unwieldy. We lost the power steering belt on turn 1 of run 5. That run did not go well... For run 6, we swapped to smaller tires like it had in the rear, kept it in 1st gear and ripped on the throttle to spin the tires and assist the very stiff steering. Due to some cones and losing 6 seconds on the unexpected manual steering, I ended up mid pack for the day... Oh well, it was a hoot! It's also for sale! So if you want a really crazy/cool lemons/chump/rallycross car, we had 3 drivers in it yesterday and other than the PS belt, it didn't skip a beat. No overheating, nothing. I think the PS belt is more a symptom of the oversized tires. Here's a link if you want to get a hold of the owner: https://denver.craigslist.org/cto/d/99-dodge-neon-lemons-dirt/6517805661.html 

blakteky
blakteky None
3/26/18 6:26 p.m.

After 18 runs in 2 hours, that Neon got 2nd place (Me), 7th place (Krautastic), and 10th place (first time rallyXer), but more importantly, it put many smiles on many faces.

Photo Credit to Brent Murphy Photography (brentmurphyphoto.com)

krautastic
krautastic New Reader
4/2/18 10:32 a.m.

Ok, I should be able to get some updates on this project soon. I had to get the miata on the road, and then the next big task was making my welder mobile. This was the cart I was using and the bottle wasn't the most secure. It was fine when not moving, but putting it out in the middle of the garage was sketchy...


So I built this tig welding cart for my AHP alphatig. I still need to add some cable management and some filler rod holders. But, the bottle is at least stationary. I did the side by side setup so that the front edge was about the same as my welding table and work benches.

Now that I have a mobile welding setup, I can get to work on the motor mounts. I did get the wiring harness back and installed that on the motor, but that's pretty boring so no pictures of that.

krautastic
krautastic New Reader
4/8/18 11:09 p.m.

What an awesome weekend! The motor is now hanging in the engine bay without a hoist attached. Having never done a motor swap before, man this feels awesome. Here's a shot of the motor in the bay

I have a spreadsheet I'll upload at some point that has tons of reference threads on various forums. One of them talked about how to mount the S54 transmission with an engine in the AW11 and suggested starting with the rear mount first. Only the top bolt hole needs elongating. So simple, I didn't take a picture, but start there.


The drivers side mount is easiest. Two options here, the C50/C52 driver side mount  has two holes that line up with the S54 transmission. But I just used the S54 mount which has all 3 holes that line up. The slotted holes also make for a good hoisting location, since the stock lifting point by the valve cover hits the rear sill. The mount is made from the original AW11 mount cut and welded to the S54 mount plate:

Next was the passenger side. To balance the lifting point on the transmission, I was using this part of the block to lift from. So, I had to incorporate a lifting point. The mount itself is made from 1.5"x1.5"x.125" angle and an extra AW11 front torque mount I had. The reason I didn't just use the passenger side mount was the rubber had completely tore from the metal housing. It was no good. But this mount came out real nice and simple.

Lastly I did the front torque mount. My transmission didn't come with the front or rear mounts. The front mount would have had the shifter cable mounts. So I had to make  shifter cable mounts. Start with some CAD work- some cardboard aided design:

I used .25" plate to make the main bracket and .125" plate to make the cable brackets. (By the way, if you're using this as reference, the hole to hole distance actually measure 76mm, not 75mm like i wrote down!)

I used the AW11 front torque mount components. Lined up the top hole with the transmission. Had to drill a new hole for the cross mount bolt. 

It ends up looking like this (maybe I missed my calling as an obscure metal sculpture artist):

It will probably be a blessing in the end, it allowed me to get the cables away from the header as much as possible.


One issue is the rear exhaust manifold clearance is real tight. I can't assemble the manifold to the motor without dropping the motor. Vey unorthodox, but what would be the issue using bolts to hold on the manifold instead of studs + nuts. I know I wouldn't be able to torque the bolts like crazy, because they'd be going into aluminum heads, but it would make the car a whole lot more serviceable. Alternatively, I remove the studs and use bolts while doing the exhaust fab work where it'll be getting bolted and removed several times, and switch to studs when its time for final assembly. What are your thoughts?

krautastic
krautastic New Reader
4/9/18 9:00 p.m.

Took some quick measurements for driver side coolant hose and went over to the autoparts store. Got there about 3 minutes to 7, asked to go to the back and look at hoses... the girl obliged. And holy cow, hit the jackpot almost immediately. This hose looks like it will be perfect. About 2 minutes later a different girl comes by and is really pushy about helping me find what I need, and casually mentions they're closed. Wha? Auto parts store that closes at 7? Yeesh... Well.. I got the one hose then. I thought it would work pretty much as is, but I actually cut off one of the bends to make it fit even better. Awesome!! It is a 1.31" hose vs the stock 1.25", but should be able to clamp it down.


Hose part number is Dayco 71799 for the 96-2000 Toyota Tacoma 2.4L:

GIRTHQUAKE
GIRTHQUAKE New Reader
4/10/18 12:20 p.m.

Not bad! I had to do something similar on my AW11 to get my heater core to work again.

pinchvalve
pinchvalve GRM+ Memberand MegaDork
4/10/18 12:42 p.m.

Epic. 

Fitzauto
Fitzauto Dork
4/10/18 5:51 p.m.

Friggin badass. Never seen or heard of a v6 aw11.

krautastic
krautastic New Reader
4/12/18 2:15 p.m.

Feeling real honored by the feature on the main page! This build isn't even getting fun yet. I did order the necessary piping for the exhaust, so that'll be coming up soon. I also have a very special fiberglass piece that should be coming from belgium in the near future.


Fitzauto, V6 swaps in AW11's have been around for some time. They were the rage for a while, along with mk1.5 swaps (taking a mk2 turbo motor, and putting it in the mk1/ aw11). 3vz's (iron block v6's in the early 90's camry's) were done for a long time due to cost and a more stout internals. But they're heavy. Now these 1mz's are super cheap, and make more power. But, the newer 2GR V6's make even more power and are the hot choice. For me, I can't imagine needing more than 200whp on dirt with 2WD, and I need something that can be readily found in a junkyard. 

EDIT: probably should have a trigger warning for people that don't like tube being called pipe. I know there's a difference. I ordered tubing haha.

krautastic
krautastic New Reader
4/15/18 11:21 p.m.

Weekend update: hoses and throttle cable bracket. I decided to ditch the hose above. It was a little too stretched for my liking, and the 1 5/16" hose was a little too loose on the chassis side. So, driver side got a universal flex hose for now and I found the perfect hose for passenger side. Oddly enough, the stock driver side hose is almost perfect, but it is a little too stretched and would rub itself through on the valve cover.

Dayco 71478 used on several honda/acura 2.2L motors. Something like a 40" hose for $10. Can't beat that!. As you can see, only one little curvy bit at the end has to get chopped off:

Clearance between the valve cover, alternator, and firewall are all awesome:

Here it is cut to length:

Here's the flex hose on the drivers side. I used Dayco 81051

The throttle cable bracket wouldn't work with the rubber isolator used on the avalon. With the isolator removed, it was about an 1/8" away from being usable. So make a plate, drill, and slot with the angle grinder. Remove as much toxic coating off the part as possible and weld on the plate.

Funny, all the build threads I've read, no one talks about these smaller items, but alot of people mention needing to lengthen one of the shifter cables. My shifter cables are fine... I found one person who reported that Mk1a MR2's (85-86.5) don't need their shifter cables adjusted. Maybe something to do with the change from the C50 transmission which is prone to 5th gear pop out to the C52 transmission which addressed the issue on the MK1b MR2's.


Rallycross season event number 2 was on saturday. I asked the forums for a RWD codrive, and a novice offered me his 1993 325i. It was a prepared RWD car with maxxis rally tires. Basically an $800 car with a bunch of money in cooling repairs/upgrades and some sticky tires. Competition was really fierce. I was fighting with two previous national champions (actually, mod front's national champion from last year). Both were piloting his supercharged honda CRX. While I laid down a pretty good time my first outing, I never really gained more than a second on course through out the morning. They were getting about a second faster every run. Between their learning the course and my cone penalties, at the end of morning runs, I was in 3rd. I was 9 seconds down on 1st, and 3 seconds down on 2nd place. And, that neon from event 1 was 2 seconds behind me (due in part to having fixed his power steering). So I didn't have room for error there either! After lunch, the CRX would not start, and they both borrowed different front wheel drive cars to finish out the day. They never found the same speed they had in the morning and I clawed my way back into first place. I finished with a 2 second lead over the person who lead by 9 seconds in the morning. 

krautastic
krautastic New Reader
5/16/18 4:31 p.m.

It’s been a long time since an update. Progress has been few and far between, but I’m seeing the light. So, here’s a quick run down of what I’ve done and lessons I’ve learned:


Modified the fuel rail hoses with barbs. Turns out, I did this the hardway (like pretty much every step of this project). The return style fuel rail I purchased on ebay had the line in cut. If it hadn’t been cut, I would have found a banjo fitting that would have worked with the factory fuel filter. When I was disassembling the 4AGE, I cut the fuel line near the fuel rail, which meant it needed modifying too:

The oil pressure sender needs to come from the 4AGE to work with the stock gauge cluster. The stock oil sender for the 1mz is supposed to be an oddball metric size. I’ve read it’s an M9 thread (who does that?!). There’s two oil pressure galley plugs near the AC unit. So near in fact, that I had to remove the AC compressor. No air conditioned race car for me… To do this, I used bosch part number SP0F000009, which is a kit of metric threaded brass pieces that adapt to a 1/8 npt on the other end. The oil galley plugs are M16x1.5. The front plug didn’t have enough clearance for the bulbous pressure sender, and so I used the side plug. I’d rather know if the engine is about to go than be air conditioned between runs. I cut the 1mz oil sender wire. I sent the harness to woodsport in the UK for doing the harness, and he had this wired so this wire would send the signal to the cluster:

I did a ton of research before on how to do AC on this swap. So here’s some helpful links, but basically the AW11 has an AC clutch lock up and that’s it (well it has an idle up solenoid but that got binned months ago). The 1mz has a 3 wire connector. 1 wire is the clutch lock up and the other 2 are for the sensor that the AC has locked up. That feeds to the ECU for it to adjust idle and such. AW11 = R12, 1mz = R134, so there’s some work to convert. Here’s the useful links: https://midshiprunabout.org/mk1/ac-conversion/ and http://www.mr2oc.com/188-v6-mr2-forum/601201-ac-wiring-question.html


I had to do some junkyard diving to get some connectors that I broke herculese’ing them off the donor. That took some time but is kind of boring. So, I made a list of items that are standing between me and starting the motor (which included those connectors). On the list is exhaust with O2 sensors. So I started on that. The donor I have is a California model which has 2 precats and a main cat. Those precats cause clearance issues, so I bought different manifolds. Then started adding tubing. The original headers measure approximately 42” in length. The new headers are unequal length (and the rear bank is actually facing backwards). So there goes scavenging for firing order, and maybe I’ll have a toyabaru sound. The new headers are 32” and 16” in length, so we’ll see what the torque curve does:

First time using v bands and I’m pretty excited about it. No back purging here, I’m using solar flux inside the headers.

I’m about as far as I can go on these headers, and the rear bank is only tacked. I want to make sure I’m clearing the rear crossmember, although, the rear engine mount indicates that I am.


So one of the other issues before starting is sorting the slave cylinder. The S54 slave cylinder has M10 ports with inverted flare ends. The AW11 has M12 inverted flare ends. Apparently the S54 front torque mount includes shifter cable holders and some important hard lines that leaves an M12 inlet. Well, I don’t have any of that. And after lots of head scratching and ordering of the wrong parts, I think I’ve got it figured out. My plan is this M12 to 3AN fitting > 3AN flexible braided line > 3AN to M10 fitting > S51 slave cylinder from a celica which has a bleed port right on it. Looks like it’ll work, time will tell.

Here’s the front torque mount and its gaggle of hard lines:

Since I’m keeping my front torque mount, I braced the shifter cable holders. I also lost one of the clips that retains the shifter cables. Turns out the early AWD talons use the exact same manual transmission clips. Thanks U Pull and Pay!

I need to figure out the air intake which is fun. The VVTI has two small inlets on the throttle body. Toyota does some trickery to affect the runner lengths into 3 different lengths. Supposedly makes for a very peppy motor. The problem? The tubing sizes are weird. 2” ID for the small runners and 2.75” ID for where the MAF lives. The 2” is fine, I can find 2” pipe/tubing, but the 2.75”… I’ll have to go with 3” with .120 walls which seems super overkill. It might be worth just buying 2.75” tubing and use some thin wall. The MAF will think more air is entering than is truly entering, so it’d run rich. But I’ve read using the return style fuel rail without a vacuum reference actually makes it run a little lean. Maybe they’ll balance out? Here’s a cool document that explains how the variable intake runner length works: https://drive.google.com/file/d/0B_piOguU9u__cmZGd2hST1pSTkU/view


Oh yeah, I took a cut a little too big to tig back together on the strut tower where I was trying to stitch the pinch welds. So I bought one of these:

Never mig welded before, but I’ve heard it’s an art. Wait- no I heard it was a glue gun. Yeah, ran a quick flux core bead and it was so easy. I’m sure it’s easy to do, but harder to do correctly.


I painted the engine mounts. Man, they almost look legit.

While I was painting the engine mounts, I stripped the interior. Was left trying to decide if I should delete the hvac. There’s some much smaller heater units available through jegs and demontweeks that would simplify this greatly. For now I’ll hold off, but I’ll leave this off to delete the AC and run my new battery lines.

B13Birk
B13Birk GRM+ Memberand Reader
5/16/18 9:44 p.m.

Love this build! Super cool! I look forward to following along. We have a guy down here that RallyX's 1gn MR2 and he loves it. 

krautastic
krautastic New Reader
6/15/18 12:22 a.m.

Some big updates this week, but lots to catch up on. So without ado…

First off, that whole clutch line debacle. I finally figured out how to adapt the clutch lines. The AW11 clutch lines were all M12 fittings and the S54 fittings were M10. I could not find M10-M12 adapters… Also, couldn't find that S54 front torque mount locally. So, I ended up using a fitting from the AW11 which was an M12 to M12 female, and fits in in the chassis line holder. Then an M12 to 3an adapter, then a braided line (24") to a 3an to M10 banjo fitting coupled to a slave cylinder from an early 90's celiac which has the lines pointing in slightly different directions. Bled the clutch and it is working well. It looked like this off the car:


Then I mounted some batboy racing seats (I'm about 225lbs, 5'10, shakira hips don't lie hips, ~38 waist). Sparco Sprint-L. It's a tight fit. It's actually like a half inch to the left of the steering wheel. The seat fits me pretty well. I'm not broad shouldered enough for the seat, but my waist can actually fit down in the seat, unlike most race seats. Fatboy racing approved!


It's tight but not touching the door


Speaking of tight fits. I hadn't fit the axles yet. Just kind of trusted peoples previous experiences with engine mounts. Tight, but I massaged it down with the die grinder.


This one took a bit more cutting…


That's when I found out that the axle vibration damper was hitting…


So I tweaked that header. Got it all tack welded to make the y pipe. 


But, Turns out making tubes interconnect is kind of tricky… So I had some fairly large gaps to fill. I used two tig rods and did some lay wire. And it pulled the pipe way out of round when it cooled. There's a v-band clamp going there, so its not a big deal, I'll see how much I can massage it back to round.


I needed to stitch up the fender wheels where I cut out the spot welds. I had to get the rubber undercoating off, which can make it hard to see what you're doing. Usually I wear a headlight when working on a car, but the grinder was blocking the light… So I improvised…:


This is where I decided to mount the ACIS system's vacuum reserve canister. Nothing special, but some people don't know where to mount it. If you do it, make sure to pay attention to which lines have restrictor pills in them:

more updates to come in a follow on post...

1 2

You'll need to log in to post.

Our Preferred Partners
4tRGeyQhLH884TJqGVQ3Gplinr5CWKWrkeYdaX9ly7Vvx1MmdYUnjxdcC9Y5jtTq