1 2 3
greasemonkeyreborne_5x1gs
greasemonkeyreborne_5x1gs New Reader
10/22/22 1:20 p.m.

Oil change this weekend.   looks like we consumed 1/3 quart since last oil change 4511 miles ago between the kansas and michigan  trips   kept it under 75mph.  i thought it burned twice that normally??


began using synthetic oil around 160k.   normally change oil 3-4k intervals.  always used a mid grade fram filter.  never tried mobile1, did use castrol a little.   mostly quakerstate.  recent years has been costco oil.


Great engine at 285k.  original, unopened


Agent98
Agent98 Reader
10/23/22 8:07 p.m.

Amazing detailed story in this thread = a great read! I was going to warn against Fram oil filters with all the times I've had to run them through with screwdrivers and the one that blew out an o ring , but no ....you got the 281,000 miles you can preach oil filters to the rest of us.

greasemonkeyreborne_5x1gs
greasemonkeyreborne_5x1gs New Reader
11/10/22 5:31 p.m.


ROAD TRIP #3:  DALLAS TO DENVER.   


No work on car planned.  Just pile my parts/tools and go.....   Pix posted after the trip later this month.  Another 1500-1800 mile trip


Agent98, I think its the frequency of oil changes in my case.  I've been told I should buy a couple of different filters and cut them open to unravel the truth inside.  Fram for me has just been convenience, cost and habit.   I opened the top end of another car we have w 180K for a timing chain job.  It was surprisingly (golden) clean.  I change that one every 4-5K miles.  I hear ya, not advocating what I'm doing.  Probably changing my oil too often to compensate for inferior products.


Last year I had 2 of my original plug wire clips finally break.  Heat and age I assume.  Was looking for these from the last 2 cars I pulled from at the junkies this summer (most were broken also).  The one on the bottom right is original and tends to break the most.  I took one like in the upper left, whittled it down to mirror the bottom right.  Upper right is final product.  Sanded it w 1000 grit to polish up the plastic back to gloss.  Its on the car now to see if it'll hold up


What I had learned in the AC industry is to buy refrigerant in early winter.  Supply and demand thing.  Someone posted these on our local craigs.  Seems like going rate on ebay $30-40.  These were about $21.  If your thinking of picking up some, wait til January.  People need to pay off Holiday expenses....   Expect a better price.


It was 4am somewhere in middle America.  I was bored.  This is a screen shot from my phones video.  Low beams w Sylvania silverstar.  I wish I had taken a pix of the old bulbs w misaligned headlights as a comparison.  The car must have been hit on the front drivers - pushed over.  The drivers headlight was overlapping the passenger's bean spread.  I had fixed this when I replaced the passenger cracked glass.  This is about twice the light coverage as before.


This is a few minutes down the highway w GM Acadia foggers on.  Fills out the light much better.   Pix quality is better on this, plus its a straight away.  Its just a better image.  Not a fair comparison.    I have my foggers adjusted  a little higher.  Goal is to see deer eyes and other animals on the side of the road.  Collisions are my biggest fear for this car driving so much at night up north like this.  Foggers are silver stars also.


Its been awhile since I've been on a midnight run like this.  More people than I recall driving w their hi-beams on.   A courtesy flash back to them yeilded few results.  Apparently my foggers weren't a problem for anyone.  No one flashed me.  

greasemonkeyreborne_5x1gs
greasemonkeyreborne_5x1gs New Reader
11/25/22 6:38 p.m.

ROAD TRIP #14, 3rd OF 3 COMPLETE.  CLOCKED 1521 MILES ROUND TRIP DALLAS TO DENVER.


Makes it over 6000 miles of trekking this year.  Cheapest gas in TX 2.69.  Most expensive in CO 3.49.


Nothing interesting to show.  Car drove great.  Delayed trip a day to miss the snow in New Mexico/Colorado.  Melted next day in the upper 40's.  Stayed w friends and family.


Caught the sunset at the perfect time.  Raton Pass just leaving New Mexico in Colorado.  Thats Fischer's Peak just past the sign.


Dust devils and tumble weeds in New Mexico.   Picked out a few tumbles in the grille on the way back - more wind.


Suns intense.   Mountains in Colorado Springs


greasemonkeyreborne_5x1gs
greasemonkeyreborne_5x1gs New Reader
12/22/22 5:41 p.m.

15th ANNUAL ROAD TRIP:  DALLAS to DESTIN, FLORIDA.   - January 2023.


Every winter my other brother snow birds in Florida.  I had to skip last years trip since we had a COVID case in the family.     Game on!   End of January to early February.  More to come........  Not sure the mileage yet.  I think 2023 will see another Denver and Detroit trip as well.


MadMax's been driving the beater as his daily.  No issues.  Just another oil change and off we go......


I was able to source a part I had forgotten about.  Back in 1993 when I bought the car, I replaced the exhaust w aftermarket from Tuffy Muffler back in Michigan.  I had them install aftermarket chrome tips.  After moving to NYC, the muffler blew another hole.   I had them reuse the chrome tips.  The mounting bolts rusted off so they welded the stainless tips to the pipes.  I kept that muffler after it had gotten another hole and tossed the assembly in the attic and forgot about it.  We came across them several months ago.  Mad Max wanted them for his car.  I told him those babies were mine bc I just don't see them anymore.  A guy on ebay was selling the exact set, however w scrapes some minor dents.  I searched for Honda, Toyota, Mazda....   Found an outfit out of Cypress selling new sets almost identical to the aftermarkets of the 1980's.  Package just came in and they are just like the 80's aftermarket period correct originals.  My issue was finding tips fitting 1.5" pipes (incredibly small to todays standards) to keep it original.   They look great. And match the period


I went overboard and bought 6 sets.  I have 5 CRX's and I figure we'll lose one from time to time or might back into something and need spares.  Like that favorite pair of shoes we wish we'd bought more of.  The set on the left are the originals from 1993 (took a brillo pad and cleaned them up).  Middle are the new ones.  To the right are OEM Honda (I believe still available).


Top are new from Cypress.  Bottom left 1993 from Tuffy Muffler.  Bottom right Honda NOS


Honda NOS tips p/n 18310-sh3-010

Honda NOS mounting bolts 95701-06016-08


New Aftermarket tips I got off ebay.  They came from an outfit out of Cypress.  Ebay was $75/ea.   Their website was 65 Euros.  Google "150188 set" and you'll find them.  They fit 1.5-1.75".   We worked out a volume deal.  Magnet won't stick - assume SS.   Feel well made and solid.


If you like bigger, Look into DC Sports web site.  They have some that fit 1.5-2" range.


I haven't mounted them yet.  I recall years ago they rattled as the engine would idle.  I'll take a piece of rubber and a block of wood to pound the tips down over the pipe to get the interference fit at the tip end to prevent that.


greasemonkeyreborne_5x1gs
greasemonkeyreborne_5x1gs New Reader
2/6/23 7:58 p.m.

Trip prep for Destin, Florida......


Tires had a little vibration on the highway here in town.  Took them off and had my tire guy balance them up.


Unfortunately, I had cross threaded a lug when I last installed this tire w my cordless drill.   Since I needed to replace the wheel bearings, I just broke it off.  Thats an OEM Honda rotor w OEM pads.  Appears original Honda pads for this car were organic.  Lots of break dust and no scoring on rotors.   Not a brake expert, but from what I've read......


Took both knuckles off and pressed out the bearings.


Bearing on left is from this car w 287k.  Surprisingly, the 36 year old Japanese grease was still sticky and looked reasonable.  I really couldn't hear noise when spinning nor felt play in the bearings.  The bearing on the right is from CRX#9 I parted out w 129K.  I pulled this bearing out of the hub since that knuckle was broken.  (Needed practice and a new lug stem).  The grease in this one looked even better.  I'm going to say consider replacing yours around 200K+.  Appears they hold up well w such a light car.   The wheel bearing replacement was "piece of mind".  When we get to this part of MadMax's restoration, I'm leaving his bearings in place.  He's got 108K on his car.


Hub on lower left is mine, knuckle upper right was lug donor.   Replaced the lug post.  If you look at the hub on the lower left, I had broken off the phillips screws holding on the rotors years ago.  They jammed up w corrosion.  While i had these out, I drilled ou the old screws, retapped and replace w original Honda's off the other sets of spare knuckle assemblies I had.  I was able to use that pair of pliers to remove the clip ring.


While i had the car apart, I flushed the brakes.  I replaced the NOS front Honda Pads w AC Delco Ceramics off Rock Auto.   I had always used semi-metallic pads prior, aftermarket.  always dragged a little w noise.  And severely grooved rotors.  After replacing w Honda pads and new Honda Rotor, all noises and grooving went way (back 4 yrs ago).  but had noticed excessive break dust since.  Also  had weakening braking power.....    Replaced w ceramic to keep the Honda pads for future use.  Ceramics are known to be quiet and easy on rotors.  I'm not racing this car.  Performance is fine for my needs.    2 issues found during break inspections.  One wheel cylinder piston was seeping (pictured above).  And I messed up a spring . My previous installed did not allow the drums to self adjust w wear = weakening breaks and emergency breaks close to not working.


What I've learned for long term storage of these cars, is moisture forms inside the cylinder and corrodes a spot into the aluminum forming a leak.  Out of habit, I open the wheel cylinders to flush out all sediment and sand the bore if necessary.  Both these bores were perfect.  They were Honda NOS parts installed several years ago.  I lightly spot sanded w 600 grit.   I've had really good luck w calipers.  I did rebuilt these calipes w Honda NOS seals several years ago.  I remove calipers and flush inside w brake cleaner about every ten years to get the sediment and and standing water out.  Each brake job gets the caliper sliding pins cleaned and regreased.


For some reason, the pistons on both R/L sides had corrosion forming on the upper most piston.  Appears the Honda chrome plating was failing.   I lightly sanded the upper pistons.  Installed new Honda cups.  swapped the pistons from top to bottom to even the corrosion.  Lightly greased the pistons "outside" of the fluid area to see if that'll last longer.


Here's where I messed up.  I verified i had the springs on the correct L/R sides using NOS Stock packaged parts to ensure it was correct.  Pen points to how the springs are supposed to be installed.  This pix is proper configuration.   My mistake was having the straight part of the spring outside of the adjuster (where the ball point is touching).  So drums weren't adjusting as they wore down.   Put it all back together.  Adjusted the slop out of the drum tension.  Adjusted the parking brake (all per Helms manual).  Brakes haven't worked this well in years!


I kept the same springs, HW and shoes.  Shoes are aftermarkets.  I always take the drums and rotors and grind off the little lip of steel that forms as the pads wear into the metal.  Makes removal easier the next time I inspect.  I generally don't resurface the rotors/drums (unless heavy grooving/warping).  When I do, I give the guy $20 and stand there while he resurfaces.  I tell them to leave at least a little bit of a groove so I know the absolute least amount of metal is removed for maxium life.  The drums are the original drums from this 287K car.  I measured them.  the are probably 80-75% worn.


Used a wooden block and whacked the new tips on mentioned in previous posts.  It was an interference fit.  Very tight.  No vibration.  1.5" dual pipes.  I had to file the OD of the tail pipes to chamfer enough to get the tips to slide over the pipe.  The bolts were not stainless.  I bought stainless bolts from Home Depot (shorter in length to not snag branches when I'm driving 2 tracks hunting Michigan).  Pix is a little distorted.  They are straight.


My 30 year old steering wheel aftermarket grip finally began tearing.   I first bought a new one (white box far right - is on car right now).  Realized it was a little slippery, I searched ebay for my original one.  I had "superior super sport grip" made in the USA back in the 80's-90's.  Was able to find the exact match.  Center right is my 30yr old superior grip.  The box to left is the NOS I got off ebay.  Not installed yet.  Will do later.  These fit the CRX 14" wheel perfectly.  The width on both the super grip and the chinese knock off I bought are 3 1/2 inches.  I did buy a regular superior sport grip.  Those were 3" width.  IMO, both of these pictured will work.  I like the Superior brand better.  wider & Stickier.

greasemonkeyreborne_5x1gs
greasemonkeyreborne_5x1gs New Reader
2/10/23 7:56 p.m.

My low speed fan setting stopped working.


I took apart the climate control to get to the blower fan switch.  This assembly is a spare I pulled from a junkyard a while back.  Finger is pointing to dirty switch contacts from the junkyard unit.  Notice the 4 copper circles, deep grooves worn into this unit.


The switch to the upper right was the dirty junkyard unit.  I cleaned the grease off and sanded the copper smooth.  Bottom left is out of my 290K car.  The 290K switch looks cleaner than expected.  Put the switches together.  used dielectric grease on the copper.  Note: there's a small BB on the other side of the switch.  It creates the detent when moving the switch selection.  Make sure you don't loose it.


Determined the fan switch was good (sanded and regreased the 290K switch).  Ohm'd the supply wire = good.  Removed the "blower resistor" and found wire was broken to the low speed circuit.  Apparently, when I removed the blower assembly to replace the fuel lines, the jolt of removing the assembly broke the wire.


I didn't have a replacement part in stock.  So I began pulling resistors off used assemblies.  Apparently, the resistor coils were broken off the parts from CRX#5 & 9.  A suspect part for other Civic/Integra owners out there of similar vintage.   Then I went to MadMax's car.  That one was good.  Using his part until I can order some new ones.  Honda's out.  Standard manufacture's them.   P/n RU-435 is what you need.  Costs $25-43 depending where you get them


Appears Honda potted the coils to prevent damage from vibration.  The potting was deteriorating.  Seems like jolts or accidents damage these.  Some of them had corrosion on the wires.  And evidence of thinning as well.  These coils are in-line of the fans airflow.  Most likely to keep them cool.  Exposed to the environment.


onemanarmy
onemanarmy Reader
2/17/23 9:54 a.m.

Love it!   Love CRXs and all your details.

Following

Slippery
Slippery GRM+ Memberand PowerDork
2/17/23 10:05 a.m.
onemanarmy said:

Love it!   Love CRXs and all your details.

Following

Could not agree more. 

greasemonkeyreborne_5x1gs
greasemonkeyreborne_5x1gs New Reader
2/18/23 11:14 p.m.

15th ANNUL ROAD TRIP.    DALLAS to DESTIN


Clocked 2020 miles.  No issues.  Purred like a kitten.  Most expensive gas was $3.55, cheapest 2.78.


Had some interesting  events on the drive down through Louisiana....


Passed 50 plus deer.  Luckily non were on the road.  All had their heads down feeding


Then around 1:30am, a pocket rocket flies by.  Followed by 6 cop cars, sirens/lights blaring.  Didn't see any action further down.  The cycle must have taken the possie down some side roads for some fun.


Caught a few zzz's at a gas station.  Woke up and passed this


It was still smoldering, pick up right top.


Hung out, fished, walked the beach, drank, ate shrimp.  Nice and easy stay.  Had a gator hanging out 50' behind us I. The pond.    I forget how large vehicles have gotten over the years.  This things a midget.  Drove up and down 30A (Destin - Panama City) as much as I could.  Nice shore line towns.  Reminded me of the Hamptons.  Property so tight, couldn't get a car pix on the ocean


Visited the USS Alabama


Great, smooth and relaxing trip.....


Looks like a Denver trip next month or two.


Armyofone, you a crx owner?  Stories?

greasemonkeyreborne_5x1gs
greasemonkeyreborne_5x1gs New Reader
2/23/23 12:23 a.m.

My drivers seat belt stopped retracting a few years back.  Swapped it out w #9's drivers side.  Was cleaning out the attic and organizing parts the other day.  Found the original drivers seat belt and took it apart.


Removed the spring/recoil assy.  The ribbon spring tore, split and jammed.  Wasn't a complete separation yet, but jammed the ribbon spring from recoiling.


Examined the spring assy.  Just like a small engine recoil.  Didn't see an easy way to hold the spring in place while disassembly.  drilled a hole through the cover, used a needle nose to hold the spool drum in place so it wouldn't release the spring tension once removing it.   Gray plastic is the drivers side, Blue is passenger.   So passenger side is barely used.  Meaning very few recoil cycles.  Assume a good/better spring assy.....


W the needle nose in place, unscrew the cover plate and remove it from the assembly.  Must hold the needle nose so spring does not unwind (bottom left).  Note the bad coil assembly removed (bottom right).  Used vise grips to hold spring in place to remove.  Keep grips on until reinstallation to the un-needed passenger side (put it there to hold for future,...  well, I always keep my old parts b/c I never know what i'll need doe the road...)


Used a second pair of vise grips to hold the passenger spring assy in place.  This locked it.  Removed it from the blue passenger cover.  Used a third vise grip set and gripped it from the opposite side (inverted).  Release the first set, now holding the spring assy inverted.  Inserted to the gray plastic housing of the drivers side assy.  Was able to rebuild my broken, drivers side seat belt assy w the spring assy from a good passenger side.


Point here is..   passenger sides will have a lot less use, assume good springs.  The green spools and springs are identical for both driver/passenger sides.  Just have to invert them and your good to go.  No point buying a used drivers side that is going to be worn out.  Just rebuild w more readily available passenger side springs w less wear....


Sorted through the stock.  Retrieved the set from CRX#3 for mad max and have a 2 sets put away for future show cars.  Plus spares for the other cars.


Notice the black electrical tape.  To cover the holes to keep the internal clean.  Doing this repair, I see no way I've created a safety issue in the operation of the seal belt mechanism.


Glad its repairable after after 36yrs.


greasemonkeyreborne_5x1gs
greasemonkeyreborne_5x1gs New Reader
2/28/23 11:59 p.m.

My 1994 Rand McNally Atlas.  This atlas has gone everywhere w the car over the years.  No plans to touch every state.  Just commuting point A to B.


Digging through parts storage.  Locating the parts to reinstall on MadMax's car.  Opened a box and found my original alternator removed around 160K ish.  I thought I tossed it.  Going to rebuilt it and put it back where it belongs on this car as soon as I can.


greasemonkeyreborne_5x1gs
greasemonkeyreborne_5x1gs New Reader
3/4/23 6:01 p.m.

I edited the  post #1 above.  Created 2 subsections.  One to summarize the life expectancy of major components like tranny, alt, fuel pump,....  etc.   The other is a summation of sub assembly rebuilds I've performed maintains this car.  Hopefully helpful to other 1g/3g owners wanting to keep their cars original


Several things I've worked on didn't 100% fail.  Those components were getting suspect.  After disassembly, looks like they could have been left in service longer after all

RacerBoy75
RacerBoy75 Reader
3/5/23 2:34 p.m.

Nice thread! I had two '86 CRX Si's. I loved those cars, I ended up putting an aftermarket cruise control on my first one, and that made it so much nicer for long trips.

greasemonkeyreborne_5x1gs
greasemonkeyreborne_5x1gs New Reader
3/8/23 12:49 p.m.
RacerBoy75 said:

Nice thread! I had two '86 CRX Si's. I loved those cars, I ended up putting an aftermarket cruise control on my first one, and that made it so much nicer for long trips.


You've got that right!  Im not aware of those 80's econo boxes w std CC.  My father put one in his 80's Subaru.  Vacuum controls...    I assume it bogged down going up hills??  Ours did

Seems every year the discomfort gets worse.  Past few years I've been propping a pillow like this.  Push it under my knee a little.  The 16-19hr drive is not not really an issue now...   Add another decade to my age,.... and I'll let you know.


A fellow CRX'r on RPR was looking up head light options.  I had taken a better set of night drive images on the Florida trip last month.  Figured I'd post for better comparison.   Straight away.  No other cars around.  A little twilight.  Asphalt.  These halogens seem to be the brightest of other halogen cars from what I can tell.  Night and day when a modern car w HID's pass from behind.  The shadow of my car rolls across the highway as they pass.

Silver Stars..... 

Low beam.  I adjusted beam to throw the light out front and out to the sides more.   So I can catch the deer grazing on the shoulders in time to react if one jumps.

Low beams w GMC foggers.  Backed up the screen to capture the corners of the wind shield.  The foggers flare the sides of the shoulder much better.


Best case.  Hi beams w foggers.  I had always had problems catching road debris (18 wheelers tire chunks against asphalt).  Now I can really see down there.  Again, I really like the pockets of light in the shoulders abour 100 yards ahead.  Any bulb will do that - just adjustment.

If you guys find a set of really good bulbs, LMK.  I'd give them a try.  Redundant, I know...  sorry.


I drive through the night.  Improving my lighting/adjustment has been the biggest factor improving these trips w a 36yr old car.  Besides the pillow.   Now I need a bathroom....   And a cup holder.


greasemonkeyreborne_5x1gs
greasemonkeyreborne_5x1gs New Reader
4/30/23 2:03 p.m.

MadMax and I drove the Beater down to Austin for its first car show.  Clocked 480 miles.  Gas ranged  from $2.85-3.29.  


Radwood Austin 2023.   Good diversity of 80/90's cars.  Mostly originals, many daily driven.  The Rex fit in w the cracked windshield and road rashed bumps.....  pictures best taken from afar (of mine).  LOL.   There were some really nice examples of original and restored classics. 

Went last year and no other 1g's there.  Mine was the only 1G this year.  Plastic fenders just make these hard to keep around.... 


Hard to tell how many cars...  300-400??.  Last year we were able to access the bleachers from the race track and take shots of the entire grounds.  This year they relocated them.  No aerial shots this year.

 A "smokey and the bandit" TA was there.  A nice Grand National.  Several cars I have no idea what they were.


A young lady had this really nice 103K 89 Teg.  Engine bay was perfect.  She said mostly original.  Had copper radiator repaired as an old school specialty shop in Dallas.  She replaced the lower control arms.  Has a website on the car.  I wished I had written it down.  Searched and couldn't find it.  She's quite knowledgeable.  Was climbing underneath my car looking for the front torsion bars.  Appears we both had the only torsion suspension cars at the show.  Have to make "Tail of the Dragon" next year....  


Chatted w this guy quite a while.  Nice 2g CRX w 113K.  Had it for DD use.  Now its a weekender.  Cars in great shape.  Was asking the 2G folks about parts availability.  Most had lower mileage and just haven't replaced much.  No real problems.


A local shop brought their customer's RHD glass topped 2G.  Lots of specialty performance/Mugen added parts on this one.


Nice to see people having fun w the show....


A guy was walking around w a 1990's CVR camcorder....   I didn't realize it until I saw some videos from yesterdays show that looked a bit grainier than normal.


A 3g hatch from last years show.  Appears it was at this years show.  Wasn't able to connect w the owner...  Hopefully next year.  Same era as the 1G


greasemonkeyreborne_5x1gs
greasemonkeyreborne_5x1gs New Reader
6/5/23 2:13 a.m.

Needed to pass inspection last month and my cyclops brake light went out.  Then my rear wiper would come on and off on its own.   Happened about ten years ago.   The wire harness to the hatch gets flexed each time the lid opens and eventually yields the insulation and wire.


The wires I used to repair the last time yielded at the insulation and began shorting out defroster/rear wiper.  Nothing new to CRX owners.  Just a PITA w age.  The brake light completely severed


top wire is 16G, middle green 18g, and bottom for defroster/ground 12G.  All failing along same pinch point or hinge point when closing the hatch.  About 2 years ago, I quit using a piece of wood to hold the hatch up and replaced the strut supports (had replaced them every three years w Honda OE supports and got tired of the expense back in the day).  This opened the hatch to maximum.  So the failure came back faster.


Pix in process after soldering the wires and starting the heat shrinking.   Went w all 16G.  All 6 wires fit inside the boot well.  The wire repair 10 years ago was too much copper and difficult to fit inside the boot.   I cut the jumpers 7".  Was just enough to work w.  The rubber boot is very pliable after 36 years.  Again, great Honda material sciences


Since this is now a reoccuring issue, next time I"m going to solder barrel connectors and make this subsection replaceable.  The original Honda wires had 2x the copper strand count and much thinner for flexibility.   Hatch gets a lot of use as a DD now and hauling MadMax's stuff to his sporting events.  Will do the barrel connectors on MadMax's car


Another issue I stumbled on several months ago are wrong sized (wattage) light bulbs melting the mating plastic assembly.  I was making a care package for the Beater consisting of all the random light bulbs needed for future blow outs.  I went through my trunk lids to pull bulbs out of the cyclops brake light assy's.  Found 1/2 of them burnt out.  And noticed the aftermarket bulbs were melting the bulb holder bayonette.   

Pix off the Beater.  The silicon bulb holders on this car were fine.  No discoloration.  The ball point pend shows the area getting distorted - this pix isn't too bad.   I don't recall replacing these bulbs before.  Mine were Sylvania 921's.  I'm pretty sure they were replaced as Honda mostly used Stanley bulbs.  My other hatch lid cyclops plastics were melted a lot more than this.   Going to research and obtain 921 type bulbs in lower wattage to head off this problem.


Another issue...  I lost the plastic trim piece to the rear wiper assembly arm a few years ago.  Installed a used one from stock.  And that one disappeared this past week.    The wiper motor was going burzerk w the shoring wires and It folded over past its swing as shown in the pix below.


Top pix is the Beaters rear arm in hyper extended condition (Looks like I can drill out the rivet and install a screw/nut long enough to act as a stopper in the future).  This caused the trim the fly off somewhere.   Bottom is another wiper assy as an example.   I had given Ballade one of my spares several years ago.  Now I've lost 2 others.....  I just never know what odd balled parts i'll need going forward.   I typically never sell or give away parts since I really don't know what I'll need down the road.....  Getting low on this particular part stock


did oil change and checked seals/boots.  Current mileage 292,400

greasemonkeyreborne_5x1gs
greasemonkeyreborne_5x1gs New Reader
9/15/23 1:17 a.m.

15th ANNUAL ROAD TRIP - 2nd OF 3 TRIPS :  DALLAS TO INDIANAPOLIS TO CHICAGO TO DETROIT TO UPPER MICHIGAN TO ROCHESTER, NY AND BACK.......    Maybe Maine???


I'm expecting a couple trips to Austin, another to Oklahoma and finally Denver before the years out.......


The upper Midwest trip is probably going to clock 5000-6000 miles.  This one's w purpose as usual w a some nomadic adventures mixed in.  Cars almost at 296k so she'll break 300K on the odometer on this one.   Be a good milestone to pass.


Hunting as usual.  MadMax is flying out and I'll pick him up at Detroit metro.  Visiting a couple RPR members, some buddies from grade school and finally by buddy who sold me this car in 1993 (blast from the past for the both of us)


Hot, dragged out summer......  MadMax was a trooper driving my beater around wo A/C.  So he and I went in a brought him a more modern car w strong A/C.   The summer sun and heat was killing my CRXs plastics and fading the carpet/moldings.   Reality check: these cars won't be true DD's.  I need to keep them protected from the southern sun.


MadMax taking an early morning drive.  About the only good time to drive this summer......


Finally ordered my blower resistors.


The potting on the coils is already cracked out of the box.  Purpose is to dampen vibrations and keep it together as the thinner coil easily breaks.  I'll need to add some additional dielectric epoxy on top of the factory potting to beef it up.  Bought enough of these to last me a while for the rest of the cars.  I have no idea when these parts will become NLA as they seem to only work for 84-89 honda/acuras.  Honda NOS long gone.


Prepping car for the trip.  MadMax drove it solid from the time he obtained his license until middle of the summer.  No mechanical issues.  Doing a once over and general maintenance.....  tranny fluid, coolant flush, balance tires, oil change.....


Drivers seat has had a little tear from the day I bought it.  The fabric is degrading and declined pretty quick this year.


I removed the black towels I've been using for years and slipped these on for the time being.  I'm not interested in redoing the seats yet as this car gets a lot of abuse.  Bottoms fit really well.  Head rests not at all so didn't use.  The upper portion is sloppy....  but it works.  The black material seems like it'll turn purple if left out in the sun after a few months.  So we'll see.   Part number 96311a-gs1 if interested.  Bought 4 covers for $246 w tax/shipping.  About $61/seat.  Volume price break so bought a set for made max.  Drove it around tonight and feels fine.  The Husky floor mats barely show in pix.   They're the ones I picked up from last years junkie trip to the Louisiana boarder last summer.  They work great and don't move at all.


I removed the pivot/lever assy.  slipped the fabric underneath and punched holes for the screws.


The upper portion of the cover was longer than my seats.   The material hangs in the back like an untucked dress shirt.  No back seat so I don't care.


Cyclopse (third brake light)


Closer view of where the light bulbs are melting the plastic holder mentioned in earlier posts.  The bulb socket holders are fine.  Gray rubber material.  No discoloration.  Bulb gets to hot, its melting the plastic base.


I bought these a while back.


Bulb on left is incandescent - extremely hot to touch.  Bulb on right LED.  LED much brighter and cooler.  Popped in the set and they look better than before.  Again, scrounging for light bulbs off the other hatch lids I have in storage several months ago....  i notice several of them were melted and some worse than mine in the pix above.   LEDs are risk mitigation.  The other factor is this summers heat compounded temperature as its trapped like a magnifying glass mounted to the trunk glass.


Fog lights


One of the foggers went out.  Apparently the base cracked from the bulb.   Same bulbs i use on my wife's Acadia (where I got the idea to use the GM assemblies as they were easily obtained from the junkies).


greasemonkeyreborne_5x1gs
greasemonkeyreborne_5x1gs New Reader
9/19/23 2:26 a.m.

More trip checks...


Cup holder....  check  


Went to a North Dallas Honda dealership for some manual tranny oil.   Got to chat w several of the mechanics.  One guy I met before in a parking lot last year.  He had an old acura.  Got to catch up.


296K engine bay.   Utilitarian, Keeps on ticking.


A little oil coming from the oil pan seal.  Seals original 1987.  All else is tight.


And then I found this.   Just blew past couple days.  Was torn about 75% around.  Grease clean and joint reusable


Shafts out.  Tear down to repack grease and redo the outer boots.  Reusing inners.  They last quite a bit longer.   What sucks in I just replaced these boots 36K ago w Honda NOS.   I was noticing progressive degredation over the years rebooting my shafts.


History....

1st rebooting 100K, replaced OEM w aftermarkets (100K)

2nd rebooting 167K, thought they should have made it to 200K, reinstalled Honda OE (67K)

3rd rebooting 205K, rebooted honda NOS (38K)

4th rebooting 259K, (54K) Installed Honda NOS drivers shaft and a tight OE passenger shaft rebooted w Honda OE boots.  Original shafts had a lot of backlash (2.8 degrees).  I figured the backlash was twisting the boots and accelerating degredation.  New shafts total backlash was about 1%.

5th rebooting 296K.  (37K).   Using Honda OE.  I sorted through my boot stock and appears oldest boots are from 2008.  reinstalling those.   


Conclusion: Honda OE NOS CV boots deteriorating and no longer have a service life of new (not surprising since 20-30yr old stock).  I'll continue to use up my stock of boots then search for the best quality aftermarket boots I can find


This has been an ongoing problem.  When i drive roller coaster country roads, I'll go into a big dip.  Come out and catch a little air and the drivers axle hits the control arm when the tires hang down.   Pix is car on blocks, static.  I'm sure the car flexes, engine mounts shift and the arms extend down farther.  You can see a series of scraps on the axle when it made contact in several different positions.


Used a mirror and flashlight to get a look on top of the control arm mount at the torsion bar.  Can see where the paint is rubbed.  Plan to grind a little metal away from this to help it out.   I assume the accident in 1988 by the first owner distorted the suspension and is the root cause of the problem.  I don't like this impact on my axle and translating to the joints and transmission.  Going to put the axle on the press when I have the joints and boots off to see if I can make it a little better Shaft has a little wobble but no vibration driving 60-80mpg.


onemanarmy
onemanarmy Reader
9/19/23 3:14 p.m.
greasemonkeyreborne_5x1gs said:

15th ANNUL ROAD TRIP.    DALLAS to DESTIN


Clocked 2020 miles.  No issues.  Purred like a kitten.  Most expensive gas was $3.55, cheapest 2.78.


Had some interesting  events on the drive down through Louisiana....


Passed 50 plus deer.  Luckily non were on the road.  All had their heads down feeding


Then around 1:30am, a pocket rocket flies by.  Followed by 6 cop cars, sirens/lights blaring.  Didn't see any action further down.  The cycle must have taken the possie down some side roads for some fun.


Caught a few zzz's at a gas station.  Woke up and passed this


It was still smoldering, pick up right top.


Hung out, fished, walked the beach, drank, ate shrimp.  Nice and easy stay.  Had a gator hanging out 50' behind us I. The pond.    I forget how large vehicles have gotten over the years.  This things a midget.  Drove up and down 30A (Destin - Panama City) as much as I could.  Nice shore line towns.  Reminded me of the Hamptons.  Property so tight, couldn't get a car pix on the ocean


Visited the USS Alabama


Great, smooth and relaxing trip.....


Looks like a Denver trip next month or two.


Armyofone, you a crx owner?  Stories?

Just caught this....

Na, I just like clean, simple cars and we all appreciate your updates!

greasemonkeyreborne_5x1gs
greasemonkeyreborne_5x1gs New Reader
9/24/23 10:55 p.m.

Got to the repairs.....


AXLES


 Placed the axle on a press w radius blocks.  Bent back easy.  Axle isn't heat treated,  Just the spline ends.  Used PVC pipes at ends as spin journals to test straightening.  Used a metal pipe w a PVC insert to press against the middle of the axle.


I had rebuilt these 37K ago.  Grease on outers/inners clean (Honda grease).  So I reused the grease.   The last rebuild got a good solvent soak and compressed air blow out.  Grease that looks that good....  i have no concern.    New grease on the blown outer joint though.   This is the 5th time I've rebooted my axles.  The outer boots always fail first.  Makes sense, turning steering wheel works the boots pretty good.  This time I reused the inner boots as well.  Appears the outers will last another 35-45K.  Curious how long the inners will go.


I've been reusing the original Honda OE boot bands.  I like these.  Work like a cam action.  Lock in place and go.  Correct compression every time.


Honda OE axles back in place.  Honda grease, boots, bands, joints and axles.


No pickle fork required to remove ball joints.  I've been able to whack the knuckle w a mallet (where my finger points to) while using a jack w enough force to lift the car by the rotor.  After a couple whacks, it pops out.  Able to reuse the ball joint boots.


TIE ROD INNER BELLOW BOOT


I rebuilt the rack a few years ago.  The boots were OEM I installed in 2003.  The boot finally failed.   Joint was still pristine.  Slapped a little grease, another boot and on my way.


When the rack was rebuilt around 250K, I grabbed a set of OE used, tight inner tie rods.    You can tell OE by the 4 alpha-numeric manufacturing number stamped on the rod.  Bottoms on the ball and outer tie rod joints have them as well.


The original bellows boot bands came w a phillips head screw.  They always strip at the head from rusting threads.  I've been using metric allen head screws.  Working much better to remove years later.


AXLE CONTACT W LCA


Used a dremmel and removed some metal on top of the LCA to give more clearance for the axle.


Painted the area in red so I can easily monitor contact in the future.  I don't expect this to fix the issue, just soften the impact.  Theres so much motion in the engine mounts, then body flex


Tranny/engine oil changed.   Cars about ready for the trip

greasemonkeyreborne_5x1gs
greasemonkeyreborne_5x1gs New Reader
11/2/23 7:09 p.m.

15th ANNUAL ROAD TRIP 2 OF 3, MAYBE 4.....   DALLAS-INDIANAPOLIS-CHICAGO-DETROIT-UPPER MICHIGAN-NIAGRA FALLS-ROCHESTER.


Home Sweet Home!


Traveled 5409 miles over 16 days.  This trip beats my record of around 5000 miles when I graduated college and took her cross county in the 1990's.   Gas was around $3.25 when I left Texas.  Came back and it dropped to $2.77.  Most expensive was upper NY state $3.90.  Cheapest was passing through Ohio $2.55.


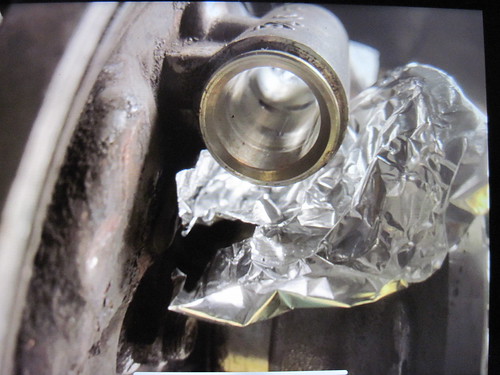
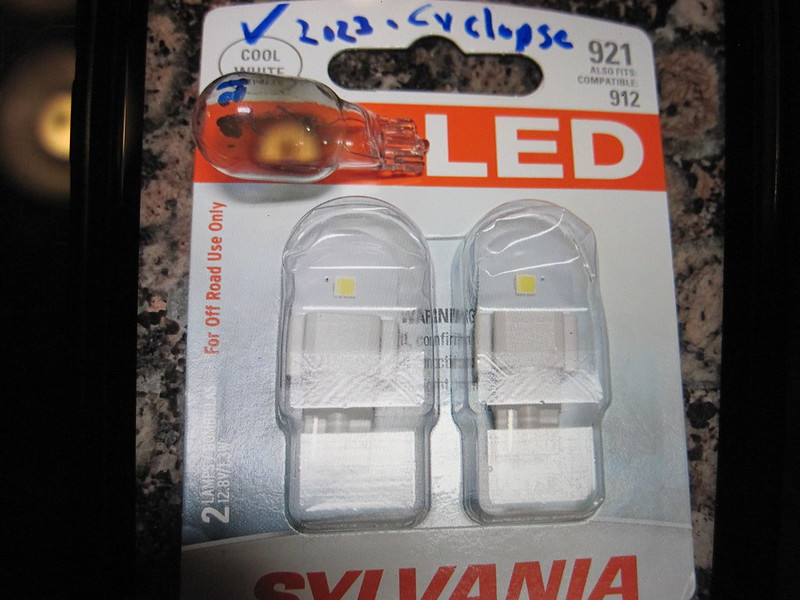
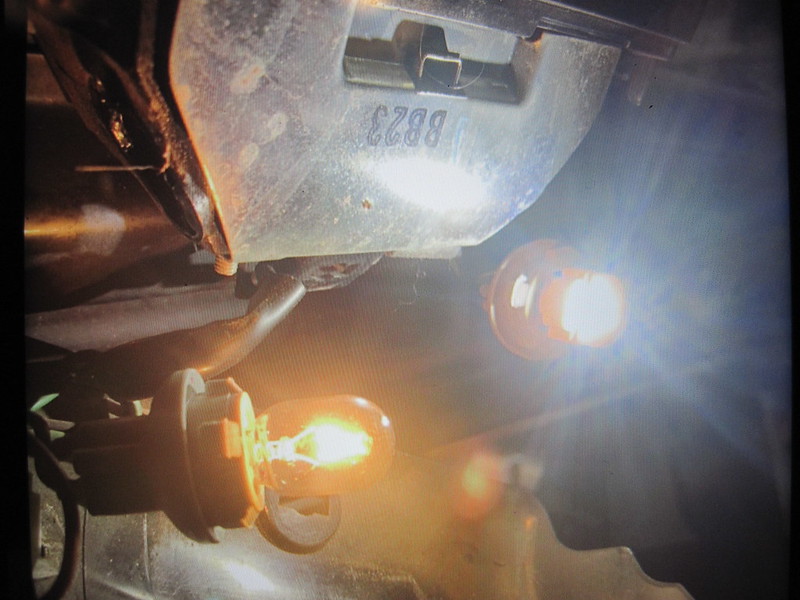
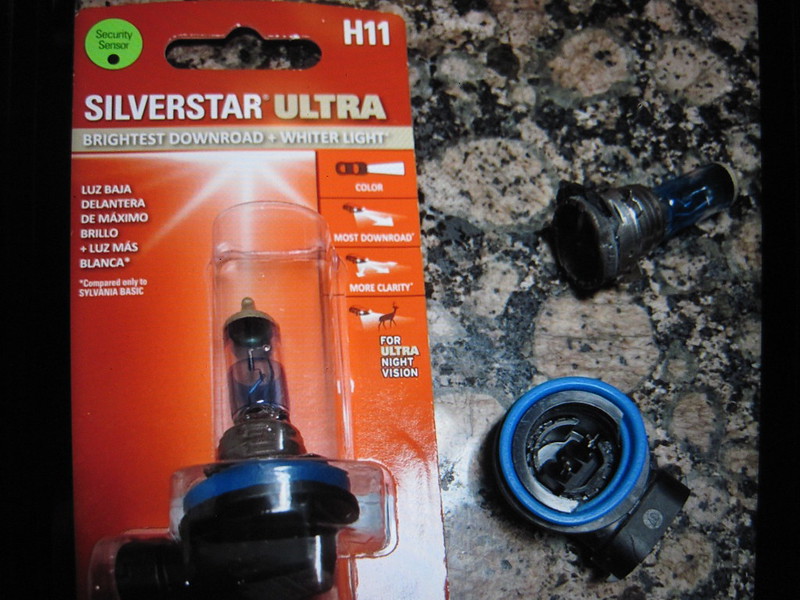
Had four problems with the car on this trip.  First, the passenger headlight went out when I passed into Michigan. 


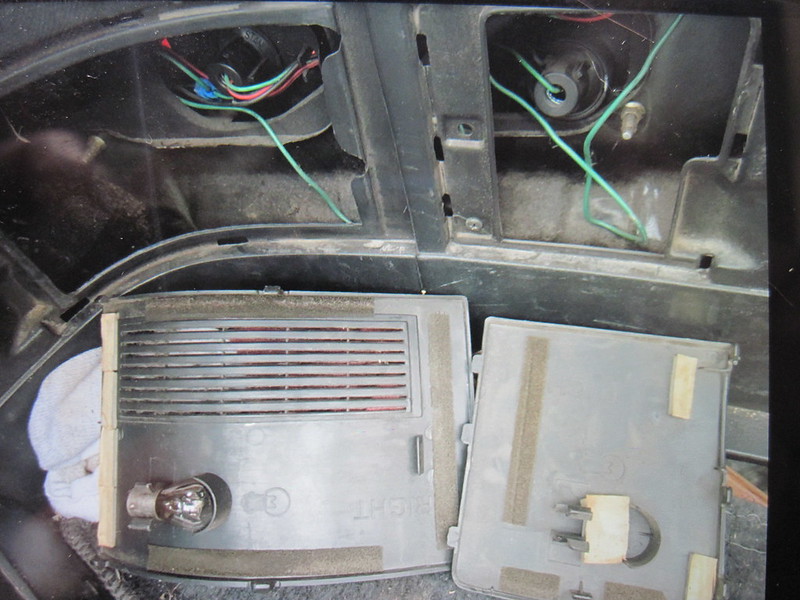
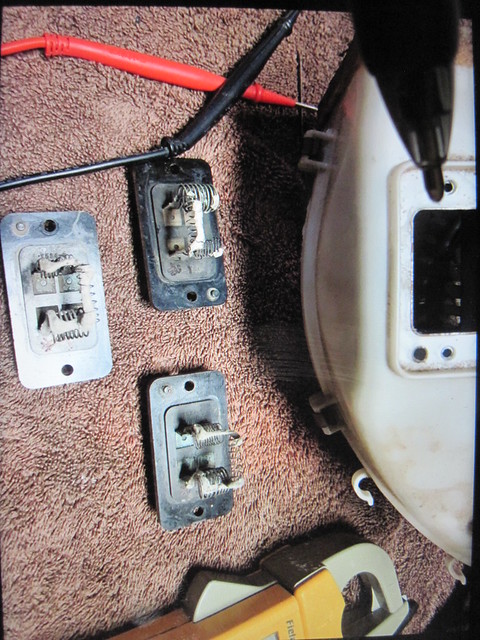
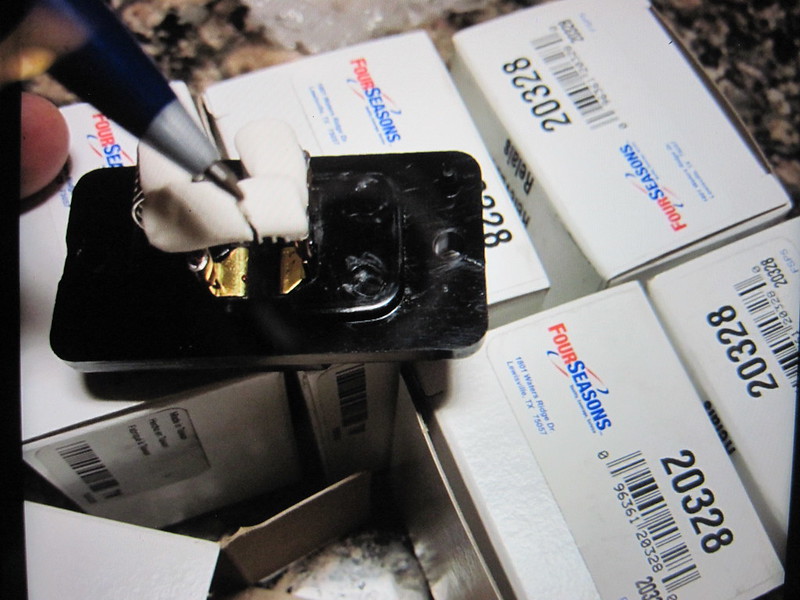
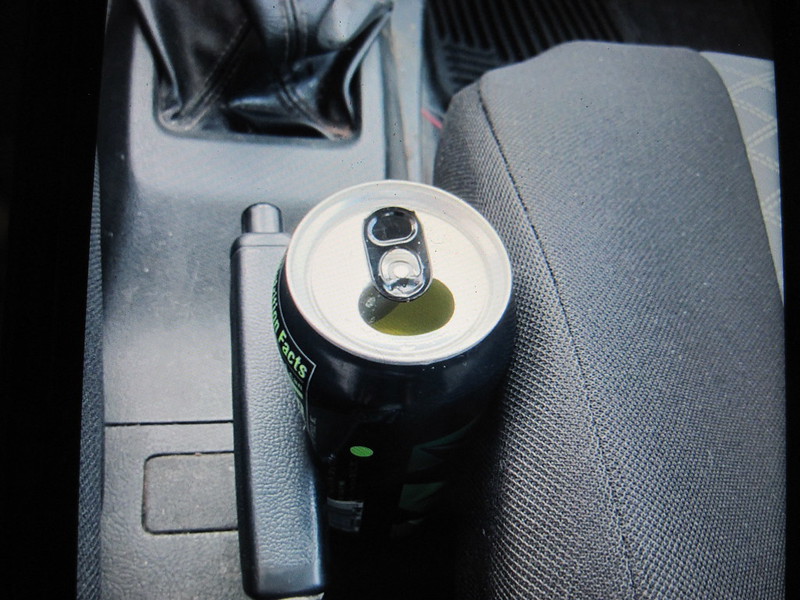
Second was I lost my passenger brake light a week later......   Nice of Honda to give us spare light bulbs mounted right where you need them.  No cup holder, but light bulb holders.....


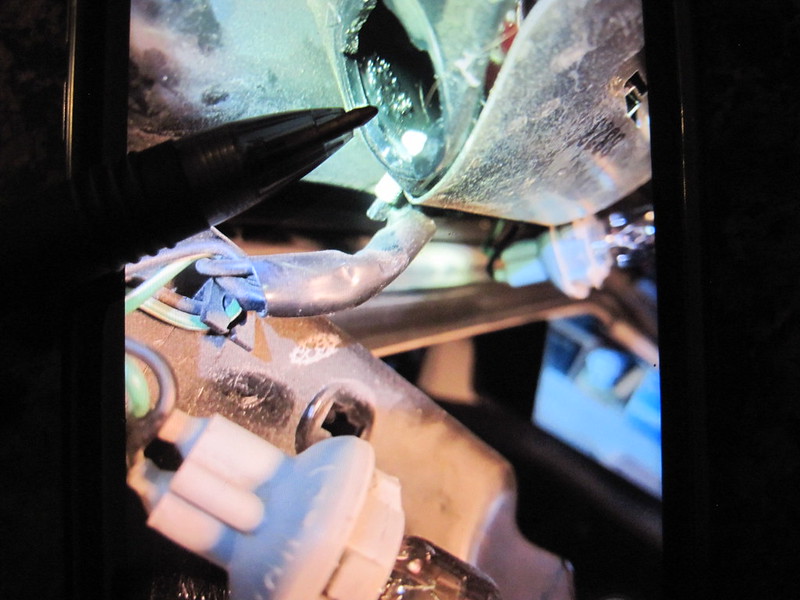
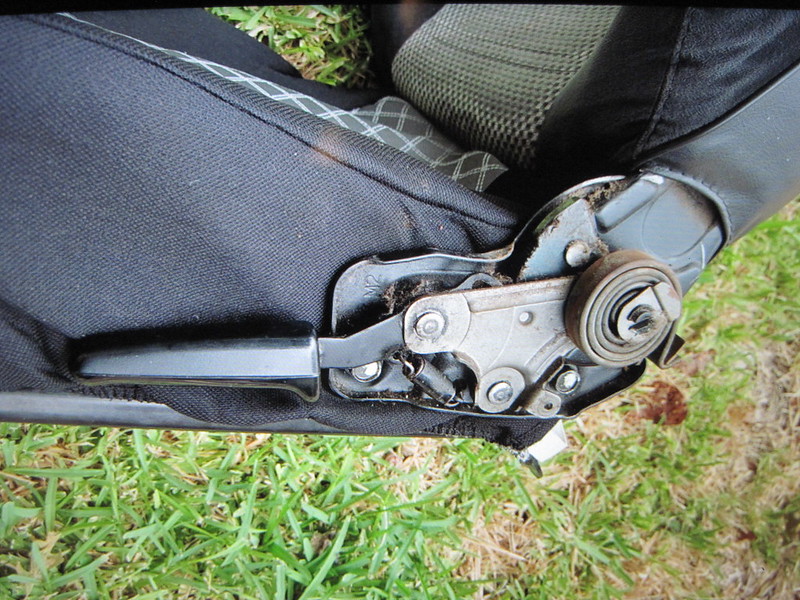
Third was more breakage of the lower rocker garnish sill......    The hinges are pretty worn after all this time.  I had adjusted the door strikers up higher like 10-15 years ago.   Not exactly sure what caused it.  Occurred beginning of trip when I got to Michigan before I took her into the back country.  Have to meticulously remove the sill and bond it back together, change the door hinges and lift the strikers as a start.  


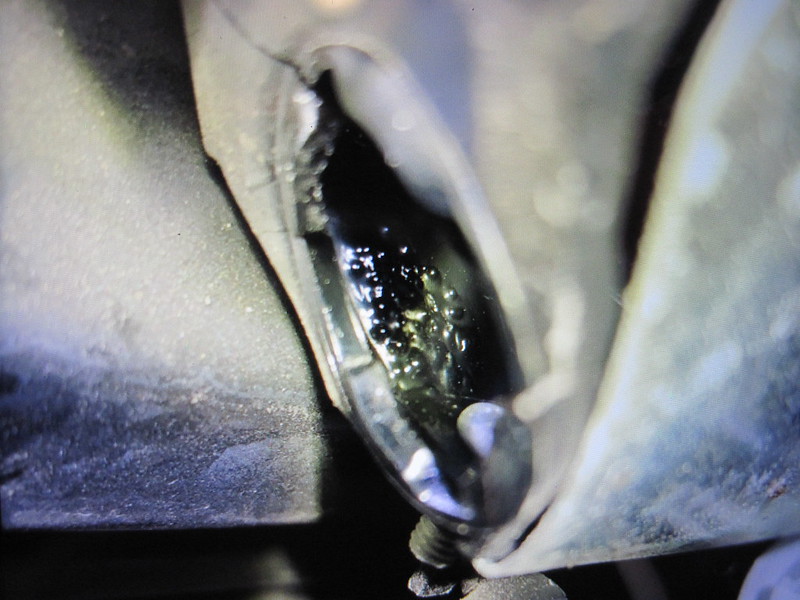
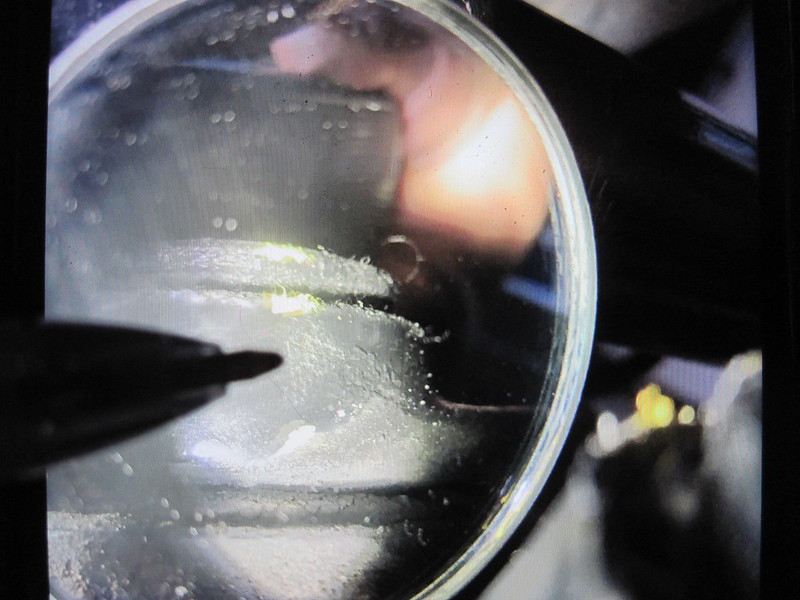
Crack starting through the lower right of the sill...  And a substantial rub mark from the door lower garnish making contact w the sill (a little upper right from the hole).


Fourth,..... burned 1/3 quart of oil over the trip.  Normally do oil changes around 3K, I let this one go for the entire 5400 miles.


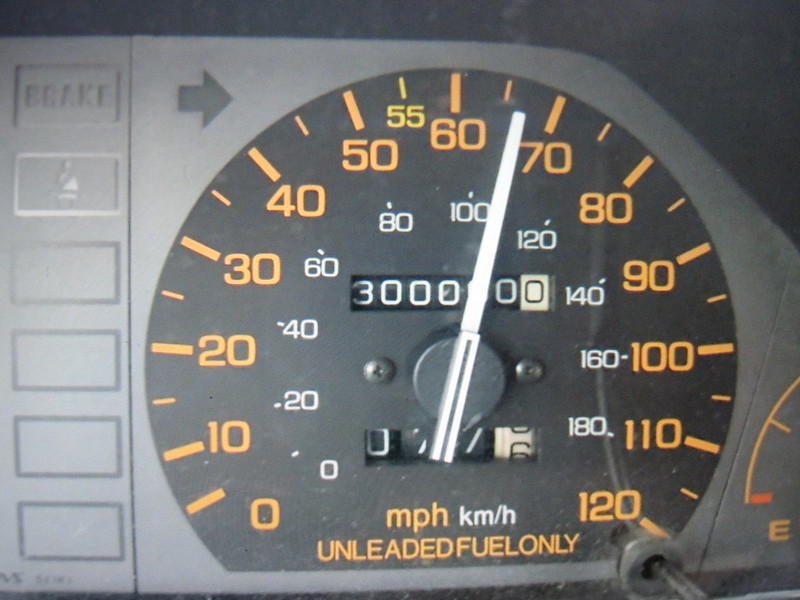
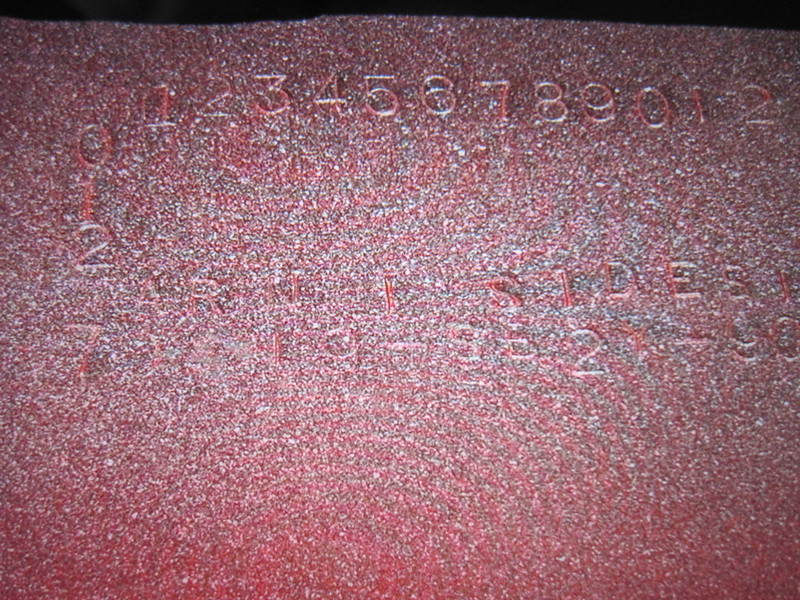
I've never taken a car over 300K before.  Not a major milestone for modern cars these days, but nice to capture the odometer during the end of the trip passing through New York's I90.   She's sitting at 301,326 miles now awaiting oil change.


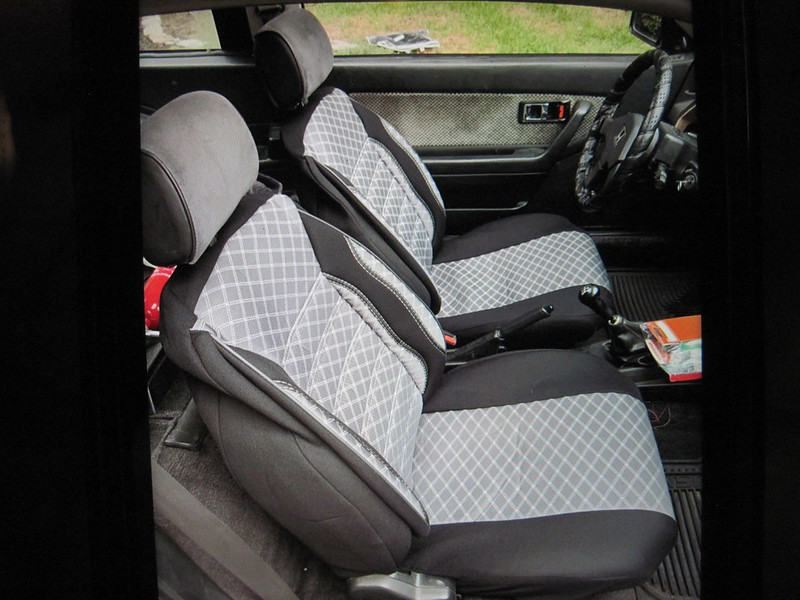
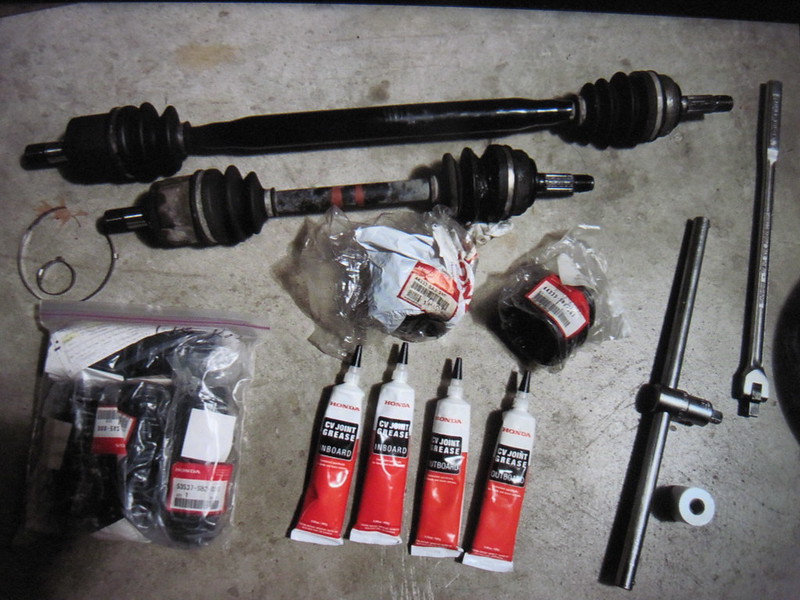
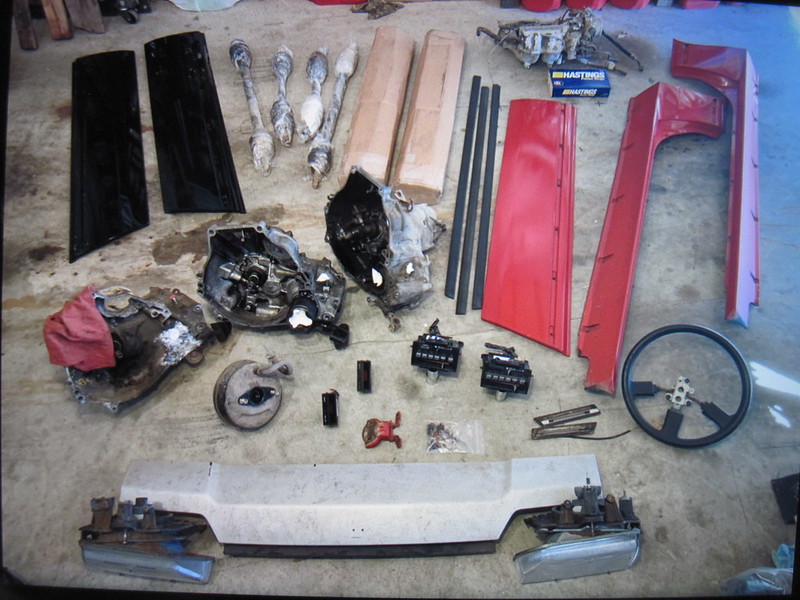
The car served as a cross country commuter, airport taxi, Daily driver and finally a heavy freight hauler. Came back to Texas w a full load of body panels, transmissions, axles and other misc parts on top of my gear, tools and travel parts.  She was weighted down more than I felt comfortable with.


Visited an RPR buddy and dropped off a set of Rims, then visited a buddy and picked up a tranny in Chicago, hunting for 12 days in Michigan.


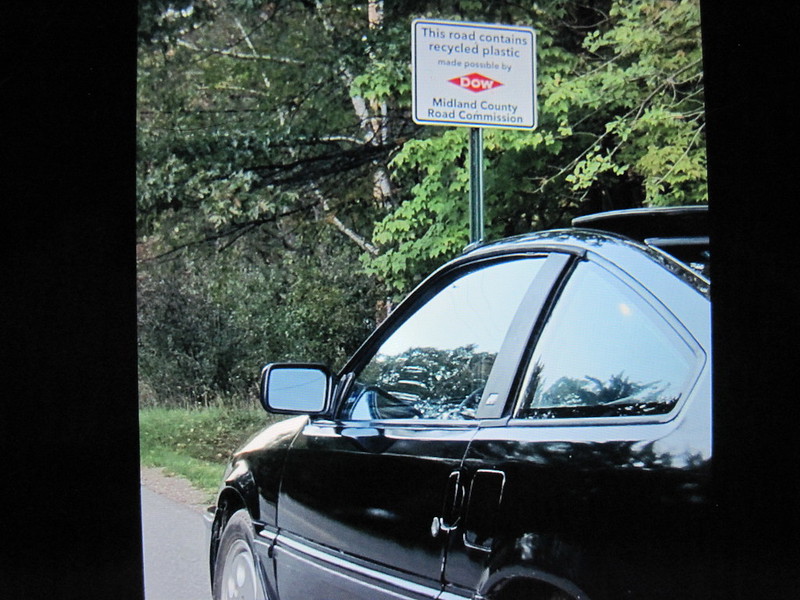
Crossing the boarder in Michigan from Chicago...


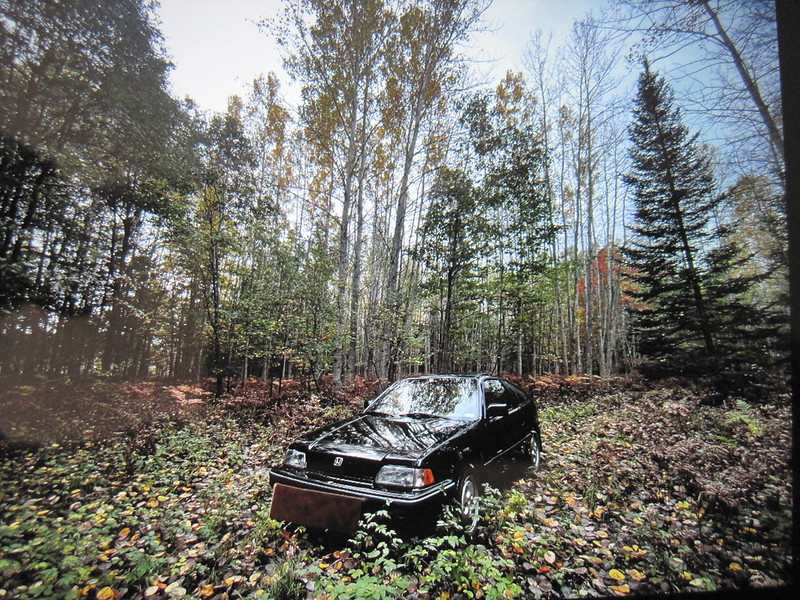
Backwoods hunting waiting for MadMax to get out of the woods.  Windy day parked under an 80' Pine.  I continually pick pine needles out of my engine bay, sunroof tray and back hatch spare tire well.   Memory of  where they all came from.....


MadMax and I taking a lunch break.  Nice thing about the short wheelbase w this 13' long car is we can turn around just about anywhere on these backwoods 2 tracks as long as we're not inside a rut.


Loved the father and son time.   He was out for 6 days.   Memories for a lifetime.


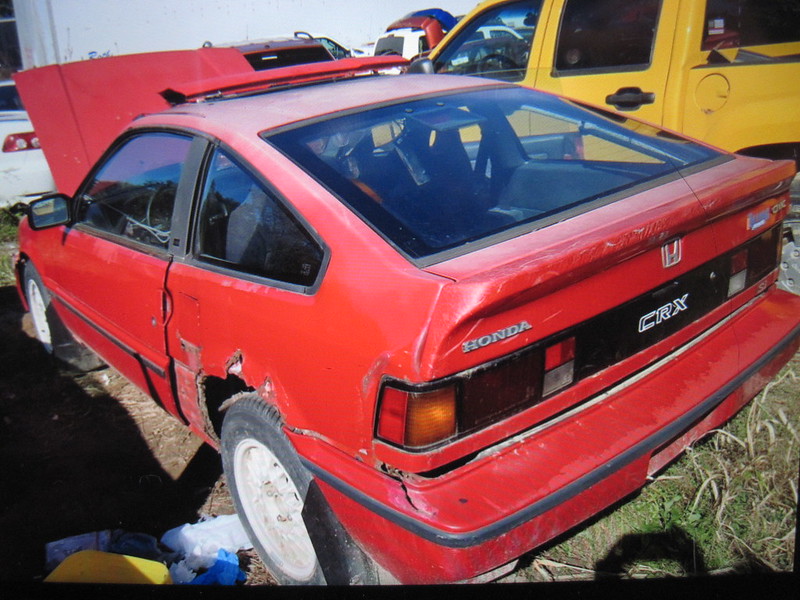
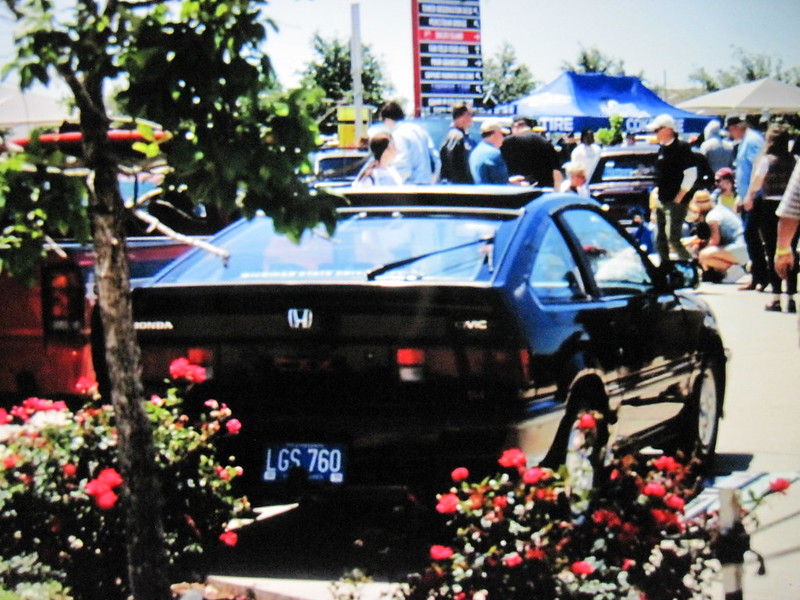
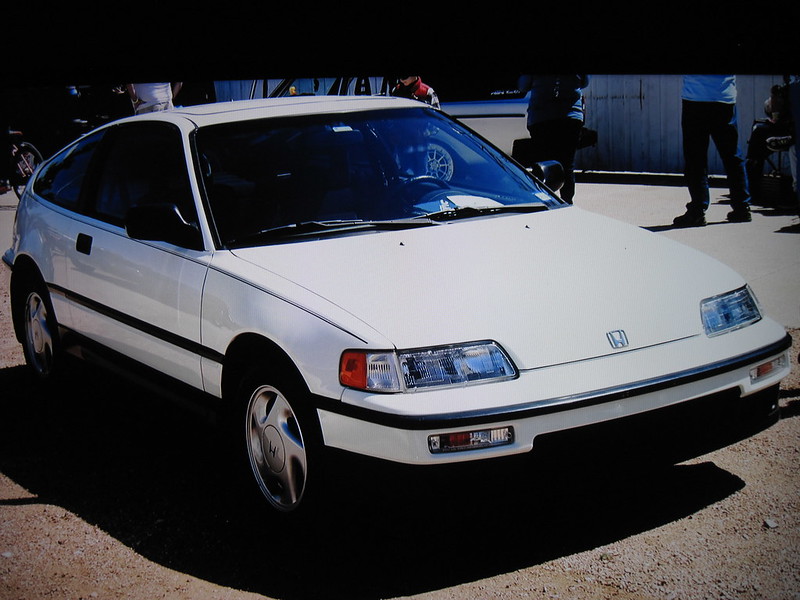
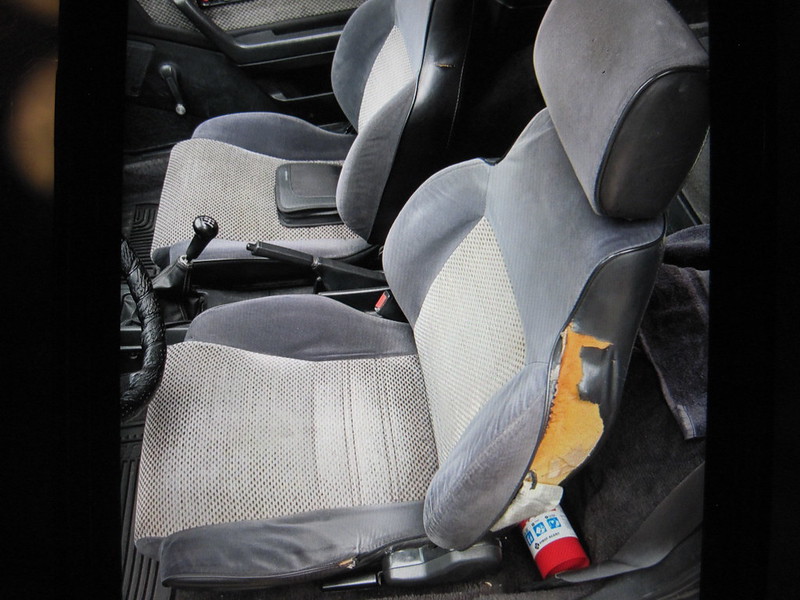
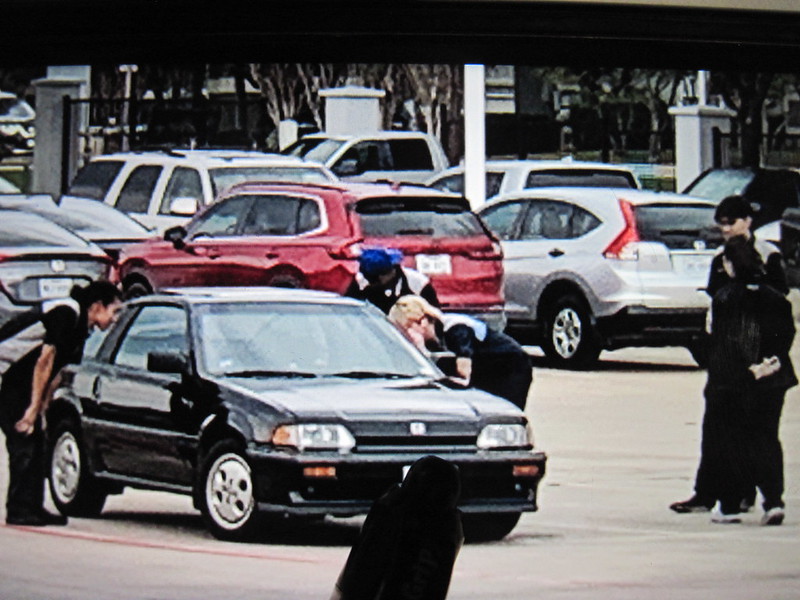
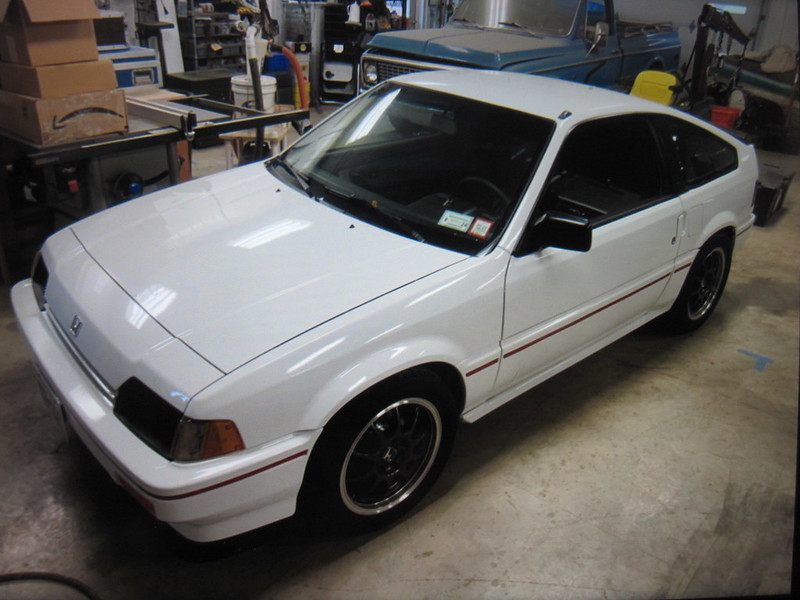
At the tail end of the Michigan leg w MadMax, we went to a yard on the way to the airport and got to pick off a Detroit CRX sitting in the yard for a year just rusting away.  MadMax's first yarding experience.  Glad it started out w a rex.  Wheel wells a good example of northern cancer eating these cars away.  This one was actually good for its years.  It had good lower rocker sills.  Needed those to replace my deteriorating ones.  I hit 4 yards on this trip.  Most wouldn't let me back there.  Times have changed.  Guys complaining no one wants to work, short staffed and politics/economy affecting their businesses.......    This one I had to bribe them to let me take the plastics off as they are tricky to not break.    Most of my stuff was prepaid and ordered 3-10 months ago.  Wasn't a last minute find by any means.   I picked them up on the trip to save the shipping charges and ensure the plastics would survive the transit.


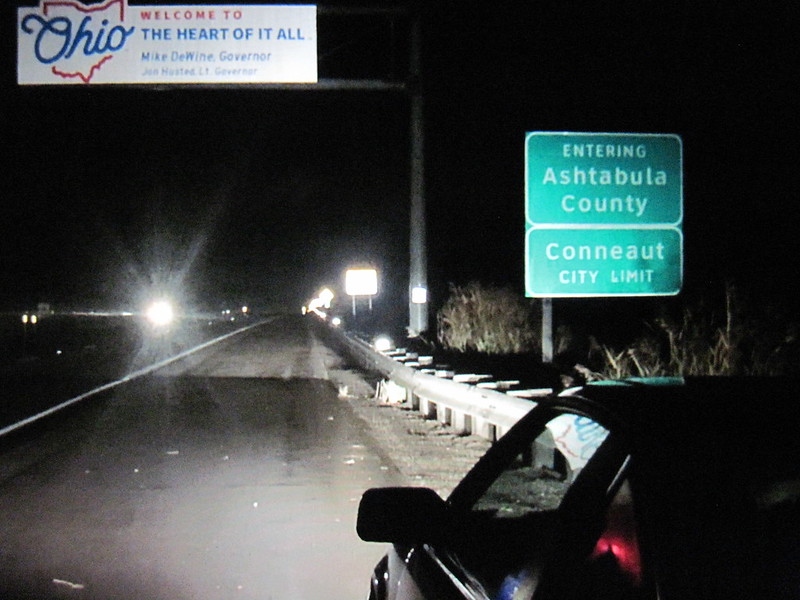
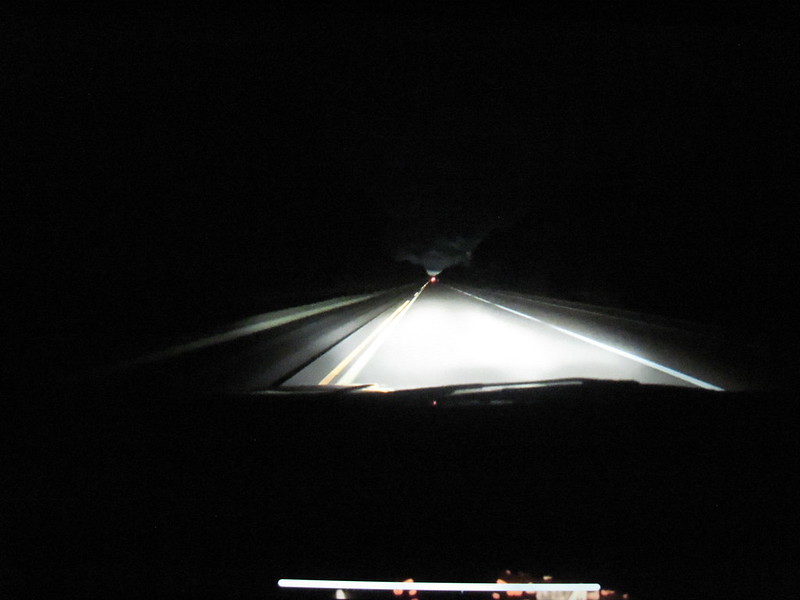
Visited more old friends before leaving Michigan on my way to New York.  Again, I drive through the night to get the most out of my days.  State line drive-bys.


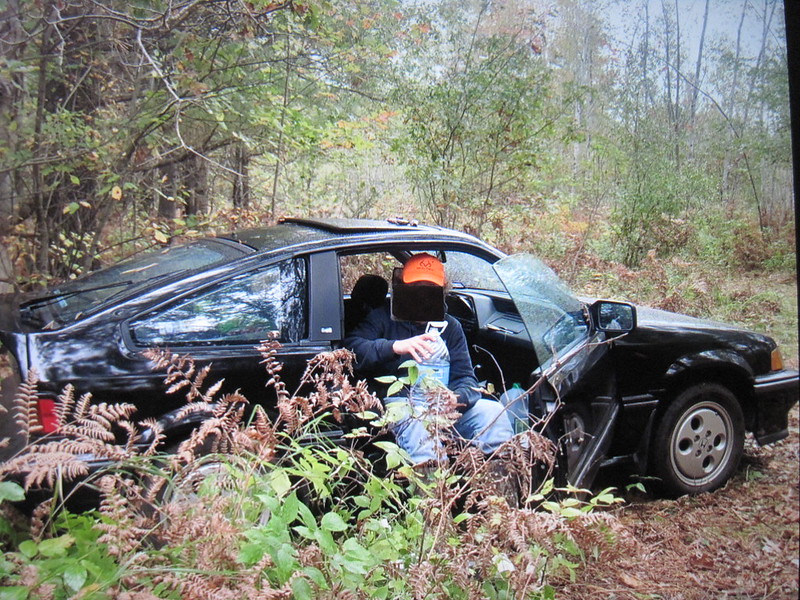
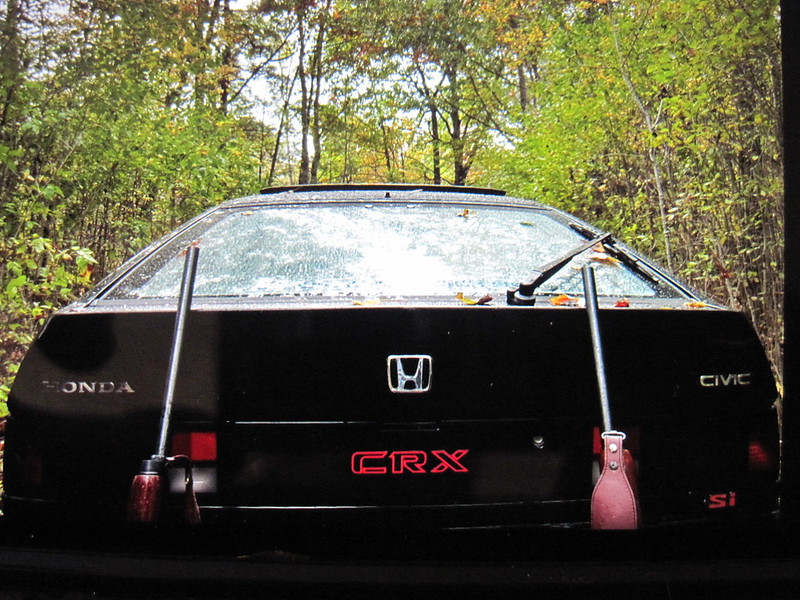
Had some time to Kill before meeting another RPR member DearBoss in Rochester.  Spent the day in and around Niagra Falls. I spent the last 3 days living out of this car...   And i did look homeless (look through the back quarter window).....   Didn't bother w a hotel as car was meticulously packed and full of valuables I didn't want left unattended.


DearBoss had been holding a transmission for me for like 15 months off this car.  His first car purchased at age 12-14ish.  He converted to an SI.  He had a parts car we picked off a little as well.  Great guy.  Glad he took time out of his day to hang out.   Hes posted his build on RPR 

******** REMINDER TO ADD LINK HERE *****************

I appreciate what hes done so much more seeing it in person.  Clever guy.  Took away a good amount of tips and lessons hes gone through.  Looking forward to implementing some of his ideas and giving credit where due.   Looking forward to future conversations and hopefully more visits.


He devac'd his SI.   I had not followed this conversion before as i've been keeping everything OEM.  But makes a lot of sense as it gets rid of so many vacuum related control parts, dizzy, etc... that's bound to give my a failure down the road some day.


He bought a standard ECU kit and converted for his 1500SI.  Kept it generic enough if he later decides to change engines.


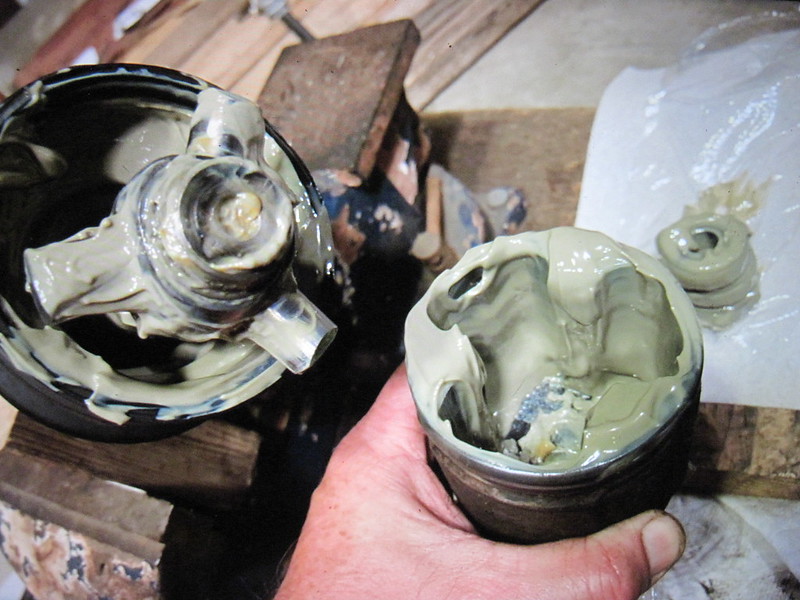
Unpacking, cleaning up.   Sorting stuff out....


Next planned trip to Denver, then another Florida


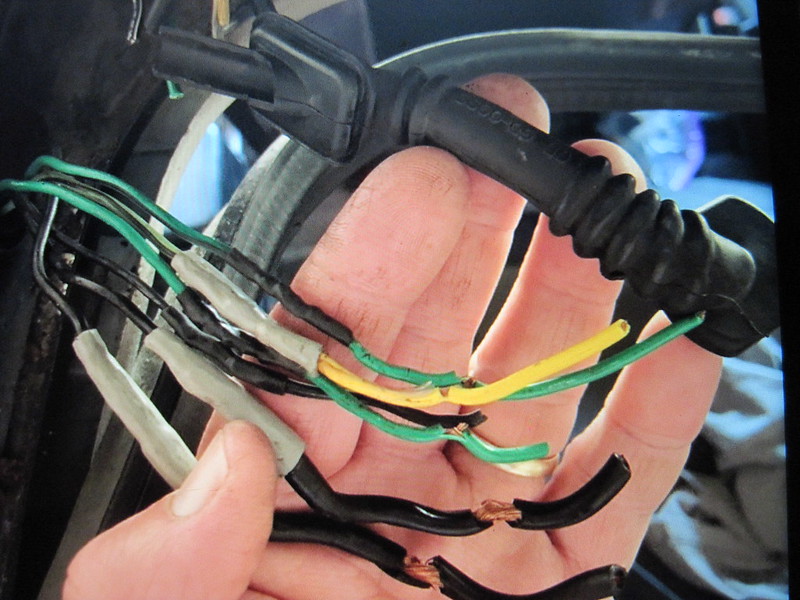
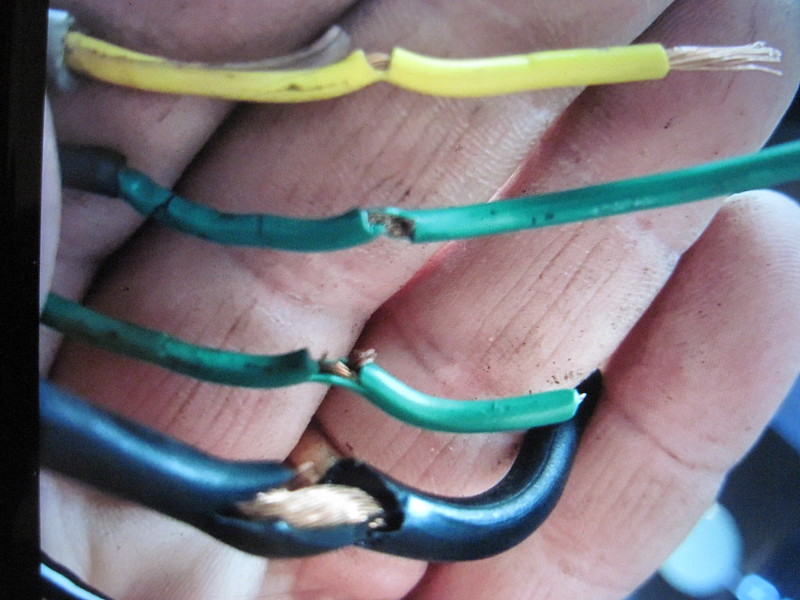
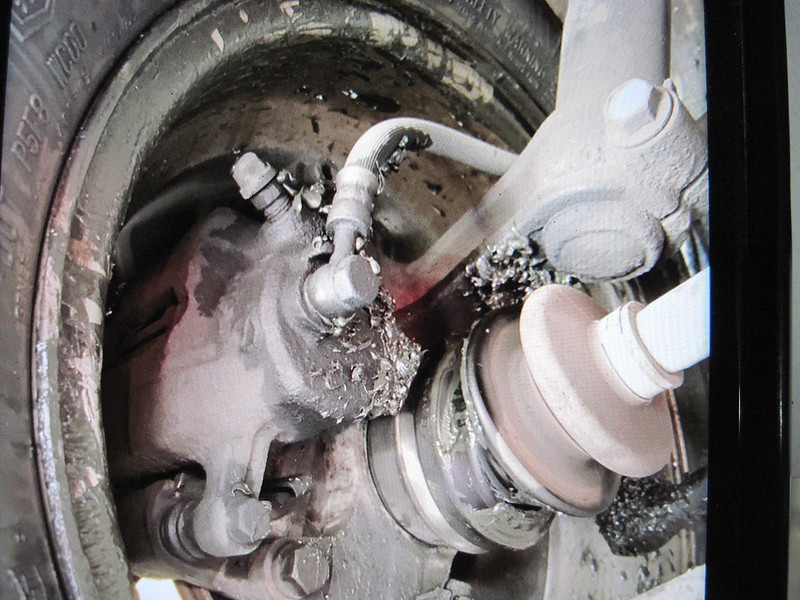
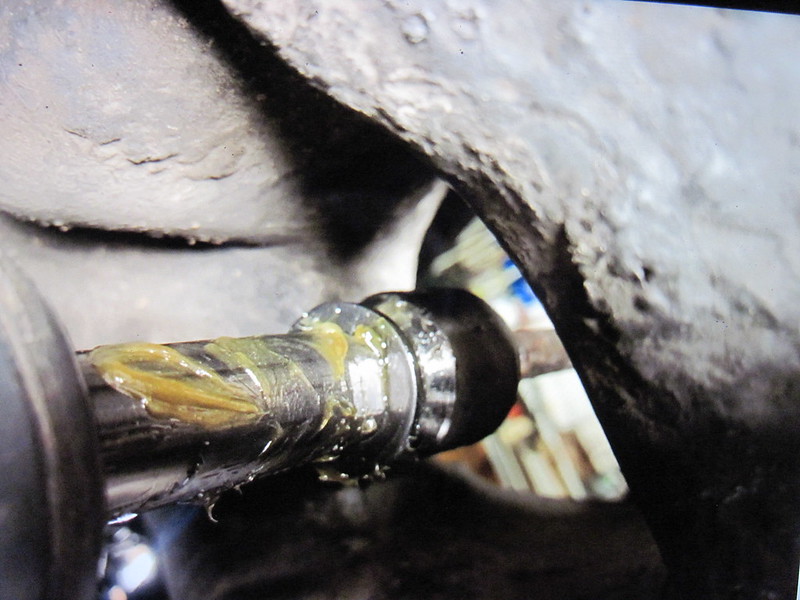
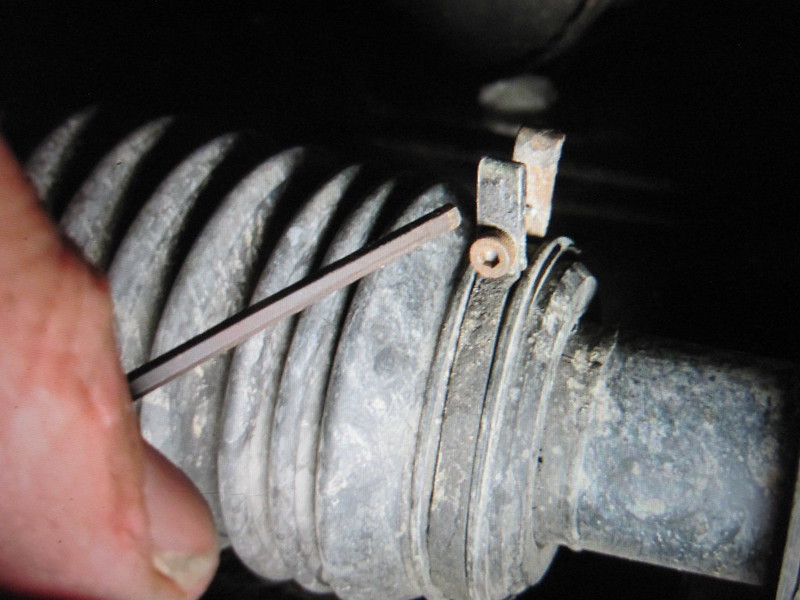
Did get some extra humming from my drivers side tire area.  Not sure if Its axle related to my work???  Investigation to follow


Added a couple more lines to the map.

greasemonkeyreborne_5x1gs
greasemonkeyreborne_5x1gs New Reader
11/7/23 5:33 p.m.

Thanksgiving is coming up and I have alternator parts all over the dining room table.   I was going to rebuild this cars original 160/170K alt  removed back in 2002ish.  This alt began chirping the belt at start ups when sitting a while in 1998.  It took 4 years to get bad enough for me to finally replace it.  I had assumed the bearings were shot from being a northern salted car.


As it turned out, the bearings were perfect.  It was rotor interference w the stator.   Somethings out of round.   Just like MadMax's original 108K factory alternator.  Comparing both, interference occurred same location.  both alts are orientated about how they are mounted in the car.  There's more white corrosion on the bottoms of the aluminum housings.  Now I"m thinking corrosion grew between the aluminum housing and steel stator core where water/condensation could build up.  Both cars spent time in the north in salt spray environment.   I noted the direction of pulley force.  Interference does not line up direction of pulley pull.  Thats ruled out.


I started to dremmel the Beaters stator to fit the rotor again.  Looking at the "T" features of the stator, it appears the insulation is cooked/rusted away.  Tested the stator and it failed to ground w .5Mohms.  MadMax's stator on the left in pix is cracked 4 places.  His stator core is good.  I must have overheated mine from the friction and it began degrading.  Both these stators are set aside.  A later time I might try to remove the good stator from MM and place inside the Beater.


Changed gears to rebuild the alt found in a yard last summer from East Texas.  Improving technique for removing bearing seals.   Lower right shows about where the pick is inserted against the inner race.  Have to work it underneath the seal edge and pop out the seal cover.  Upper right shows using a straight pick to push the second cover off going through the bearing race.  Much faster and no damage to the seal.  Bottom left is an NOS bearing opened to gauge amount of grease for the restored bearings.


Its tricky to remove the seals wo damage.  Above is a seal I tore and won't reuse from last year.  I'd have to do a video on the technique, but for $15 bucks a bearing, who's going to spend this much time....


I figure I hauled about 350 pounds of parts back home on this trip.  Adding my weight, hunting gear, tools and travel parts, I was at about 750 pounds for a 500 pound rated car.  Car took forever to brake. 


Since my  plastic door garnishes were cracking, I found a replacement set in black and placed on hold for pick up.  Hoping to pop them on as is w some polishing.  The red Detroit car was a bonus as my lower rocker sills began cracking more on the trip, luckily found a great replacement set at that yard.  I would have loaded up more if I had time and more capacity.  The boxes are 4 more axles i had shipped.  I ran out of time to get to their location.


The other  parts are  sustainment for (hopefully) decades of road trips to come.   Have open projects to rebuild axles, trannys, vacuum boosters...   


The trip cost about $550 in fuel/tolls.  I figured the cost to ship these parts from multiple locations would have run about $1000.  One yard told me it was about $150 to ship one small tranny.  The yard I couldn't get to charged $100 to ship 4 axles just to give a cost reference.  Those plastic parts are tricky to ship!! 

greasemonkeyreborne_5x1gs
greasemonkeyreborne_5x1gs New Reader
11/20/23 6:52 p.m.

I'm on my Michigan trip last month and happen to drive down a road that brings back my past w this car.  I use to work at Dow in their plastics division.  I drove this car there back in the 90's while I was employed.  Honda created the PC/ABS blended plastic body panels in the 1980's.  Apparently, GM's Saturn followed suit in the 1990's with their own blend of PC/ABS door panels called Pulse from Dow.  At that time, I had no idea my body panels where plastic.  Spent several years testing and working w this blend never realizing it was the same material on my car.  By the time I was there, GM switched to an ABS/PPO blend for better dimensional stability so it really never came up in the conversations in the office -- Dow didn't make that blend.


After I got back I sorted through the plastic body panels made out of the PC/ABS blended plastic and placed in storage. 


 I was Checking the mold markings on the parts and realized all five parts where actually made after the CRX ceased production.  1-12 across the top is Jan-Dec.  8-0 along the side is 1988-1990.   This pix is the mold marking for a drivers door side skirt.  When I was in production back in the day, we'd pull a sample of parts and have them QC'd monthly to confirm the process and mold were spot on.  Looks like Honda did the same w their suppliers. These parts were replacement parts on the cars I got them from.  So they are newer.  They have less heat and UV degredation.  I assume they will last longer.  on top of that, they came off cars from the north where the head and UV aren't as strong as it is here in the south


Passenger door skirt manufactured December 1990.


Header panel manufactured November 1990.


Apparently the lower door sills where manufactured in 1991.  This is the first time I've seen a molded parts manufactured from a first gen dated past 1990..   March 1991


Left sill.  The mold has no QC markings.  I'd assume this was the very first run on this mold or they just weren't producing enough to bother QC'ing the mold.


Point of this is to share history of the car and for those other CRX owners out there to understand some additional detail about their cars.  And helping others to identify better plastics as I'm assuming these will be stronger since they are newer due to the manufacturing date.


I've randomly found plastic body parts produced after 1987, but never hit the jackpot of obtaining 5 for 5 on a parts run.  This was a lucky find for this car.


My time at Dow and passion for plastics from that era in my life makes it a matter of pride to repair and care for these original parts best I can.   Hope this info helps someone down the road.....  From my POV, these details add another dimension to the old car experience.

CrustyRedXpress
CrustyRedXpress GRM+ Memberand Dork
12/26/23 6:54 p.m.

What a great thread!

1 2 3

You'll need to log in to post.

Our Preferred Partners
H8lW4QFKMPec70sFKxxBIRTFwrXzmhRRxZYuWkqT2ncFcKtn0RwU7GpsDOYAZ79C