


Titus wrote: https://www.youtube.com/embed/GnpkDy23g7Y
Sounds like Miss Titus is excited too--Awesome!

Titus wrote: https://www.youtube.com/embed/GnpkDy23g7Y
Sounds like Miss Titus is excited too--Awesome!

nderwater wrote: Sounds like Miss Titus is excited too--Awesome!
I'm just afraid she is going to ask for one in her Miata when I am done!
I tackled installing the exhaust tonight. First up was new studs in the exhaust manifolds. Some were missing and the others didn’t look so hot, so I got all new ones. I ran a thread repair tool through the holes first to clean them up. The passenger side studs went in easy, but the steering linkage makes the drivers side a pain. I ender up pulling it off to install them.

Once those were taken care of, the Y pipe from the kit slid right in place with the included new gasket rings. Getting the bolts tightened involved an interesting combination of extension, flex joint, and flex wrench, but I managed.

It’s now all in.

It included a plate to be welded on for mating with the cat, but it looks like it won’t be close enough on my car to make the connection. I’m not too concerned, as I planned on taking it to someone to modify for additional clearance any way.


Titus wrote:
In this picture, it looks as if the starter is hanging a fair way below the Miata bell housing. How's the ground clearance look?
Based on some recent, umm, destructive testing of the V8R-manufactured subframes, I'd strongly recommend coming up with a way to put a brace between the rear control arm mounting points if you're going to be driving this hard.
Keith Tanner wrote: In this picture, it looks as if the starter is hanging a fair way below the Miata bell housing. How's the ground clearance look? Based on some recent, umm, destructive testing of the V8R-manufactured subframes, I'd strongly recommend coming up with a way to put a brace between the rear control arm mounting points if you're going to be driving this hard.
The starter clearance on the early kits like mine is pretty bad. They recently updated the adapter plate to move the starter up the side a bit to add about an inch of clearance. I may upgrade mine at some point, likely once I grenade my first transmission LOL. The good news is it is a dirt cheap Honda B series starter that can be had new for under $50, and it can be changes in about 2 minutes.
Good to hear. We've had a few reports of people taking out our butterfly braces on manhole covers (that sounds exciting), I'd hate to hang up the adapter plate and starter. We had to do some trimming and build a little "just in case" approach ramp on our V8 Exocet build for the same reason.
That's some odd exhaust routing. I don't get why the driver's side goes under the trans - it's post-collector, so tube length isn't a factor. I'd have to get underneath to look, but I wonder if running the passenger's side alongside the trans a bit further before it crosses under would gain you a extra bit of clearance. Might not.
Keith Tanner wrote: Good to hear. We've had a few reports of people taking out our butterfly braces on manhole covers (that sounds exciting), I'd hate to hang up the adapter plate and starter. We had to do some trimming and build a little "just in case" approach ramp on our V8 Exocet build for the same reason. That's some odd exhaust routing. I don't get why the driver's side goes under the trans - it's post-collector, so tube length isn't a factor. I'd have to get underneath to look, but I wonder if running the passenger's side alongside the trans a bit further before it crosses under would gain you a extra bit of clearance. Might not.
Clearance is definitely reduced, so I am going to need to be very careful. Fabbing up some sort of skid plate is in the long term plans.
The crossover routing is far from perfect. I will be having it modified to get it as high as possible, and may even look at using oval pipe at the crossover pipe to maximize clearance.
What ECU did you have in the car on start up? I know you've mentioned you purchased the AEM.
1973elanst wrote: What ECU did you have in the car on start up? I know you've mentioned you purchased the AEM.
AEM Series 2 ver 6051, using the AEM base map made for the engine. I am not sure if I will do any tuning on my own or take it to a shop. I previously had great success self tuning the old Link ECU when I was supercharged, but the AEM is not as immediately intuitive to me compared to the Link. That, and there is an excellent (although expensive) tuning shop near me that I am comfortable with.

Woot! Watching the video and hearing mrs Titus squeak with joy on first startup made me smile, it's nice when our women can enjoy the things we do, even if they don't always haha
Mazda Harness Cleanup- Drivers Side
There are several things in the Mazda harness that you still need, but others that are no longer needed. The drivers side and passenger side are separate, so I decided to clean up the easier drivers side first.
First step was to remove all of the factory tape and plastic tubing holding the harness together. This is a long dirty job.

Next step was removing what wasn’t needed. I wanted to COMPLETELY remove the unneeded wires, but I quickly realized that was more work than I was willing to take on. I ended up cutting each wire, folding the end back on itself, and covered in heat shrink. They are then taped in to the harness. This was done to the AFM, cruise control, air bag, and side indicator wire, as I am not using any of theses.

Next I wrapped the wires in fresh electrical tape the way I wanted it to be.

Next it needed to be covered. I am not a fan of the factory style tubing, so I went with a product called Techflex F6. I am very happy with it. It has a split in it, and coils over it self nicely. I recommend a hot knife for cutting it as it does fray if you don’t melt the end. I finished the ends off with silicone tape for a clean look.

Along the way, I also gave the diagnostic connector bracket a coat of paint and reinstalled the headlight.

I need to get some new anchors before I can call this side done, but that is about it.
Pardon the intermission… I seem to have fallen down the rabbit hole.

Titus wrote: Pardon the intermission… I seem to have fallen down the rabbit hole.


This is a vision of my future.
I mean, how hard can it be to Wire a Miata in Drag with a 302 Drivetrain?
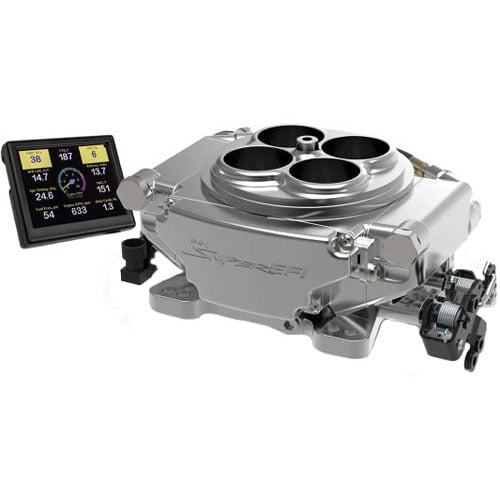
I am banking on this new product from Holley to make life easier:

Titus wrote: Pardon the intermission… I seem to have fallen down the rabbit hole.
50,000 shades of NOPE
The harness work under the dash didn’t end up being so bad. It was time consuming work that left my fingers sticky and sore, but I managed to get all of the unneeded Mazda wires that go to the passanger side completely removed from the harness. What was left was rapped up and reattached to the firewall.

Before reinstalling the dash, I disassembled the 3 hvac boxes, cleaned them, and applied new weather stripping. The AC box was the worst of them.

Once they were reinstalled, the dash went back in and I gave it another startup test to make sure it still ran after surgery. All was good, so now I can move forward with final passanger side engine bay wiring wrapping and routing.

Keep up the good work, not only that keep up the great build thread.
You have struck a great balance on details vs time.
Wiring isn't hard, especially if you have documentation. It's tedious. Just do one wire at a time and eventually you'll get through it. Don't know why everyone makes a big deal out of it.
I got the passenger side engine bay wiring wrapped this weekend, along with reinstalling the headlights, fans, and radiator overflow. The oem overflow is nasty looking. It will do for now, but I am looking at aftermarket options. If I can’t find anything I like, I may just get a new oem one.


I am behind on my writeups, but got a few things writen up last night.
Sway bar reinstall
Even after a good cleaning, my 13 year old Flyin Miata front sway bar is looking pretty sad.

What should have been a 5 minute step in my reassembly turned in to hours. Even though I thought I had done a good job bagging and labeling bolts, I just could not find 2 of the end link bolts. After a few hours of searching everywhere, I remembered that I had a set of end links in a box of parts from a 96m I parted out years ago. I pull them out and find they still had the nuts and bolts attached to them. 5 minutes later and the sway bar was back in the car.

It is hard to tell from the pic, but it clears the pulleys by a good 3/4″.
Throttle cable modification
The throttle cable needs some mods to work. First is the throttle body side.

You need to cut off both the rubber piece, and the metal bushing that slides in to it.
Once those are out of the way, it bolts right up.

With this done, you quickly realize the cable is about 3 inches too long, and you really only have about +/- 3/4″ adjustment. This is caused by the mounting point being closer to the Acura throttle body than the Miata throttle body.
Unless you have the skills to do the fancy barrel cable ends like used at the throttle body end, you need to shorten the cable from the peddle end. This means you first need to remove it from the car, which is a real pain. The stupid firewall clip is my worst enemy. It may be marginally easier with the dash out, but I have reinstalled the dash twice so I was not going there. The only advice I can give is letting you know that there are 4 clipping points that need to be compressed at once, all from the inside of the car. 2 on top that you push down and 2 on bottom that you push up.
Once out, I cut off the amount needed and followed a write-up I found on line for making a new solder ball. It involved first sticking the old ball into playdough to make a mold.

It was then removed and the cable was slid in to place.

No pictures of the solder melt because I don’t have enough hands, but I basically filled the hole with liquid flux and then hit it with a torch while feeding 5050 lead solder in. In the write-up I was following, it said the playdough wouldn’t burn, but mine looked like a toasted marshmallow in seconds. Might be because I was using a hotter torch? Regardless, it worked.

After a little cleanup on the grinder, the ball fit right in to the plastic retainer. It also is on there very securely.

A few minutes later it was in the car and working perfectly, and I was off to the next item on my list.
I never knew you could do that with play-doh. How cool.
I suddenly want to melt aluminum cans and use them as molds...
Flight Service wrote: I never knew you could do that with play-doh. How cool. I suddenly want to melt aluminum cans and use them as molds...
I would suggest using one of the blue tank (propane) torches. That was what the other how-to I followed was using, and it didn't toast it like my yellow tank (MAPP) did.
That trick about resoldering ends is going to come in handy for my CRX sunroof cables. Nice.
NA6, NA8 and NB Miatas have different length throttle cables. It might be possible to swap the cable out. Alternately, a new bracket for the cable would also address the problem.
Would it be worth pre-tinning the cable end before you put it in the play-dough mold?
You'll need to log in to post.


