


I had a dipstick laying around somewhere. Ill look around tomorrow, if I find it you can have it if you pay for shipping.
I had a dipstick laying around somewhere. Ill look around tomorrow, if I find it you can have it if you pay for shipping.
In reply to Project86fox :
That would be awesome. Yep definitely willing to pay for shipping.
Minor update!
Car is back up and running! Finished fixing the starter wiring last night, put everything back together, and kind of half bolted the h-pipe into the exhaust. Still need correct hardware for header collector flange to H-pipe leading edge flange. First time I started it up it had a pretty nasty intake leak through the EGR blockoff plate... Long story short I bought a 351W fuel pump blockoff plate (same bolt hole distance as EGR, alot cheaper than what they wanted for the '95 GT blockoff plate) and it came with a gasket. Well, gasket didnt fit right over EGR port and was letting air through. Pulled that off of there and just bolted the delete plate right up against the intake manifold, and problem fixed! Car seems to run quite a bit better, think it really liked the spark plug change and the fact that they were properly gapped. Will be getting new hardware for the exhaust tonight, and then planning on driving it around for a few days to figure out any other quirks.
Also, found an awesome deal on a set of Forgeline RS comp wheels in 17x9 with some like-new BFGoodrich rival S 255/40/17 tires on them. Looking forward to the extra grip, should be one of the last pieces needed before I can take this thing to the track!
Update after a few days of driving the car around:
Bought the correct hardware for the collector to h-pipe joint, so no more exhuast leaks :)
Car drives around fairly well, although there are a TON of suspension squeaks and clunks... I'm going to have to redo pretty much every bushing on this car... Another interesting adventure was when I was headed to lunch yesterday, the dipstick and dipstick tube decided they no longer wanted to be a part of the engine block... Caused alot of burnt oil smell and had to pull over and push the dip stick and tube back in. Went looking for a foxbody one locally, and apparently Ford does not make them anymore. Long story short, I spent far too much time trying to make the stock one fit better last night, and ended up mangling it to the point that the dipstick no longer threaded all the way through the tube... Headed to Autozone and picked up one of the universal ones for a small block ford, and it was very mediocre... Had to grind the chrome plating off of the tube to get it to fit into the block, and the dipstick wont go all the way in. I'm going to trim the end of the dipstick this evening, and in the meantime I ordered a flexible Locar one from Summit, should be here early next week, hopefully that will solve my issues once and for all. Never thought an oil dipstick would give me such a headache..
On a more positive note, I did delete the smog pump last night finally. Unbolted it from the front cover, saved probably ~10lbs off the nose of the car. Used a shorter 90.5" belt and it worked perfectly.
On a side note, I have an update on the brake side of things. Have a co-worker that has been doing brake design for a long, long time and he hooked me up with a pretty sweet setup for the car that he used to run on his foxbody with SN95 spindles. It is quite an interesting conglomeration of parts. In the front it uses Porsche 928 GTS brembo 4 piston calipers, 13" C4 corvette J55 package vented front rotors drilled for a mustang bolt pattern, and Porsche brake pads. These are held onto the spindle with a custom adaptor bracket. He gave me brackets for the rear that allow you to move the stock rear caliper up, and use 13.5" vented GT500 rear rotors as well. So the car certainly should not have any issues stopping. This is apparently the best setup you can run underneath a 17" rim. I really wanted to stick to 17's to keep tire prices down. Enough talk, time for pics:


Plan is to test fit these tonight when I have access to a lift.

Those calipers use the 993 Carrera brake pad, same as the Stoptech ST40 calipers. I had them on both of my previous 944 Turbo S's, they're the bomb! Loads of brake pad choices!
In reply to docwyte :
Awesome! Glad to know I have a multitude of selections.

Narly brake setup man! Things going to STOP
Minor Sunday update:
Flushed the coolant and trans fluid Friday night. Replaced both upper and lower radiator hoses. Everything holds vacuum pressure and comes up to temperature with no overheating/leaks etc. Also pulled the front passengers side fender off and removed all of the vacuum solenoids and other things related to the EGR and smog pump. Pulled the radio antenna out (didn't work anyways), but left the charcoal canister for the evap system. Also removed the hood blanket and a few other small things to trim as much weight as possible.
Went to take the wheels off to test fit the brakes, and found out it has spline drive lug nuts that I don't have the key to... Gah.. Going to stop by one of the wheel/tire shops and see if they can help me out.


Going by memory but I think on my ‘97 Mustang Cobra I went with the Agent 47 front brake duct and hose cooling kit. On my car I removed the fog lights and fabbed some air inlets in the fog light holes out of roof flashing.

Major score on the brake parts!

If they are spline-drive, there's a good chance they are from Gorilla.
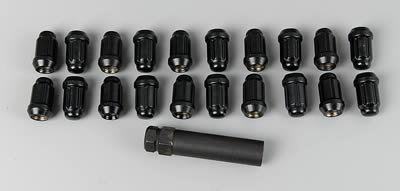
If they tire shop can't help, reach out to the local car community. Someone probably has a socket, they are pretty standard.
Got the correct wheel lug removal tool from Belle Tire ![]() Will finally be able to take these wheels off and test fit the brakes.
Will finally be able to take these wheels off and test fit the brakes.
Also, put in the new Lokar oil dipstick tonight. Shoutout to those guys, fit was spot on and literally installed in 10 minutes, and the little braket fit right onto the header stud. Amazing how easy a well engineered product makes things... To anyone out there thinking about doing long tubes on an SN95, just factor ones of these into your budget. It pays for itself in the time saved alone.
Couple updates from work completed last night:
1. Test fit the new brakes finally. This is before:

Gaining just a little bit of rotor size ![]()


Had to cut the dust shields off to give the new rotors sufficient clearance. This is how the adaptor bracket goes on:

Also, looks like new wheel hub assemblies not long ago ![]() . Annndddd last but not least, a test fitted brake caliper, bracket, and rotor!
. Annndddd last but not least, a test fitted brake caliper, bracket, and rotor!

Had to order a Steeda bump steer kit to get better clearance to the tie-rod arms... The factory rubber boot was rubbing on the rotor:

Going to be tight, but it will fit! Then I went to put the stock wheels over the setup... Let me just say I am very happy I did not unhook the factory brake setup before that point! The stock wheels would need a MINIMUM 1/2” spacer to clear the brakes. Can’t say I didn’t expect it, but some part of me was really hoping to finally completely bolt up this new setup. Oh well, pulled the rotors and calipers back off, and put the stockers back on for the time being. New wheels cant get here soon enough...
While I was in the shop, I wanted to experiment with a dumped exhaust... And this ended up happening:

Let me tell you, I sure am glad I experimented with a “free” dumped exhaust first... Sure does sound good, but the car is absolutely deafening from the inside! ![]() Plus I feel like if anything ever went wrong with the car on the track, I’d never be able to hear it... Soooo, if anyone has a relatively reasonable cat-back for an SN95 laying around, hit me up...
Plus I feel like if anything ever went wrong with the car on the track, I’d never be able to hear it... Soooo, if anyone has a relatively reasonable cat-back for an SN95 laying around, hit me up...
Rear suspension work should be commencing on Monday, so stay tuned :)
In reply to KonaBoss :
I bought a Cobra with turn downs years ago ,and it only took a few days for me to reinstall the tail pipes. It sounded awesome on the outside but was just too much inside the car.
I have also heard of people boiling the fuel in the tank with poorly executed exhaust. So if this is a track beast, make sure the pipes dump to the side or out of the back of the car.

I'm excited to follow your progress too. After getting my fox body car operational I realize I should probably be doing track days or something because I'm probably going to get in trouble driving it on the road...it's that much fun.

In reply to ClemSparks :
"Get in trouble driving on the road"...
Isn't that the whole point of driving a Mustang??

Not sure if the following will help you or not, but I know the following wheels will clear 4-piston Cobra R (Brembo) calipers w/o spacers:
@Will,
Thanks for the wheel suggestions! Forgelines should be here Thursday finally, so looking forward to the opportunity to test fit those, and get the brakes installed finally. Speaking of brakes...
Time for another build update! Had Friday and Monday off of work around Easter, so figured it would be a good time to knock some of the suspension items out on the mustang. Monday turned into a long day...
Initial goal for Monday was to get the new upper and lower control arms installed, and the panhard bar as well. That goal ended up being a little optimistic. Started with the car on a lift, with a motorcycle lift table underneath with jack stands on top so that I could support the axle when I removed the control arms, so the brake line from the chassis to the axle didn’t hate its life. Ended up working pretty well as an alternative to screw-style pole jacks (none were available at the location I was working). First step was to remove the stock, completely worn out lower control arms and replace them with the maximum motorsports lower control arms with adjustable spring perches. Started off on the axle side of the control arms, nut came undone easily enough, but the bolt absolutely would not budge. Ended up taking the rear brakes apart (pulled calipers, rotors, and dust shields) so that I could get a straight shot at the bolt with a big punch and a 4lb sledge. Usually this equipment is enough to do the job... Not on these bolts! Went at them for literally 20 minutes, didn’t move in the slightest. Came to the conclusion that the sleeves inside the bushings must be corroded to the bolt shafts. So, out came the cutoff wheel and sawsall! Cut the bolt on each side of the bushing, and dropped the control arm that way. Then smashed the remainder of the bolt out of the hole with continued hammering and brute force. I don’t have a ton of pictures of this process, just due to the overall level of frustration. Have some of the aftermath though ![]()


Then removed the chassis-side bolt on the LCA’s, that came out extremely easily. Did the exact same thing on the other side of the car, rinse and repeat.
Somewhere in the middle here I let the axle sag as much as possible and attempted to pull the stock springs. They weren’t even close to wanting to come out, so had to rent a spring compressor and get them out that way. I’ll take this opportunity to say I really think spring compressors are a massive PITA...
After recovering from that whole debacle, it was time to put the MM panhard bar mount on the drivers side LCA bracket that attaches to the axle tube. This was pretty straightforward, everything fit together well, and I went ahead and loosely bolted in the new MM LCA’s. Looking at them again in the car, they are really really stout pieces with poly bushings on the chassis side, and a spherical joint on the axle tube side. One thing MM noted in their instructions was that the bracket on the parking brake cables needed to be removed and flipped over to fit up to the new control arms, and the part of the bracket that holds the wheel speed sensor wires in place also needed to be flipped over. This is where things really started hitting the fan... I noticed the other day that my parking brake does not really do anything, and does not hold the car in place. I figured it was just out of adjustment, but looking back now there is definitely something more wrong with it.. Let’s just say I absolutely mauled the brackets for the parking brake cables in order to get the cables out of the calipers. As I came to find out, that wasn’t a huge deal anyways since I’ll be replacing both rear calipers... They both have completely ceased slides. Definitely have some very odd wear on the pads from that.
After struggling with the parking brake cables, I got the brackets flipped around and moved onto installing the upper control arms (UCA’s). The stock UCA’s came unbolted pretty easily (no cutting required this time). Then I moved onto the bushings that are pressed into ears on the top of the axle housing... What a crap show that ended up being... I ordered the busing removal tool from Maximum Motorsports, and everything started off well. I was able to press the first bushing out of its mounting ear easily enough, but when I went to back the nut off of the bolt, something happened and I messed up the threads on the end of the bolt, and a few in the nut. Thankfully the shop I was working out of had a set of tap and dies and actually had ones in the right size, so I was able to re-cut a few threads and move on with the install. I went ahead and put the new bushing in on that side, and removed the old bushing on the other side. However, when I went to install the new bushing on the passenger’s side (literally the last step in the process of course...), I must have had the bushing slightly tilted one way or the other when I started pressing it in... Things got really hard to turn, then I managed to completely strip half of the threads off the bolt and wipe the inside of the nut completely clean... Note to self, make sure the bushing is absolutely straight before starting to press it in.. Anyone ever try throwing bushings in the freezer before install? Does this help at all? Here are a couple of pictures of the absolutely shot stock UCA axle housing bushings:


While I was at it, I also removed the quad shocks since they were completely worn out (pushed them in to maximum compression, and they still haven’t retracted 4 days later...)


This all happened about an hour before the shop closed, so my friend and I had to absolutely thrash to get the car back together well enough to attempt to drive it home.
Drove it home (albeit very gingerly) on 2 lower control arms and 1 upper control arm lol... Suffice it to say the car had some interesting handling characteristics. Called Maximum up today and had them send 2 new bolts and nuts for the removal tool, just in case I manage to screw it up again. Those are supposed to be here Thursday, so I guess the fun starts again!
I’ll add pics once I have the car back up in the air, probably this weekend.
Final picture of everything removed:


Spring compressors are a pita...
Quote for truth!
I'm so happy with mine I get almost excited (not really) about the prospect of using it. It does make spring work less-dreadful, though ;)

I can get the part number if anyone's interested. Its an OTC. I've only used it for front springs so far (In a fox body Ford and a G-body GM) but I'm SO HAPPY I have it.
@ClemSparks,
Thanks for the info! I'd definitely be interested in the OTC part no., this is one of those tools that I have rented enough times that I should probably just up and buy one.
I have been lazy the last couple days, and not gotten pictures for the long post above. It has also been cold and snowing off and on here, so that certainly puts a damper on my motivation to go out and take them.. I'm planning on working on the car again tonight (maximum motorsports sent me some new bolts for the bushing tool), so I'll grab some pictures then.
Also, wanted to take the time to lay out some next steps on the build here so I keep myself on track and eliminate as much installing then removing parts to put new parts on as possible.
1. Finish installing rear upper control arms
2. Install remainder of rear panhard bar setup
3. Check fitment of front brakes under new wheels
4. If brakes fit, install bumpsteer kit. Then install new front and rear calipers, front rotors, and front and rear stainless lines. Put speed bleeders into calipers at this time before bleeding
5. Install MM forward offset front control arms, tokico d-spec dampers with front coilover conversion, and caster/camber plates. Install new rear dampers and springs at this time as well.
6. Hit the track!
Maximum Motorsports replacement bolts came in yesterday for the bushing install tool, so very carefully lined up the tool again and successfully pulled the new bushing into the axle housing. Installed the new upper control arms, and then set the ride height on the car and torqued the fasteners at ride height. Also, the new Forgelines came in today!

These should provide some much needed clearance for the new brakes ![]() Hoping to work on those along with the panhard bar this weekend. Also, just FYI I added a bunch more pictures to the rear end control arm install fiasco in the post above.
Hoping to work on those along with the panhard bar this weekend. Also, just FYI I added a bunch more pictures to the rear end control arm install fiasco in the post above.

Is that your ride height? Looks like a 4x4!

In reply to docwyte :
Normal for an SN95. My sister's '97 looks about that bad at stock height with 255/40r17s. Front fenders appear to be cut higher which makes it worse.
docwyte said:Is that your ride height? Looks like a 4x4!
You can’t really lower these cars without royally screwing up the suspension geometry. If you really want to make one handle the path is a new k-member with new control arm locations and geometry in front, and a torque arm / panhard bar rear set up. Unfortunately, this suspension will be as much or more than the car is worth so there has to be a lot of motivation to spend the money - like wheel-to-wheel racing (NASA CMC or American Iron) - but this car won’t be as competitive as the newer ones.
You'll need to log in to post.


