For the first time in over a month, I actually have a little bit of free time on my hands, so let's get us caught up.
The full details are here, but the rough cut is this:
Got the hub back. Looked pretty good:


I put another new wheel bearing in the knuckle and got the hub in. Boom. All good.
One thing didn't work out: I have these longer wheel studs that Greenhouse gave me. I've put wheel studs in before and there's a little groove in the knuckle to let you knock the old ones out and pull the new ones in, right? Yeah, so the long studs don't fit there and the new studs that came with the hub from Timken don't have the requisite notch cut in them to fit, either. So getting the regular-length studs in there was a bit of a PITA, but I wasn't about to put yet another new wheel bearing on there PLUS do the other side. The long studs will have to wait.
Next problem was the sway bar:

There was no getting a wrench or socket on that. So I got agressive:

I didn't do it at the time, but since we're talking about the front-left corner here I did come back and tighten the strut body collar and correct the camber. So the front suspension was all good to go.
Now the motor mount. Oh, that motor mount.
Eastside Tim gave me some help in getting that project started. I had spent a lot of time with cardboard and parts diagrams and photos trying to figure out what to do. in the end, I settled on basically re-creating the 1gn engine-side bracket that could also accommodate the structural collar of the 2.4 Turbo. I got some 1/8" steel bar stock and some 1 1/4" angle and we went to work:

The welds are ugly, but it fit:

To make up the offset on the lower transmission bolt, I ground the zinc off a nut coupler, welded it on, and trimmed it down:

And just like that, the first step is completed. Next up, I need to connect it to the body-side mount. Which is angled. Apparently on purpose:

A little bit of cardboard-aided-design and I was able to determine what the right side needed to look like:

For those of you keeping score at home, look at the body-side mount versus the charge pipe. That information becomes important later, but I wish I had realized its importance at this step.
Continuing on, I made a little wedge out of some angle for the left side to accommodate the angle of the mount:

And when it was all put together it looked something like this:

Refining it a bit after some test fittings got me this ugly bracket:

I did some more test-fitting and hole-drilling, threw a little paint on it, and finally had a front motor mount:

For my next trick, I needed to get that fixed bobble strut bracket re-installed. Rather than go with another solid bobble rod, I went ahead and put the OEM bobble strut back in place. But... it didn't fit. The strut would bolt to the brackets but then the transmission bracket was way out of line and couldn't even begin to bolt to the trans. So I un-bolted the front motor mount and discovered my problem. I had no idea that the bobble strut spacing was so tight, but the motor was at such an angle that while the front mount was fine, the bobble strut would have needed to be located through the transmission case itself in order to get to the K-member bracket. In retrospect, that should have been pretty obvious, but I never claimed to be smart.
So back to the grind:

Well crap. That won't work.
And I actually had to cut that bracket down even more. Now, notice the spacing between the charge pipe and the body mount, right? That should have been a clue.
I cut up some more 1/8" bar stock and welded it to the existing bracket:

The right side went pretty well, but on the left side, because of that wedge I added, the bolt hole was now going to be right through the edge. Look for the starter hole for the new bolt hole on the center-left of the picture:

I welded on some more stacks of bar stock to even that out a bit and re-drilled the hole:

At this point, I'd like to point out that the cheap electric finger sander from Harbor Freight is fantastic for this kind of work when you add some of the 3M purple 1/2"x18" sanding belts. It turns that cheap-o sander into a very narrow grinder and the 3M belts seem to last forever. After some cleanup work and paint, I had this: (again):

And now it all bolts up correctly:

I considered just removing the torque strut, but I figured that any additional support should help, given my experiences, so I turned my attention to that. The biggest problem was that because someone put an oil pan in the way, I had to either rub the strut against the pan or have a long bolt to connect the strut to the engine. So I pulled off the bracket that connected the strut to the K-member and decided to extend it a bit:

Welding those bits of bar stock on and then a little grinding and sanding gave me this:

And now the torque strut doesn't rub and has a much shorter bolt:

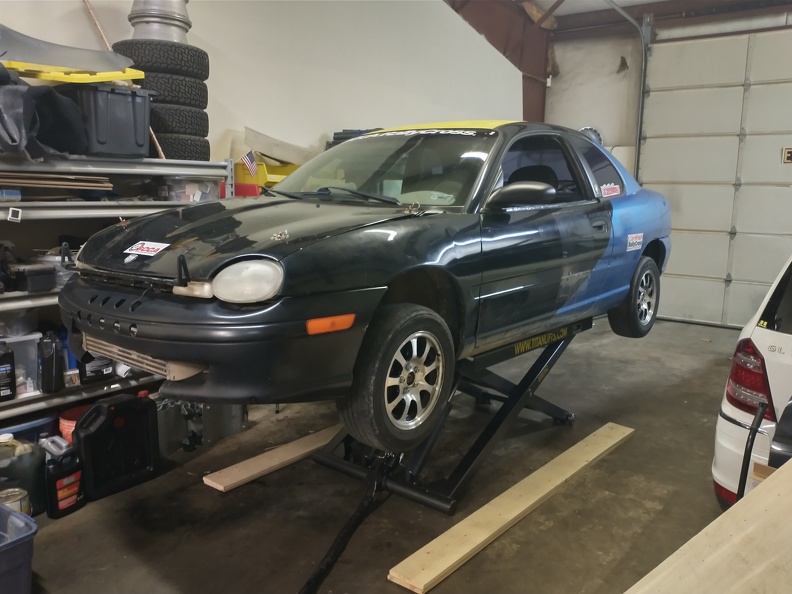
With all that taken care of, it needed a test drive. I filled up the radiator and left it to run for a bit to get the air out while I put the street tires on. After the system was bled, I put the hood on, pulled out of the garage, and went for a quick drive. It didn't take long before I was getting white smoke from under the hood, fluid on my windshield, and a total loss of power steering. Ruh-roh. I was pretty sure that I had cut through the power steering lines with the alternator pulley, so I brought it back into the shop and shut it down. I pulled off the hood and discovered:

As it turns out, that is NOT a proper place to install the cooling system pressure cap. The worst part about that is as I was getting ready to pull away from the garage I stopped to get out to double-check the cap. But then I distinctly - but very inaccurately - remembered putting the cap back on before I put the hood on. But after some more coolant and some more bleeding, along with 100% MORE radiator cap installation, everything was fine.

It made the drive back home with no problems other than the usual idling and tip-in issues that I still need to tune out (and, like, get a functioning idle air control system). In fact, it even made the drive without catching on fire even a little bit!
Tomorrow is the OVR 2-day RallyX event at Bitzer's so the real test is coming. I've driven it around on the streets a bit this week and have tried to hit every bump I can find, but there is something about Scott's place that just punishes the motor mounts so if it can survive the weekend, I think I'll finally be able to call it "fixed". Here's hoping!


