Man, long day of work and doesn't feel like that much progress!
Gas pedal has mounts, and my linkage to pick up the throttle cable is done. I need to drill the "upright" to catch the end of the sheath, and mount that through the floor and pedal operations will be complete (other than floor-stop and forward-stop pads).


It should be plenty of clearance (everything is relative on a car this size) between foot/shoe and where the cable runs.
Please tell me that pic is misleading, your pull arm for the cable does not sit horizontal when the pedal is at rest?
If so I see binding in your future. Cable needs to be pulled strait forward, not up and forward.
In reply to RichardSIA :
EDIT: I think you're talking about the tab that the cable attaches to, not the arm extending off the pedal. You are right, that should be vertical if the cable is horizontal.

Gas pedal is operational. I will p-clamp sheath to the firewall to keep it from being loose/interfering with my legs.
Edit: RichardSIA, I see what you are saying with the pull-arm. However, the pivot for this pedal is above the floor, and even putting the tab off the top instead of the front results in the cable following a decent arc. (I tried it with the pedal laid down on paper, first).
I may still be missing the benefit of having it on the topside instead of front, but for now the cable /pedal seem to move pretty freely through the whole range of motion,
Very hard to see in this pic. I pulled it off and tried to expand it for a better look with no luck.
If the pull arm starts at horizontal your initial movement will be vertical rotation that does not actually pull the cable forward very much.
You probably need at least a 45° as a starting point. I have no idea how many degrees of rotation you need for full travel.
A longer arm acts more quickly but will be stiffer under your foot.
Does not look to be a touring car so probably less issue than getting correct function.
Not sure of your longer term plans for the car, you may want to come back to this later when tight budget is less of an issue.
In reply to RichardSIA :
Tight budget and time. It does work for now. Long term I expect I'll sell the car and work on my other projects :)

Also, here's the pedal box now:


RoddyMac17 said:
1. I see there are different tie rod ends for early/late cars. Is the tie rod change linked to the steering rack (where I would order for the older version), or for the steering arms (where I would order newer to match my disc brake parts)?
The rack is different and the steering arms are different. The early rack is BMC the late is Triumph based. The early rack has 5/8" UNF threads for the tie rods, late is 1/2" UNF, plus the taper sizes are different. Luckily, the steering arms can be swapped, the early arms were used with both drum and disc brakes (part number BTA 648 and 649). Any idea what year your disc brake set up came from?
Going to pop back to this point - the Disc Brake set-up is from a car with the 7/16" tie rod ends, and that rack is CRUSTY. So, I may just need to compare arms and see if I can still use the original steering arms with the disc brake front end. What's on the car now is the 5/8" thread.
Otherwise it would need a new/rebuilt rack before being something I'd want to run (no budget for new inner tie rods).
Um, OK, but you may want to bring an extra cable in case that one frays.
I still see the exact issue I originally raised.
As you depress the pedal the end of the cable will be forced to a steep angle, rubbing on the top of the end of the sleeve.
A frayed cable may become sticky or break. Break would be better than stuck open.
Frankly not sure Tech will approve this, I would not.
Everything becomes more stressed in actual use than just a quick check in the garage.
Maybe if the outer sleeve could pivot at the attachment it would help.
In reply to RichardSIA :
I've got it improved from where it was, working to get it all back together now. I'll share pics
In reply to MuSTANK :
In this case the pedal is exactly in line with the carb, so a traditional gas pedal pulls the wrong way.
Doesn't look very different but gas pedal is done, and Patrick rewired all my stuff to be a little cleaner.
I'm printing off GRMs harness mounting guide tonight in hopes I can get my 2 lap belts and maybe anti-sub in tomorrow.

That looks MUCH more reasonable and trustworthy. 
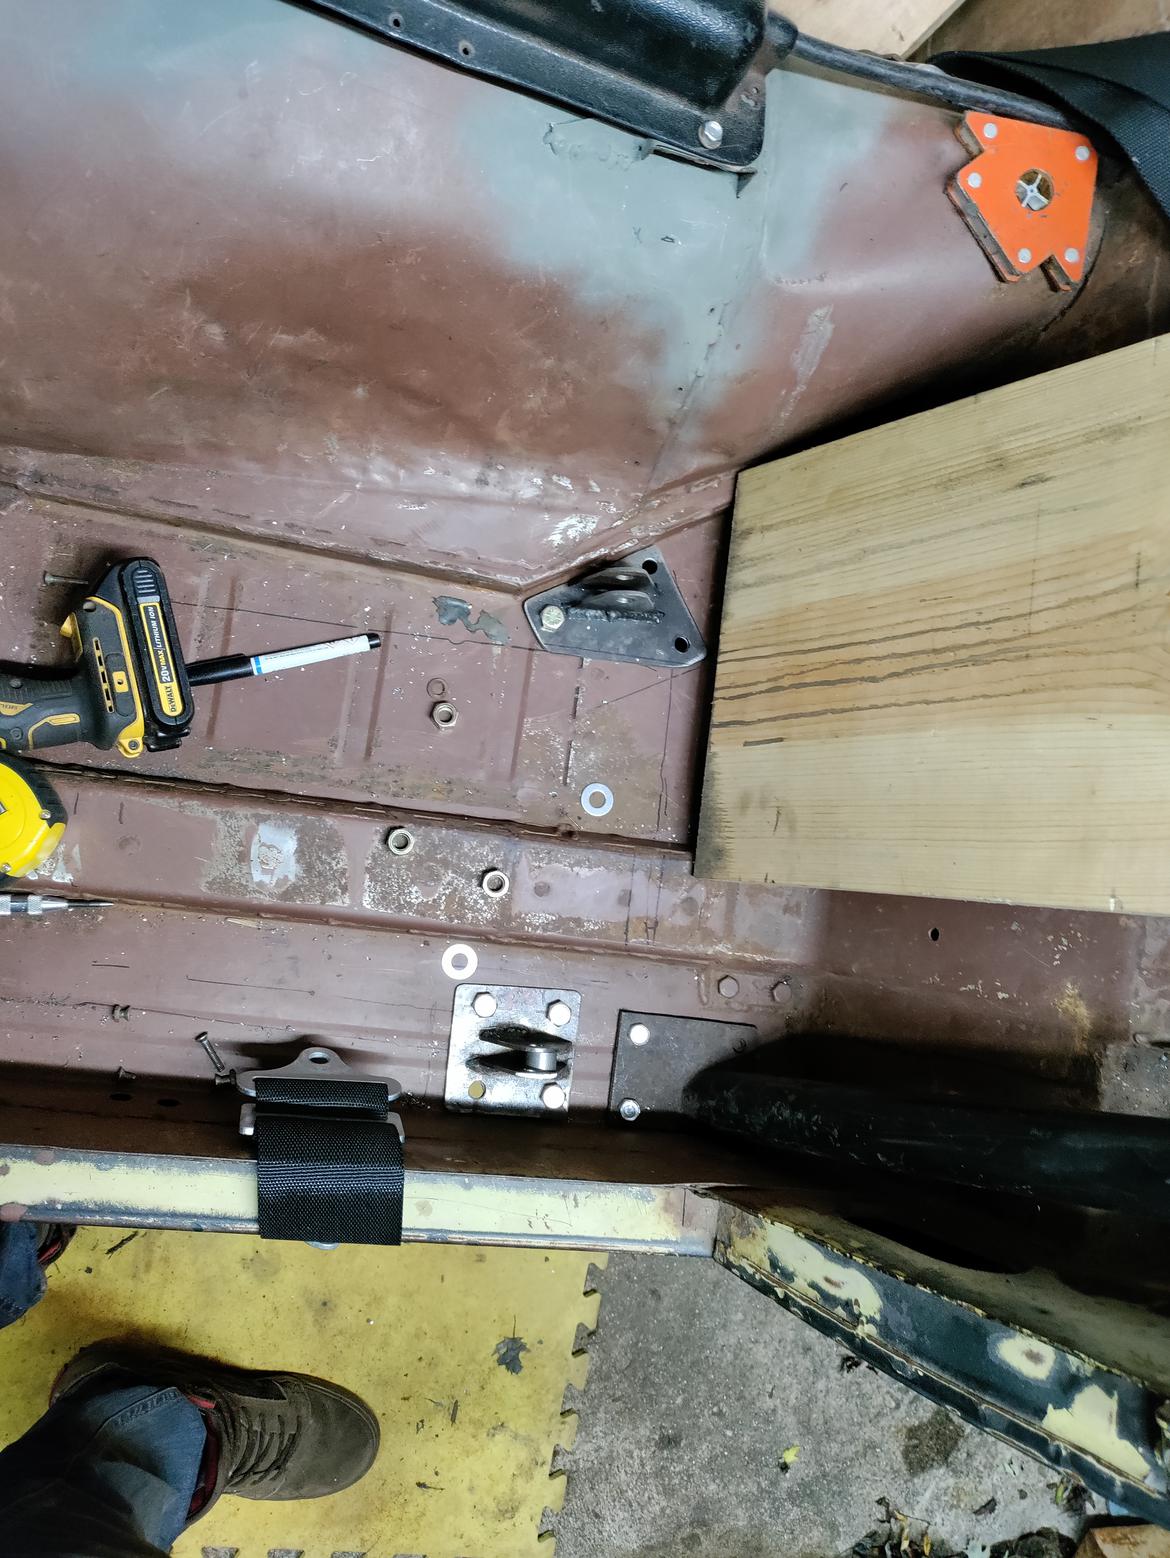
Switchimg gears - with the pedals positioned and my seating position roughed in to clear the bar, I need to get harnessed mounted. I cut a big-ish piece of 1/8" and some tabs, filed them to equal shape, and drilled 1/2" hole in them. I'll likely put a heavy gauge sleeve in between as well. I need to actually calculate the angles off horizontal to be sure I fall within "spec," but I think this is going to be a good location for this hip belt.

The opposite hip will be tricky to place, as the same spot fore-aft in car falls about where the roll bar bolts are. I may try to pick up on 2 of those and use 2 others to hold this down. Both sides will get matching plates on the back side and likely 4, 3/8" or 7/16" mounting bolts to sandwich. Seems like overkill, but I've never done this before and that seems like the right kind of kill for this car.
classicJackets (FS) said:
The opposite hip will be tricky to place, as the same spot fore-aft in car falls about where the roll bar bolts are. I may try to pick up on 2 of those and use 2 others to hold this down. Both sides will get matching plates on the back side and likely 4, 3/8" or 7/16" mounting bolts to sandwich. Seems like overkill, but I've never done this before and that seems like the right kind of kill for this car.
overkill better than classicjacketskill.
Enlarging one rollbar bolt to lap belt size and adding to the area of the base plate is probably a satisfactory solution to that problem.
Turns out left hip will be easier to get than right due to shape of the cabin.
It's easy enough to get a 65° pull back on each side, but it places my "uprights" right at the edge of the plate on right hip. Probably not a big deal, but not something I love to see.
This location is about right to my hips and keeps my vertical angle closer to 15° than the limit of 25-30.
The foam is pretty much exactly as wide as my butt, and the 2 lines are the 2 "center lines of my body I can comfortably sit at.

Also - is there any reason the harness mount can't be contained by the washer/nut end of the bolt, instead of the head? Would make loading a bolt/harness in car much easier..
Edit:
Mocked up - both belts pass directly over my front hip bones and angle back nicely. I'll try to get my wife to get another picture tomorrow, but the Angles should be good!

In reply to classicJackets (FS) :
Okay, following good things - here's a new disaster.
I ordered a new Master Cylinder. The first one that showed up was an MGB one, and was my mistake. Then I ordered this one, for a later midget - which doesn't fit in any sense of the word. The other MC was not original to the car and had 1" bore to factory 3/4", and had lots of travel and very little effort/output. I expected this to be my ticket to dual circuit brakes, now I'm not sure where I'm at..

Edit: okay, I'm breathing again.
The good news is it looks like the pushrod is original, and the side-mounting locations for the original Bugeye MC are still there in the picture I put above. So, disaster still in that I'll now be plumbing brakes at the last minute, but if I play it right it may not be so bad - shouldn't require any further pedal/pushrod changes.. at least the Bugeye MC is still available.
In reply to classicJackets (FS) :
Good news is that Replacement of the original master cylinder should be budget neutral.
Keep up the good work, this is going to be fun to watch at the Challenge.
In reply to Indy "Nub" Guy :
Very true - just have to be sure to get it in time!
Also - possible future for Riggamort??
https://bringatrailer.com/listing/1958-austin-healey-100-6-2/
Slightly reshaped both harness mount bases after looking at how over-built they were compared to any of the '"tabs" you can buy. They'll still be plenty strong, and I'll still bolt through the floor with 7/16" grade 8 hardware.

My wife and kid are with her family today and tomorrow so I'm trying to take advantage of the responsibility-free time in the garage to get as much as I can knocked out!
Harness plates bolt in, which is nice! Patrick got the Internally regulated alt. I bought hooked up and mounted (chop/weld the sketchy mount it came mounted upside down on), as well as wrapping up other wiring.
I bought a battery as well today, and plug welded on lower rad supports while we talked what could be done about rad hoses. Lots of talking, and lots of progress. It got late, so more to come tomorrow.


Lower and upper rollbar backing plates are cut, I need to finish drilling holes in one and add the holes to the wheel well and the cage will be ready to bolt in for good. Gas tank is attached.
Aside from cooling, its ready to fire and run. Aside from brakes (going to get some work today) and a seat back/harness bar, is ready to drive.
Patrick's been checking the brakes at each corner, which turned out to be a blessing - he noticed the drums couldn't sit flush against the wheel, as the flange on the wheel interferes. So I'll need to pick up 0.5" worth of spacers per side to clear everything. Happy to catch it now.

I also got the radiator lines figured a little better using scraps from Patrick's header build. I replaced a lower rubber line that had 2 plastic Inserts tying to the other 2 hoses. So, I'm down to 2 hoses and 1 metal line. The top hose needed about 2.5-3" extra, so I used another scrap and some rubber hose I had from the Courier(?) Or Merkur to bridge it.


Also, here's my wall of mounting plates in primer.


I noticed the center of the RR drum was all kinda of not flat, and didn't see anything out of place with the hub, so I laid the drum into the wheel and it was pretty obvious that there was some inappropriate touching going on. Nipple marks on drum face:

and about 3/8" gap between intended mounting surfaces:

any chance there's a wheel spacer laying around? LOL wouldn't you know it, the car came with *one* 3/4" spacer. So I put it in place and saw the next challenge:

yeah, how the heck are we supposed to line all that up to drive the shouldered lug nuts?
Fortunately I'm wicked clever, so I grabbed the crusty old 7/16" fuel hose from the scrap pile and cut it into Wheel Hub Alignment Tool (WHAT?) lengths:

3 pieces of hose center up the spacer, then it's a simple matter of slipping the wheel in place, running the shouldered lug nuts onto the other two studs, then replacing the hoses one by one with lug nuts. Worked a treat!

Doug called around and found 1/2" spacers locally, so he'll button that up tomorrow. And I moved on to inspecting the front drum brake assemblies.
Any concern about V8 torque and wire wheels? What's the bolt pattern?
In reply to Stampie :
5x4.75, and I wasn't concerned but not sure if I'm supposed to be? Lol.
I am bringing my spare (free) 14x6 Pontiac wheels that also fit, so if something fails or is deemed too sketchy I'll have some form of backup.


