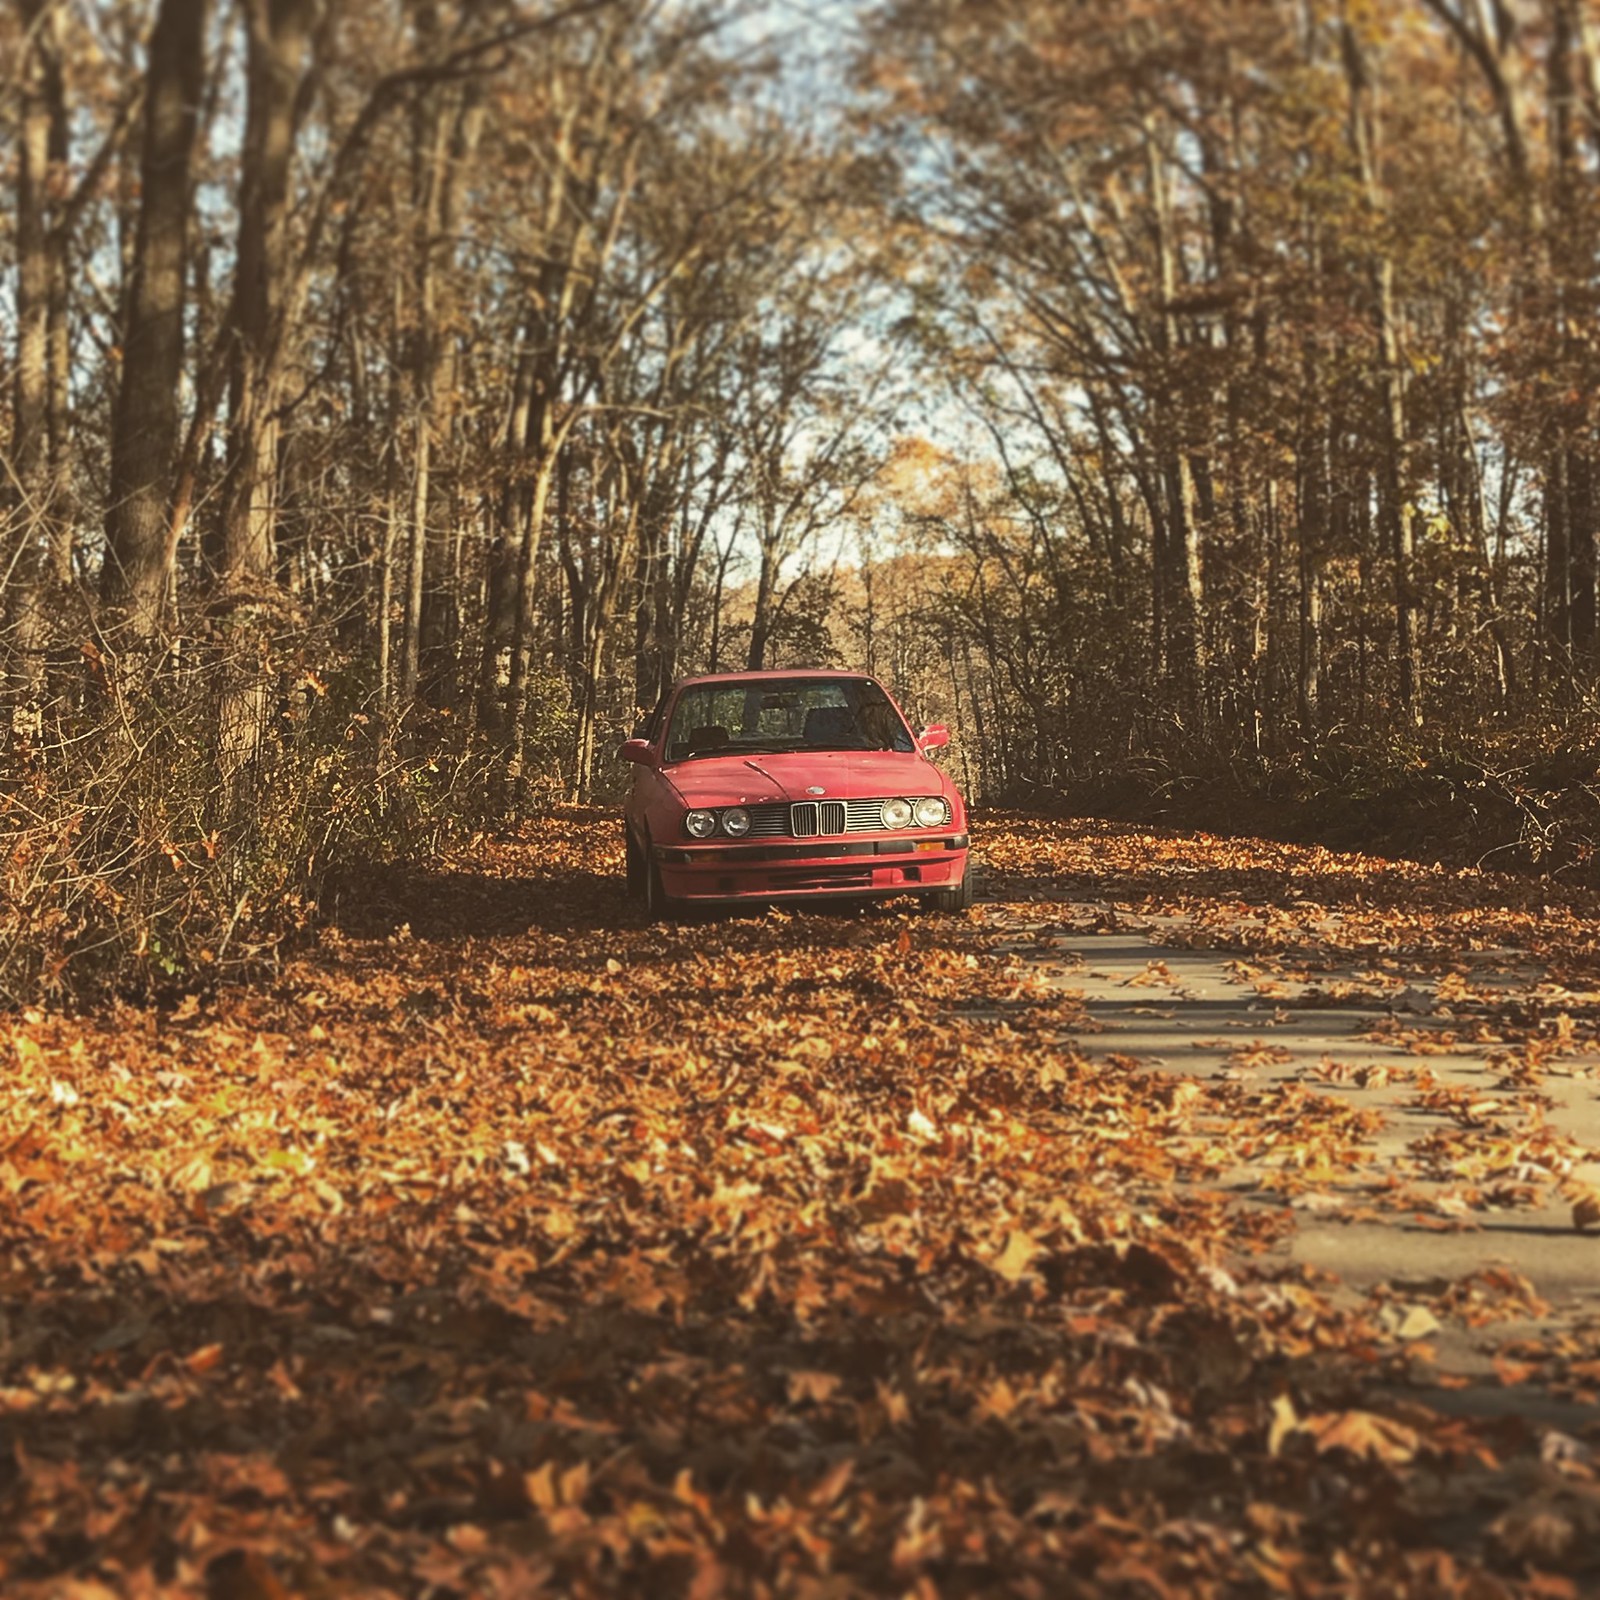
AxeHealey said:
In reply to captainawesome :
Yeah - just like Adam these were issues on my E28 as well. I didn't with the E21 but the Healey is getting POR-15 all over. Those other floor repairs were definitely done with a stick welder and with galvanized. Same thing with the rockers they put in...
Right on about the weight loss, I'm planning to go dash-less and heater-less too. I've only had issues with fogging once when it was pouring rain and 50 degrees. I'm going to bet it's not going to happen very often. I've got a little hot rod heater sitting around if you want it. Pretty sure it's never been used although it's not fresh off the shelf.
I may be interested in the heater if it's not too heavy. The one I was eyeballing was at JEGS and weights about 9 pounds, which still sounds like more than I want to have. The windshield heater/defrosters I found cost around $100 but are fairly simple and weigh next to nothing. Bimmerworld sells a kit, but there are other companies with the same product.
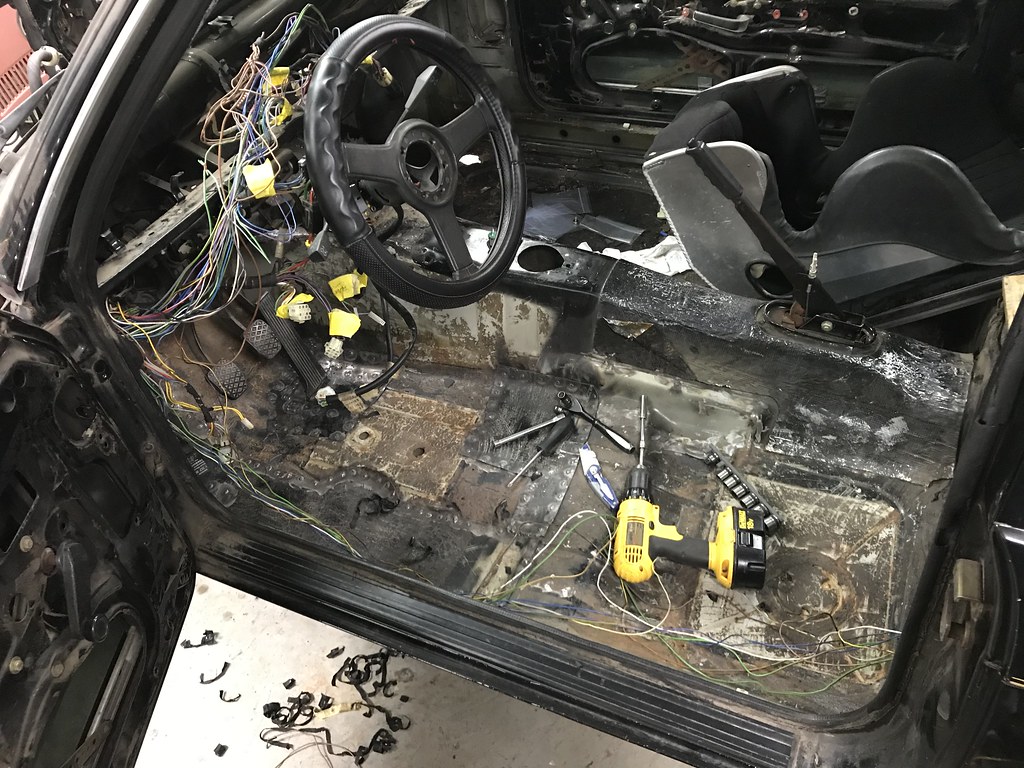
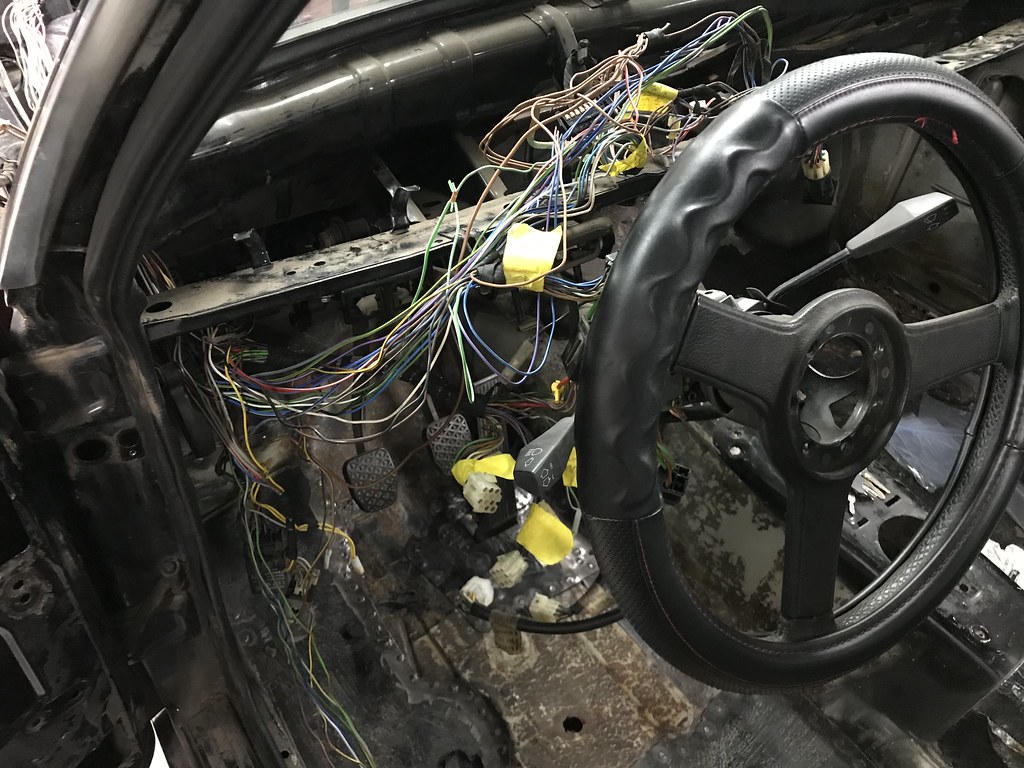
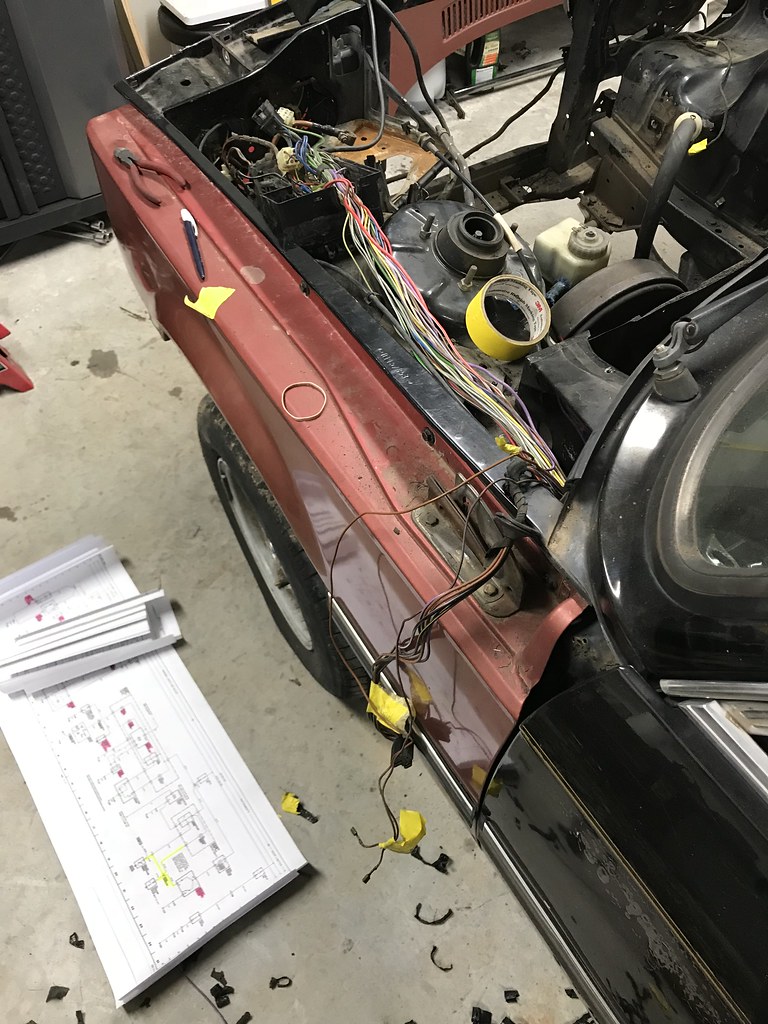
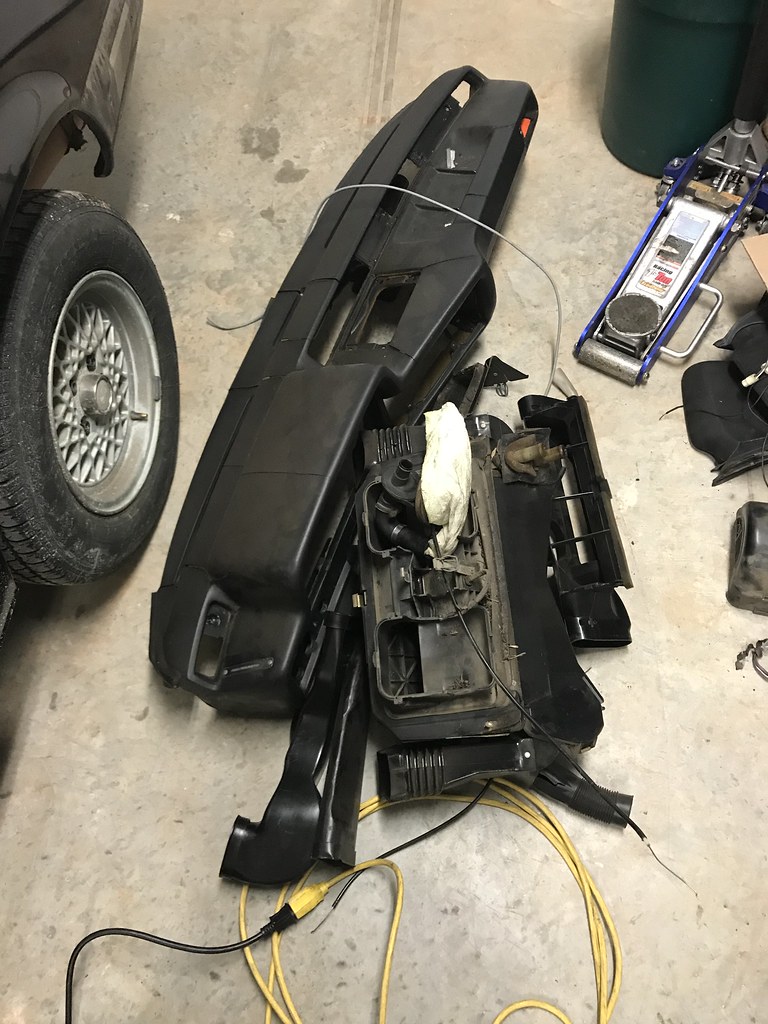
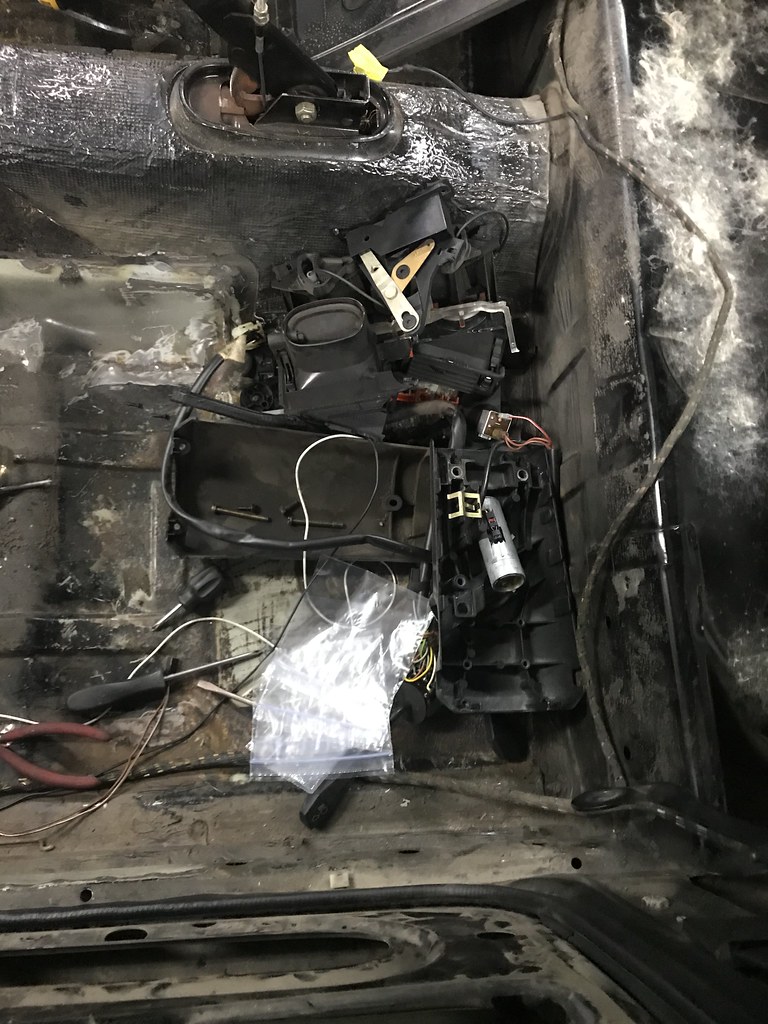
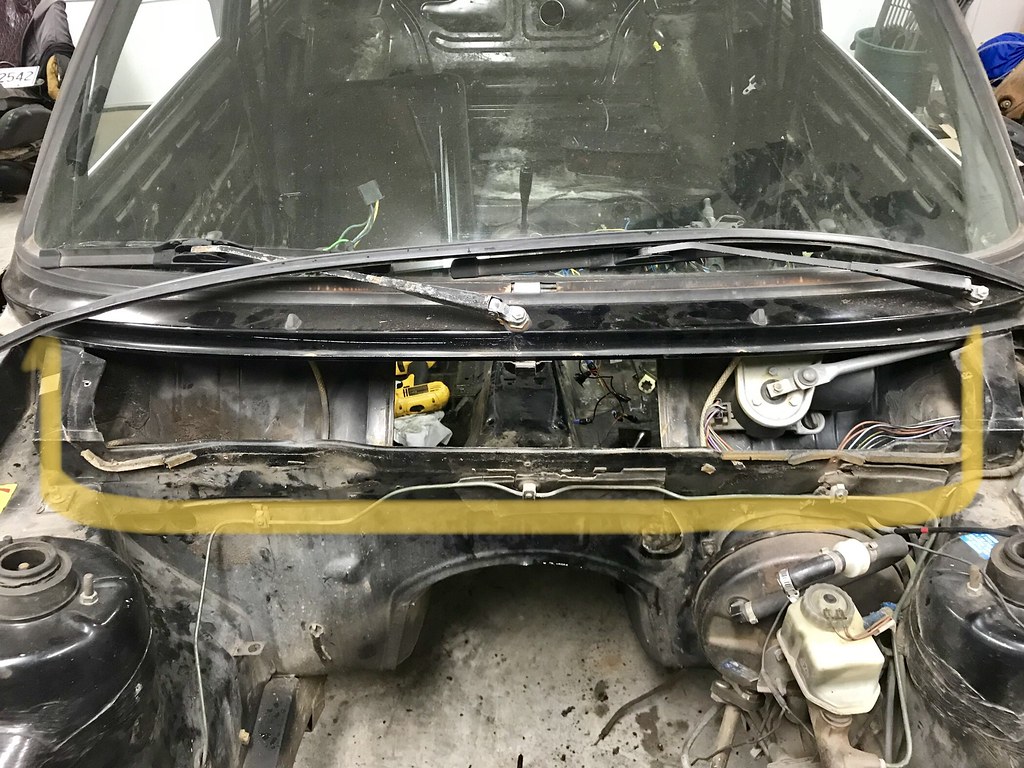
I didn't have much time to tinker last night, but I've had a hankering for dash removal. Half of the trim surrounding any buttons or levers are just pure crap, falling apart, and all mounting tabs are nonexistent. There were a couple surprises. The dash felt heavier than I expected, and the heater assembly seemed lighter. I didn't get a chance to weigh it all, but even in the steering column there was some weight shed. I'm guessing about 15-20 lbs including the engine bay cover. All the surrounding metal at the firewall creating the blower housing will be trimmed and a lightweight blanking plate will seal up the big hole. I'm thinking a good chunk of the wires will be deleted when I get to that stage as well.
 Untitled by hatchethairy, on Flickr
 Untitled by hatchethairy, on Flickr
 Untitled by hatchethairy, on Flickr
 Untitled by hatchethairy, on Flickr
 Untitled by hatchethairy, on Flickr
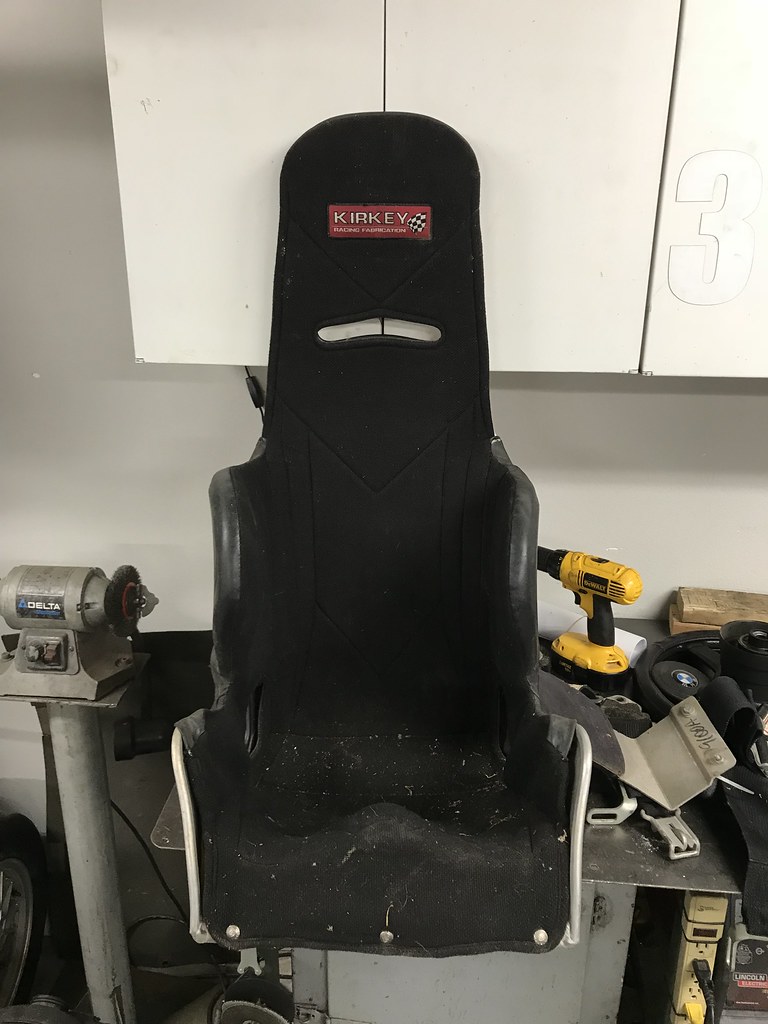
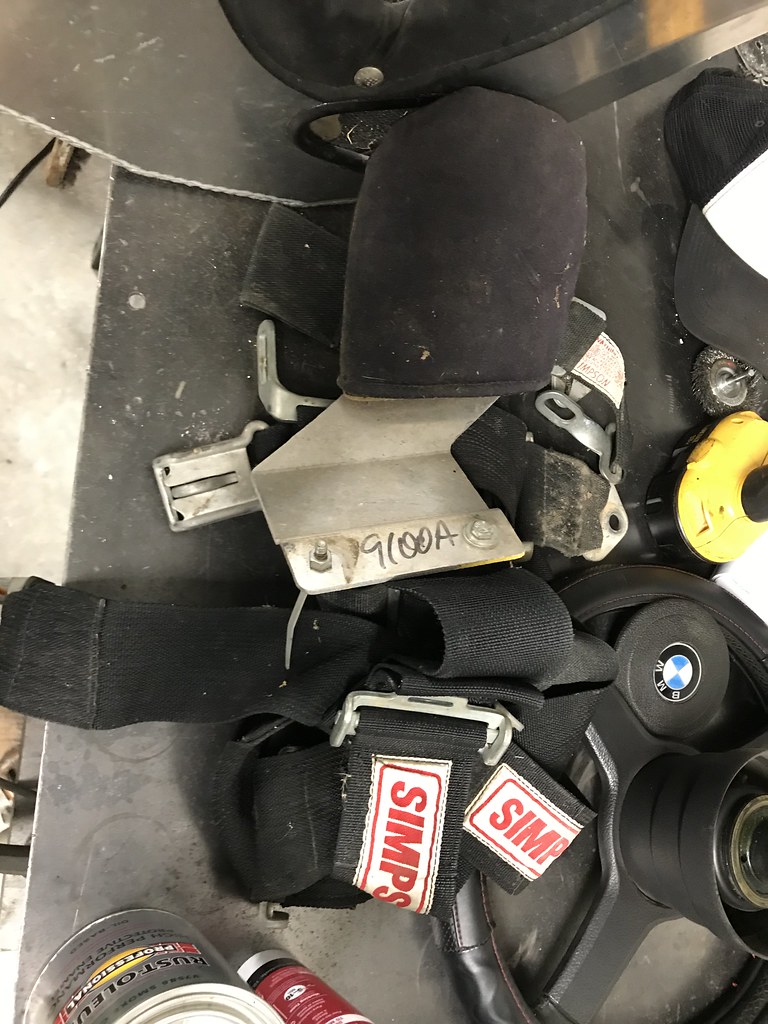
I stumbled upon a Kirkey seat last night with a harness for $40, and raced over to claim it. After a conversation about my plans for it, he offered to knock $20 off the price to help out. Gotta love that. So for $20 I got a ~15" Kirkey with I think 15 degree layback and an of out of date Simpson 5 point harness. Doubt I'll use the harness, but nothing wrong with more for less. Since it was originally for circle track use, he also had a head bracket that bolts on to the right side. I fit in nice and snug, which is a big relief with such a small seat width. I'll keep my eyes peeled for a larger seat for passenger, but for now I've got the most important one out of the way.
 Untitled by hatchethairy, on Flickr
 Untitled by hatchethairy, on Flickr
Nice score! I'm over here drooling at your weight-loss progress but it's going to be a long time before I'm back at it with the E21.
Awesome build! Do you want to be listed with many other challenge car builds? If so, add a link to this build thread here:
https://grassrootsmotorsports.com/forum/grm/please-link-your-2000-challenge-build-here/144111/page1/
AxeHealey said:
Nice score! I'm over here drooling at your weight-loss progress but it's going to be a long time before I'm back at it with the E21.
I'm hoping all of the weight loss actually adds up like I want it to. Trying to not get my hopes up, but I think getting to 1900 without gutting doors is my current goal. The guy I bought the seat from has a set of scales and offered to let me drop by to check and adjust corner weight. It's a bit of distance to get there, so I'm hoping to find someone a little closer to use theirs if possible.
Robbie said:
Awesome build! Do you want to be listed with many other challenge car builds? If so, add a link to this build thread here:
https://grassrootsmotorsports.com/forum/grm/please-link-your-2000-challenge-build-here/144111/page1/
Got it added! That's a great idea, I'll be digging through quite a few of those that I hadn't seen before.
In reply to captainawesome :
Great deal on that Kirkey! We have $24 in ours and we didn't even get a seat cover.
Stampie said:
In reply to captainawesome :
Great deal on that Kirkey! We have $24 in ours and we didn't even get a seat cover.
Agreed. I'm still surprised at how many people around here know about the Challenge and are willing to help out on price. I think the button that snaps by the left leg is torn or pulled from the cover, but overall looks like it will clean up nice. Still need to weigh it, but I'm pretty sure they are reported to be only 13 lbs.
Had a chance to weigh the heater - let me first say though that my scale kind of sucks.
Good sign - it doesn't pick up weight under 10lbs if it's on there by itself. So it's definitely under 10. With me holding the heater and then stepping off, weighing myself and repeating a number of times the weight difference was between 7.5-8 lbs. It's yours for whatever shipping costs if you want it.
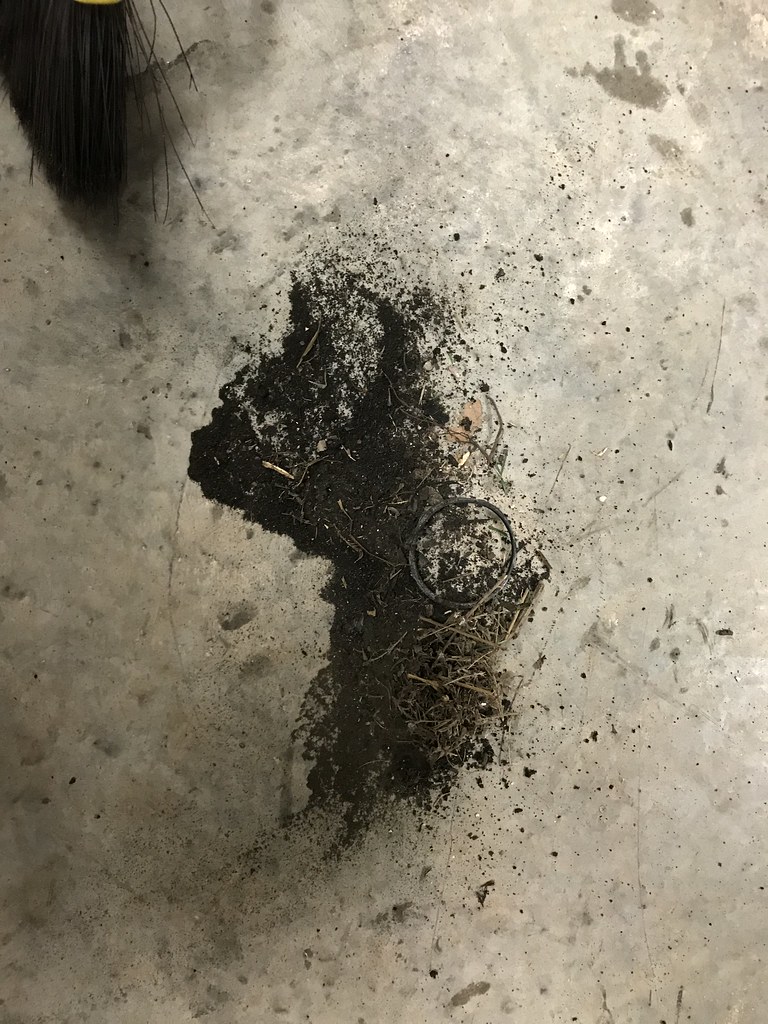
Weight-saving side note. I had some time this evening before picking up dinner and chopped out the crash bar in the driver's side door. 8 lbs! I was expecting 3, 5 at the most.
AxeHealey said:
Had a chance to weigh the heater - let me first say though that my scale kind of sucks.
Good sign - it doesn't pick up weight under 10lbs if it's on there by itself. So it's definitely under 10. With me holding the heater and then stepping off, weighing myself and repeating a number of times the weight difference was between 7.5-8 lbs. It's yours for whatever shipping costs if you want it.
Weight-saving side note. I had some time this evening before picking up dinner and chopped out the crash bar in the driver's side door. 8 lbs! I was expecting 3, 5 at the most.
I'll see here in a month or two if I'm still considering the heater. If you need to unload it before then, I totally understand.
That's awesome about the door bars. I eyeballed them this evening, and I think I can unbolt one side, and if I cut an access hole should be able to dremel the other side out. An extra 16 lbs would be well worth the effort.
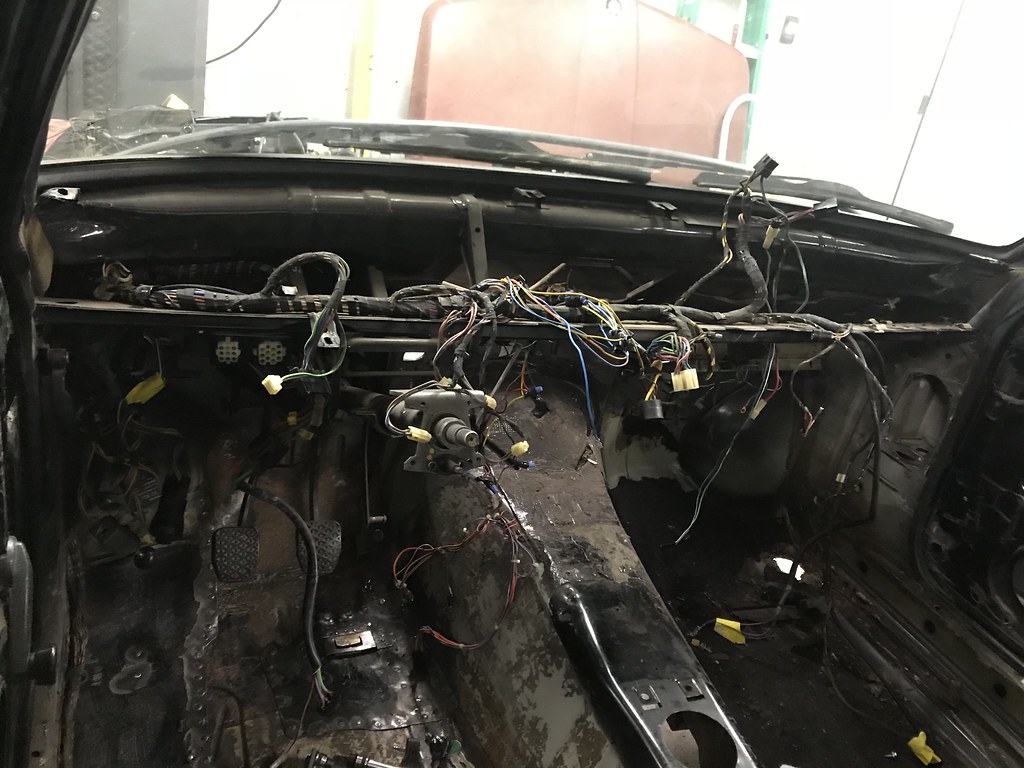
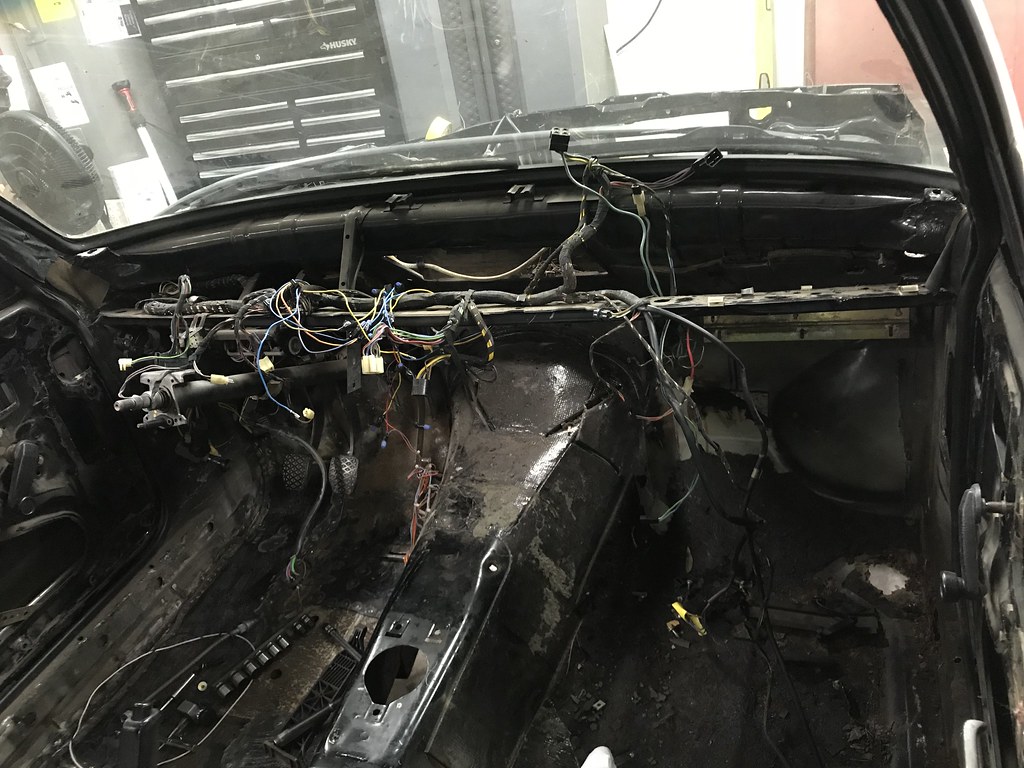
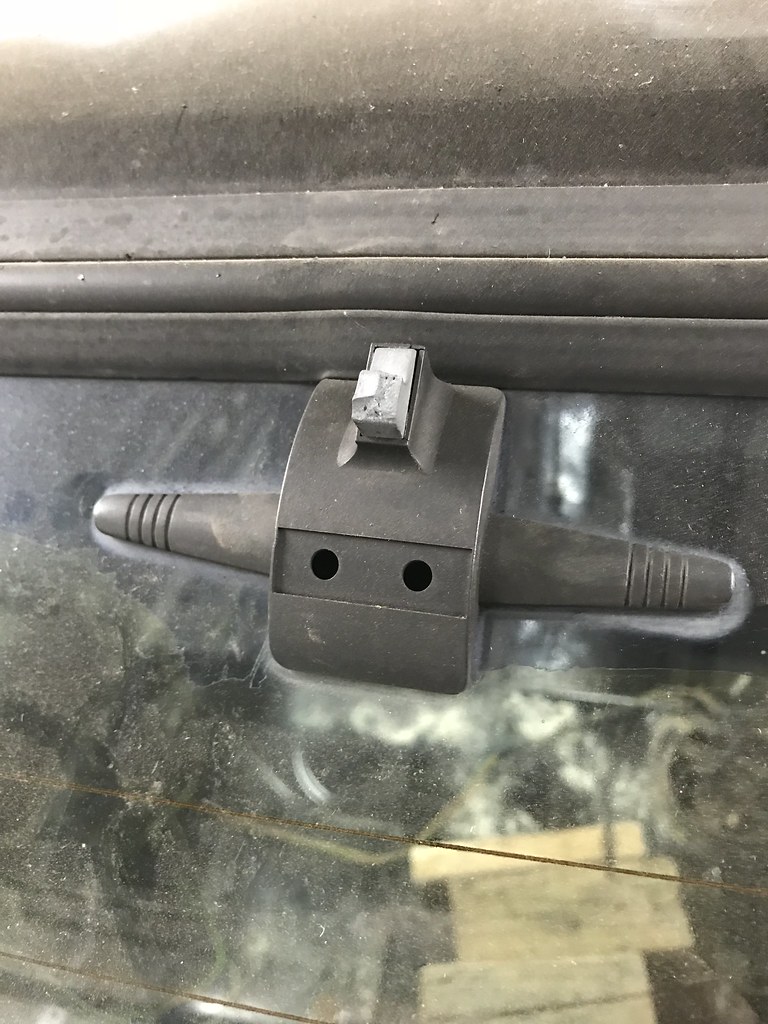
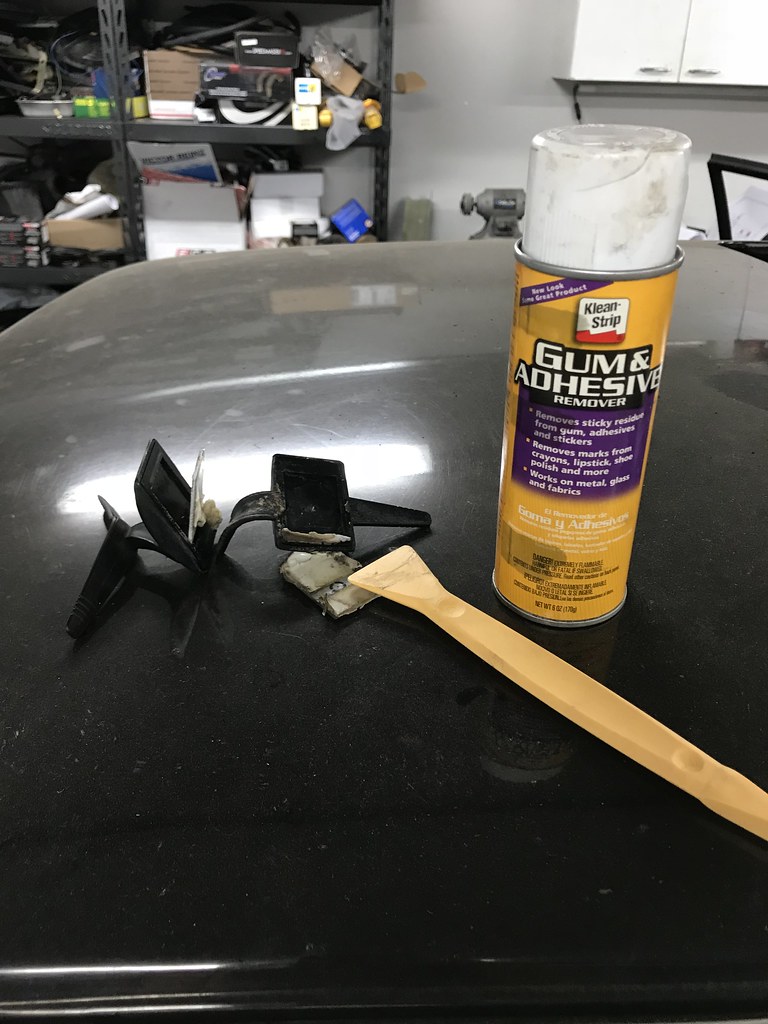
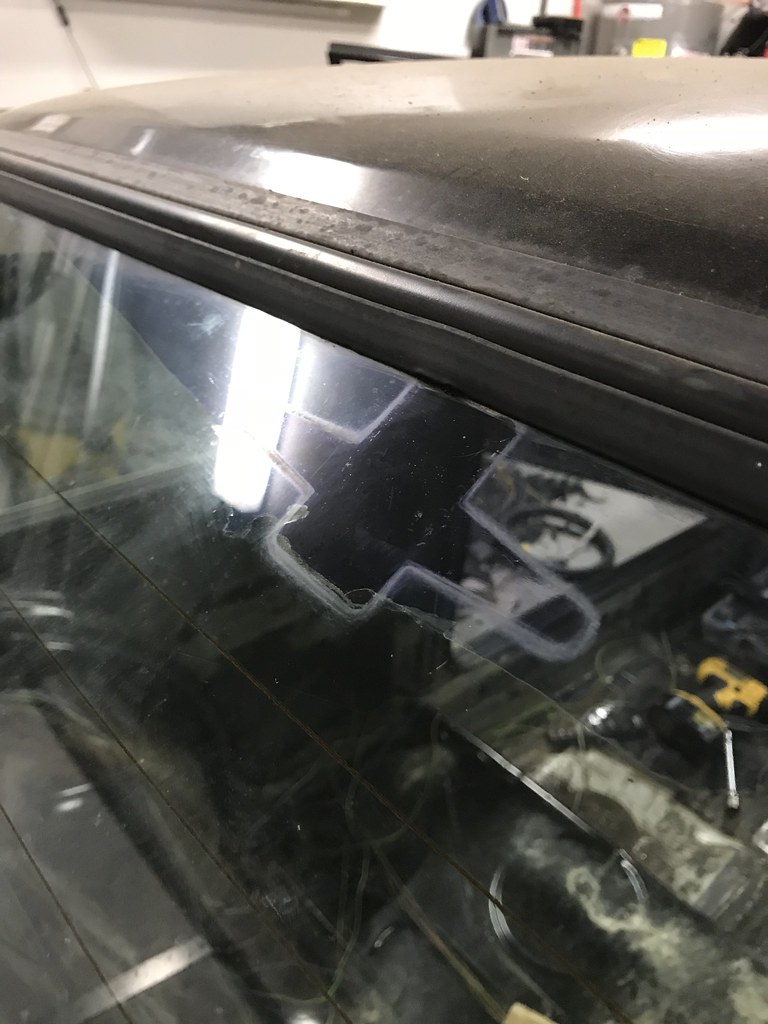
Last night I planned to get stuff done, but just kept staring at everything and getting discouraged at the overwhelming amount of work left to do. I finally snapped out of it and started stripping down more wires, trimming out the remains of the headliner, removing the rest of the front seat belts, and cutting away the degrading leather on the steering wheel. There's also this ugly alien spaceship thingy that's on the rear window that has bothered me. After some googles I found out it's a cell phone antenna and it's just glued to the glass. I sprayed some adhesive remover on it, put a heat gun to it, and scraped it off with a trim remover tool. It's the little things.
Almost forgot, I weighed the dash and hvac stuff minus the cluster. I am happy to report 44 lbs of weight savings.
 Untitled by hatchethairy, on Flickr
 Untitled by hatchethairy, on Flickr
 Untitled by hatchethairy, on Flickr
I have no plans to sell or use the heater so no rush.
As for the door bars...maybe BMW changed the design with the later cars but I don't think there was an option for me to unbolt one side but maybe I overlooked it. Also - it would be worth it but you'd go through about 5 Dremel discs a side.
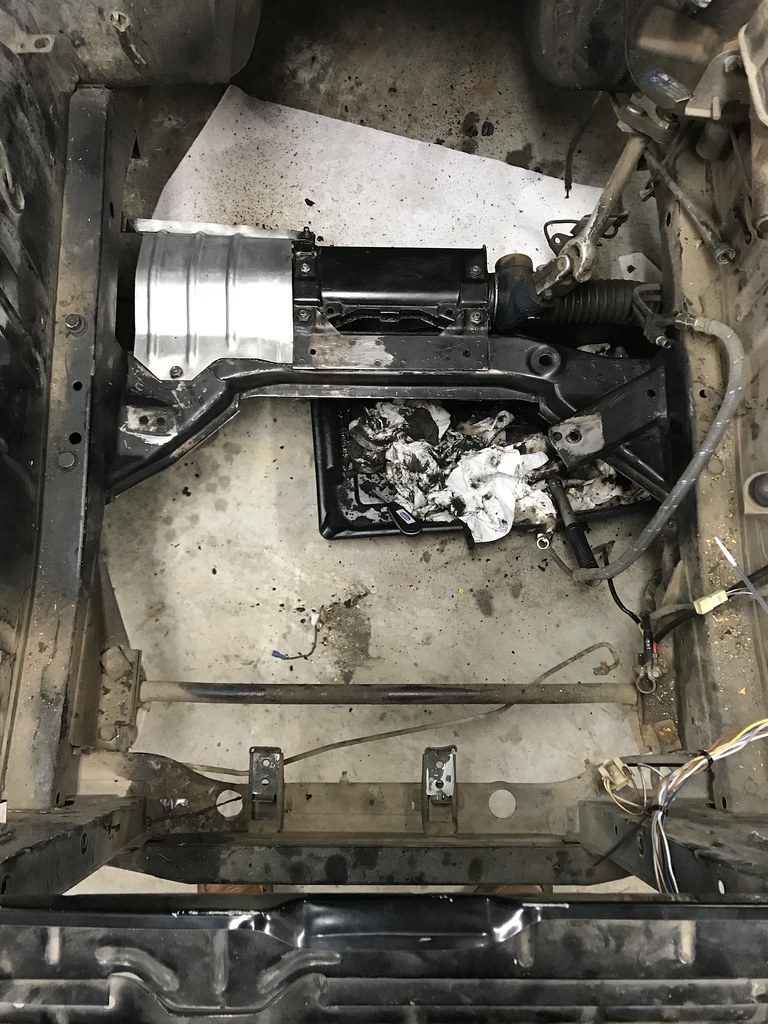
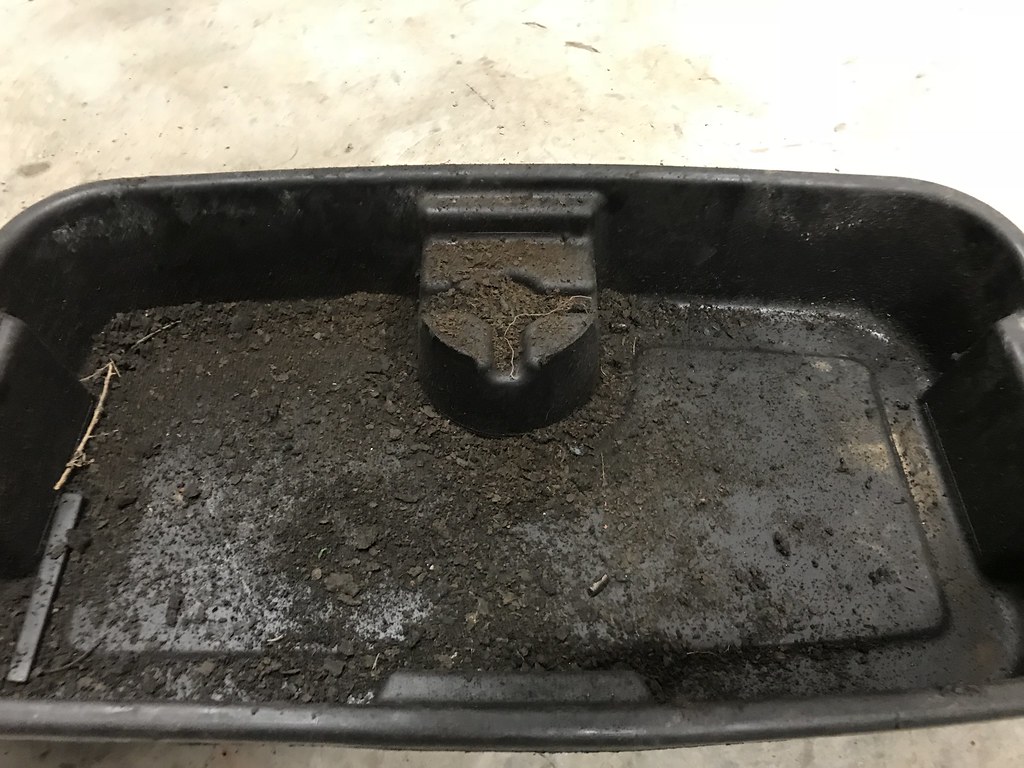
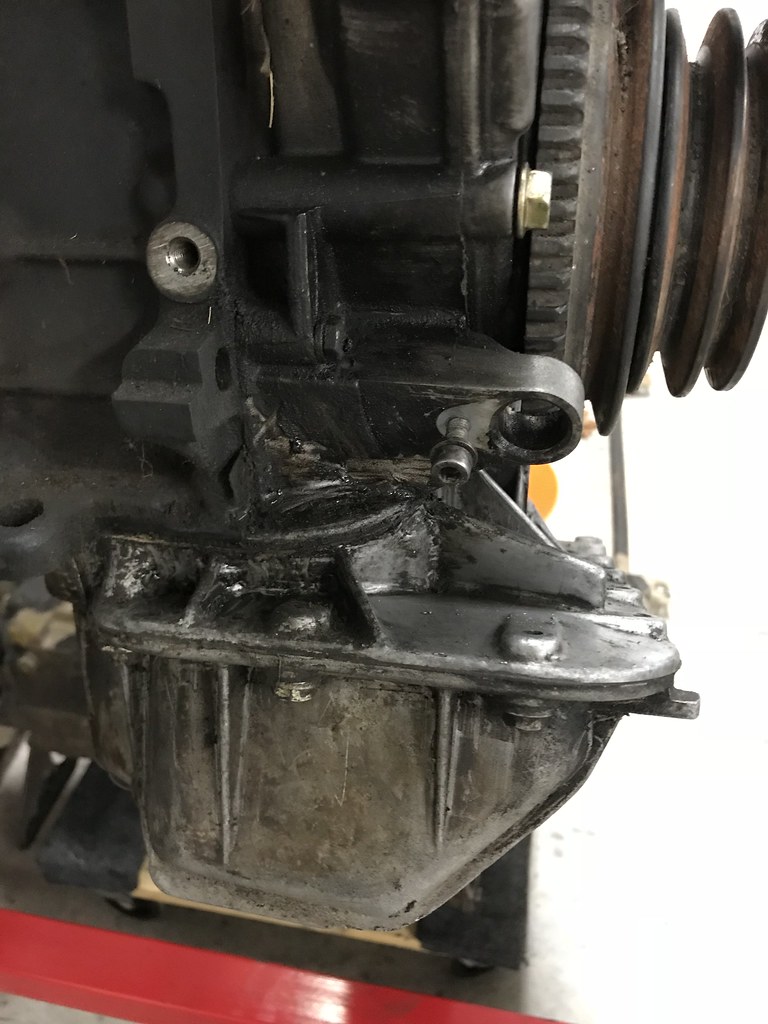
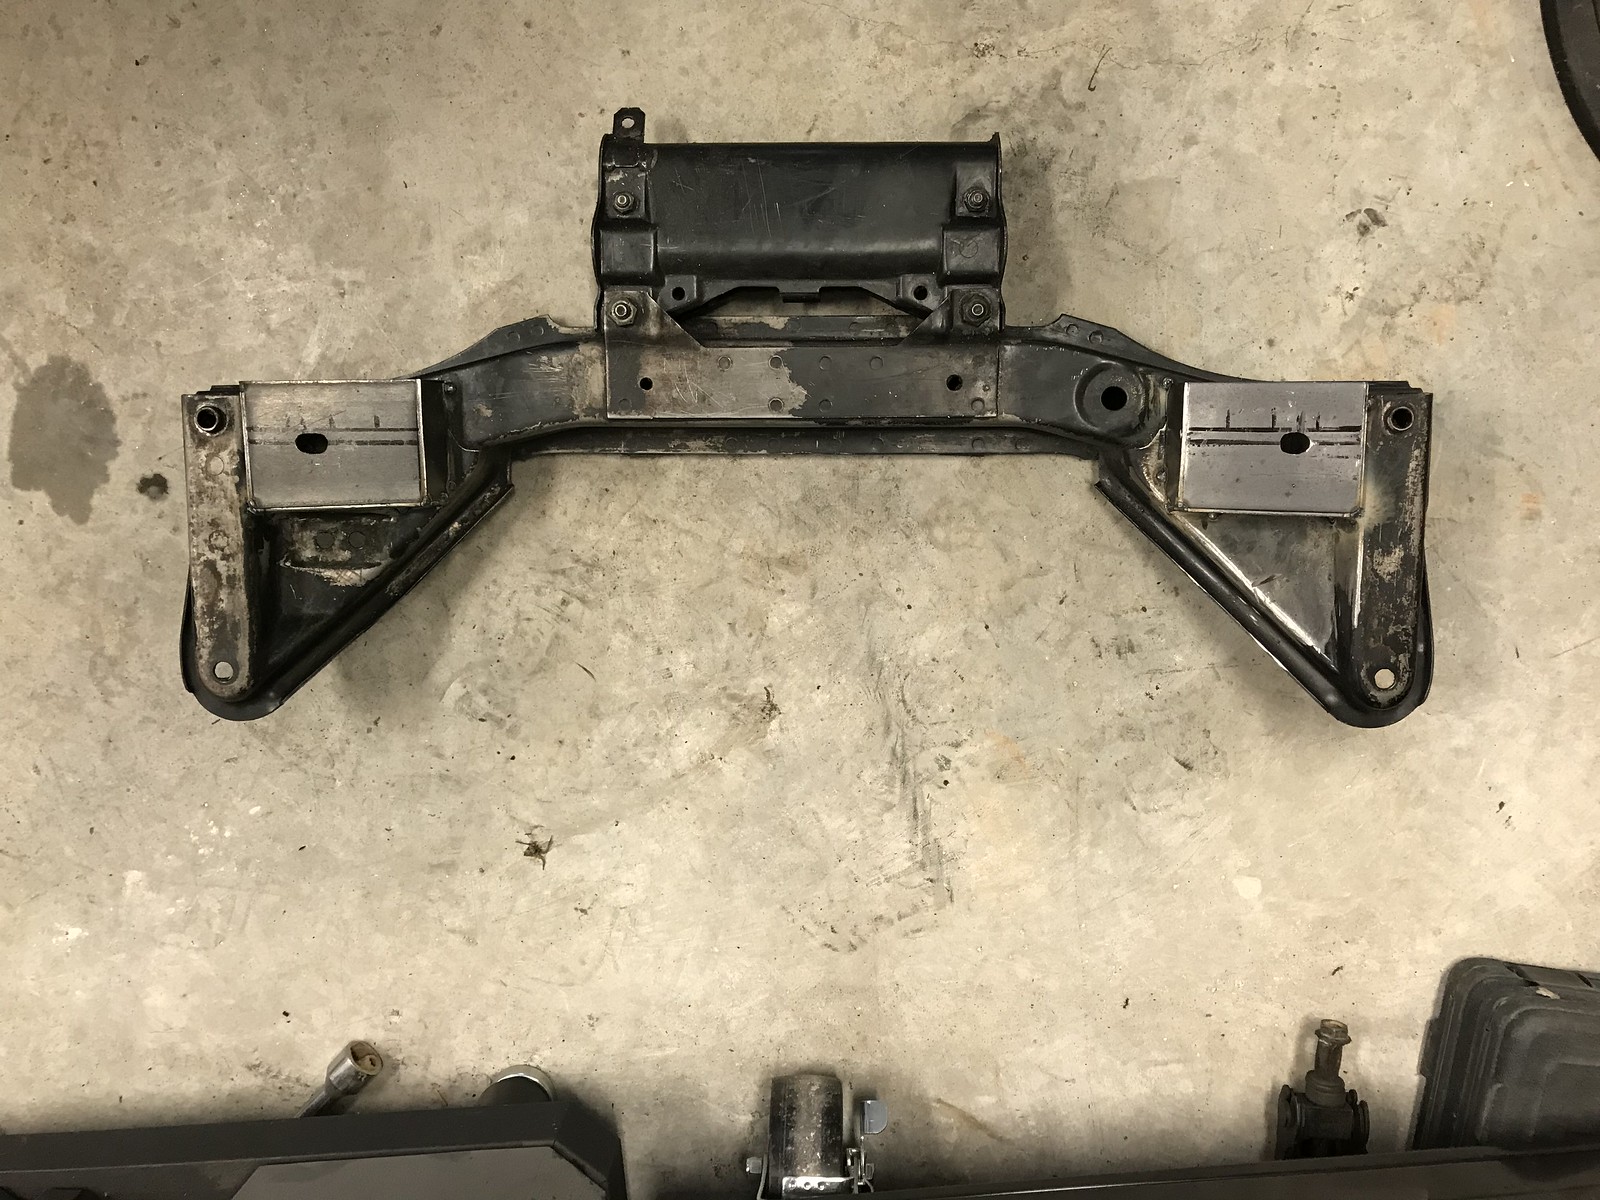
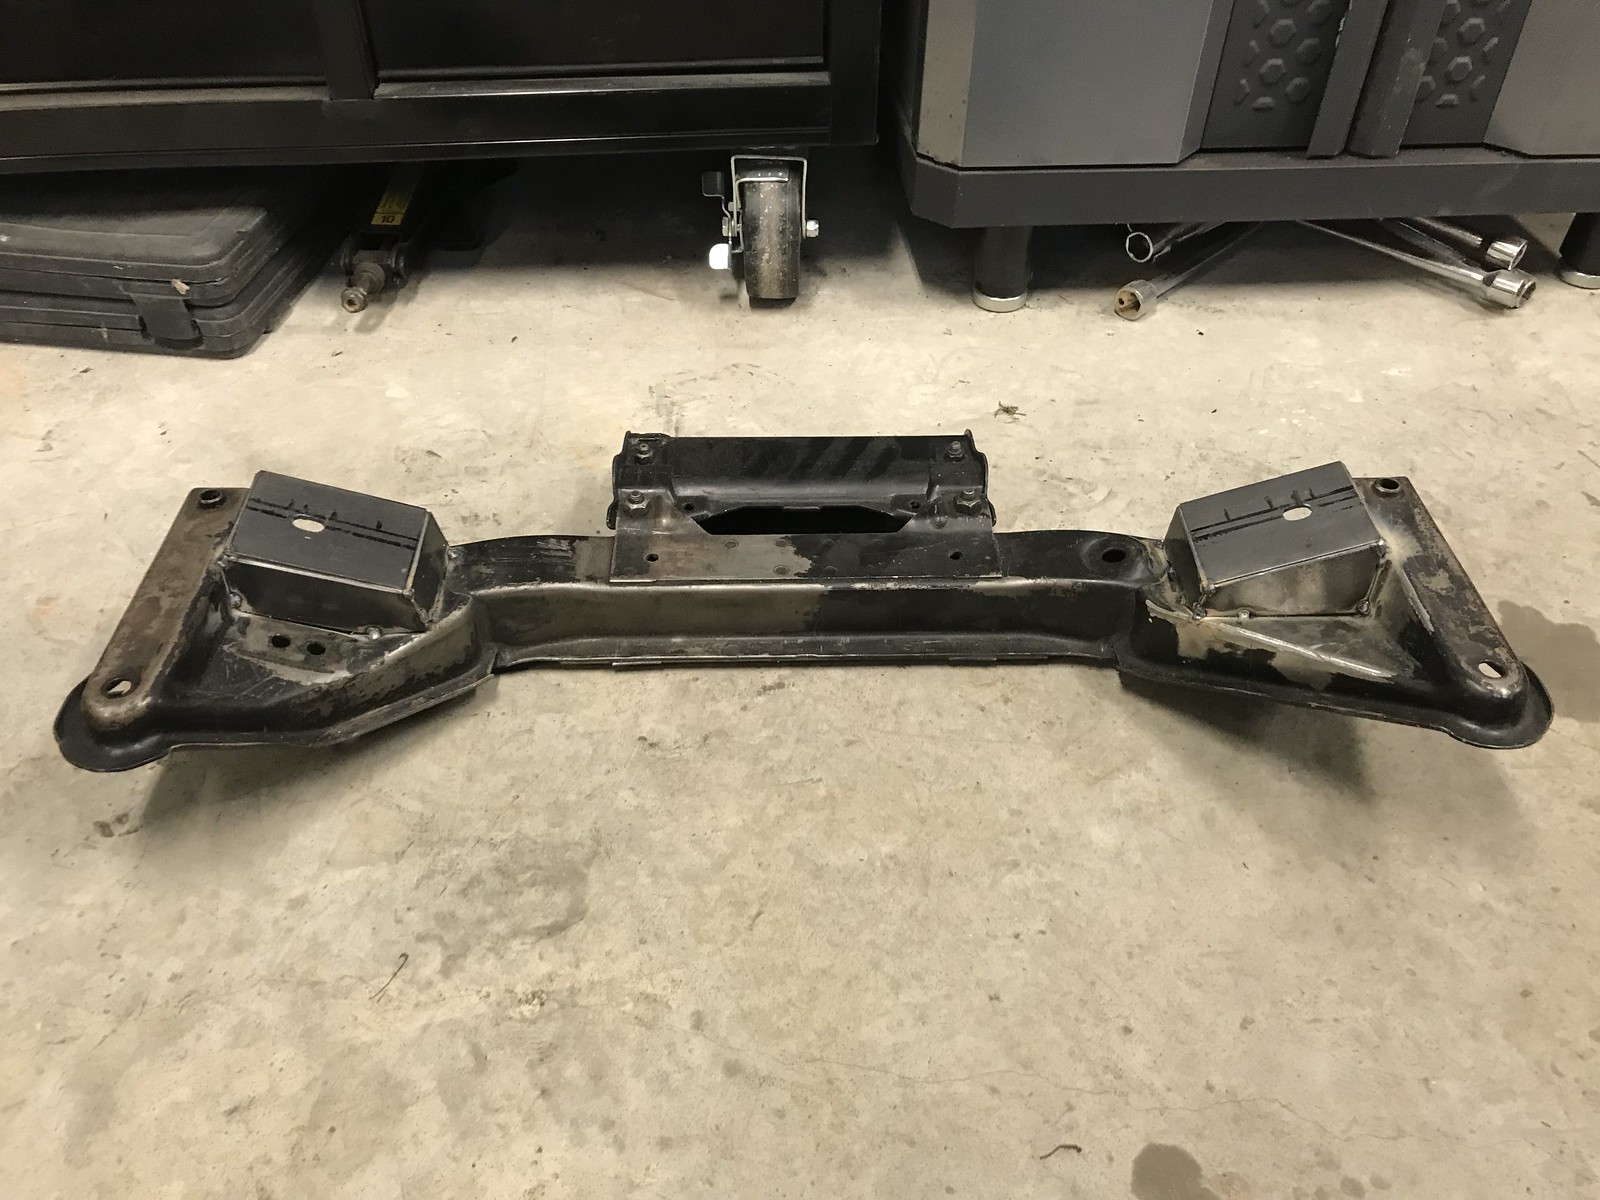
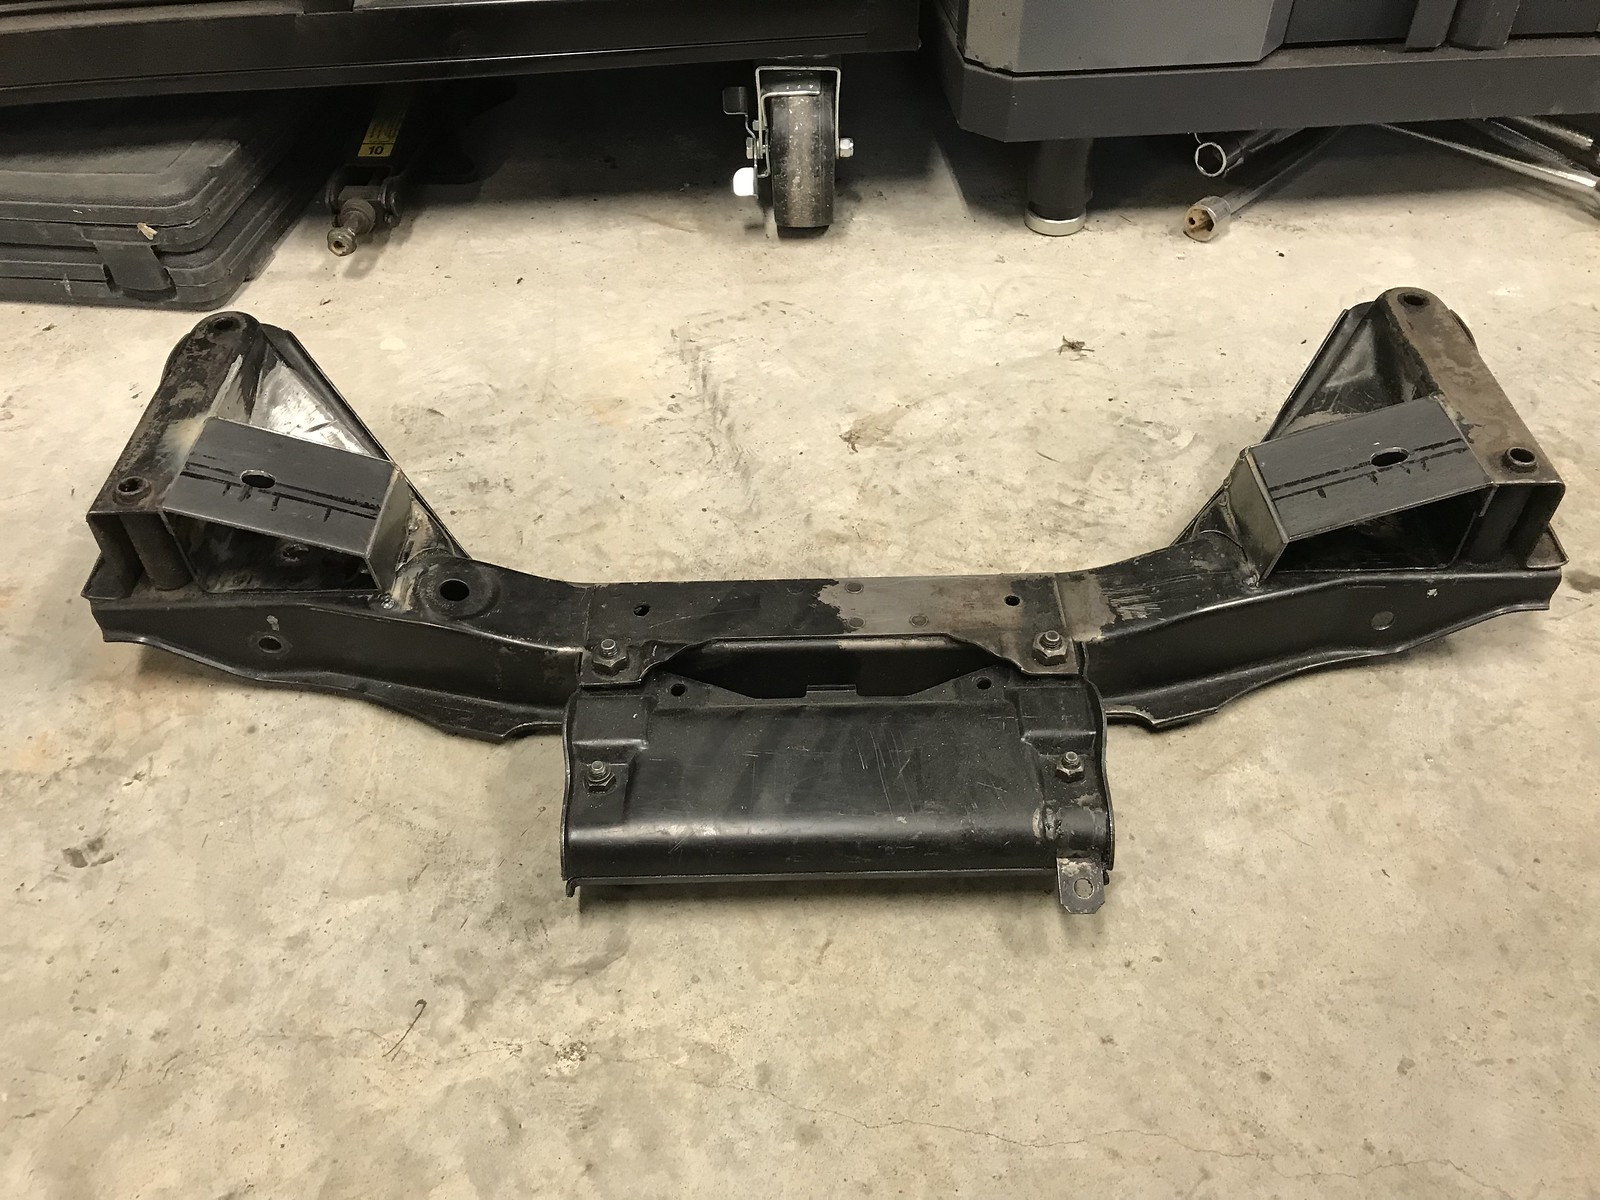
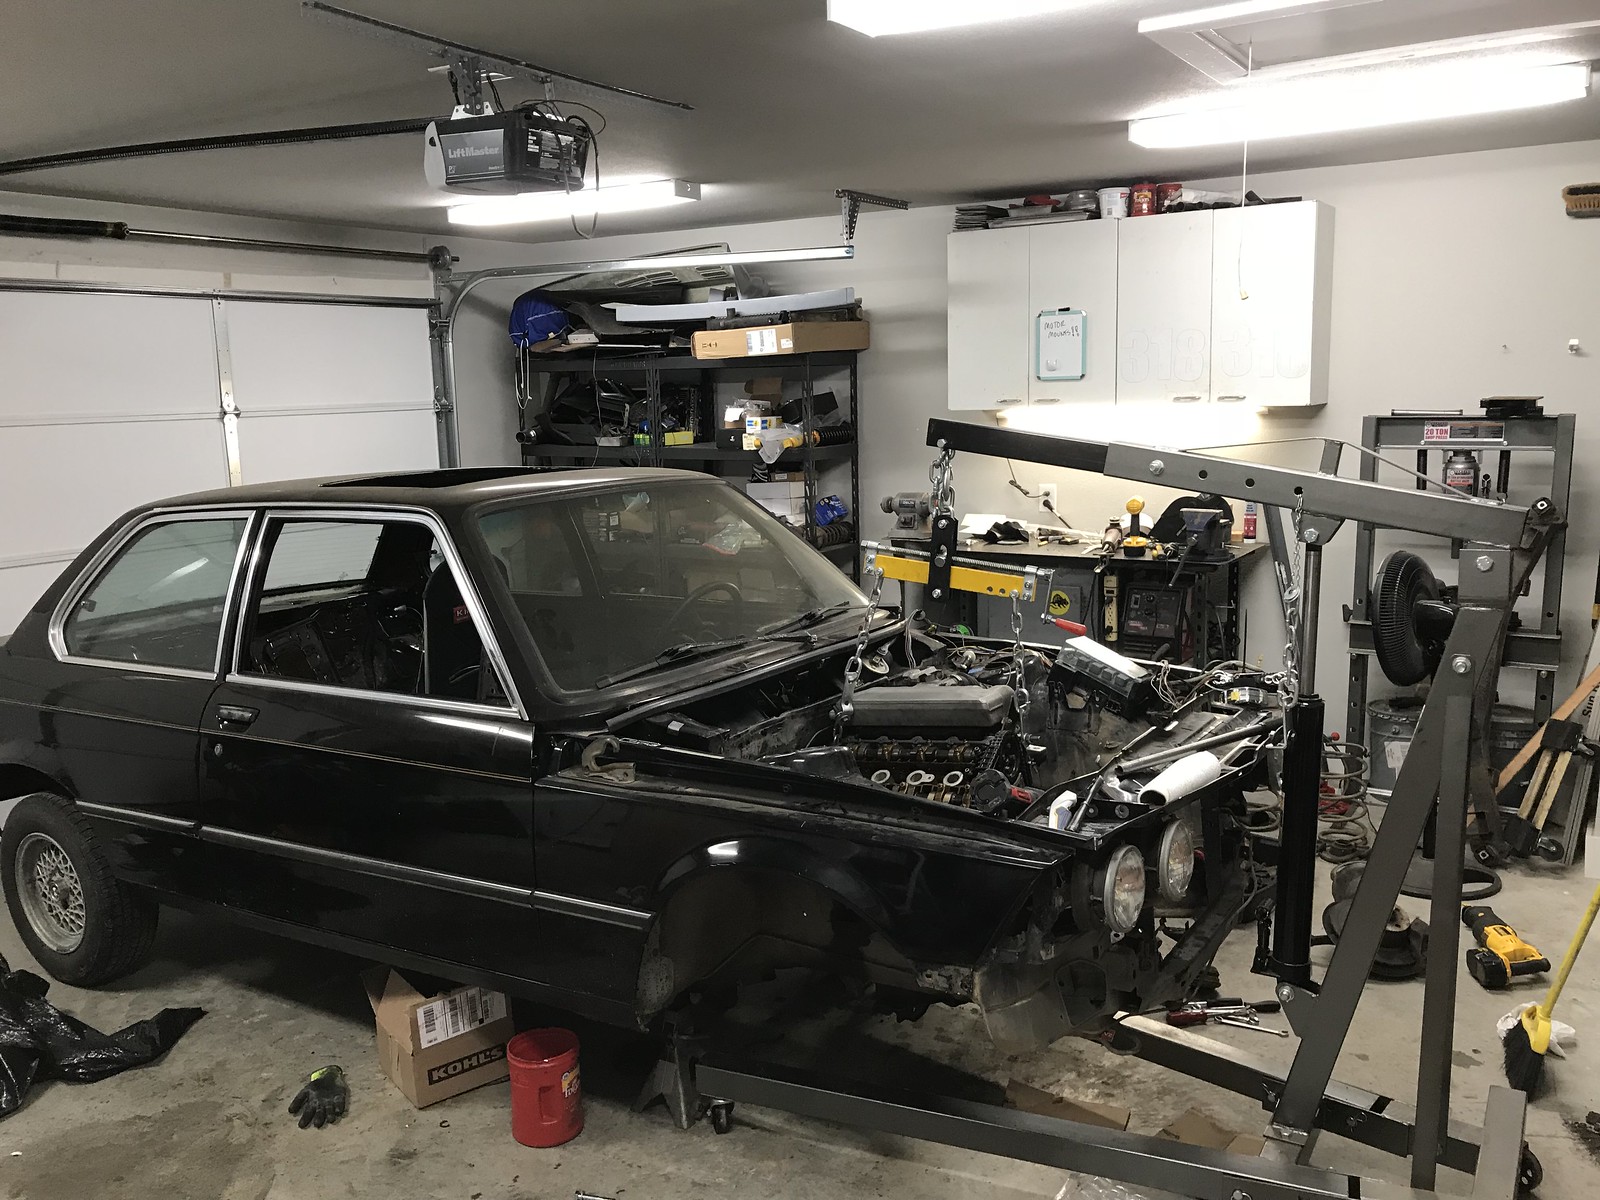
A few more days have passed, and I haven't managed to get much done other than degreasing the front subframe. That thing was FILTHY, and it's still not really clean yet. I'm off early today, so any spare time I have will be dedicated to dropping the front suspension and subframe to start figuring out motor mounts. If autocross is going to be cold and rainy on Sunday, I'll probably just dedicate that time to cut and weld the mounts. My plan for this month is to get the m42 situated in the engine bay, rad mounted, driveshaft center support bearing brackets made, and start engine harness wiring. All of this has been done by many others before me, and luckily all of them have posted plenty of information to help guide me with each step. Somewhere in there I'll probably do the front suspension stuff and brakes since it will all be out. We'll see though.
Another thing of note is the SCCA has an upcoming rule proposal to allow motor swaps like mine, so if it passes the car will then be legal for D Prepared. The weight penalty is a little higher, so I'll probably have to add some ballast in the spare tire area since the minimum for my setup would be 2063.96 lbs. Fingers crossed that the rules pass.
 Untitled by hatchethairy, on Flickr
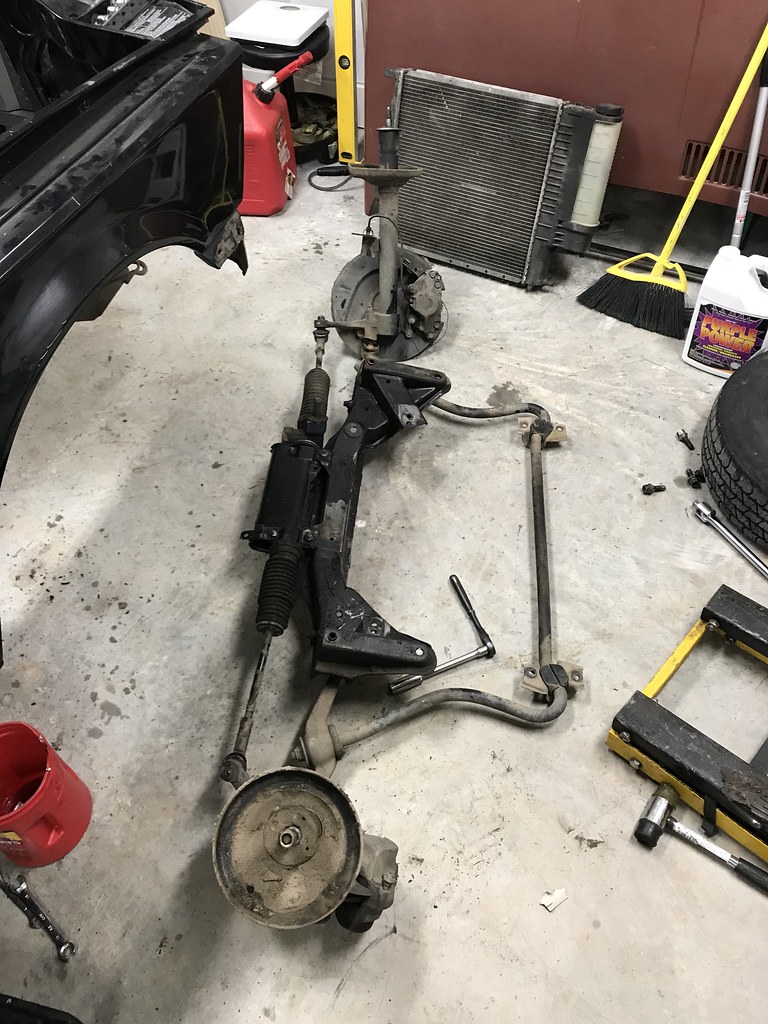
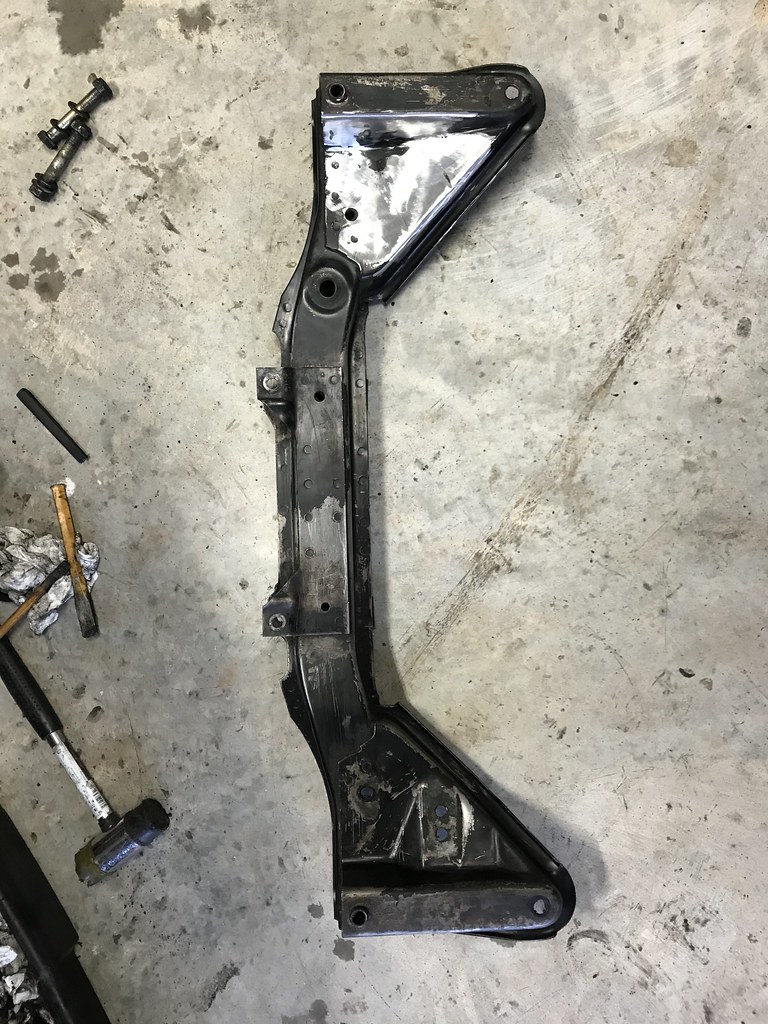
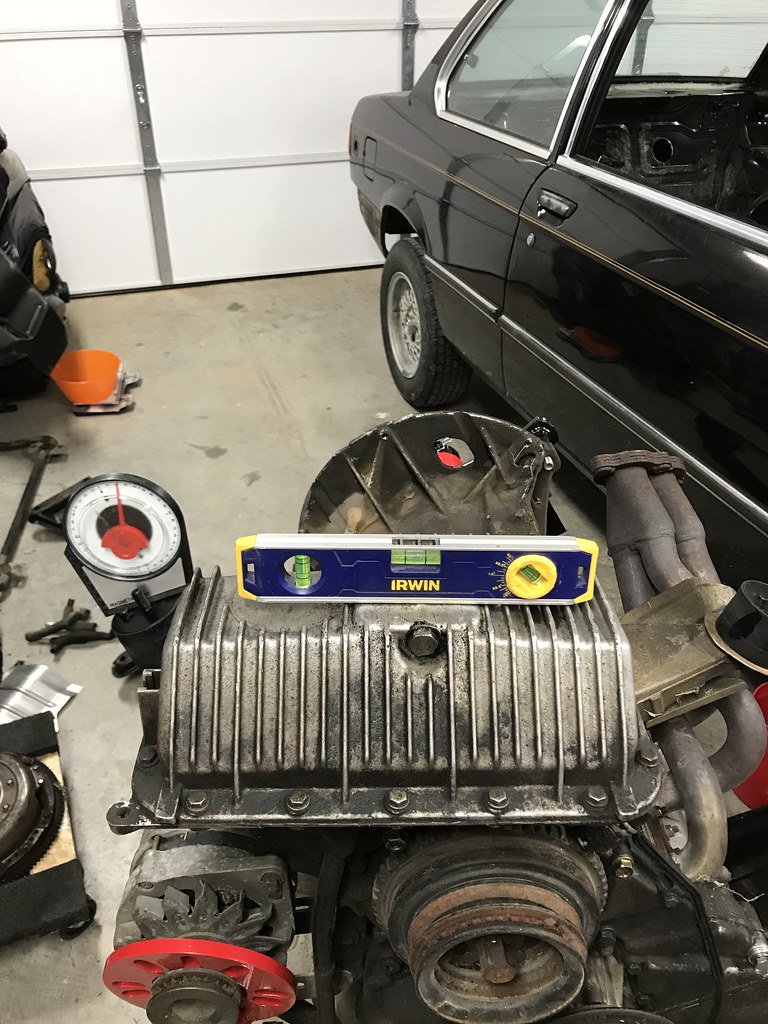
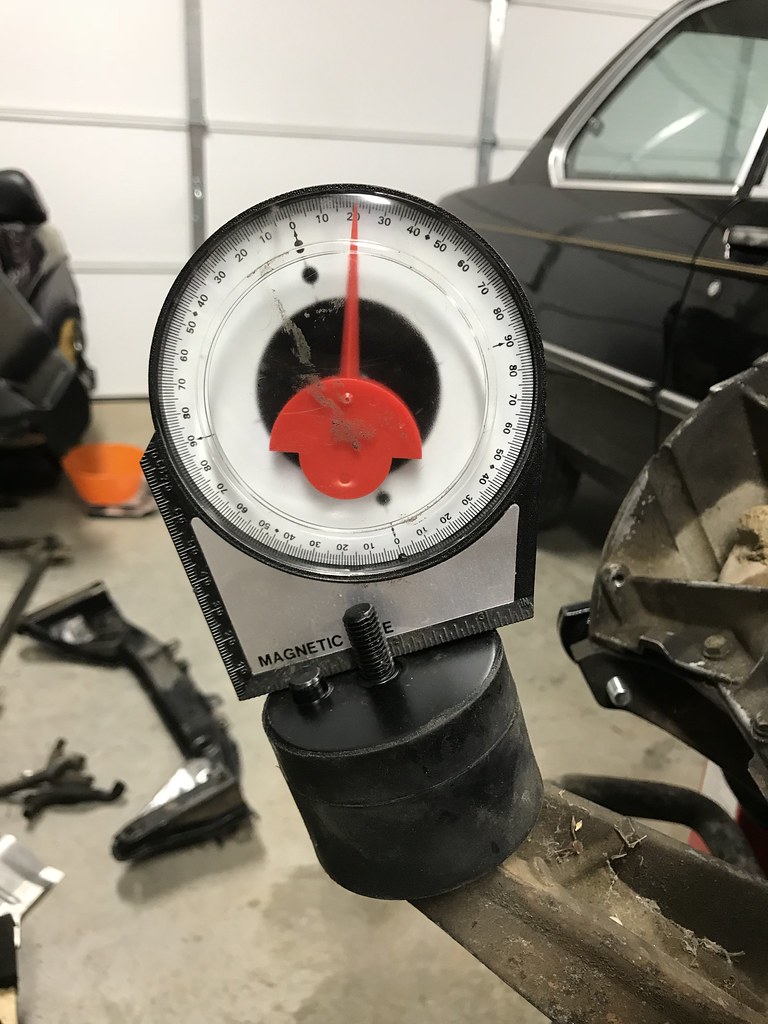
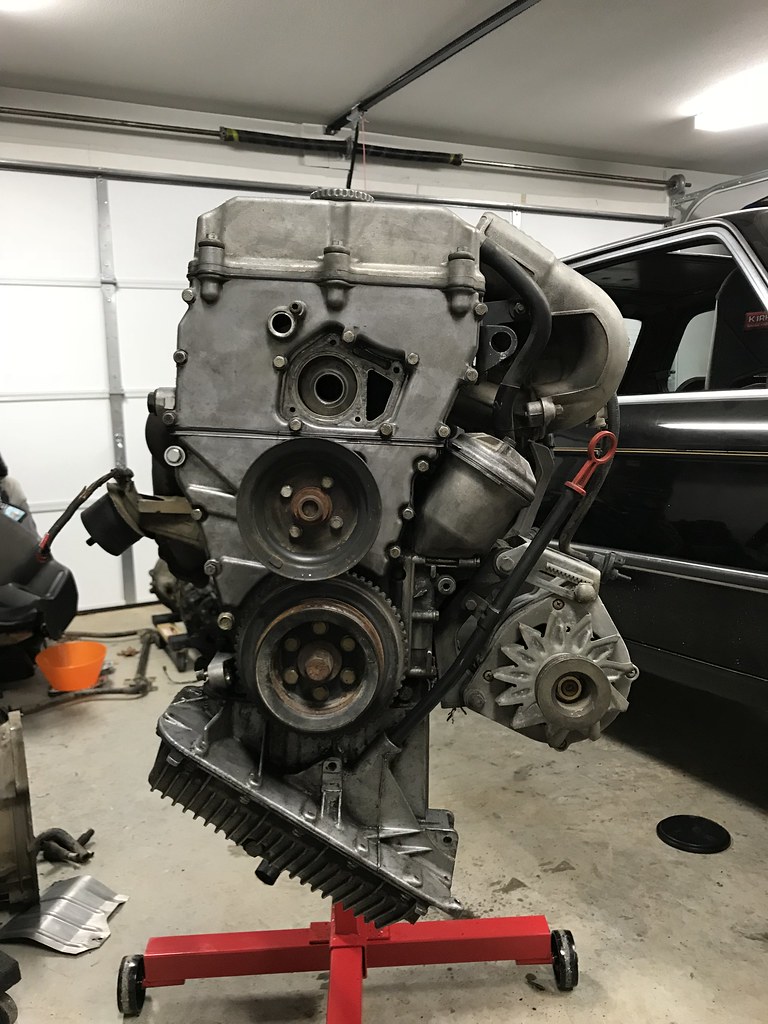
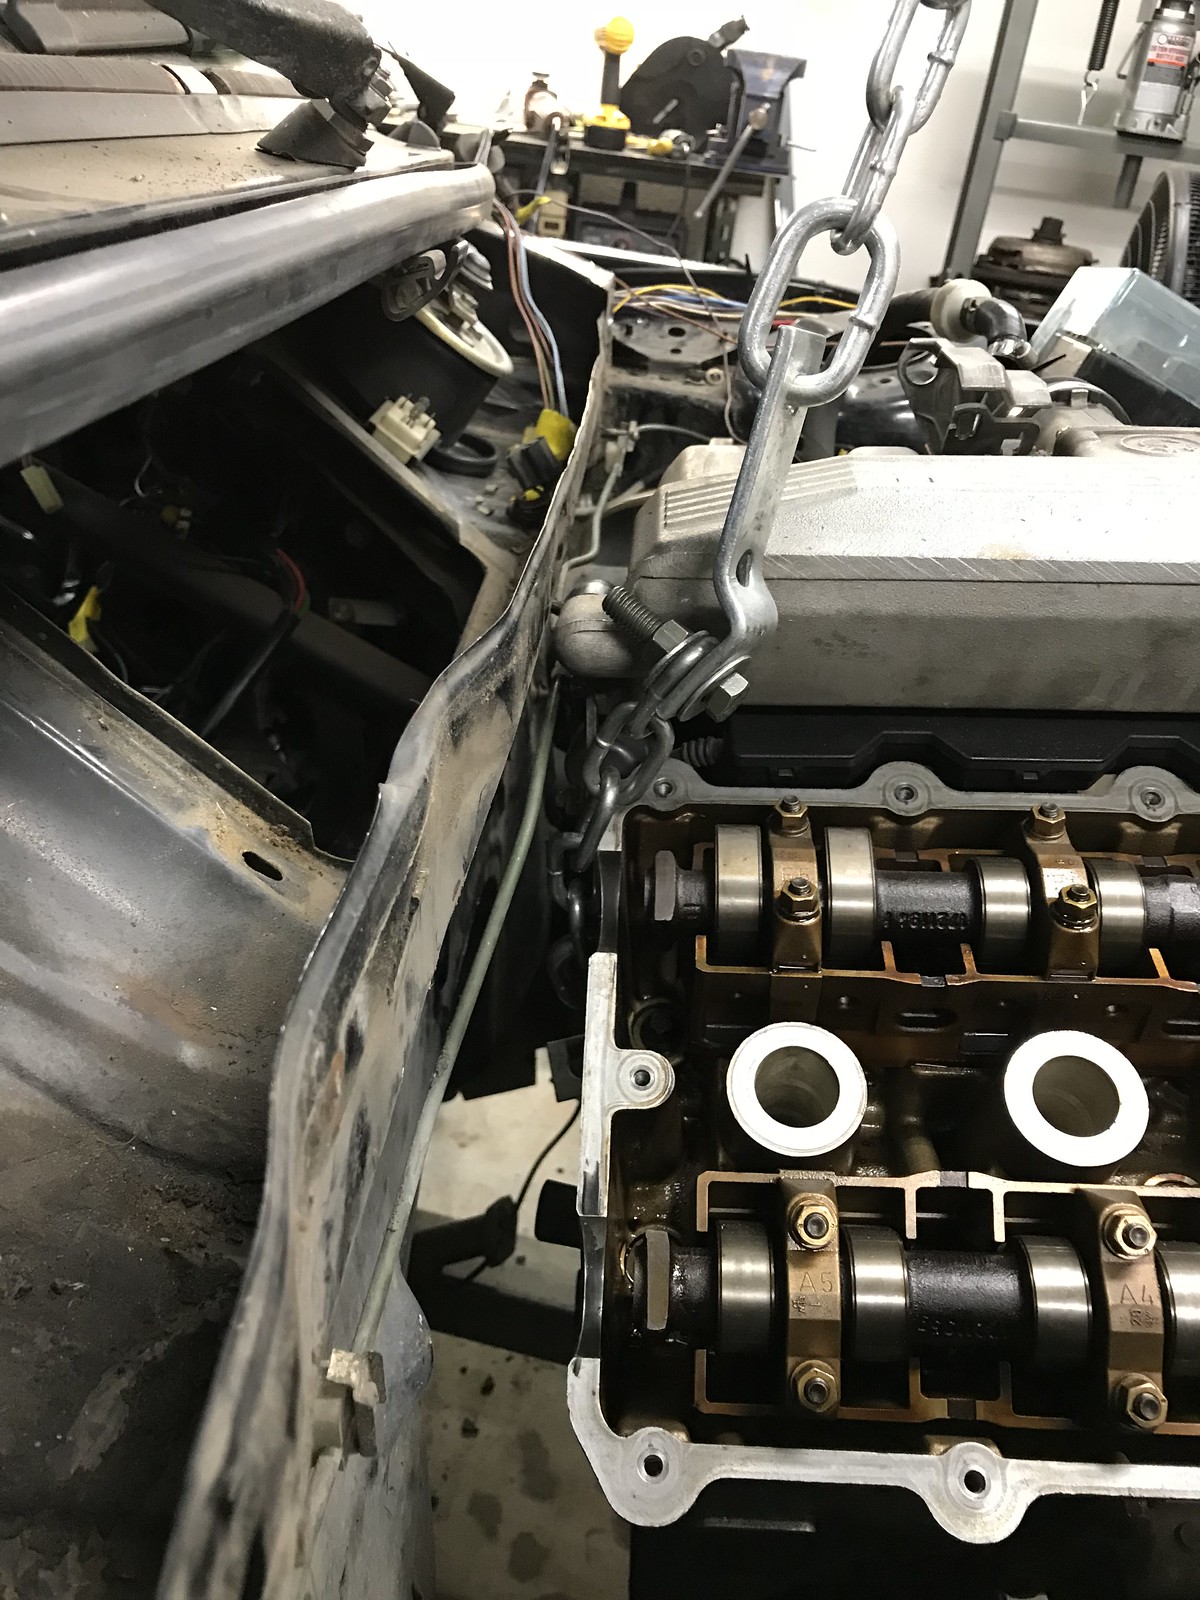
I had a few hours to tear down the front end yesterday with the sole mission to get my hands on the front subframe for motor mount fabrication. I didn't put much effort into separating the control arms from the spindle since they didn't want to let go, but I'll revisit that soon. It took FOREVER to clean the rest of the subframe since it was still plenty caked in car feces. Filthy. Once the caca was mostly removed, I chopped off the factory motor mount bracketry on the driver side and bolted up the new e24 motor mounts (part number 11811132322) to the m42 arms. Since the engine is on a stand I rotated it until the oil pan was level, and measured the angle of the mounts I'll need to fabricate. 20 degrees will do the trick, but since the e24 mounts I got are a bit shorter than the m42 ones, I may have to shim the mounts or build up a higher resting place on the subframe. I think the plan for now is to tack something up real good, and test fit it all to make sure I'm as close to the firewall and low as possible. Fabrication for the mounts won't be until at least Sunday night though, and it's driving me nuts. Forecast for Sunday's autocross is free of rain now, but it's tempting to skip so I can get some more work on the car done.
 Untitled by hatchethairy, on Flickr
 Untitled by hatchethairy, on Flickr
 Untitled by hatchethairy, on Flickr
 Untitled by hatchethairy, on Flickr
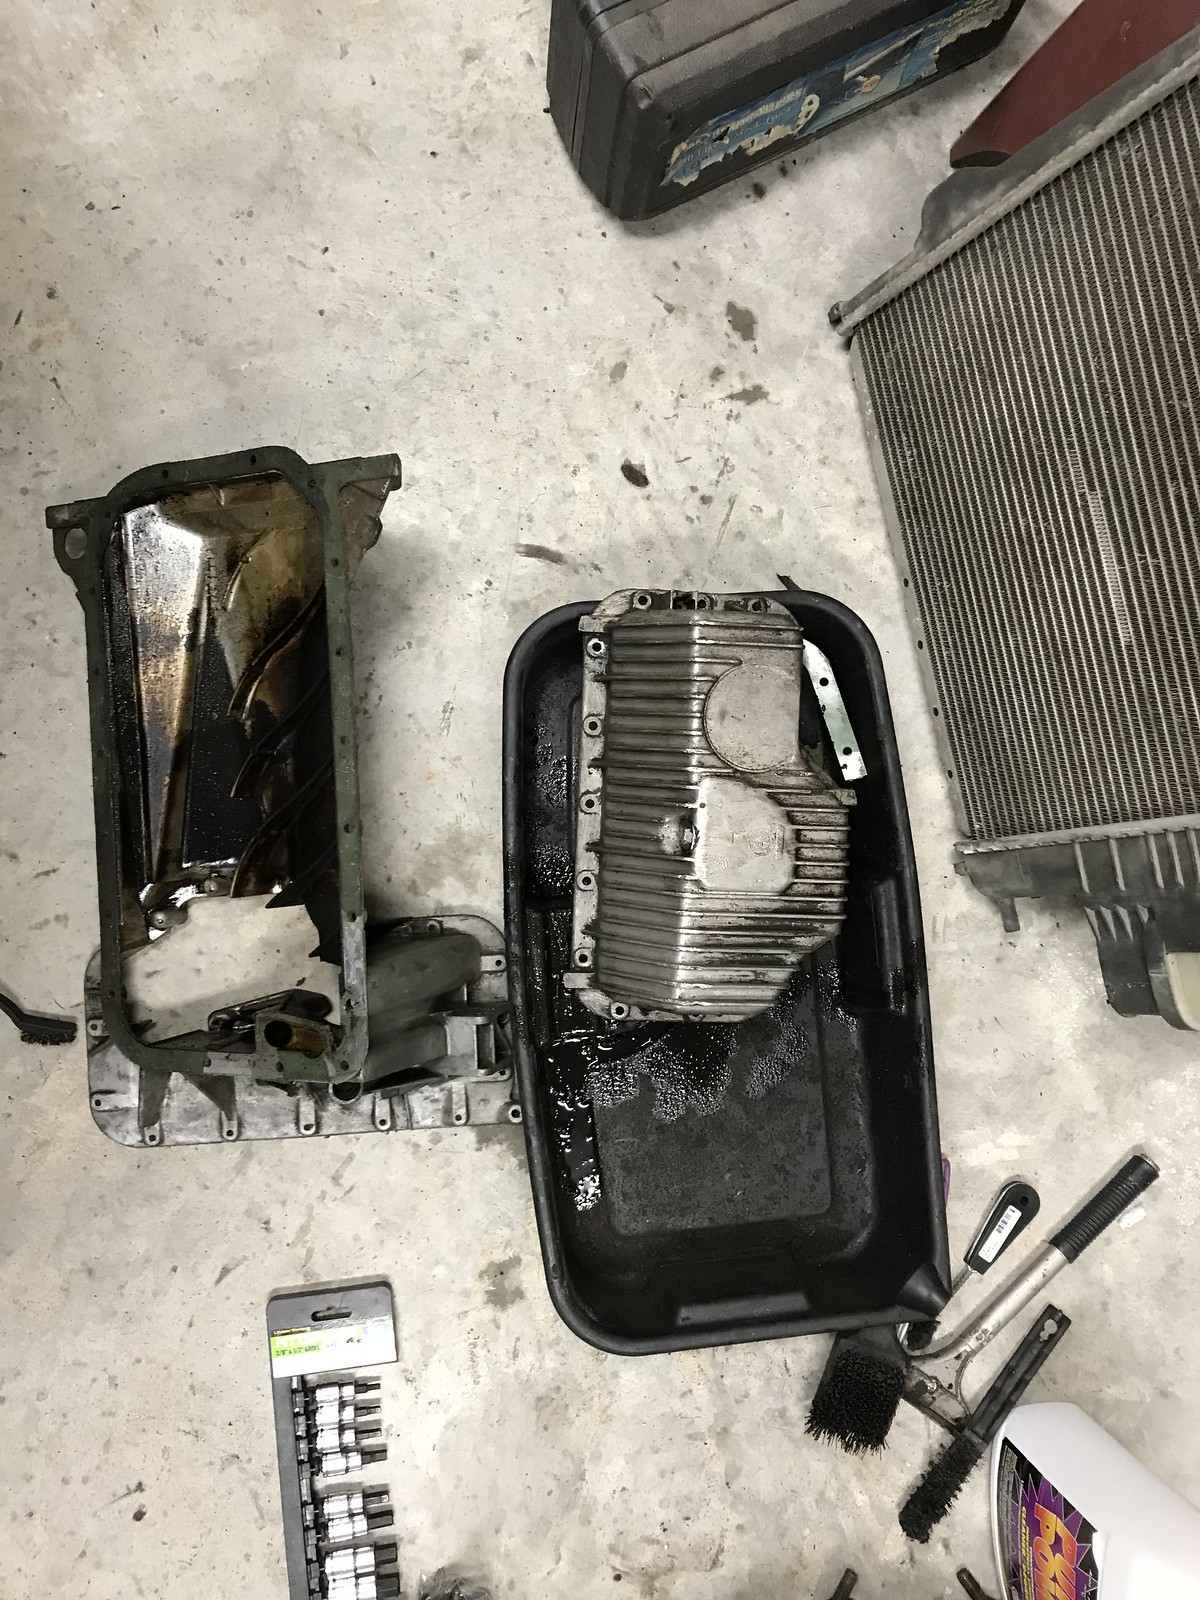
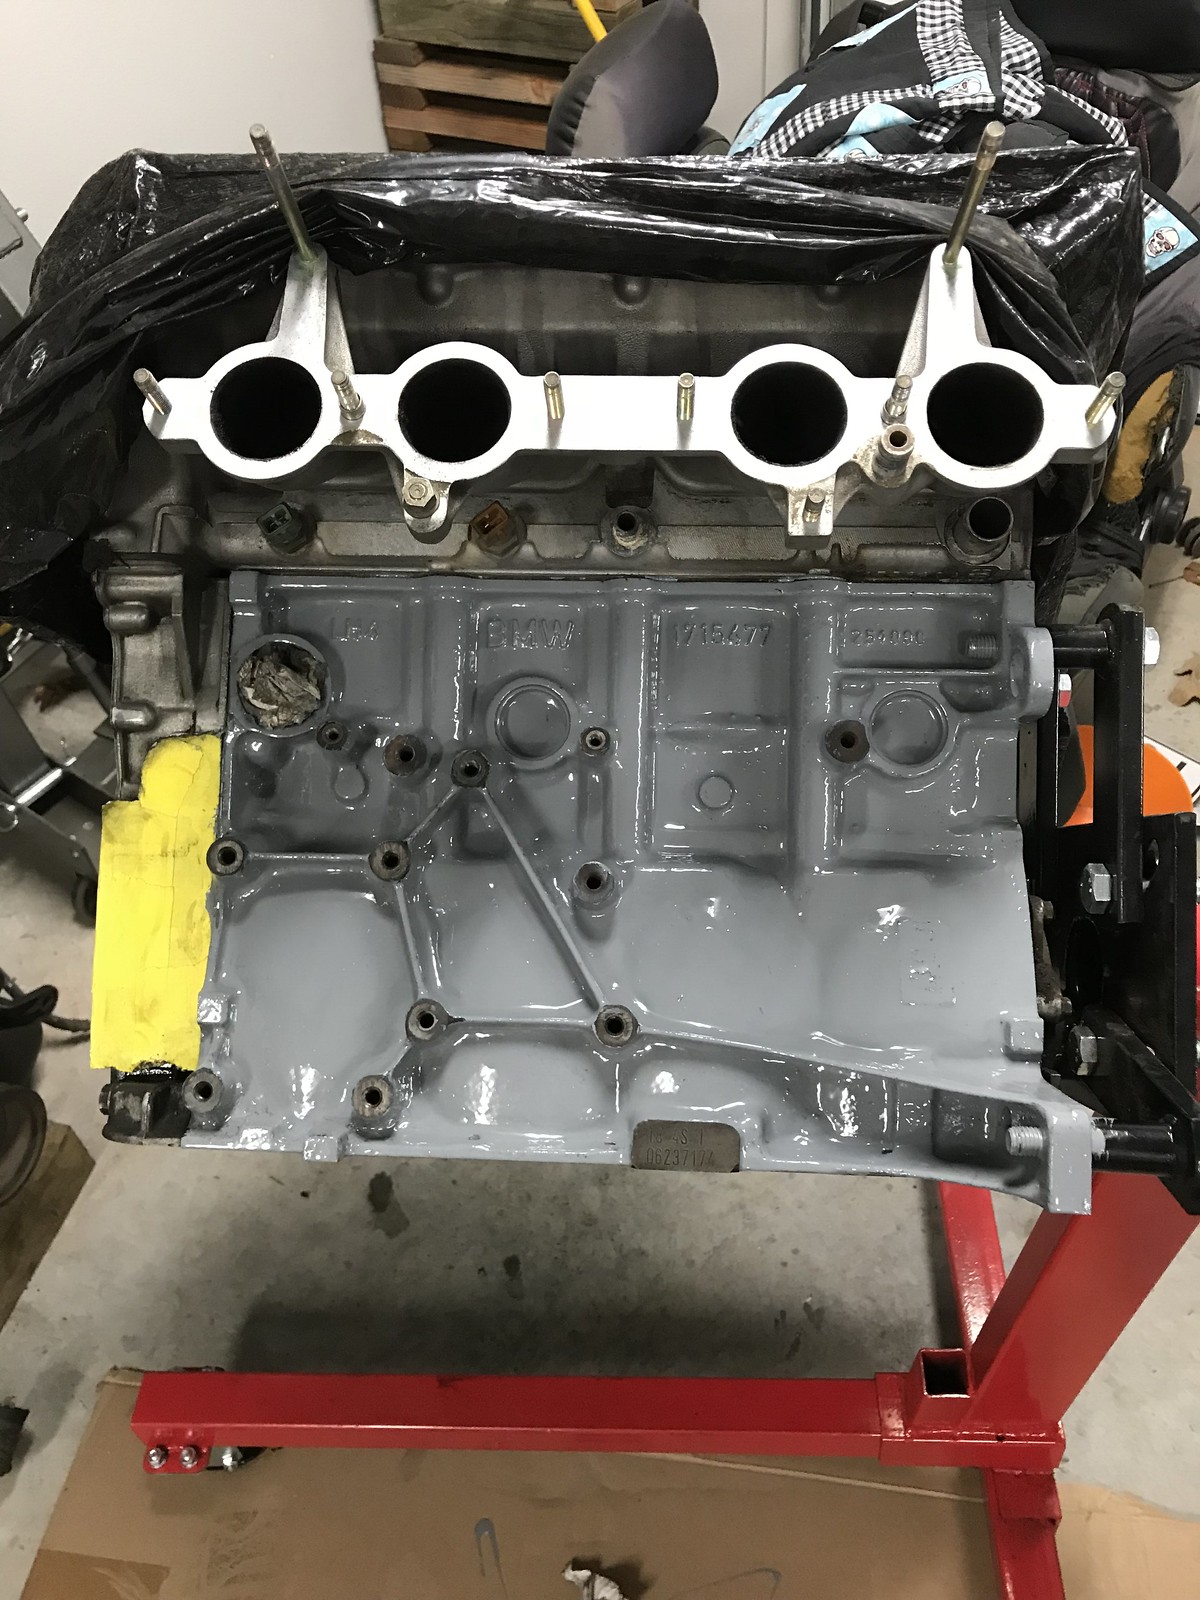
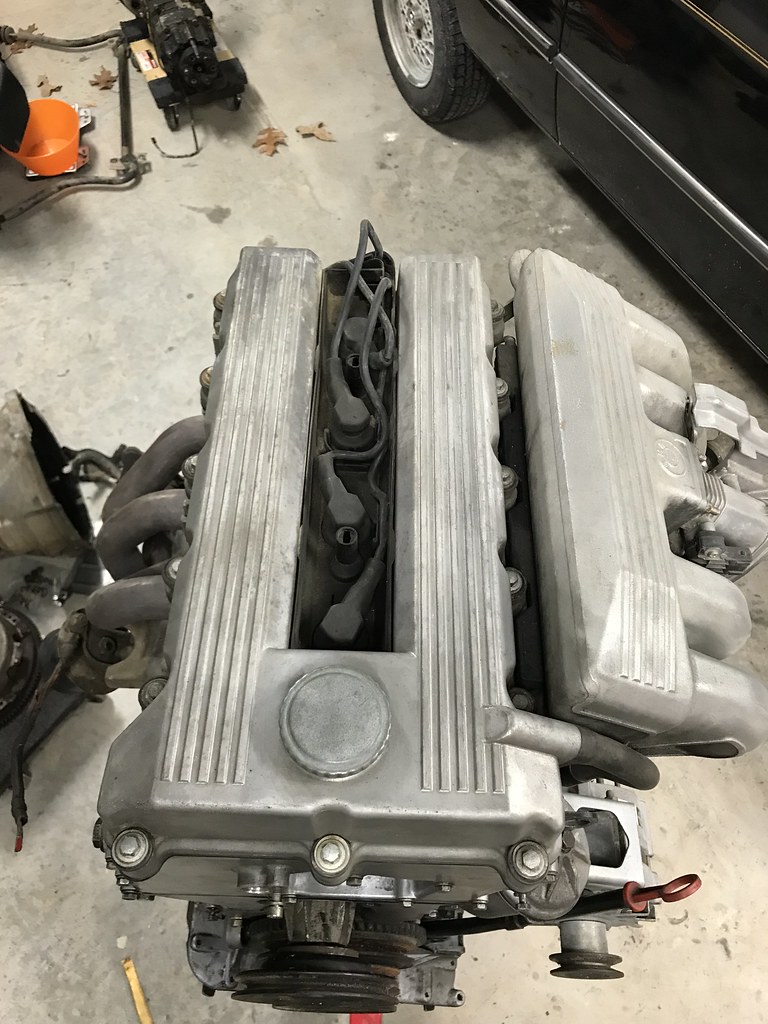
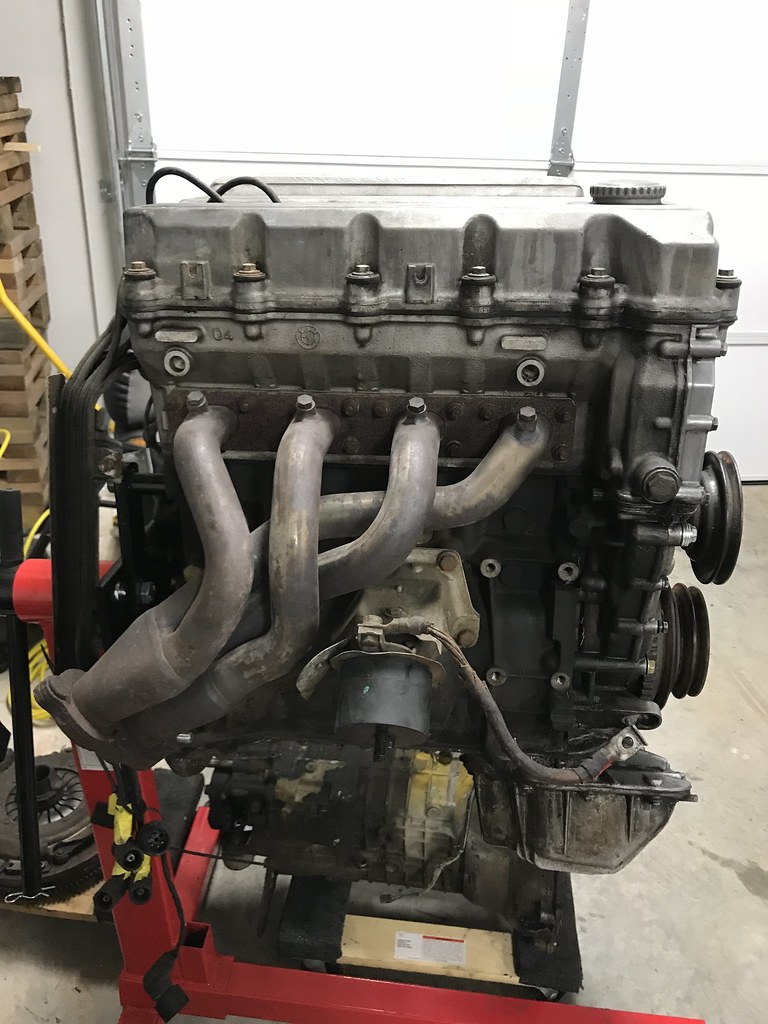
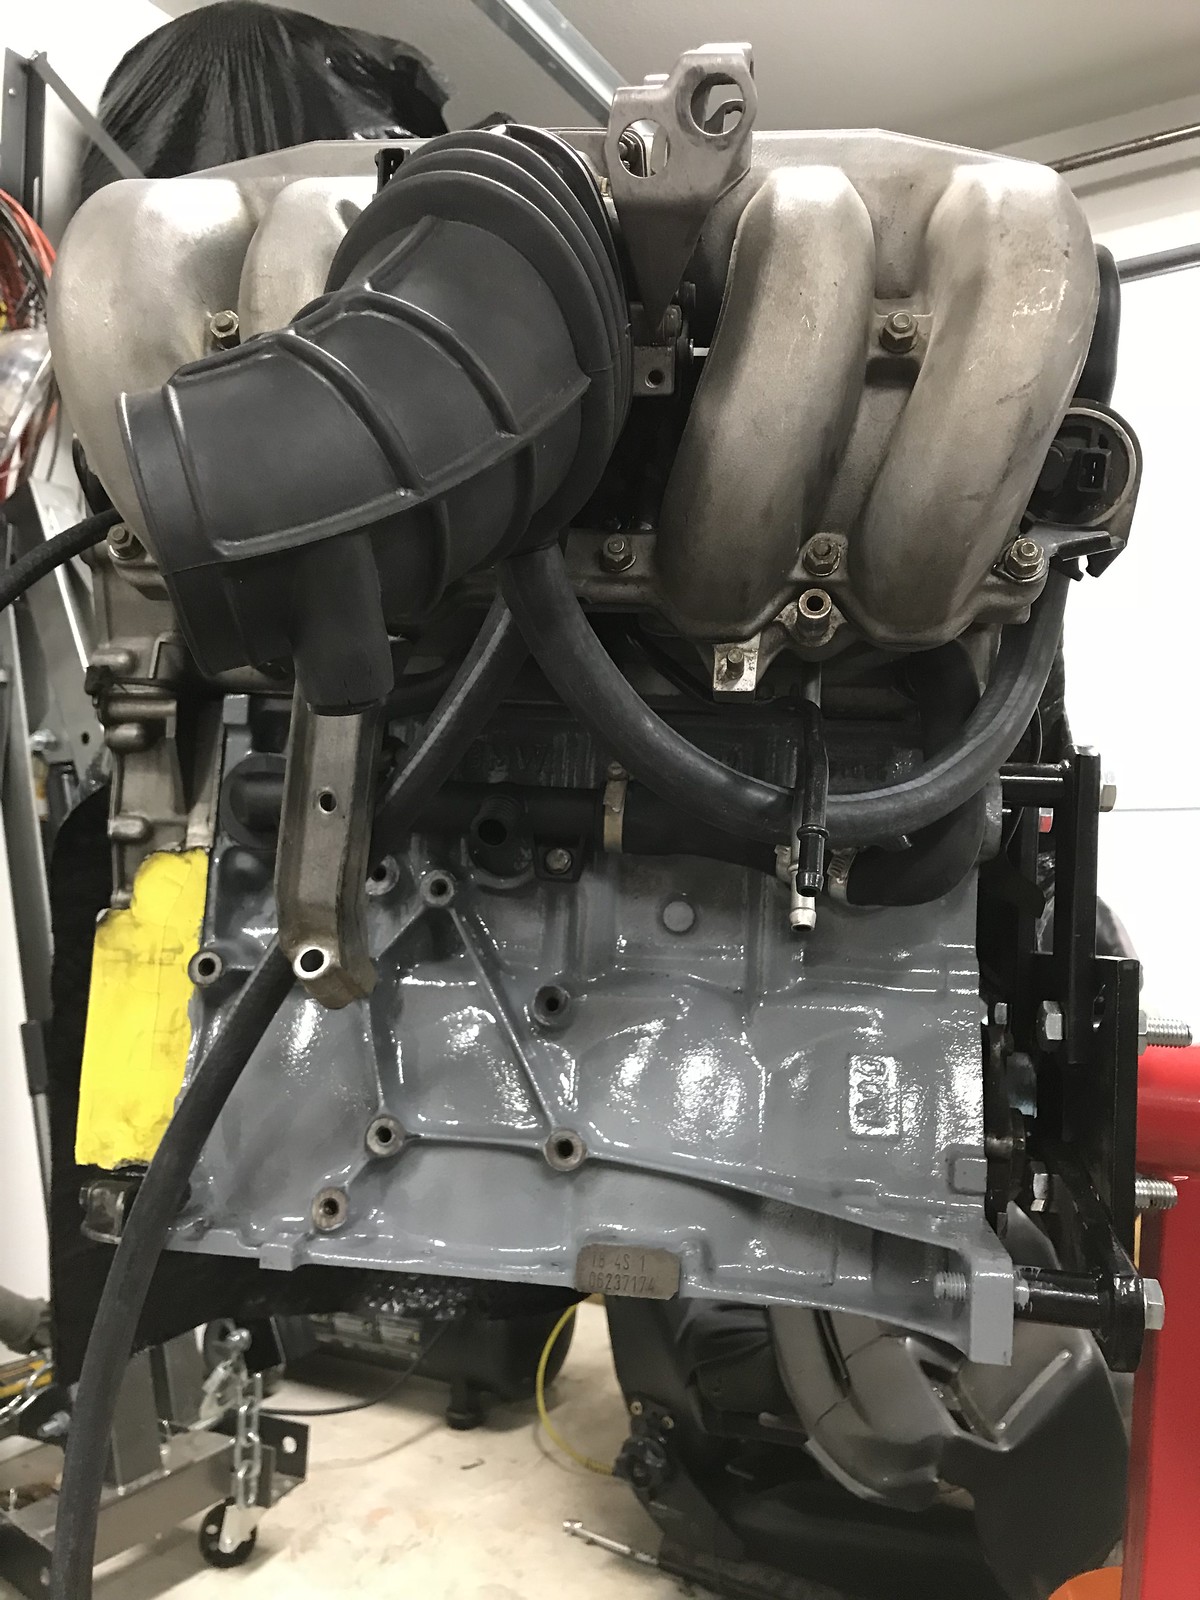
I'm tired of the sludge that's glued to the engine, so last night I started the long journey of cleaning it all up. I Hope to have it presentable and some of it ready for paint soon, just need to decide which direction I want to go. The oil cap from the m10 looks way cooler than the m42, so it got swapped. The thermostat was tested, and checks out fine, so it's one less thing to hit the budget.
 Untitled by hatchethairy, on Flickr
 Untitled by hatchethairy, on Flickr
 Untitled by hatchethairy, on Flickr
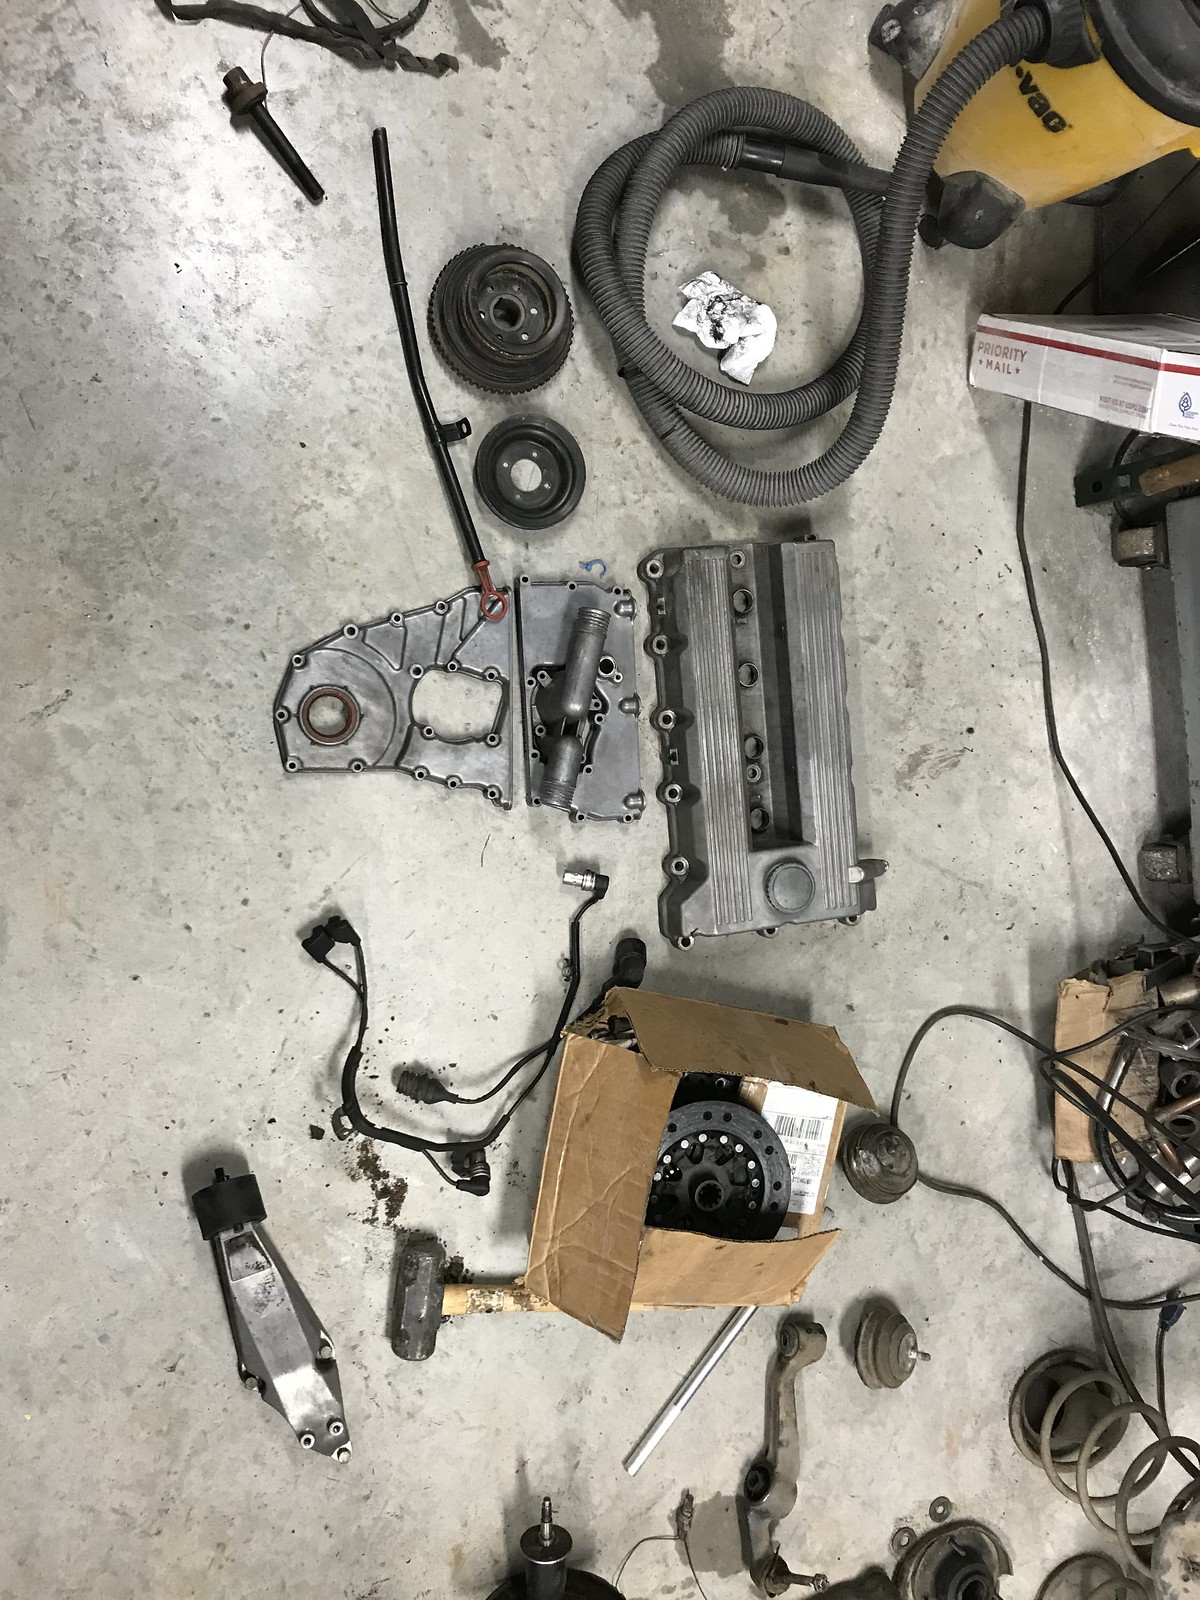
Piles of crap scraped and wire brushed. I haven't started using any solvents or degreaser yet, as I find they end up making things messier when it's caked on this thick.
 Untitled by hatchethairy, on Flickr
 Untitled by hatchethairy, on Flickr
 Untitled by hatchethairy, on Flickr
 Untitled by hatchethairy, on Flickr
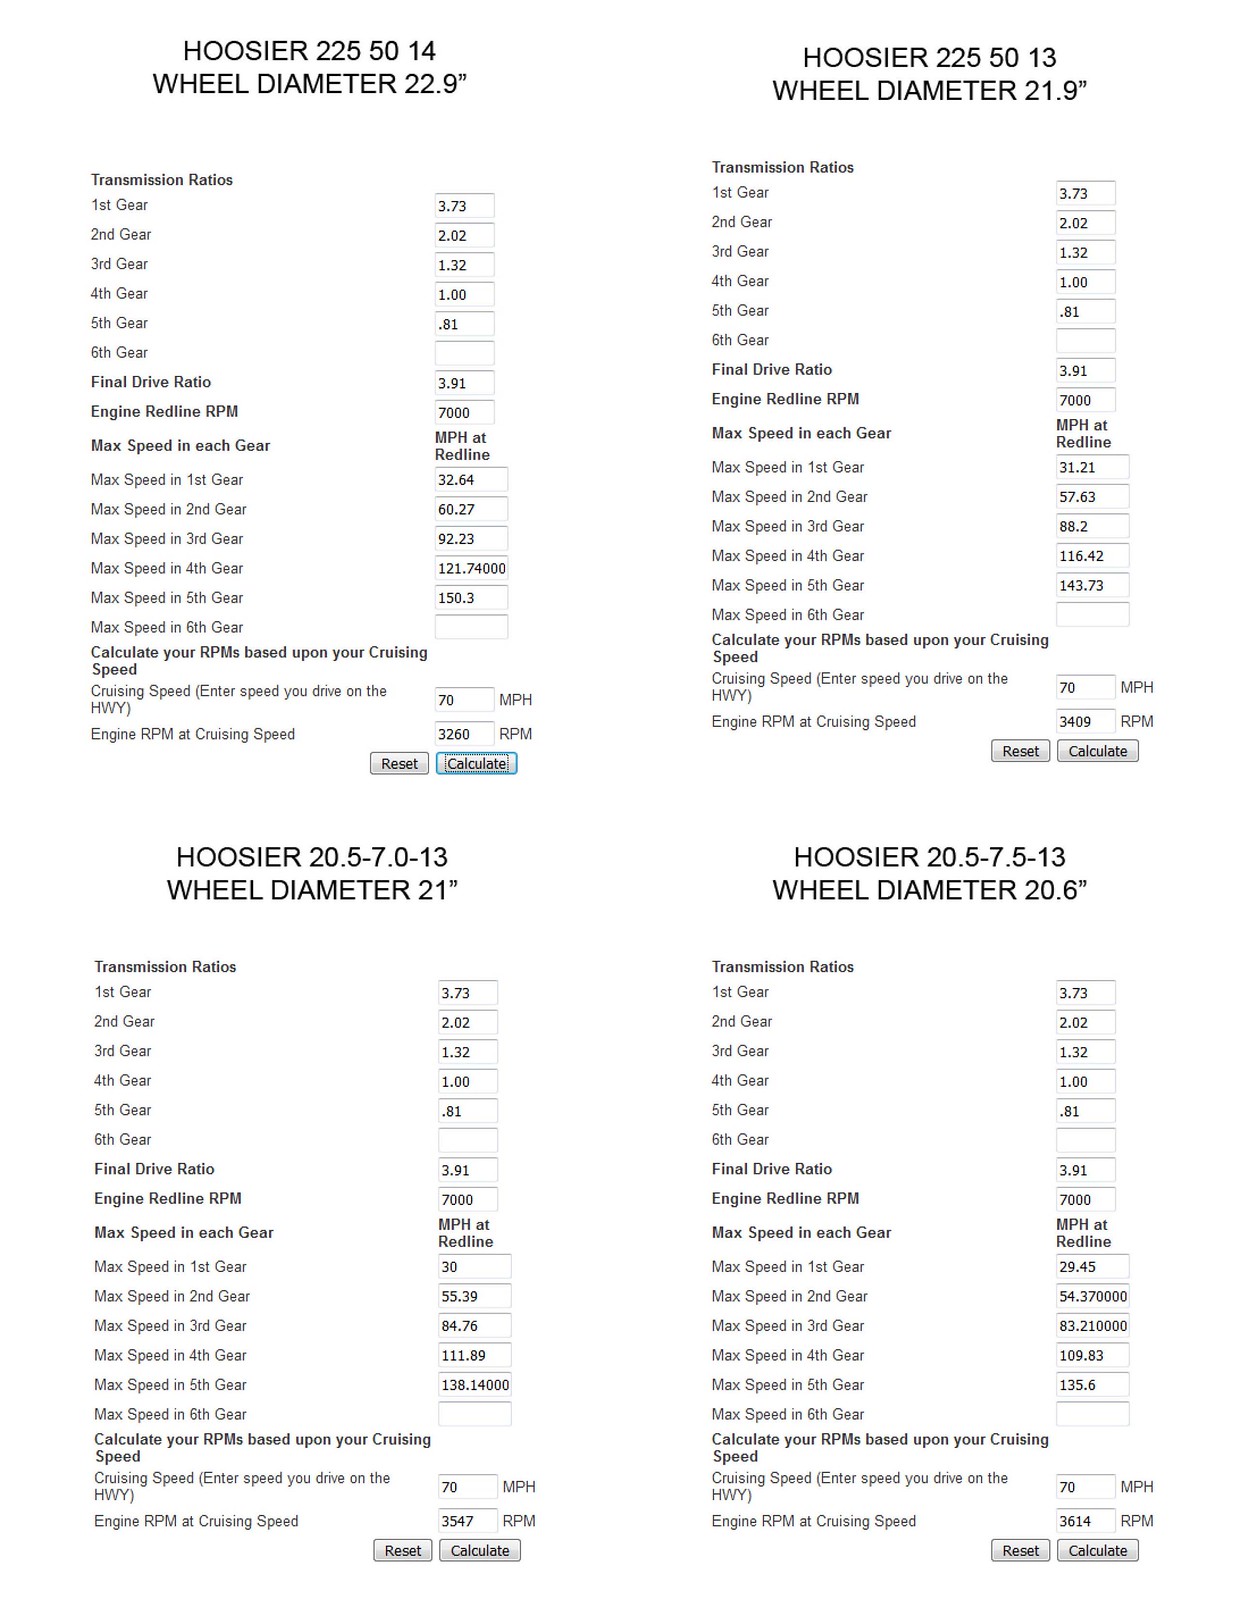
I also spent way too much time comparing the gearing I'll have with the e21 depending on the tire package I eventually go with. My e30 with the same motor and trans redlines in second gear way sooner than I prefer with 4.44 gears. I think ends up causing me more harm than good even with short courses. If I keep the 14" Hoosier package, second gear will top out around 60, which gives me another 7 mph over what I have now since the e21 is 3.91 ratio. At this point I don't know if it will be all that noticeable, but it's worth testing to see.
 gearing comparisons by hatchethairy, on Flickr
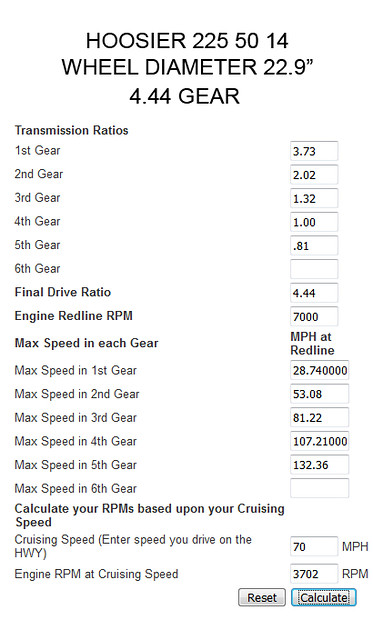 hoosier a7 14- 4.44 by hatchethairy, on Flickr
I need to channel my inner captainawesome next time I need to clean an engine. Looks great.
Stampie said:
I need to channel my inner captainawesome next time I need to clean an engine. Looks great.
Thanks! I knew if I made one piece really clean I would be forced to make the others match.
Still can't believe this is how it started out:
 1AF4AC5B-FA41-401C-8F60-C8227631CA54 by hatchethairy, on Flickr
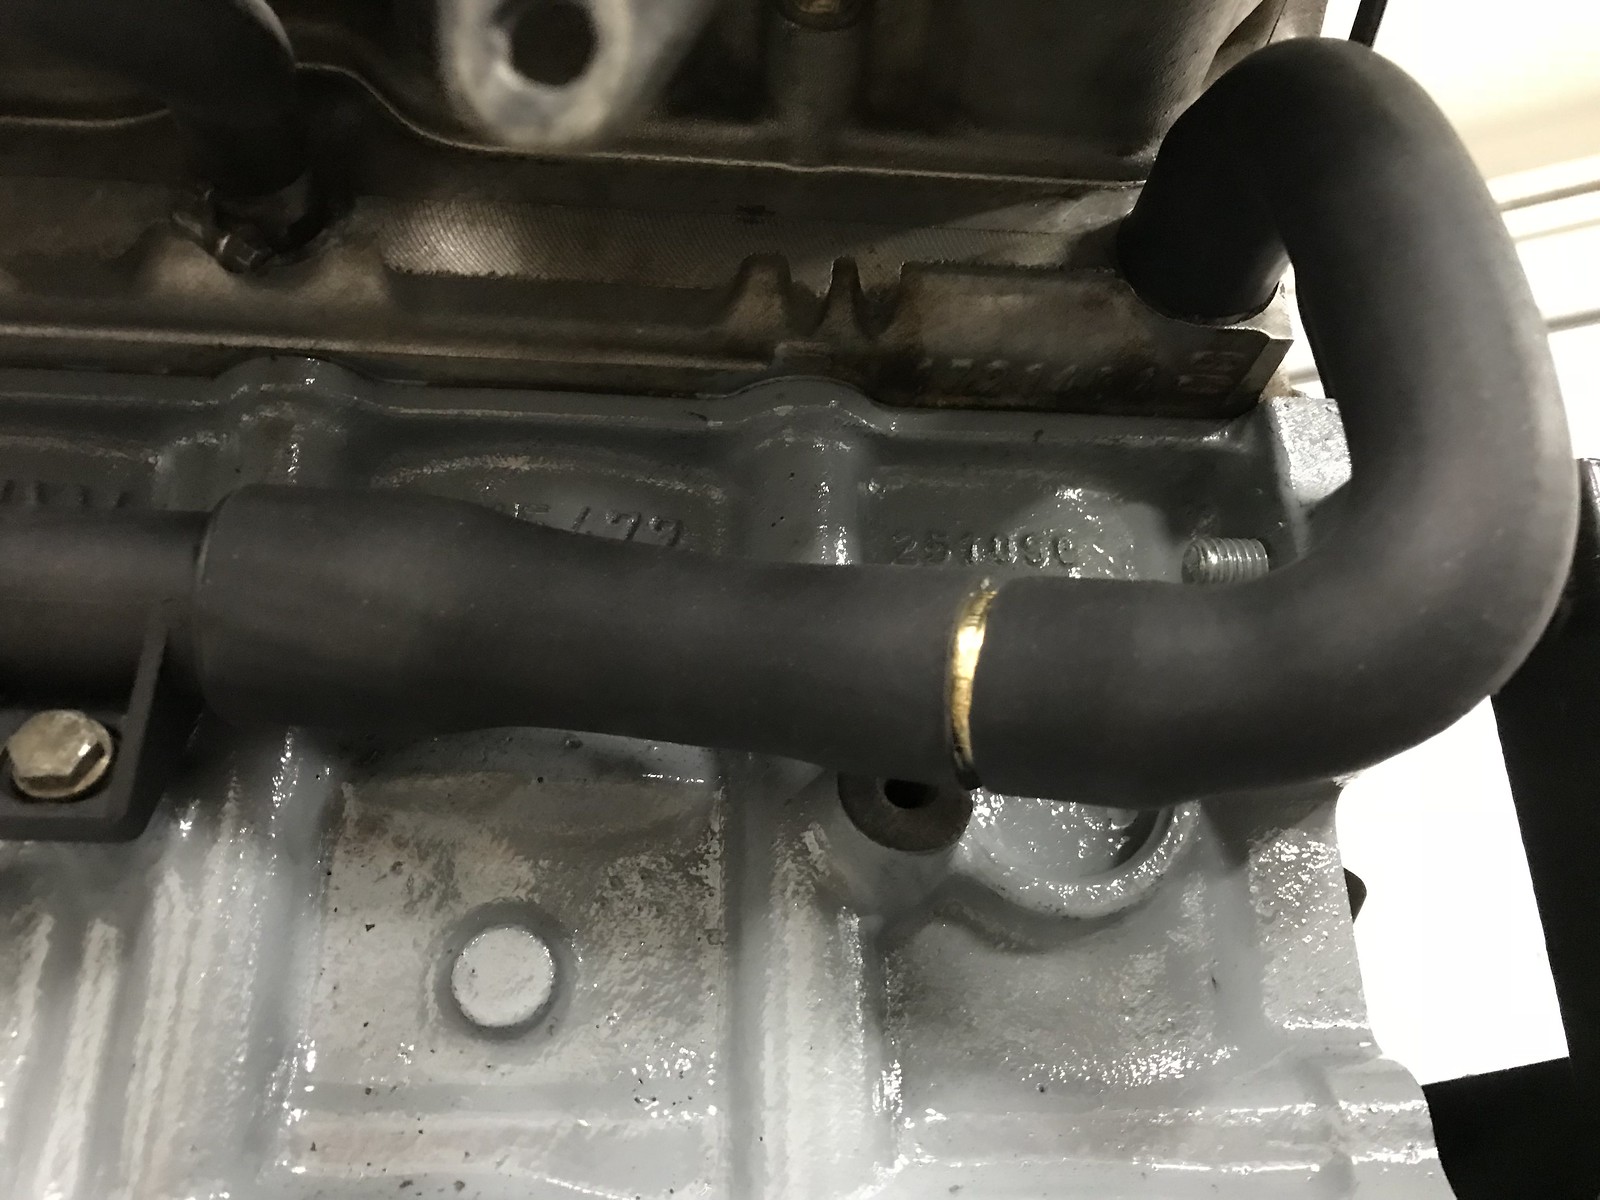
Not much to report here, just plumbing cooling lines and vaccum stuff still. I ditched the pex elbow and used just a straight coupler which saves me a couple bucks on budget, but also looks to be a better setup overall. My garage was a complete disaster, so I spent some time cleaning up and then focusing on prepping gasket surfaces. I realized I'm missing a couple small o-rings and gaskets, so until they roll in I'm just going to attack the exhaust side to prep for paint.
 Untitled by hatchethairy, on Flickr
 Untitled by hatchethairy, on Flickr
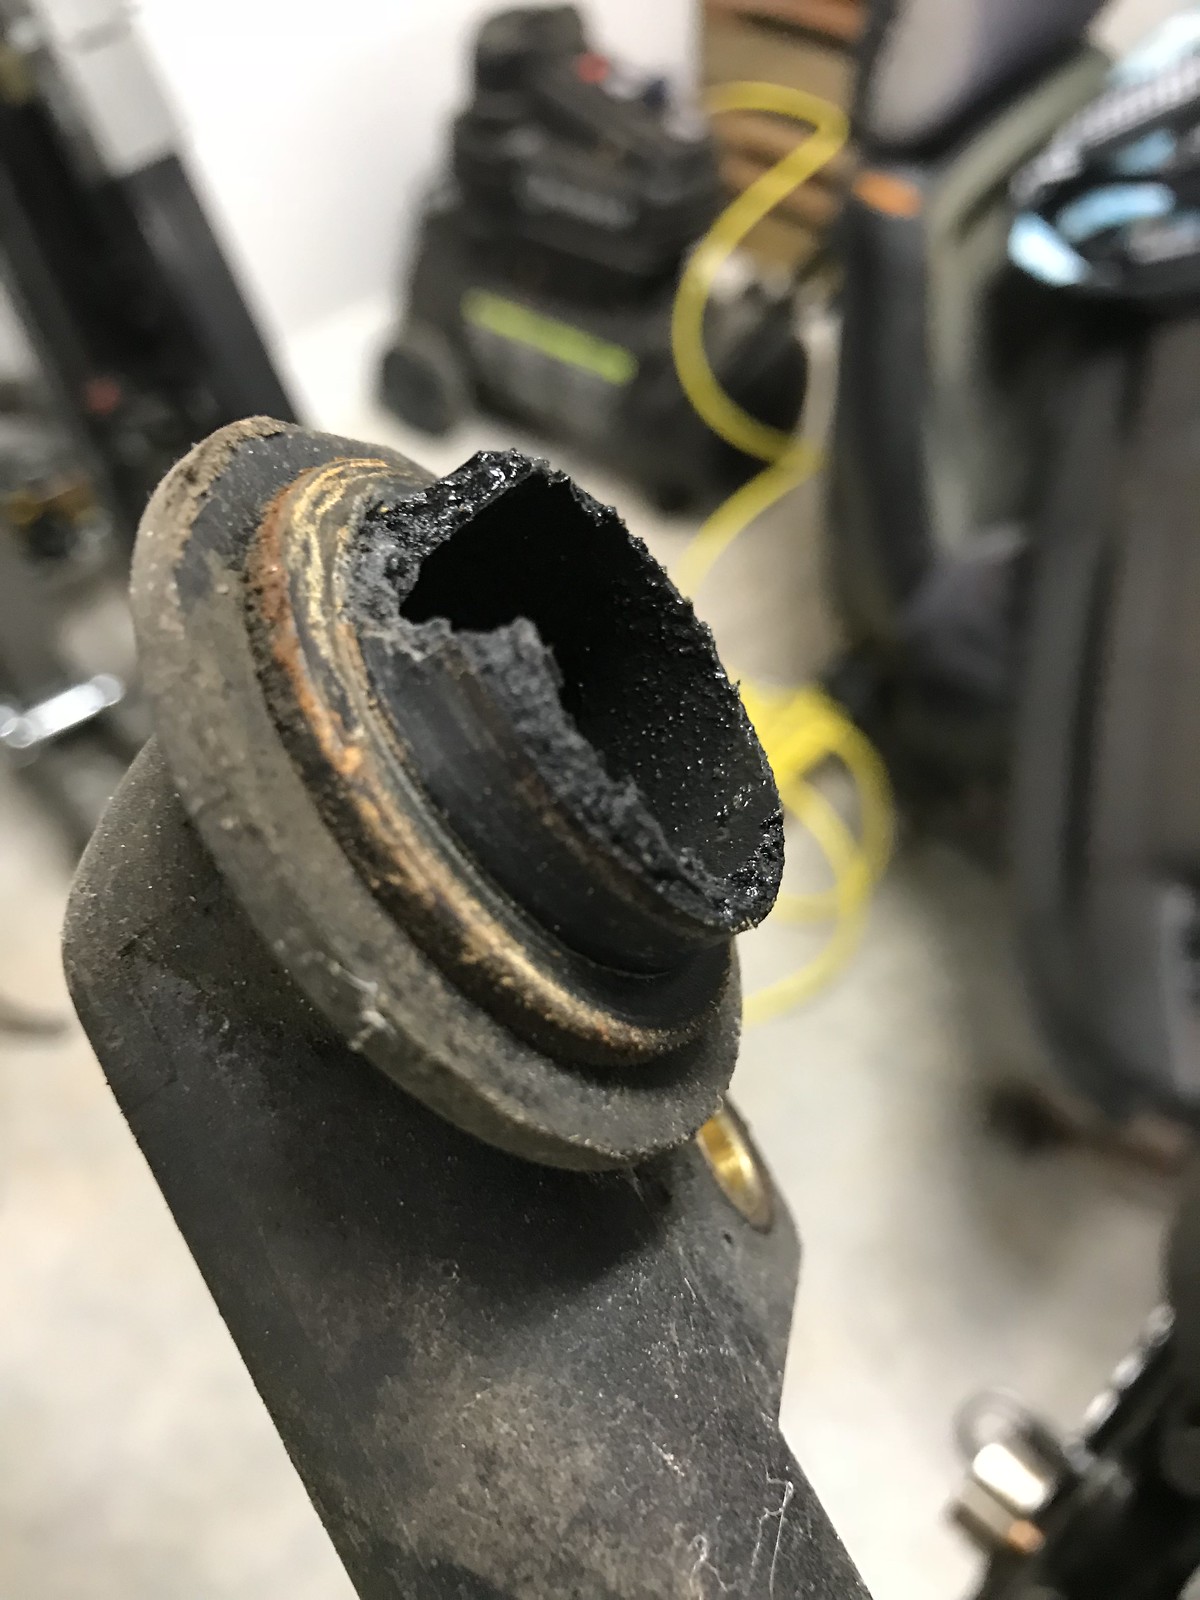
In reply to captainawesome :
When the guy who did material selection for that coolant pipe dies, I hope he goes straight to the front of the line at the "Receiver in the Devil's Threesome" room in Hell.
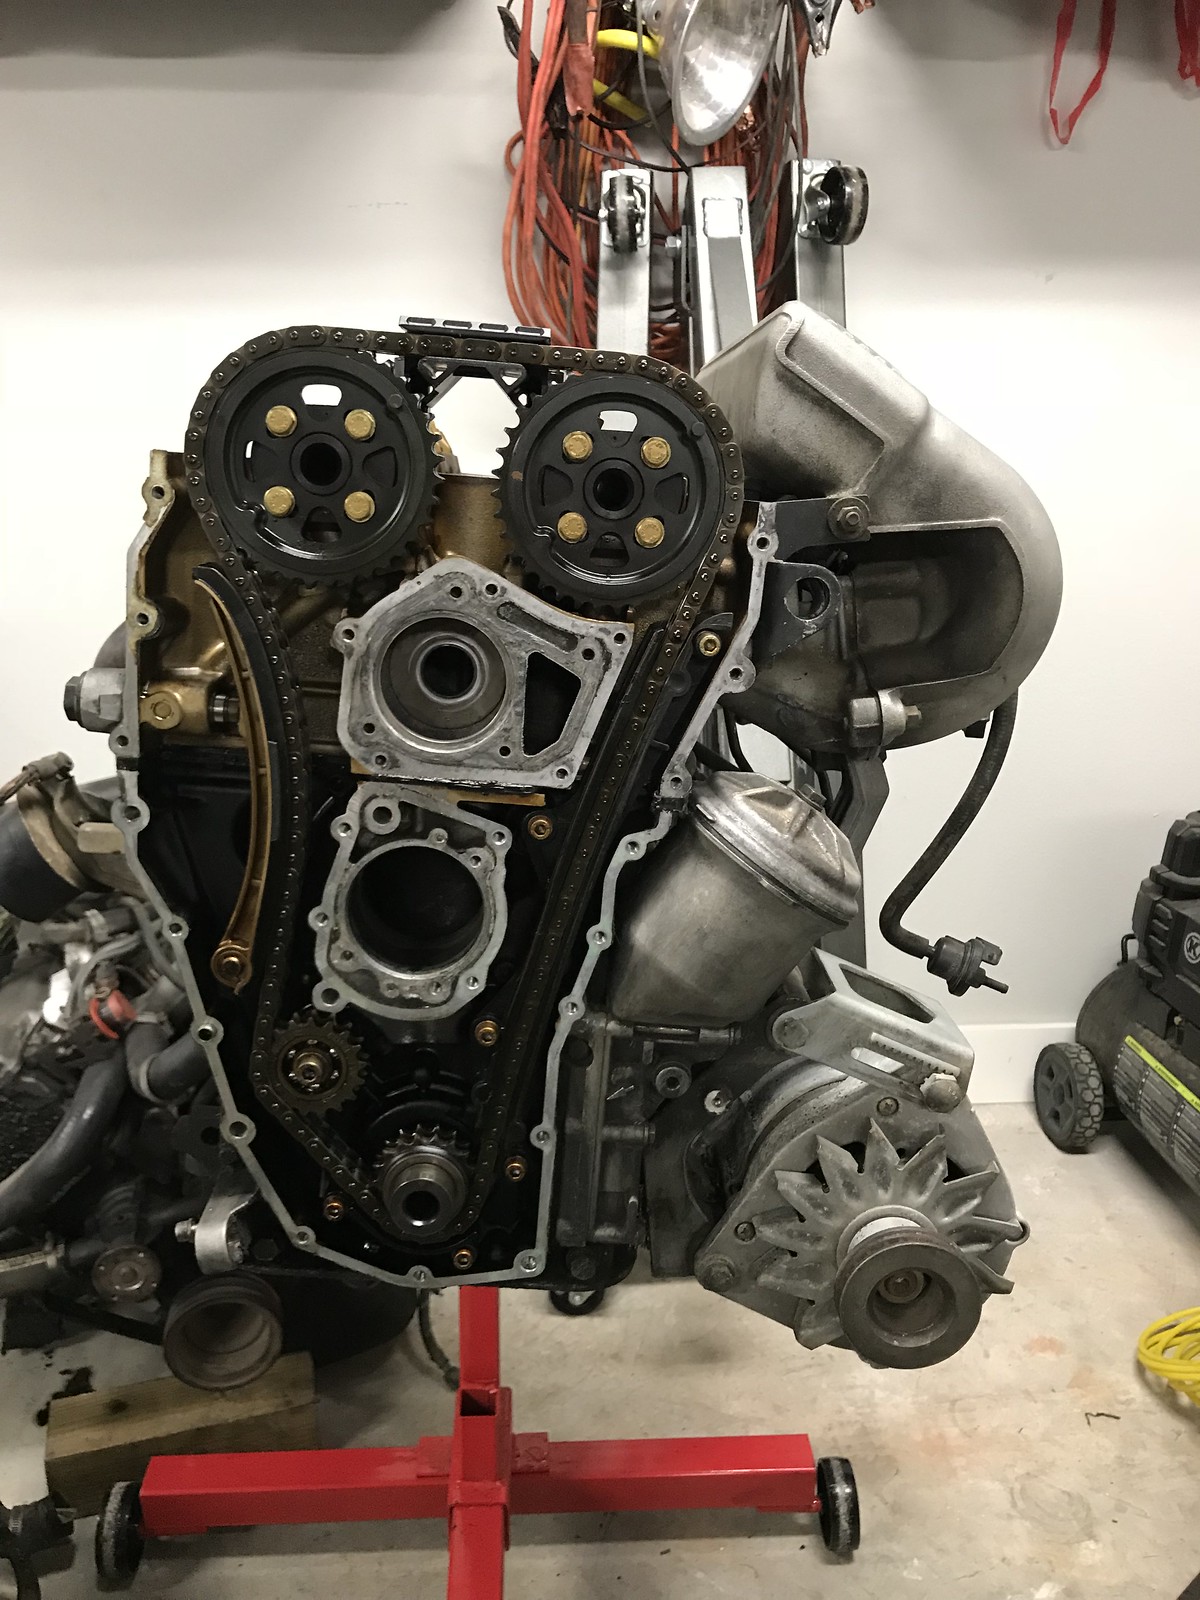
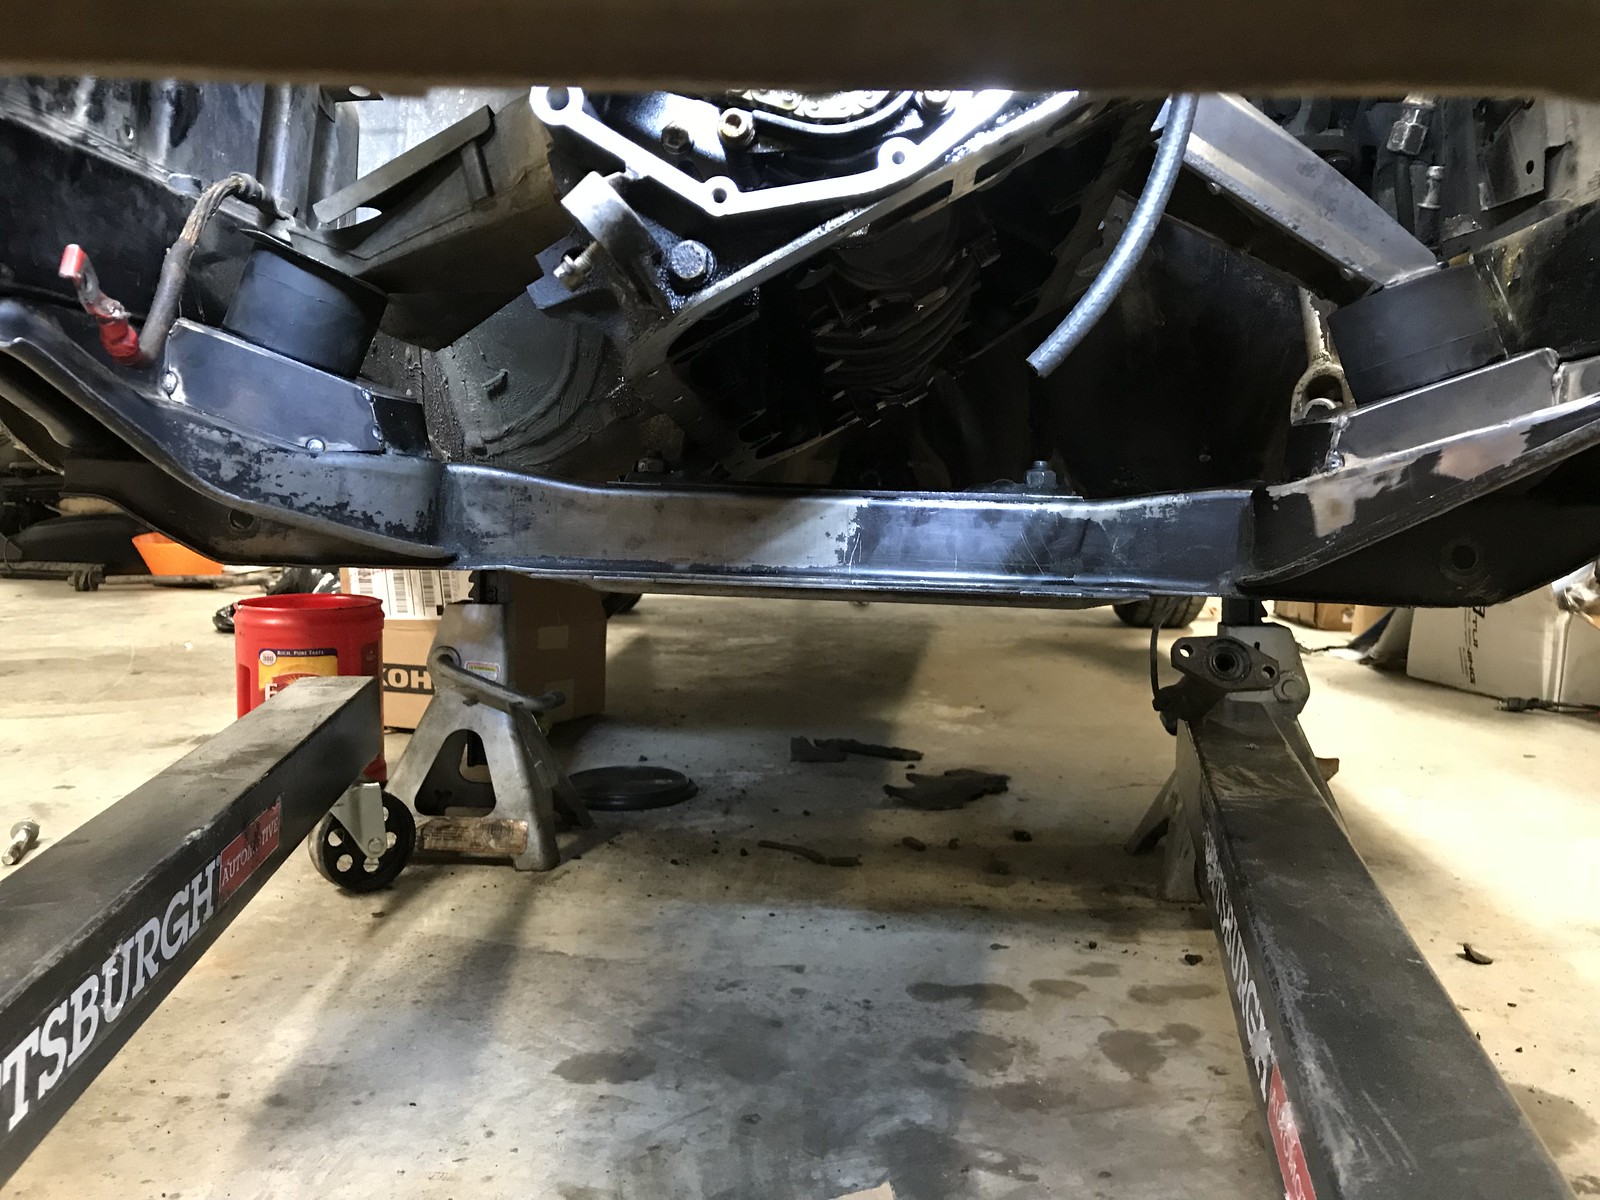
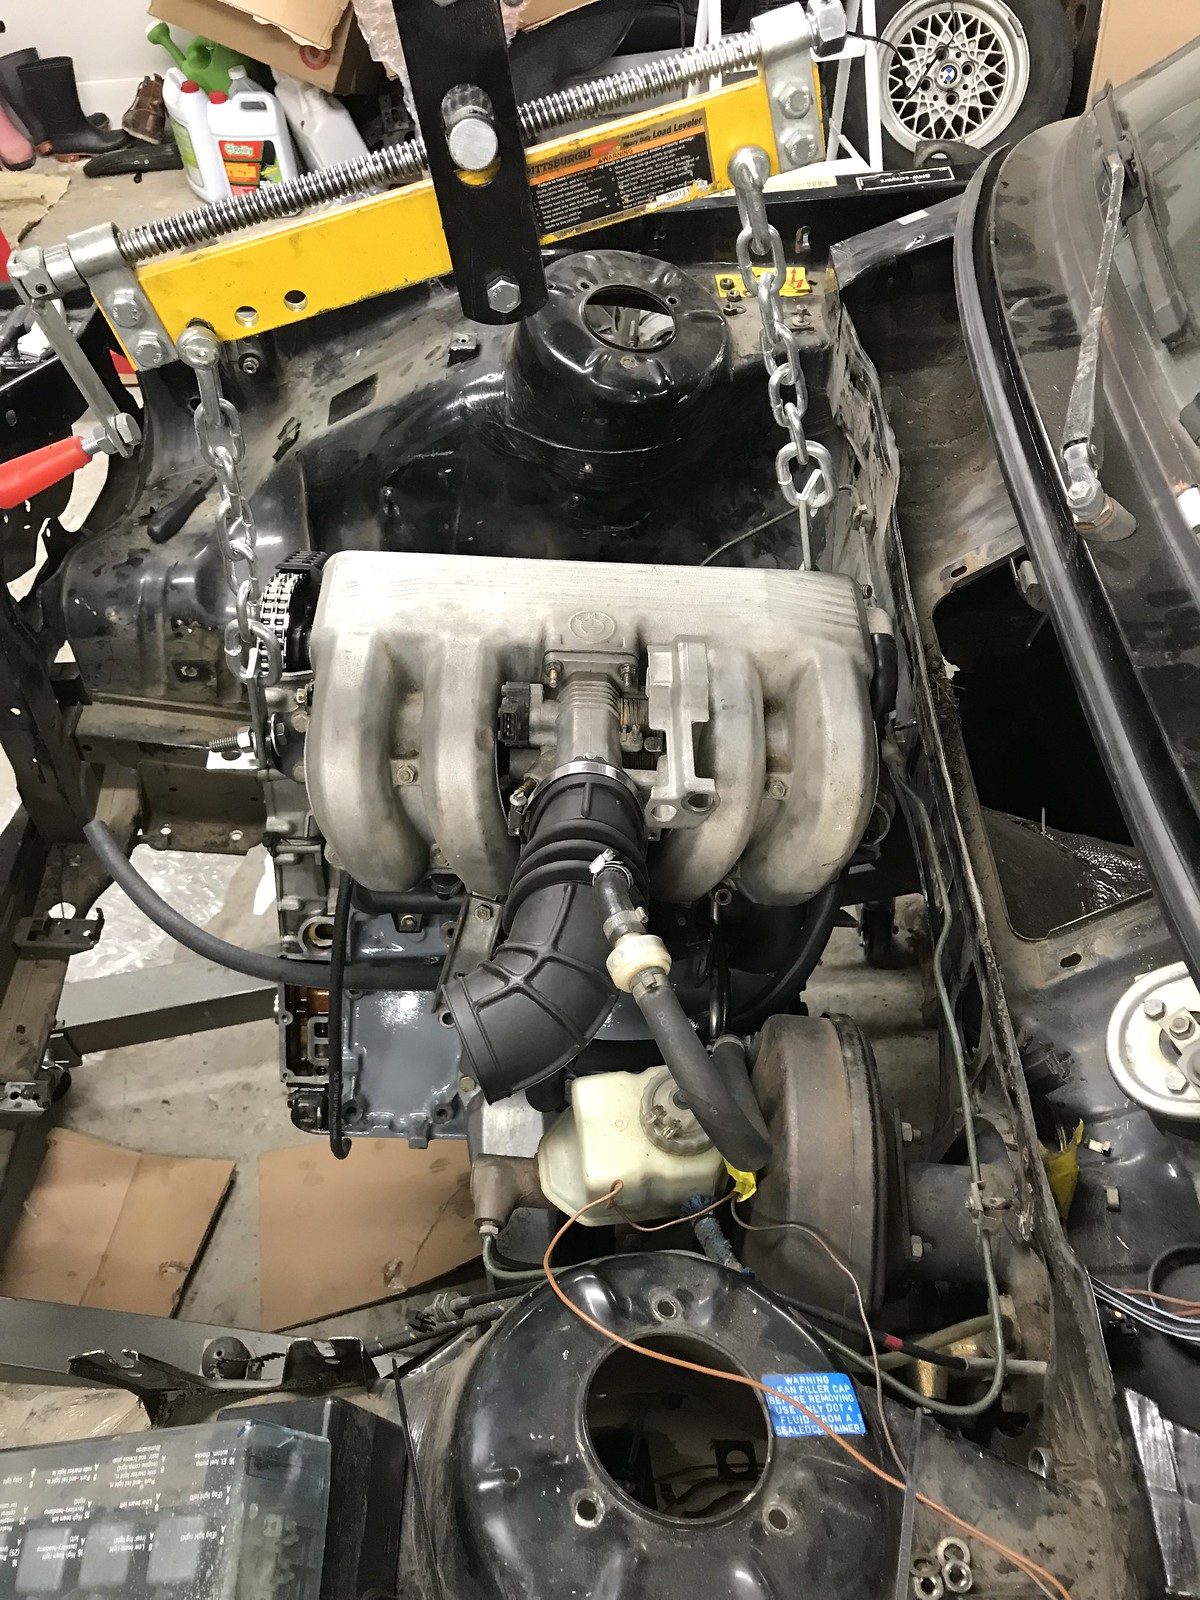
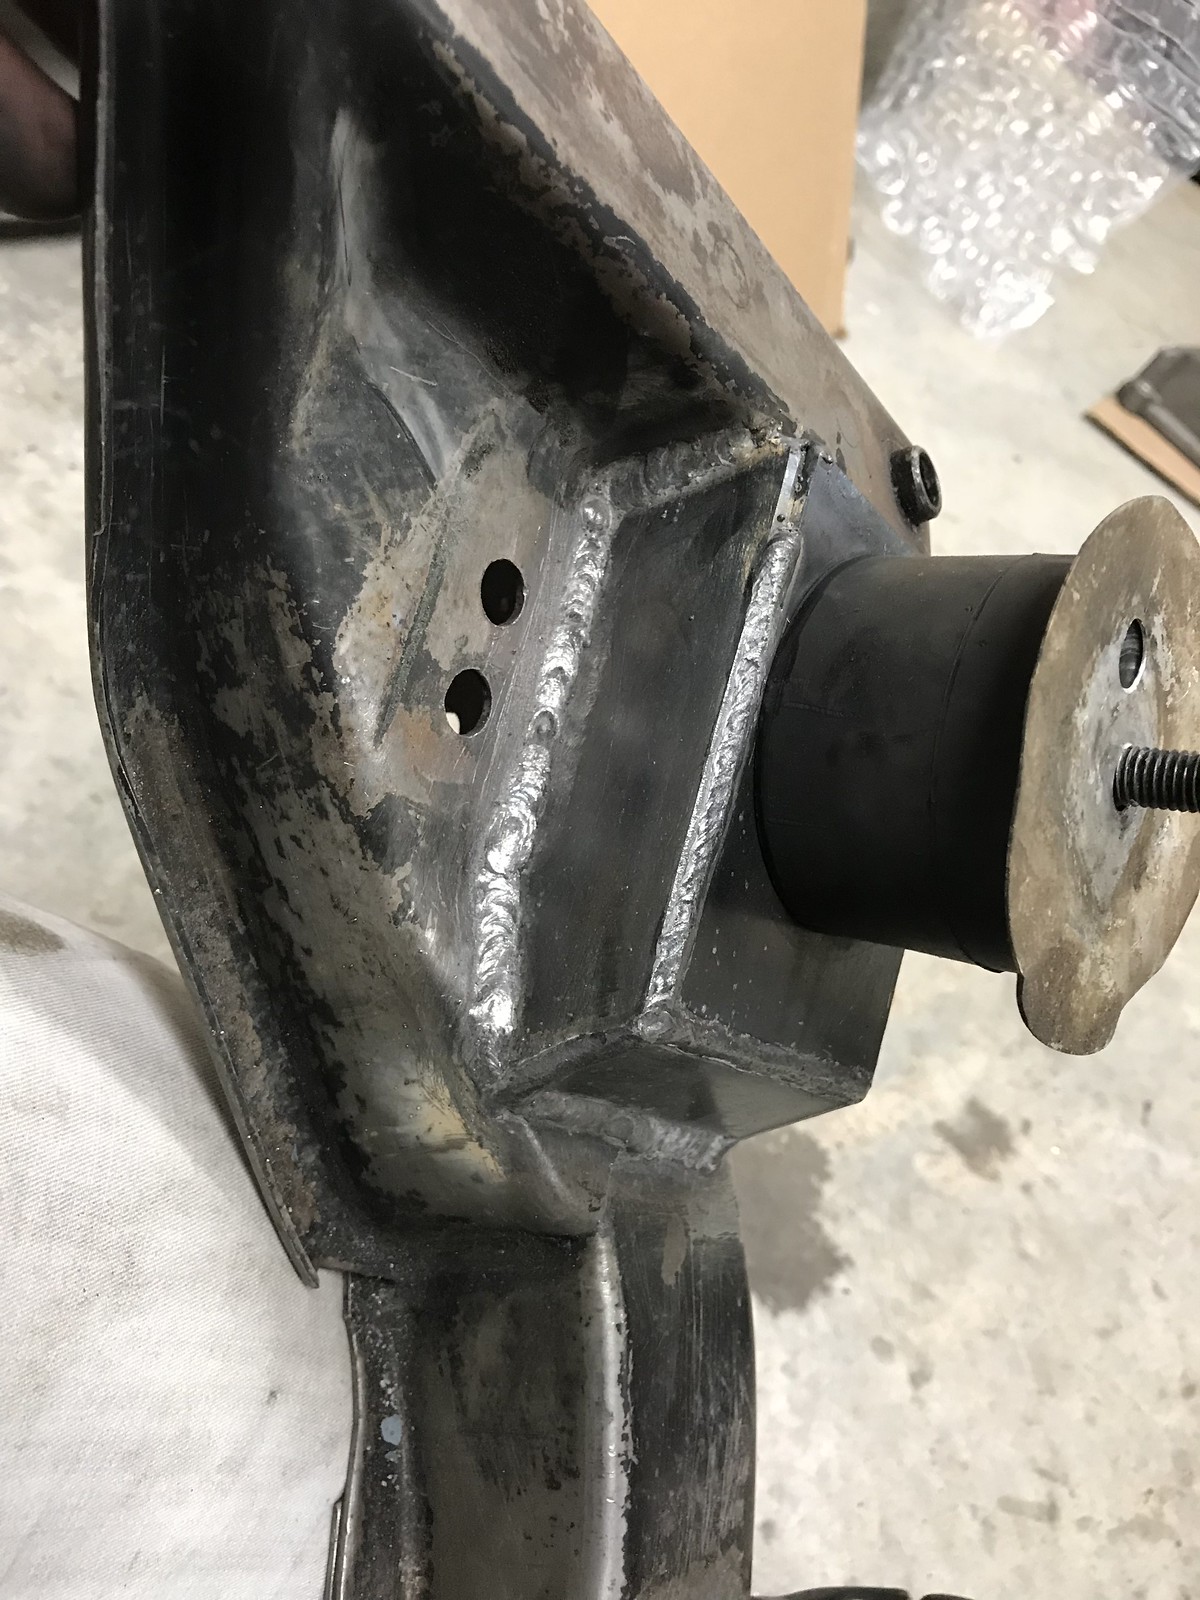
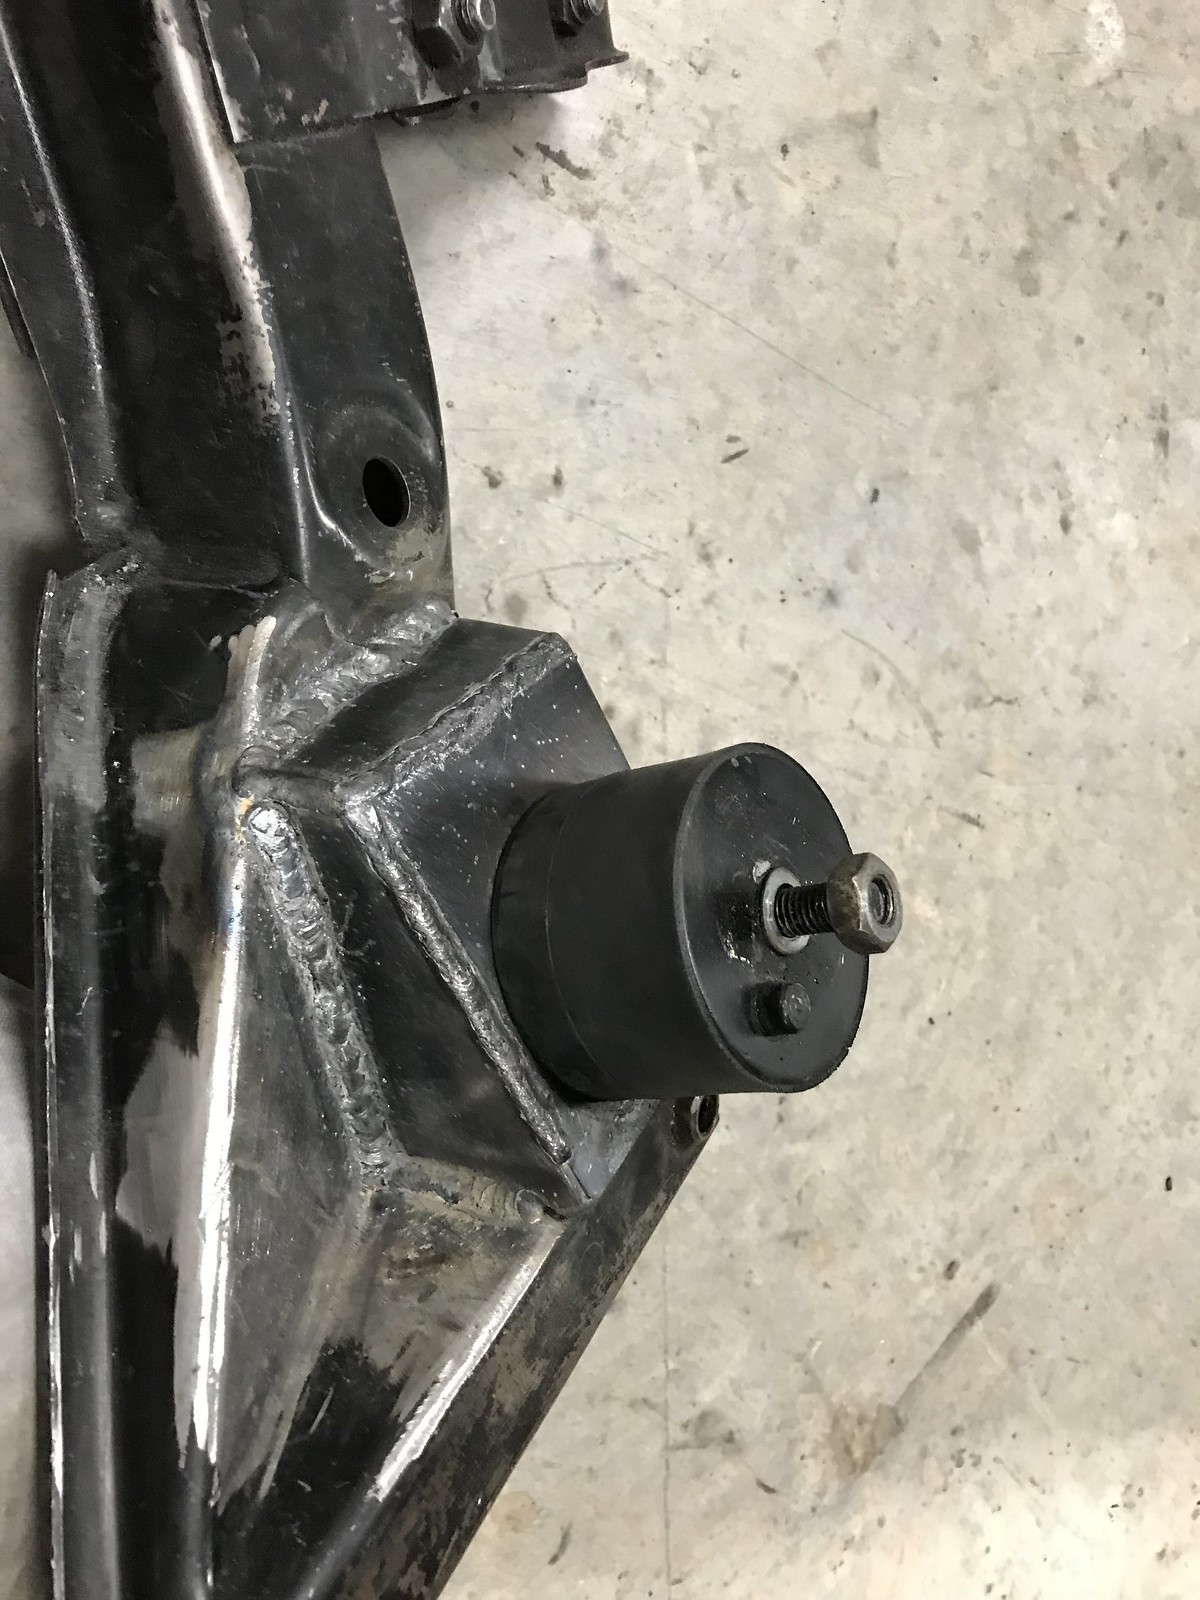
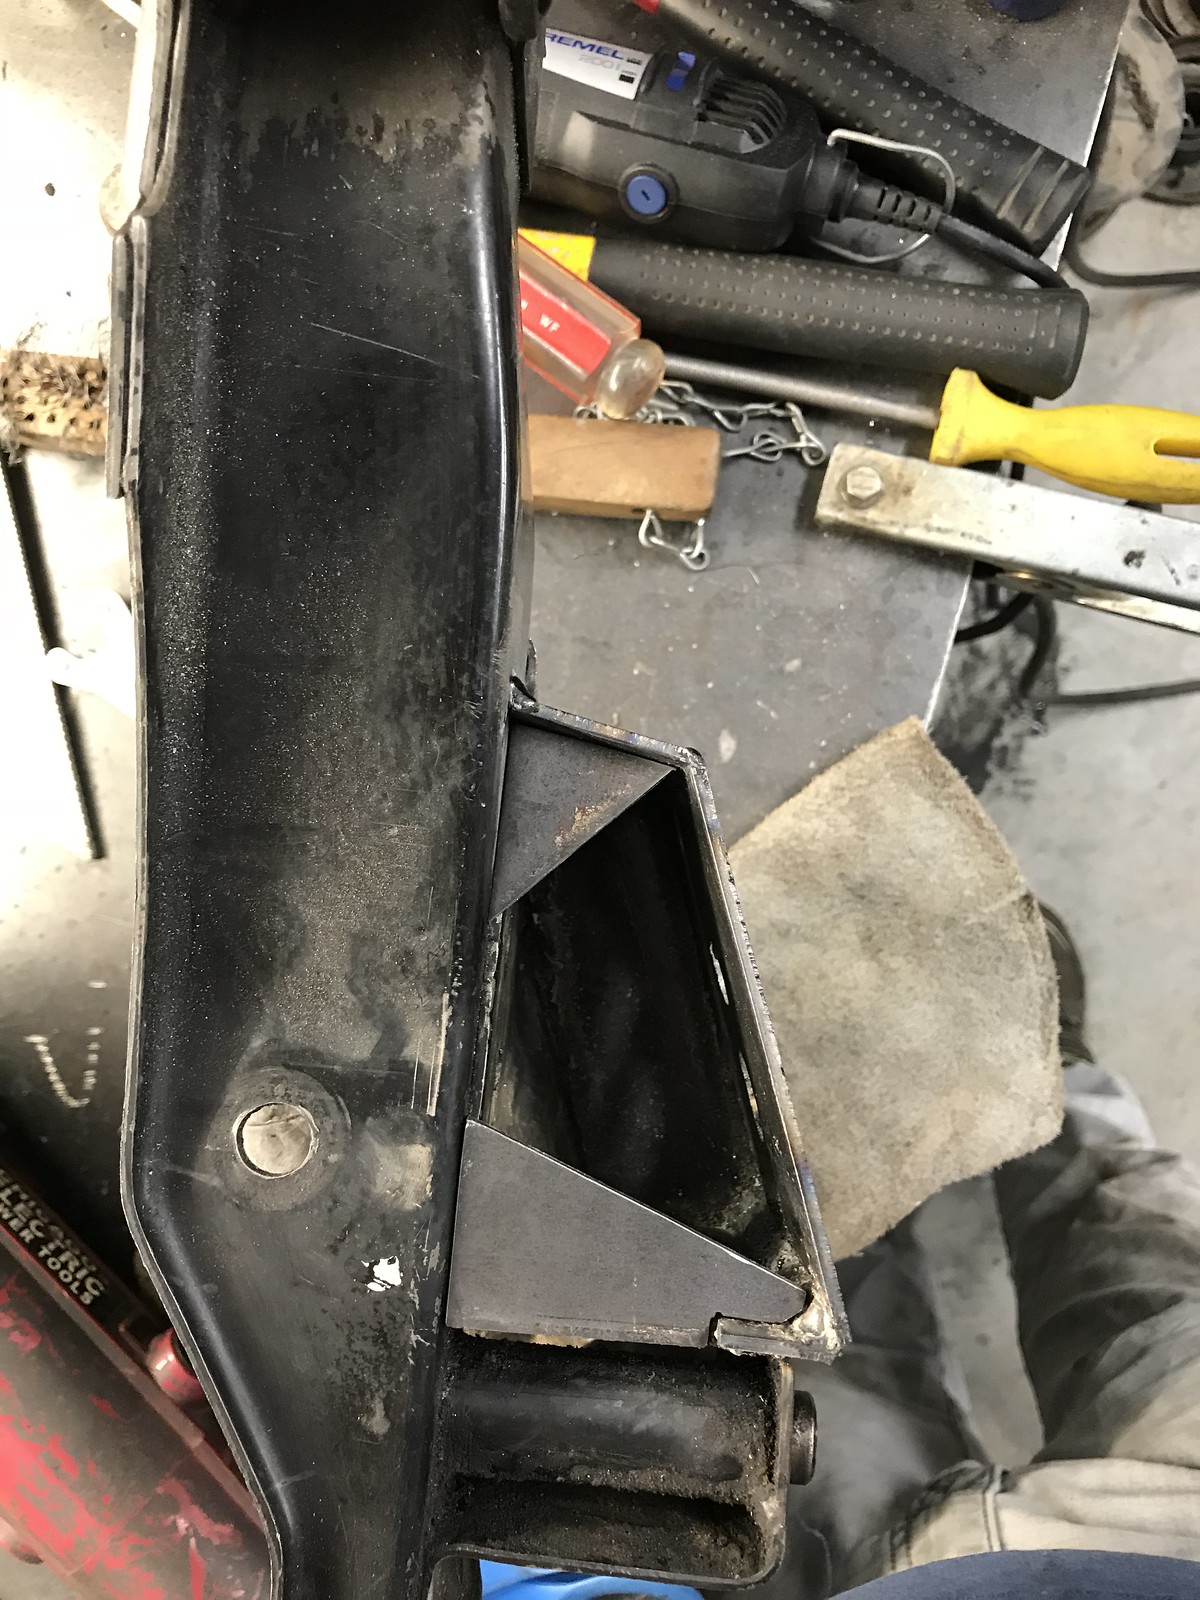
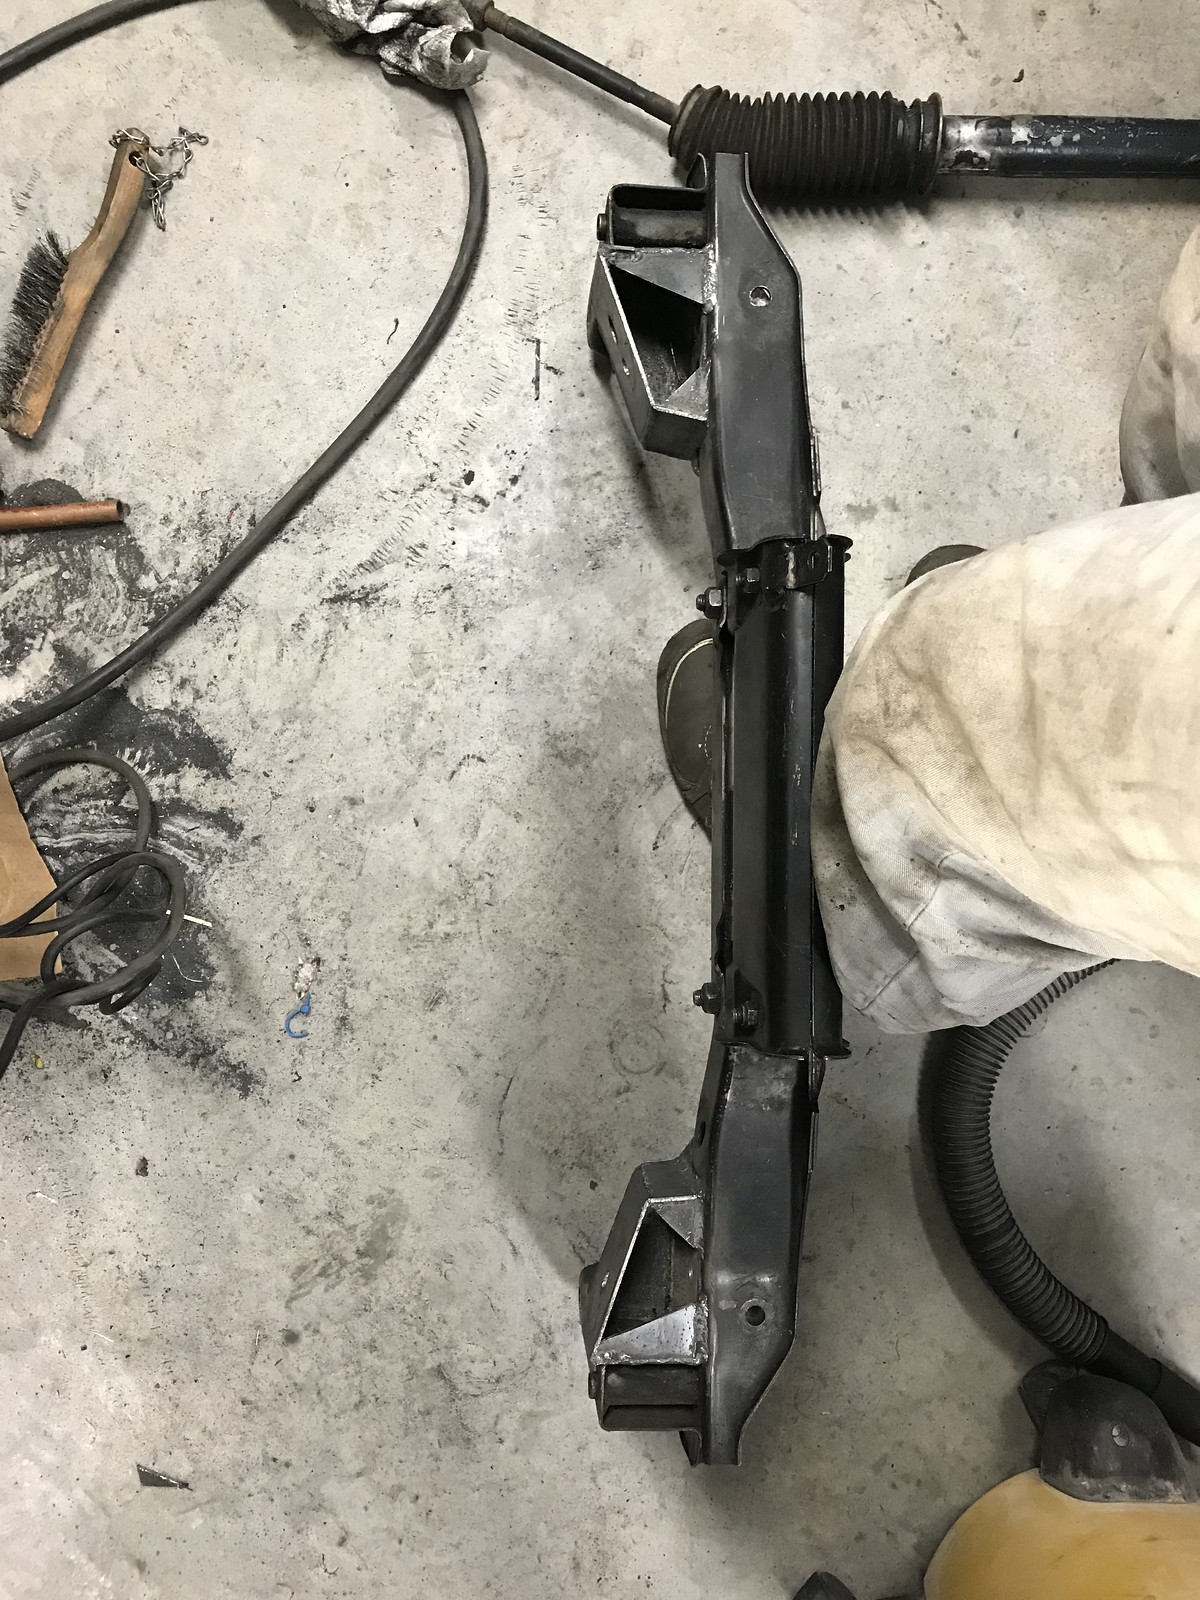
I spent some time Friday afternoon and Sunday morning knocking out the motor mounts to swap in the m42.
 Untitled by hatchethairy, on Flickr
 Untitled by hatchethairy, on Flickr
 Untitled by hatchethairy, on Flickr
The test fit went well, so I burned it all in with the trusty flux core booger welding.
 Untitled by hatchethairy, on Flickr
 Untitled by hatchethairy, on Flickr
 Untitled by hatchethairy, on Flickr
 Untitled by hatchethairy, on Flickr
 Untitled by hatchethairy, on Flickr
 Untitled by hatchethairy, on Flickr
 Untitled by hatchethairy, on Flickr
 Untitled by hatchethairy, on Flickr
 Untitled by hatchethairy, on Flickr
Nice mounts, I don't see a lot of boogers on those welds.
Adam