1 2 3 4 ... 9
infernosg
infernosg New Reader
2/13/18 4:58 p.m.

Time to do something about the exterior. Recall this car had been in an accident at some point in its life so some minor collision repair was needed on the front passenger's side. I also now had an assortment of colors: red from the '89, silver from the '86, and an assortment of aftermarket fiberglass parts. While working on the red car in previous years I quickly realized body work wasn't something I could do. I simply lack the patience. So in late 2014 I decided I'd hand it over to the professionals. I met with a local custom/hot rod/collision shop that got good reviews and we agreed work would start in early 2015. We agreed this was going to be a "10-foot car" when all was said and down. Aside from the few parts needs to get the car to the shop it was to be completely torn down and I had all Winter to accomplish that. I ultimately ended up dropping the car off in early February 2015. The first step was to finish stripping it down and take it all the way to bare metal. We originally discussed sand-blasting but eventually went with chemical-stripping.

The yellow tape is covering all the holes I wanted welded shut. I mainly wanted to close the larger holes where the A/C and heater lines ran through the firewall but since the welder was out I told them to have at it.

I briefly considering welding in the roll bar. In the end though I decided leaving it bolt-in was still the best for what I needed. I did ask that they build some reinforcement into the mounting points though.

That's 1/4" steel plat welded to the bulkhead and floor. The idea was to tie the forward mounting points of the roll bar in with the front of the rear subframe, which mounts underneath the bulkhead. Don't worry, I still have the required backer plates as well.

After a couple of coats of primer it already started to look better.

It's hard to tell but the rear fenders have been rolled and pulled out more than an inch.

Looks much better than the half-assed flare job I did on the red car. And on the inside...

In this next picture of the interior you can see where we beat out part of the transmission tunnel.

The exhaust manifold was closer than I'd like and considering this is where any passenger's left foot would be and pretty close to the ECU I figured any more air gap would be good.

Lastly, at the shops recommendation I had the underbody coated with bed-liner.

I've had this stuff on trucks in the past so I'm familiar with its durability. My concern was (and still is) how well it will handle the exhaust heat from the Wankel.

Unfortunately, I need to take a break. Sorry for the short post but I promise the next one is worth it.

Next up: PAINT!

infernosg
infernosg New Reader
2/17/18 2:15 p.m.

I had a hard time coming up with the final color. Red has always been my favorite on Mazdas. I'd owned a Classic Red Protege5, a True Red Mazda2, and a Blaze Red RX-7. Of them I think the Classis Red was my favorite. Unfortunately, I'm told red is one of the more expensive paint choices. Since this was a car I knew I was going to throw around at a track I didn't want to invest thousands on a fancy paint job that's going to take a beating. On the other spectrum is black and white. The cheapest colors, but also the hardest to keep clean and pretty boring. I wanted something you don't typically see on a RX-7 or even in general. Green was considered but growing up with two forest green family sedans has killed that color for me. Yellow was another option and probably ended up being my #2 choice. In the end I went with a color I remembered seeing when I was shopping for Jetta TDI's with my wife. It made a lasting impression.

Magma Orange, better known as "Fahrenheit GTi Orange."

The more progress was made the better it looked.

You'll note I left the interior in primer. This was another cost-savings choice but I'm going to cover everything up with black carpet and trim so it doesn't really matter. In the end keeping it black ended up being a good idea though.

At this point I made another spontaneous decision:

I picked up a polycarbonate rear window from Optic Armor. It came pre-formed but a little oversized so some trimming was required. It turned out pretty well in the end:

Since the window is only 1/8" thick we added to 1 x 1/8" straps on both sides. This took out a lot of the flex and I think it meets all NASA and SCCA CCR's. We ended up using vinyl tape for the window trim since whatever protective coating Optic Armor uses was preventing the paint from sticking. I think the body-colored hatch is a nice touch of originality. Overall it weighs ~15 lbs compared to the stock ~50 lbs. With the OEM struts installed it'll give you a good shot to the chin if you aren't paying attention while opening (ask me how I know).

More progress being made: side trim, windshield, bumper cover, hood pins, and side skirts installed. It looks pretty comical with the suspension raised up and rolling on the OEM wheels and tires.

Back when I still had the red car I had purchased the last fiberglass splitter ISC Racing had. This would have given the front a nice low, aggressive appearance but it ended up being more trouble than it was worth. The splitter was warped, asymmetrical, and didn't really line up with the bumper cover at all. I sold it for a loss and picked up one of the last available OEM-optional front chin spoilers. Only black was available but that didn't matter since everything was being painted. Subtle:

Sometime in the future I'm going to make my own custom undetray/front splitter but this completed the overall exterior appearance of the car. Finally, after around 6 months of work (~July 2015) it was ready to come home.

I'm happy with how it turned out. It's still easily recognized as a 2nd generation RX-7 but is just aggressive enough without being over-the-top. The reflector-less side trim from a European market car turned out to be a nice touch.

We're nearing the home stretch now...

Next up: some assembly required.

infernosg
infernosg New Reader
3/20/18 10:04 a.m.

Keeping this moving...

I got the car back from the body shop in July 2015. By September my wife accepted a new job in another state so that Autumn was reserved for cleaning and preparing to sell the house and trips to Virginia to look for a new house. By November I was all by myself in Ohio so naturally I occupied myself. I figured it would be easier to ship one most-intact car than 100 separate pieces so I got to assembling everything I could. No wife and no kids meant I could be as messy as I needed to be. I started with the exterior: side windows, trim, etc.

Next was some interior trim I know I wouldn't need to remove again in the future like the headliner, door cars, b-pillar trim, etc.

Everything else was pretty much just thrown in the car for the move.

The main task I wanted to complete before the build was to finally build the engine. Anyone who's ever built a rotary knows there's like 100 small pieces and seals and I had no doubt something would get lost in the move. I'll spare everyone the detailed build log and just share some of the highlights. This was my first rotary build so I was pretty thorough in taking pictures.

Low-tech method of applying 320 ft-lb to the flywheel nut: apply body weight (~160 lb) 2 ft from nut:

I find it easier to install the engine and transmission as one piece.

Final resting place:

Bolted a few more things on the engine and this is pretty much how the car would sit for a while.

Exterior buttoned up and ready to move:

In late December 2015 the car finally made its way from Cincinnati, OH to Richmond, VA. Since we were staying in a 2 bedroom apartment at the time the car lived in a storage unit for the next four months. Every week I'd stop by and crank the engine by hand a few times to make sure nothing seized up. Unfortunately, I'd make little progress for the rest of 2016.

Next up: final assembly, a minor setback, and first fire

oilstain
oilstain New Reader
3/22/18 12:21 p.m.

Fun read, please keep it going!

infernosg
infernosg New Reader
3/23/18 1:15 p.m.

I spent the first 4 months of 2016 living in an apartment so no progress was made. We closed on our house and moved in the first week in May but I really didn't get back to work on the car until August. I finished up the chassis wiring I posted out of order on the previous page but that was about it for 2016. Why did I get no work done in late 2016? This happened:

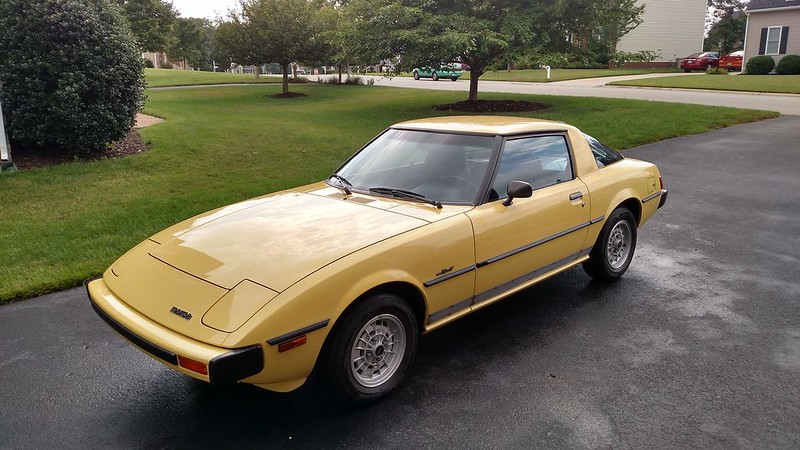
I found this for sale in Nebraska (I might have even made a post here about it) and it was just to good to pass up. It's an all-original '79 (made in March '78) GS with less than 30k miles on it. It's nearly immaculate but did require some work since the previous owner basically drove it a handful of times every 10 years since getting it from his brother in the early '80's. I spent late Summer through the end of 2016 fixing small things here and there.

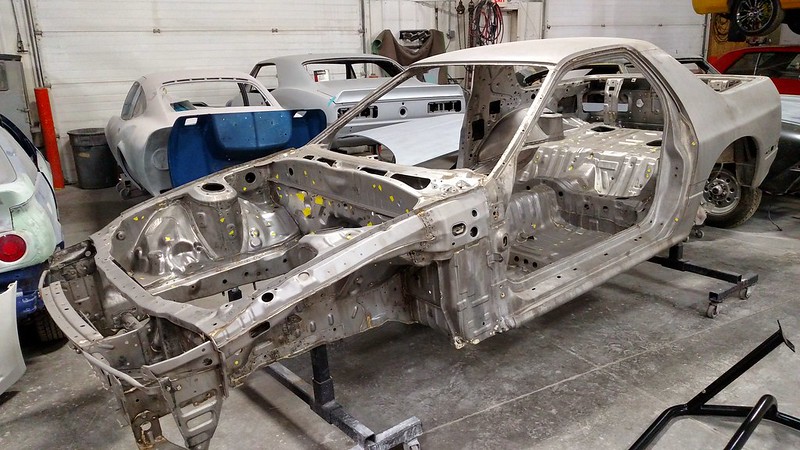
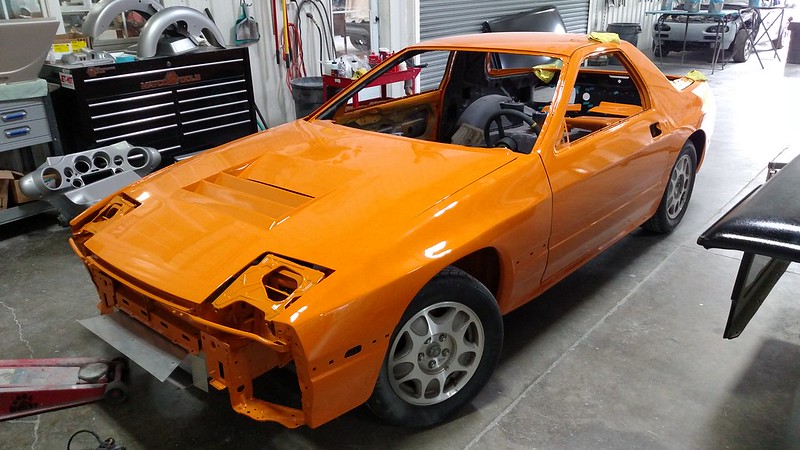
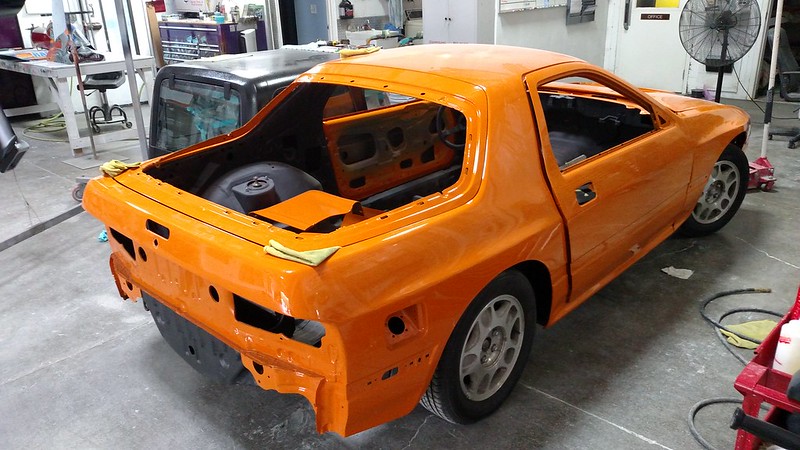
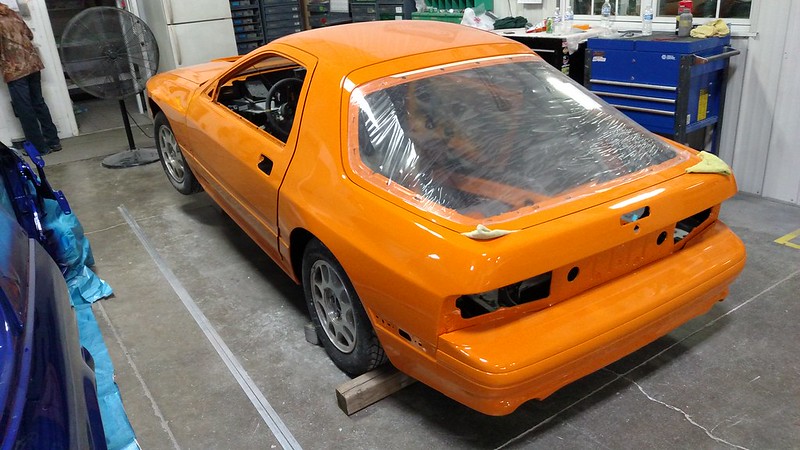
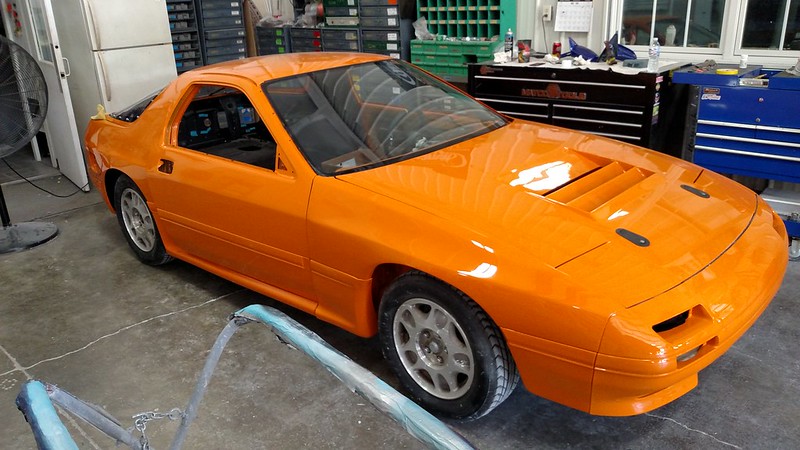
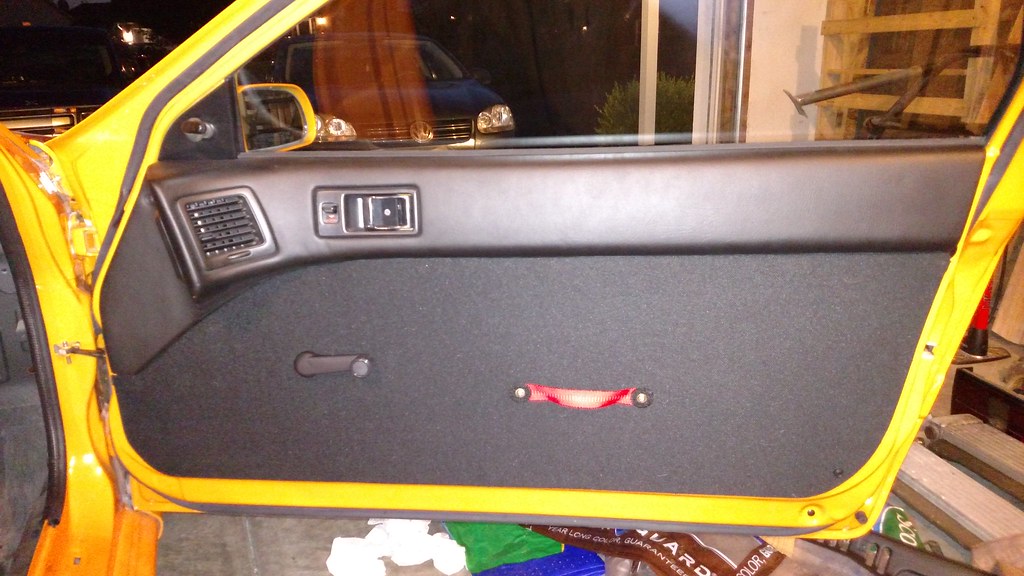
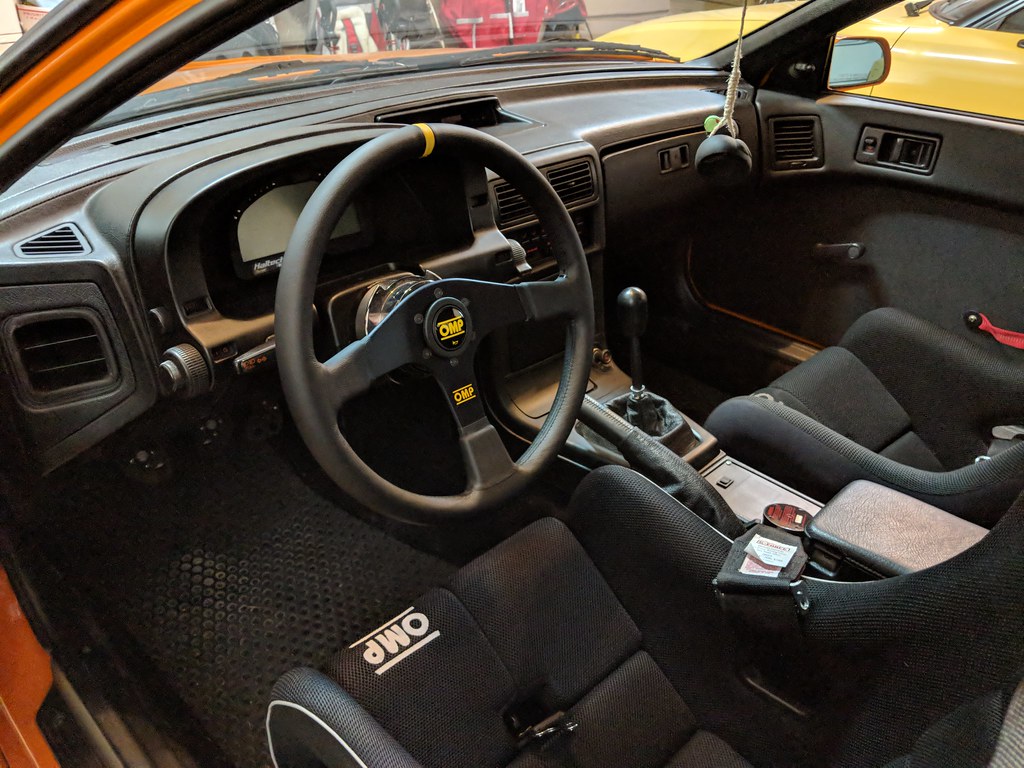
Back to the subject car. Finally in Spring 2017 I started throwing the interior back together.

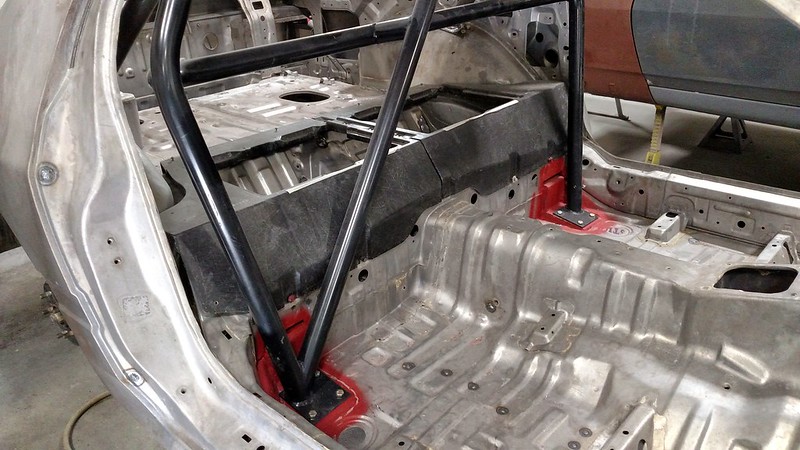
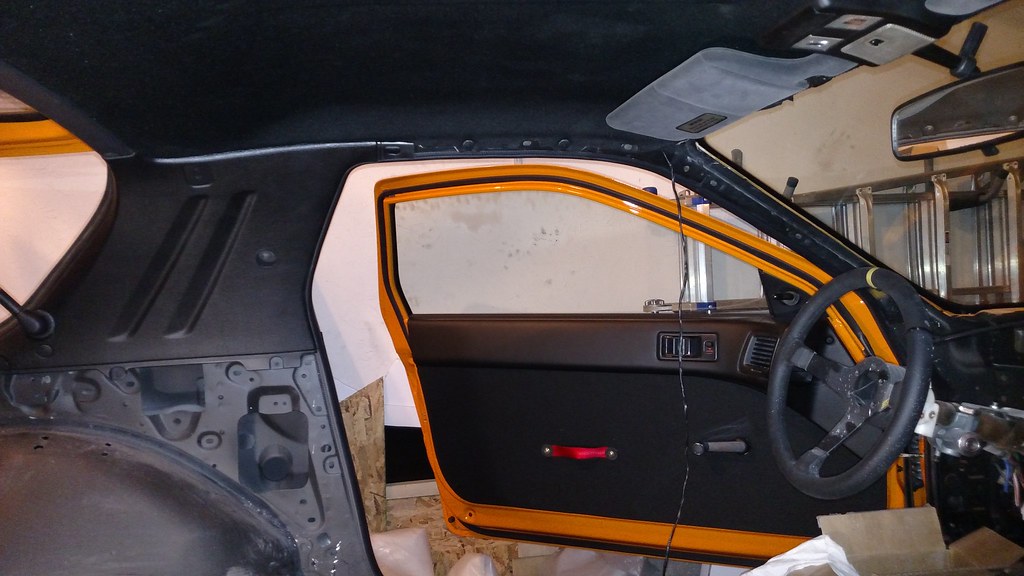
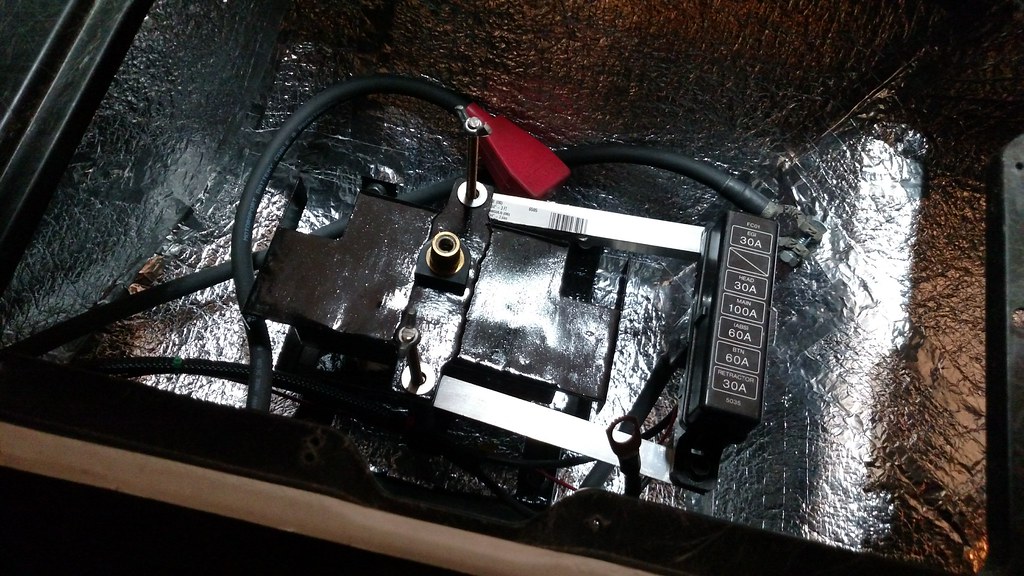
The shiny stuff is that "EZ-Cool" thermal/sound barrier you can pick up at your local hardware store. It weighs next to nothing and I figured it couldn't hurt. I can't remember if I posted this before or not but I made a simple battery tray/tie-down to hold the ETX18L battery behind the passenger's seat. I also relocated the main fuse box along side it.

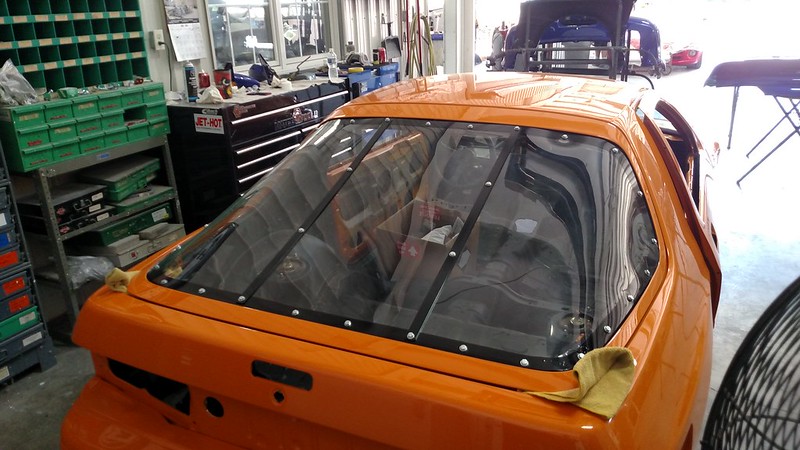
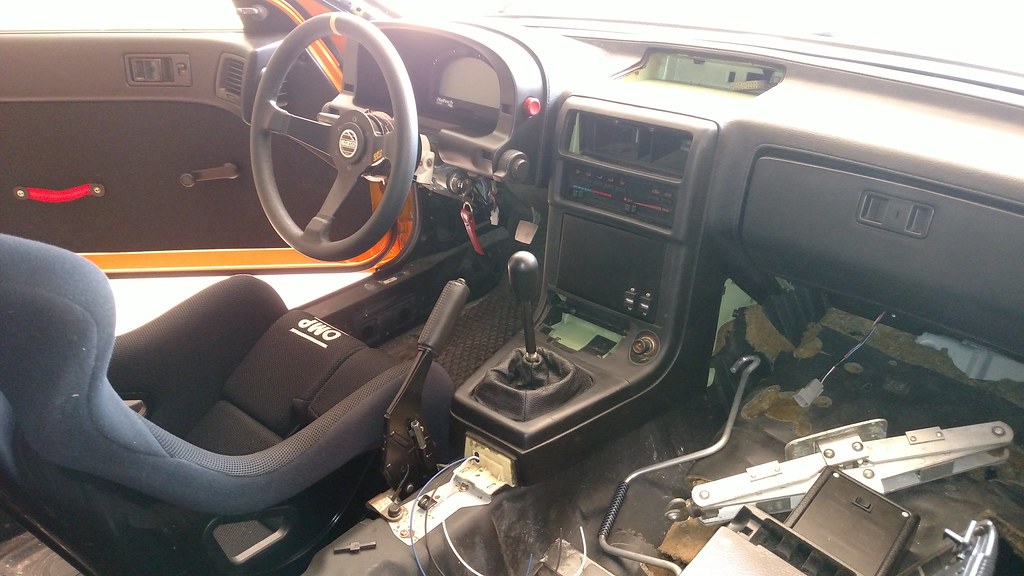
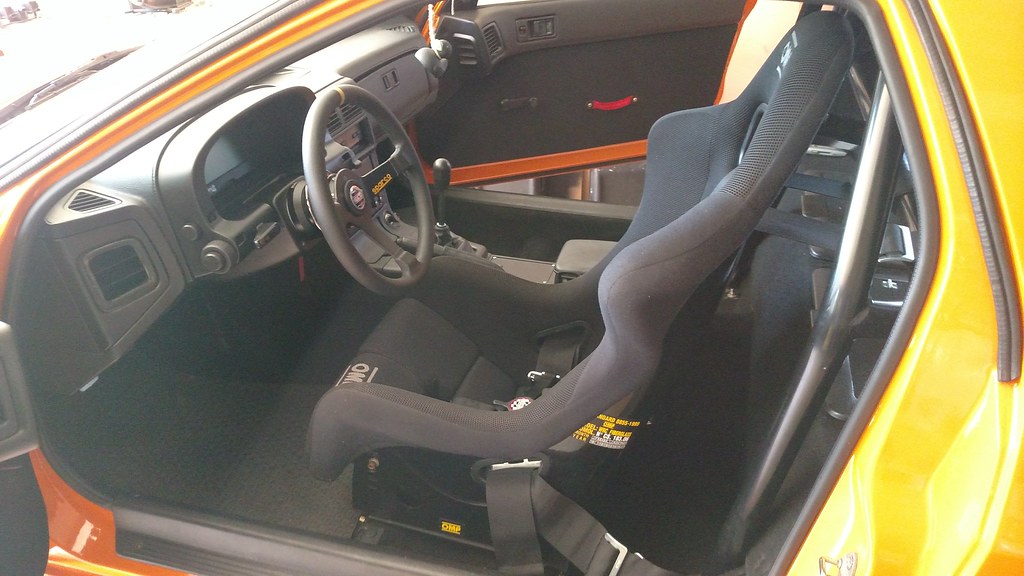
Interior all buttoned up:

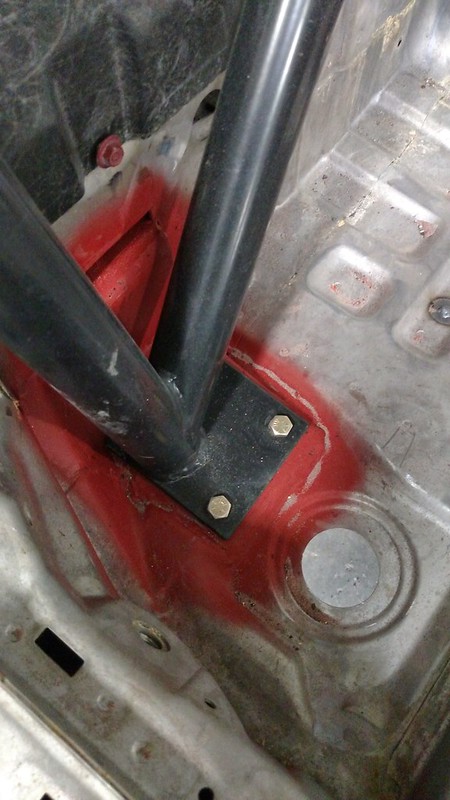
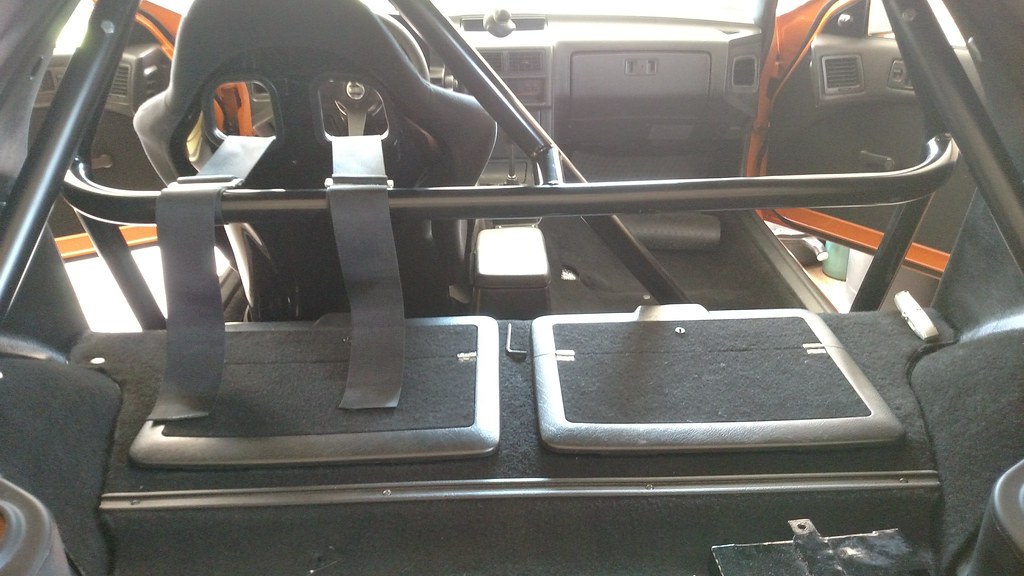
One of the issues I ran into with the roll bar was it interfered with the storage bin lids. Not a huge deal but it made installing and removing the battery difficult. My not-so-elegant solution was to cut the lids in half and add small hinges for a sort of bi-fold setup. It works...

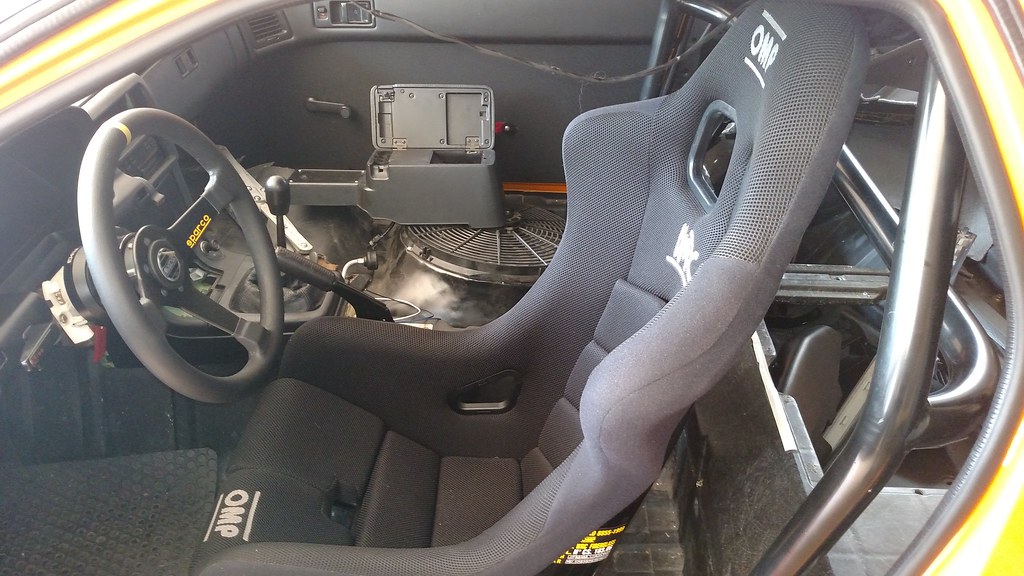
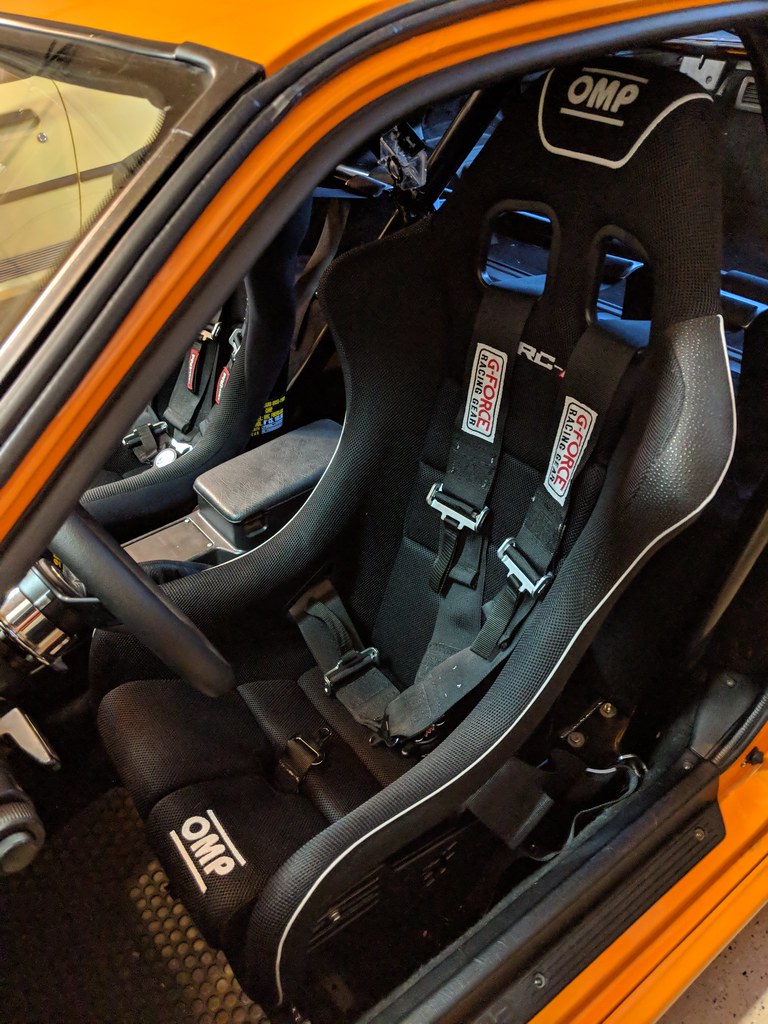
To this day I still don't have a passenger's seat.

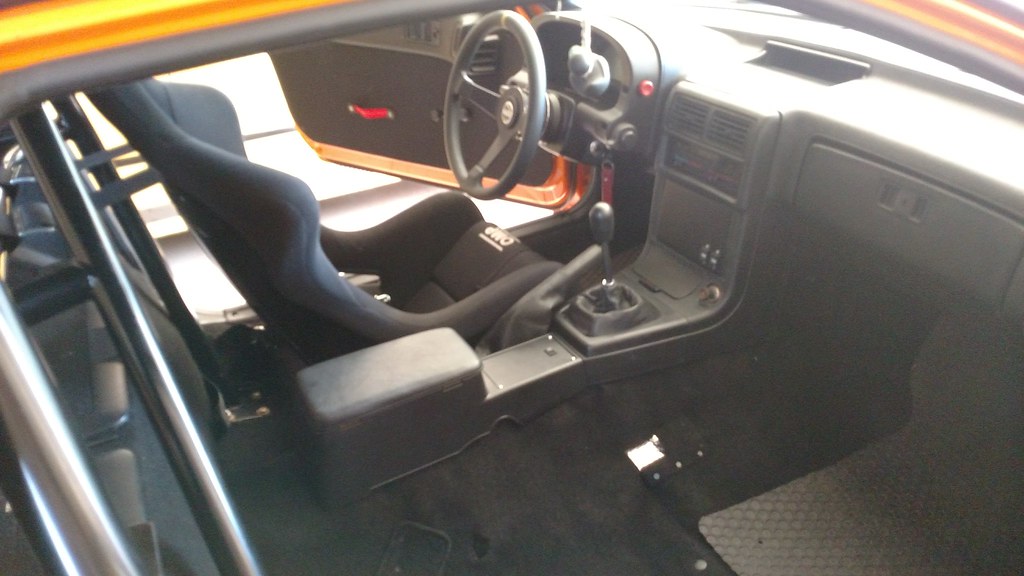
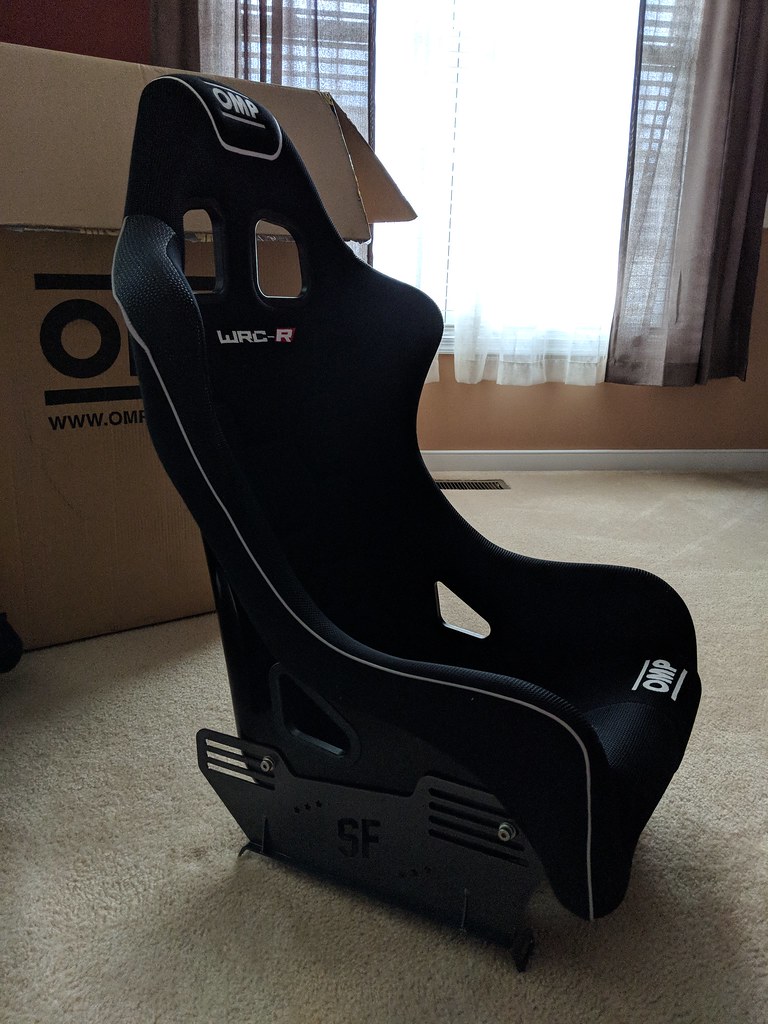
I'll be picking up another OMP WRC seat and G-Force 5-point harness shortly. I bothers me to no end that OMP changed the look of their seats in 2014. Now I'm going to have mismatched seats because I'm not spending another $800 just to have matching seats...

The good news is I hooked up the battery and most everything worked. At least the magic smoke stayed inside the wires. I had one small issue with the factory alarm being triggered. It's integrated into the OEM CPU, which also contains the horn and indicator/hazard relays. To avoid rewiring those I kept the CPU and severed all the alarm connections. The problem was I also removed the ground on the ONLY circuit that switches to open when triggered. This caused the horn to go off (because they're internally connected in the CPU) at random times. One quick jumper to ground and that problem was solved.

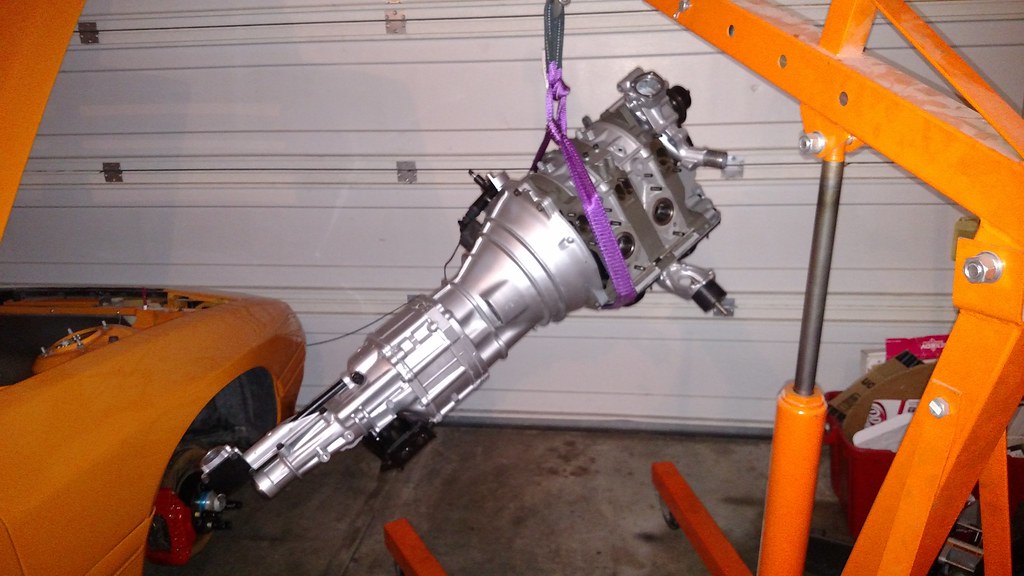
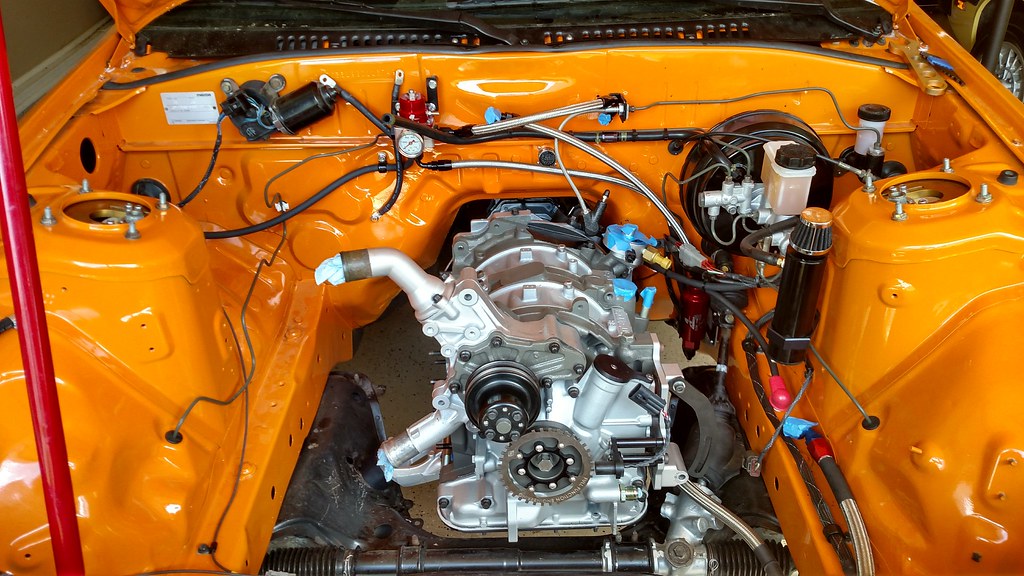
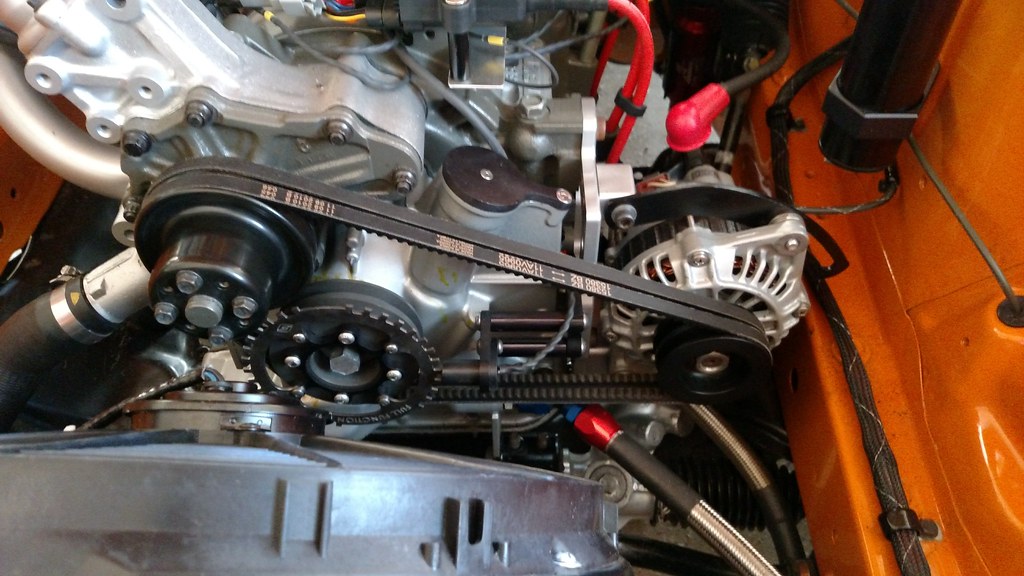
Back to the engine. Test-mounted the radiator. Installed the clutch master cylinder and ran the spark plug leads.


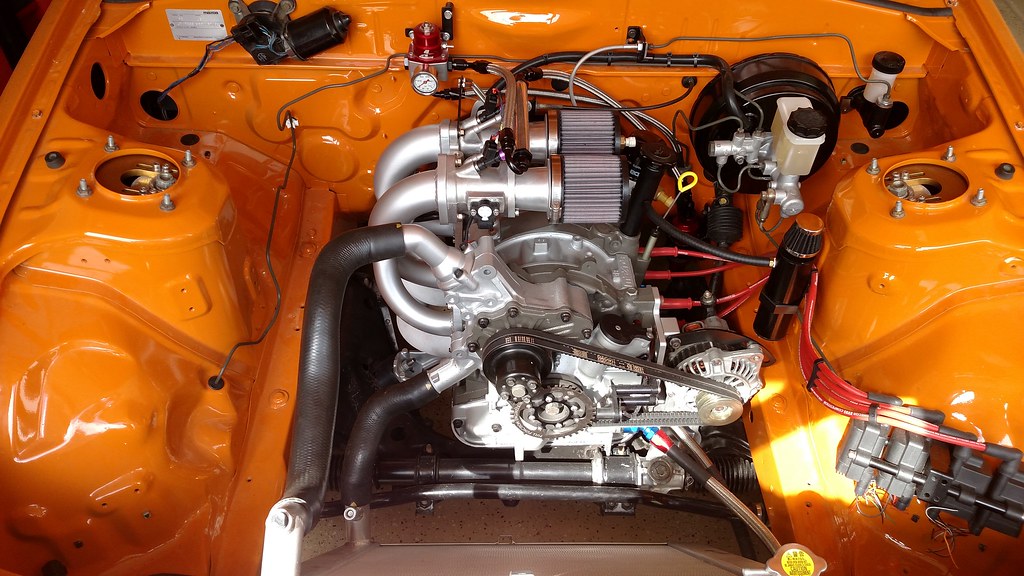
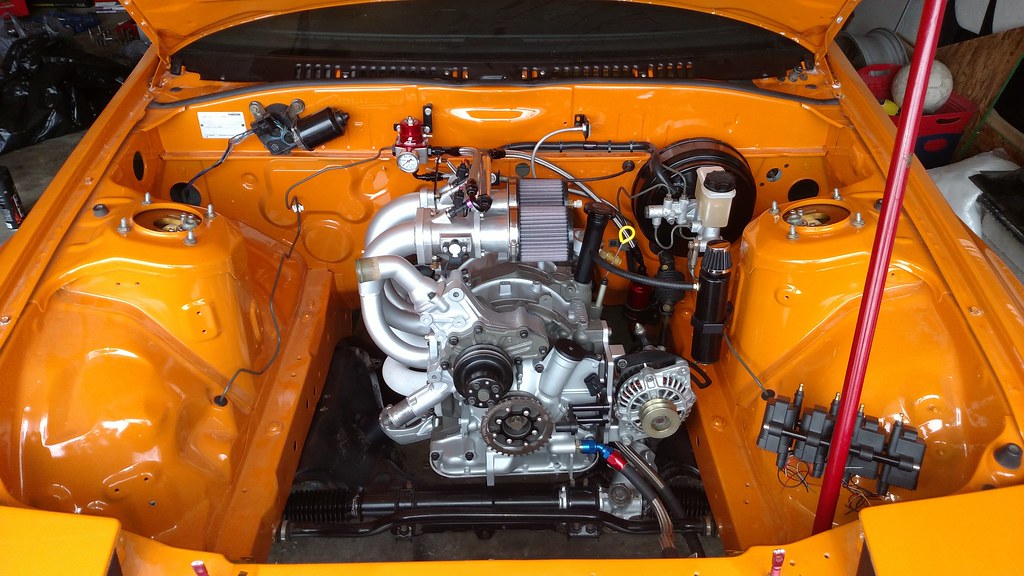
I decided I didn't like the leads snaking around the engine so I made a new bracket the mounted the coils on top of the engine.

They're a close fit with the filters installed.

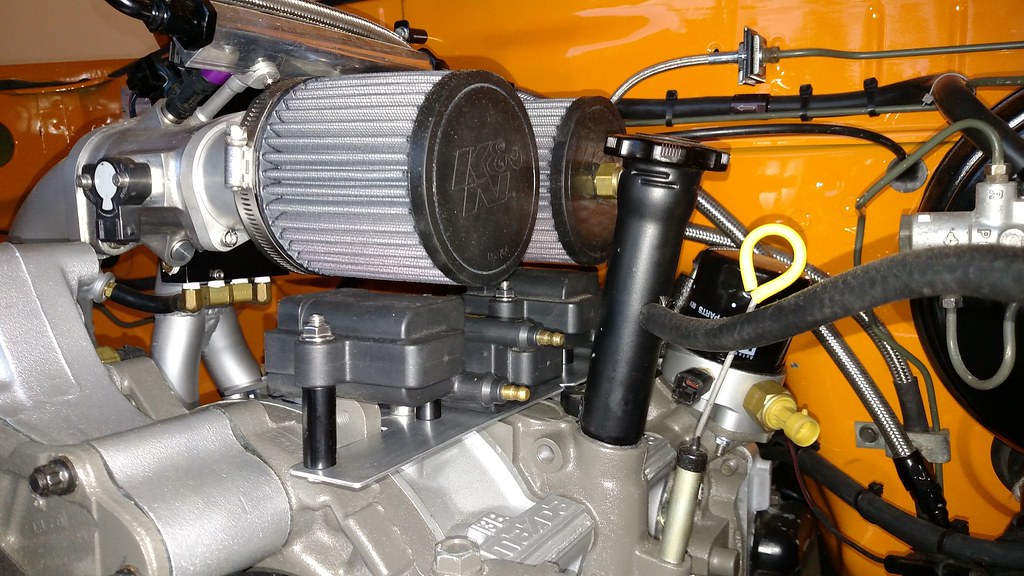
Hit up Magnecor for another set of custom leads. Much better:

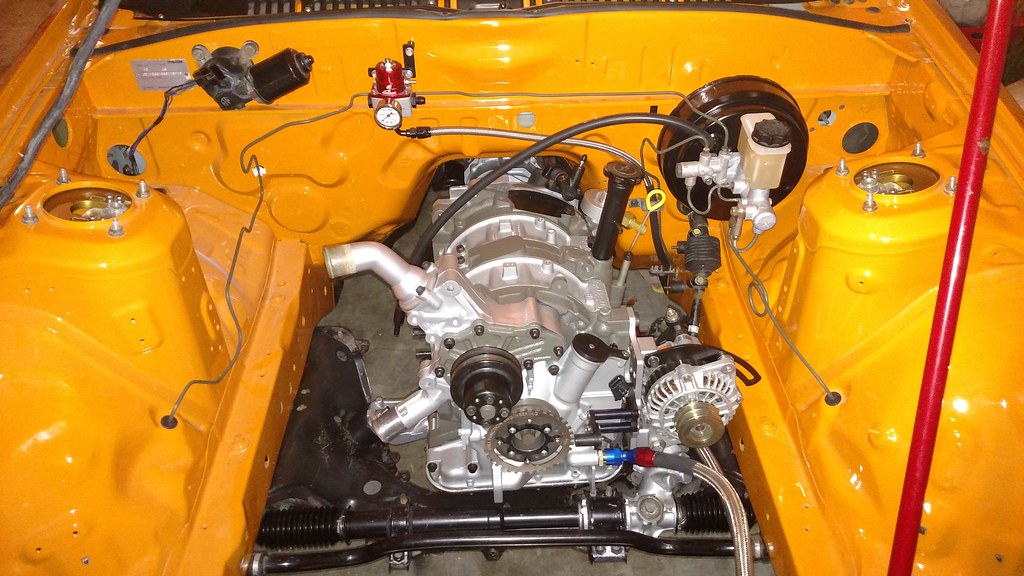
Unfortunately this wrought havok on my engine harness since it was designed with the coils mounted behind the driver's side headlight. I still made it work. The ignition subharness just spirals around the engine for the moment.

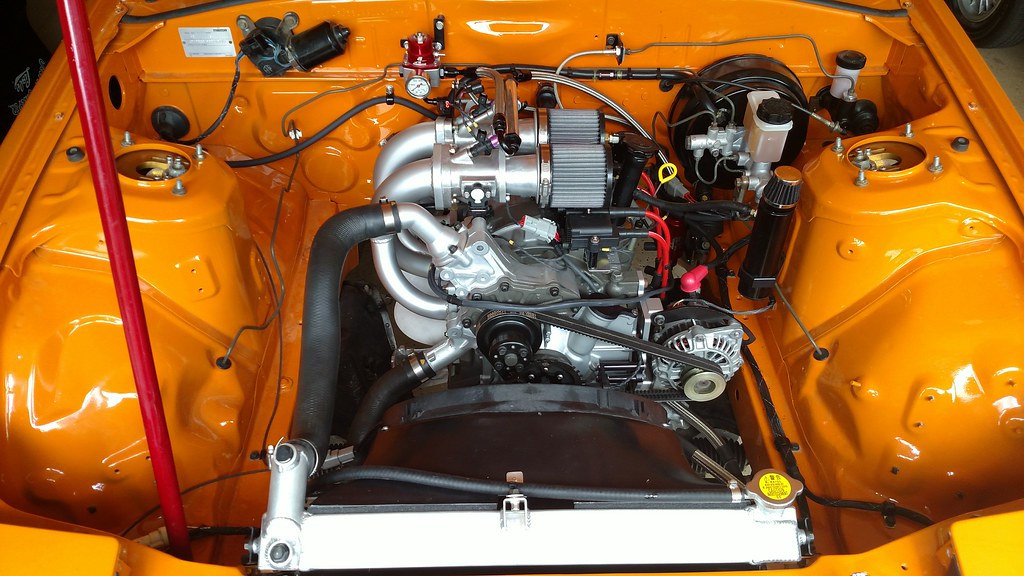
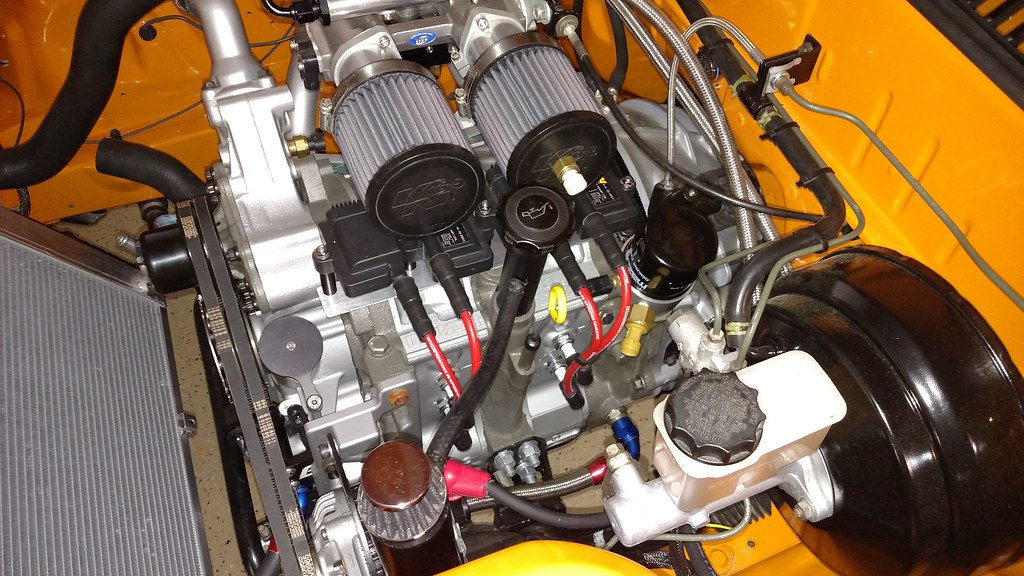
Here's what it looks like under the filters:

I definitely need to clean up the harness at some point (later).

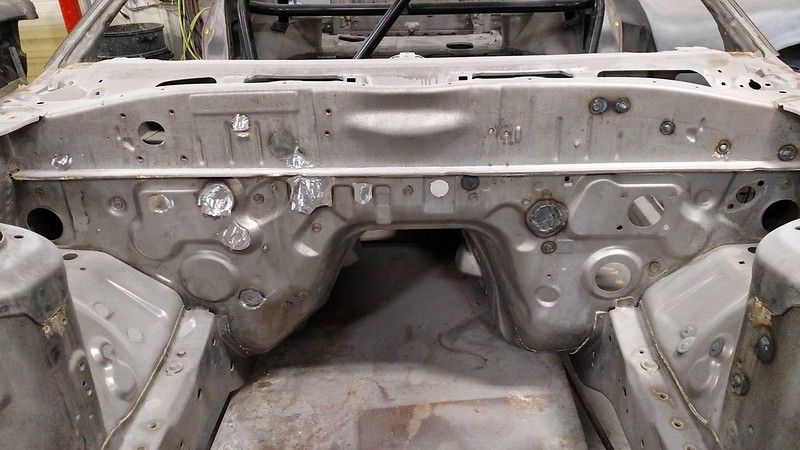
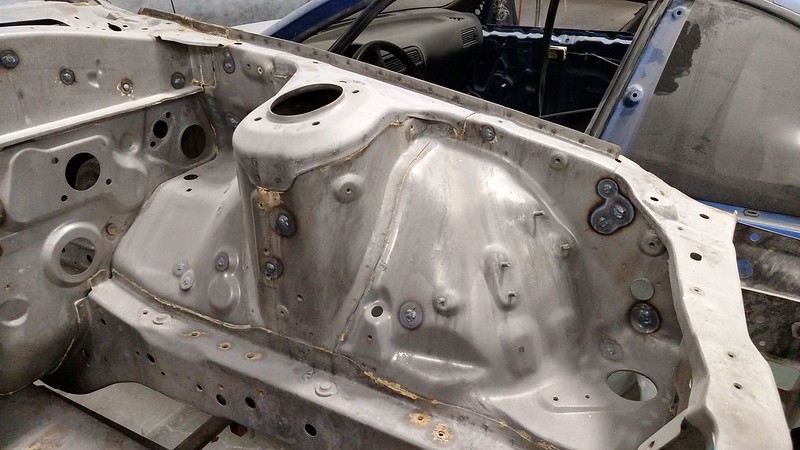
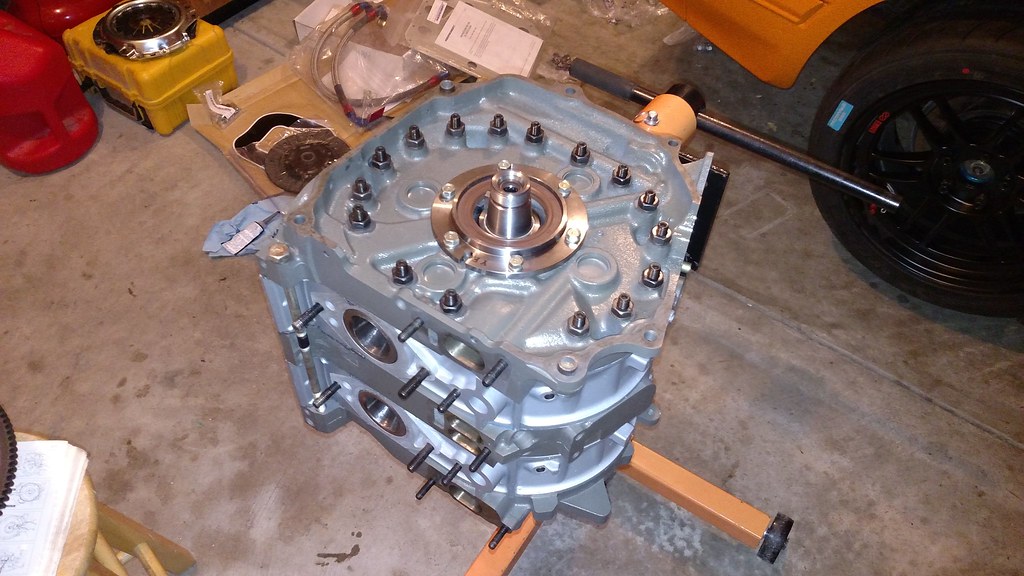
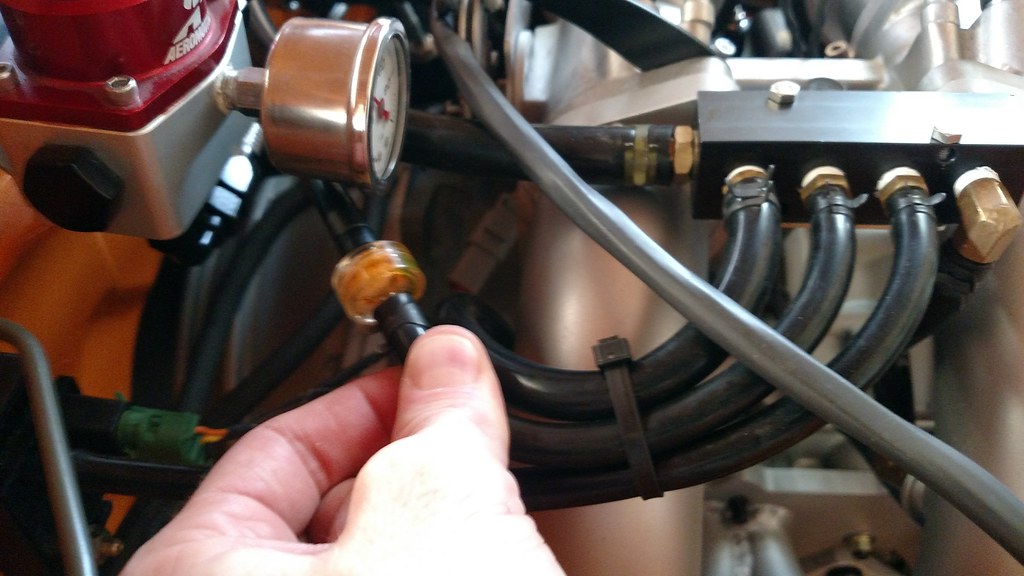
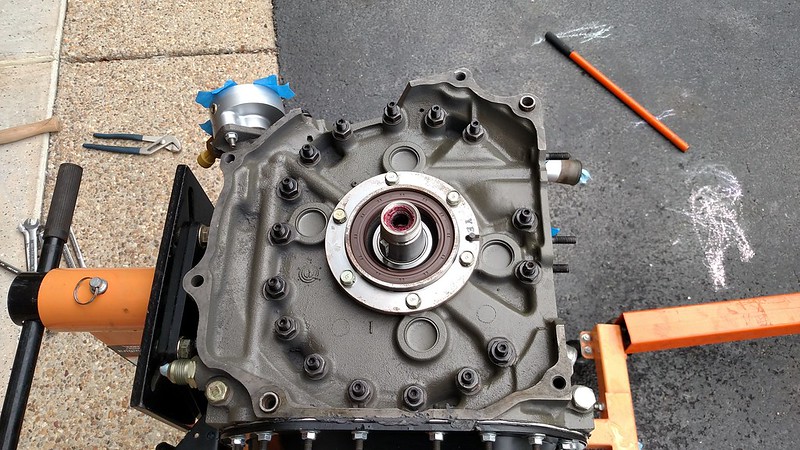
So... that's it, right? Engine built. Harnesses completed and installed. Time to add oil and coolant! Oil goes in as expected. Just as I'm finishing topping off the coolant I see a small puddle on the floor under the transmission bellhouding. Please don't be coolant. PLEASE DON'T BE COOLANT! ...it's coolant. CRAP! My heart sank. Pretty much the only reason coolant would be leaking is a failed coolant seal, which means I screwed up something in the rebuild and would have to take it all apart. Before I admitted defeat I figured I'd try to at least see where the coolant was coming from. I had received an endoscope for Christmas the previous year and figured now was a good time to use it. I popped off one of the inspection covers, plugged the endoscope into my phone and started probing (ha). This is what I see immediately:
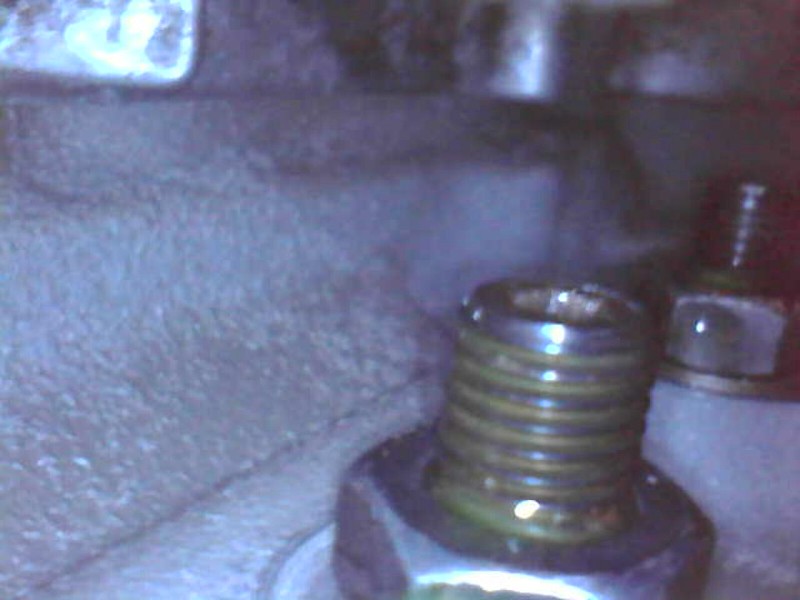
and

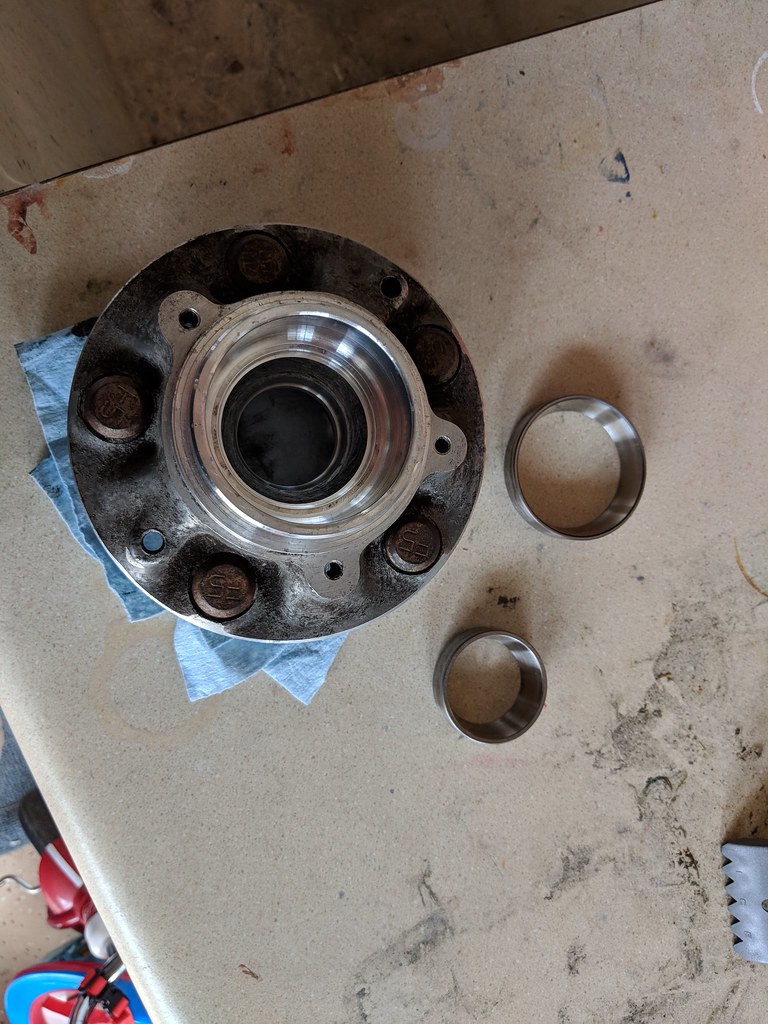
Okay, so coolant is leaking around the threads of the tension studs. Yes, studs. I replaced the OEM bolts with studs because reasons! This is good news. It's not leaking from the block so the seals should be intact. I drain the oil to make sure and fortunately it's devoid of coolant. The studs run between the inner and outer coolant seals and are exposed to coolant so somehow it's finding its way around the threads. I used the OEM sealing washers so what gives. Oh, wait. The sealing washers are designed to be crushed under a bolt head. Mine are still crushed but there's still a leakage path around the threads. I did use sealant like the instructions said, right? WRONG. Turns out I skipped over that part. Well the good news is I didn't completely botch the rebuild. The bad news is the engine still has to come out.

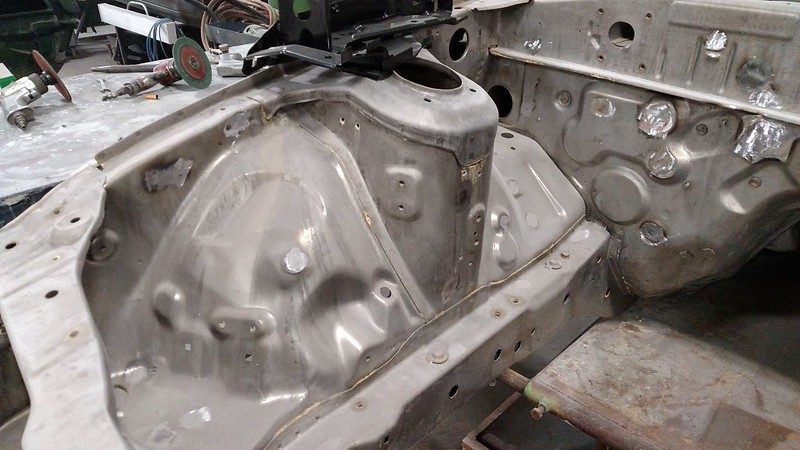
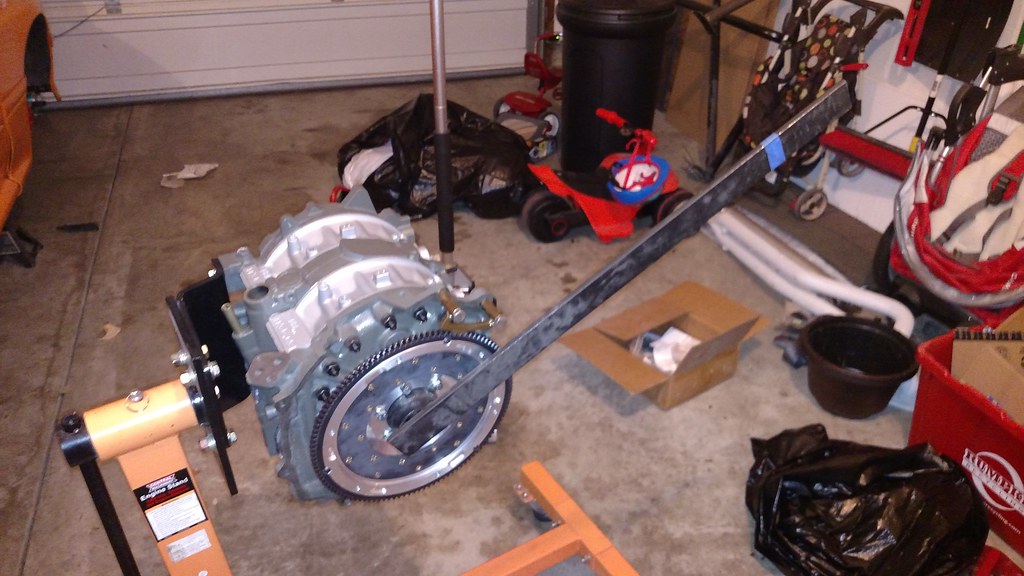
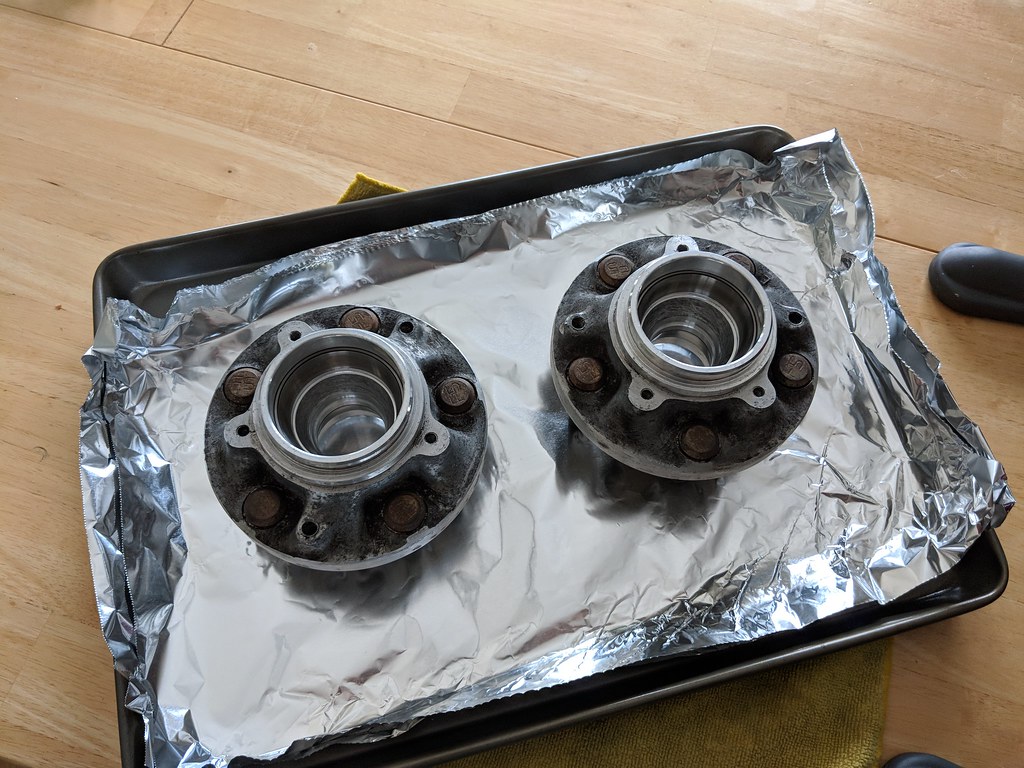
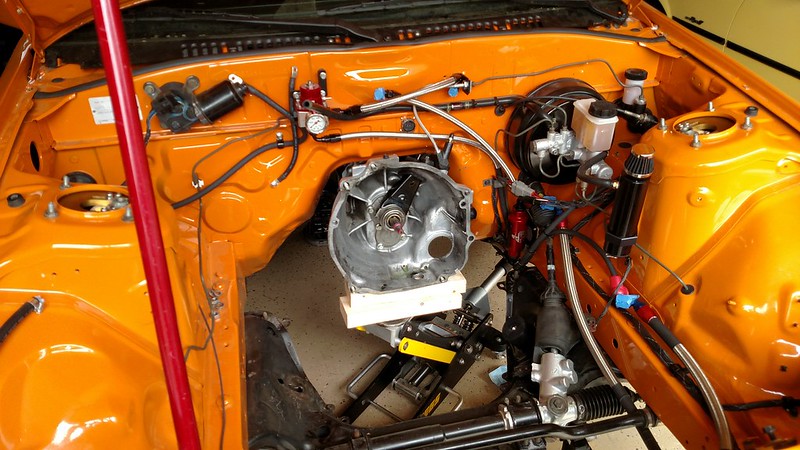
If I recall correctly I had all the fluids drained and the peripherals drained that evening (a Friday). By noon Saturday the engine was out.

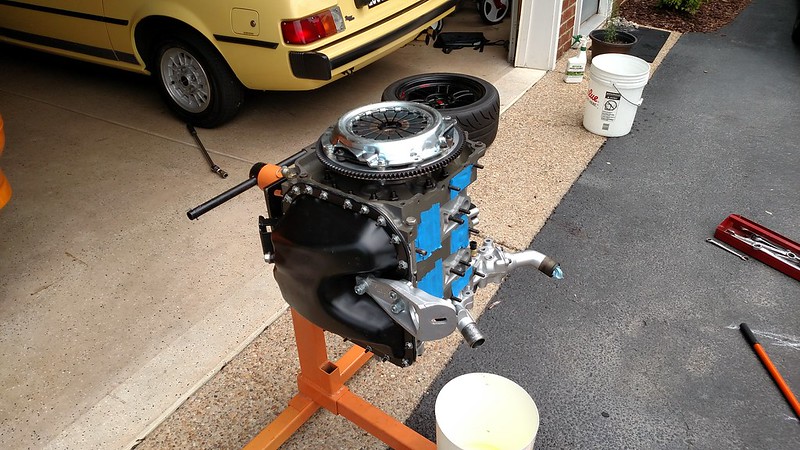
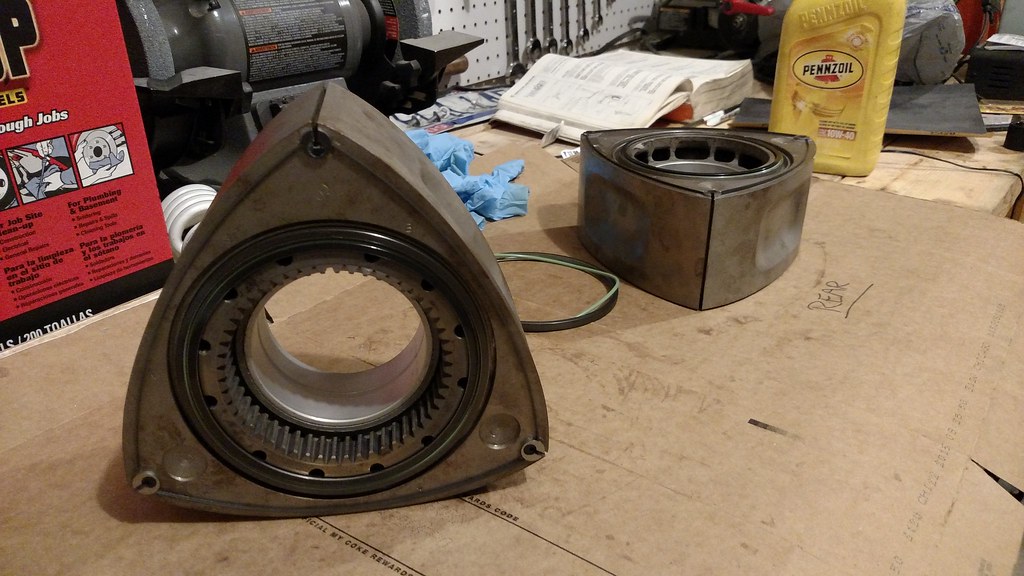
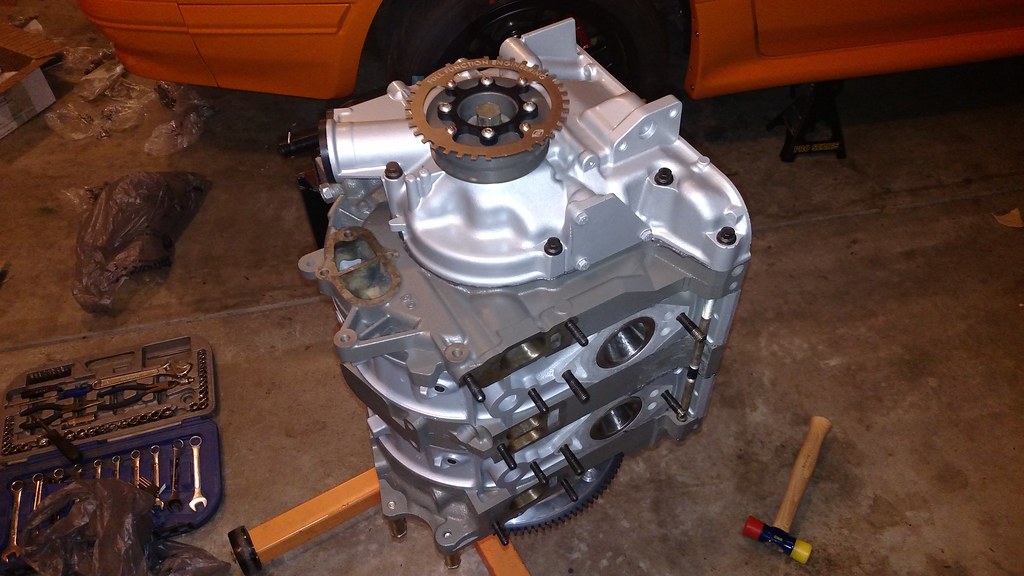
Off goes the clutch and flywheel:

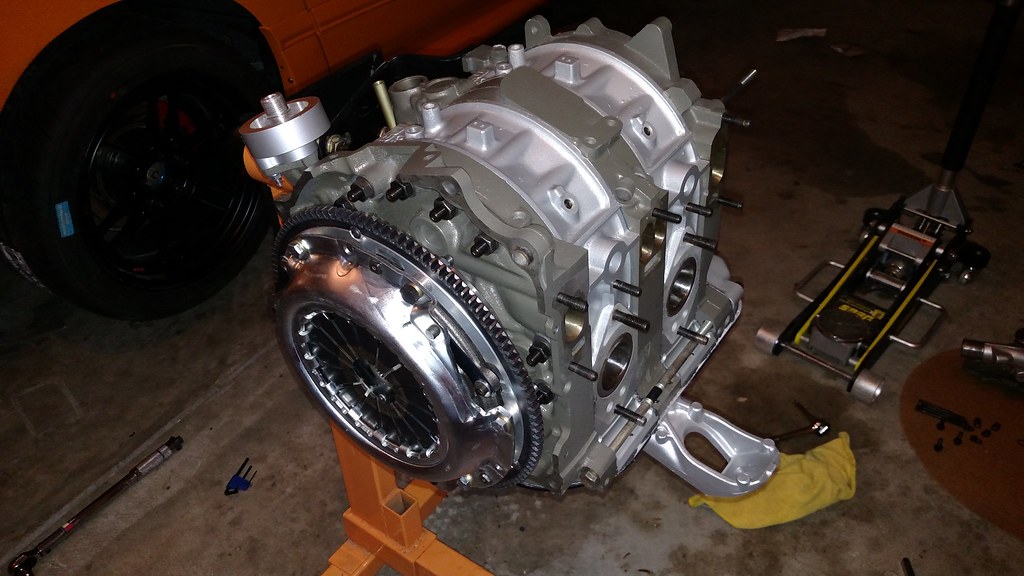
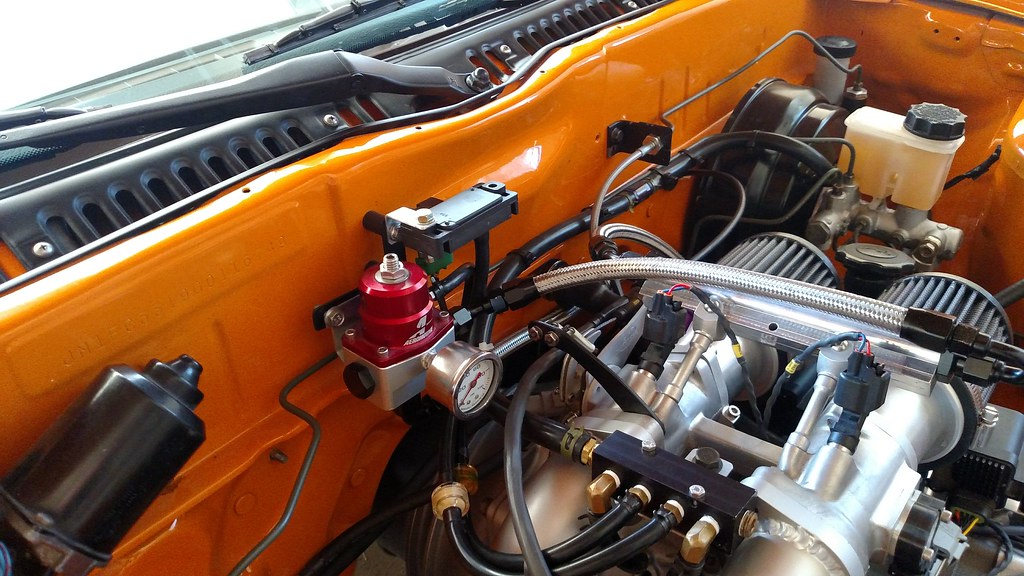
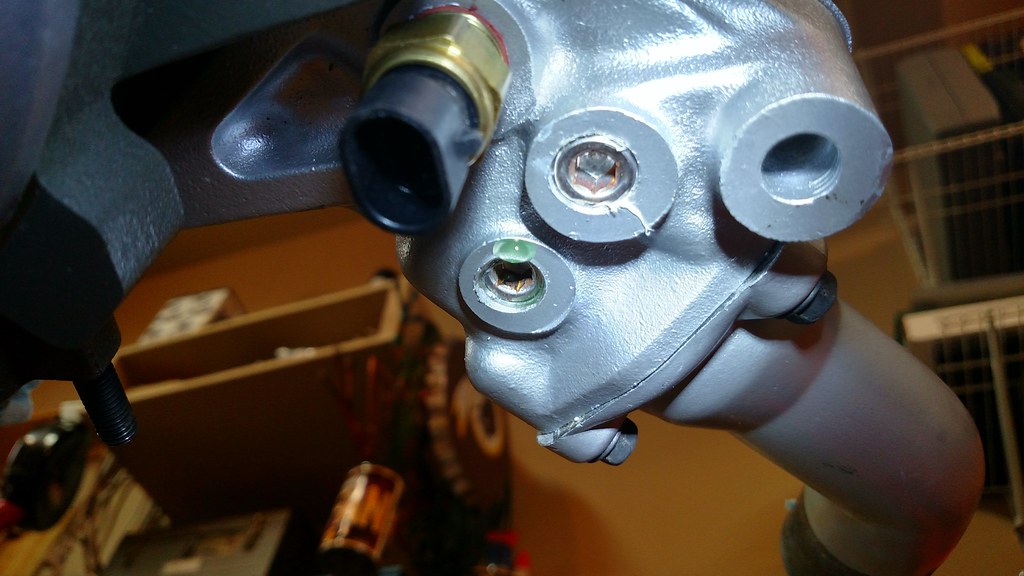
I spent the rest of the afternoon slowly loosening each nut, then cleaning each one, applying a pea-sized dab of Permatex black to the threads of the stud, and then slowly re-torquing each nut down again. I let the silicone cure overnight and reinstalled the flywheel and clutch on Sunday. This time I would make sure the engine was watertight before reinstalling it. I flipped it upside down on the stand and filled it with coolant and let it sit for a week. I did find one more leak at a loose NPT fitting:

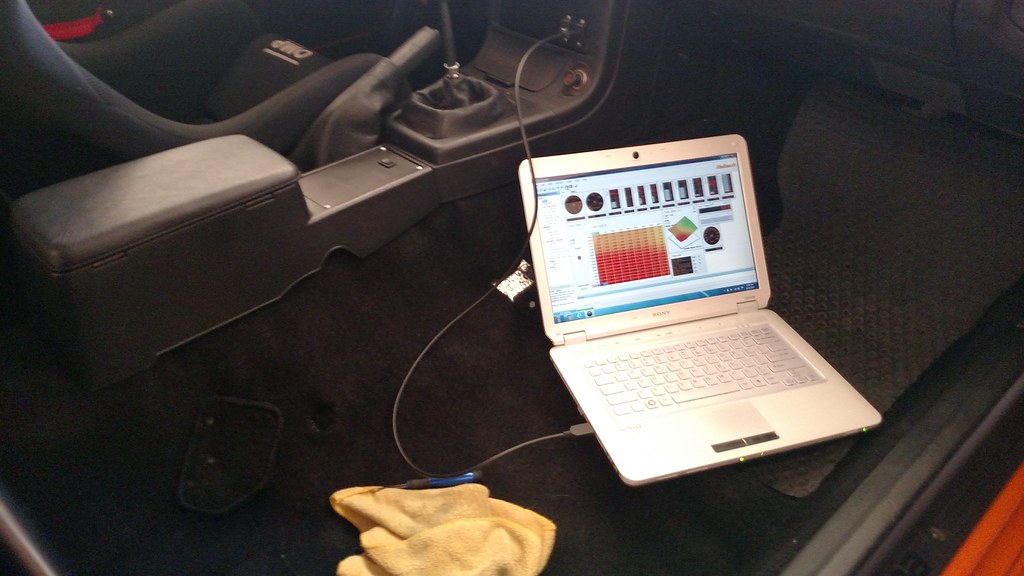
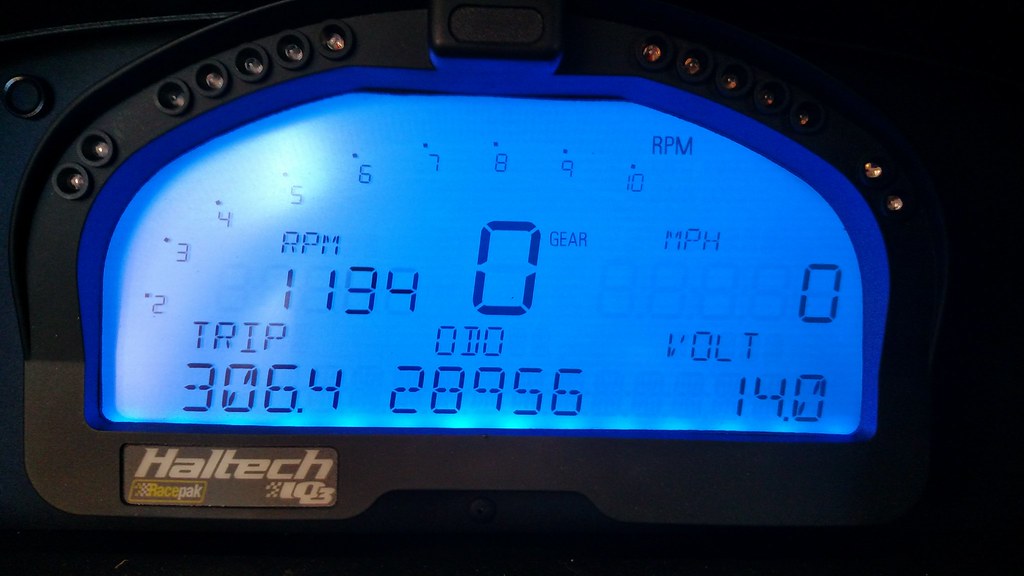
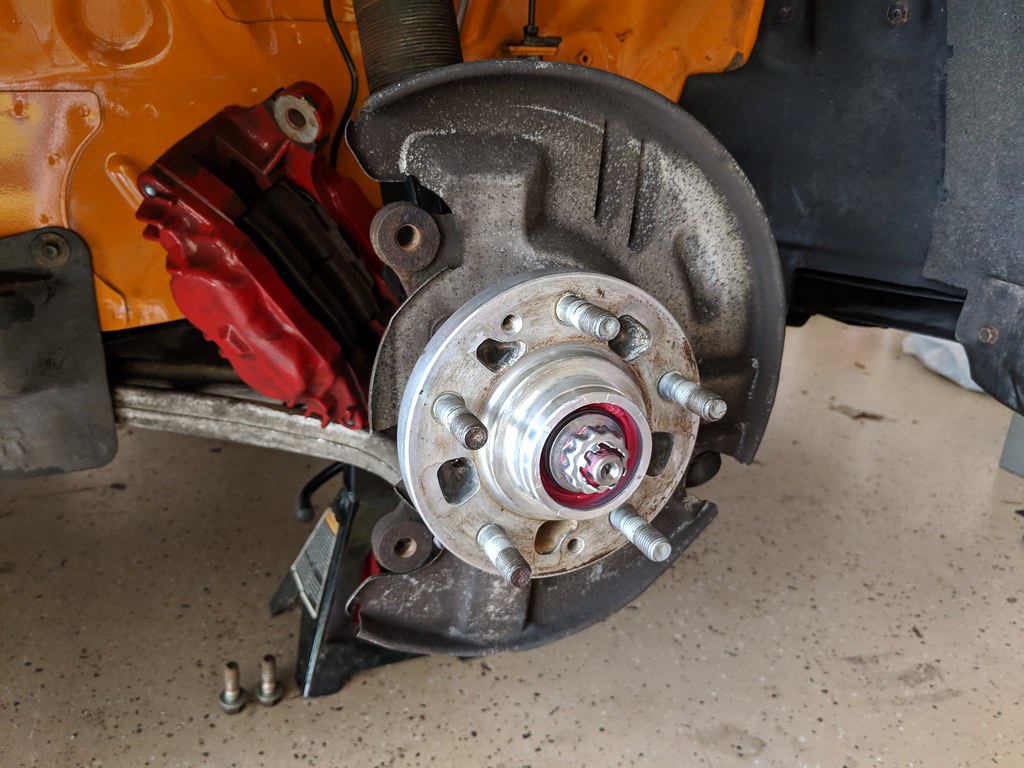
After torquing that a bit deeper the engine was leak free and I reinstalled it the next weekend. Fluids were added once again and I completed the painful process that was calibrating the fuel level sensor: note empty voltage, add 2 gal, wait for sender to equalize and note voltage again. Repeat up to 16 gal. The last piece of the puzzle was a start-up tune. Fortunately, Chris Ludwig at LMS-EFI came through once again and provided me with a TPS-based map to get it running.

Next up: let's get this party started


infernosg
infernosg New Reader
4/2/18 9:09 a.m.

Okay, so this is probably the last of the "catching up" posts. After this we're pretty much at the present.

With the coolant leaks fixed it was time to drop the engine back in:

Hmm, not quite there.

Much better! This is more-or-less the engine as it sits today. I'll get to some small changes here-and-there but this is how she sat primed for first fire. Here it almost looks like I know what I'm doing:

As I mentioned previously Chris Ludwig was instrumental in getting this started. He provided a baseline map I was able to tweak (crank trigger angle, etc.). In typical Discovery/Velocity channel fashion the car did not want to start at first. I spent a Sunday afternoon cranking to no avail. I took a break and after dinner I pulled the plugs expecting to find a flooded engine. I was partly correct. The rear plugs were wet but the front were dry. I wasn't getting fuel to the front rotor and with this being a "fresh" rebuild it didn't want to start on one rotor. A day of troubleshooting revealed the culprit: a mis-wired injector subharness. After playing with a multimeter for a bit I got the wires moved to their proper locations. Now let's try again. 


The next 20 minutes went as follows: "Crank, crank, crank, crank." Nothing. "Crank, crank, crank, rumble." Did it try to start start? "Crank, crank rumble, rumble." I think it did. "Crank, rumble, rumble, VROOM!" HOLY @#$%^$# It STARTED! After composing myself I jumped out of the car to adjust the idle to a more-friendly ~2000 RPM and then checked the laptop to make some adjustments to the fuel mixture. I spent the next hour making small tweaks to fuel and timing while varying engine speed between 1000-3000 RPM at idle. Here's a short video of it idling at 1000 RPM after I pulled it back into the garage:

I don't know why the video is so small. Is there a way to embed it larger? Also, sorry about the noise. The fan had just kicked on.

So after over 6 years I have a running RX7! The "driving" part would come about a week later. While it would start, idle, and freely rev in neutral it would lean out and stall every time I tried to get it moving. Little by little it got better. At first it inched up and down the driveway. Then it made it down the street where it promptly stalled on the return attempt forcing me and a very helpful neighbor to push it back up the street because I had killed the battery. After many more tweaks and a new battery I got it to the point where it could drive up and down the street. It would stall out nearly every time I came to a stop but it was "driveable" to the point where I could start racking up miles. Here's a video of one of the first drives:

Try to ignore the goofy-looking driver (made worse by the wide-angle GoPro). Note the squeaking suspension and stalling at nearly every stop (and the excited fist pump when it didn't). I drove the car around like this for a while. There was a slight interruption for the birth of our third child but that didn't keep me away for long. After accumulating a couple hundred miles I noticed I was getting fuel/oil in the little in-line vacuum filter I installed between the vacuum manifold and my FPR.

I think I'm getting some reversion in the intake coupled with the fact the injectors are upstream of the vacuum ports. I moved the vacuum manifold as high up on the intake as possible but this is still occurring. I might be able to play with the injection firing angle to improve this but I think a big part of the problem is the location of the ports on the intake manifold. Ideally they'd be on the top, right after the throttle body. I might change this in the future but for the meantime I have several of these filters and they appear to be doing their job.

The next change I made was to add a 1 bar MAP sensor. On the advice of a much more knowledgeable rotary tuner I decided to switch from a TPS-based load source to MAP.

After sharing this picture I was quickly told I had the MAP sensor mounted in the wrong orientation and it should be as high as possible. Fixed:

After a quick visit from the tuner the car was running better than ever. The tune has more-or-less stayed the same since October last year with some small tweaks here and there. Here's a long, boring video with the improved tune:

Proof the display works:

Note the odometer only has space for 5 digits and that's actually ~129k miles on the chassis.

Not long after getting the car running I started to notice small drops on the ground under the engine. I didn't have to look hard to find the source:

Coolant was leaking from the bottom of the water pump (weep hole), down the front cover and then around the oil pan. Occasionally it would hit the main pulley and splatter around the front of the engine bay. I would eventually fix this (more later). By the way I highly recommend fluorscent dye to anyone trying to track down leaks. At one point I had it in my coolant, oil, and fuel. Attentive readers will also notice I changed the alternator pulley. The previous one had a different belt spacing than the main and water pump pulleys, which was causing some wear on the belts and peppering the fenders in specks of black rubber. The new pulley is matched to the main pulley (Racing Beat) and fixed that issue.

Hey look, a running, mostly complete RX7!

This brings us largely to the present. I think that last engine photo was taking in February after I cleaned up the engine wiring harness a little.

Next up: finishing up the interior and future plans.

wvumtnbkr
wvumtnbkr GRM+ Memberand UltraDork
4/2/18 10:18 a.m.

MOAR...

infernosg
infernosg New Reader
4/5/18 12:57 p.m.

In reply to wvumtnbkr :

Well, we've more or less caught up to the present to this will become a running blog, essentially.

Since getting the car running last August I've been cruising around back roads on a nearly daily basis trying to break-in the engine. There are many opinions on break-in and while some think it's best to go all-out from the get-go the general consensus is that the duration is proportional to the amount of "new" parts. Basically, had I just replaced the soft seals (e.g. water seals) and kept everything else break-in would have amounted to a couple hours of idling to get the assembly crap out of the system followed by an oil change. New hard seals: ~500 miles to "bed" them to the housings. New/resurfaced housings: ~1000 miles. New bearings and/or crankshaft? Double the break-in duration. That puts me at ~2000 miles. I'm at 1700 miles now. I changed the oil around the 2 hour mark and went from 20W50 to 10W40. Up to 1000 miles I kept the engine speeds below 5000 RPM. At 1000 miles I changed the oil again and went with 10W30 and have been slowly increasing engine speed. The ultimate goal is 9000 RPM and I'll change the oil again at 2000 miles. I'll be making the switch to synthetic oil and I'm considering dropping to 5W20. That's what the RX8 calls for and I have a RX8 crankshaft and stationary gears. The plan is to go as thin as possible while maintaining 20-40 psi at idle and >= 80 psi above 3000 RPM. My thought process being thinner oil flows more easily, thus aiding in oil cooling.

I did have one slight hiccup when installing a new water pump to address the leak I noted in the previous post. Replacing the pump is pretty straightforward on a stock car but my modifications have made the process a little more involved. The extra step needed is to remove the crank pulley (underdrive) to get one of the bolts holding the water pump in place. This is not a difficult task but care needs to be taken to apply load on the crankshaft to insure the needle bearings on the front stay in place. This is done by disengaging the clutch. All that is easy but in the process of pulling the crank pulley I let the woodruff key that holds the front counterweight and oil pump sprocket in place come out too far. The front counterweight rotated out of place. After a while I realized its mass would cause it to rotate downward putting its keyway at the 6 o' clock position. After rotating the crank to align the keyway in that position I was able to fully seat the key again after a few love taps with a rubber hammer. Crisis averted.

The car has been running reliably so I decided to finally install a passenger's seat. Actually, I'd be getting a new driver's seat and swapping the current one over to the passenger's side. Considering I bought the current seat and harness in 2012 both are now expired. That's no big deal for track days and HPDE's, though. I had also purchased some new seat brackets that incorporate the bracket and side mounts into one piece with the hope of being able to lower the driving position. Here's the new OMP WRC-R seat and Street Faction brackets mocked up outside the car:

Installed in the car:

Unfortunately I wasn't really able to lower the seat anymore than I had previously. I gained maybe 1/4 in. I have adequate clearance to the headliner with a helmet on, which is the most important thing. The other issue was line-of-sight to my instrument display. With the Sparco R345 steering wheel the shift lights at the top of the display and my turn signal and highbeam indicators were obstructed by the rim of the wheel. The R345 has a 350 mm diameter and 65 mm of "dish." In order to be able to see the shift lights, etc. I needed to lower the seating position and/or increase the diameter of the steering wheel. Since the former wasn't possible I started looking for larger steering wheels. Apparently 350 mm is the industry standard for a "large" steering wheel so larger options are scarce. Nardi/Personal offers some in 360 mm and Sparco has the R368, which is VERY similar to the R345 but only comes in suede leather. In the end I went with a OMP Velocita 380, which is 380 mm in diameter and has 35 mm of "dish."

Installed:

It's noticeably larger at about the same size as the stock steering wheel and the one in my '79. Overall, I'm liking the change, though. I can see my shift lights and turn signal indicators and low-speed turning is a little easier. The less "dish" turned out to be a good thing as the wheel is a more comfortable distance from me. I had originally purchased the R345 before I picked up a quick-release hub and that setup was a little too NASCAR-esque for my liking.

It's getting to be trackday/carshow season so I'm really wanting to get the car out more. Unfortunately, I've got a few things in my way:

1) Headlight aim - I haven't messed with this since putting the car back together. God knows where they're pointing. Rain/darkness precludes me from driving the car at the moment for fear of blinding other drivers. It's not that this is a difficult task, it just hasn't been a priority. Plan is to get that sorted this weekend.

2) Transmission noise - I'm getting bearing noise in neutral with the clutch engaged (pedal out). It's also very noticeable while cruising in 4th gear and to a lesser extent 3rd gear. My understanding is this likely means the input shaft bearing is bad since the noise goes away with the clutch disengaged (pedal in). I re-used the Miata bearings in my transmission rebuild under the assumption that new and less miles meant they were in better condition than the RX7 bearings but apparently that wasn't the case. I have new front and rear main and countershaft bearings on order. I should probably replace every bearing in there but getting to the center bearings and all the needle bearings under the gears is an order of magnitude more disassembly.

3) Transmission (?) vibration - I don't have a solution for this one. I get a noticeable vibration in 5th gear at highway speeds (65-75 mi/hr or 3000-3500 RPM). It feels like bent wheel, bad u-joint, or out-of-balance driveshaft vibration but it goes away if I downshift to 4th and it doesn't occur in any other gear at the same engine speeds. It's almost like it's some kind of resonance. It's tolerable below 3000 RPM, but gets significantly worse as speed rises, then gets better again as speed continues to increase to levels not safe on public roads. I wonder if this is related the transmission noise but I haven't been able to find any records of similar symptoms on any RX7 or Miata boards.

Deals Gap Rotary Rally (DGRR) is later this month and I really want to finally make it but the transmission noises have me hesitant to undertake a 6 hour drive. Even though I won't be using 5th on track I definitely want it sorted before I sign up for any HPDE's.

infernosg
infernosg New Reader
4/23/18 4:05 p.m.

I made my first big road trip this past weekend. 360 miles in total and the car made it just fine. The only thing it burned was fuel, and lots of it. I need to lean out the cruising mixtures. It's certainly not the most comfortable vehicle and in the future I'm going to have to work out a towing solution.

Before the big trip I decided to address the front wheel bearings. They had ~110k miles on them and I was starting to feel some play on both sides. I decided to go ahead and replace them, which is complicated slightly by Mazda's decision to make the outer races "unreplaceable." There's no ledge or lip to set up a drift to drive out the races. Some people grind reliefs into the hubs but I didn't trust myself to do that. I took the E-Z Bake Oven approach:

After a half hour in the oven at 400 degrees I soaked a rag in ice water and cooled the races until they dropped out of the hubs. 

An added bonus was the hot hubs made it easier to press in the new races. All packed up and ready to go:

(Don't worry, I didn't forget the cotter pin) I've had to tighten up the locking nut a couple times as the bearings "bed" in. The sad part is most of the "play" I thought I had on the driver's side was due to a loose collar on the coilover sleeve.

Back to my road trip. The car club at my alma mater was hosting their biannual car show. I hadn't been back since 2013 and I figured it make for a good family trip. I got to hang out with some old friends I hadn't seen in a while and my wife got to walk around campus for the first time in over 5 years. They had a mobile dynamometer at the show, and not just the kind that bolts to a single drive wheel. I figured, "what the hell" and threw the RX7 on to see what kind of power it makes on an unfinished, but safe, tune.


It's running a bit rich and the timing is rather conservative. We spun it to 8500 RPM to be safe but I know there's room for more. After a couple of runs it started to get pretty hot. The hood was closed and they didn't have the fan in front of the car on. The ECU started to pull timing and so it made less power on the second run and I decided to call it quits since oil temperatures were starting to creep over 200 degrees. Fortunately, my cooling system seems adequate and temperatures quickly dropped. In the end the first pull put down nearly 169 hp and 135 ft-lb to the wheels.

Not too bad considering the stock engine is 160 hp and 140 ft-lb at the flywheel and I think I still have room for improvement.

I've got a couple of days to recover and do some basic maintenance and then it's off to DGRR for the first time!

jfryjfry
jfryjfry HalfDork
4/24/18 8:52 a.m.

It's a bit late and I'm no expert but I don't believe that primer is a good final coat (as you have in the interior).  I understand that moisture can penetrate it.  Might be a good idea to spray some black paint over it all.  Shouldn't take more than 10 - 15 minutes. Er days.  

infernosg
infernosg New Reader
4/24/18 8:00 p.m.

In reply to jfryjfry :

Thanks for the heads-up. I'll keep that in mind when I rip out everything to swap carpets. At the very least I should probably spray the exposed areas.

wvumtnbkr
wvumtnbkr GRM+ Memberand UltraDork
4/24/18 8:26 p.m.

Another way to get blind bearing races out is to run a weld along the I'd the entire way around.  When it cools, it shrinks the race and it will fall out.


It is arguably less heat into the aluminum hub which has been debated to hurt the strength of the aluminum.

infernosg
infernosg New Reader
4/25/18 7:45 a.m.

In reply to wvumtnbkr :

I've heard of that method too. Unfortunately I no longer have a welding machine at my disposal. One day I'll pick up another when I get to putting some money into the garage and not the cars in it.

I'm not too sure heating aluminum to 400-450 degrees Fahrenheit really affects its material properties. I'm pretty sure that's below the annealing temperature of most, if not all, aluminum alloys. Heating them in an oven should have allowed them to heat up uniformly too.

badwaytolive
badwaytolive New Reader
4/26/18 12:28 p.m.

So sweet, love the color choice-

infernosg
infernosg New Reader
5/2/18 10:07 a.m.

In reply to badwaytolive :

Thanks! I've been getting a lot of compliments on the color lately. It definitely stands out in a crowd.

This past weekend was the Deals Gap Rotary Rally. It's arguably the largest rotary-powered car meet on the East Coast and this was my first year attending. Against better judgment I drove the FC 400 miles to Western NC, beat the E36 M3 out of the car for three days, and then drove 400 miles back to Richmond. Overall, I've put 1000 miles on the car in a little over a week. It performed as well as could be expected and handled the Tail of the Dragon with ease. I learned my tune is not as good as I thought it was. I had closed loop control turned on during break in, which was masking an overly-lean fuel map. I got some road tuning in and the car feels much better. I got some pointers from more knowledgeable individuals while I was down there and I think I'm in a good place to continue sorting out the tune. I even took home first place in the "FC" category at the car show. All-in-all I had a blast and am planning on returning next year.

Now the bad:

-The transmission was making noise before and it's making even more noise now. There's something wrong with 5th gear and one of the input shaft bearings is going. I also spotted a leak at the shifter turret that was there before. The fluid inside the turret is gray/black and not very viscous. When I checked it at the filler hole a couple weeks ago it looked good. A rebuild is definitely next on the list and I've already started accumulating parts.

-The suspension is making more noise than usual. In addition to the rear sway bar squeaking there's some clunking but everything seems to be tight. More investigation is needed.

-My reverse lights randomly decided to stop working during the trip. I confirmed the switch is bad and a new one is on order.

-The inner CV joint on the passenger's rear axle is leaking. I don't hear any noise but it's left a good splatter of grease under the car. It looks like a rebuild kit will be needed in the near future.

-It looks like I had a small leak at the lower radiator hose. I tightened the clamp some more so hopefully that was all that was needed.

-I have a small oil leak somewhere in the back of the engine. Not enough to drip on the floor. Looks like it's around the oil pan. I'll know for sure when I pull the transmission. In the meantime I cranked some of the oil pan bolts down a bit more.

-My rear window leaks. This was the first time the car saw rain. I'm guessing there is a gap somewhere in the foam sandwiched between the polycarbonate window and frame. I tightened the bolts a little but I think the main solution is to stay out of the rain.

-My exhaust is horrible. I mean, it works and, for a rotary, it's quiet, but the overall fit and quality is lacking. It bounces all over the place. Once I'm done with the transmission and CV joint I think the next order of business is to get a new system made.

stylngle2003
stylngle2003 GRM+ Memberand New Reader
5/4/18 11:31 a.m.

Nice to see another GRM'er in Richmond.  Which part of town do you guys live in?  

Beautiful work on the FC, you've done a very thorough and detailed job.  Excited to see how it continues to evolve.

infernosg
infernosg New Reader
5/5/18 6:31 p.m.

In reply to stylngle2003 :

I'm down in the Midlothian/Chesterfield area. Not really Richmond proper but no one outside the area knows where Midlothian is.

Thanks for the kind words. As you can see from the previous post there's a laundry list of things to do. It'll be going under the knife soon to hopefully address the transmission noise and vibration. I'll probably address the CV joint as well. After that it's finishing the tune and probably getting a new exhaust made. I was hoping to get back on track this year but I may have to wait until 2019 to get all the bugs worked out.

infernosg
infernosg New Reader
4/23/20 9:39 a.m.

So it's been nearly two years since I've made an update. I'll admit this hasn't been this most exciting build so I'll try to keep the picture content high. Picking up where I left off...


May 2018:

Started tackling my list from above:

-Re-filled and re-seal the shift turret and that maybe improved some of the transmission noise. It would still bother me enough to take the nuclear approach about a year later (more on that in a bit).

-Squeaking suspension turned out not to be the rear swaybar. I have these neat little adjustable links on the forward inner mount of the rear control arms to take out negative camber from lowering the car. I guess all the grease had worn/washed off in the 8+ years since installing them so I now had metal-on-metal contact. Pulled them apart, cleaned and re-greased them and the noise was gone. It's amazing what regular maintenance can accomplish.

-Determined the nonfunctioning reverse lights was were due to a bad switch. Replaced that with a new OEM piece - done!

-Bought a "rebuild" kit for the CV joint. Not so much of a rebuild as a "take apart, clean, and put back together kit". Not difficult but the first time I'd done this. These things are pretty neat.

-Oil leak will have to remain for now. As with these things it never "got better" and I'd end up taking action a year later.

-I decided a leaking rear window is just the price I have to pay for the polycarbonate. I still make it a point to not drive in the rain but sometimes it's inevitable. This would come back to bite me a year later...

-Exhaust is still E36 M3 but it'll have to stay that way for a while. More on this in a bit...

So that was me "addressing" my list in May 2018. Around the same time I started to add back some of the complexity of a modern car.

Ever since getting the car running my garage smelled like gasoline. Even if I hadn't driven the car in days. It was worse on hot days. It got so bad the house started to smell like fuel if you opened the door into the garage. The wife was not happy. This needed to be fixed. My assumption of root cause was the lack of a functioning EVAP system on the car. In my search for simplicity and lightness I ditched the charcoal cannister and left the fuel tank vent open. It was time to add this back to the car.  I sourced a charcoal cannister and a stock purge control valve but quickly discovered a problem. The stock purge control valve is normally closed but relies on differential pressure across the throttle plate to open. It's kind of like a primitive PCV valve in that it's closed both under hard vacuum and no vacuum. Since my ITBs never generate any vacuum upstream of the throttle plates that means the valve would never open. I needed another solution. In a stroke of genious I looked into the FD RX7. Early FDs have the EVAP line teed into to the PCV system and control flow with a solenoid. Since my car is naturally aspirated I figured I could use the "boost control" function of the Haltech to drive the EVAP solenoid so I can control where it operates and its duty cycle. Here's the end result:

I also took this opportunity to work out a better PCV system. With the vented catch can I had run to date I'd get a decent build up of condensation in the oil filler neck on colder days. This mixed with the oil vapor and formed a nasty yellow-ish goop. The solution is air circulation and since I had already installed half of the FD's passive emission system why not install the other half. You can already see the FD PCV valve in the picture above. I just needed a filtered air source. This works:

Filtered air is supplied from the rear air filter and goes to a lower port on the oil filler neck. From there it exits through the upper port on the oil filler neck, goes into and out of a catch can, through the PCV valve, tees into the EVAP line, and goes into the intake manifold.

So how does this all work? Pretty well, actually. I set the EVAP solenoid function as closely to the stock FD as possible (only open at part throttle and low RPM - cruising conditions) and the PCV valve does its thing as intended. The fuel smell in the garage is down SIGNIFICANTLY but it is still there. I've concluded this is due to permeation through my fuel lines since I cheaped out and didn't opt for the PTFE-lined hoses. I'll correct that in the future.

That was all for May 2018. I took a break in June/July for some family vacation time away from the car but came back for a little work in late Summer.

infernosg
infernosg New Reader
4/23/20 12:31 p.m.

Continuing into Summer 2018. Not much happened in June/July since that's when we typically do family vacations. I did finally discover the concept of road tuning so for a while I was taking the car out, driving for 30 minutes or so while taking logs, then coming back and processing the information to make changes. The car felt and drove better now that the closed loop control wasn't applying massive corrections. Still WOT tuning was something that eluded me. I've read the ideal gear to tune in is 4th but given 3000 RPM in 4th is around 50 mi/hr I did most of my driving in 3rd gear. Even then just hitting 7000 RPM still puts me well into hand-over-your-keys-and-come-with-me territory. So I decided to schedule some dyno time. There are a few local and I ended up scoring some time with Kevin Adolf at FlimFlam Speed. While inexperience with rotaries he agreed to operate the car on the dyno while I screwed around. Ended up spending around 2 hrs on the dyno and here are the results:

I know it's not an apples-to-apples comparison but it was a pretty decent improvement since the last dyno. We were having some issues with the car initially, which is why the first few runs stopped early. Even on the last run Kevin let off early because he thought something felt off. We were constant battling temperatures the entire session (90+ degrees in VA Summer). You could say it got a little hot in the car...

That's the passenger's foot well near the transmission tunnel. Heat from the exhaust manifold melted the carpet and rubber floormat. Here were the main takeaways from the dyno session:

-Power was up +20 hp and torque +10 ft-lb but I was still shy of my 200 hp target.

-My engine cooling system had no problem bringing the oil and coolant temperatures down to acceptable levels after a couple of pulls but intake air temperatures became a problem. Even with the open hood and shop fan. One of the reasons we stopped is because IATs were getting so high the Haltech was pulling timing.

-The car was falling on its face shortly after peak power. At the time we thought this might be fuel-related since my fuel pressure gage was reading low (more on that in a bit). Another thought was exhaust restriction. 

-According to the shop oxygen sensor the car was leaning out at high RPM. No matter how much fuel I added it didn't make a difference and according to the Haltech my maximum injector duty cycle was ~85%. I suspect something was up with the shop oxygen sensor as when I looked at the logs afterward the on-board sensors didn't agree.

-2 hours exposure to rotary exhaust noise/heat/vibration is enough to kill an oxygen sensor (sorry Kevin!)


In the next couple weeks not much was done. I was a little bummed from the dyno session so I took a short break. I did make a couple small tweaks. First I upgraded to the slightly-higher output FD alternator and switched back to a non-underdrive pulley.

I had a half-baked theory that my original, 100k mile FC alternator wasn't keeping up with system demand and maybe that's why fuel pressure was dropping. That turned out to not be the case and the solution to the mysterious fuel pressure drop turned out to be simple physics. Most pressure gauges operate using simple differential pressure. Pressure at the port minus the internal pressure of the gauge equals indicated pressure. Since I'm using a liquid-filled gauge what happens when temperature increases? Yep, pressure goes up. So higher internal pressure means less pressure differential, which means lower indicated pressure. This was verified with the purchase of a "vented" fuel pressure gauge:

It's got a little valve thing at the top that can be opened to equalize the internal pressure with ambient pressure. With that in place I verified I was not getting a pressure drop at higher speeds.

That was pretty much it for 2018. My oldest started Kindergarten and then came all the Fall sports/activities. I did another 2 hr dyno session with Kevin with slightly better results. I was able to fine-tune the air-fuel mixture a little better and optimized timing to pick up a few more HP. I've apparently lost the dyno sheet but if I recall correctly power was up around 195 HP with a similar torque curve. So close to my goal! We concluded the power loss after 7000 RPM was one/combination of three things:

1. Minute tuning details (injector firing angle, injector offset, rotary timing split, etc.)

2. Restrictive exhaust

3. Some other fuel issue (faulty injector, clogged fuel filter, etc.)

I would make it my goal to address these in 2019.

infernosg
infernosg New Reader
4/23/20 12:57 p.m.

Enter 2019.

Exhaust was my first priority. Even though I had quality components (Racing Beat pre-silencer, muffler and flanges) overall the exhaust kind of sucked. Crush bends, sloppy welds and poorly hung. It served its purpose but I know I could have better. I remember reading about Burn's Stainless in an older issue of GRM and how they made more power and were better at sound suppression than the SuperTrapp mufflers many racers used. Anyone has ever heard an IT7 car with a SuperTrapp knows those are both good things. I spoke with Vic at Burn's and started acquiring the pieces:

The largest 3" single stage race muffler they offered and a custom merge/megaphone assembly. I contacted a relatively new speed shop in the Richmond area, National Speed, to see if they could help. While not having any rotary experience they had several talented fabricators and were willing to work with my requirements:

-Longest possible primaries with provision to shorten in the future, if possible.

-All bends to be as smooth and gradual as possible.

-Keep the primaries as far away from the intake as possible.

-Correct oxygen sensor orientation.

You get what you pay for and I paid for a work of art:

New on top. Old on bottom. I had to compromise on my first requirement so instead of slip fittings for easy primary length adjustment we just went for the longest length possible with straight sections that could be cut out, if needed. I have since wrapped, and un-wrapped this manifold and am debating going with another SwainTech coating. The car is now loud. Stupidly loud. I've yet to actually try measuring it but I've got some concerns about being black-flagged. More on that later.

Because IAT was in my sights I made a heat shield thingy. It's not pretty but it works.

It's got some DEI heat shielding underneath for added benefit.

Not the prettiest thing but function over form.

In mid-March I took the car to a show that turned out to be a bust but I got what is probably one of the best still shots of the car to date:

DGRR 2019 was coming up in late April/early May and I wanted to address all the issues from the previous year. This meant I had some work to do...

infernosg
infernosg New Reader
4/23/20 1:57 p.m.

March-April 2019.

These two months were among the busiest since I began working on this car many years ago. Here was my plan:

-Replace/clean every external gasket/filter.

-Pull engine and address rear oil leak.

-Pull transmission and rebuild properly this time.

-Assembly everything and be ready for DGRR (~2 months).

Just a week after the last picture above was taken I was reminded how the car had spent the better part of the past decade:

I've gotten lazier with my photo documentation so I don't take as many in-process shots.

While I waited for transmission parts I started work on what I thought was a leaking rear main seal. When I built the engine I went with the harder RX8 stationary gears and the rear gear came with the RX8 rear main seal. Compared to the RX7 seal the RX8's is thinner and there's some debate it doesn't seal as well. Even when using a RX8 eccentric shaft like I am. I erred on the side of caution and ordered the beefier RX7 seal but that turned out not to be the culprit. Once I got the clutch and flywheel removed the source of my leak was between the rear stationary gear and the rear iron.

Note I had already cleaned up a lot of the mess when I took that picture. One of the main differences between the RX7 and RX8 gears is the RX7 has a groove for an o-ring whereas the groove is in the iron on the RX8. I had this groove machined into my gear to avoid any leaks but apparently that wasn't enough. I failed to note the FSM also calls for sealant on the mating surface of the gear and assumed this was the source of my leak. After precariously removing the rear gear (if the rotor moves while the gear is out I'm SOL and it's full rebuild time) I replaced the rear main seal, applied a small layer of sealant and bolted everything back together.

Next was the transmission. The last time I built this I pretty much took apart two transmissions, swapped gears and put one back together. Everything looked good so I reused everything assuming all the clearances would work out. Well ever since getting the car running I had some weird noise in 4th and an odd vibration in 5th. This time I would replace every bearing and confirm every clearance. The only wear items I did not replace were the synchros although now I'm wondering if I should have. I guess I'll save those for my next rebuild (2021?). All buttoned up:

A little under a month since I started and about two weeks before DDGR everything was back together.

Here's a quick video of the car idling after the first drive since putting the engine back in.


Everything was set for DGRR.

infernosg
infernosg New Reader
4/24/20 12:25 p.m.

DGRR 2019 Time. I covered an entire year in what, 3 posts?

I decided to drive the car down again. This was in even poorer judgment than 2018 because 1. I knew better and 2. the car was now significantly louder. Regardless, I made the trip down with no issues other than a sore back and a headache. It was overall warmer then 2018, which meant every break in driving my car looked like this:

I struggled with high IATs all weekend. It's clear I did not build this car for low speed, high RPM operation often in "dirty" air. This being my second year I was now a veteran. I reunited with new friends from the previous year, drove some awesome roads and generally had a great time. Oh yeah, I also ate what I swear was the world's largest stromboli:

That was lunch and dinner for about 3 days. What was that I said earlier about rotary IT cars...

Ultimate I took 1st place in the FC category for the second year in a row. Apparently lots of people like this car even though it doesn't have a turbo the size of a human head.

Unfortantely the 6.5 hour drive back on Sunday was terrible. Cooler temperatures and rain the entire way meant I was constantly struggling with fogging windows (no heat) and a lack of traction (200 TW tires). Some points (e.g. I40 around Asheville) were downright scary necesitating a reduction in speed and the use of hazards for several miles. I aso quickly learned my car is not sealed as well as I thought. At my first fuel stop I discovered about a half inch of standing water behind the seats. Fortunately there are no electronics in the area so I stuffed some towels back there and continued on. Got home about an hour behind schedule and promptly ripped out the interior to dry everything out. Learnings from DGRR 2019:

-IATs are a problem I NEED to solve. The car drives fine but I cannot be having 150F+ air entering the engine.

-Despite rebuilding the transmission and balancing the driveshaft I still have a weird vibration in 5th gear.

-I need to seal the car. Although I don't drive in rain if I can avoid it it will most certainly happen at some point.

-After consulting with several experts we've concluded my low RPM hesitation and lack of power above 7000 RPM is because of my intake. Really long runners with injectors near the throttle plates is not ideal.

infernosg
infernosg New Reader
4/24/20 1:04 p.m.

Summer 2019.

Even before DGRR I knew the answer to the 4th bullet above. My super-long intake manifold was robbing me of top end power and with the injectors so far upstream of the engine good low RPM throttle response would never happen. I had actually sold my entire intake setup before DGRR so less than a week later it was off.

That ended up being replaced with an off-the-shelf manifold intended for IDA carbs and a shiny new billet throttle body from EFI Hardware.

The new TB is actually 5 mm smaller at the throttle but the bore is tapered to increase intake velocity. I hoped that combined with "high flow" ram tubes would solve my top end power issues. I also had the injectors sent out to be cleaned and tested. Once came back a little out-of-spec and flowed less than the other so it was recommended to be replaced. On that note I have one spare ID1000 if anyone needs one. Also, new PTFE fuel lines meant maybe slightly less gas fumes in the engine bay. After a few tweaks to the tune initial driving impressions were great. Throttle response was greatly improved and the immediate drop in acceleration at 7000 RPM was gone. Low end power didn't really feel any differently either!

However, I did have a problem. I sold my previous air filters with the old setup and there was no way I was fitting traditional K&N filters on these like I did before. As cool as the ram tubes looked I certainly didn't want to risk driving without a filter. Have to protect those apex seals. I tried a couple different setups. First was the tried-and-true ram tube "sock"

Obviously meant for smaller ram tubes but still stretched over my massive high flow units. Even came with an inner support spring and nifty reusable zip ties. Unfortunately, apparently rotaries pull A LOT of air and these things are more restrictive than they look. By the end of my first drive after installing I could tell something was up. I quickly found out when I got home. The filters had completely collapsed into the ram tubes (video link?). I'd seen many people run these on their cars. Not sure why this wasn't going to work for me...

Next up are these cheap screens I randomly found while scouring the internet late at night.

Basically, a small, thin circle of oil foam intended to be sandwiched between two circular cut-outs of wire mesh.

Knowing how restrictive these things are I left the upper screen out and only retained the lower one to keep the foam out of the engine. These lasted a month, maybe. Apparently the reflected wave from the intake is enough to push the foam outward from the engine. I noticed some loose edges after a couple of drives and always stuffed them back in. After one day of particularly hard driving I came home and they were gone. Left somewhere on the side of a backroad in central VA...

In late July I got a random call from National Speed, the shop that had done my exhaust work earlier in the year. Apparently my car had left an impression. They were having their one year anniversary celebration and had offer some free dyno pulls to select customers. No tuning. Just show up and see what kind of numbers you put down. That "hard driving" I mentioned above. That was me trying to get a quick WOT tune in before this dyno day. Here's my third and final pull of the day:


Note by this time everyone in the room donned ear protection. Pulls were done in 3rd gear. I was hoping I finally broke my 200 HP barrier. What I got is something I still don't think is real to this day.

240 HP! If that were true this would have to be one of the highest power non-bridge/peripherally ported rotaries in the world. I mean, there's no way a new intake, exhaust and quick tune netted me 50 HP and 15 ft-lb, right? I keep telling myself it isn't real and to this day I just tell people I'm somewhere between 200-250 HP. What I find particularly interesting is the comparison with the previous plot from FlimFlam. The numbers are actually pretty similar up to around 6500 RPM. Within 5-10 HP/ft-lb. Even the shapes are similar and there's no perceptible loss in low end. The new setup just explodes after 6500 RPM. It's strange, these cars never "feel" fast. That must be the 160 ft-lb talking... I'm still not thrilled about the cliff after 8000 RPM. I'm told power/torque should gradually plateau and start to fall off. Not plummet. It's likely this is still something in my tune. I've still yet to actually have a rotary tuning expert touch the car.

By this point I was getting pretty confident. It had been running for two years (TWO YEARS!) and nearly 10k miles. I convinced myself if it was going to break it would have done so by now. That meant I could finally get back to doing what I originally wanted. Track Days...

RXBeetle
RXBeetle Reader
4/27/20 11:39 a.m.

Retyping – internet stole my first reply.

I don’t know how I’ve missed this build thread for all these years; incredibly clean build throughout and I really love seeing the intake dyno comparison. Do you have MAP readings going from 145ft-lb/186hp to 160ft-lb/240hp dyno runs? That would give you an idea of how much of the difference was the pod filters alone. They are notorious power killers.  

I had a similar IAT issue with a 4 barrel EFI 13B setup with an open element filter. I usually saw 140F+ intake temps cruising on 70-80F days. Are you currently running filters? Just pulled for the dyno run? Check out the group B RX7 airbox/plenum setup. Based on the fan shroud and rad ducting you have all the skills to pull something like that off.


Keep the updates coming!

infernosg
infernosg New Reader
4/28/20 2:09 p.m.

In reply to RXBeetle :

The 240 HP pulls were done without filters. I hadn't figured out a solution at that point. I did a couple pulls at FlimFlam without filters with the old setup and I do recall it being worth a few HP. Definitely not 50 HP though. Perhaps because I kept mine ridiculously oversized. I can't recall if I logged the pulls at National Speed. I'll have to dig out that computer and see what I have. MAP is something I record.

I do have a filter setup now (I'll get to it). It's an off-the-shelf K&N kit intended for IDA carbs that I modified to work. I had to go with smaller ram tubes so I'm probably down a bit on power but I figure that's better than junking the engine. Late last year I rigged up a simple pipe that takes air from the passenger's side fog light hole and directs it at the filter. It definitely made an improvement at the one track day I managed last year.

It's funny you mention the Group B airbox. I have something in the works. I will say those are not drop-in ready for FCs, especially the S5s, due to the thermostat housing (specifically the coolant neck)...

1 2 3 4 ... 9

You'll need to log in to post.

Our Preferred Partners
4kwofJaeOrnqIlgSWBqajzXK7vFtXBaiVvmymWqyoBVOKkPt9UTxI36miEeeC8OS