1 2 3 4
FunkyCricket
FunkyCricket Reader
6/4/19 3:59 p.m.

First, awesome. just awesome.

I do some local stuff with the boys (see a post I had) but not anywhere near as good. It's fun stuff and those costumes can compete.


The aluminum frame is sweet, but what are you using for the actual wings? I know a lot of places would frown upon essentially a back full of metal blades.

TVR Scott
TVR Scott GRM+ Memberand HalfDork
6/4/19 6:26 p.m.

I'm thinking about the whole gas-contamination thing.  If your bottle is indeed leaching CO2 onto the welds, then you'll probably never get any farther along. 

I always just exchange argon bottles when they're empty.  No need to worry about certification or testing.  Just grab and go.  And no worries about contamination that way.

What's your technique for balling the end of the tungsten?  This can affect arc stability quite a bit.

I find aluminum rewards getting a rhythm going.  Puddle-dip-move-puddle-dip-move.  Only dip the rod in a molten puddle, and remove it entirely between dips.

Are you seeing the puddle formation clearly?  Some people have trouble seeing this in aluminum.  Your close-up vision is ok right?  (mine isn't anymore...)

Would be good for you to know the alloy you're using.  Someone else mentioned matching rod to base metal, and this can make a difference.

How sensitive is that old TIG machine?  Aluminum will overheat really easily and fall apart like nothing.  A machine that modulates well makes the job much easier.  Long ago I tried to weld on an old scratch-start machine without continuous heat control, and it was basically impossible.

You said you had a knowledgeable buddy over helping, right?  Could he make a nice bead with the same set-up?  Have you ever used a modern machine as a comparison?  Maybe do a demo at a weld shop?

That's my random collection of thoughts.

BirgerBuilder
BirgerBuilder Reader
6/4/19 7:03 p.m.
FunkyCricket said:

First, awesome. just awesome.

I do some local stuff with the boys (see a post I had) but not anywhere near as good. It's fun stuff and those costumes can compete.


The aluminum frame is sweet, but what are you using for the actual wings? I know a lot of places would frown upon essentially a back full of metal blades.

Thanks! not that I had anything to do with with my wife's skill.

As for the feathers/ wings she is going to make them out of thin sheets of painted plastic, I forget which kind, there will only be one more piece of aluminum back bone attached to the frame. 

BirgerBuilder
BirgerBuilder Reader
6/4/19 7:14 p.m.
TVR Scott said:

I'm thinking about the whole gas-contamination thing.  If your bottle is indeed leaching CO2 onto the welds, then you'll probably never get any farther along. 

I always just exchange argon bottles when they're empty.  No need to worry about certification or testing.  Just grab and go.  And no worries about contamination that way.

What's your technique for balling the end of the tungsten?  This can affect arc stability quite a bit.

I find aluminum rewards getting a rhythm going.  Puddle-dip-move-puddle-dip-move.  Only dip the rod in a molten puddle, and remove it entirely between dips.

Are you seeing the puddle formation clearly?  Some people have trouble seeing this in aluminum.  Your close-up vision is ok right?  (mine isn't anymore...)

Would be good for you to know the alloy you're using.  Someone else mentioned matching rod to base metal, and this can make a difference.

How sensitive is that old TIG machine?  Aluminum will overheat really easily and fall apart like nothing.  A machine that modulates well makes the job much easier.  Long ago I tried to weld on an old scratch-start machine without continuous heat control, and it was basically impossible.

You said you had a knowledgeable buddy over helping, right?  Could he make a nice bead with the same set-up?  Have you ever used a modern machine as a comparison?  Maybe do a demo at a weld shop?

That's my random collection of thoughts.

The local shop I go to does not do a bottle swap. They did offer to let me borrow another bottle to compare last time I was there so I may ask about that if I can't get it figured out soon. 

To ball the tungsten, I just start an arc and wait for it to ball up. Is there something more to it? 

Vision is still 20/20 and I can see all of the mistakes I'm making. 

Pretty sure it's 6061, from what I saw, anything in the grade 6 series should use 4043.

The pedal seems to modulate nicely, my foot doesn't always do what it's supposed to though.

As for a knowledgeable friend, that's the one thing I am clearly lacking. This is the only TIG machine I have ever used on Aluminum so I have no idea what percentage of the problem is the set up and what percentage is my lack of skill. But I can tell you, it's a combo. 

If anyone out there in internet land is a good welder near the Baltimore area, I've got some beers waiting for you...

Thanks for all your help. 

FunkyCricket
FunkyCricket Reader
6/5/19 7:12 a.m.

probably warbla so she can heat shape them, and it takes paint really well...


keep us updated. I didn't update my cosplay post with the updated costumes from our comic con, I should do that.

TVR Scott
TVR Scott GRM+ Memberand HalfDork
6/5/19 7:22 a.m.

In reply to BirgerBuilder :

This is how I ball my tungsten:

Grind the point to a 45 deg tip

Set machine to DC Positive Electrode.  This focuses all the heat to the tungsten.

Strike the arc on a piece of scrap aluminum and let the tungsten ball.  This should happen relatively quickly.  Let off the pedal.

Switch back to AC.

Just occurred to me - you're not using a dirty contaminated grinding wheel for your tungsten, are you?  And are you using the same tungsten for steel welding?  Because you should keep one separate for each metal type.

BirgerBuilder
BirgerBuilder Reader
6/5/19 2:53 p.m.
TVR Scott said:

In reply to BirgerBuilder :

This is how I ball my tungsten:

Grind the point to a 45 deg tip

Set machine to DC Positive Electrode.  This focuses all the heat to the tungsten.

Strike the arc on a piece of scrap aluminum and let the tungsten ball.  This should happen relatively quickly.  Let off the pedal.

Switch back to AC.

Just occurred to me - you're not using a dirty contaminated grinding wheel for your tungsten, are you?  And are you using the same tungsten for steel welding?  Because you should keep one separate for each metal type.

I am in fact using a dirty and contaminated grinder to shape the tungsten. I wipe it down with acetone after, is that good enough? I'm only TIGing aluminum right now so I'm not switching back and forth from steel. 

TVR Scott
TVR Scott GRM+ Memberand HalfDork
6/5/19 6:00 p.m.
BirgerBuilder said:

I am in fact using a dirty and contaminated grinder to shape the tungsten. I wipe it down with acetone after, is that good enough? I'm only TIGing aluminum right now so I'm not switching back and forth from steel. 

Not good enough.

You could try running a grinding wheel dresser over the wheel to clean it off and cut a new surface.  Then dedicate that wheel only to tungsten.

You might want to pick up a little bottle of argon from your supplier.  Not sure of the size but they're not expensive and I keep one around as a spare if my big tank runs out.  This would give you a verified up-or-down on your bottle condition.

BirgerBuilder
BirgerBuilder Reader
6/6/19 1:23 p.m.

In reply to TVR Scott :

I cleaned up the grinding wheel, though I'm not sure it made any difference. I have noticed that the bad brownish gray spots seem to appear right near the tungsten and only when welding hot. Also I've read that the Black specs are from filler rod contamination so maybe just wiping them with acetone isn't good enough either...

BirgerBuilder
BirgerBuilder Reader
6/6/19 1:34 p.m.

All ugliness and problems aside, I press on. 

In what is sadly, my best work yet, I got the other side done. This has been brushed clean after welding and looks, pretty ok. So, hopefully most of the contamination is not inside the welds weakening them too badly. 

I wanted to remake the inside supports as well so first, I welded one of my grandfather's old clamps down to the table to hold the work piece. 

I barely even cleaned the rust off of the  clamp before using the TIG to attach it. Damn, steel is easy. 

Aluminum, so much harder...

But this was the last piece needed for the basic frame to be complete. 

Ta-Da. Hideous. 

But it will hopefully hold. 

Next up, I need to do a bunch of trimming and modification to make it more comfortable to wear.

BirgerBuilder
BirgerBuilder Reader
6/26/19 2:50 p.m.

I got the back panel trimmed down. It looks more feminine now, as well. 

Also, my wife was featured in the local paper. (right)

Next, I started on the extendable section of the wings. I got some small aluminum L stock, and I had to cut slots in the main supports. 

I had 2 of the manual miata window cranks left over from Crinkles, the crashed auto-cross car and they seem perfect to use for this project. 

(side note, Am I allowed to "sell" these parts to my wife at FMV for budget reasons?)

Now, when you take the window cranks apart, they kind of explode like spring snakes out of a nut jar. This was a bit daunting at first but it all went back together easily enough. 

Here they are temporarily clamped in place for testing. And a close up of the clip to hold the wire sleeve. 

The metal clip at the end fits in snugly, and tension should keep them in place with no trouble. 

First test!

I'm pretty happy at how little effort is needed to move the arm. Hopefully it will stay that way after more weight is added. If not, I'll need to add the helper spring back inside the crank. I will be adding an electric motor to move them, and the smaller and lighter that motor is, the better.

The Wife is working on the armor and costume as well, she doesn't have a ton of it done yet but here is the beginning of the process. 


BirgerBuilder
BirgerBuilder Reader
7/9/19 2:02 p.m.

With the boss prodding me, I got a bit more work done over this long weekend. (Not as much as she hoped)

I have the wings able to open and close using hand cranks, but they need to be automated and they need to move with synchronism. 

The next step to achieve that is to build a pulley system. 

I started out by taking the window crank drive shafts from a difficult to replicate shape, (a star) to a simple one, (a box)

Then I was able to make some very simple key holes for them.

Next up, I machined a pulley on the lathe. But first I had to make a workpiece holder.

Next, I scribed a centered circle onto the work piece. 

The four dots are from my first attempt to do this on the rotary table, but I realized how difficult it would be to center it perfectly and moved to the lathe. 

I did the rough cut on the bandsaw,

Then I turned it down to size and cut a groove into the edge on the lathe. 

I centered and bolted the first two keyhole pieces, cut the extra ends off of the window cranks, and, success.

I wanted to remove any extra ounces, so I bolted it back down on the rotary table for a weight loss program.

I ordered a small motor, geared down to 12 RPM which should hopefully do the job at the right speed while having having enough torque and come in a light, small package. 

That's the hope anyway. 

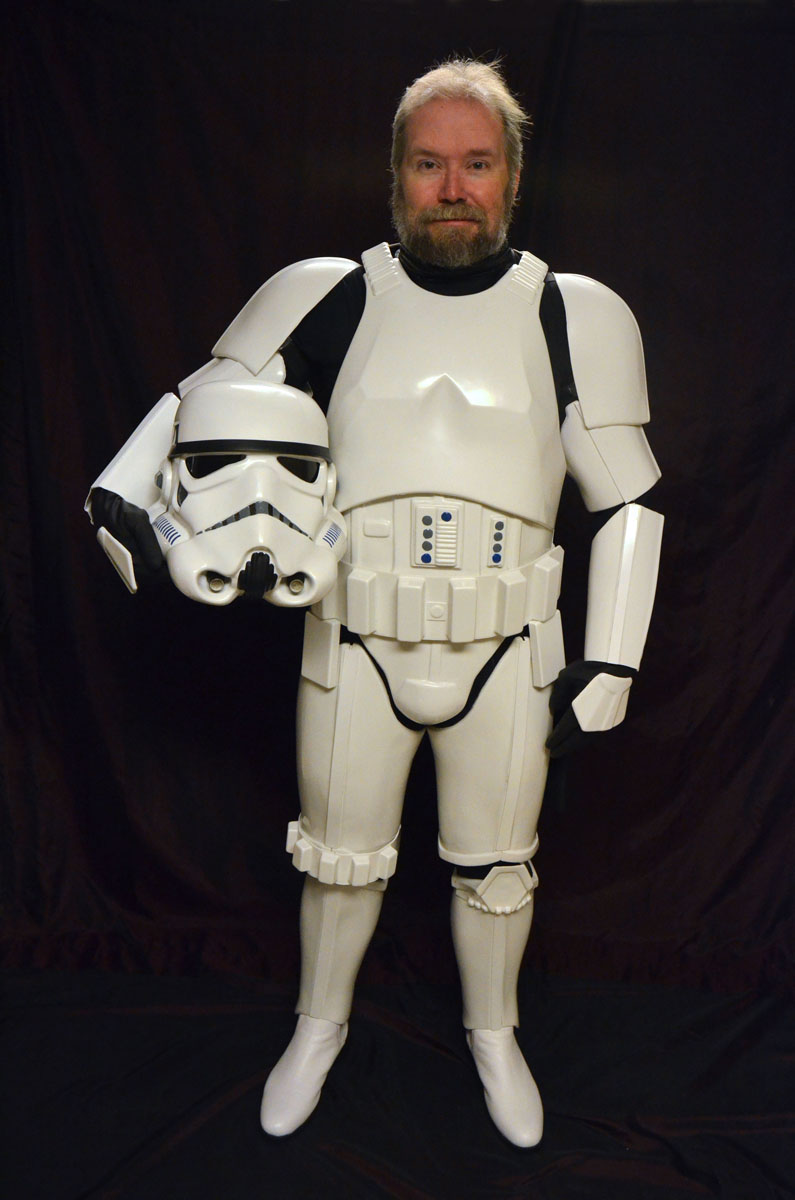
The wife has been much busier than I have on the project, but I don't have that many pictures of her work. Here is the start of the foam armor and the shirt she sewed from scratch. If you want to see more on that end, check out her Insta page. PlexiCosplay


maschinenbau
maschinenbau GRM+ Memberand SuperDork
7/9/19 10:01 p.m.

Holy E36 M3 that is some amazing work your wife has done. Y'all make a good team.

Jerry
Jerry UberDork
7/12/19 9:56 a.m.
TVR Scott
TVR Scott GRM+ Memberand HalfDork
7/14/19 7:57 a.m.

I was tig welding some aluminum intercooler pipes yesterday, which got me thinking about you and your learning process.

Couple questions:

That big old machine of yours does have a high-frequency unit, right?  Have you checked/adjusted the gap on it?  It's sort of like adjusting points on an old distributor.

Is there a chance your wife could take a video of you welding?  Like thru a second welding helmet?  I'd love to see exactly what you're doing and what your puddles look like.

BirgerBuilder
BirgerBuilder Reader
7/16/19 2:24 p.m.
TVR Scott said:

I was tig welding some aluminum intercooler pipes yesterday, which got me thinking about you and your learning process.

Couple questions:

That big old machine of yours does have a high-frequency unit, right?  Have you checked/adjusted the gap on it?  It's sort of like adjusting points on an old distributor.

Is there a chance your wife could take a video of you welding?  Like thru a second welding helmet?  I'd love to see exactly what you're doing and what your puddles look like.

It does have high frequency, and I did check the gap which did not need adjustment. I will need to do some more welding soon, so I will ask her the shoot some video when I do, Thanks!


BirgerBuilder
BirgerBuilder Reader
7/16/19 2:52 p.m.

The wife is getting anxious about the build so I am doing what I can to hold up my end for her and putting some extra time in on this project.

This past Saturday and today, I finished the second pulley. This took way longer than it should have because I refused to cut the part off with a band saw for some stupid reason. Instead I spent 2 hours making a long enough parting tool, seeing that it didn't work, adjusting it, hogging out the space to cut from and just all around acting like an amateur.

Oh, well, It's done now.

Then I centered it on the rotary table and made a D-shaped hole.

I forgot to take a good picture but after some file work, it's a nice snug fit.

As you can see, it's also mounted to the frame, though I will have to add some sliders for belt tightness.

As it sits, it's not that easy to get the belt to move the wings. The bottom pulley is just hanging there so, shocker.

Also, the wife drew up the outline for the feathers, these will be semi-transparent foam with poster board inserts to hold the LEDs and add stiffness.

And, in what I think is one of the most fascinating/ impressive portions. She made the neck section of the armor.

She didn't want it to be made out of foam because it's too hot and inflexible so she is using a semi-hard resin.

First we made a plaster cast of her neck and shoulders, (You can just barely see it in the background of the earlier photo with the two mannequins)

Then she sculpted the design she wanted out of clay and poured a silicon mold over it.

From that, she used flexible resin to make a wearable piece.

still needs paint, but nearly finished.

TVR Scott
TVR Scott GRM+ Memberand HalfDork
7/16/19 2:55 p.m.

In reply to BirgerBuilder :

Cool.  In this case a video is worth about 10,000 words.  As close as she can get.

BirgerBuilder
BirgerBuilder Reader
7/19/19 10:54 a.m.

Ok, so after a few attempts with two different cameras, I finally managed to get a decent video. Apparently, neither apple nor android will let you use manual control during video. So  I downloaded "open camera" on my android and it works much better. 

I went to the local metal shop and they let me go through the scrap bucket and I pulled out several pounds of aluminum and they only charged me $2.

Once again, my prep process:

Clean the metal with acetone,

sand it down with a dedicated  flap wheel.

Clean the table, filler rod, and work piece with acetone a second time. 

Here are the settings on the machine:

And several videos of terrible welding! 

First one has the most, "goop" the filler rod turns to boogers and I can't get it to join the puddle. This is my most common problem. And likely due to my technique or lack there of. 

On the second attempt, It started out the same but I managed to get the puddle moving and the filler to join for the second bit.

And it the third one, I tried to show the arc without any filler for a moment. Also, had a harder time getting a puddle started this time. Maybe too cold?


And of course, when it's done, all of the welds look like they have freshly cracked pepper in them. 


Much appreciated if you're able to help at all!

AngryCorvair
AngryCorvair GRM+ Memberand MegaDork
7/19/19 12:36 p.m.

just looked at this thread for the first time.  Damn, you’ve both got crazy vision and skills!  Waiting for next update...

AWSX1686
AWSX1686 GRM+ Memberand SuperDork
7/19/19 2:14 p.m.

As I noted before, I am not a welding expert. I did some TIG on a friend's machine for maybe 15 minutes one evening. I am pretty sure I had the same issue as you, and to me it looks like you aren't giving it enough power. Is your pedal all the way down when trying to run the bead? I was told to get it started with light pedal, but then really just mash it all the way down to create the puddle and run your bead. 

BirgerBuilder
BirgerBuilder Reader
7/19/19 2:19 p.m.

In reply to AWSX1686 :

I may need to work on pedal modulation but I don't think lack of power is the problem, as you can see in the photo at the end, I am on the verge of burning all the way through the plate and still having the same issues...

AWSX1686
AWSX1686 GRM+ Memberand SuperDork
7/19/19 2:29 p.m.

In reply to BirgerBuilder :

I would guess that that part is due to heat soak. If that was your last weld on that plate, when aluminum gets hot it doesn't weld well. 

From what I was told, set the machine to the amps you think you need, then when welding you should be at full pedal. Not much modulation should be necessary. 

AWSX1686
AWSX1686 GRM+ Memberand SuperDork
7/19/19 2:44 p.m.

Here's a picture of my very first TIG welds. 

My buddy did the nicest couple beads there to show me and then I had at it. 

At the bottom corner you can see where mine was getting the filler all globby, and getting that cracked pepper look. That's where he showed me I hadn't even been giving it enough pedal to start the puddle, just enough to glob the filler rod. 

Again, I'm no expert, but I don't really think I could see much of a puddle in your videos, and I'm fairly sure the filler rod isn't supposed to glob on you like it was.


Here you can see at the end of the lap joint, and also on the weld on the edge what heat soak does. The metal just seems to melt away before you even get very far. I had just kinda gotten the hang of it, and then that happened when I didn't think I changed anything and I was very confused until my buddy explained heat soak to me.  

TVR Scott
TVR Scott GRM+ Memberand HalfDork
7/19/19 6:54 p.m.

Ok, that was indeed extremely useful.

You sir do not have a puddle forming at all.  You really need to get the base metal melted and then add material.  As a matter of fact, I would suggest putting aside your filler rod for a while, and just try to form a puddle and then manipulate it.

Get an understanding of what the puddle actually looks like - before it's formed, as it starts to go molten, and then as you expand it and work with it.  Really good puddle control is the key to successful tig welding.

Also, I think you're getting the black spots because of how you're melting your rod and then pulling it out of the argon stream.  The molten rod should end up in the puddle and should not be pulled back out.  The black is just oxidation, I'm thinking.

I might try some welding videos myself.

1 2 3 4

You'll need to log in to post.

Our Preferred Partners
gHsGQzK5LwrqjvPyVUdDvr9SVuKfyPu7tzdTEARUe4mJBdL0le982pZ9pFhYxv2d