tuna55 said:
Dusterbd13-michael said:
I used cheap lacquer spray paint for guidecoat. Worked good for me, without some of the issues you are having.
I hear that, but I can't spray inside, and therefore can't spray at night when all of this is happening, so it works.
You might look into dry guide coat powder. No spraying is required. It's used a lot in marine applications but I don't see why it wouldn't work on a vehicle as well.

tuna55
MegaDork
10/1/22 6:07 p.m.
Toyman! said:
tuna55 said:
Dusterbd13-michael said:
I used cheap lacquer spray paint for guidecoat. Worked good for me, without some of the issues you are having.
I hear that, but I can't spray inside, and therefore can't spray at night when all of this is happening, so it works.
You might look into dry guide coat powder. No spraying is required. It's used a lot in marine applications but I don't see why it wouldn't work on a vehicle as well.
Yep that's the exact stuff I was using
tuna55
MegaDork
10/1/22 6:47 p.m.
The stars aligned and I got about 5 hours in today, my hands are killing me and my nose won't stop running, but the truck looks great!
Wear some kind of dust filter.
After hours of sanding I needed Ibuprofen, Acetaminophen, and Voltaren to keep me going for the rest of the day. Old Man Muscle comes with a price.
tuna55
MegaDork
10/2/22 7:23 a.m.


Just for the record. It's weird that during this phase, every bit of forward progress looks worse than when I started to there untrained eye.
tuna55
MegaDork
10/3/22 12:34 p.m.
I had some help Sunday evening. I don't count this as working on the Lord's Day.


The thing is that he's really good at it, the roof is nearly ready, I have a little bit of work to do near the edge of the windshield but really it's ready for primer again. I'm pretty pumped. We're picking out colors and we mean it now.
tuna55
MegaDork
10/3/22 2:14 p.m.
A question for those who have done it before.
I do the next coat of epoxy, then 2K, then block sanding/wet sanding before a sealer coat (which I will use reduced epoxy for)
How long is the blocking/wet sanding phase compared to the phase I am in now?
Depends how perfect you want it?
What I did:
1. Rough body work, everything scuffed to 180 grit
2. Epoxy
3. 2K high-build (spray within epoxy recoat window so you don't have to sand)
4. Block until you can't feel your extremities (I think I went to 320/400 grit)
5. Epoxy or Epoxy/Sealer
6. De-nib anything odd and shoot colour.
But I ain't no body man.
Unless you're after time. By hand it might have been an hour per panel?
I used Slick Sand. It was really nice to sand, it really hid imperfections well. Featherfill is likely similar.
You will find everything you missed once it's painted.
I kept shooting high build and blocking through 600 wet. But i wanted perfection.
Every subsequent round went faster. By the end it was 15-20 minutes a panel on the neon.
tuna55
MegaDork
10/4/22 9:39 a.m.
Thanks guys! I look forward to getting primer on this thing in a week or so.
One more question, and it's way way out.
In a modern car, a slathering of RTV style compound is placed in the windshield channel, and the windshield is smooshed into place. I happen to know that the BOM for the Acura MDX and Honda Pilot contained a 6" piece of duct tape which they slapped on the bottom of the windshield when they drove it away, because the first thing they did with the new vehicles is to drive them. The driver at the end of the line, right after the windshield was smooshed in, would mat the throttle and drive a mile, slam the brakes, do a 180 degree turn, mat the throttle, and drive it back to the lot. The windshields were sliding -up- and curing near the roof during the drive because of the acceleration.
I hate chrome. I believe I have mentioned this. I do not want the giant ugle chrome trip around the windshield and back window. I am also not a huge fan of the giant black rubber gasket. Is that required, or can I just smoosh it in like a modern car?
In reply to tuna55 :
Having installed old school style glass with the gasket in a VW Beetle, I'd be concerned there is not enough of an overlap between the glass and the body to just use adhesive. It's a pretty thick area, on modern cars, especially at the bottom of the windshield. Is it possible to scuff and paint the chrome trim the same color as the body? Or a different accent color?

NOHOME
MegaDork
10/4/22 9:48 a.m.
Your windshield opening was designed either for a rubber seal where you rope the window into the gasket, or to be glued in using urethane window sealant and a primer. You are pretty much stuck with one way or the other depending on what the factory did.
tuna55
MegaDork
10/4/22 10:08 a.m.
NOHOME said:
Your windshield opening was designed either for a rubber seal where you rope the window into the gasket, or to be glued in using urethane window sealant and a primer. You are pretty much stuck with one way or the other depending on what the factory did.
What's the difference? I really don't know. I have a welder, ya know?
tuna55
MegaDork
10/4/22 10:09 a.m.
eastsideTim said:
In reply to tuna55 :
Having installed old school style glass with the gasket in a VW Beetle, I'd be concerned there is not enough of an overlap between the glass and the body to just use adhesive. It's a pretty think area, on modern cars, especially at the bottom of the windshield. Is it possible to scuff and paint the chrome trim the same color as the body? Or a different accent color?
Yeah, body color is likely the choice, but I don't love it either.

tuna55 said:
NOHOME said:
Your windshield opening was designed either for a rubber seal where you rope the window into the gasket, or to be glued in using urethane window sealant and a primer. You are pretty much stuck with one way or the other depending on what the factory did.
What's the difference? I really don't know. I have a welder, ya know?
I am guessing you would need to build up some sheet metal all the way around the windshield frame, in order to support the windshield and give a big enough interface for the sealant. It'd be doable, but seems like a lot of work for little result. Even modern cars tend to have a small black piece of trim around the windshield. If you do it, you'll want to get the depth right, too, so the windshield doesn't sit out too far from the frame. That would look weird.
Edit: I also do not know if there are any structural concerns for the different types of installations. I think in the bonded method, the windshield is part of the structure. Not sure with the gasket seal.
tuna55
MegaDork
10/4/22 12:29 p.m.
Let's talk about this stripe.

I initially was thinking about a painted pinstripe (the stereotypical old guy who shows up with a brush and a can of 1 shot and is done in 45 seconds), but I think I like this wider stripe. Does it then become correct to spray white on that area, mask the stripe, then paint body color? I ask because that requires installing, then removing the bed again. Thoughts?
tuna55
MegaDork
10/5/22 3:26 p.m.
It wasn't a wonderful evening in the garage, but I did have a gaggle of kiddoes in there with me. Tunakid 4 sanded some, and Tunakid 1 started stripping the interior of stuff. We removed the radio, lighter, ignition switch, glovebox and lid, and a few other odds and ends in preparation for scuffing and masking. It's forward progress, just more like 1/2 hour of "me" forward progress with three sets of hands and an hour of actual time.
tuna55
MegaDork
10/7/22 9:05 a.m.
Another moderate night of progress. Tunakid 4 disassembled some more interior parts by herself (because, of course) and we're nearly ready to strip it. I did a small amount of sanding and work on the roof. I am starting to like this color.
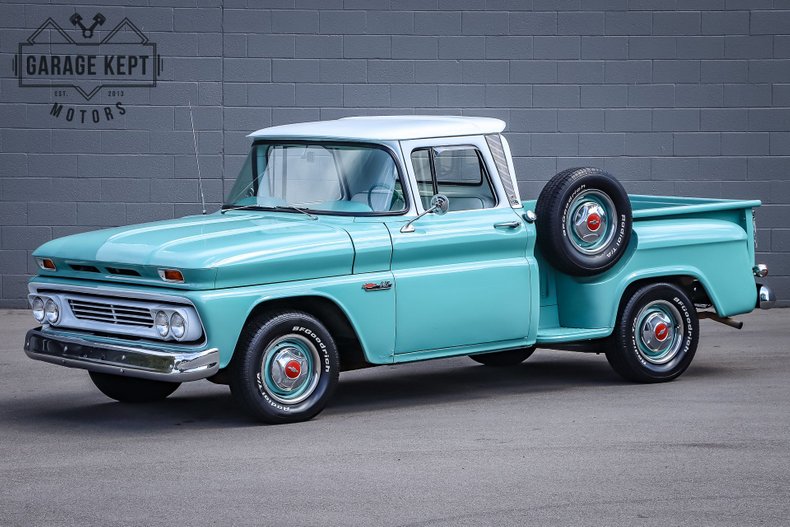
I'm liking the body style.
And its relieving to see from all the way over here just how bad all the panels fit on that '60.
tuna55
MegaDork
10/7/22 9:53 a.m.
SkinnyG (Forum Supporter) said:
I'm liking the body style.
And its relieving to see from all the way over here just how bad all the panels fit on that '60.
Funny I never liked that body style, the extra bulge, especially in the hood area, always looked forced to me. The color is the goal though, I think.
tuna55
MegaDork
10/10/22 12:12 p.m.
Sorry, folks. I got my booster on Friday, along with the flu vaccine. It went rough, and I didn't get anything done on the truck AT ALL.
Feel better my friend. Truck will still be there next week.
tuna55
MegaDork
10/13/22 8:20 a.m.
Sanded some more on the roof and windshield surround. No pictures, but work is being done.
tuna55
MegaDork
10/14/22 8:07 a.m.
More sanding for 1/2 hour. The roof is hard.


