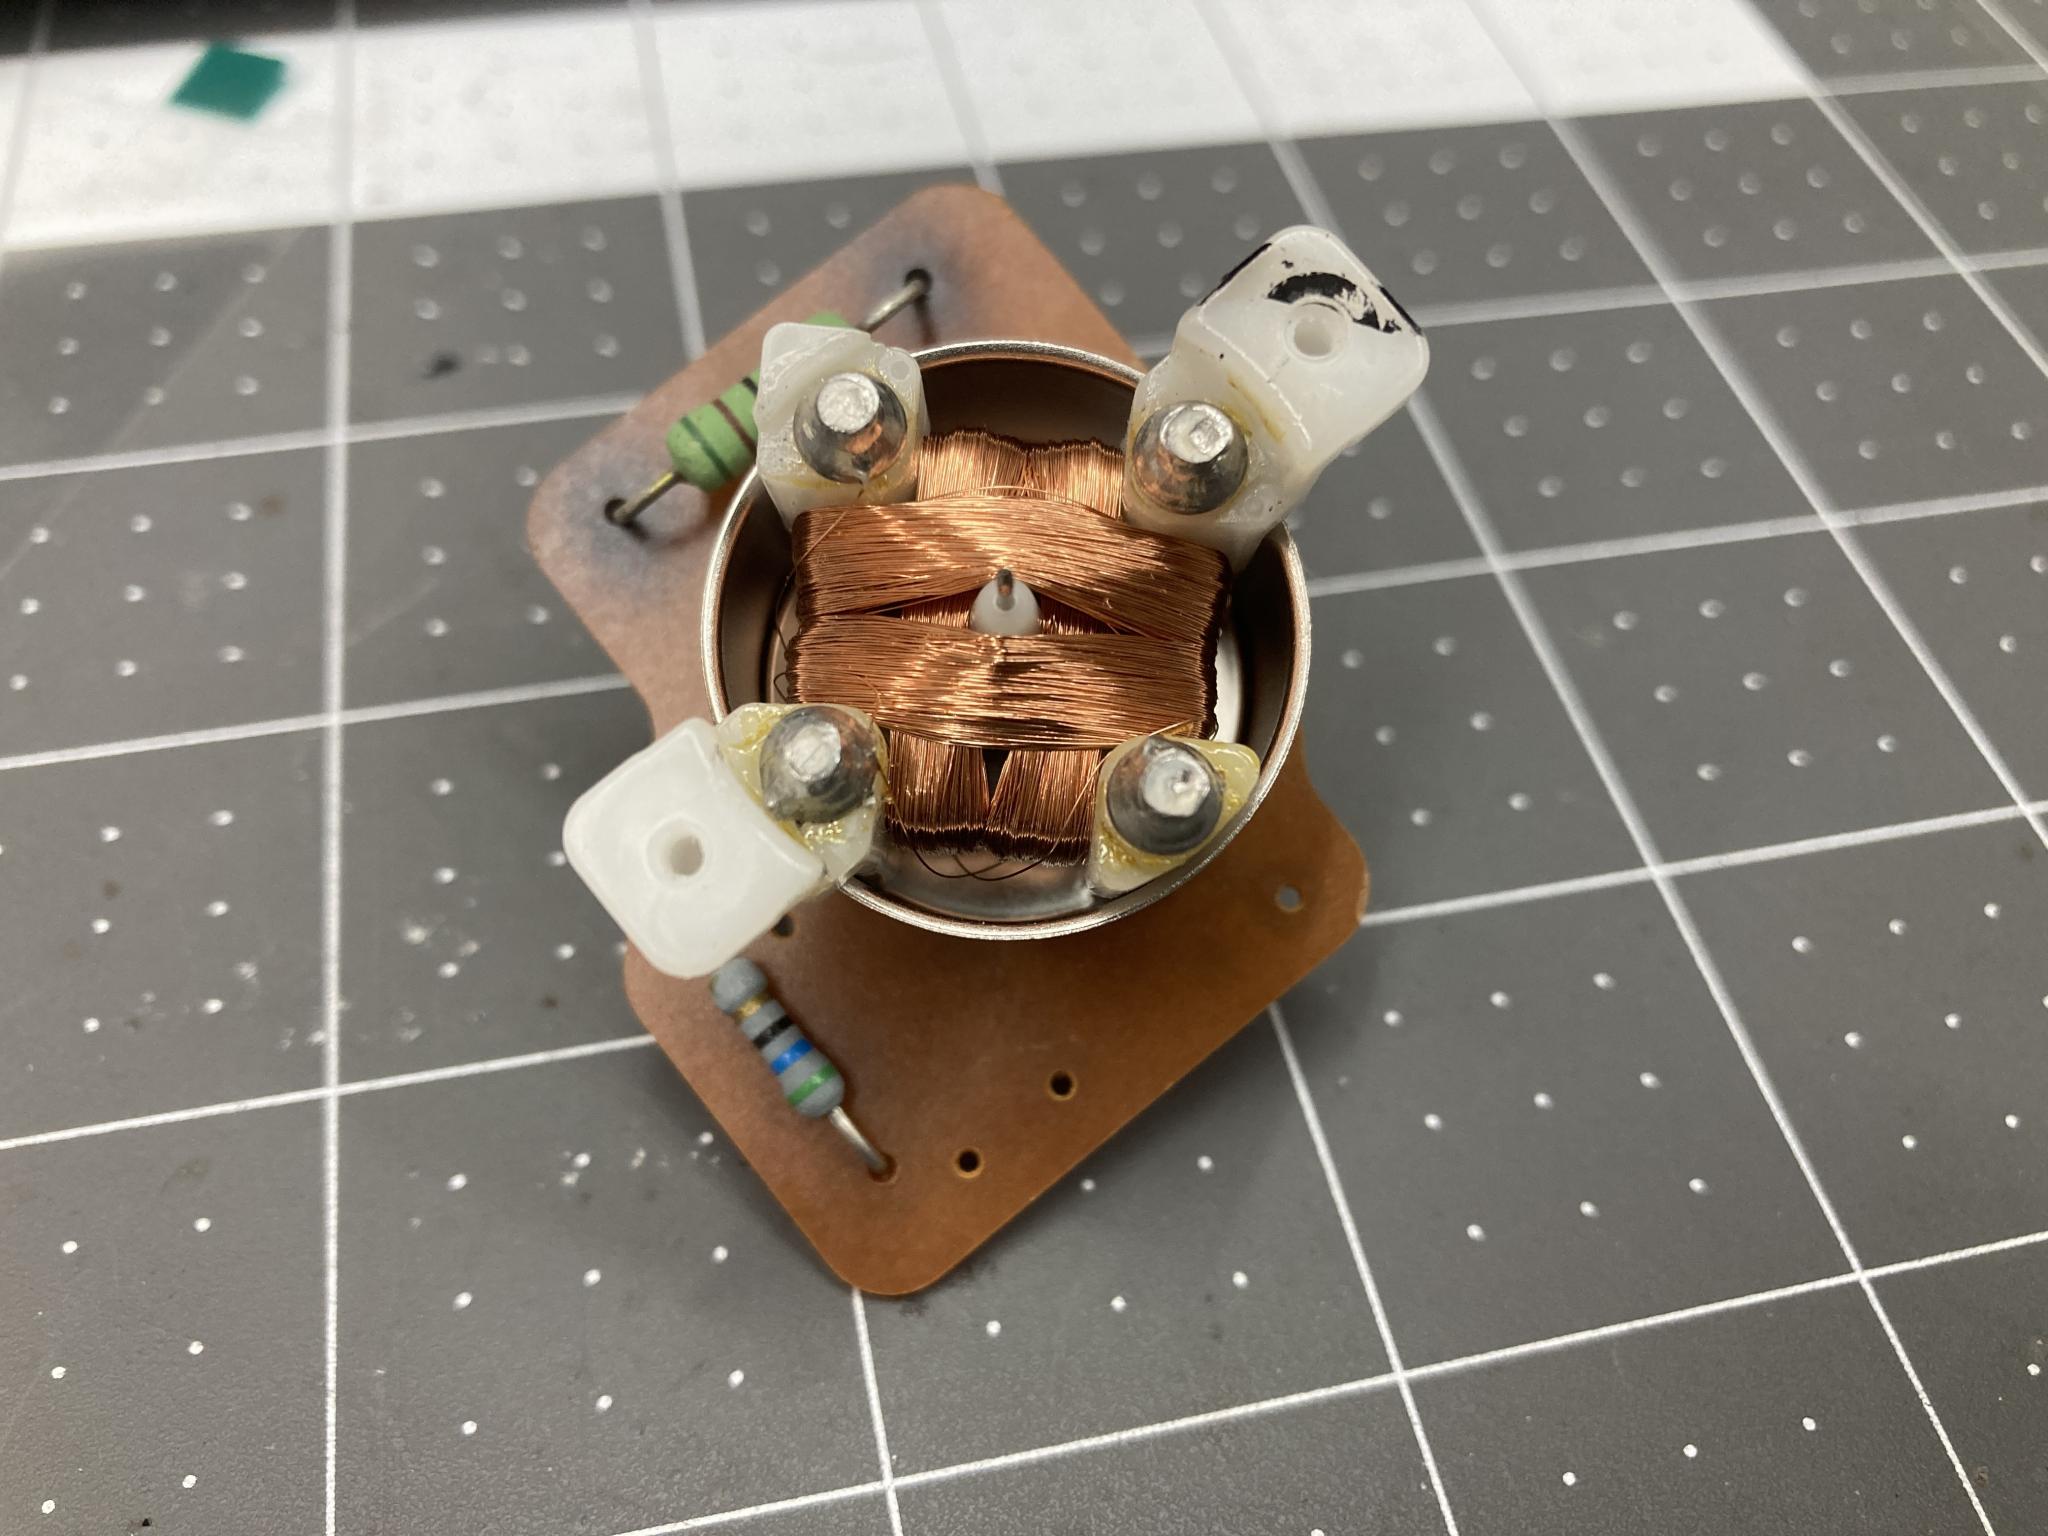
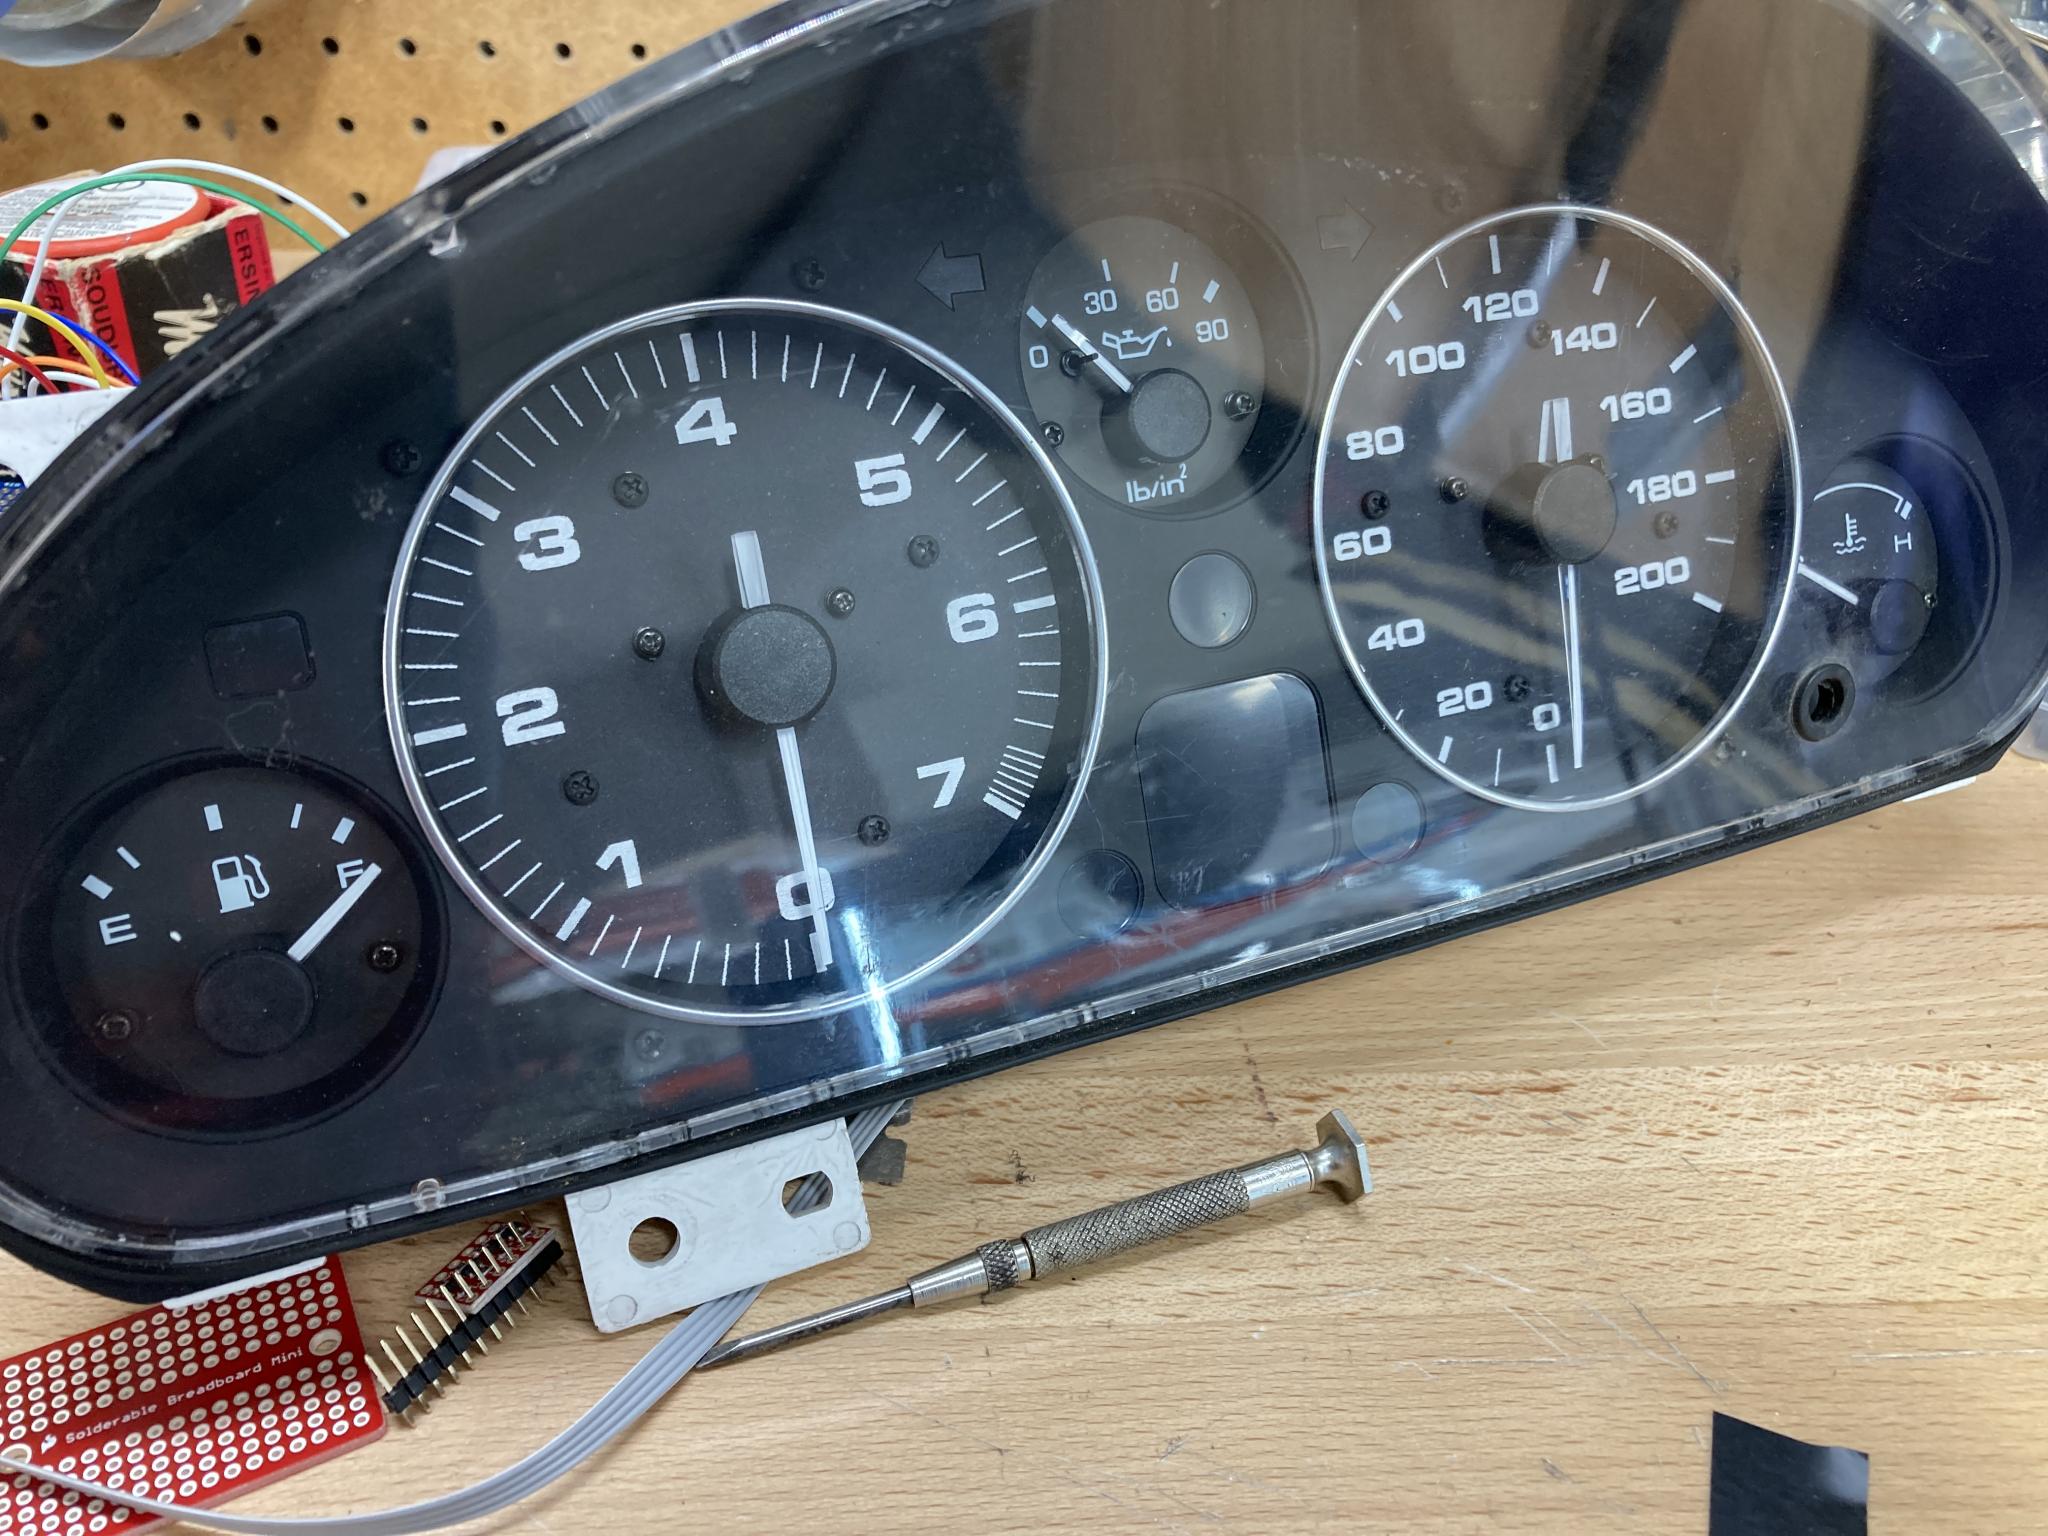
I spent a bit of time cleaning up code over the weekend. I soldered the stepper motor in and separated the power supply for the LEDs, no real change but it seems noisier. I'm going to swap in a different motor tonight and see. I'm also going to look at those air core gauges and see if I'm wasting my time screwing around with those steppers.
I also came up with a ridiculous addition that takes it beyond just "a factory style dash with flashy lights", but I have to wait for some components to arrive to put it into action.

Got a set of replacement steppers, they're all skipping slightly. My test is pretty extreme - 0 rpm to 6000 rpm and back to 3000 at full speed, and see if it slips. Maybe I'll just put it back in the car and see how/if it happens with the actual speed of the tach.
I've got a stack of air core motors on the workbench too, I think I can control them fairly easily. Maybe that'll be a side project some night. Here's one from a Miata gauge cluster of which I have a surprising amount. Apparently I've been collecting them.
But I want to get this into a demonstratable form in a week.
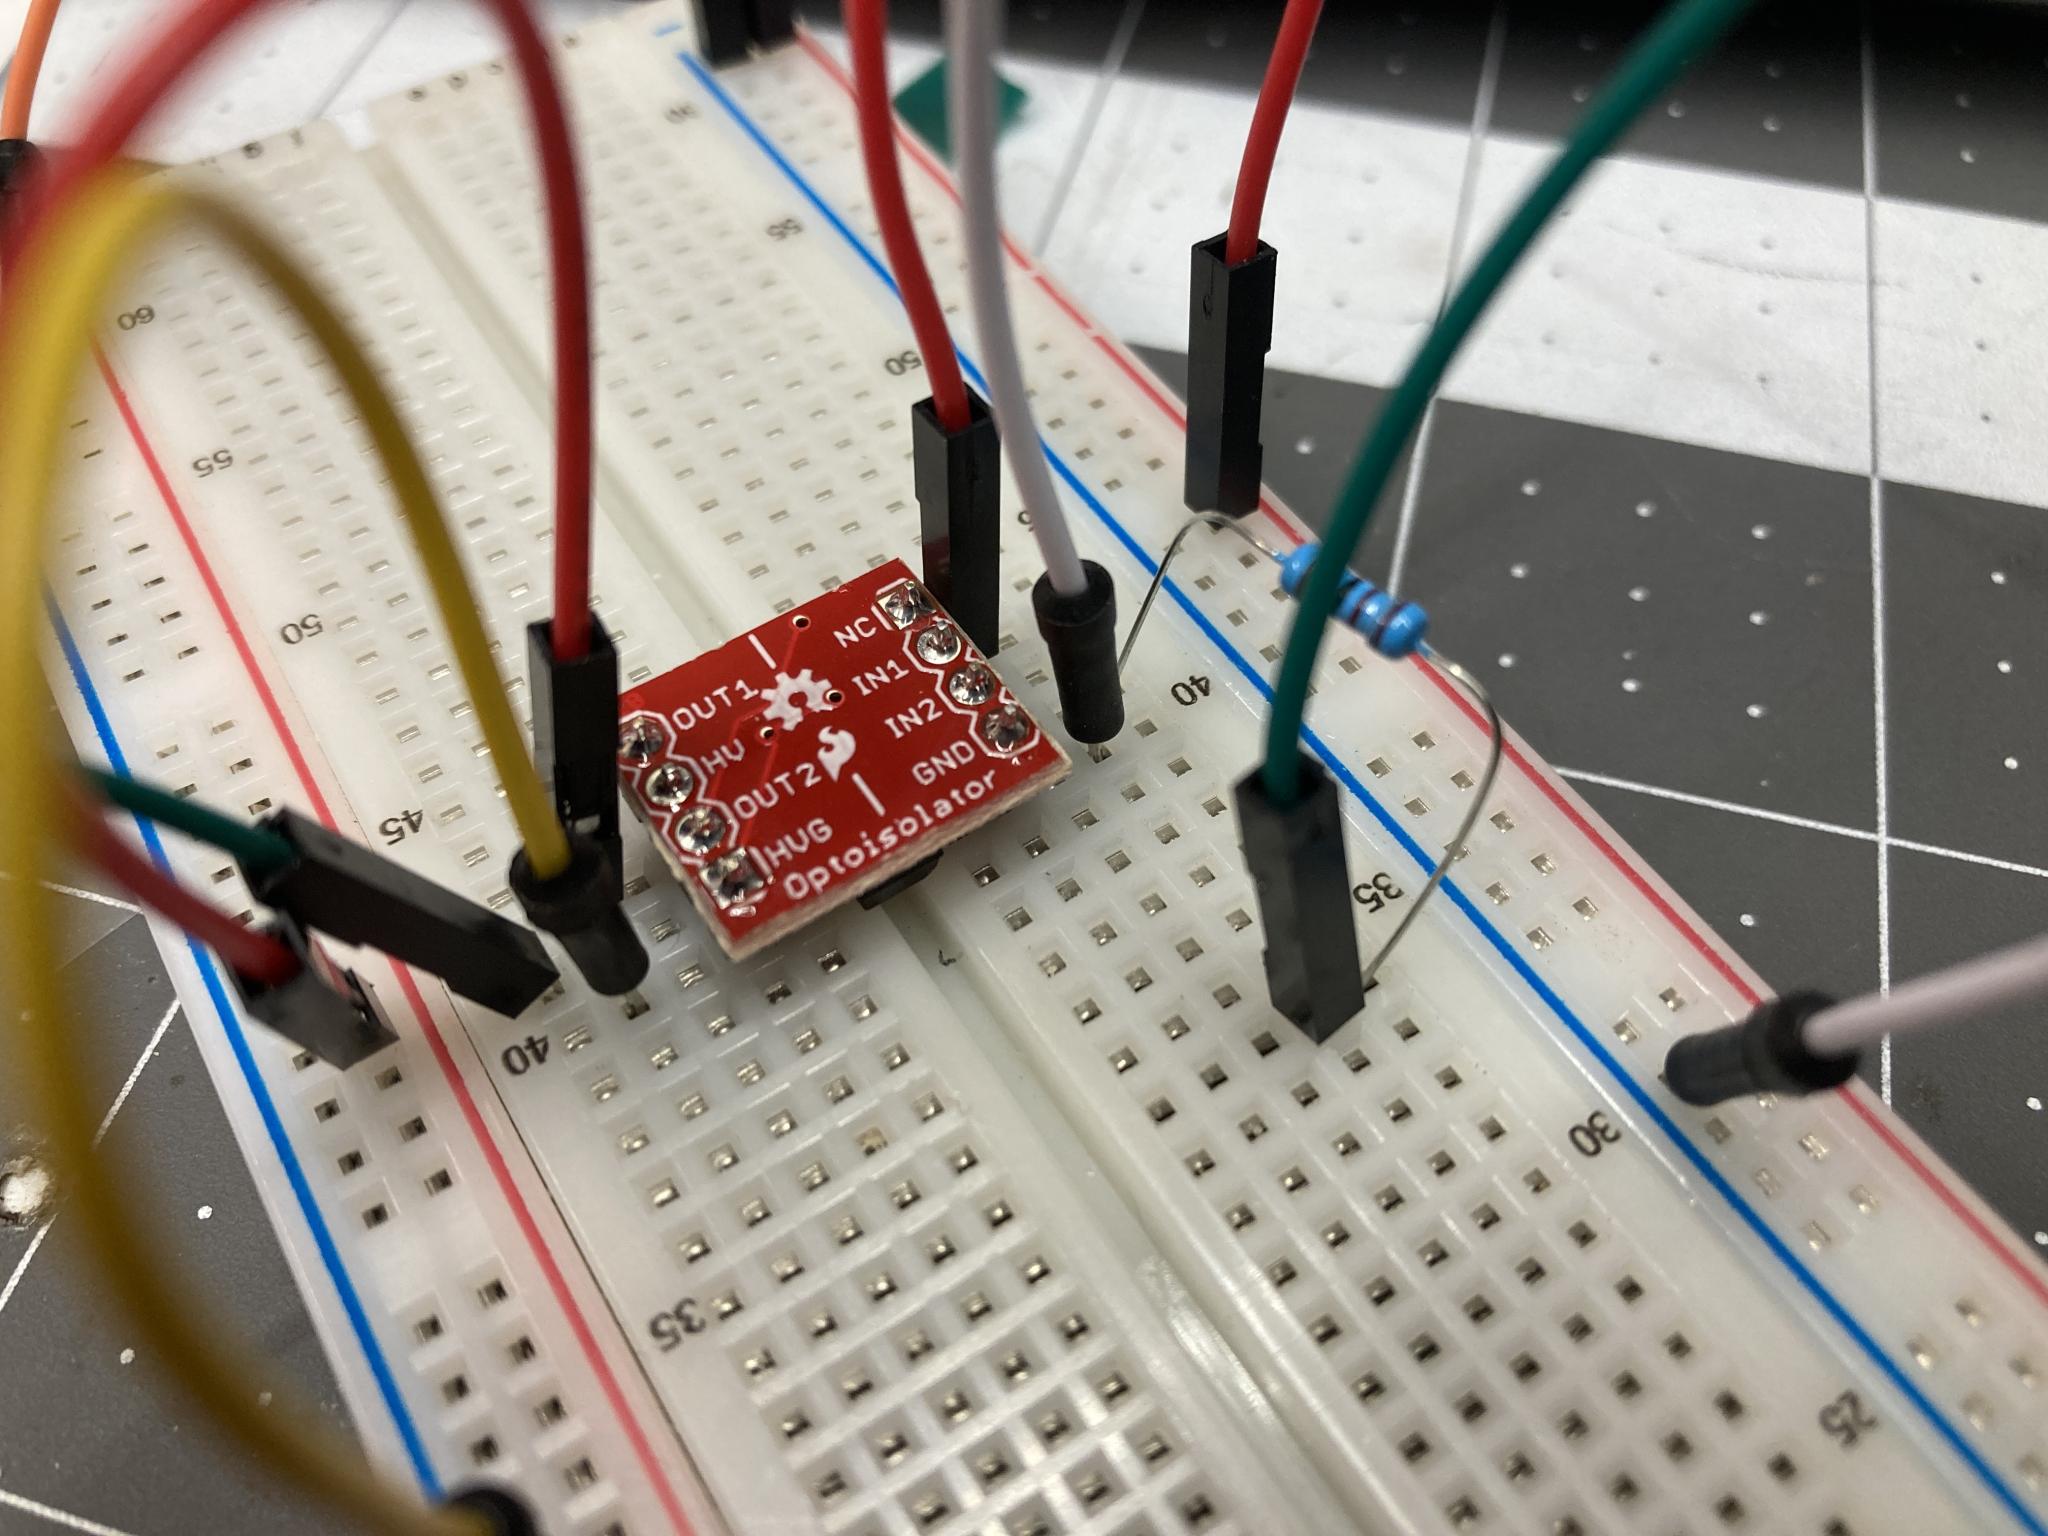
So with that goal, it's time to add a few more inputs, I think. I need to add FreakoutMode for the low oil pressure and I want to dim the LEDs when the headlights are on. For the latter, I need to drop the 12v input voltage from the car down to 3.3v for the Pi or I will let the tiny smoke pixies free. For this, I'm using a optoisolator which uses light to transmit the signal and prevent any leakage. That is ridiculously cool. And tiny. The pins on this breadboard are 0.10" apart. I have it hooked up here for testing and to learn how it works before I plug it in to anything.
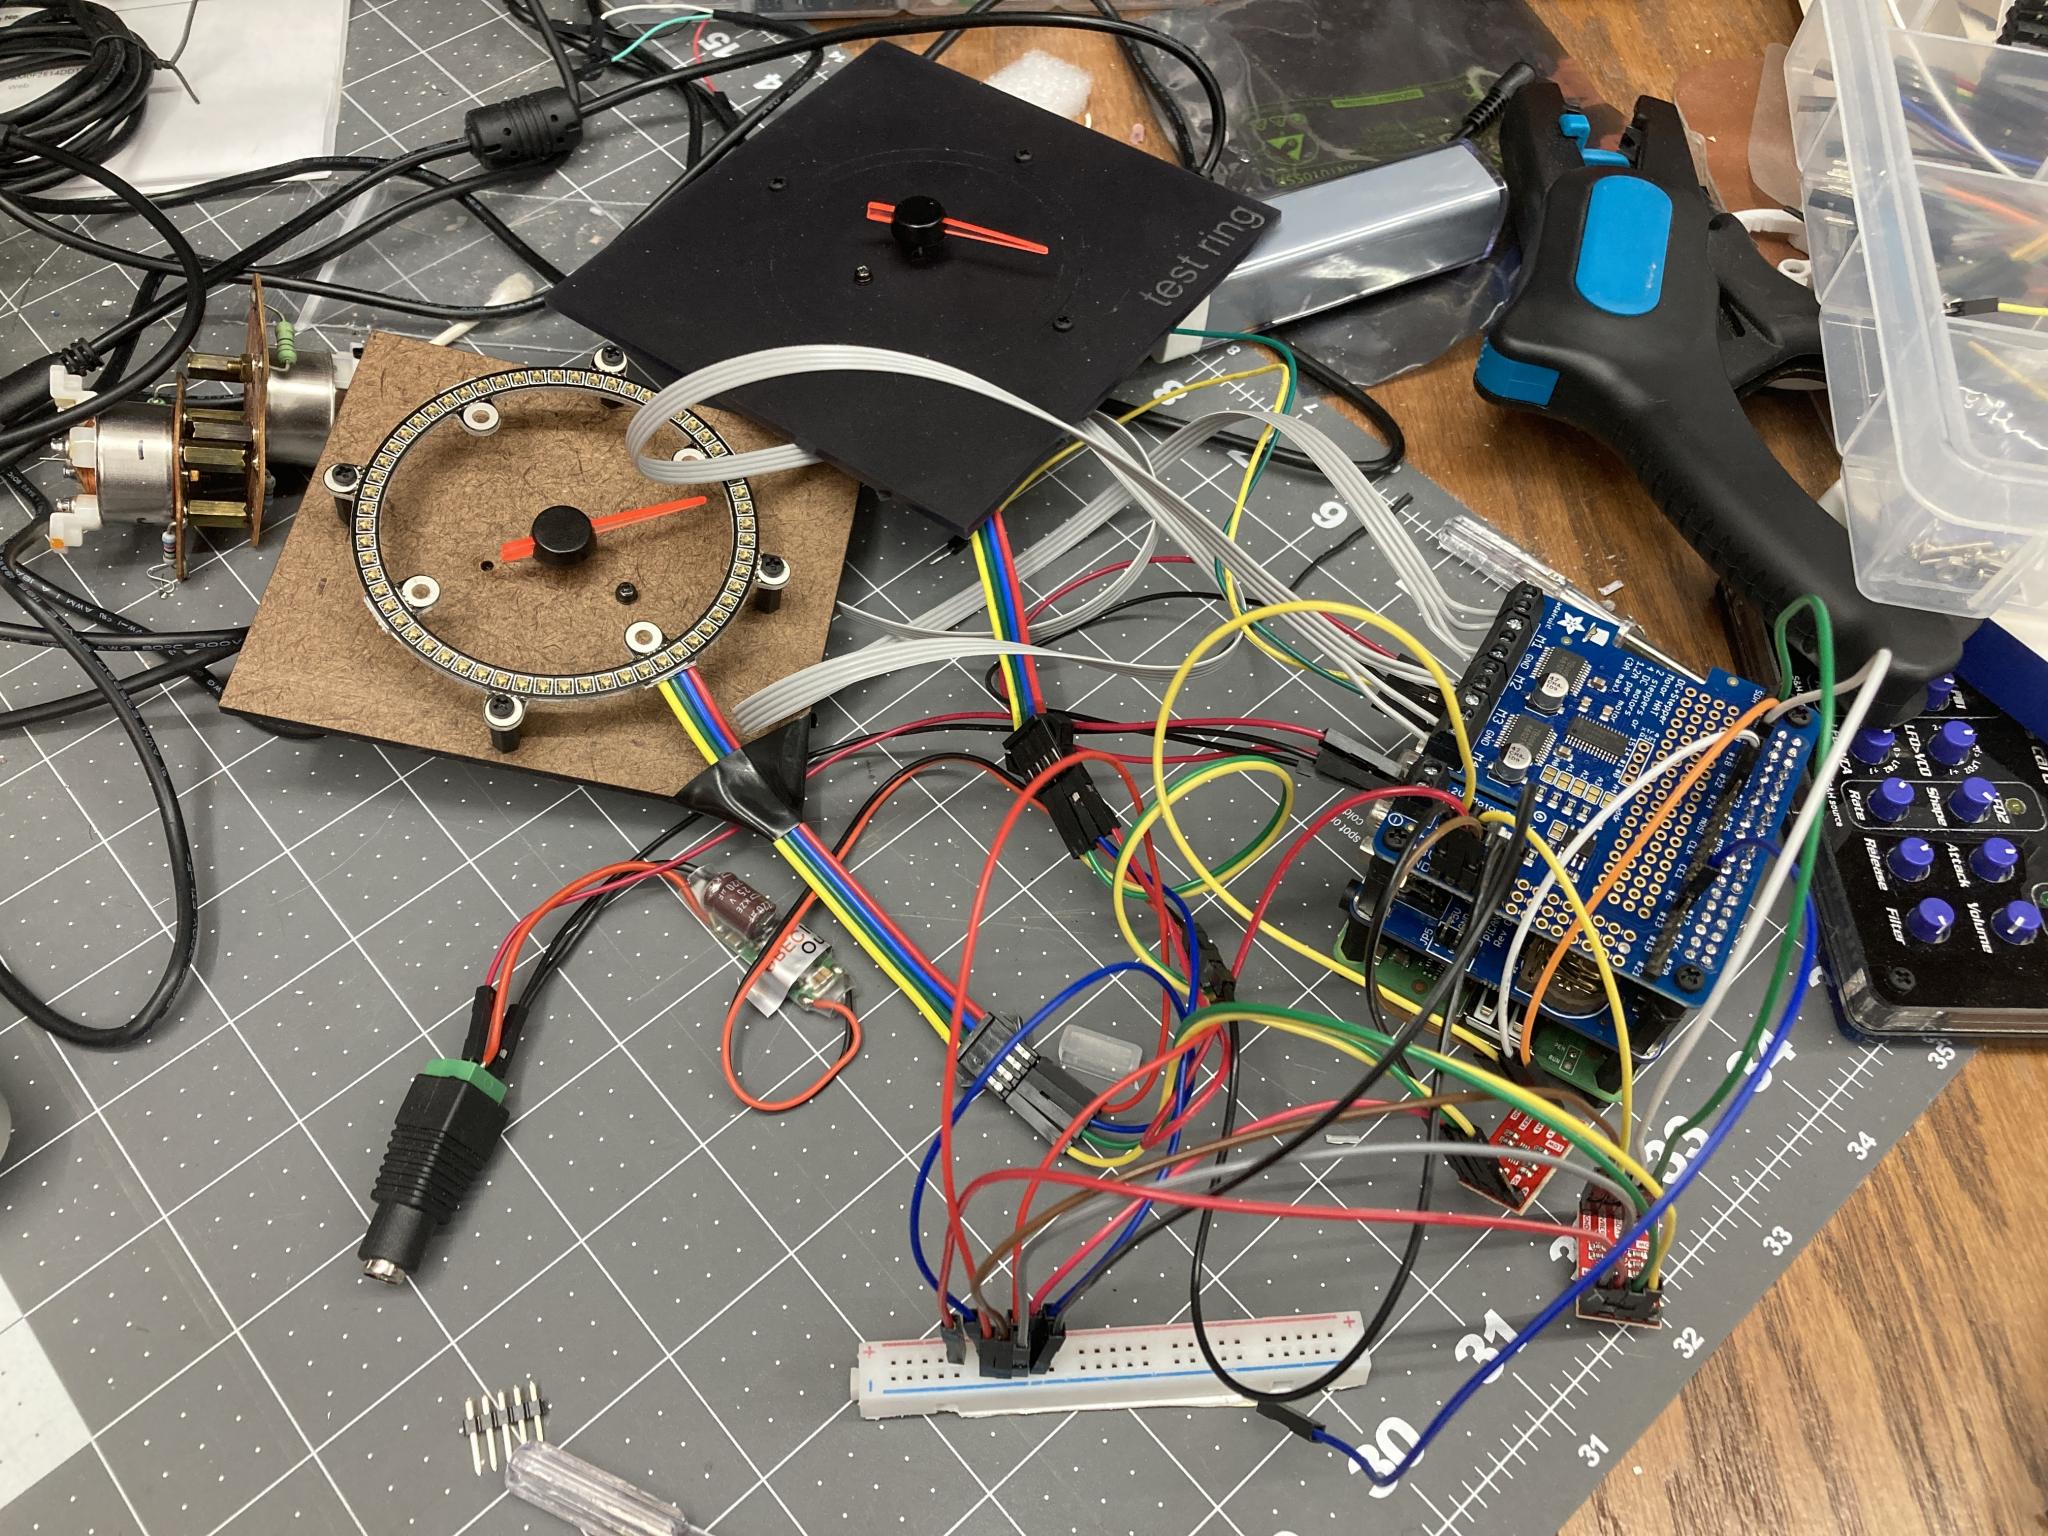
I've also cleaned up the code a bit although it's still not what I would call "production quality". The tach is a lot more complicated than the speedometer, mostly due to that LED ring. I'm currently using the LED ring on the speedo as a big overcomplex warning light, I'll give it some different brains later.
Packing this into a stock Miata gauge cluster comes later :) I'm going to take it back down to the shop and see how it likes being hooked to a car.
Plugged it into the car, so far so good. The low oil pressure light is working as well.
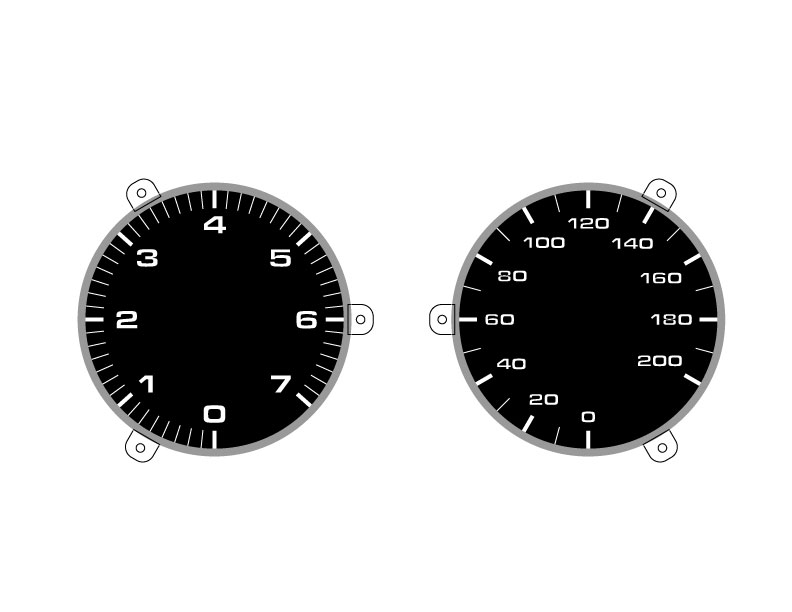
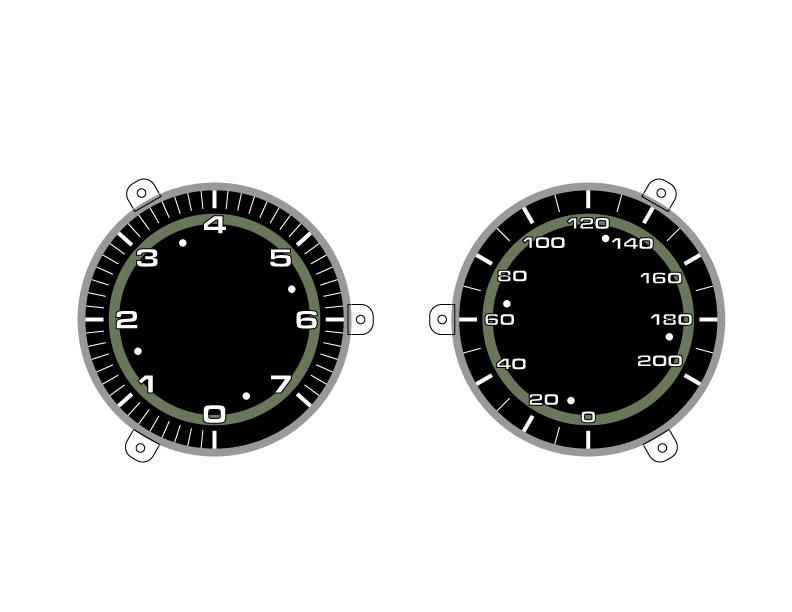
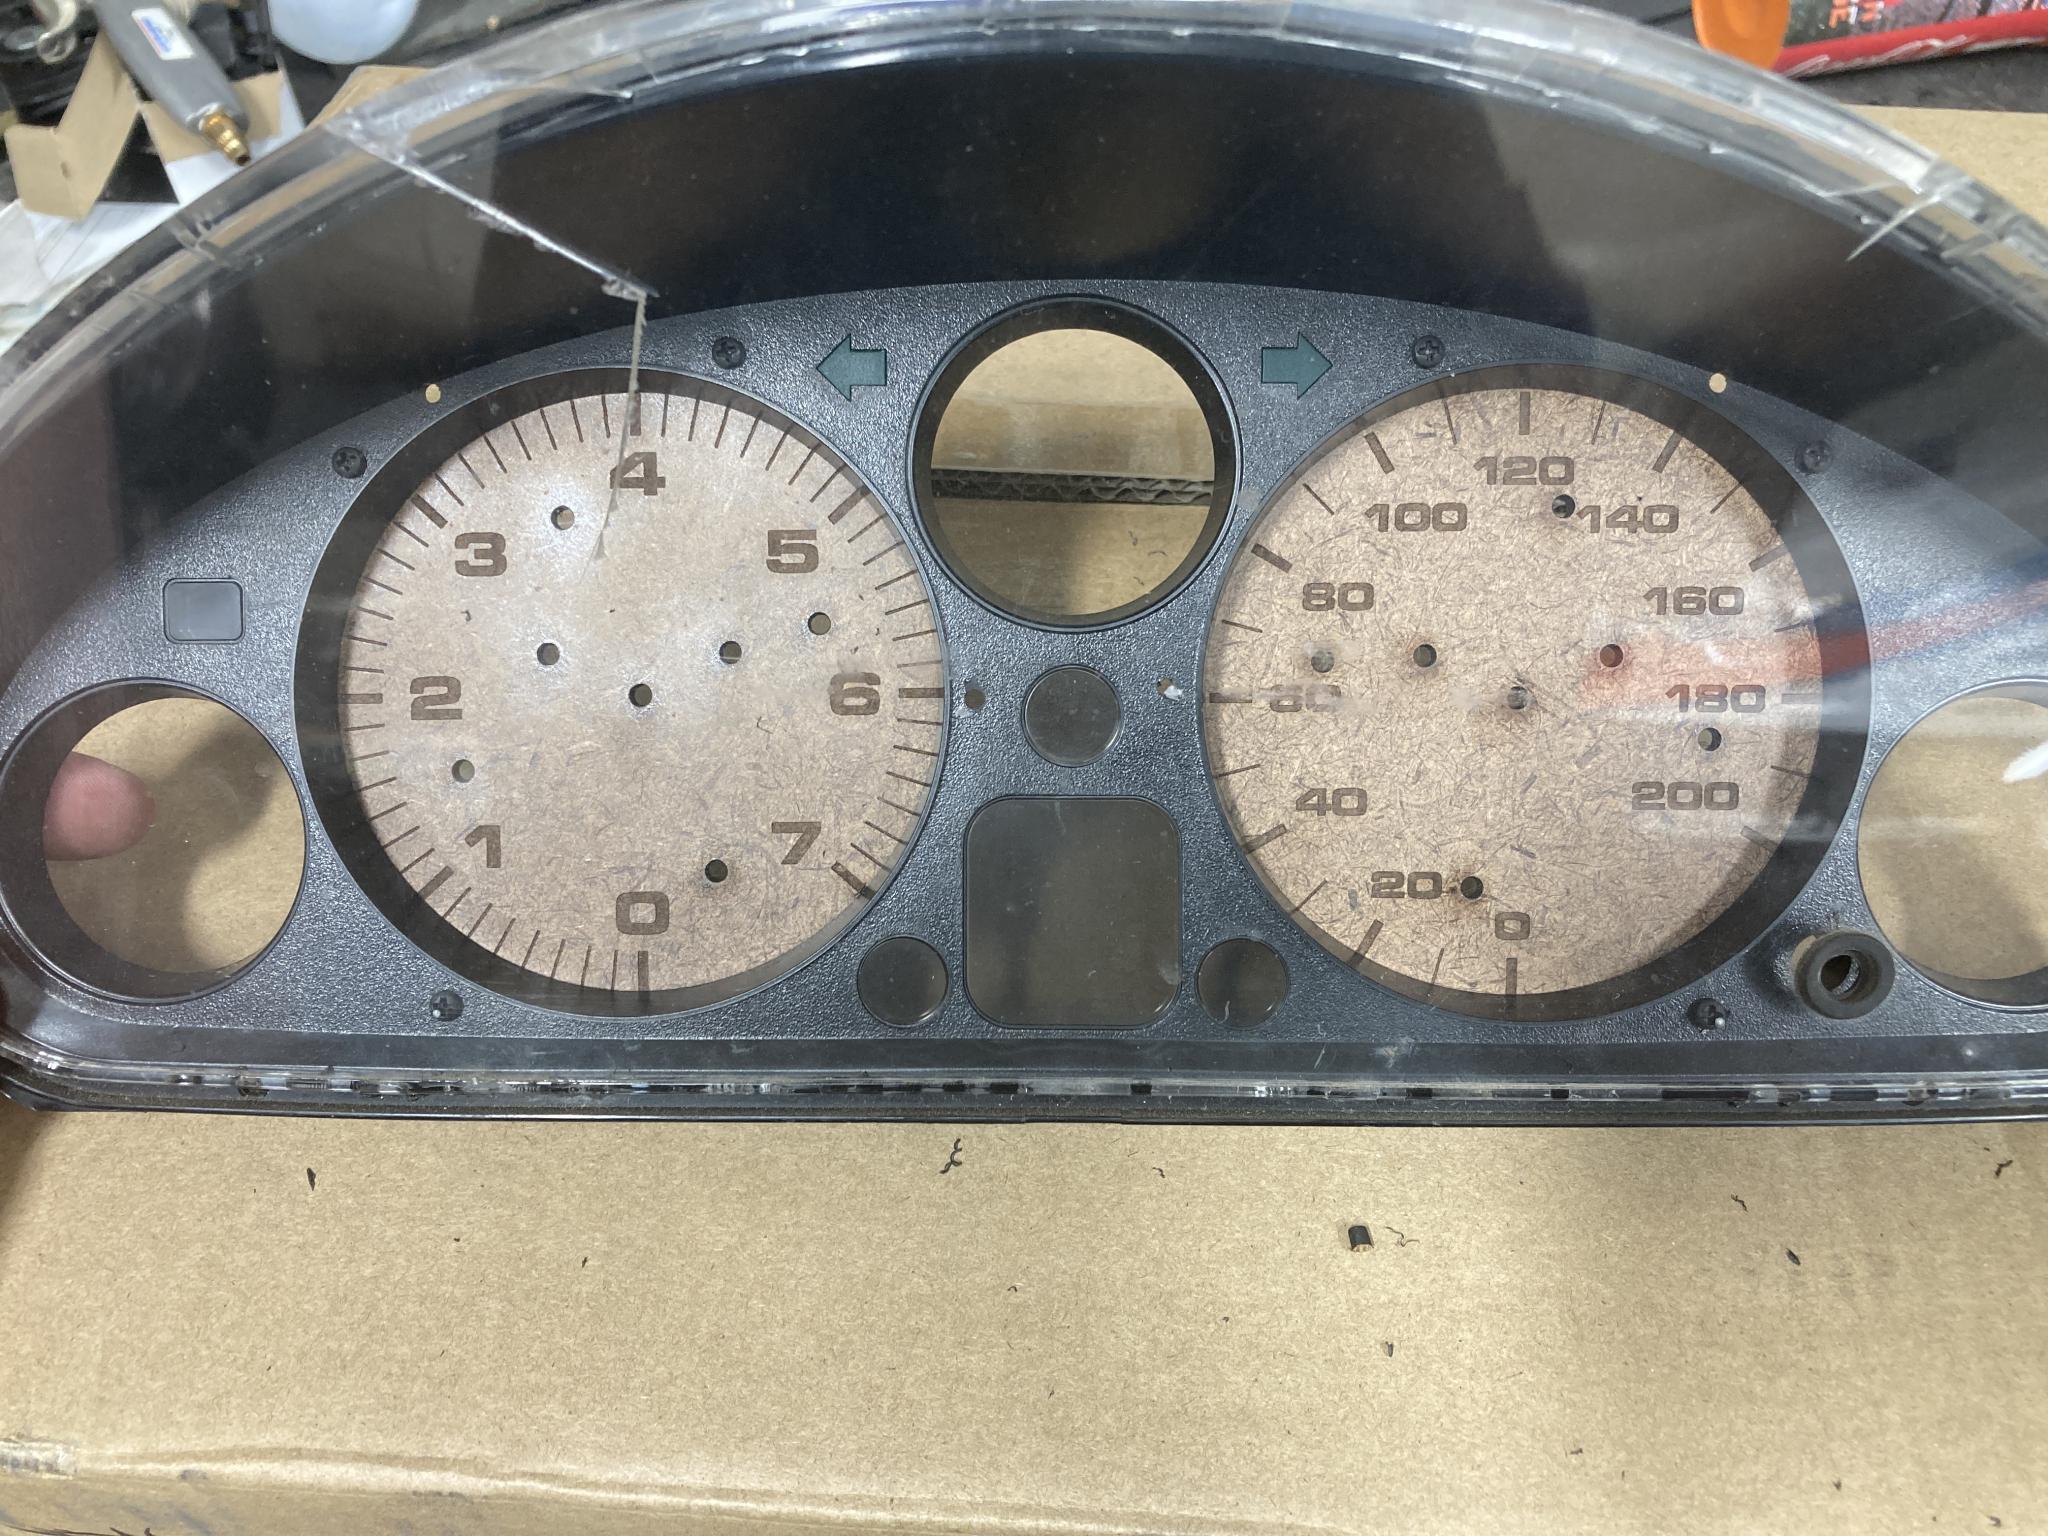
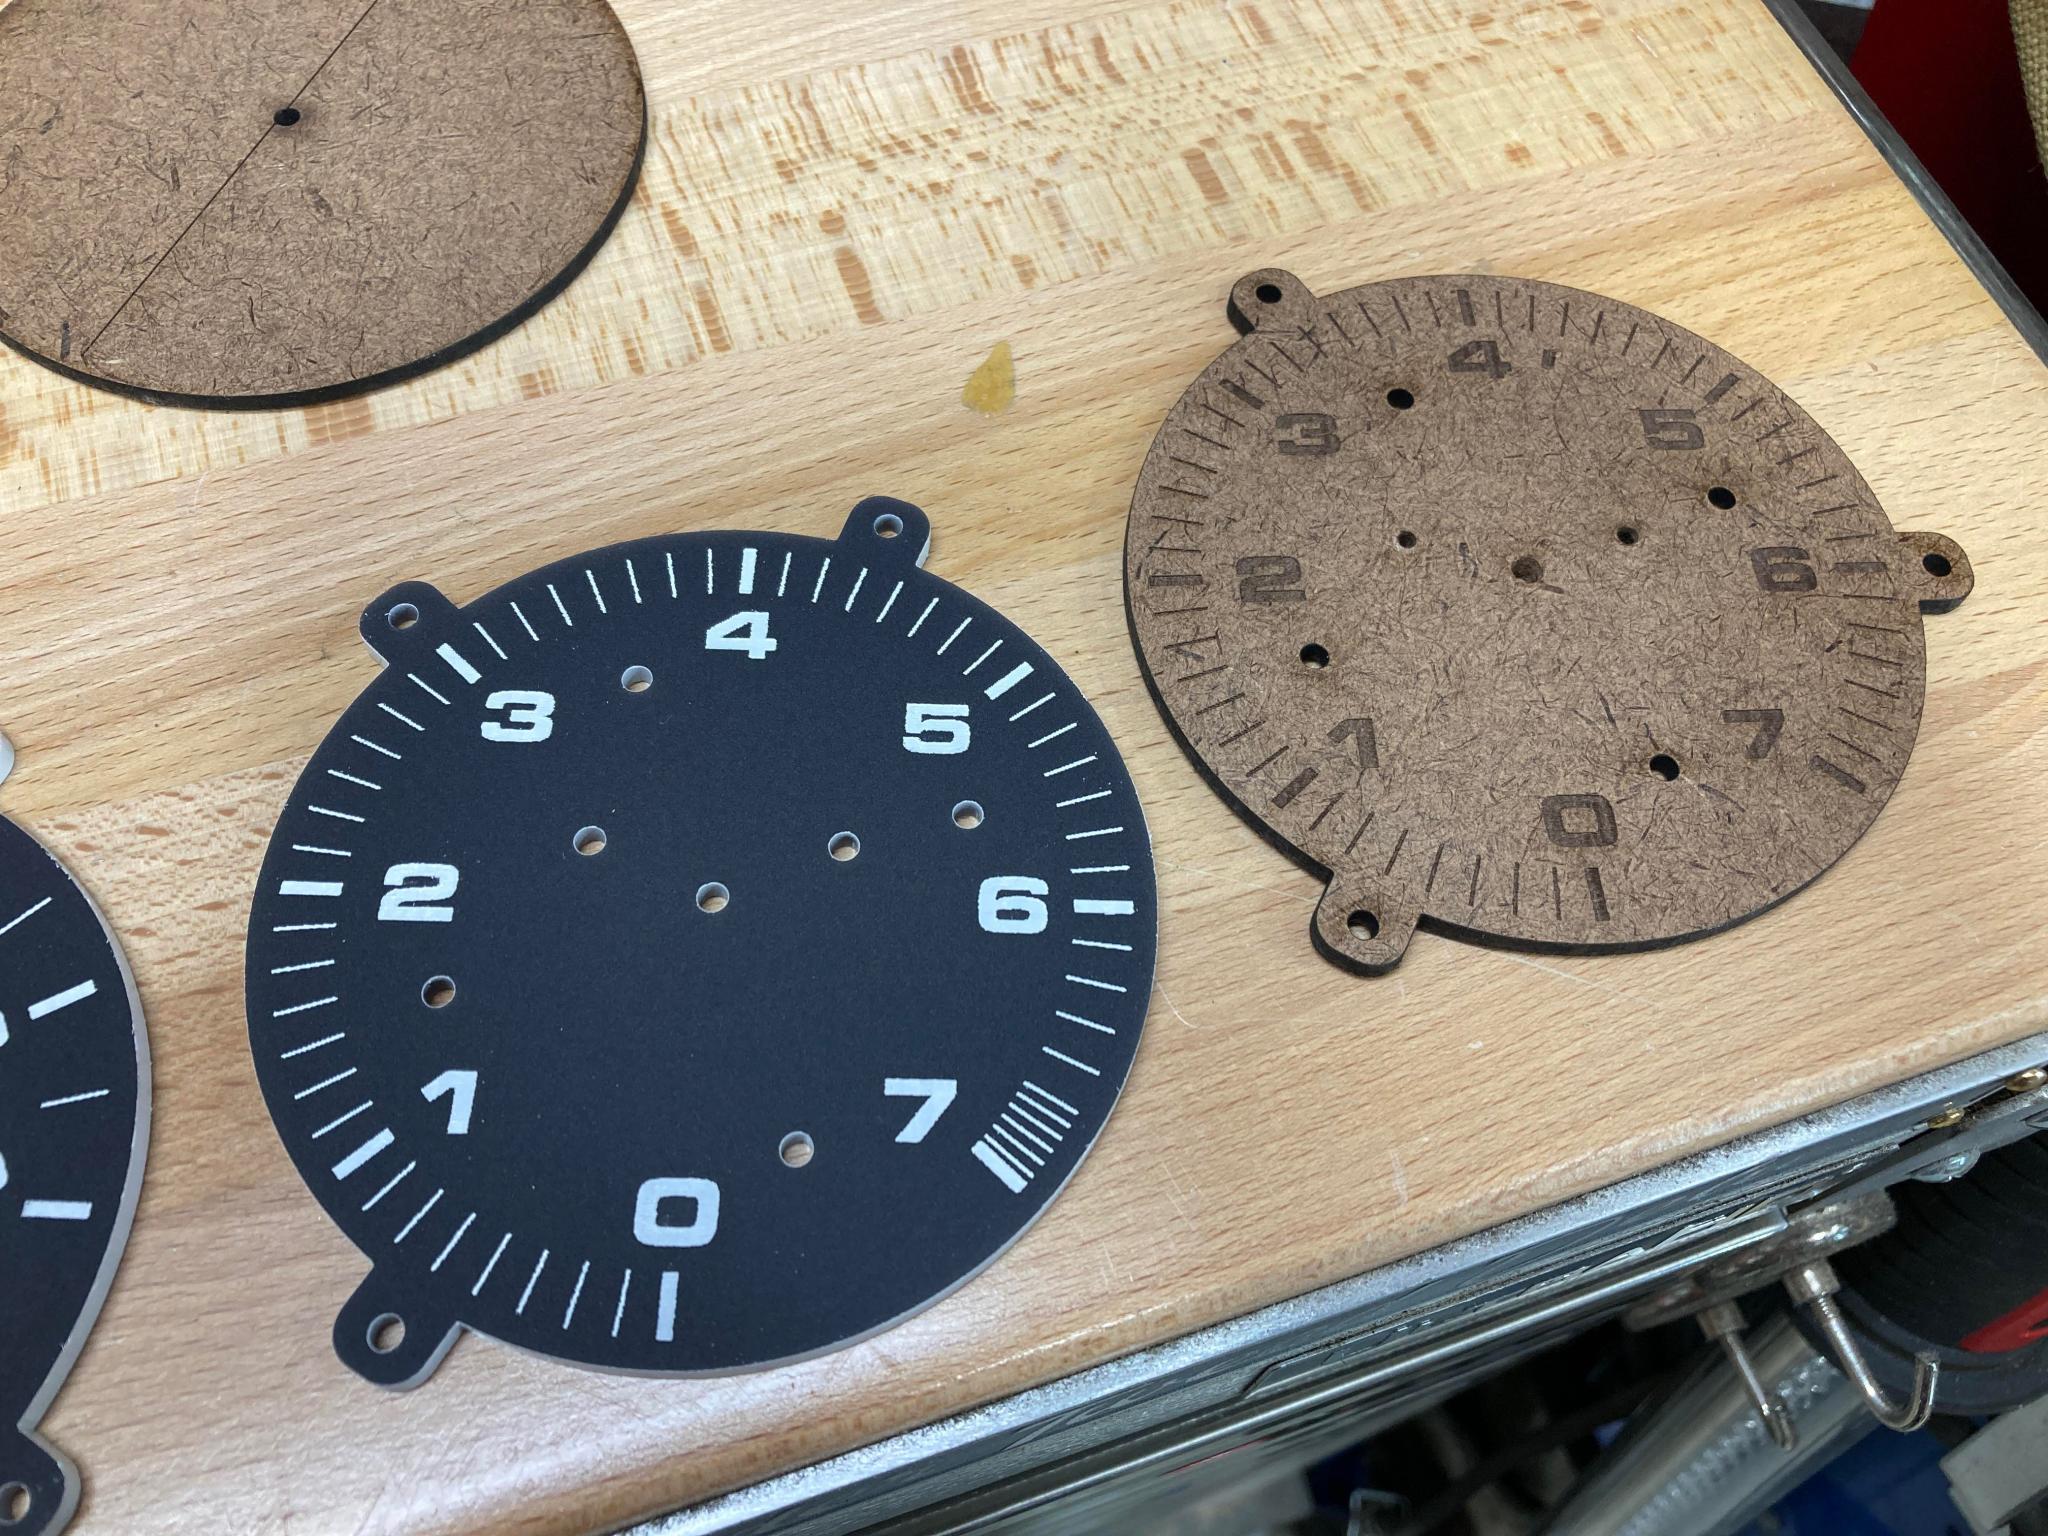
I came up with a way to mount the new gauges to the existing cluster, so to do that I need some faces. Spent some time designing them so I can try cutting them. They look very much like factory gauges on purpose, although I have rescaled both the tach and speedo to be more appropriate :)
Here's where the LED rings sit.
Fun idea implemented! Well, proof of concept, anyhow. I decided to use the LED ring behind the speedo as a friction circle indicator. Direction of acceleration is easy enough, and I had it range from green to red with increasing intensity to indicate the magnitude of the acceleration. I'll play with the colors and maybe the frequency (it's running updates at 10 Hz) but the concept works. All it took was a $4.95 accelerometer.
This was all done with basic trig. See kids, you DO use it in the real world.
Moving pictures for illustration!
I'm doing a FB live video on this project this week, so i shall practice on you lot. Does this make sense? Any ideas/suggestions for a different implementation?
The current plan is such:
Built into a stock gauge cluster so oil pressure, fuel level and coolant temp have their usual gauges along with the turn indicator, umm, indicators.
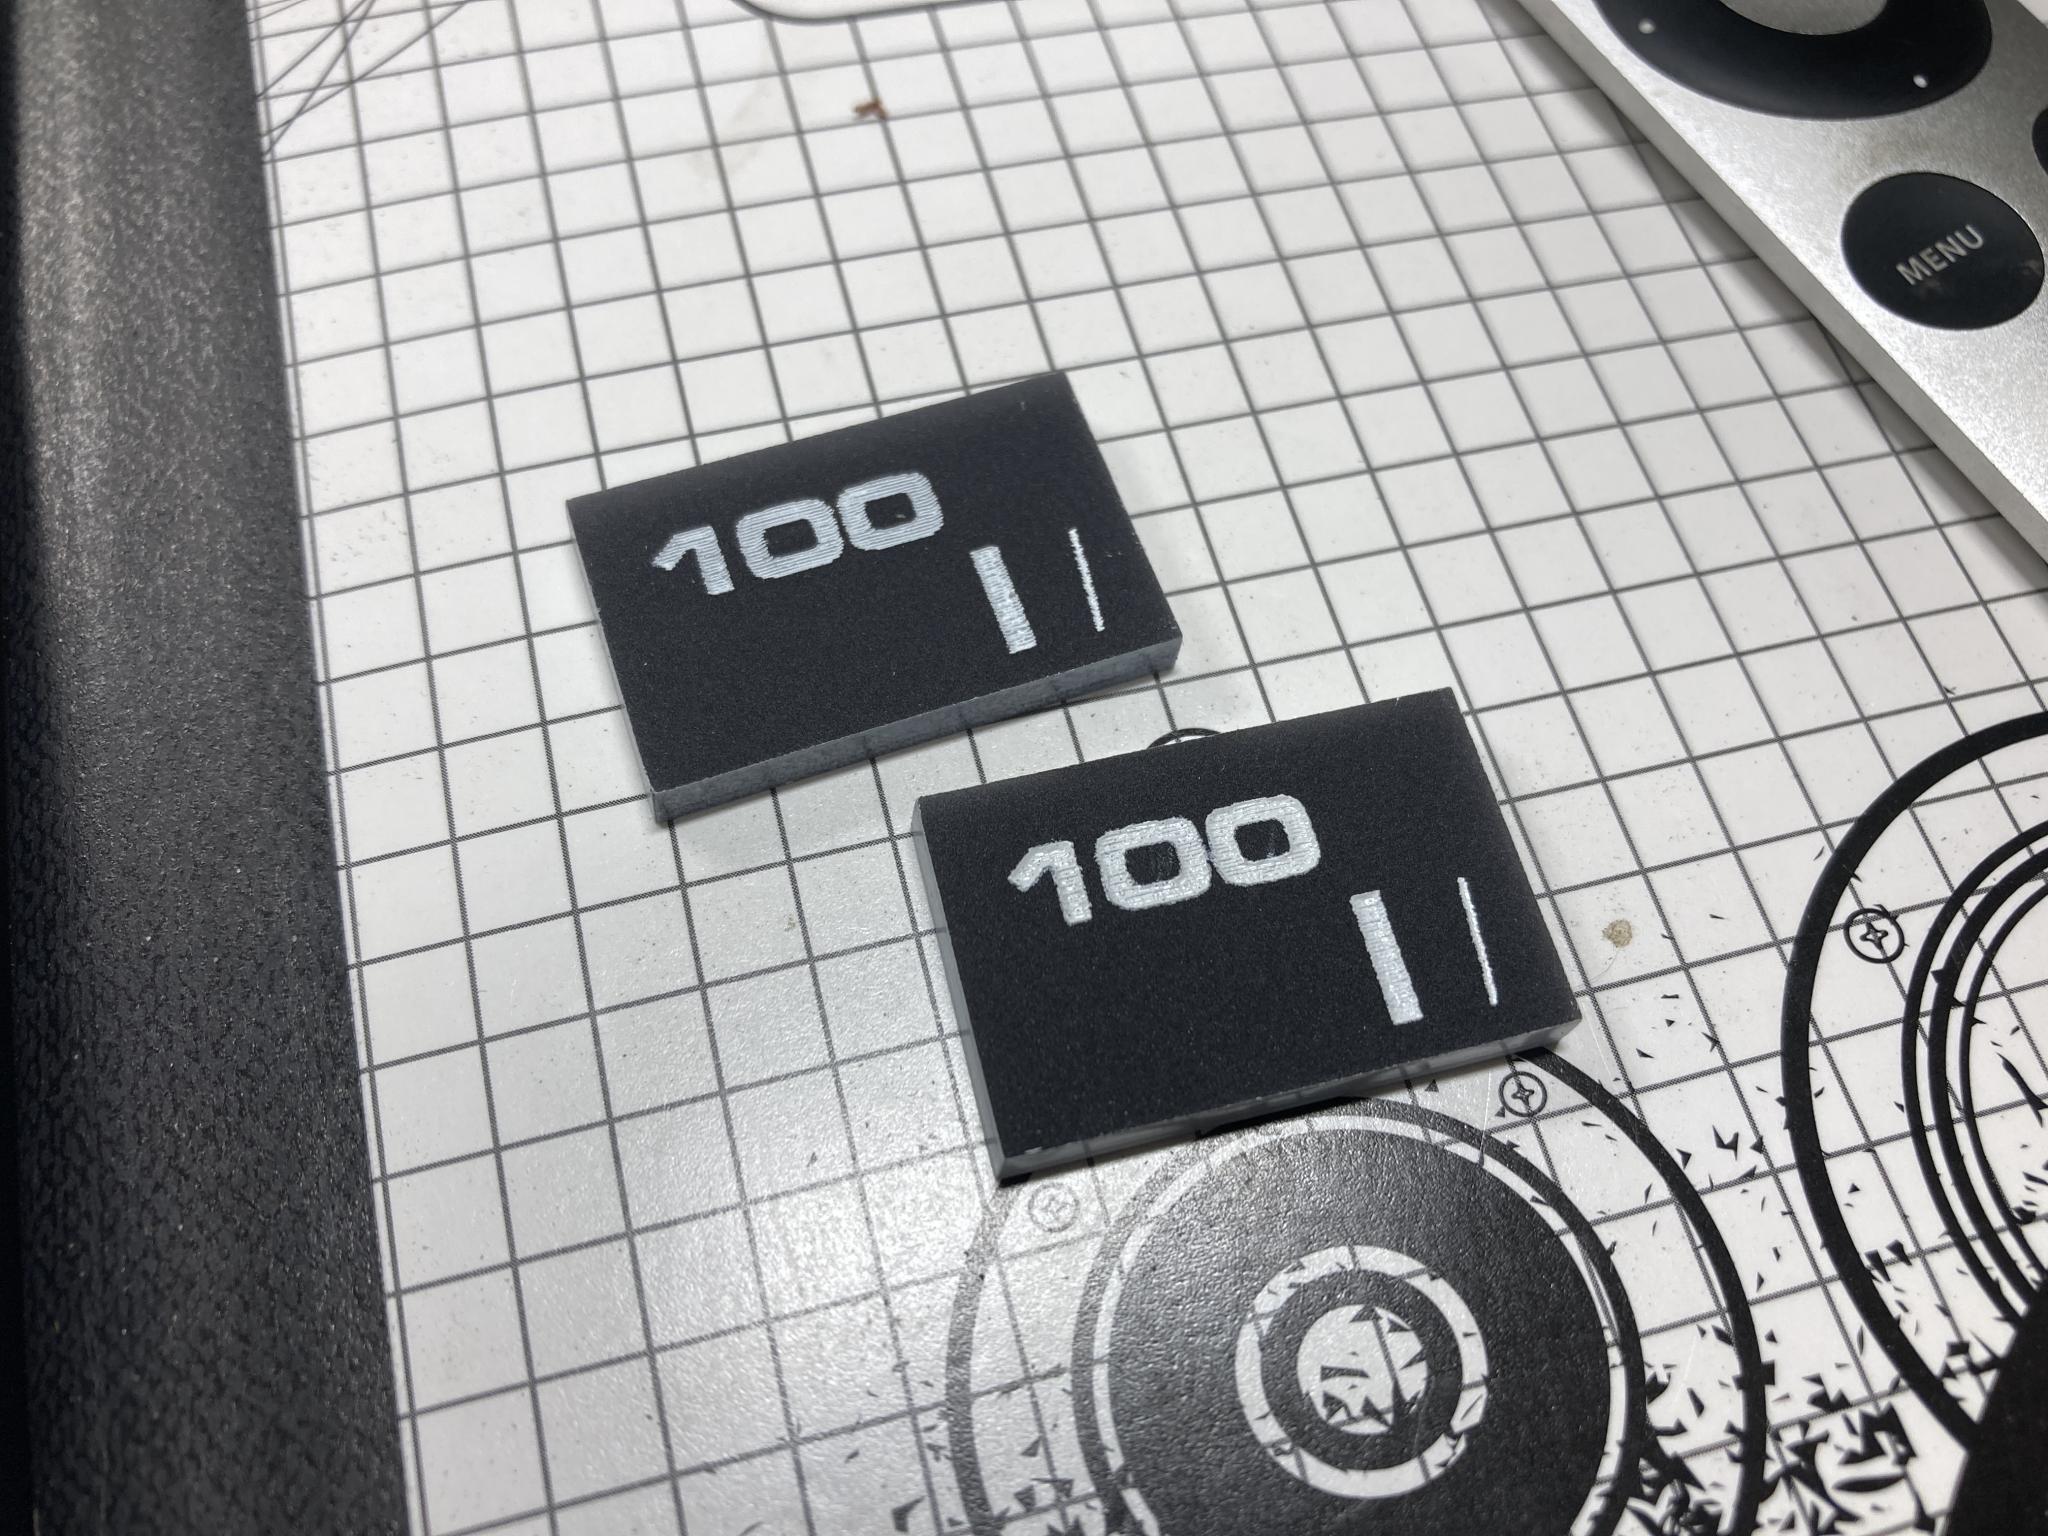
Tachometer will have the LED "ring" behind it mirroring the needle and providing the 0.5s peak indicator. It also has the temperature-driven variable redline. The "quiet pixels" between 0 and 7 will be used for things like high beam (a single blue dot) and probably check engine light (single yellow dot). I've got 7 LEDs to play with there, anything else?
Speedometer will act normally and will have the friction circle indication. I may bump the threshold high enough that it rarely shows up on the street. Low oil pressure or high coolant temp will light this ring up fully with red or blue. I might have the blue fade in according to temp, oil pressure is a 7 psi freakout. I'm considering adding a switch that lets you change the speedo LEDs to work like the ones on the tach instead of the friction circle.
When the lights are on, I'll dim the LEDs to half brightness or so.
What am I missing?
Man, this is really cool. And thanks for playing this all out in front of us. The process of creation is just as cool as the final product. (I think that's why shows like bad obsession are so engaging).
I'm just delving into CAN communication and programming with a project (which I have no experience with either). Does the Pi have a boot up time? Lag between power on and functionality? I was apprehensive the Pi wouldn't be fast enough to come online so it might trip error codes.
The Pi does have a boot time but it's pretty quick. I'm looking at some options for power management - the body control module in the ND Miata seems to have both a sleep state as well as a shutdown. My plan is to have the Pi go to sleep when the ignition is turned off, then have it shut down if there's no more action after (insert time here). I'll measure the draw.
Apparently the real-time clock built into my CAN hat helps speed boot time. I'm also using a reasonably powerful variant of the Pi which boots faster than the slow ones. Let's just say the Pi should come online quicker than an ND Miata can play any music :)
But I'm not modifying the CAN signals, just listening. It won't cause any errors because nothing else in the car even knows it's there. The signals don't have to pass through the Pi either.
If you're intercepting and blocking/modifying signals, it's possible a module could identify that as an error. That really depends on the nature of the message and the devices involved. For example, even the miniscule lag introduced in relaying messages can cause an ABS unit to go into error mode because that is critical (BTDT on the ND V8). But if you're screwing around with the speedometer or ECT or something like that, you're less likely to cause a problem.
Just going to mention that getting inside the CAN is really fun, especially on a modern car that really uses it. All of a sudden, you have all sorts of really high quality information at your fingertips and you can do crazy things with/to the car.
I keep threatening to put easter eggs in, like tying the turn indicator to the brake lights but only on the second Tuesday of the month before noon.
That friction circle indicator is all kinds of cool. I wonder about a little bit of fade out on that. I feel like the cars I've driven with similar indicators had a little persistence in the display. Actually, as I'm typing I'm wondering if the car itself provided that.
That would be easy enough to accomplish, a bit of a "trail" for the friction circle. I'll give it a try tonight. I think I'm going to have to build this into a box and try driving the car to see how it really works, I'm not sure my 1:64 scale Miata Dynamic Emulation Device is a good substitute.
Spent some time last night working on mounting this into the stock cluster. The stock gauge faces are actually mounted to the needle drivers, which are sitting on the light tubes that are fairly organic looking. I wanted to mount the LEDs and steppers to the gauge faces themselves. The easiest option is to drill a couple of holes and use some standoffs. But first I needed to place the holes correctly. I made a guide out of two pieces of laser-cut wood - the outline of a gauge face including mounting tabs plus a centering piece that makes sure it's properly placed in the gauge opening. I have an old cracked cluster that I'm practicing on.
Forgot to turn on the air assist for the laser on one cut, don't mind the ugly edges :)
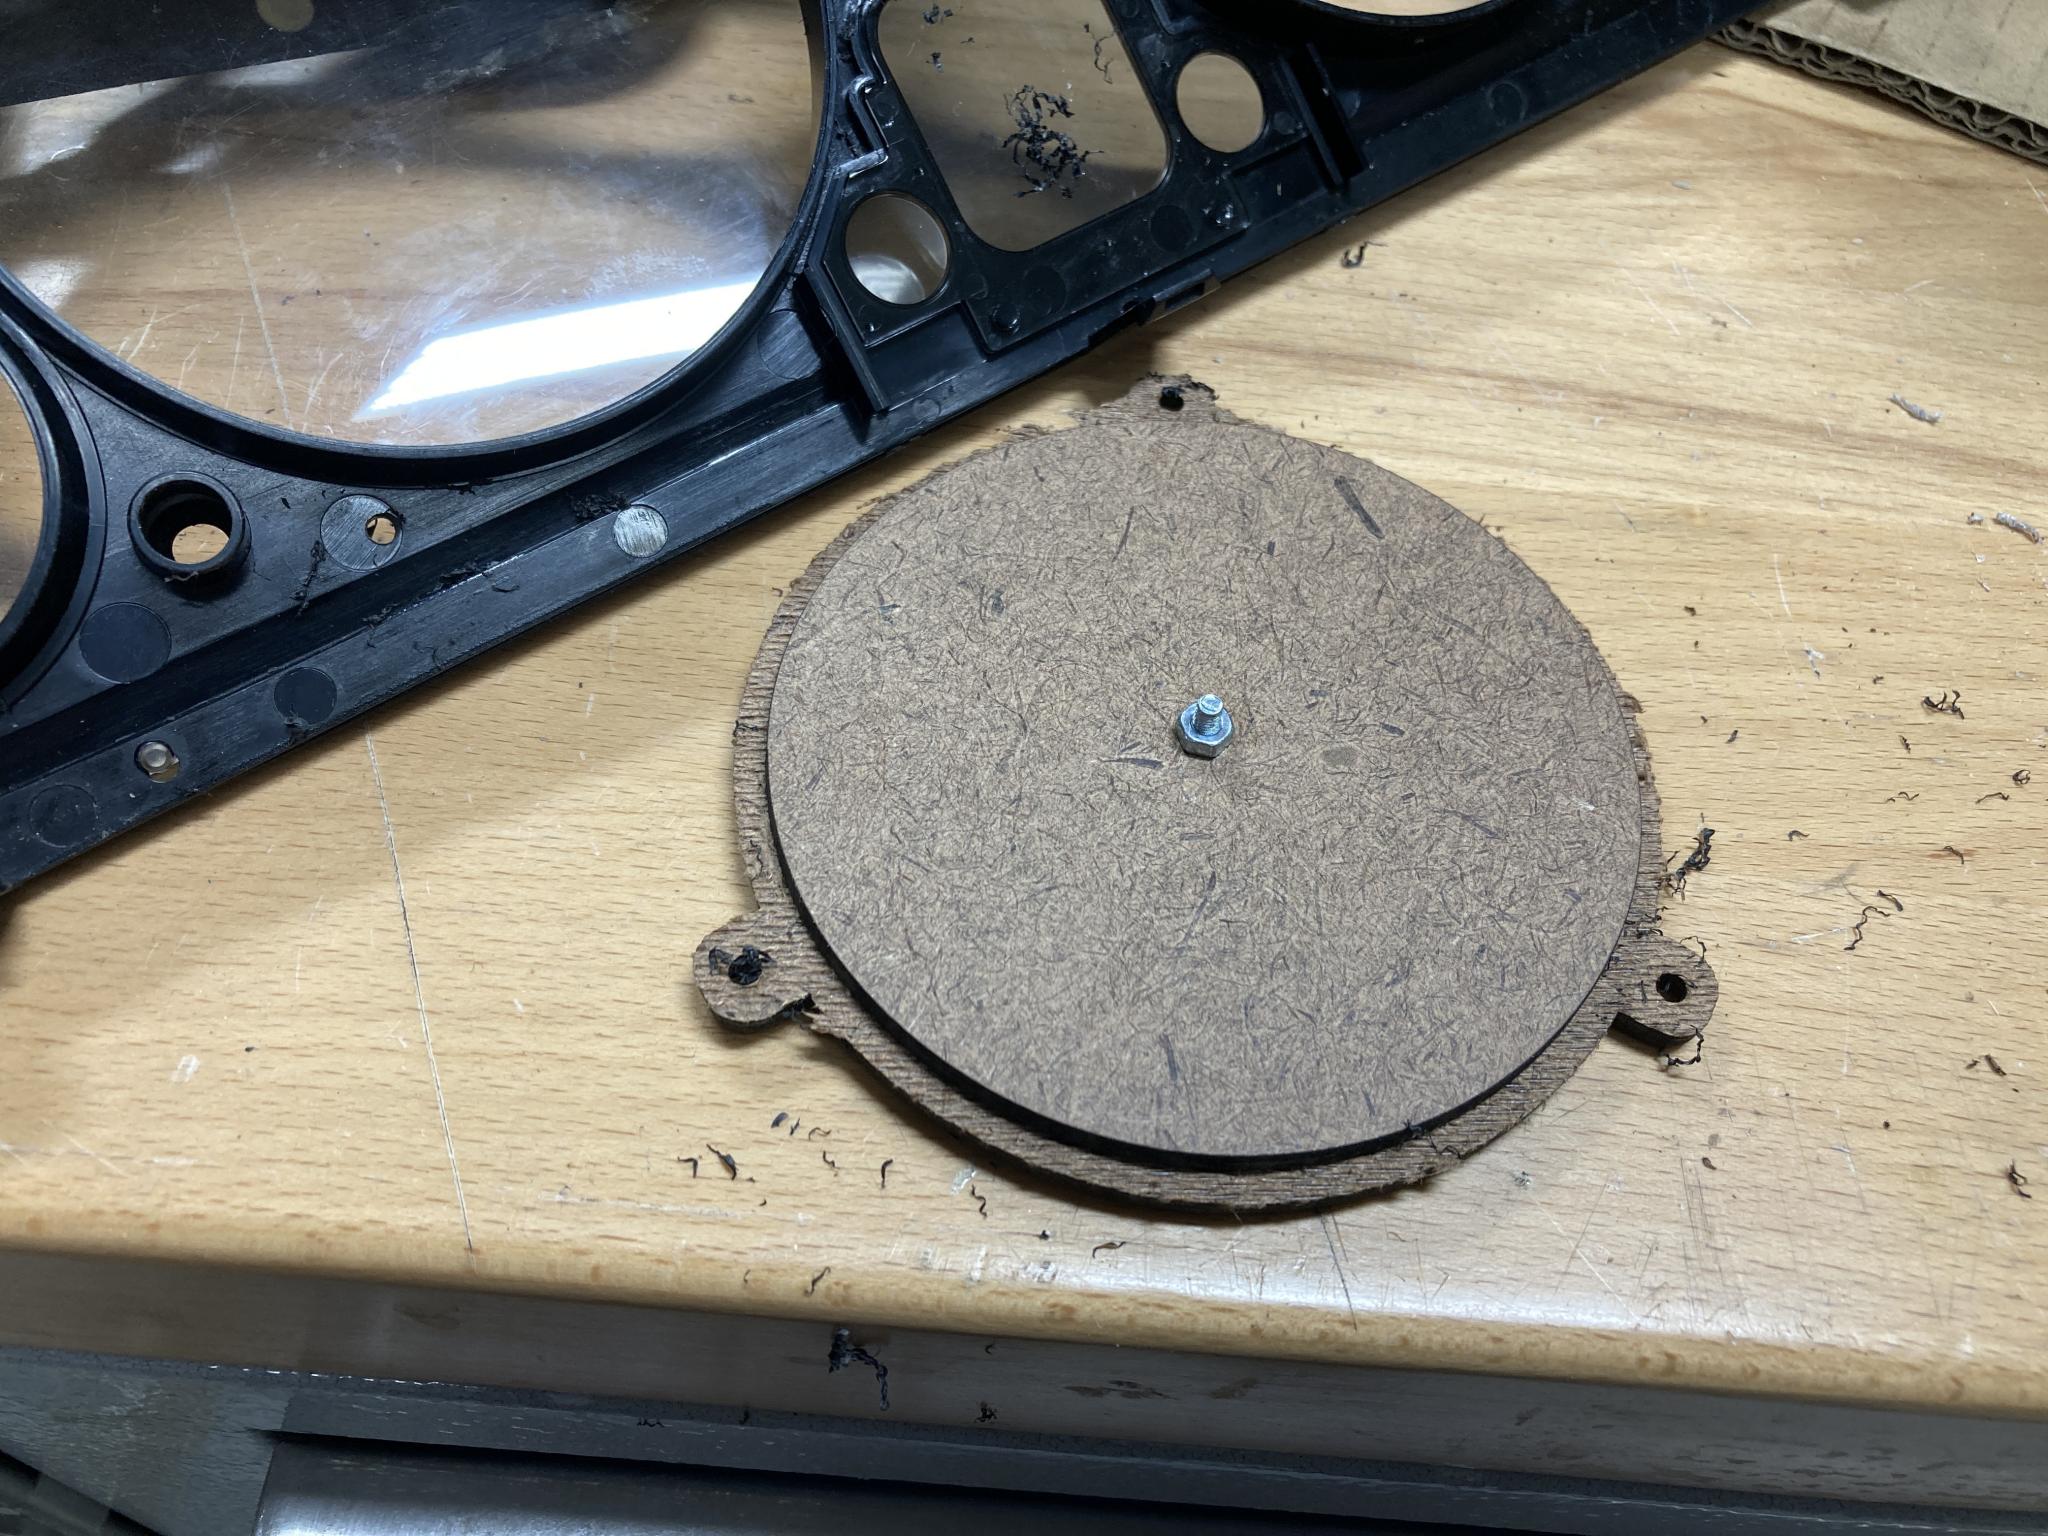 Drilling! I added the line on the back to give me a vertical reference so the gauge will be straight.
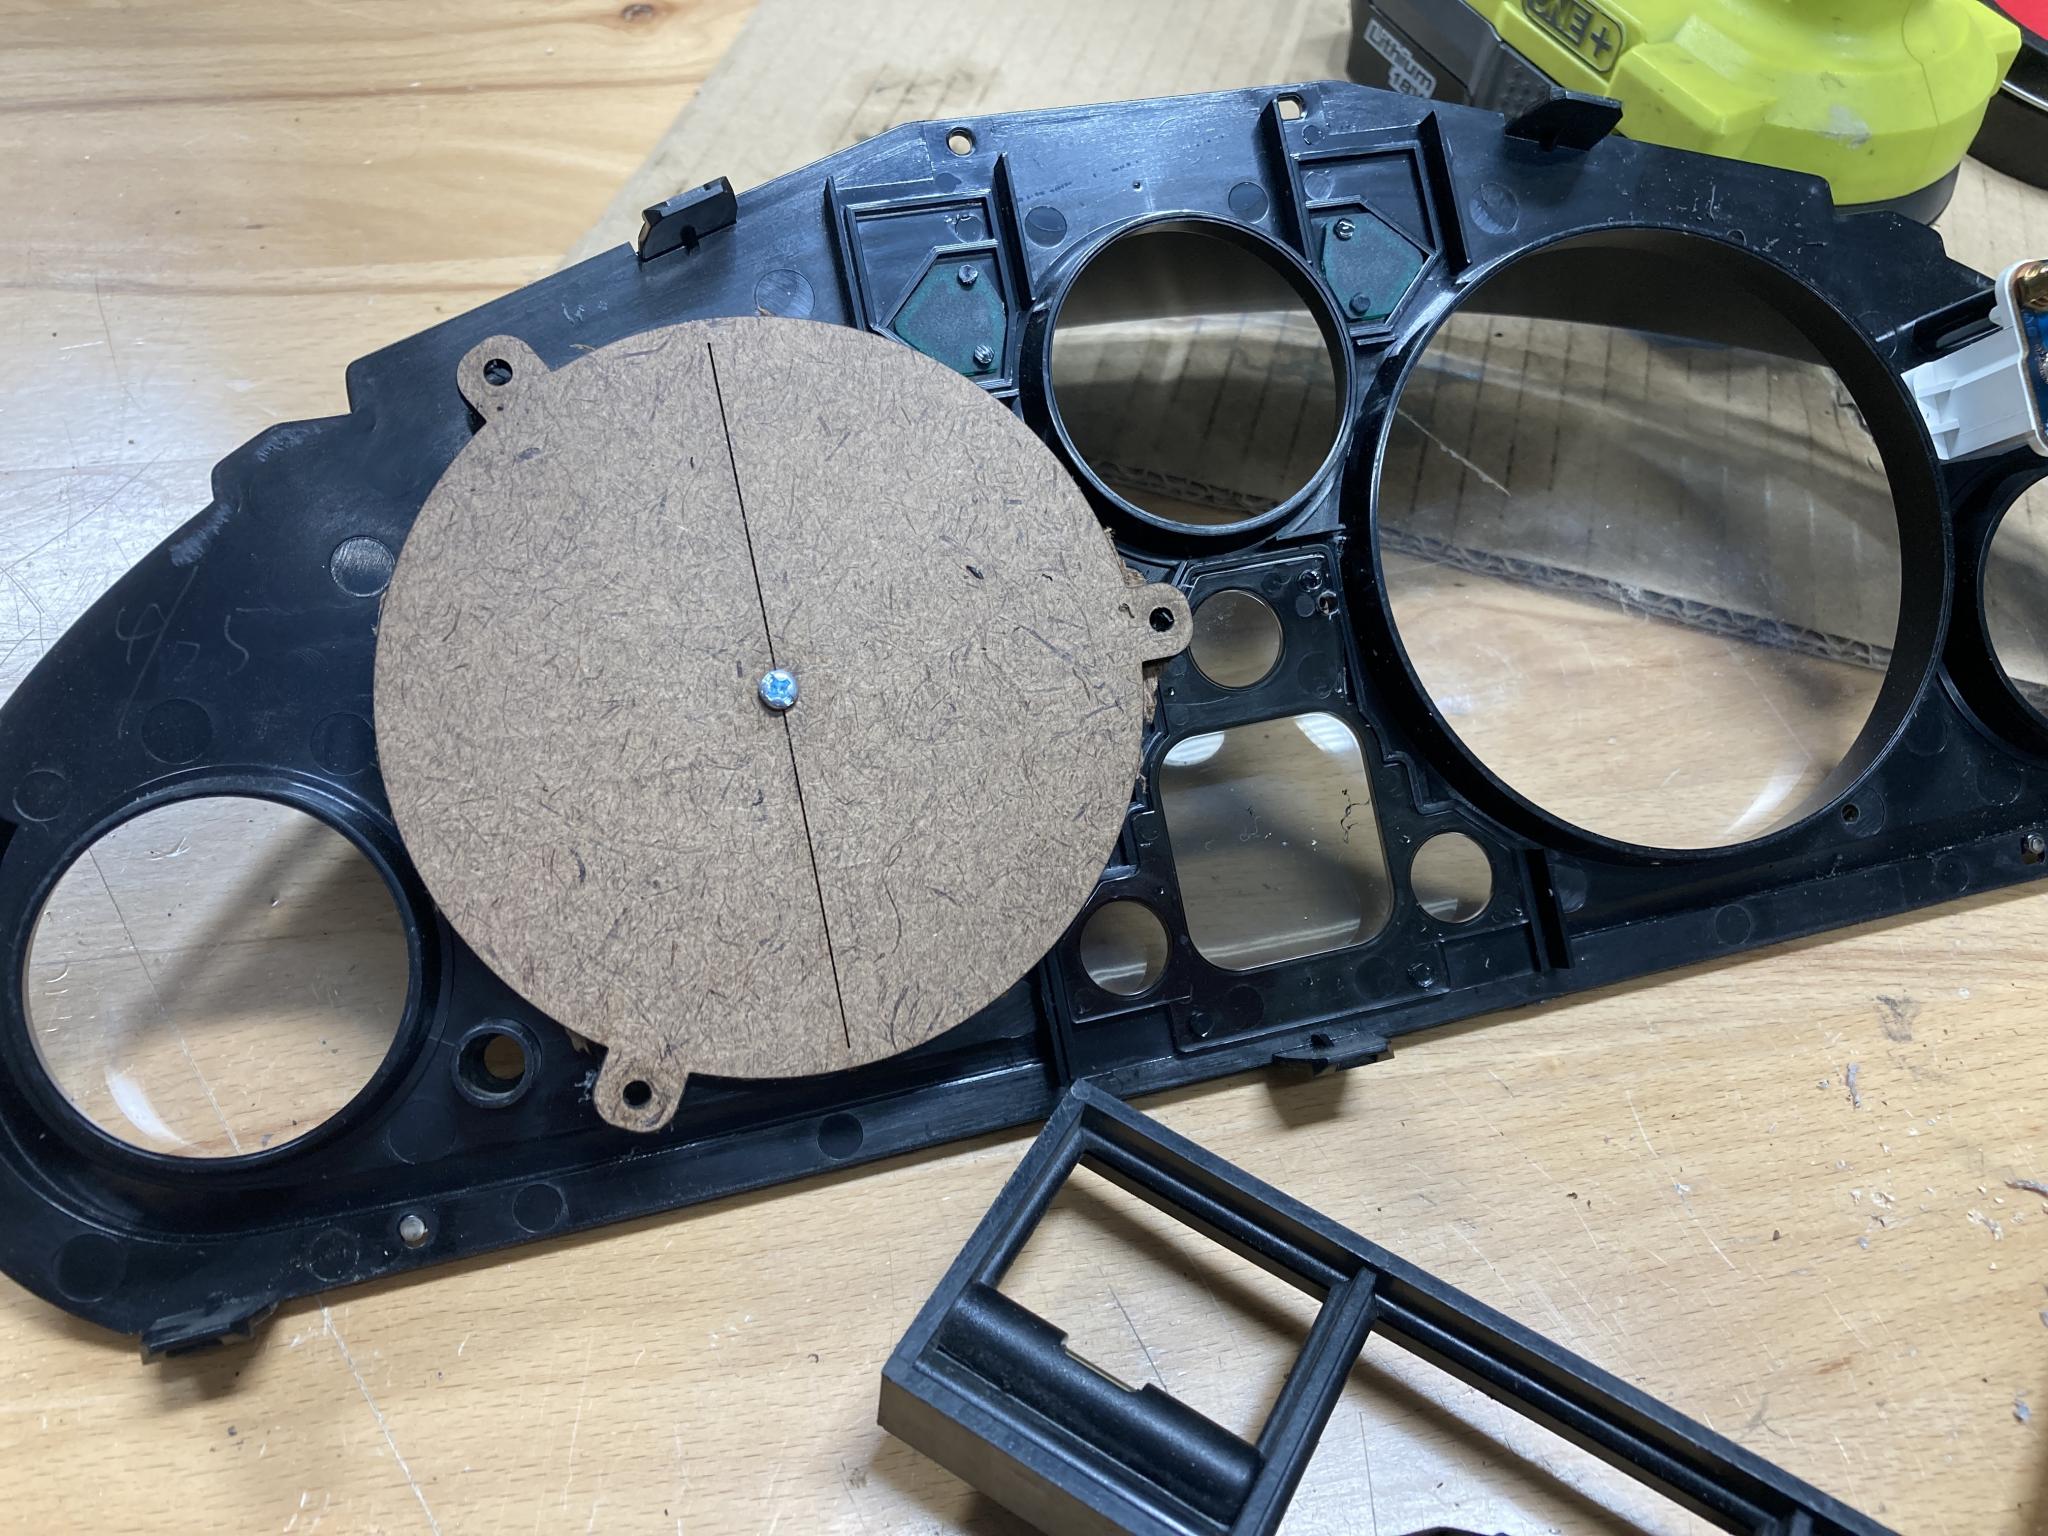
And this is why we test. Two of the tabs worked better in a different place. The holes in the gauge face are to mount the LEDs and the stepper.
There's a certain group of Miata enthusiasts who would get all hot and sweaty over this.
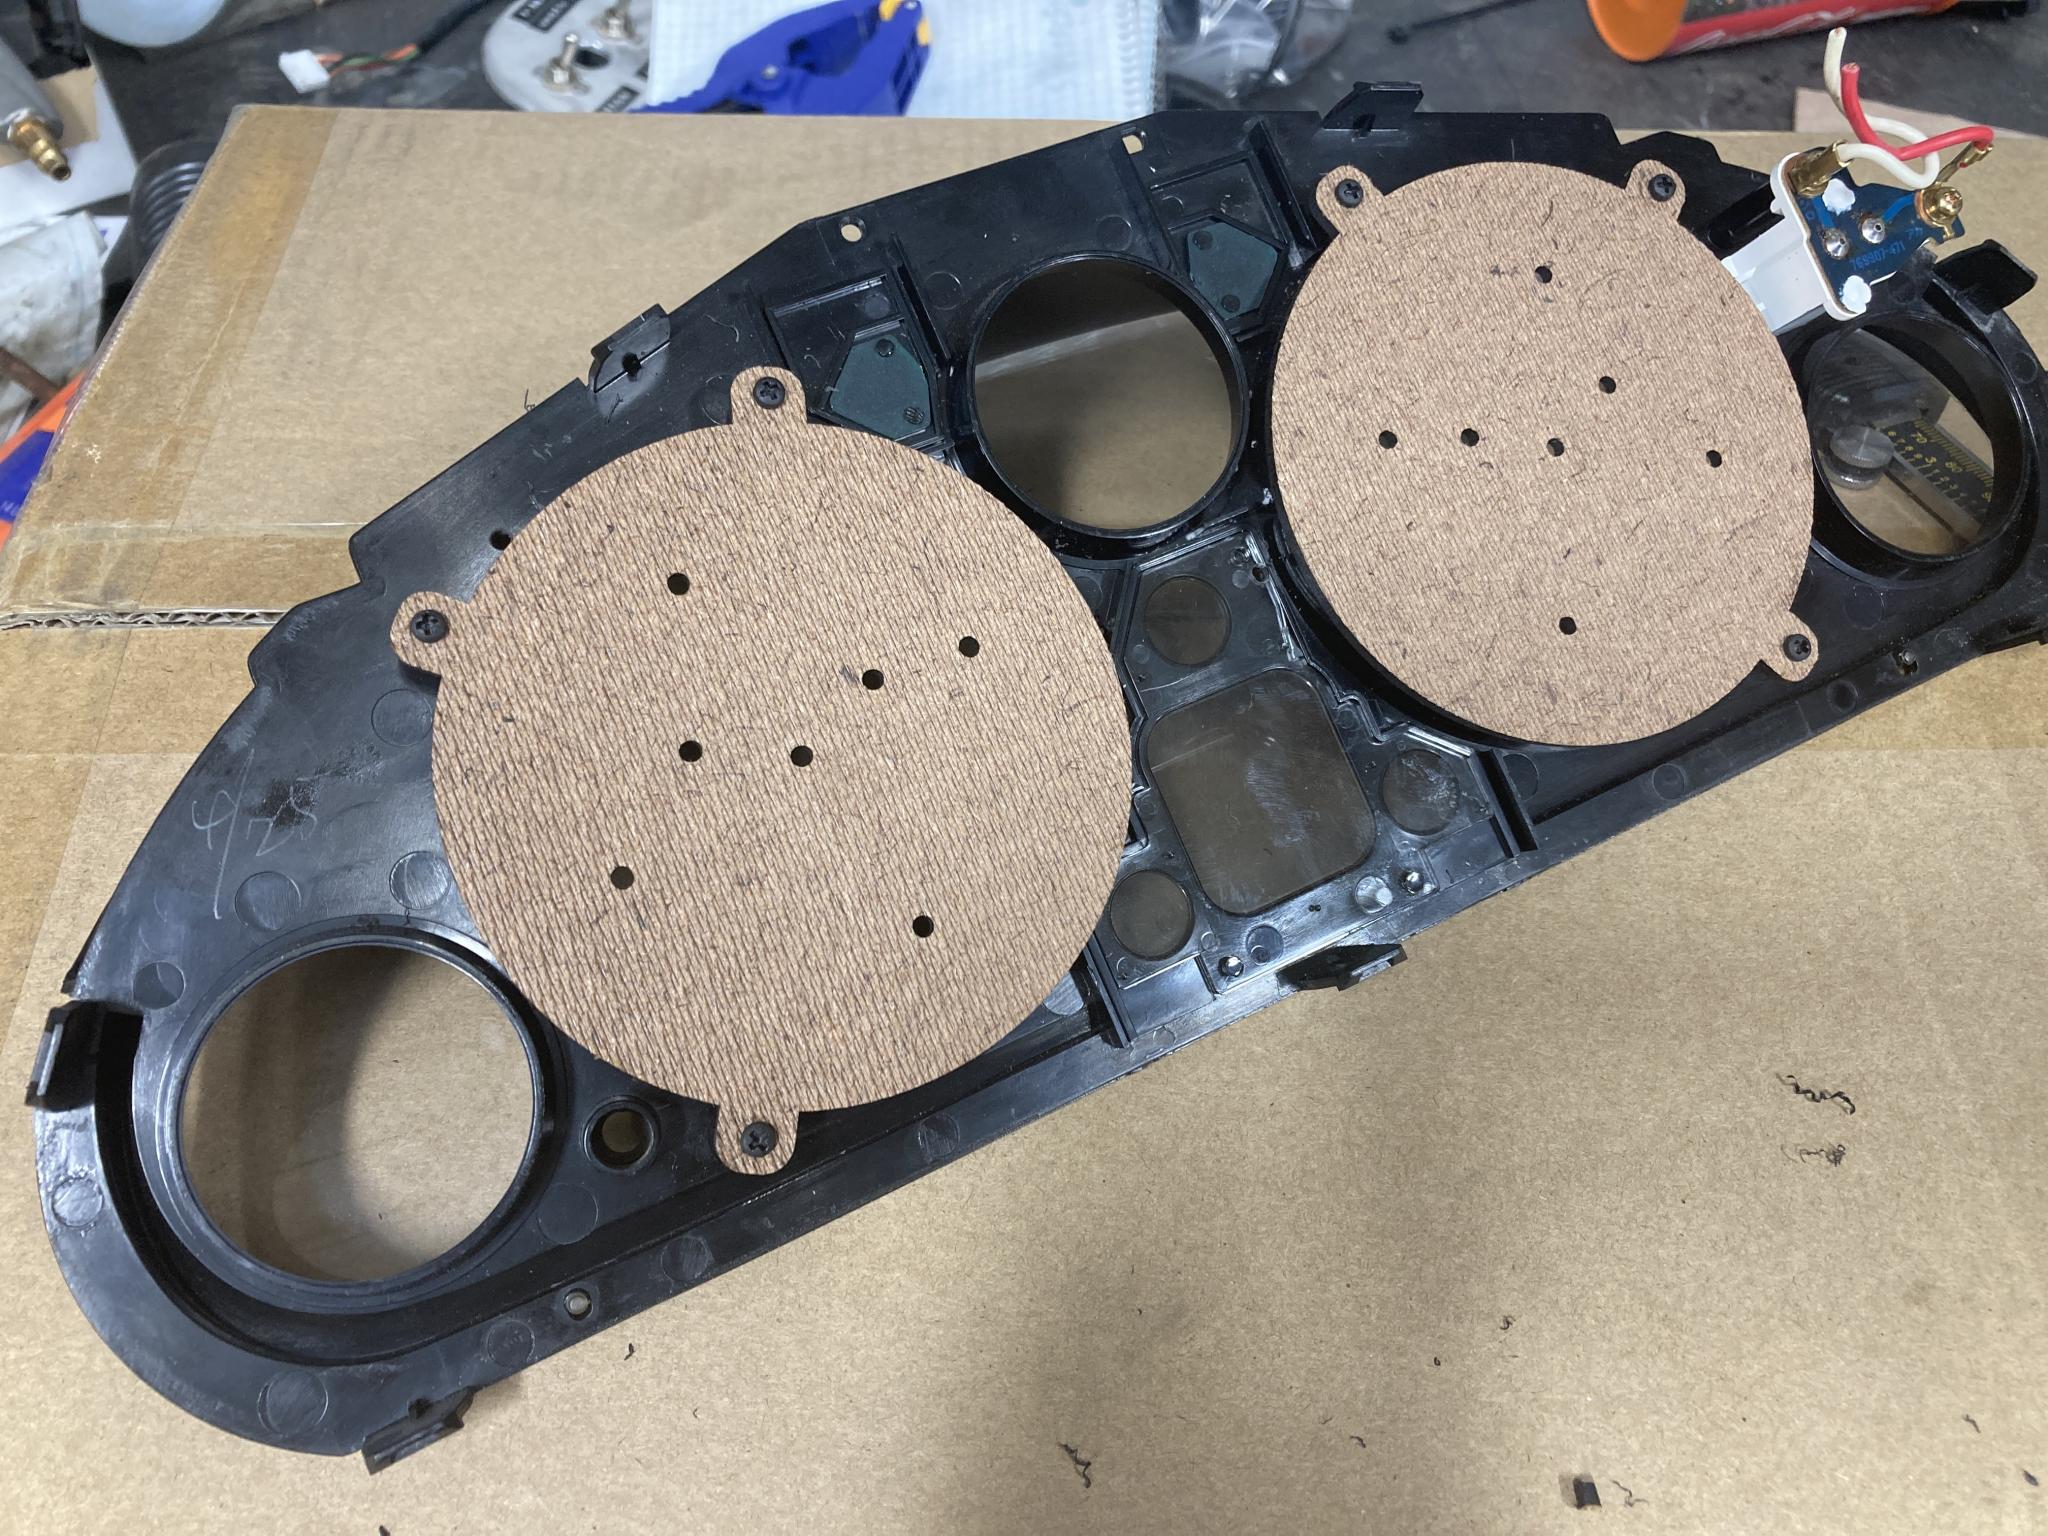
Mockups done, I'm doing some tests with the acrylic before I cut those. I have a limited supply of the "LED transparent" plastic so I use this cheap hardboard for test cuts.
An Awesome Project!! I Cant wait to see it fully set up!
I understand it won't work for your project but man I actually really like the look of the hardboard gauge faces.
Shavarsh said:
I understand it won't work for your project but man I actually really like the look of the hardboard gauge faces.
I'm really tempted to troll the "Rare and Vintage Miata Group" on FB with them, they are all about useless parts as long as they're JDM. I'll just put MAZDASPEED ROYAL CLOVER ARC on the face.
They may not be terribly effective at night, as Miata gauges are backlit :)
In reply to Keith Tanner :
Hahaha, if you really wanted it to work you could probably mill the numbers and tick marks all the way through and just put a piece of colored acrylic behind the hard board. I realize its just a prototype though, I still think they would make interesting front lit faces!
I could easily cut all the way through. If anyone wants a set of custom wooden gauge faces, I can hook you up :) I'll throw in the drilling template for free.
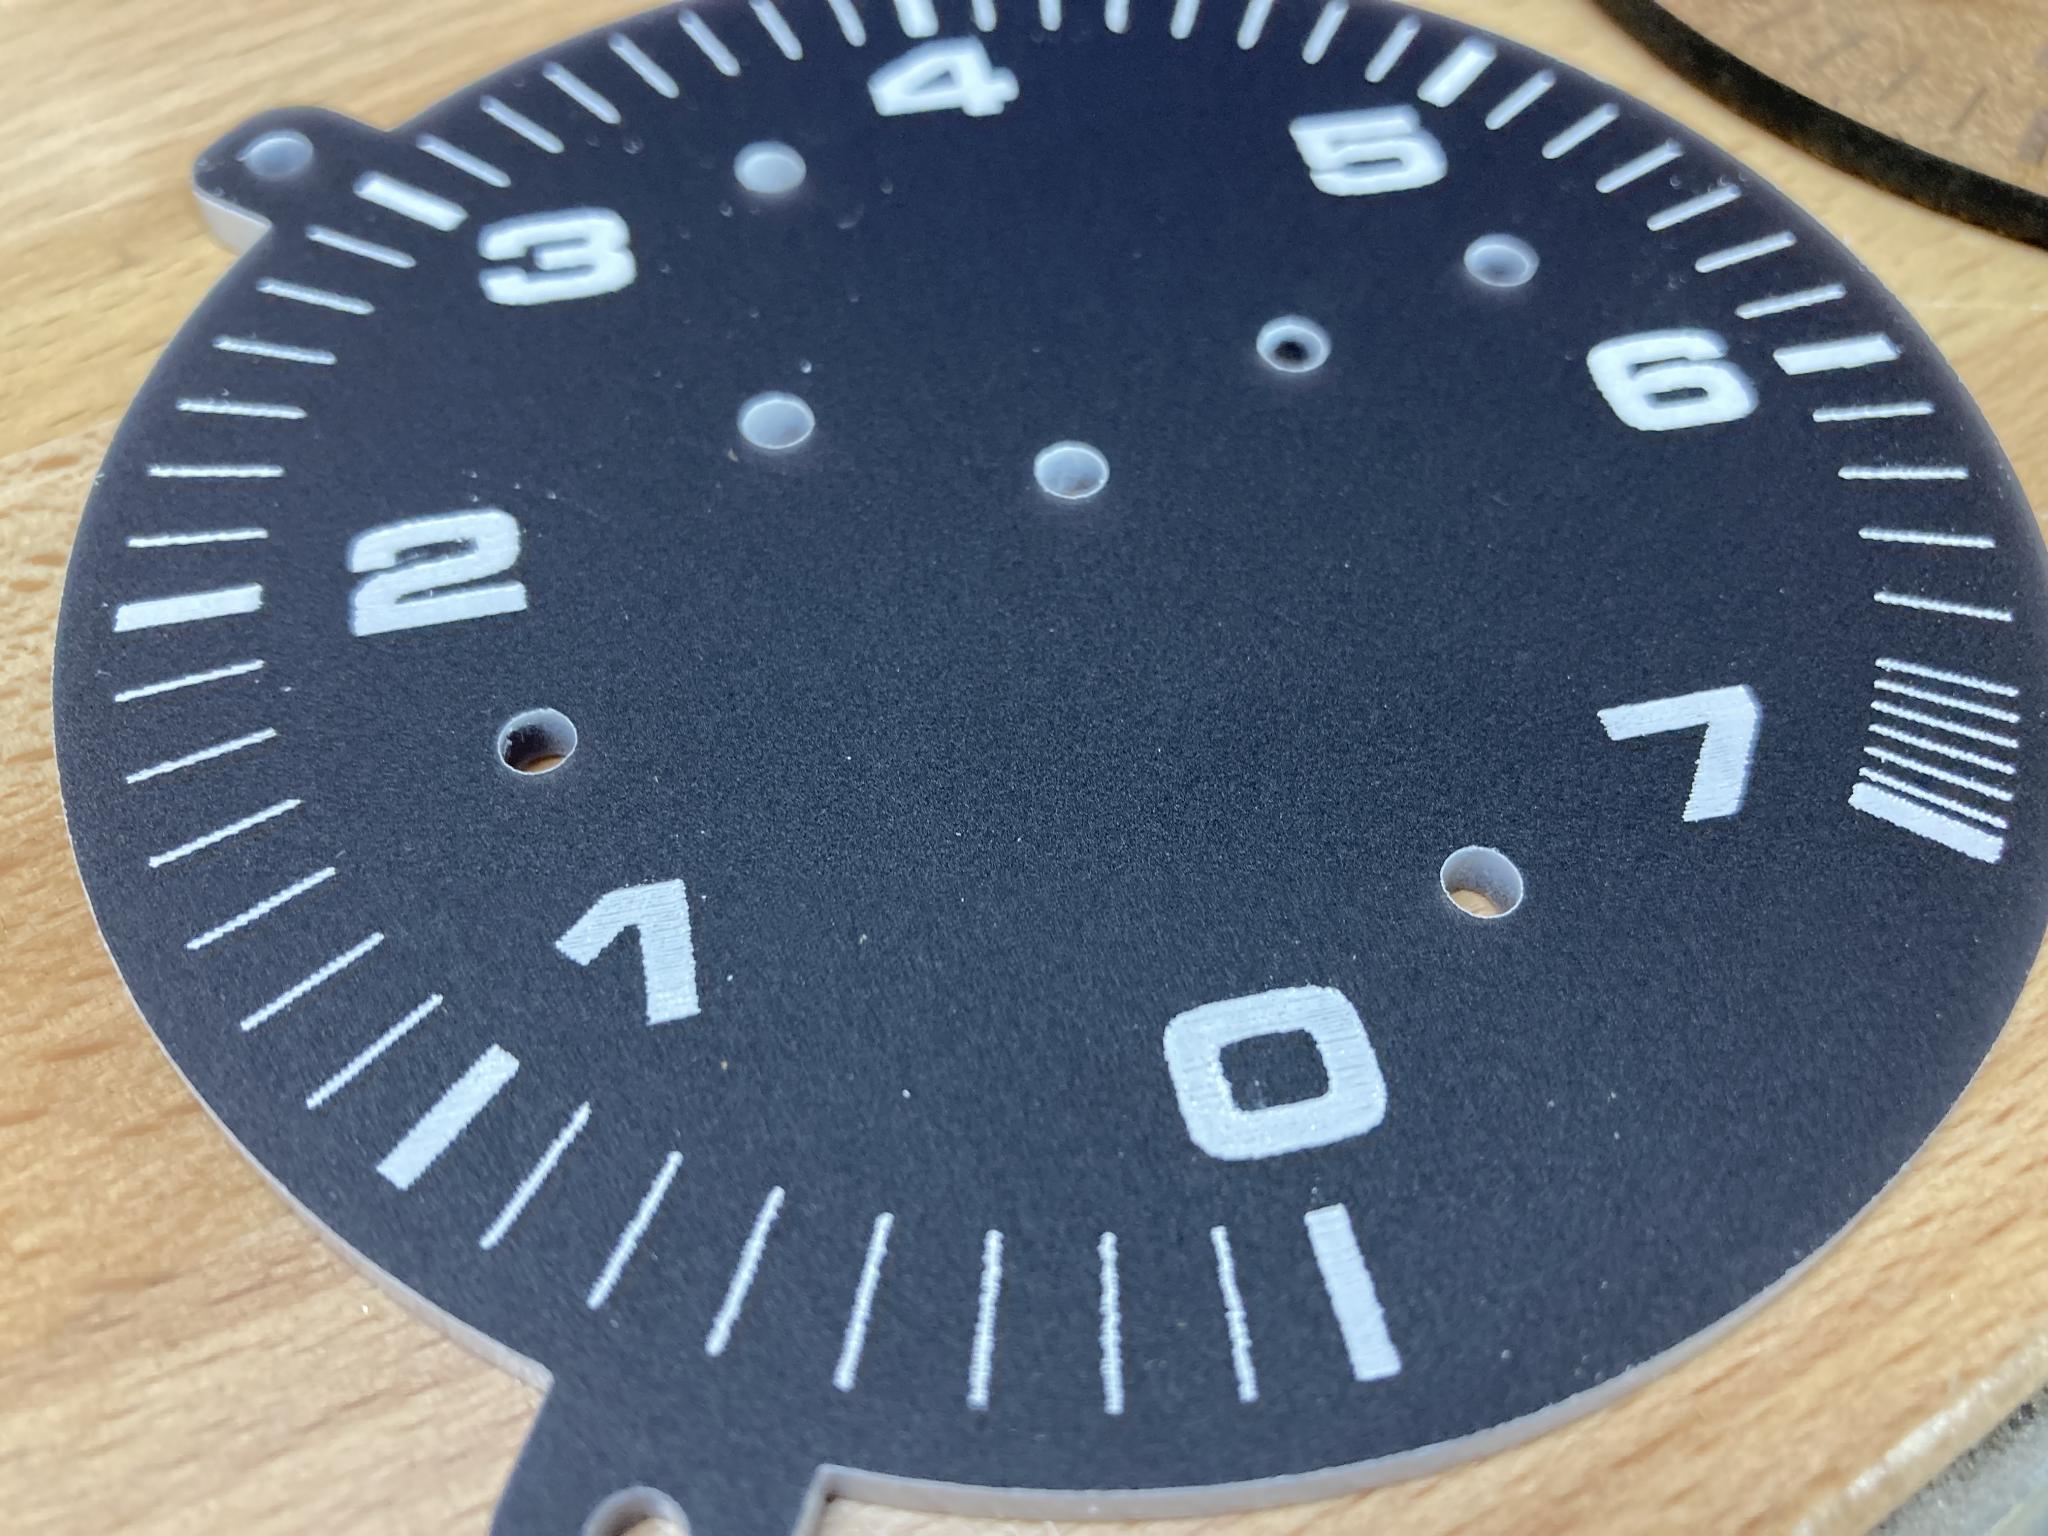
Time to put this together. First, I did a few tests on the acrylic for the gauge faces.
The acylic has a paper or plastic mask on it. When I'm running the laser, I can burn through the mask and engrave the acrylic - or run slower/hotter and cut all the way through. Once it's engraved and cut, I leave the mask on and hose it down with paint. Several thin layers are better than one thick one.

The hardest part is waiting long enough to remove the mask :) This was overnight.
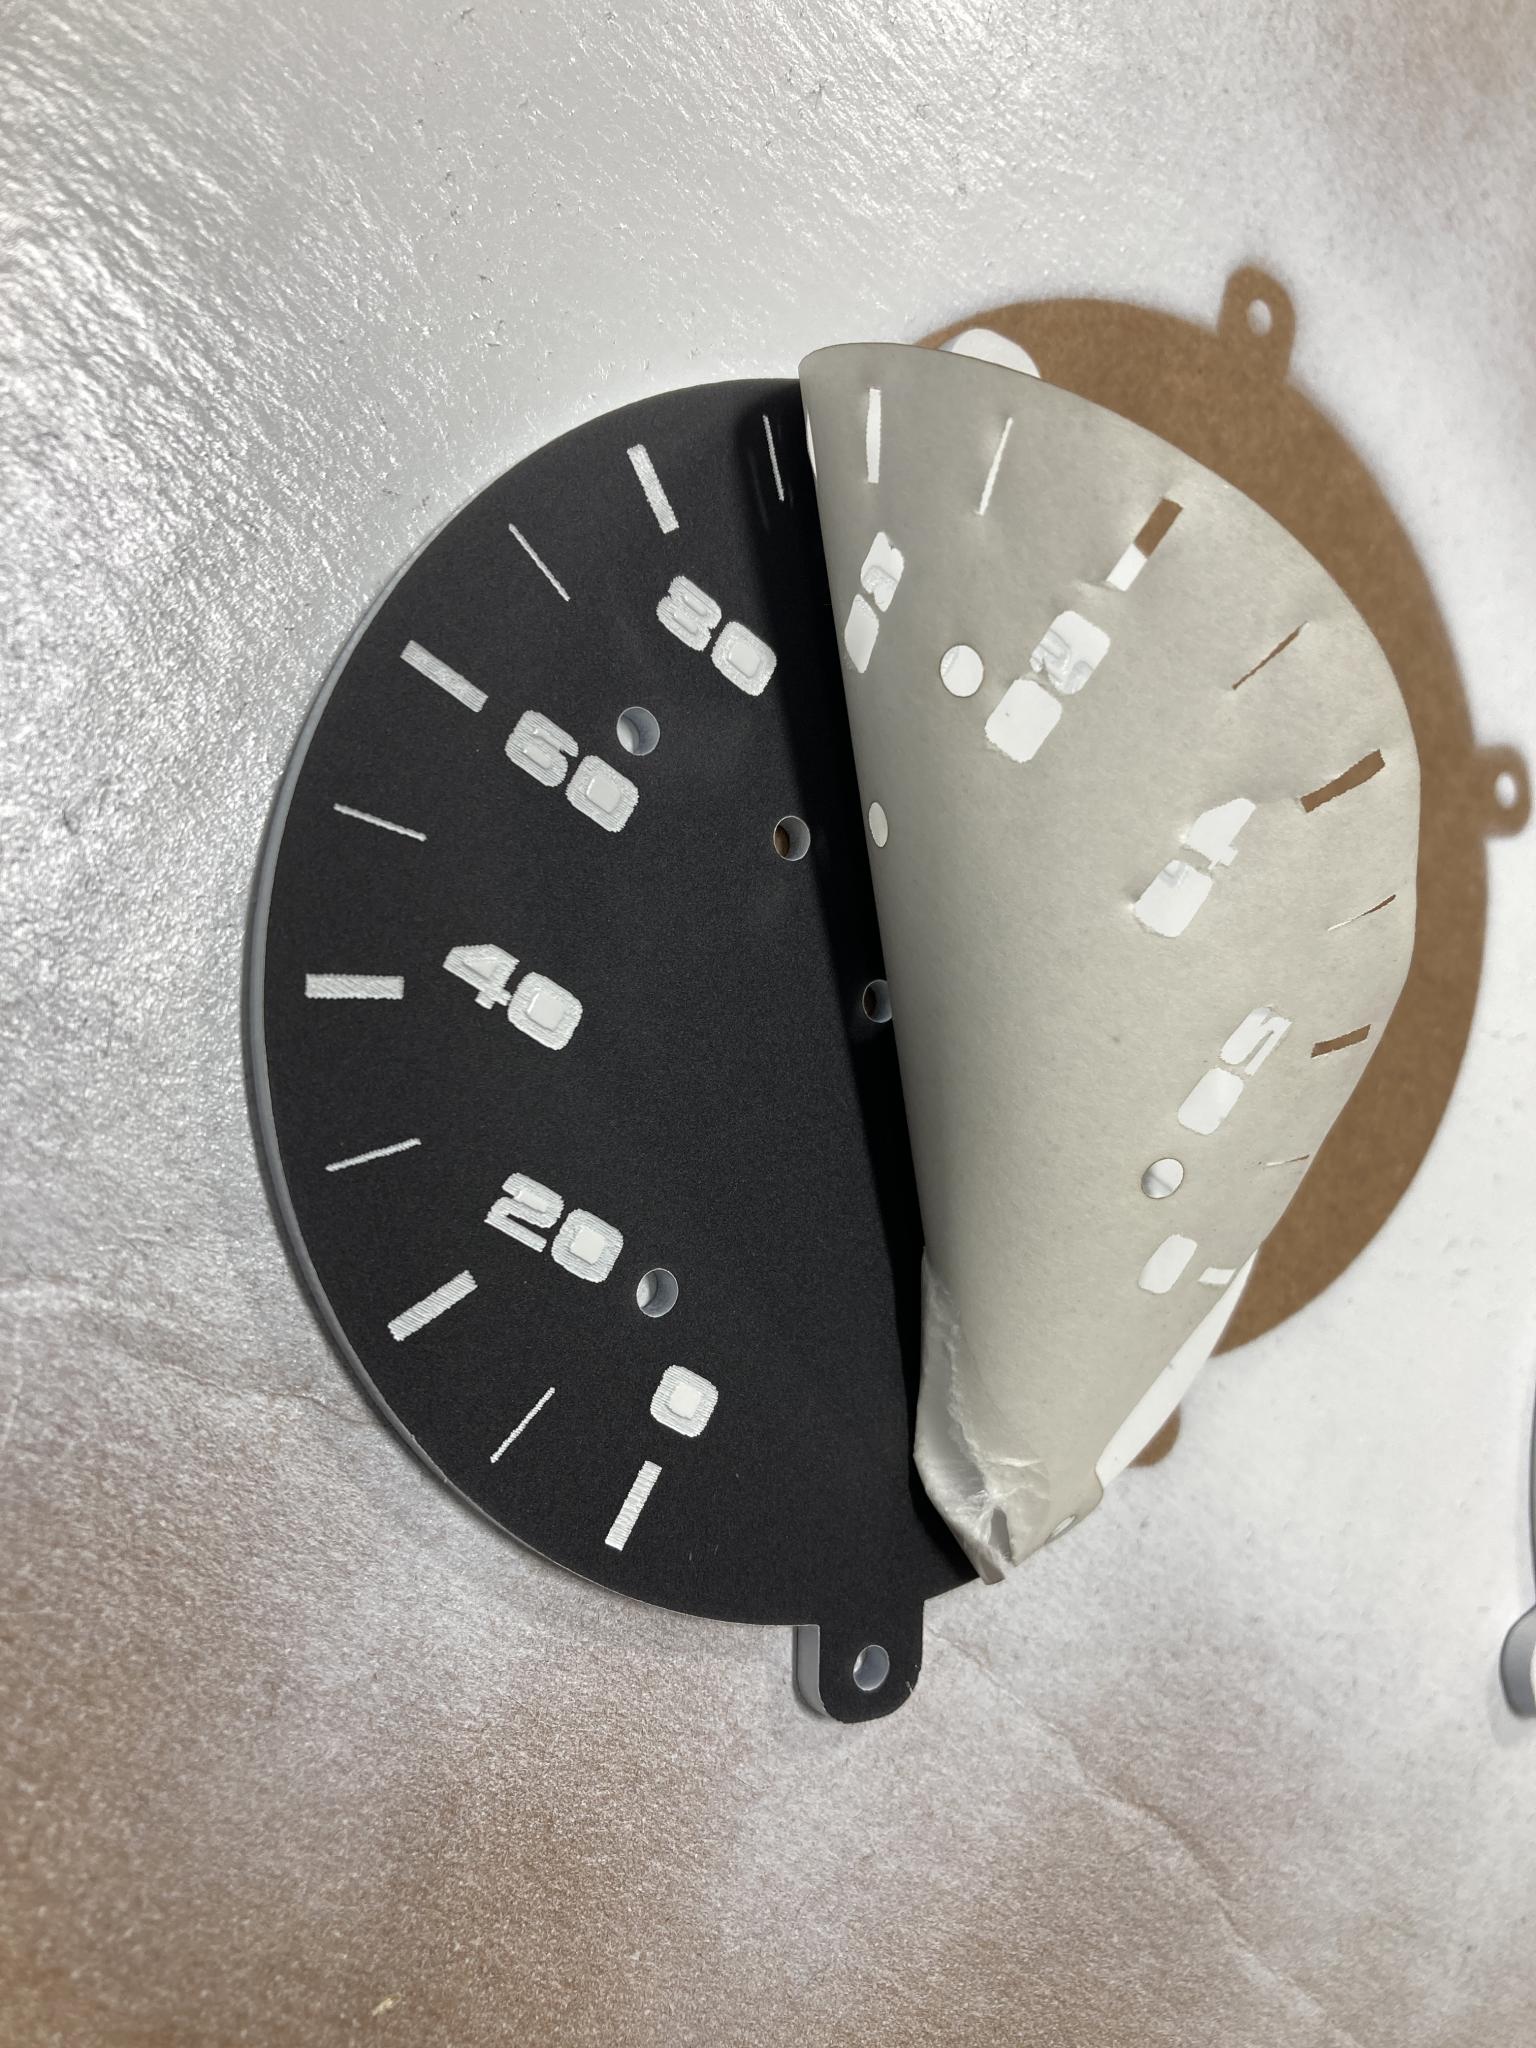
Not bad! First time I've used this particular material, it works really nicely.
And voila.
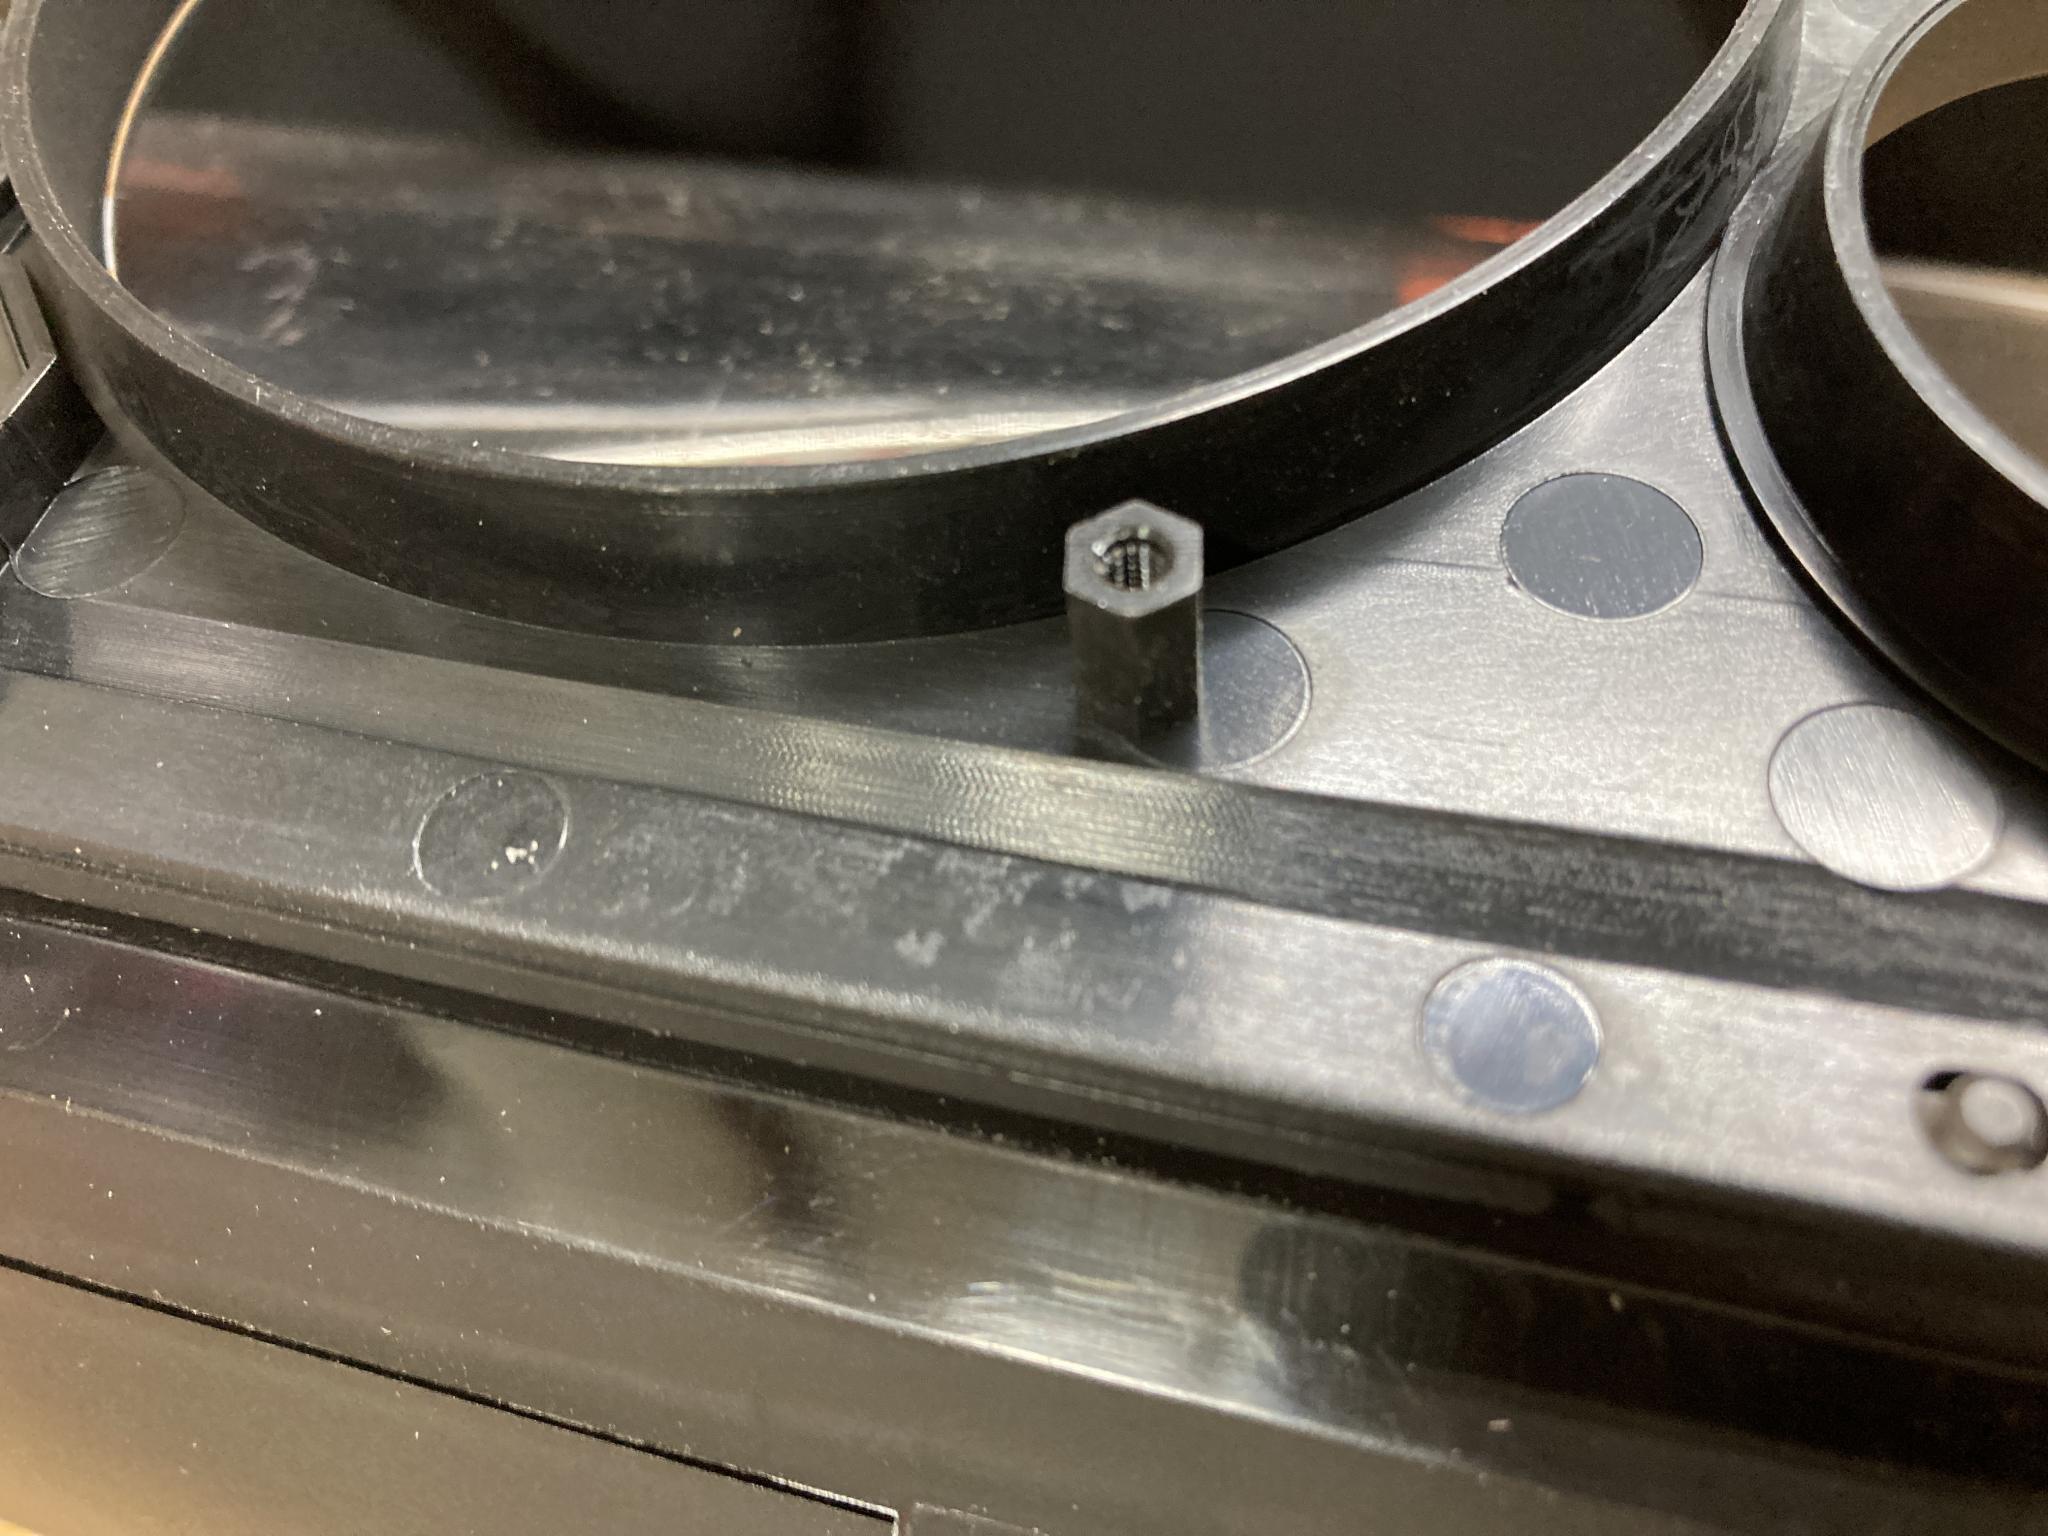
Time to assemble. I grabbed a nicer gauge cluster and drilled it with my handy dandy templates. Here are the nylon standoffs I'm using to mount the gauge faces. These are really handy little things to have on hand.
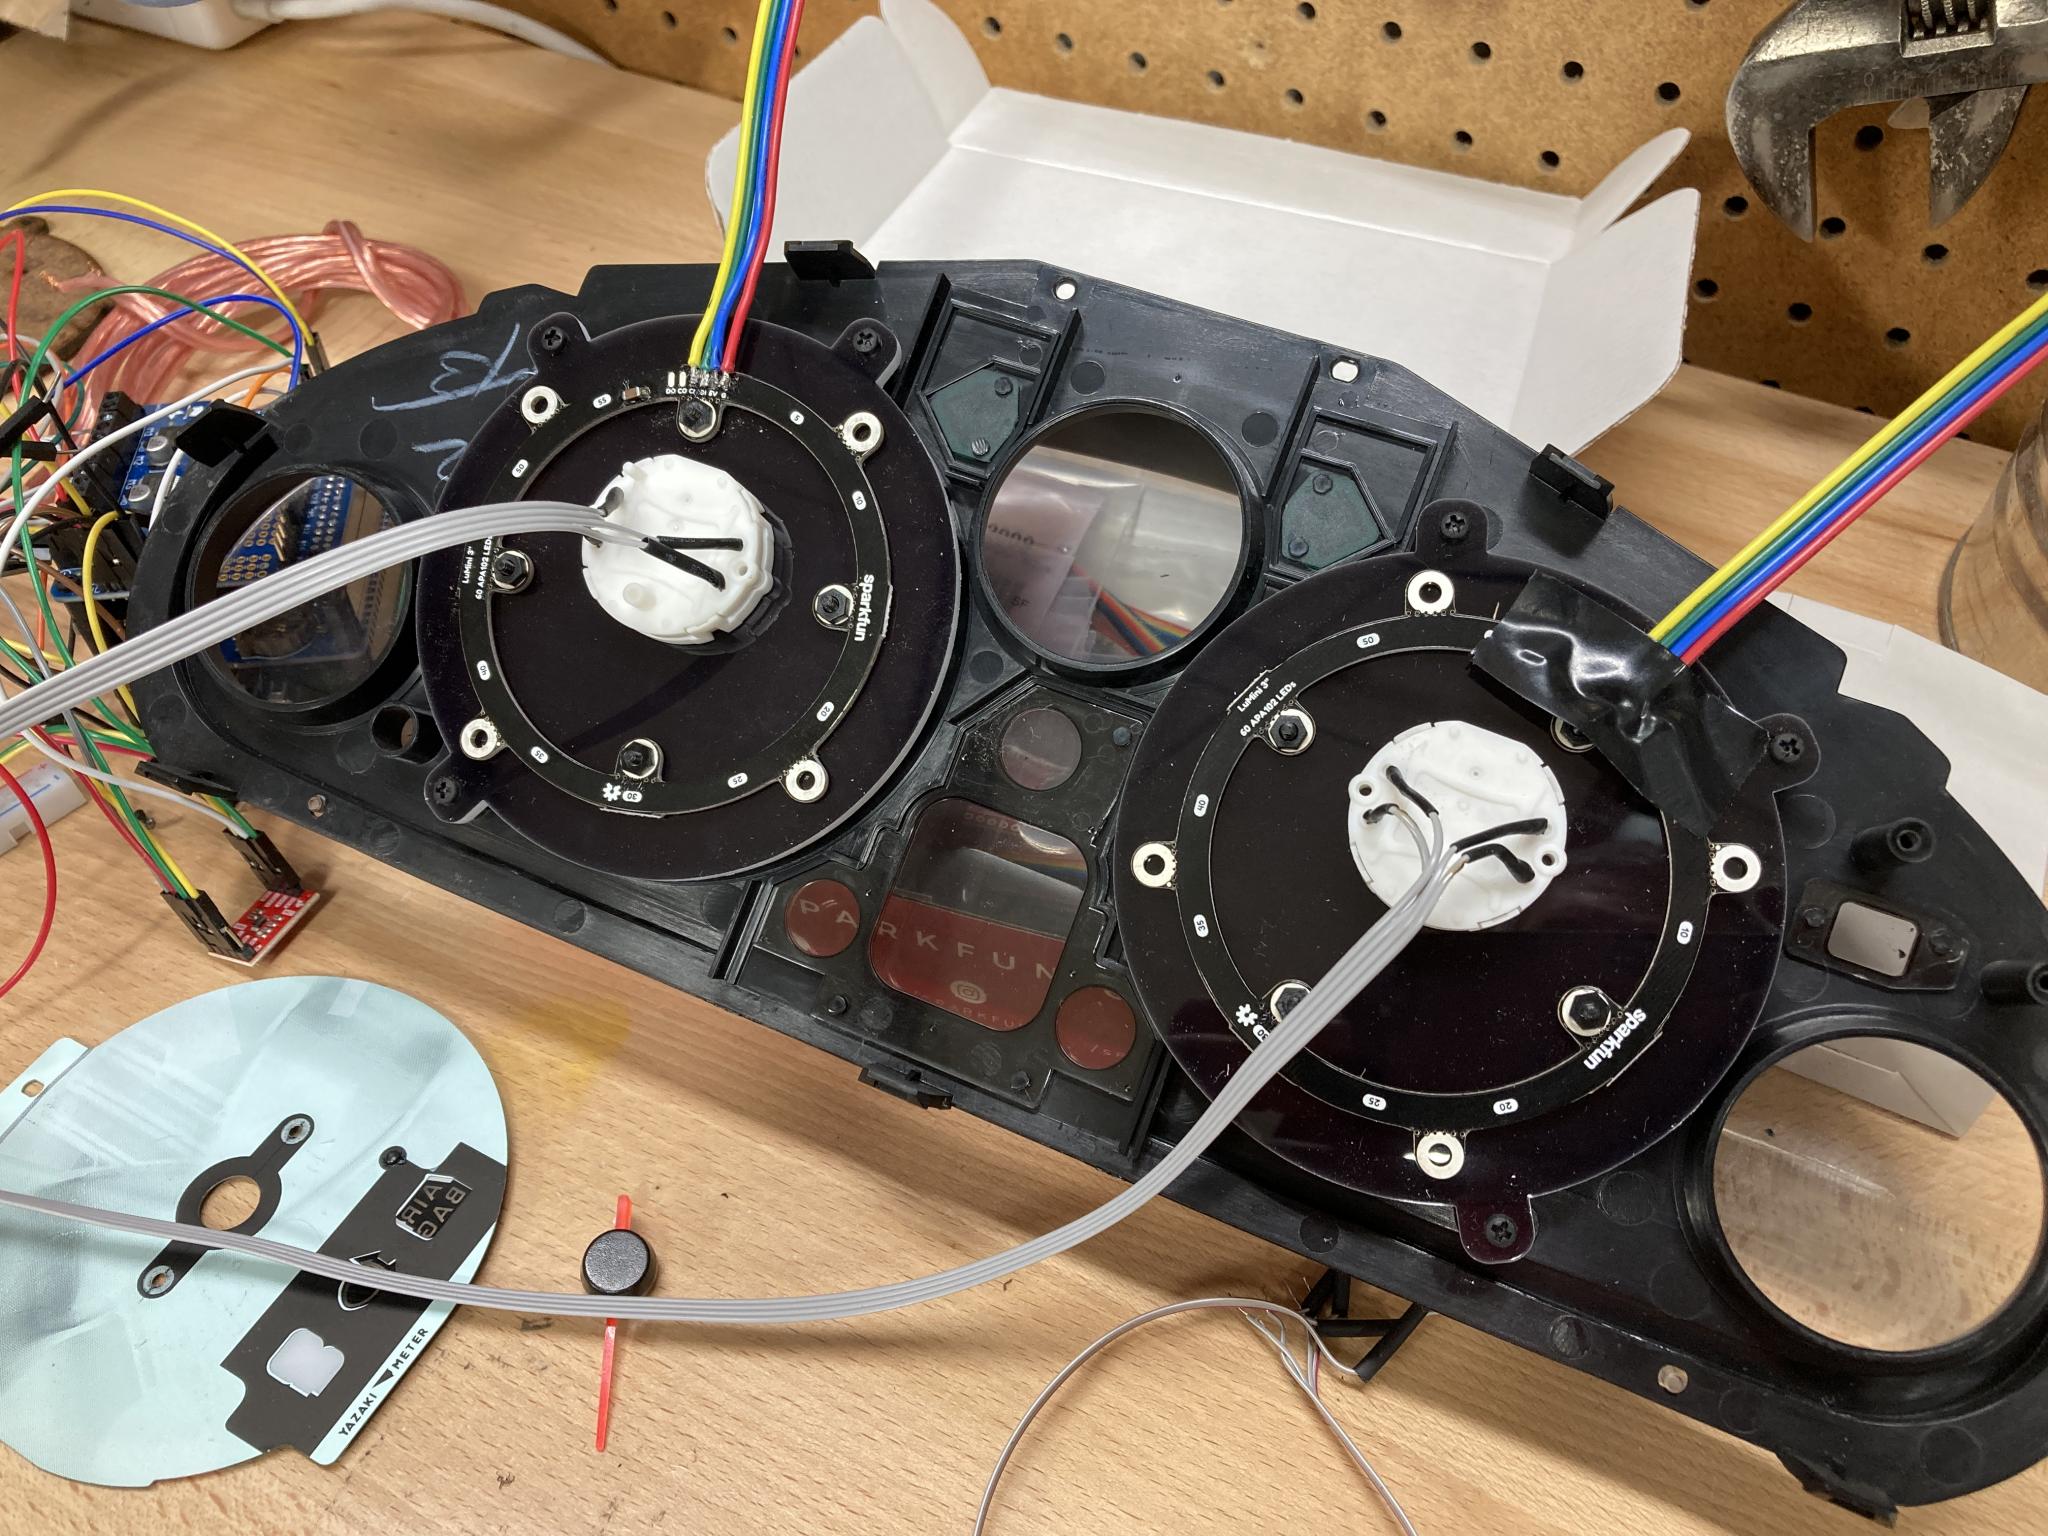
Attach the LEDs, attach the steppers, install.
I did learn that apparently the shaft on the tachometer is smaller than the shaft on the speedometer - a stock speedo needle will fit (a little loosely) on my steppers, a stock tach needle will not. I'm still learning things about these cars :)
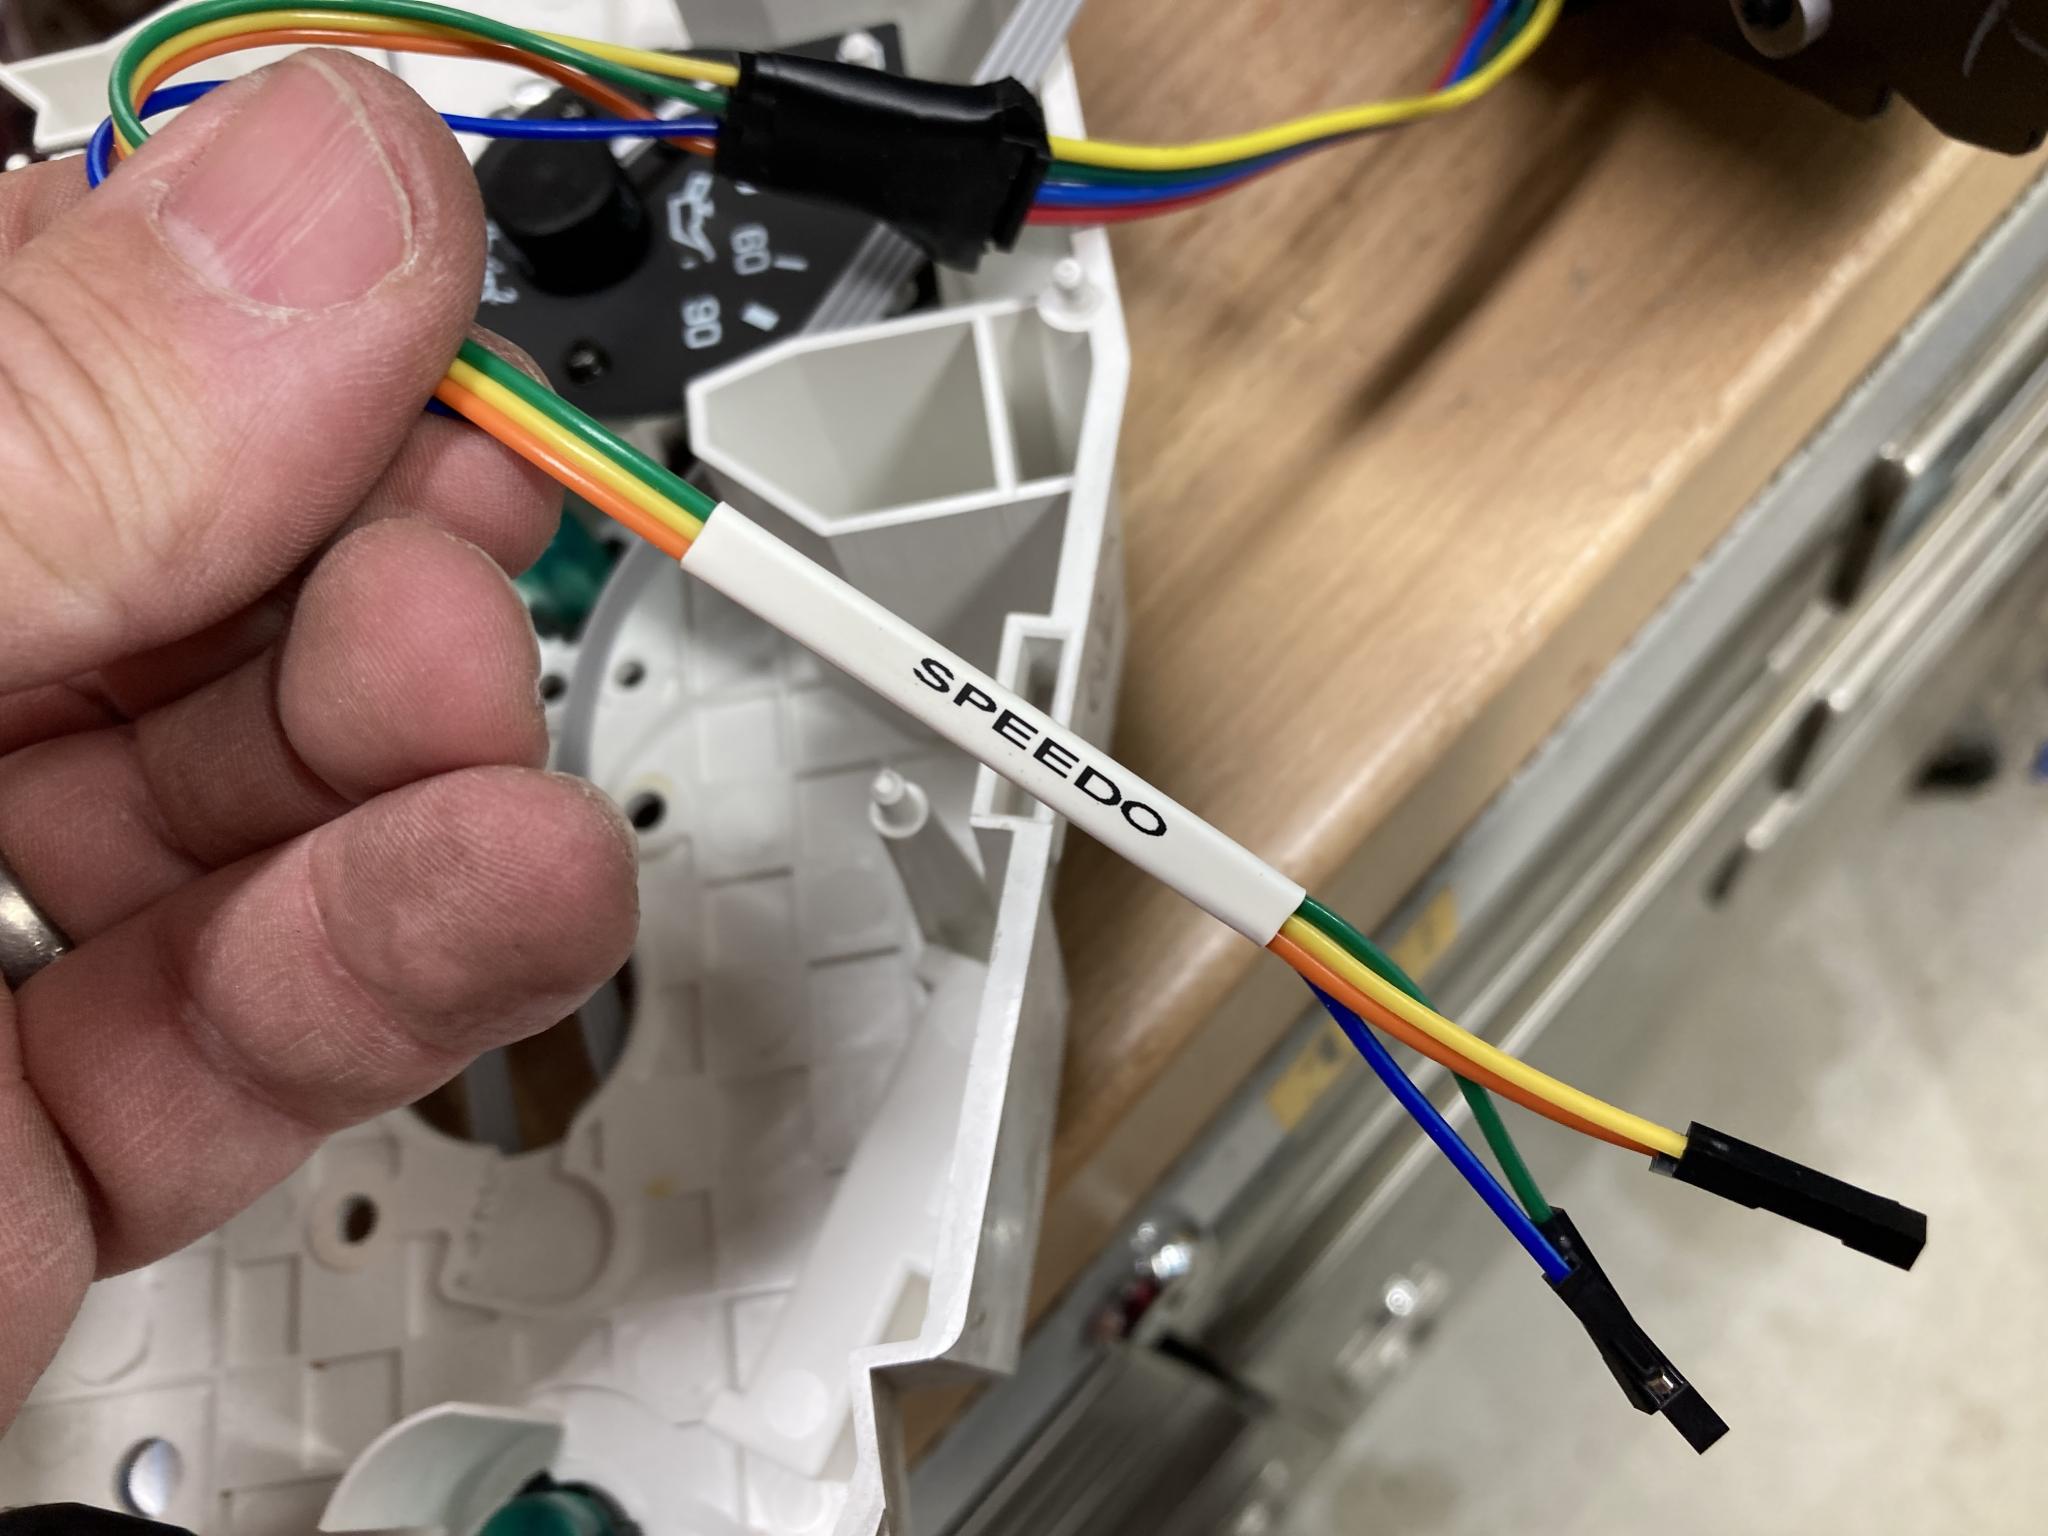
The NA Miata cluster has a big hole behind the speedo for the mechanical cable, so I ran all the wires through that. And labeled them. Did you know you can get heatshrink that you can run through a Dymo label maker? It's addictive.
And voila. I am really happy with how this looks. The satin finish on the nylon mounting hardware is really subtle. I did have to remove a light well from behind the tach, they're usually part of the air bag and headlight warning lights and I'm not using them anymore.
With the system assembled, I spent a little more time testing and cleaning up some of the wiring. I still have a little way to go on that front :)
I added a bit of persistence to the friction circle display as suggested by APEowner. I've also played a bit with the startup sequence just because it's fun. The LED flash is actually two brightnesses - the dim (night) setting and the day setting - but the camera can't see it. The tach needle slipped while I was doing free rev testing. That one is very clearly not the stepper slipping, it's the needle. I'll probably have to superglue that on or find a way to drill out a tach needle just very slightly.
Here's what the "OMG YOU HAVE NO OIL PRESSURE" freakout looks like. I'm going to add something a little less excitable for high coolant temp.
Still a long way to go but this is a really satisfying step.
Keith Tanner said:
Did you know you can get heatshrink that you can run through a Dymo label maker? It's addictive.
And where would one go to find this markable heat shrink? I may need to get some in my life.
So. Freaking. Cool.
Those faces have a really professional look.
I have a coworker asking me how we could productionize these. I wonder what I could do with a Pi inside the stock cluster, using just the inputs into the stock cluster? It might actually be possible on an NB, an NA would require the electric speedo sensor from an NB plus a couple of wires. Luckily, those sensors literally plug into the transmission in place of the cable. It might be an interesting experiment, I'm not sure I'd want to bring it to a marketable state with the expectation of PnP.
Heat shrink: This is what I'm using
Label maker: This one
I'm doing a Facebook Live on these things at 2:00 Mountain today on the Flyin' Miata FB page. All are invited to join in and ask questions, because the questions lead to interesting conversations. We'll post the video to YouTube after and I'll put it here in case anyone wants to see me blather on about my project.
The best nerding I've seen in a while.
Also kinda funny, we saw a diy custom gauge setup first in an European exotic (jalpa) and now the fancy new tech has filtered down to the everyday second hand sports car.


