1 ... 40 41 42 43 44 ... 63
Robbie (Forum Supporter)
Robbie (Forum Supporter) GRM+ Memberand MegaDork
10/28/20 9:21 a.m.

Ok, let's put in a challenge summary post! 

First event was autox. We were watching the weather so we decided to hit it early and risk cooler pavement rather than risking wetness later. If there is one thing these tires don't do well, it is handle any water. 

Immediately we realized we had a huge issue with a harmonic bounce in the body that really affected ability to drive the car. Upon returning home, I found some dents in the trunk lid that show exactly how much the body was actually moving compared to the chassis... No good. 

But Alan was able to drive through the bounce to a very respectable 7th in the autox at 49.928. Ian's best time was a 51 something. We had lots of DNFs because we would simply bounce around the gate. 

My brother actually got 3 fun runs though, and those are his first 3 autox runs ever. Welcome to the deep end buddy!

Car was reliable and we pretty much only had to add gas and mess with tire pressure. We tried everything from 12 down to 8, but never found a lot of success reducing the bounce. On the front section of the course that is perfectly smooth, the car was a rocket, but after you start bouncing, there is nothing to do except wait for the bouncing to stop and then you can start moving forward again. 

Next was the drag racing. We did 4 runs, each better than the last. We ended up 8th at 13.608. We were very pleased with this because the online calculators were telling us our 'ideal' time would be 13.3 ish with our weight and HP. I've never been that close to an ideal calculated time before, so we were very pleased. Normally I think a 13.6 would have been better than 8th, but there were a lot of fast drag cars at the event this year. hats off guys!

Finally was the concour. Here is where lifting the body up like a funny car so people could see the frame built underneath really paid off. We thought we had a solid performance, but were floored to learn we got 1st with 22.25 points average! This is a high honor as there is some really neat stuff that shows up to any challenge. 

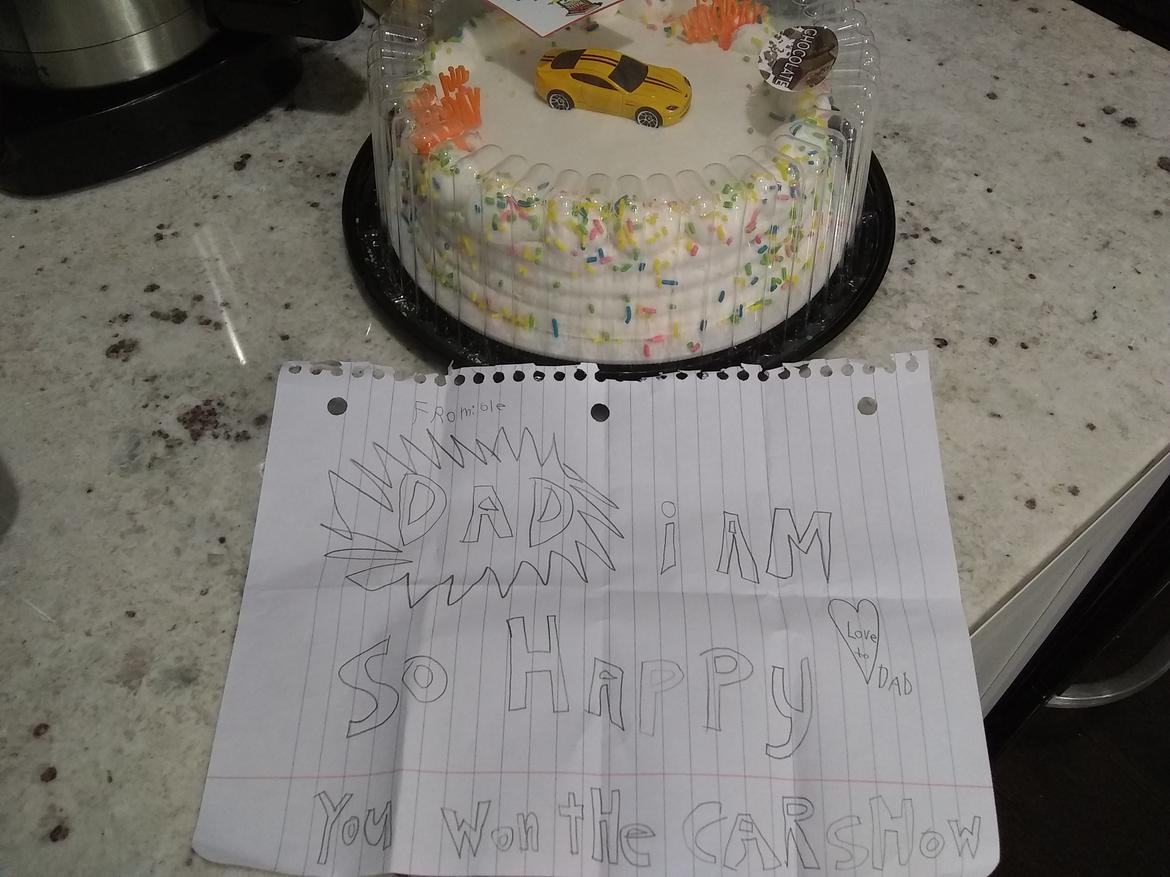
All those scores together put us into 4th overall. We were just 0.6 seconds in dynamic time off of the podium. I am super pleased with the car's first showing, and we have plans to improve significantly for next year. Upon returning home, this is what I was presented with by my family: (I love them!)

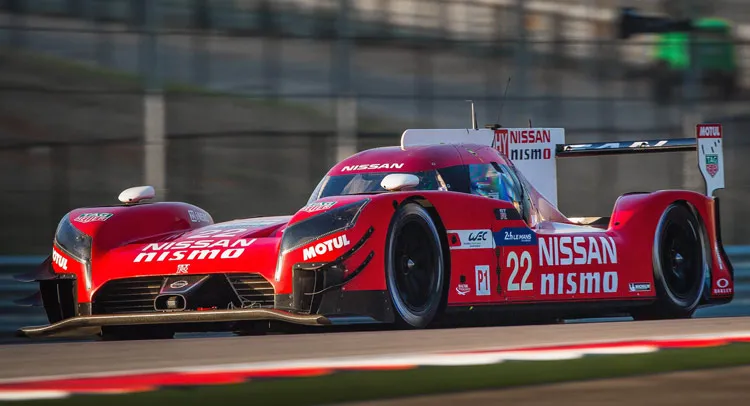
And, after unloading the trailer in the SNOW (thanks Chicago), I just had to take a pic of the car with the hardware. Can't wait to put this parts washer to good use!!

java230
java230 UberDork
10/28/20 1:19 p.m.

Congrats!!

Mr_Asa
Mr_Asa GRM+ Memberand SuperDork
10/28/20 1:44 p.m.
Apexcarver said:
Mr_Asa said:

In reply to Apexcarver :

Rear suspension is the tires and the pucks.  Engine is on the sprung side, but thats isnt saying much

Those cars were notoriously bouncy. I've seen old runoffs video of them pogoing around a road course. The inertia of the unsprung weight relative to the rest of the chassis was the root of the problem I think. Not sure that the RC comparisons will give good or accurate representation of the relative tire sidewall dynamics. 


It would be worthwhile to redo the rear suspension entirely and in doing so reduce unsprung weight and work in actual shocks and springs. There are ways of ghetto fabricating a solution costing more time than money.

I've got some definite ideas for that.  Tuning with them will be fun once it is bolted together, but that's why there's one competition a year.

Robbie (Forum Supporter)
Robbie (Forum Supporter) GRM+ Memberand MegaDork
10/31/20 9:56 a.m.

Well, I saw this ad on CL and jumped on it last night. Turns out he only had 2 yards not 3, but I did get it for $40, or $20/yard. 

Let's see if it's enough to make a real wing!

sleepyhead the buffalo
sleepyhead the buffalo GRM+ Memberand Mod Squad
10/31/20 12:34 p.m.
Robbie (Forum Supporter) said:

Turns out he only had 2 yards not 3, but I did get it for $40, or $20/yard.

Let's see if it's enough to make a real wing!

Depends on how big the wing is... and how much you use the carbon in the building.

one thing to keep in mind, is if you use it for "skin"... you want to plan for two layers, with one on a '45 deg bias', which can suck up a lot of material.  Otherwise, if it's only aligned chord & span, then it leaves it open to 'unzippering' along the 'grain' (so to speak) if it's loaded wrong.

Patrick (Forum Supporter)
Patrick (Forum Supporter) GRM+ Memberand MegaDork
10/31/20 1:38 p.m.

Following along because I have 10 feet of free CF cloth from the end of a roll because it was a blem, and plan to use that for aero elements 

Mr_Asa
Mr_Asa GRM+ Memberand SuperDork
10/31/20 1:47 p.m.
Robbie (Forum Supporter) said:

Well, I saw this ad on CL and jumped on it last night. Turns out he only had 2 yards not 3, but I did get it for $40, or $20/yard. 

Let's see if it's enough to make a real wing!

How are you going to make the mold?  

TurnerX19
TurnerX19 SuperDork
10/31/20 2:49 p.m.

In reply to Mr_Asa :

Composite wings are usually made without a mold. You use polystyrene foam core made undersized by the final skin thickness and melt the core out with acetone later if hollow is a requirement.

Mr_Asa
Mr_Asa GRM+ Memberand SuperDork
10/31/20 3:56 p.m.
TurnerX19 said:

In reply to Mr_Asa :

Composite wings are usually made without a mold. You use polystyrene foam core made undersized by the final skin thickness and melt the core out with acetone later if hollow is a requirement.

I've built or helped build half a dozen for FSAE.  Tried both an external and internal mold with moderate success on both methods.  We liked an external mold as you got a prettier face.

This was one we didn't run due to voids on surfave resin 

singleslammer
singleslammer PowerDork
11/1/20 2:09 p.m.

Congrats Robbie! That is a great finish. Given the amount of time and effort you put into this build, you deserved that 1st in concourse! Next year, we can car pool.

Robbie (Forum Supporter)
Robbie (Forum Supporter) GRM+ Memberand MegaDork
11/1/20 3:42 p.m.

In reply to singleslammer :

Thanks man, yeah we should do that!

Robbie (Forum Supporter)
Robbie (Forum Supporter) GRM+ Memberand MegaDork
11/1/20 3:46 p.m.
Mr_Asa said:
TurnerX19 said:

In reply to Mr_Asa :

Composite wings are usually made without a mold. You use polystyrene foam core made undersized by the final skin thickness and melt the core out with acetone later if hollow is a requirement.

I've built or helped build half a dozen for FSAE.  Tried both an external and internal mold with moderate success on both methods.  We liked an external mold as you got a prettier face.

This was one we didn't run due to voids on surfave resin 

Oooooh, is that an s1223?

http://airfoiltools.com/airfoil/details?airfoil=s1223-il

Lol. How did you make the bucks and then how did you join the halves? Also what's that metal in the end? How did you add that? I have never done CF or fiberglass, so this will be a learning experience, but I was thinking doing the foam wing and simply wrapping it might be easiest. I was also thinking of using the e423 airfoil shape, as the added thickness I think would help increase stiffness overall.

sleepyhead the buffalo
sleepyhead the buffalo GRM+ Memberand Mod Squad
11/3/20 10:22 a.m.

so, I don't know for sure... but I think the wing Mr_Asa posted is an aluminum core of some kind (it looks a bit like the 9LR extrusion... but thinner), with the carbon laid up wet around the outside.  Generally that'd mean the carbon would be a bit more resistant to the 'zippering' I mentioned; and the aluminum extrusion helps to distribute the point loads from the mount into the skin.

One caveat, though, is that carbon (both the fiber, and like pencils) oxidizes aluminum.  I haven't done that kind of construction, but I'd guess you want a bit of epoxy on the aluminum and 'tacky' before laying down the carbon to wet out for its layup.

Also, please please please: Get a new respirator, and lots of nitrile gloves... as long up your arms as you can get.  I got sensitized to epoxy in college, and I don't wish that on anyone.

It's interesting to see the structure of Asa's wing, and it's similarity to 9LR's... but also how different it is to most aircraft wing structures.  Most... 'diy'/kit 'small airplane' wings are of the "two spar" setup, with a main spar at ~25% chord, and a second spar around 75% chord.  The front spar takes most of the "lift" forces loading (which is part of the reason many wings have their t/c.max location around 25-30% of chord), so it's usually the stronger of the two.  While the 'aft' spar mainly has to do with the 'pitching moment' loads, and the convenience of hanging various high-lift and aileron devices to it.  So, from my experience, that structure looks... heavy?  But, maybe that's because I'm used to single-clamped beam calculations that allow for more deflection?  Motorsports (iirc) tend to favor very stiff elements... outside of a handful of exotic (and frequently short-lived) examples.

Because of the above, one of the best ways to use a limited amount of carbon is to build a "D-box Spar"... which is kinda like turning the whole front 30% of the wing into a spar.
here's one example implementation of it:   https://www.espritmodel.com/explanation-of-the-d-box-build-technology.aspx

How big are you thinking/How much downforce do you want?  Any thought to how you'll balance the front end?


Robbie (Forum Supporter)
Robbie (Forum Supporter) GRM+ Memberand MegaDork
11/3/20 12:23 p.m.

I want all the downforces!

However, my plan for achieving that is mostly from devices other than the wing. In general, the overall aero will become the main focus moving this build forward. I'm hoping that the major downforce comes from attention to underbody aero. So flat bottoms, undertrays, skirts (though probably not 'sliding' skirts, we will see), tunnels, and diffusers. The wing will play into this by essentially trying to help create the negative pressure to pull more air out from under the car. 

I also want to modify my hood into a wing of sorts. The Ojai scoop can be majorly improved I'm sure. I'm thinking about smaller elements as well like louvers above the wheels, enclosing the 'tonneau' area as much as possible, possibly adding wheel curtain ducts, etc. 

All this will hopefully be balanced with real testing to make sure the parts are actually helping. 

Finally, even though I got a good deal on the carbon fabric, the epoxies still aren't cheap, so I might be focusing on other build methods, TBD there I guess. 

Mr_Asa
Mr_Asa GRM+ Memberand SuperDork
11/3/20 1:42 p.m.
Robbie (Forum Supporter) said:
Mr_Asa said:
TurnerX19 said:

In reply to Mr_Asa :

Composite wings are usually made without a mold. You use polystyrene foam core made undersized by the final skin thickness and melt the core out with acetone later if hollow is a requirement.

I've built or helped build half a dozen for FSAE.  Tried both an external and internal mold with moderate success on both methods.  We liked an external mold as you got a prettier face.

This was one we didn't run due to voids on surfave resin 

Oooooh, is that an s1223?

http://airfoiltools.com/airfoil/details?airfoil=s1223-il

Lol. How did you make the bucks and then how did you join the halves? Also what's that metal in the end? How did you add that? I have never done CF or fiberglass, so this will be a learning experience, but I was thinking doing the foam wing and simply wrapping it might be easiest. I was also thinking of using the e423 airfoil shape, as the added thickness I think would help increase stiffness overall.

Ok, its been a while since I've gone through this, so I'll give the outline and the go through my pics and try and email the aero lead for anything I missed.

The shape was something that our aero guys found online then tweaked obsessively through AnSYS simulations.

Stiffness shouldn't be a problem, read all of this and I mention what we did to allow a 180lb student to stand on the wing.

Here's how you make the buck, for our biggest wing we actually used aluminum as the two halves, but for most of them we went with styrofoam cut with a hot wire from a sponsor (should be fairly easy to do on your own, though, I can run through that later.)  We'd seal the styrofoam with various paints and whatnot, then apply a generous amount of mold release, then we would prep the CF and resin.

Cut the CF so you have enough to lay the way you want, I think we went with three layers?  We'd "paint" resin on the halves of the mold so that the outer layer wouldn't have the problems we saw with the one I showed above and lay the CF in.  The important part of this was that we'd lay it in one unbroken sheet.  When everything was cured and you removed it from the form you could actually open the trailing edge and it would look like a weird C shape, open at one end and a solid material throughout the rest of it.  After it was cut and laid in the mold, we would bag it in such a way that the entire buck was wrapped including the interior.  Look at this, blue is the bagging material, red is the CF, black is the mold.  Seal the ends however you want, apply vacuum to one end and send resin through to impregnate the CF.


Cure completely, peel out of the mold and clean all surfaces.  Trim excess, then bring in your inner forms.  We had these waterjet from a local company that has been a sponsor for almost as long as the FSAE team has been around.  These are for the main wing element of our first year car on which the aero package was MASSIVE.  Despite the size of the aero, it only weighed about 48lbs?  We had beefy outer supports for the end plates and smaller ones inside for the inner support, 4-5 supports total across a wing that was about 60" wide?  Once it was mounted it was strong enough to allow a 180lb student to stand on it.

When you have everything cleaned and prepped, install the outer support forms on the bottom of the wing, do this with epoxy.  It was a Loctite product I think, something like this? http://www.techni-tool.com/512CH309? but it was green when you squeezed it out.  Anyways, glue the bottom half, put it back in the mold if you didn't destroy it and clamp the mold down to help everything set properly.  Once the bottom is set you open the mold up, apply the epoxy to the top portion and the trailing wing and then put it back in the mold a final time.


Eventually we also hooked up with A2 Wind Tunnel in North Carolina and validated designs.  I think we took wind speed up to 70 or 80MPH, so stiffness wasn't an issue.

Mr_Asa
Mr_Asa GRM+ Memberand SuperDork
11/3/20 1:43 p.m.

There is a lot of info in there, but there is a lot of info that is missing and a lot that I don't know as I wasn't on the Aero team, I just helped.  Let me know what questions you have and I'll answer as best I can

barefootskater (Shaun)
barefootskater (Shaun) UberDork
11/3/20 2:07 p.m.

Big brains here. This place is awesome. 

sleepyhead the buffalo
sleepyhead the buffalo GRM+ Memberand Mod Squad
11/3/20 2:22 p.m.
Robbie (Forum Supporter) said:

I want all the downforces!

However, my plan for achieving that is mostly from devices other than the wing. In general, the overall aero will become the main focus moving this build forward. I'm hoping that the major downforce comes from attention to underbody aero. So flat bottoms, undertrays, skirts (though probably not 'sliding' skirts, we will see), tunnels, and diffusers. The wing will play into this by essentially trying to help create the negative pressure to pull more air out from under the car. 

I also want to modify my hood into a wing of sorts. The Ojai scoop can be majorly improved I'm sure. I'm thinking about smaller elements as well like louvers above the wheels, enclosing the 'tonneau' area as much as possible, possibly adding wheel curtain ducts, etc.

I haz h'omage idearz..

might be easier to brainstorm that a bit in a video chat of some kind... if you, Ian, and/or Asa are up for it?

Mr_Asa
Mr_Asa GRM+ Memberand SuperDork
11/3/20 2:25 p.m.

In reply to sleepyhead the buffalo :

Probably possible later tonight?  7ish Eastern would likely be the earliest

stafford1500
stafford1500 GRM+ Memberand Dork
11/3/20 2:28 p.m.

Robbie, The plan laid out by Mr Asa is sound and similar to the technique I proposed for a wing that was being built by another $2000 competitor, but not for the competition. I will dig up my instructions/plan and post it up here. Mine varied a little bit in that it used a foam core that remained sealed in the carbon structure. There were also hard points located in the wing blank before the carbon went on. The note above about getting the layer angular alignments can be an issue, but there are plenty of wings built that don't have the bias applied.

The way to get started is to get some fiberglass cloth and resin and try your hand at small scale before using your carbon cloth. Similar process. Start with simple flat panels (I'm sure you can find a use for those elsewhere on the car). For flat sheets, you do want to mirror the bias (top to bottom) or you will get potato chip warpage once the mold is removed.

Another method not mentioned yet is making the wing in upper and lower halves and bonding the the two together after installing and stiffeners/hardware. This is a reasonable way to get good surface finish and allow wet layup in the home shop.

Mr_Asa
Mr_Asa GRM+ Memberand SuperDork
11/3/20 2:35 p.m.
stafford1500 said:

Robbie, The plan laid out by Mr Asa is sound and similar to the technique I proposed for a wing that was being built by another $2000 competitor, but not for the competition. I will dig up my instructions/plan and post it up here. Mine varied a little bit in that it used a foam core that remained sealed in the carbon structure. There were also hard points located in the wing blank before the carbon went on. The note above about getting the layer angular alignments can be an issue, but there are plenty of wings built that don't have the bias applied.

The way to get started is to get some fiberglass cloth and resin and try your hand at small scale before using your carbon cloth. Similar process. Start with simple flat panels (I'm sure you can find a use for those elsewhere on the car). For flat sheets, you do want to mirror the bias (top to bottom) or you will get potato chip warpage once the mold is removed.

Another method not mentioned yet is making the wing in upper and lower halves and bonding the the two together after installing and stiffeners/hardware. This is a reasonable way to get good surface finish and allow wet layup in the home shop.

For that car above we would typically lay out a layer or two of CF on an old sliding glass door and let it cure, then cut and trim it for random button panels, floor pieces, all sorts of stuff.  Huge usefulness out of a sheet of the stuff that's been cured.

That last paragraph is how we did some of the first test wings in our cars.  Definitely an easy way to do it, the one drawback we found was that it just doesn't end as pretty on the leading edge.  After we bonded those we would typically lay a little 3" wide strip over the leading edge to give it a smoother finish.  It can be damn hard to get the cuts right for that first wing to mate properly, and that strip hid a multitude of sins.

sleepyhead the buffalo
sleepyhead the buffalo GRM+ Memberand Mod Squad
11/3/20 2:42 p.m.
Mr_Asa said:

In reply to sleepyhead the buffalo :

Probably possible later tonight?  7ish Eastern would likely be the earliest

That's 1am where I am.  We might need to wait until the weekend?  and I dunno if stafford wants (can?) to join in the conversation?

Mr_Asa
Mr_Asa GRM+ Memberand SuperDork
11/3/20 2:44 p.m.

In reply to sleepyhead the buffalo :

I'm open pretty much all day tomorrow and Friday.  I'm not a morning person though.

stafford1500
stafford1500 GRM+ Memberand Dork
11/3/20 2:55 p.m.

I can always be convinced to talk aero. Most anytime is workable for me.

Robbie (Forum Supporter)
Robbie (Forum Supporter) GRM+ Memberand MegaDork
11/3/20 3:14 p.m.

Let me send around some PMs and collect some good availability from everyone over the next couple weeks. We could possibly offer up to other folks on the board to listen in too. 

1 ... 40 41 42 43 44 ... 63

You'll need to log in to post.

Our Preferred Partners
K3bpKMQ5aoAhijccvKB137VpEAtFU6UIk9VO5zoLgdsSCQBKDyteMoXZ9CqmS3h8