


Ok. I think I see what you mean. Will definitely keep it in mind.
And I am planning to do something similar to the diner trimon work bench.

Ok. I think I see what you mean. Will definitely keep it in mind.
And I am planning to do something similar to the diner trimon work bench.

Looking good!
i aint spent any money on the shop for this update. I did, however, schore a few partial sheets of 3/4 OSB. yay!!
finally got all the lights up over the work bay, and only two small sections of ceiling left to finsh. I am so sick of that damn ceiling. those parts will wait for a while. maybe a long while. maybe forever.
also need to paint my I-beam yet.
[URL=http://s54.photobucket.com/user/dusterbd13/media/20150908_113400_zpsakk4uc93.jpg.html]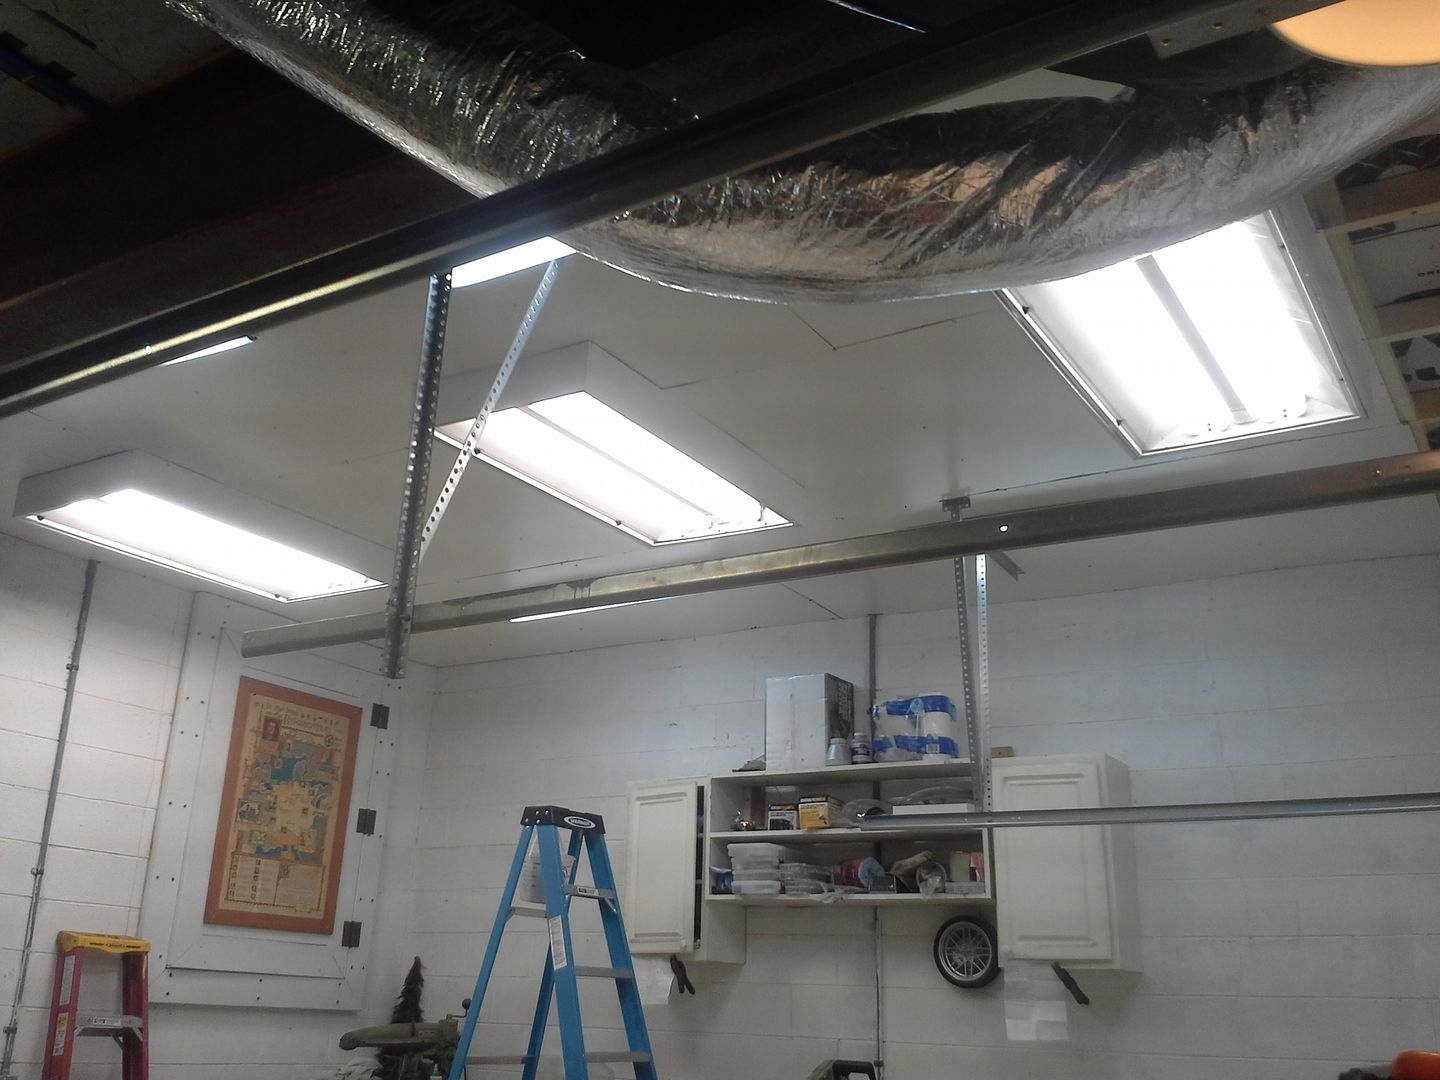 [/URL]
[URL=http://s54.photobucket.com/user/dusterbd13/media/20150908_113404_zpsd3idztaw.jpg.html]
[/URL]
[URL=http://s54.photobucket.com/user/dusterbd13/media/20150908_113404_zpsd3idztaw.jpg.html]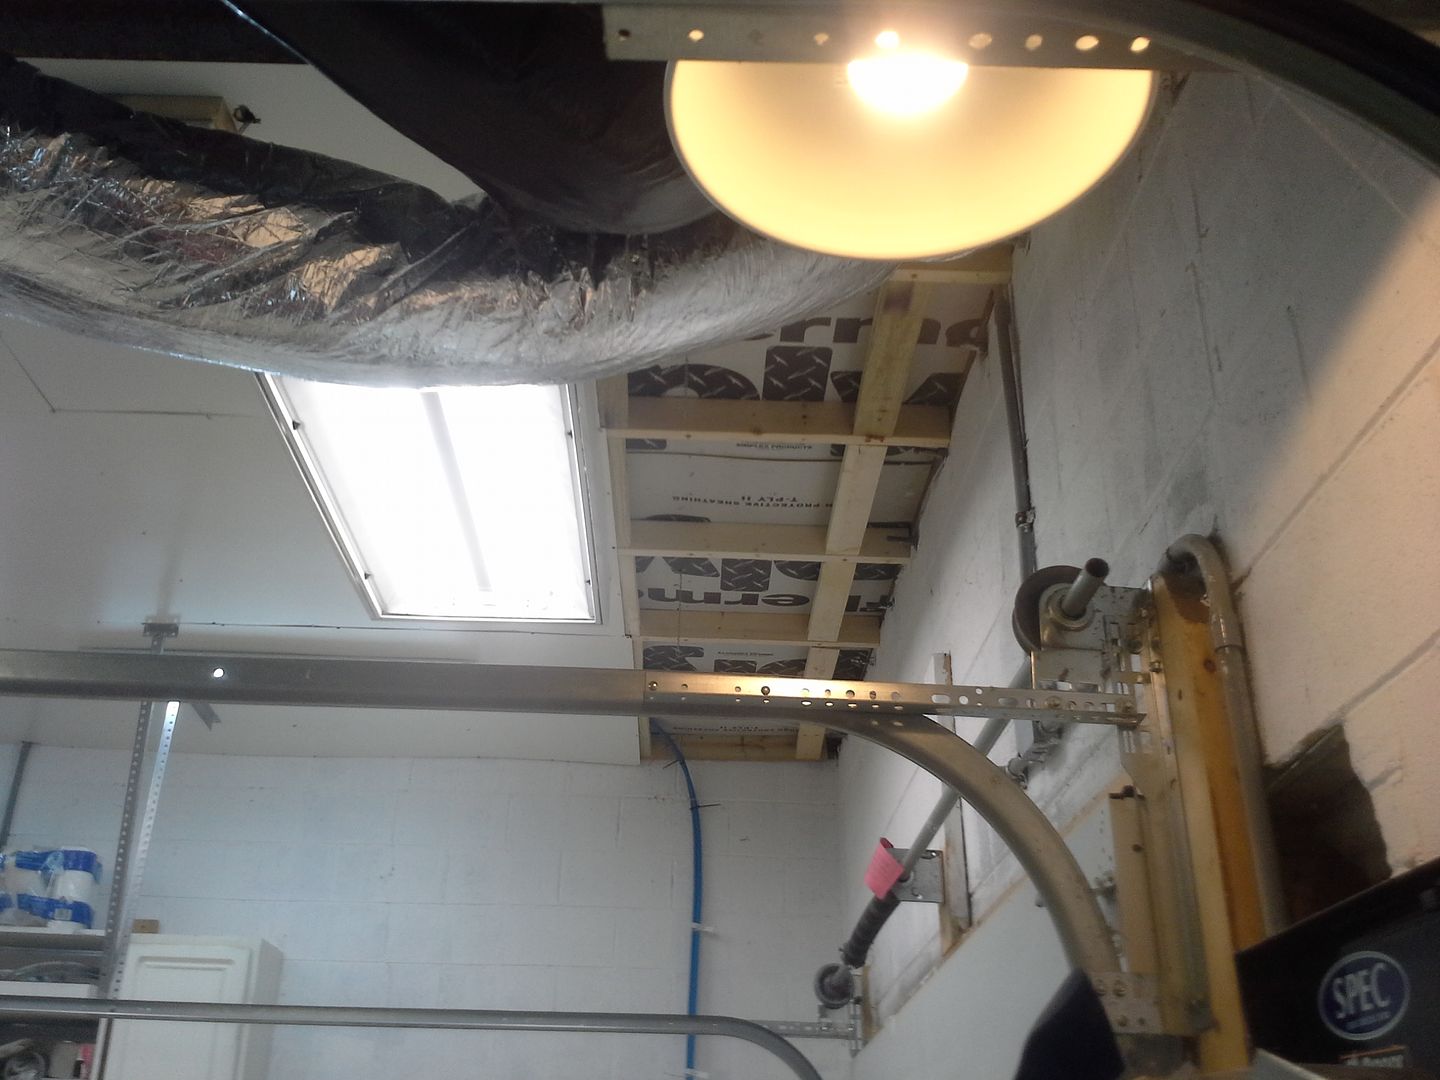 [/URL]
[URL=http://s54.photobucket.com/user/dusterbd13/media/20150908_113412_zpsine0xxkw.jpg.html]
[/URL]
[URL=http://s54.photobucket.com/user/dusterbd13/media/20150908_113412_zpsine0xxkw.jpg.html]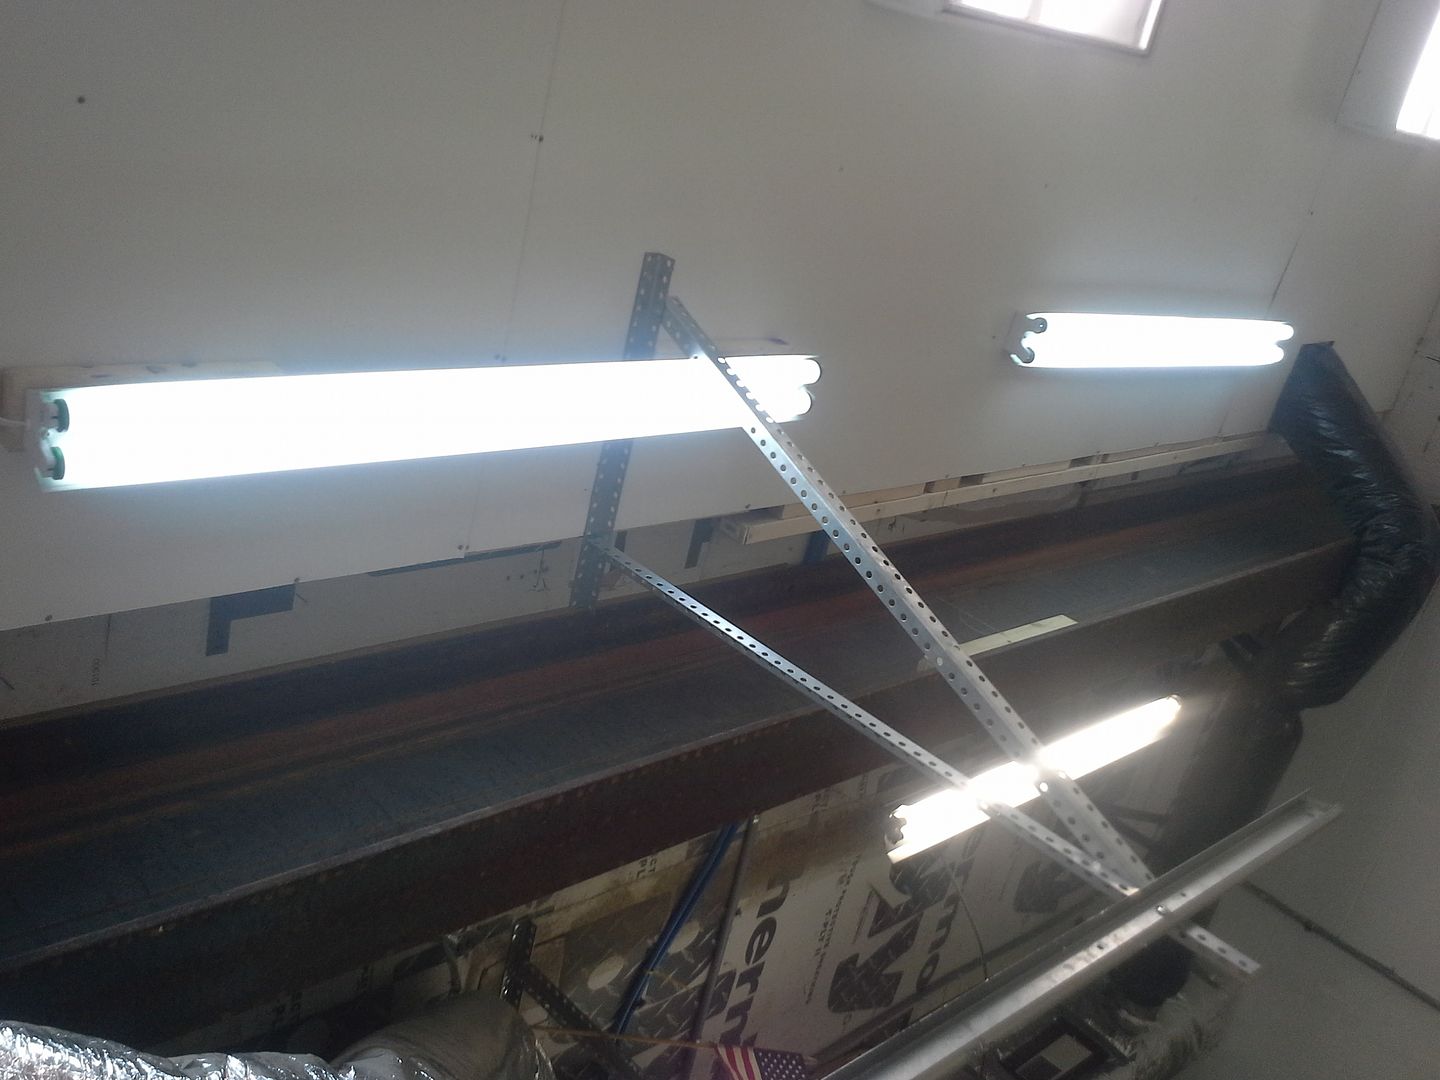 [/URL]
also finally installed my garage door threshold.
[URL=http://s54.photobucket.com/user/dusterbd13/media/20150908_122637_zpsd5emzvlz.jpg.html]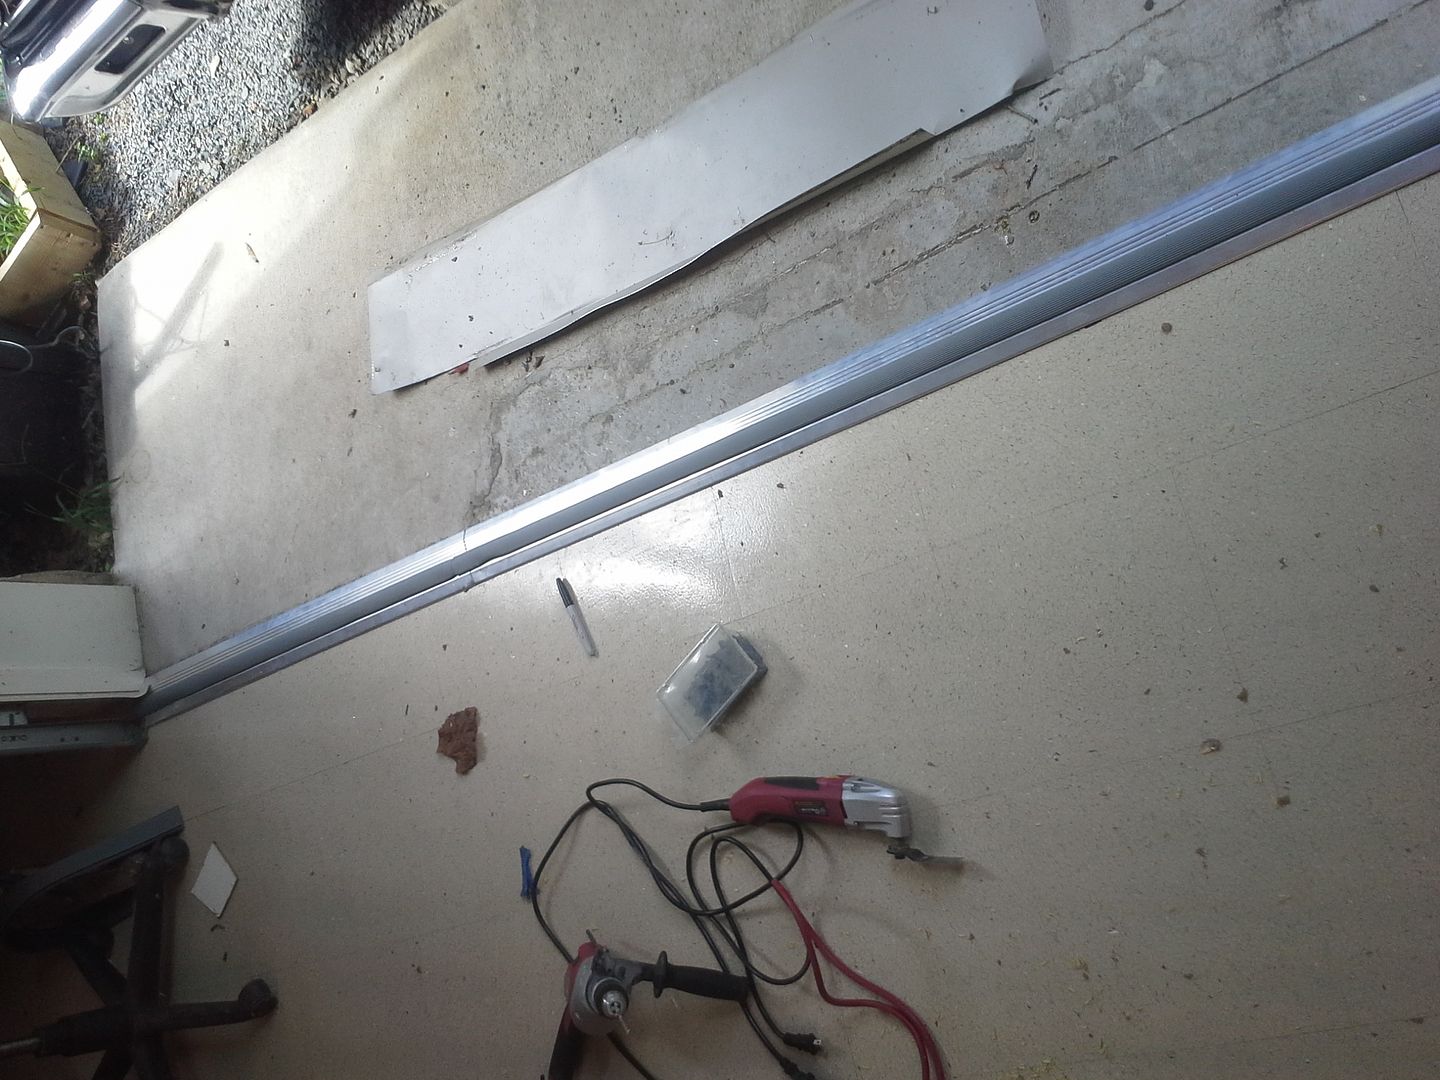 [/URL]
got the majority of the deck railings done.
[URL=http://s54.photobucket.com/user/dusterbd13/media/20150908_130932_zpsw1fxxgcb.jpg.html]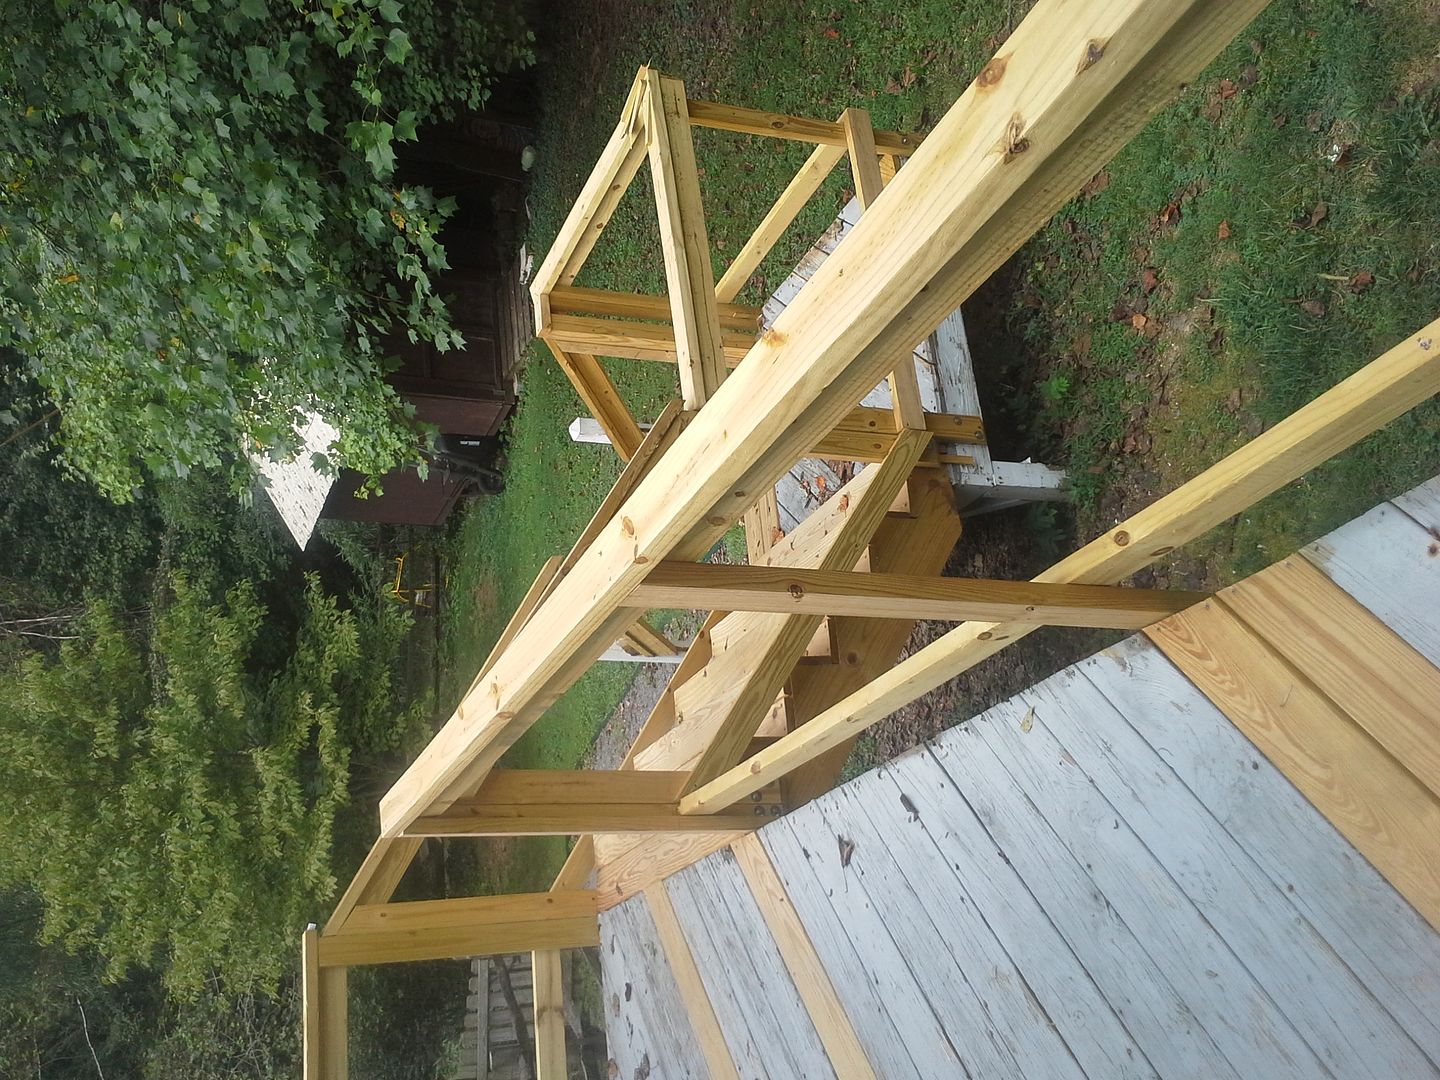 [/URL]
and then I cleaned up the shop, laid some sheet goods over the cabinetry, and mocked up work bench height/depth with the biggest car I won to really get a feel for it. im in love with how this is turning out. now I just need to find some money so I can work on the workbench/cabinets.
[URL=http://s54.photobucket.com/user/dusterbd13/media/1964%20elcamino/20150827_205338_zpsuxuxssj2.jpg.html] [/URL]
[URL=http://s54.photobucket.com/user/dusterbd13/media/1964%20elcamino/20150828_152326_zpsaffeff8m.jpg.html]
[/URL]
[URL=http://s54.photobucket.com/user/dusterbd13/media/1964%20elcamino/20150828_152326_zpsaffeff8m.jpg.html]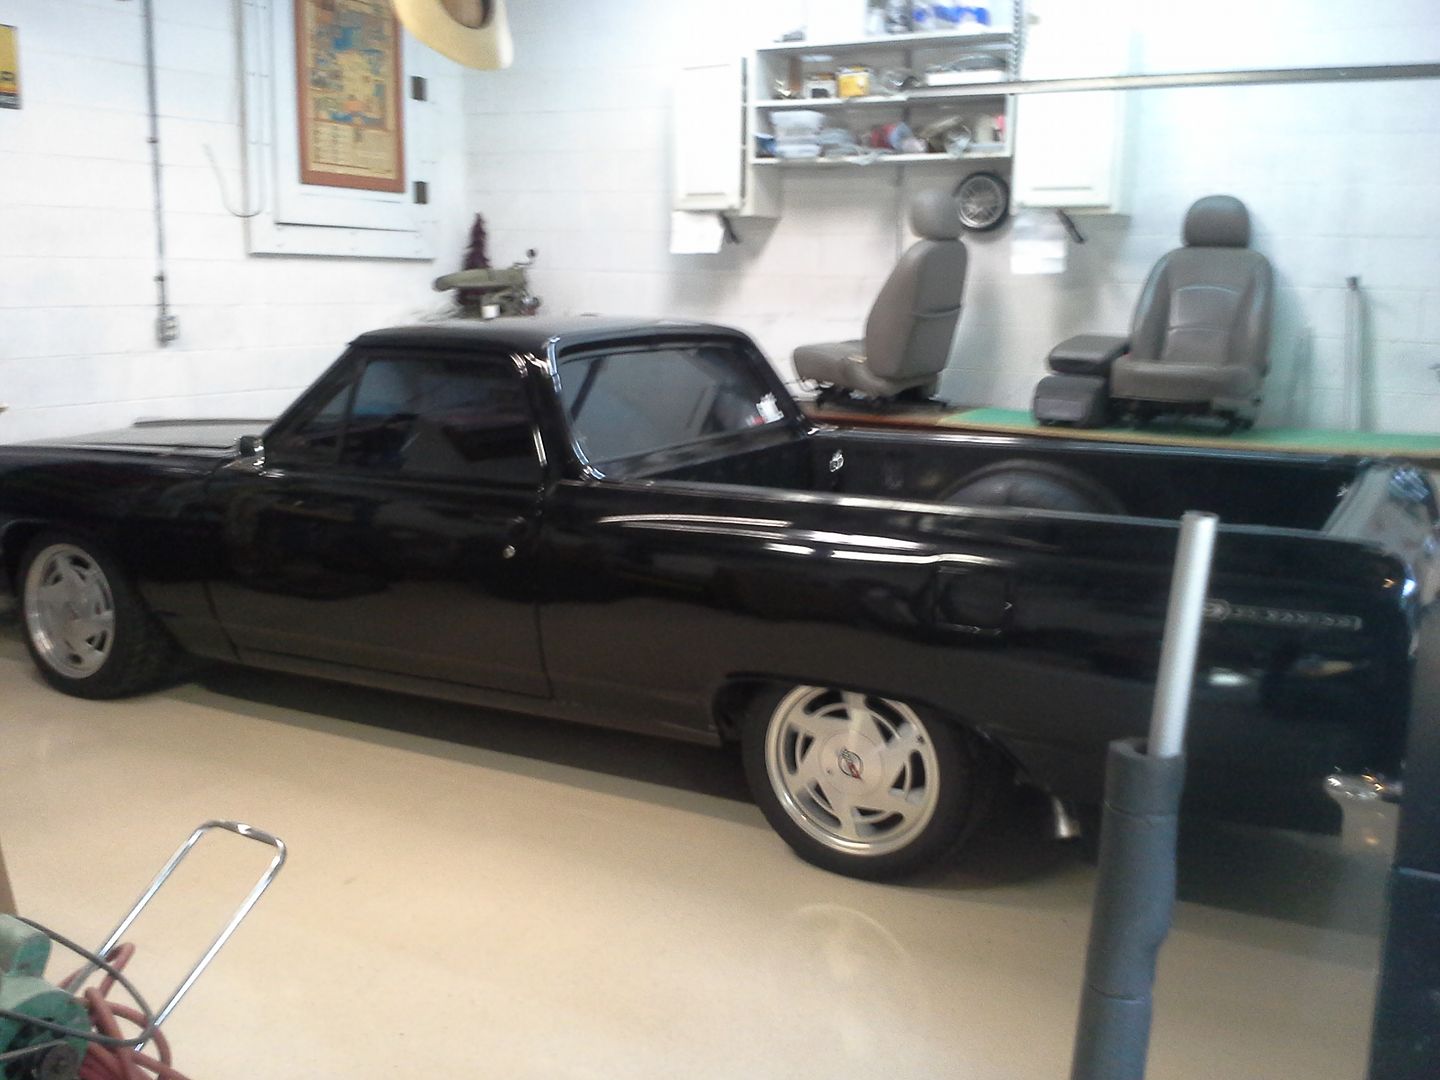 [/URL]
[URL=http://s54.photobucket.com/user/dusterbd13/media/1964%20elcamino/20150828_152406_zpsy73fhnuv.jpg.html]
[/URL]
[URL=http://s54.photobucket.com/user/dusterbd13/media/1964%20elcamino/20150828_152406_zpsy73fhnuv.jpg.html]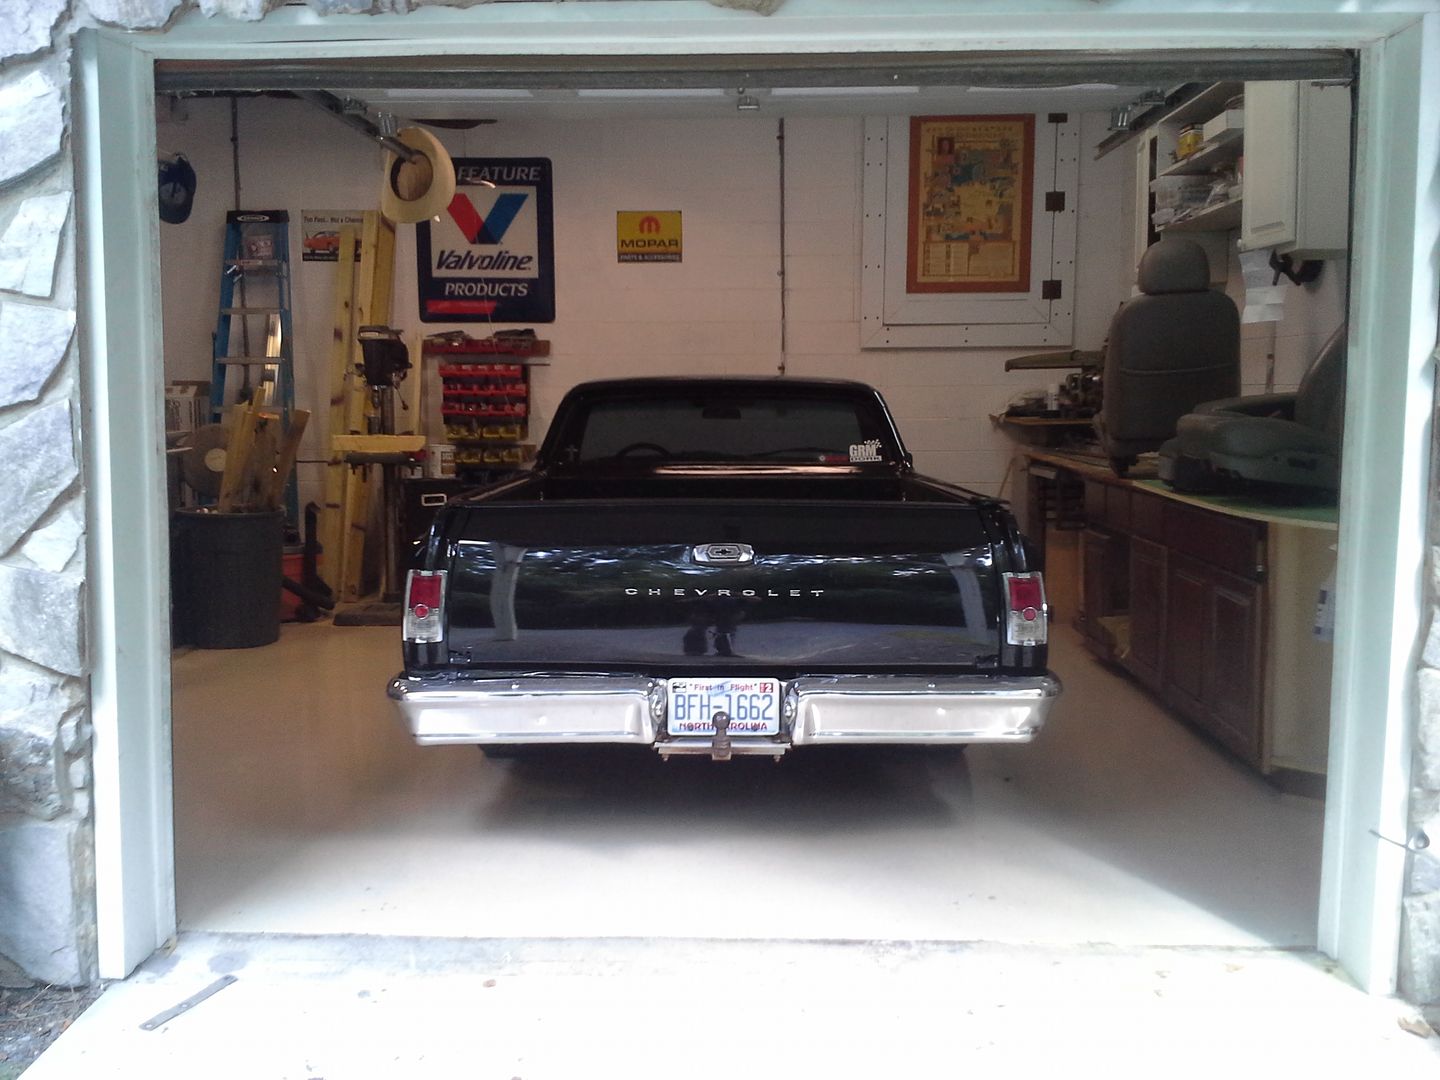 [/URL]
[URL=http://s54.photobucket.com/user/dusterbd13/media/1964%20elcamino/20150828_152417_zps5r4kygjd.jpg.html]
[/URL]
[URL=http://s54.photobucket.com/user/dusterbd13/media/1964%20elcamino/20150828_152417_zps5r4kygjd.jpg.html]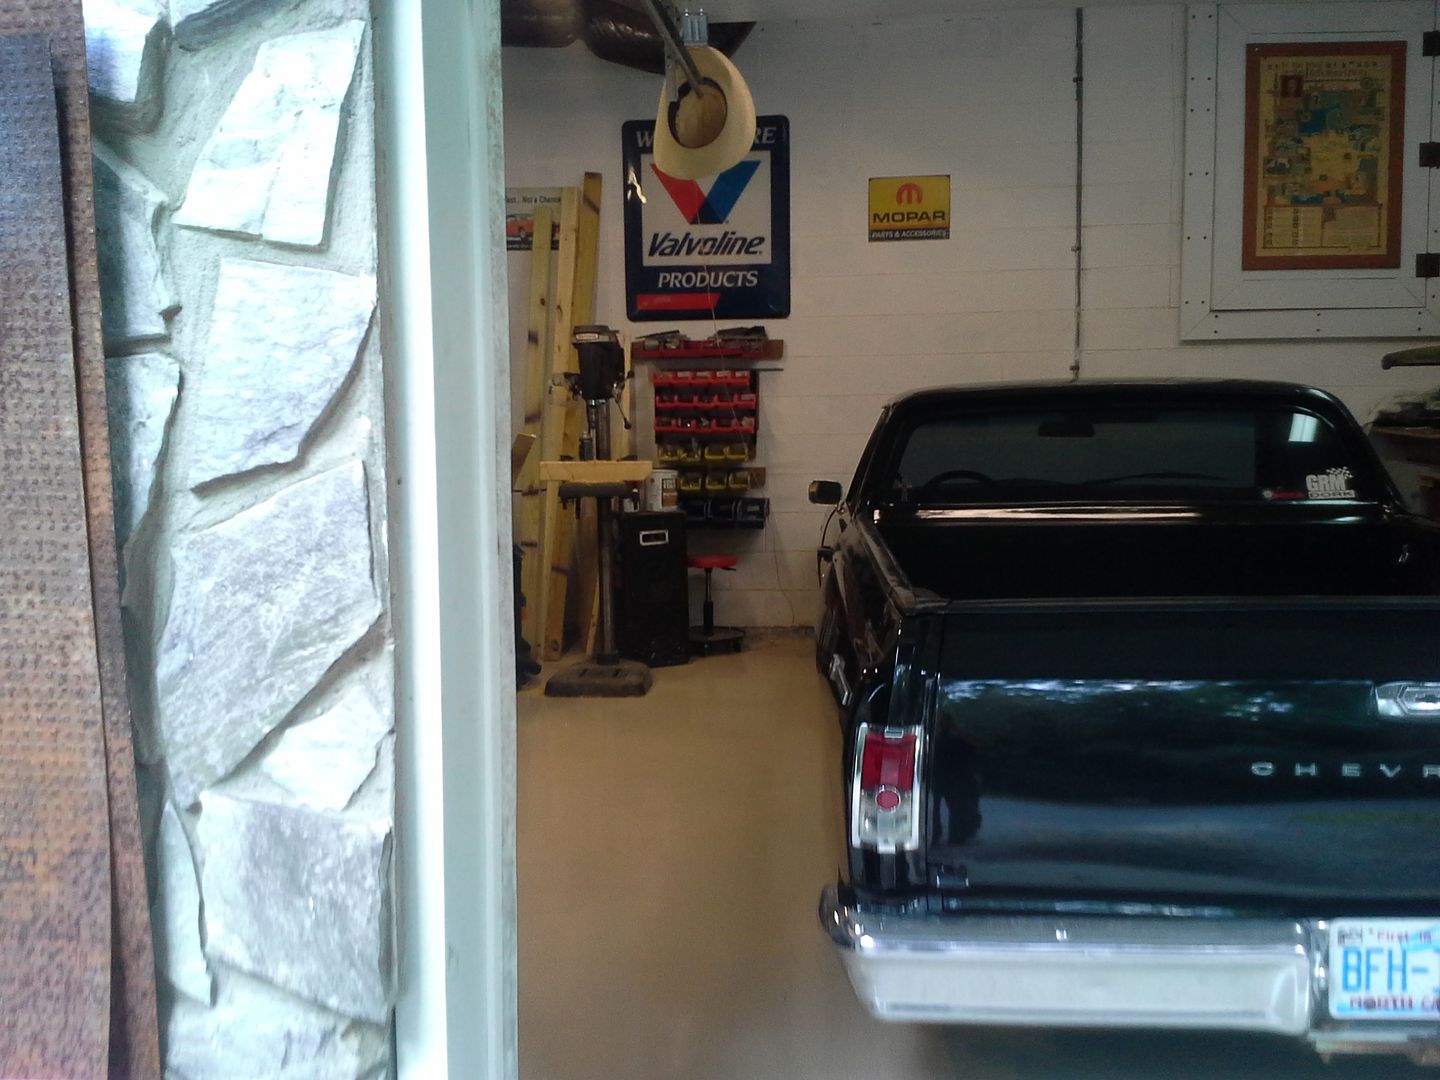 [/URL]
[URL=http://s54.photobucket.com/user/dusterbd13/media/1964%20elcamino/20150828_152424_zpsanux7hqa.jpg.html]
[/URL]
[URL=http://s54.photobucket.com/user/dusterbd13/media/1964%20elcamino/20150828_152424_zpsanux7hqa.jpg.html]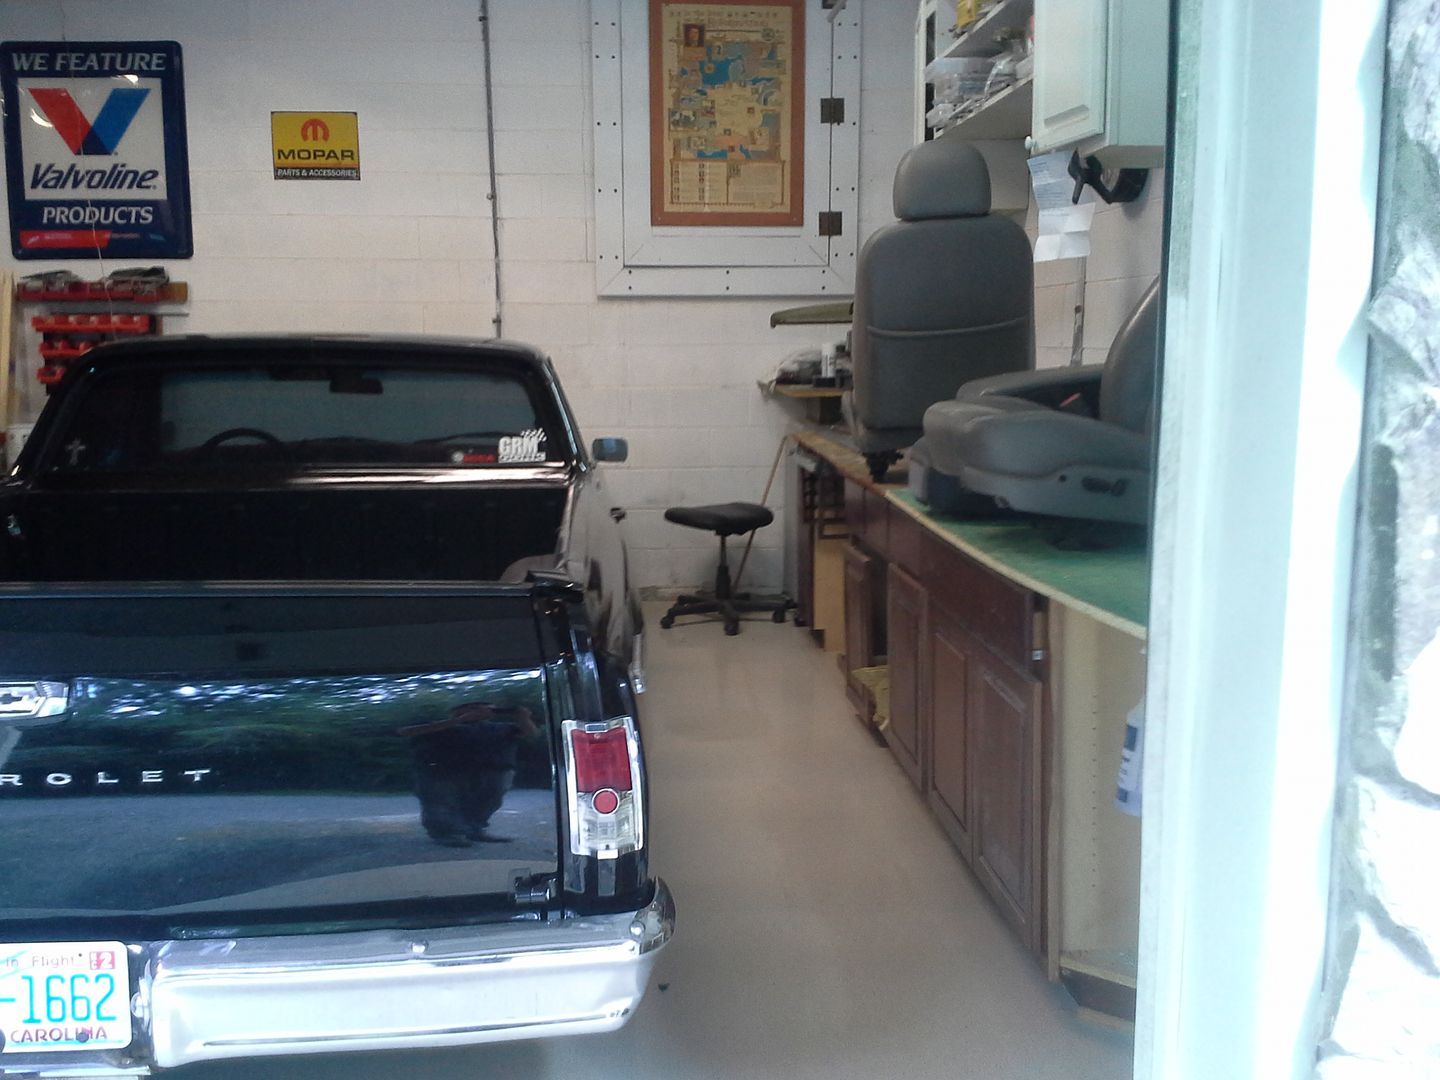 [/URL]
truck pictures were taken before the rest of the lights, and the floor needed mopped. but I already have more usable light than ever before, and proceeded to add two more four foot/two bulb fixtures, as well as two more four bulb fixtures. its incredibly well lit on that side now.
Michael

That looks like a really good place to work. Good job.

I swear I can see a huge difference in light with the new lights...
I know I can. Especially the amount under the car. It was a pleasure doing the bucket seat swap on the new floor with the improved lighting.
previous budget: 707
80 for sheet goods (sheet 3/4 osb, 2 sheets tempered hardboard, 1 sheet 5/8 b/c ply) and 5 1x4x8
new total: 787
[URL=http://s54.photobucket.com/user/dusterbd13/media/20150912_082840_zpsqzldh2ls.jpg.html] [/URL]
this go round finds us doing cabinetry and workbench. finally. working on the floor and sawhorses while tripping over stuff sucks.
anyway, started with this as my general idea:
[URL=http://s54.photobucket.com/user/dusterbd13/media/20150717_162255_zpswryx7mus.jpg.html]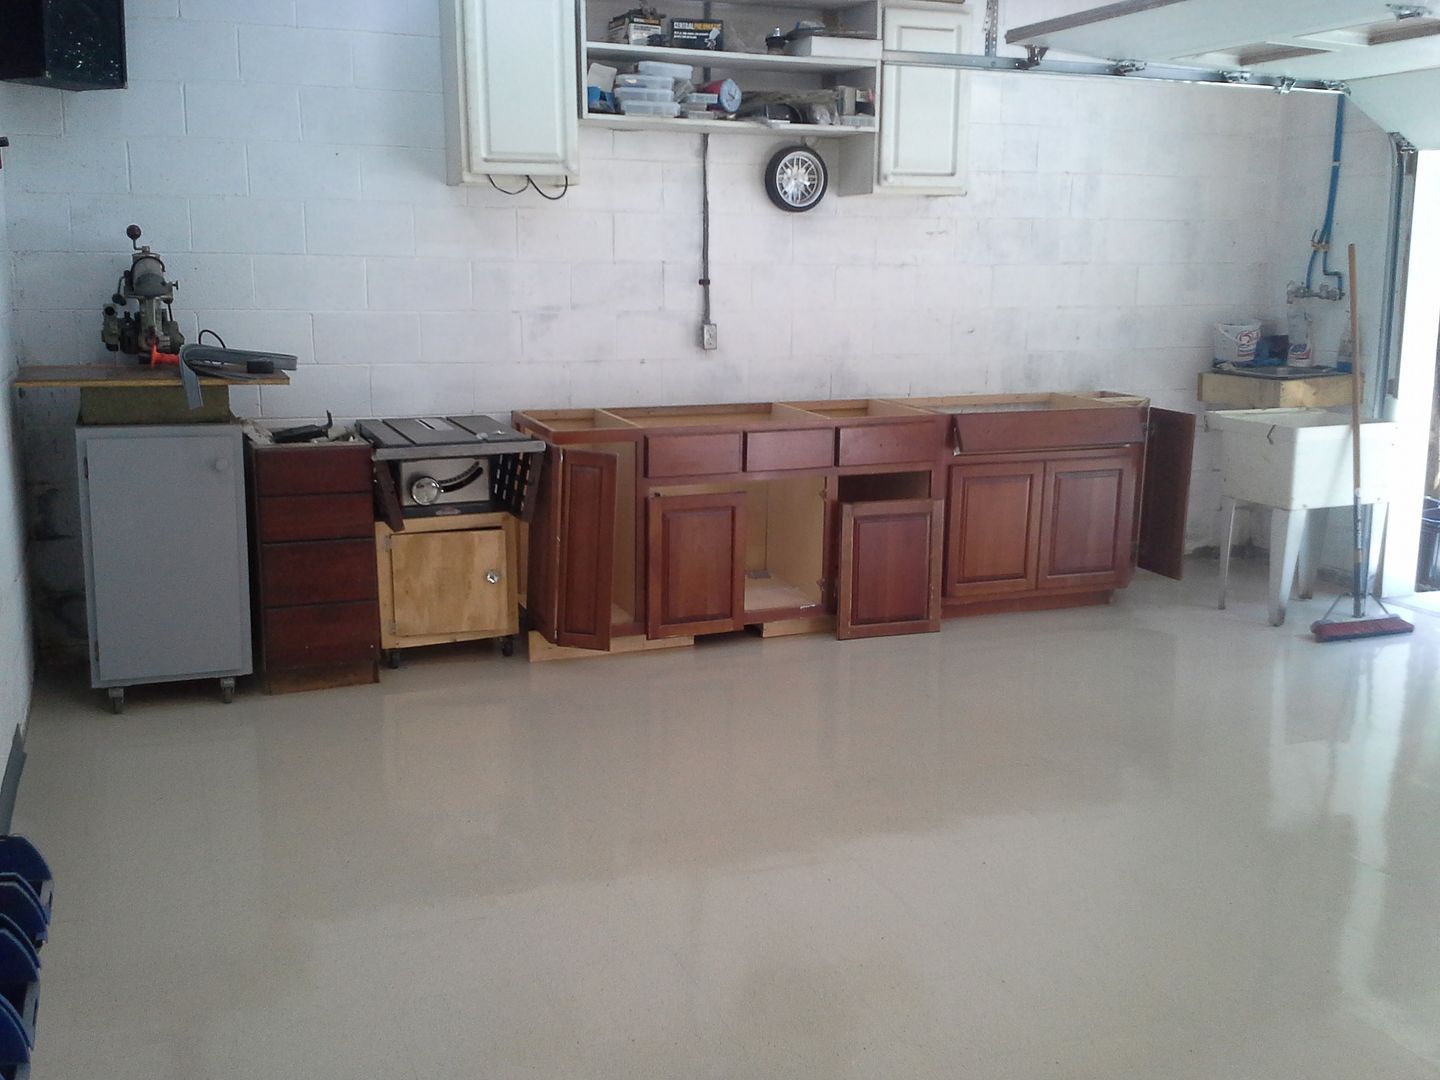 [/URL]
goal was to turn the big hole in the left most base cabinet into drawers, make the two false drawers functional drawers, remove the right most angled cabinet entirely, and build a base cabinet for the sink with drawers and rag storage, while using underneath for drain pans/buckets/etc.
I started on Friday night after selling some leftover chevelle parts to fund the supplies.
first, I needed to start at the back wall. the old dewalt radial arm slots into the corner. right up against the cinderblock. the block texture was acting like a cheese grater on the edge of my table, so I had to address it. to that end, I used part of a longbed over the rail bedliner that I cut up years ago, laminated to a 1x4 and tapconned to the wall.
[URL=http://s54.photobucket.com/user/dusterbd13/media/20150912_082850_zpsmzv6lyxg.jpg.html] [/URL]
[URL=http://s54.photobucket.com/user/dusterbd13/media/20150912_091825_zpszxddz7kp.jpg.html]
[/URL]
[URL=http://s54.photobucket.com/user/dusterbd13/media/20150912_091825_zpszxddz7kp.jpg.html]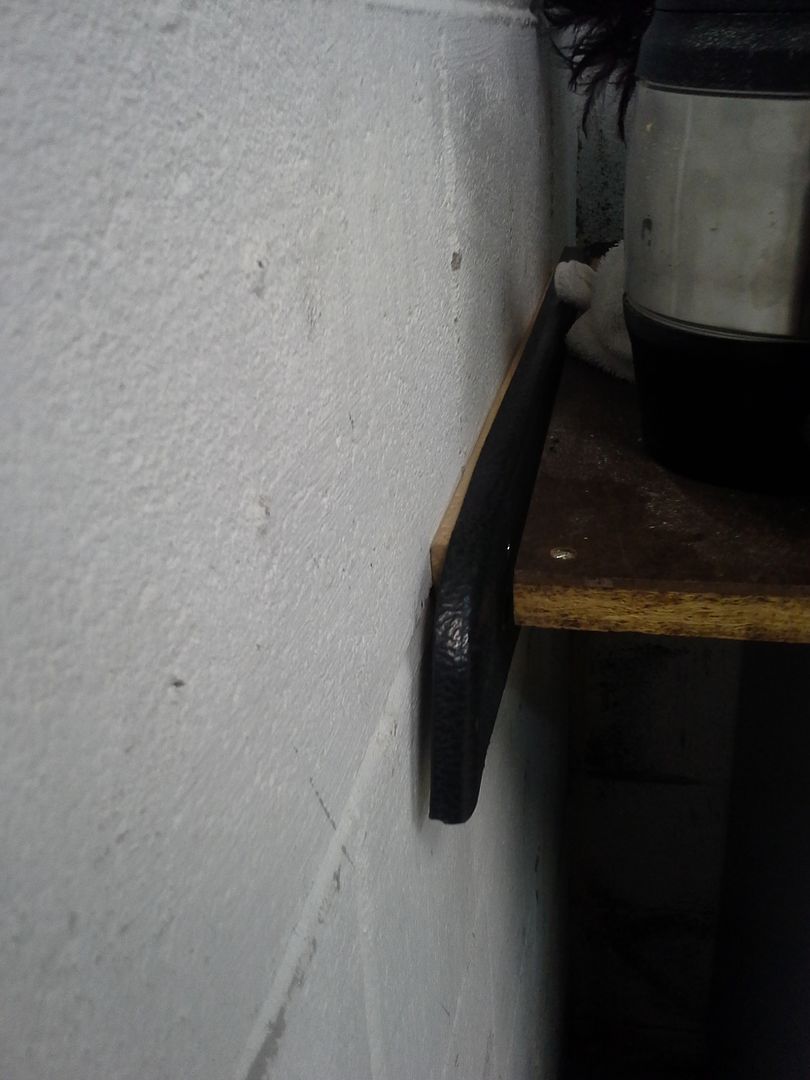 [/URL]
made one for the other side to protect the base cabinet to radial arm saw cabinet interface. also made two more for the hole where the table saw fits.
[URL=http://s54.photobucket.com/user/dusterbd13/media/20150912_091820_zpsmqguehln.jpg.html]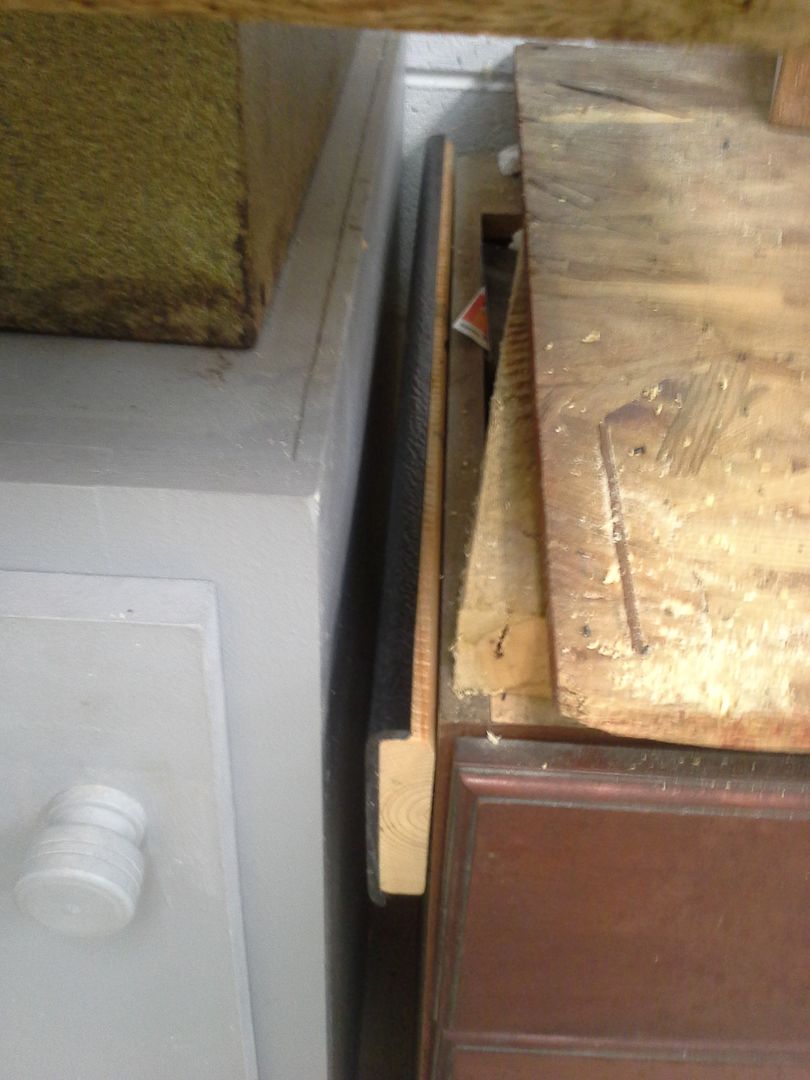 [/URL]
[URL=http://s54.photobucket.com/user/dusterbd13/media/20150912_091846_zpszujcyz5a.jpg.html]
[/URL]
[URL=http://s54.photobucket.com/user/dusterbd13/media/20150912_091846_zpszujcyz5a.jpg.html]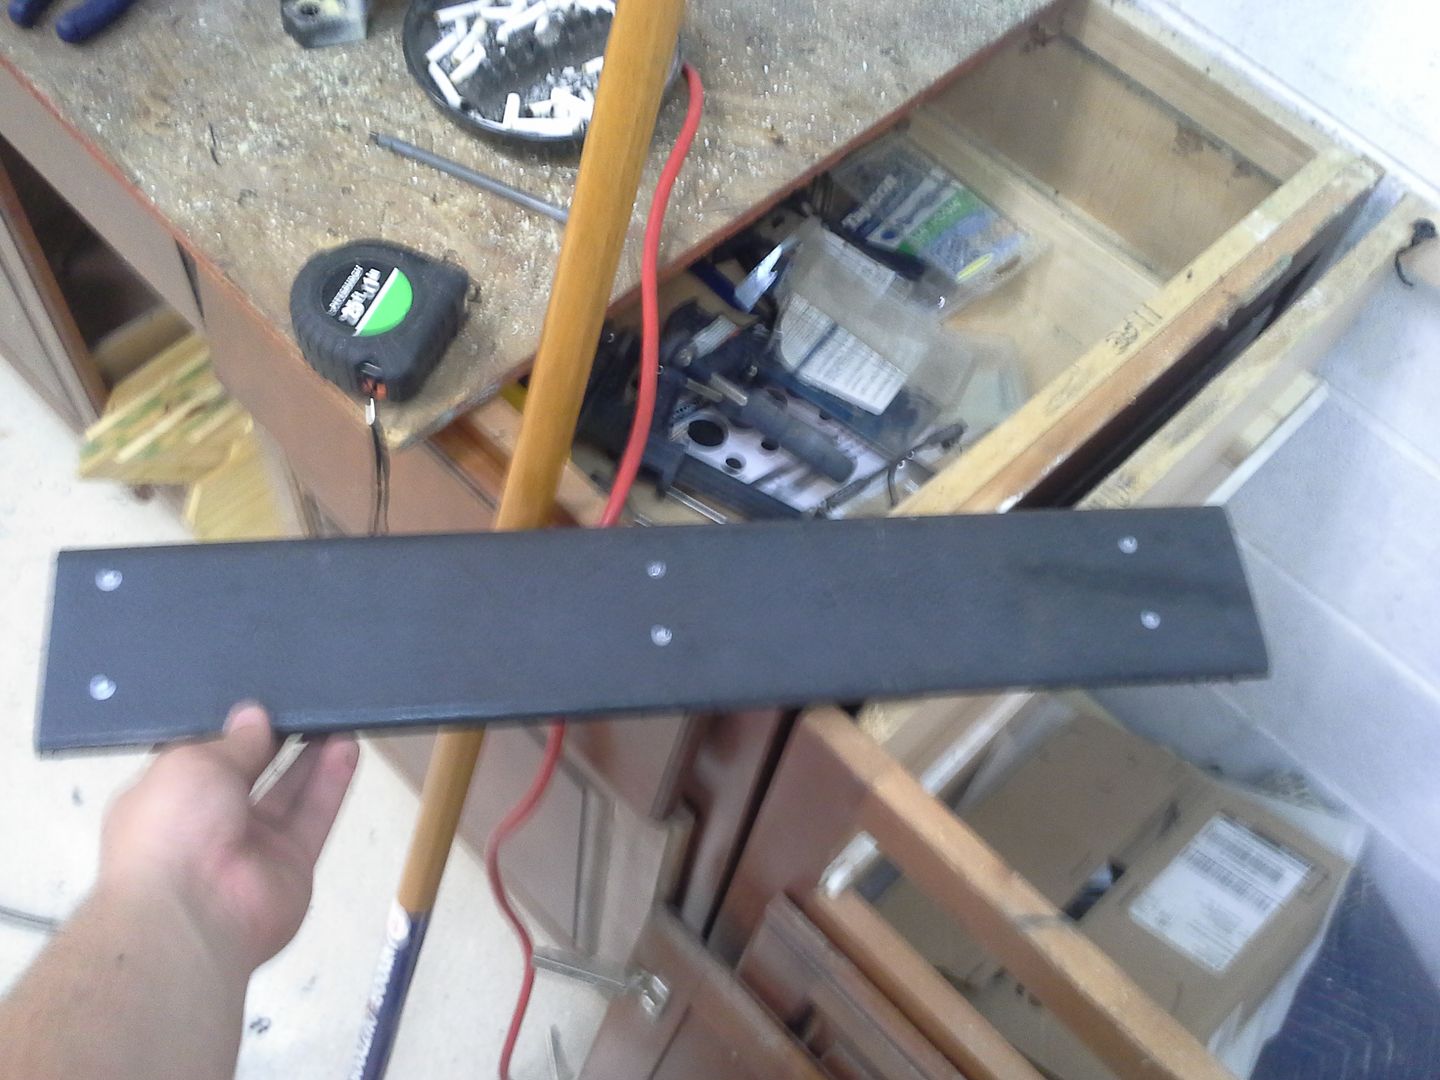 [/URL]
[URL=http://s54.photobucket.com/user/dusterbd13/media/20150912_091837_zpsy7uu7pet.jpg.html]
[/URL]
[URL=http://s54.photobucket.com/user/dusterbd13/media/20150912_091837_zpsy7uu7pet.jpg.html]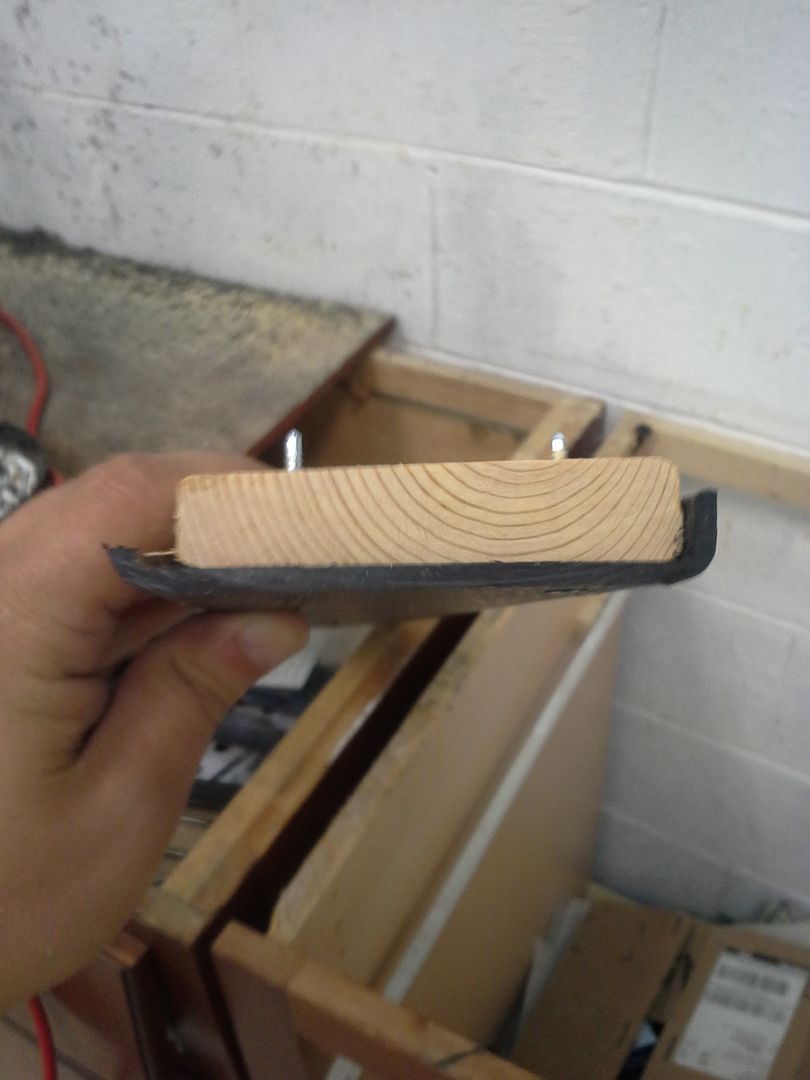 [/URL]
these work really well. works well, and the saws just bounce off instead of digging in or getting damaged.
so I then took my end 4 drawer stack and placed it exactly where I wanted it, leveled it back to front and side to side. it was at this point I realized the overall height was an inch shorter than the other cabinets. so I made a spacer ring from scrap, and screwed and glued it to the top of the stack. problem solved.
now, on to the hole that will become drawers. first, cut a piece of 3/4 ply from my pile to fit as a whole side. drilled countersunk holes for 1 1/4 screws, as well as pocket holes for a piece of face frame. glued and screwed it into place. then, ripped a 1x4 down into a 2 inch and 1 1/4 pair of strips. use the 1 1/4 as the edge of my face frame to dress out that corner. glued and pocket screwed into place, and that end was done.
[URL=http://s54.photobucket.com/user/dusterbd13/media/20150911_210847_zpsr5oy2acu.jpg.html]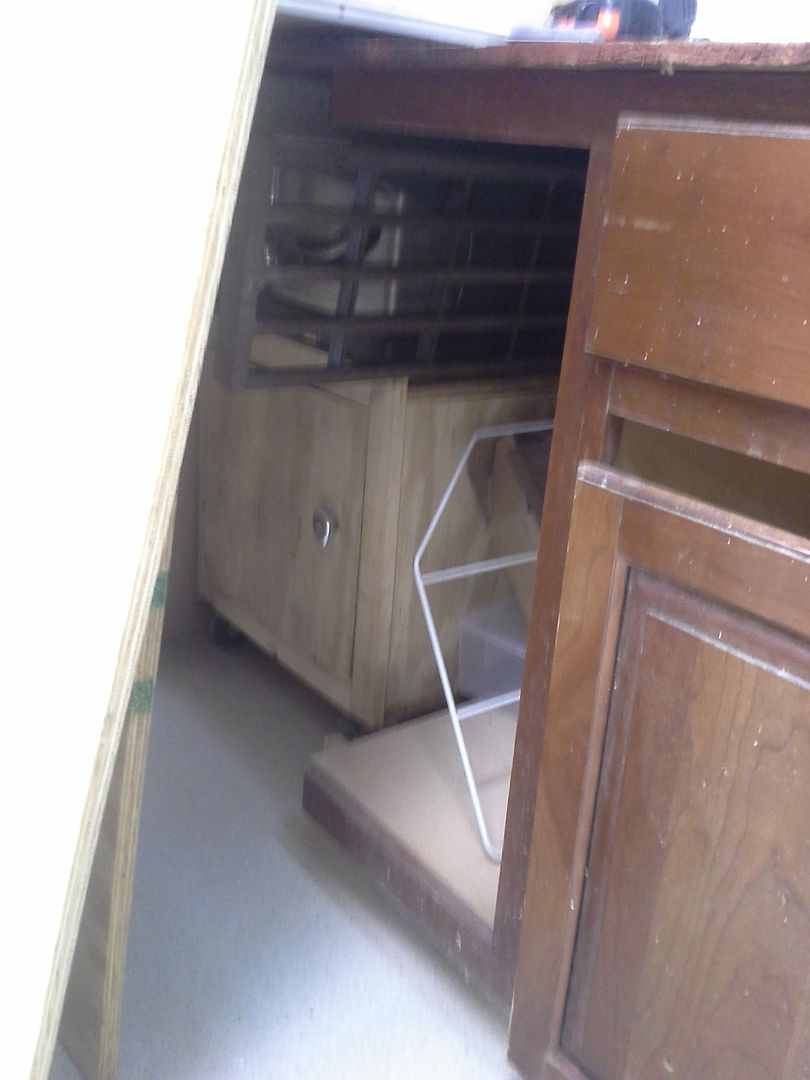 [/URL]
[URL=http://s54.photobucket.com/user/dusterbd13/media/20150912_153941_zpsueqmdzl7.jpg.html]
[/URL]
[URL=http://s54.photobucket.com/user/dusterbd13/media/20150912_153941_zpsueqmdzl7.jpg.html]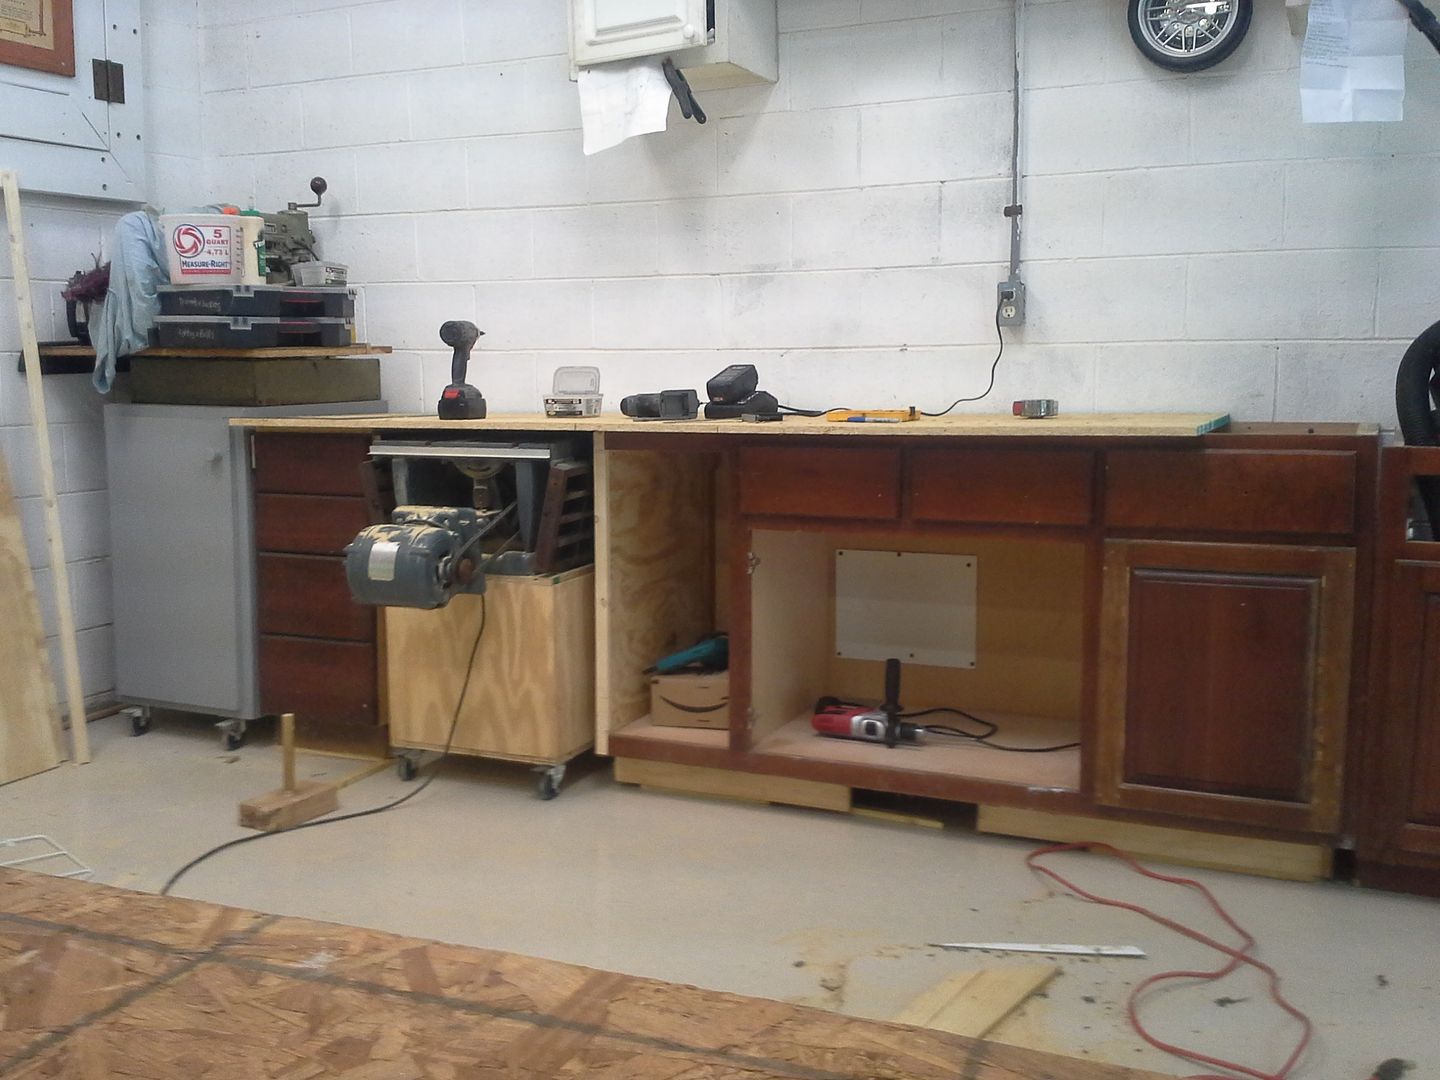 [/URL]
I then patched a really ugly hole in the back of the cabinet from where the plumbing went through with a scrap of ceiling. while doing this, the back fell off. turns out the backs were only held on with a couple of staples. so I used a bunch of 3/4 screws and glue. aint coming off now. the patch is ugly, but functional. its just to keep dirt and such out.
[URL=http://s54.photobucket.com/user/dusterbd13/media/20150911_210852_zpsl3xlpv9j.jpg.html]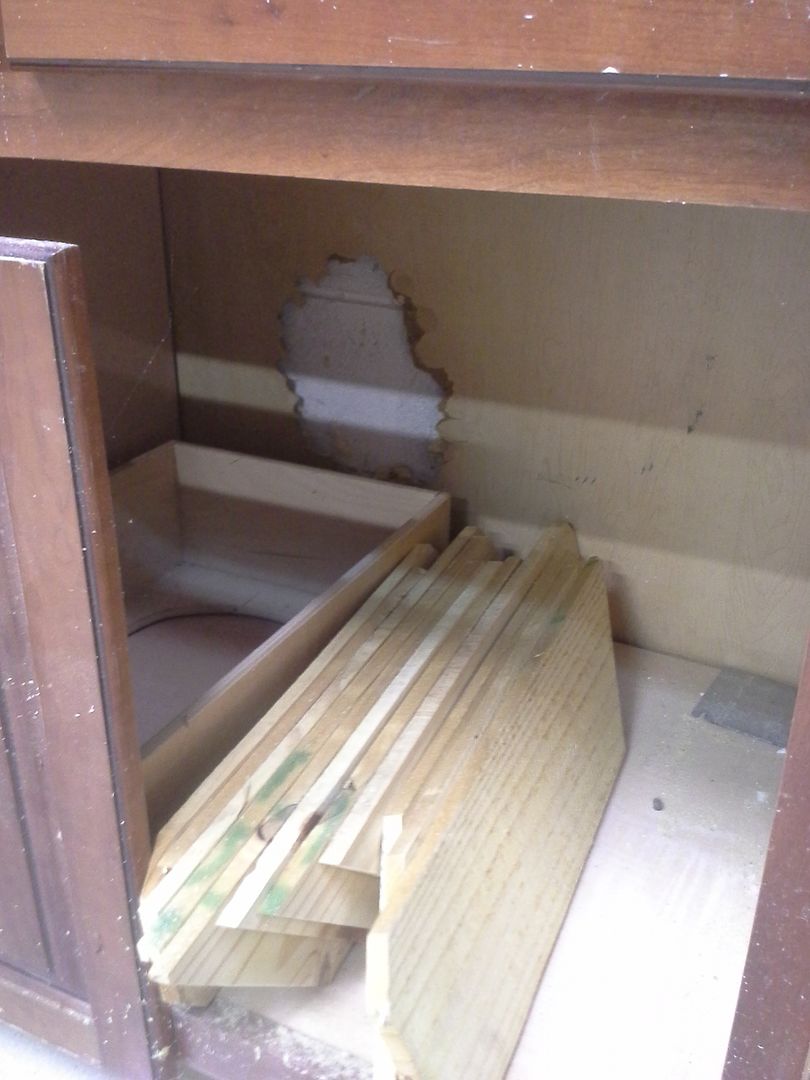 [/URL]
[URL=http://s54.photobucket.com/user/dusterbd13/media/20150912_153951_zpsmxugqglb.jpg.html]
[/URL]
[URL=http://s54.photobucket.com/user/dusterbd13/media/20150912_153951_zpsmxugqglb.jpg.html]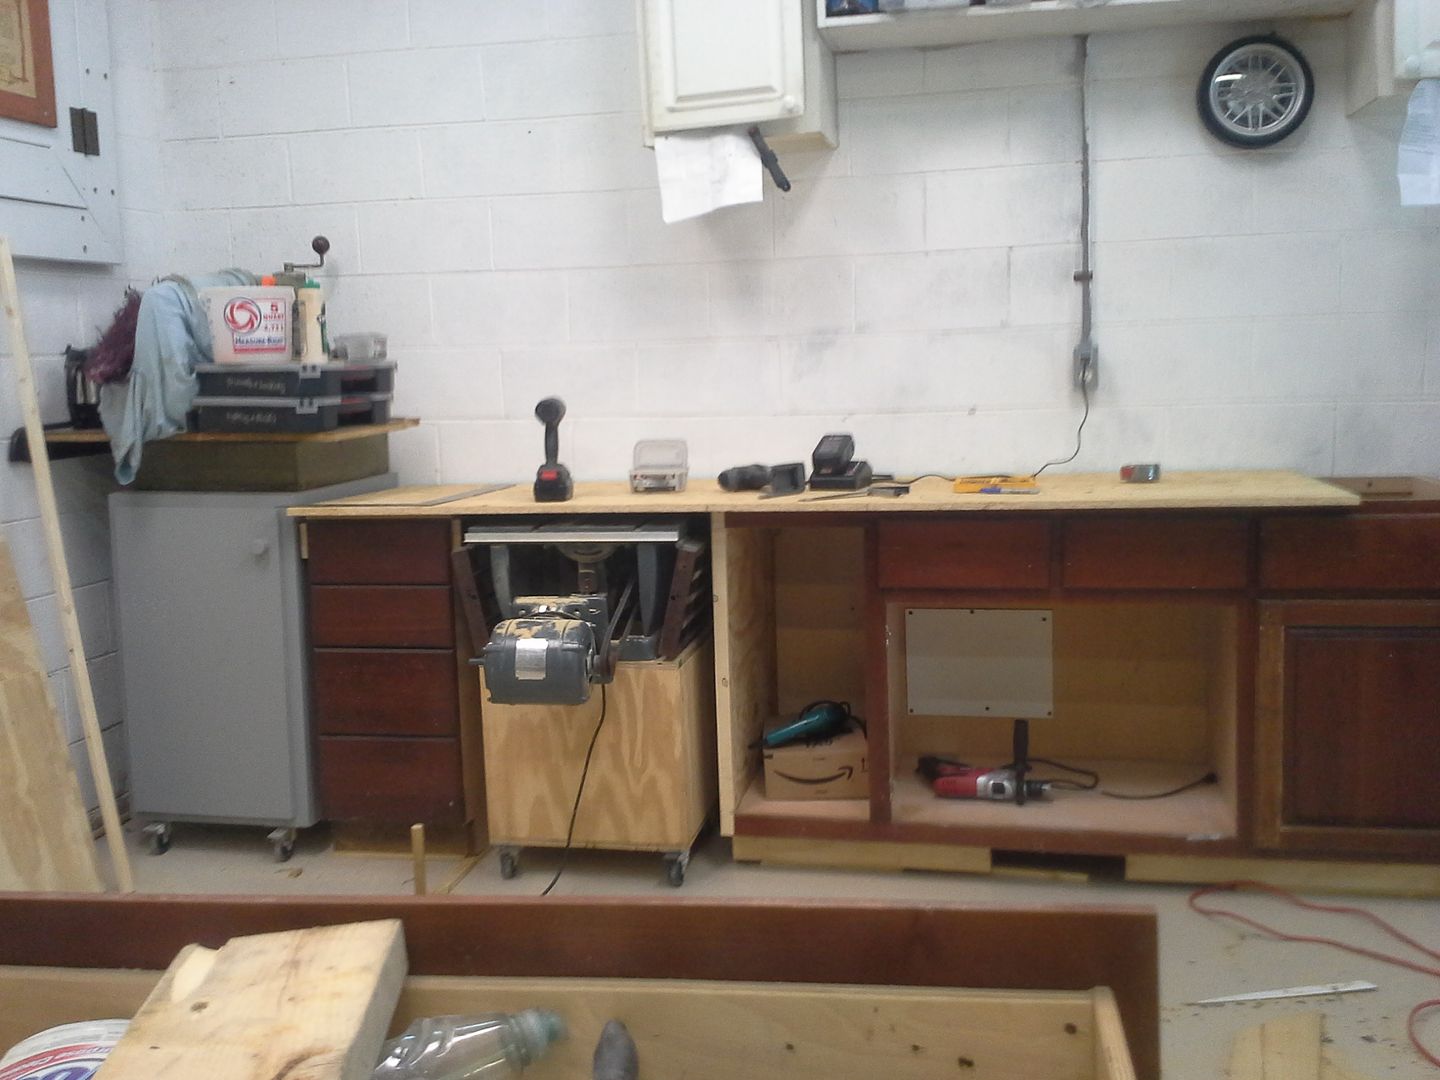 [/URL]
leveled the cabinet, tapconned it to the wall. aint moving. ever. placed a 28 inch wide, 8 foot long piece of osb over top, and screwed it down every 8 inches. front and back, as well as along all the vertical walls of every cabinet. its solid. next step will be creating the worksurface. but OSB was the underlayment.
next cabinet in the row was the one with the funky angled end. the end had to go away, and the sawzall and hammer made quick work of it. used a plunge cut attachment on the multitool to cut the bottom of the cabinet flush with the new side, and my router with a flush cut bit to trim the face frame to size. should have used the circular saw, as it would have been quicker and just as easy.
[URL=http://s54.photobucket.com/user/dusterbd13/media/20150911_210831_zps6dooggiu.jpg.html]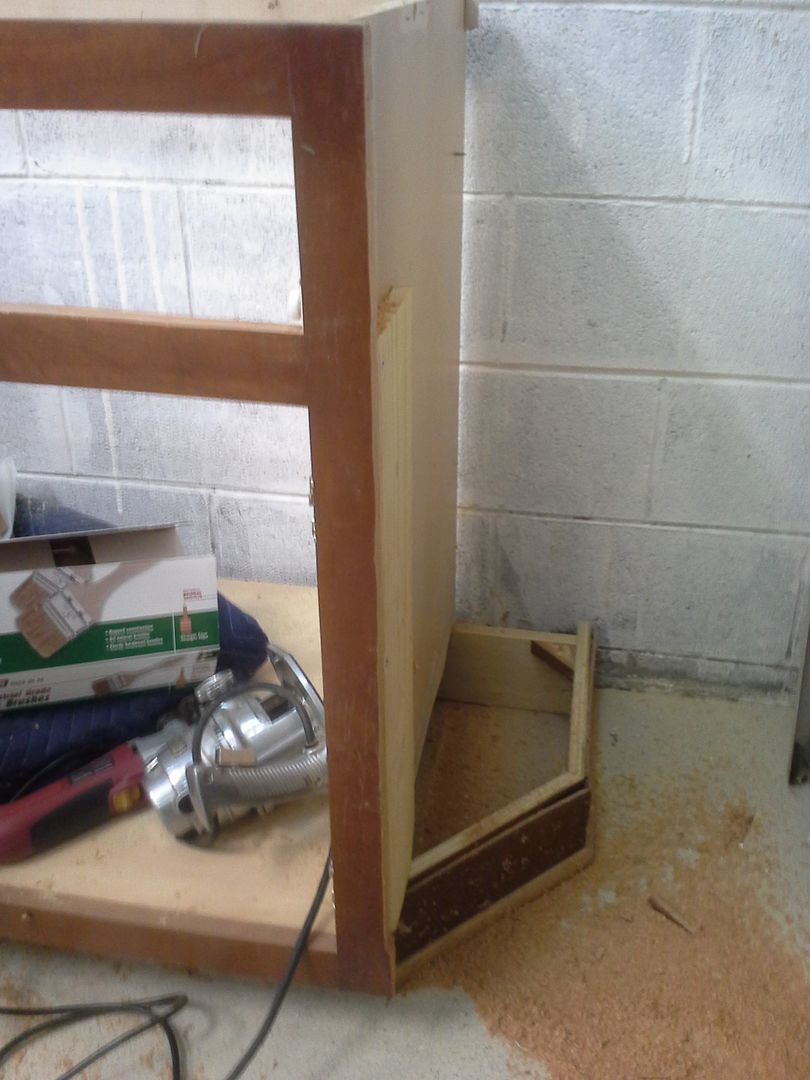 [/URL]
[URL=http://s54.photobucket.com/user/dusterbd13/media/20150911_210835_zpsdc1uyvnu.jpg.html]
[/URL]
[URL=http://s54.photobucket.com/user/dusterbd13/media/20150911_210835_zpsdc1uyvnu.jpg.html]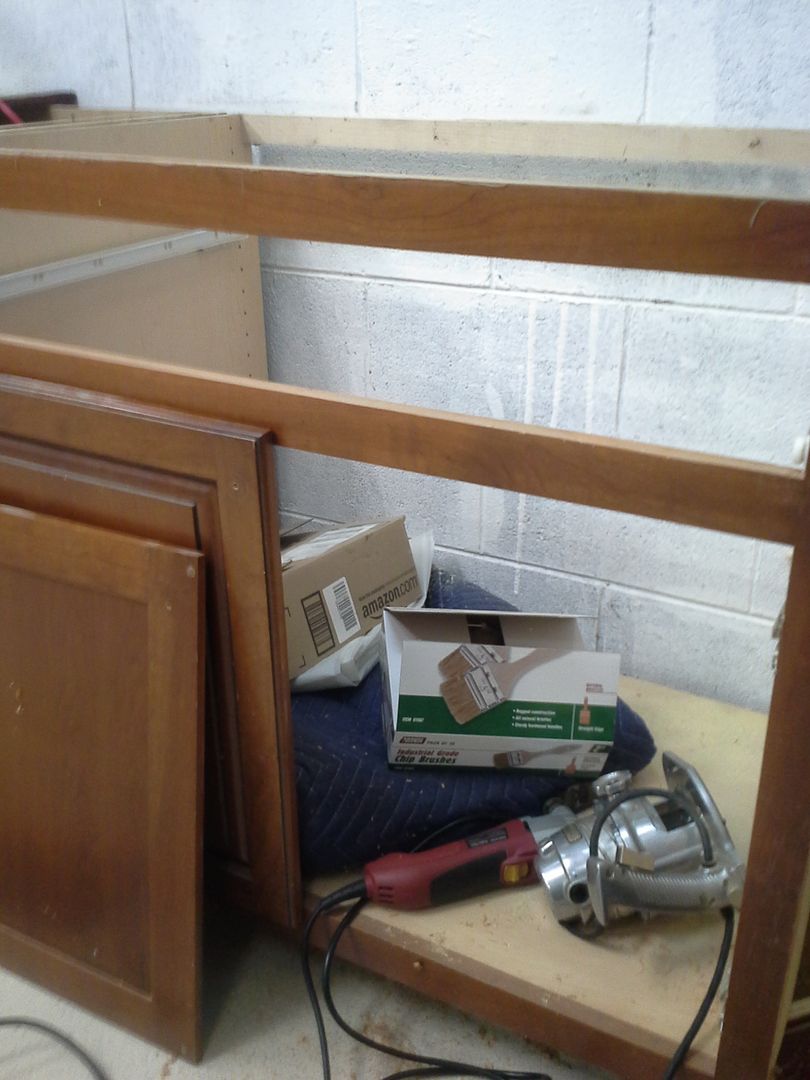 [/URL]
there was no back to this one, so I used a piece of tempered hard board and made one.
[URL=http://s54.photobucket.com/user/dusterbd13/media/20150913_105119_zps0kioi3vo.jpg.html]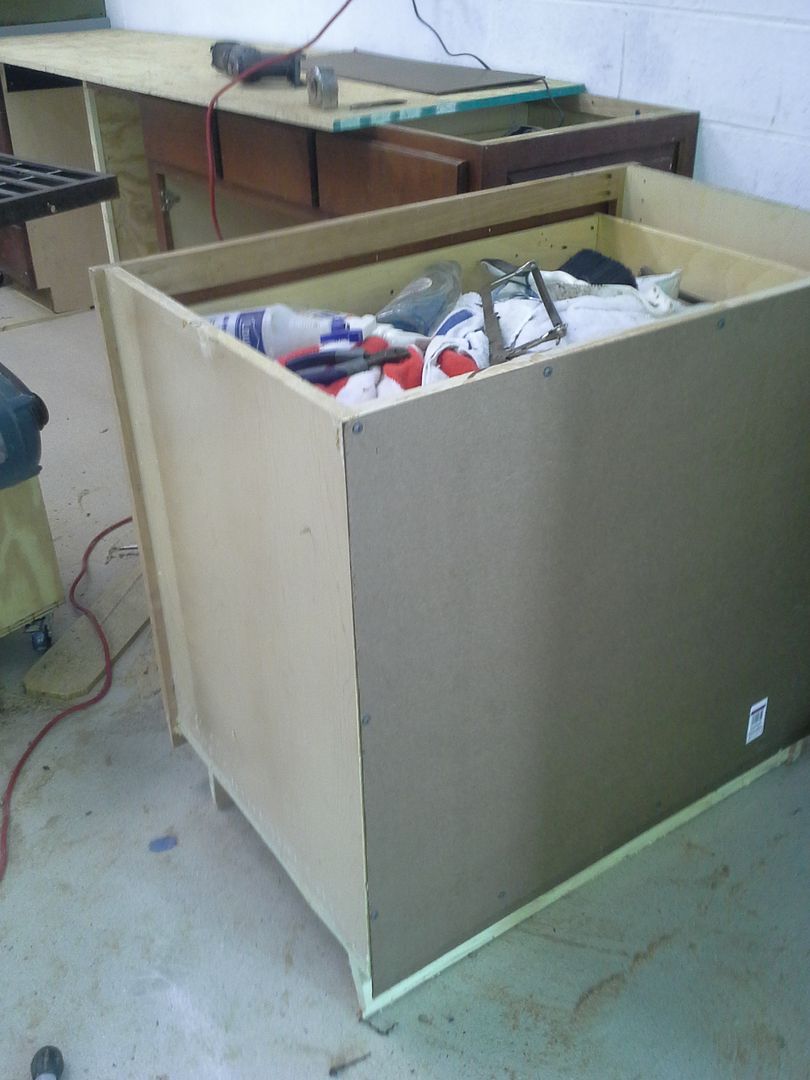 [/URL]
next was the sink cabinet. this cabinet will not really support any significant weight, and the workbench surrounding it wont see much abuse, so it doesn't need to be overkill strong. im also broke, so materials cost is significant at this point. I used a piece of 3/4 osb flooring my dad gave me for the base, ripped some used 2x6 down to 5 inches tall for the toe kick area, and two pieces of 5/8 ply for the sides. piece of hardboard for the back, and the two interior walls were bore 3/4 osb. all screwed and glued. had to cut a hole for the drain for the sink, and sized the interior walls to where it would be a friction fit when the sink is dropped in. left the front of the toe kick open for somewhere to slide my drip pans for storage.
[URL=http://s54.photobucket.com/user/dusterbd13/media/20150913_105123_zpscuoyhucd.jpg.html]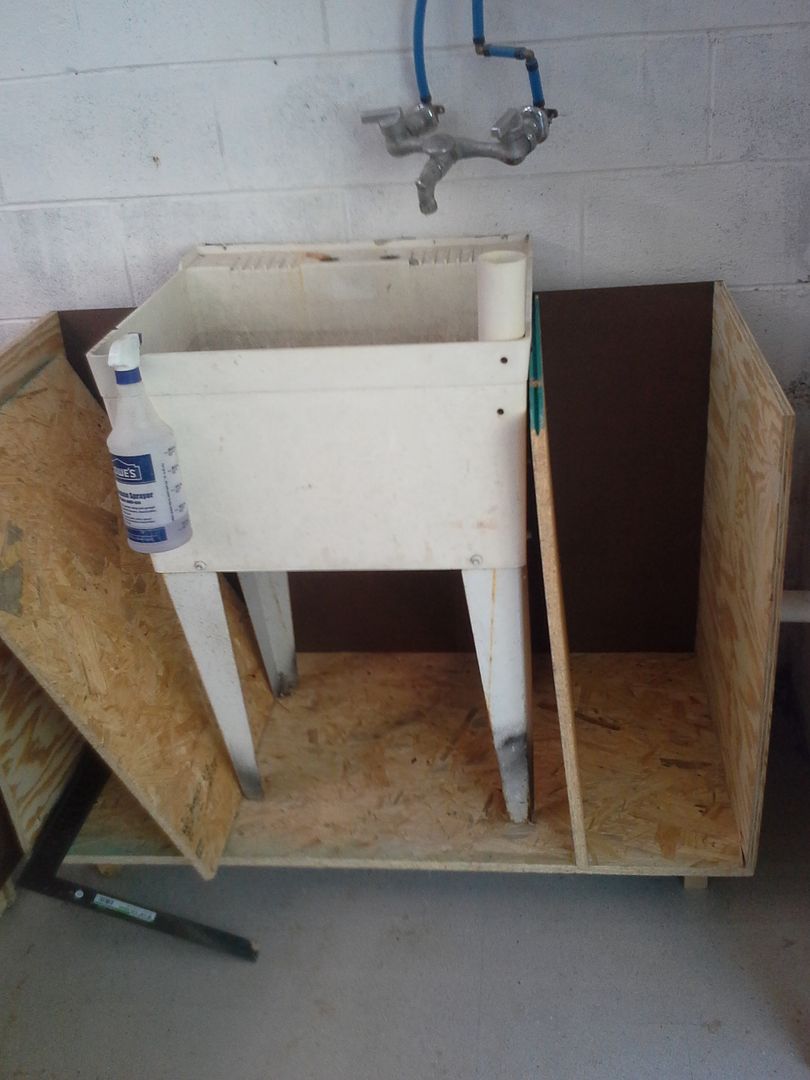 [/URL]
[URL=http://s54.photobucket.com/user/dusterbd13/media/20150913_105142_zpsyo5ftyal.jpg.html]
[/URL]
[URL=http://s54.photobucket.com/user/dusterbd13/media/20150913_105142_zpsyo5ftyal.jpg.html] [/URL]
[URL=http://s54.photobucket.com/user/dusterbd13/media/20150915_073629_zpsx1bidua6.jpg.html]
[/URL]
[URL=http://s54.photobucket.com/user/dusterbd13/media/20150915_073629_zpsx1bidua6.jpg.html]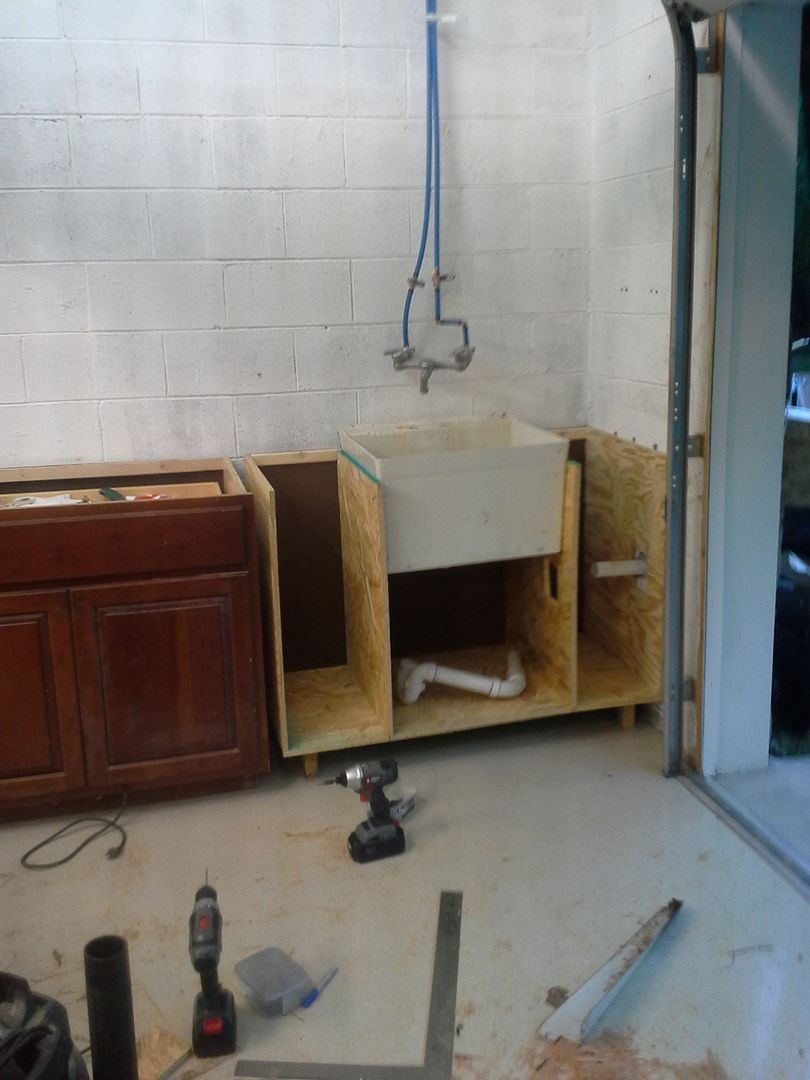 [/URL]
[URL=http://s54.photobucket.com/user/dusterbd13/media/20150915_073634_zpslfneaho8.jpg.html]
[/URL]
[URL=http://s54.photobucket.com/user/dusterbd13/media/20150915_073634_zpslfneaho8.jpg.html]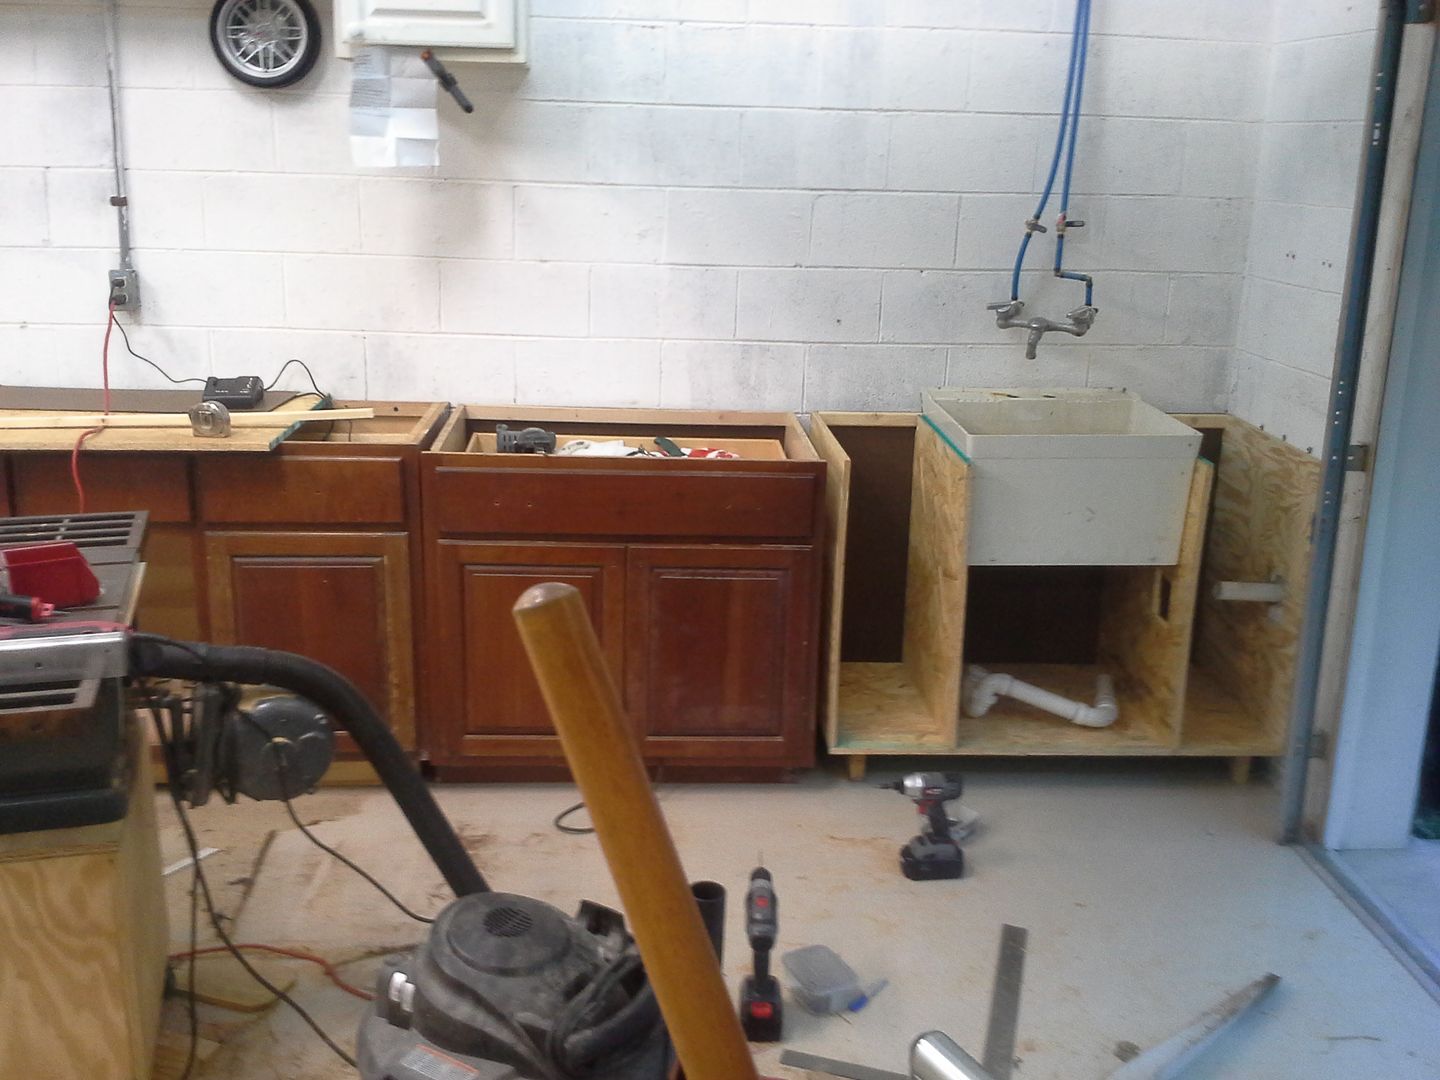 [/URL]
need to build a face frame for the final cabinet, as well as install a reinforcement rail for the front of the sink. will also add some screws for more secure attachment of the sink to base, as I just don't trust a 1/16 lip and friction fit in this application. the cabinet will also get painted inside and out to better protect it from water.
that's it for today.
previous total: 787
money spent: 13 for plumbing supplies 31 for MDF
new total: 831
when I updated last week, I had roughed in the sink cabinet. I didn't take a lot of pictures of finishing the cabinet, but I ripped some of the furring strips to two inch wide sections, assembled with glue and pocket screws, and then glued and pocked screwed the face frame to the carcass. proceeded to seal the whole thing with Zinsser coverstain primer, and topcoat the section under the sink with gloss white. pushed it into place, and them moved the middle cabinet in. leveled the cabinets, tapconned them to the wall, and away we go!!
I also laid down the rest of my first layer of countertop, which was 3/4 OSB underlayment. its already very solid at this point, but I still have more to go.
[URL=http://s54.photobucket.com/user/dusterbd13/media/20150918_185420_zpszjopt15n.jpg.html]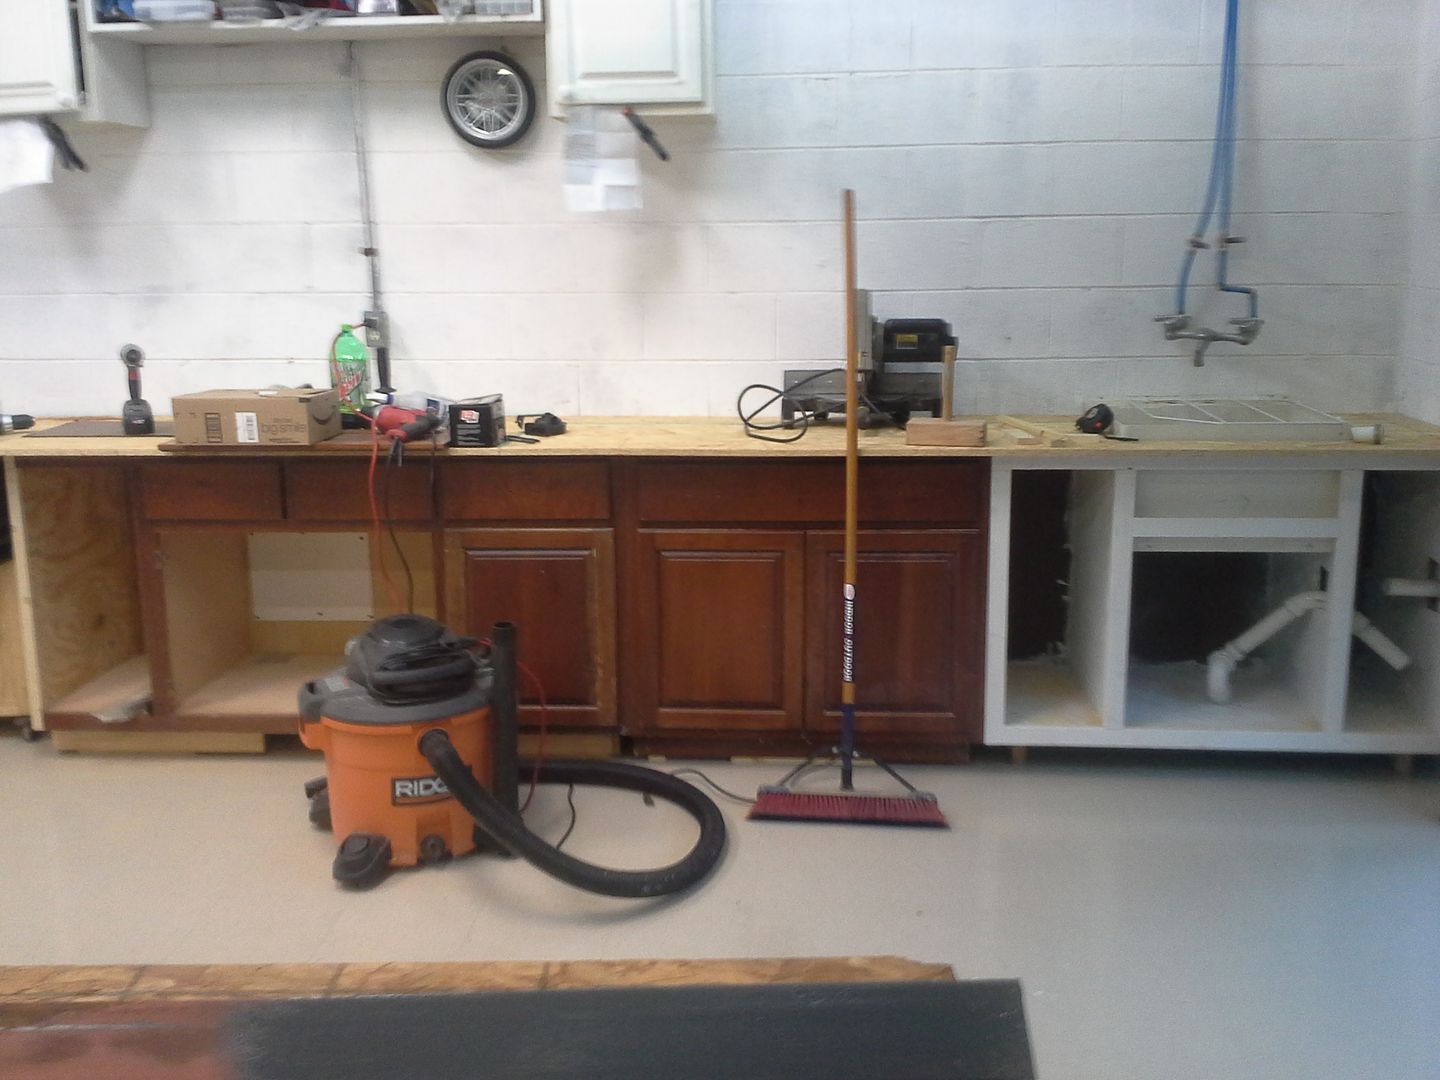 [/URL]
next, I wanted some sort of backsplash on the bench. my dad has one that's about 4 inches from the wall, where he stores spray cans of chemicals, fluids, etc that he uses on a regular basis. I really like that feature of his bench, and wanted to replicate it. to do so, I looked at what I had around. I found that I had never used/gotten rid of the lintels I removed when I installed the garage doors after buying the house. the wall where the doors are originally contained a French door and a window. we added garage doors about 4 hours after closing on the house. that was my first shop renovation I ever performed, creating the shop.
anyway, the lintels are 3/8 thick 4x4 steel angle iron. serious and profound overkill for a backsplash, but if I butt it up against the wall, and attach it to the OSB surface, it will provide a serious surface for beating against when necessary.
so I cleaned and painted them the craftsman blue/gray that I used on my table saw restorations. still had 3/4 of a can left, and its glossy and durable.
[URL=http://s54.photobucket.com/user/dusterbd13/media/20150918_185406_zpseqlgbvlr.jpg.html]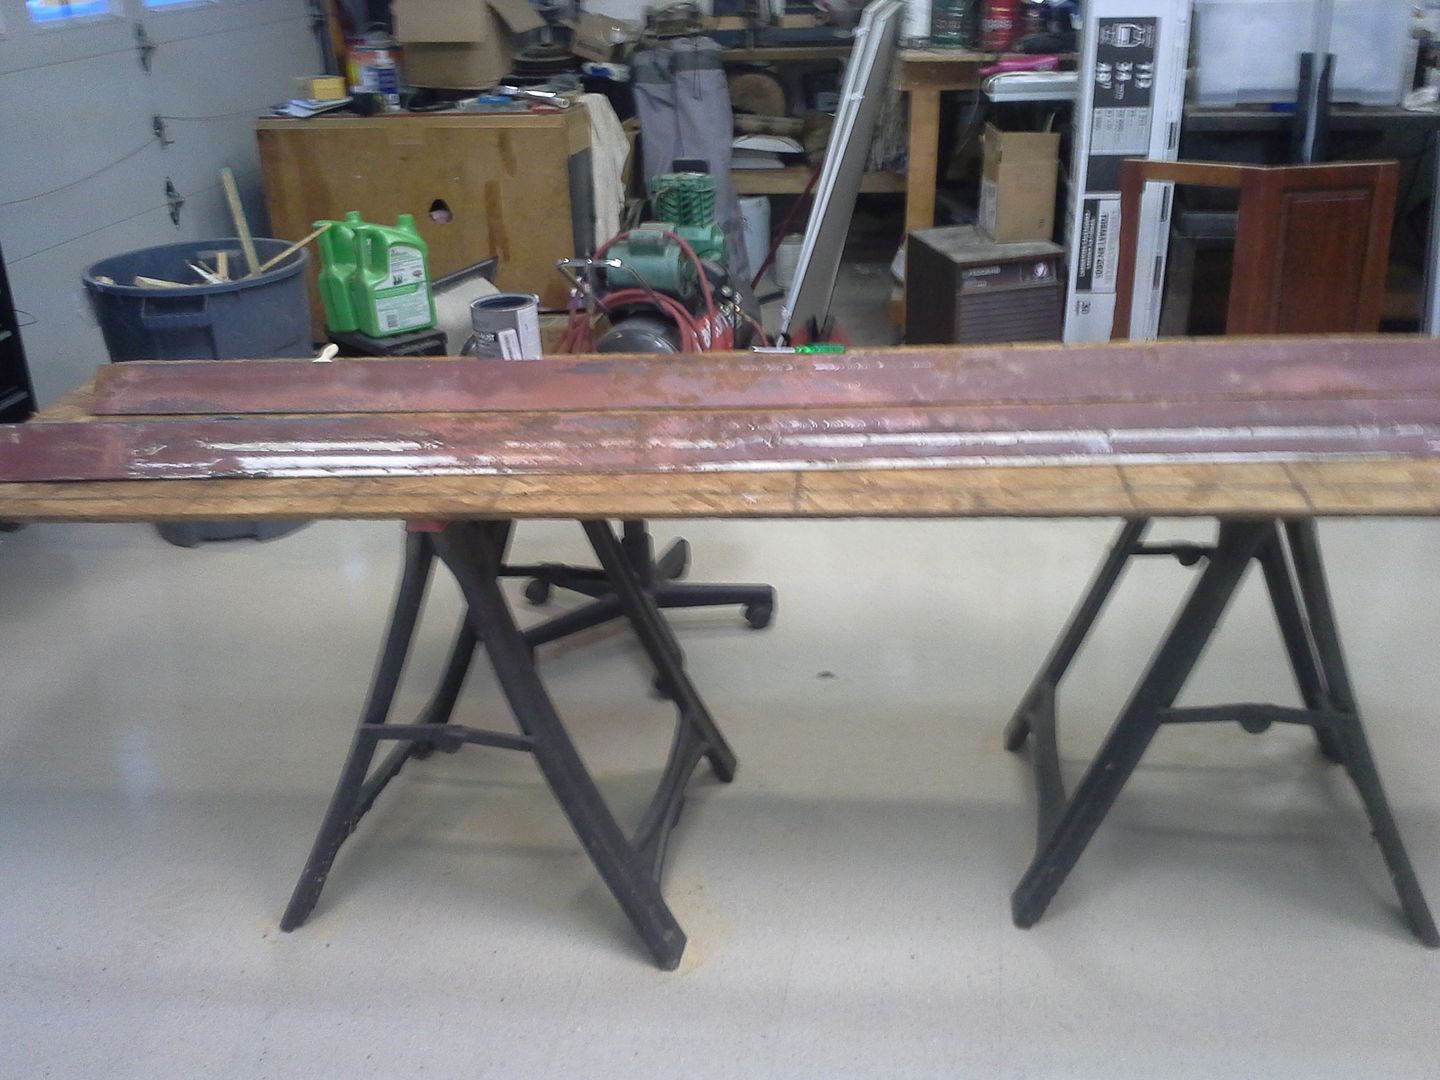 [/URL]
[URL=http://s54.photobucket.com/user/dusterbd13/media/20150918_185415_zpszrrdixab.jpg.html]
[/URL]
[URL=http://s54.photobucket.com/user/dusterbd13/media/20150918_185415_zpszrrdixab.jpg.html]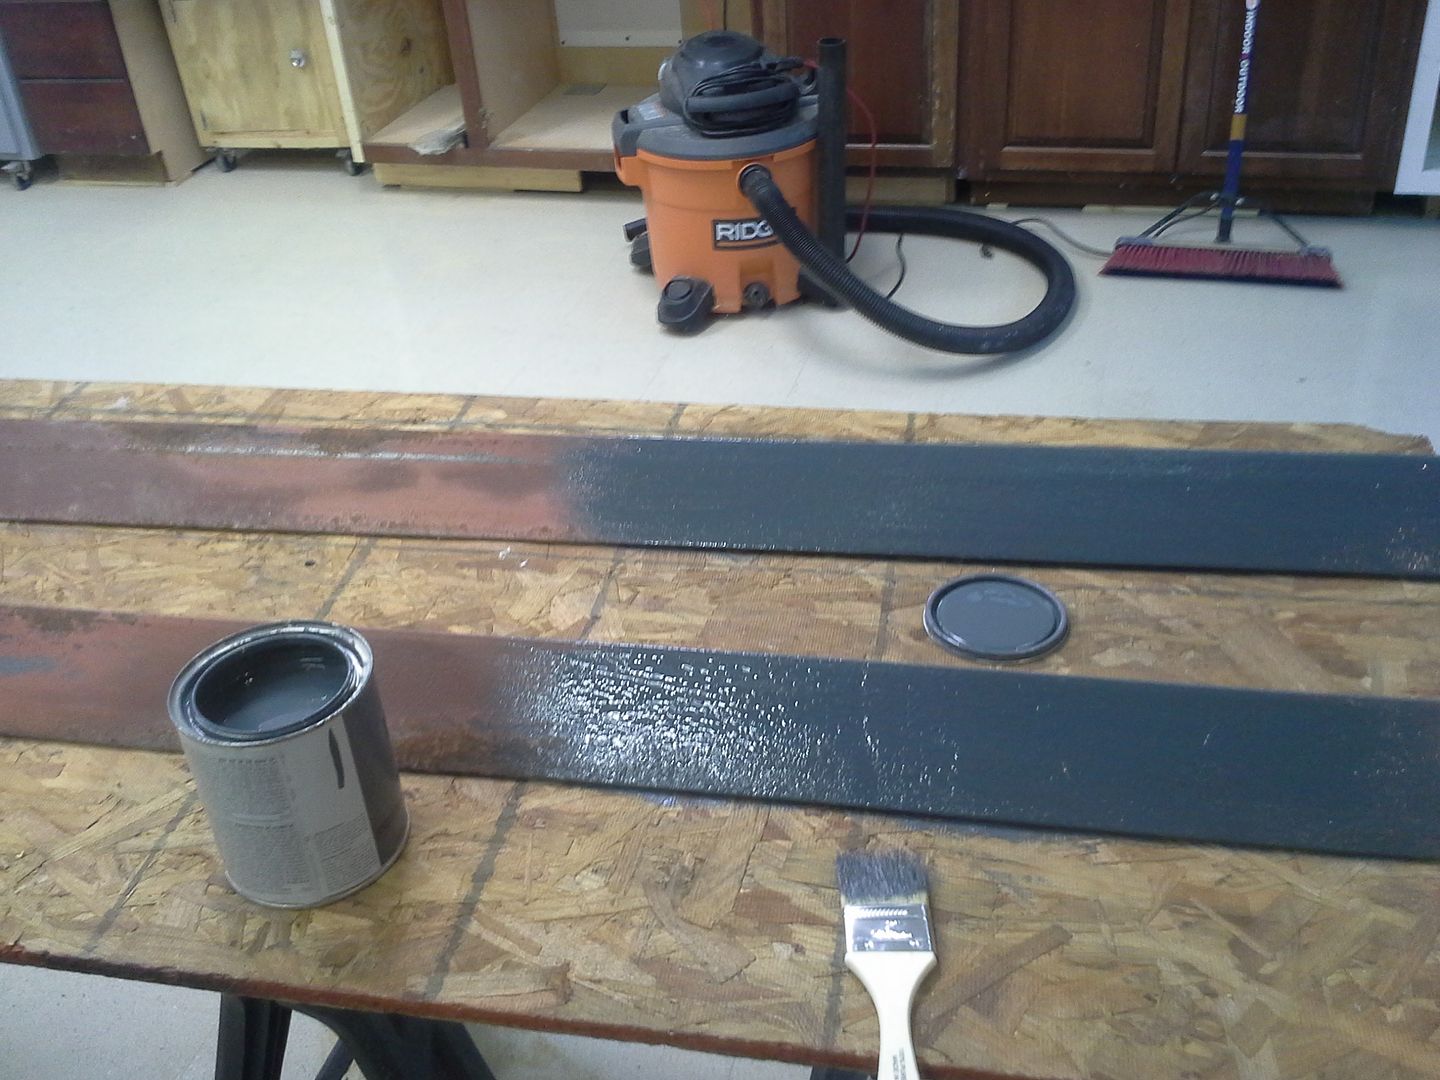 [/URL]
[URL=http://s54.photobucket.com/user/dusterbd13/media/20150918_191001_zpsz1l2gdlp.jpg.html]
[/URL]
[URL=http://s54.photobucket.com/user/dusterbd13/media/20150918_191001_zpsz1l2gdlp.jpg.html]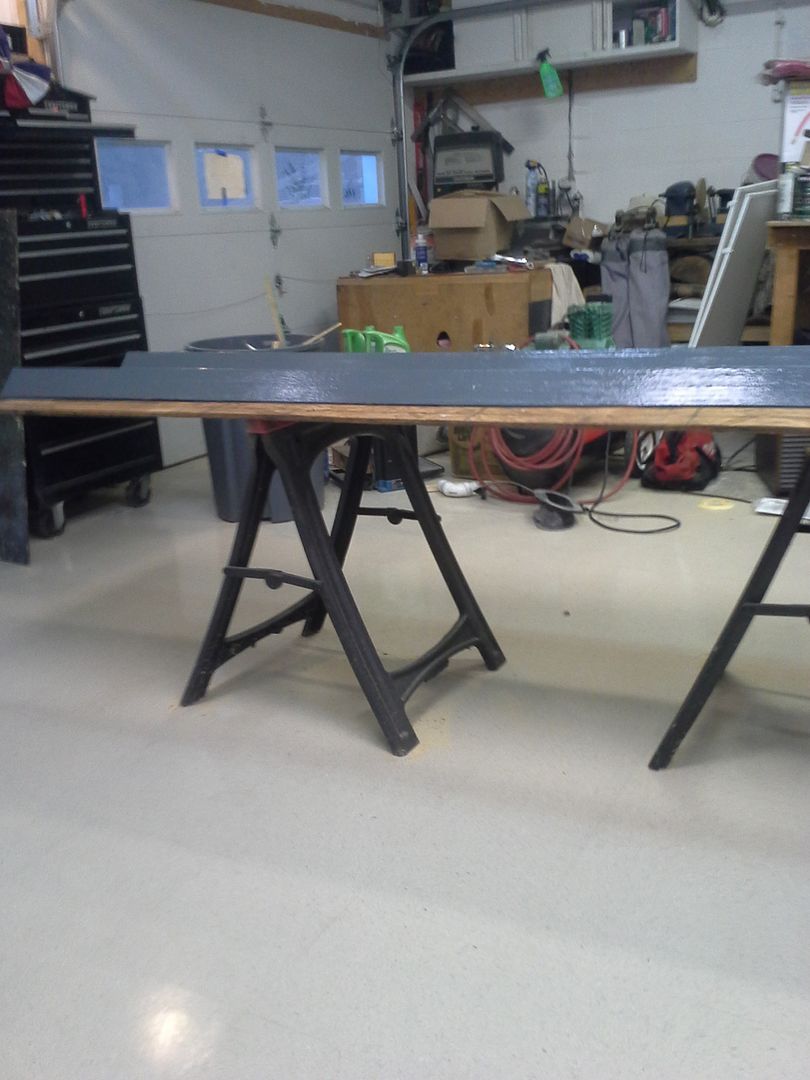 [/URL]
I had some concerns about how to cut this stuff to length, as I have never had much success cutting square with a saws all or 4 inch grinder. I found a 10 inch metal chop saw blade in my radial arm saw cabinet (got no idea why/where I got it) and tossed it in my miter saw. it worked. but now I have to thoroughly disassemble and clean my miter saw, as its all full of grit and shavings.
[URL=http://s54.photobucket.com/user/dusterbd13/media/20150921_072419_zpsjpzj2vtk.jpg.html]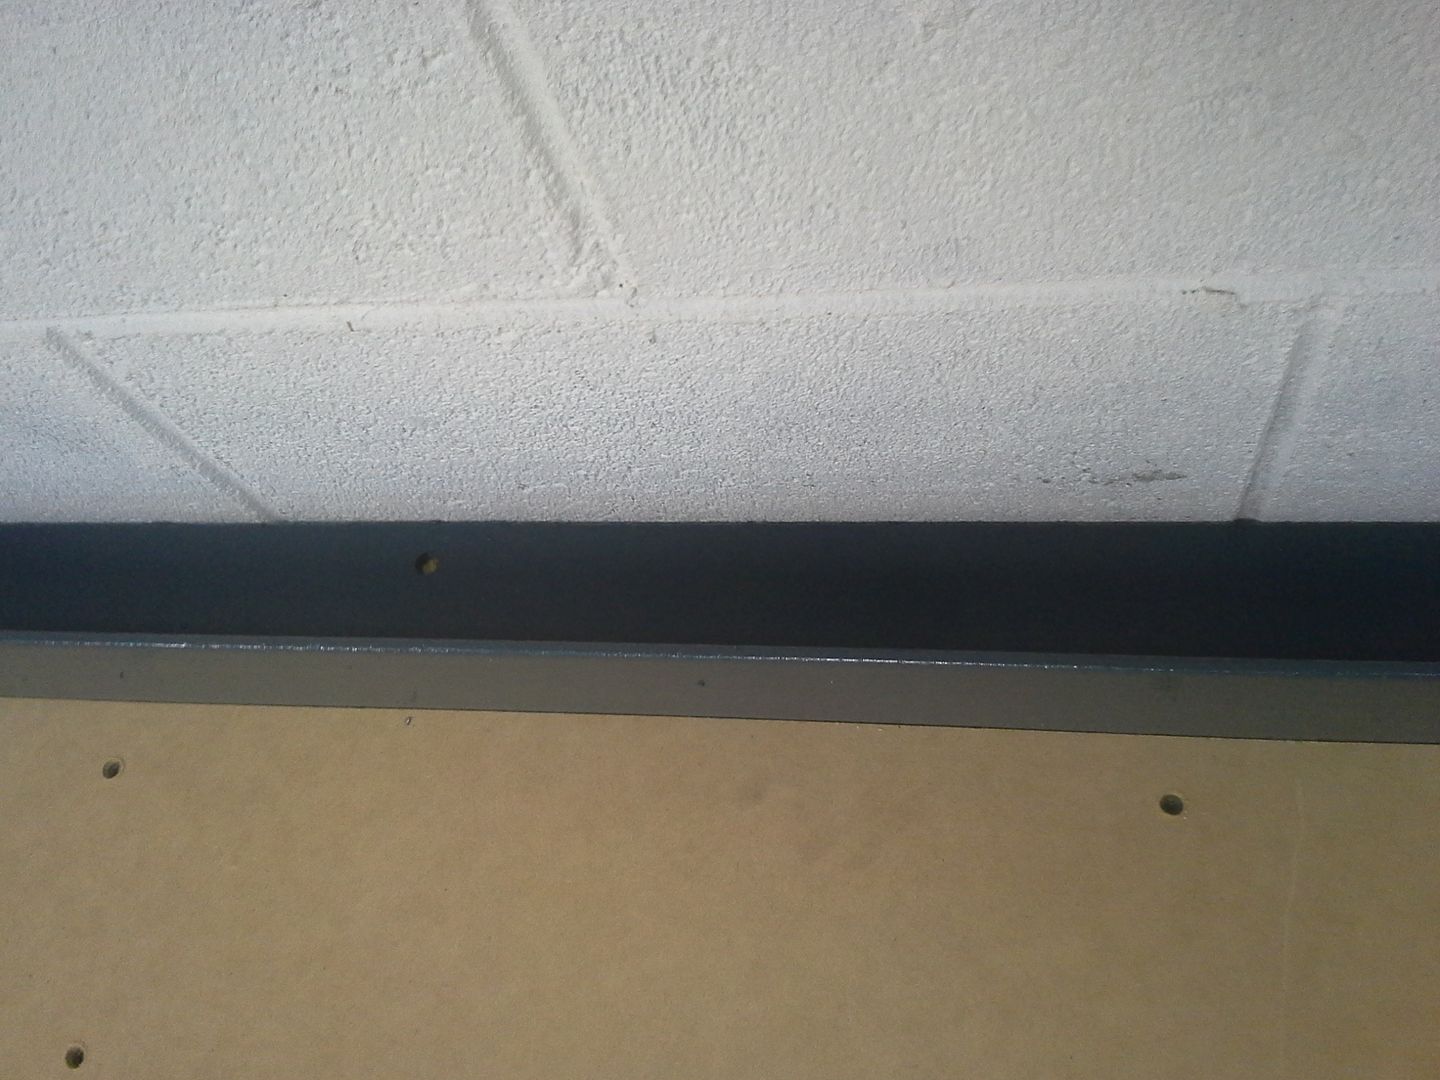 [/URL]
anyway, got that mounted up, and went to Lowes to get the next layer of my workbench top, which is 3/4 MDF. nice, flat, dense surface.
glued and screwed it down to the OSB.
[URL=http://s54.photobucket.com/user/dusterbd13/media/20150919_104218_zpsa1uedoxi.jpg.html]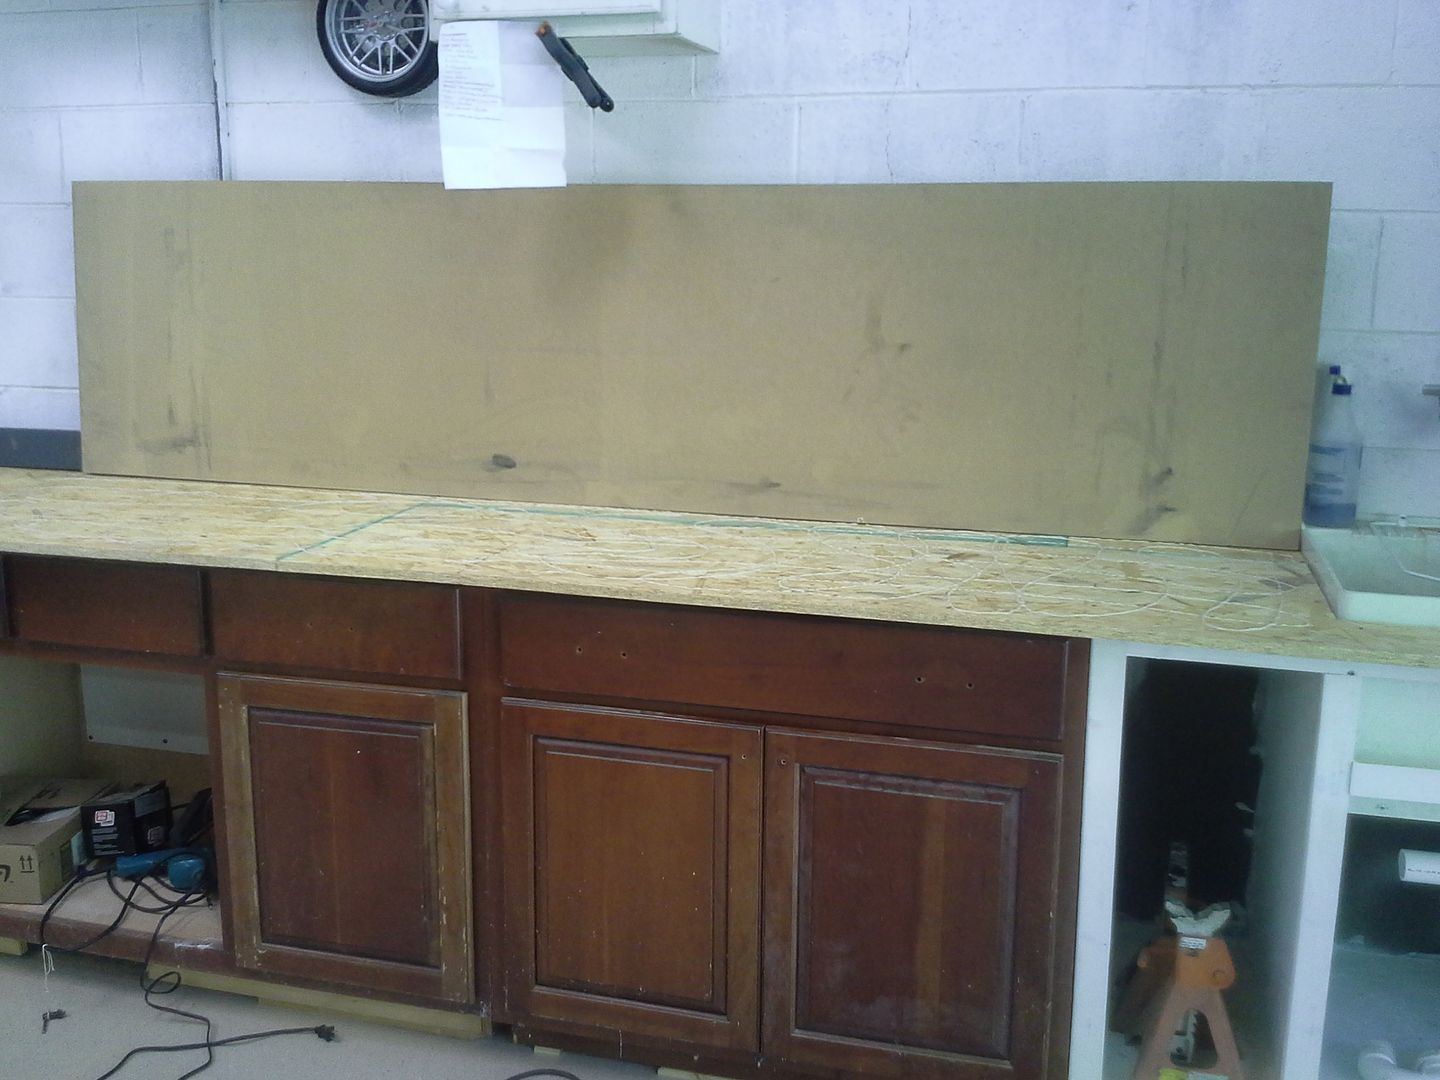 [/URL]
[URL=http://s54.photobucket.com/user/dusterbd13/media/20150919_104224_zpsq6o7wcb3.jpg.html]
[/URL]
[URL=http://s54.photobucket.com/user/dusterbd13/media/20150919_104224_zpsq6o7wcb3.jpg.html] [/URL]
[URL=http://s54.photobucket.com/user/dusterbd13/media/20150919_105308_zpsm2dne8a6.jpg.html]
[/URL]
[URL=http://s54.photobucket.com/user/dusterbd13/media/20150919_105308_zpsm2dne8a6.jpg.html]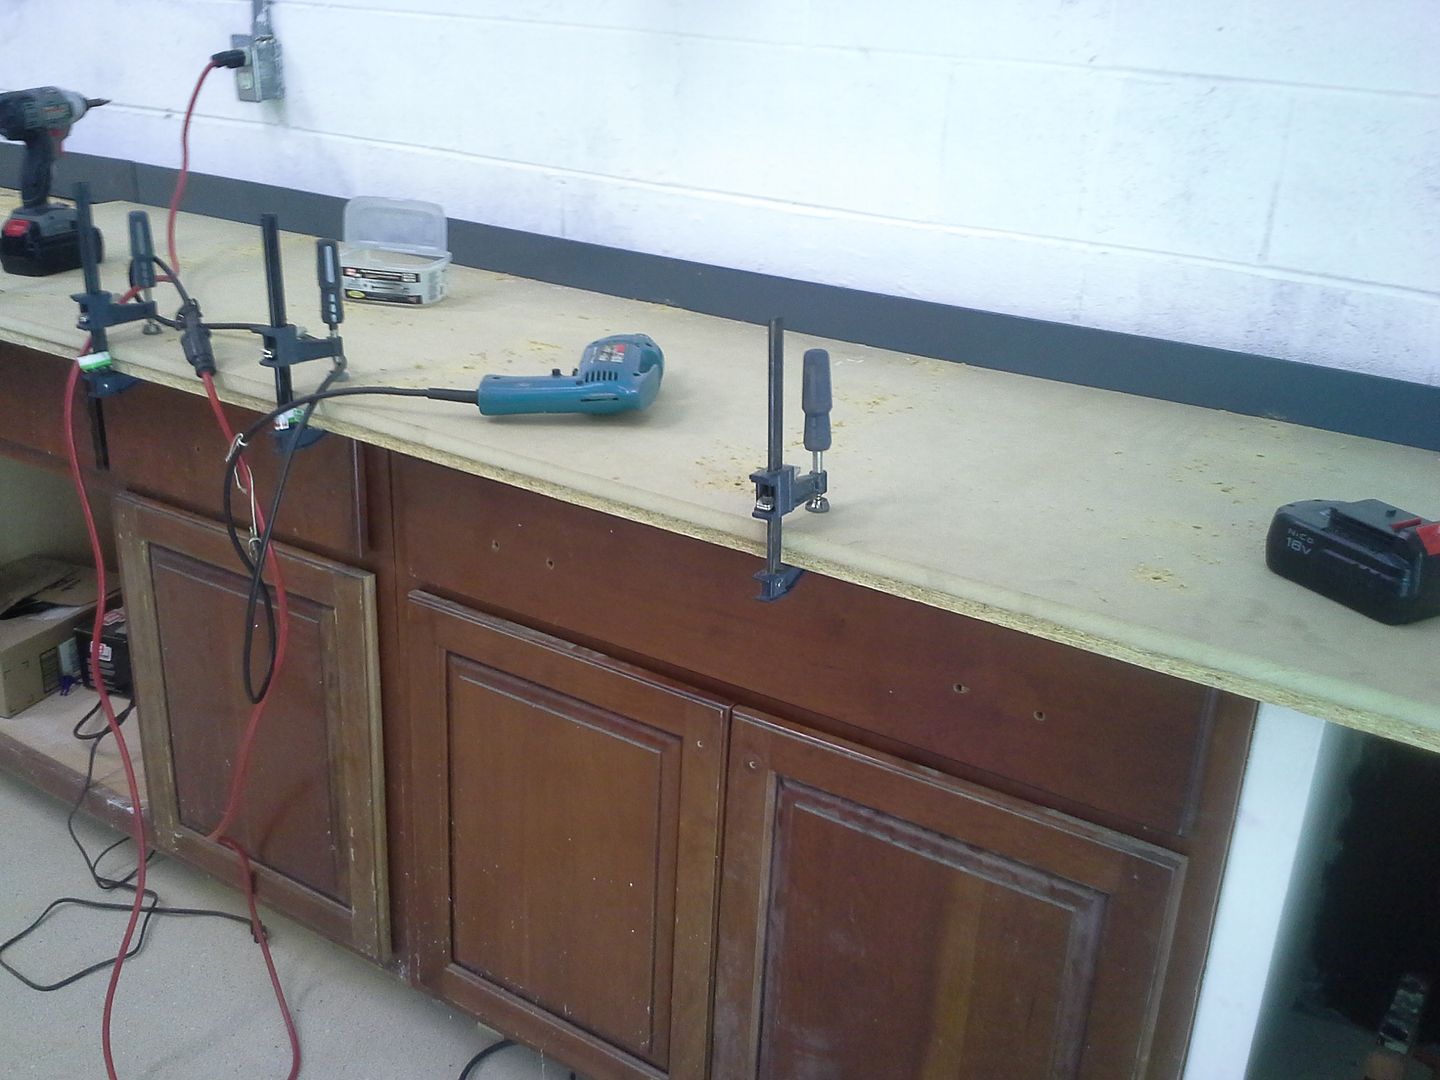 [/URL]
[URL=http://s54.photobucket.com/user/dusterbd13/media/20150919_105314_zpsztqzpd1k.jpg.html]
[/URL]
[URL=http://s54.photobucket.com/user/dusterbd13/media/20150919_105314_zpsztqzpd1k.jpg.html]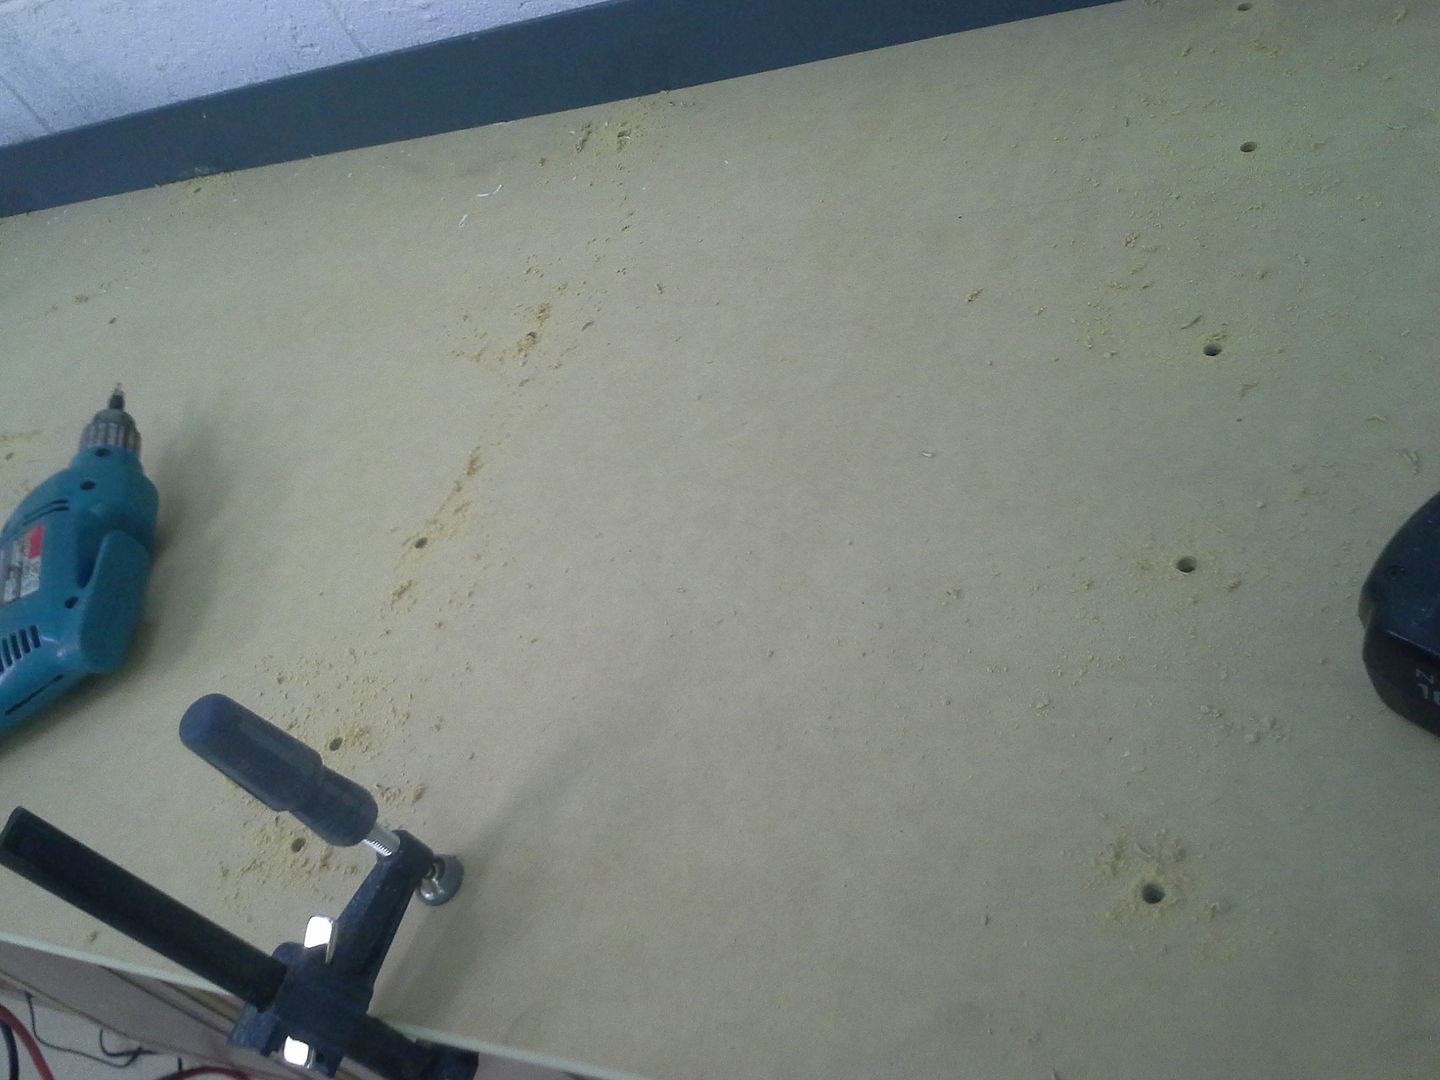 [/URL]
then moved on to plumbing. its SOOOO nice to have a sink again. the drain wasn't too bad, but it took a few trips to Lowes to get all the right pieces. don't do plumbing enough to estimate properly the first go round.
[URL=http://s54.photobucket.com/user/dusterbd13/media/20150919_120256_zpsnb1peupe.jpg.html]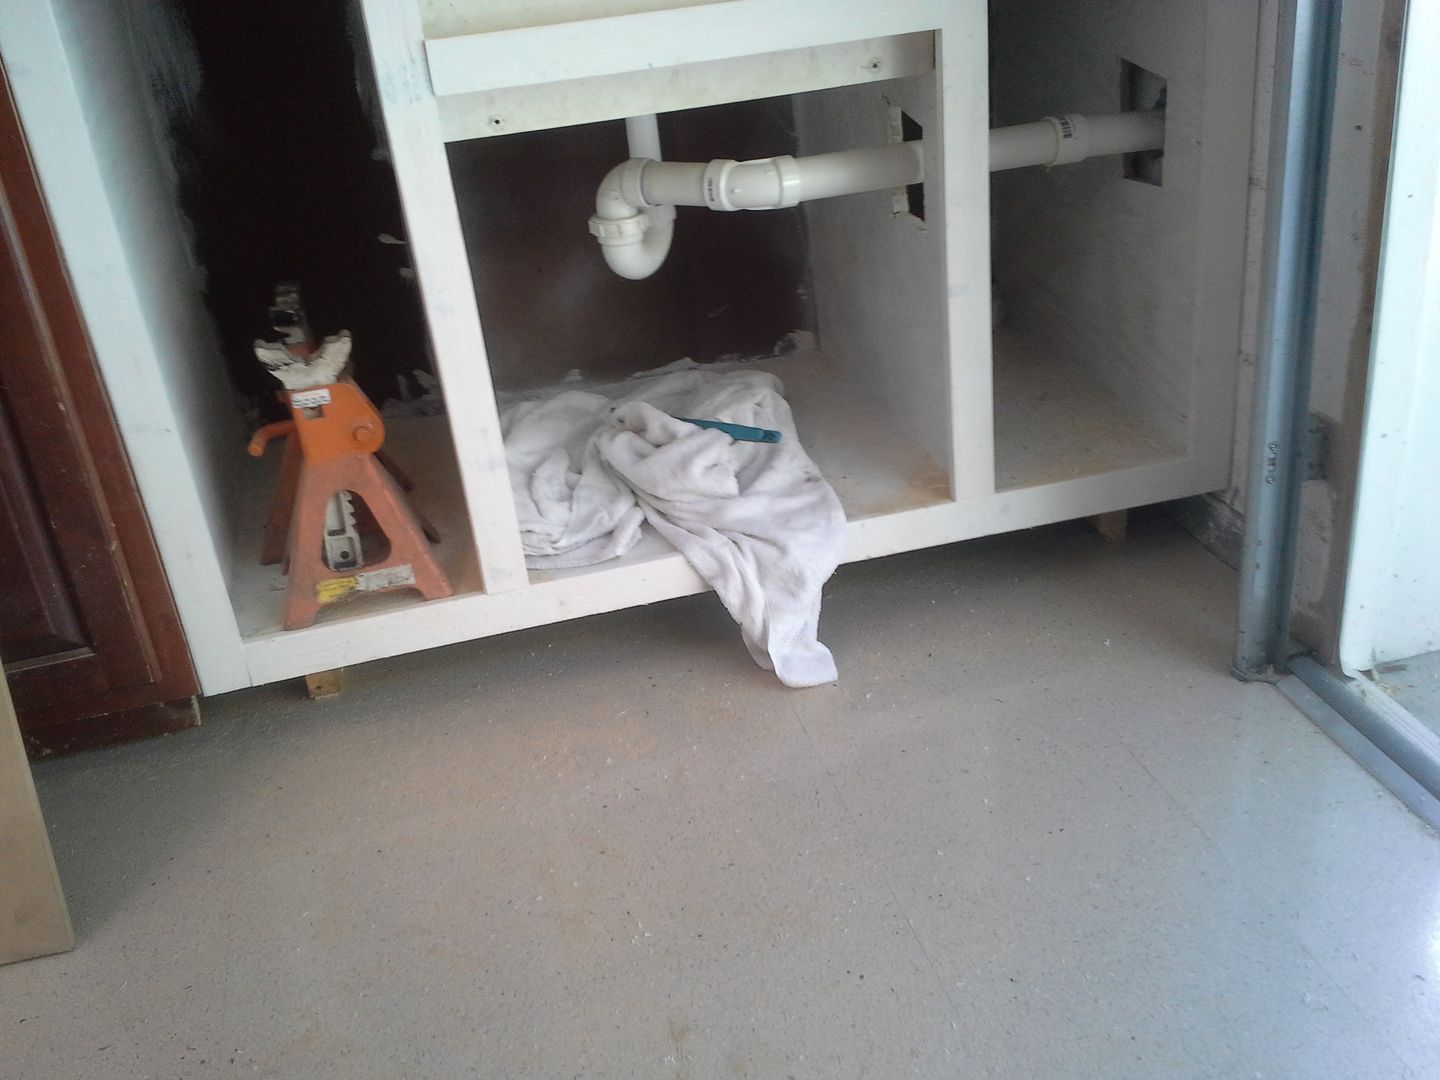 [/URL]
after this, I removed all the doors and drawers, wiped the face frames and parts with lacquer thinner, scuffed with a scotchbrite pad, and primed with Zinsser.
[URL=http://s54.photobucket.com/user/dusterbd13/media/20150919_151541_zpsjssjkqw7.jpg.html]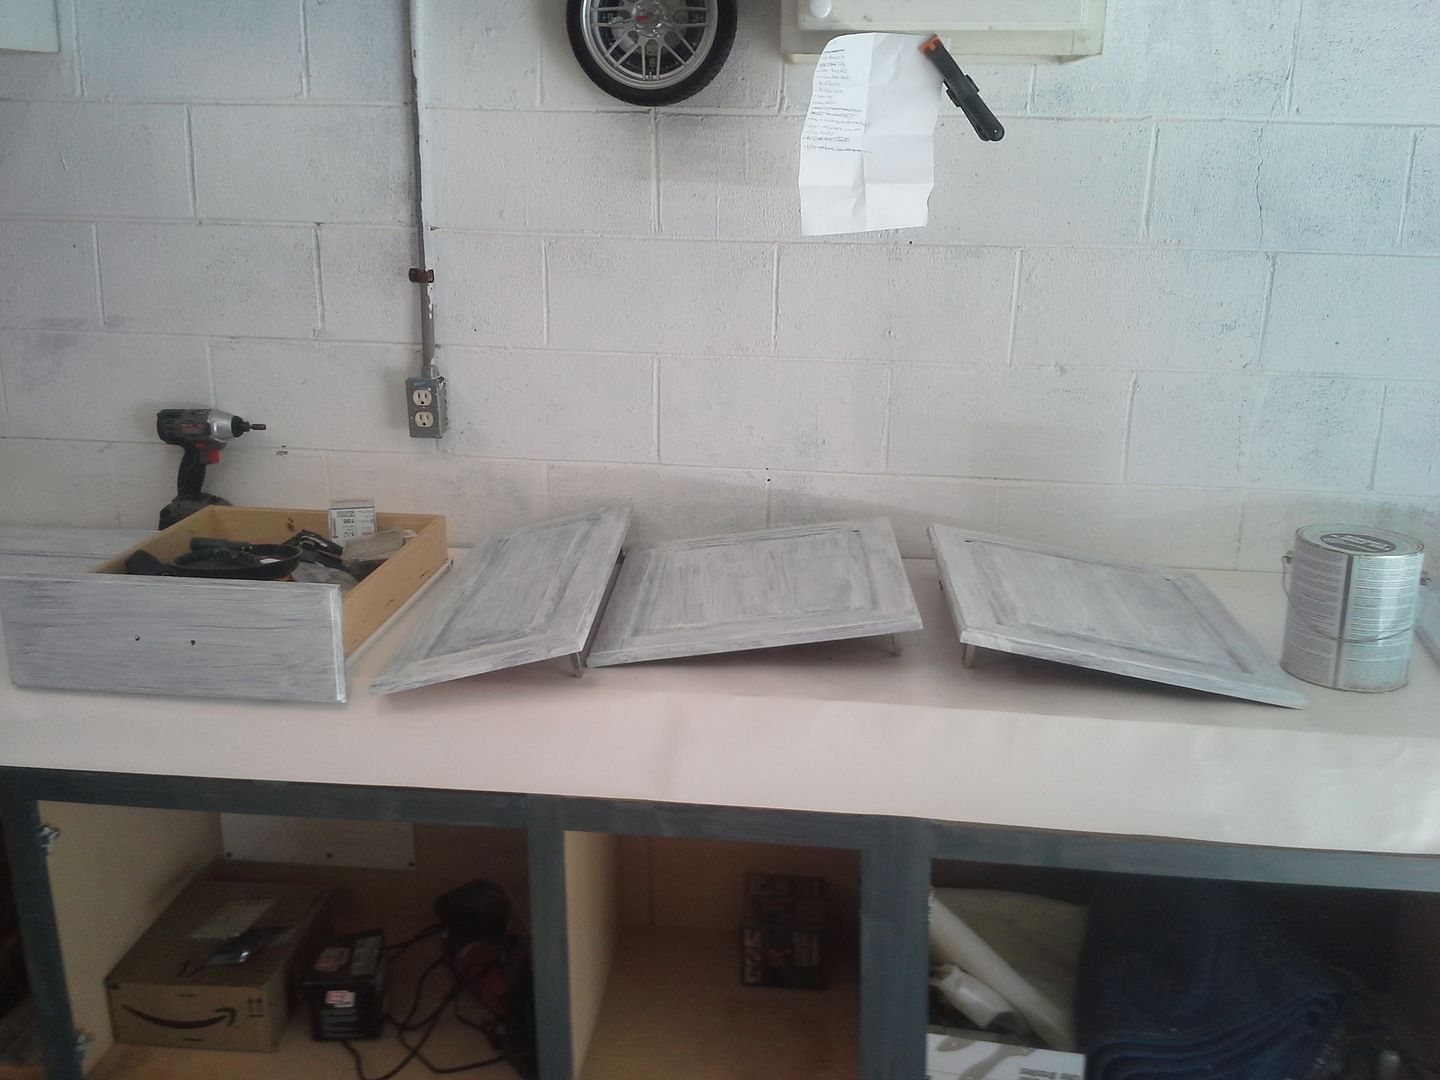 [/URL]
[URL=http://s54.photobucket.com/user/dusterbd13/media/20150919_134832_zpscvf1jaqi.jpg.html]
[/URL]
[URL=http://s54.photobucket.com/user/dusterbd13/media/20150919_134832_zpscvf1jaqi.jpg.html]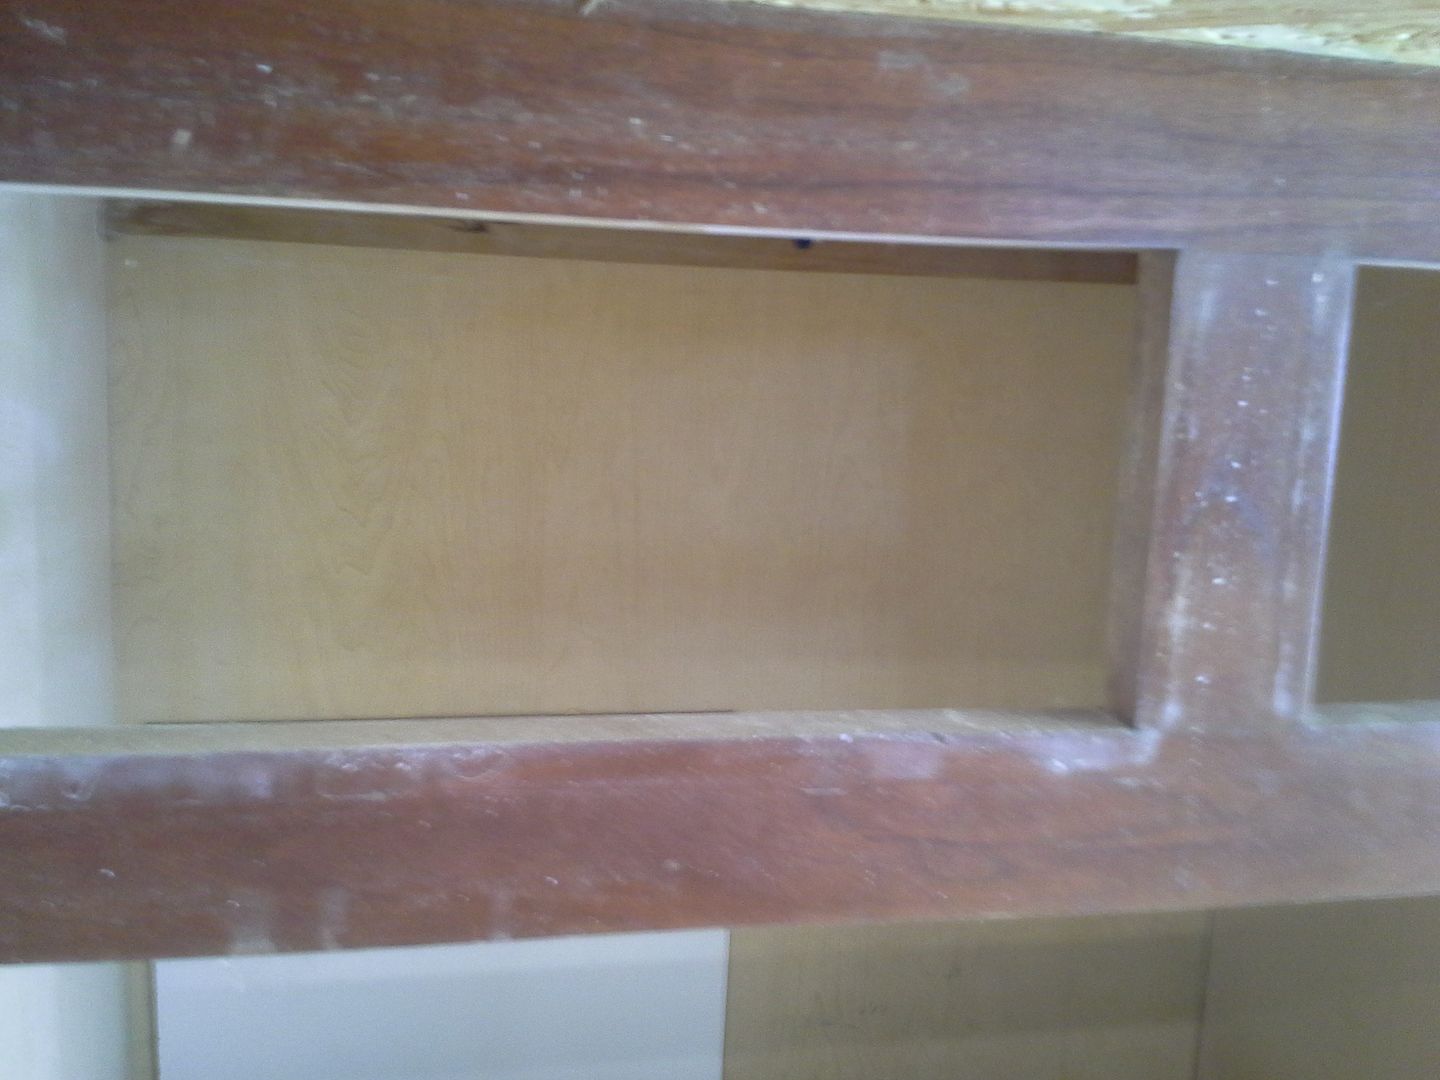 [/URL]
then began to topcoat. my best friend has worked for ICI deluxe paints for the last decade or so. he regularly has a shelf of mistint paint that is for sale cheap. I had him match the craftsman blue/gray I used on the saws, and bought a gallon for a couple of dollars. this was before I started keeping tabs of the costs, so I have no idea how to add it, as I don't remember what I spent on it.
anyway, this stuff didn't start getting good until the third coat. but it looks great now!
[URL=http://s54.photobucket.com/user/dusterbd13/media/20150919_151550_zpsfg9gqjrk.jpg.html]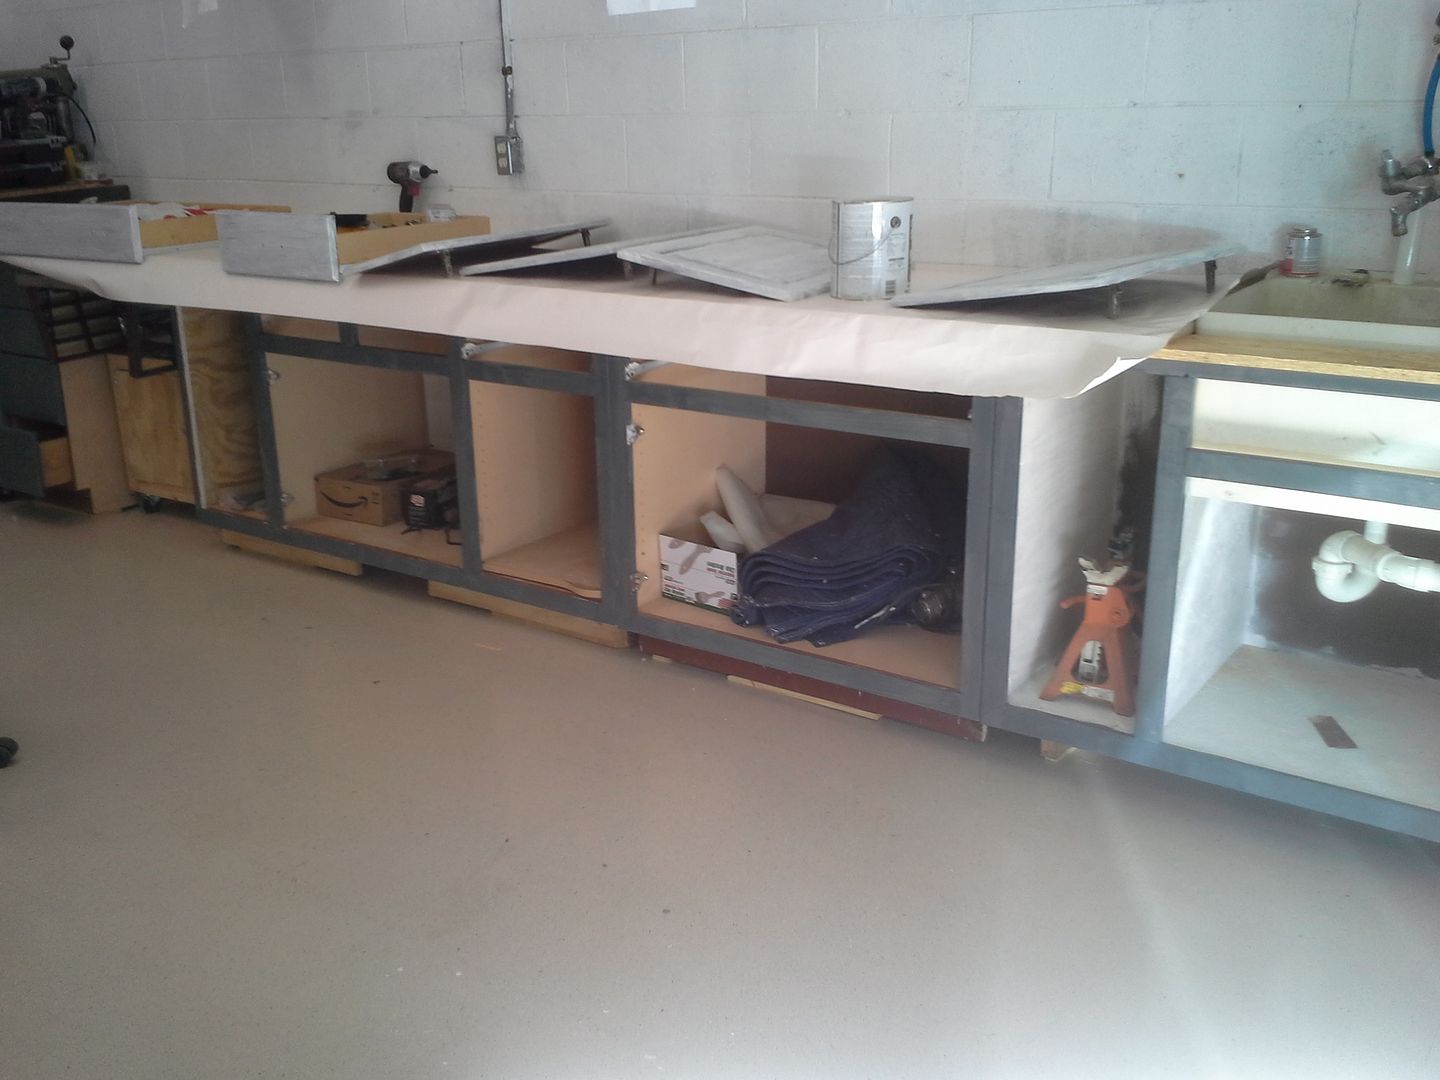 [/URL]
[URL=http://s54.photobucket.com/user/dusterbd13/media/20150921_072359_zpskkcnss5u.jpg.html]
[/URL]
[URL=http://s54.photobucket.com/user/dusterbd13/media/20150921_072359_zpskkcnss5u.jpg.html]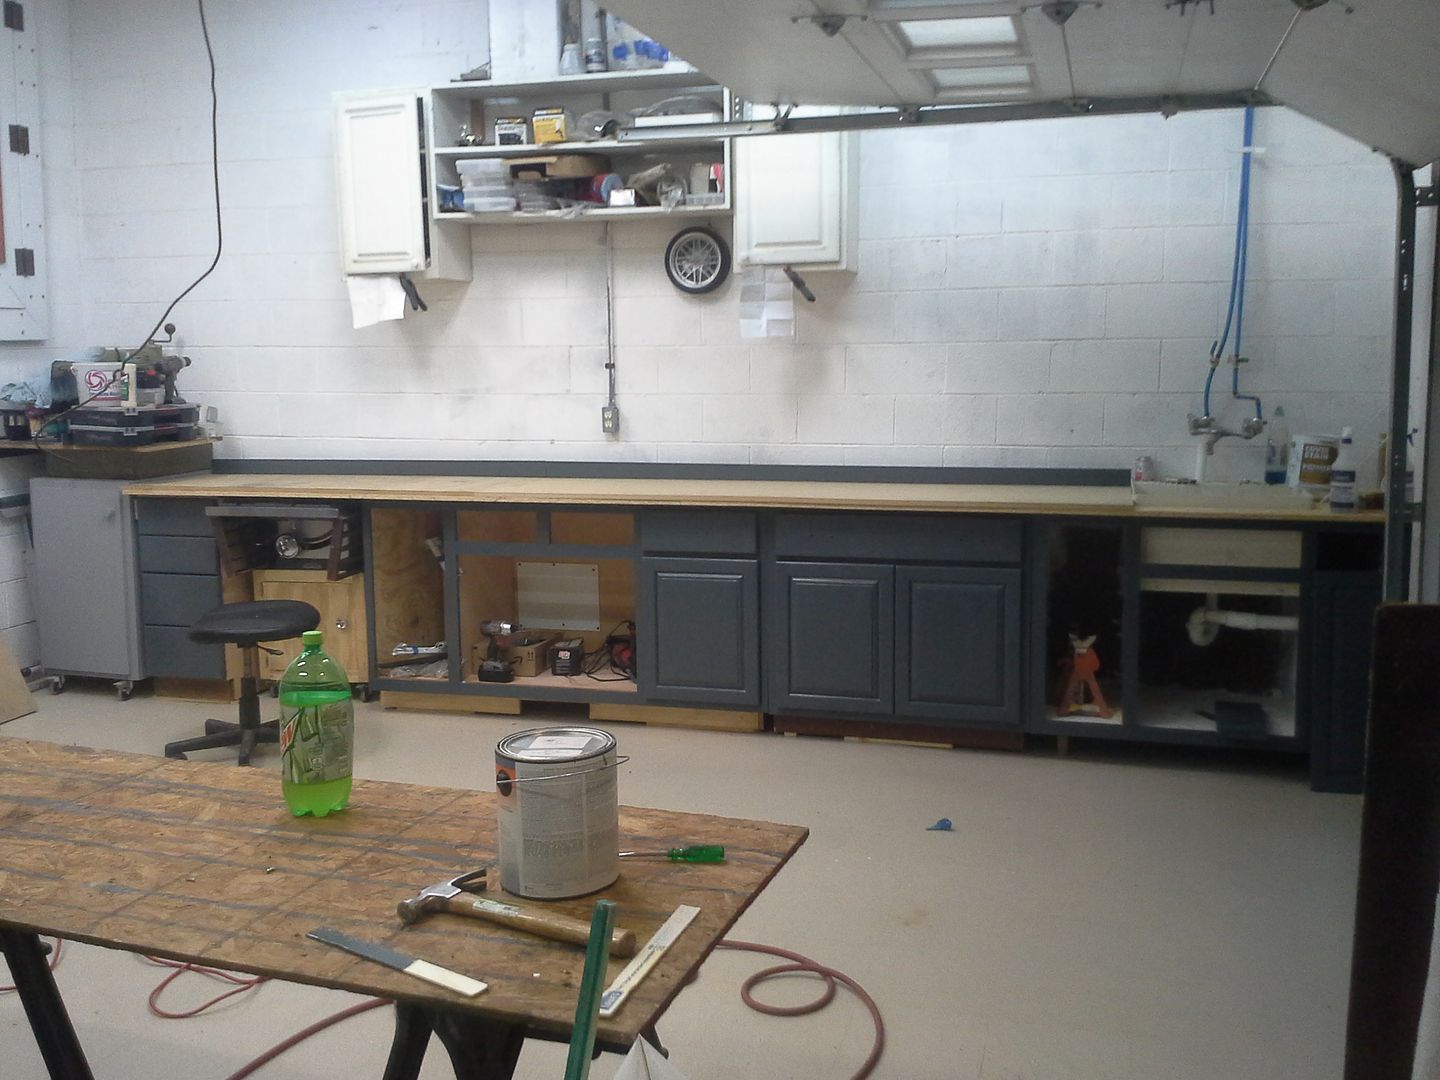 [/URL]
so the next steps are to fill the holes in the cabinets. part of them will be filled with drawers, some just need doors made. eventually all the doors will match, but right now they wont. my dad has given me a pile of drawer slides, some used, some new. but free is free, so ill use them. may have to get creative, though.
also coming up is final sizing of the workbench top, the sacrificial hardboard layer, and beginning to finally put crap away.
[URL=http://s54.photobucket.com/user/dusterbd13/media/20150921_072410_zpstzsqbtz2.jpg.html]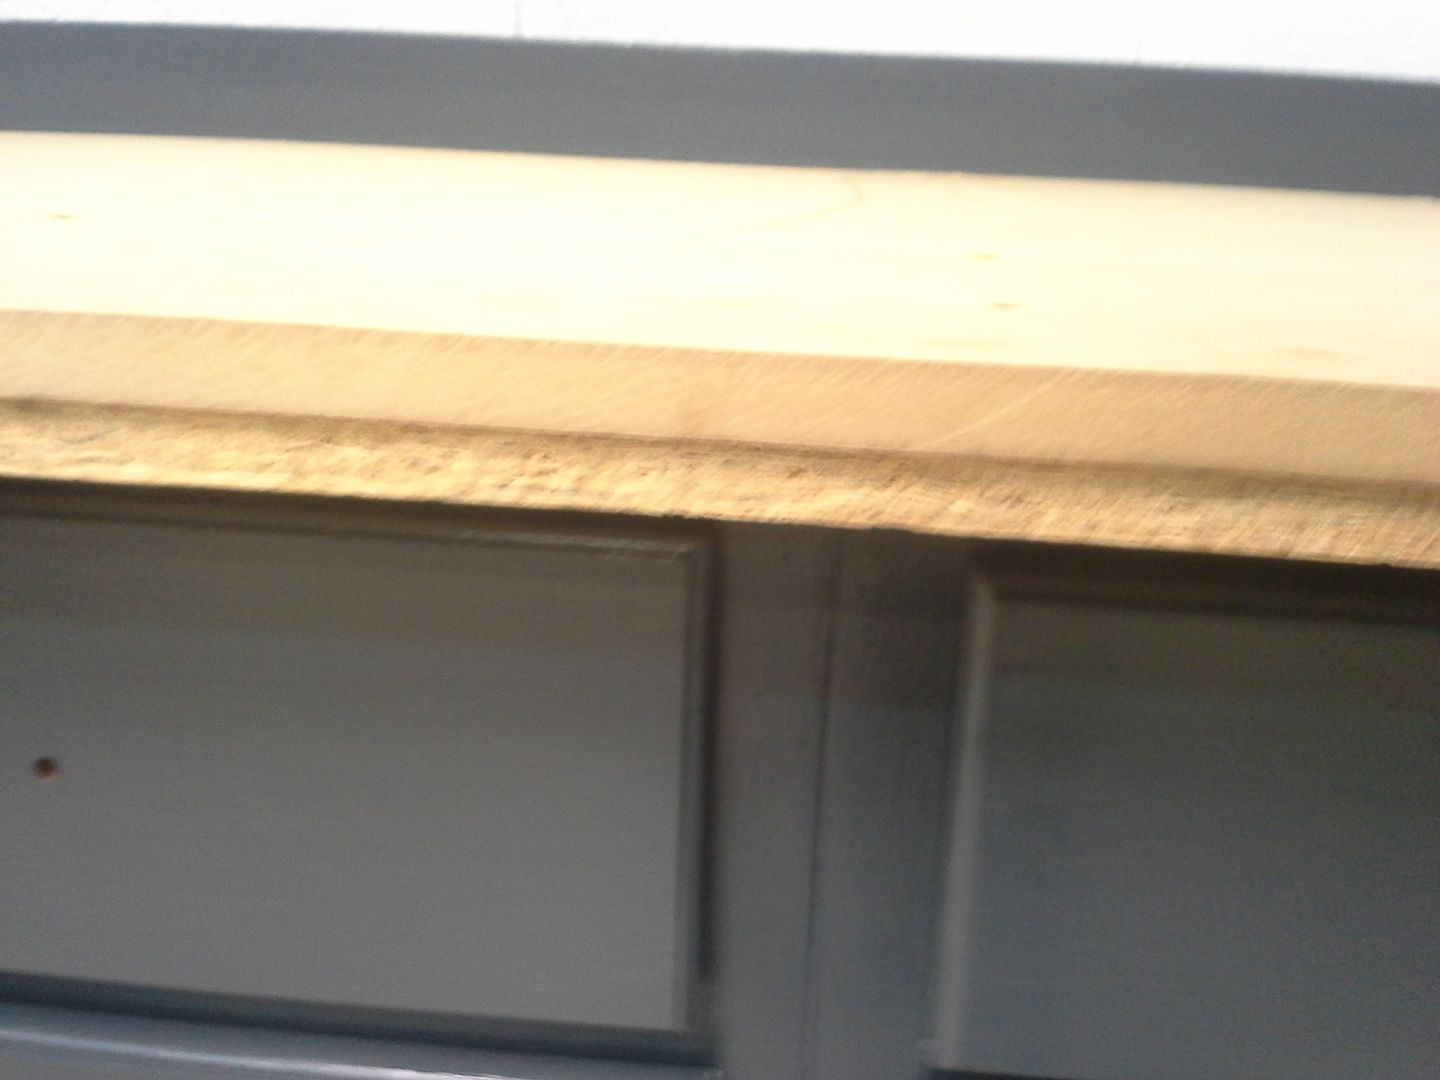 [/URL]
now, I need some advice. I have to remount my faucet to the wall. with the new sink arrangement, I need to space it out about 2 inches for water to hit the middle of the sink. what ideas other than a 2x6 do yall have? I would like something simple, attractive, and durable.
[URL=http://s54.photobucket.com/user/dusterbd13/media/20150919_120302_zpsavezpura.jpg.html]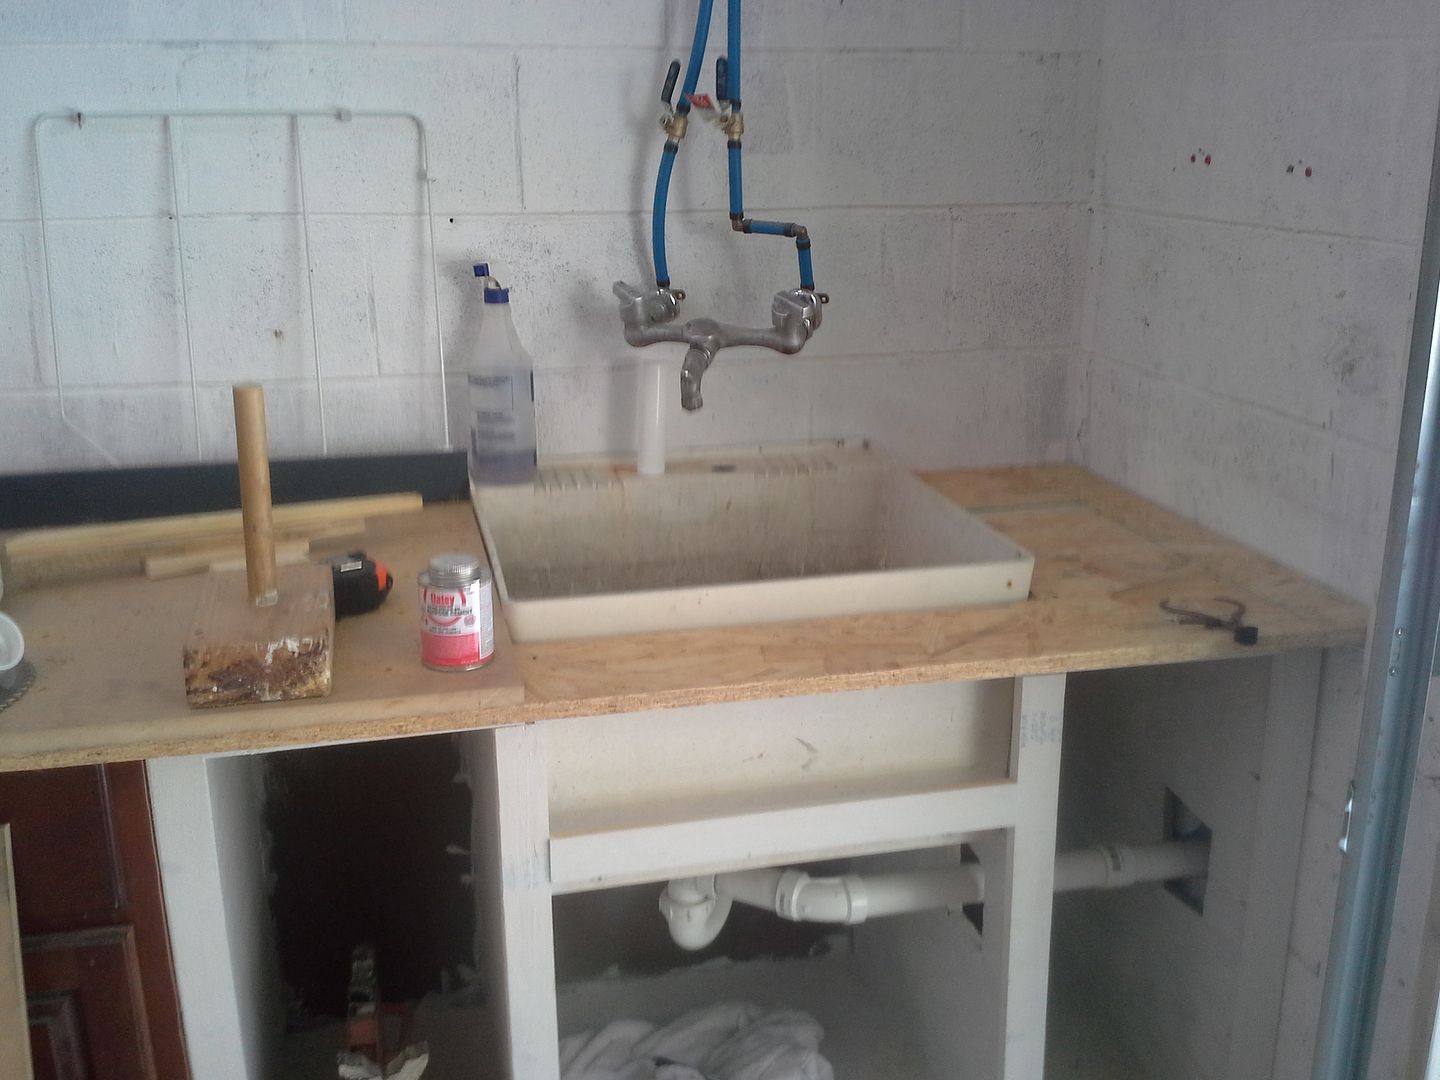 [/URL]
I missed last weeks update somehow, and I'm glad I did. I couldn't quite get your vision with all of the cabinets lined up, but the end of this week is awesome. You did a fantastic job integrating everything and I'm way impressed with the sink cabinet.
Thanks mazduece. Im happy that the product is looking very similar to what I had in my head.
Im also looking forward to working on something different. Once this part is completed, im going to work on the elky for a bit.

I wish I had a sink in the garage. Well thought out plan. Looks great and doesn't look like it will EVER move unless you want to.![]()
You thought about getting a flexible hose/sprayer setup for the faucet? Like you'd see in a dish washing sink in a restaurant. Maybe you guys have washed some dishes in your day?
It does look good and I really like the grey on the cabinets! And sinks in the shop are amazing!
Dude, flexible hose may just be the perfect solution! Next trip to Lowe's I'll look around and see what I can find.
Would make washing my arms a lot easier as well.
And I'm not sure that the bench would move even if I wanted it to.
In reply to Skervey:
The gray really ties things together. I'm really digging it. Still have the saw cabinets to paint, and all the chrome/polished trim to put on. Ought to look really nifty.
What I was thinking but not cheap though. ![]()
http://r.ebay.com/Q75QkS

I spent a lot of time using a faucet just like that. And a Hobart dishwasher.
200 is way more than I can spend. Im thinking something more along the lines of a garden hose and nozzle threaded on the current faucet.
I have one of these on the kitchen sink at the cottage. I love it. I'll get one for the Grosh as soon as I remember. http://www.amazon.com/BrassCraft-SF0077X-Thread-Swivel-Aerator/dp/B0058G1K32/ref=sr_1_1?ie=UTF8&qid=1442877869&sr=8-1&keywords=Dual+spray+faucet+swivel
I like the price, I understand the words, but have no idea what it does. Care to learn me?
It turns the stream from the sink into a spray (or a gentle bubbly flow, but who needs that?) And most importantly, is swivels so you can point it into all of the corners of the sink. Might not provide the spray velocity you want for washing things, but your sink is plumbed with PEX, it's about a five minute job to tee in another line and add a proper spigot with a hose sprayer that hangs from the wall.
Edit: which is actually a good enough idea I kind of want to do it to my sink ......
How stiff a stream does that make? Is it similar to the sprayer handle on my kitchen sink?
I've still gotta mount the faucet too. Any idea on that?
Dusterbd13 wrote: How stiff a stream does that make? Is it similar to the sprayer handle on my kitchen sink?
Basically exactly like that. Great for kitchen sink stuff, maybe not for blasting grime off stuff depending.
As far as faucet mounting, a lot depends on whether or not you have hot water out there and if your sink has faucet holes on it. If it does, they're probably spaced for a laundry faucet, not a kitchen sink faucet. I'm seriously seriously about to buy the stuff to put a hose sprayer in my sink. I'll let you know what I come up with.
I'd see if your local restore doesnt have one of those restaurant style ones posted above. I swear I saw one last time I was at ours (spring of this year though...)
Hmmm......
Good call. Ill stop by the one in concord. They tend to get more.
About $10 in parts. Washing machine valve and hose pieces. I'll hook the water up when I pull the sink.
Thanks for leading me down this path. 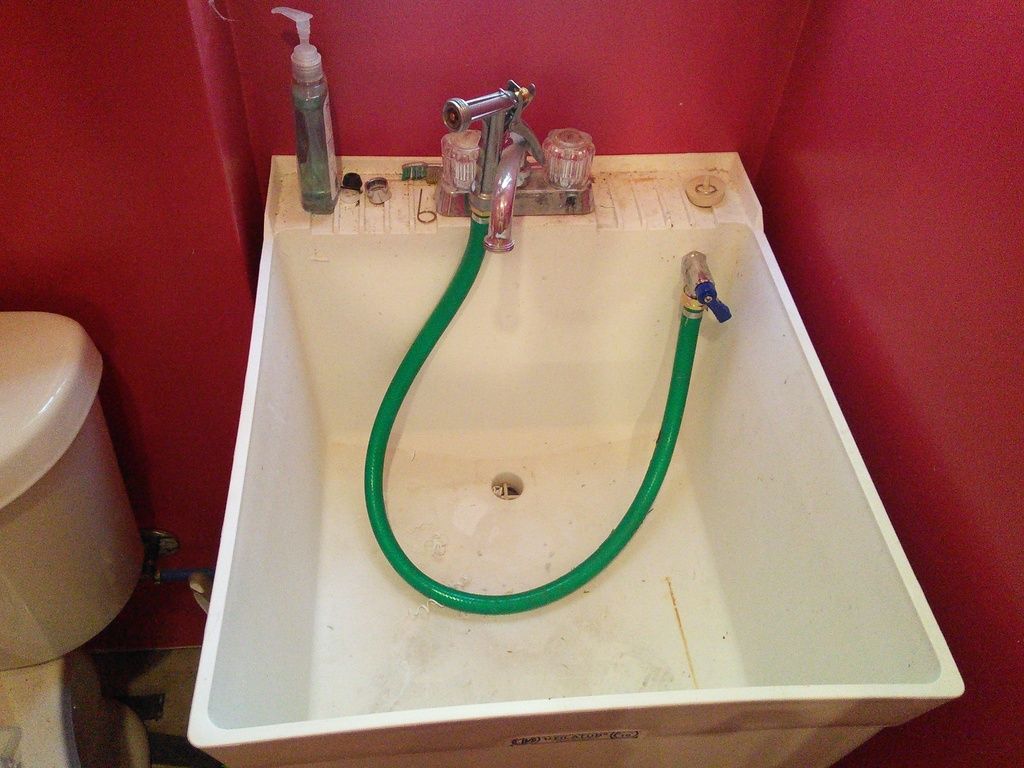
You'll need to log in to post.


