I started experimenting with this as part of my guitar electronics projects, but figured that it would be more interesting to the GRM community at large. I am not a subject matter expert, I am a recently introduced enthusiast that won't shut about it. So there will be some learning in this thread. I am sharing what I've learned, hopefully others will do so as well.
Electro etching is the process of etching metals with THE POWER OF ELECTRICITY!

What you need:
- water
- salt
- 12v power supply of some sort
- wire
- masking material
I've only tried this with aluminum so far, but it should work with other metals like steel and brass.
The first step is to transfer your design to the material. Any exposed metal will be etched away, so everything you want to remain untouched needs to be masked. You can do this by painting everything and scratching away your design. You could do the same with electrical tape and a knife. You can take a page from the guys who do DIY circuit boards and use laser printer toner. This has the potential for much more detailed etchings, and I'll try it later.
You can also use a vinyl cutter. I chose this option because I have access to one.
Attach a wire to your piece somehow. A couple of times, I've simply taped it to the bare metal.
Mask off everything on both sides. Any exposed metal will be etched, and a leak will give you a crater. Make sure your wire well taped down so water can't get inside.
Now we need a DC power source. Battery chargers seem to be a popular option, but make sure it's old school and not full of protective circuitry. Turns out all of mine are too intelligent so I just grabbed a big car battery.
You'll also need water in an appropriate container. Mix in as much salt as it will dissolve. Don't mind the appearance of the water here, it has pink salt in it and has been used 
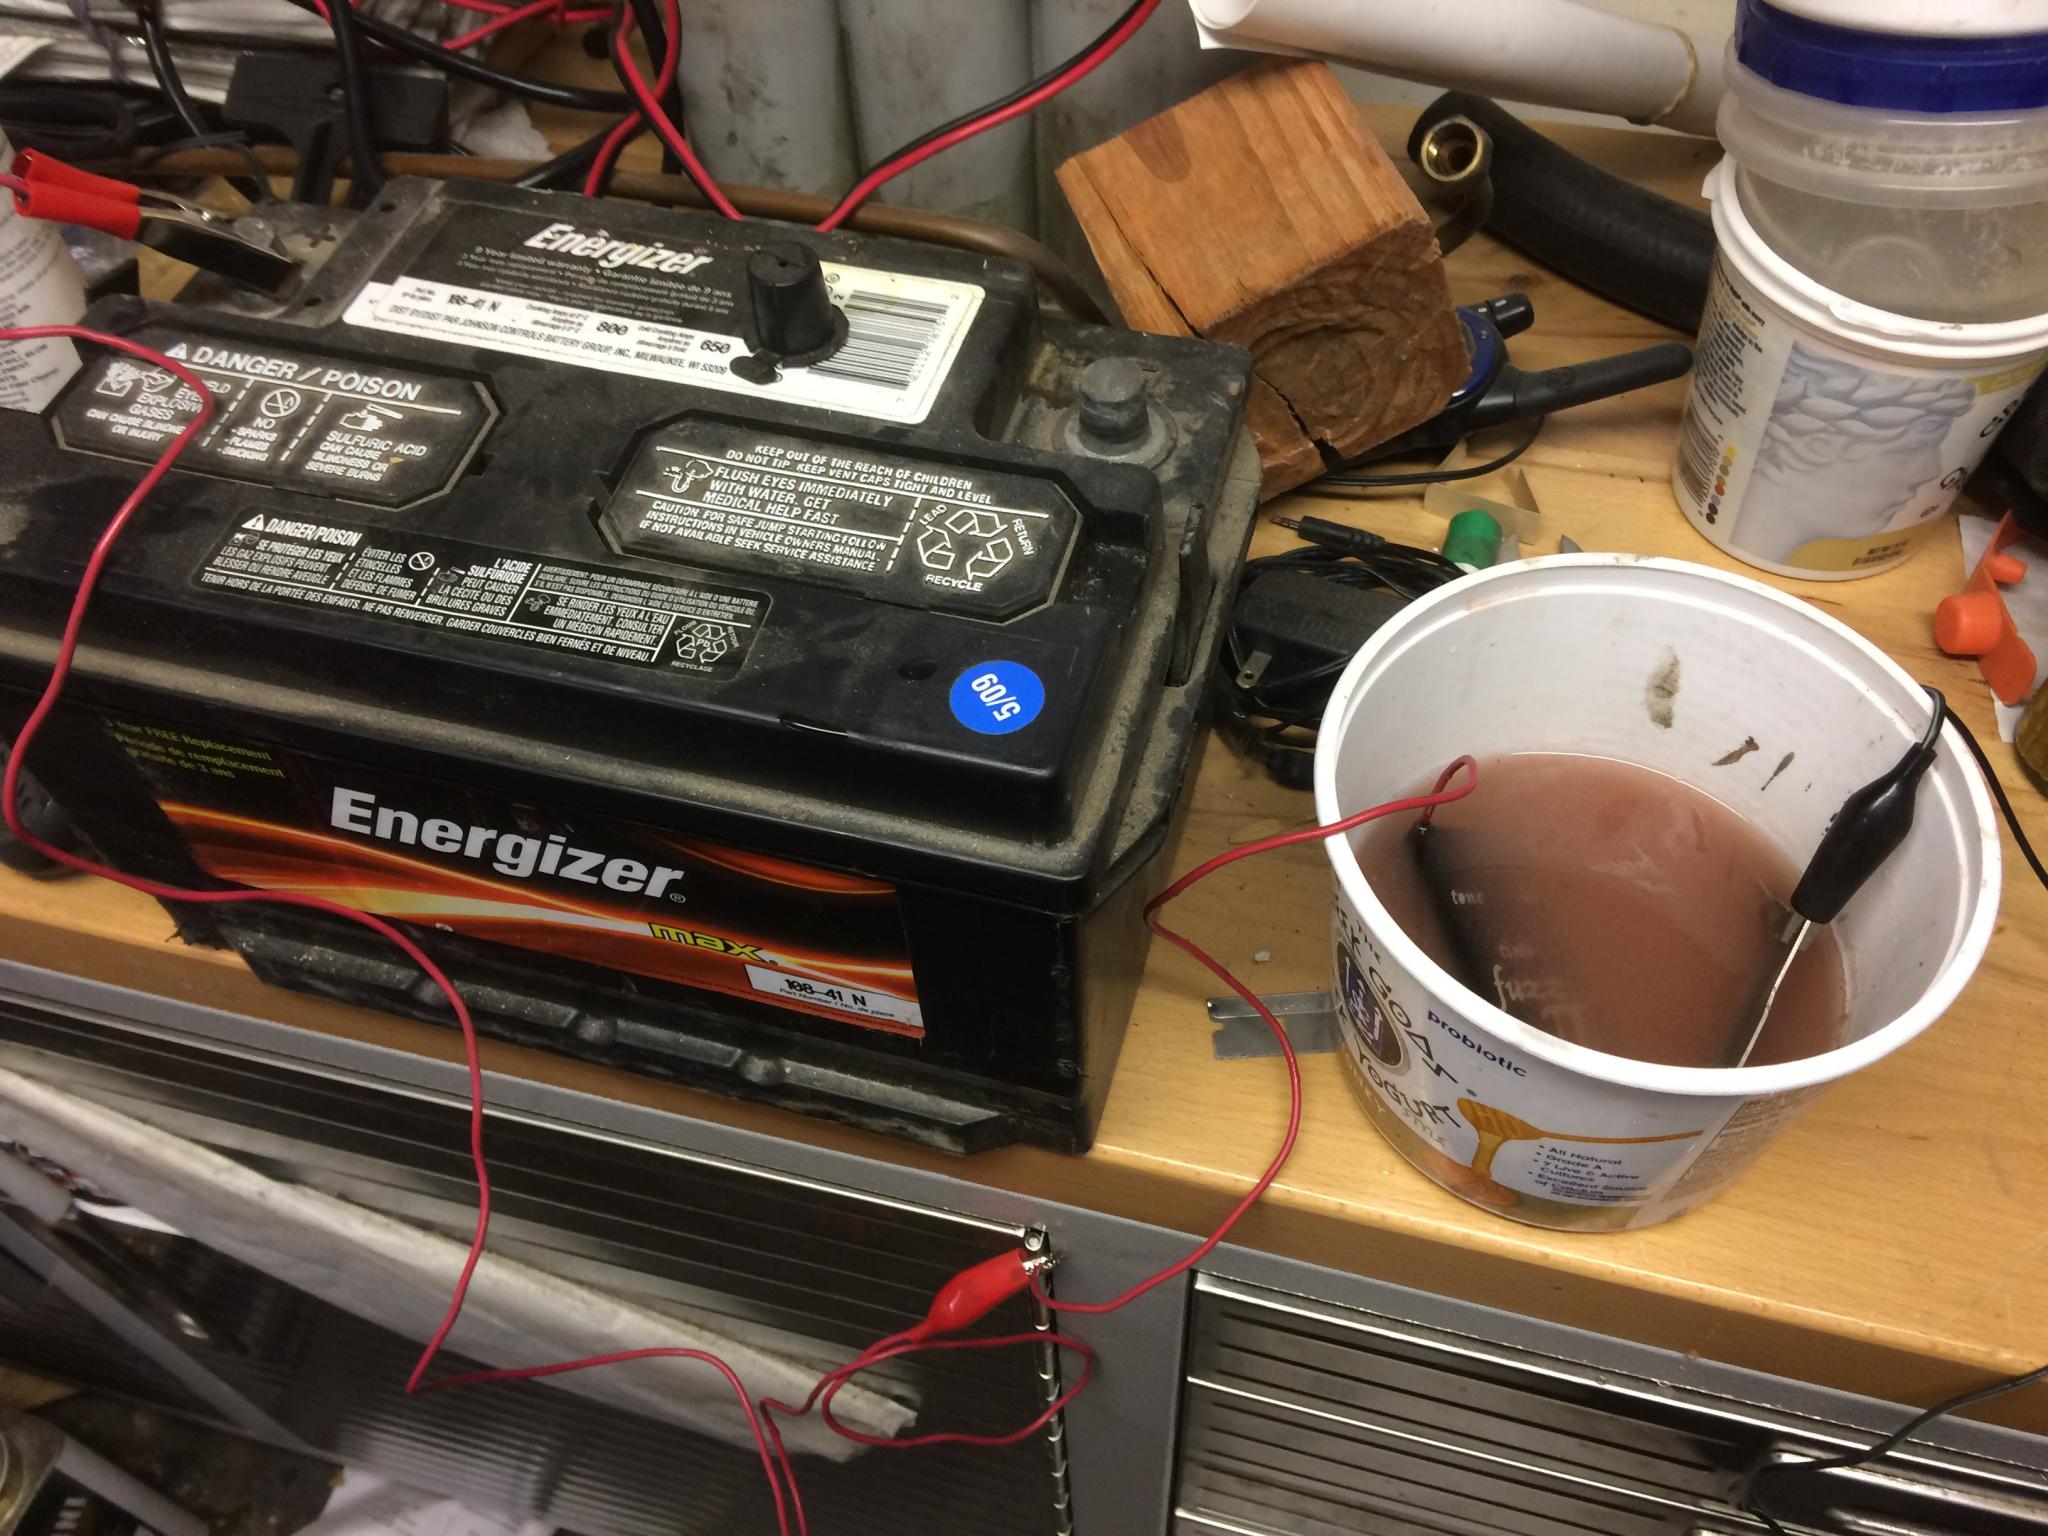
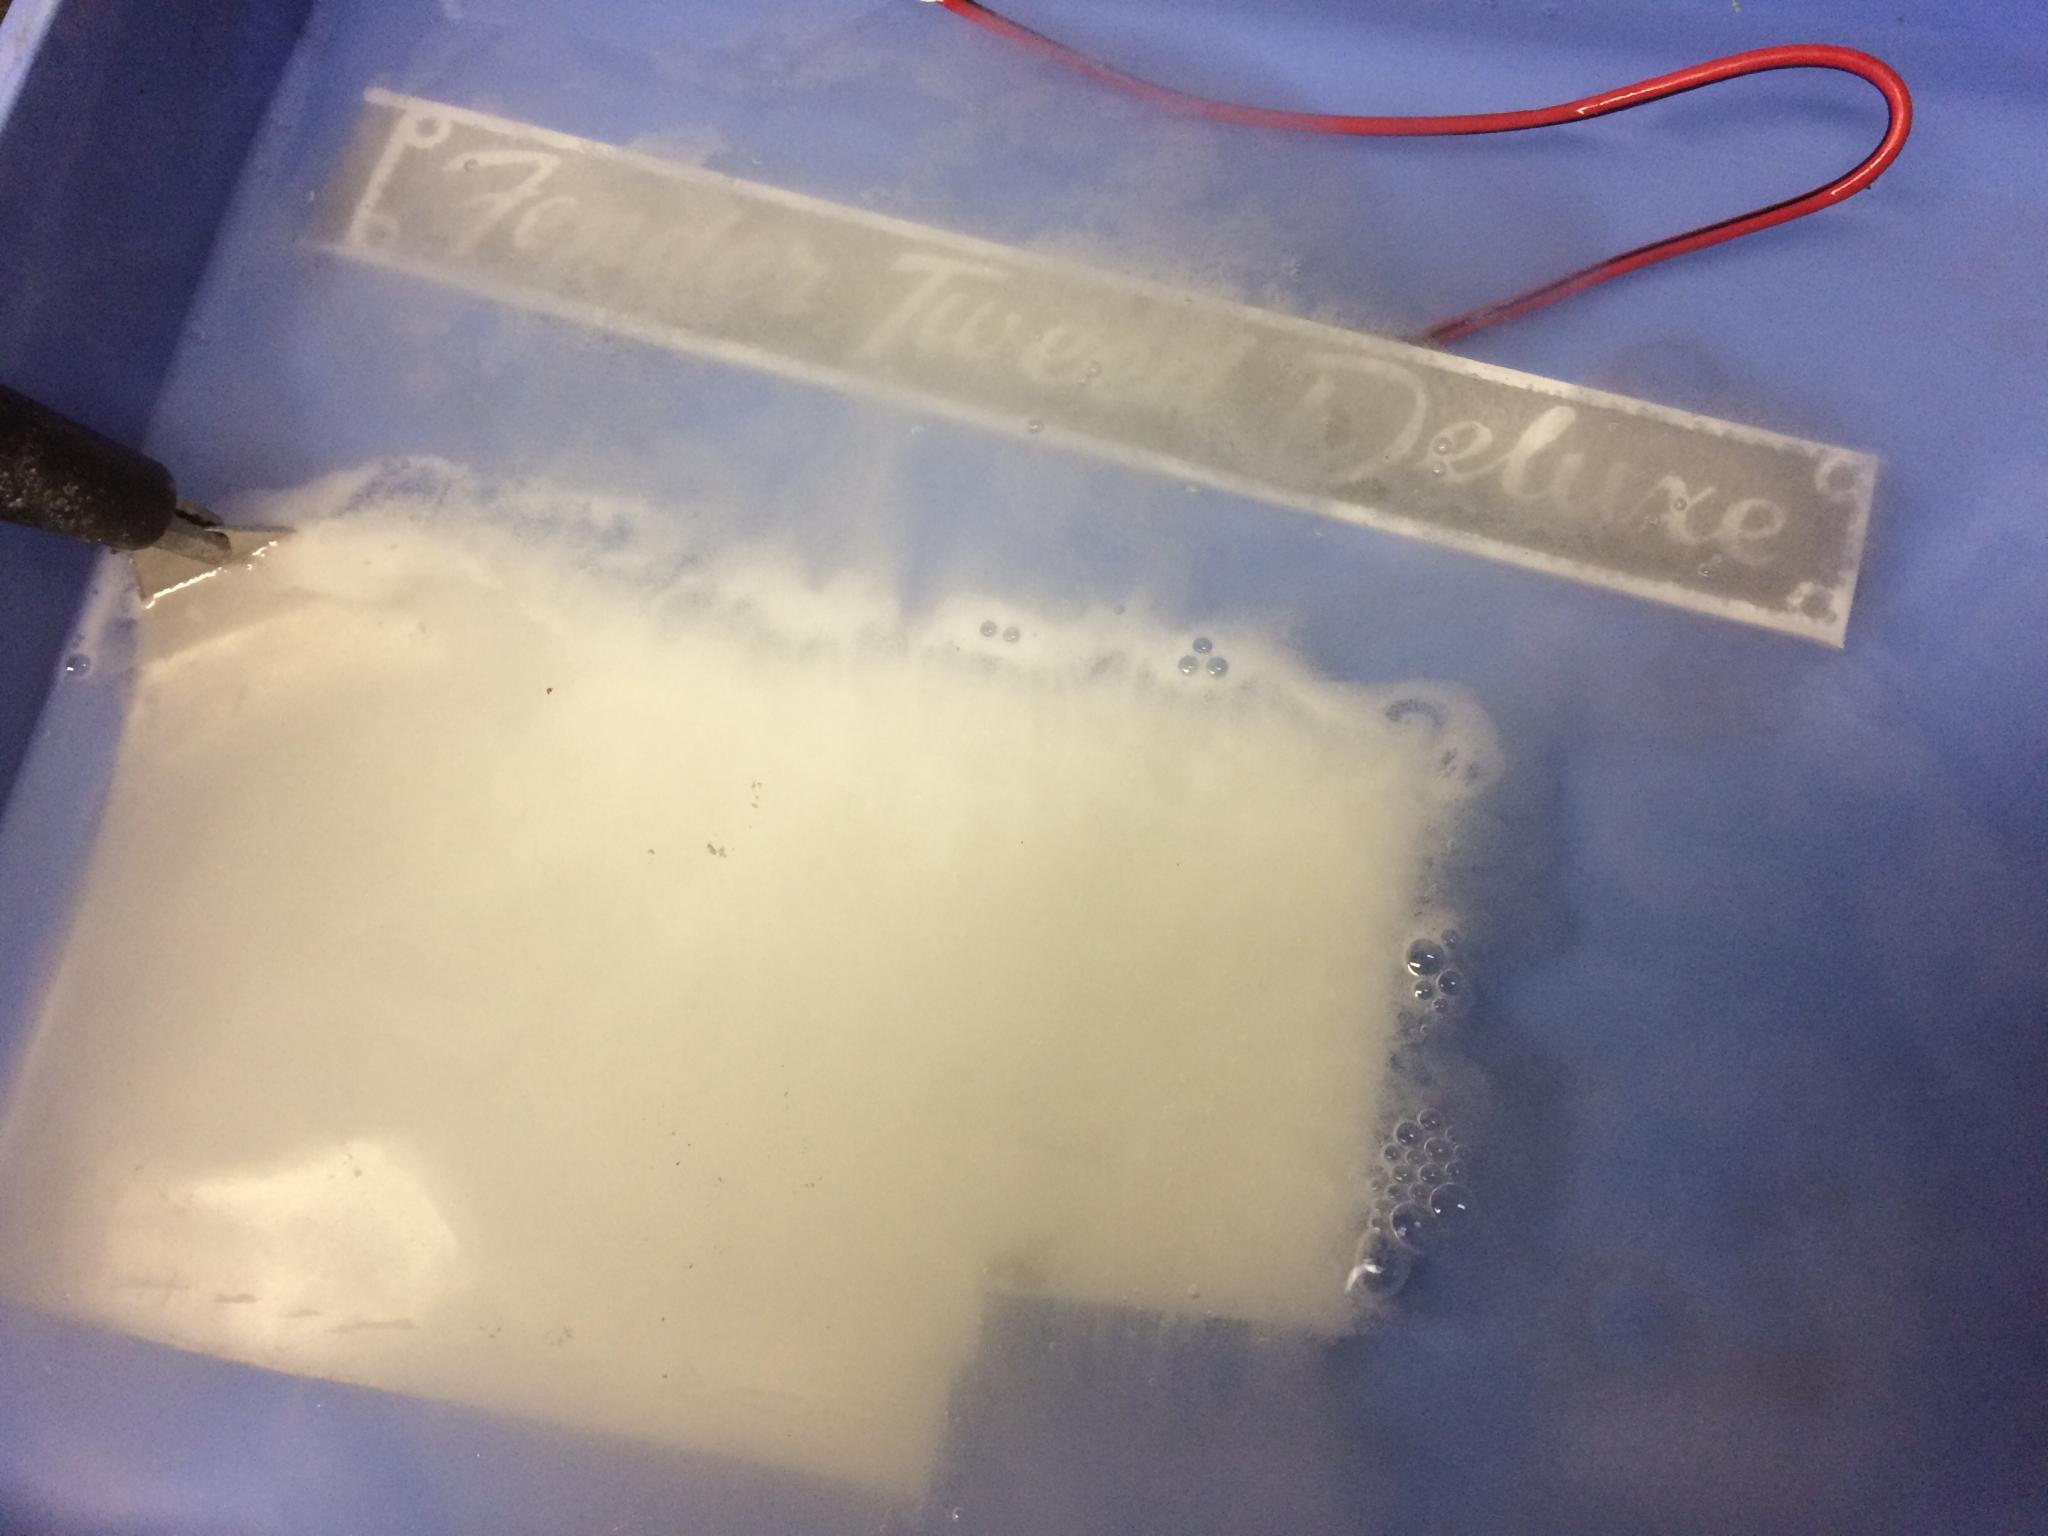
Drop your piece in the water and hook up the wire to the positive terminal - this is important. Now toss another piece of metal in the water and hook it up to the negative. Stuff will start happening, probably on the negative (cathode) piece first. Apparently you can hook the negative side to the container if you're using a stainless pot, but I didn't dare risk the wrath of She.
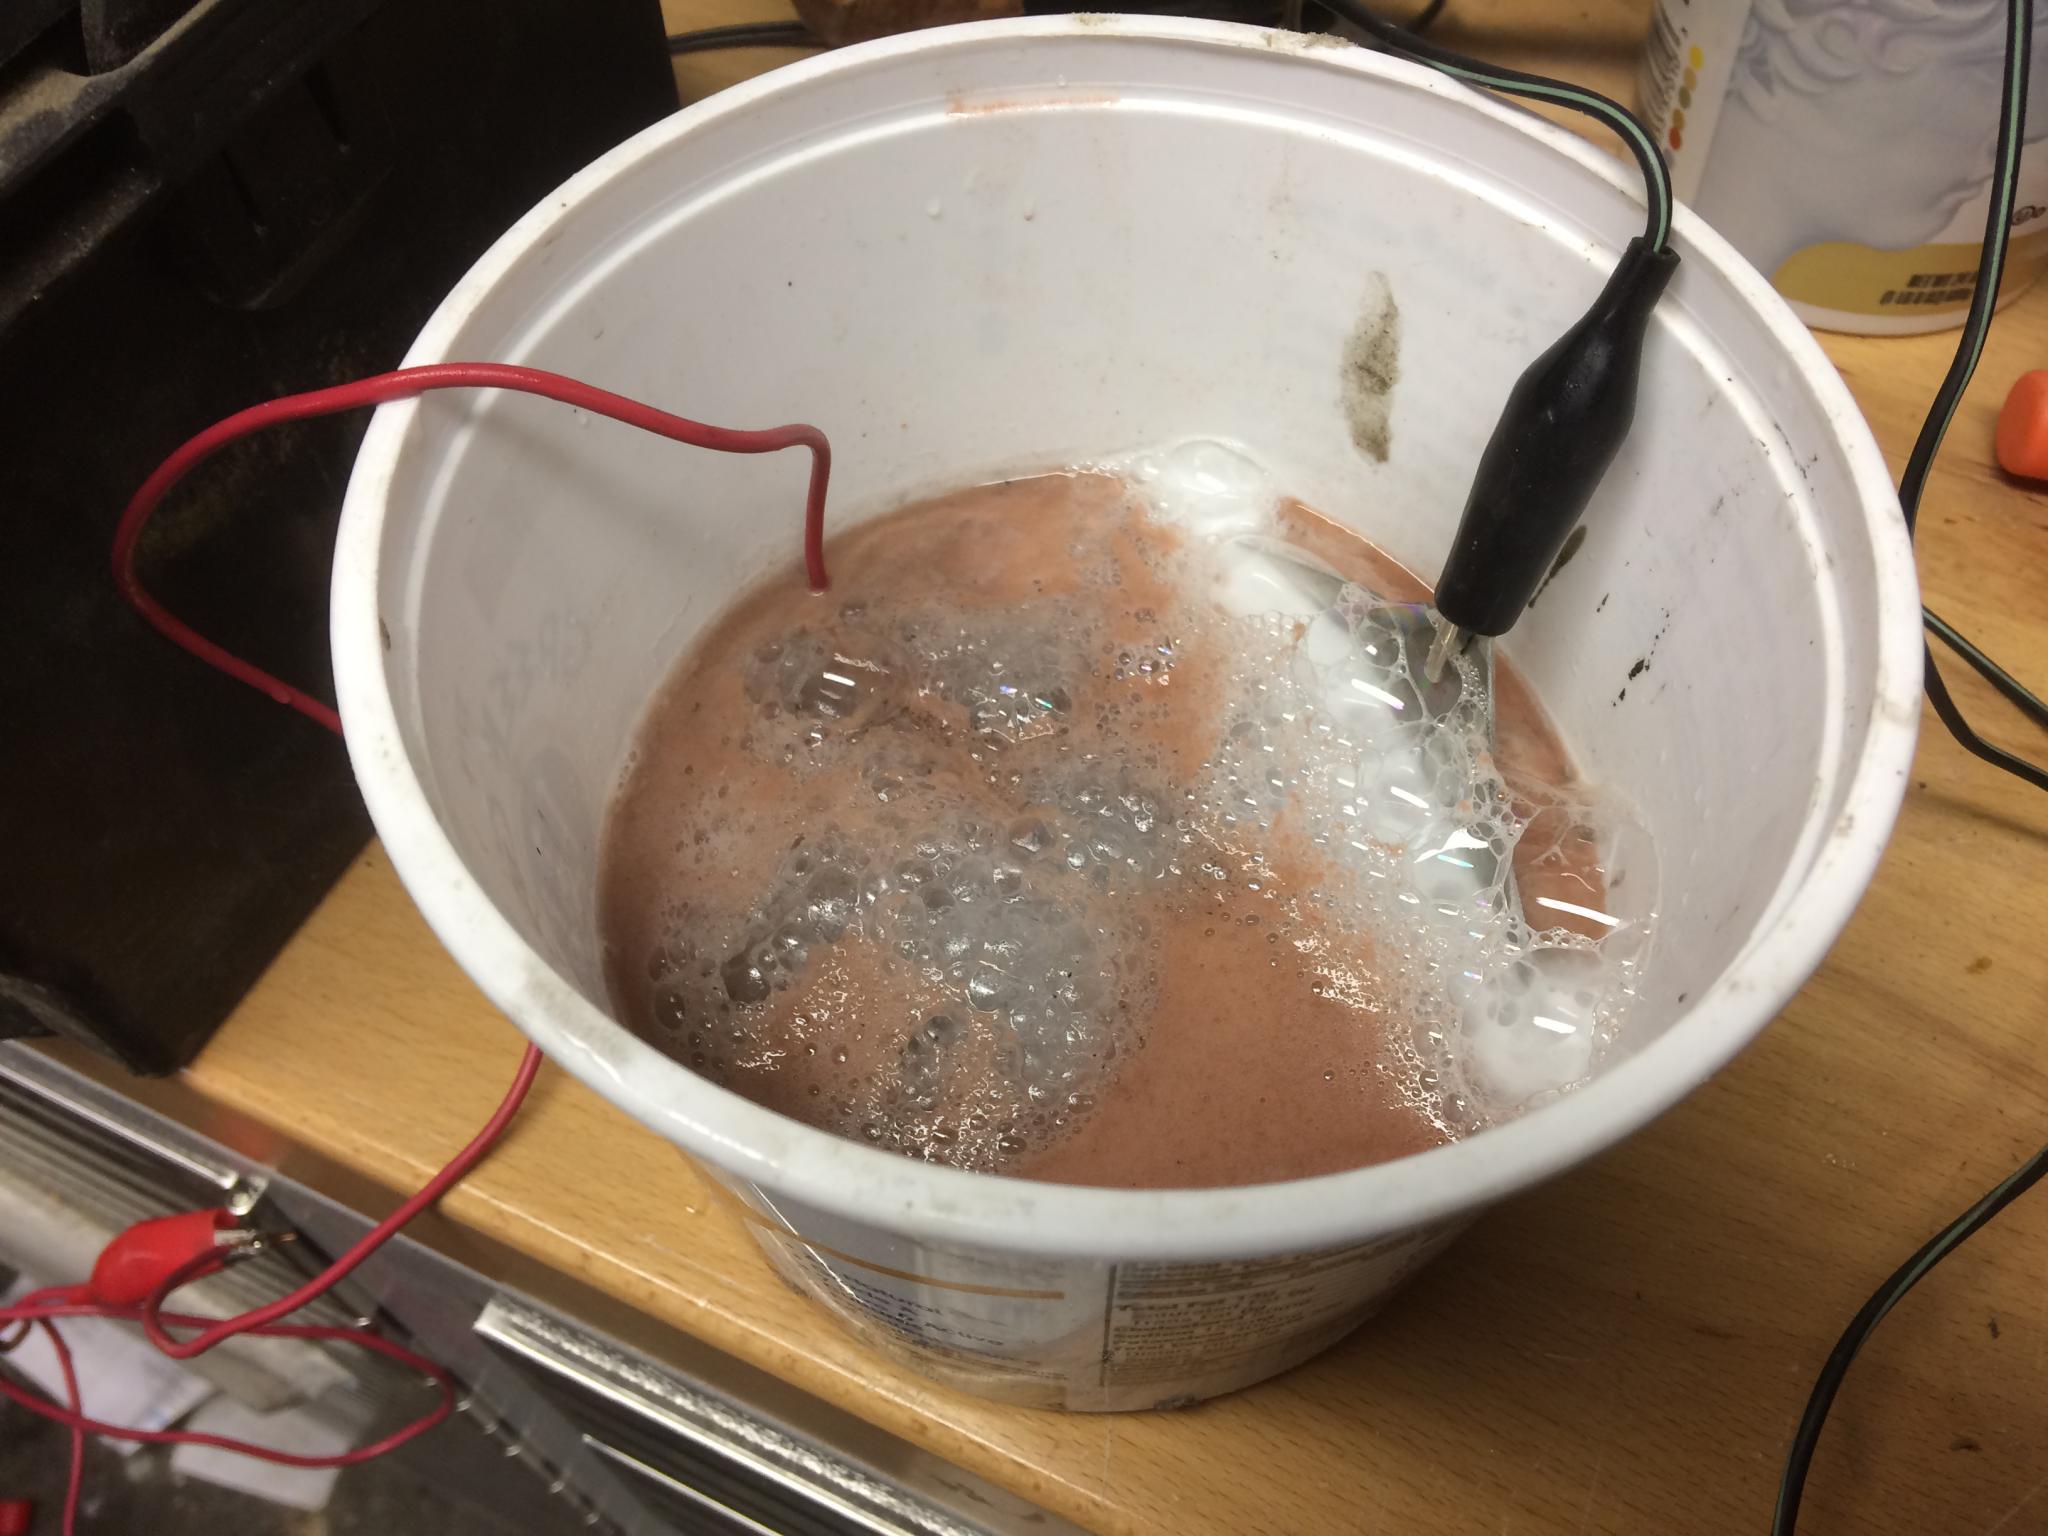
The bubbles coming off the cathode are hydrogen, and that's oxygen coming off the positive anode.
After a while, pull the piece out of the water. The elapsed time seems to vary depending on the material, the amount of exposed area and the salt content of the water. Experiment!
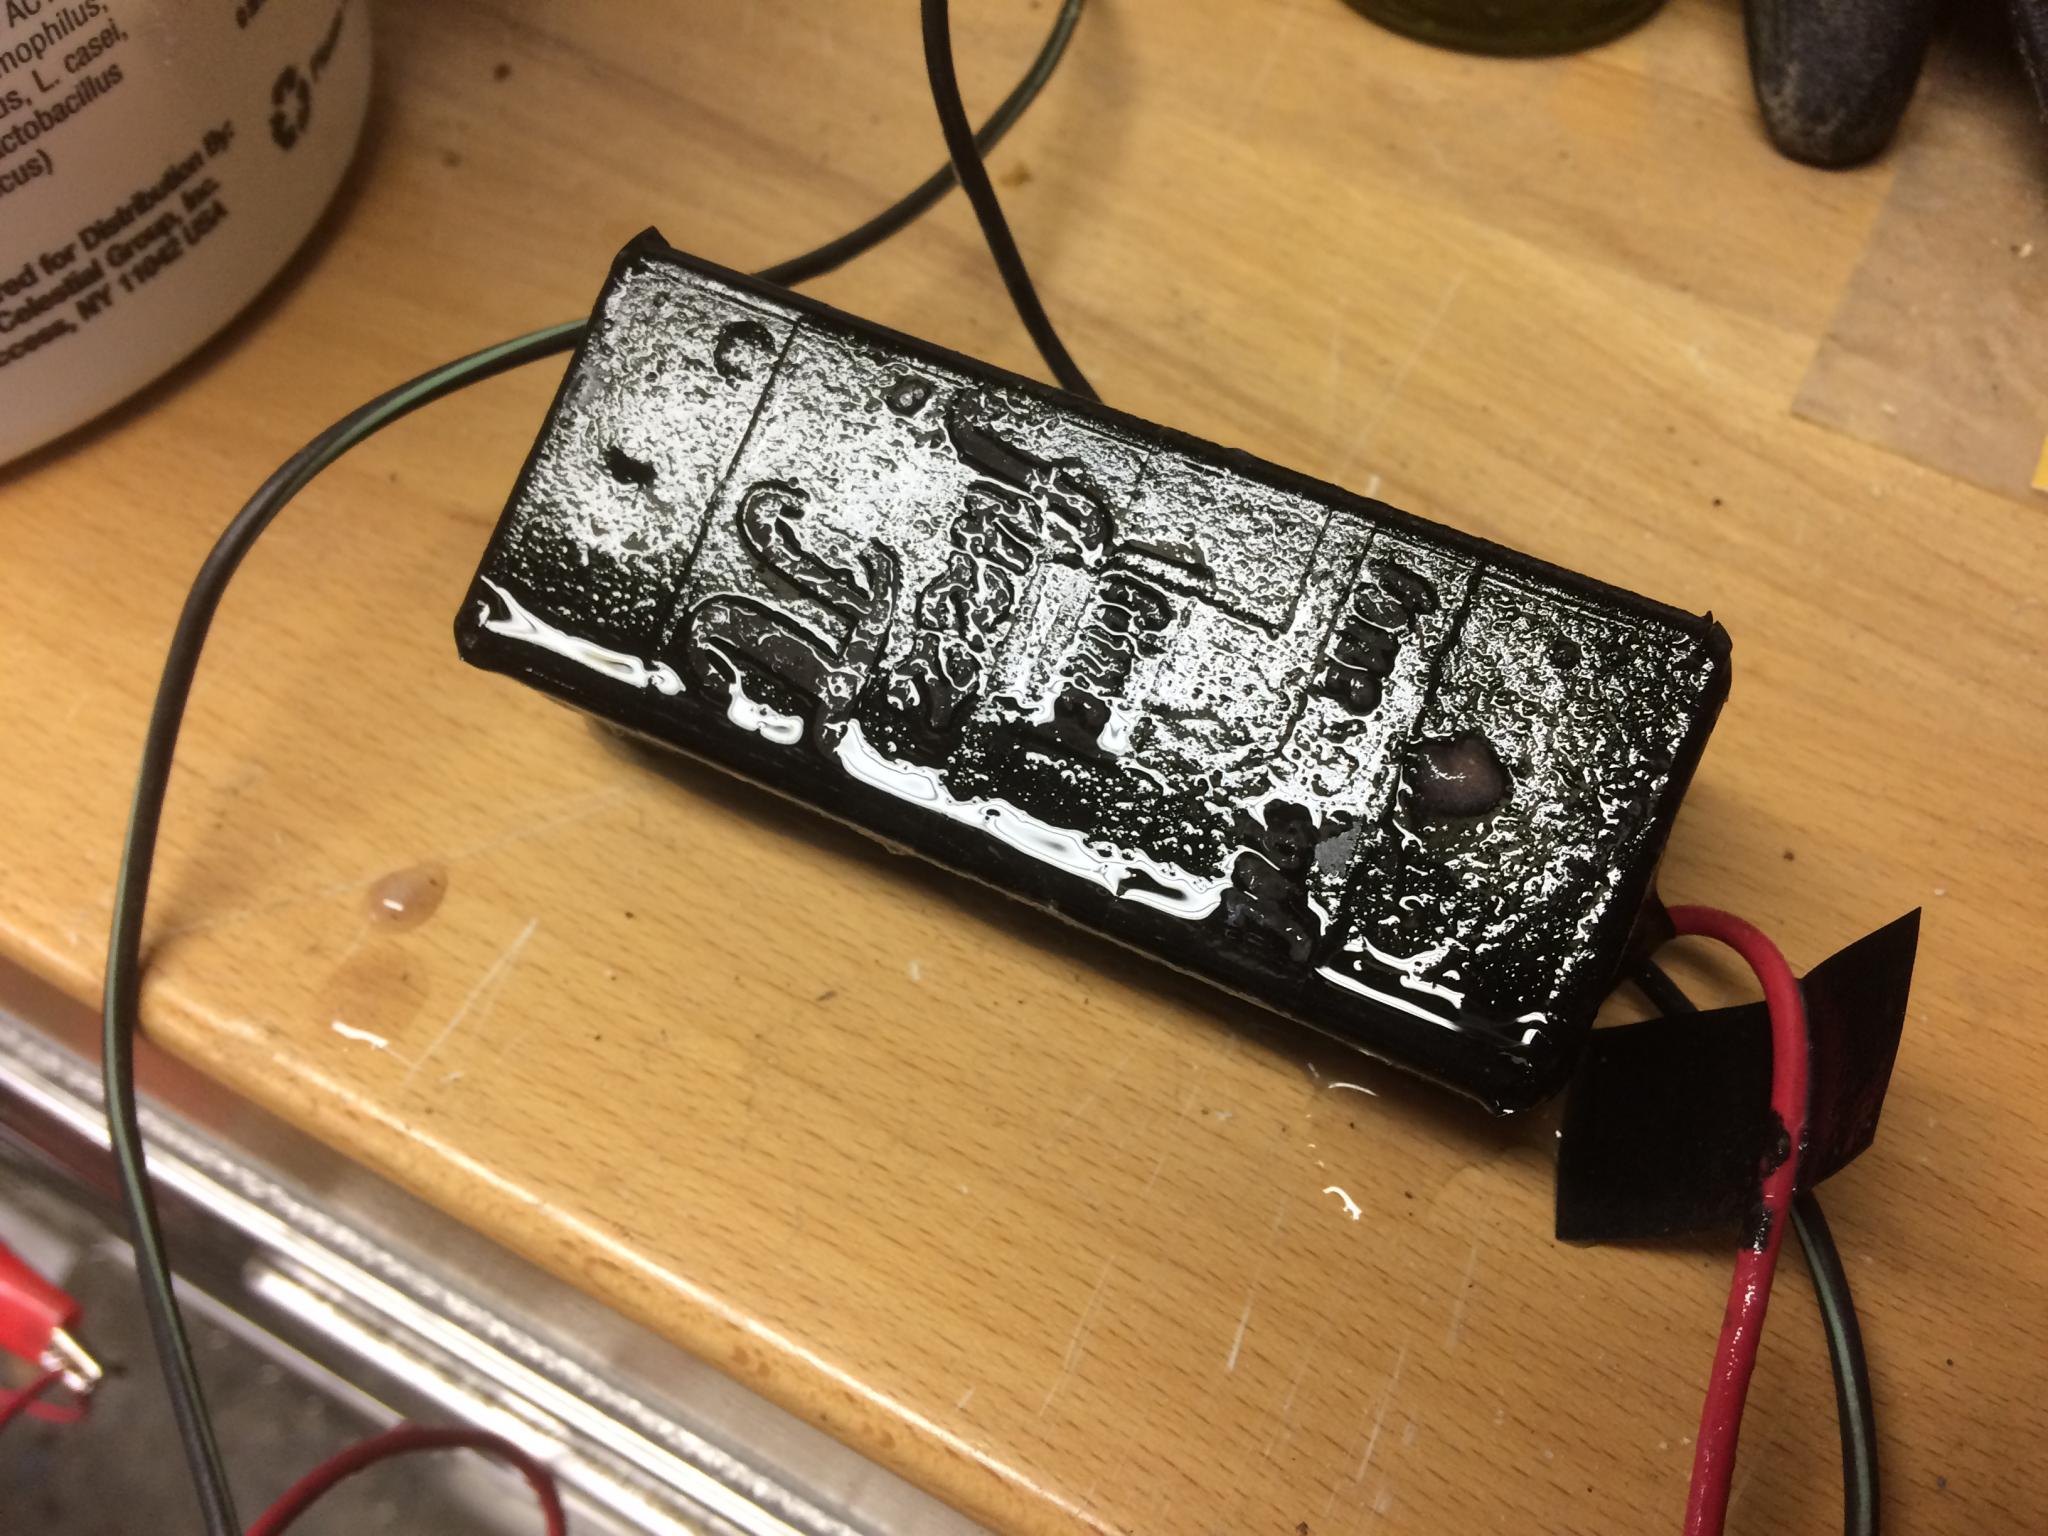
Rinse it off and bask in the magic! The black is from the process, I haven't tried to remove it yet. Aluminum oxide?
The longer you leave it in, the more it will erode the metal and the deeper your etching.
Lessons learned.
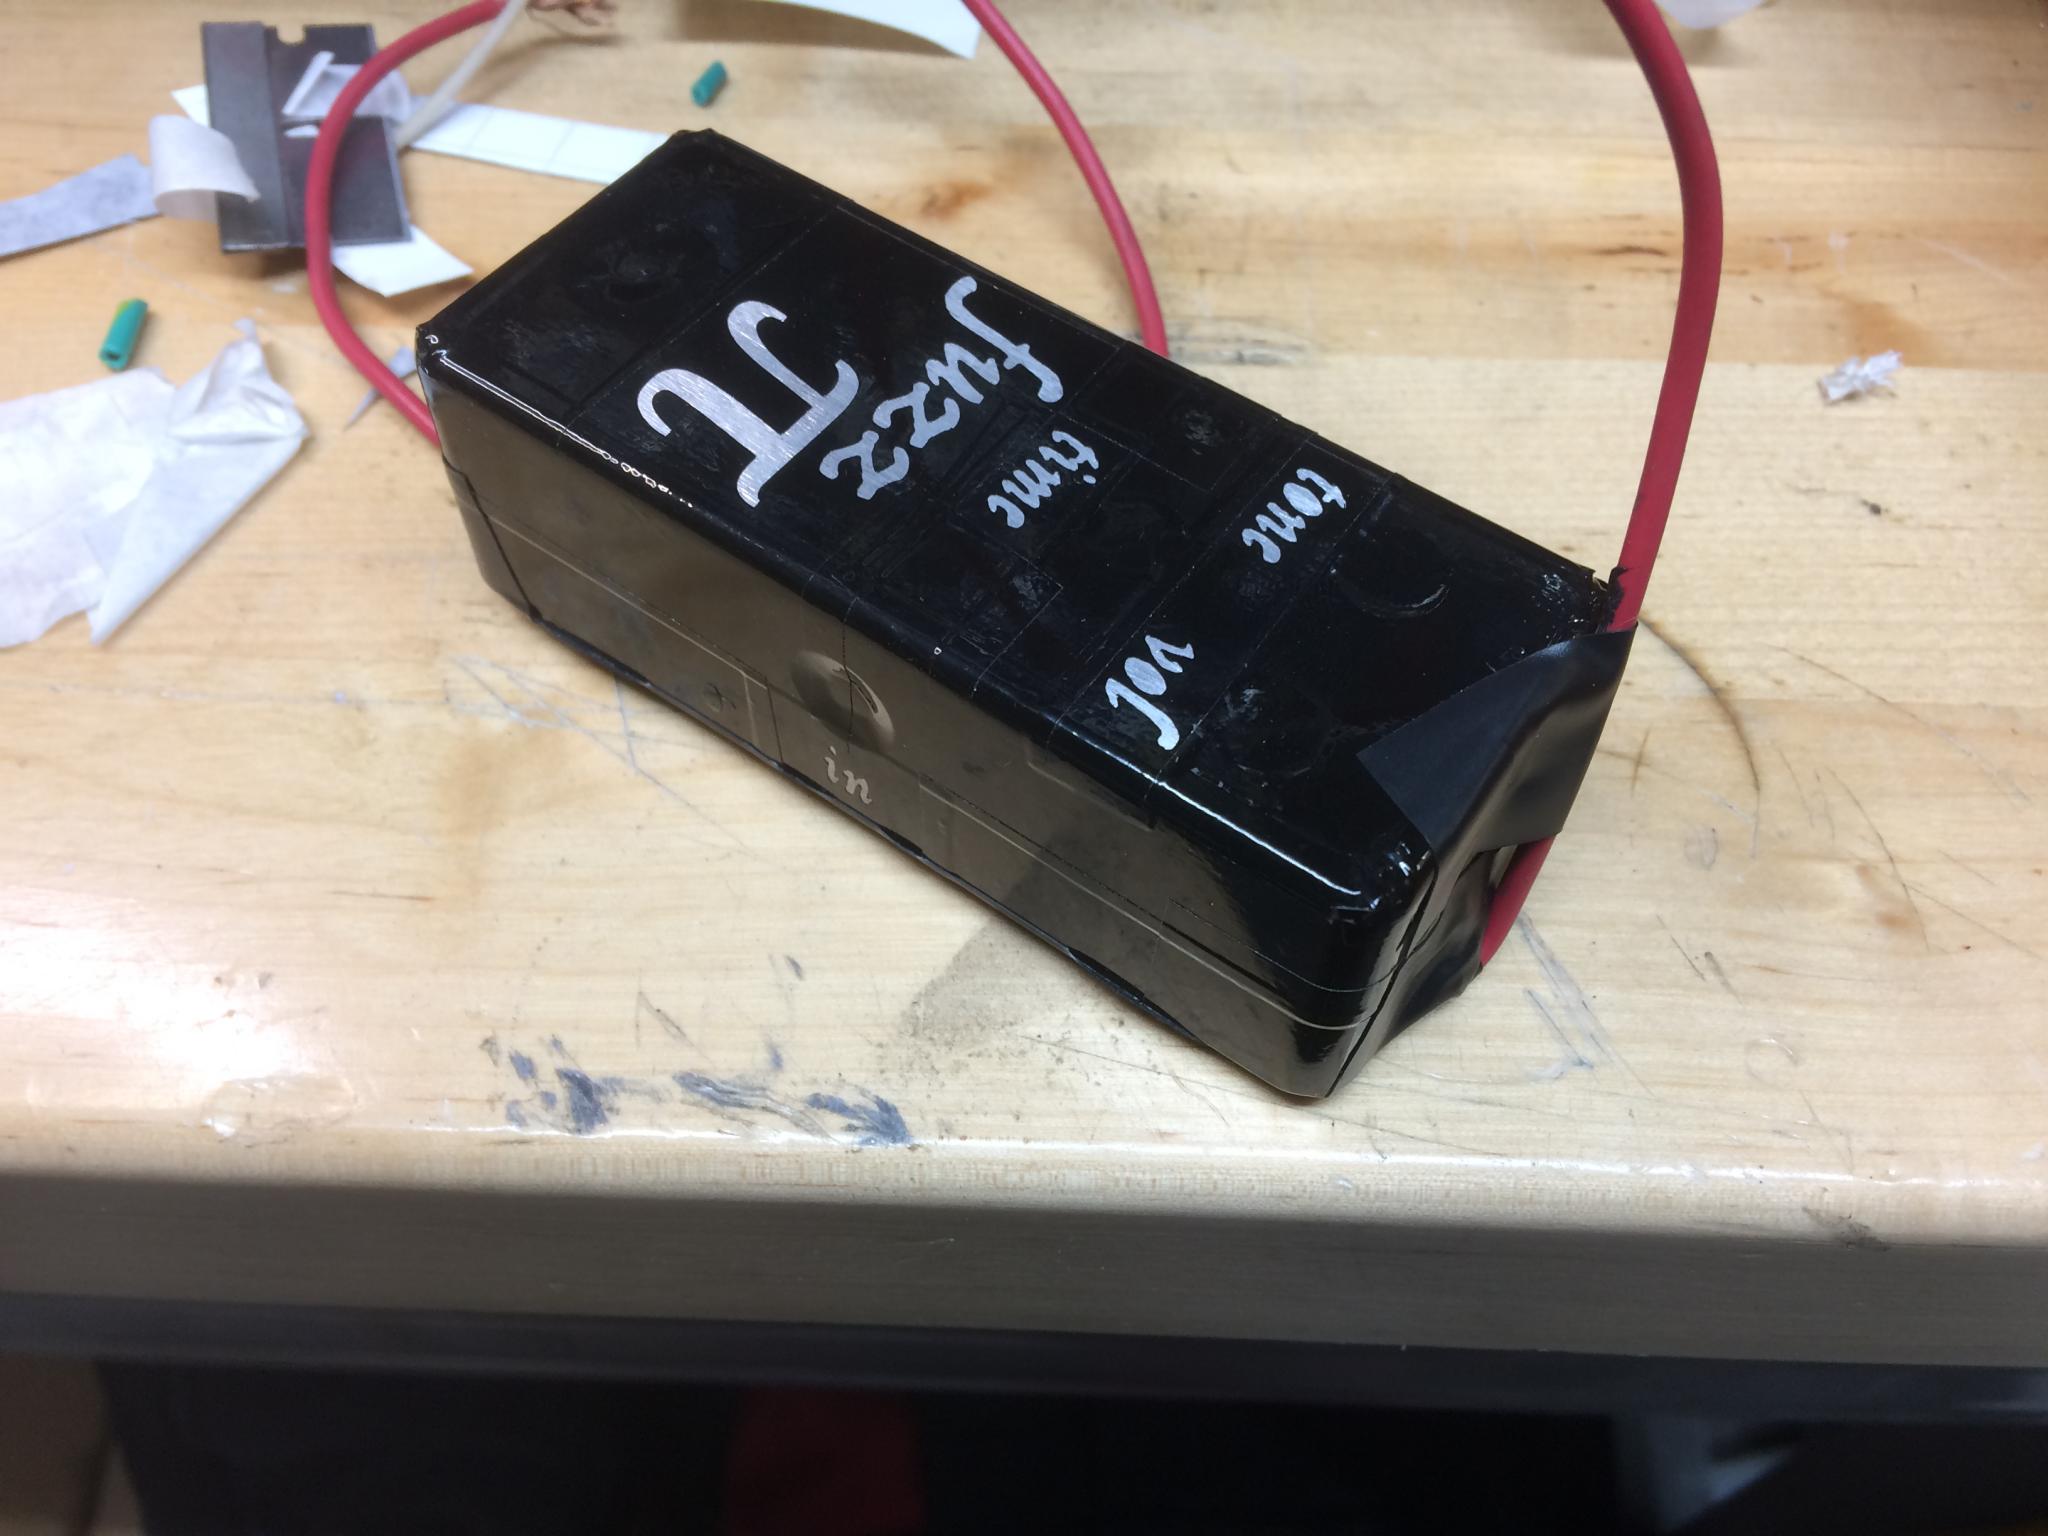
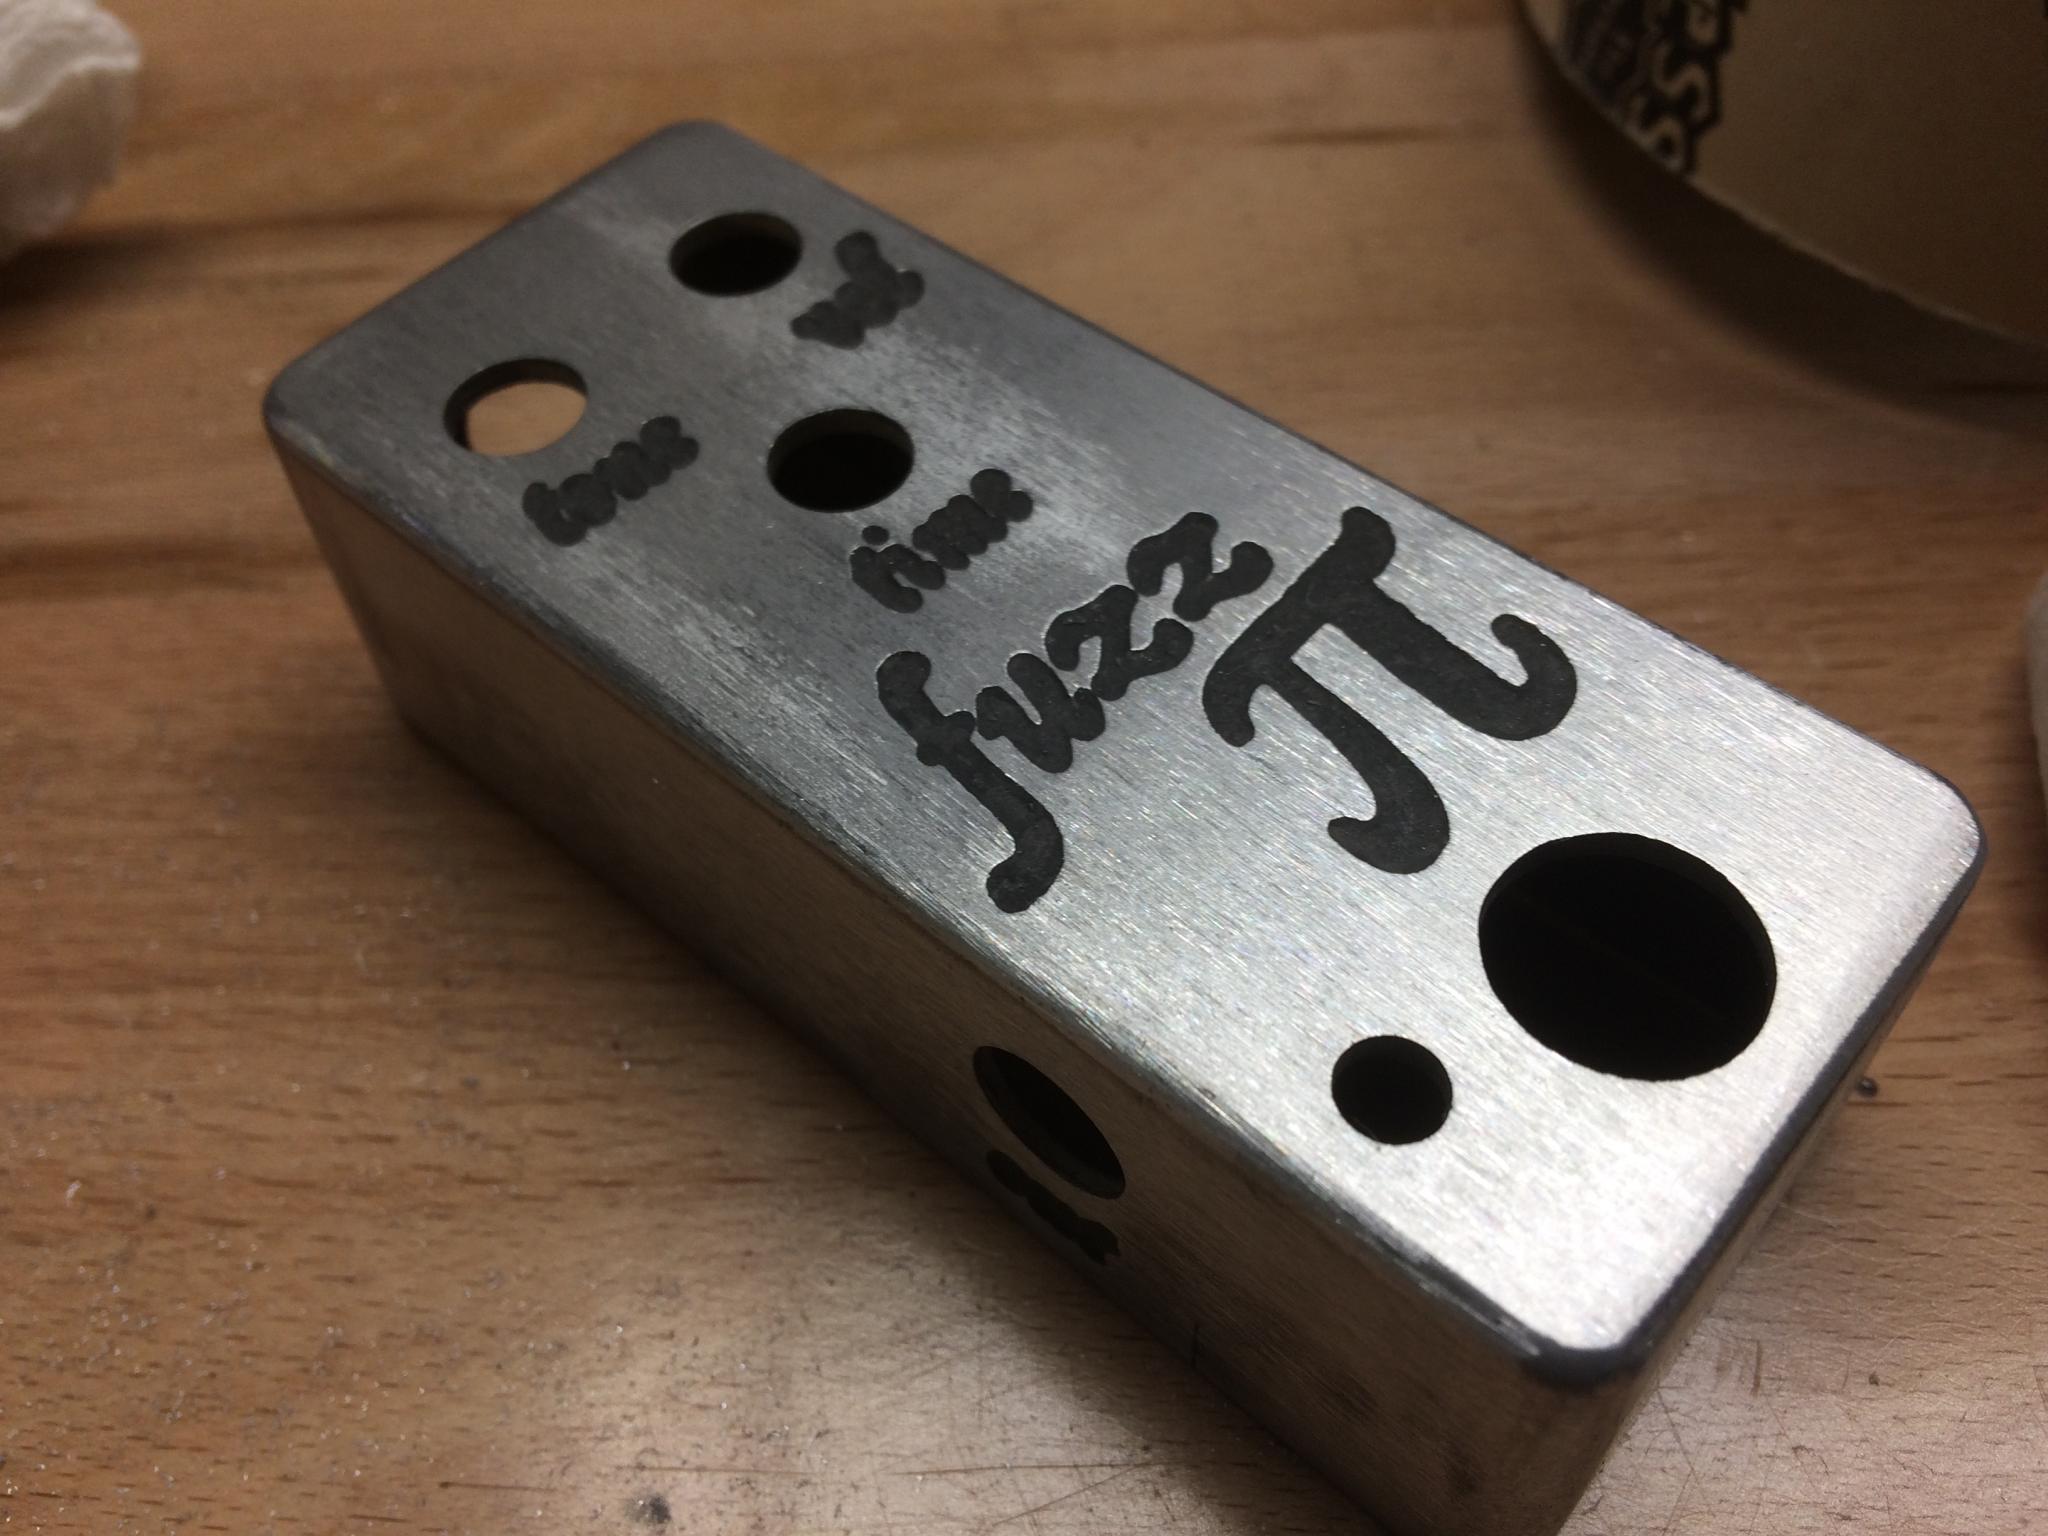
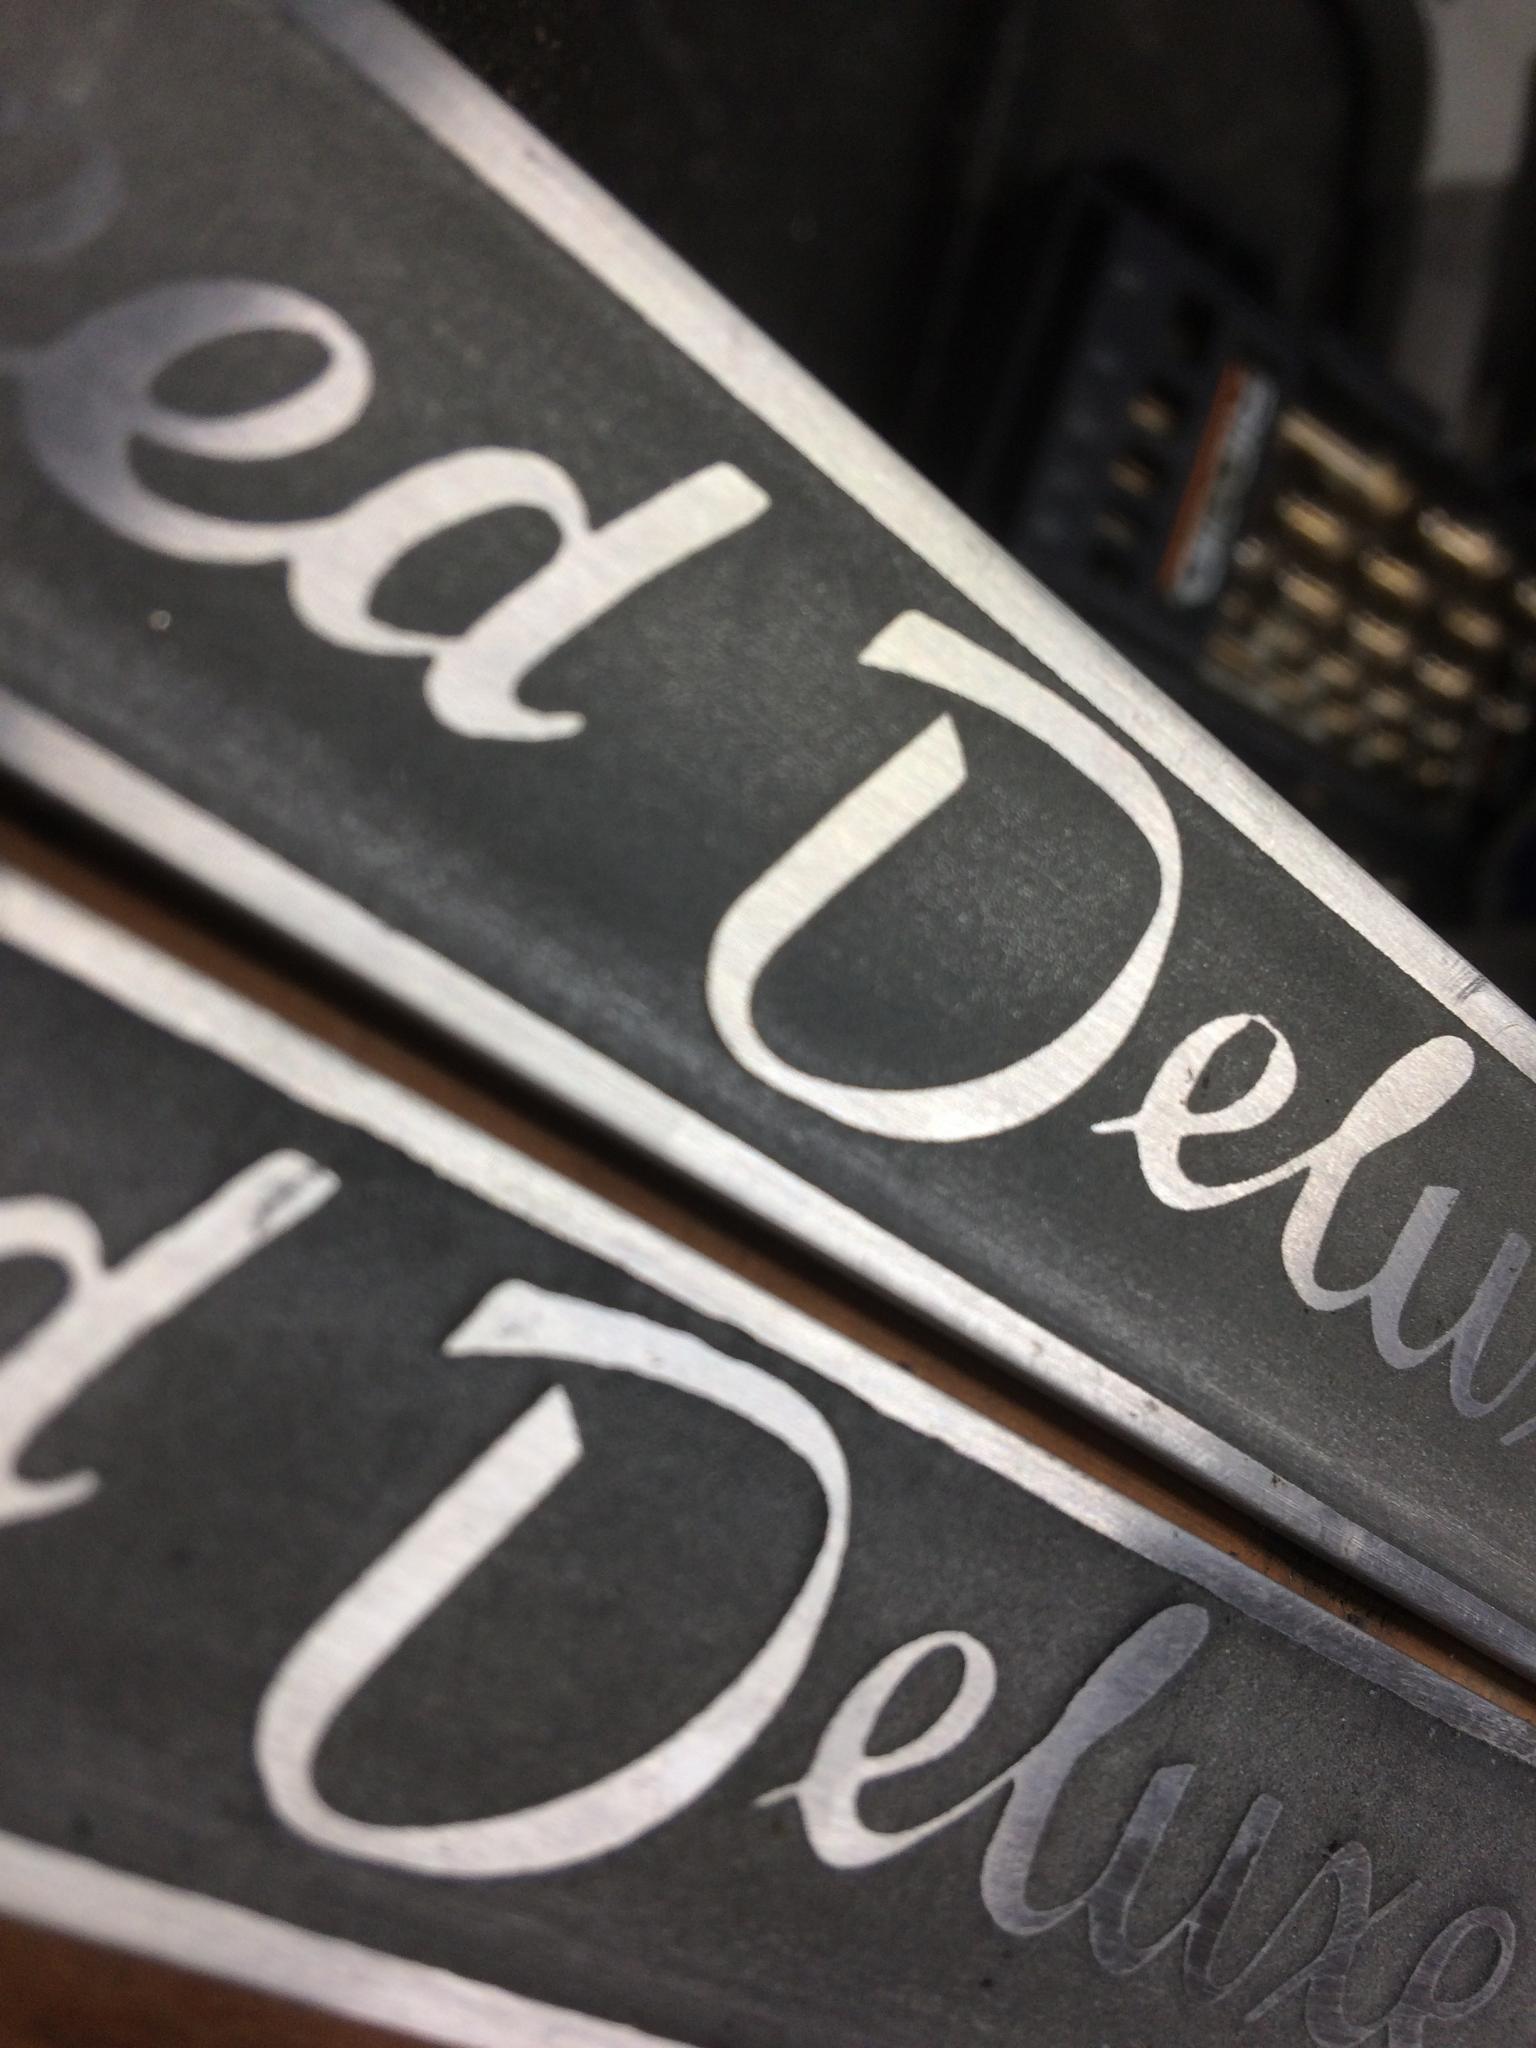
Leave it in too long and you'll start to undercut your mask. Interestingly, this seems to happen more on the sides that aren't facing upright and are free to bubble off. Look at the difference between the text on the top of the box ("time") and the same size font here ("out"). This was 10 minutes, by the way. If I were doing this one again, I'd do one side at a time.
Another comparison of times. The upper piece was run for 30 minutes. The lower one was in for 90. The lower one is nice and deep, but it's starting to undercut the mask on the tighter sections. It clearly etched faster on the smaller areas, the large area is shallower. The funky top of the "e" in the upper one was a masking problem.
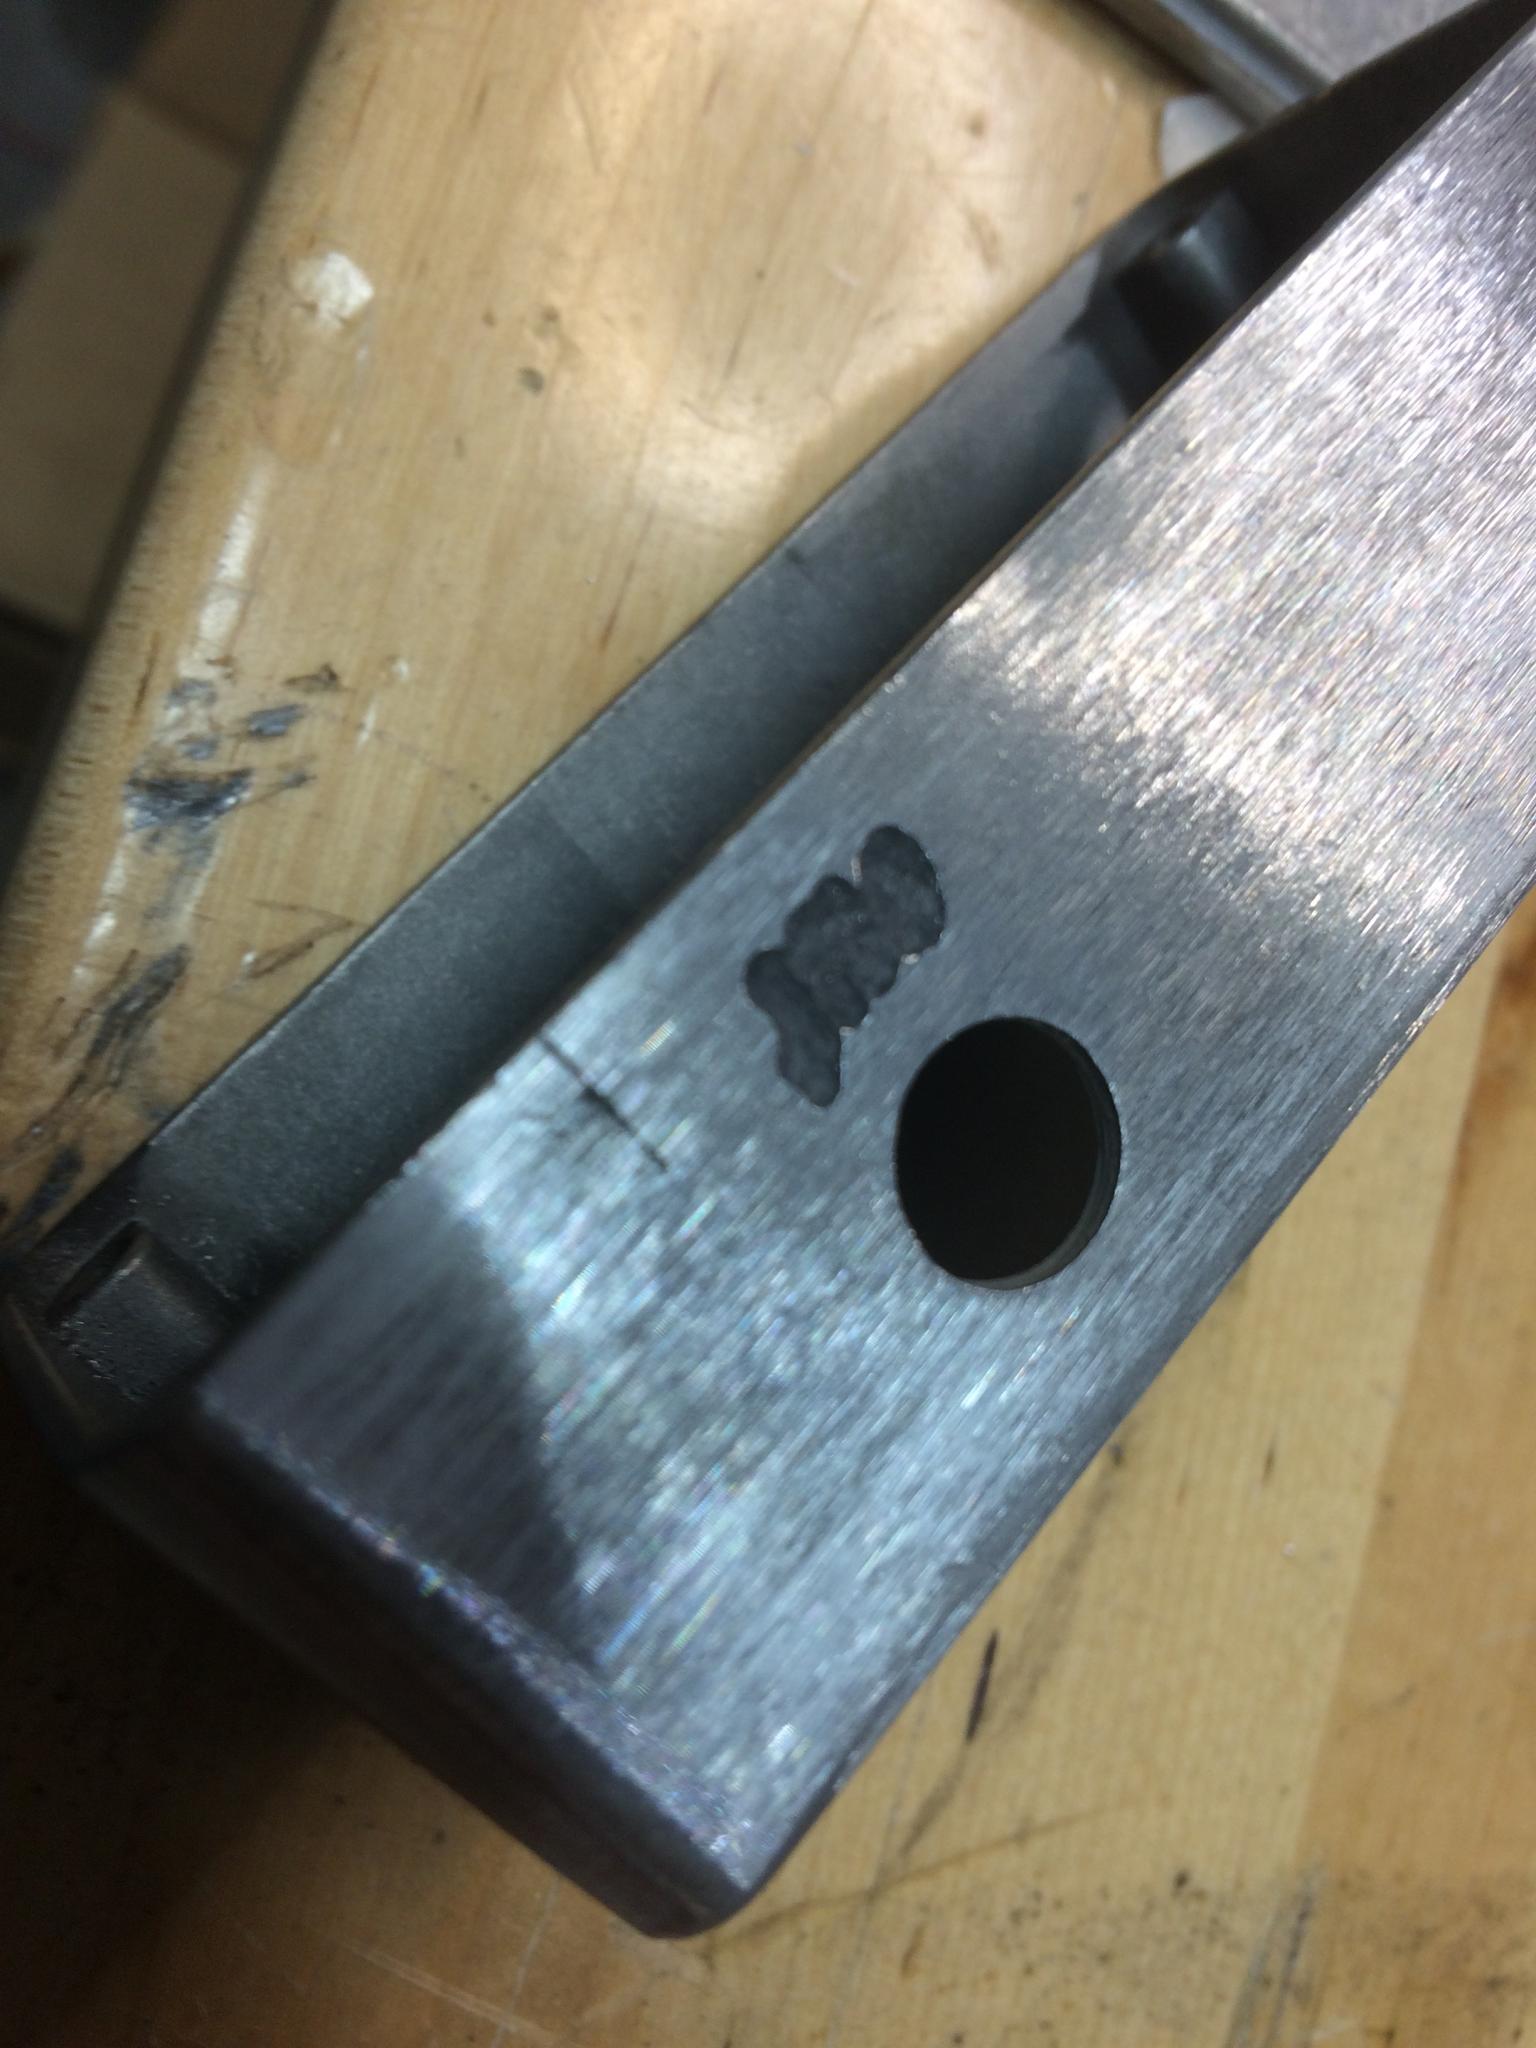
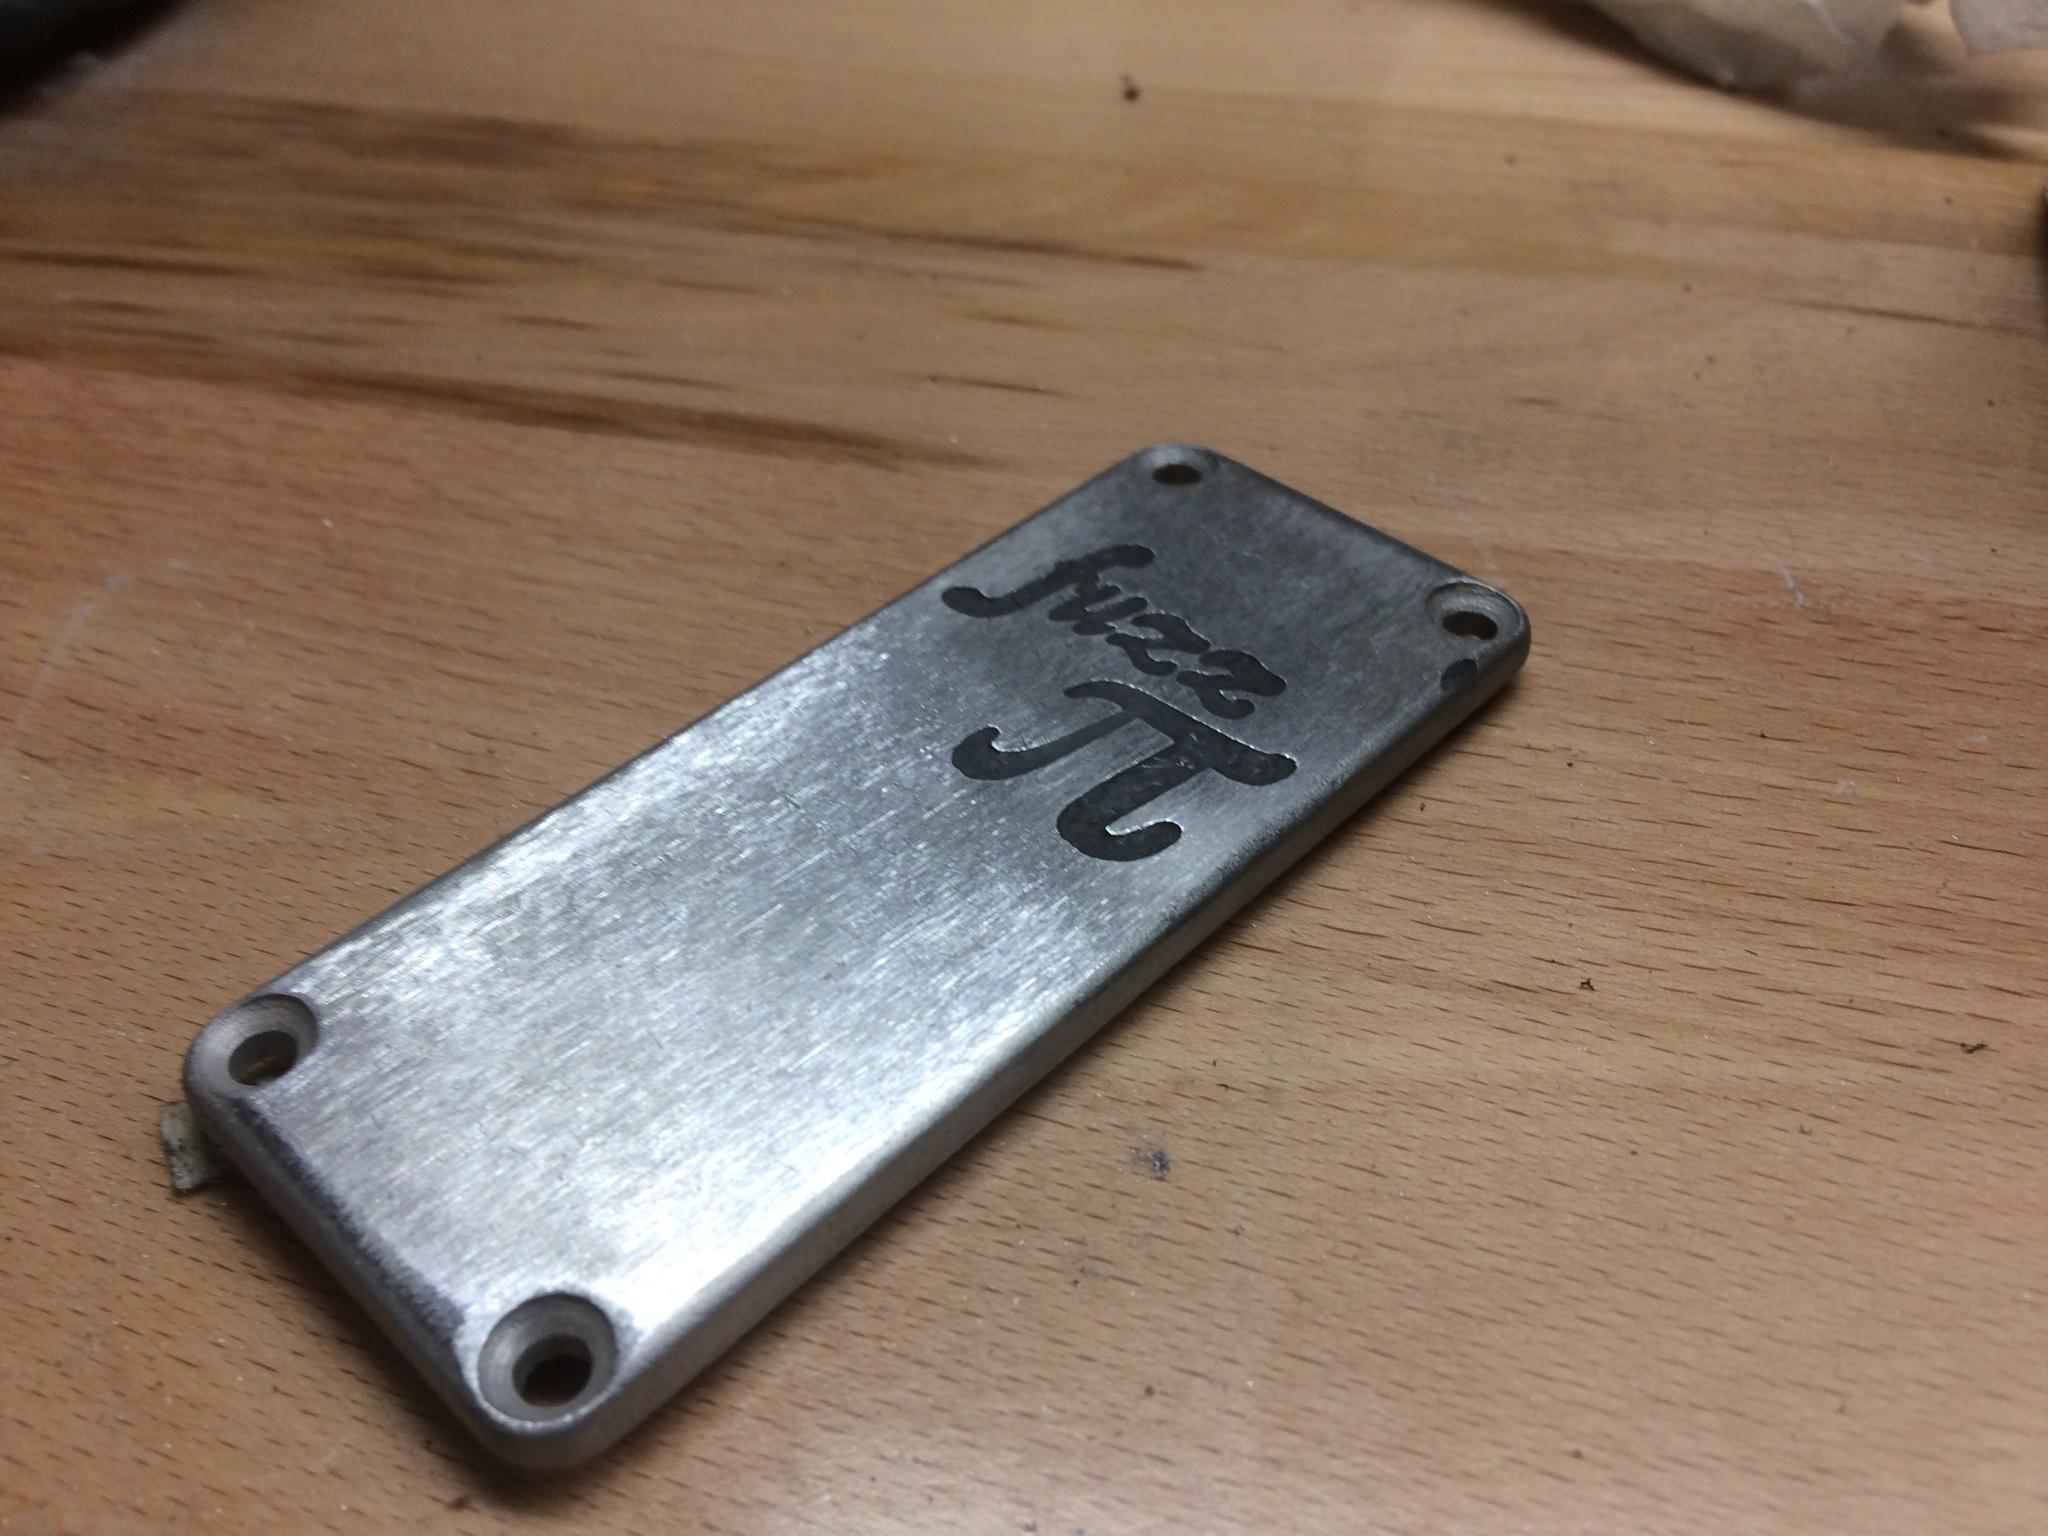
See the notch near the screw hole in this piece? That was a spot where the masking wasn't perfect.
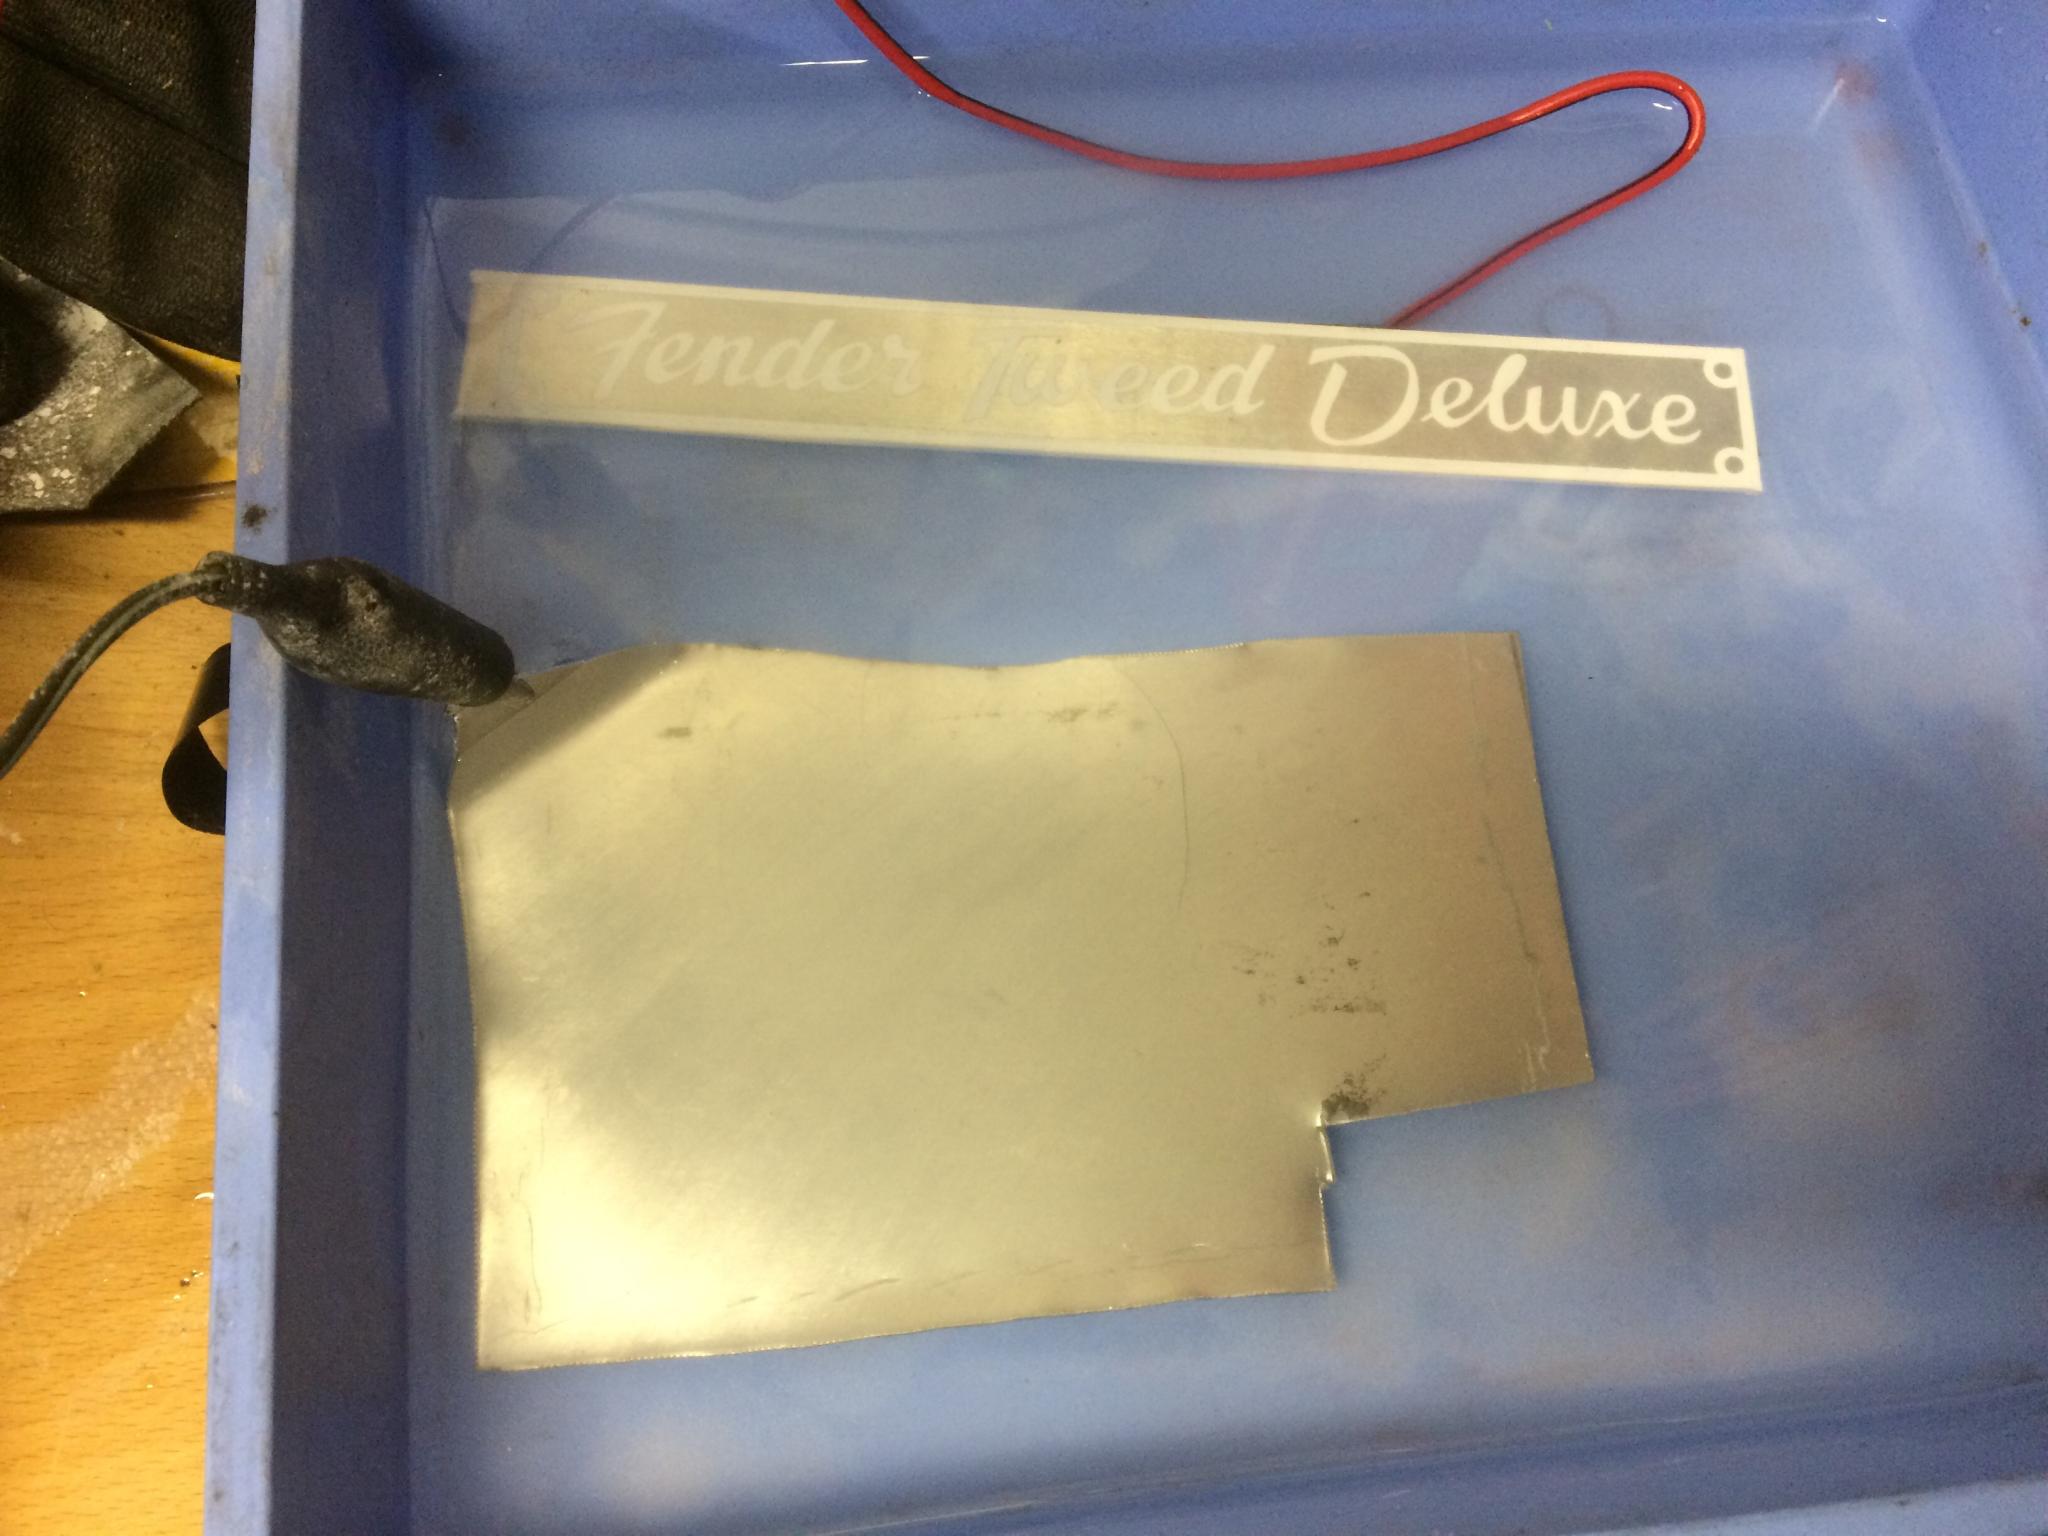
The big piece etched far more slowly than the little one. This could be a difference in metals, a difference in salt content in the water or the larger surface area. I suspect it's the latter primarily, but it's a good example of why you need to do some test runs first.

NOHOME
UltimaDork
7/25/17 11:37 a.m.
This is not far from the electrolysis method of rust removal. I know that Stainless Steel is discouraged for anode use since it produces hexavalent chromium and that stuff is bad.
question about the battery and safety, do you have to worry about how much current is going through the wires,
or is there enough resistance in the mixture to keep the wires from getting hot, melting, arcing, etc... ?
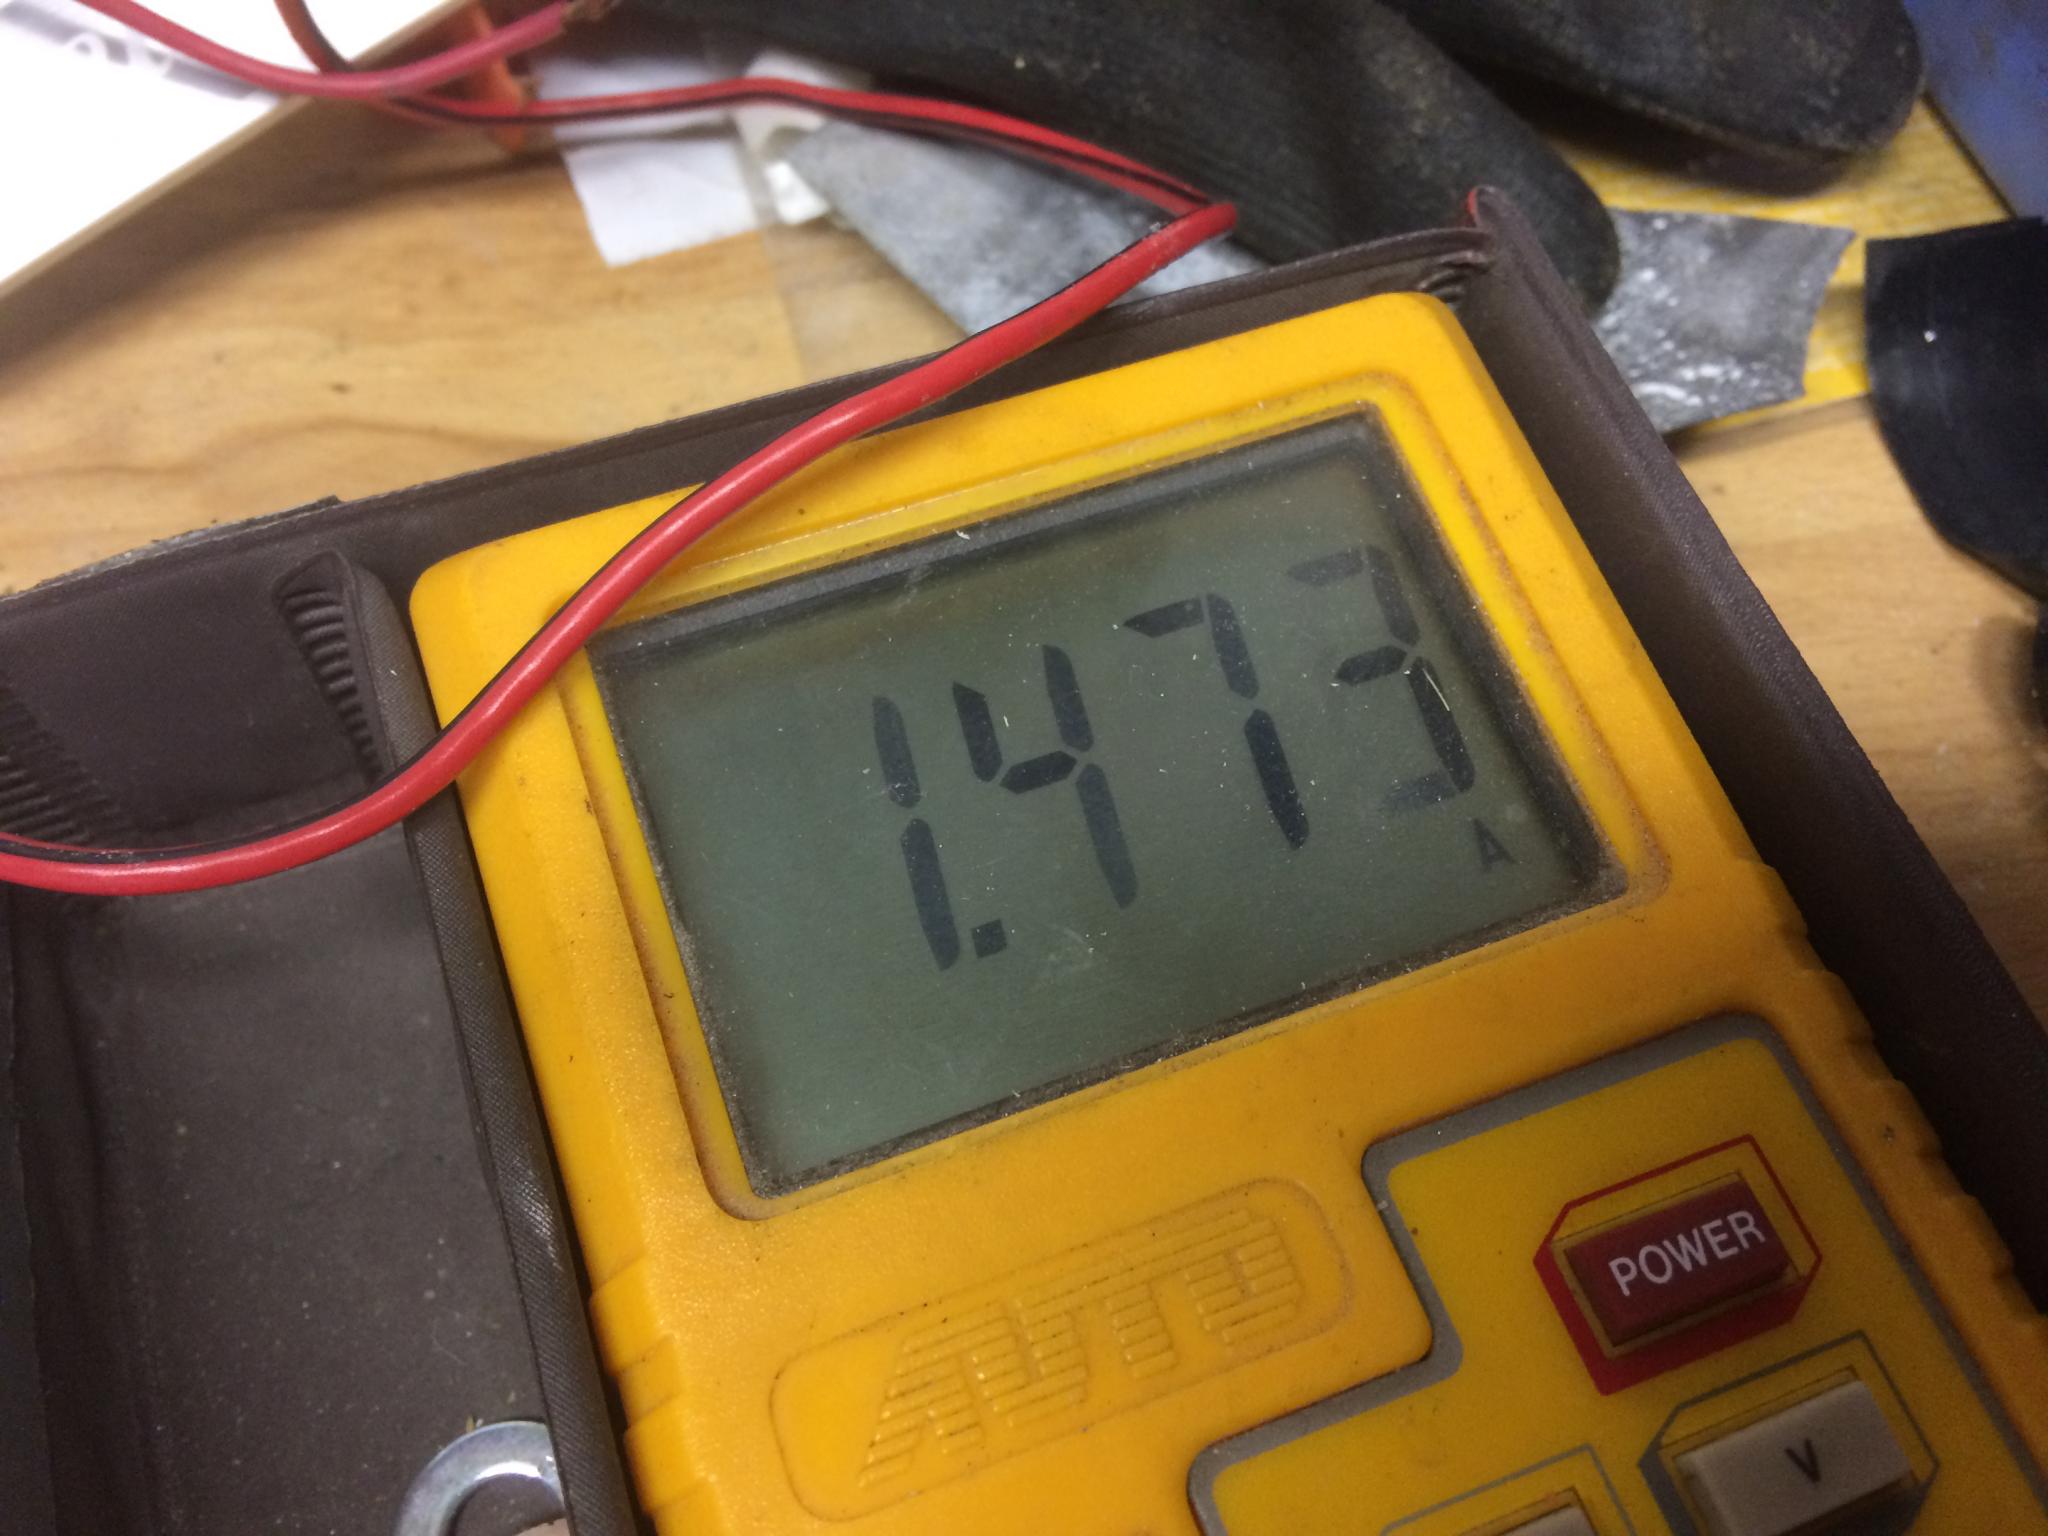
After running the two big pieces - a total of 2.5 hours non-stop - the water was warm but the wires were not. I wasn't using very heavy wires as you can see. Not a lot of amperage is going through here. I did make sure to disconnect the battery every time I wanted to pull a piece out to check it, just in case.
NOHOME wrote:
This is not far from the electrolysis method of rust removal. I know that Stainless Steel is discouraged for anode use since it produces hexavalent chromium and that stuff is bad.
It's also electroplating, depending on what you use for your metals. Or galvanic corrosion if you own a Land Rover You're removing material from the anode and depositing it on the cathode. I can see that my cathode plate is taking on some sort of material, but since I'm using the same(ish) metal for both it just looks like oxidation.
This is the perfect answer to a modified badge project I have been planning. My first thought was to cast it, but now I think I will use this etching method. Cool and thanks for the write up.
Cool
now I need to start a project to try this
I have been doing a little experimenting with metal etching in hopes to make faceplates for my amplifiers and various other projects. I have been using Ferric Chloride on stainless.

The logo was cut from vinyl. My problem is that the adhesive fails after a few hours in the solution and I start to get bleeding in the areas I don't want etched. In the case of letters the smaller bits of vinyl fall off and the D's and R's lose their definition.
I have a roll of photo resist film, transparency sheets for a laser printer and a UV light but haven't had the time to do some proper attempts.
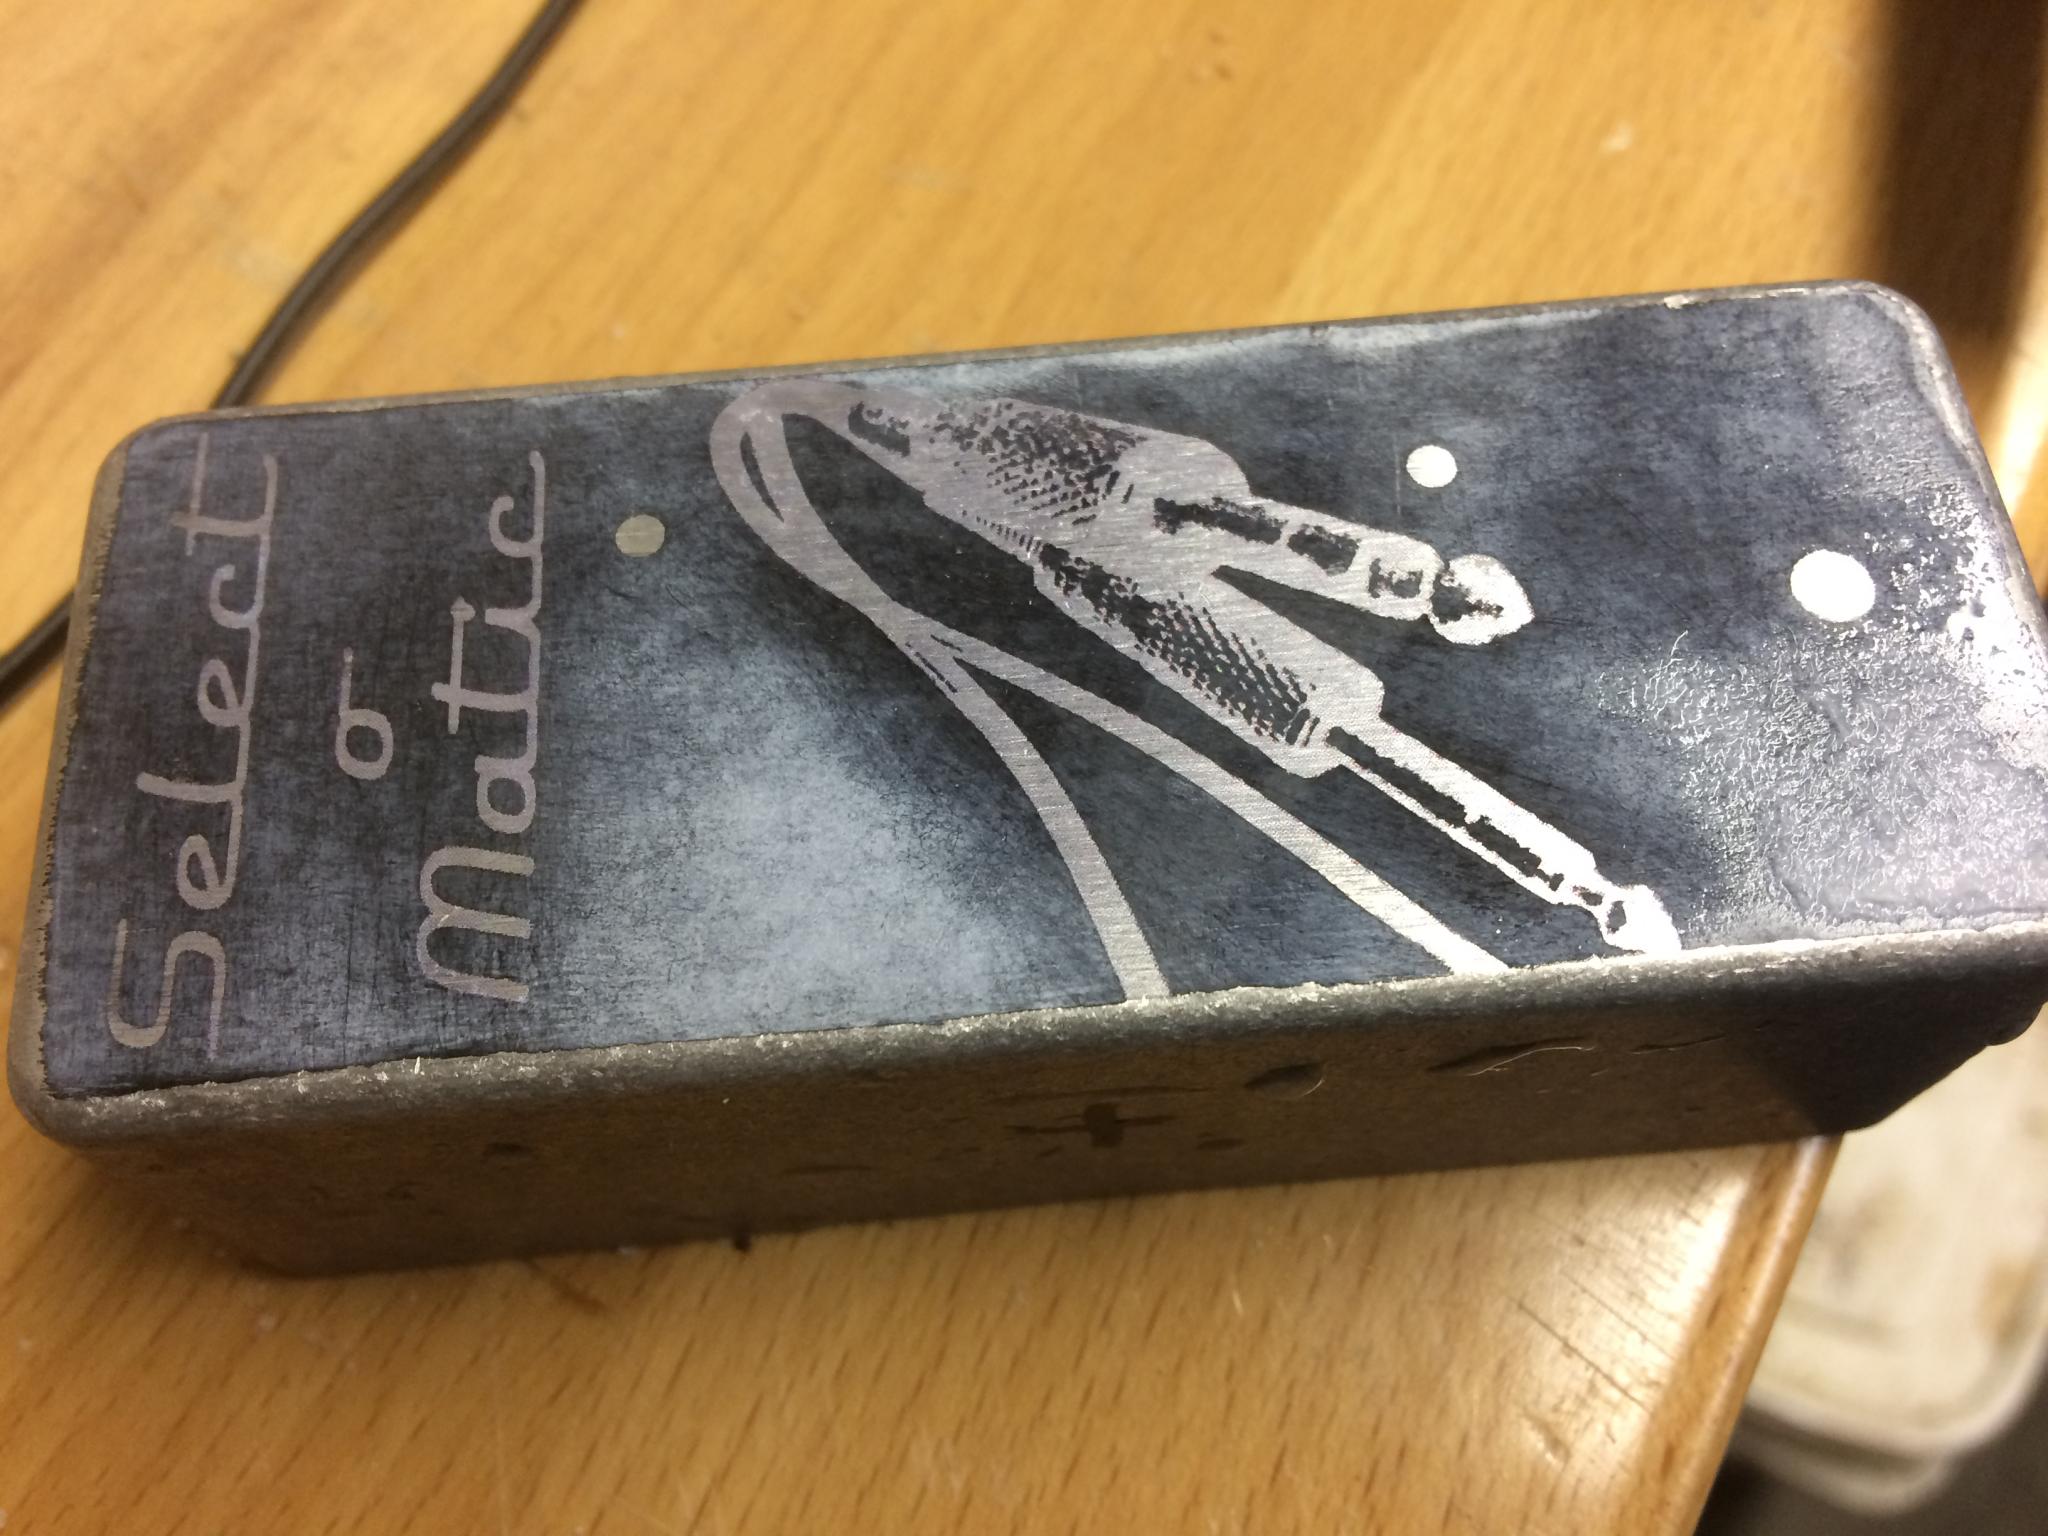
The plaque makes a nice backdrop for small machining projects on our Instagram account though 
I was interested in trying acid etching, but I didn't have the ferric chloride and I did have a car battery The vinyl has no trouble staying on with the electrical version.
I'm probably going to play with the toner method this weekend, see how it compares. It'll open up more possibilities for detailed designs for sure.
One tip I've recently read is that the negative cathode should be as large or larger than the anode. I might give that a try on my next run, although I think mine's actually bigger when surface area is calculated.
I will admit to not researching the chemistry. I'm assuming those bubbles coming off the anode and cathode are O2 and H2 (and when I think about it, it's about a 2:1 ratio) but I'm not taking the aluminum into account. Any ideas on what we're actually creating here?
I'm posting here just because I want to try this and seeing this thread pop up will be a good reminder.

GSmith
HalfDork
7/25/17 9:39 p.m.
Tagged for later. I have plenty of salt water for weed removal... looks like it has more fun uses!
More experimentation!
I started with nice clean water and lots of normal table salt. You can also see the nice big negative cathode, and I've moved them a bit closer together.
Hook it up and instant action.
For those wondering about the draw.
The results of my experimentation. Here are attempts 1-5, top to bottom.
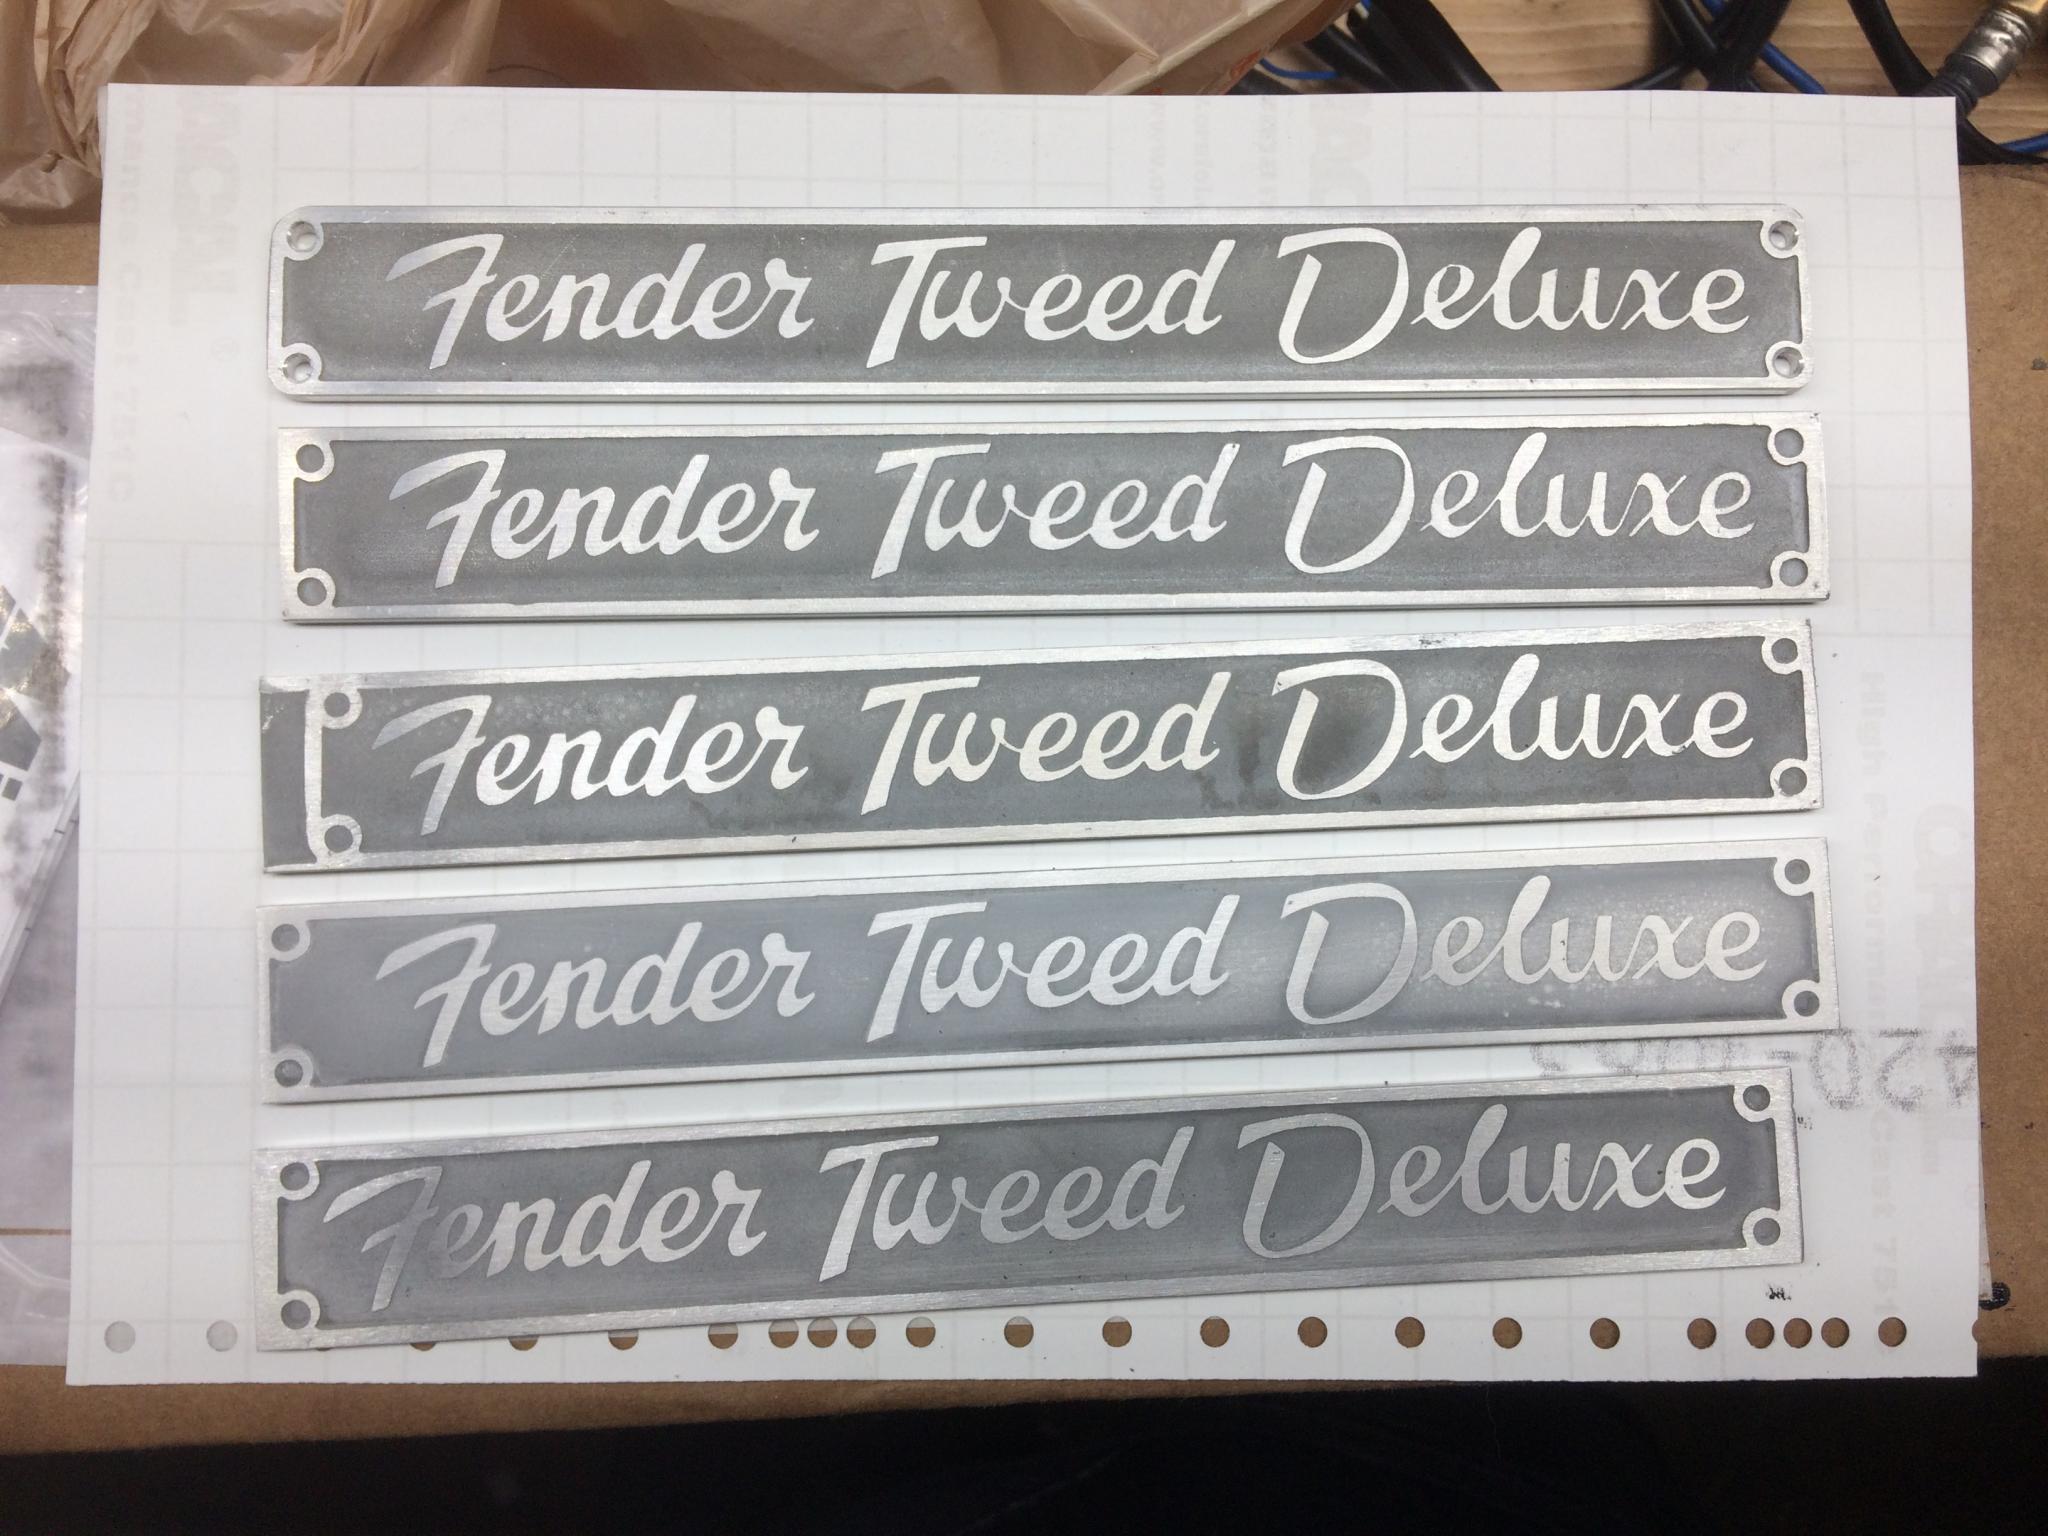
Here's what I learned. With the exception of #4, these are all as they came out of the tank after removing the mask.
1, 2: we've already discussed. 30 and 90 minutes respectively, undercutting on 2.
3: I spent more time prepping the surface to make sure it was free of oxide. The new setup was obviously etching a lot faster. I was concerned about undercutting, so I pulled it after 10 minutes. It seemed to etch deeper on the bottom edge. That edge was sitting a bit higher in the tank and was also closest to the cathode.
4: I cut two pieces of wood about 3/8" thick and used them to put the anode directly on top of the cathode. This means that it's equally spaced across the work area. The close proximity also meant really good transfer, and both the water and wires started to heat up due to the amount of energy being used. This was pulled after 5 minutes. It wasn't etched all that deeply - although I did try polishing the non-etched surfaces to see how it would work. That's why it's a bit washed out. The etching was more even across the piece, but it still etched deepest along those long borders at top and bottom.
5: Same technique, but 7 minutes of time. I should have left it in longer but I knew this was the good one and I didn't want to undercut it. It's not a perfect background, but it's pretty good.
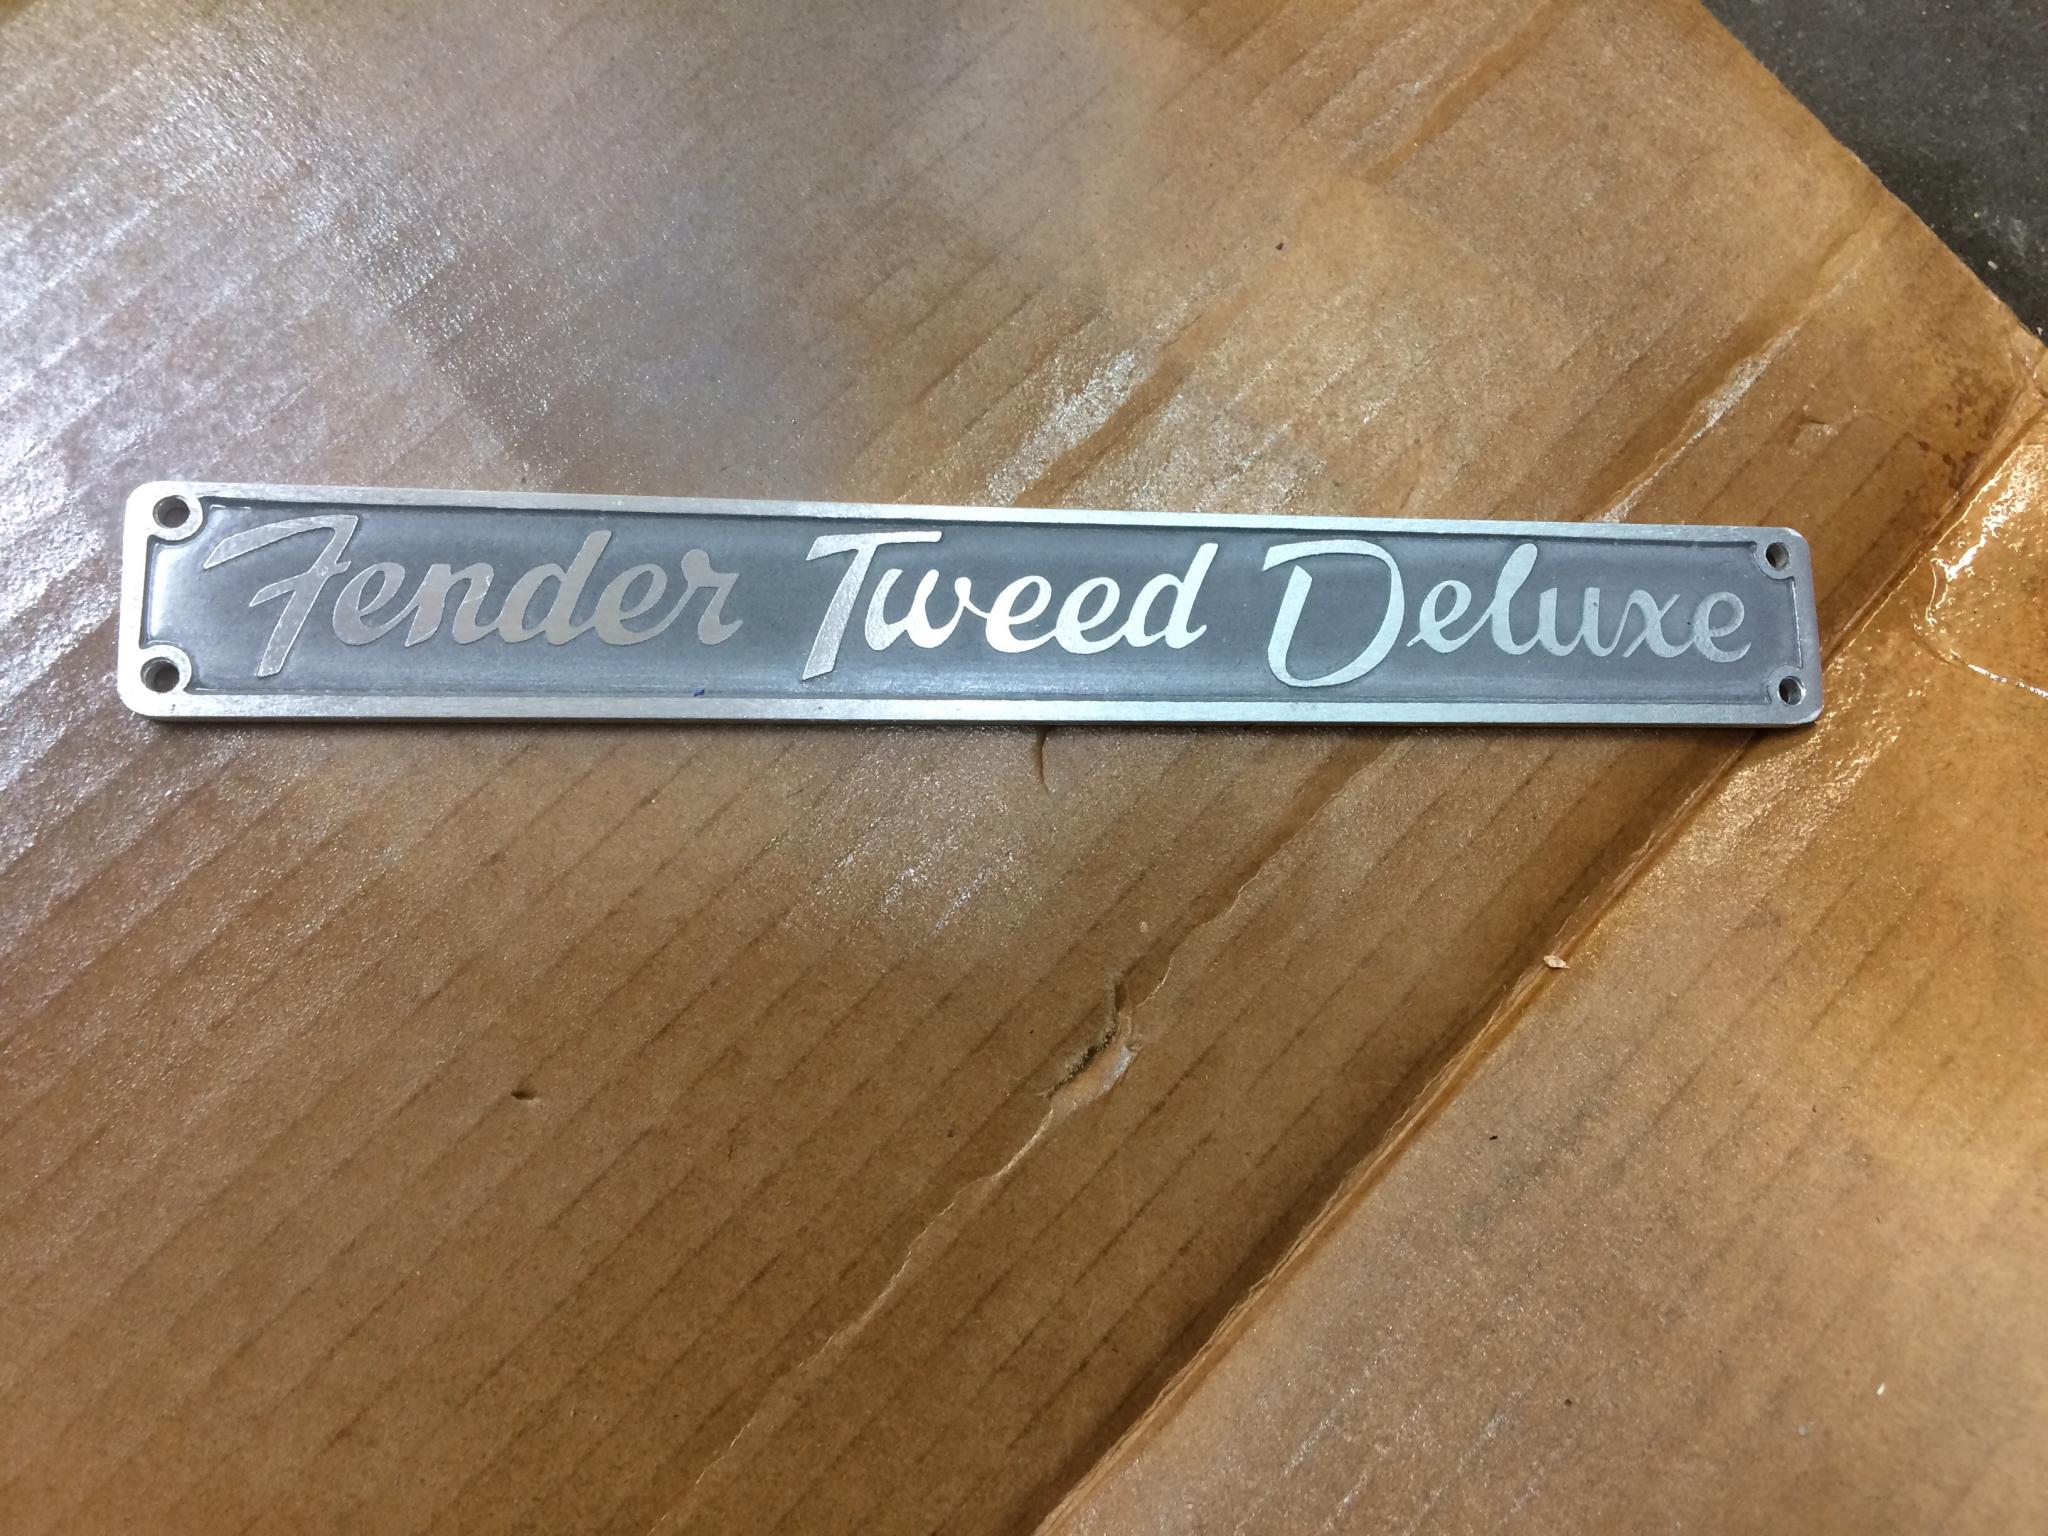
Did the finishing work on the edges, drilled it and shot it with lacquer.
The photo paper arrived today, I'll probably try toner transfer this weekend. Just have to come up with ideas.

SkinnyG
SuperDork
7/26/17 12:28 a.m.
I did PCB's in my Electronics class way back in the day with the toner and photo-quality ink-jet paper. I used Ferric Chloride initially, but switched to Ammonium Persulphate because it didn't turn the room brown.
Don't forget to print a mirror image.
First try with toner. I'm using HP presentation grade glossy paper because I found a recommendation, and it seems to work.

Iron that on to a piece of clean, flat metal with the iron set to the "wool" setting. I used lots of pressure and let it sit for about 60s, then rubbed it down while keeping it hot. Soak it water to dissolve the paper and use a toothbrush to do the final cleaning. The three shiny circles are pilot holes for drilling later.
Unfortunately, I fell prey to the "just a little bit more" disease. I didn't think the plugs were fully etched, so I threw it in for an extra 90s. Shoulda looked at my pattern again. So I got freckles as the etching got through the toner. Still, the very ambitious attempt at a halftone kinda worked. I'll give this another try later.
I also realized from looking at my printouts that the white was actually a very light grey, but I don't think that mattered.
Soooo cool.
I need to etch something.... just because cool.

RossD
UltimaDork
7/29/17 7:50 a.m.
A white paint pen to highlight certain etched areas might make it really pop.
If you get a clean etch, you could definitely do interesting things wilth color.
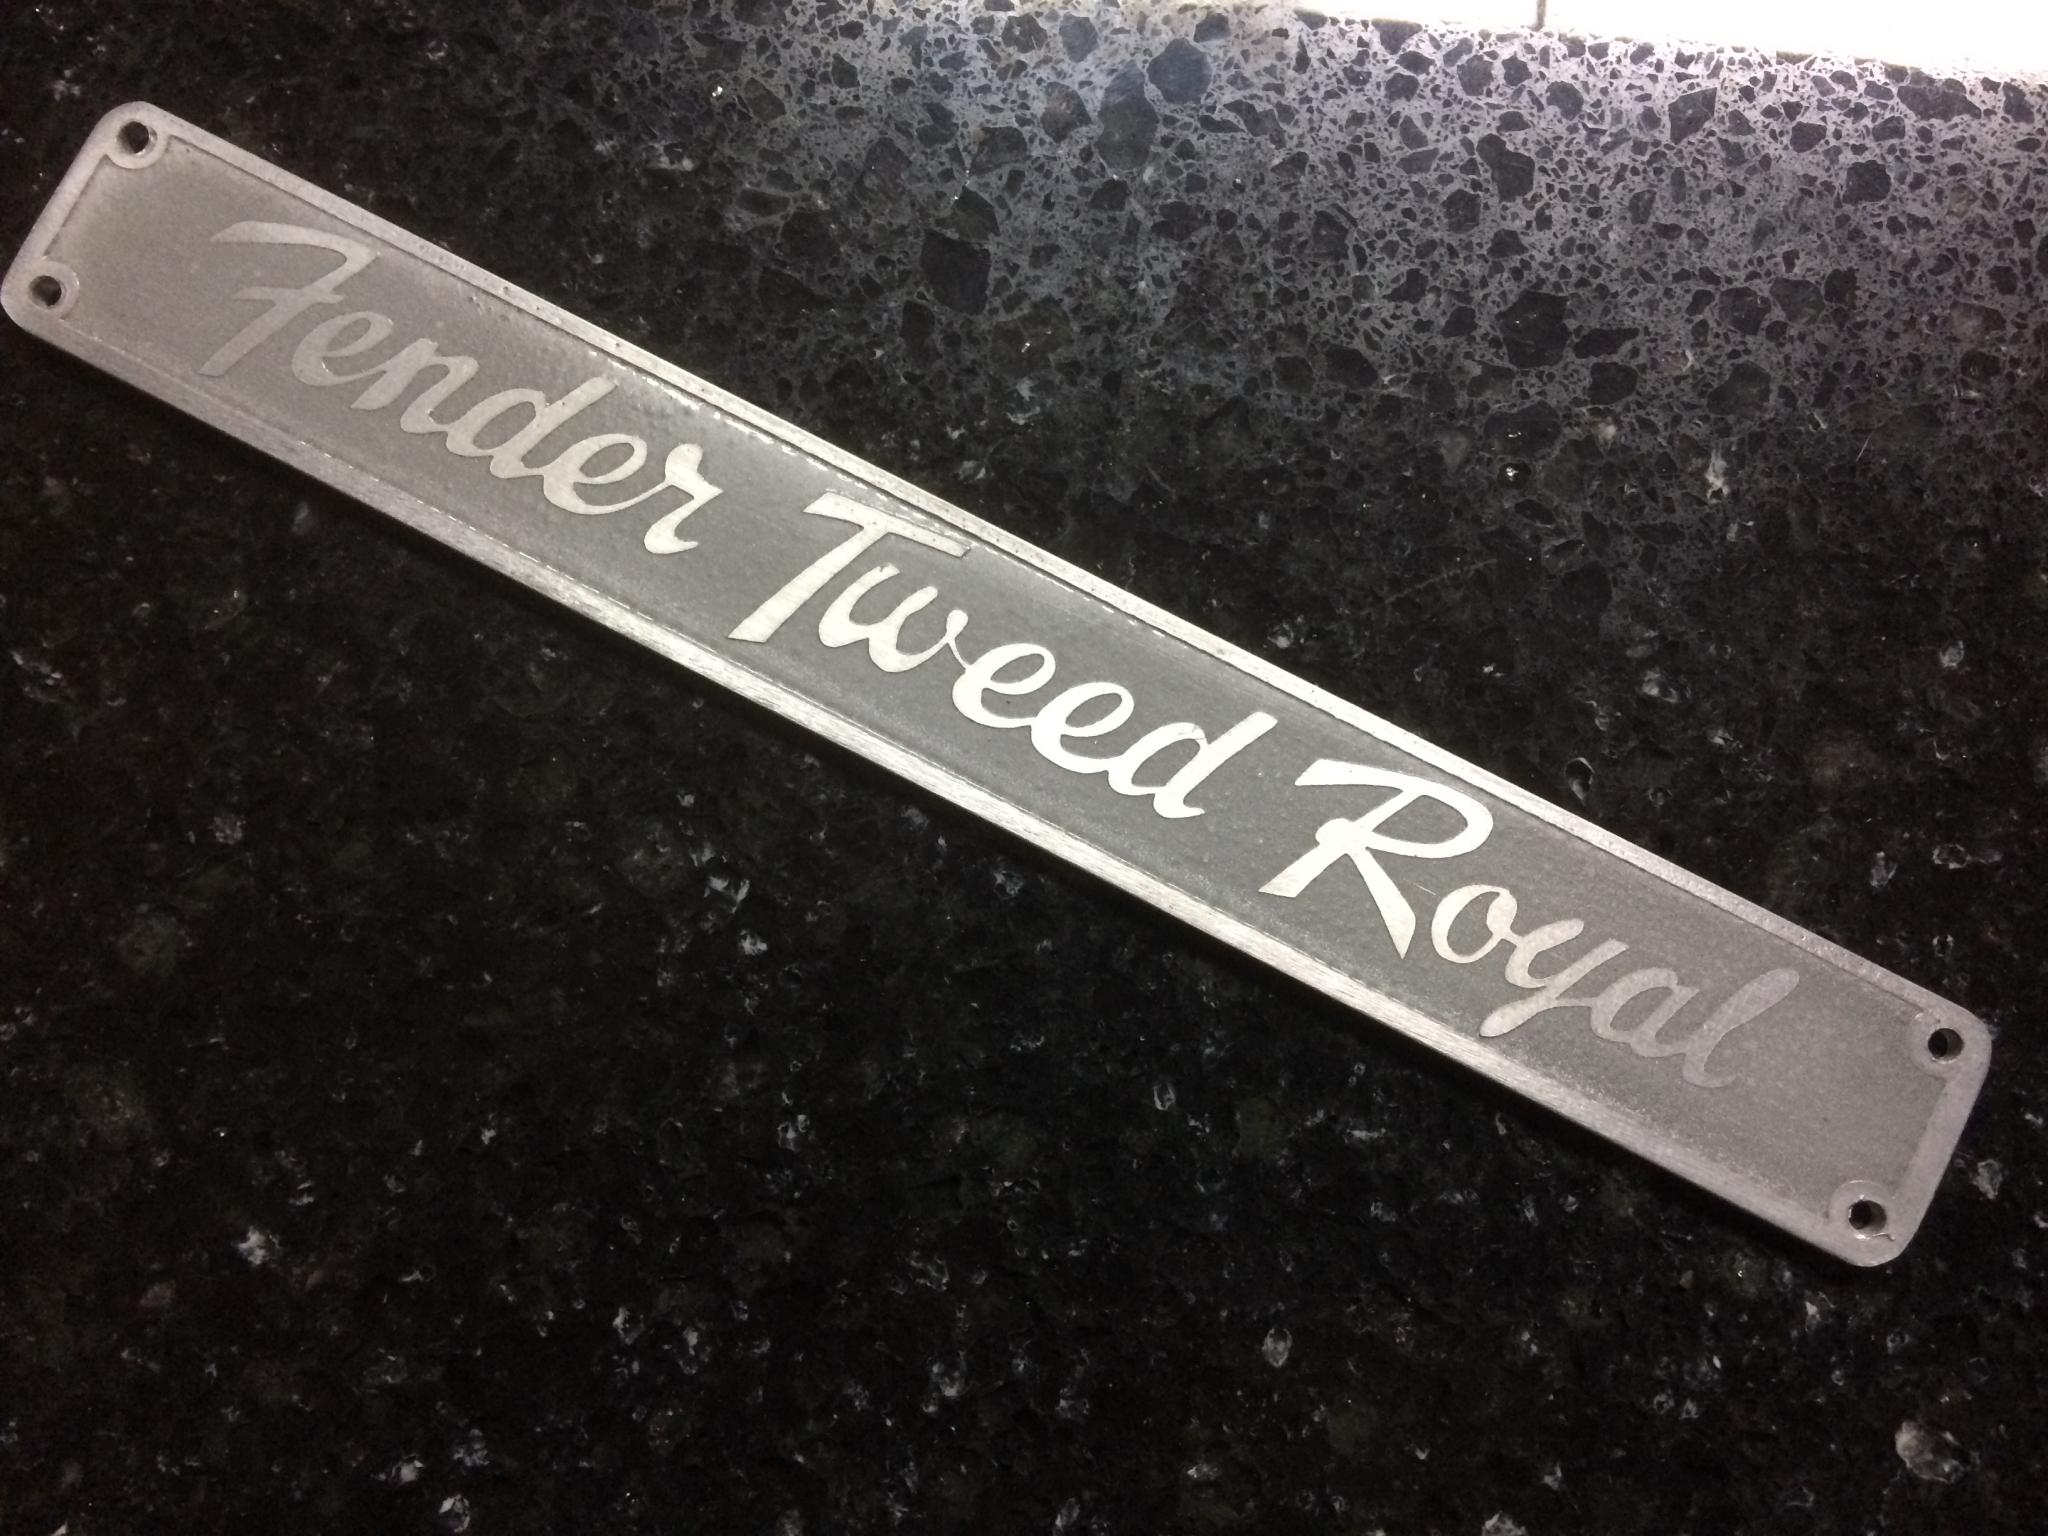
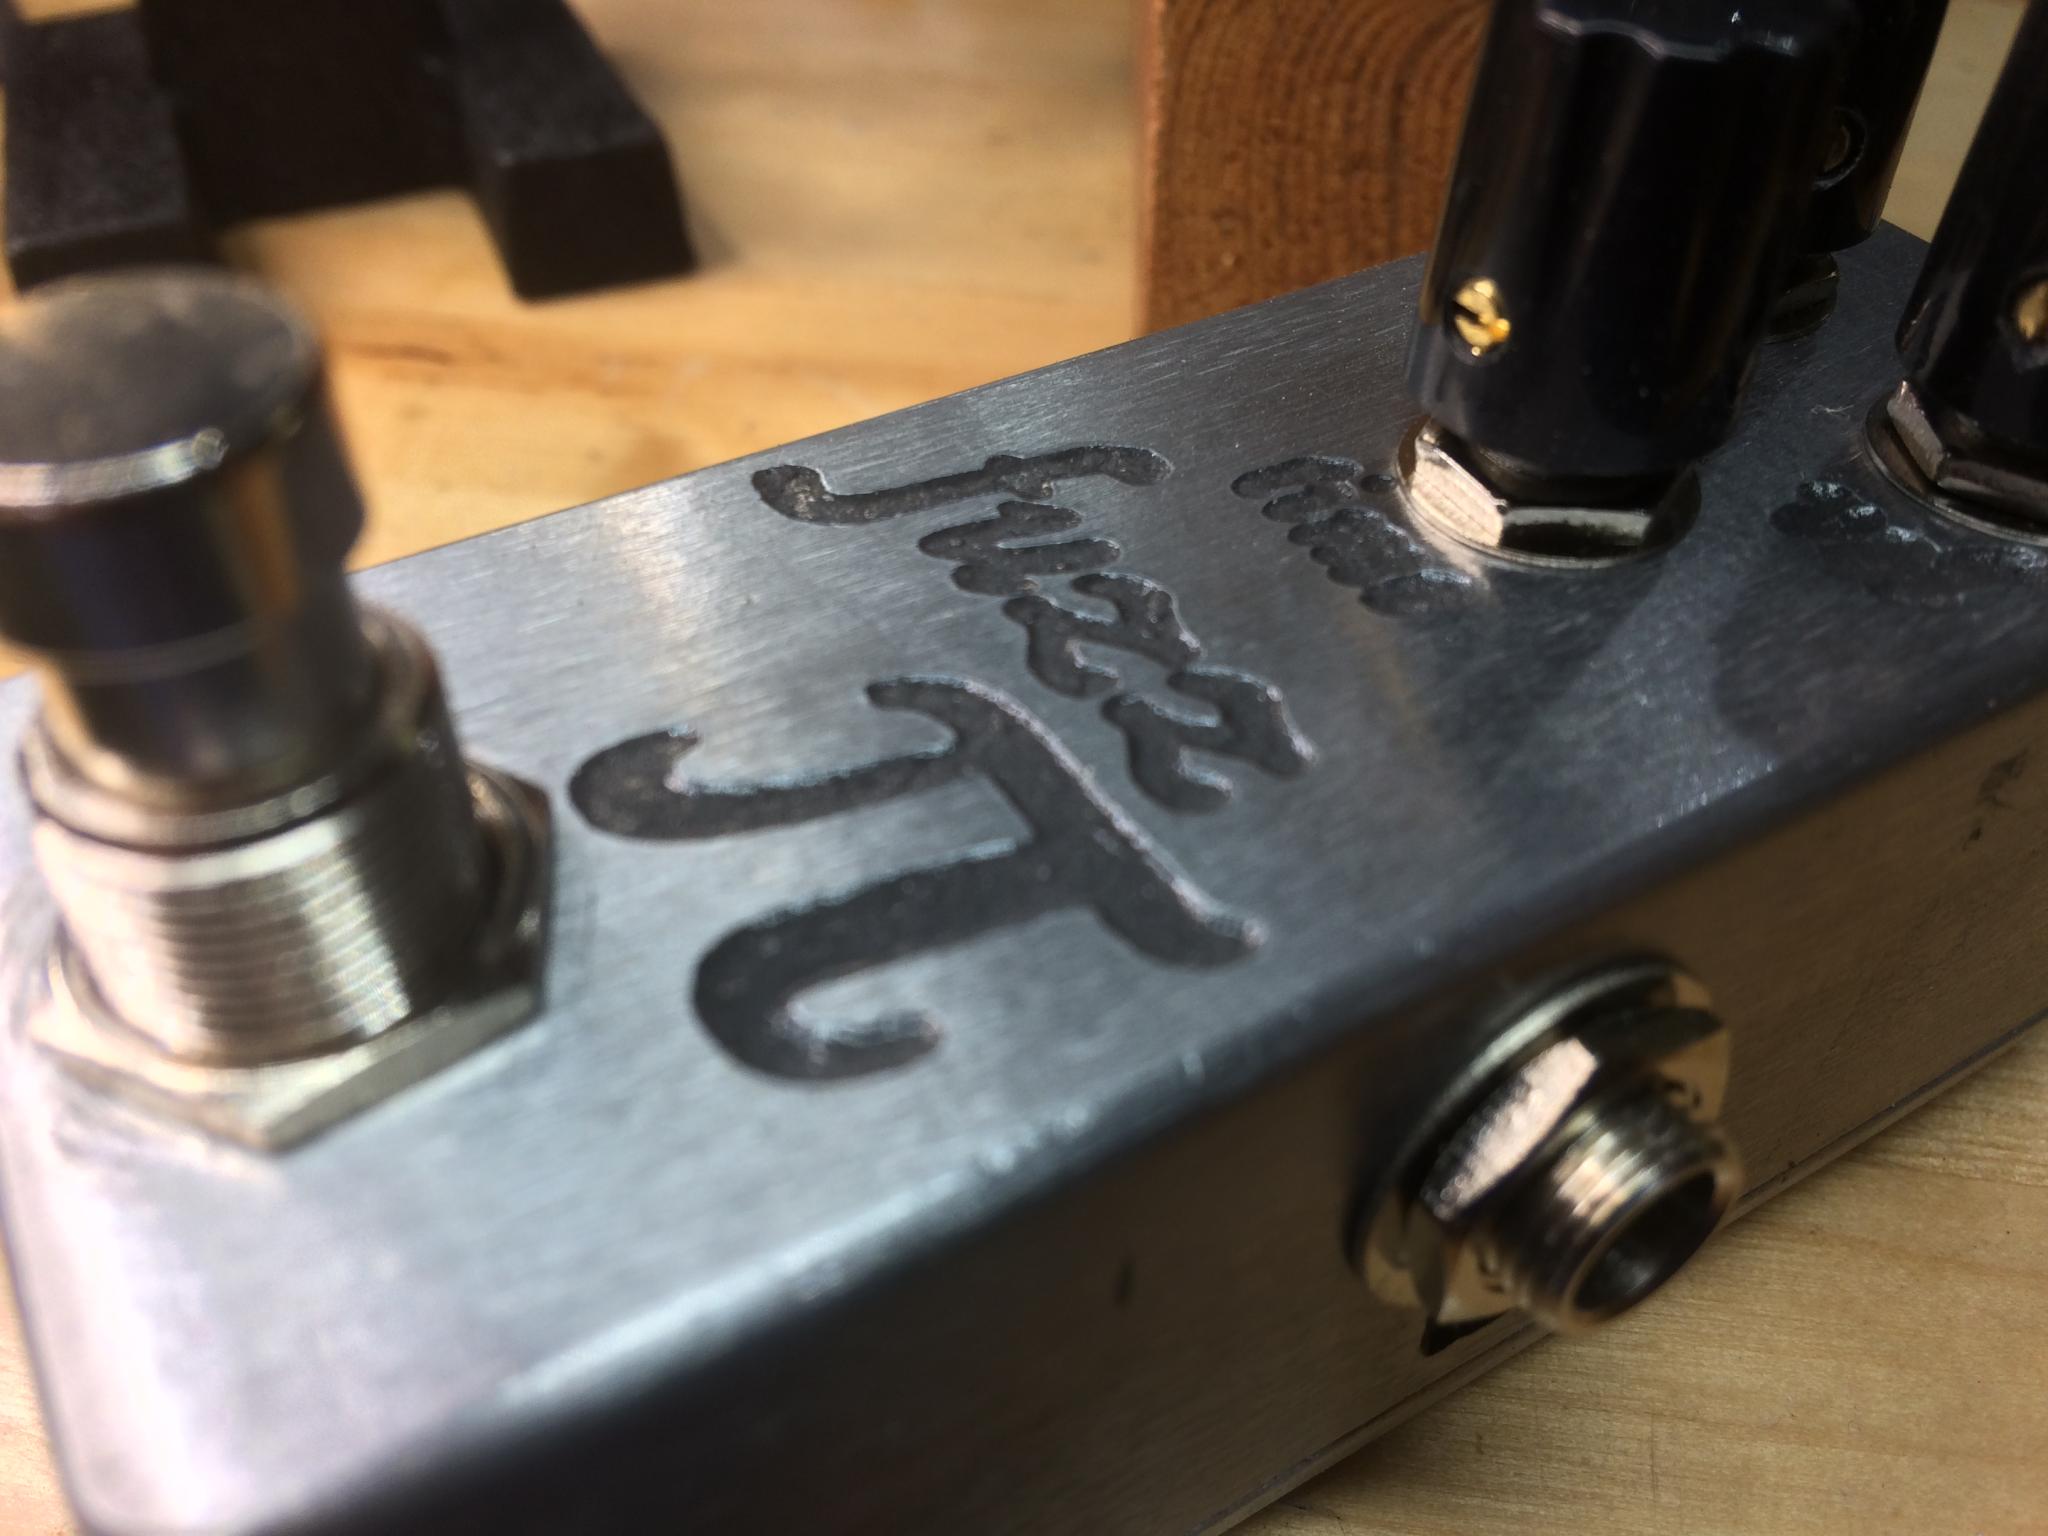
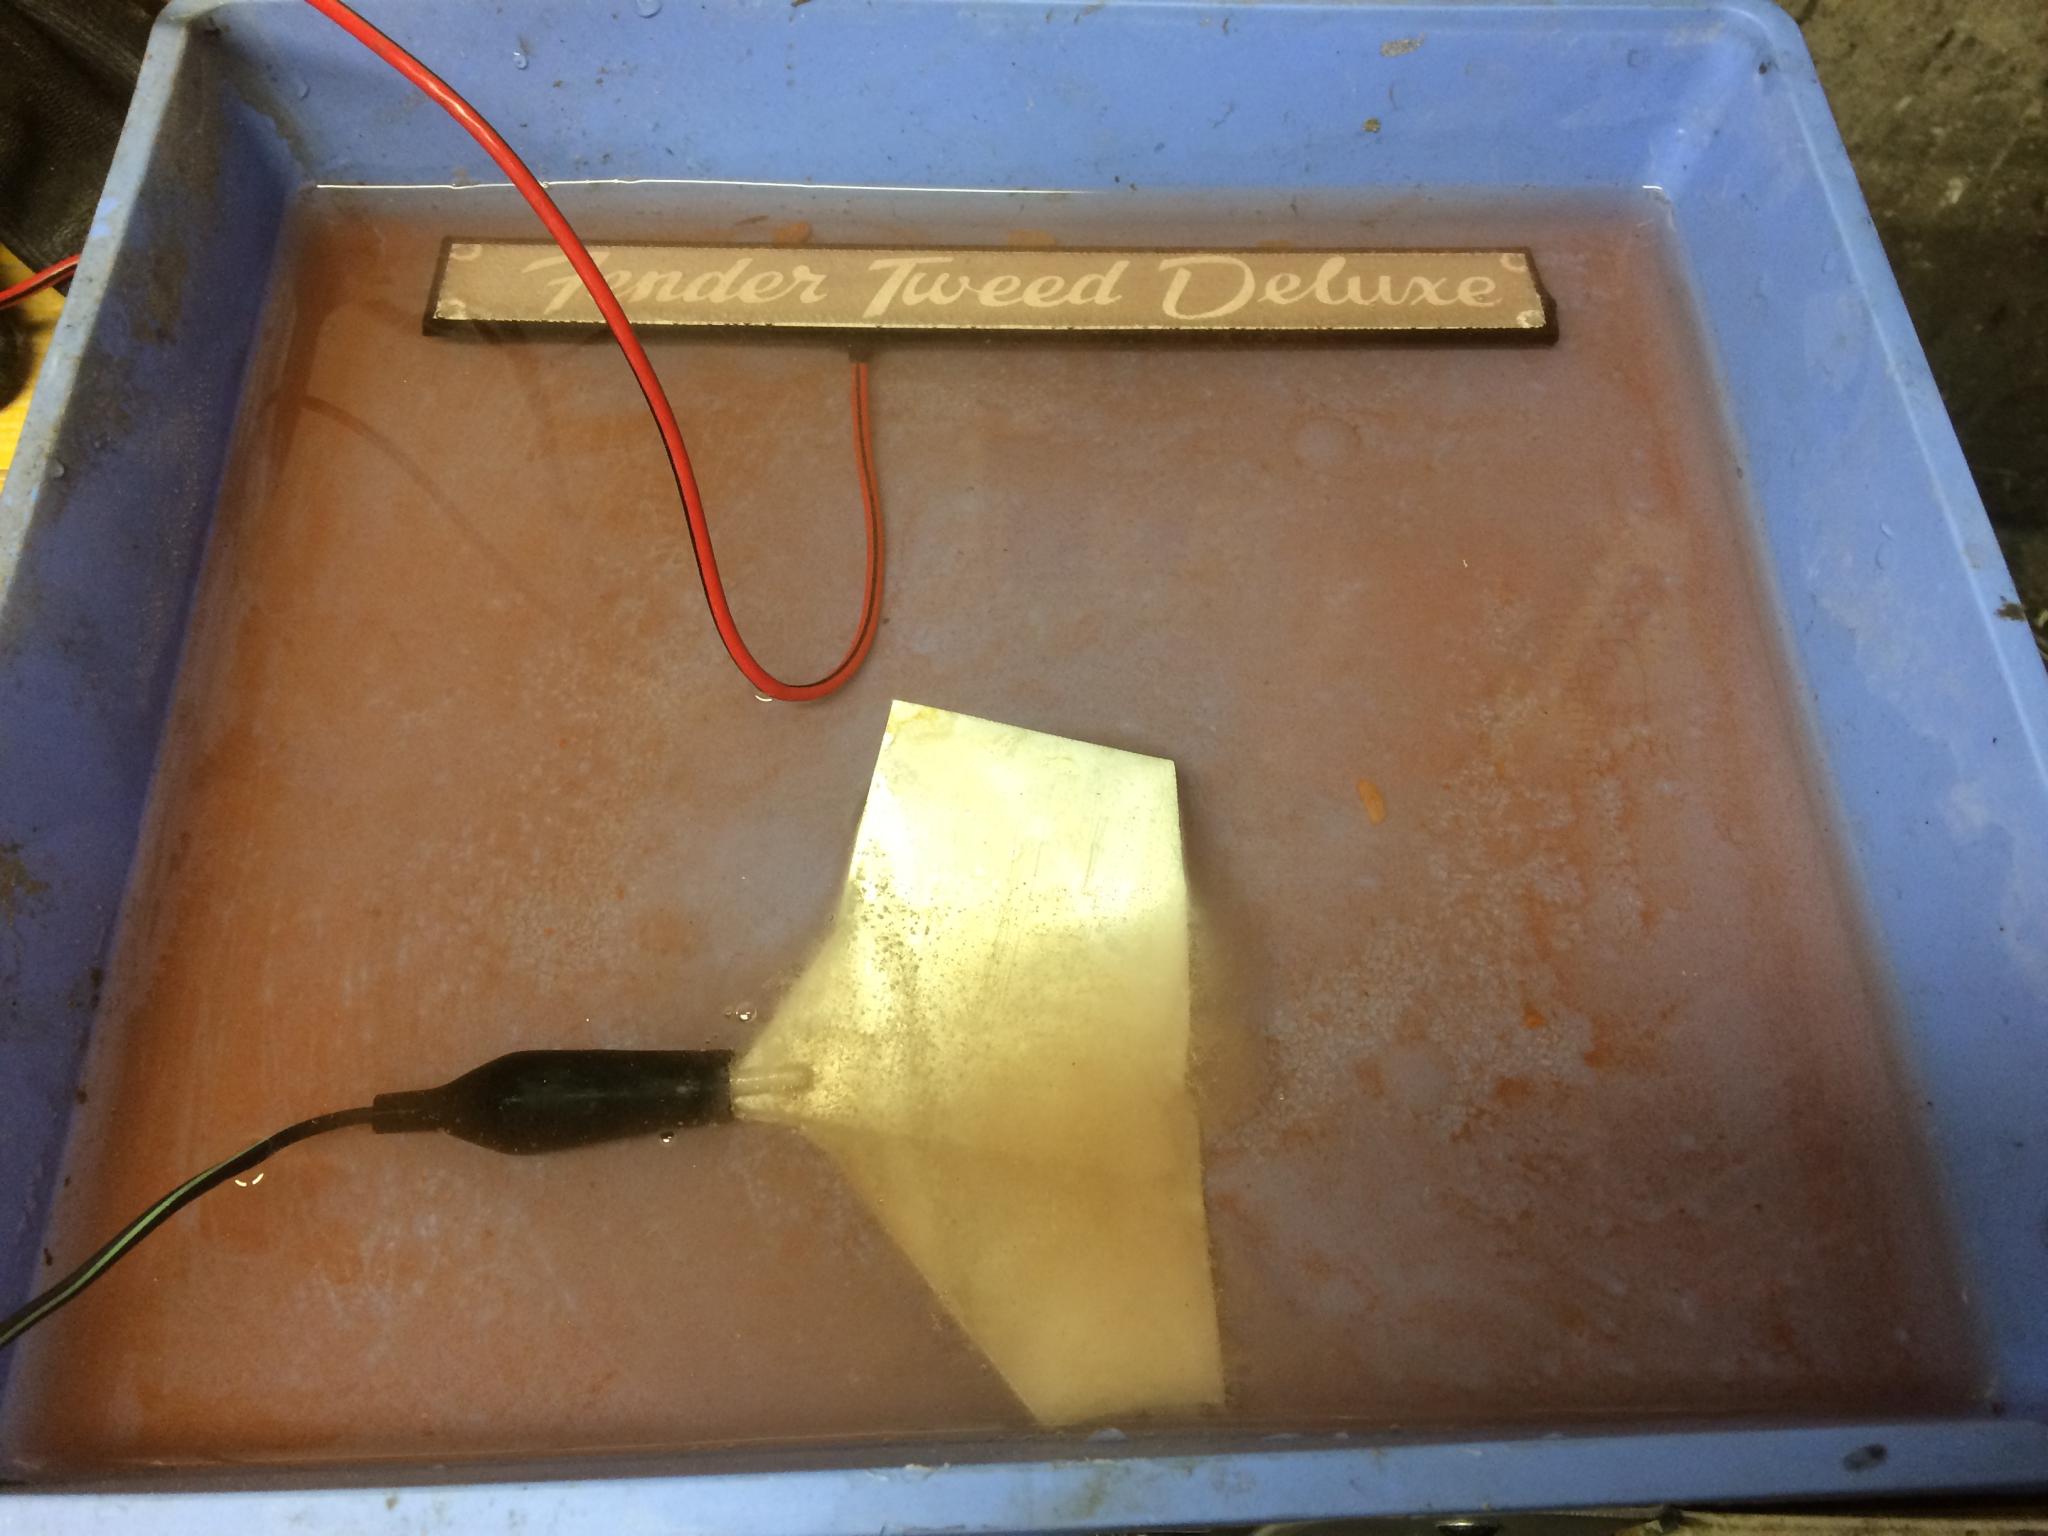
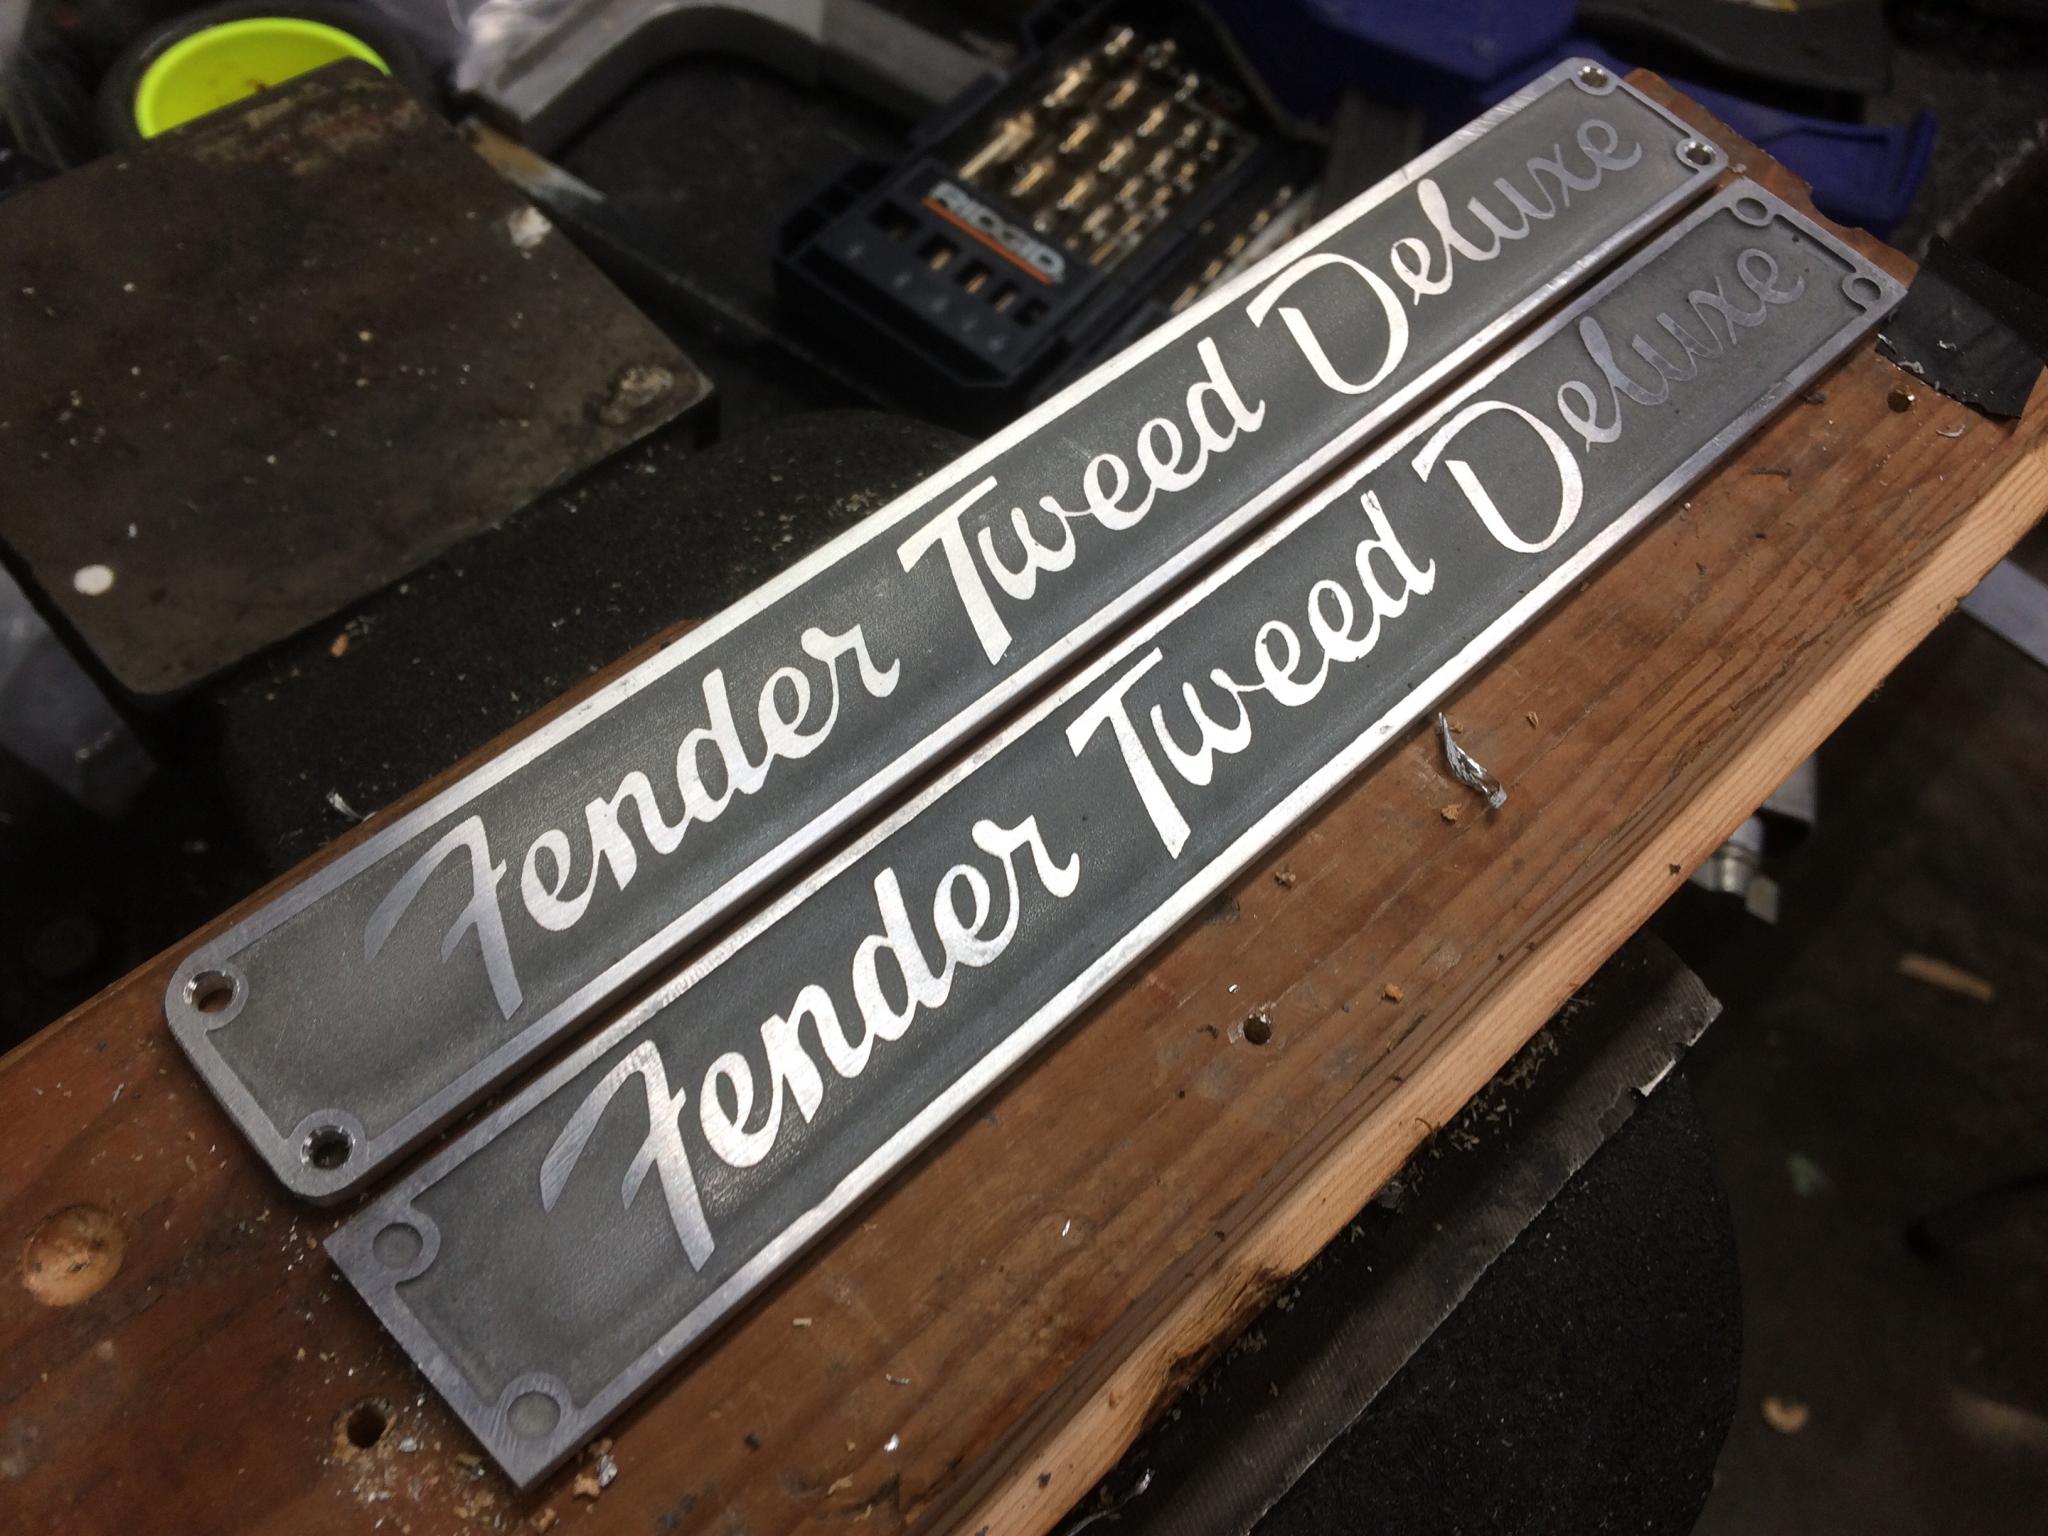
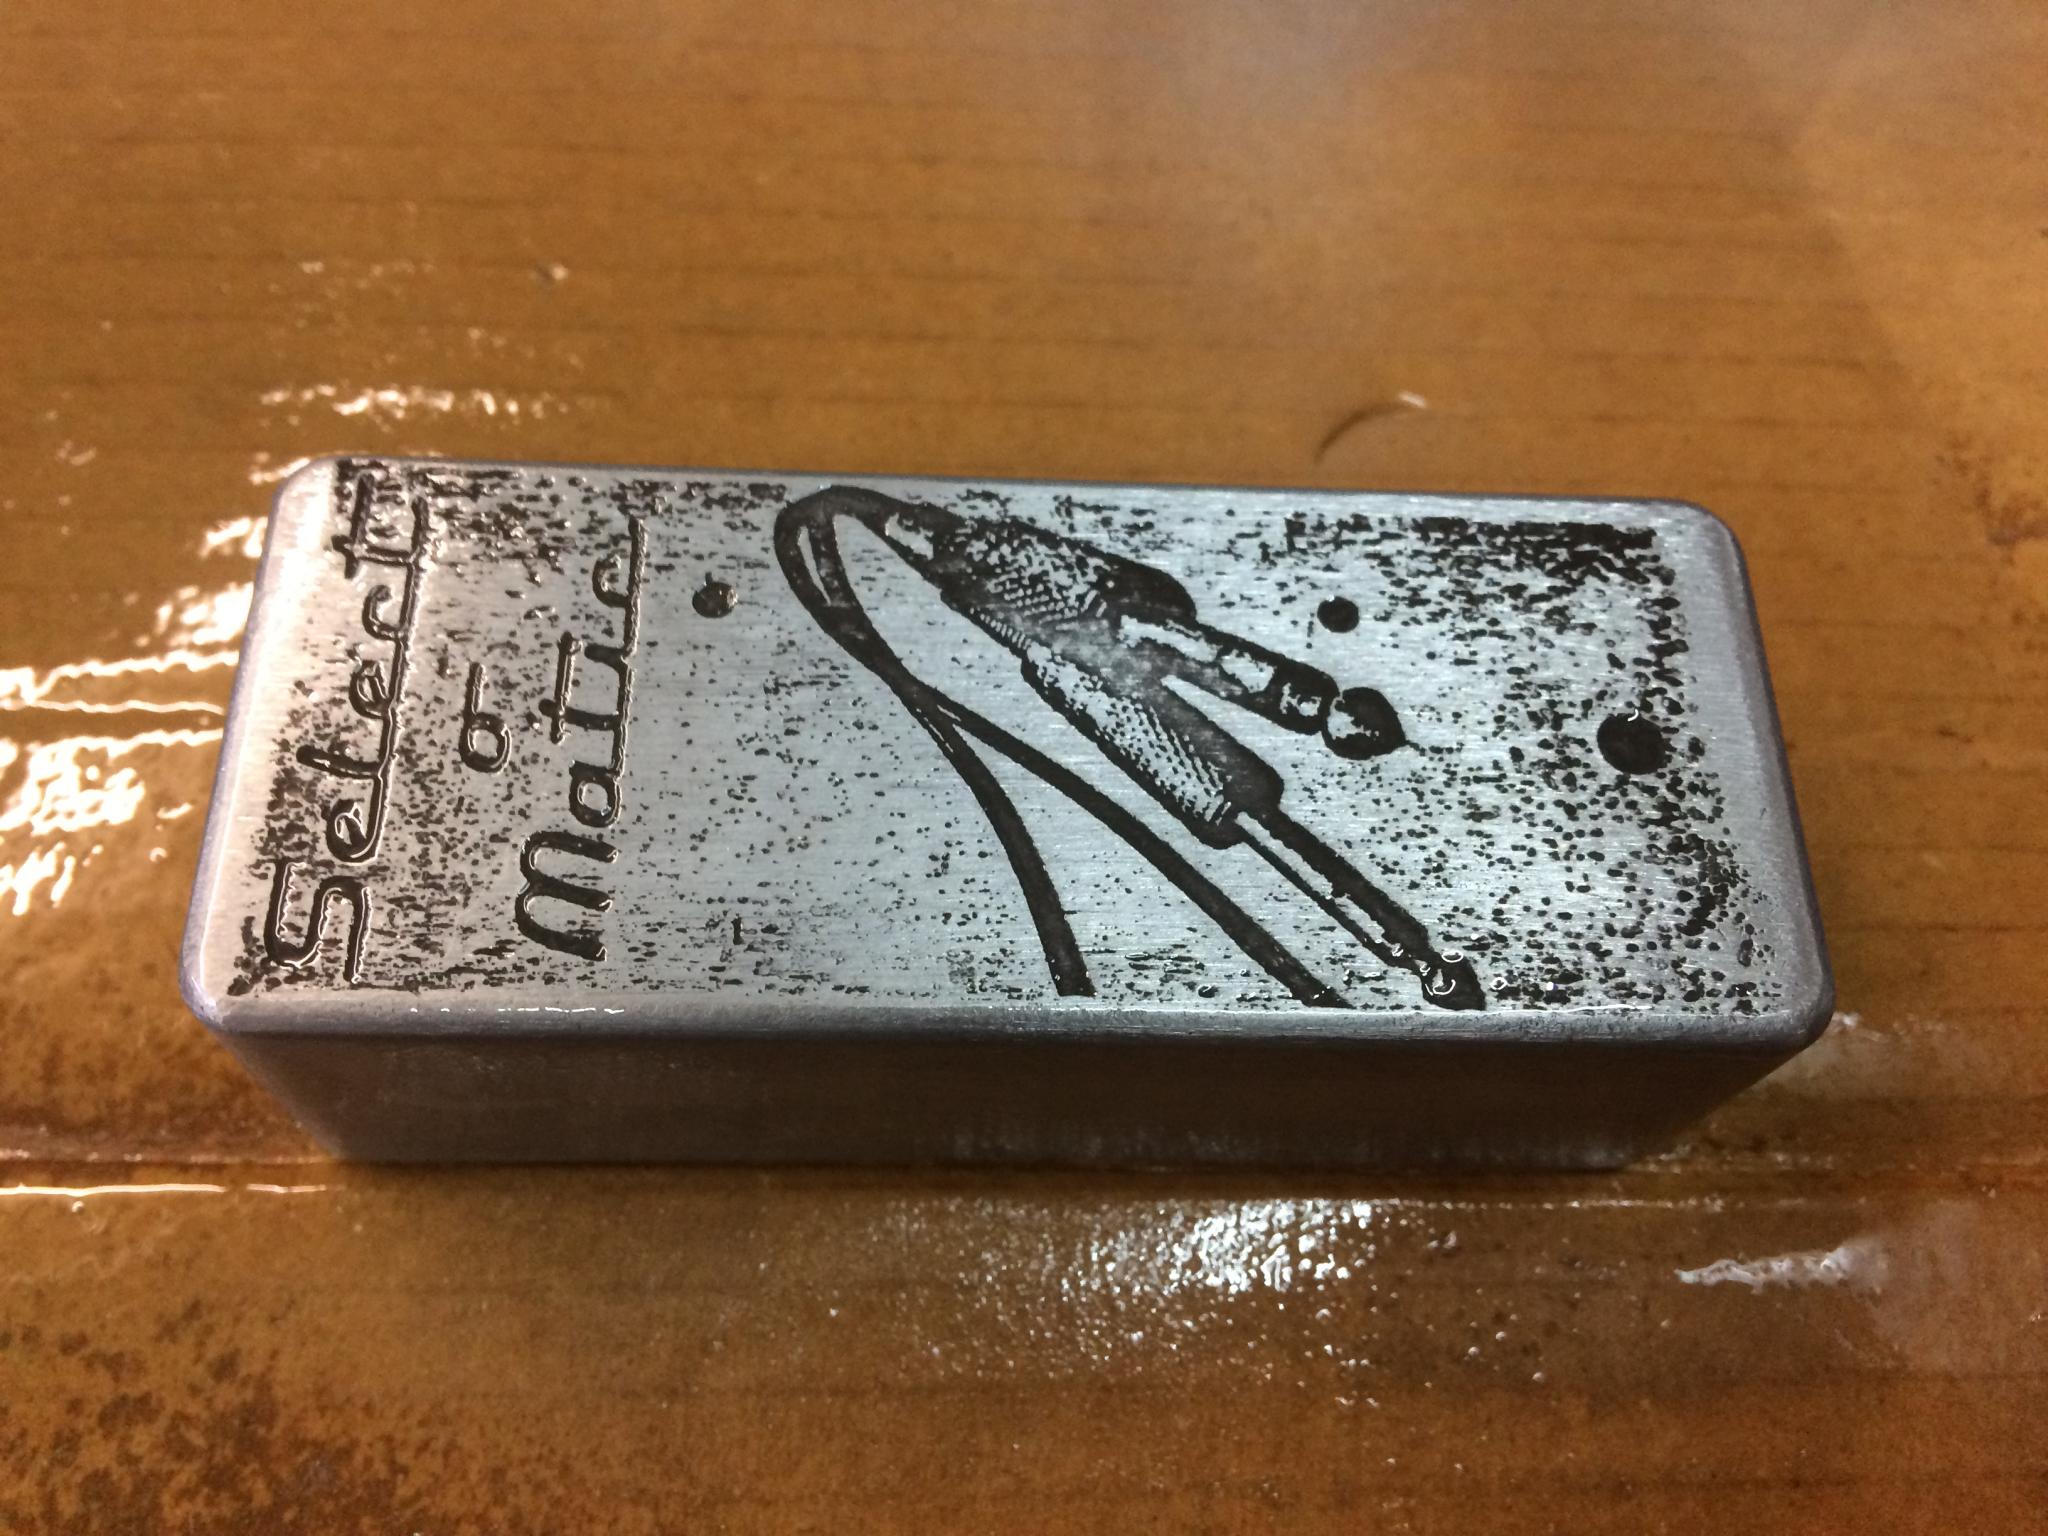
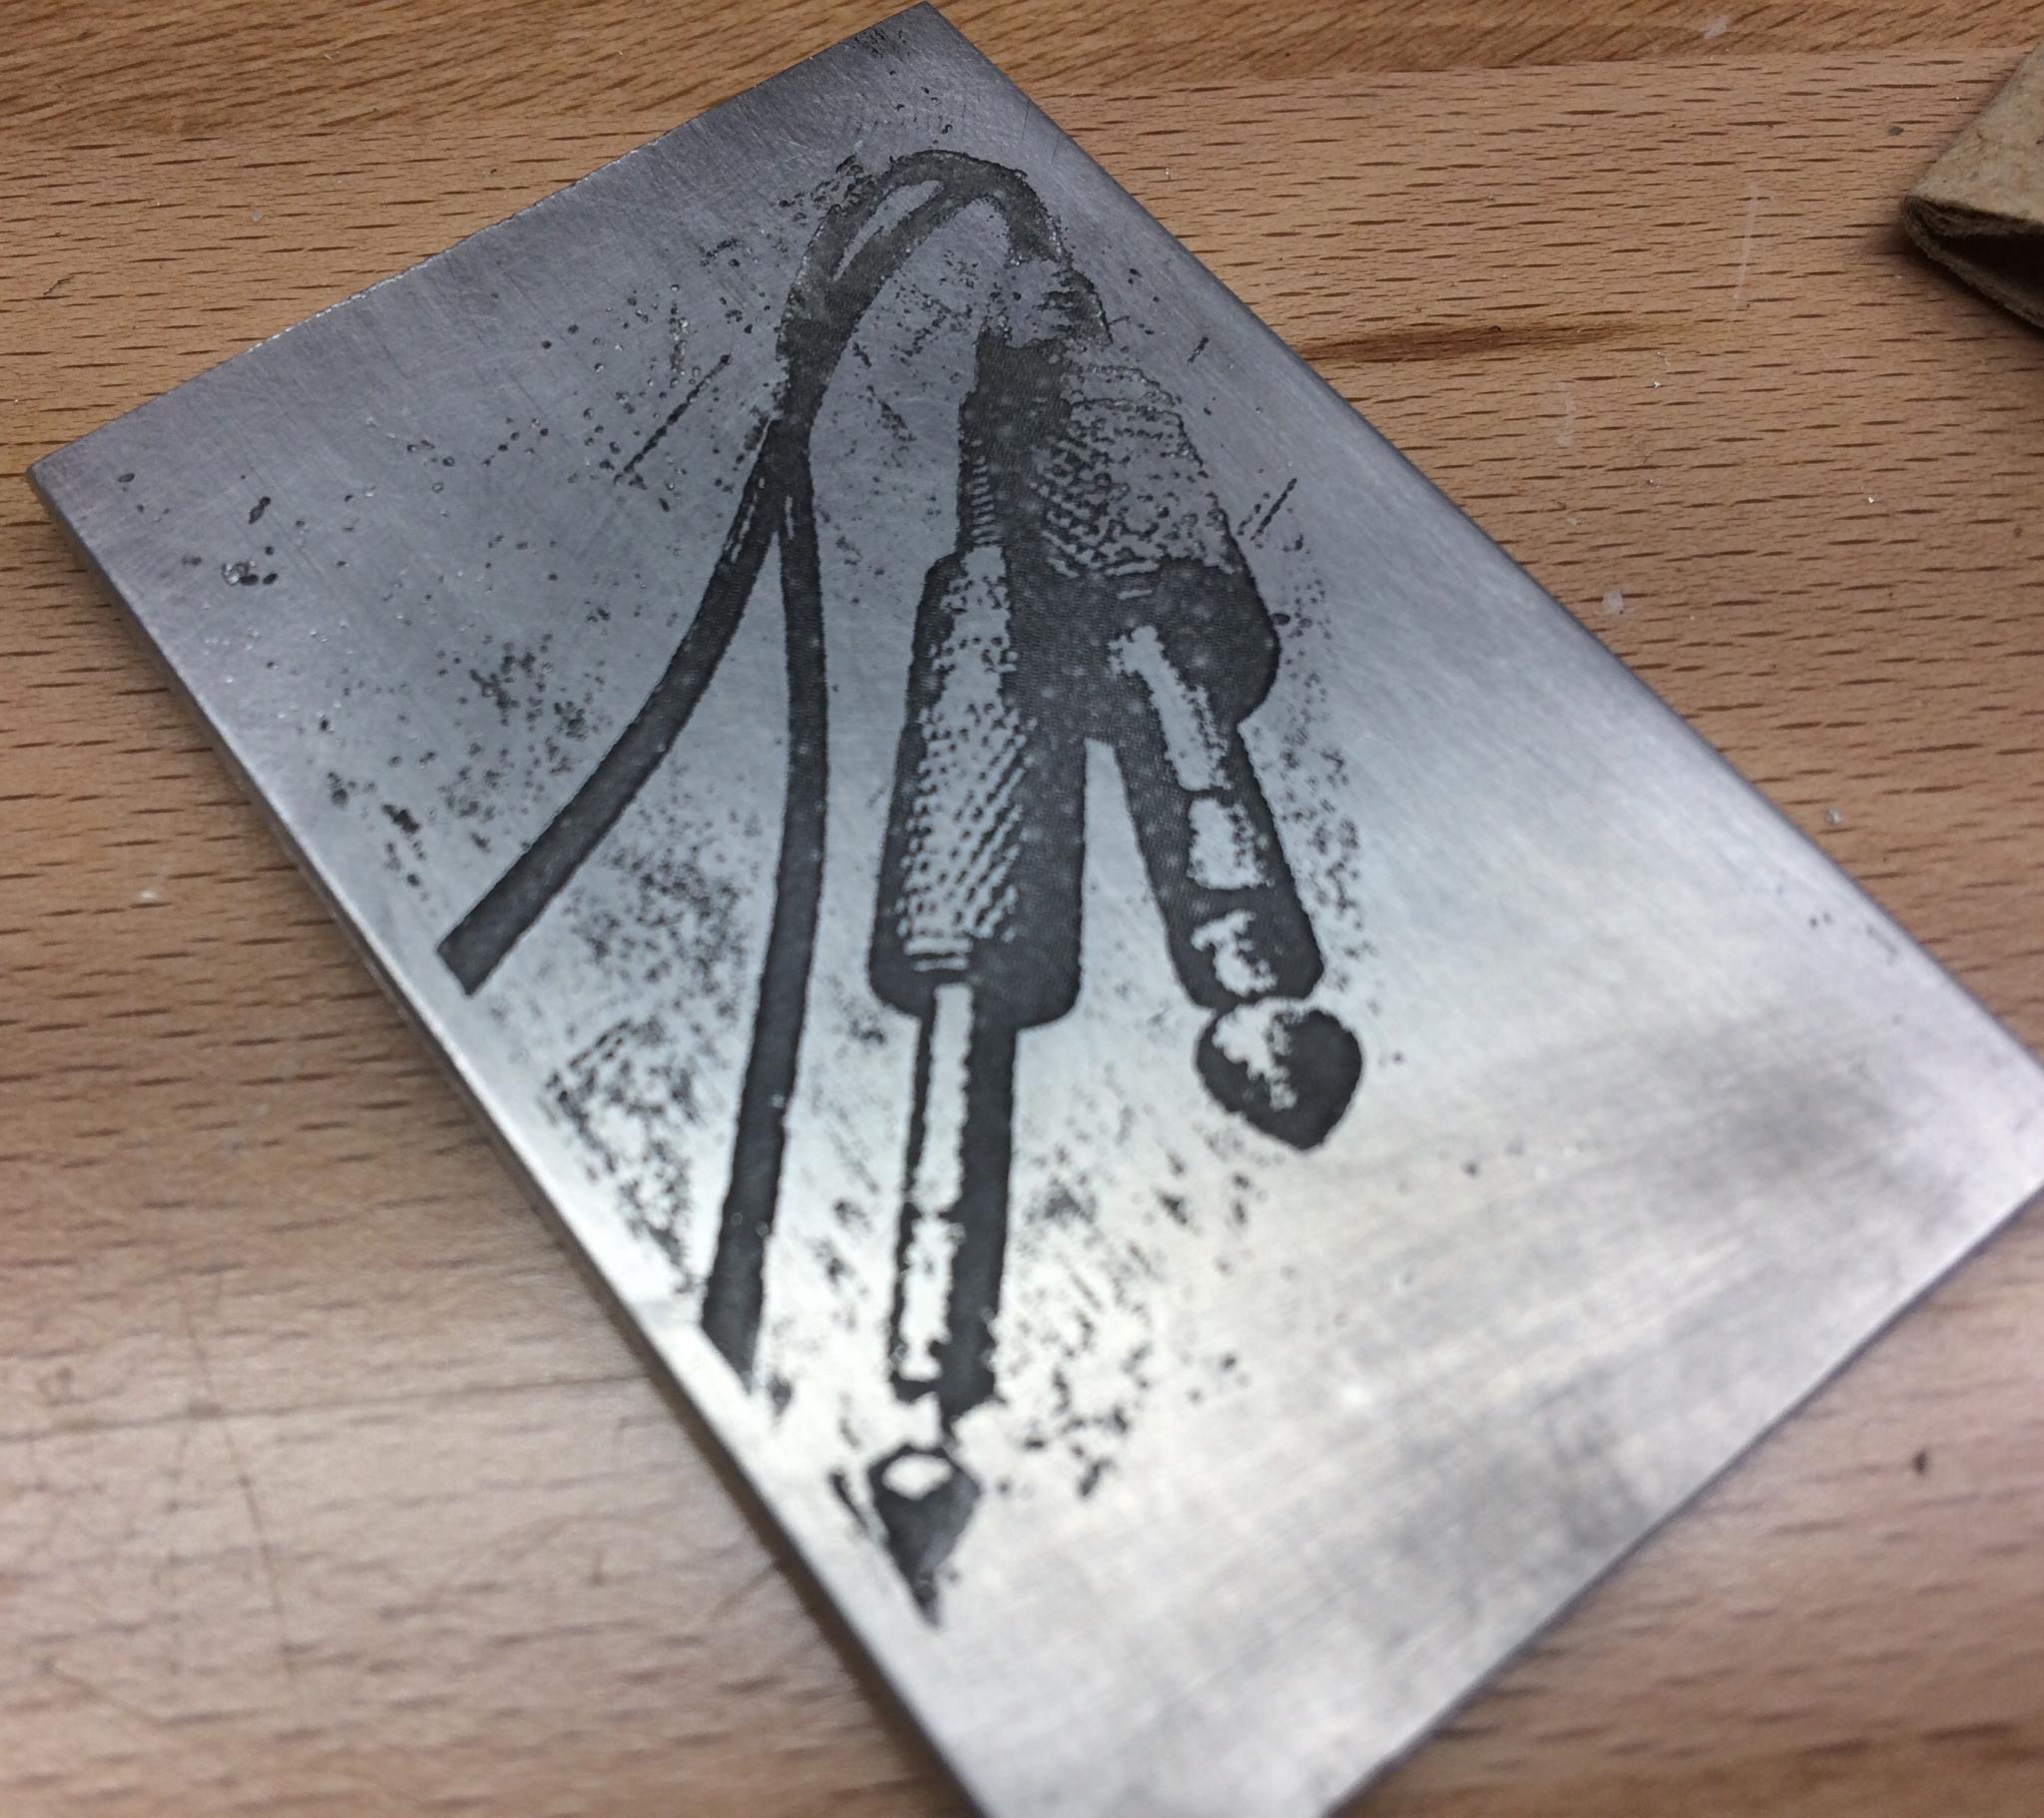
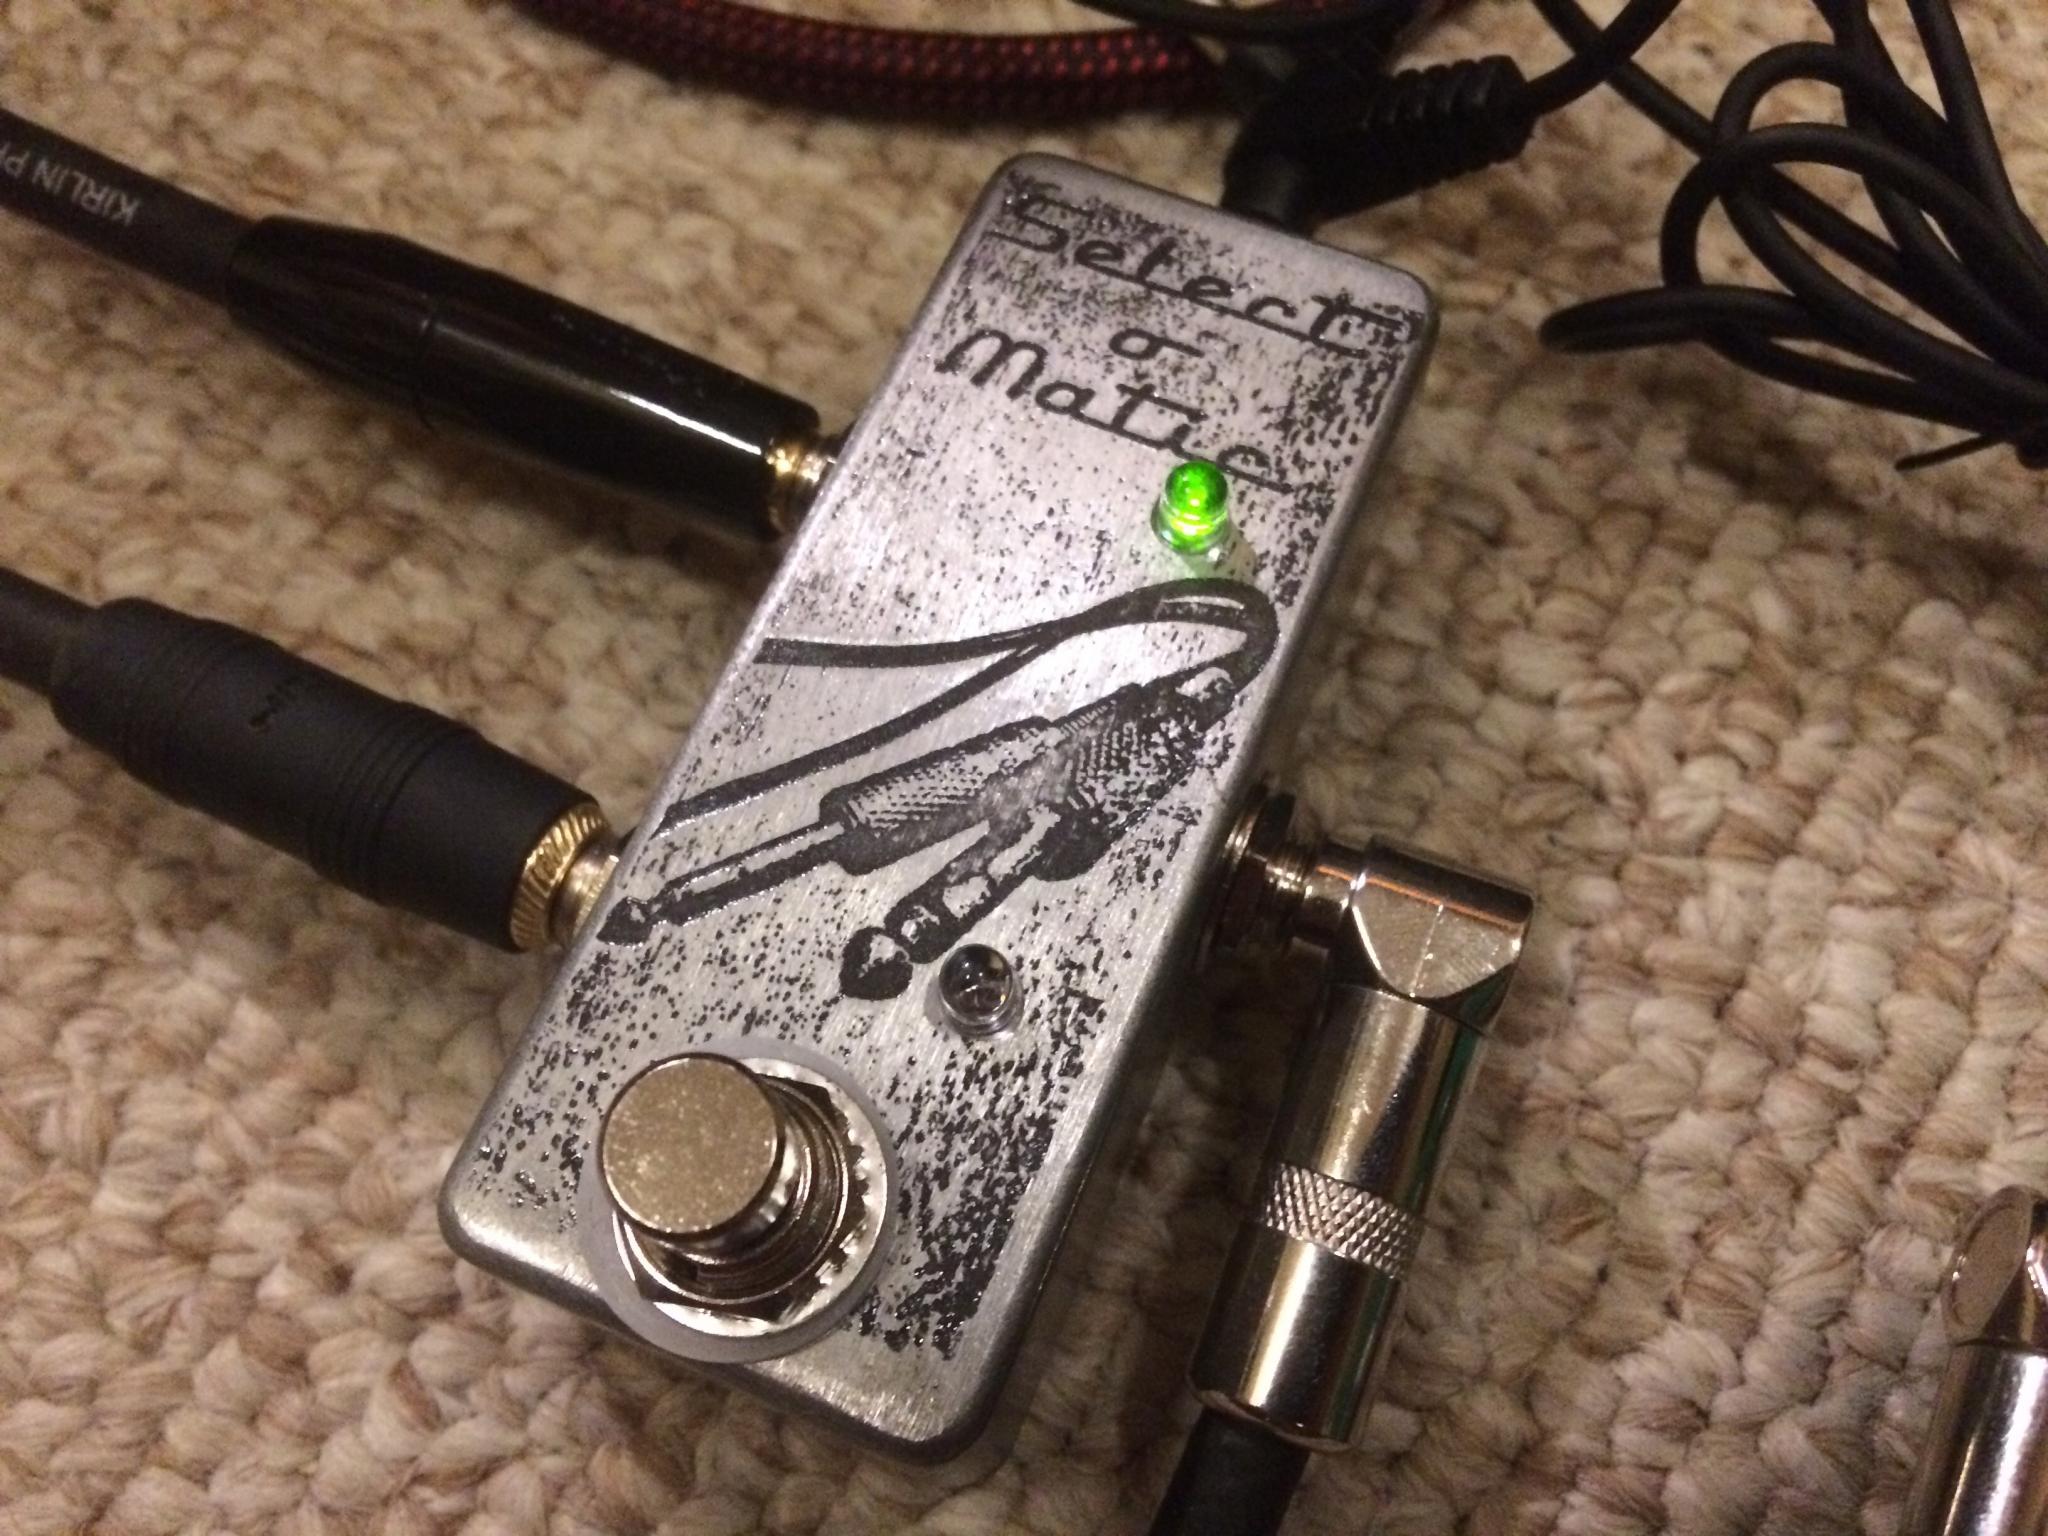
Another test. This is aluminum again, but a different material than the pedal enclosures seen just now. It's the same Home Depot bar stock as the Tweed Deluxe badge.
Toner transfer again, but only 2:30 in the tank. Still got freckles, which tells me the toner isn't properly transferred. The clean areas are where I used vinyl to mask. It's not from scrubbing too hard because I only scrub where the image is. Other than the freckles, I'm pretty happy with the look of the image.
Btw, brake clean takes the toner right off when you're done.
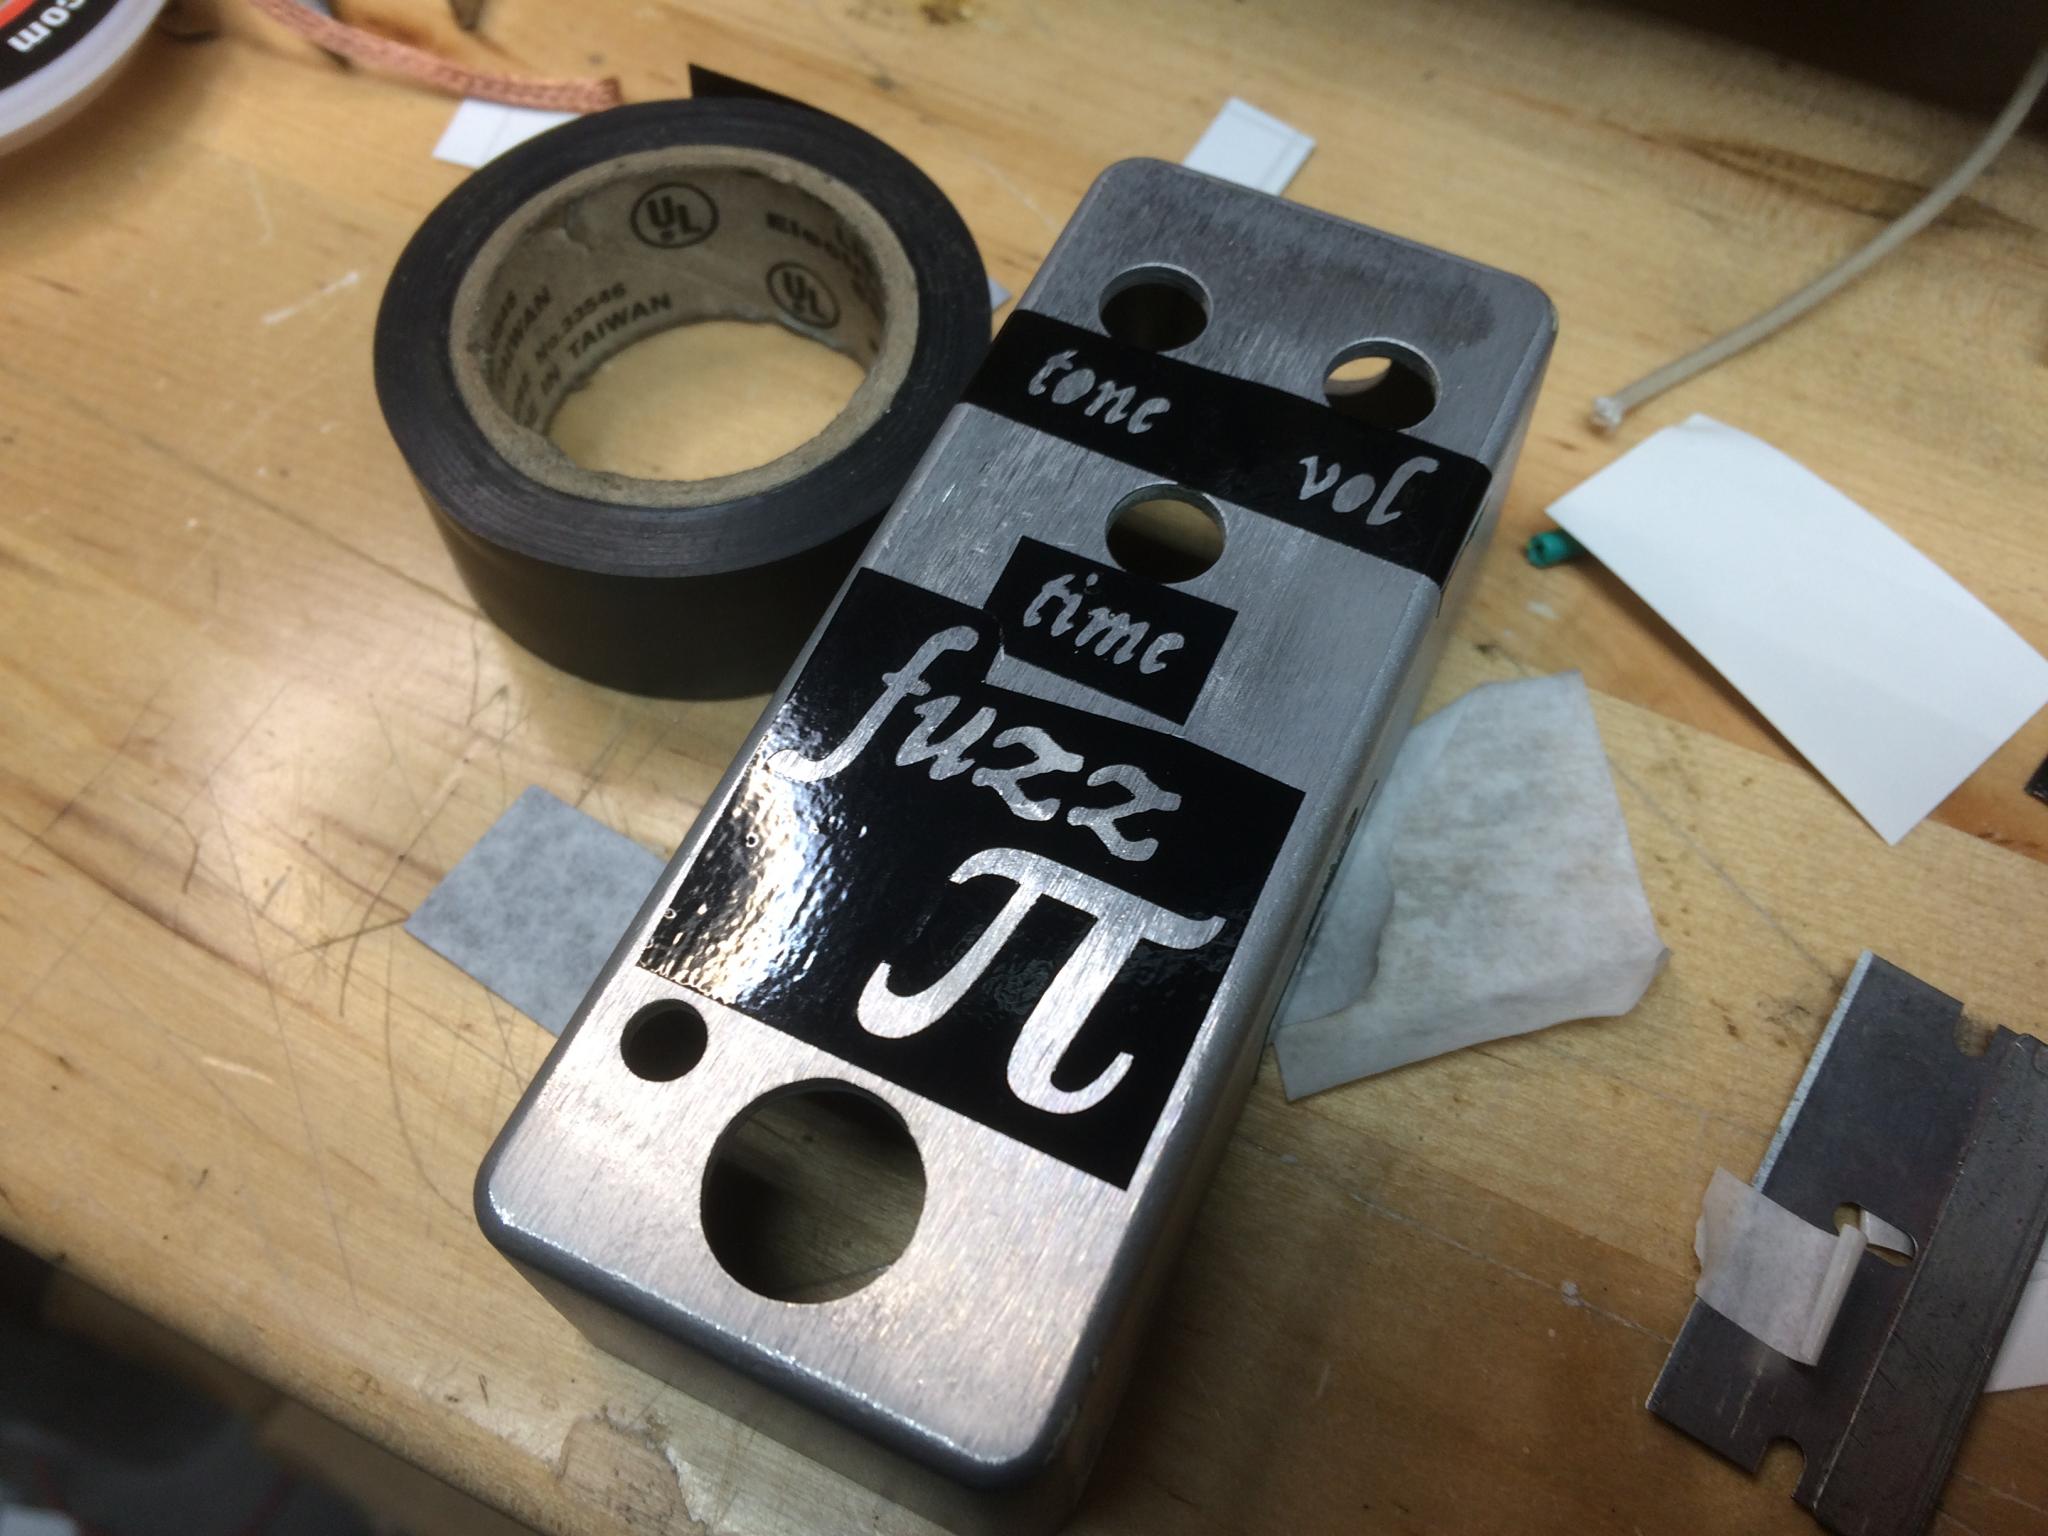
The end result of the previous attempt. These bare enclosures are pretty cheap, so they're good for experimentation.
Keith Tanner wrote:
Hey Keith. If you don't mind me asking, what font is that?
A friend has a vinyl cutter and I have a stock of thick aluminum. Looks like some signage might be coming up.
Jumper K. Balls wrote:
Keith Tanner wrote:
Hey Keith. If you don't mind me asking, what font is that?
Hand-drawn. The Fender and Deluxe are off vintage tweed-era amps converted to vector, the "Tweed" was created out of Twin-Amp and bits of others. The "Fender Tweed Royal" was more work, Royal was pretty much created from scratch.
I've got some more test pieces to do, probably tomorrow. Improvements on the toner method and a few more attempts at the vinyl, trying to figure out why it etches deepest along the long edges.
I've seen some guys use nail polish and vinyl. So you take the reverse of the image in vinyl(keep the part you normally remove, remove the part you normally keep), paint it over with nail polish, peel vinyl off. Now you have a nail polish version of the vinyl you've been using (the small spots in the D and R shouldn't float away) then when you are done, acetone will take the nail polish right off. It's worth a shot.
The vinyl works pretty well in the electro version without having to do a negative. I haven't had any fail on me yet. Might help with acid, though.
Here's the font for the Royal. I'll be playing with run times soon to see if I can get a more consistent depth.