
mke
Dork
11/11/21 8:24 p.m.
With the clay test "passed" I preped for head install. The new o-rings for the oil tubes came....I have an extra 98 or each if anyone else needs some ferrari 400/412 oil tube o-rings

Then all the stuff in the V that can't be done with the heads on gets done and in my waste I nearly installed the coolant temp sensor

before realizing that it's not supposed to be black. I used the red coolant last time thinking it was better for the engine but EVERYTHING corroded thoughout the engine bay, no more of that.

And all is now well. Heads tomorrow.

mke said:
Syscrush said:
Great work and amazing news.
Sadly I'm mostly just fixing my own mistakes at the moment 
How the heck I screwed up the cams like that is beyond me...its a simple job......
Oh well. I guess heads on, then engine on the trans, then timing cover and fix the cam timing.
If fixing our own mistakes wasn't an accomplishment, then there would be no such thing as job satisfaction among software devs.
There's no job too simple to screw up, and no person to smart to make a dumb mistake. Diagnosing and fixing it still counts as a win in my book!
mke
Dork
11/12/21 8:27 p.m.
Opened the new head gaskets

And the heads are on, hopefully for good.

Please tell Lana that your GRM followers appreciate her letting you have some garage time. :-)
mke
Dork
11/13/21 7:31 a.m.
In reply to AngryCorvair (Forum Supporter) :
LOL...I'm kind of fitting it in because the approved projects involve a lot of drying time. Handrails and newel posts I made last weekend are getting sanded and two more coats of poly today, then if the rain hold off there are a bunch of boxwoods that were on sale to plant....then I can mount the engine to the trans. Last week I was finishing up the theater equipment cabinet.. a lot of days of sand, poly, wait (engine work).
It's so close to going back in the car now though I do sense there is an understanding that my mental health will require a test run.

mke
Dork
11/13/21 1:35 p.m.
I went out to the shop to start prepping the trans....and spent an hour looking at cams.
The best I can tell I timing the back to intake to to match bank 1....when I line up the timing marks, the lobes for cyl 7 are exactly matching the lobes for cyl 1, so its advanced by 60 crank degrees from where it belongs
Cyl 1

cyl 7

The exhaust was out a little less, but retarded not advanced so it about matched the timing on #4 I think it was, becasue why not right?
I put some temporary marks on so they will be close when I drop them in.

edit, forgot, he timing checking was made a bit easier by a knock on the front of the cams that the cam grinder used to time the 1st lobe...so I could use that and angle blocks to figure out what was where

mke
Dork
11/13/21 8:20 p.m.
This afternoon I saw a show..you know that one where the couple had separated but run into each other, end up spending the night together, then decide to move back in together and find out their old place is still available?


mke
Dork
11/14/21 7:17 a.m.
I couple more pics from yesterday. The trans getting cleaned and prepped, also shows the drysump pickups I added way back that connect to a F360 oil pump
]


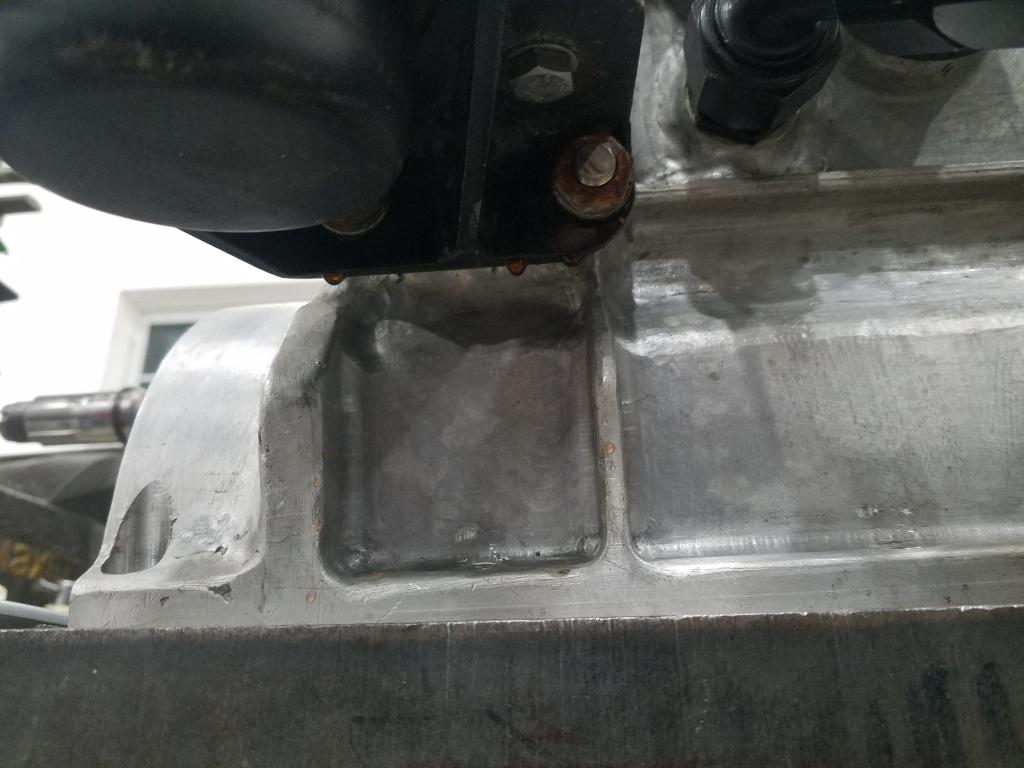
This puddle of coolant leaking from the trans disturbed me

But it turner out it has gotten behind the motor mount, probably when i drained the block to pull it so no worries beyond the corroded nuts I"ll need to replace
[
mke
Dork
11/14/21 8:36 a.m.
I'll share this before I start so you guys have time to stop me if you see something wrong
Time from the engine software. I
m using the marked row, true timing at .050 lift at the valve which accounts for lash, the line above is at the cam and would be how ferrari says to set timing by first setting the valve to 0 lash. The lobe are a symmetric grind, which means the lobe center, which is what I'm really setting is exactly in the middle so if I set opening and closing is off, I just split the difference and the lobe center will be correct.

Degree wheel on and marked, blue is intake, red exhaust. My marks don't fall in the printed windows because I have the wheel on the flywheel not the damper so its backwards. This wheel is almost exactly the OD of my trigger pattern on the flywheel which I use for the ECU but also for reading timing so setting it up is as simple as stick it on with the 0 aligned with the TDC mark on the flywheel.

Last time I bolted it to the crank, I guess the flywheel wasn't finished? don't recall, anyway I I did bank 1 then calculated where bank 2 stuff should be and clearly buggered that math beyond belief, but this time its going to be different!....I'm just going to move the damn degree wheel and use the exact same marks. The trigger pattern is 36-1 so there is a tooth exactly every 10 degrees and the way I built is #1 TDC is exactly the center of a tooth marking #7 TCD exactly the center of the 6th tooth....no more dumbass mistakes...I hope....
mke
Dork
11/14/21 10:44 a.m.
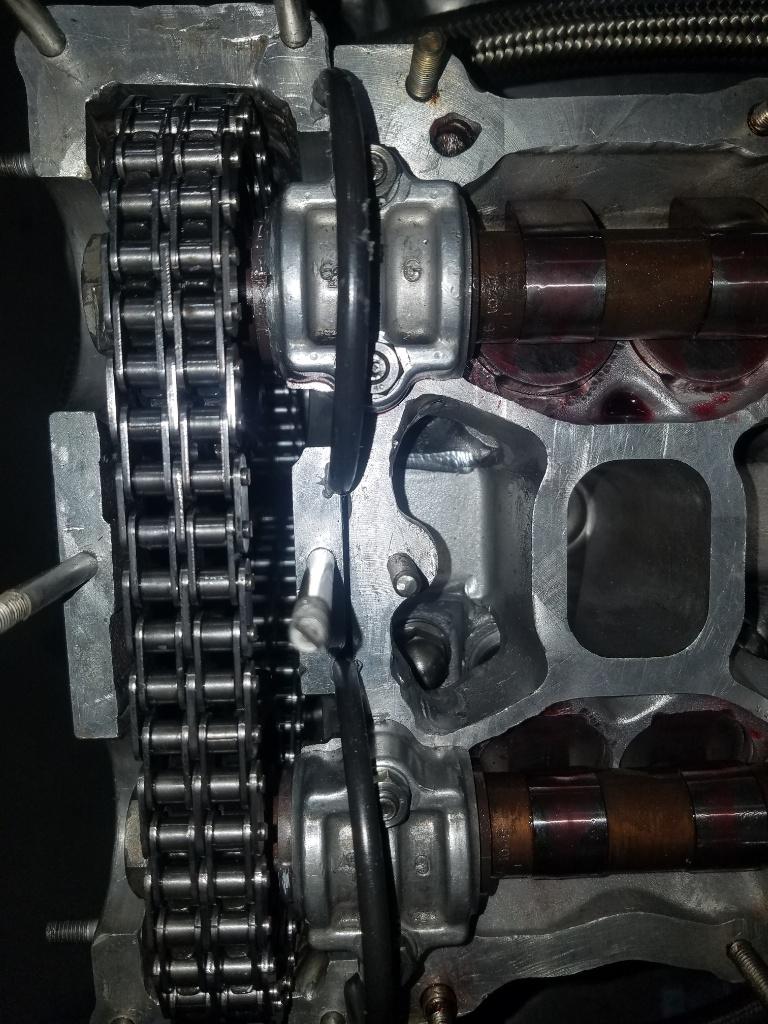
Cams in and they at least LOOK about right

Once the timing cover is on I'll check them with a dial indicator. The ferrari timing setup has (iirc) 25 holes on the sprockets and 24 on the cams setup giving 14.4 between holes on the sprocket and 15 on the cam which lets you move the timing in about 0.6 degree steps by looking for the hole that lines up closest so its not like most cars where you just need to get within a tooth on the chain...you need to get it right.

mke
Dork
11/14/21 8:15 p.m.
Timing cover time....and this is the job from hell on this engine.
First up, a stud for the timing chain drive pulled out on the last test fit so it needed to be helicoiled. I like to fit or make a drill block to be sure it stays straight


Then the bank 2 head gasket was sticking out a little bit so that had to be filed off

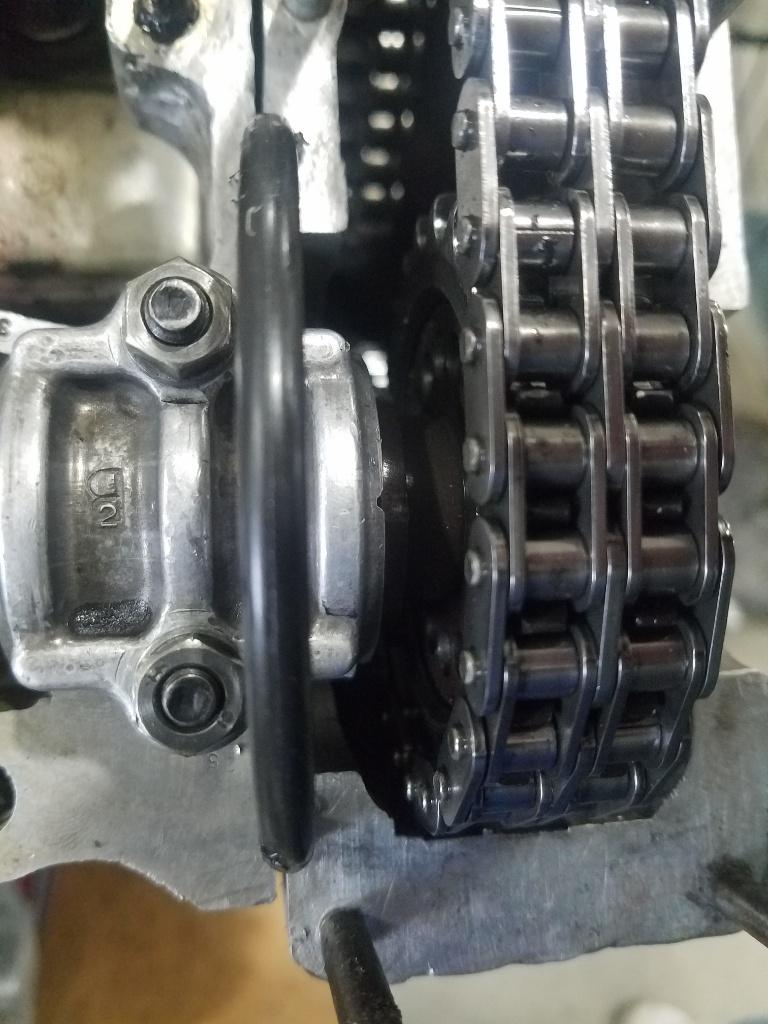
Then the fun really begin. First stage the cover itself with the oil pump and timing chains and the 2 crank gear/sprockets because there is no way to reach any of this once the cover goes on so it has to be in place and you have to try to get the gears on the crank and timing chain drive onto its studs as you go (I drilled hole in the front of the cover to allow access to the timing chain drive nuts so they can be installed last).
Then the oil chain tensioner goes on the block. It has a lock screw so to lock it retracted, get the cover on to about 1/4" gap then slide a lock screwdriver in and try to release it without actually seeing it.

And it all has to be covered with sealant because there is are a couple timing chain idler shafts that need to be seals but they cross the block/head line so you need to work fast before the sealant sets up

And if all goes well you end up with a cover in place that won't leak and cams that turn....if it all went well.

Next up is indicate the cams in., then covers, intake, clutch and bellhousing...it should be an engine by next weekend.
I am positively GIDDY with excitement!
I'm excited to hear the motor fire on all cylinders. Keep the momentum going!
mke
Dork
11/15/21 8:35 a.m.
Woke up early and rather than waste the time before work sitting I timed bank 1
first I confirmed my TDC setting on the degree wheel with a high tech welding rod extension for the dial indicator. Actual TDC is pretty hard to read directly so I read the indicator at +/- 15 degrees and make sure they are the same, TDC is exactly in the middle.


I did exhaust first, if you look close you can see my pencil marks on the wheel that way I'm not trying to remember anything. I got it within 1 degree which is about the best I can do...the cam moves about 0.6 degree each pin hole, the crank 1.2.


Then did intake, I got it almost perfect. then a brought the engine to TDC to see were my original marks were...they were correct
Intake

Exhaust
mke
Dork
11/15/21 2:41 p.m.
I'm feeling pretty confident at the moment.....just ordered oil, filters, coolant and a scale because I'm really curious what it weighs, hopefully under the 1100lbs the scale reads 
mke
Dork
11/15/21 6:10 p.m.
I timed bank 2 then rolled back to #1 TDC to remark them....the marks are perfect which caused more staring in disbelief. Finally I arrived at I did the clay test pretty wrong. I put it together correctly but because of the clay I just turned it and disassembled and then wondered what the hell had gone wrong. For a real assembly its align the marks, rotate, realign the marks cam by cam until they all come to the mark with the chain under tension and all the lash out of the system. I didn't do that for the clay because once I turn it the clay is smashed. Not sure how I convince myself they were as wrong as I thought I was seeing them....but the marks are right and the bank 2 exhaust cam clay looked as bad as it did because its last on the chain which does stretch under load and would have had the most slack to begin with I guess..... so I have o idea how to correctly clay this engine but on to other things I guess
mke
Dork
11/16/21 7:28 a.m.
I started cleaning up the cam covers last night...I just don't have the heart to paint over the pretty aluminum. I'll paint the air box red when I get that built.
This whole cam thing still has me confused about what I thought I was seeing...I rechecked lash this morning and its right where I set it but I will probably also do a quick leak-down as a sanity check before I go any farther.
mke said:
I started cleaning up the cam covers last night...I just don't have the heart to paint over the pretty aluminum.
I tend to agree. Ferrari castings are nice enough that they don't need to be covered. Just keep them clean.
mke
Dork
11/16/21 1:20 p.m.
GasTungstenArc said:
mke said:
I started cleaning up the cam covers last night...I just don't have the heart to paint over the pretty aluminum.
I tend to agree. Ferrari castings are nice enough that they don't need to be covered. Just keep them clean.
Part of it is the nice ferrari castrings and part is honestly showing off my fabrication on them..they needed so work


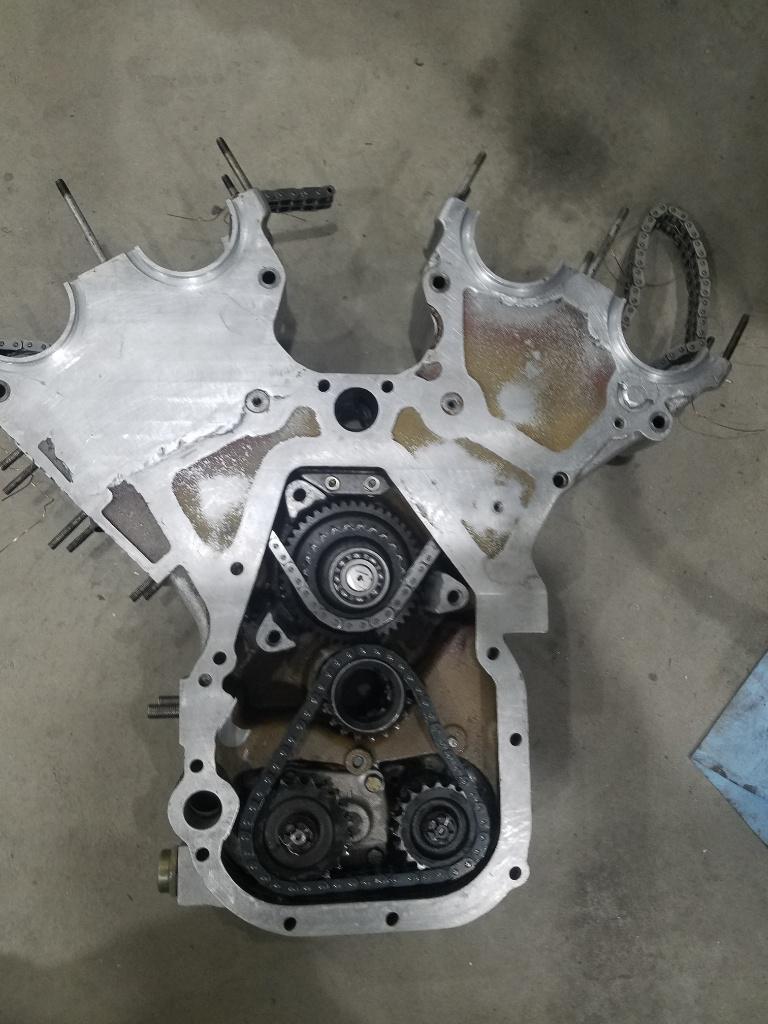
Than all cleaned up and fitting both the TR heads and 400i timing cover

mke
Dork
11/16/21 9:10 p.m.
spent too much time shining up the cam covers before installing them


In reply to mke :
I guess I had forgotten about or overlooked the rework on the covers. In that case, it might be just as well that you didn't have them coated since powdercoating and painting have a way of magnifying every flaw. Maybe it's different for the crinkle finishes.
About how far are you from first fire?
mke
Dork
11/17/21 7:13 a.m.
GasTungstenArc said:
In reply to mke :
About how far are you from first fire?
Wrinkle paint hides pretty mush anything and is WAY easier than getting parts that are welded everywhere to look right bare.
Hard to say exactly on 1st fire because sadly this is 3rd priory at the moment behind planting and basement.
I think, it will be going back in the car this weekend, so first fire next weekend? Or maybe the following week? Soon, until something unexpected shows up.
mke
Dork
11/17/21 12:17 p.m.

mke said:
I probably spent about 30 minutes just staring in disbelief as all the possible causes run through my brain. Eventually I realize the only possible explanation is that way back I set up the bank 2 cams wrong...but that can be, it was running?...well, I was struggling with bank 2...Wait, I have a high speed log of MAP

Its not that smooth and it was after the engine was clearly broken so I didn't think much of it but looking now....E36 M3! there are only 6 cylinders showing! The multiMAP sends the strongest MAP signal which should be the active cylinder....unless the active cylinder has a problem making leading or trailing cylinder stronger...I can't believe I missed that.

No frikin wonder it wasn't running very well. Looking at the cams (I couldn't get a good pic), when I line up the timing marks, cylinder 7 should be 30 degrees clockwise from cyl 1.....nope, probably miss marked by 30 crank degrees, 15 cam degrees. No wonder that bank was giving me all kinds of trouble.
So, I'm going to call the clay a pass and not repeat it based on bank 1 but I need to re-time and remark the cams and as a bonus I have a new root cause for the engine failure.
So, do I understand correctly that you no longer have a smoking gun for the engine failure?


