


I found this little thumper about ten summers ago. It had been ridden hard and put away wet. The magneto and flywheel were missing as well as all the plastics and seat. I almost didn't stop, but I have a soft spot for little Hondas. A quick check of the motor ID revealed this was a not a cookie cutter XR80 but a more desirable XR75.
Old Honda's are always worth more in parts than whole. This roached out bike had enough wrong with it that it was better off going to the slaughterhouse. The art making profit is to quickly and efficiently carve up the carcass and not to get involved with a project. Sometimes I break the rules and keep one for myself.![]()
The missing parts were sourced from inventory and the frame and tank got a re-spray. The original color is R-23 Tahitian red, but in my little podunk town that paint code was as useless as the 'X' in Grand prix. Fortunately, Tahitian red translates to ‘69 dodge R4.
Once finished, the bike was used and abused, as all Hondas should. Years of faithful service including rain, snow, ice and nighttime riding took its toll and the bike was pushed aside and forgotten. Its been over four years since the bike last ran and I'm feeling like its time to get it going again.
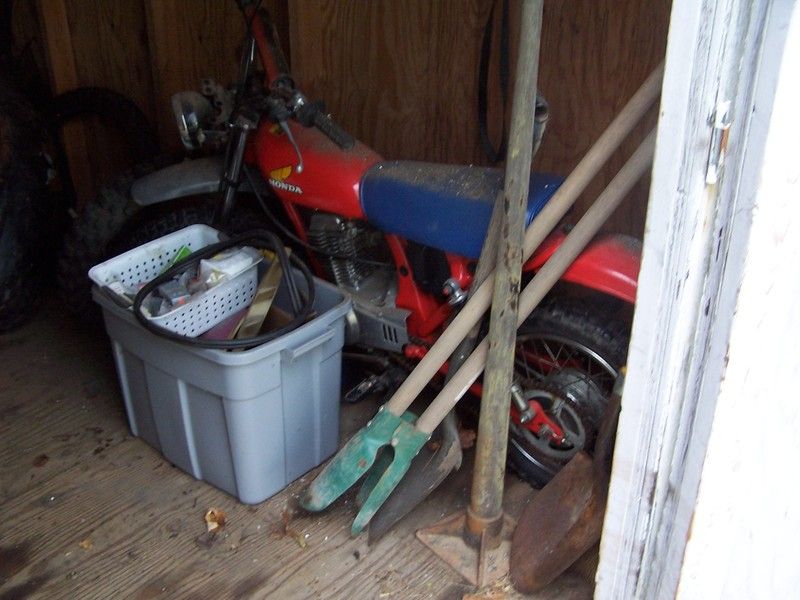 the party is over...... after years of fun the engine fell silent and little Honda was temporarily forgotten
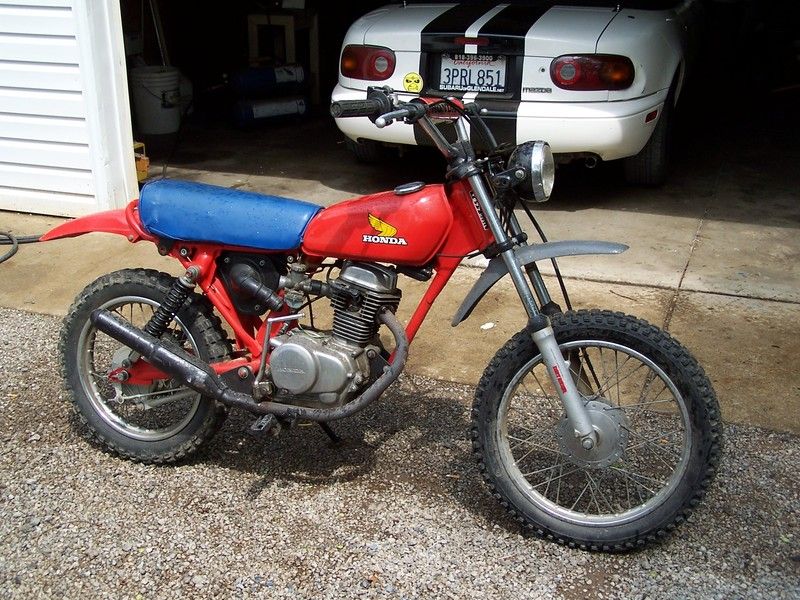 Things are not what they seem. What appears to be a dusty but well sorted vintage honda is actually a collection of carefully selected misfit parts. To the casual observer, nothing seems out of place, however on closer inspection... there is nothing short of chaos. We are look'n at two generations of XR, XL and I even dipped into the 70cc gene pool.
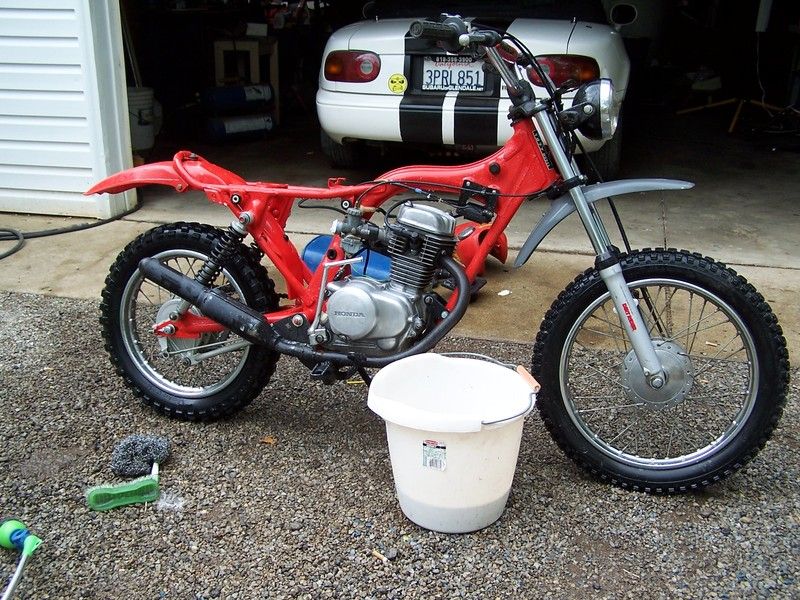 Bonding with the Honda ...again.
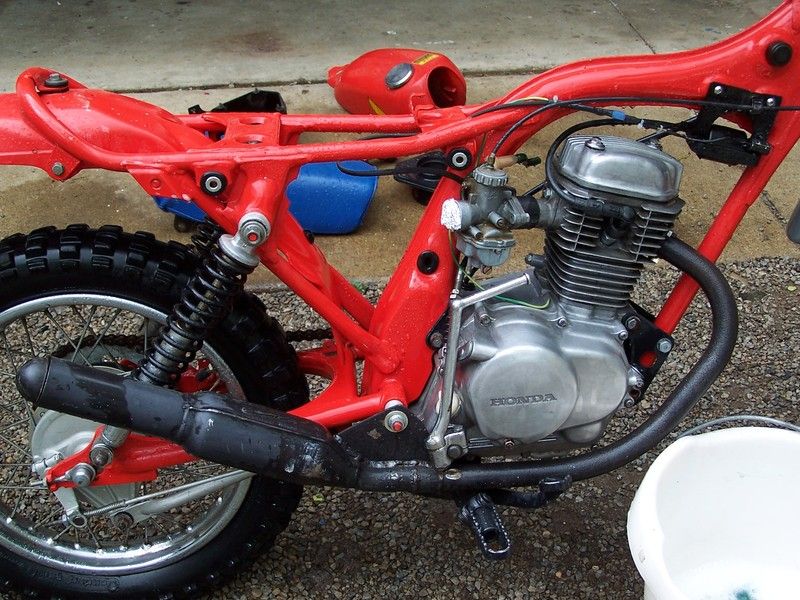 New exhausts are spendy, this exhaust was custom made from Yamaha bits and mystery metal. The system was tuned for sound and not performance.... which I guess is typical for the Honda crowd
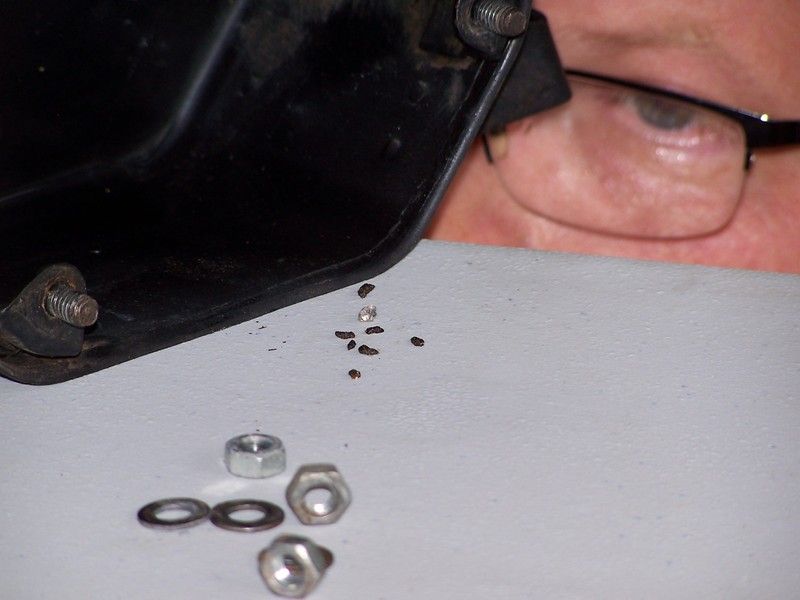 Mouse poop in the air box... but no nest? I have mixed feelings about this...Why would a mouse just take a crap and not build a condo? If I were a mouse, this Honda would be my crib... I would be like 'yo , get off my lawn....'. berkeleying mice don't know E36 M3.
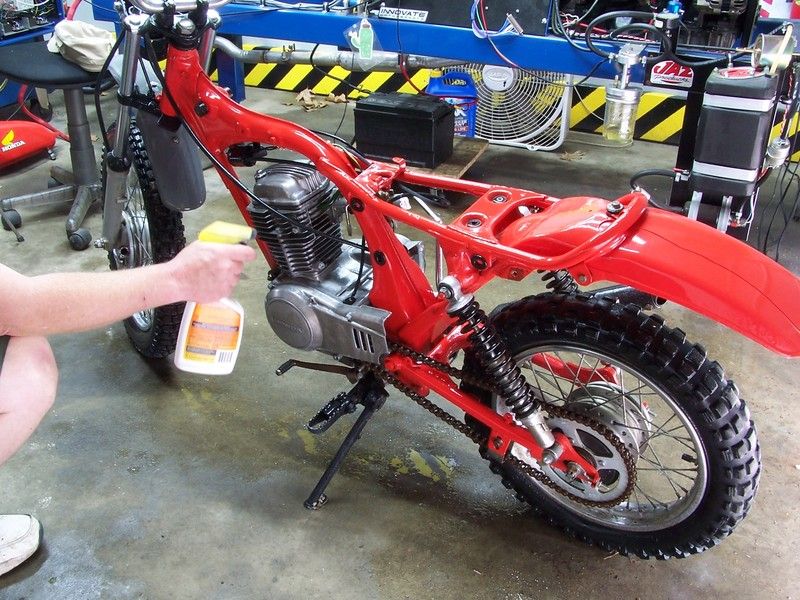 A quick dusting of Armor All is the lazy way of making the bike look good.
Next up is the ignition....

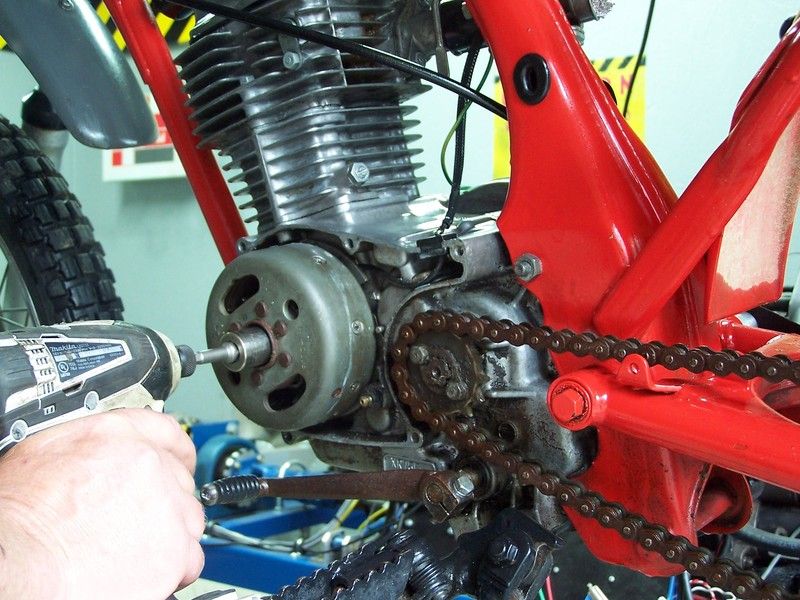 This bike has the points under the flywheel. This was typical of a lot of older bikes. Servicing the points requires a special Honda tool, but first the flywheel nut needs to come off. The flywheel nut spins counter clockwise (lefty loosy
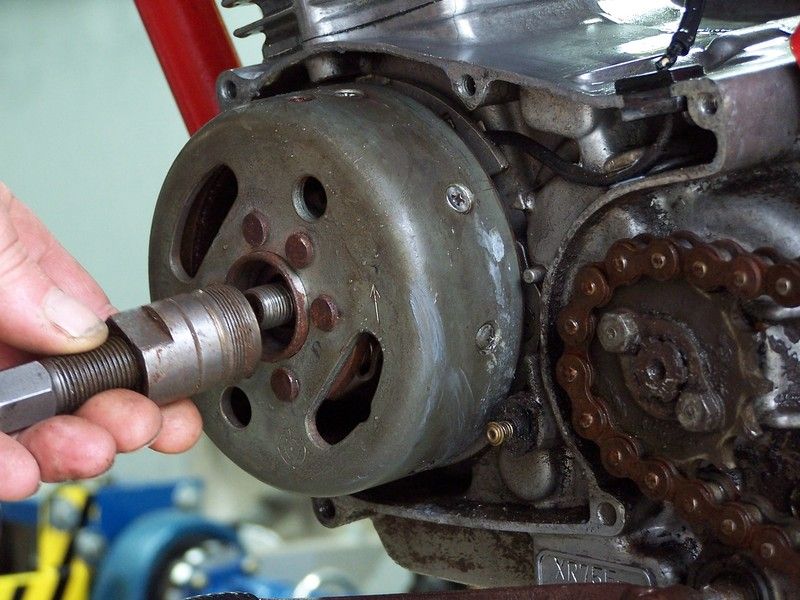 The flywheel removal tool installs by spinning it counter clockwise. It's a bit of a mind berkeley to spin something backwards to install it. its a good idea to thread the tool in as far as you can.
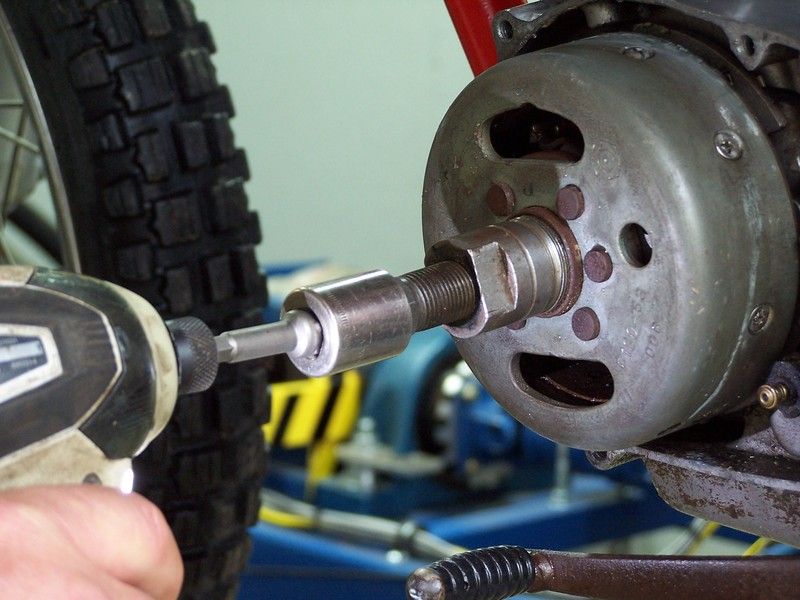 Brrrr- rat-tat-tat-tat-tat.... Brrrr- rat-tat-tat-tat-tat.... Brrrr- rat-tat-tat-tat-tat.... E36 M3, sometimes the flywheel can be a bi*ch.
  Plan 'B'...Hold flywheel and strike the wrench a few times........ Nope.
 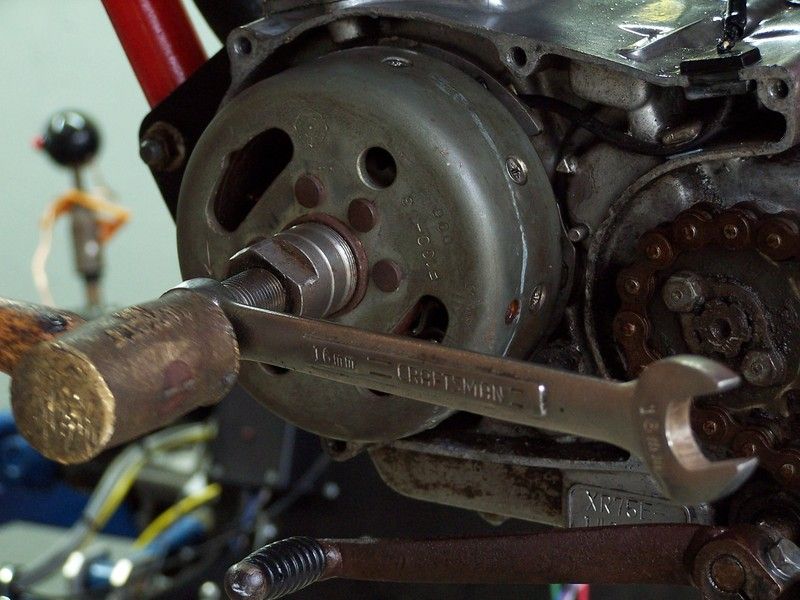 Plan 'C'... give the center thingy a few taps. Its important to never hit the flywheel directly. Hitting the flywheel will crack or dislodge the magnets and certain doom will result.
 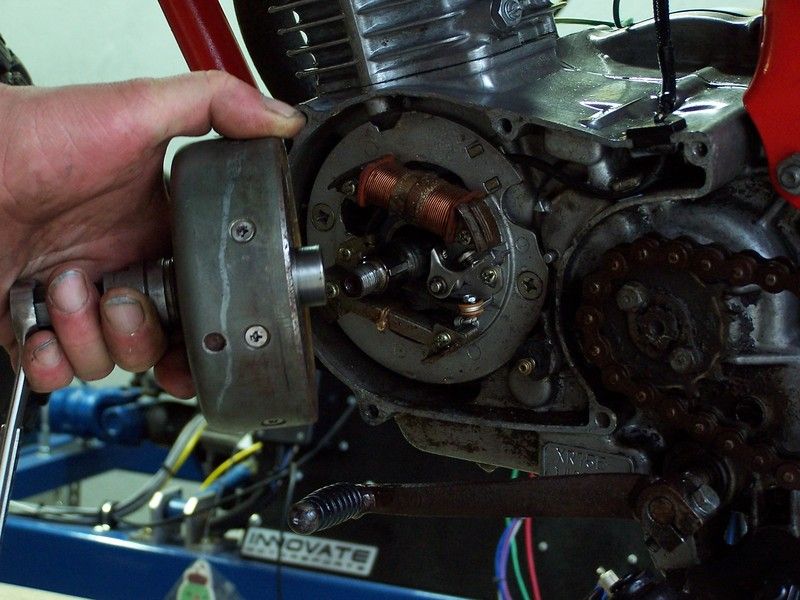 Sucess!
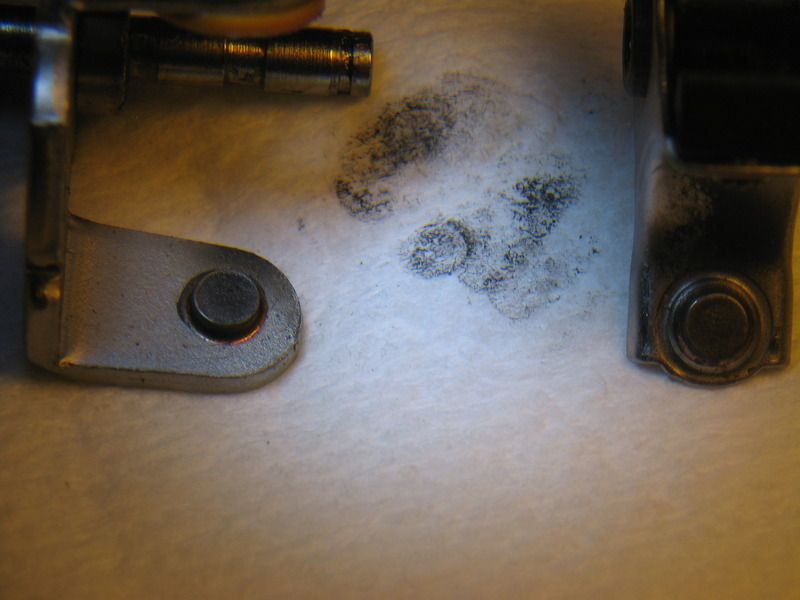 The points are blackened and have oil on the surface. This is puzzling, I don't recall this bike having an oil leak. Shrugs shoulders...I don't know, but it ain't right.
 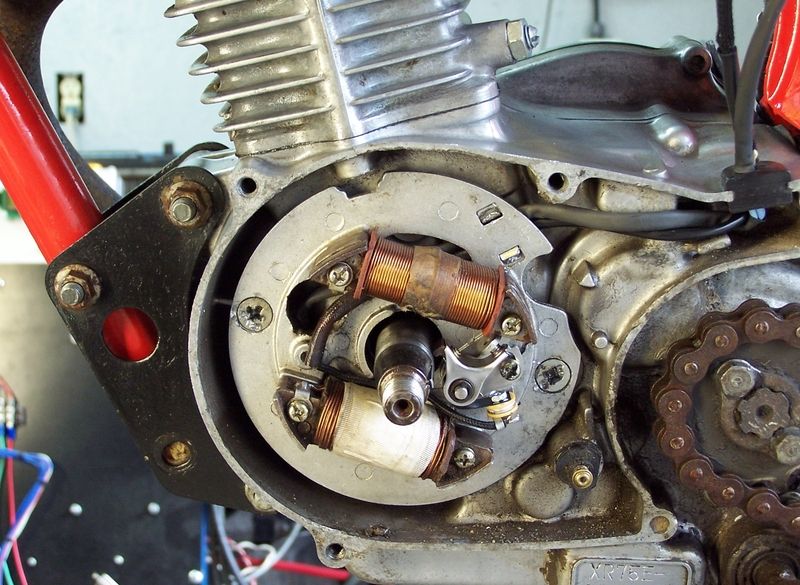 New points installed. On an XR75, the condenser is mounted on the ignition coil. I also added a secondary magneto to power the headlight.
 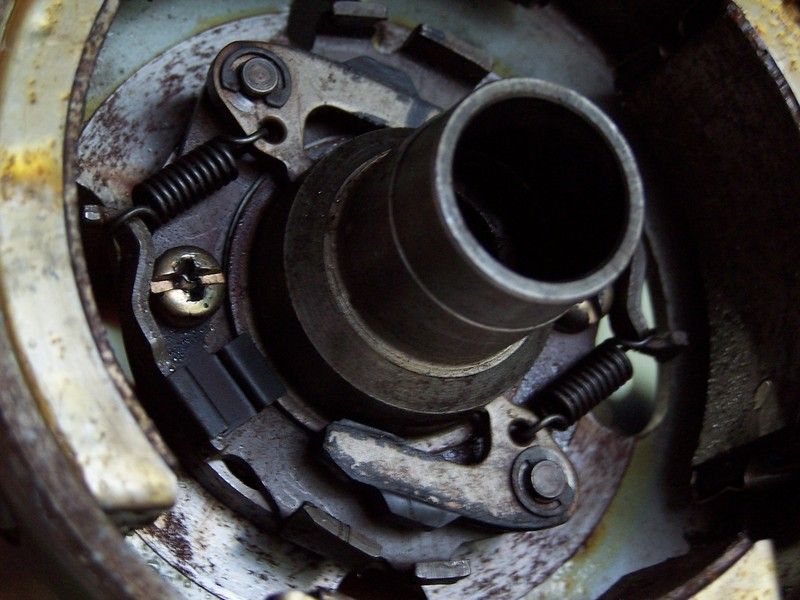 This is the inside of the flywheel. This gizmo here is what advances the ignition... the center is the cam that opens and closes the points....looks pretty crappy and will need a buff.
 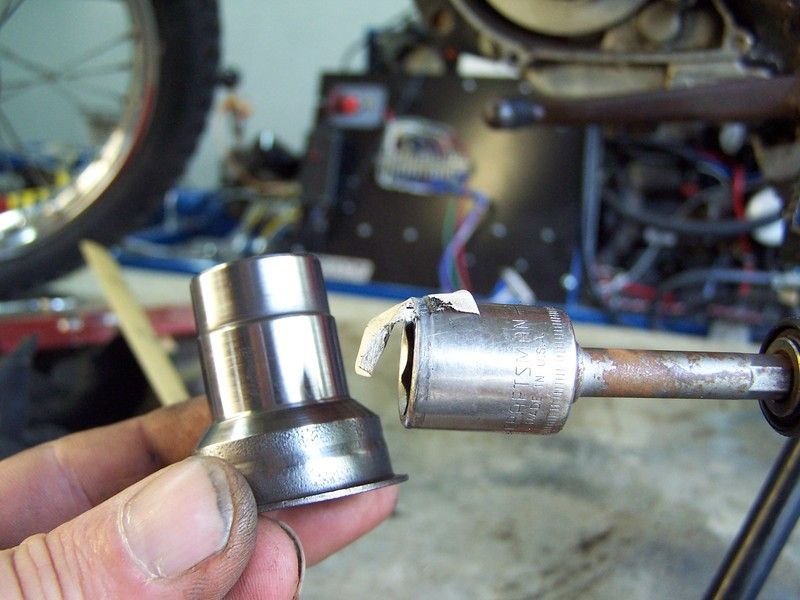 All cleaned up and ready to put back together.
 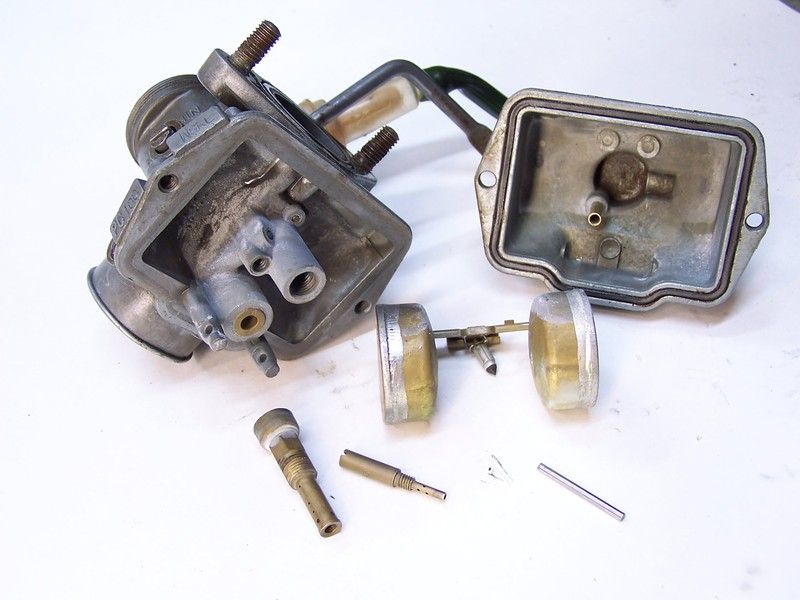 Not bad, but not good. Looks like slight moisture damage.
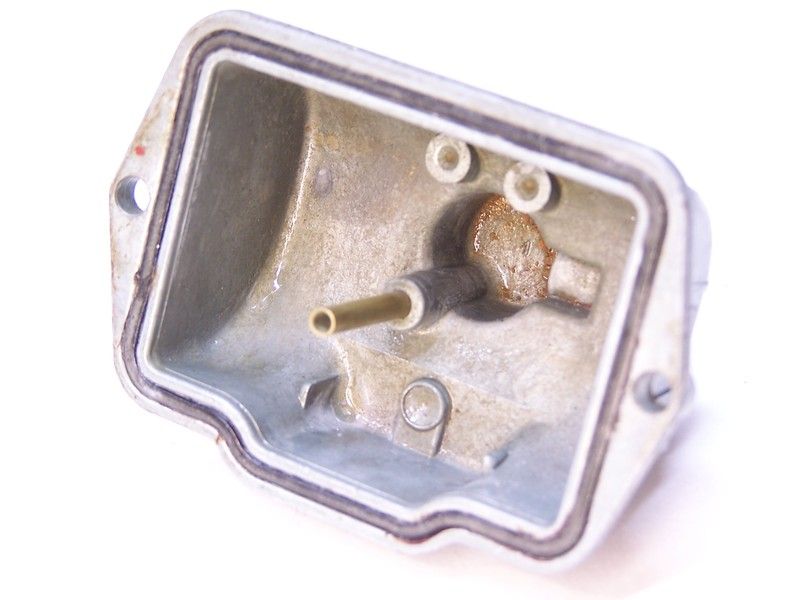 A little bit of crud at the bottom of the float chamber.
 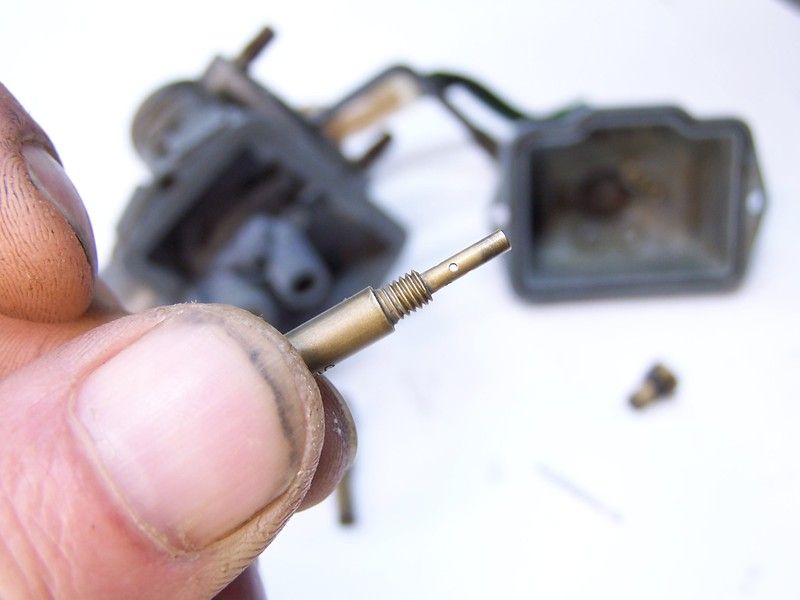 One of the jets had some junk in it.....
 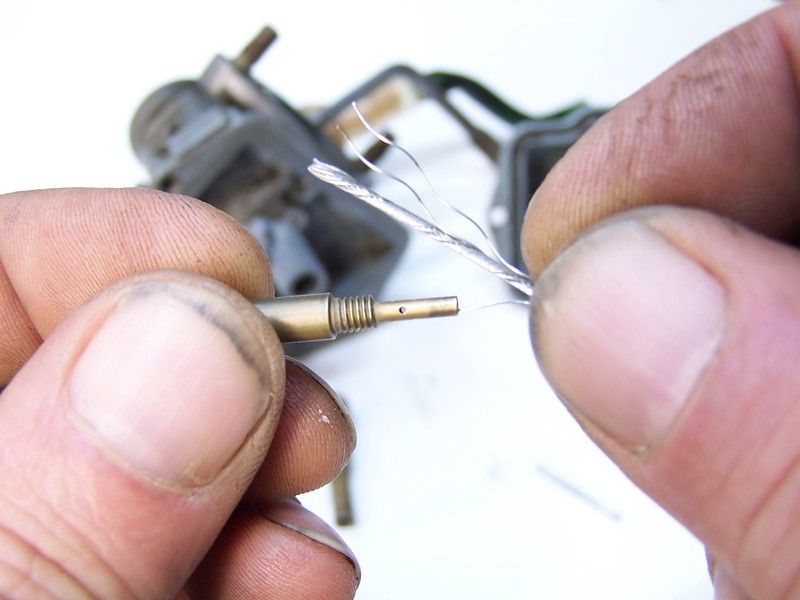 To clean the jet I use a bicycle cable and peel off a strand then poke around until the jet clears.
 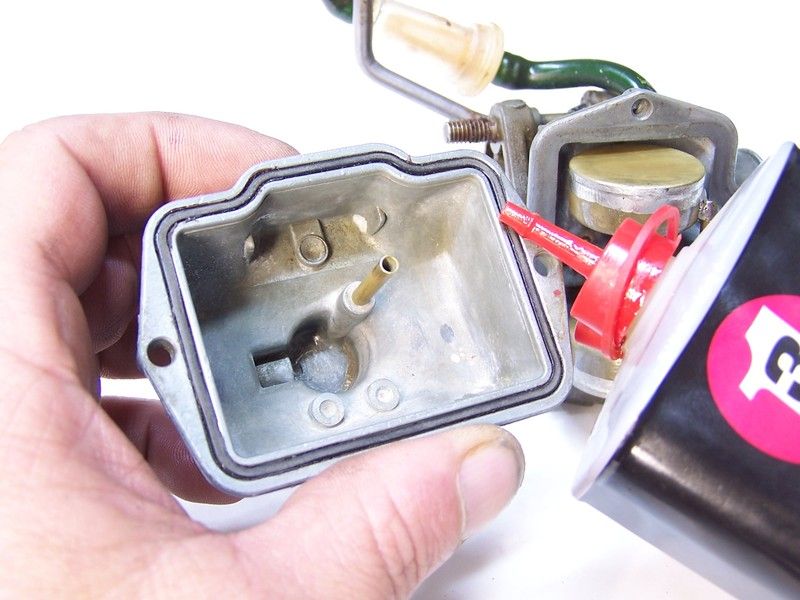 Reassemby...Put a bit of oil on the 'O' ring.
 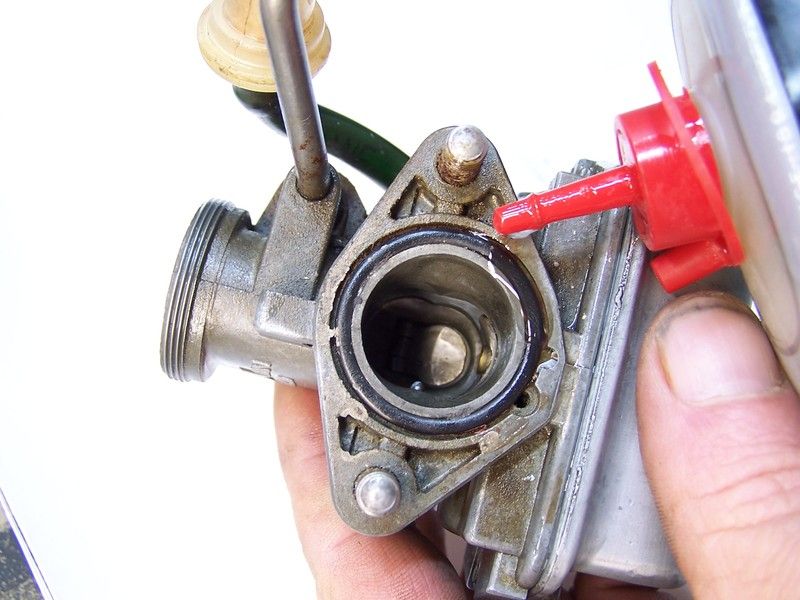 some more oil around the flange 'O' ring.
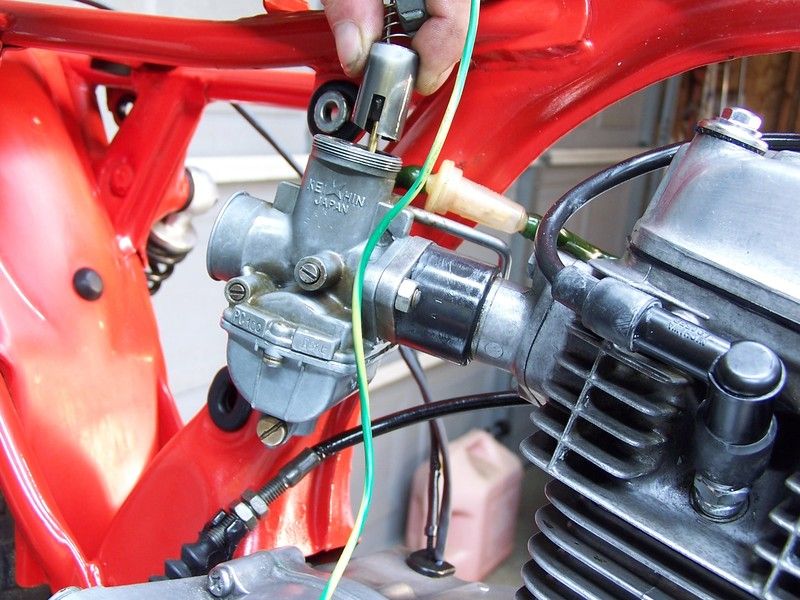 Carb back on!
 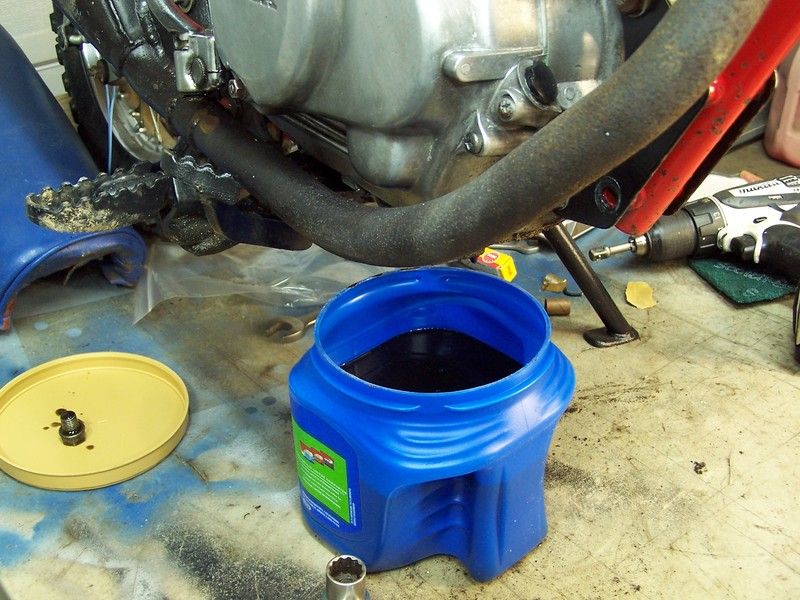 The oil had a heavy gasoline smell... plus it was time for a change.
 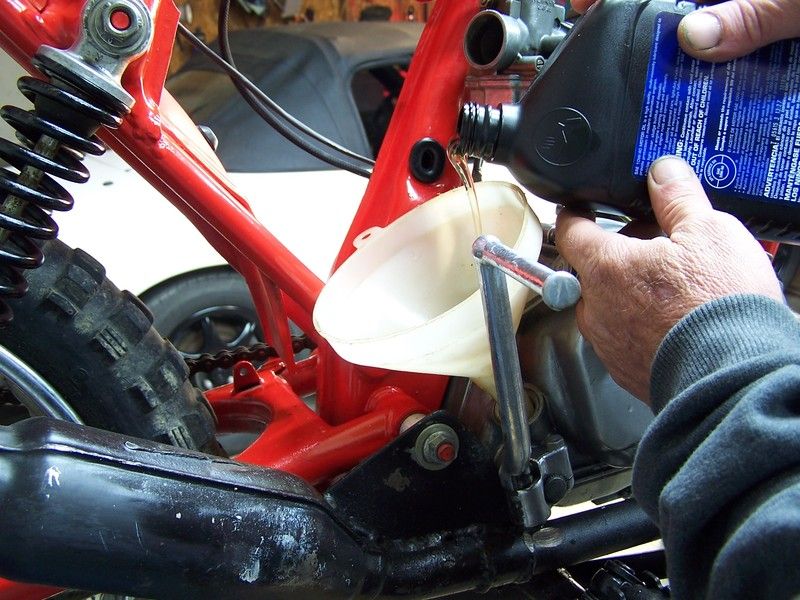 Pour in some fresh liquid dinosaur E36 M3.
 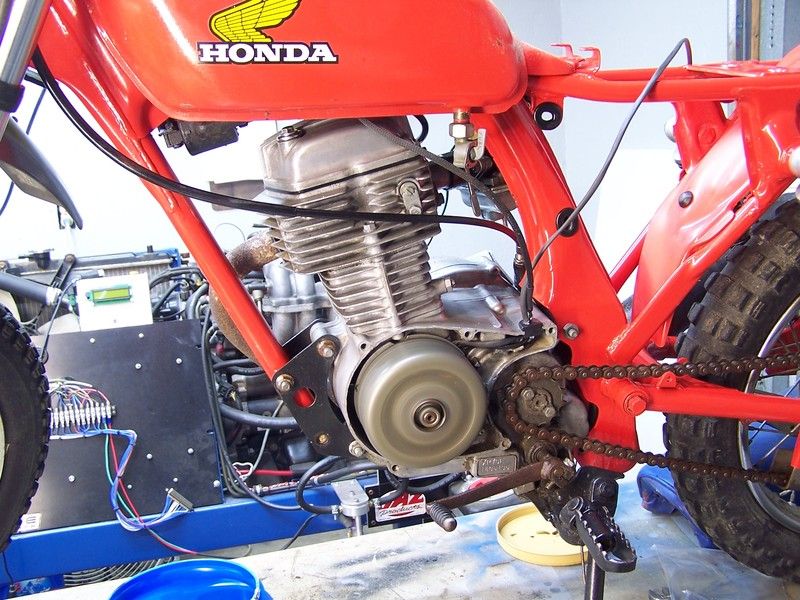 Add some fresh gas.....then spun the engine over with the power drill and it started right up.

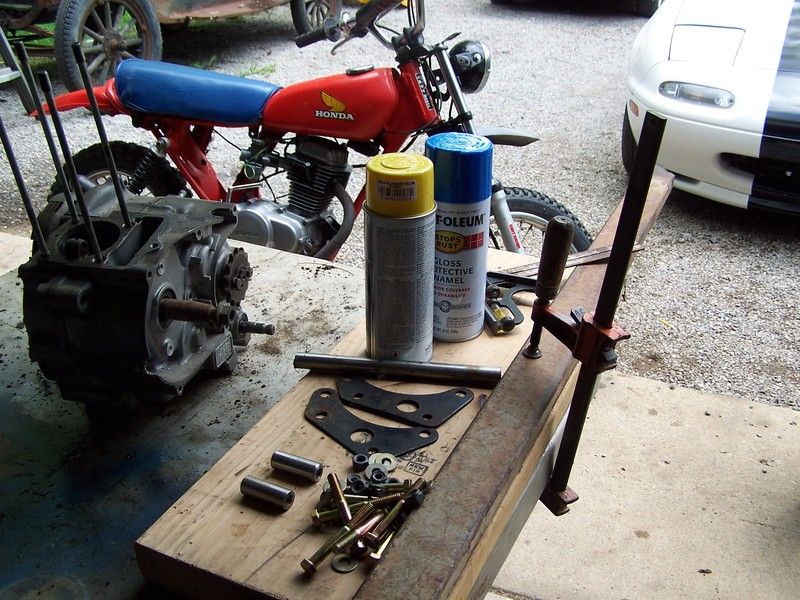 Located the required 'junk' for this project.
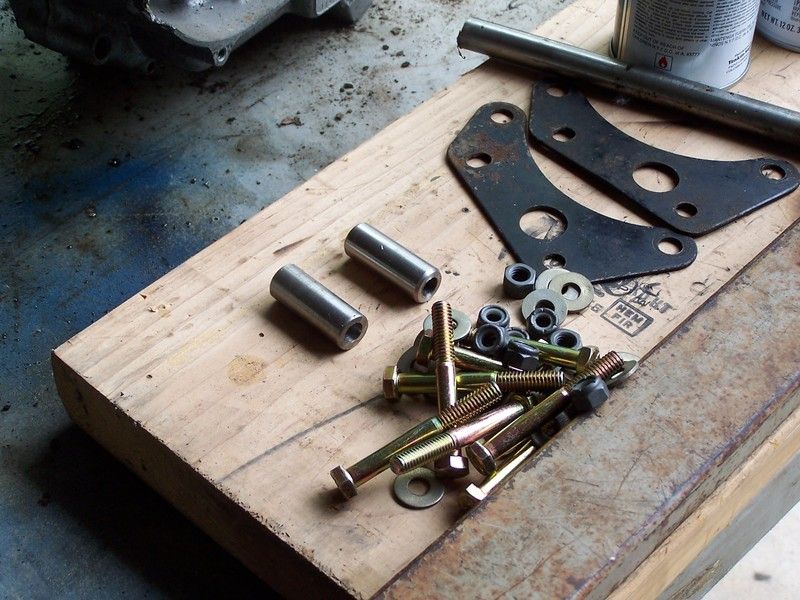 Motor mounts are from my stash, dowels were machined from some scrap that was near the lathe.
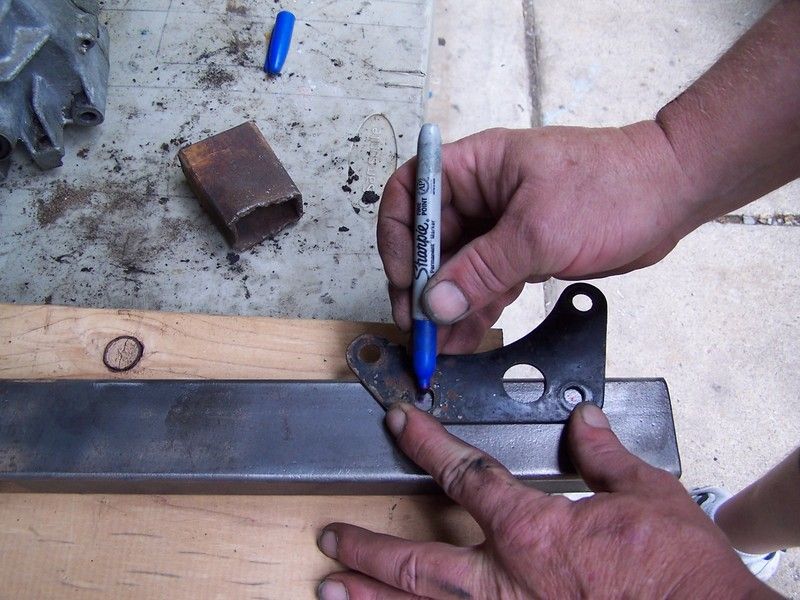 looks like the mount needs to go here...
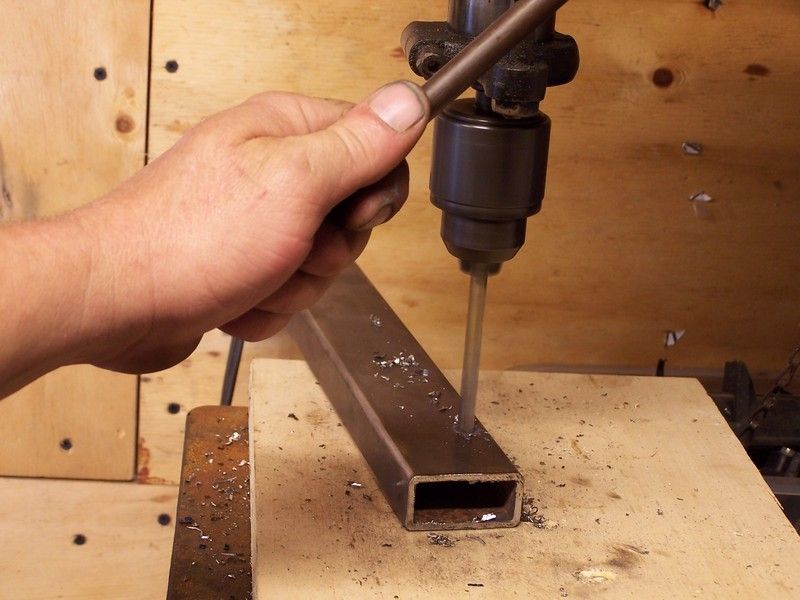 Quick visit to the drill press...
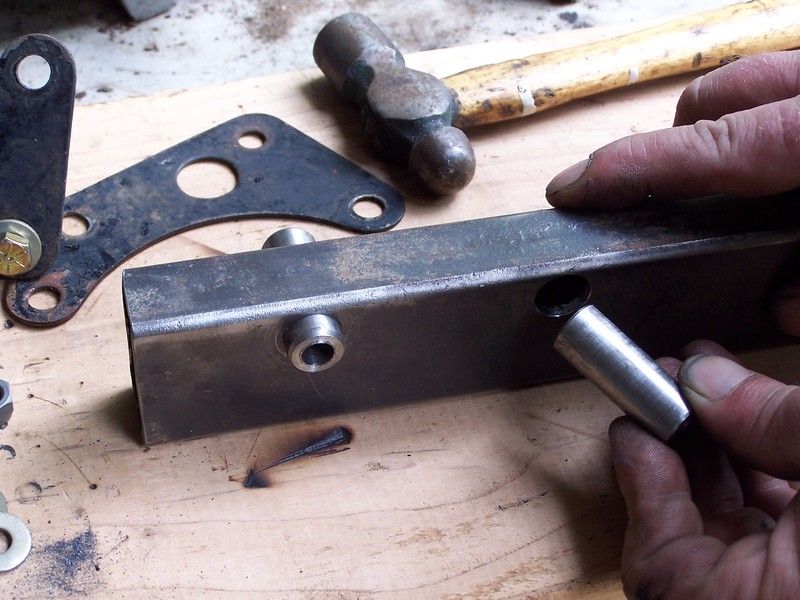 [/URL]Dowels slid in...
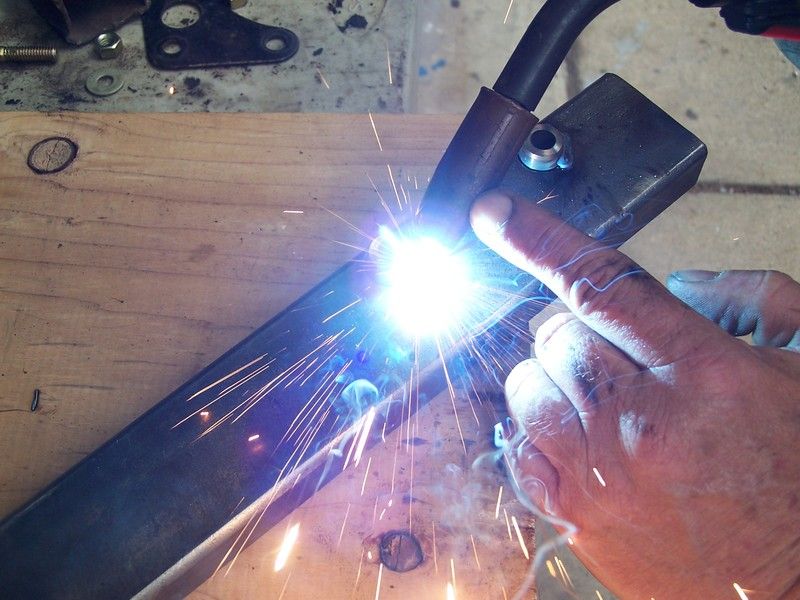 Bzzzzap...
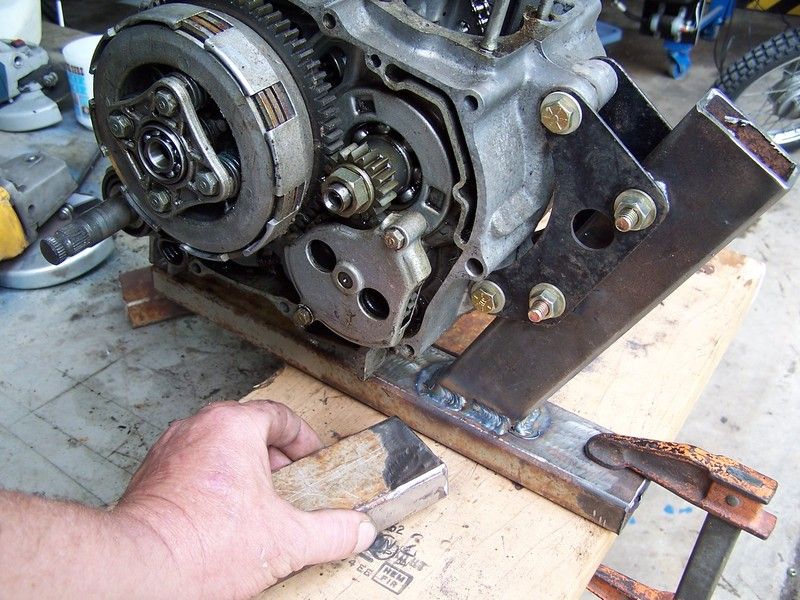 Some more welding and we arrive here. A dummy engine was mounted to check fit. Next a stabilizer leg is added.
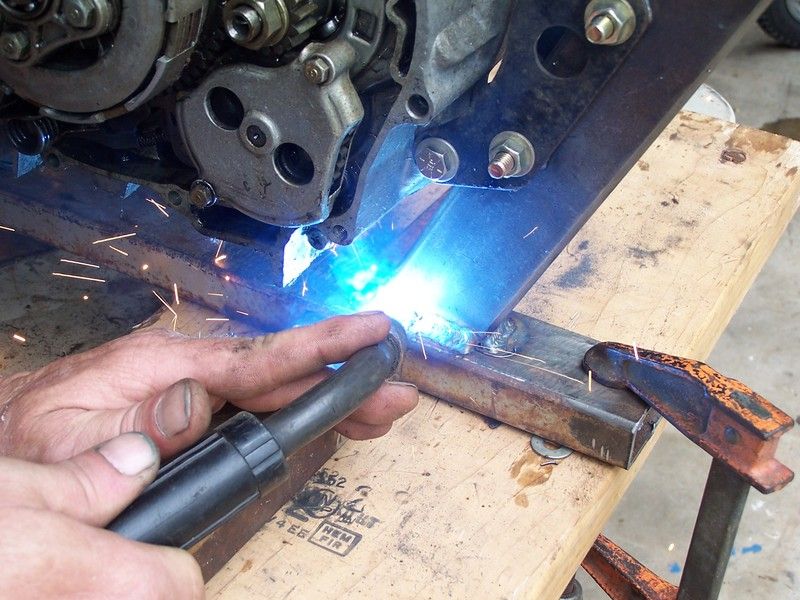 Bzzzzap!
 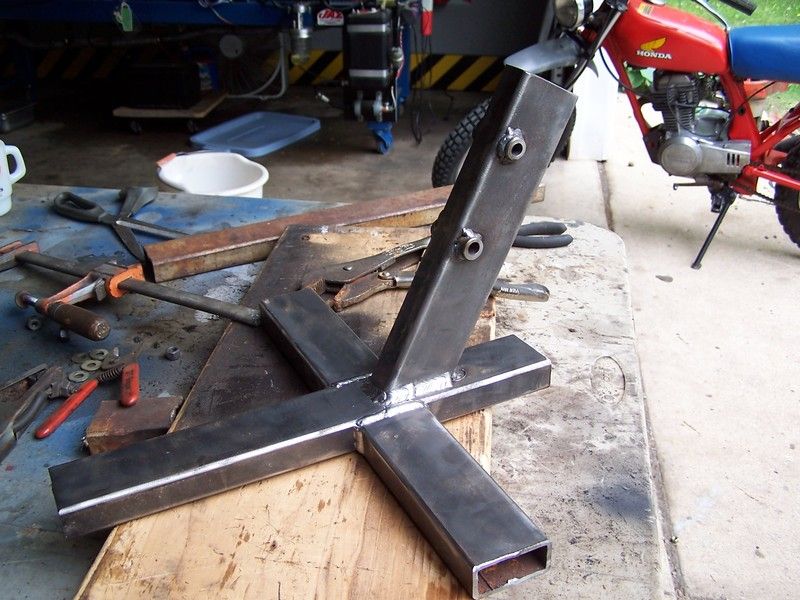 Done!...well almost... needs paint.
 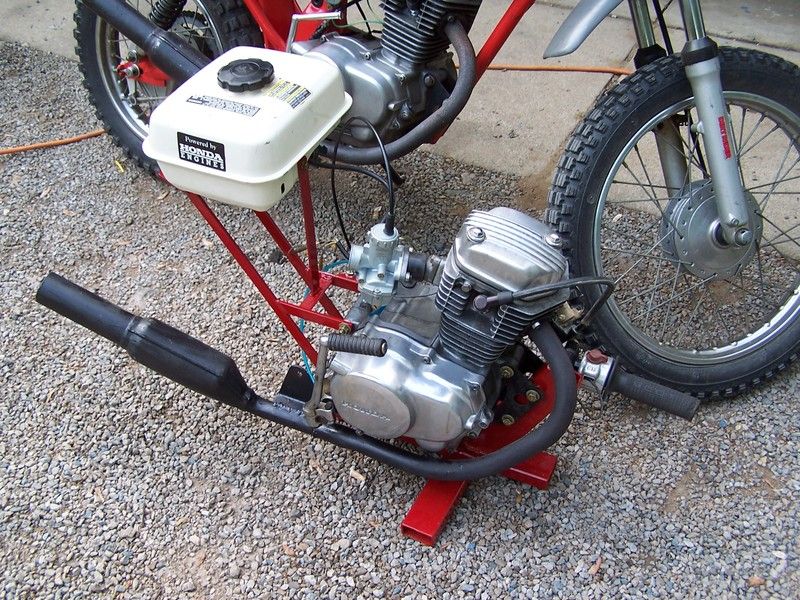 One of the basement motors mounted on the engine stand. Originally I was going to paint the stand blue, but a red stand makes the motor seem moar powerful. A fuel tank and genuine twist throttle makes this rig so cool it also qualifies as furniture for the man cave.
 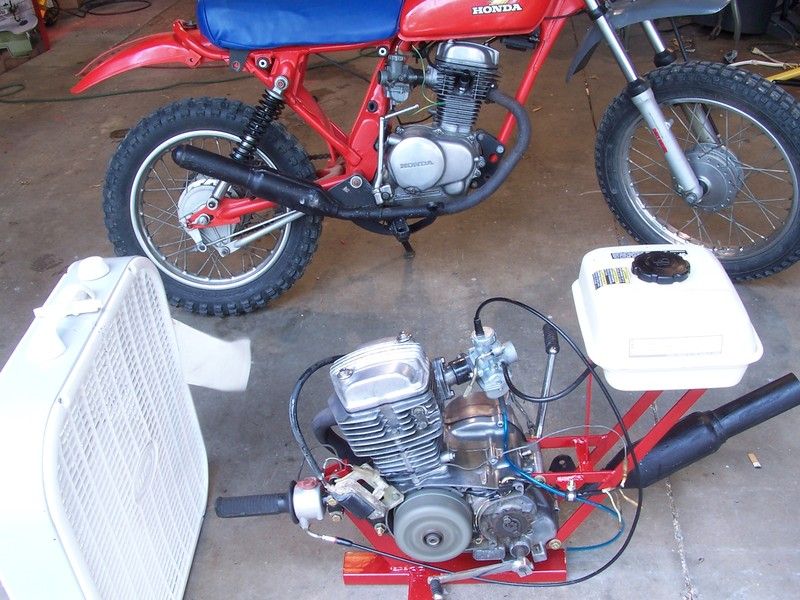 other than a squirt of oil, I didn't bother doing any preflight checks. The engine started right up.
 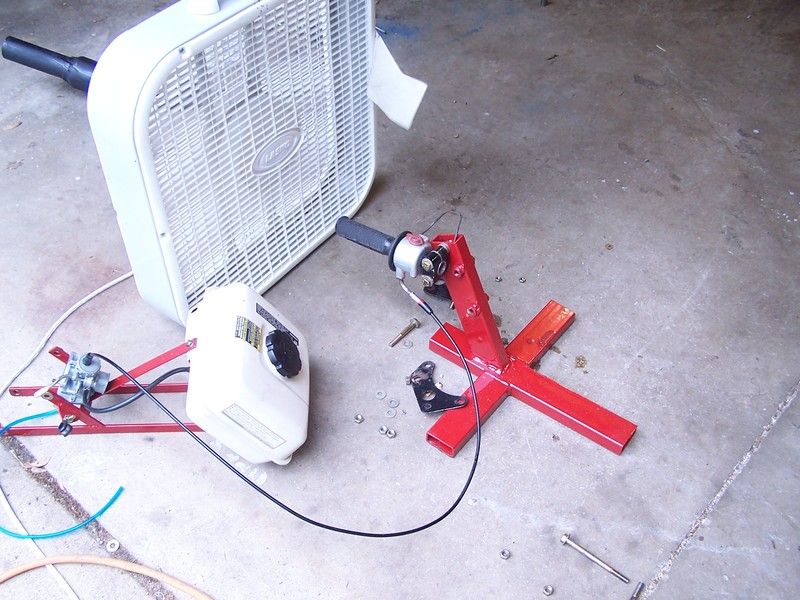 The engine ran really good and was phenomenally quiet... Good enough! A few moment latter the engine was off the stand and ......
 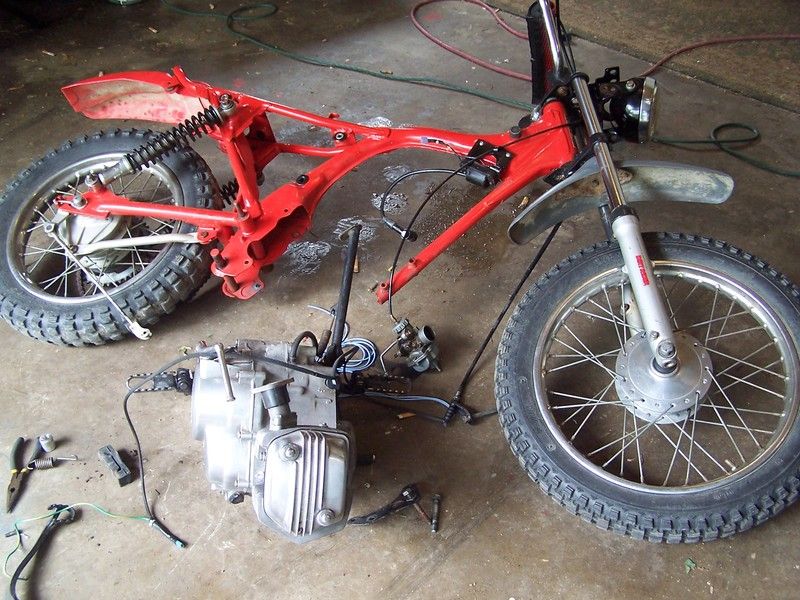 .... the engine came off the bike. the swap was finished in record time.


