In reply to Professor_Brap (Forum Supporter) :
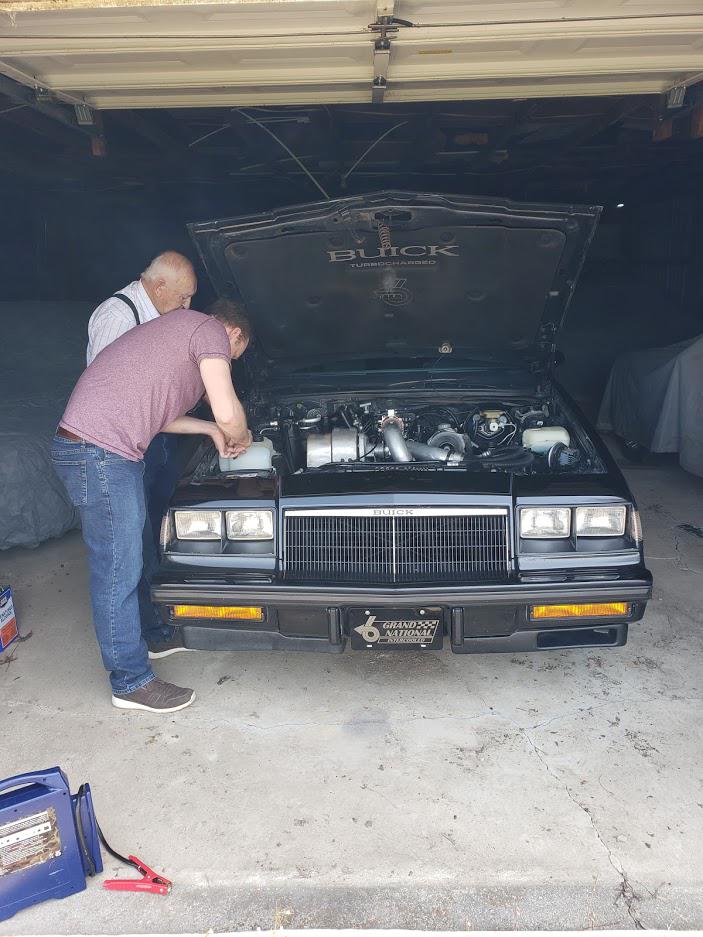
Haha I think he he was nervous just watching my rusty car roll off the u-haul trailer, but quickly realized that I actually crossed most of my Ts and dotted my Is before I got there. It would have been nice to have stronger valve springs and a more tuner friendly PCM, but oh well. The car stayed together, and Brian seemed pretty excited to have the car back for updates.

The transmission conversion commences at last! Here's my newest pretty new part.
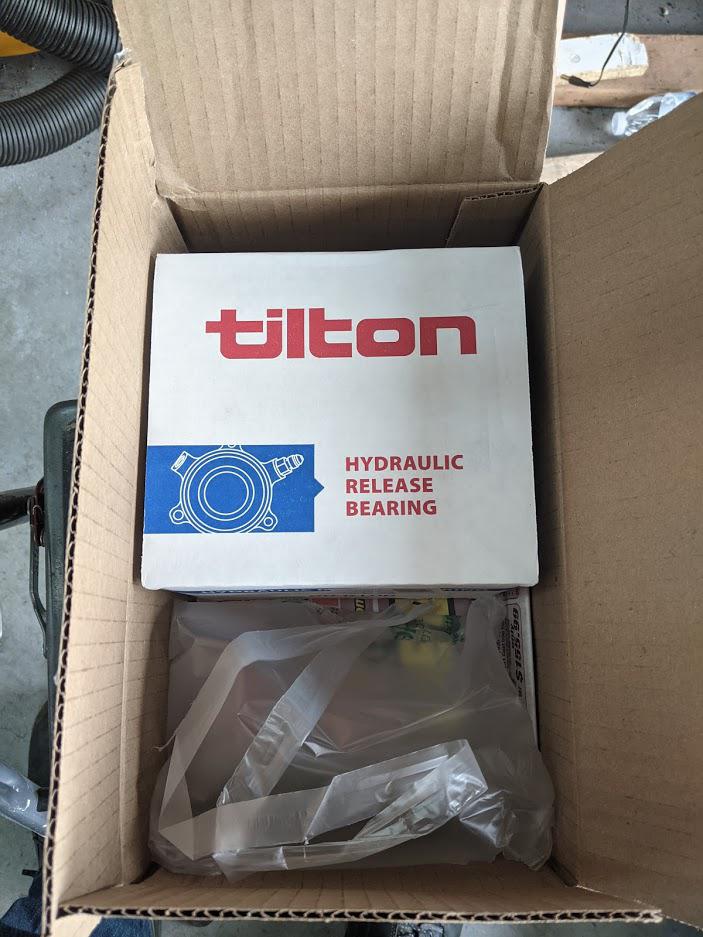
Luckily for me, this one actually fits exactly as I expected. This is the second time that I've bought a part from Tilton, and I must say that the quality is well worth the cost. Thses parts are beautiful!
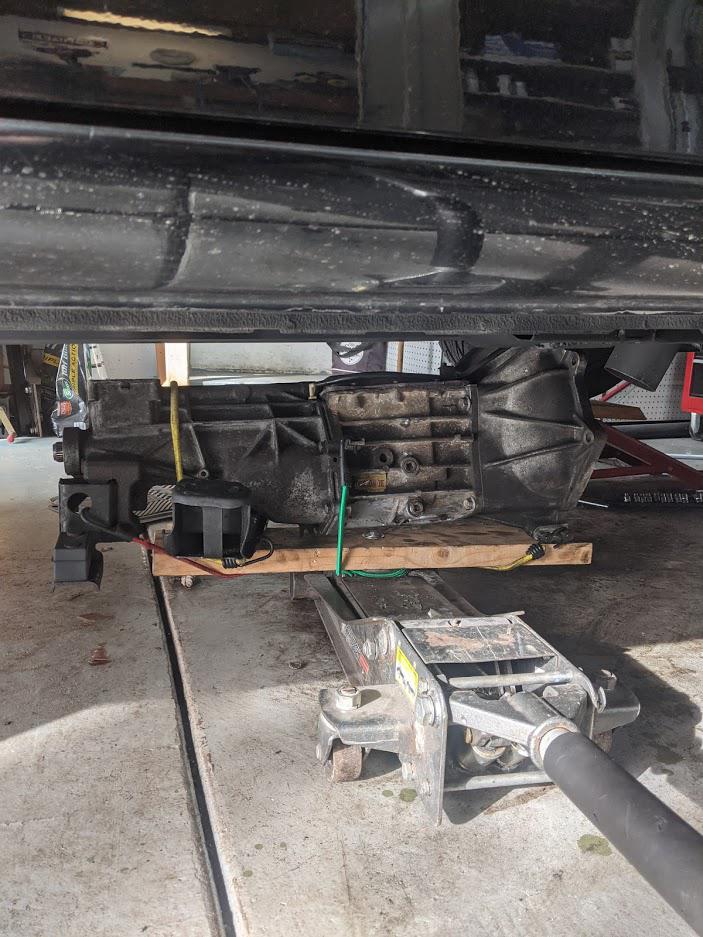
It's time to pull the broken T5, but I'm scared to go it alone again. I think my friends are tired of helping me too.  A little ingenuity went a long way here!

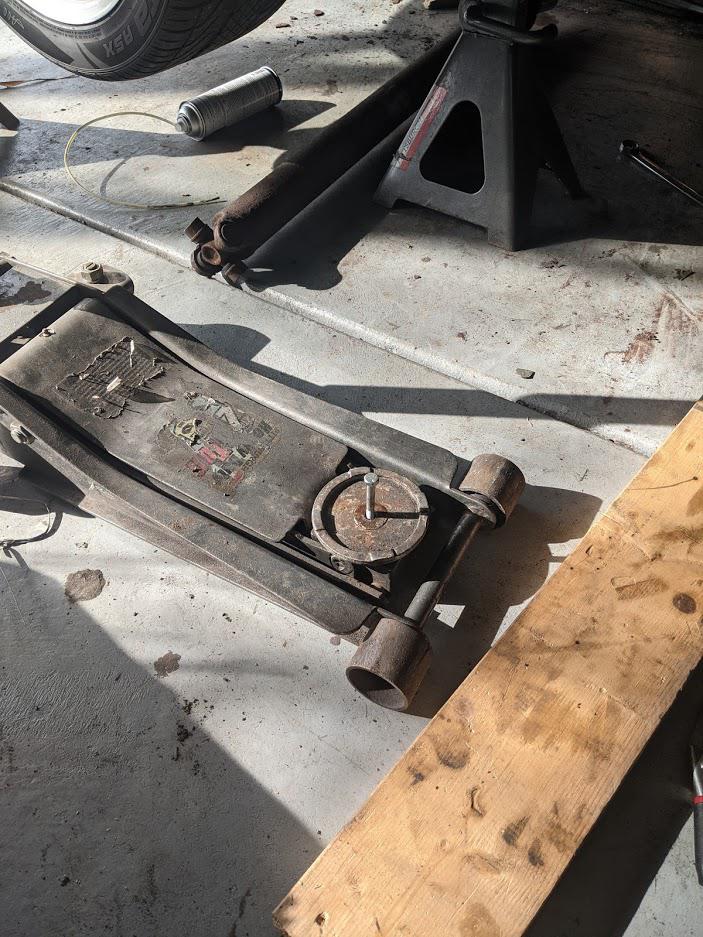
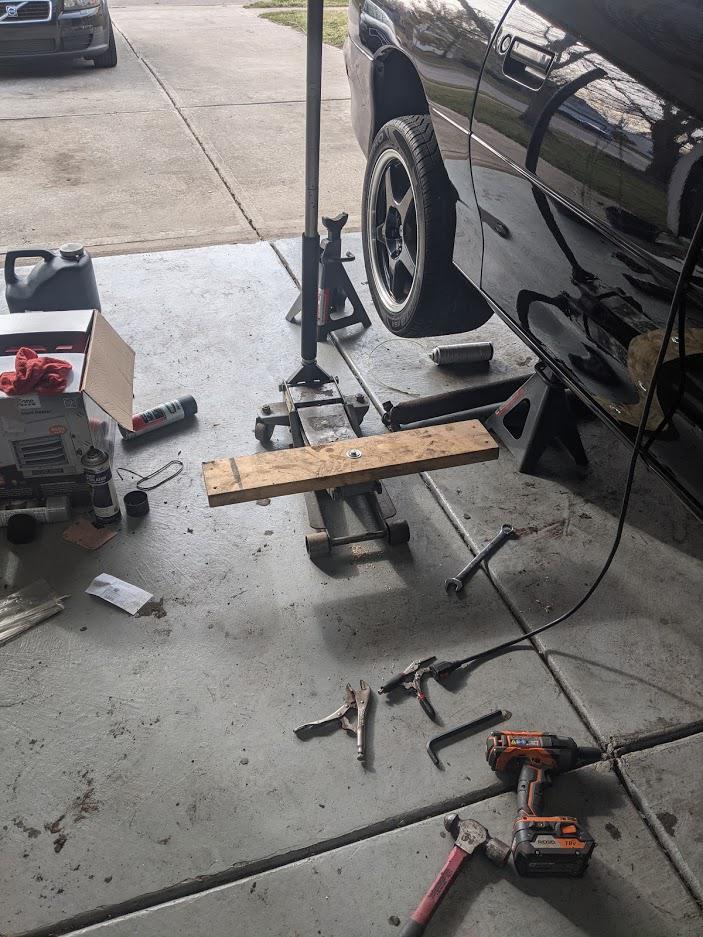
This actually worked miles better than the trans jack I borrowed a couple years ago.
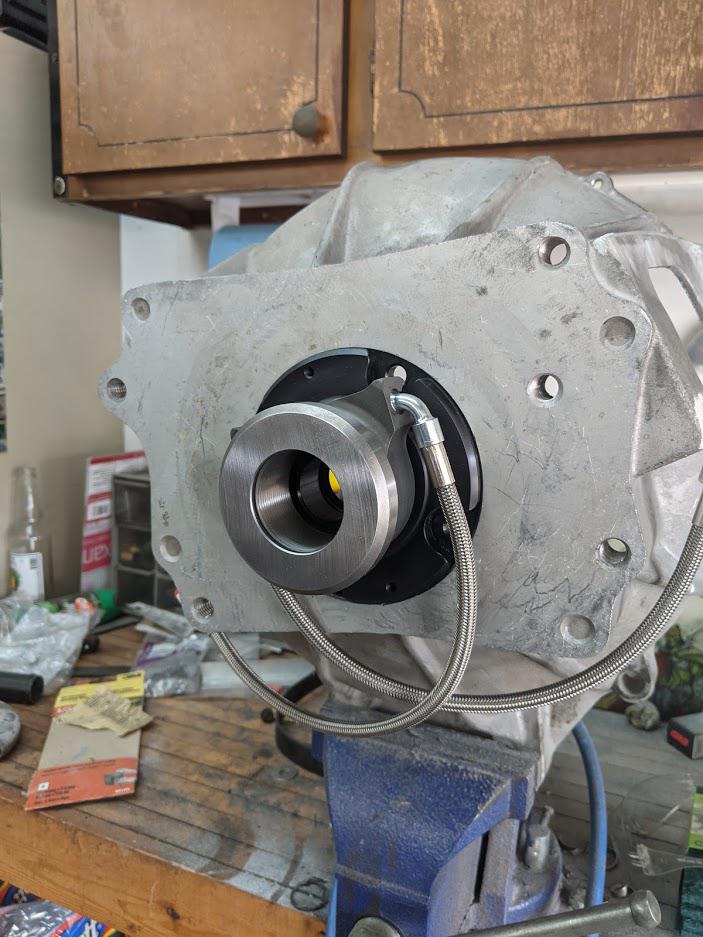
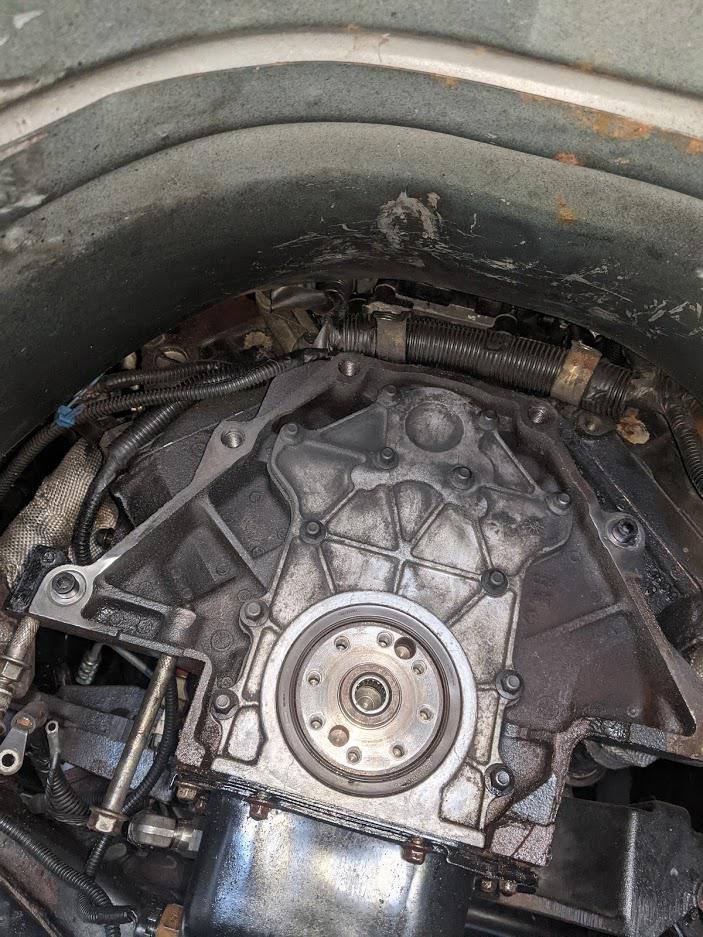
Per Tremec's instructions, you must get the bell housing bore within 0.005" of concentric with the crank centerline. Otherwise, you will wipe out the tapered roller bearing on your input shaft. I assumed that bolting a stock aluminum bell to a stock bottom end without adapters would mean that the factory already did a good enough job. Sure enough, I was wrong. I guess that goes to show how nice of a unit I'll be dealing with once it arrives.
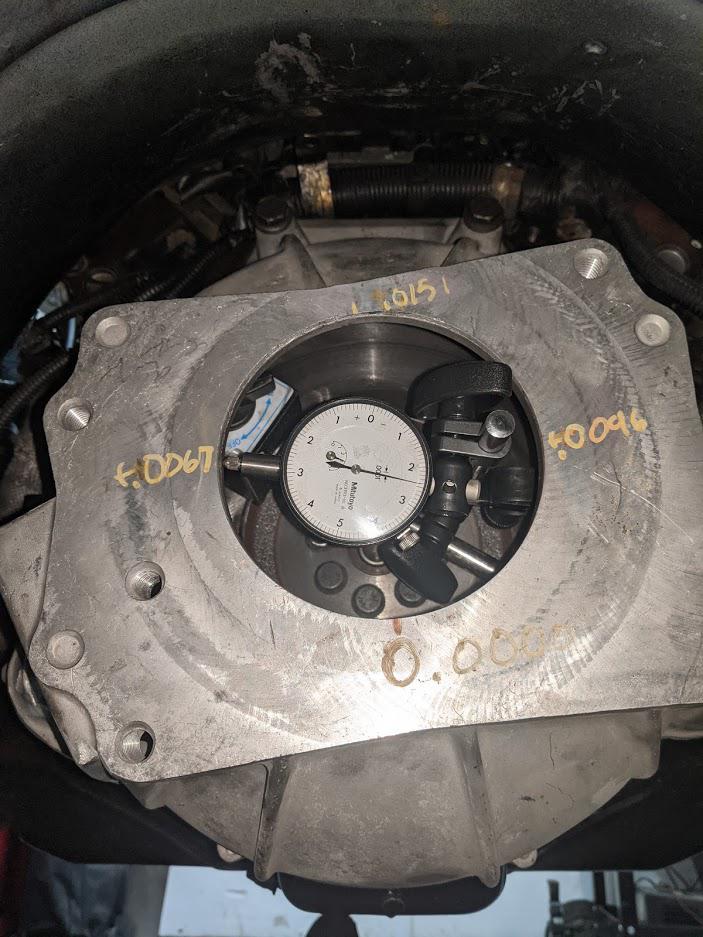
Now I need a set of 0.007" offset dowels. The V6 dowels have the same diameter as any old GM V8, so I can get them off the self. Moving the bell that far up will split the difference and get me very close to concentric. By the way, the dowel pins and transmission were thrown in the same cart and purchased on Saturday!  It's finally coming!
Since I measured my offset and got new dowel pins, I had to figure out how to replace the old ones.
The trick ended up being the use of an air hammer. The pointy attachment put a nice dimple in it which gave the fork attachment something to hold onto.
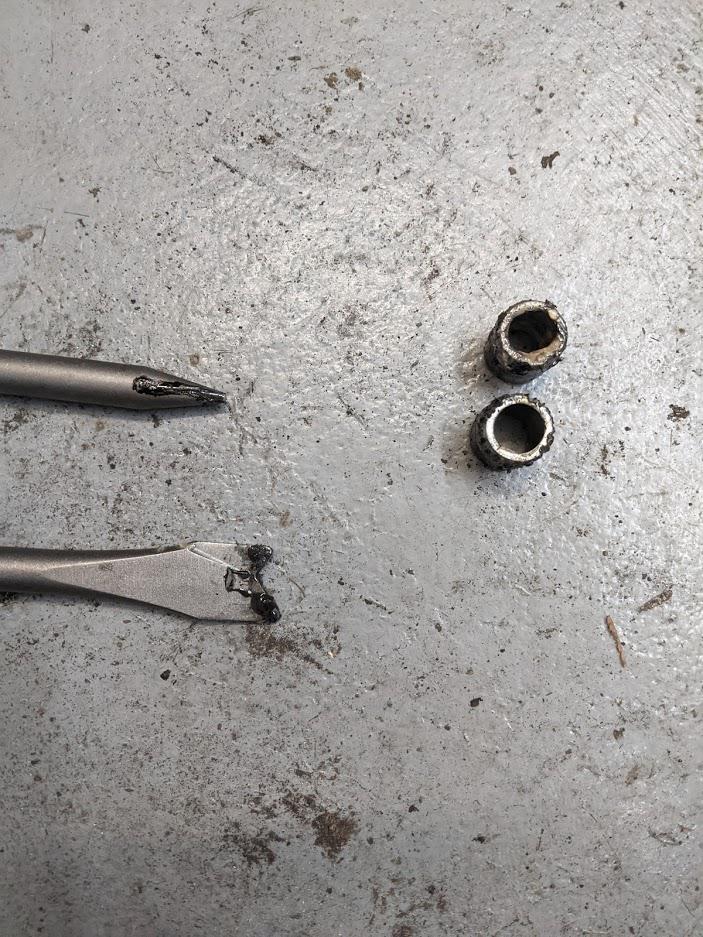
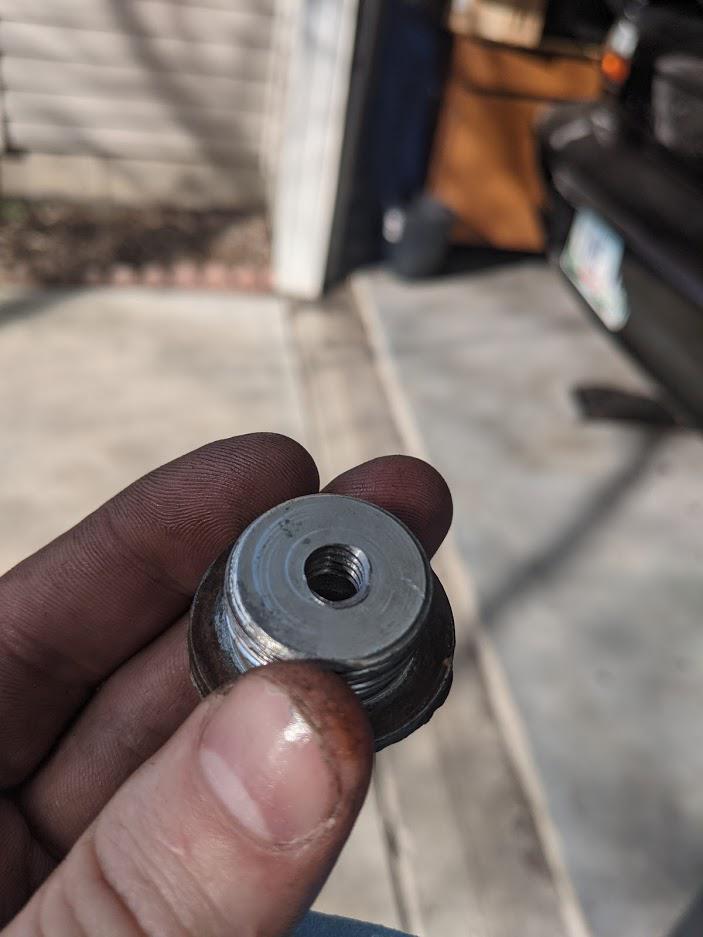
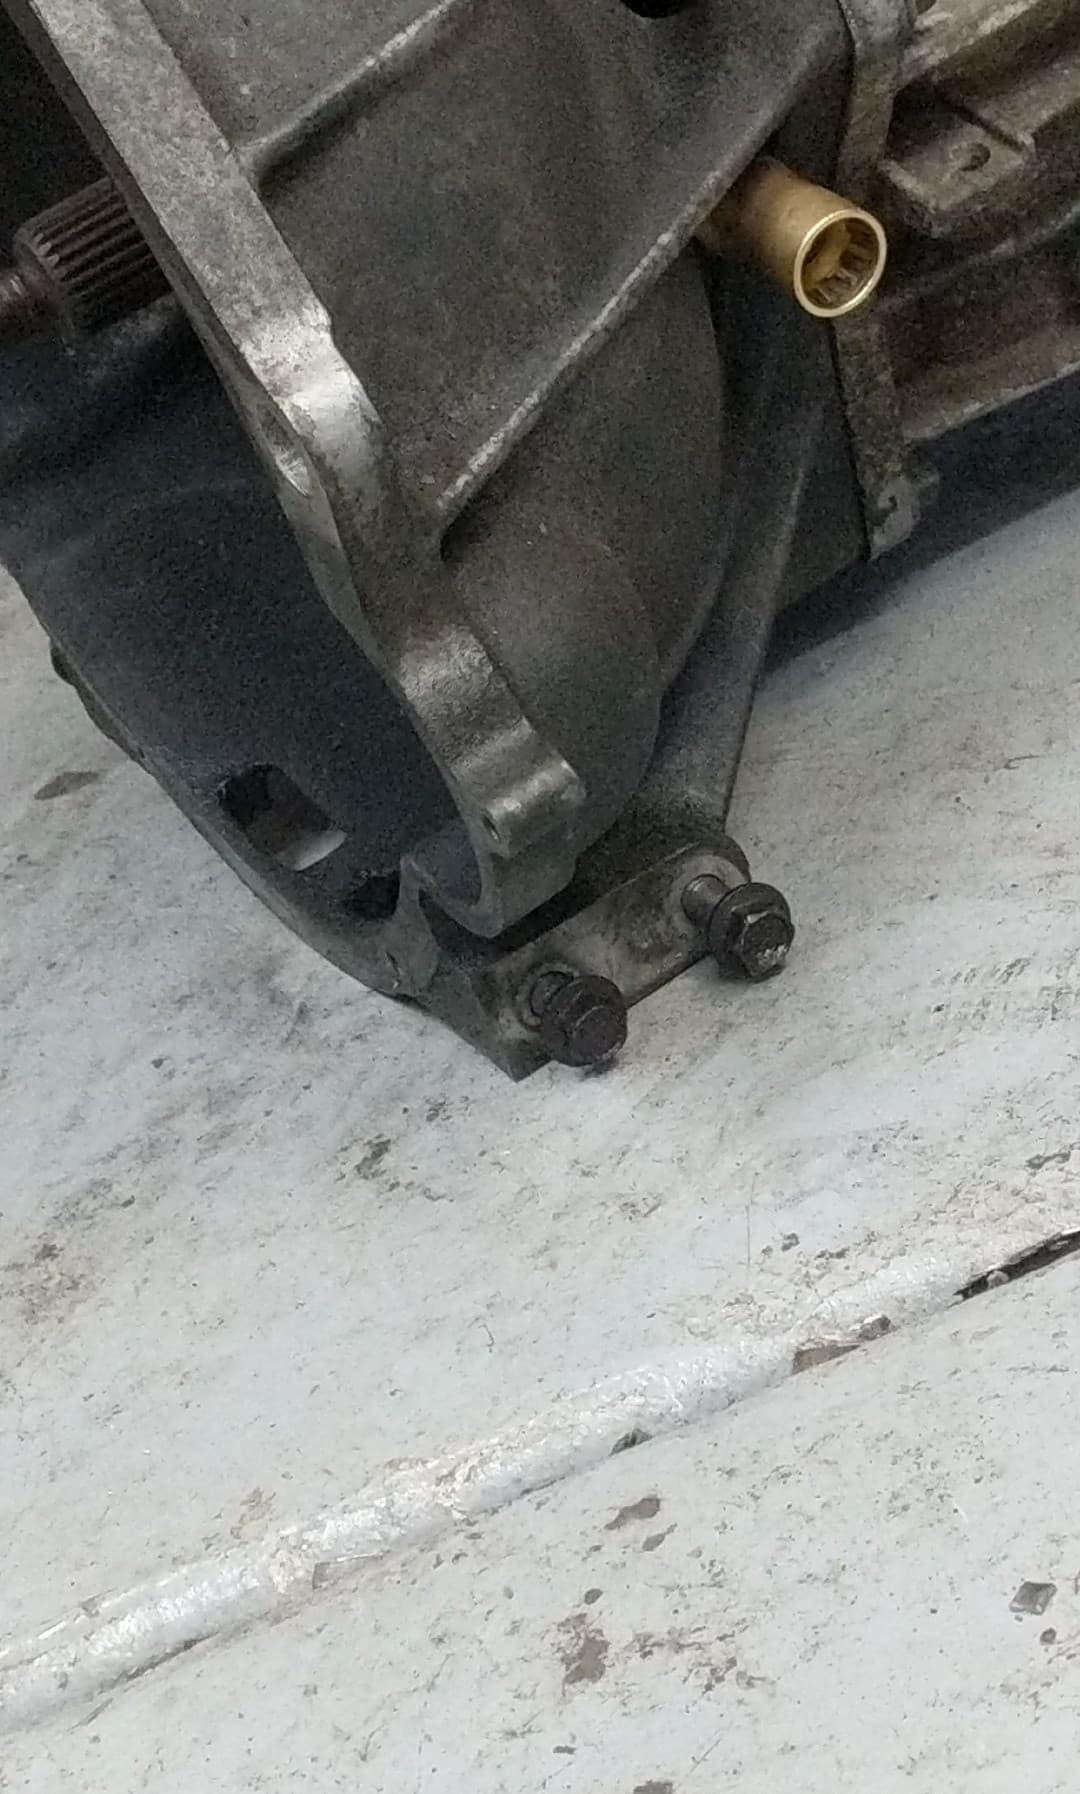
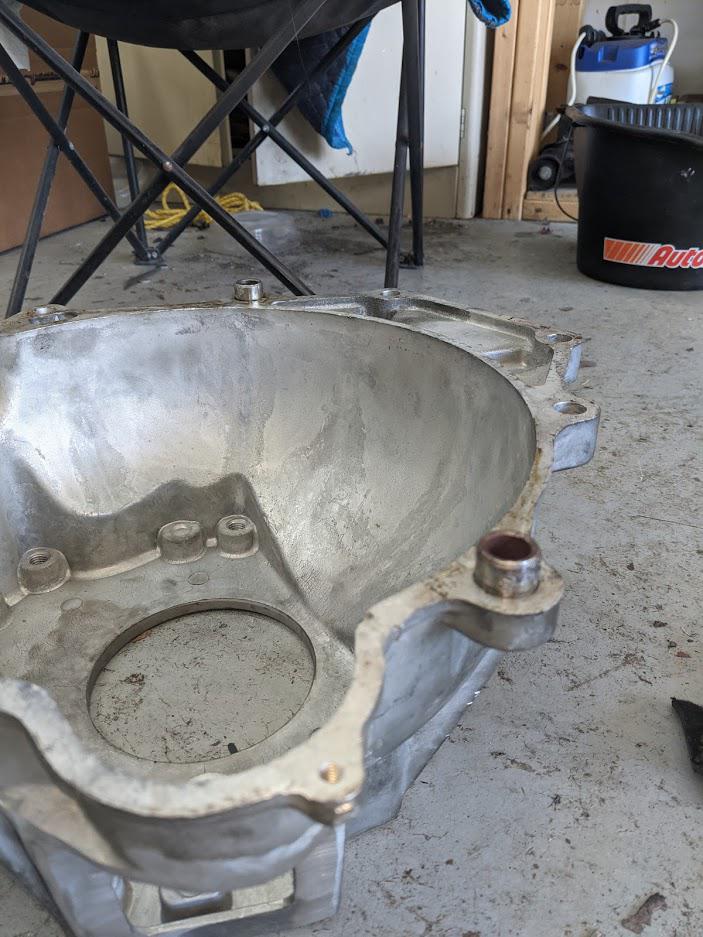
A couple unfortunate realizations dawned on me as soon as I got the second pin out. My new ones are not the same diameter. The stock ones are also hollow to allow for a bolt to pass through one of them. None of the offset pins will have that provision. I was okay with losing the bracket anchors on my new bell (see the picture of my stock bell below to see what I'm talking about) but going from five bolts to just four holding the bell to the block is not going to fly.
I thought I was screwed. At the very least, I was going to need to make some sleeves for a smaller dowel pin to fit in my block and bell or have custom pins made. That was when I got the idea to check one more thing.
You know what would be a nice press fit into the ID of stock dowel pins? Off-the-shelf Ford dowel pins! I'm going to pound these back in grind them down flush with the block and pound in the Ford pins. I also still have that spare 3800 block which can donate its dowel pins to the bell housing. Neat! Hopefully it goes as well in real life as it does in my head. As for losing the bolt hole, I'm going to have to find a way to rig up those bell to block brackets. This will most likely require some fabrication, but it might not be too hard to figure out.
Update on transmission arrival. I canceled my Summit/American Powertrain order because they were estimating arrival in mid-June. Jegs sells them through McLeod who can supposedly ship them by mid-April. I doubt that's really the case since they all come from Tremec, but I figured it was worth a shot.
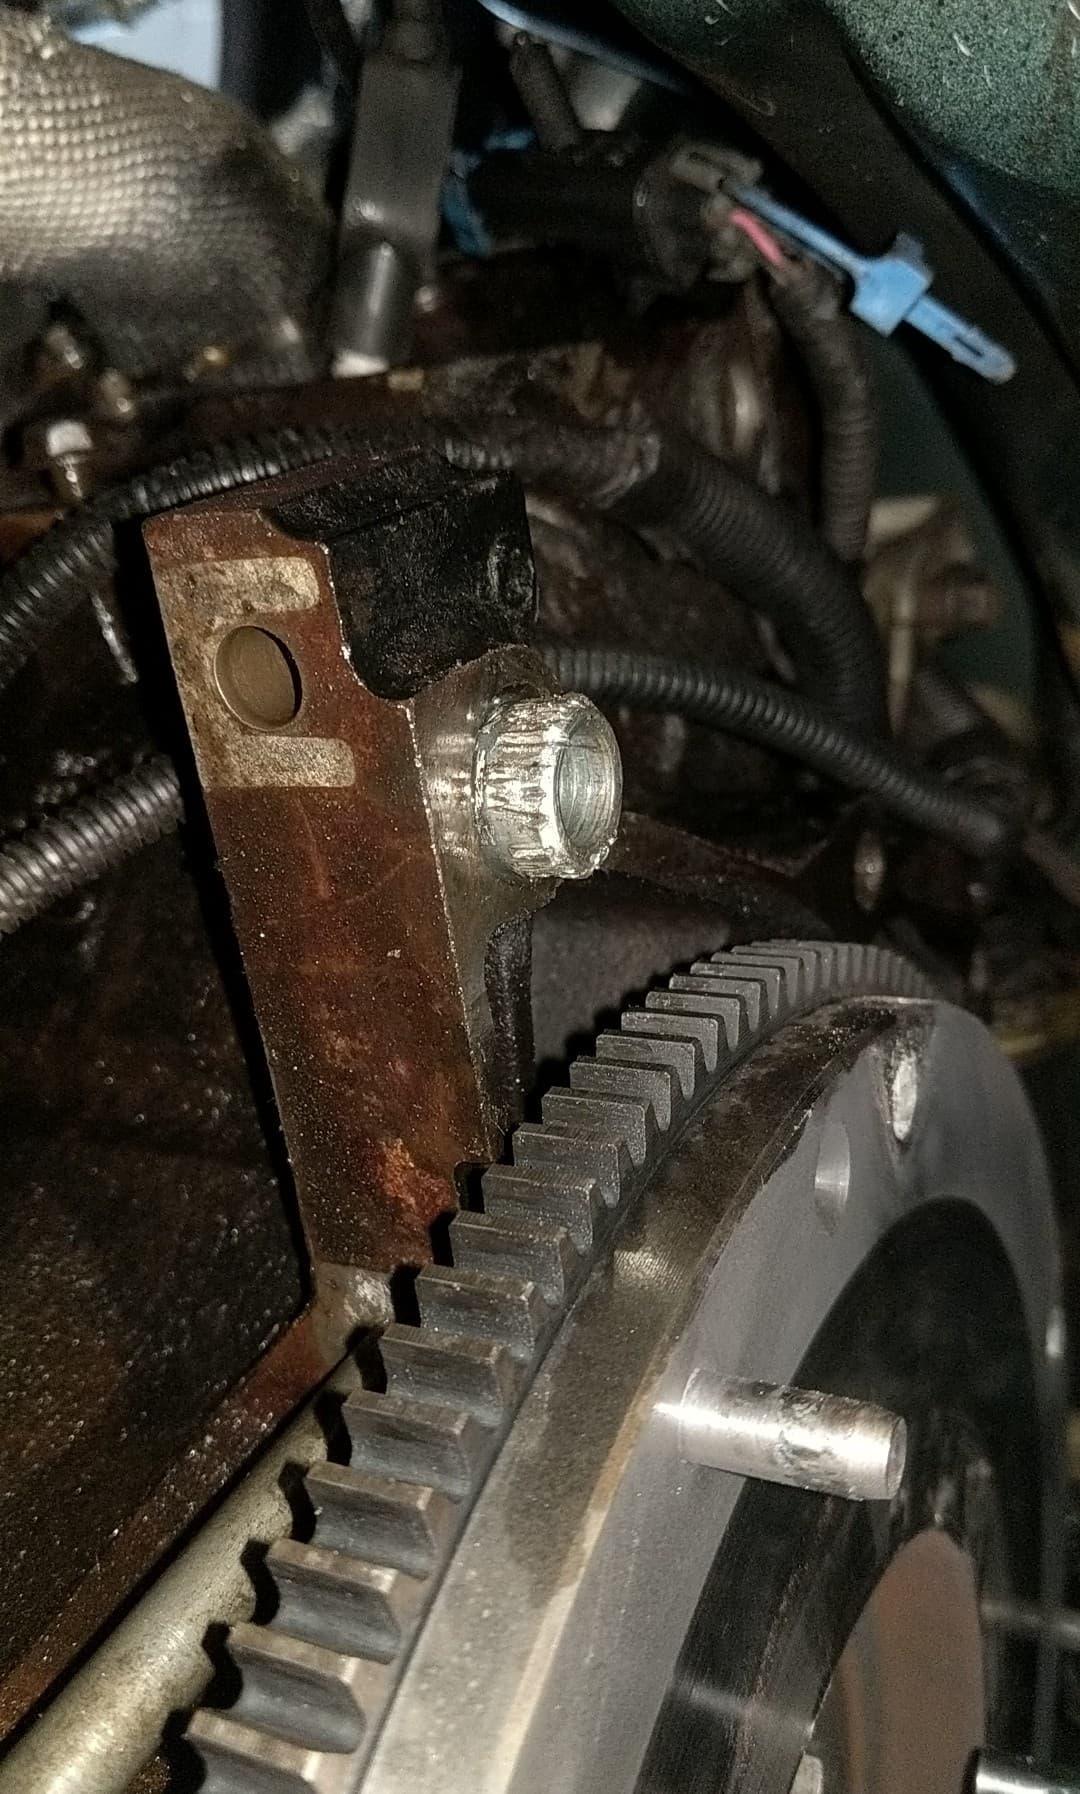
I got a little more work done this weekend. The stock dowel pins were ground flush with the block.
Then I roughly oriented and installed the Ford offset dowel pins how I wanted them. They're a nice fit by the way!
Then I removed the dowel pins from my spare block, installed them in the bell, and scribed.
After cutting and a little cleanup, I installed the shortened dowel pins around the the outside of the offset Ford dowel pins, and ended up with this masterpiece. I can't believe it ended up being that easy. The bell still installs nice and easy, but snug. I'll recheck the concentricity once I replace the oil pan, redrill/tap the crank, and reinstall the flywheel.
Oh, that's slick. I wasn't sure where you were going with the Ford dowel pins at first, but that's a great solution. Nice work.
In reply to obsolete :
Thanks! I'm shocked that it worked as well as it did, but I'll feel a lot better about it once I get everything remeasured within spec.
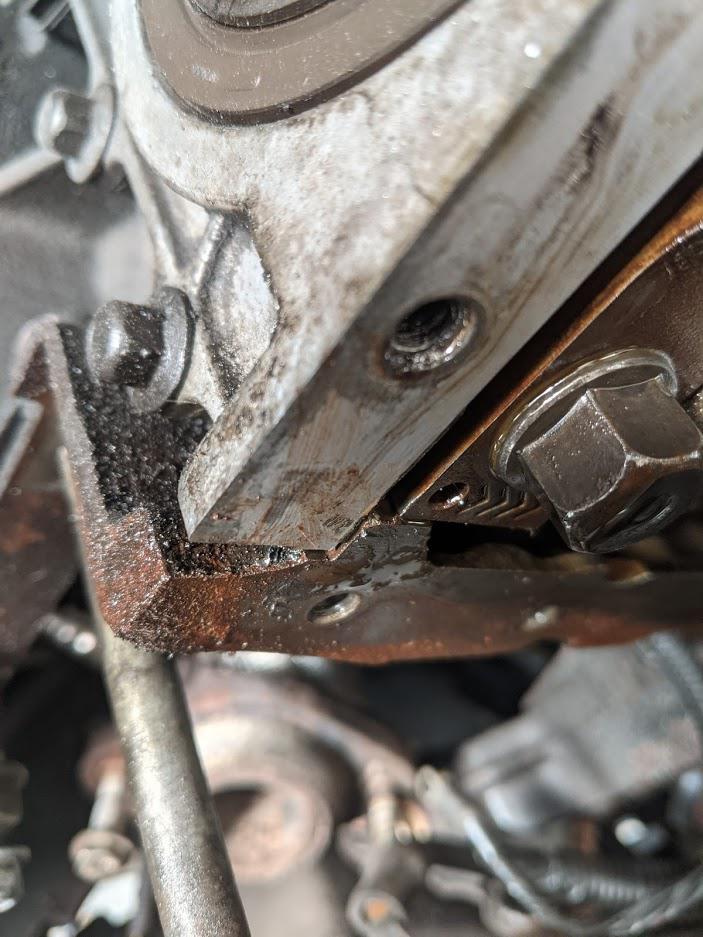
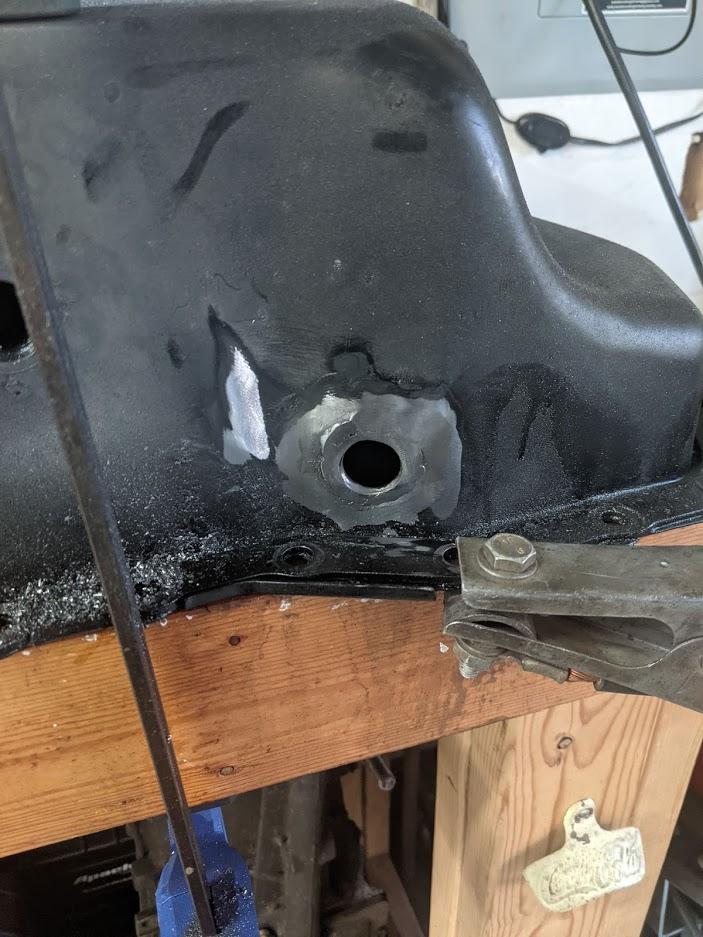
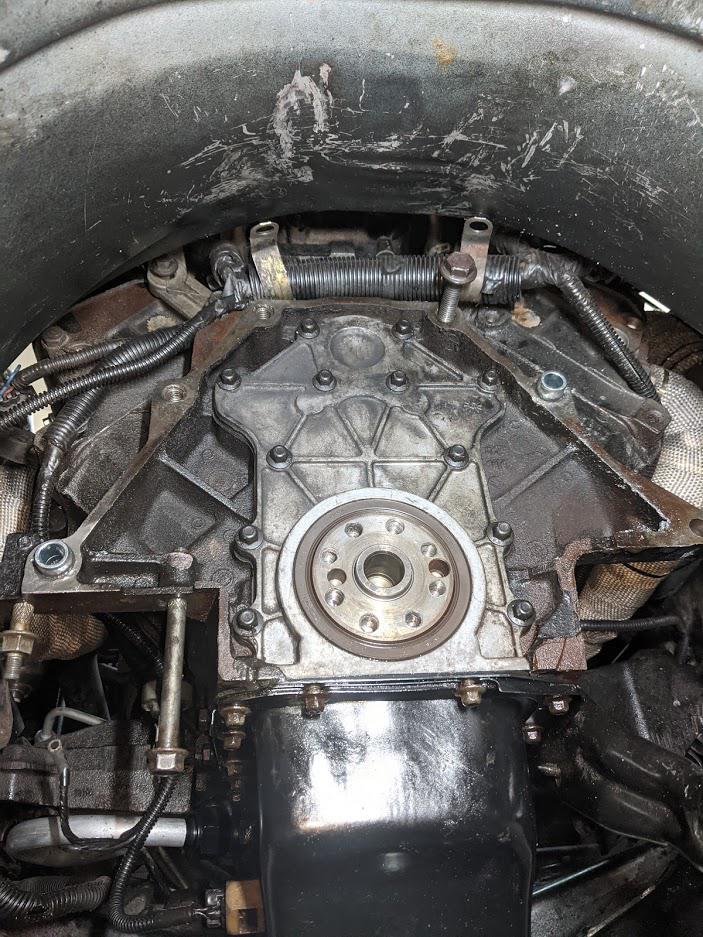
I needed to take care of some not fun stuff. There's nothing else to do since I'm waiting for parts anyway. It's time to figure out where my oil and coolant leaks are coming from.
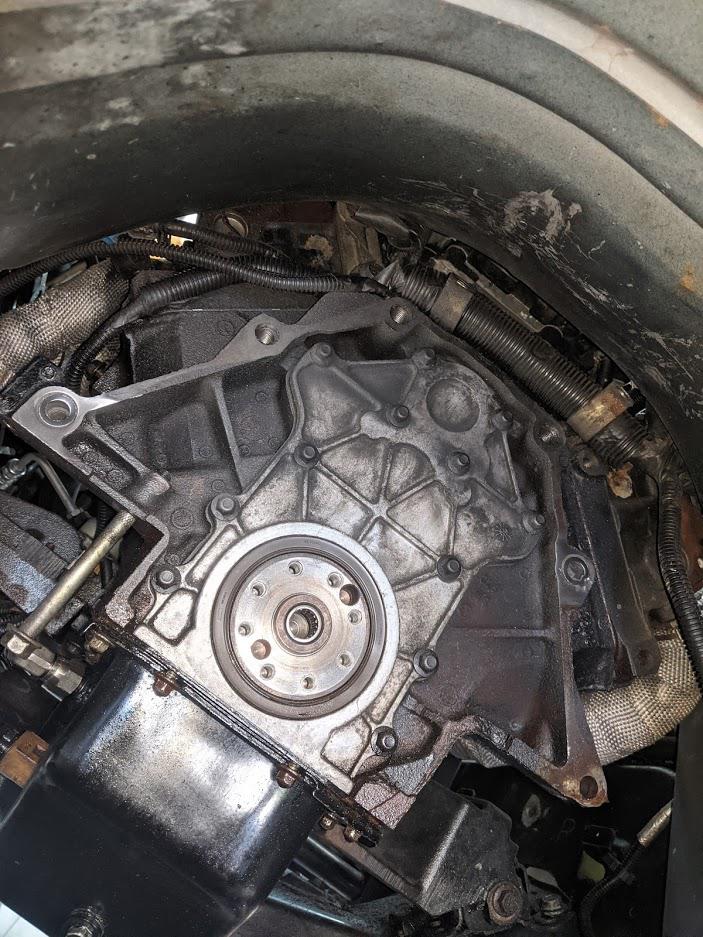
Not good.
This rear cover misalignment is bad enought to be a leak.
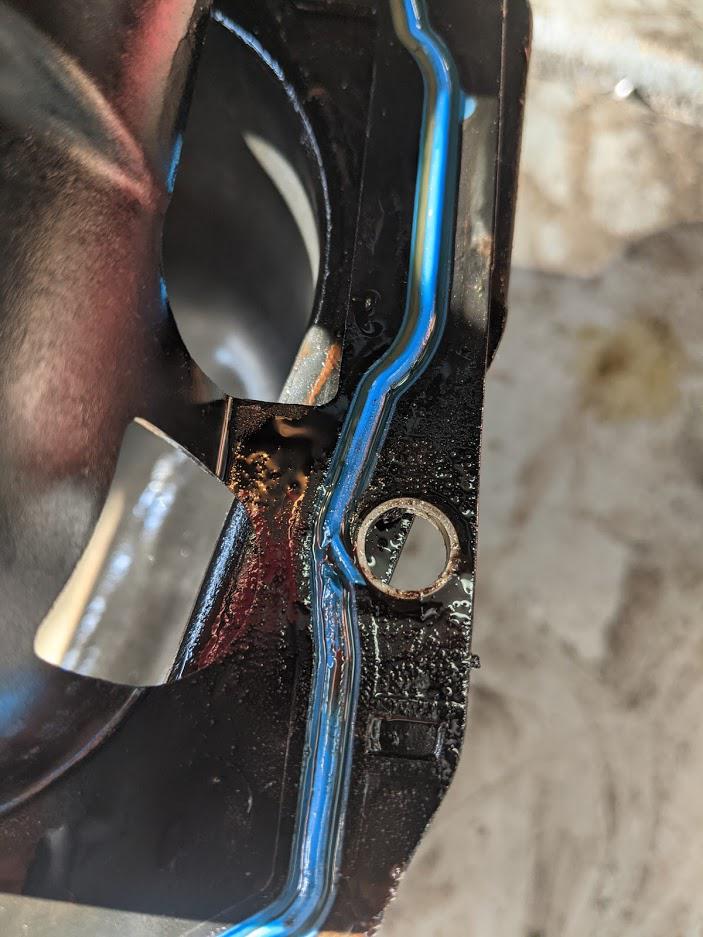
If that wasn't a leak, this torn oil pan gasket certainly was.
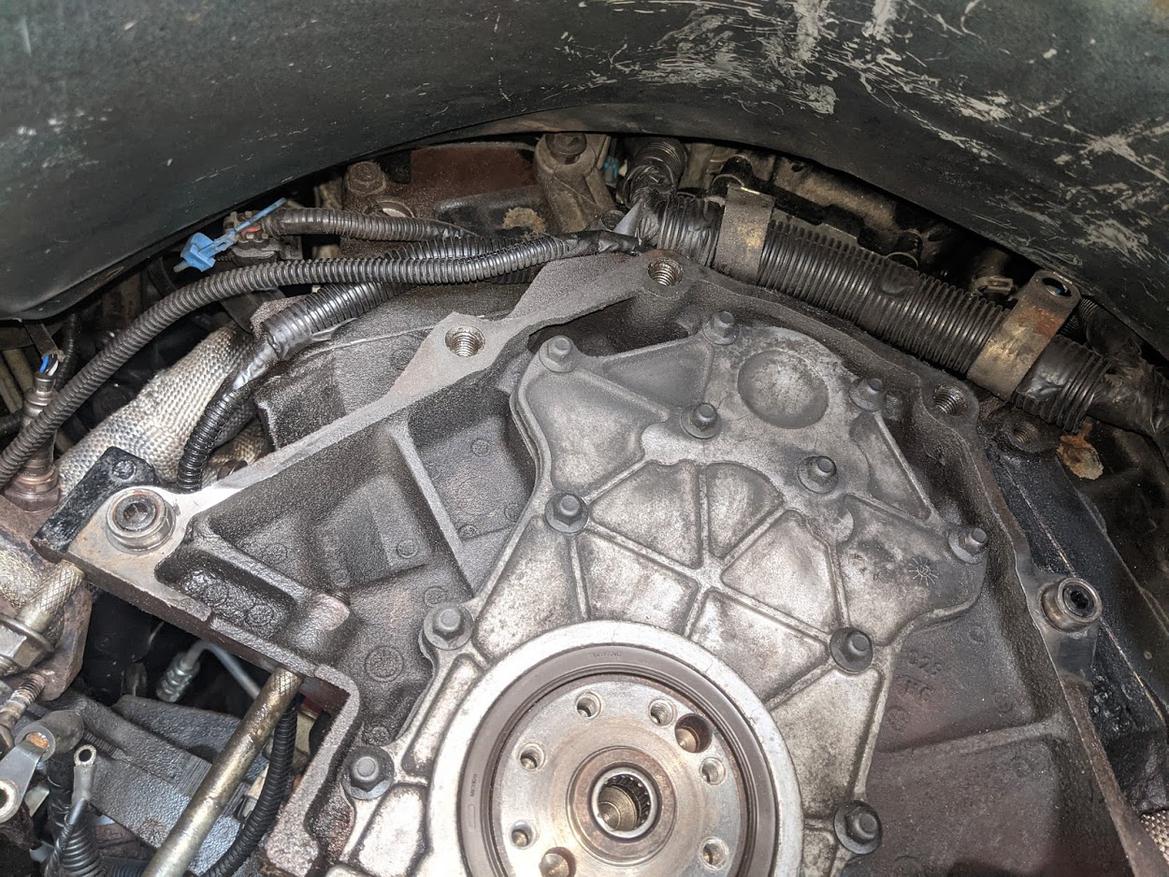
And because I had never done it before, I figured I'd tackle the timing cover gasket as well.
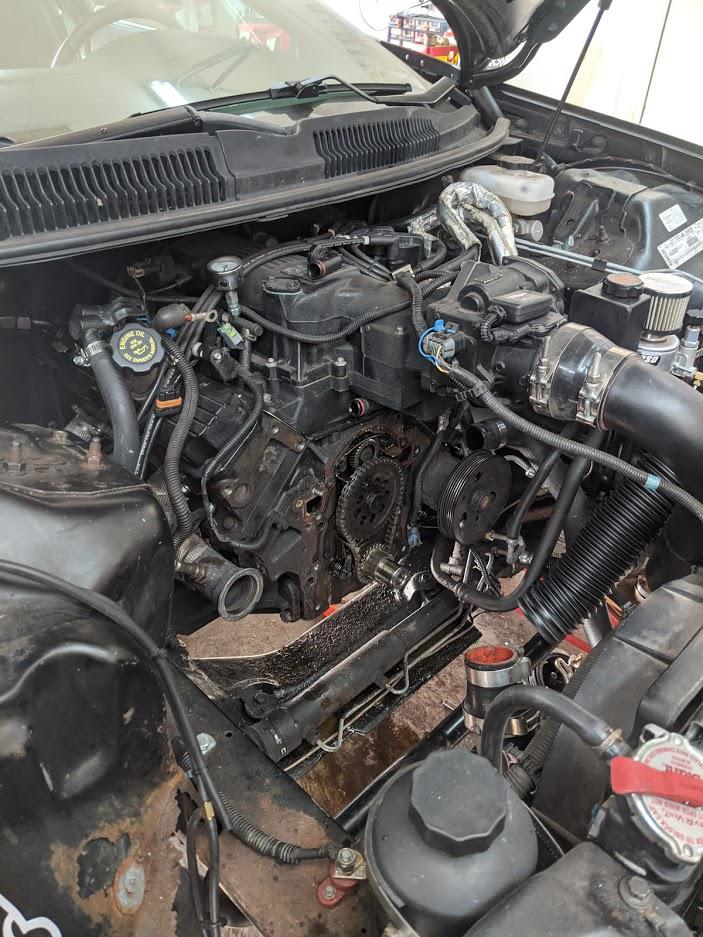
All done! I've never seen the cover so clean!
That was when I decided to quit on the Camaro progress for a bit. If I didn't clean the garage or get a fun car to drive for the summer I was going to drive myself insane. Once the garage was clean enough, I was even able to wash the car. It had quite a bit of dust on it.

The next day, I pulled the other car out of storage. I missed her!
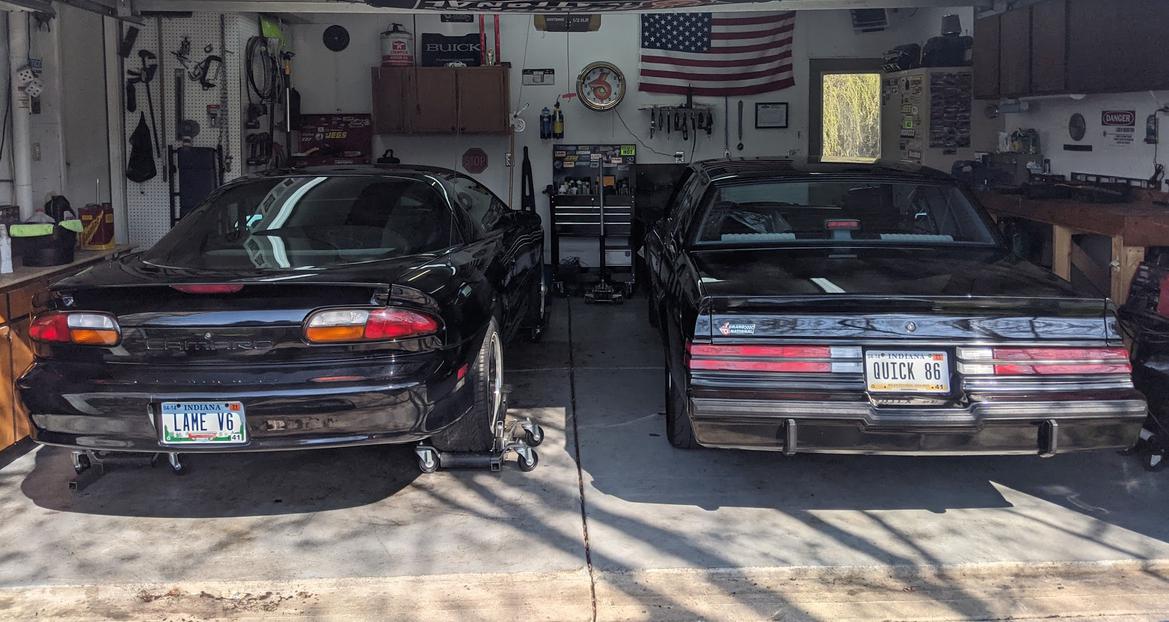
It takes up all my Camaro work space, but at least I'll be able to do some driving while I wait for the transmission to arrive.
I have to modify my oil pan again and install it. Then I'll be drilling my crank for bigger ARP flywheel bolts, fixing the oil pressure sensor harness, and a few other odd and ends. Hopefully that keeps me busy a while.
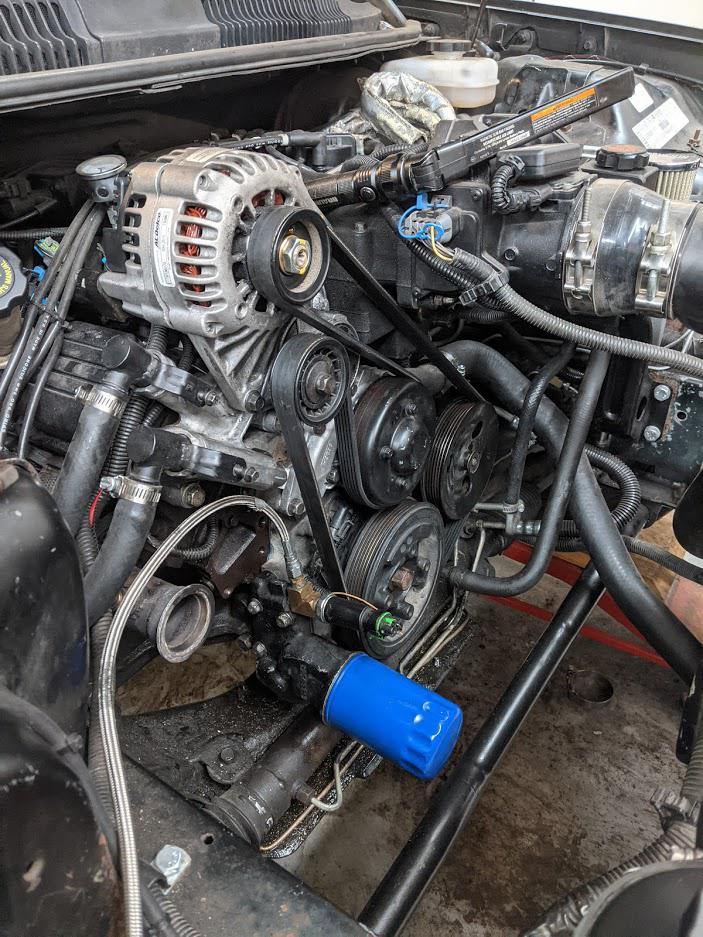
I'm regaining my zen, and progress is picking back up. Soon after my last post it would become apparent that my new Dorman coolant elbows were leaky. I was not shocked int he slightest, but also unsure of how to fix it. I decided to try another pair of junky aluminum elbows I had. I figured, why not? If other people have had good luck with them then the quality control must suck. The second pair went in with a respectable amount of resistance. 
 I slammed all that back together, filled with coolant, and observed no leaks!
 Sick. I'm done under the hood for a while.
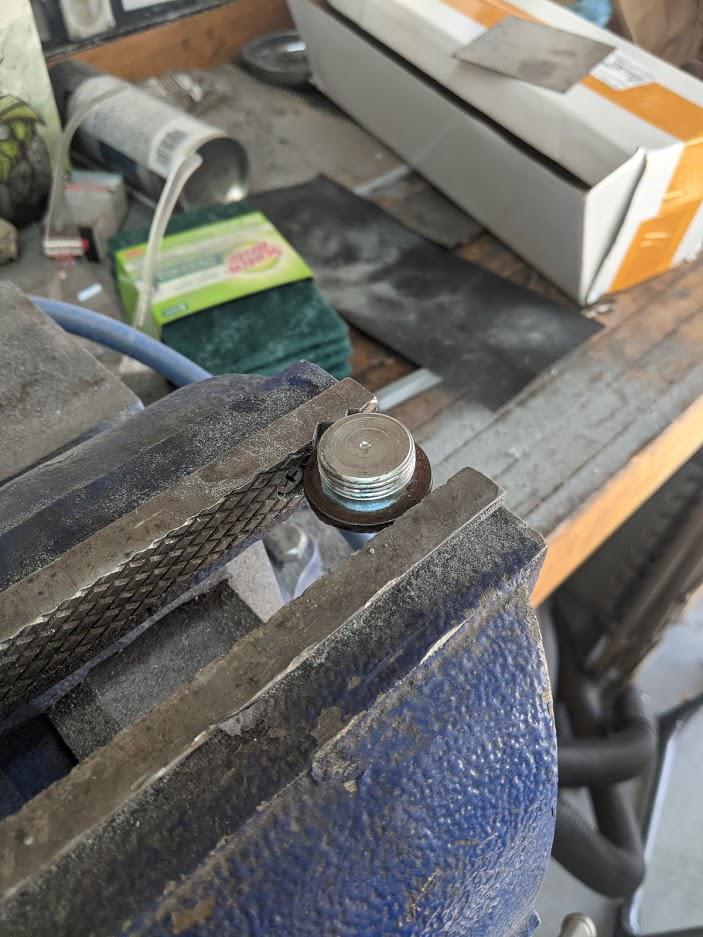
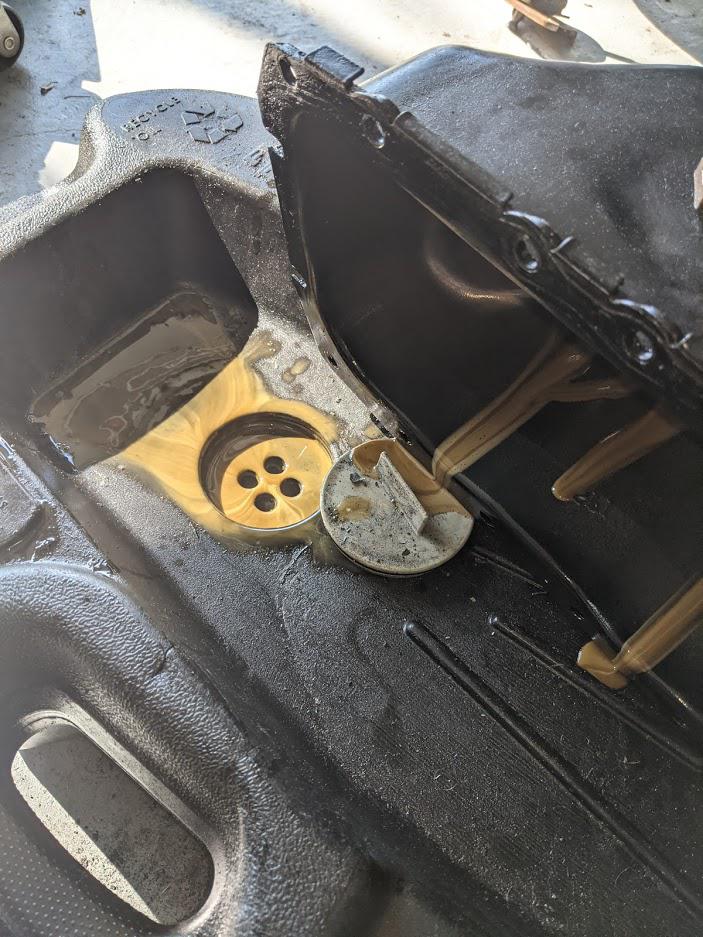
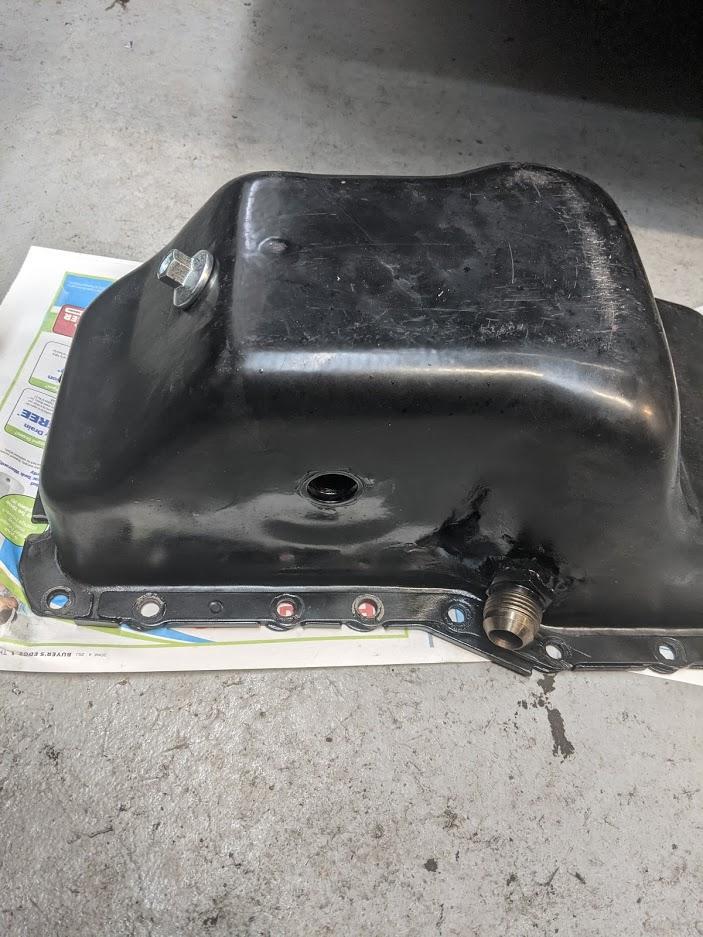
While I was re-doing that job, I filled my newly modified oil pan with water and waited for leaks to show themselves. The I welded a new -12 drain bung on the side and sourced a new (correct) drain plug. Dorman failed here too. Ever heard of using a crush washer to seal a stamped steel pan? Me neither.
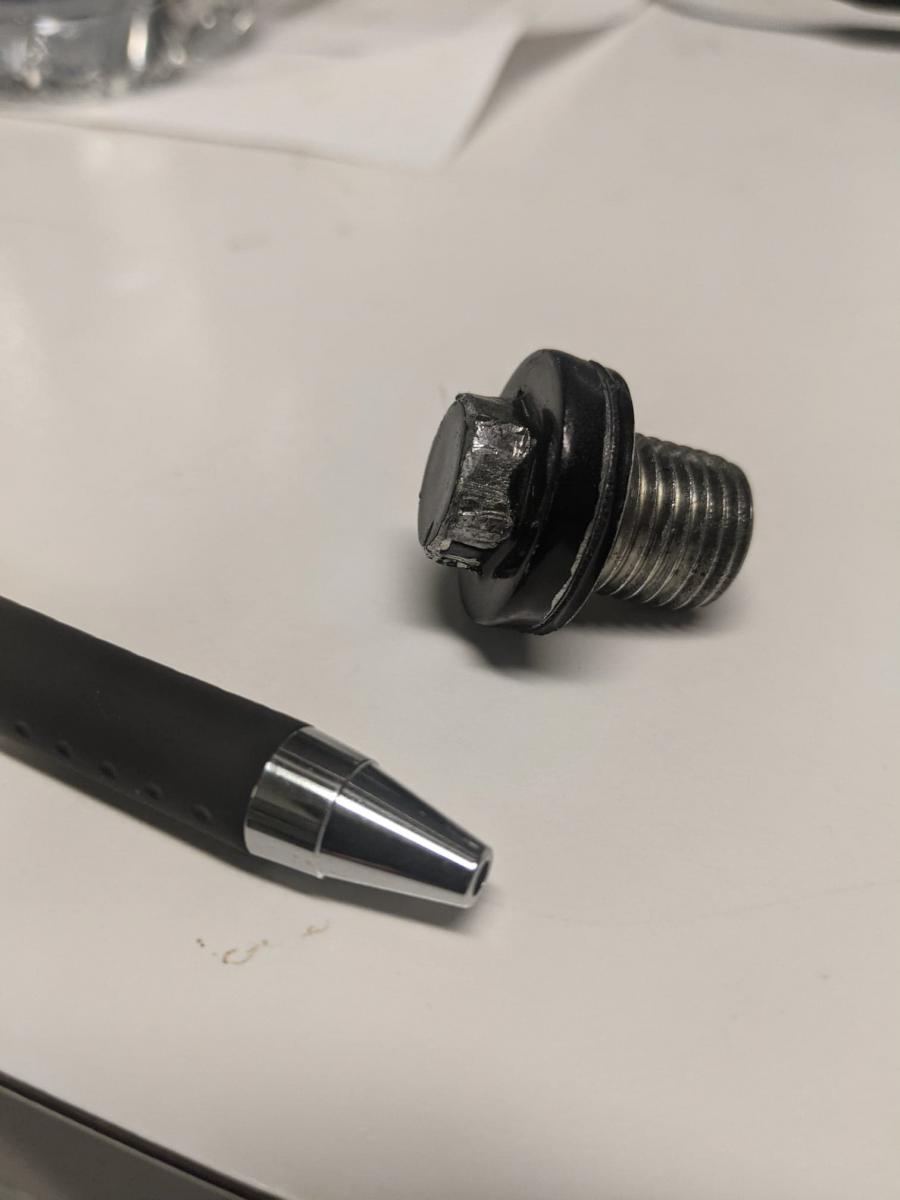
-10 removed
-12 and captured oring style drain plug installed. I hope that nice tall head doesn't get in the way of my crossover.
Why the bigger turbo drain? It's not because I need it. It's actually because I'm too cheap to buy tools. I have access to 3/4" line bender and flaring tool at work, but nothing for 5/8". I'd like to convert part of the drain hose to hard line just to ensure that I have a downward slope for the entire path back to the pan. The hose is too floppy and dangerously close to the serpentine belt.
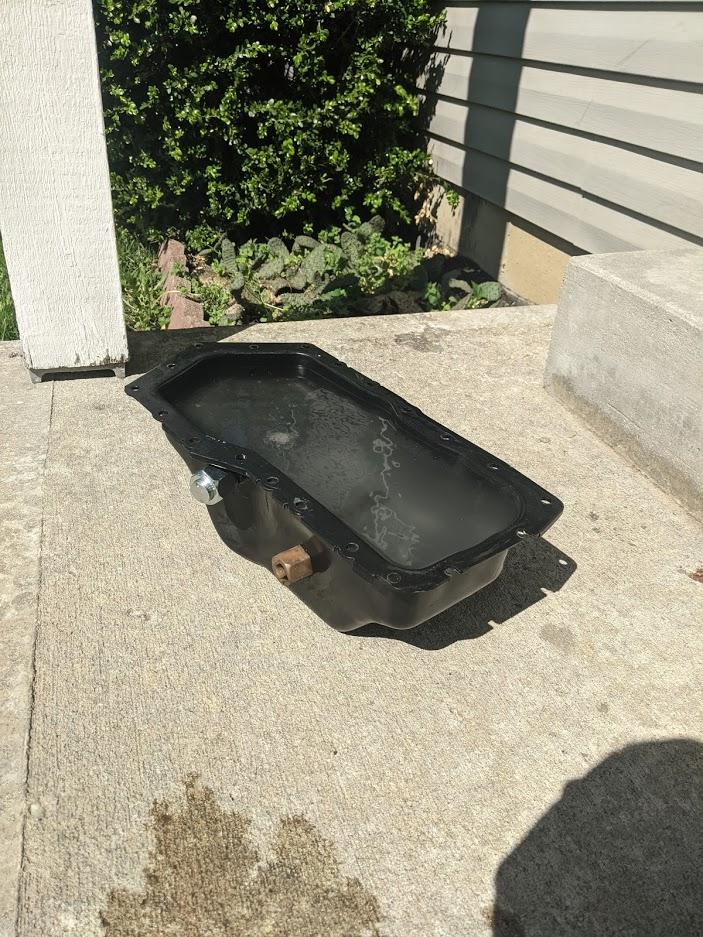
No leaks!
I tossed the pan back on the car, and called it a win for the day. The engine is finally sealed back up! Tonight I'll drpo a filter and jug of oil in there, and begin tackling the engine mounts. I have poly inserts, so it's going to involve a few extra steps.
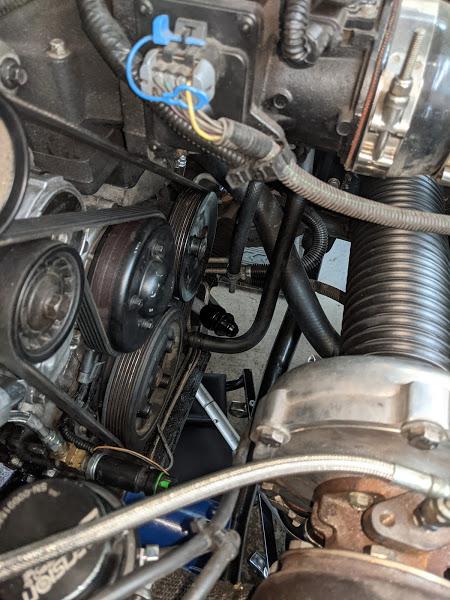
Progress is continuing as slow as usual. I'll start the update on a high and work my way low.
I finished something! It's not as good as I wanted it to be, but it should at least be better than what I had. If I have oil drainage issues down the road I'll address it then. Here's the hard line I made out of scrap 3/4" aluminum tube I had.
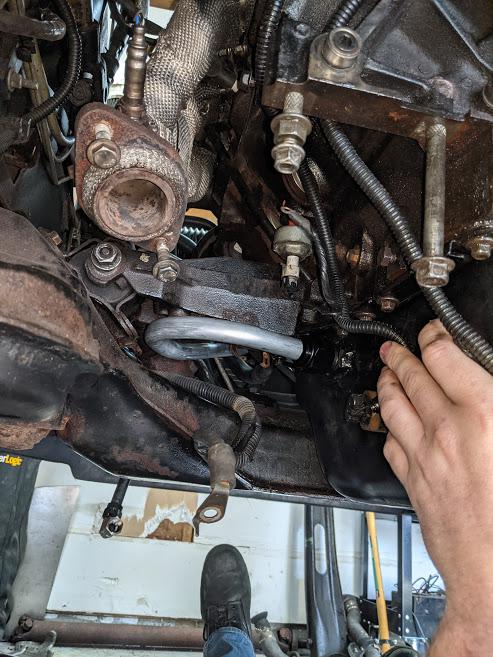
You can see the reducer fitting poking out right next to the balancer.
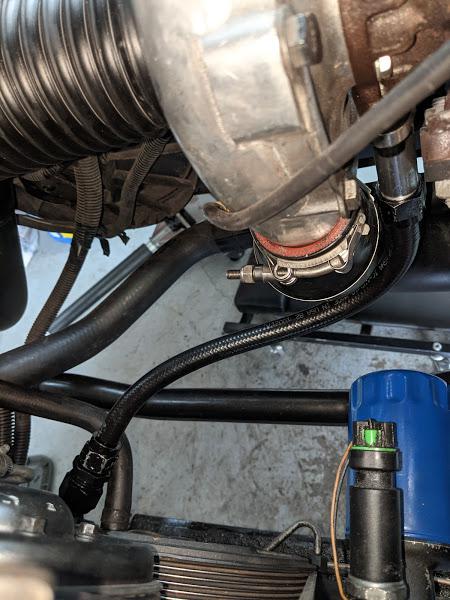
Cut down the hose about a foot and re-installed the fitting.
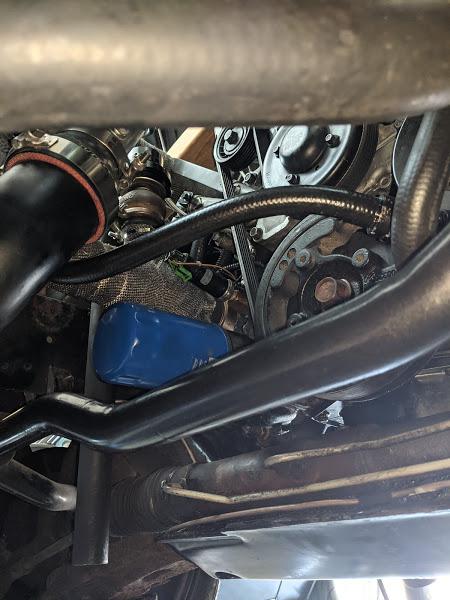
By comparing the sway bar to the hose you can see the lack of downward slope in the oil's path. I think it will be okay. I'm certainly not going to spend any more time on this particular issue becasue I think it's better than what I had.
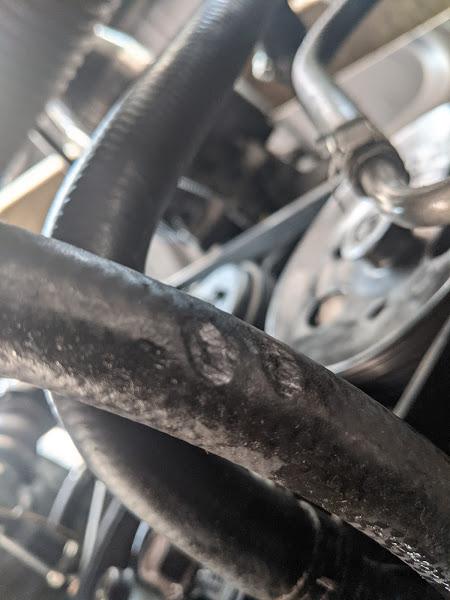
For perspective, here's a section I cut off. It looks like it was so floppy that the steering joint was cutting chunks out. Not good! I'm glad I made the hard line.
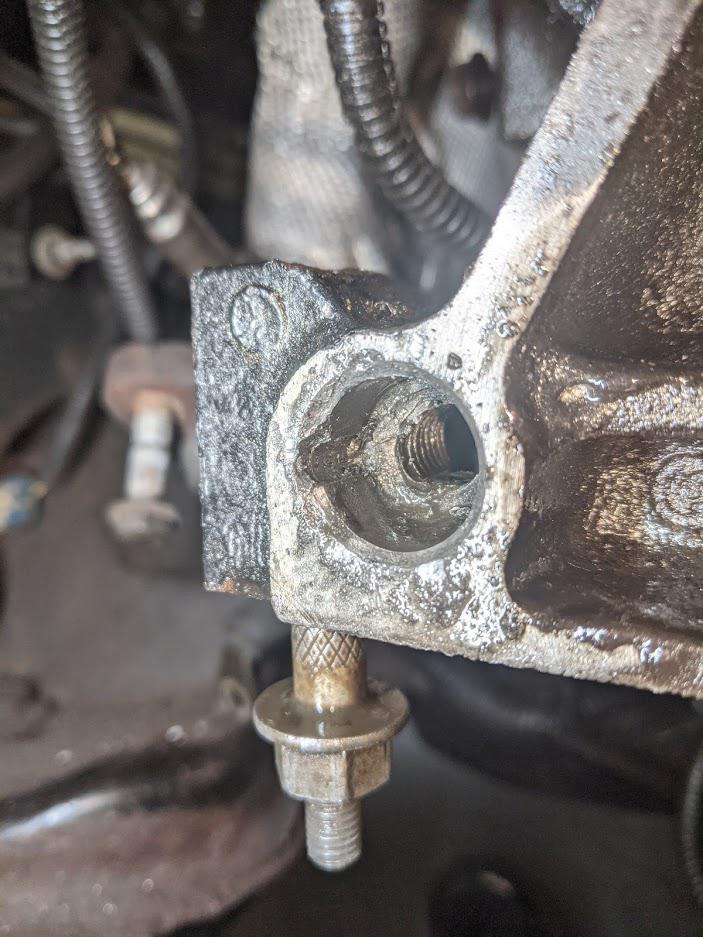
Now for the slightly troubling news.
Here's where I spent about five hours over the weekend. Hunched over and pretzel legged, I drilled a little, sprayed compressed air, sprayed WD-40, and repeated more times than I can count. Tapping was also fun because I needed to use the flywheel as a guide necessitation removal and reinstallation of the flywheel several times.
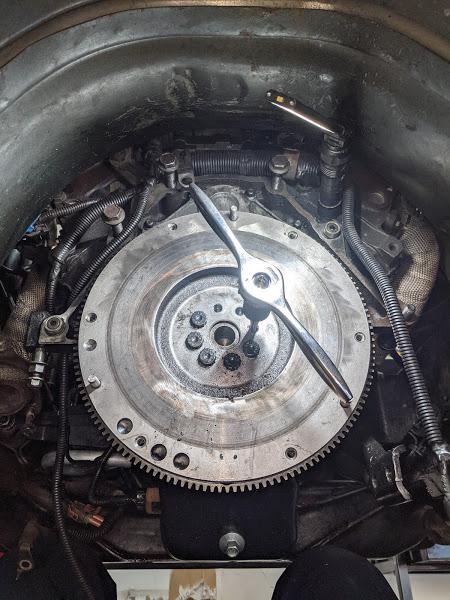
It looks done, but I made a big booboo. The last bolt I torqued started going righty-loosey.  I boogered the threads pretty badly in the first one I tried tapping and figured it would become an issue. Heli-coil time! Let's hope I don't waste this engine.
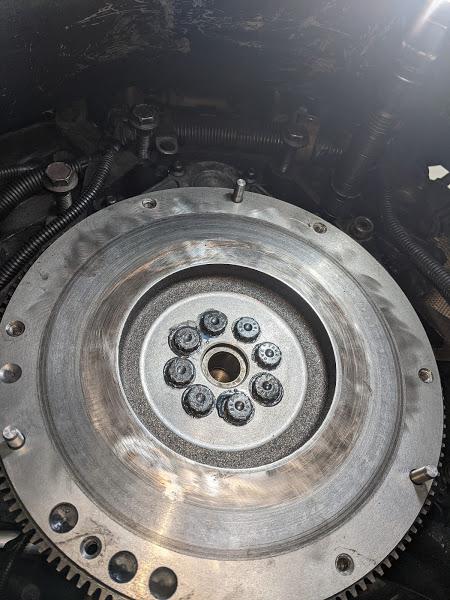
This won't be an exciting update without pictures, but it's exciting for me. I installed the heli-coil last night with success. All the flywheel bolts are torqued to ARPs spec. Now I can confirm that my bell alignment is corrected and move on to some other odds/ends.
Good save with the helicoil. Righty loosey is bad, mmkay?
Helicoils are lift. I repaired a local guys fancy cylinder head with one a few weeks back.
As you all have witness in this thread, I was trucking right along with this project and expected to finish before the end of the summer. Things changed this weekend. To make a long story short, I made a big mistake when I made and installed those custom dowel pins.
To make a short story long, I threw the bell housing back on the block where I was confident that I would be finding a concentric bore. It actually ended up being a massive pain to install and the bore was so far off center that it couldn't be measured with my indicator. When I tried to adjust one, I broke the socket. That sucker would not budge.
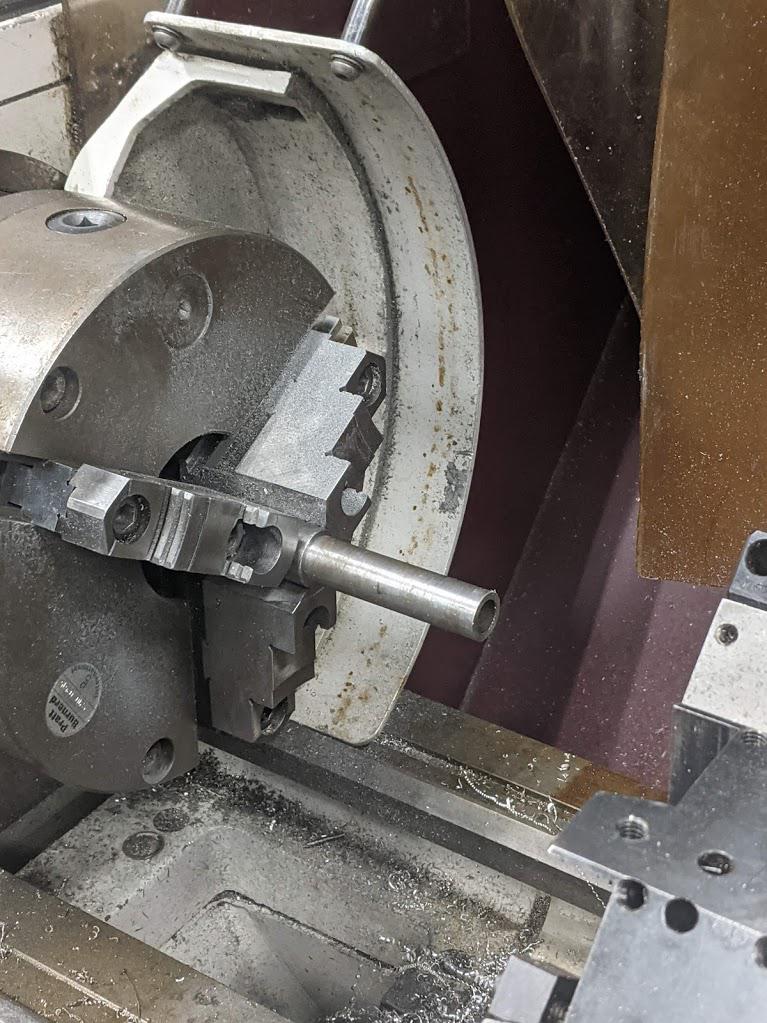
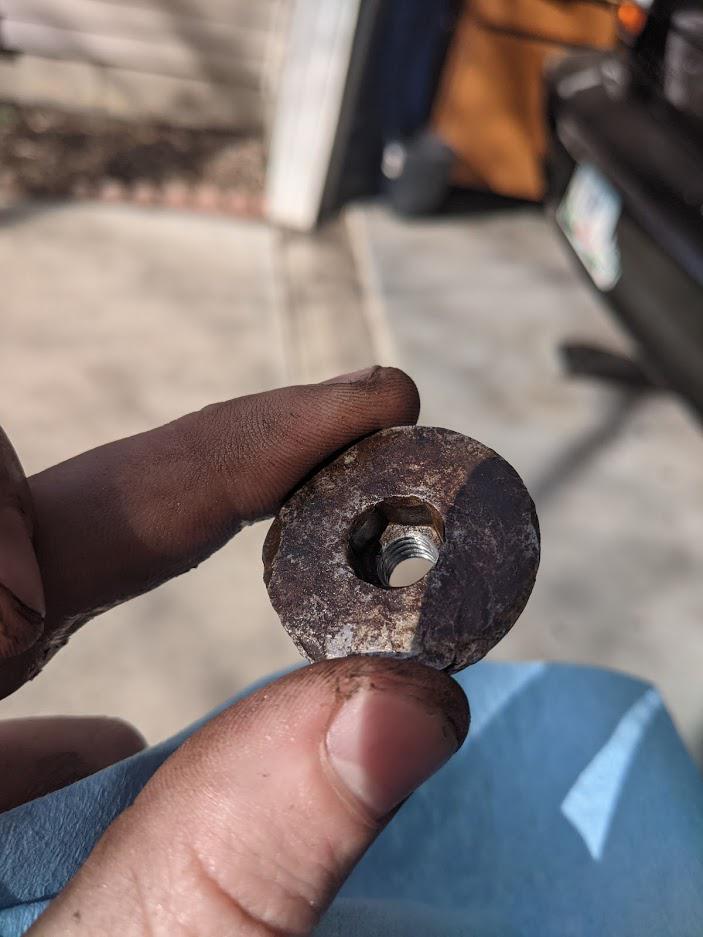
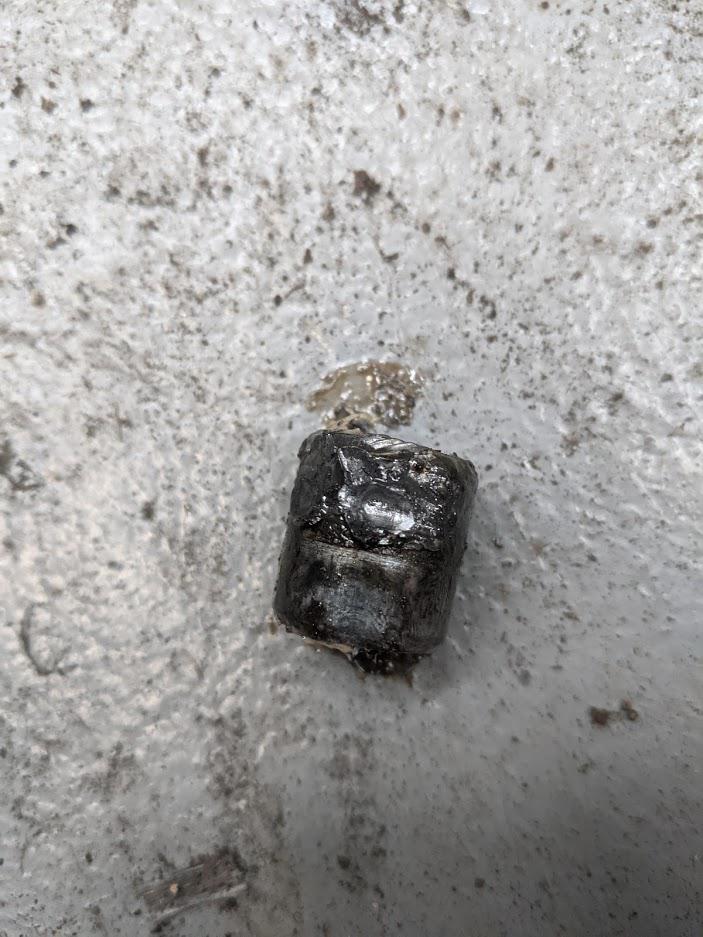
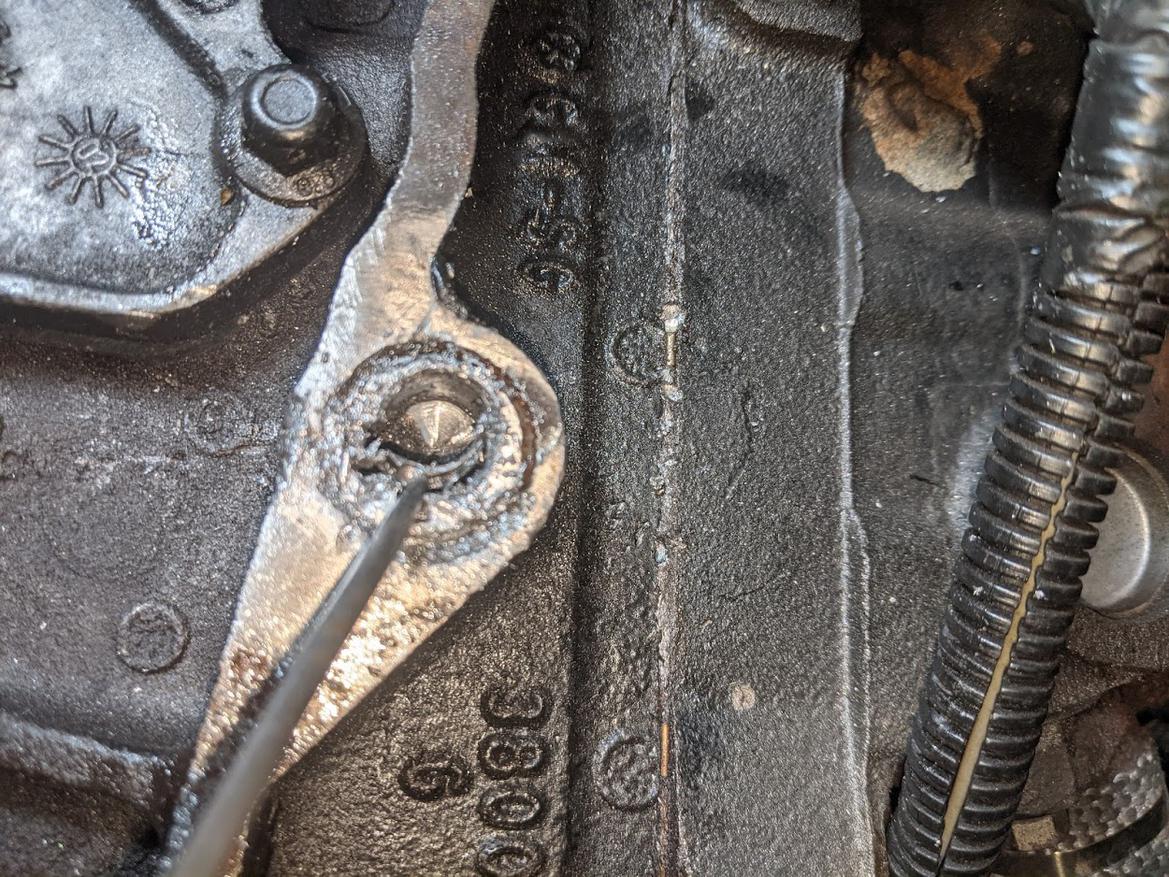
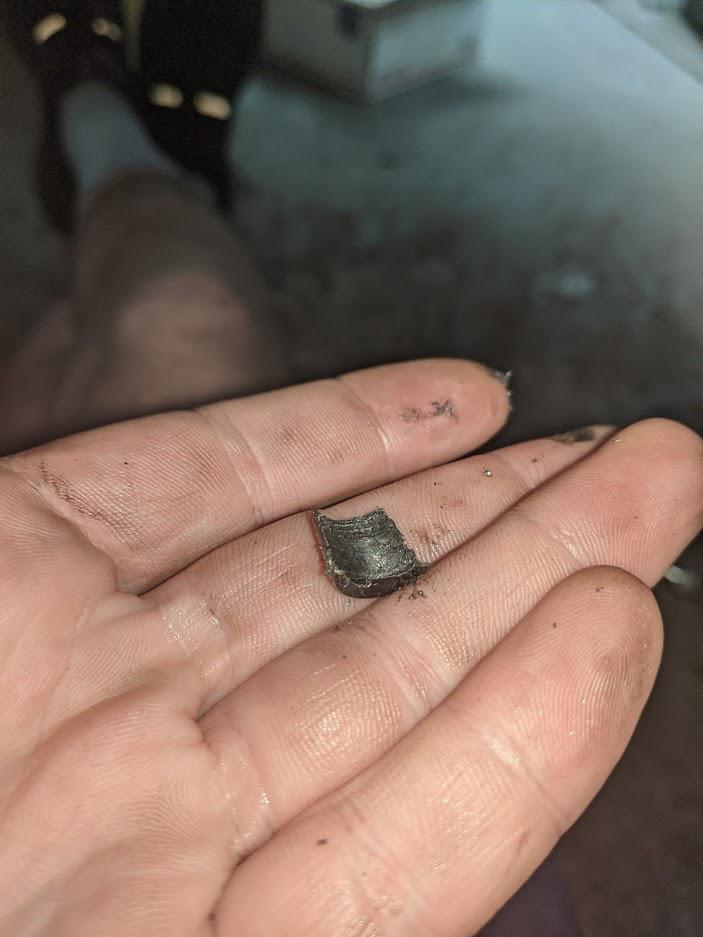
Obviously something was very wrong with how I made these pins. I needed them out one way or another, so I broke out the air hammer just like I had when I needed to remove the original dowel pins. After a couple hours of fiddling, I am only left with this.

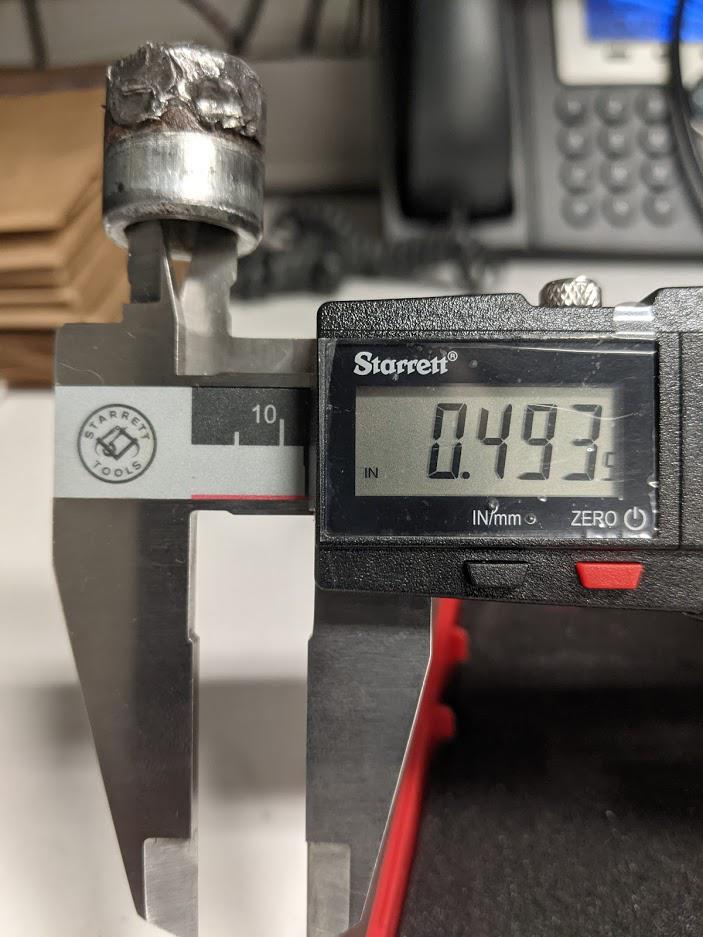
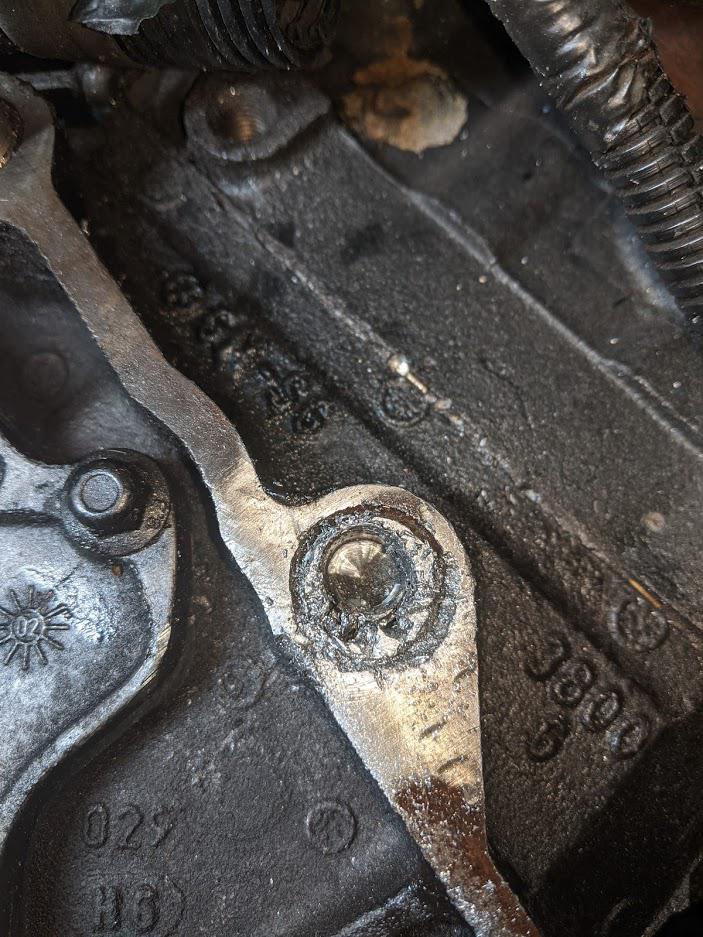
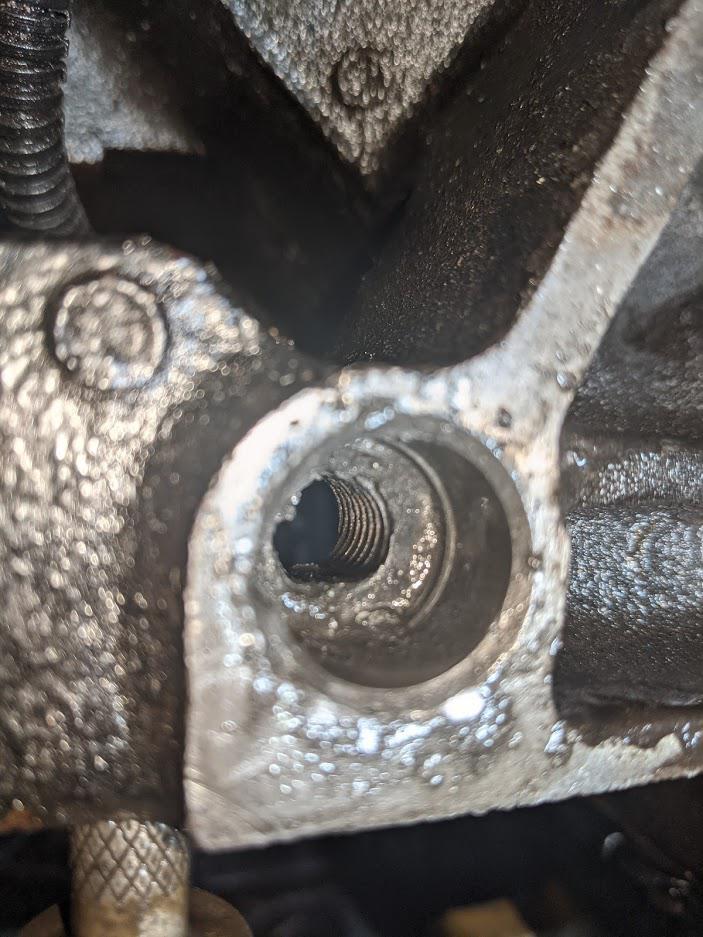
I needed a break to figure out what went wrong and if any standard methods were going to aid in this extraction. I popped the dowel that wasn't stuck out, and took some closer measurements.

Oops... I wish I discovered this a lot sooner. These pins are very slightly tapered. It seems that the pin above has two block side halves and the one stuck in the block is a transmission side which I forced into place. That would explain the added resistance when I was beating it with a hammer. DOH!
So no what? There's no room for my drill or a slide hammer because the tunnel is in the way. Pulling the whole engine out just for this hiccup would mega suck, so I ordered a right angle drill and some stubby bits. Hopefully, this does the trick. I probably won't be able to drill the whole thing out, but I'm hopeful that I'll be able to get it weak enough that I can pry the remains out with a skinny pry bar. Then the question will be whether the bore in the block is trashed. My hopes are not too high there either, but if they're still good I hope a machine shop will be able to makes some custom pins for me.
In the mean time I'm really hoping to locate some stock GM block dowels. Does anybody in here have a block they're ready to trash? 60 degree? 4-cyl? 3800? They should all share the same pins.
Dowel pins are still available from GM, part #12338076. They List for $1.54 each and come in a 4 pack. If you are local to south central Indiana, I can get you some at the GRM price! I am loving this build! If you need any GM parts info I am happy to help.
In reply to garaithon :
Dude, I've been looking for that part number on and off for the last two days! You're my hero.
I'm located in Franklin, IN and work in Columbus. Thanks for the help and kind words.
In reply to V6Buicks :
Seriously? I live 30 minutes from Franklin! My wife works in Columbus as well! Let me know if you want me to get them for you, GRM price is under a dollar. I'm sure we could meet up sometime! I have seen a GN rolling around Franklin before! It was probably you!
In reply to garaithon :
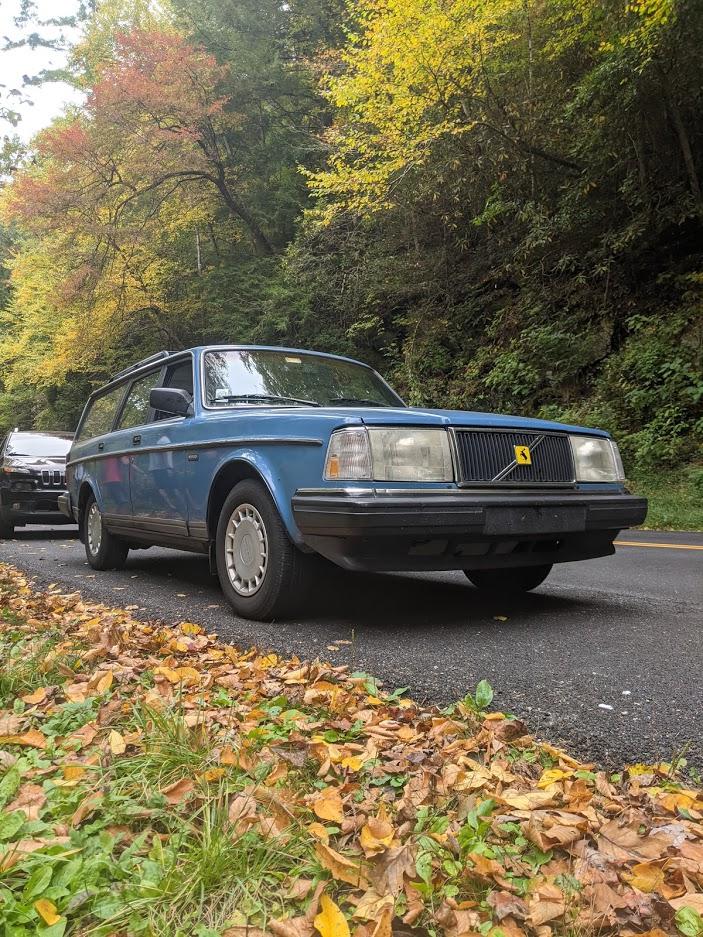
Seriously! No worries on the part. I just ordered mine for $0.97 each. We should hang some time! I creeped your profile a little. I'm a bit jealous of that 122. I had no idea that there were other classic Volvo enthusiasts in the area. If you see a mid-blue 245 rolling around, that is also us.
In reply to V6Buicks :
Yea I need to start a build thread on the 122 one of these days. I keep debating on doing some kind of modern 4 pot in it, but I like the simplicity of the B18. I just need to upgrade to an overdrive transmission to make it more highway friendly.
Nice wagon! I had a 244 turbo the same color! I am always looking for a nice 245!
We will definitely have to get together sometime! Now back to 3800 turbo development!
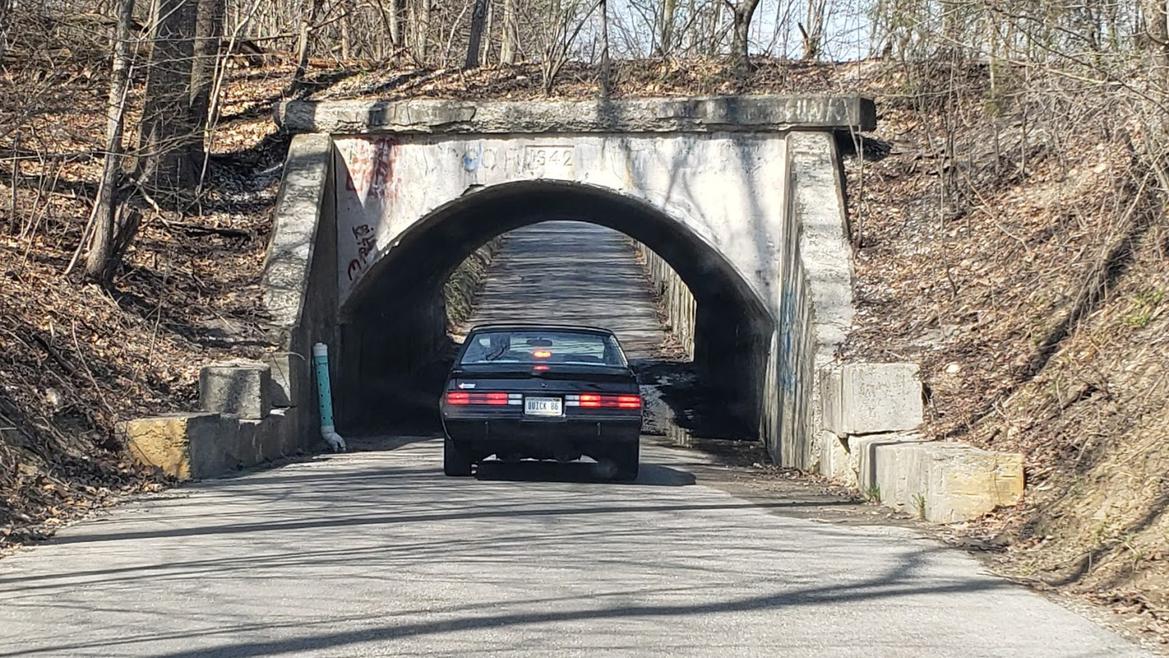
I finally made progress yesterday. I had to get my GN ready for the Buick GS Nationals, and as soon as I got home from that I added another vehicle to the driveway for a flipping opportunity. That car is gone, the GN is home safe, and now the Camaro is back to the top of the list.
I made a comment earlier about the pins being tapered which is not the case with the replacement pins. I think the real issue lies in filling the hollowed pins with more metal. It just makes the fit too tight. I'm just speculating though. Regardless, the plan ended up being that the old stuff needed to come out, new stock pins would go in, measurements would be retaken, and I'd start all over. All that is done now, but it was a painful process. I had to buy a right angle drill and stubby bits to remove these stuck pins. A lot of air hammering helped too.
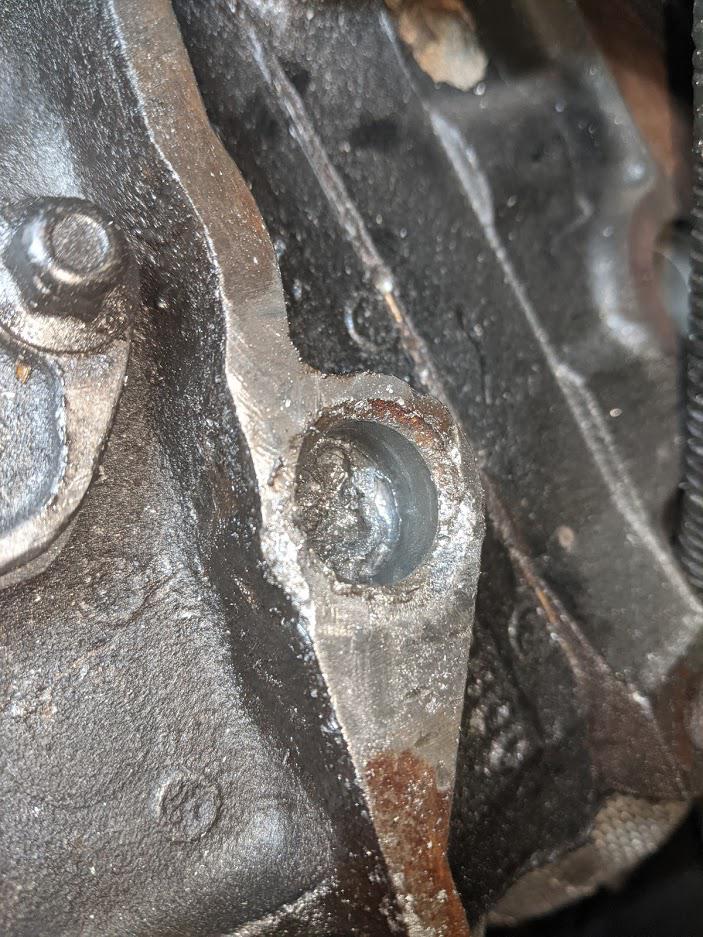
I drilled a Mickey Mouse shape. The big hole was intended to remove the Ford pin and relieve the pressure. The two small holes would allow for the outer pin to be pried out if necessary.
Picking out the last bit of the Ford pin
Freedom!
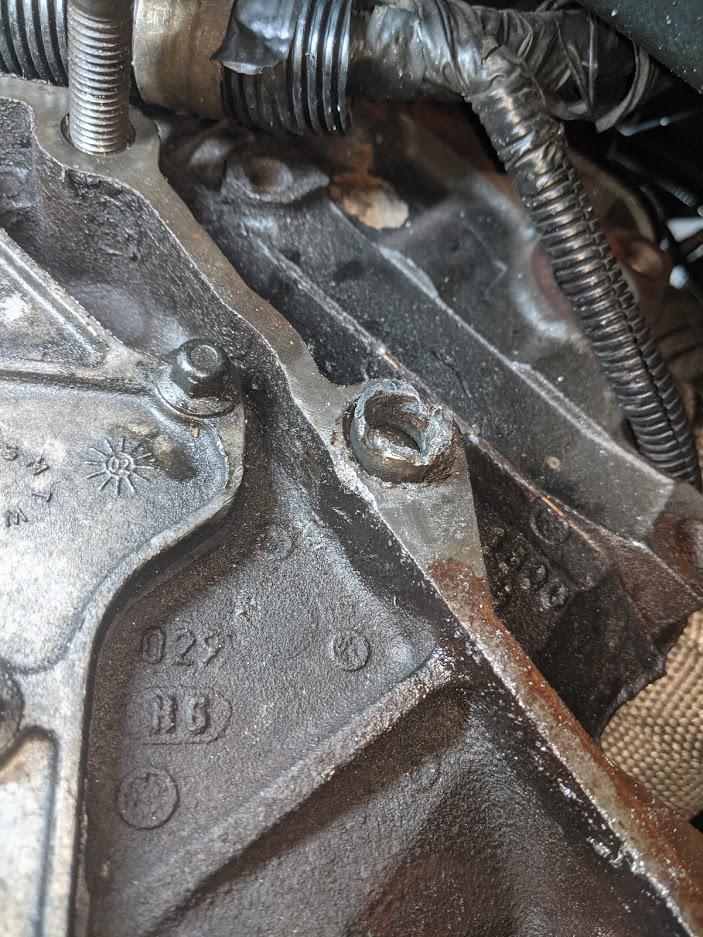
And the bores appear mostly unharmed.

I dinged up the lower one with the drill a bit, but it's still going to serve its purpose just fine.
The new pins went in nice a smooth!
I forgot to snap pictures, but it they would be duplicates at this point. The flywheel and bell were thrown back on again, and I held my breath as I remeasured the bell. I've never been so happy to announce that I'm back to square one! I still need a slight offset in the down position as I always have. Now I just need to find somebody who can make some for me. I figure that this is the best way to go about it because a custom one-piece pin can be hollow which allows for my fifth bell bolt to be used.
Those Midwest Chassis subframe connectors are trash. After a few years they will just start bending and tweak the floor pan
landstuhltaylor said:
Those Midwest Chassis subframe connectors are trash. After a few years they will just start bending and tweak the floor pan
Gee, tough crowd.
I'm willing to accept that I have an inferior part if it's true, but you lack context. How much power would be needed to do that kind of damage? This engine is weak and suspension is stock. I don't need a roll cage. How well and where were the parts in question welded? Mine are admittedly welded pretty poorly, but done well enough over a pretty long area. I don't see any reason for this sort of failure to happen unless the material itself or the box vs round construction are in question.
I don't want to think about the stress of drilling and taping the crank or drilling/picking out those dowels. Yeeesh. I'll bet you're glad that part is over!
Glad to see this project still trucking along.
In reply to iansane :
It was a pretty massive weight off my shoulders. I just wish that it meant that progress would return to a quicker speed! Not having a transmission really blows. Let's hope it doesn't get delayed any longer. Another big weight removed will be a centered bellhousing. There's a machinist at work who agreed to give it a shot, so I'm waiting to her back from him now.
I will pretty much be twiddling my thumbs after that if the transmission isn't here.
It looks like the machinist is making progress! I'm so excited to see this becoming a reality.