
Keith Tanner said:
But I'm tempted by the greater brake torque of the slightly bigger setup, and I can get that with a radial mount caliper that's got better weather sealing than the usual race calipers: the "Dynapro Dust Seal Radial Mount". Available to fit a 0.50" rotor (!) and in the size I want. It's not the cheapest option, but the calipers alone will be less money than a set of junkyard spindles and I only have to buy them once.
Thoughts?
I re-engineered the brake system on an old SAAB to switch over to Wilwoods on all four corners. I did this to ditch the crap old calipers, improve pad selection, improve the braking performance, and to work without vacuum assist (because ITBs). For a commute/DD/everyday car situation you DEFINITELY want those sealed calipers. I got ~2-3 years out of the standard Dynalite/Dynapro calipers before they needed careful rebuilds due to failing cylinder seals caused by debris on the pistons. I'm on my second round of rebuilds now, and it looks like this is just going to be a maintenance task. I now keep one spare caliper all built up so I can swap in when the pads start dragging.
It's the only flaw in my setup. So my advice is to plan for a caliper with dust seals that's intended more for street use and less for track/race applications.Otherwise everything has been covered in this thread.

AngryCorvair said:
so go with the 1.75" and increase your MC bore size by 0.0625" or maybe 0.125". i didn't do the math yet. but there are tons of OEM tandem MC's out there with bore sizes from 3/4" up to way too big for you. calculate the percent gain increase for the new front caliper effective piston area, then increase the MC bore size by some percentage less than that. the result should be more front brake output with less pedal force and somewhere around the same pedal travel that you currently have.
Okay, I will admit to playing fast and loose with pressure and force. I'm always looking at the psi in the system so that's where my brain goes.
You're proposing larger pistons and a larger master? Won't they basically just cancel each other out, or are you thinking of the rears? I'm not eager to change out the master, because that means I have to pull either the dash or the windshield. After doing the former once, I would seriously consider the latter. The fluid reservoir is accessible by removing the gauge cluster cover - Vanagons are weird.
I'm running 16" Ronals, but since I'm planning to keep the stock rotor diameter that's moot.
The 6MT reverse R&P has been out for a few years. I actually converted the trans a couple of years ago, I just haven't put it in yet. I had to shorten it. I went with the 6 because I liked the way the gear ratios worked out. They're also a LOT cheaper than 5-speeds, but you only need to buy one. I'll have to get custom shifter cables made and since I'm using a K-Tuned shifter with no reverse lockout, I'll have to figure out the reverse lockout. The plan was to get the van up and running on the new 2.5 after the 2.2 died, then start looking at the trans. The caliper failure forced me to look at something else. I've got photos of the reverse R&P swap, I figured I'd do that as a build when I went to put it in.
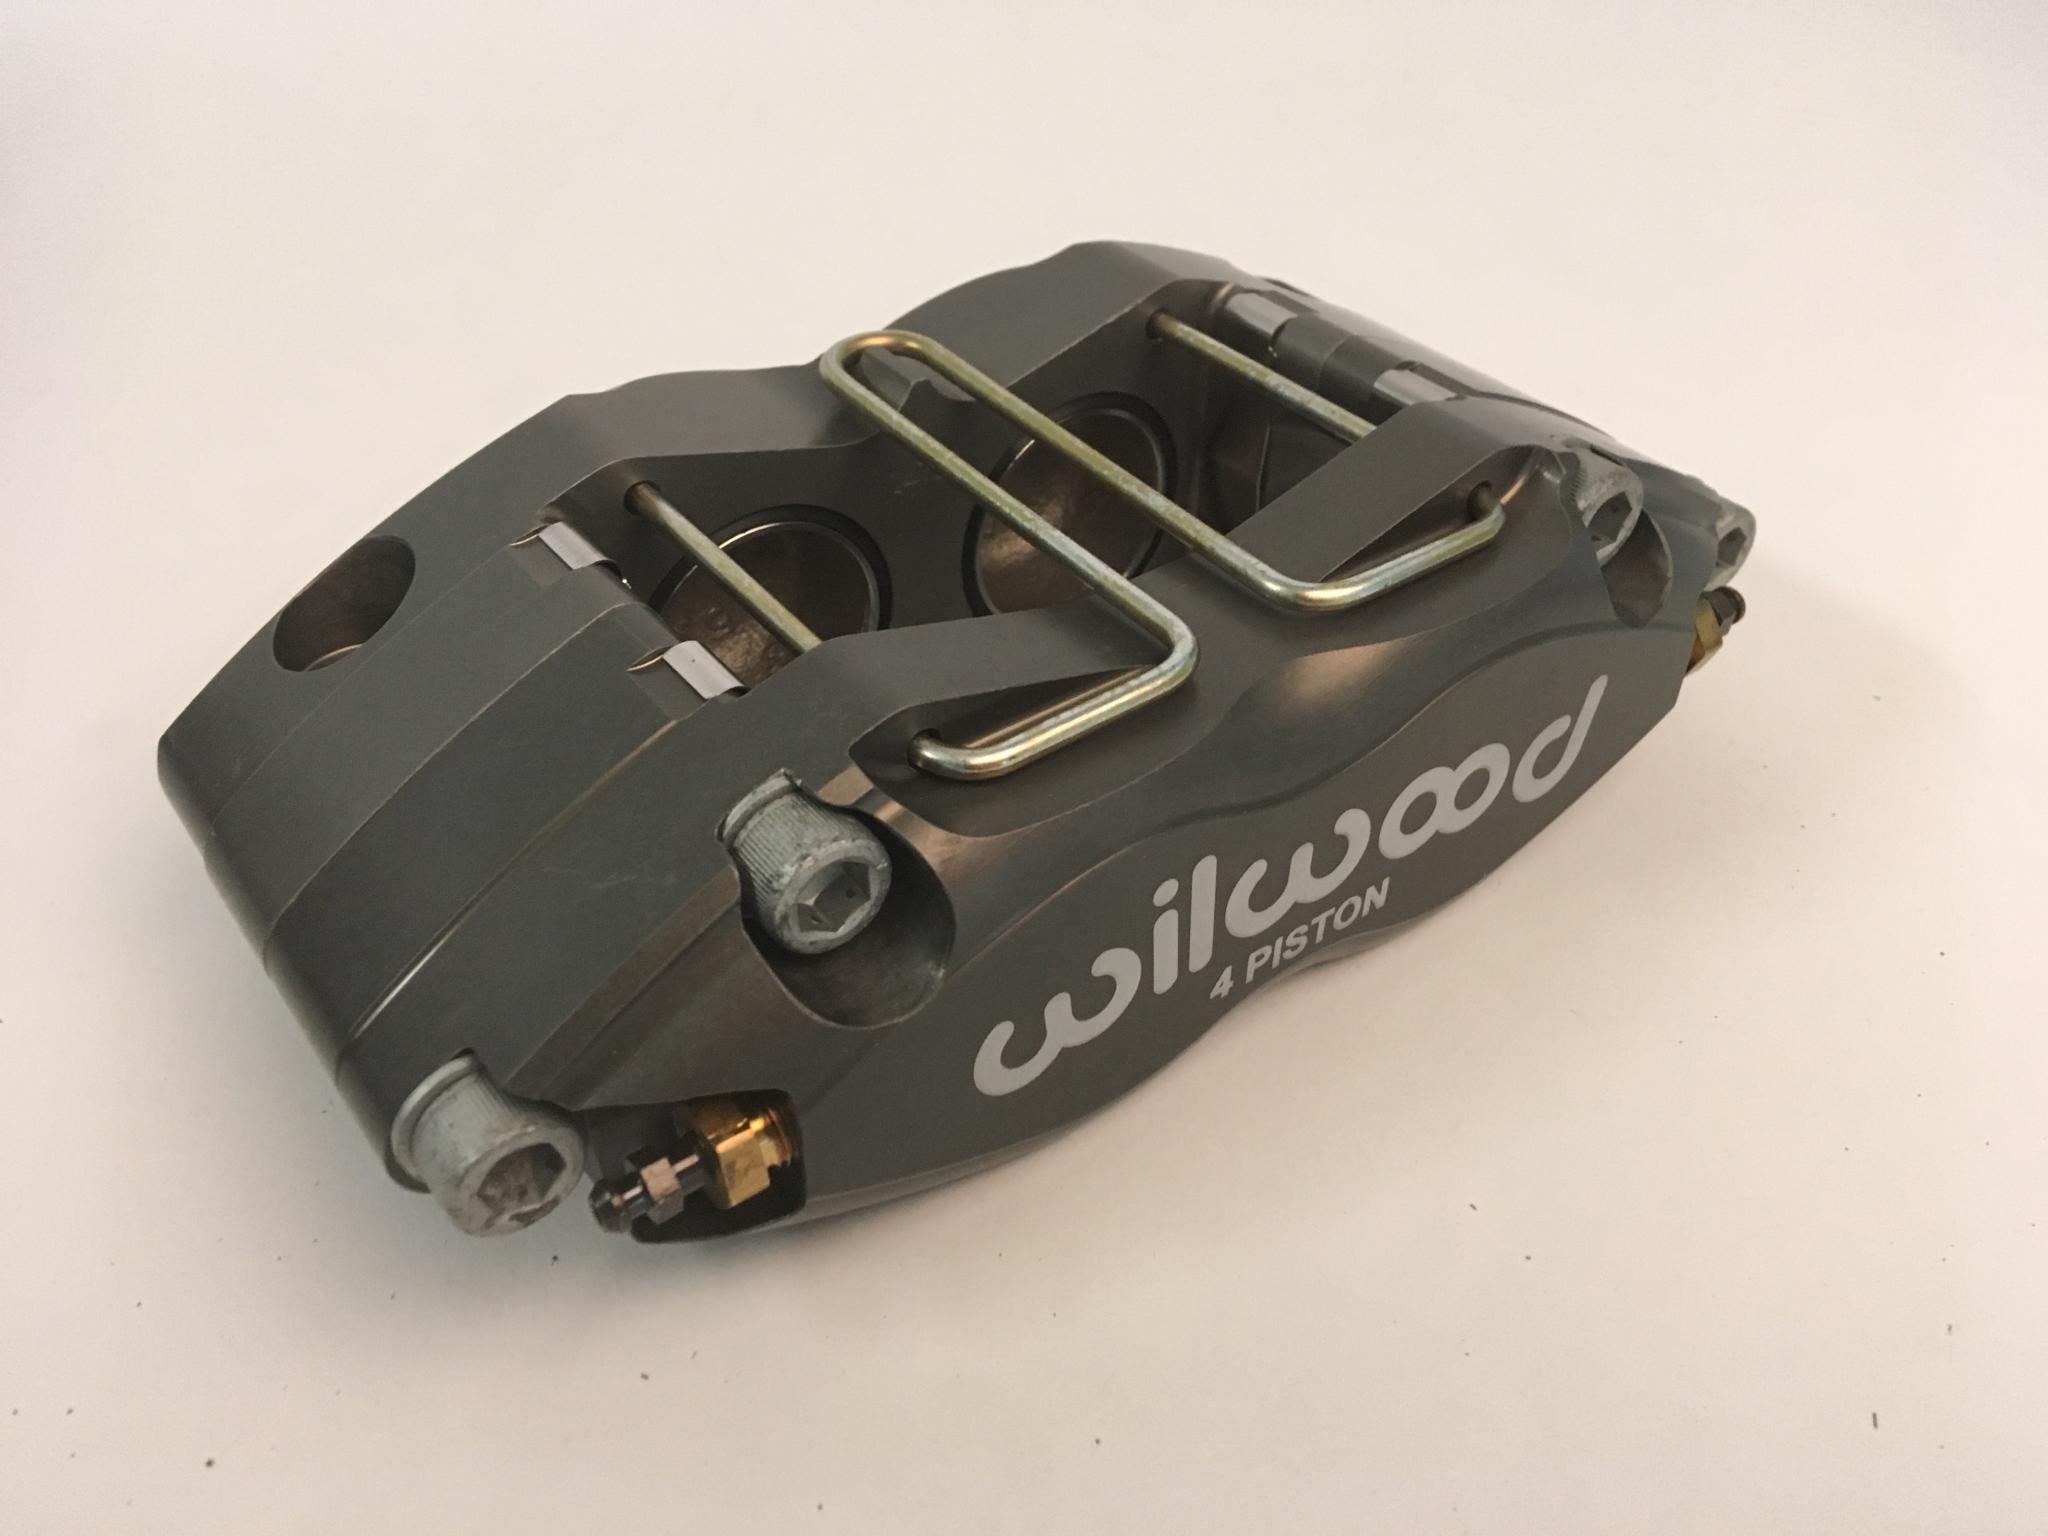
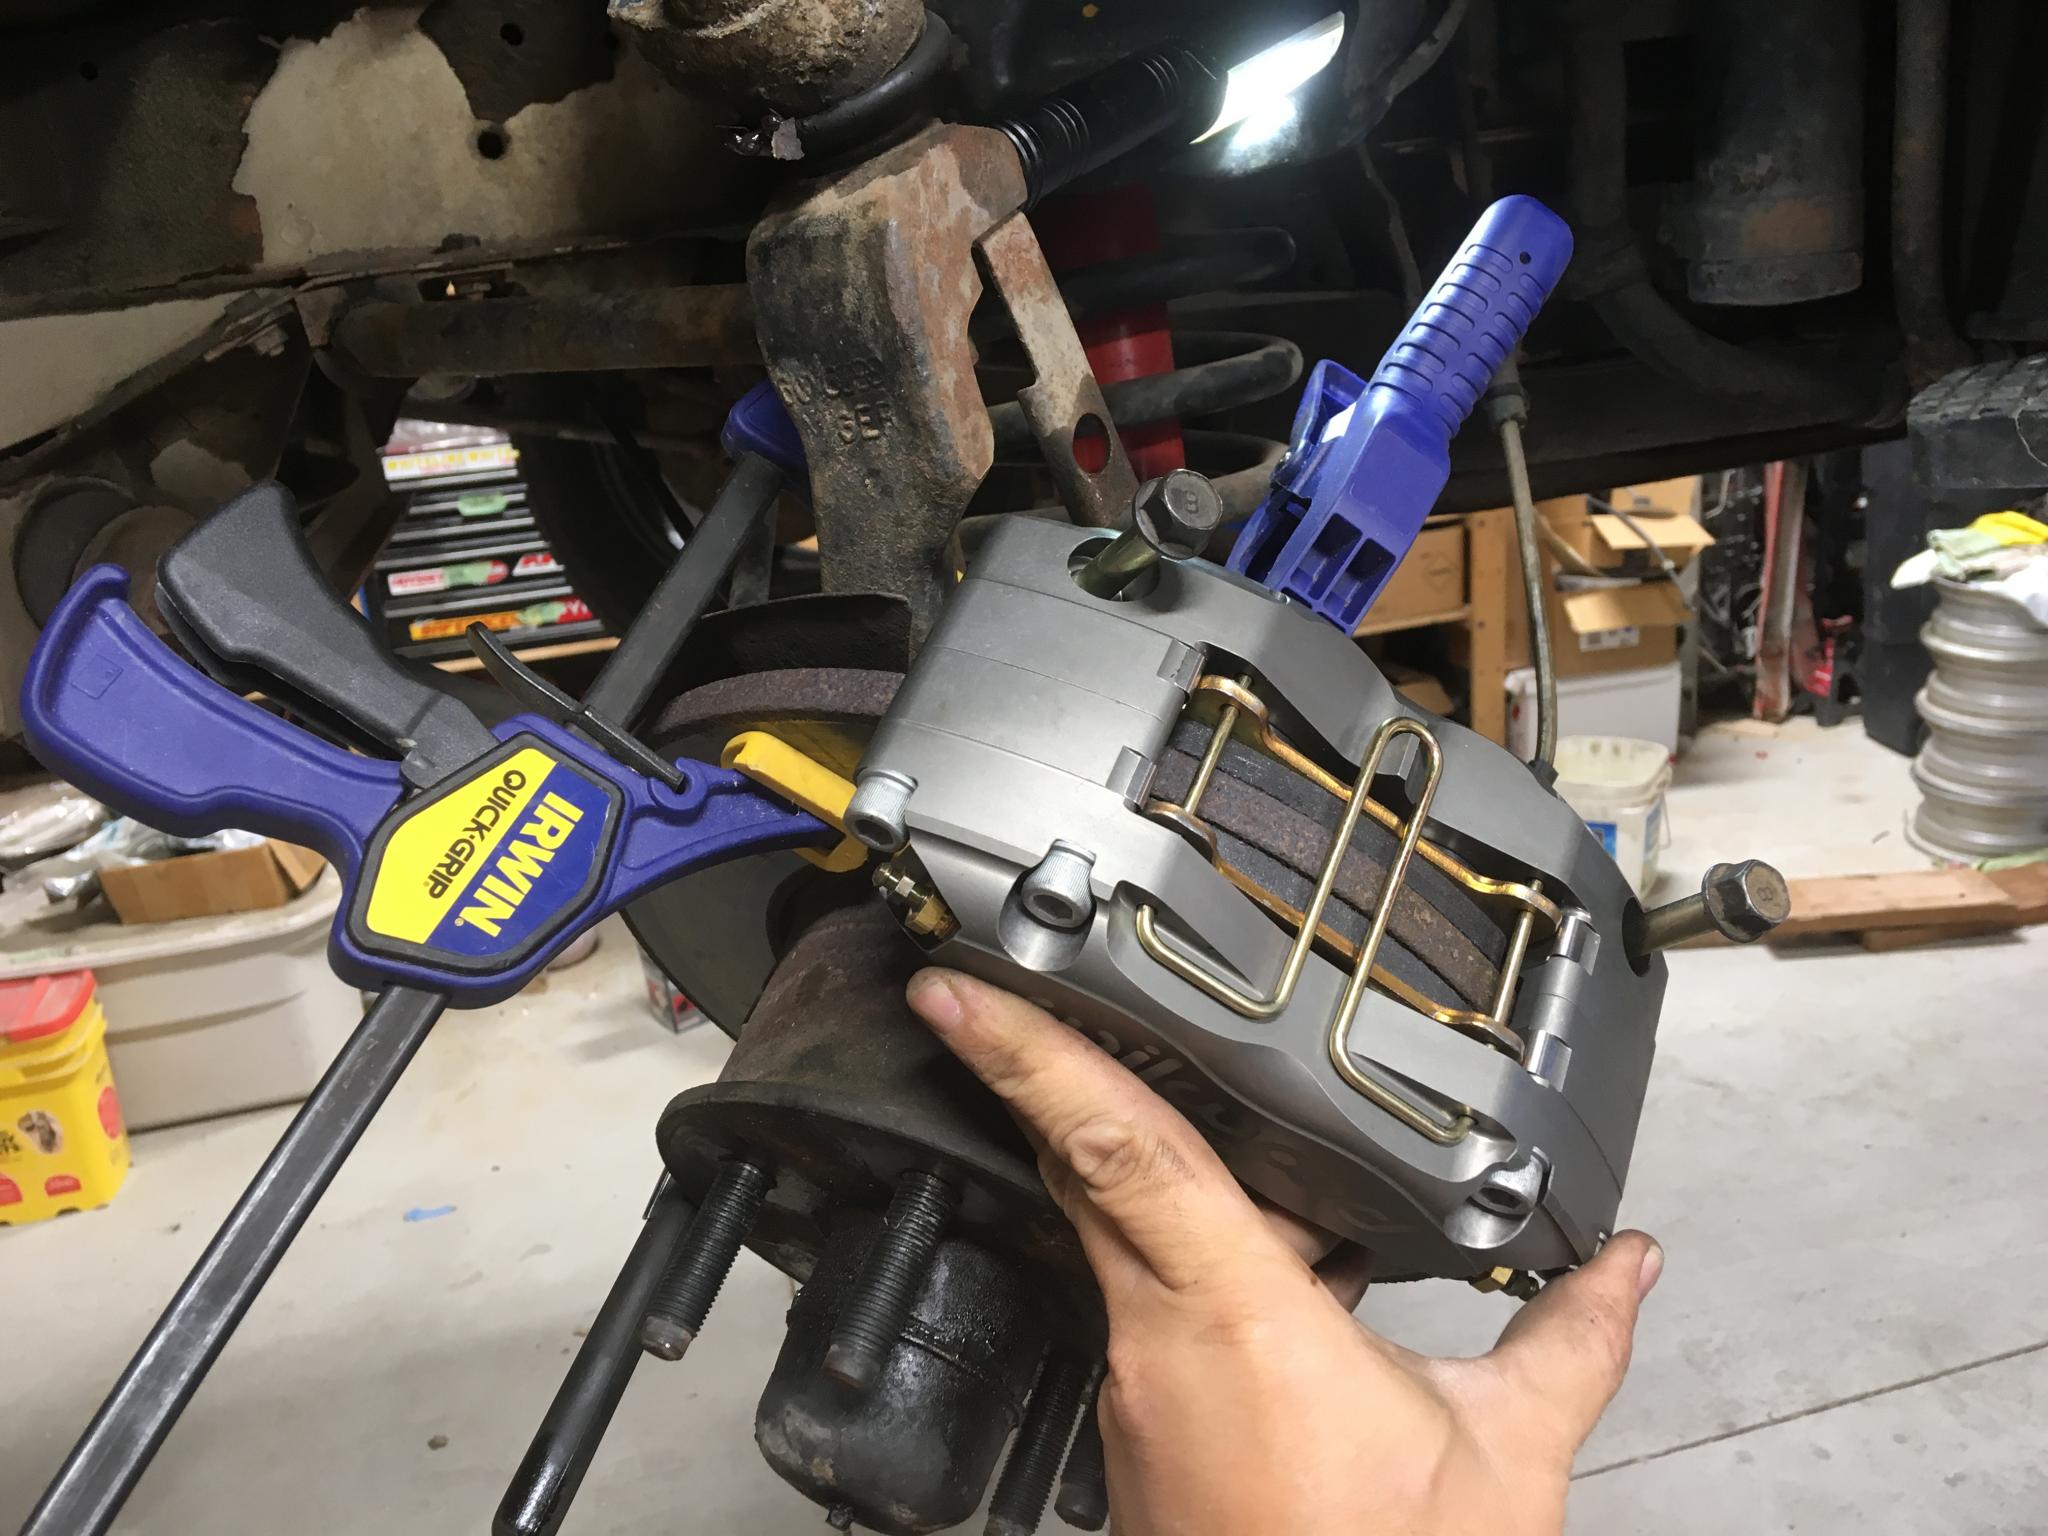
I've been running Wilwoods on my own street cars for years (decades) without too much trouble, but I know the van will be going into dustier/dirtier sitations than my daily drivers do. So the super-sealed calipers are my choice. If I didn't post it before, I've decided on the Wilwood 120-14703. Definitely more expensive than a typical lug mount Dynalite, but I figure the guy doing the design work here is working cheap :)
Keith Tanner said:
You're proposing larger pistons and a larger master? Won't they basically just cancel each other out, or are you thinking of the rears? I'm not eager to change out the master, because that means I have to pull either the dash or the windshield. After doing the former once, I would seriously consider the latter. The fluid reservoir is accessible by removing the gauge cluster cover - Vanagons are weird.
they have opposite effects, but they don't cancel each other out.
increasing caliper piston size does the following:
- increases brake output by increasing clamp force for a given line pressure (and therefore pedal force input)
- increases pedal travel required to achieve that pedal force
increasing master cylinder bore does the following:
- decreases pedal travel required to move a given volume of fluid
- increases pedal force required to generate a given line pressure
dammit, i've got somewhere to be. i'm going to pick this up again tomorrow with a detailed example.

AngryCorvair said:
Keith Tanner said:
You're proposing larger pistons and a larger master? Won't they basically just cancel each other out, or are you thinking of the rears? I'm not eager to change out the master, because that means I have to pull either the dash or the windshield. After doing the former once, I would seriously consider the latter. The fluid reservoir is accessible by removing the gauge cluster cover - Vanagons are weird.
they have opposite effects, but they don't cancel each other out.
increasing caliper piston size does the following:
- increases brake output by increasing clamp force for a given line pressure (and therefore pedal force input)
- increases pedal travel required to achieve that pedal force
increasing master cylinder bore does the following:
- decreases pedal travel required to move a given volume of fluid
- increases pedal force required to generate a given line pressure
dammit, i've got somewhere to be. i'm going to pick this up again tomorrow with a detailed example.
Love this discussion!
Angry-you and I gotta date tomorrow in yer garage. Posting can wait!

Ok I'm fairly versed with the 5 speed reverse r.p set up. The only thing I know is on the 6 speed is that they put the gear in were the reverse was on the 5 speed. Run the stock gear oil. We've done the special blend and it took about 2 months until the gears started to make noise. The lash on these gears if you got them from subarugears is very touchy. Did you use the hollow main shaft? These are found to twist and break after a while as they won't handle the hp or torque driving 2 wheels. Even less if you installed a lsd in the case. 5 Speed Bus has a direct replacement shift kit for the 5 speed but not to sure it works on the six speed as it would need the reverse lockout to be installed somewhere as it is no longer in the transmission.
I'm slowly working on my 90 vanagon to get it back into decent shape. I have a 2ltr JDM wrx motor and transmission waiting to be installed. So bigger brakes have been on my list to do as well. I don't think the stock brakes are close to being adequate for stopping my van and it's a automatic. I've got the brake set up from my old 01 S8 that got totaled. I've been working on trying to get the master cylinder to work on the odd reverse setup in the vanagon.
The 6 speed is a cable shift. Totally different beast from a shifter standpoint than the 5 speed.
I have ordered the calipers. I didn’t like the choices in 1.75” as much, so I’m going to stick with the stock MC for this go-round at least and use the 1.5” with dust seals. It’s not the right brake setup for a turbo WRX-engined van but I don’t have one of those :)
Ok then mostly you would just need some modified or custom cables made. That actually sounds interesting think I'll give that a look as well. So far I've come up with machining the front rotor down to mount a 12.5 rotor on it. This can still work on the Brembo calipers from the S8. It also moves them in just enough to run 17" rims. It looks as if I can still use the stock master as long as I keep the rear drums. Once I go to the rear discs I'll have to figure out how to run a 25mm master.
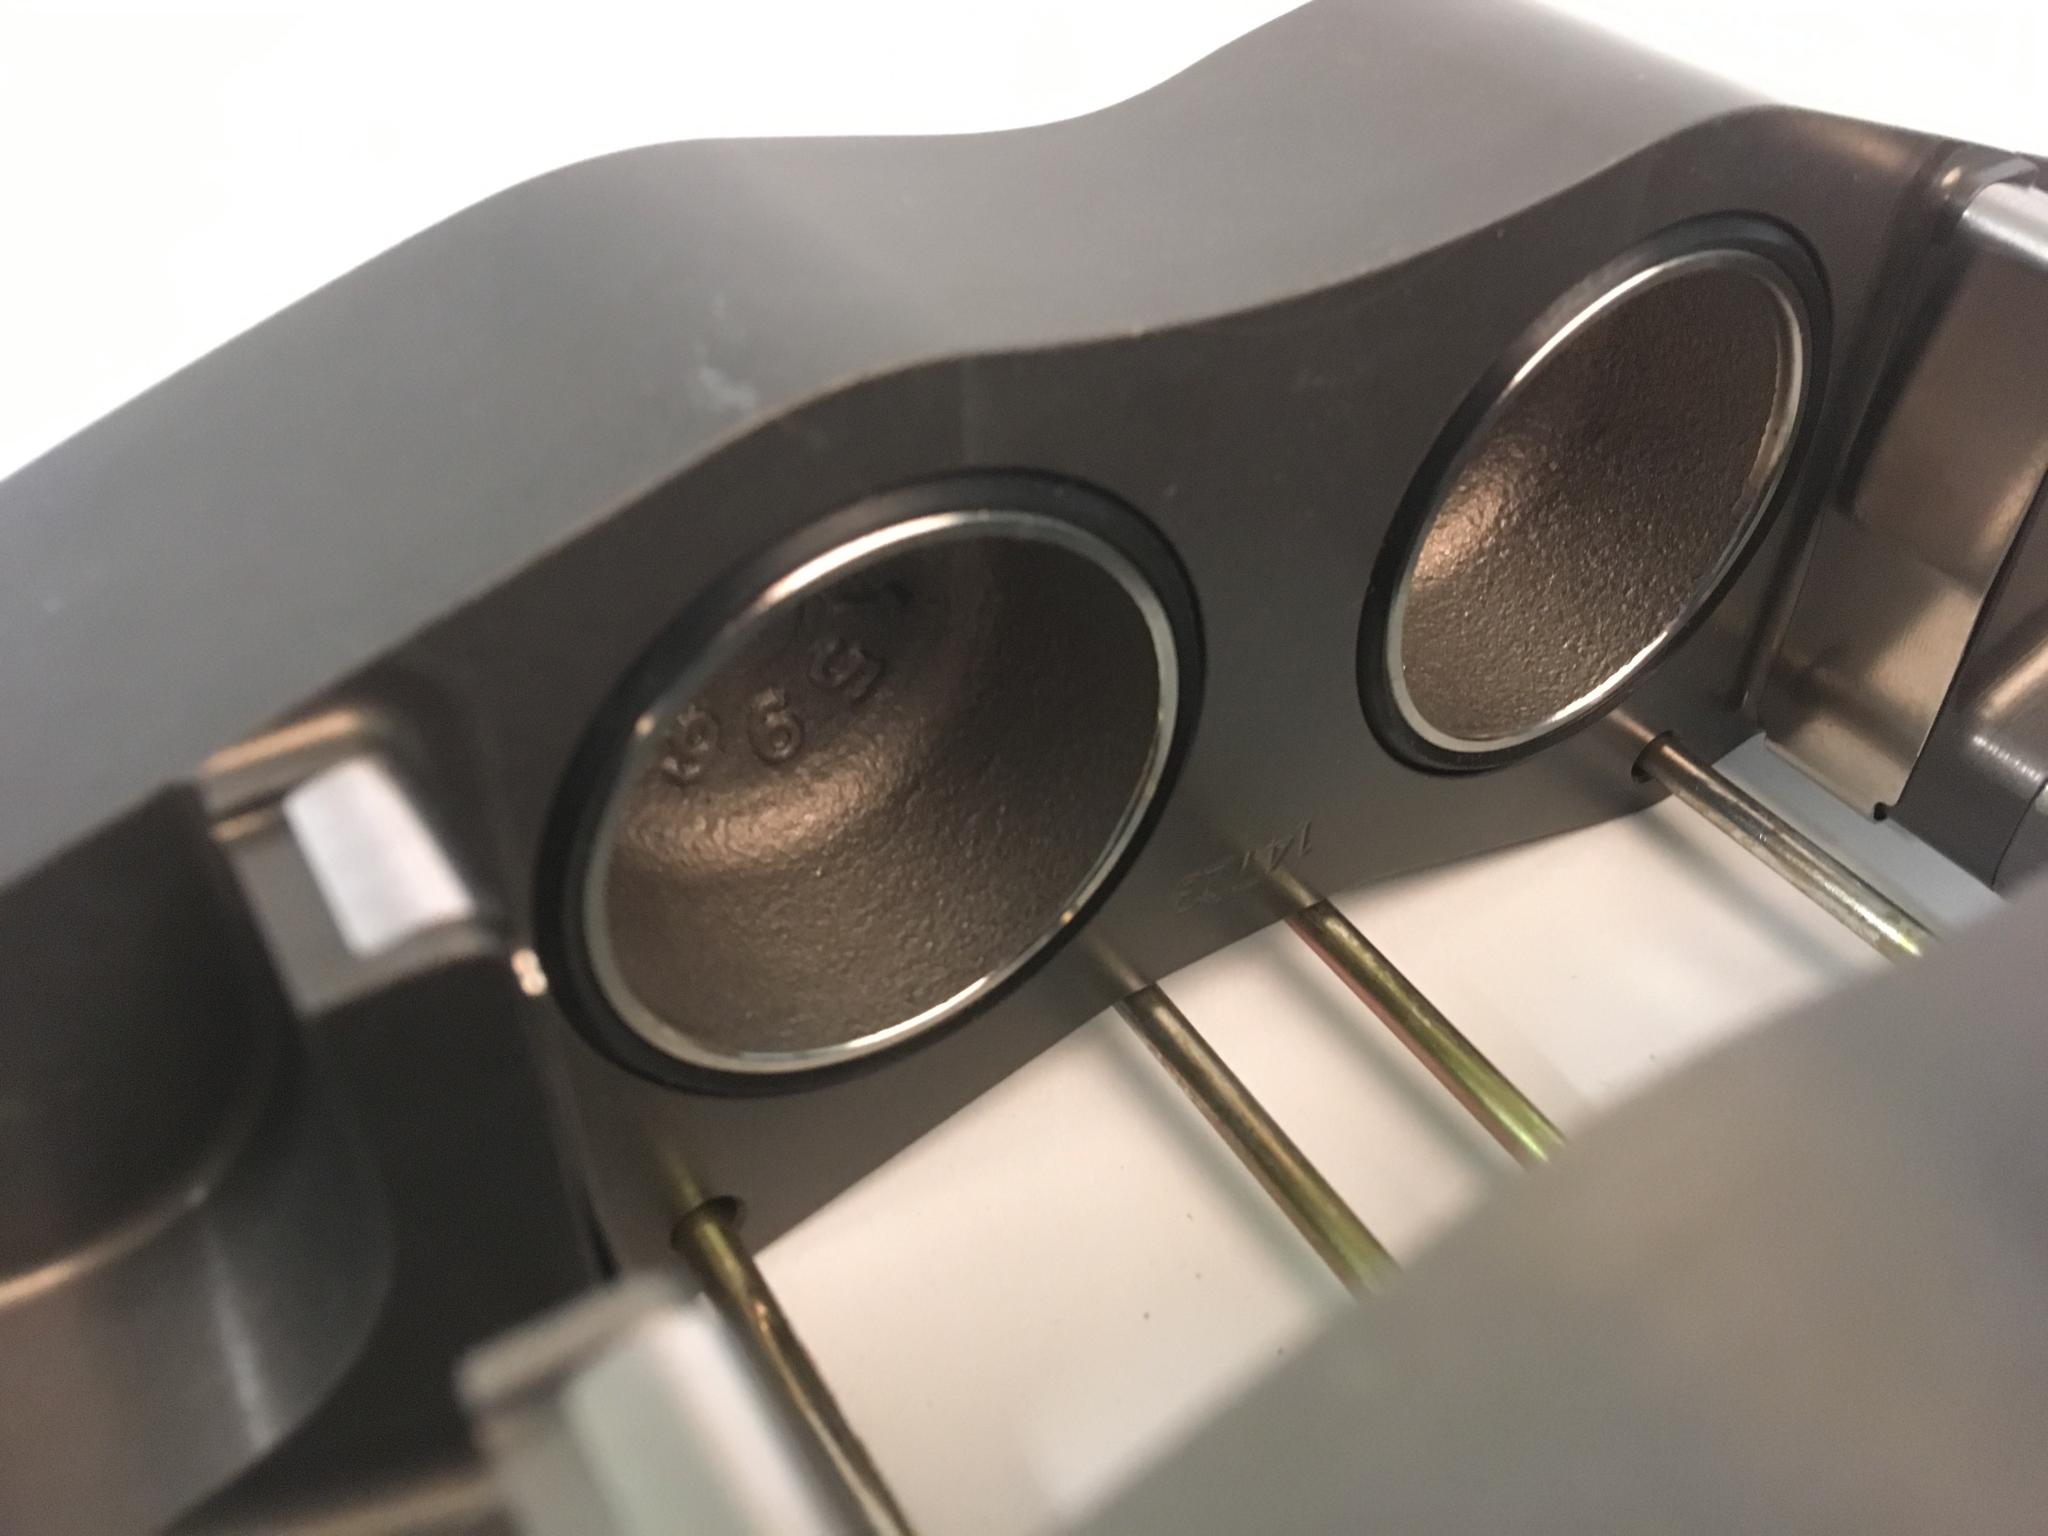
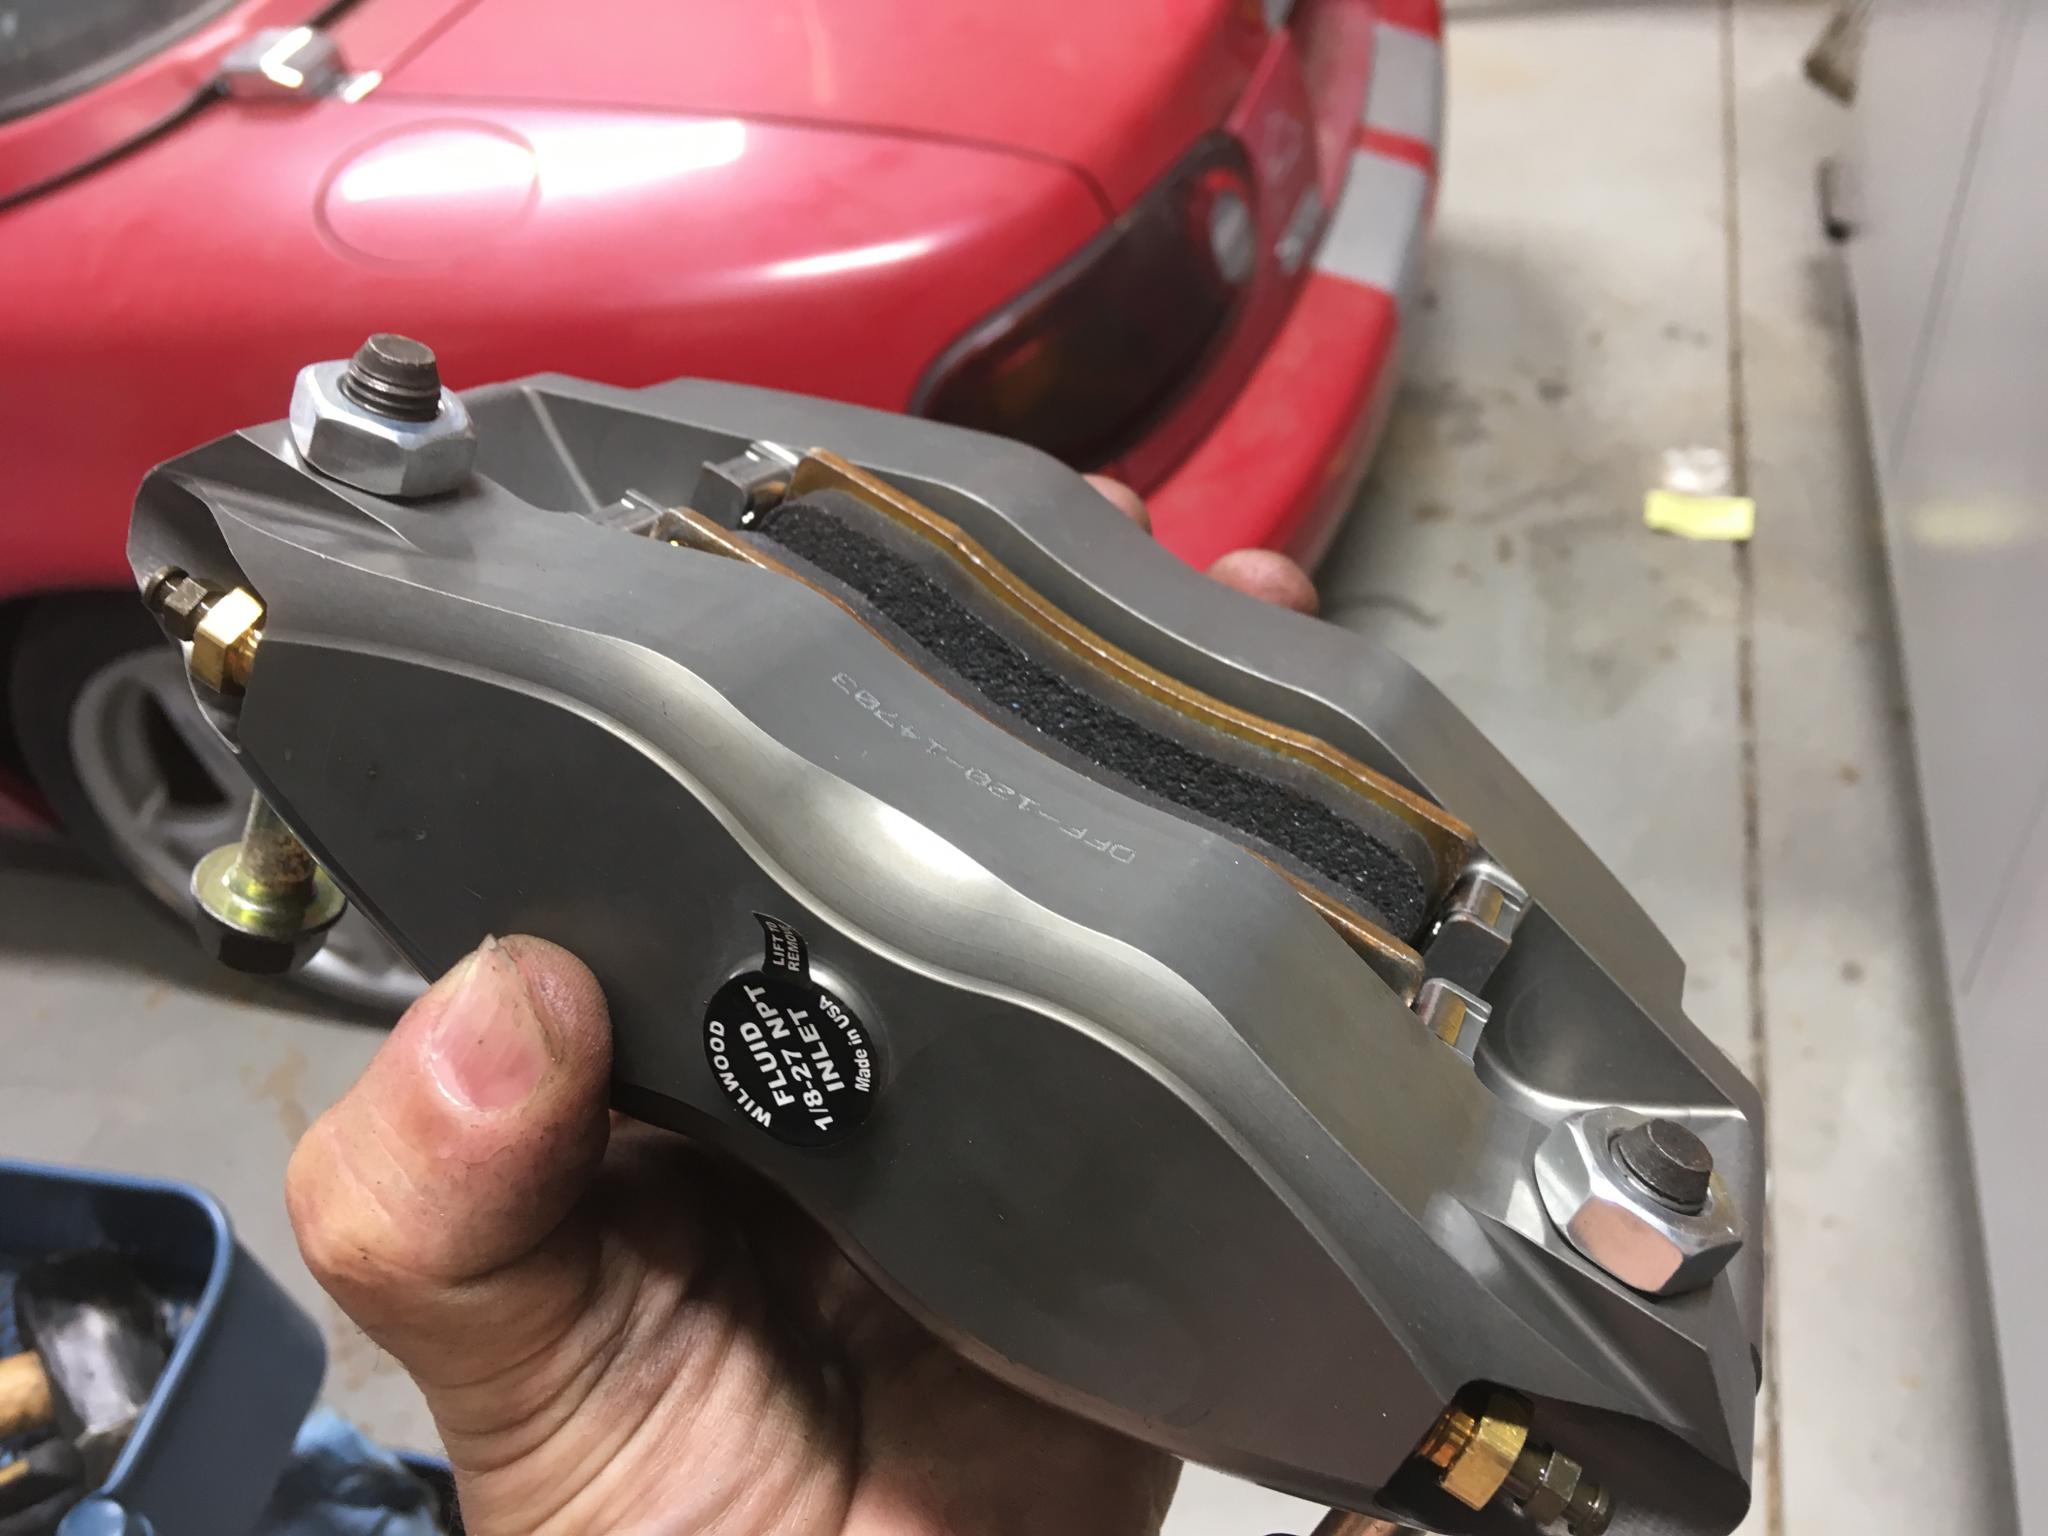
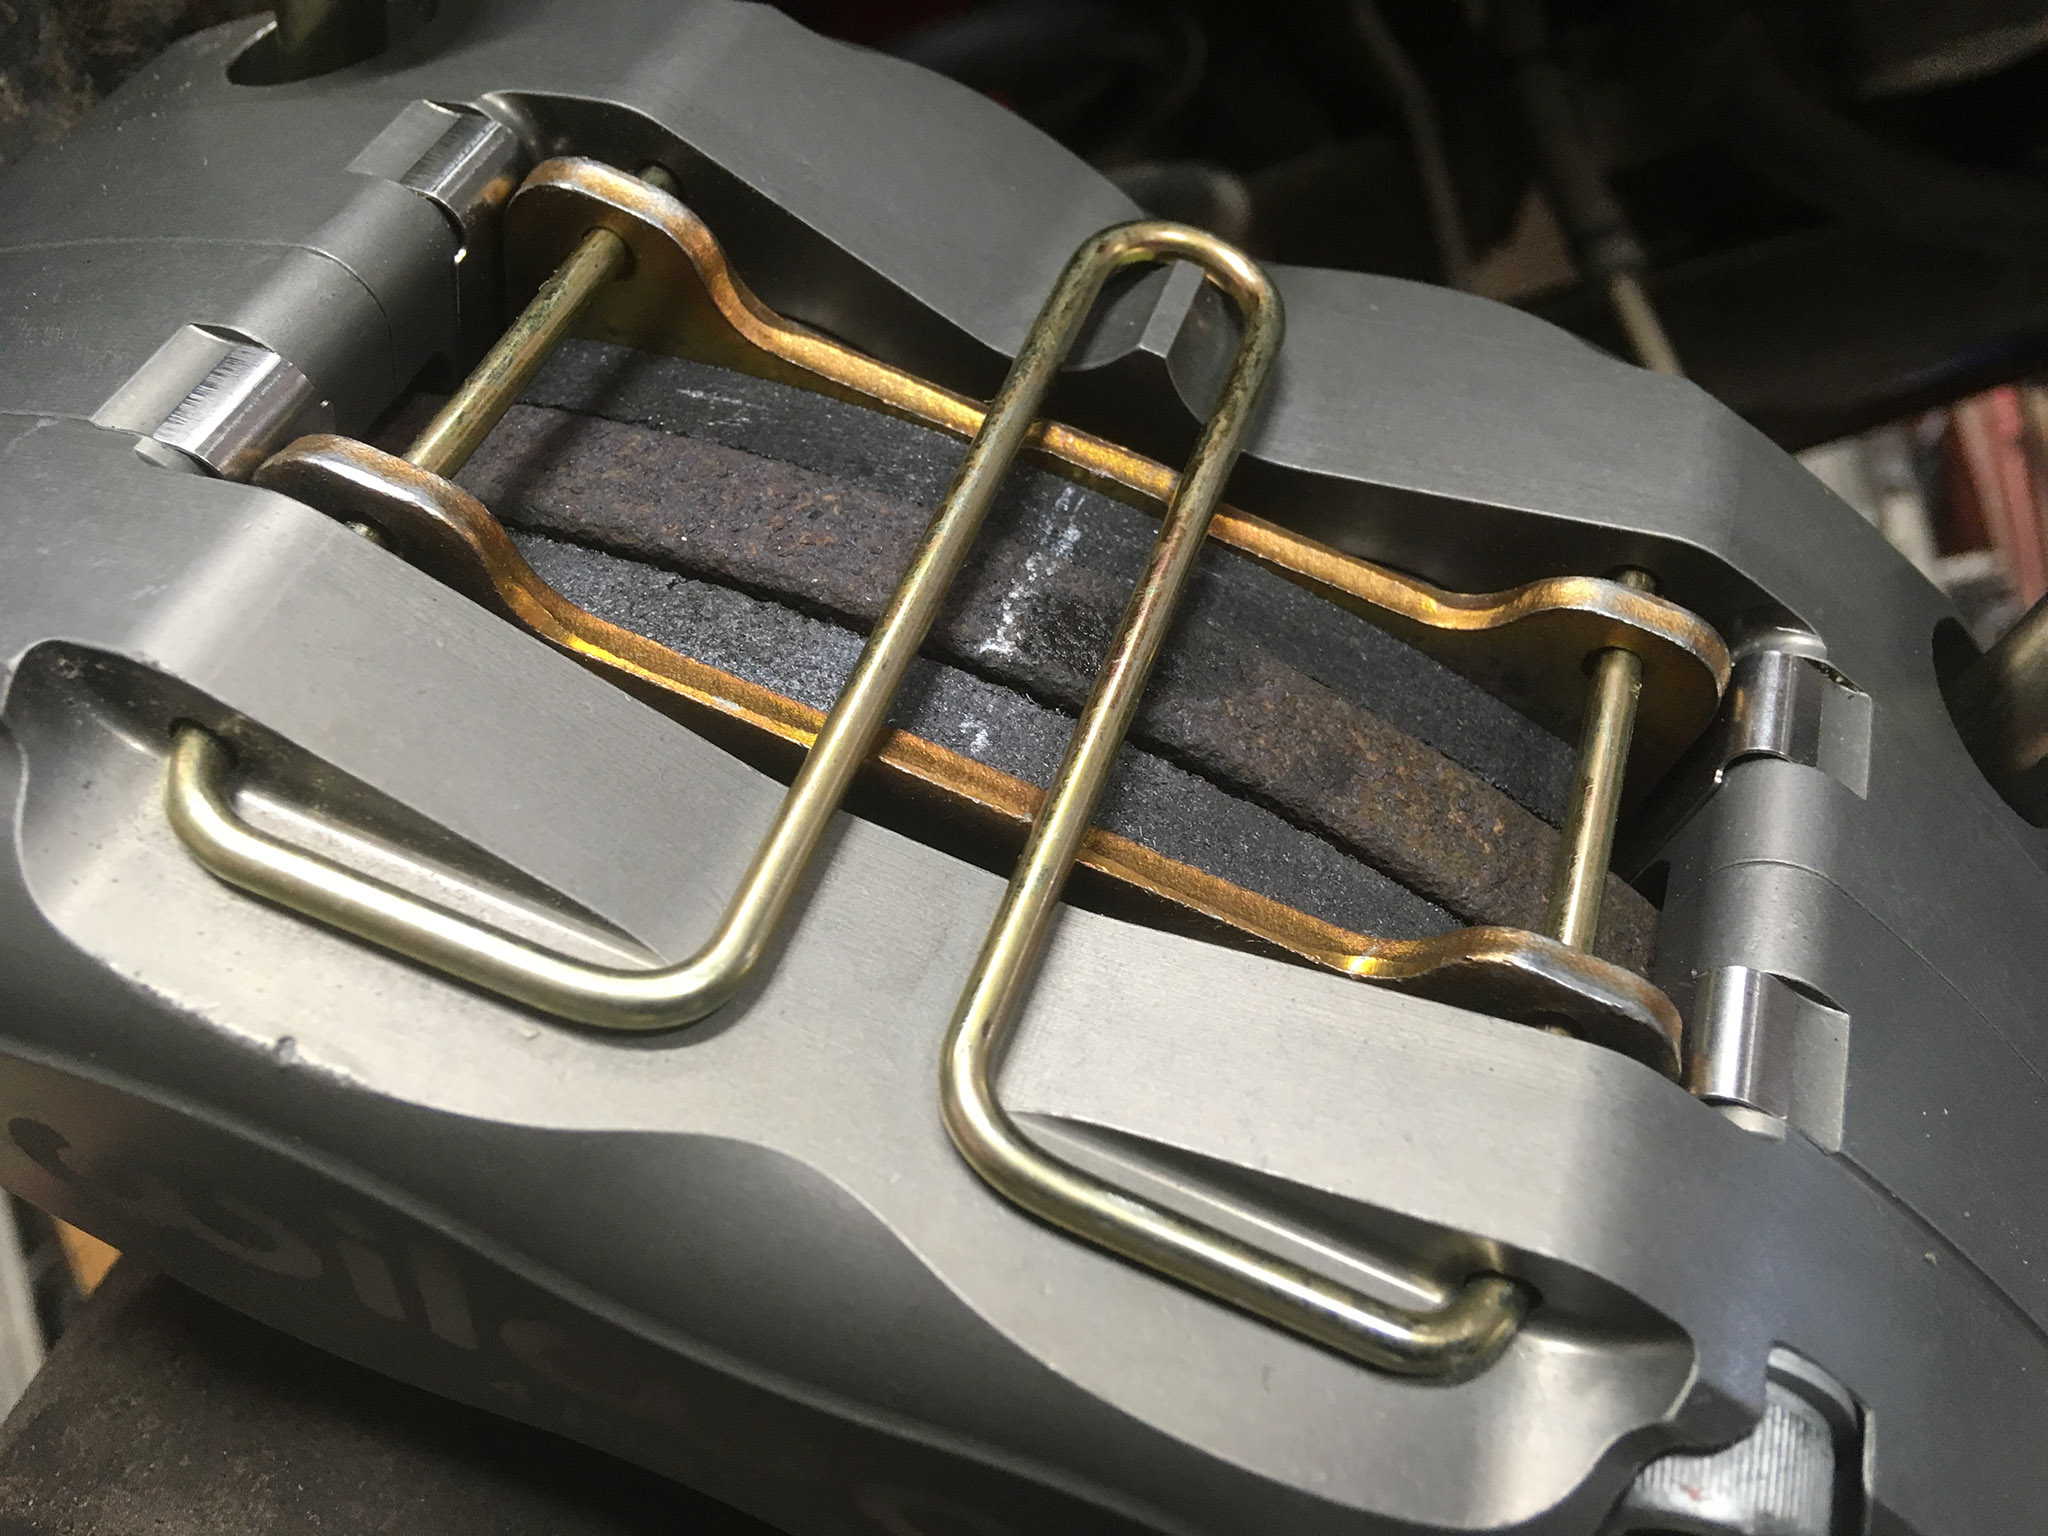
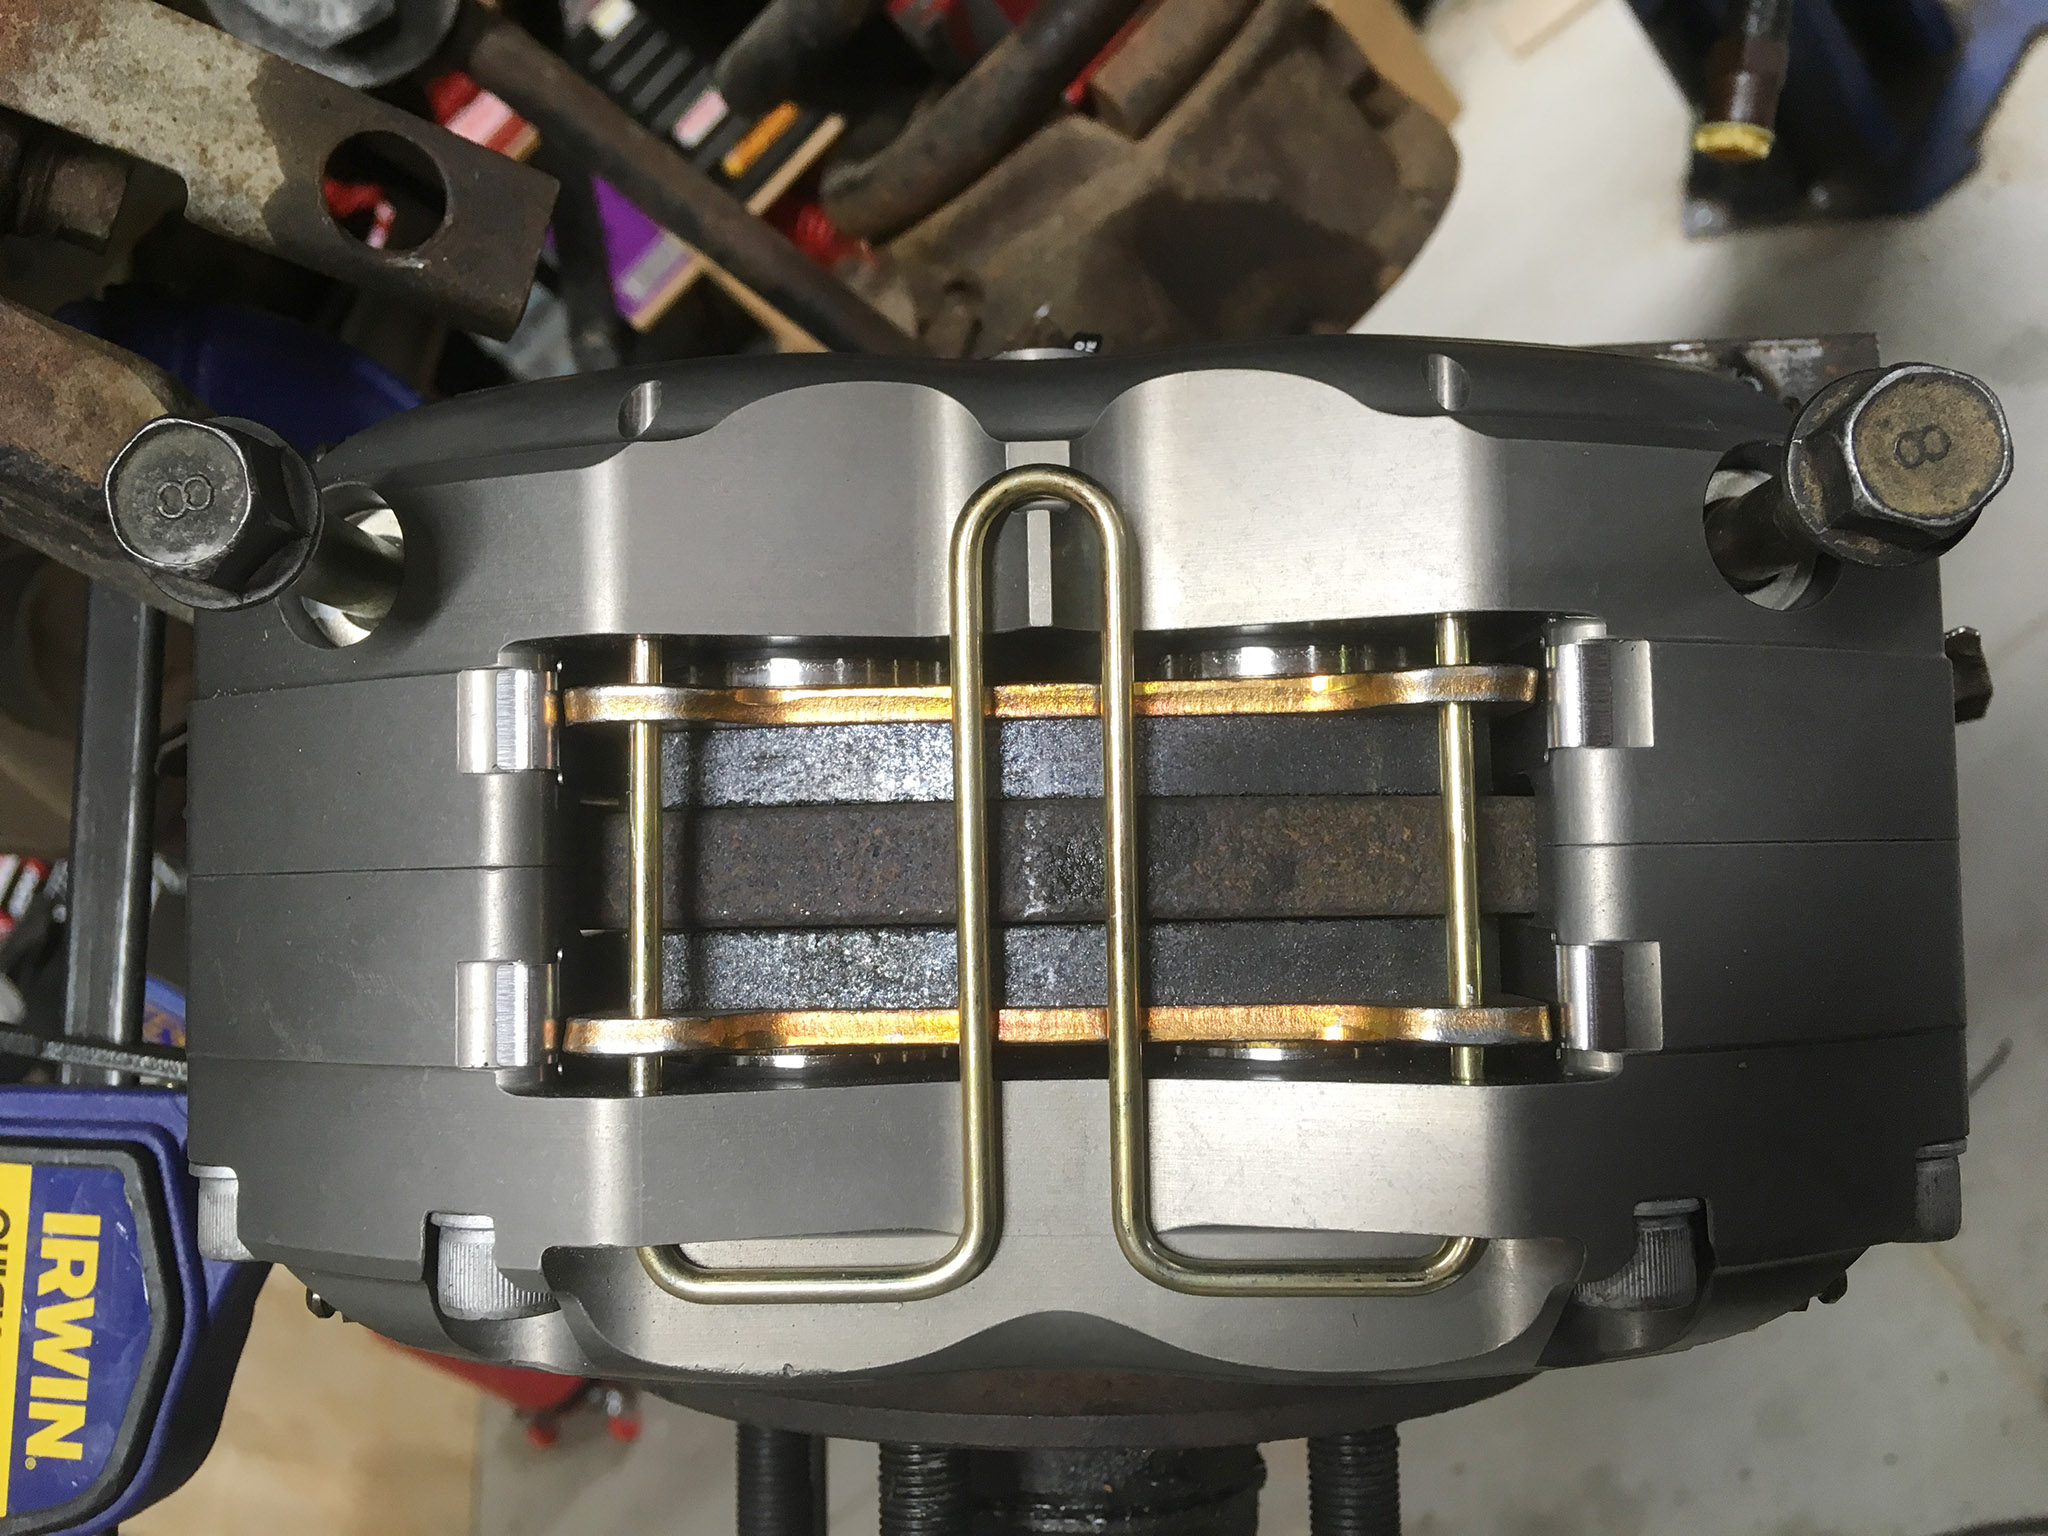
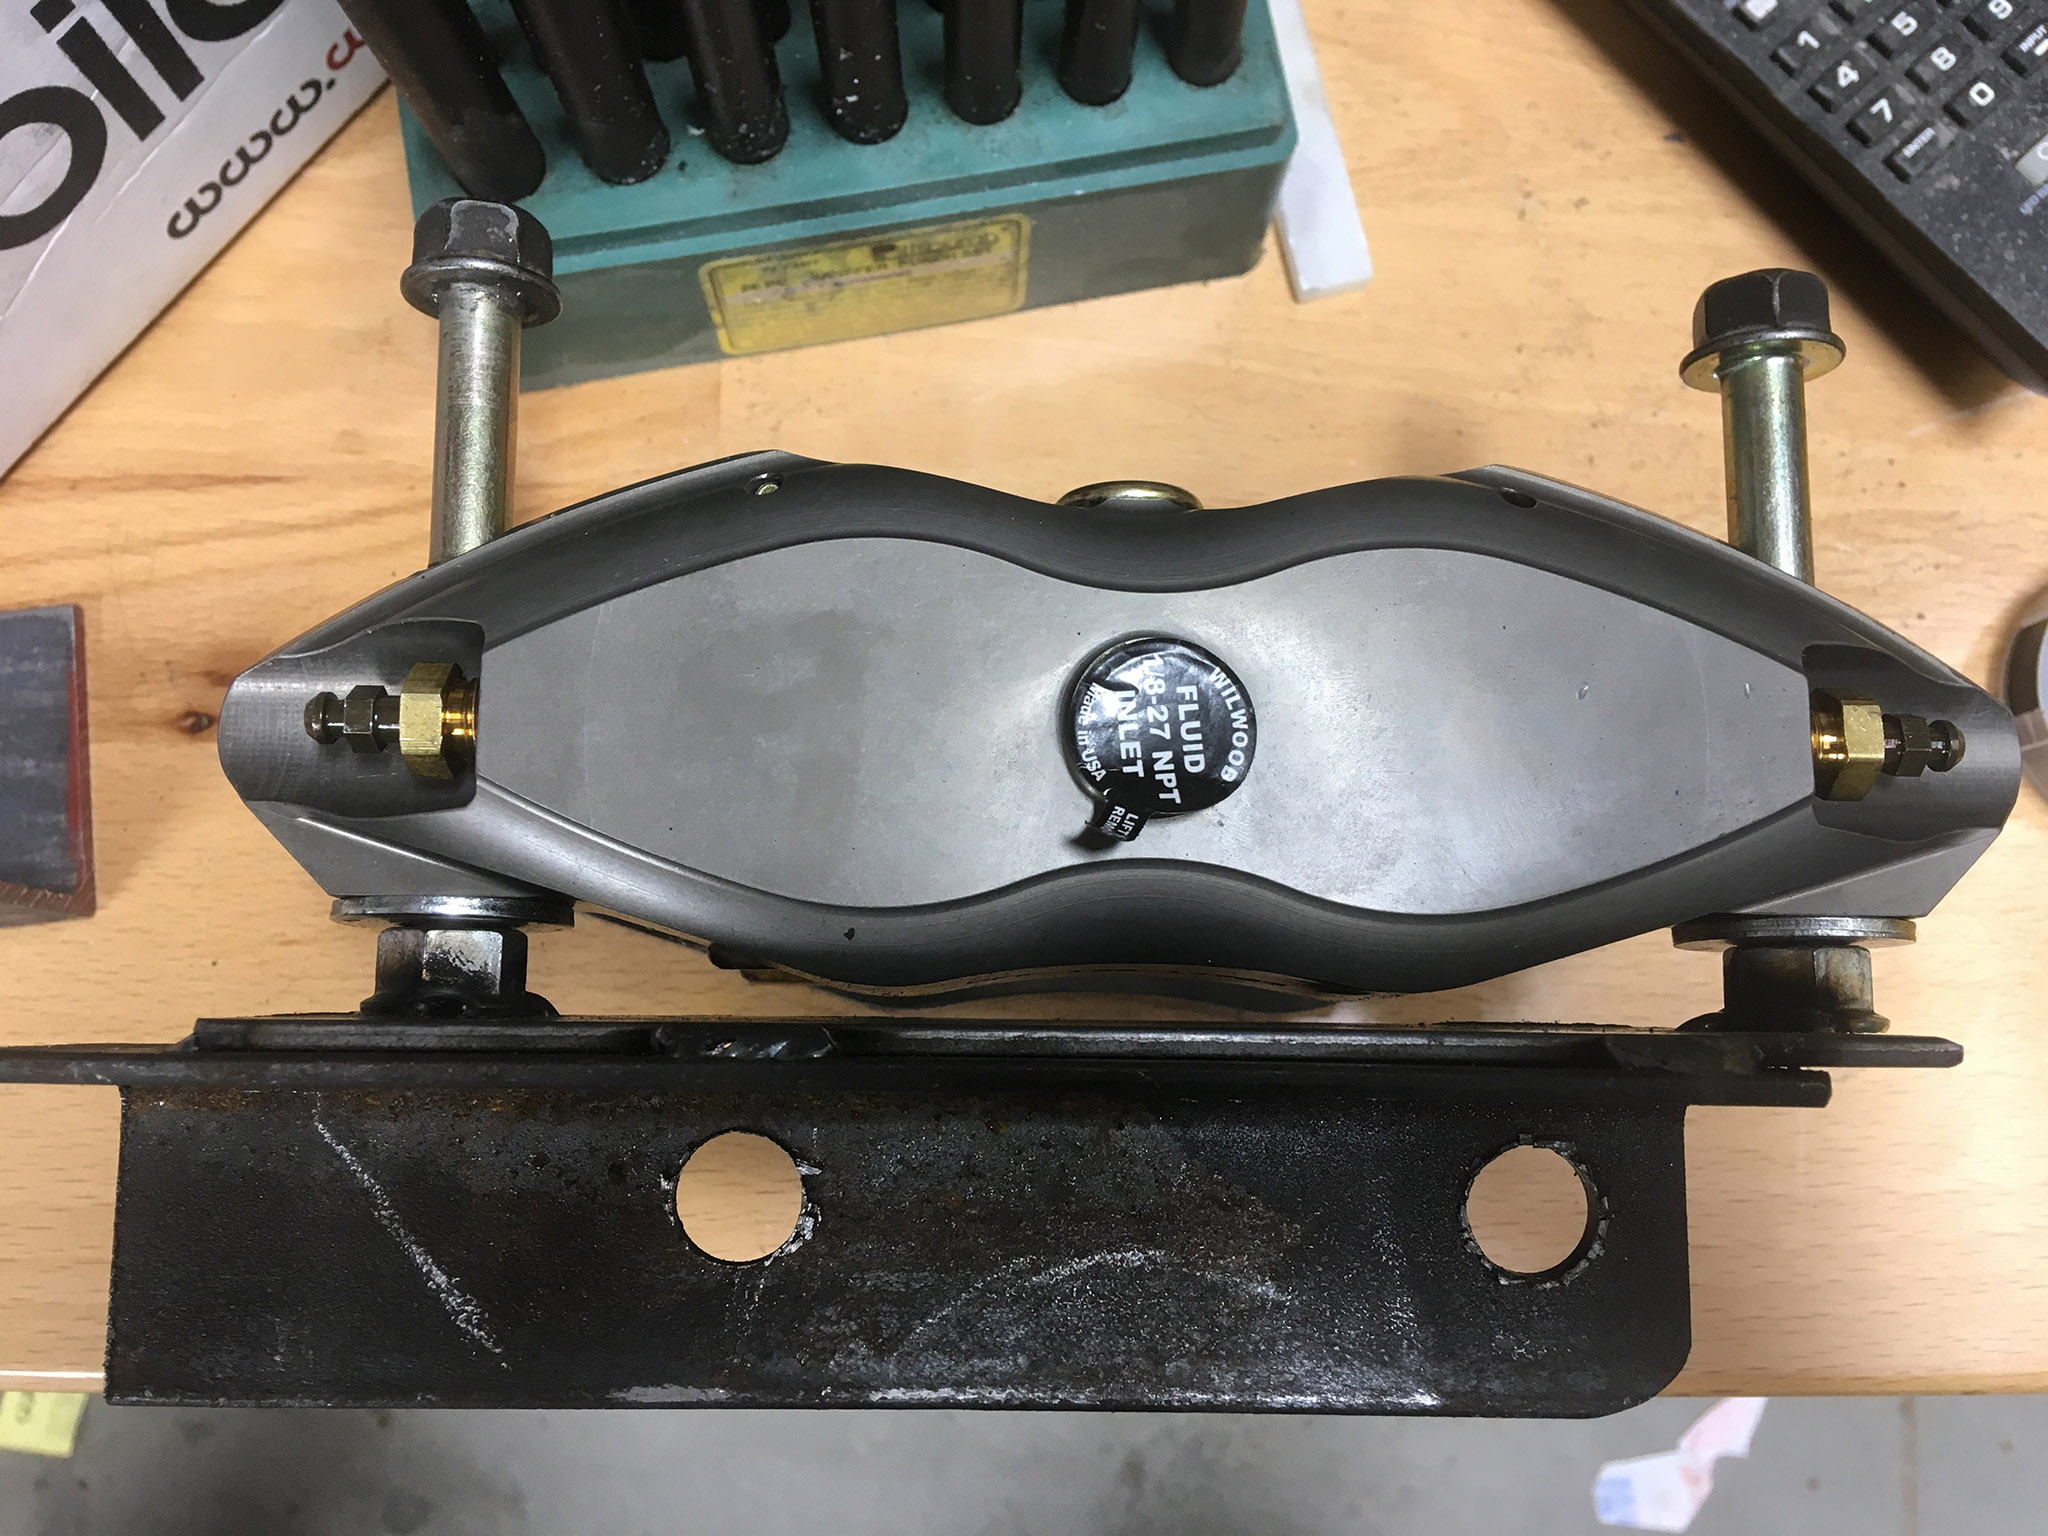
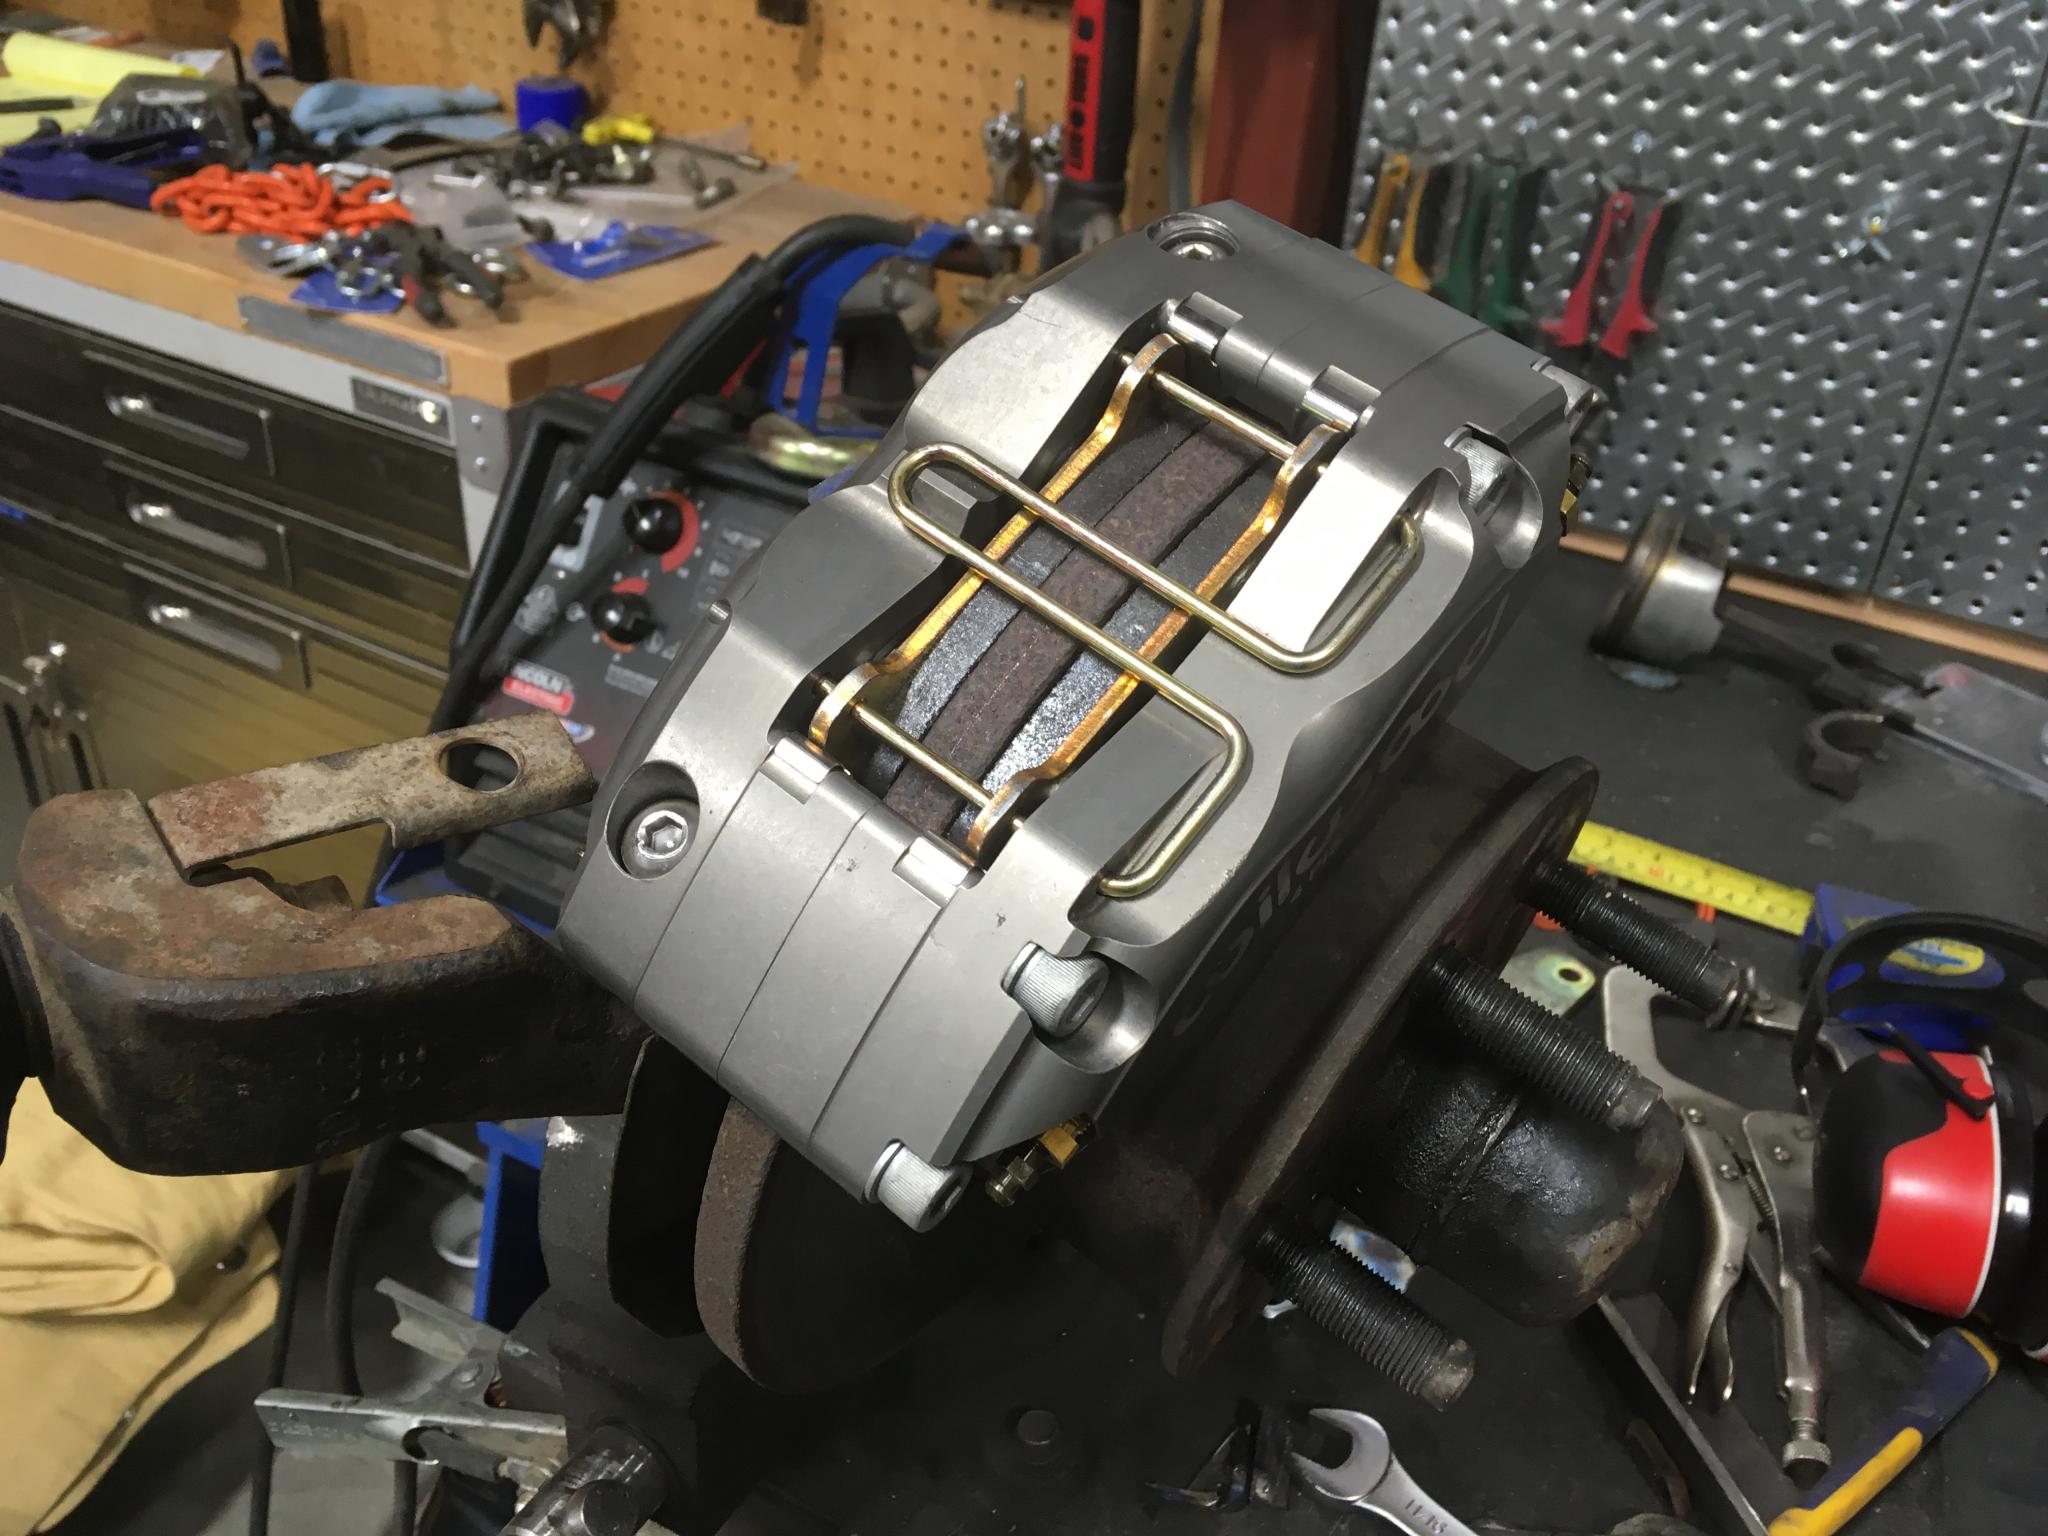
Cool parts arrived today. I'll drag them home this weekend and do some initial fitting. It's a bit of an odd looking caliper, so large but for such skinny rotors. Bodes well for stiffness.
Check them seals.
So I don't know why I didn't think of this before, but I'll bet that Vanagon has bloody bubble flares on it. All of my brake parts are for inverted flares. Oops. I can get a set of bubble -> AN3 adapters from Summit but not for this weekend. Sigh. I could reflare the hard lines on the van to a double but that seems like unnecessary vandalism just to save some time. It WOULD let me use a set of complete off-the-shelf Miata brake lines without stacked up adapters, though. Hmm. That might be preferable in the long run.
Keith Tanner said:
... It WOULD let me use a set of complete off-the-shelf Miata brake lines without stacked up adapters, though. Hmm. That might be preferable in the long run.
gotta be able to get parts for it wherever you happen to go...
Definitely, although the adapter version would be a standard AN-3 line with adapters on each end.
The lines on this thing are a little weird. There's a hard line on the body, a flex line to the upright and then another piece of hard line that goes to the caliper. You can't get away with that on a sliding caliper, but you can on a fixed one like the stock Vanagon piece - or like my Wilwood. So I can take that little piece of hard line and modify it so it goes straight into the new caliper with the correct flare. That way everything up to the spindle is off-the-shelf VW, and if I ever need to revert I can just replace the stumpy little hard line piece.
The problem with reflaring the hard line at the body is that it becomes impossible to revert back again without another fresh flare or replacing the line, but replacement flex lines would be super easy for me to get because there's a warehouse with a shelf full of them outside my office window. If I do that, the stumpy on-upright hard line gets tossed.
Plan of attack: see if I can modify the shorty hard line to go directly into the caliper. If that works, great. If not, Plan B is the reflared body hard line. They both have advantages.
Let's see if we can make this thing fit.
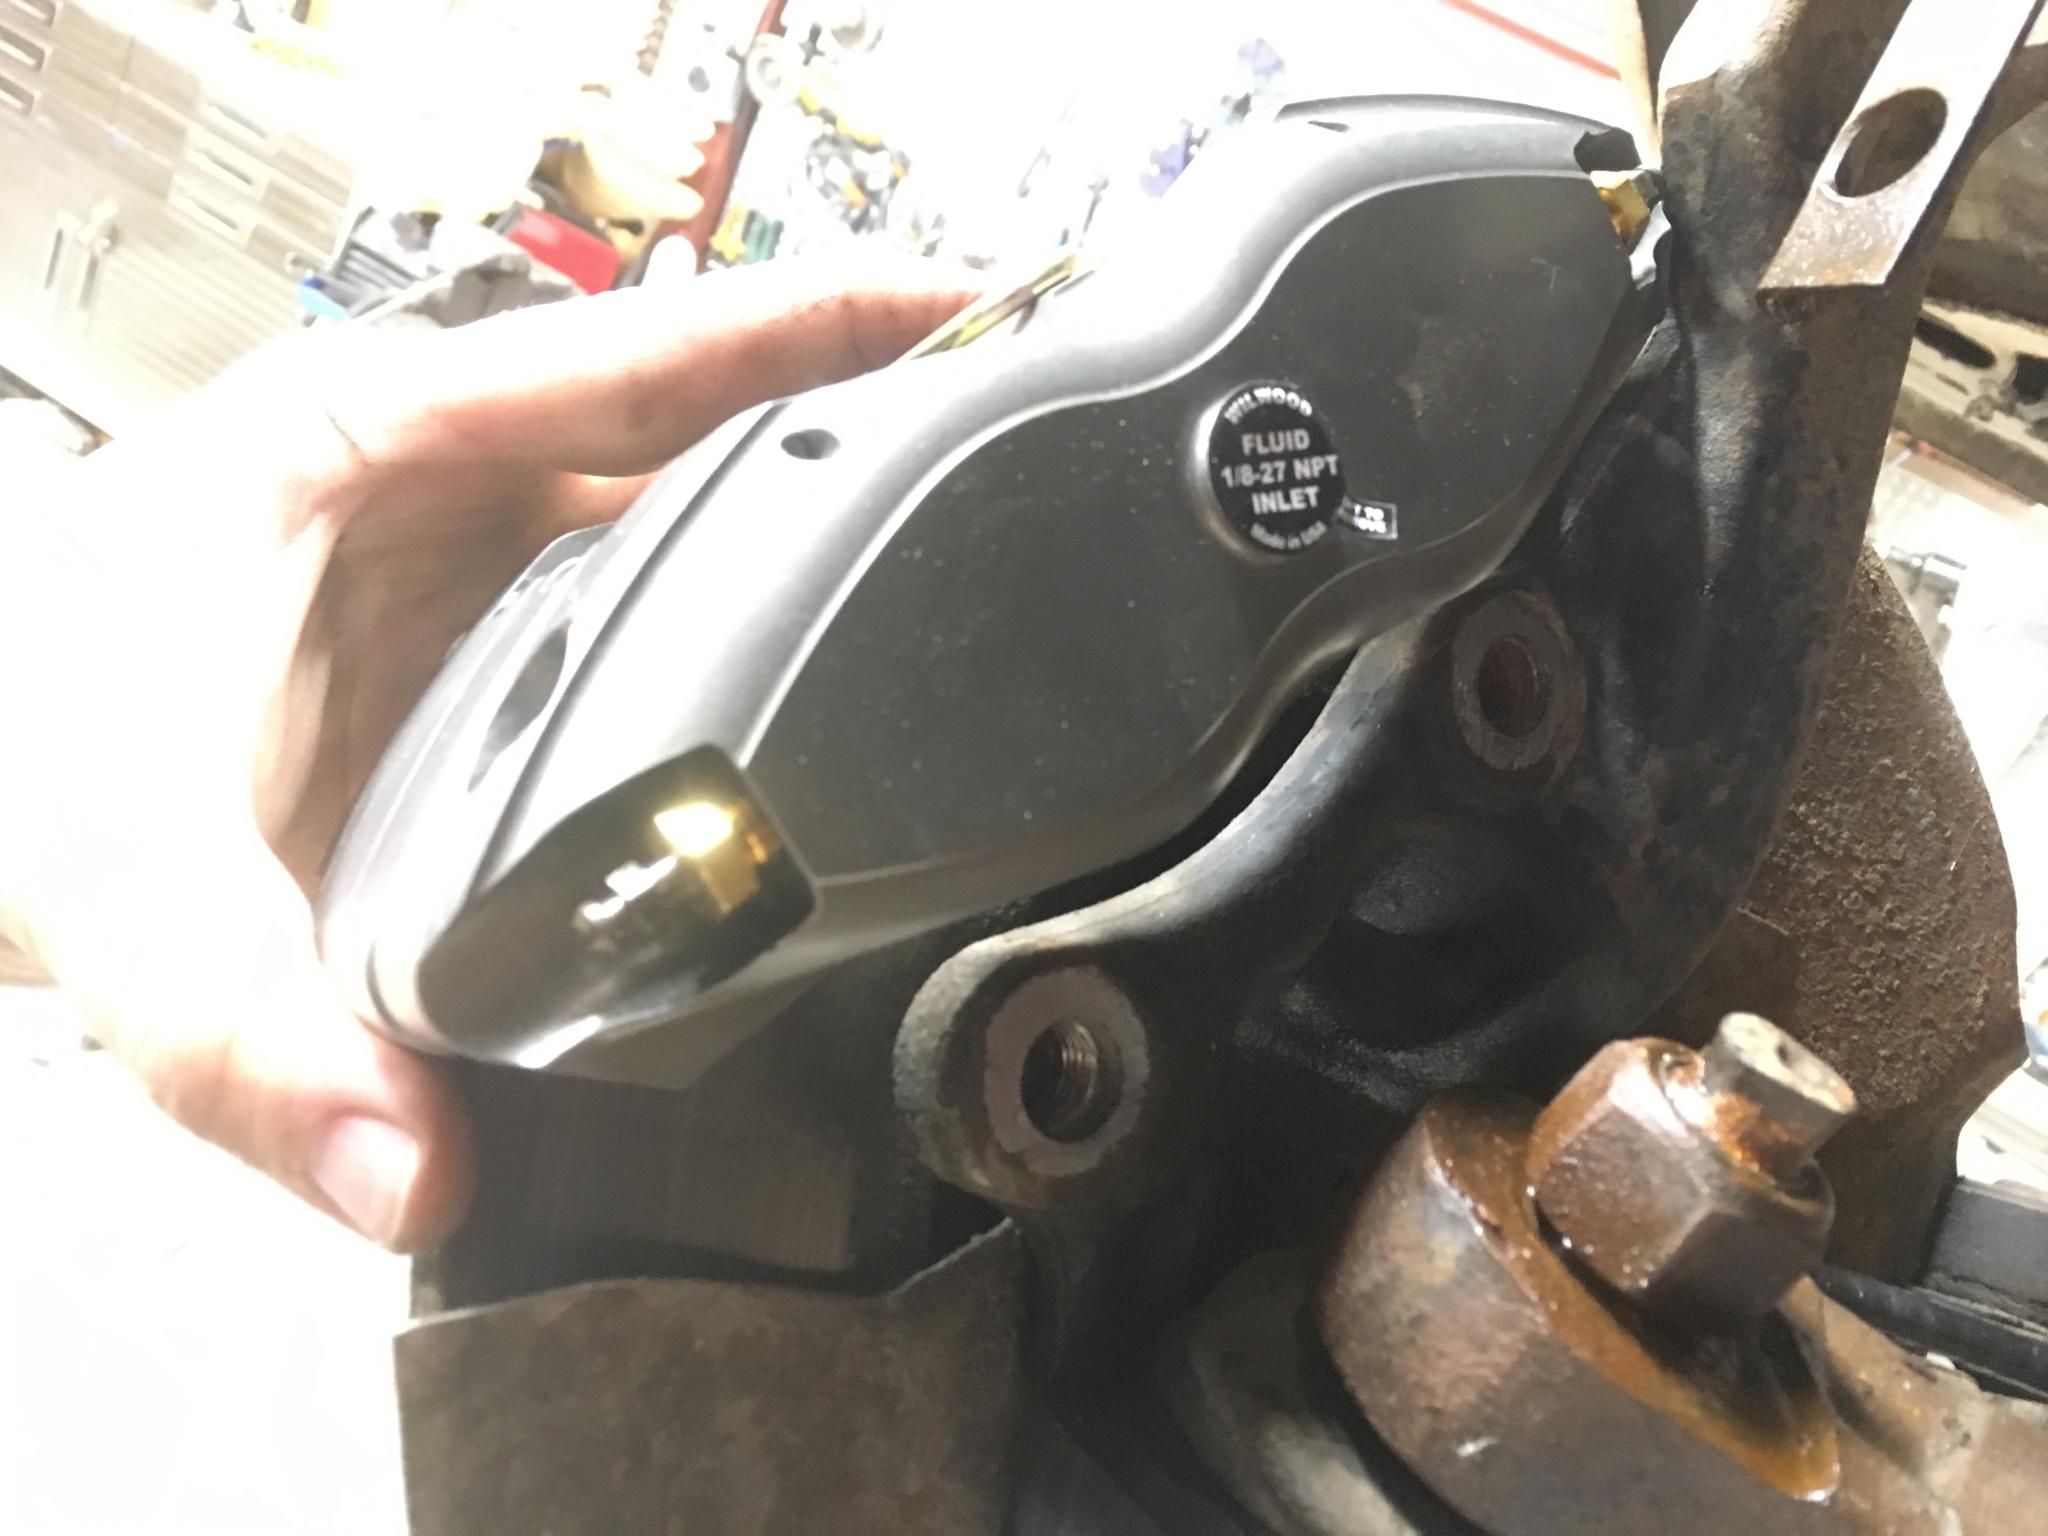
Holding the caliper up on the rotor, everything looked like it was going to fit reasonably well. No gross interference with anything other than a corner of the dust shield. Snip, an inch of metal gone and that's solved. This is looking pretty straightforward.
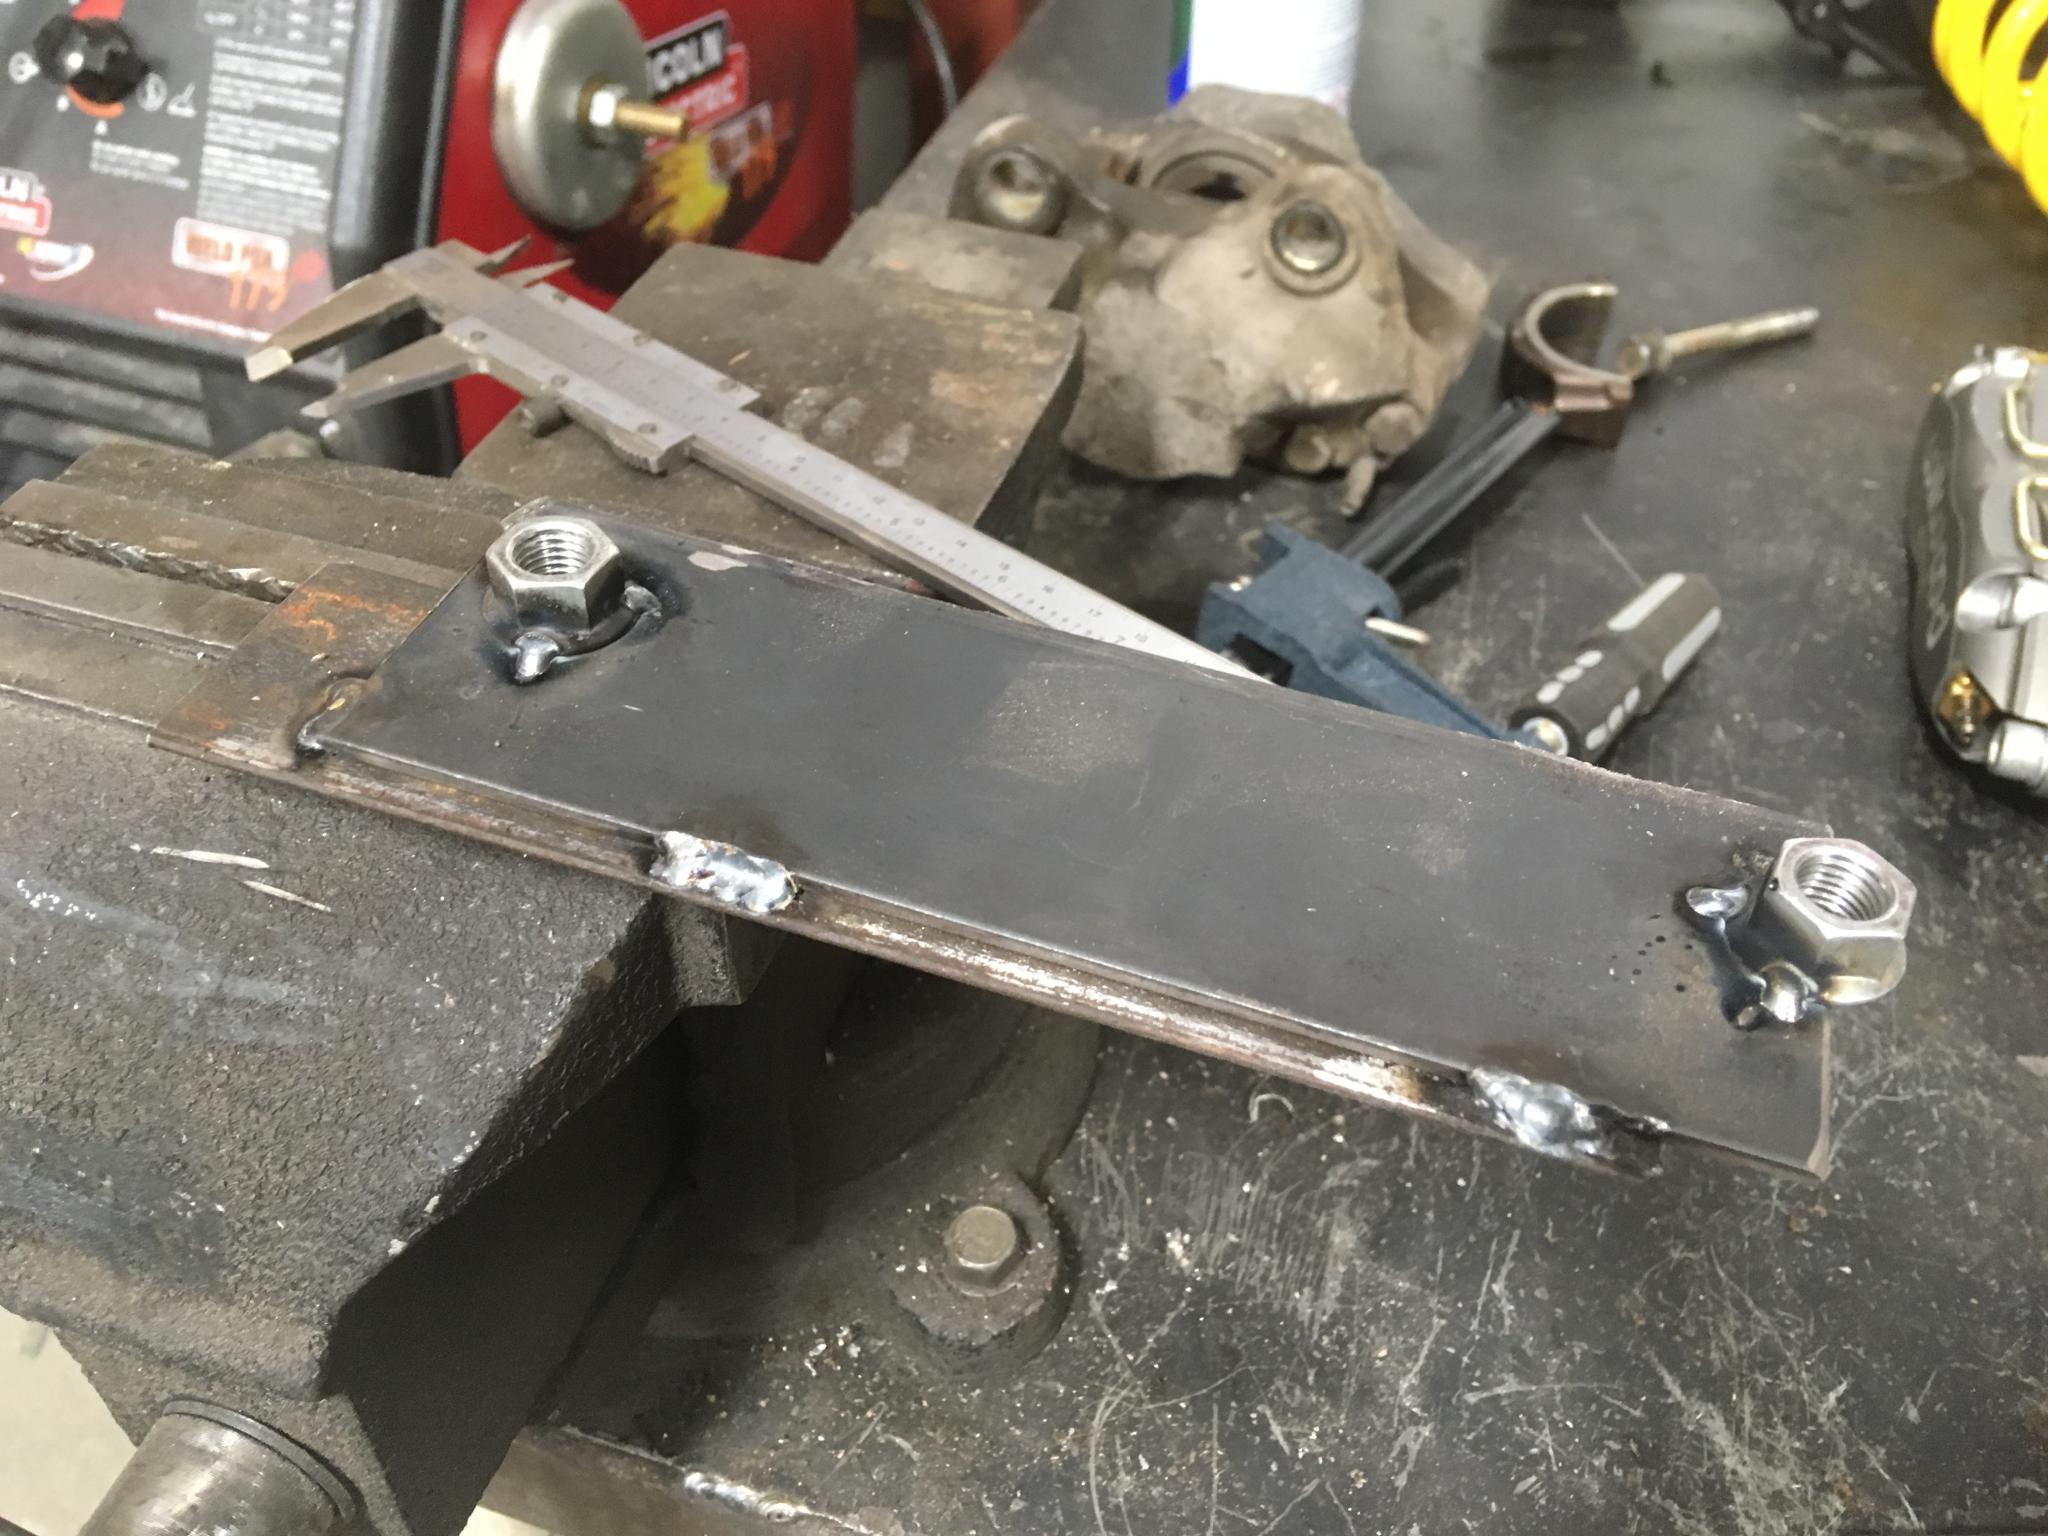
I started by giving myself a plane of reference. I drilled a hole in a piece of angle iron and bolted it in place of the caliper.
It wasn't quite long enough for the perfect fit, so I temporarily attached an extension.

Then it was a matter of getting a feel for the right location. We're looking pretty good. The bar clamp is to keep the rotor from turning just to make life easier.
Easier to do if the caliper is clamped on, so a little bit of compressed air snugged everything up.
I used too-long bolts with thin nuts as standoffs so I could fine-tune the fit. When I had it right, this let me measure the distance needed on the bench.
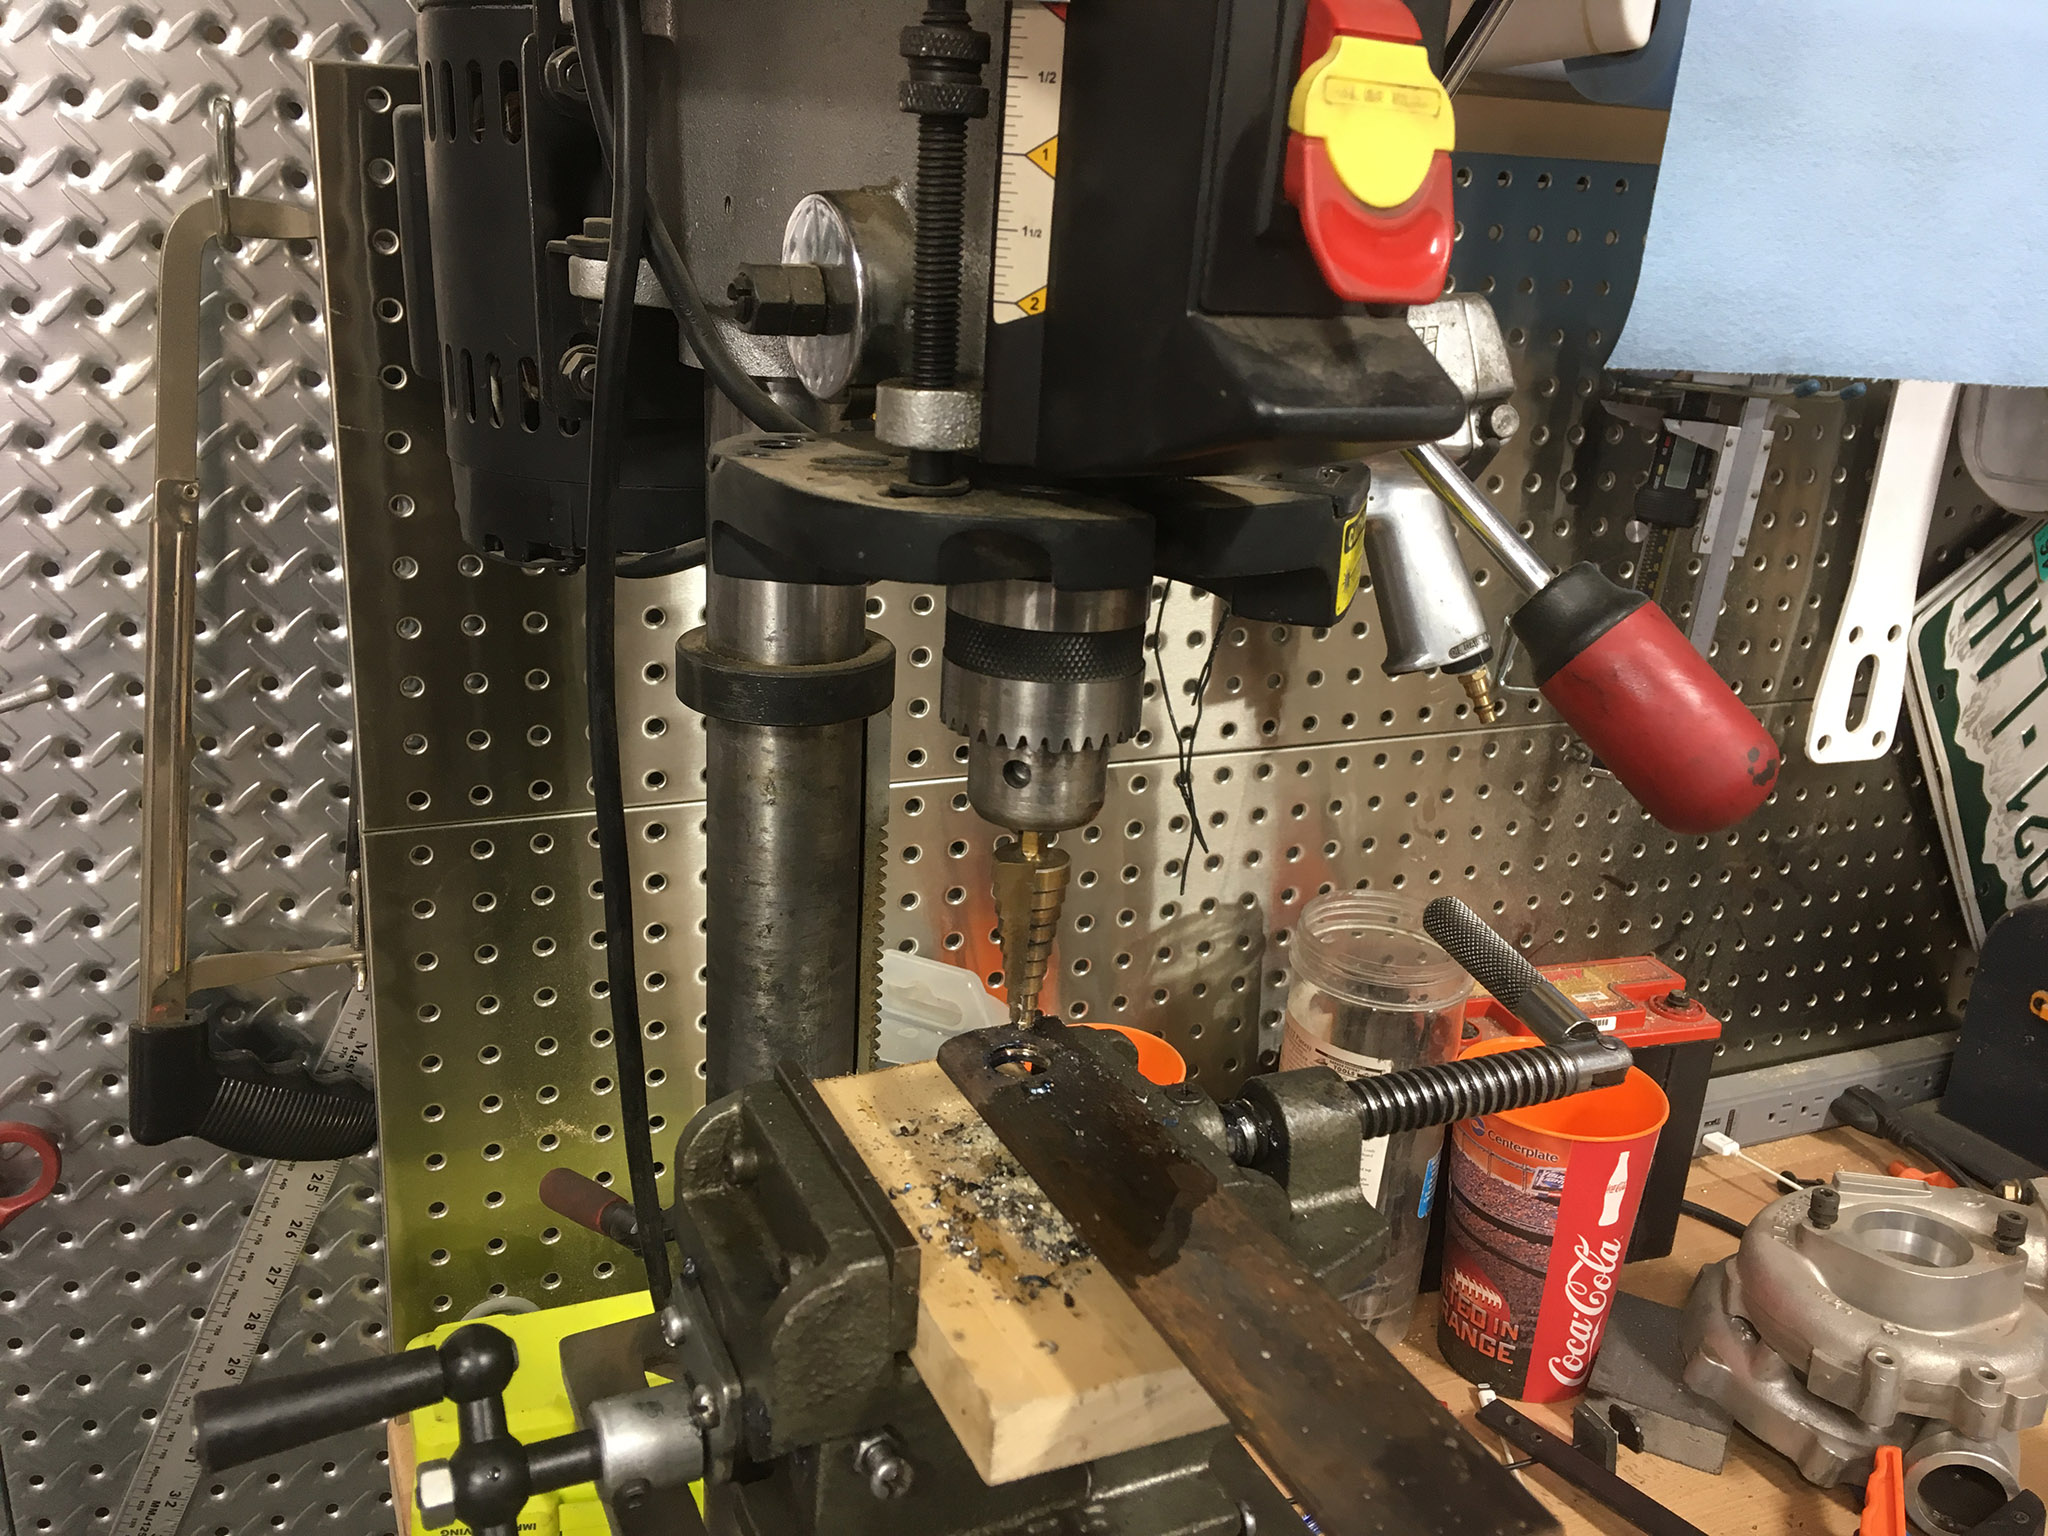
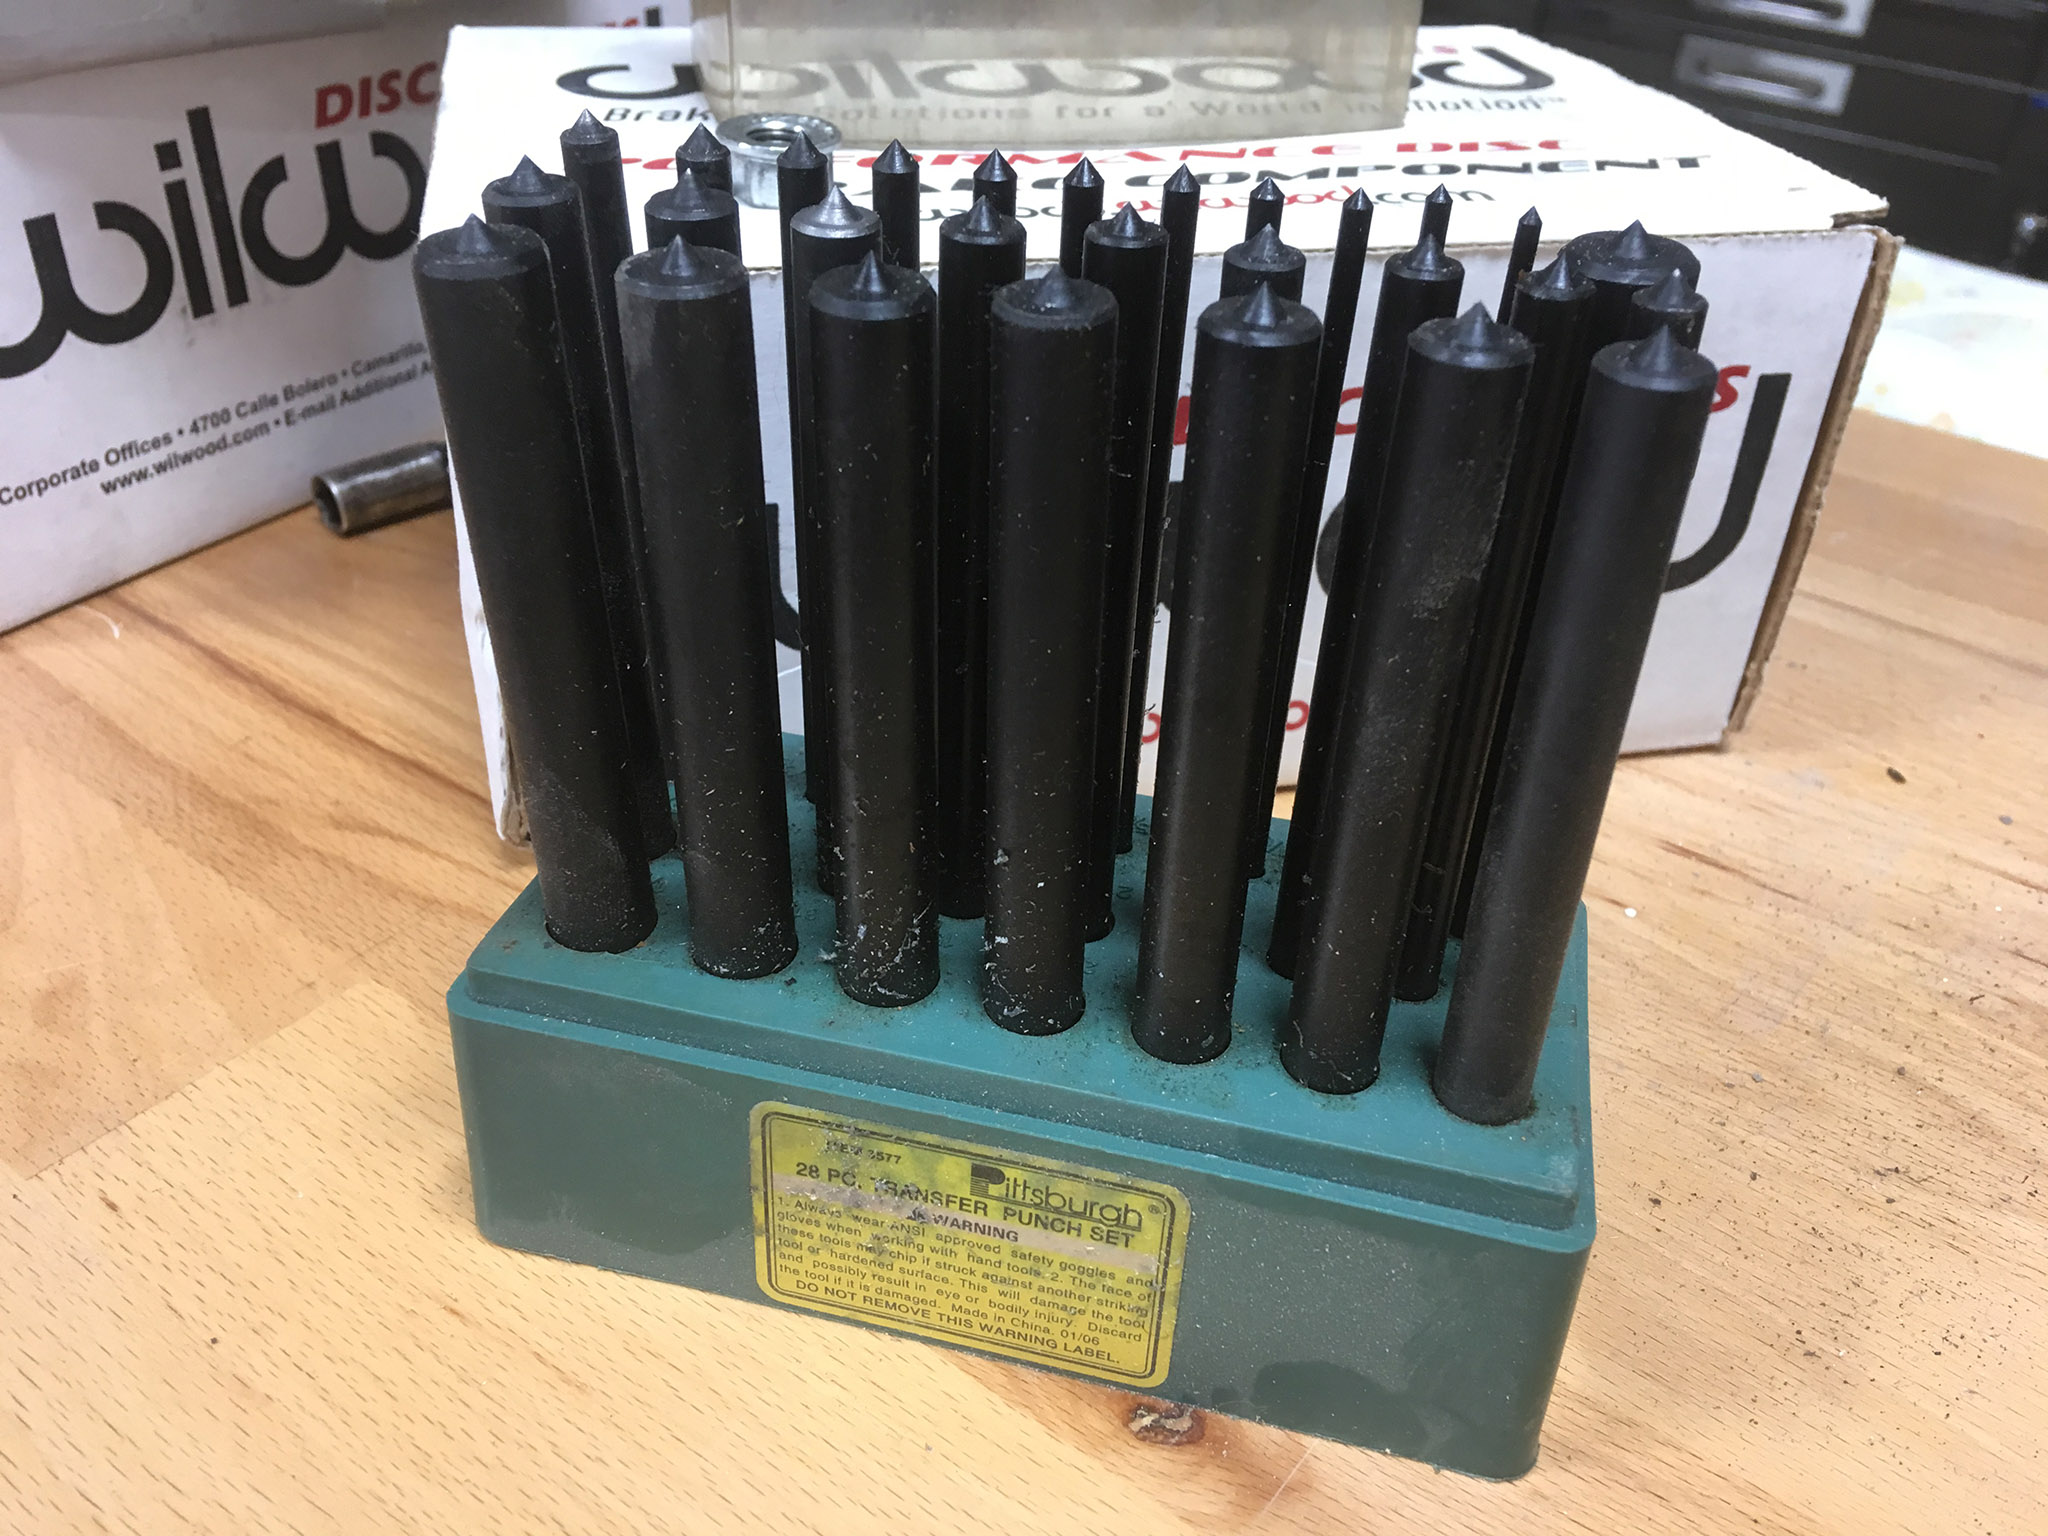
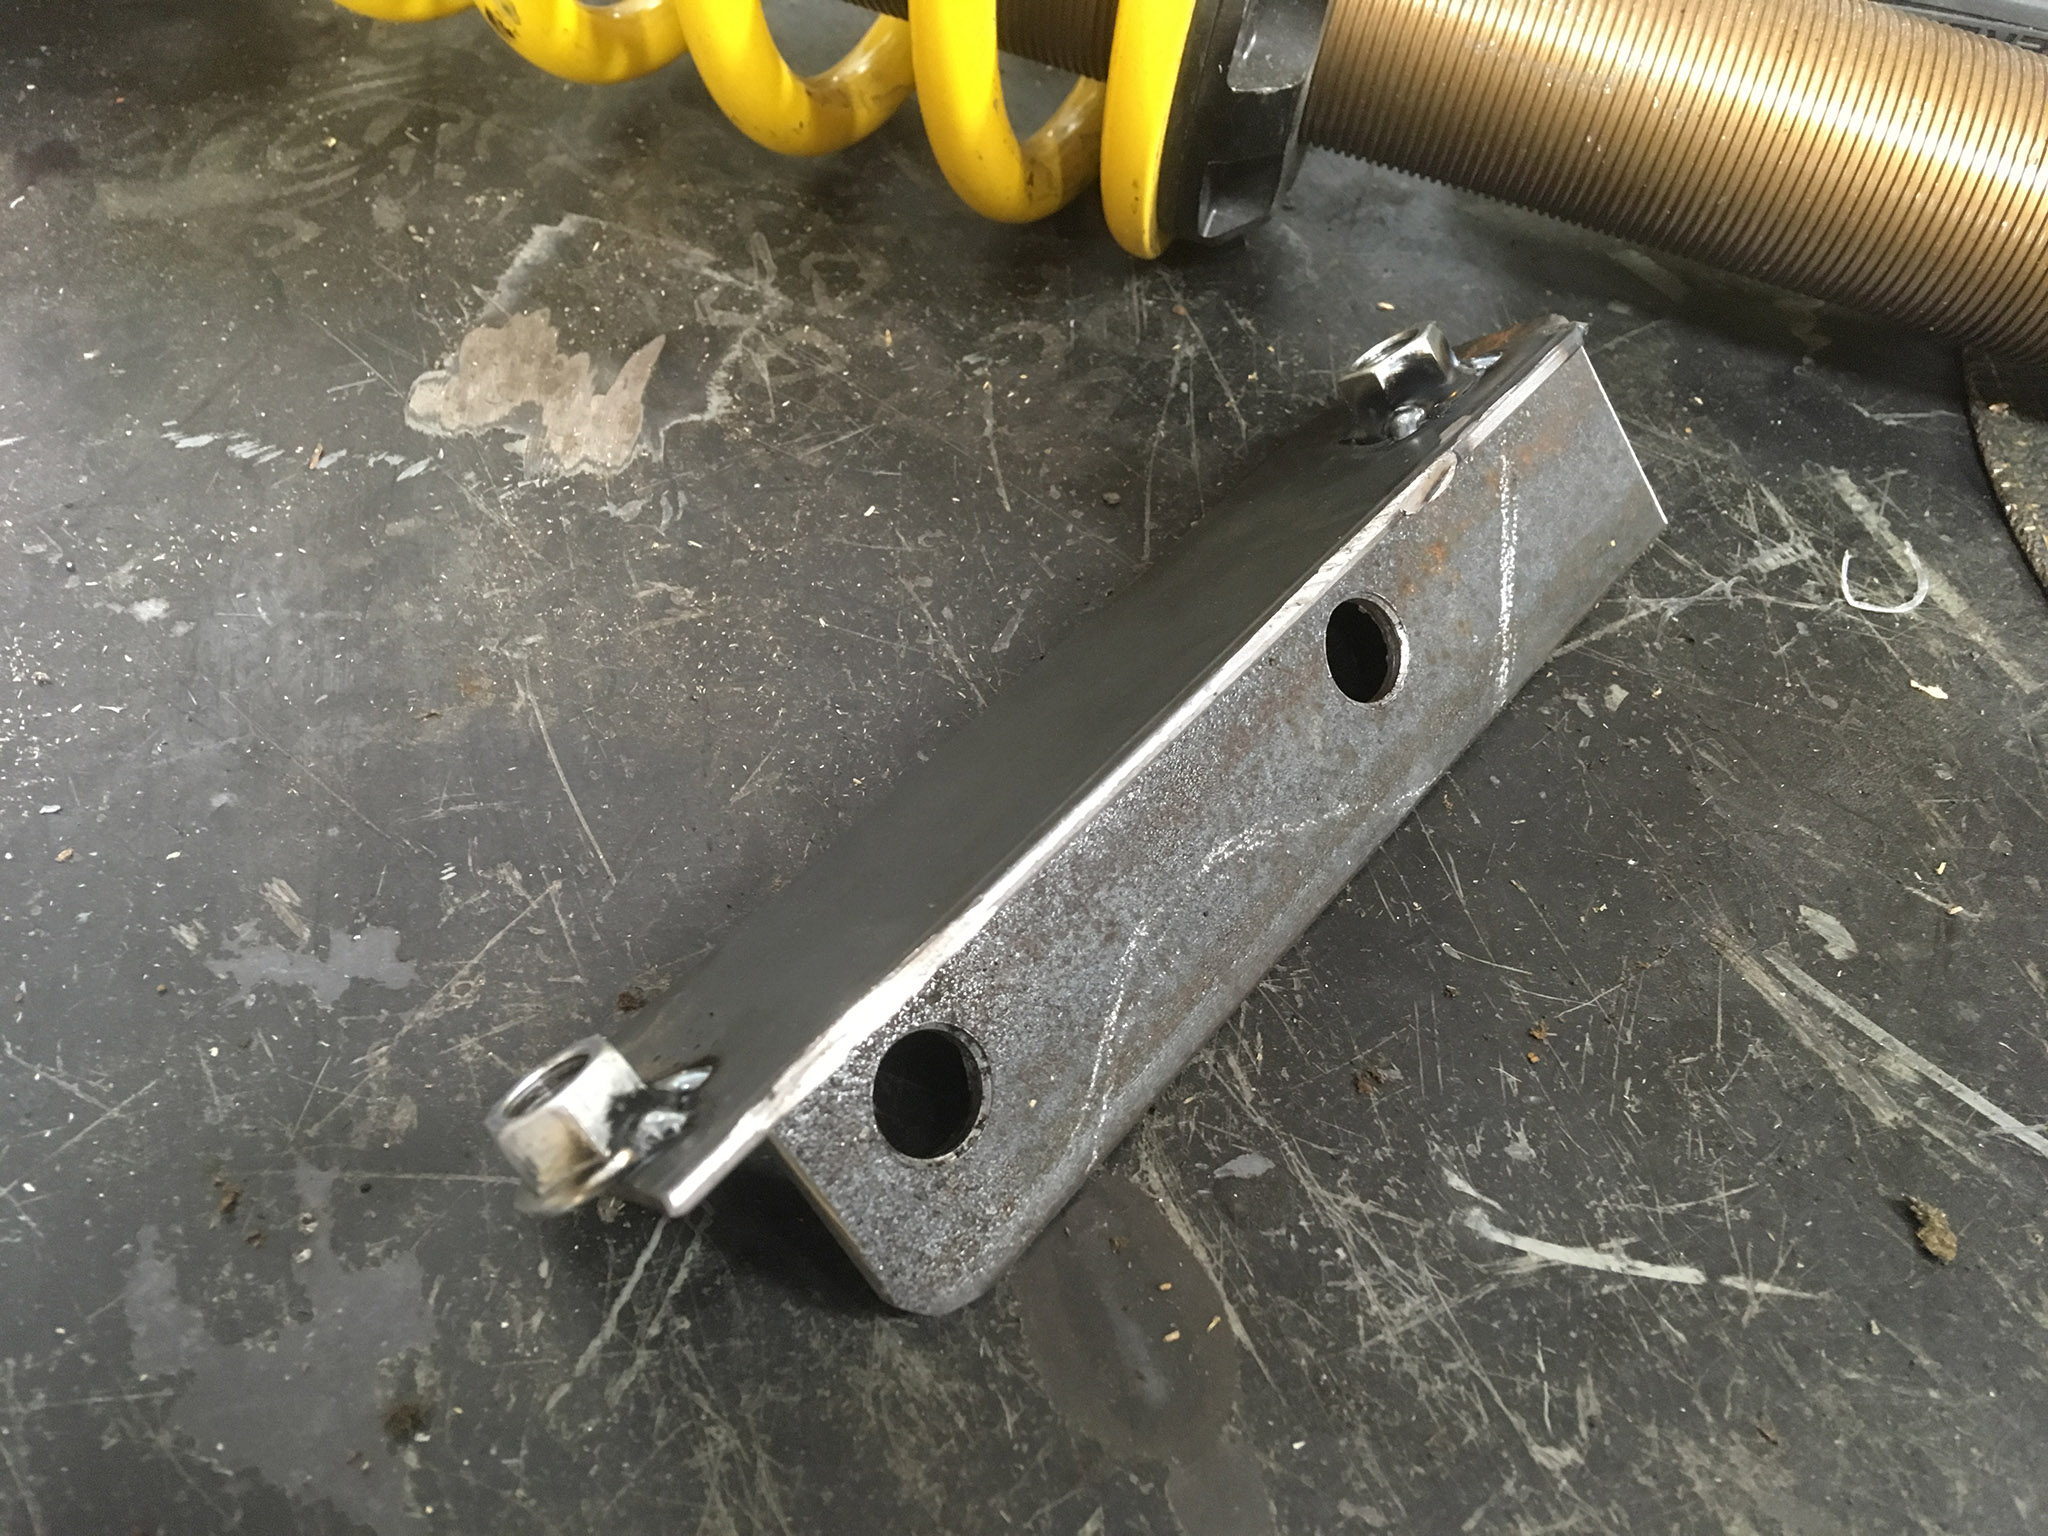
Time to build an actual bracket. I have the standoff measurements from my reference angle iron. I took that reference and tack-welded on a piece of flat steel. Then it was time for transfer punches. I went way too long without knowing these existed or having a set, but they let you get a perfectly placed center punch for any size hole. They're not expensive at HF. If you don't have a set, get a set.
I took my marks and welded on a couple of nuts. I knew these were a little short, but I wanted the ability to adust positioning with spacers. I expected to use one washer on each side.
Yup.
Fitment looks good.
So there we have it, a prototype bracket that I can use for measurements. I got lucky in that everything worked out to be nice right angles, so it'll be pretty easy to make on a mill. I think I'll build a couple out of steel for now, then borrow my coworker's mill and see what we can do.
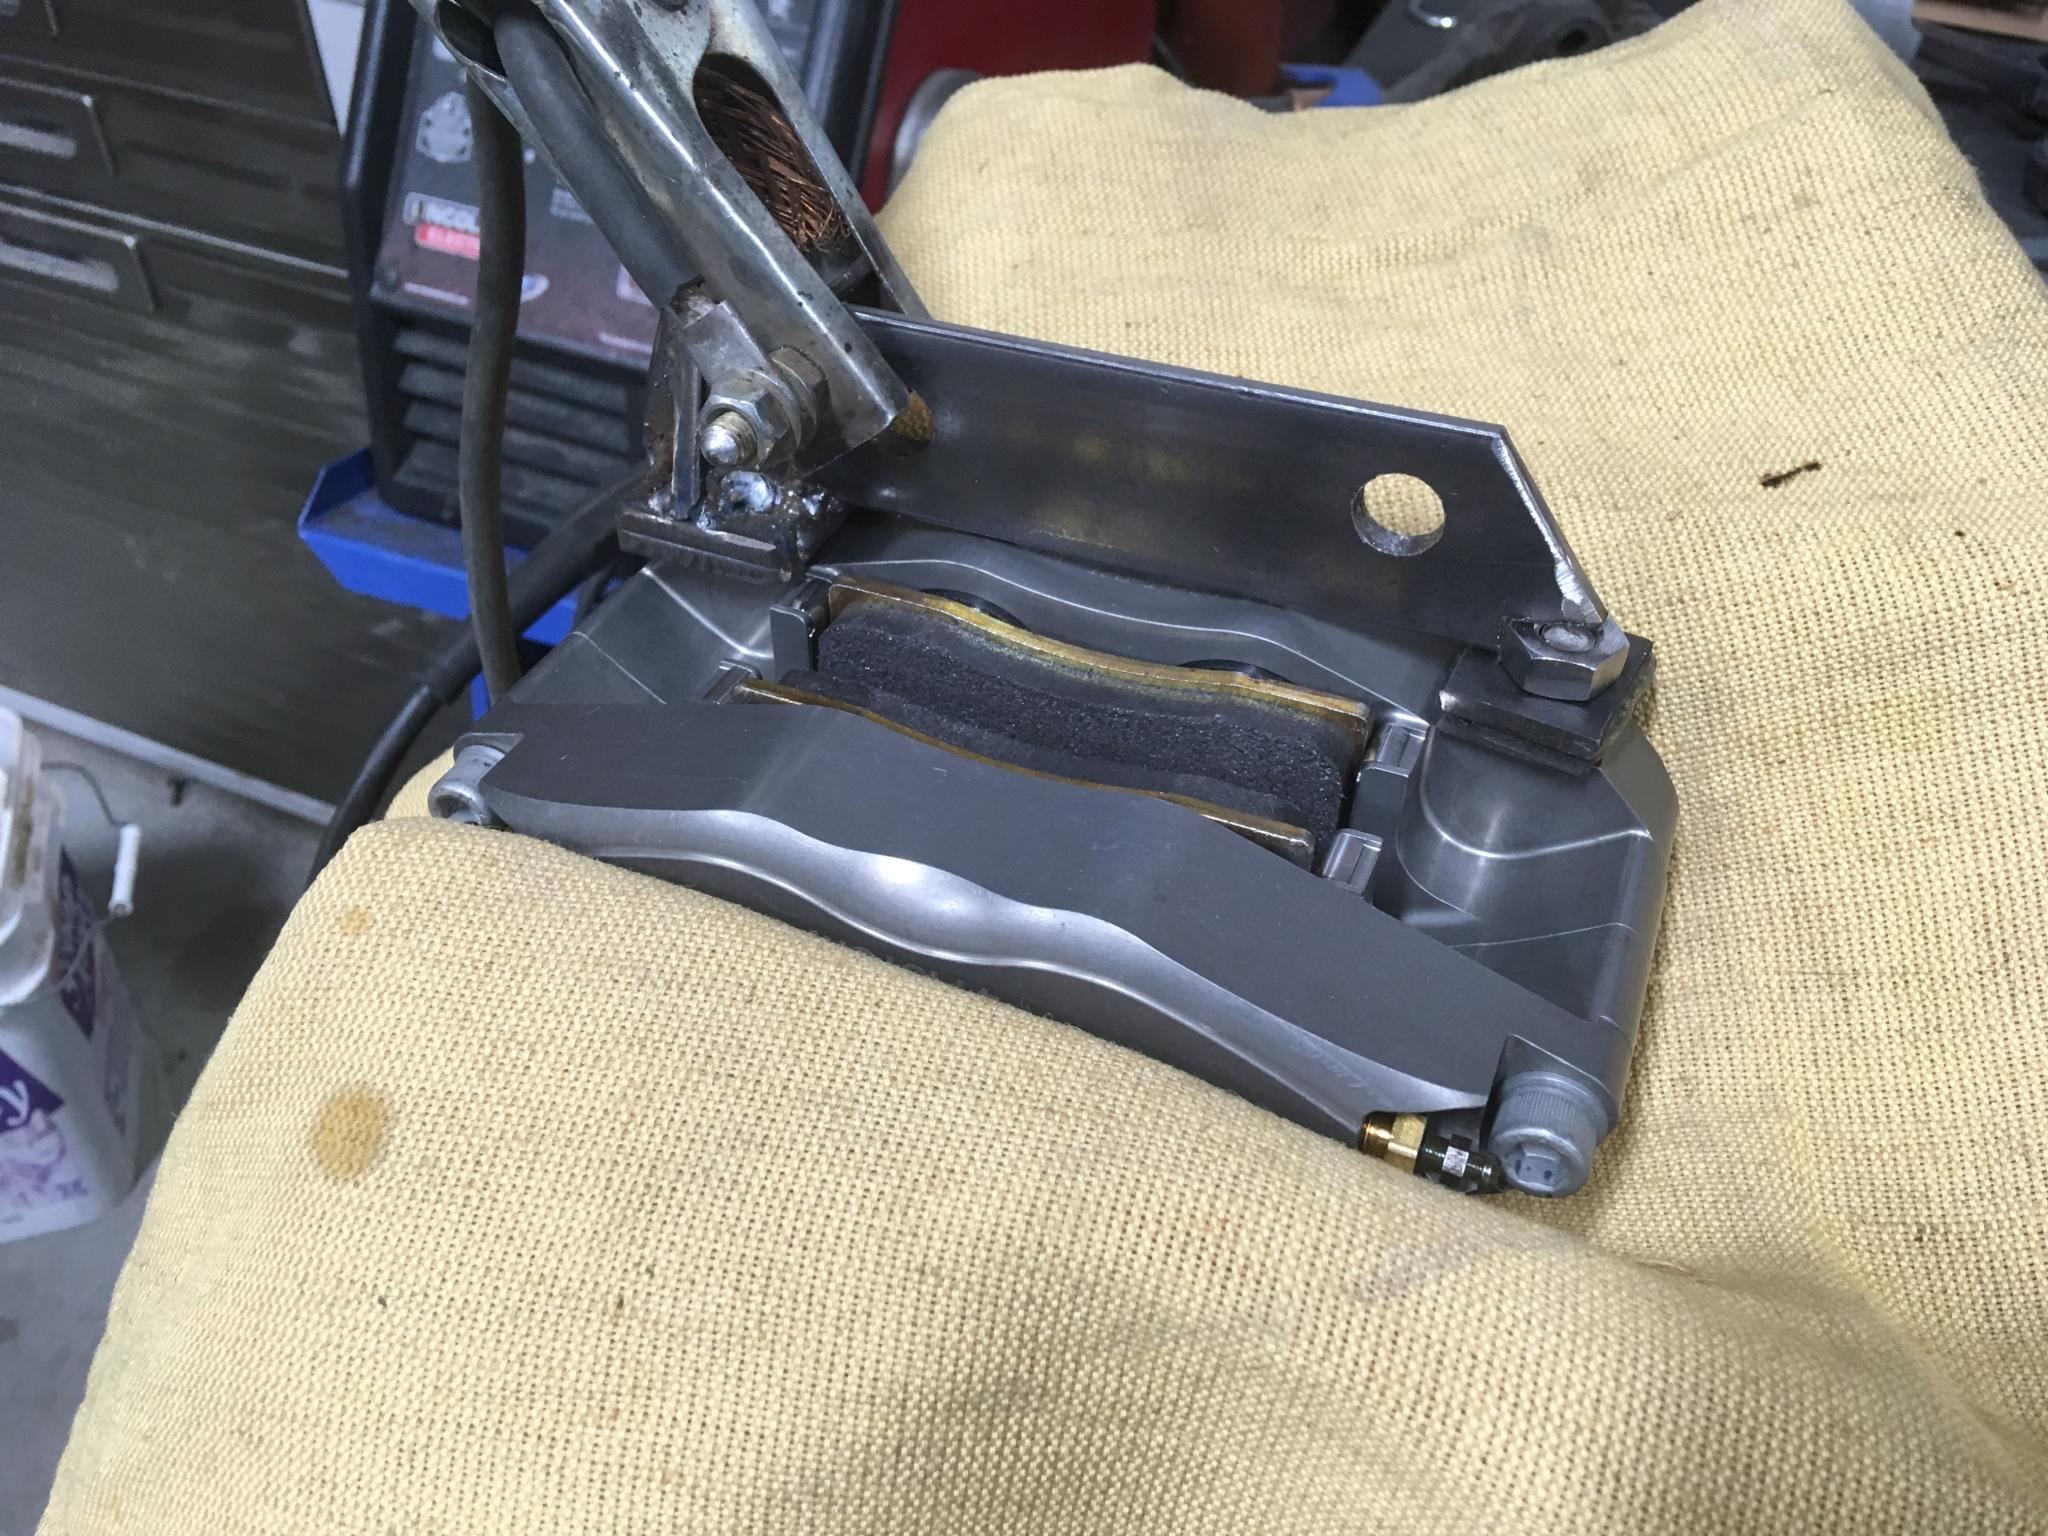
Now, brake lines. That little piece of hard line actually makes it a real pain to remove the stock caliper as it's attached to a bracket that's part of the upper ball joint. So you can't remove the caliper from the wheel without cracking into the brake system - and that includes a rotor change. Not friendly.
I counted up the joints and potential failure points, and decided that I'd rather go to plan B: a bubble flare to AN adapter, an AN line and then an AN to NPT adapter on the caliper. All off-the-shelf stuff and any hydraulic store should be able to put together an AN line should I have a failure of some sort.
Also, there's going to be fairly tight clearance for the brake line coming off the back of the caliper. Hard to see here on the stock caliper, but the spring could potentially be a problem. The stock caliper has the line come off the side instead of the backside.
 I'll have to have an immediate 90 degree turn in the line and that's difficult on a hard line. So I'll use a 90 degree NPT to AN adapter. One more check of line lengths to see if I have the right length on hand and I'll make an order from Summit.
Keith Tanner said:
One of my stock calipers just seized, so obviously the best thing to do is to redesign the whole brake system.
This is the most GRM thing I've read today, so the answer is obviously YES!
Love the pop top bus. I was surprised to not see a 'steal your face' sticker...
Keith Tanner said:
Sigh. I could reflare the hard lines on the van to a double but that seems like unnecessary vandalism just to save some time.
Intentional or not, "vandalism" has me in stitches, and accurately represents any work I've done on my Westy.
Project looks like its going well so far.
Spent some time making metal hot. The plane of the two sets of bolts interest in a way that makes it difficult to make this bracket out of steel. It would actually be really easy with a mill, but I’m at home and figured I’d try steel. So I’m using a section of 2x3x1/4 box cut into chunks for a nice solid base, and spacing it out from the upright a bit. This actually lets me reuse the stock bolts.
For spacers, I’m using some 5/8” nuts that have been opened up a little. I’ll be adding some spacers on top too. They’re pretty overbuilt but that beats the alternative. The beefier brackets are making some of the tolerances disappear, I’m really close to the upright on that upper bolt.
Pics so far. I may have a brainstorm tonight and start over :)

That bracket on the front brake attached to the ball joint is weird. I don't have those on my van or they were gone before I got it. I'm liking the caliper for the front as a alternative to the other ones I've seen.
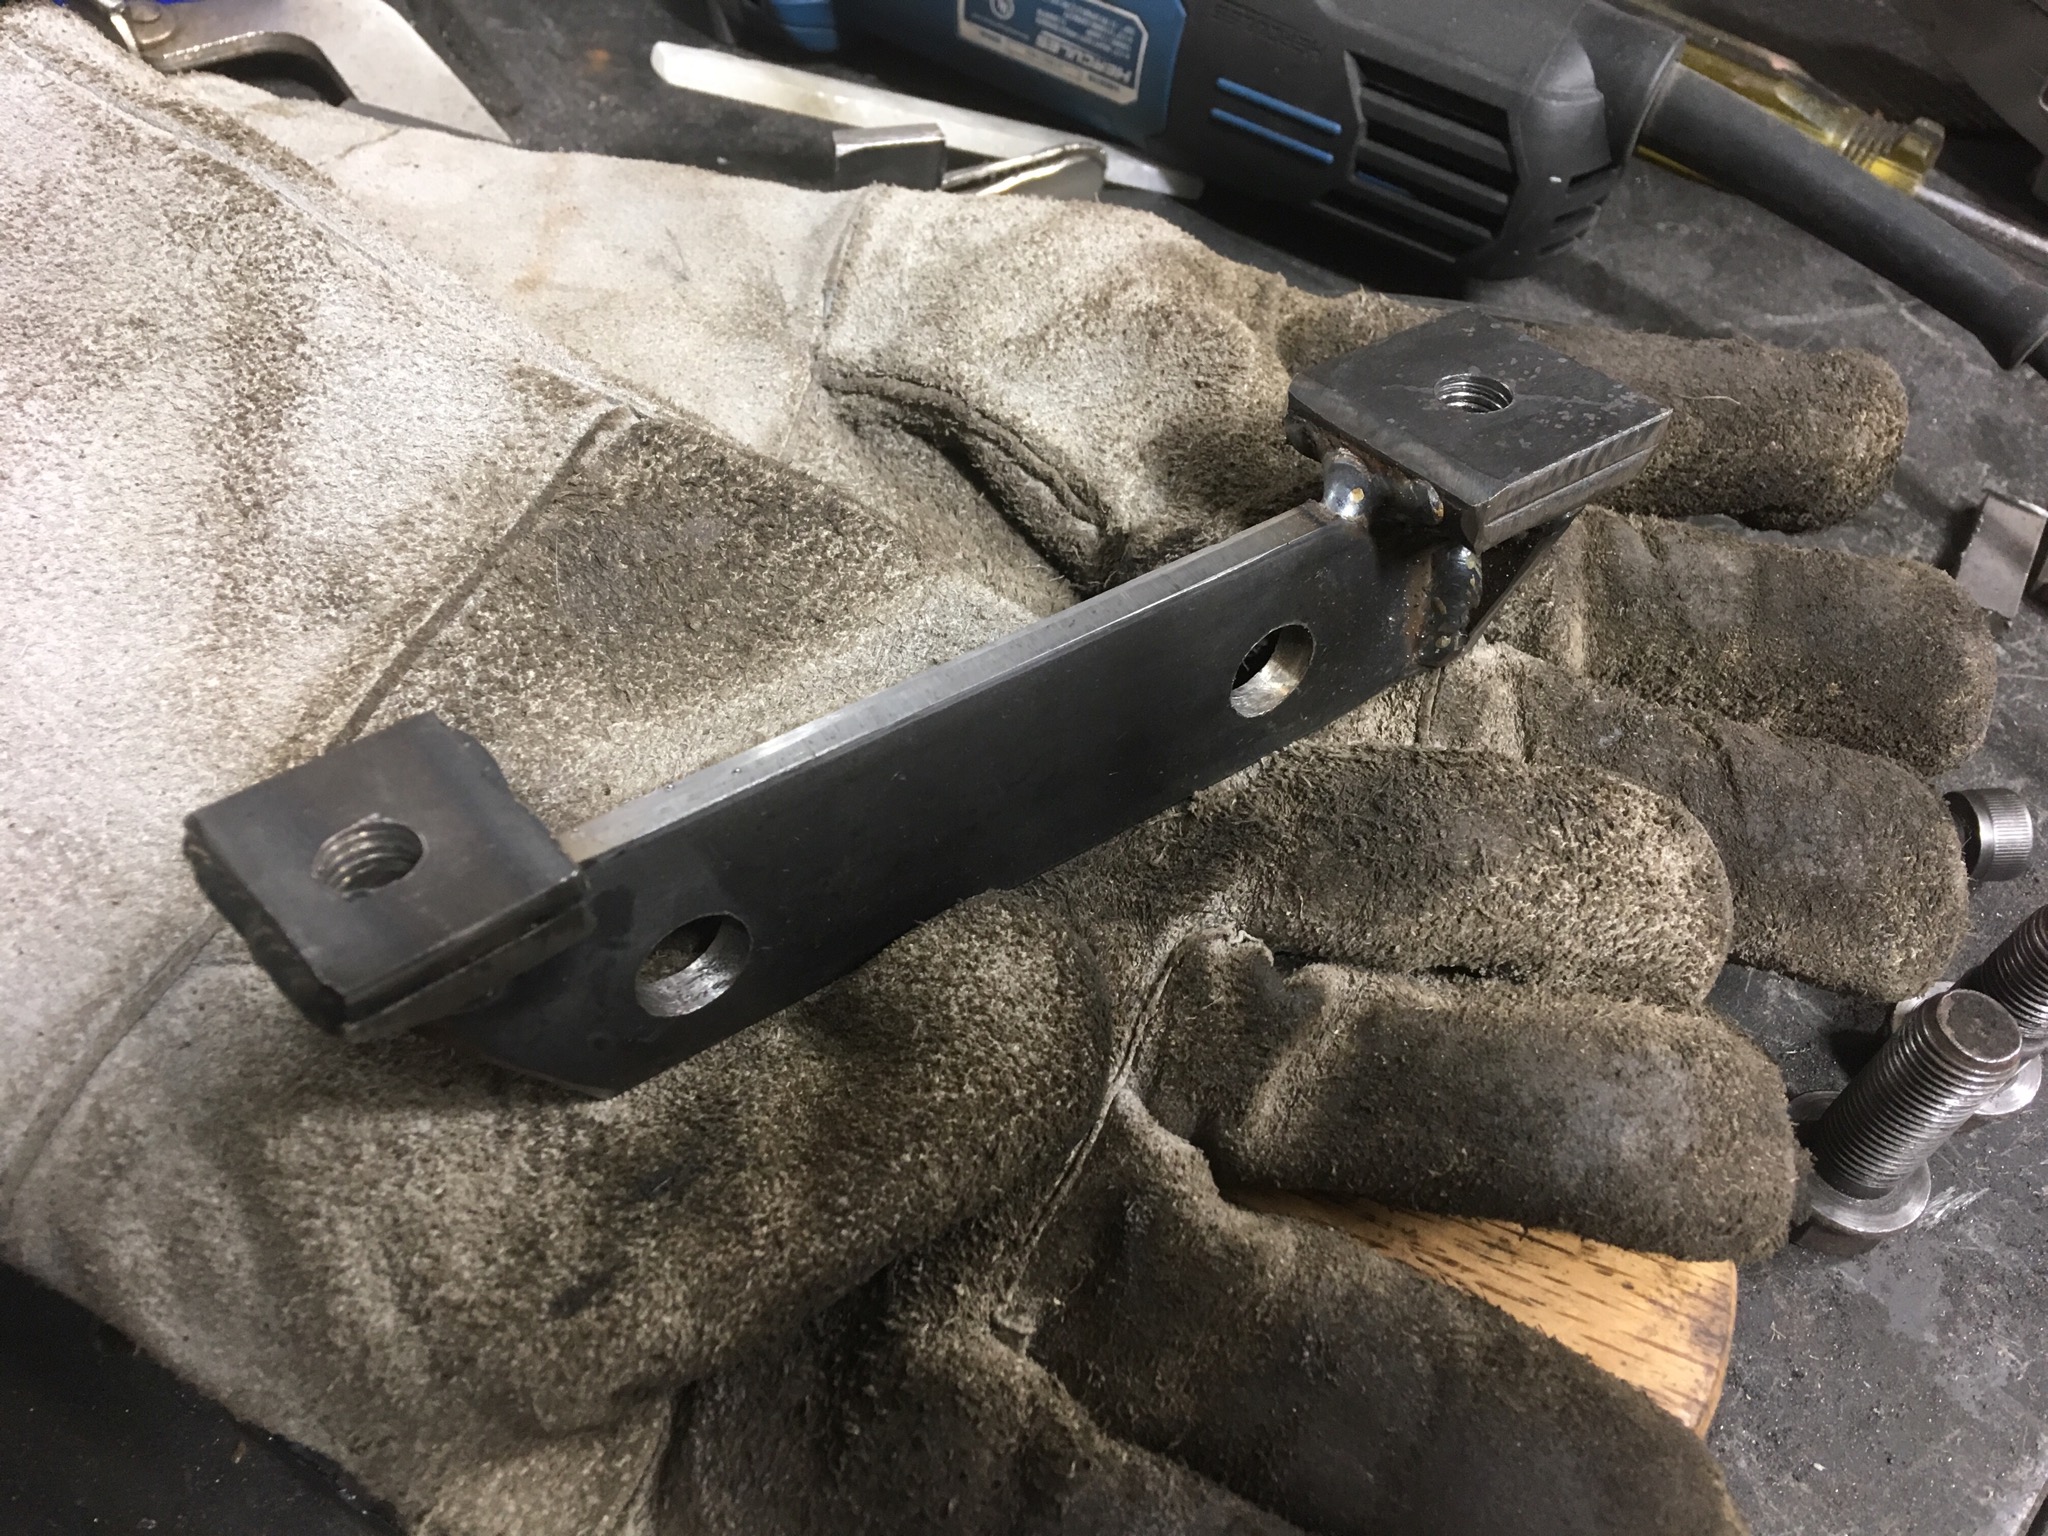
Okay, this bracket would have been easier to build out of aluminum with a mill. But I don't have a mill, so I shall continue to build it up instead of shave it off. I've started over a couple of times just to see my ideas in metal, and the final result is going to look a lot more like the initial "sketch" than my previous version. Right now, it's ugly but I think I've just figured out the final form.
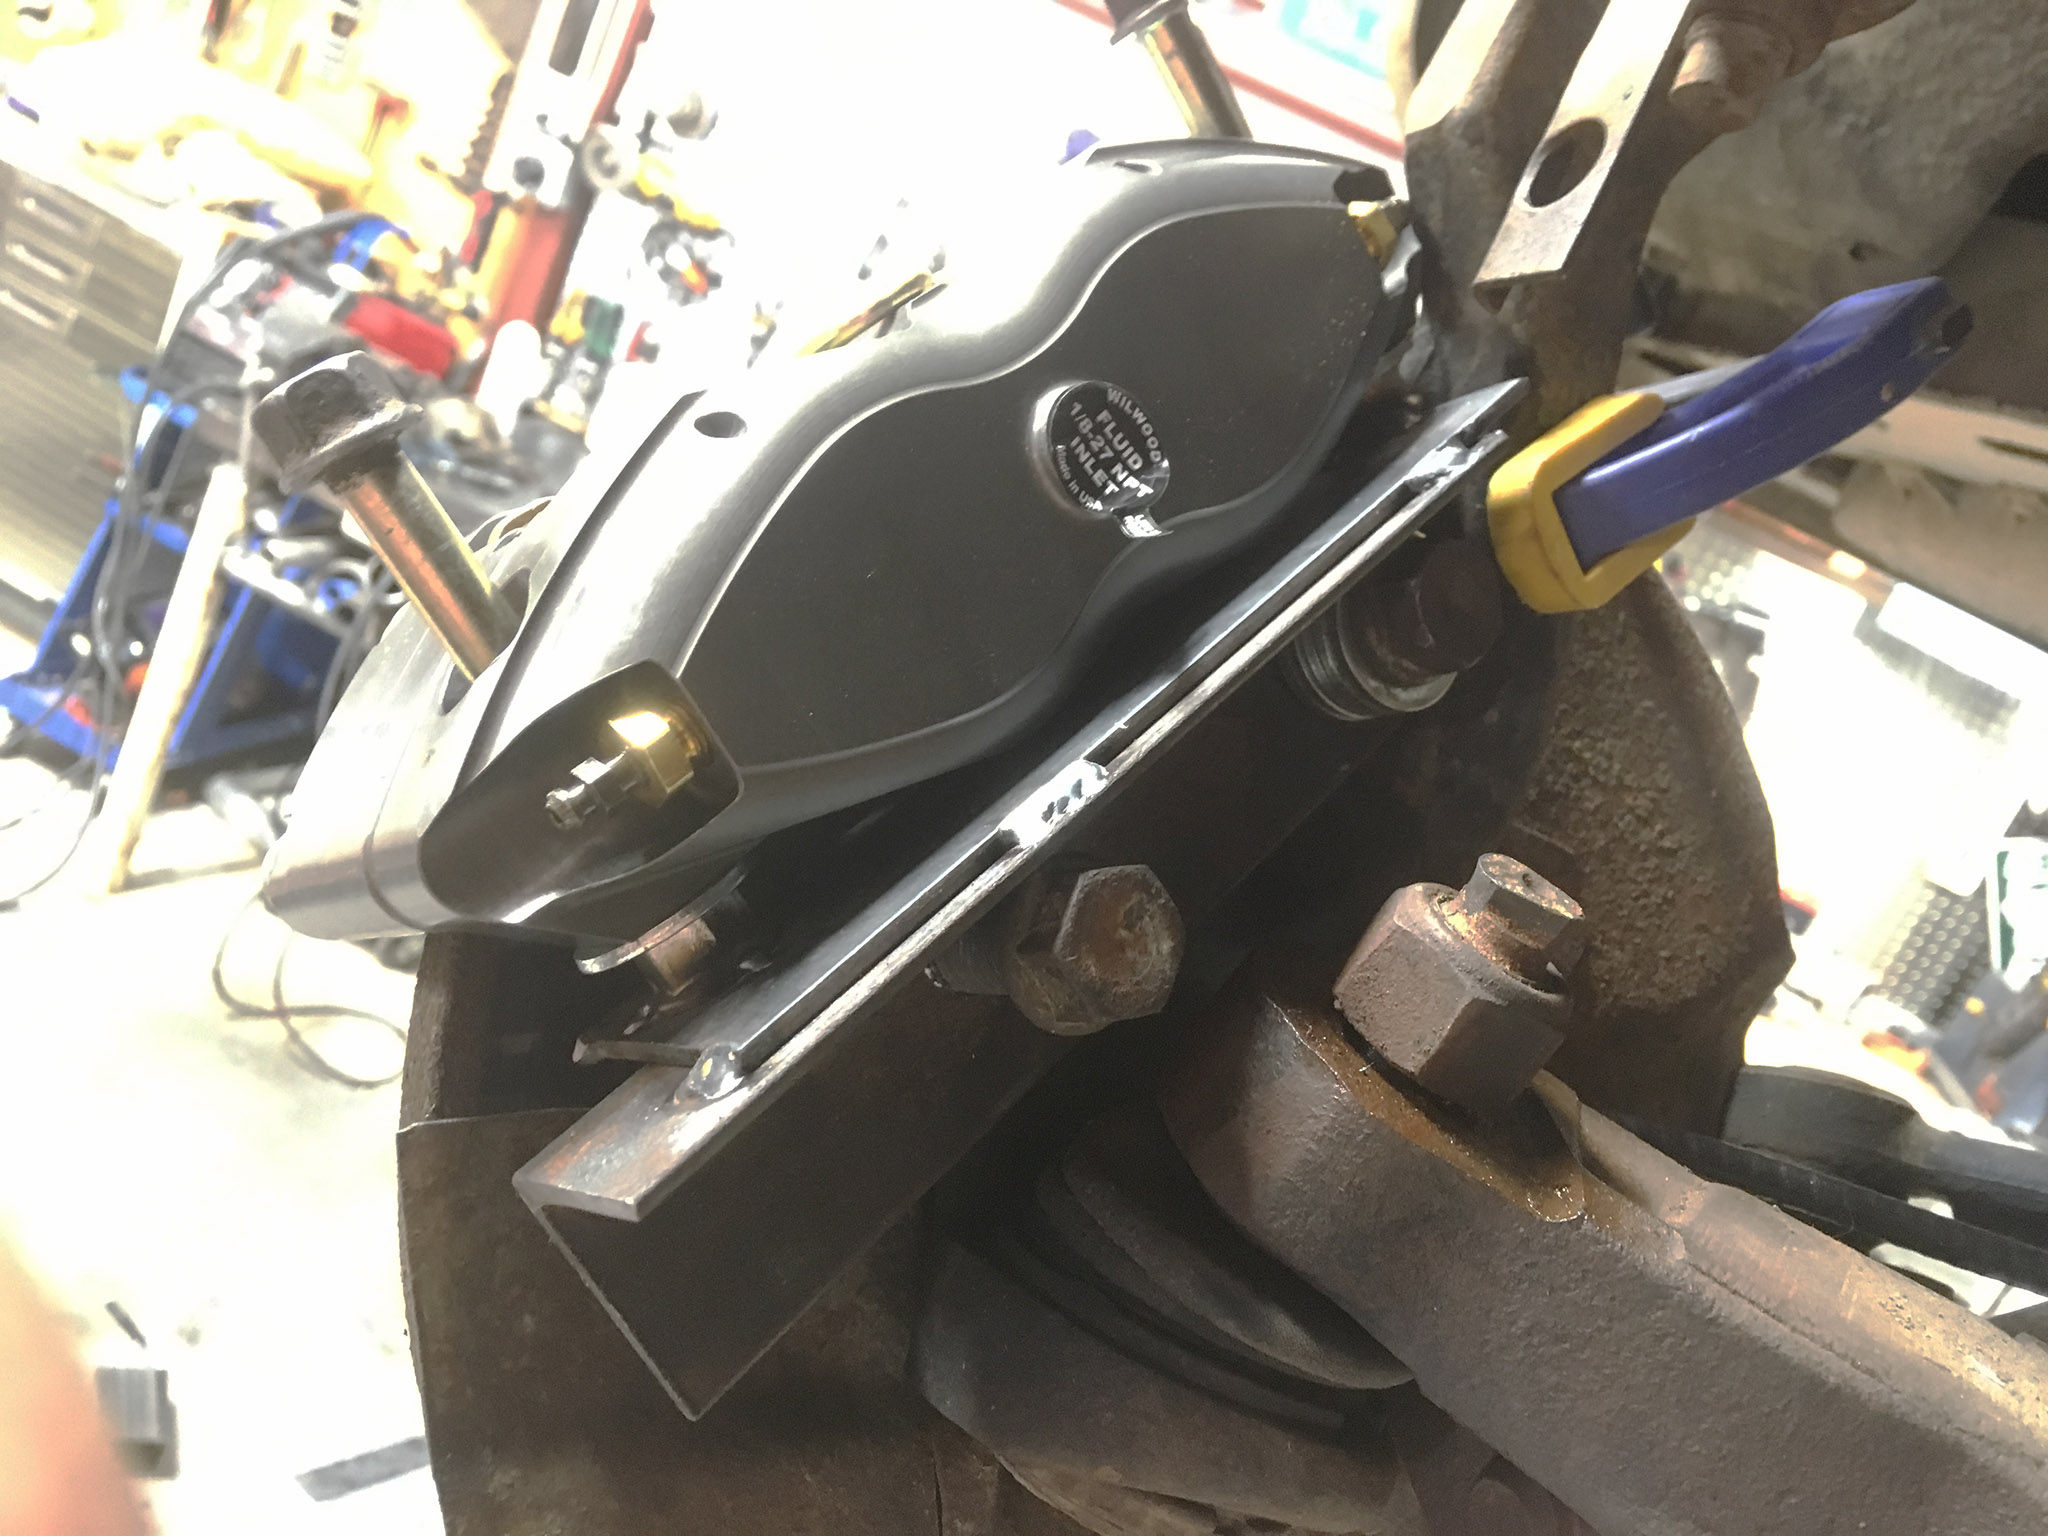
Using the caliper as a jig to make sure the threaded inserts are in just the right place. Those 1/2" pads are also threaded, so there's a fair bit of thread engagement. .
Current status. If it makes you go "well, duh, that's obvious" then that means the winnowing process worked :) The bit nearest the camera isn't fully welded in and reinforced, I've just found that I need to make it a bit slimmer for more clearance to the upright. Honestly, lug mount calipers would have been far, far easier to deal with but the extra dust protection wasn't available. At least radial mounts allow for a little more fine-tuning room, but you have to make sure you're at a perfect right angle!
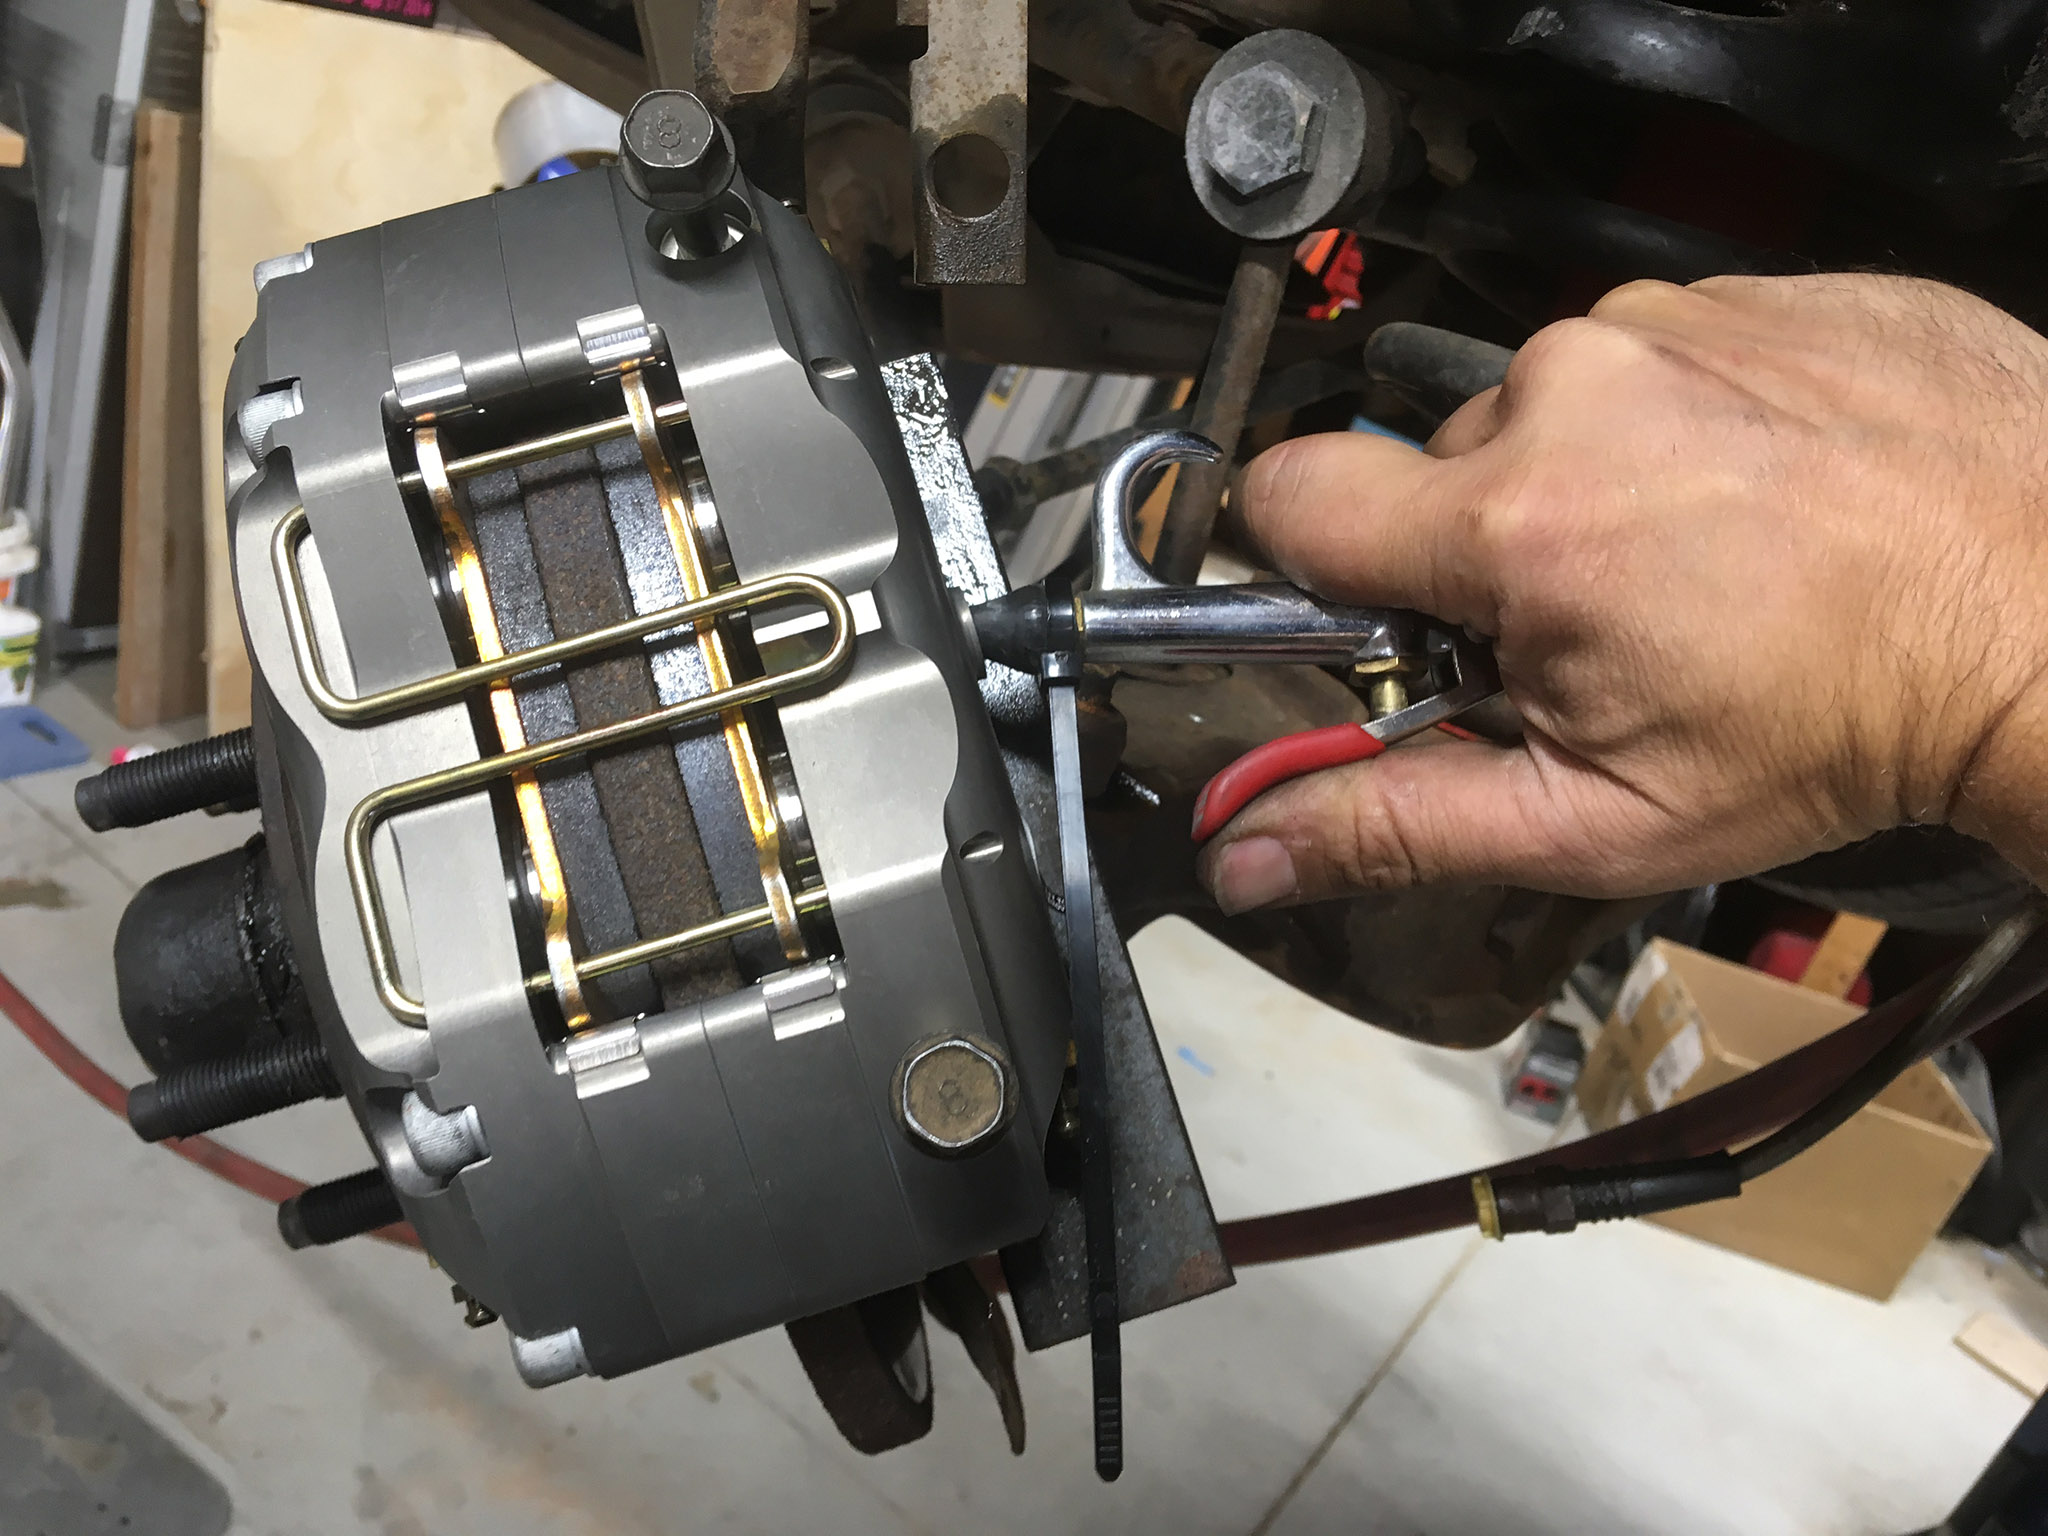
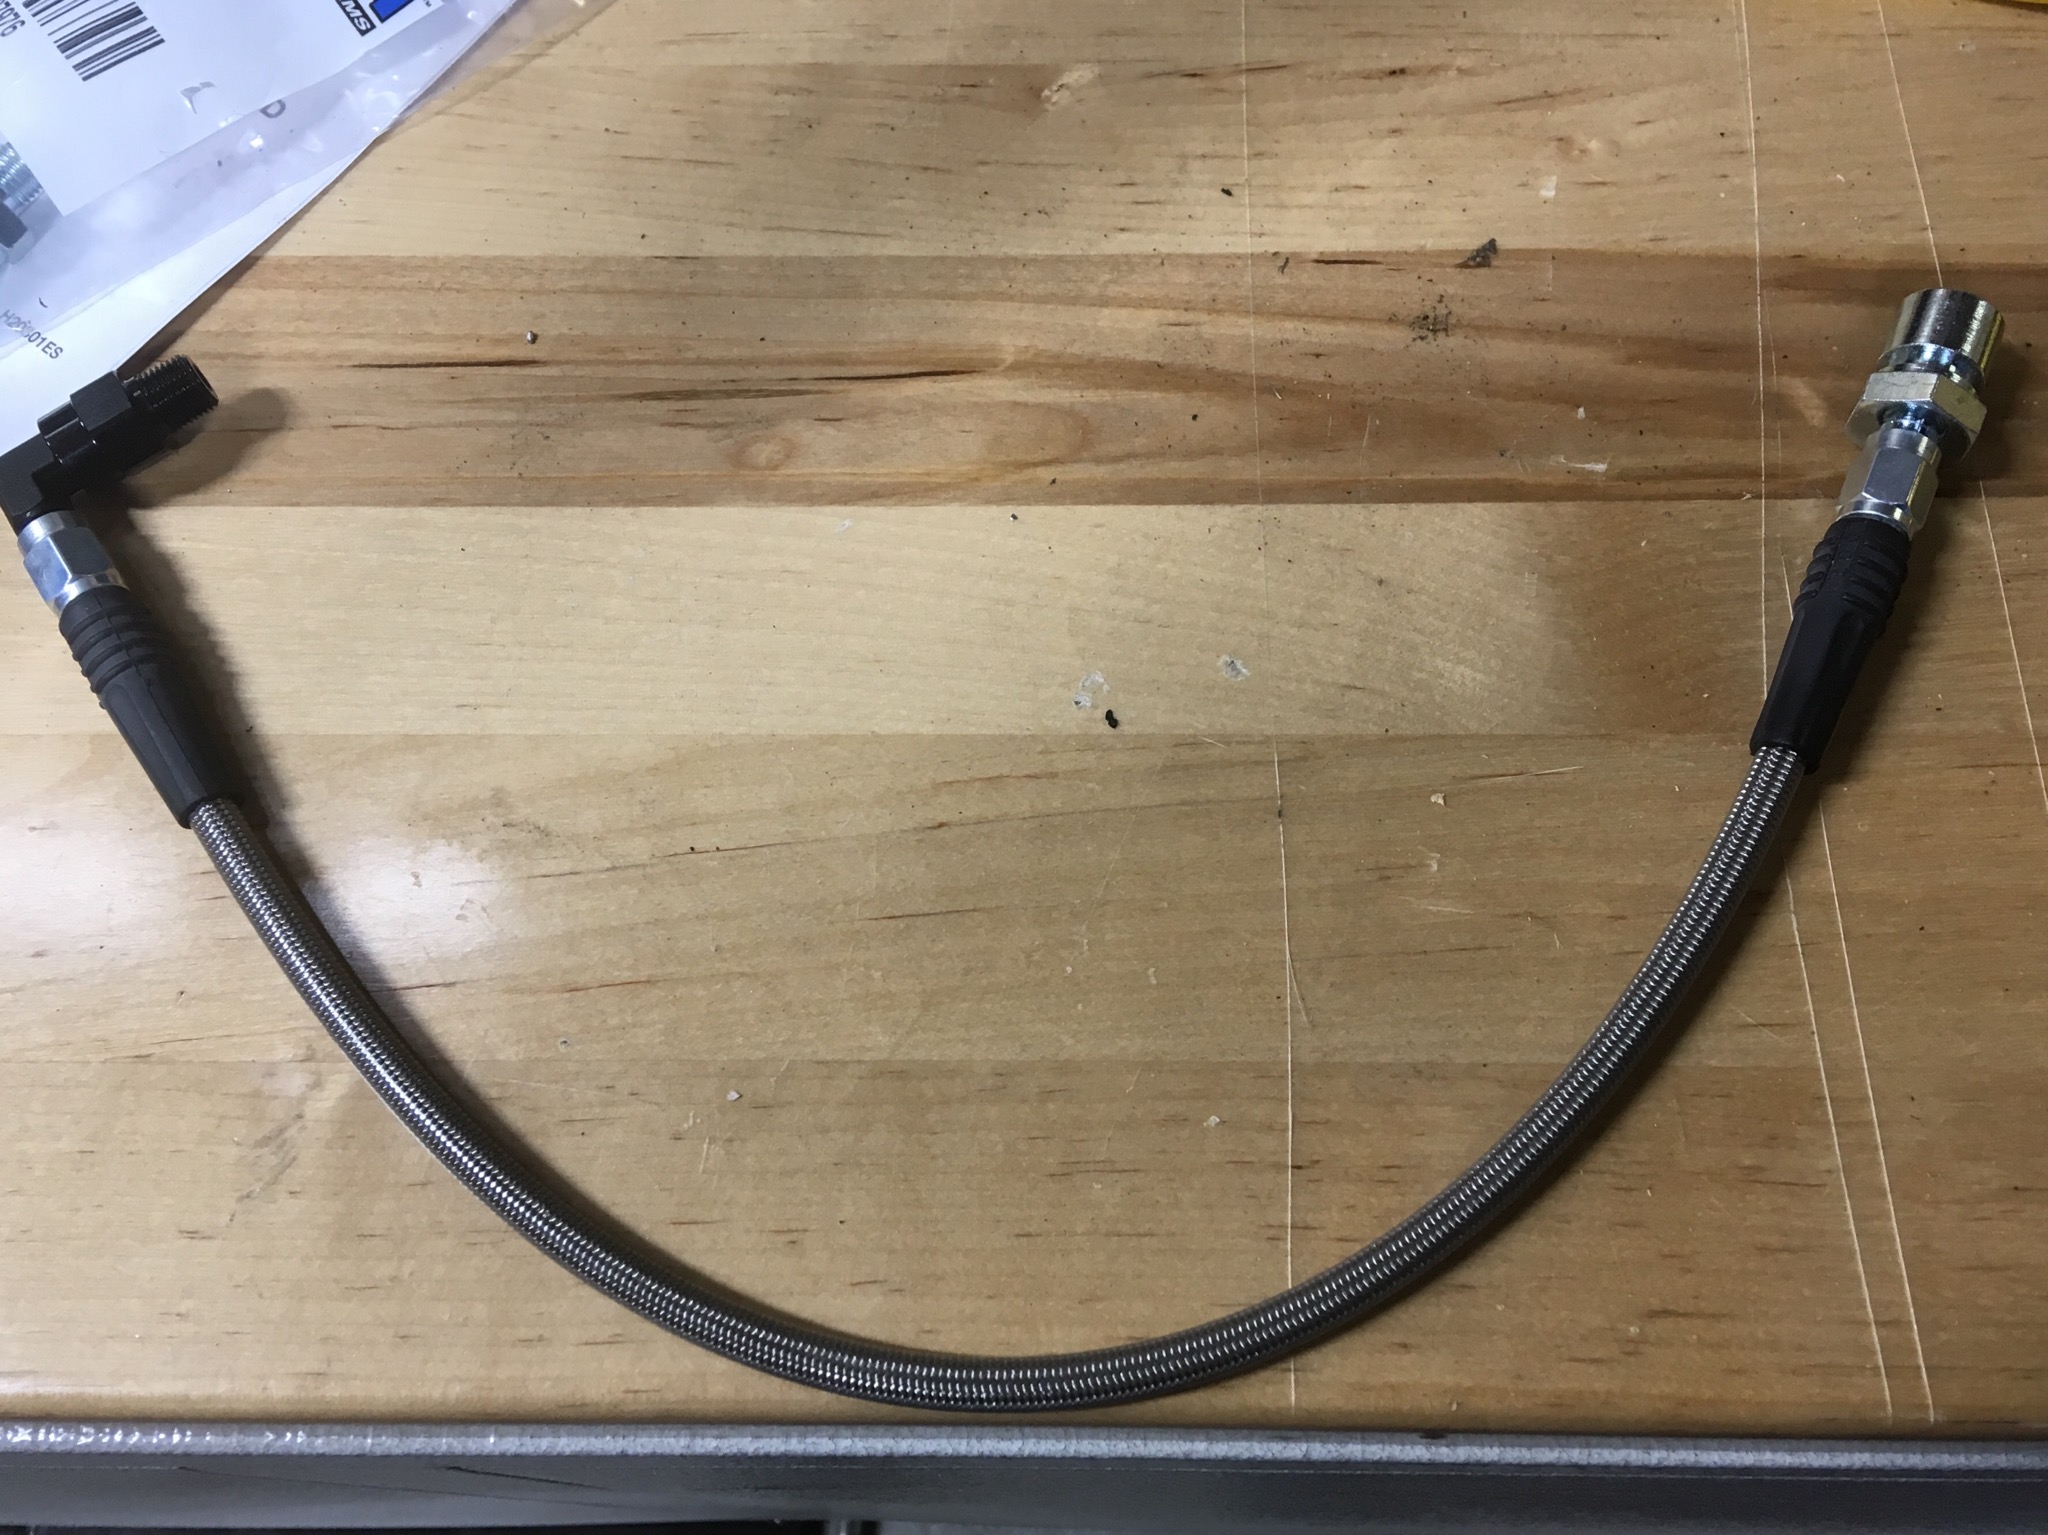
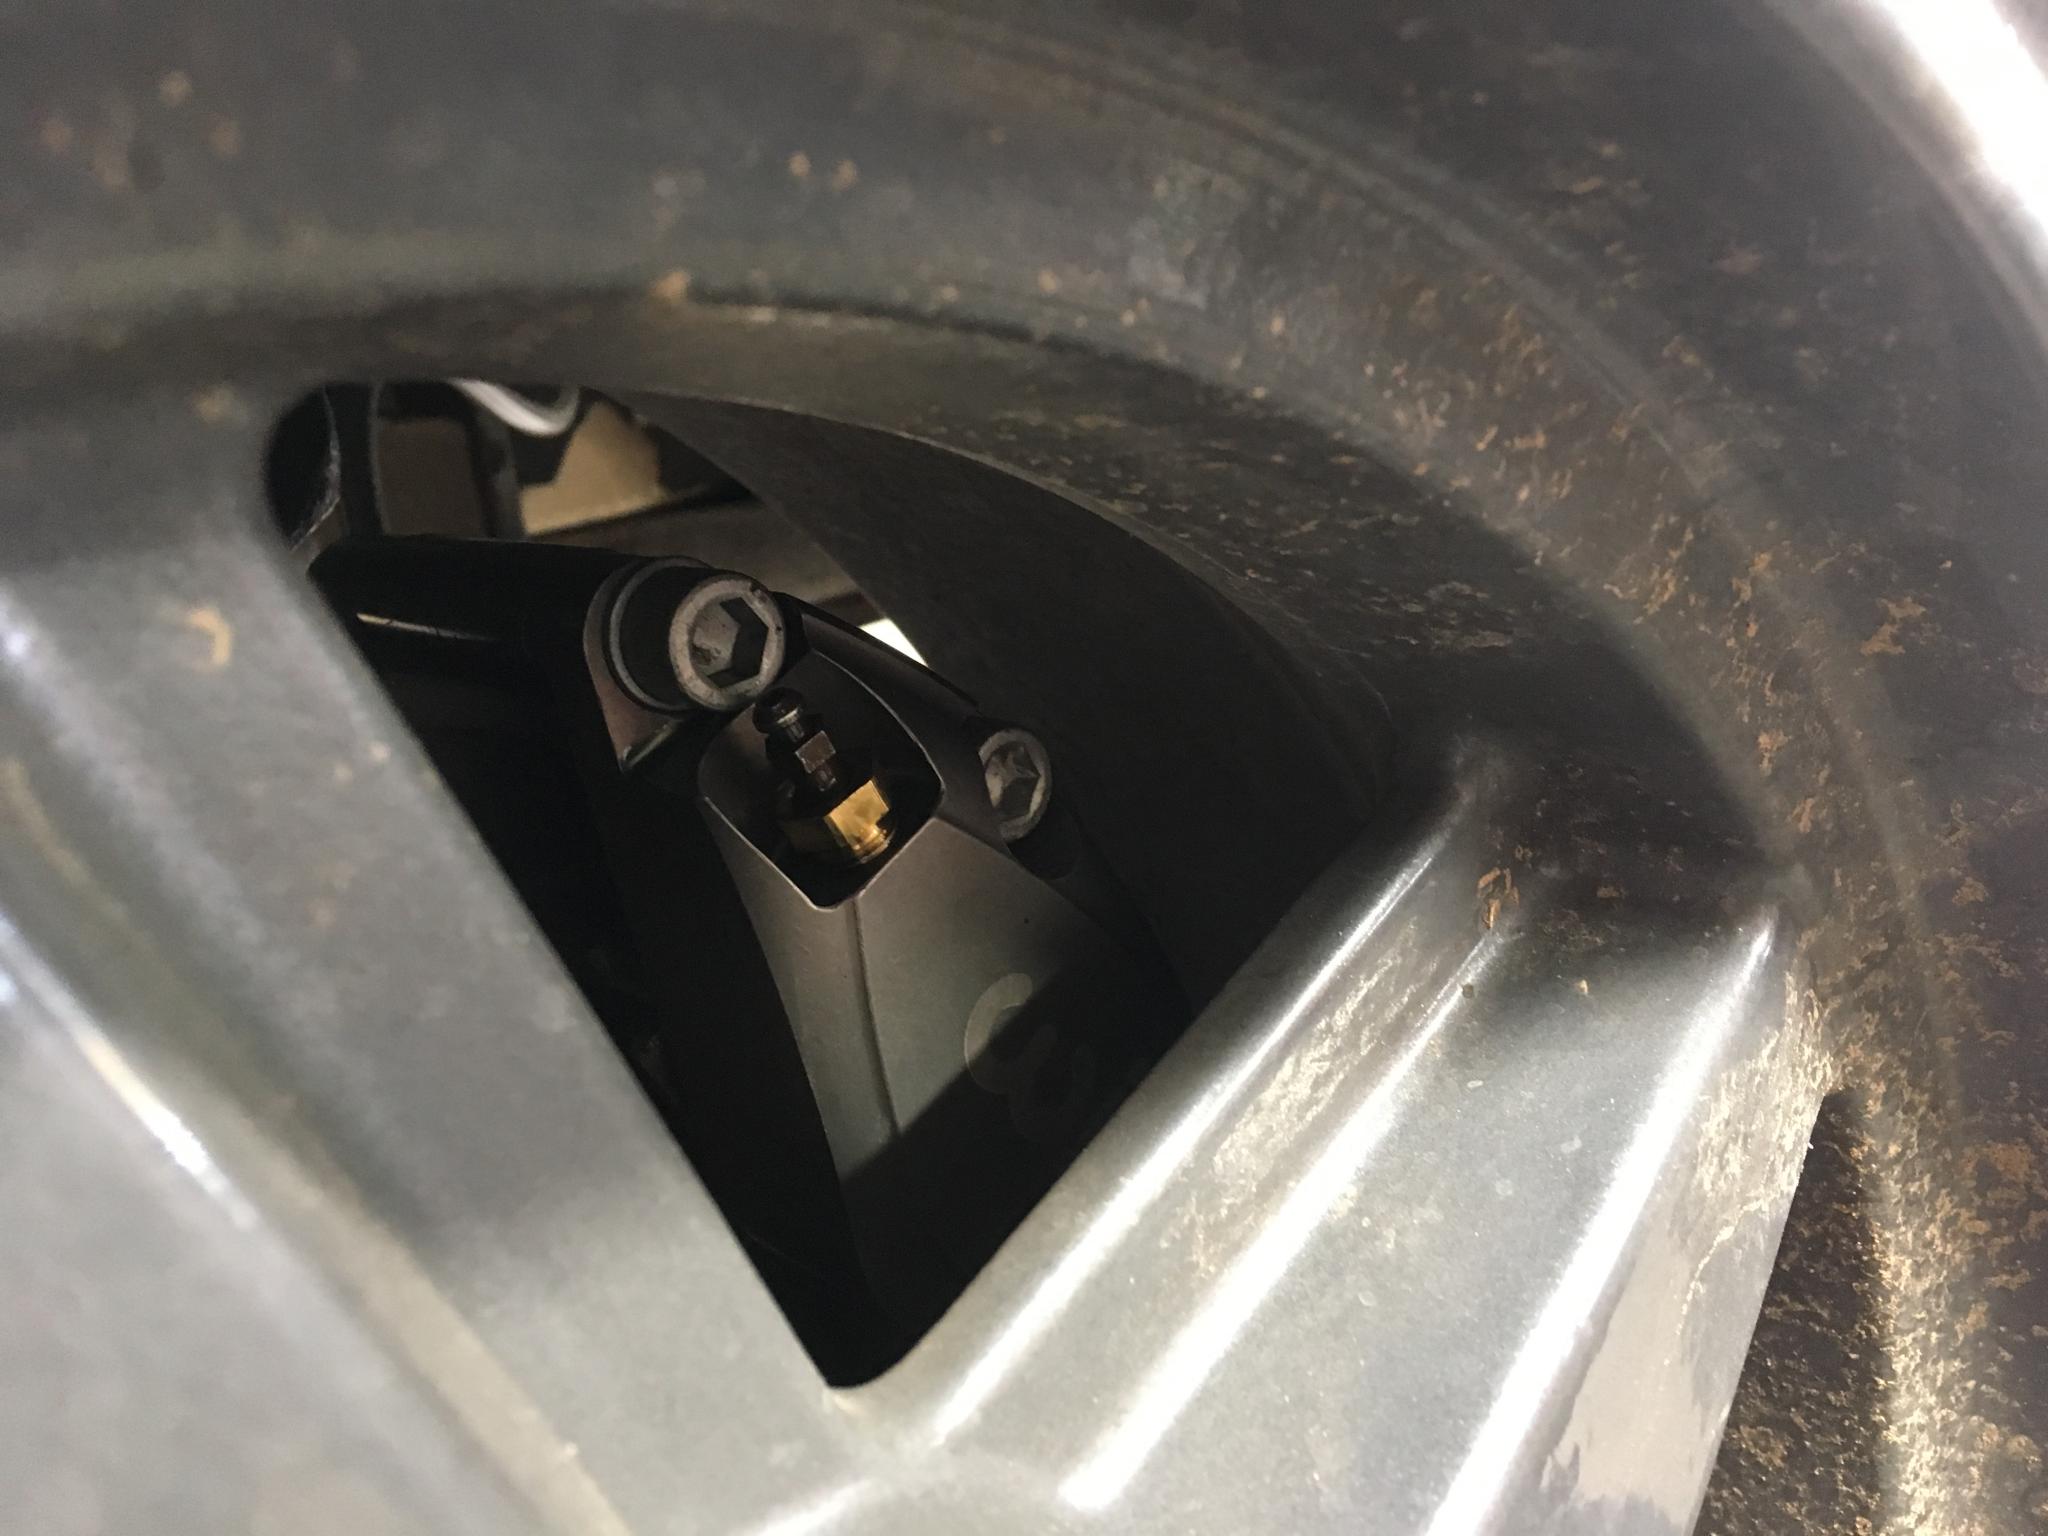
The brake line parts arrived as well. So here's a completed one. From the caliper end (at left) we have a 90 degree swivel 1/8 NPT to AN-3 adapter, then a 16" AN-3 line, then a 10x1.0 bubble flare to AN-3 adapter.
I haven't been working on this for the last three weeks because I've been out of town every weekend. Also, when I went to bolt up the last bracket it was off by just a bit. The caliper was offset by about 2mm at one end, 1mm in the other and not in a way I could easily fix. This made me put down the tools and walk away a bit. I think the right way to do these brackets really would be via a mill.
But today I had some time and I felt like taking on the challenge once again. This time, I pulled the upright off the car (after some discussion with the ball joints) and put it in the vice. I cut the mounts off the old bracket, positioned the caliper perfectly and tack welded the mounts back on in the correct place. I even scribed a centerline on the rotor to make sure I had my location just right. This was obviously the way I should have done it from the start.
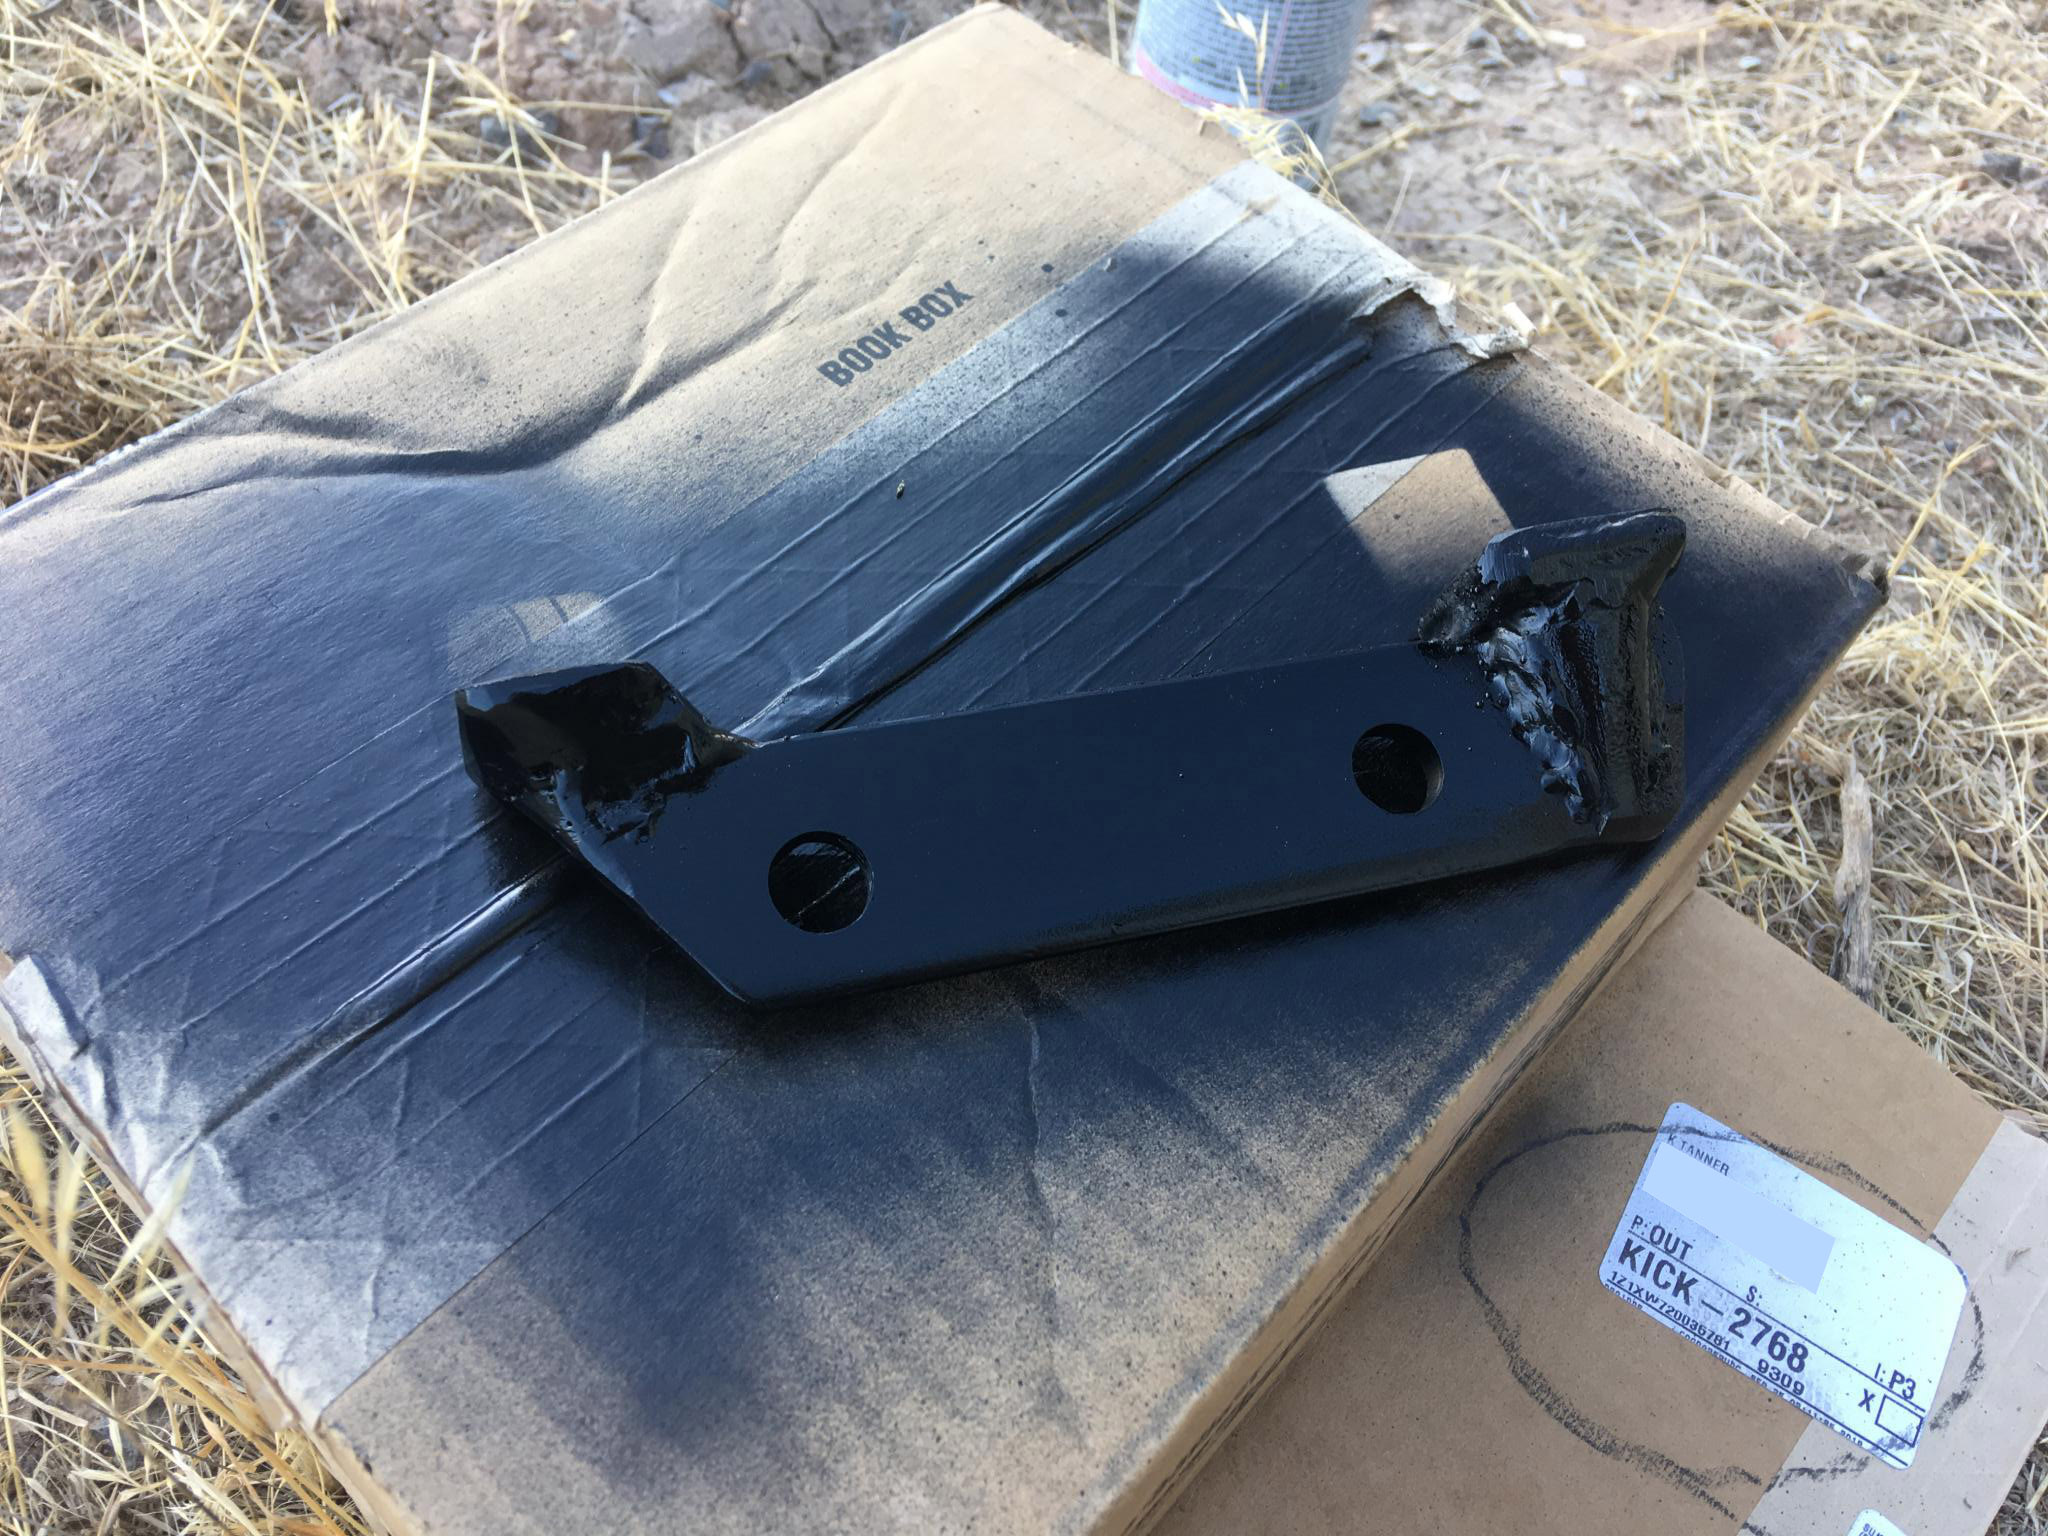
On the last go-round, I used a triangular gusset to reinforce the mounting pads. This time, I tried cutting a wedge of pipe and welding it on. It wasn't a perfect fit and I had to fill in some gaps, but it's not really all that necessary and it's sure not going anywhere. The final version of the bracket is bang on so I gave it some paint. By this point, this bracket might as well be 3D printed with a MIG welder. It's not all that pretty but it is very strong. Most of the load will be shear running along the length of that big plate.
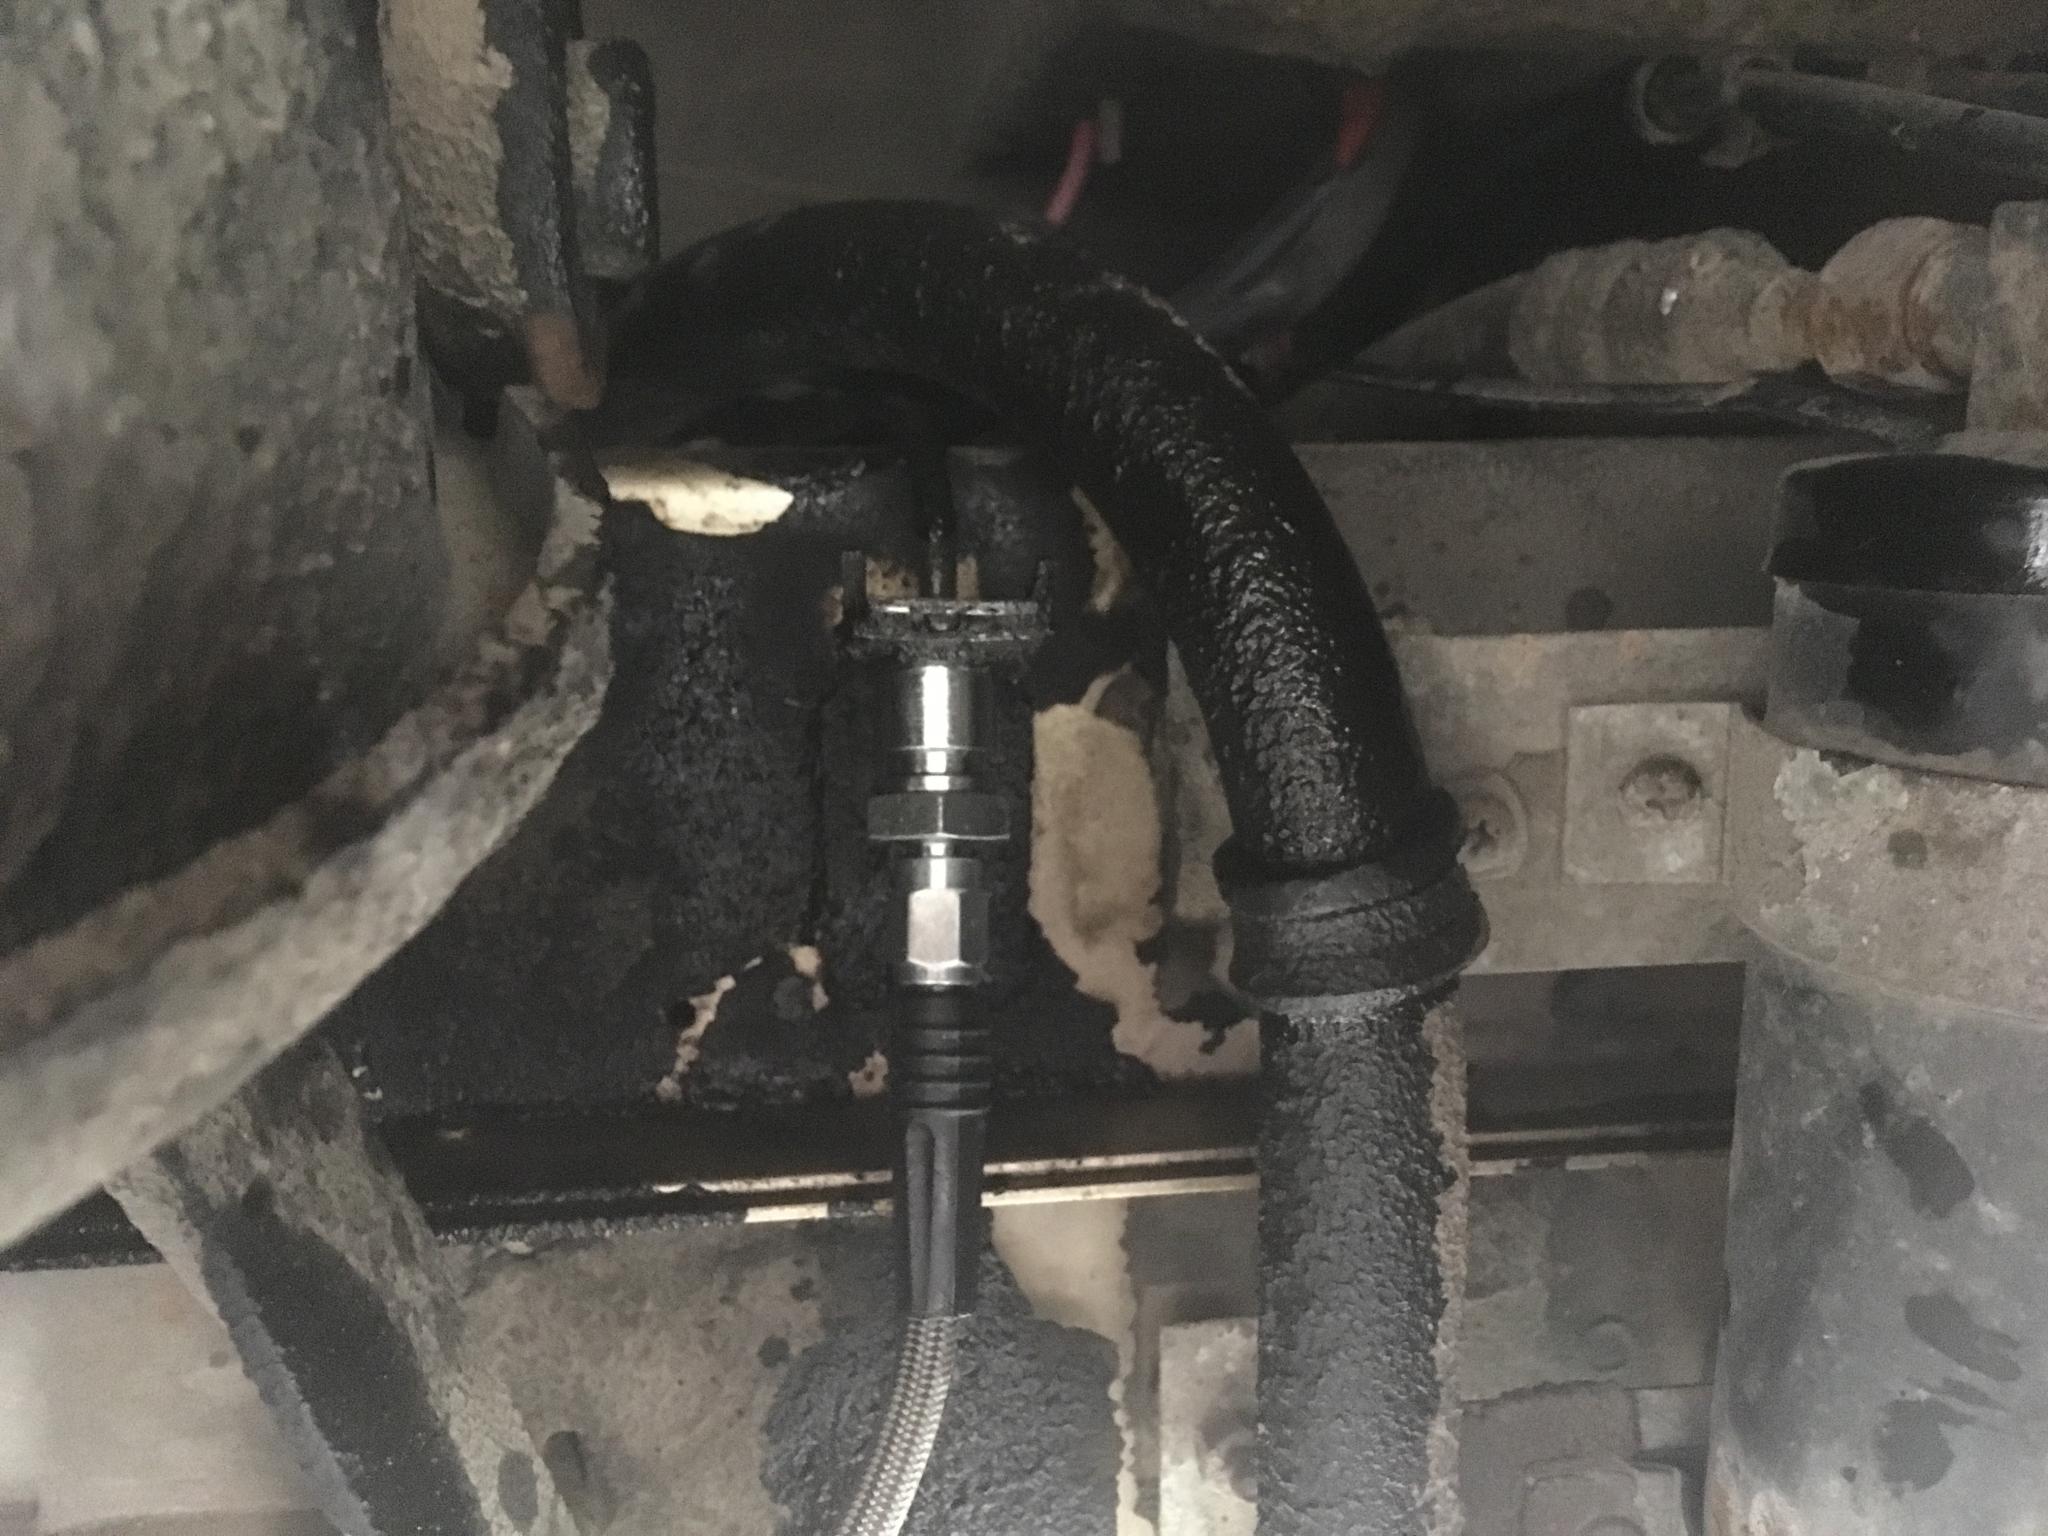
While I was waiting for the bracket to dry, I plumbed in the caliper. I have a method to this. First, attach the line to the caliper. That means the 1/8NPT to AN 90* fitting, then the AN line, then the AN to bubble flare adapter. Open the bleed screws on the caliper. Then disconnect the old line and attach the new one. By the time you have it connected, the caliper will be gravity bleeding. There's no chance of trapping air in the lines anywhere this way and it makes for a really easy bleed. If you have to attach the lines to the car first, you basically work your way out from the master cylinder and always close the bleed screws last. I'll bet I don't even have to bleed this caliper.
The hard lines do need a better anchor. The adapters are very slightly larger in diameter than the old hard lines, so I'll have to crack this open again and drill the anchor out ever so slightly.
Now that I've figured out the right way to build this bracket, it won't take long to put the second one together. I just need a few hours of time in the shop, and that's not going to happen for another couple of weeks.
As predicted, building a better looking mirror image of this bracket was a much faster job. It’s painted and waiting for installation.
Here’s how the new caliper fits under the wheels.
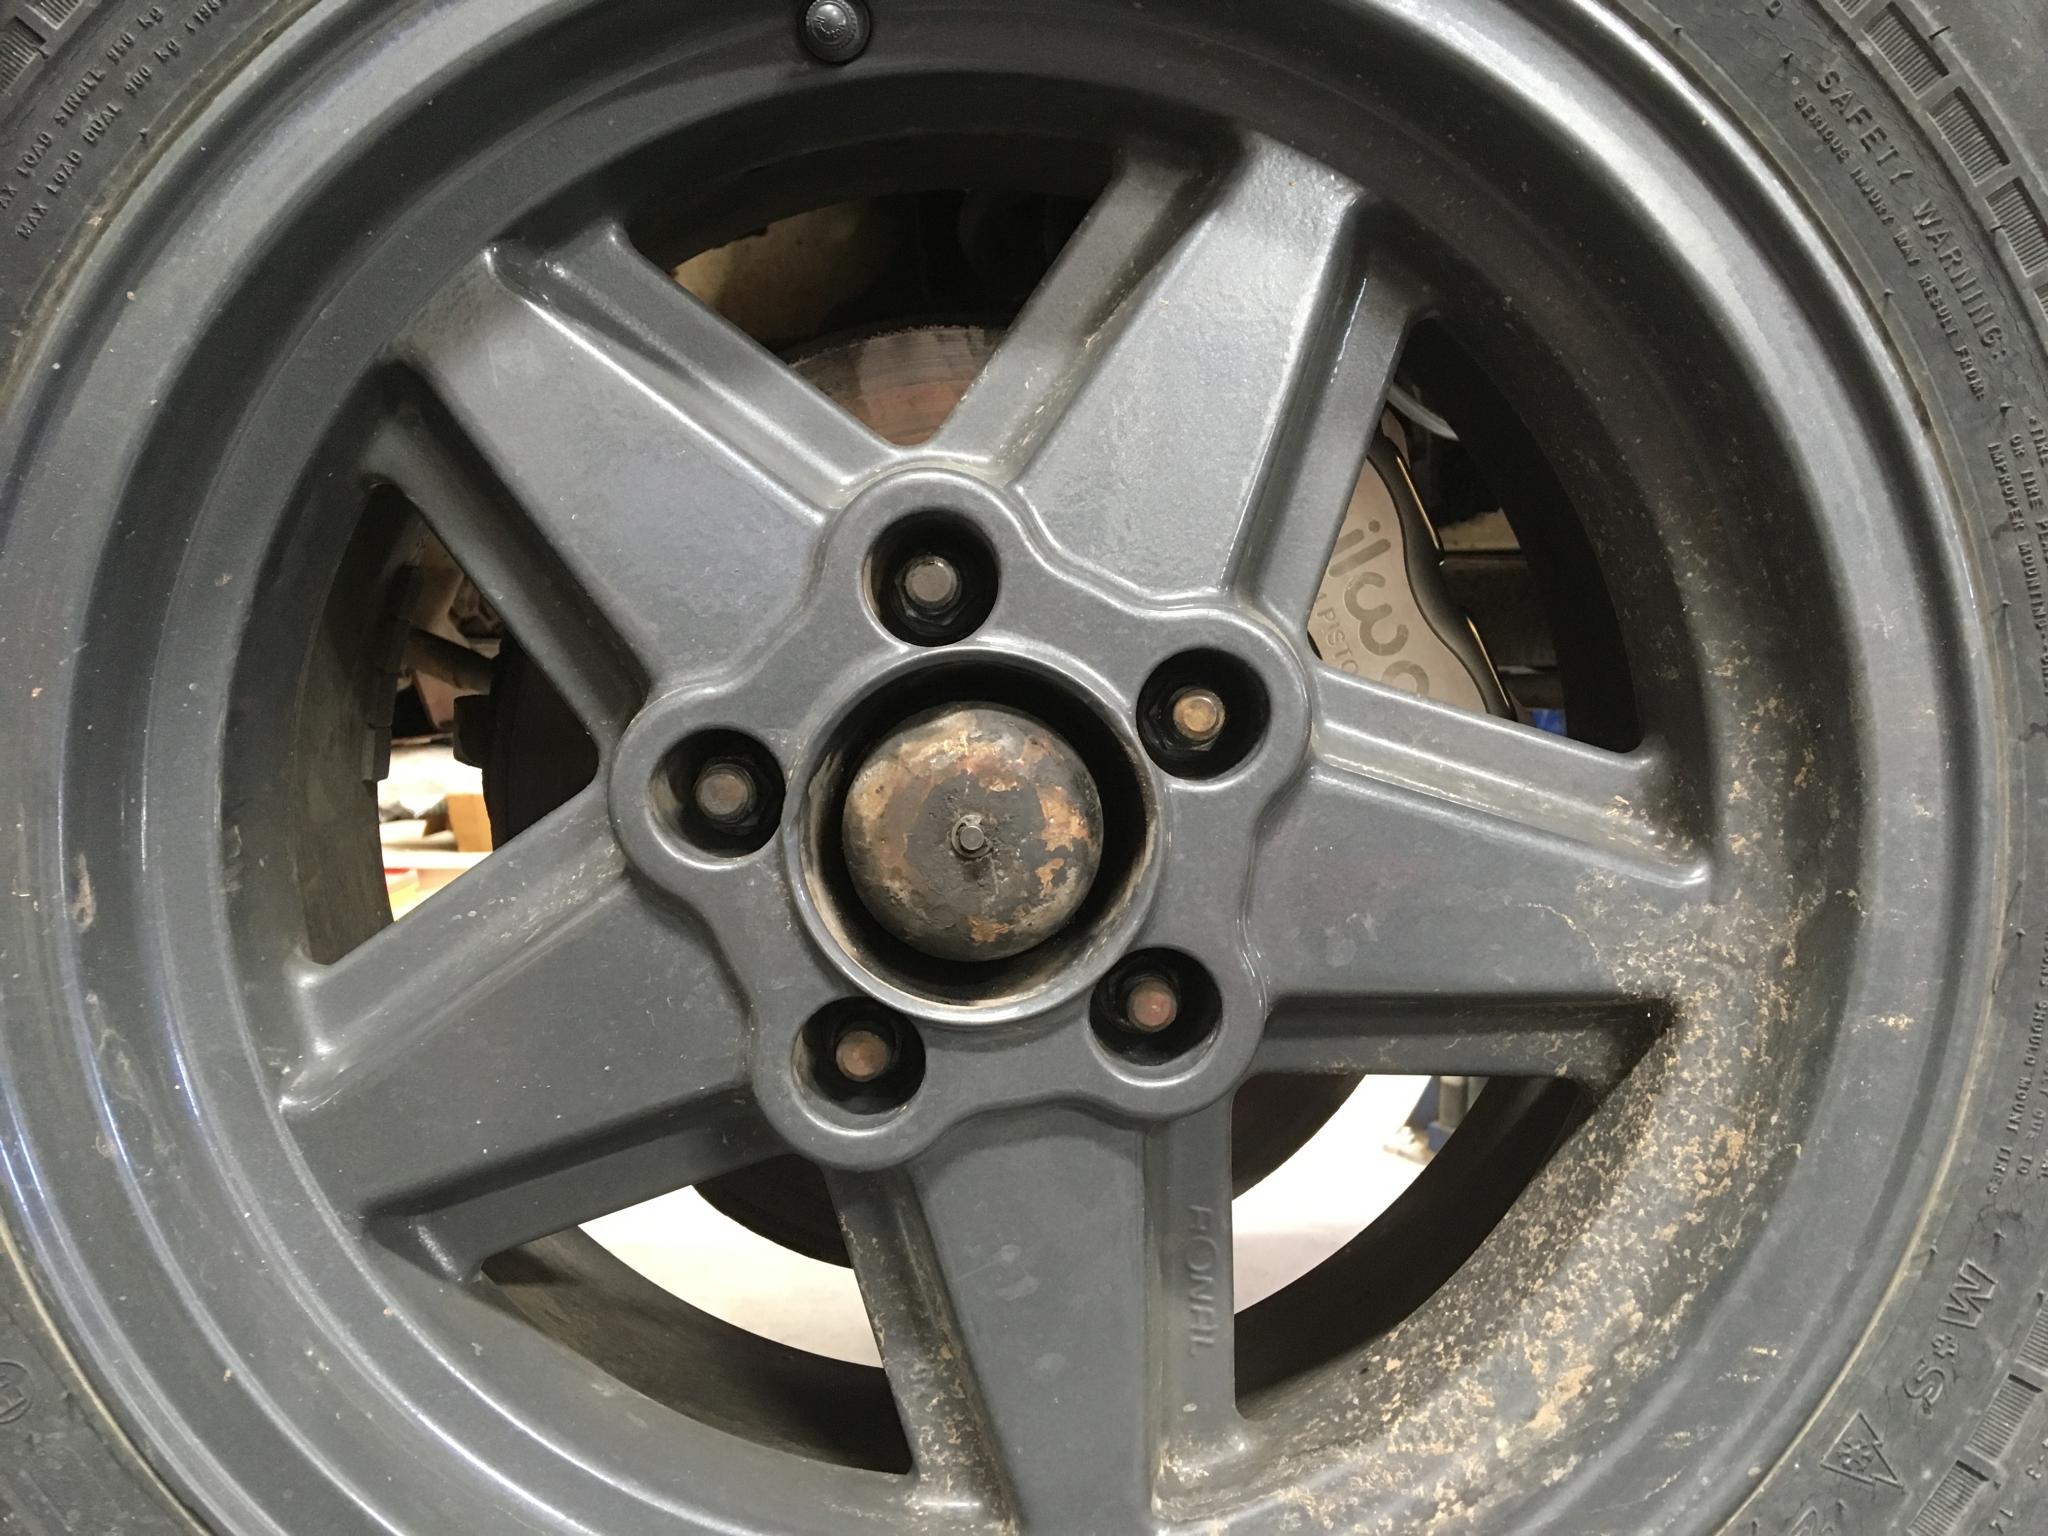
There is a ridiculous amount of room around that caliper.
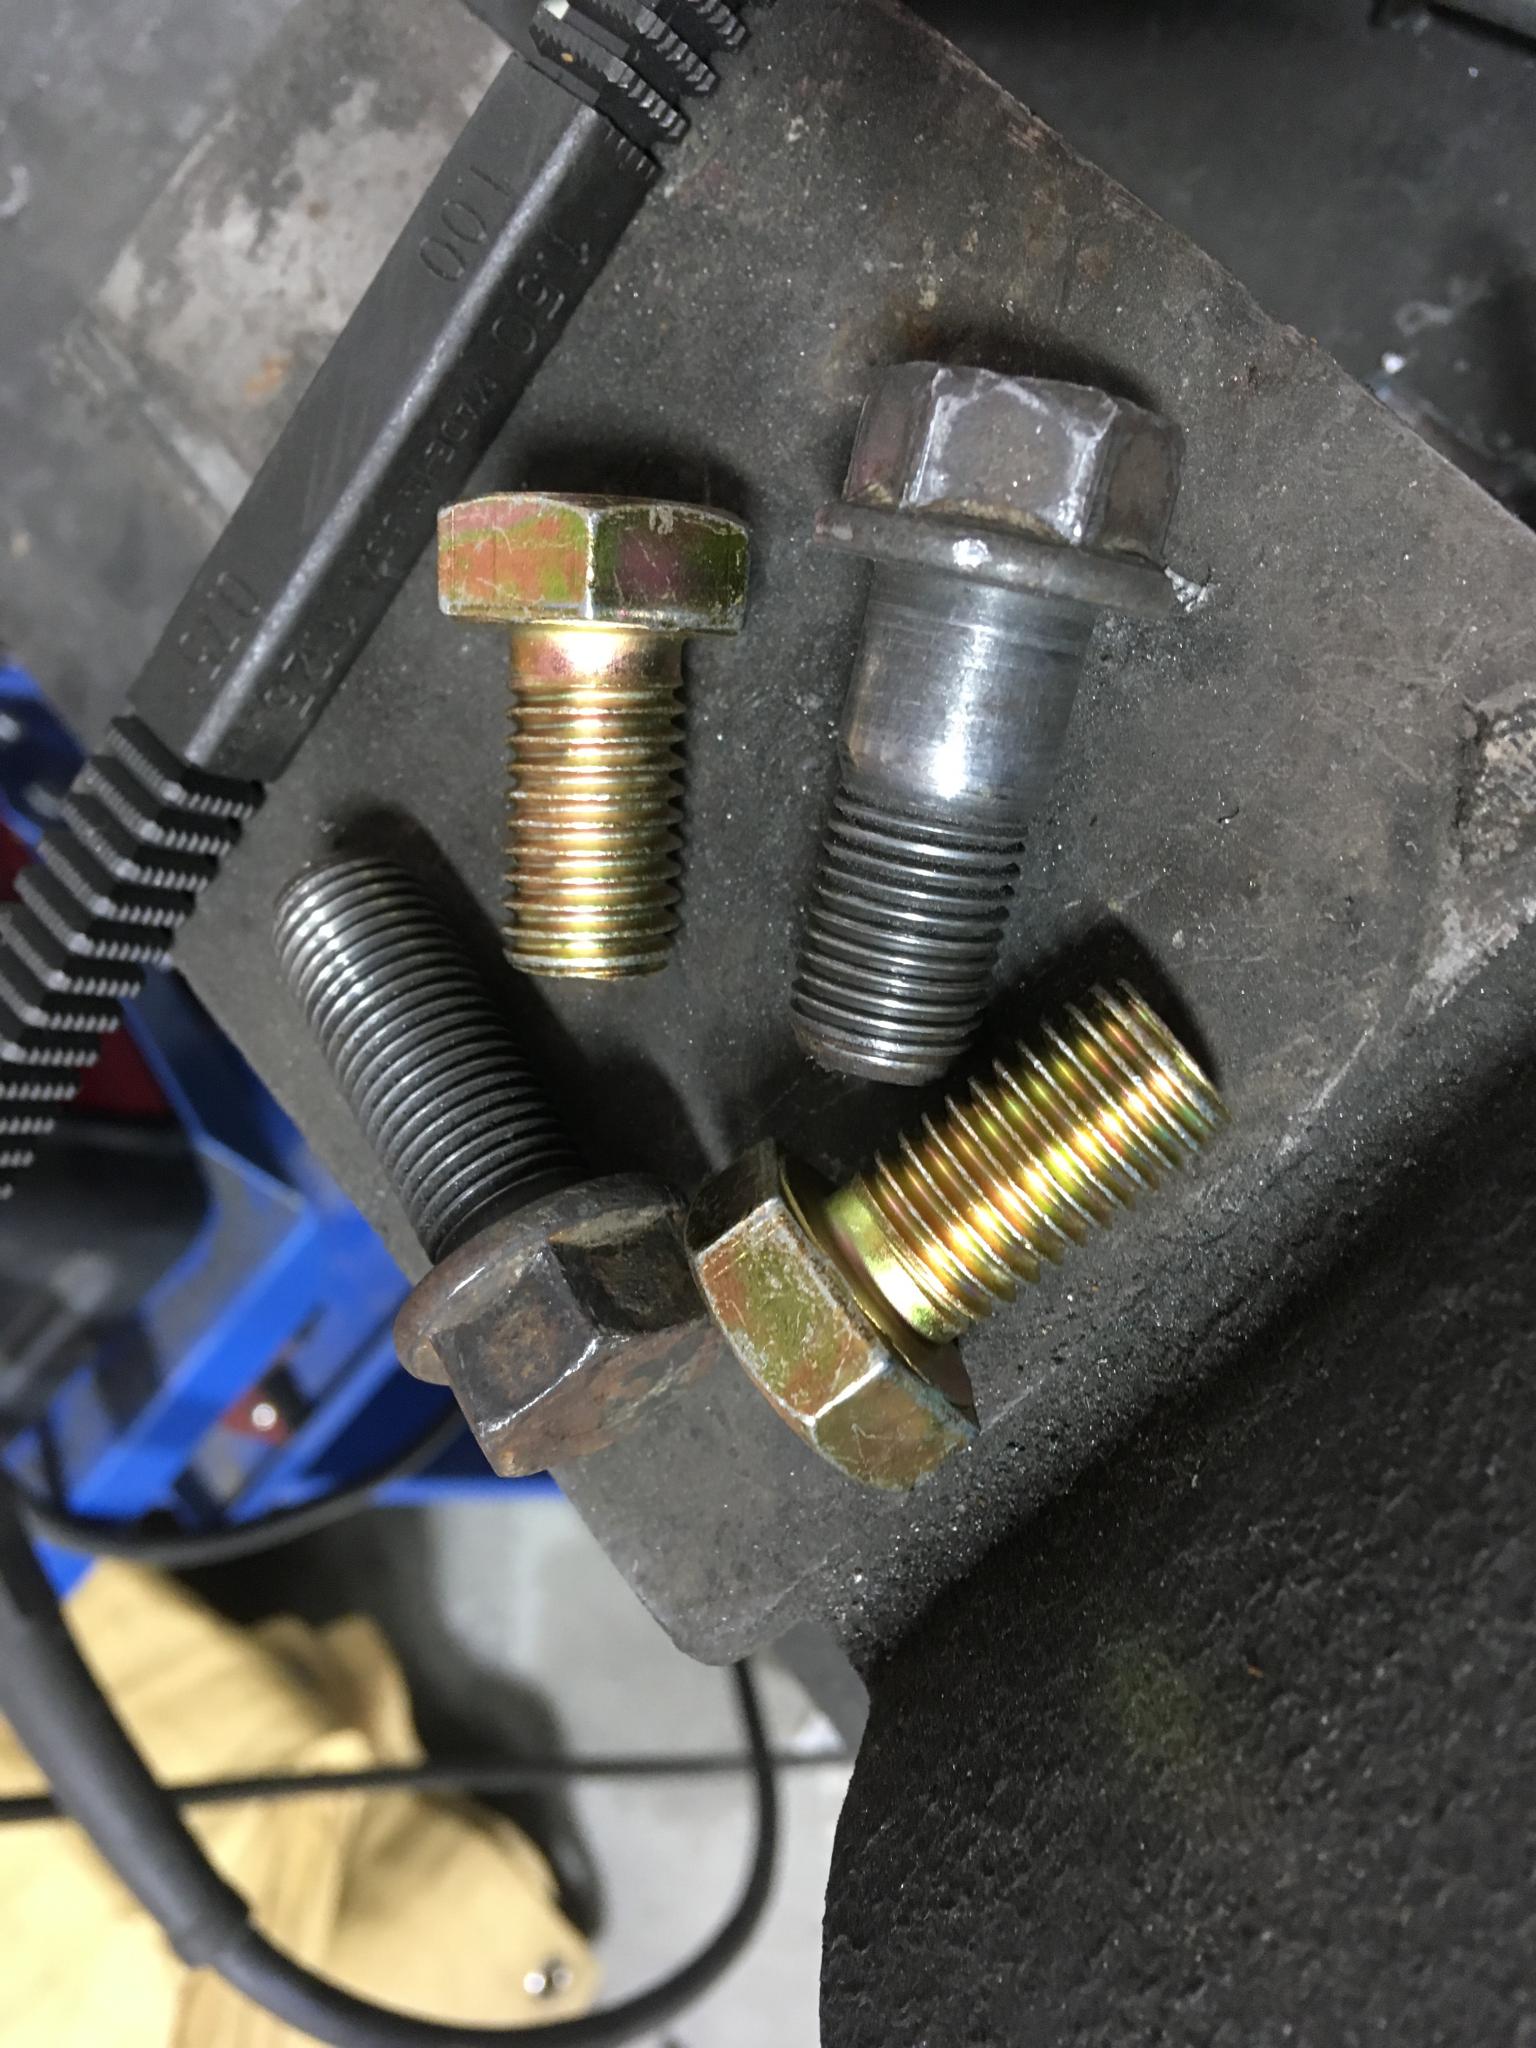
I also ordered some shorter bolts to attach the brackets to the upright. And, umm, oops. My 14x1.5 turned into 14x2.0 at some point. My mistake. So another order has been put in to McMaster and I’ll be able to drive this thing soon. I could get it off the lift tomorrow using the stock bolts as long as I’m willing to accept some significant spacers. That’ll work for moving it around, so that’s the current plan.
Have you considered drilling or grooving the rotors?
Definitely no drilling, I don’t like cracked rotors. I don’t have the tools to groove them properly, and I’m not convinced that’s the most useful thing I could do.
DeadSkunk (Warren) said:
You could machine down the stock hub/rotor to accept a Wide-5 brake rotor. Then you need the appropriate caliper to handle a 1.25" thick rotor and a bracket to hold the caliper. This won't move the rotor much distance from the stock location. Winters 11.75"diameter rotors are $40 each.
Edit: You can also buy the rotors in an 0.810" thickness, which makes more sense.
I was rereading the thread and came across this. I dismissed it partly because I didn't want to get into machining rotors, I wanted a straight bolt-on. But it's a pretty interesting idea, to make the old hub/rotor into a hat. I don't know what the bolt pattern for a wide-5 rotor is, but using the old rotor as a mount for a two-piece setup has a lot of potential. The trick is to find a very common/popular racing size. I'll have to measure the size of the pad for the wheel, that will define the minimum bolt circle we can use. 8 x 7.00" rotors are cheap, I'll bet they're the ones Warren is referring to.
It has the potential for being a really nice next step. I'll drive my current setup to see how the hydraulics feel. Then maybe a second generation will happen simply because it's so cool.


