JoeyM
Reader
3/3/10 8:31 p.m.
I hate welding sheet metal. I hadn't tried it until the other day when I was playing cut-and-paste in order to make those scuttle sides have a better fit to the frame. It didn't go well. I ended up overheating, and thus warping, the metal.  I guess the warped spot is what metal shapers call an 'oilcan'.
Yesterday I went back to the votec to ask for some advice. (I wanted to know what I should have done differently to avoid the warping.) It has been a few semesters since I was there, so I was not too surprised to find a different guy teaching the night class. He was happy to answer my questions, though, and said my basic idea - tacking every inch or so before welding, skipping around on the work piece to avoid overheating any one portion - were correct. The nearest we could determine is that I was impatient and probably went too fast.
I asked what, if anything, I could do to fix this panel so I would not need to start over. He said to try tapping it back into place with a mallet. I didn't try that. Instead, I looked on the internet and discovered heat shrinking.
After reading about and watching videos of people reducing 'oilcanning' with oxyacetylene torches and body hammers, I tried it with mapp gas. Now, instead of a smooth-but warped panel with three depressions in it, I have a lumpy one with many small dents. 
This weekend I'll be starting over and cutting new metal for that side.
I was thinking about learning to weld, but then decided it would just give me yet another arena to berkeley things up. 
Seriously though, I'll bet you'll be pretty good at it by the time this project's done.
JoeyM
Reader
3/3/10 10:49 p.m.
I hope so. I've gotten OK with the 14 ga. square tubing I'm using for the frame. It's thicker, and thus not as likely to distort or burn through....
JoeyM
Reader
3/21/10 11:57 a.m.
Hi Guys,
I've been working on the grill shell for the 1932 datsun.
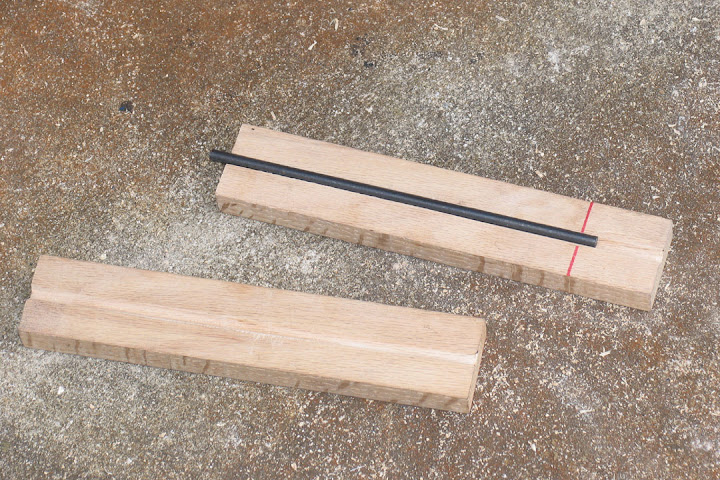
I started by mocking up the shell in cardboard and poster board.

Then I built a frame to those dimensions using 1/4 inch rod.


I took him back inside during the welding, but Cypress supervised the measuring, bending and cutting of rods during this process.

The sheet metal is mostly from a box fan I pulled out of a neighbor's trash. The additional parts are from a trashed washer stand.


Coming along nicely! It's nice to see someone show what a vision and scavenging skills can accomplish!
This thread wins if only because you have a parrot sitting on a sword, let alone the creative fabrication youve done!
JoeyM
Reader
3/21/10 7:04 p.m.
4cylndrfury wrote:
This thread wins if only because you have a parrot sitting on a sword, let alone the creative fabrication youve done!
Hey, I decorate my garage in style! 
Seriously, he was obviously feeling neglected[1] sitting alone in the house. I figured he could hang out in the garage for a while with the dog and me.
1 - He was yelling "Get the Bird! Get the Bird!"
JoeyM
Dork
9/17/10 6:36 p.m.
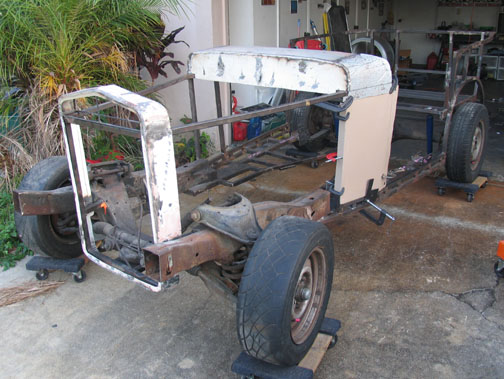
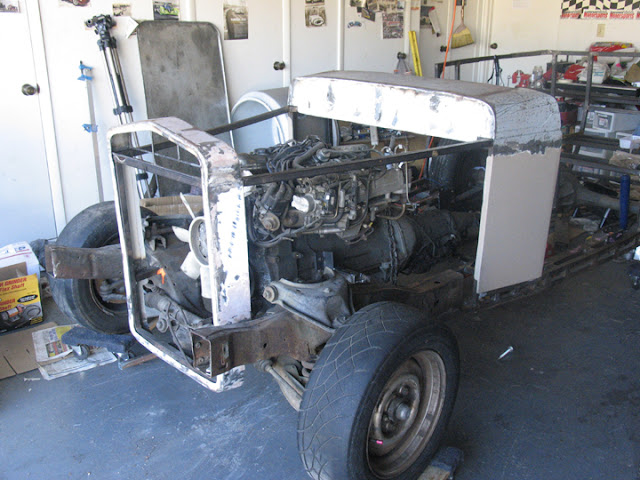
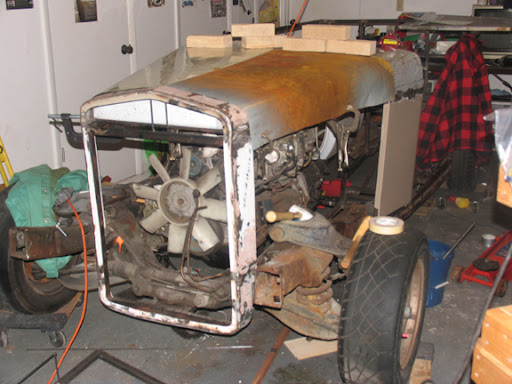
Well, it's been about six months since I've posted anything about my 1932 datsun replica, so here's an update. The short version is that the grill shell is shaped, although not anywhere near ready for paint. I've also shaped/fabricated much of the cowl/scuttle/foot well area. The sides of the footwell are not yet attached to the cowl, and none of this is permanently attached to the frame. (which is good.....I've got a lot of changes I need to make to frame to make it road worthy.) Here's the latest picture:
If you want to see how I got to that point, here's a slide show I made:
http://www.youtube.com/watch?v=z3OAldwFGh0
If you'd rather look at the pictures individually, try here and here
Except for us {GRMers} who the hell would build a 1932 Japanese car?
My hat's off and I bow before the alter of intuitive weirdness.
That is and will be cool. Keep up the good work.
JoeyM
Dork
10/15/10 9:37 p.m.
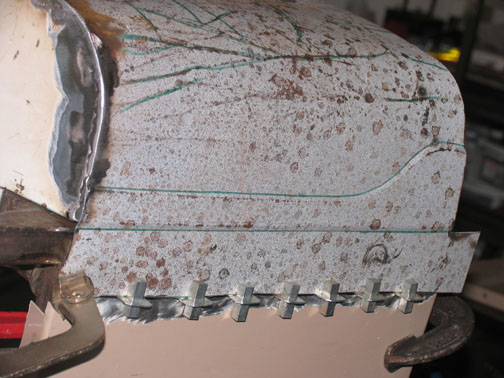
Attaching the side of the footwell area to the cowl
JoeyM
Dork
10/15/10 9:39 p.m.
JoeyM
Dork
10/21/10 6:58 p.m.
JoeyM wrote:
I hate welding sheet metal. [...] I ended up overheating, and thus warping, the metal.
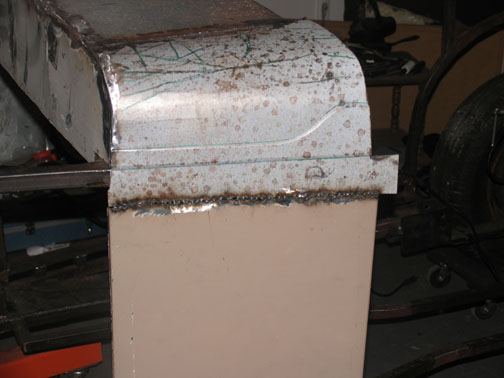
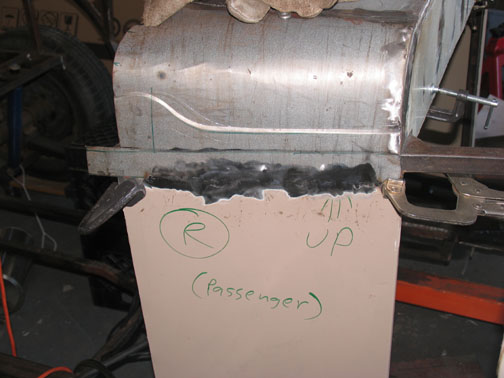
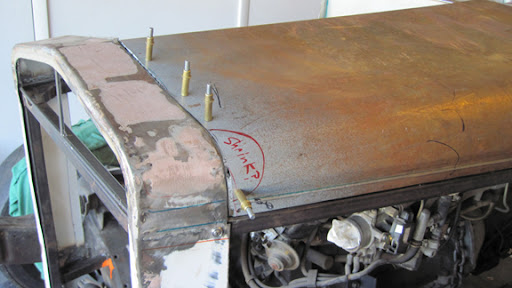
The sides of the foot well area are now attached to the cowl, which means the sheet metal between the doors and firewall is basically ready....I still have to trim in a few spots, but that's minor.
As you can see, the metal didn't get messed up in the process this time.
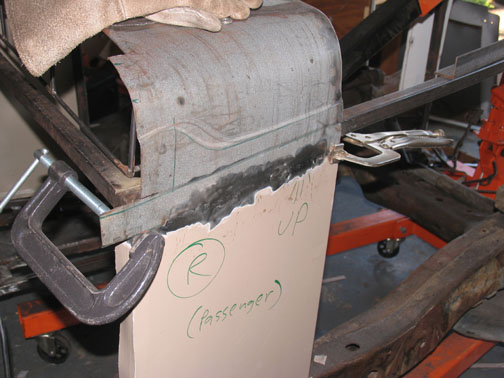
I still hate welding sheet metal, but it appears that I AM capable of doing it with little-to-no distortion. I went back to the votech and the professor demonstrated....Before, I thought I was welding slow, but I was still moving WAY too fast. That caused earlier distortion. Now that I've slowed down even more, things are going well.
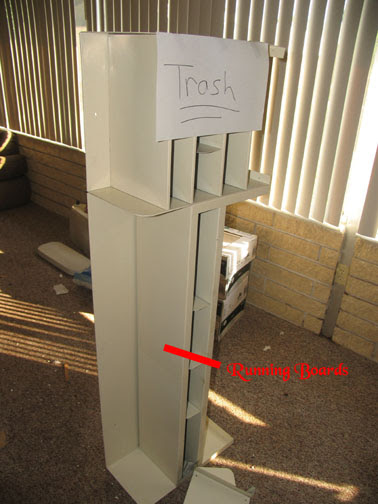
I also scored some metal shelving that will become running boards
Oh, man. I hope you're preserving the patterns. I would think that after you finish the thing, somebody could make some molds for fiberglass kits, and you could sell them like "T-Bucket" kits. I'm thinking an old 620 pickup frame and a warmed-over pushrod A12 from a B210 or something.
JoeyM
Dork
10/23/10 3:59 p.m.
Interesting idea. It would be fun to try, but I don't know that there are enough people interested in 1930s datsuns to make a viable market.
JoeyM wrote:
Interesting idea. It would be fun to try, but I don't know that there are enough people interested in 1930s datsuns to make a viable market.
I'm with the guys from the magazine. The folks that grew up with Japanese cars are gonna want cool Japanese stuff when they get old. Japanese cars will go collectable one day..
OTOH, I don't know if any of those guys will want a Japanese inspired (and sourced) version of an American style "street rod".
All I do know is that if I ever see you somewhere after you get it finished..I'm gonna ask for a ride! 
JoeyM
Dork
12/21/10 11:17 a.m.
I finally manned up, fabricated some motor mounts, and put the engine in place.
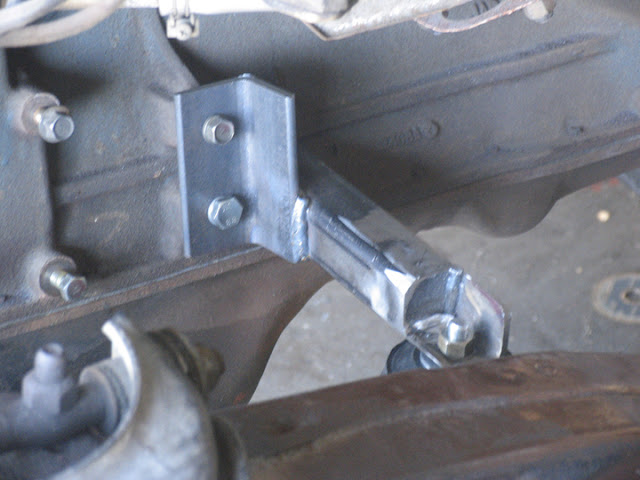
I'd read enough stuff about engine alignment/drive train angles/excessive u-joint wear that I had totally psyched myself out...I literally sat there with design paralysis for months. I finally said screw it, put a magnetic angle finder on the transmission pan (level right to left, two degrees upward from back to front), and made it happen.
I know that kind of stuff is second nature to GRM Challengers, but I've never done anything like it before. I fretted about it for over a year, and I'm very glad it is over.
JoeyM
Dork
12/29/10 3:54 p.m.
I've been fabricating other bits for the grill.
The upper portion of this picture shows the real 1932 Datsun, and the lower portion shows the grill insert that I just fabricated.
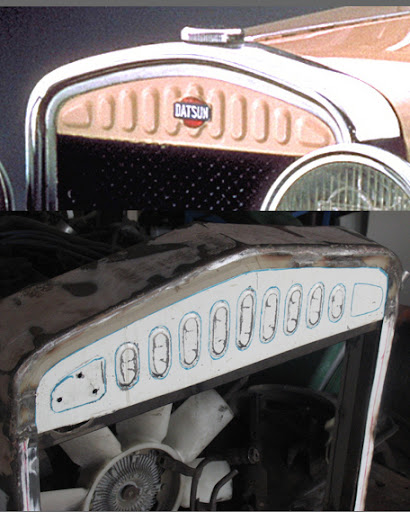
I originally tried to do this by using my english wheel to emboss the metal, but wasn't pleased with my results[*]. Thankfully, I remembered a conversation with JThw8 at the $2010 challenge where he told me how he had used a bead roller to make the panel in the back of the wartburg that has the Misfit Toys Racing logo. He explained that he started and stopped the letters by loosening the "jaws" that hold the rollers so the work piece can be moved around without leaving a mark. After the work piece is in the right place, the bead roller can be tightened so that it will begin to shape the metal.
I decided to try it on some scrap, and it worked pretty well. That's when I made the upper grill insert that is show above. The two outer triangles are not rolled because the workpiece is too large for my bead roller; i.e. the "throat" on it is too short. This isn't a problem.....I've decided to put triangular lenses in the top and use those for turn signals.
I can produce the lower grill insert the same way, and install driving lights in the outside triangles. 
[*] - I don't know if the male and female parts were too thin, or if there's a problem with my technique.....all I know is that I could get a nice raised relief effect in thin stuff like oil drip pans, but could barely raise a bump in the thicker metal from the skin of an upright freezer. I definitely wanted to use the thicker metal on the leading edge of the car where it would be exposed to rocks thrown by traffic. This meant that I needed to try a different technique.
JoeyM
Dork
12/30/10 1:36 p.m.

The grill insert parts are fabricated....the mesh is from a screen door insert and the lower portion was made from a clothes drier.
JoeyM
Dork
1/15/11 7:53 p.m.
I cut some sheet metal from the skin of a water heater to use for the hood. Here it is being test fitted.
Since that photo, I've haped the curve on one side a little better, rolled the bead down the edge, and folded a flange into it. The youtube video is here. I still need to do the same stuff to the other side andbuild the internal frame to support the sheet metal.
This one of the coolest builds ever! Great job so far! The embossing on the radiator cap is on the money! This just a cool little car, and that's all there is to it.
JoeyM
Dork
1/23/11 4:47 p.m.
Well, one quarter of the hood (i.e. driver's side front) is now fitting the way I want. It was too high; i.e. the vertical bit at the front was about 1/4" above the grill shell. This happened because I wasn't careful enough when I bent the flange at the bottom....I had to hammer it out and re-bend it to shorten the vertical side so that everything would fit properly.
I still need to trim and fit the back of the driver's side....then remove the clecos and smooth out a bunch of creases and hammer dings with the english wheel. After that, all the same stuff needs to be done to the passenger's side.
JoeyM
SuperDork
2/15/11 8:59 p.m.
The back of the hood wasn't fitting as well as the front....it stuck up above the cowl/shell. If I hadn't already bent the flange at the bottom of the hood it would have been easy to fix. I'd bent it twice, though, work hardening the metal. Soooo....I fixed it the hard way.....cutting it, trimming some out, hammering it down so it would fit, and welding it back together.

It fits much better
In reply to JoeyM:
Well, after all that work..it should!!