I have documented this car elsewhere on the web but am finally going to build a GRM build thread as suggested in my Metal Box Flare Thread
For the full build/history look on the Locost forum Build Thread
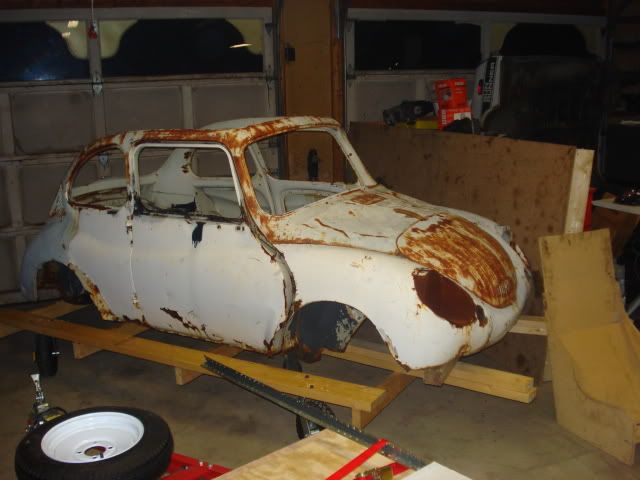
The car is a 1978 MG Midget that was nearly restored prior to being completely submerged in a flood. I pulled the stock engine and put in a 12a rotary. I blew up several rear ends before deciding new parts were in order. I went off the deep end and cut away the bodywork and have built a tube frame. The car uses Miata uprights/brakes and Diff with a custom geometry pushrod suspension using Motorcycle shocks. Engine is a Street Port 13b I purchased running MS that was featured in GRM when the MS install was completed at the Mitty. Apparently it has ~170HP. The track width is stock NA Miata which requires some fairly substantial flares to cover the tires. Wheels are 15x9 with 245 Hoosier A7, or 9.5x22 Hoosier FA Slicks.
The car will compete in DMod until I loose my mind and turbo it for EMod.
This has been a very long term build as I started when I lived in Wisconsin with 0 kids and now live in Il with 2 kids. Numerous things have gotten in the way and I apologize to anyone who has had the misfortune of attempting to follow along expecting resolution.
The goal is to have the car running at the 2016 Solo Nationals on Sept 5th. That means for the next 50 days progress will actually be swift and you will either get to see great joy or incredible agony when I am either successful or a failure. So strap in and enjoy the ride.
Battery:
So last night's project was battery mounting. Normally with a high dollar build like this you would purchase a Braile no weigh battery and restrain it with a CNC milled bracket in a carbon fiber case. I'll do that next time.
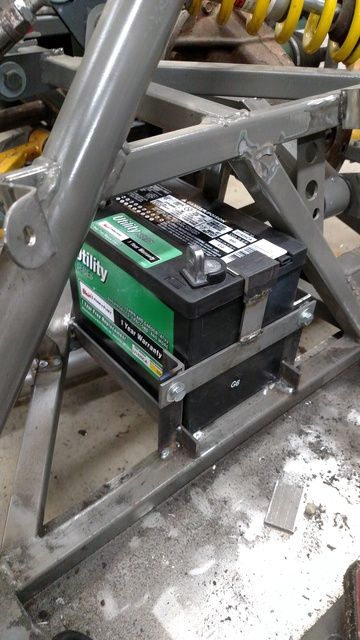
I went to my local farm store and purchase a group U1 battery featuring 350 CCA for $27. I am hopeful that it will be enough but can always run a booster pack for initial starts.
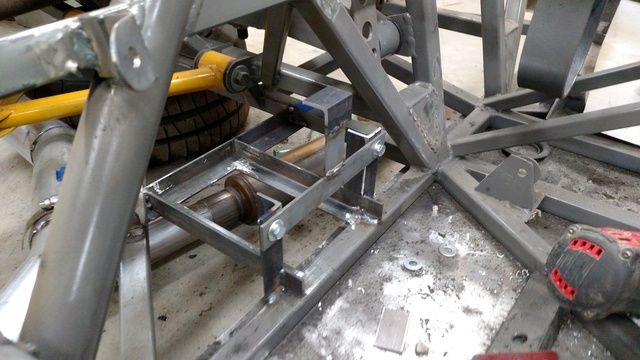
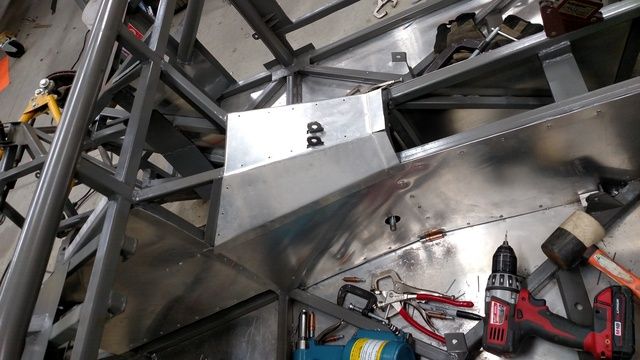
The best location I could find for the battery is behind the passenger seat 1" off the floor. I used 1" angle iron to make a shelf that the battery slides into. The restraint is secured with a strap across the front that also limits battery up travel. The battery is restrained in all dimensions. Battery replacement will require removing the passenger seat and a cover will be put in the rear firewall to allow removal.
 Overall I am pleased with the bracket. Sometimes there are parts of this project that I really don't look forward to because they seem intimidating. This was one of those so I am glad I resolved it in a few hours relatively simply.
In reply to nocones:
I'd say it really started way back in Sidney with the drivetrain swap, though it certainly got more serious in Wisconsin. Must have been those long, cold winters up there. 
Stock Miata width? I thought you built it stock RX7 width. Looking forward to the thrash.
It is both. It started 2nd gen 4 lug Rx7, now is NA Miata with torsen. The flange to flange is nearly identical.
THANK YOU!!! I love this car, cant wait to see it going. And thanks for the box flare thread, much good info.
Do you keep up the build on the Locost forum?
Thanks Ross
I'm looking forward to seeing this, as well as reading the links.
In reply to NOHOME:
Still here. I have some steel and a geo 1.0l for it.. it's nextish.
54 days to go progress. Brake pedal cluster firewall construction. Used poster board to make patterns and transferred those to metal. 2/4 panels done. More tomorrow hopefully.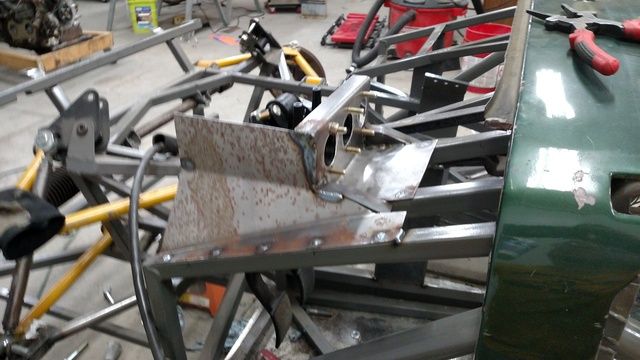
Just finished reading the thread on locost. Fun!
And you seem to fall into the same trap I do:tearing back apart for improvements before finishing the last round.
Makes the project take forever....
And now the pedal closeout is done. The only major welding left is the throttle pedal bracket and a small crossbrace then it's time to start all the aluminum panels.
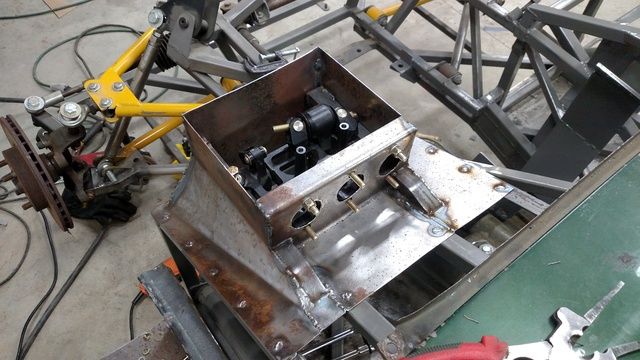
That's a mighty fine solution to the pedal box.
How did you design your suspension? CAD? Scale model (is it called a string something? It's been some years)? The bell cranks and A-arms and such are works of art. Also, as long as I'm nagging, are you thinking mid or front engine on the Subaru?
wheelsmithy wrote:
How did you design your suspension? CAD? Scale model (is it called a string something? It's been some years)? The bell cranks and A-arms and such are works of art. Also, as long as I'm nagging, are you thinking mid or front engine on the Subaru?
I used Microsoft excel for the geometry analysis (motion ratios, VSAL etc.) and then designed the 3D aspects using Pro/E (actual bellcrank design, chassis geometry, suspension arm shapes etc). It worked well. I put the whole car in Pro/E mechanism (so it could be manipulated with suspension driving bellcrank, steering) and ran some analysis to validate the excel design for RC location and camber curves. It sounds more impressive then it was. Mostly (numbers from memory) I just picked a RC height 3" F/ 5" R and a VSAL 180" F/80" R and in the front let the stock lower ball joint and oil pan width drive everything. In the rear the width of the miata diff arms drive the upper inner arm location so the rest of the geometry followed.
The Subaru will be mid engined if I ever get around to it.
Thanks for the kind words it's encouraging when peole follow along and engage in the project.
Main fabrication work is complete. It's aluminum panel time. Cleco's are my friend.
It's going well so far. I have a list of required panels that will be permanent so I'm trying to do those well. There are only 13 more of those then it is temporary ones for early car use. Those will go faster and be less well done. The two footwell sides are the worst on the car and both are done and look ok. The fit is good enough that seam sealer will make then fine. I have to wait to rivet them until the tunnel sides are ready to install. The drivers side is done. The template works mirrored with a small adjustment for the passenger side. I will try to document a panel build from Template to aluminum next time for those following at home to entertain you with a wrong way to do it.

NOHOME
PowerDork
7/25/16 6:20 a.m.
Dusterbd13 wrote:
Just finished reading the thread on locost. Fun!
And you seem to fall into the same trap I do:tearing back apart for improvements before finishing the last round.
Makes the project take forever....
I don't see this as a problem. It is more of a problem if you don't do these development cycles; makes the difference between a collection of rolling regrets and a vehicle you enjoy driving at the end of the project.
nocones wrote:
I used Microsoft excel for the geometry analysis (motion ratios, VSAL etc.) and then designed the 3D aspects using Pro/E (actual bellcrank design, chassis geometry, suspension arm shapes etc). It worked well. I put the whole car in Pro/E mechanism (so it could be manipulated with suspension driving bellcrank, steering) and ran some analysis to validate the excel design for RC location and camber curves. It sounds more impressive then it was.
Wheelsmithy replied:
I appreciate the feedback. Really cool that you worked backwards from your roll centers. I basically accepted uprights engineered for a crappy mini van, and went from there. Learning is fun.
More panels. I have 4 permanently attached and 2 ready to go. I'm not sure how realistic nationals is at this point but I'm going to keep plugging along.
Firewall is done! Trans tunnel is done. I need to do the outside panels and I will then be onto the rear bulkhead. After that it's time to start final assembly.
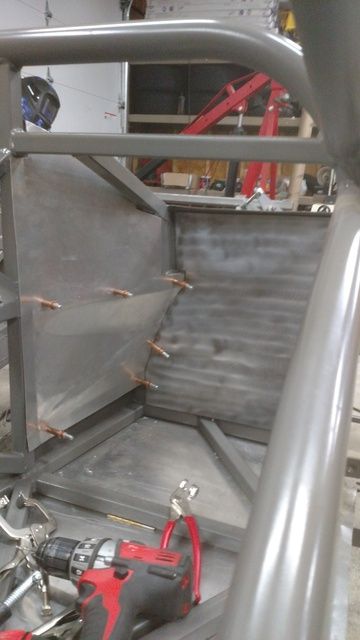
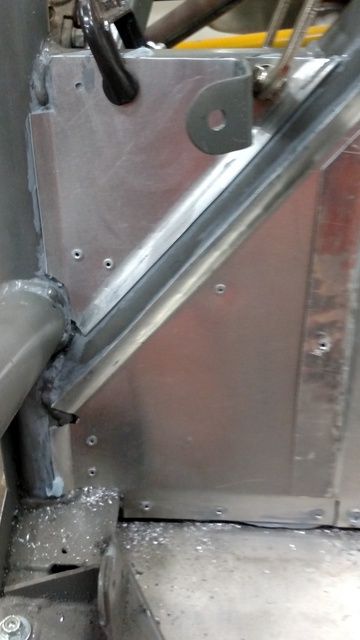
More panels. I did not want to drill any holes into the roll bar tubes. Obviously this made panel attachment to the roll bars difficult. Luckily I only had to deal with this on the rear bulkhead behind the seats. It was worst behind the passenger seat where the battery box, vertical rollbar, and diagonal all live. I ended up welding short metal tabs to the bar and bending 1/2" tabs on the panels. This was then riveted with seam sealer under the flange. It seems to work ok. We will see what happens when the car starts moving around. I may end up having to redo these but they work for now.
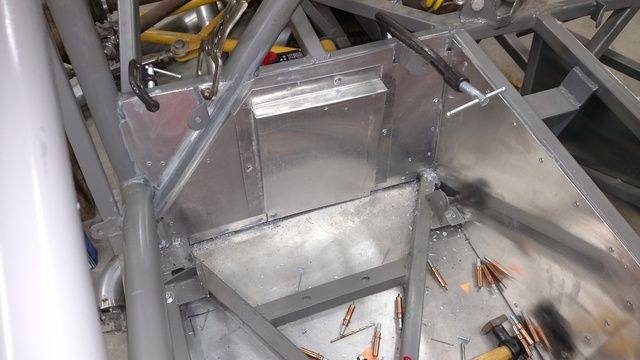
 Additionally the battery cover was completed. This is a very mundane part but I formed all the panels armed with two 90* pieces of angle iron and a rubber mallet so i was proud of how nice this ended up.
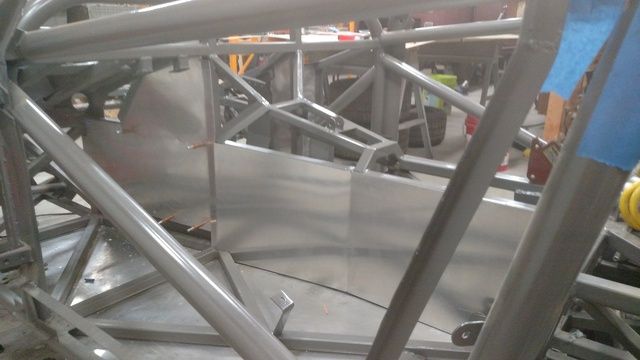
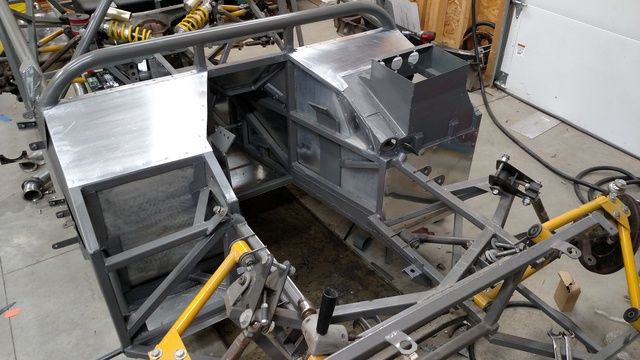
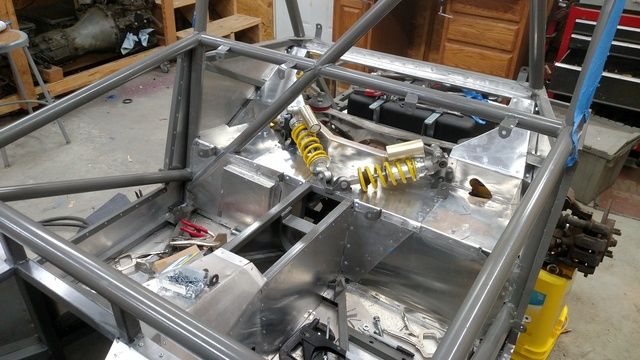
Last weekend I ended up getting almost 12 hours in the garage and had a few friends over to help. We were able to get almost all of the aluminum completed. I guess it was vanity or insanity but I decided I couldn't just do the parcel shelf area the simple way. I had to have the shocks visible. This meant a fair amount of additional work to notch the pushrod hole for all suspension travel and motion ratio adjustment positions. Additionally i had to consider removing the diff. I am more than pleased with the finished product.
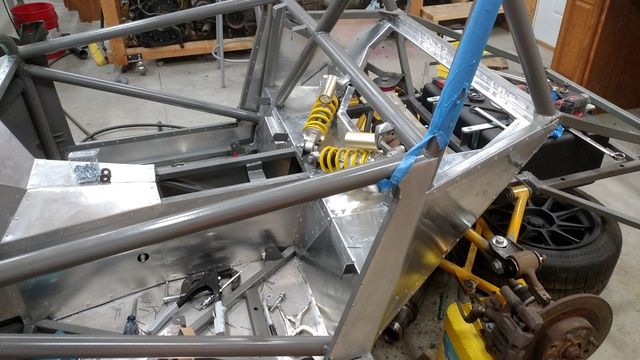 I still need to cut a large panel that will fill the diff hole and be held on with TEK screws. Believe it or not that is 1 piece with 2 bends. After that the required panel work is completed. I will move on to finishing off the front scuttle/firewall then it's finally assembly time.
At this point I have changed my nationals registration to a friend's AS C5 Z06. That will get me there on D/Emod run days and my run/work assignment will allow me to get plenty of time watching the action and meeting the people for next season. I'm sad that I didn't get it done in time however i will be able to get it done and drive if prior to the end of the season which will be a really good place for next year.