fujioko wrote:
My dad taught me how to do bodywork and paint when I was a kid. As I recall, dad would take a lot of shortcuts with aluminum foil. He once reinforced a car door with pressure treated wood. He was old school and used nails instead of drywall screws. I have un-learned some things over the years.

Thank you for posting that.

petegossett wrote:
fujioko wrote:
My dad taught me how to do bodywork and paint when I was a kid. As I recall, dad would take a lot of shortcuts with aluminum foil. He once reinforced a car door with pressure treated wood. He was old school and used nails instead of drywall screws. I have un-learned some things over the years.
Thank you for posting that.
LoL...
My dad had his unorthodox ways however he was an artist with body filler. He could sculpt lower quarter panels with nothing but aluminum foil and bondo. He even duplicated the spot welds.
The Door….
The Boler door was still dripping water by Friday night and it looked like the flow could go on a few more days. I decided to go ahead and open the door up and see what was going on.
I used a Rockwell multi-tool with a crescent cutting blade to filet the fiberglass panel off the door. The tool is great for this kind of cutting.
The internal damage to the core was pretty bad. I couldn’t identify what the core was made of, but it was some type of wood product.
I decided to go ahead and reinforce the door with some plywood strips.
Apparently, the apple doesn’t fall far from the tree……
I cut a bunch of strips on the table saw and my plan was to stack the strips inside the door cavity. No nails or drywall screws would be necessary Although a few wouldn’t hurt.
The door was rehung and adjusted with the turn buckles for a nice fit. Then removed the door and l glassed in the repair. I went with three layers of random matrix cloth on the initial build up. Once the resin cured, I rechecked the door fit. Perfect! I then finished the repair with one layer of woven cloth. I speculate the woven cloth will help the door keep its shape.
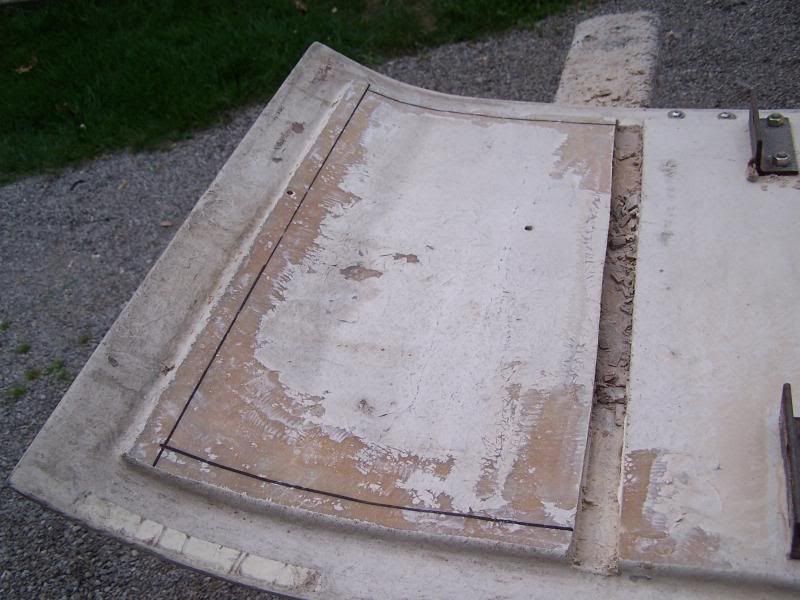 Door being prepped for surgery
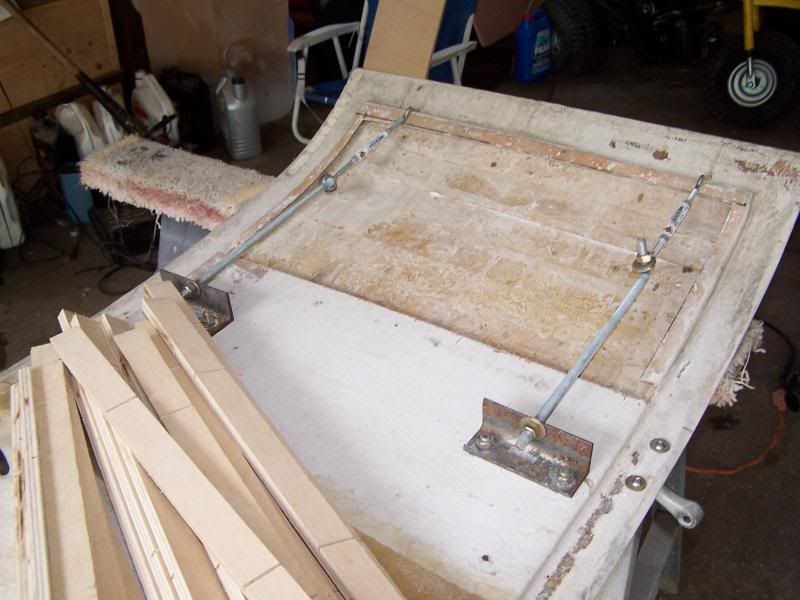 Reinforcing the door with plywood strips.
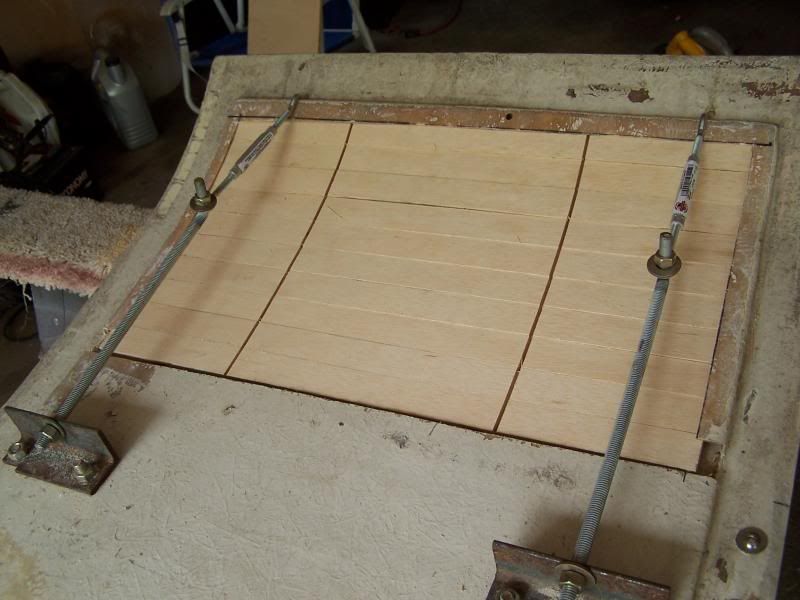 Strips stacked and ready for fiberglass mat. I cut drainage groves into the strips and then used packing tape to cover the groves.
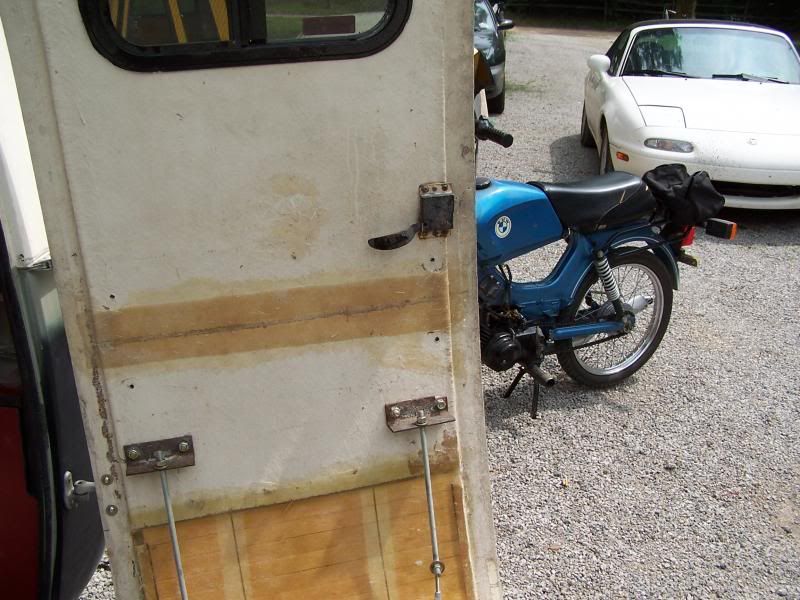 Door hung to confirm all is well.
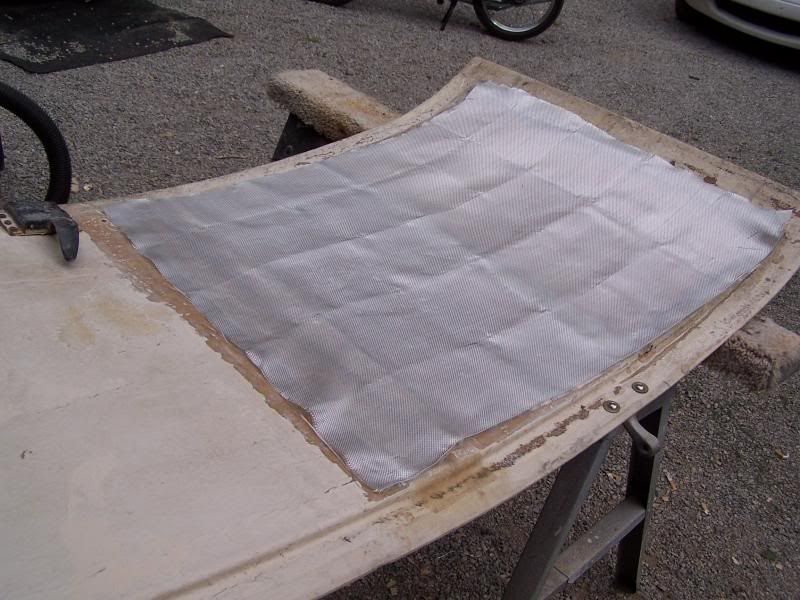 Final layer of woven cloth cut to size.
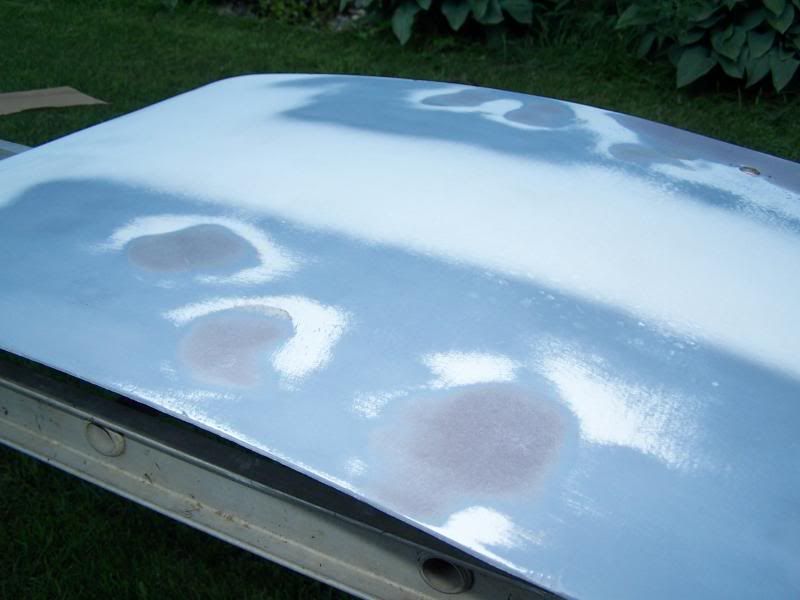
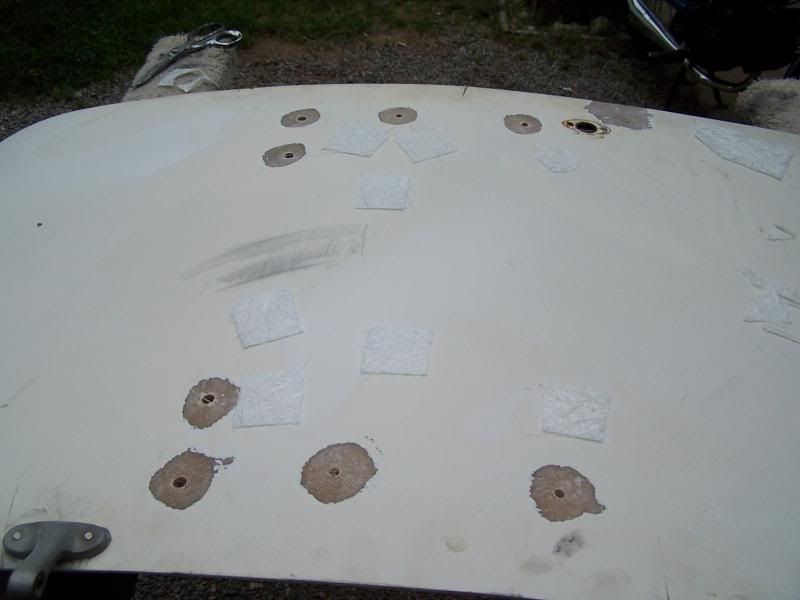 bullet like holes getti'n some glass and bondo.
Using plywood! That is classic! Dad would be proud!
"Smoother than a rough day on the old south bay!"
Love it!
The weather has been a bit unpredictable however the camper project made some progress this week. I’m starting to see the end of the tunnel.
I picked up the paint supplies and a new harbor freight spray gun last week. I have used HF paint guns before and they are good for a few paint jobs. I should just fix one of my good guns and stop giving my money to the Chinese…. Oh well.
 Windows 1972... still better than Vista.
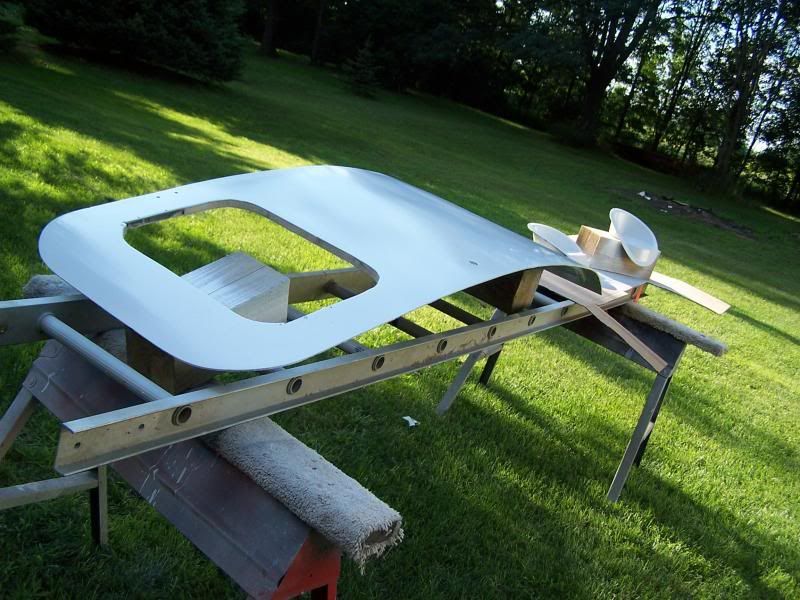
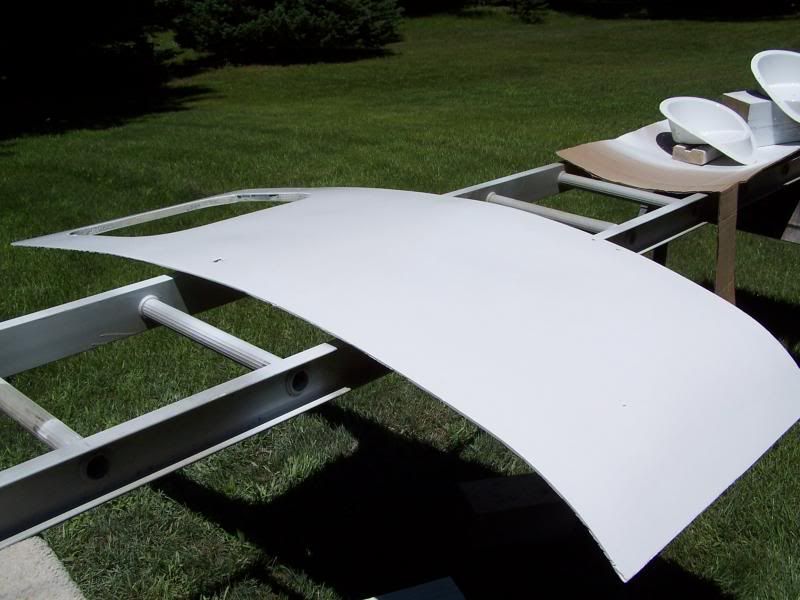
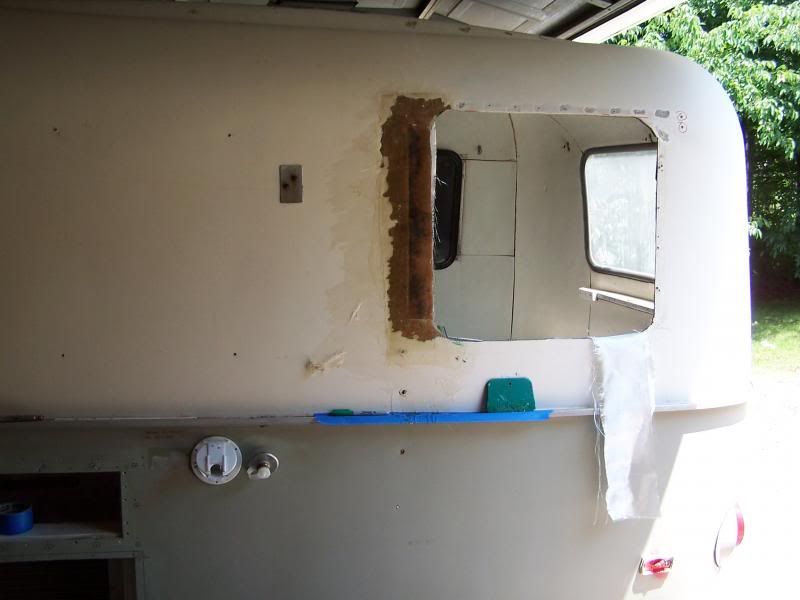 Reformatting the window
 The last of the big repairs!!!!!
 Fix'n the little stuff. Here I'm using resin jelly instead of bondo. Apparently bondo shouldent be used on fiberglass.
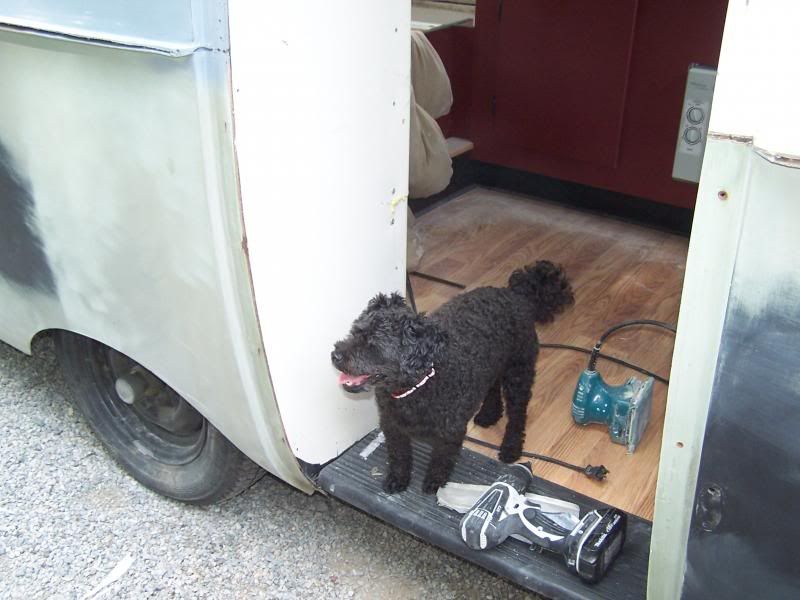 Hideyoshi (AKA Tony) checks out the camper.
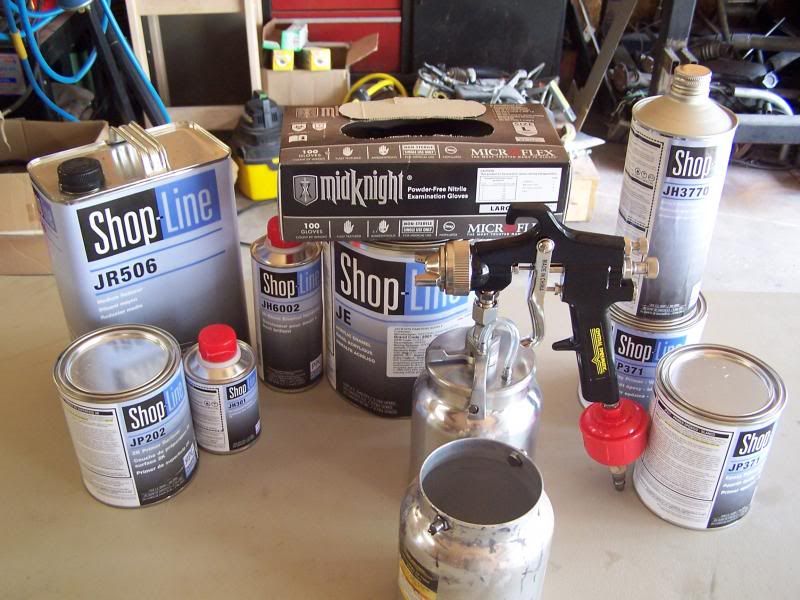 Paint!!!
We got 2 qt of two part epoxy primer sealer in white and 1 gallon of appliance white enamel. Scamp recommends appliance white for painting the campers.
Paint!!!
We got 2 qt of two part epoxy primer sealer in white and 1 gallon of appliance white enamel. Scamp recommends appliance white for painting the campers.
 Towed into the paint booth with the lawnmower.
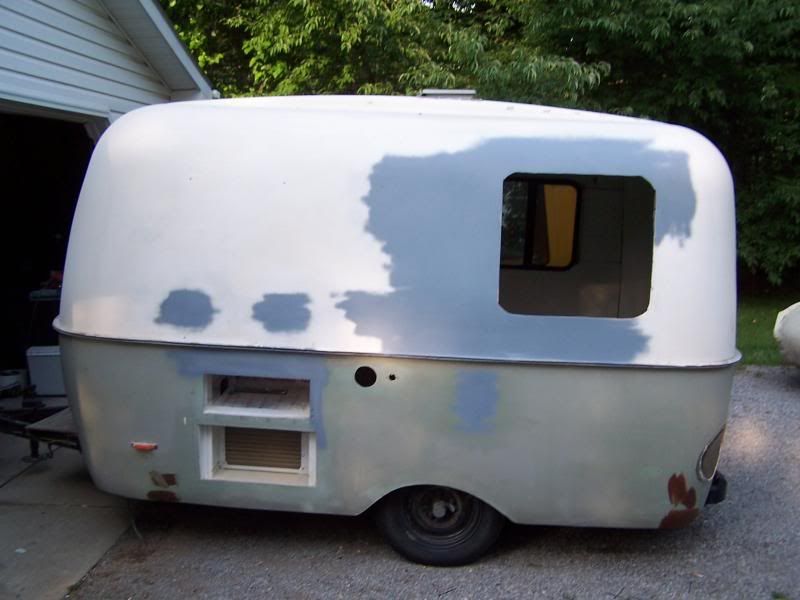
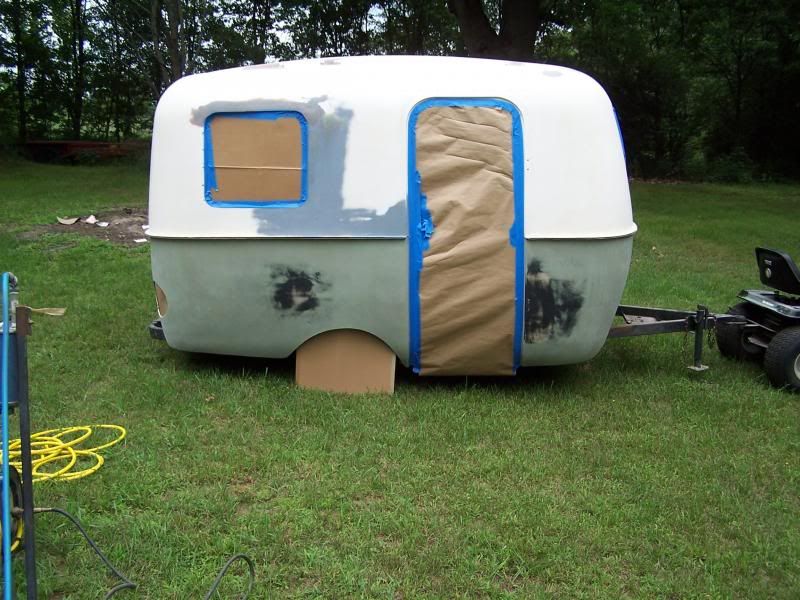
 Two coats of epoxy primer./sealer. The primer/sealer needs to be mixed then set aside for 15 min before it can be sprayed. After the camper got two coats, I let the epoxey set up for two hours then starter to apply the enamel.
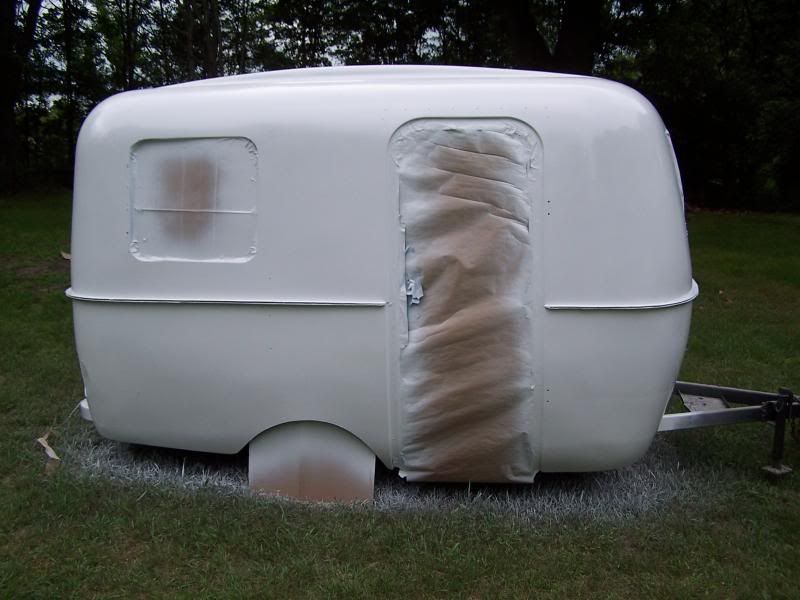 three coats of enamel with hardener. My paint booth isn't 100% sealed and a few kamikaze dragon fly's crashed into the side of the camper. I just picked them off and told myself "that will buff out".
 Moar paint!
 I'm sure the lawn mower will fix this.
Stay tuned!
Cool project!!! And cool motorcycle!
Slippery wrote:
Cool project!!! And cool motorcycle!
Thanks!... The bike is one of a kind.
Moar paint!....
One way or another I’ll be wrapping it up this weekend. This odyssey of fiberglass bondo and paint has taken about a month and the results are starting to show. I have one more paint session before finial assembly and then I can move on to the interior.
 This is me lately
 Putting it back together!
 The door didn't get painted last week because it required extra attention. Finally its ready for epoxy primer
 Two coats of primer... done!. I'll let the primer set up over night and if the weather is good I'll shoot the paint tomorrow.
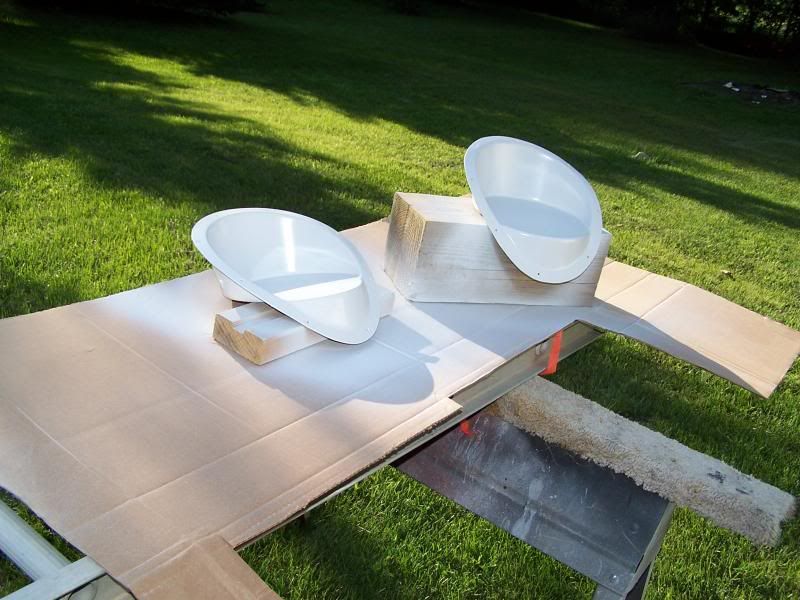 Taillight buckets are also primed and ready for paint.
Stay tuned!
I find this fascinating. Keep up the good work!
Looking at the nicely painted side I realized something-its going to get all water stained by the a/c unless you did some special draining. Usually those units just dump water out the back and onto the ground. Only yours doesn't have ground out the back but sits in a nice deep box. Hopefully you knew this and took care of it and I never saw that part of the post. If not you might want to look into it.
fujioko wrote:
I'm sure the lawn mower will fix this.
You'd be surprised. Last time I painted the lawn it stayed for a really long time!
Excellent project, keep it up!
Very cool!
We rebuilt an old Shasta...
Nice build! Now you've got me trolling Craigslist for camper trailers.
BTW, is the thread title a Last Starfighter reference?
fujioko
HalfDork
7/13/13 12:17 p.m.
Junkyard_Dog wrote:
Looking at the nicely painted side I realized something-its going to get all water stained by the a/c unless you did some special draining. Usually those units just dump water out the back and onto the ground. Only yours doesn't have ground out the back but sits in a nice deep box. Hopefully you knew this and took care of it and I never saw that part of the post. If not you might want to look into it.
Good point,
The A/C dumped condensation inside to cabin last summer. I think I need to drill some drainage holes in the A/C chassis and the plenum floor. I seem to recall there is at least one drainage hole under the A/C but it might not be in the right spot.
Unfortunately I didn’t shoot any pictures of the A/C box and plenums.
I’m not 100% certain the A/C will still work with the covers on the intake and exhaust plenums. I put an opening cover on the exhaust to help with flow but I may also need to put and additional opening cover on the intake.
I think the El- Cheapo $100.00 A/C is the way to go on a camper. The alternative is a roof top unit and the camper would no longer fit in the garage.
In reply to mightymike:
The Shasta looks sweet!
MadScientistMatt wrote:
Nice build! Now you've got me trolling Craigslist for camper trailers.
BTW, is the thread title a Last Starfighter reference?
Do it!. My neighbor buddy's are all looking for campers to restore. Camp with the family or chill out in the yard.
I haven't seen the Last Starfighter, I'll have to check it out.
It's a wrap!
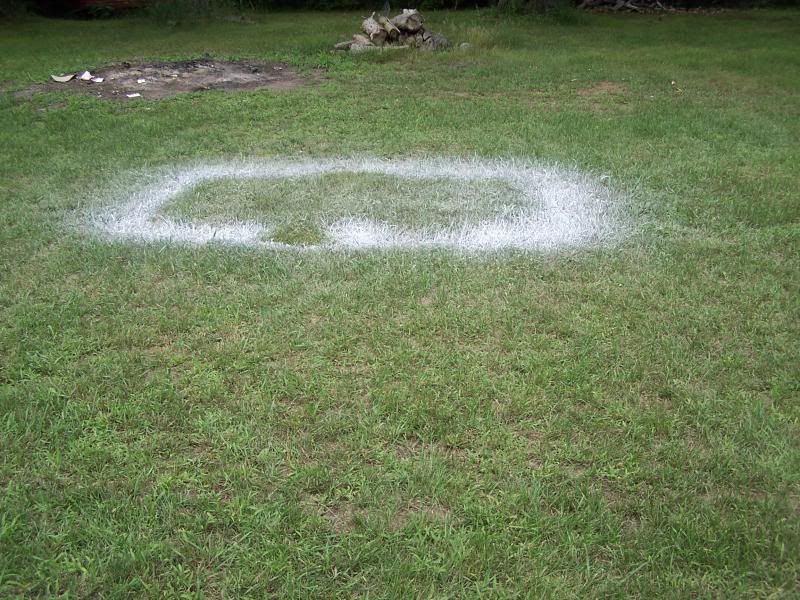
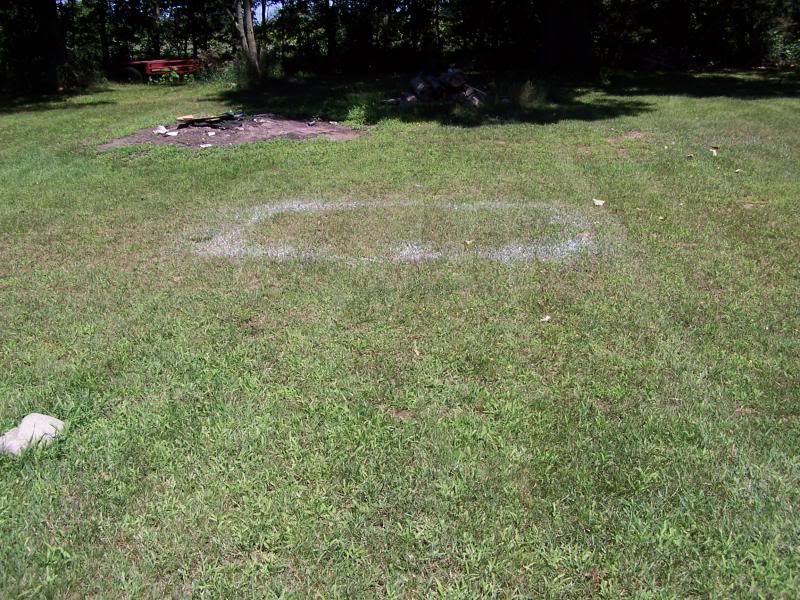 1 week latter…. I’ll give it a second application of the mower in a few days.
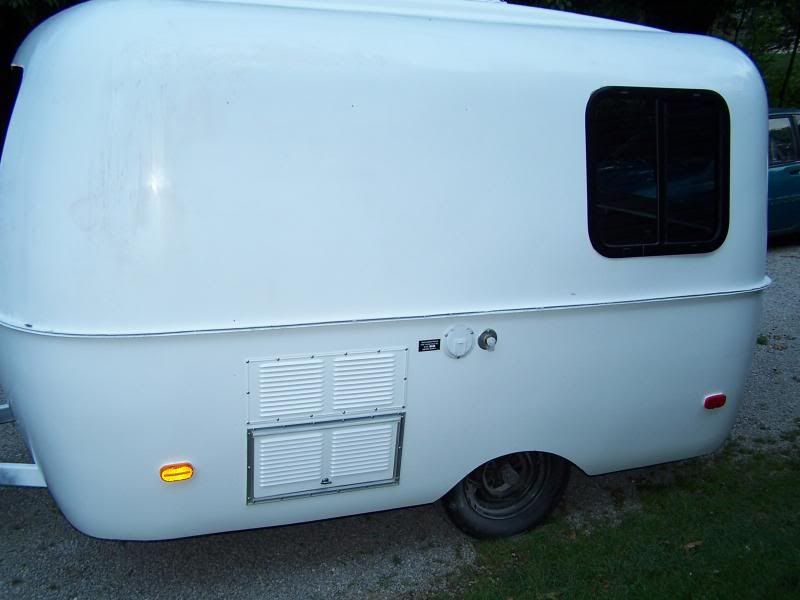
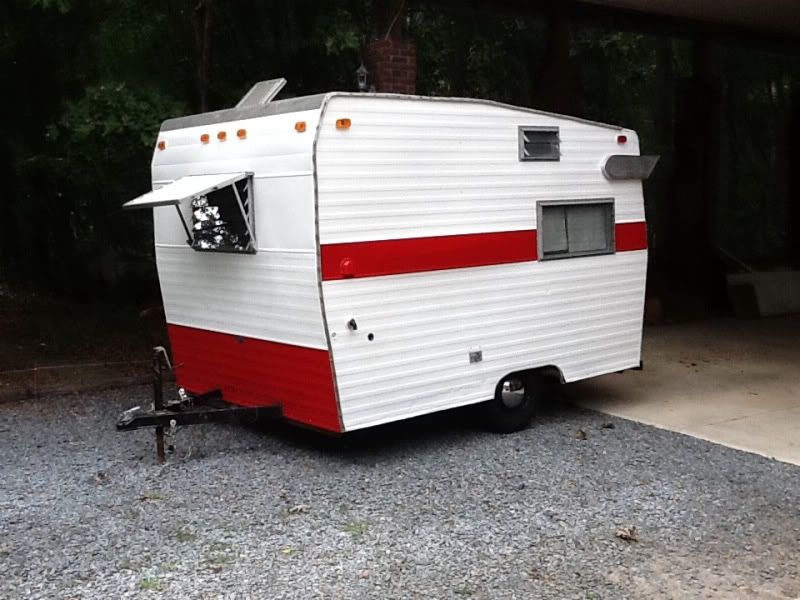
 Painted!
 Touched up the kamikaze dragon fly strikes.
 Done!
Done!
Stay tuned!
We need to add a/c like you did. I think we would use it more often in the summer.
I looked for Bolers and Scamps before we found the Shasta. I would have liked an older one, the "Canned ham" style, but the price was right on his one.
Be prepared-you will get a ton of attention and questions at campgrounds and gas stations.
Great job!
The Last Starfighter usually isn't very quotable, but there's a scene where a character who lives in a mobile home tries to explain it to a subterranean alien, and the best description he can come up with is "a portable cave."
mightymike wrote:
Very cool!
We rebuilt an old Shasta...
Did you post this on Reddit? Figures it's a GRMer.

cdowd
Reader
7/16/13 1:37 p.m.
congratulations you earned that beer!
Atomictaco wrote:
Using plywood! That is classic! Dad would be proud!
"Smoother than a rough day on the old south bay!"
Love it!
Hey Dave!
Yeah, the fiberglass hull on this camper has some natural waves in it. It's more like a rough day on the great south bay
Meanwhile....
The paint came out really nice for a backyard application. I went ahead and color sanded and buffed it out with the wheel. I wasn’t really planning to buff out the paint, but it’s a nice touch. Shooting enamel in a real paint booth can result in a finish that doesn’t need any additional work.
It took five days to buff this little elephant out.
Then.......
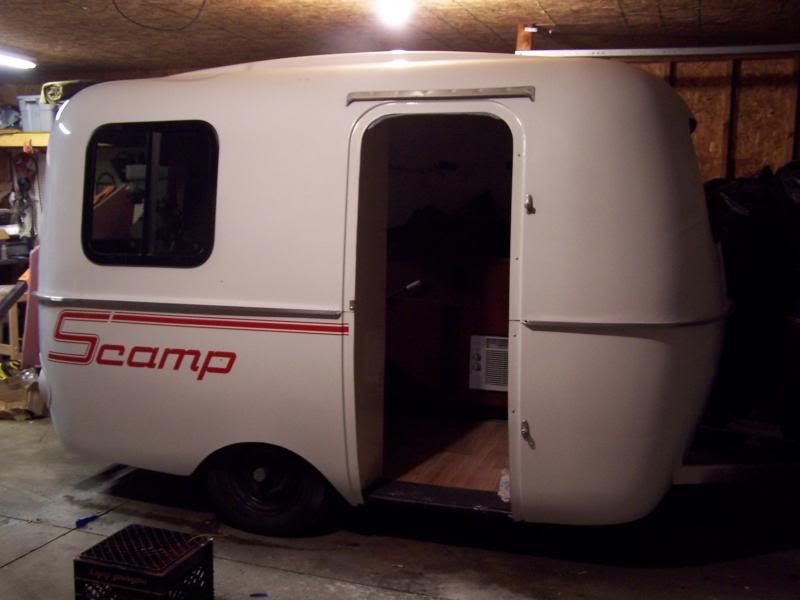
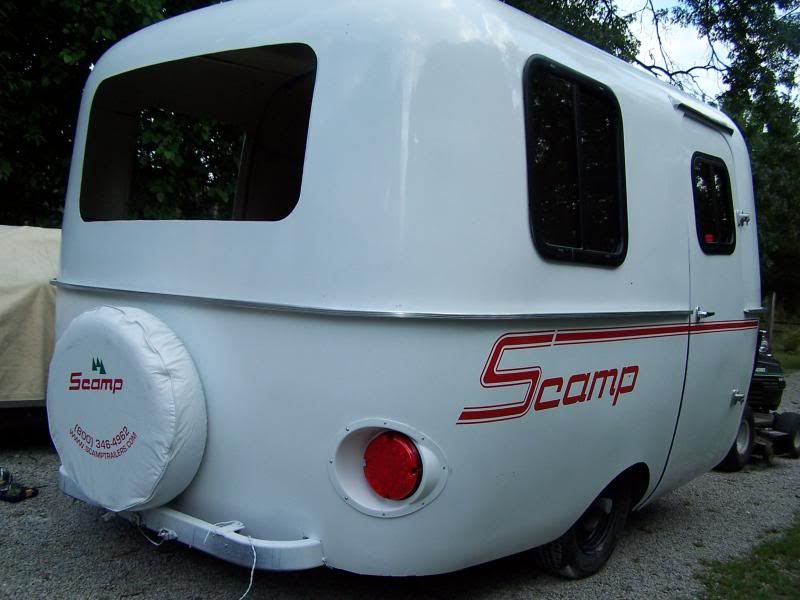
I screwed up and accidentally ordered Scamp decals. To make matters worse, I tripped and the decals fell on to the side of the camper with such force I am unable to get them off. Damn!
The spare tire needed a cover to protect it from the elements. I found a tire cover on the internet for a reasonable amount, however when it arrived I discovered it had writing all over it. Ironically the writing matched the decals that accidentally fell on to the camper.. Sometimes I step in E36 M3 and come out smelling like a rose.
The tail light lenses are most likely original. One of the lenses has a huge crack and some unattractive silicone holding it together. Unfortunately Scamp doesn’t sell the vintage tail light lenses any more.
I discovered the Boler / Scamp crowd use 7 inch school bus LED brake lights as a replacement. The new taillamps were $50.00 and the problem was solved.
I picked up some materials to start working on the interior. Hopefully I can get started on the inside accommodations this week.
Another late night in the garage.
 S C A M P is how you spell Boler. I think....
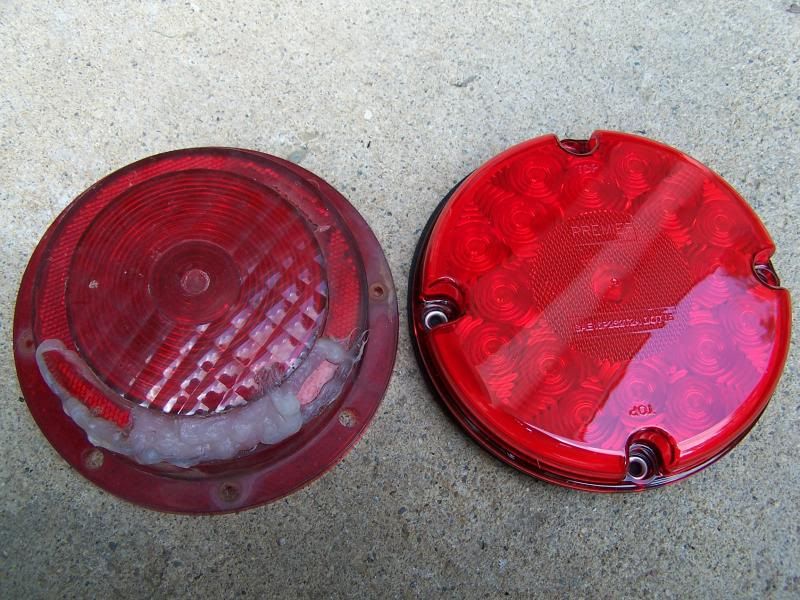
LED School bus tailights!
Making progress......
Stay tuned!
Needs some baby moons, but those axles look like they stick out too far...will any cool alloys fit?
Thanks for the comments!
Junkyard_Dog wrote:
Needs some baby moons, but those axles look like they stick out too far...will any cool alloys fit?
I think the axle thingies are bearing caps with grease fittings.
I'm sort of undecided at the moment about what to do with the wheels.
I can go with red rims and chrome baby moons... or white rims with baby moons..... or modern white spoke trailer wheels.
hmmmm..
Osterkraut wrote:
mightymike wrote:
Very cool!
We rebuilt an old Shasta...
Did you post this on Reddit? Figures it's a GRMer.
Nope-Not familiar with that site...
Great build. Grassroots Camper Sports

beans
Dork
7/24/13 12:31 p.m.
Ok. You got me. I want this. I can 'do my duties' in the bushes. Bed, TV, fridge. Fold out card table/chairs stashed behind something/under bed. Add a little gas grill somewhere, 100%. I'd live out of that thing.


