


The SpiAta looks awesome! (Spitfire and Miata combined into SpiAta!)

The SpiAta looks awesome! (Spitfire and Miata combined into SpiAta!)

Magnificent!

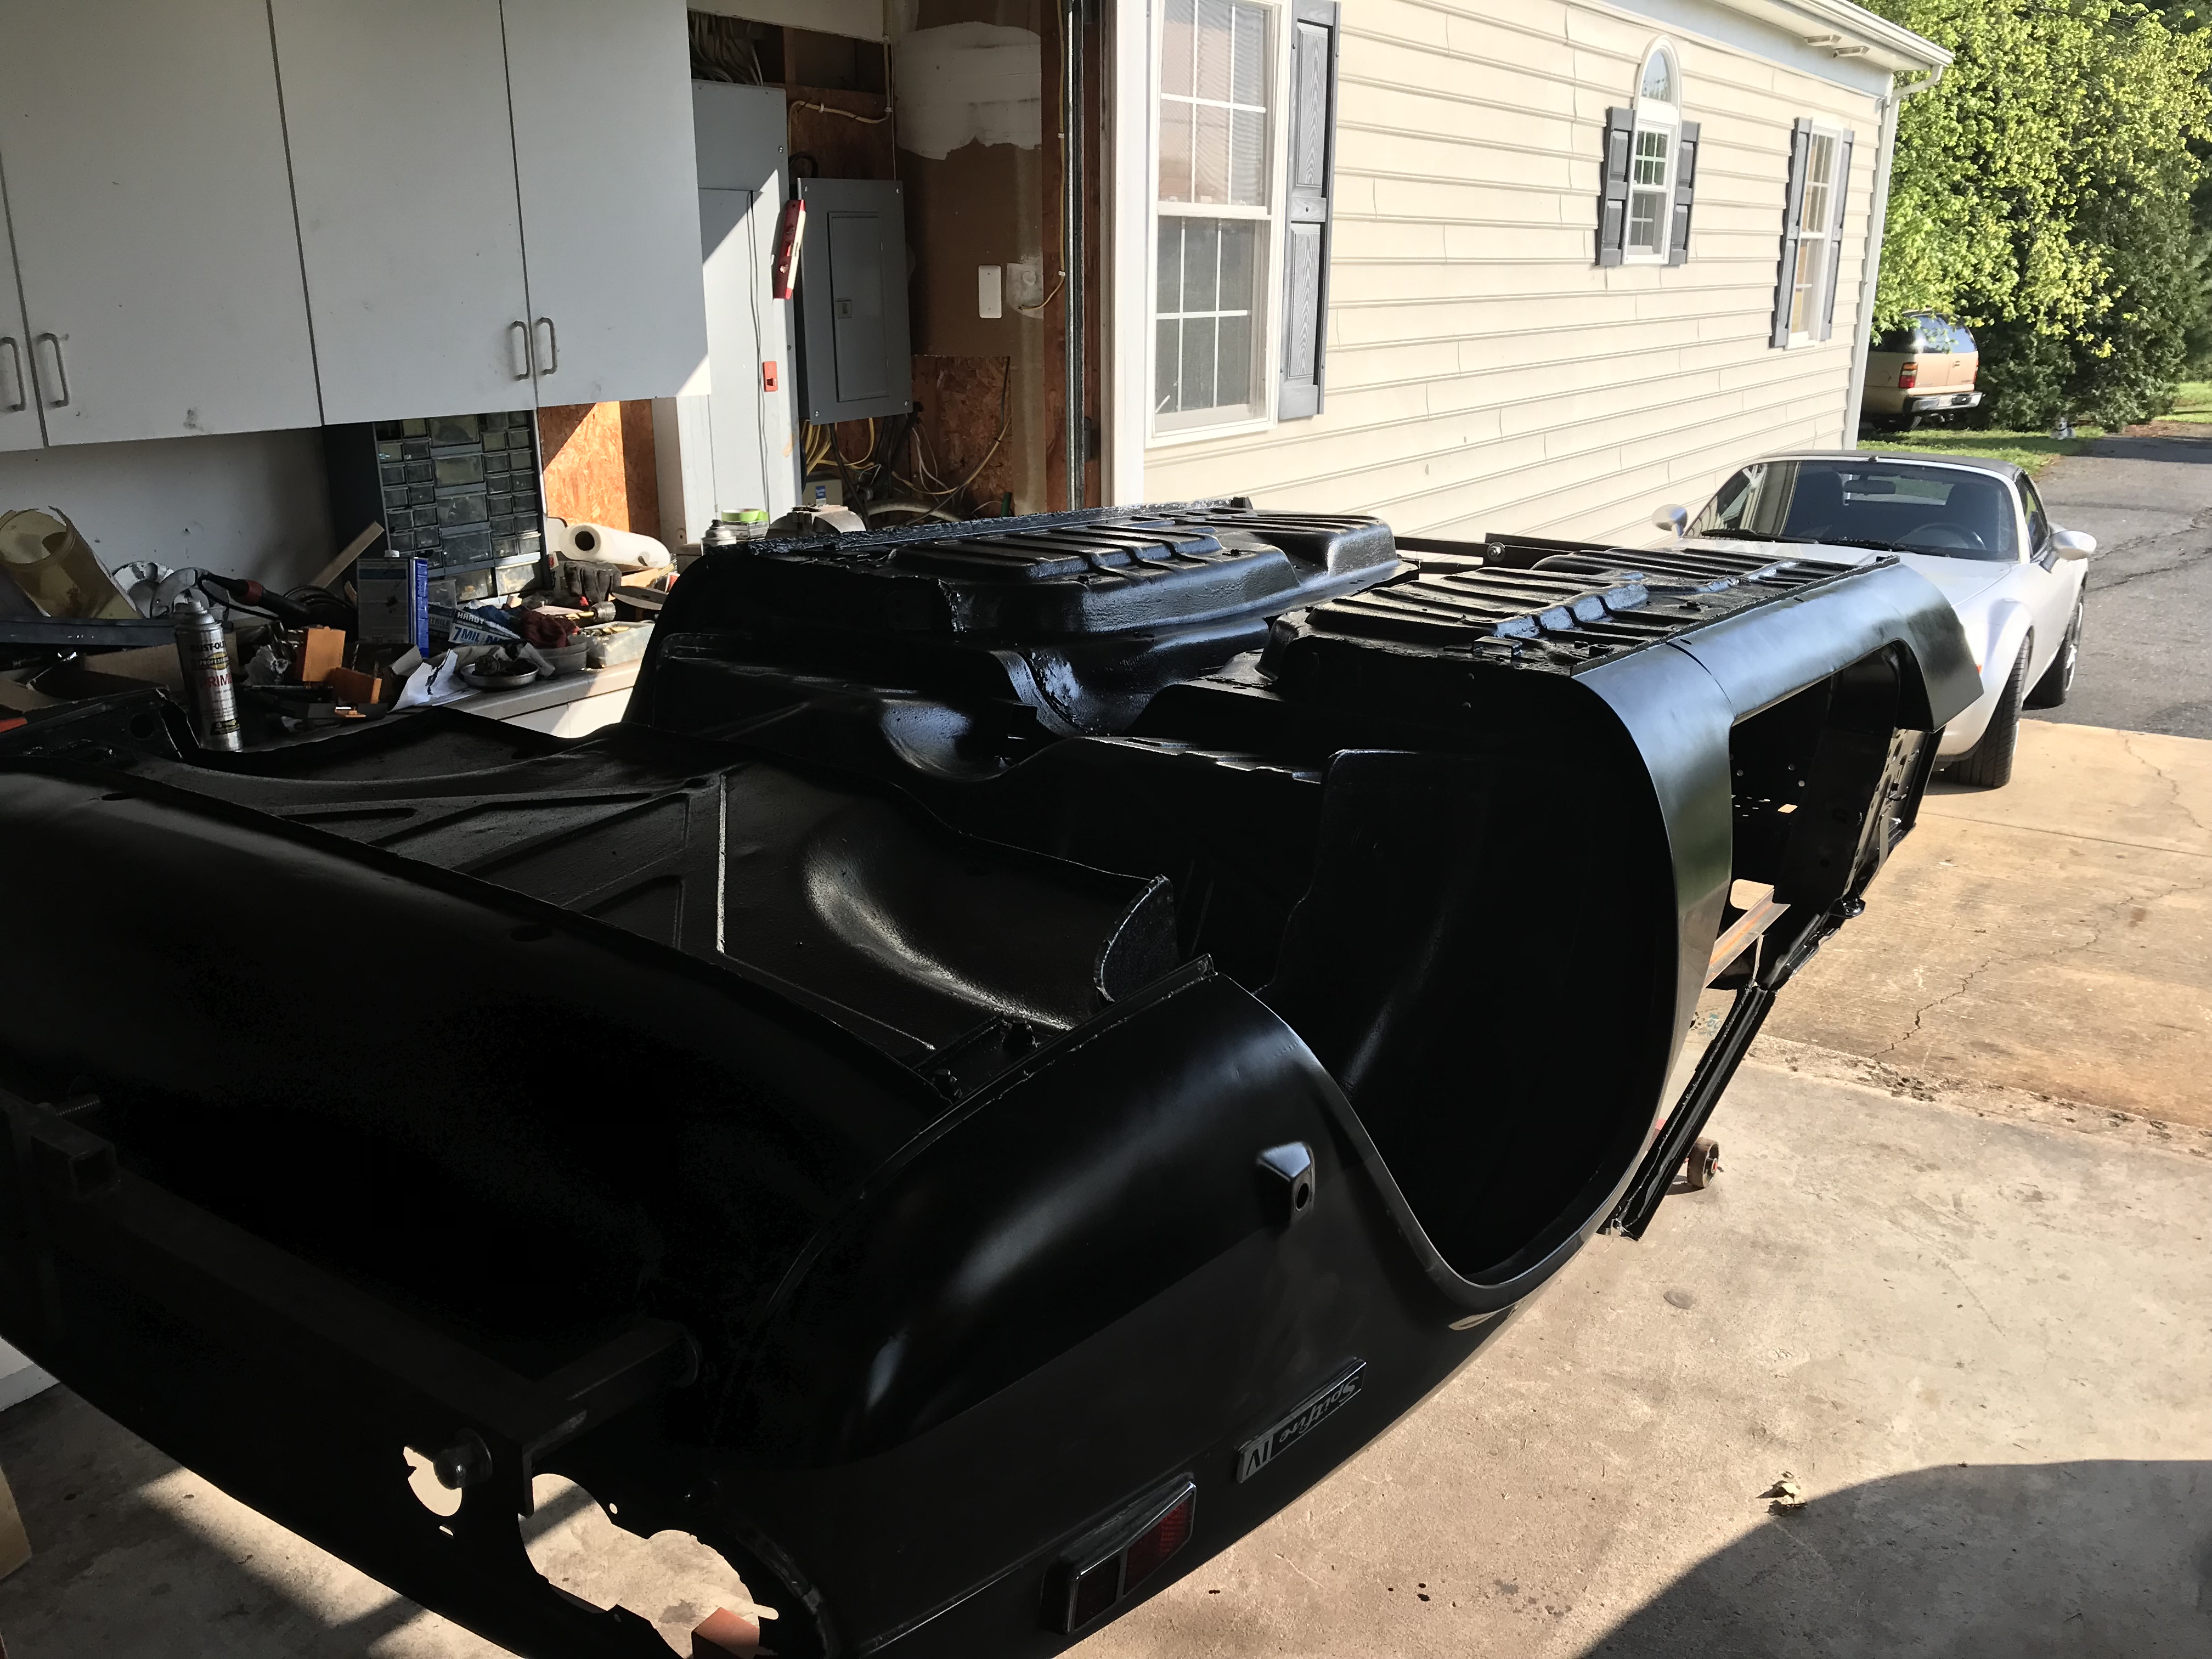
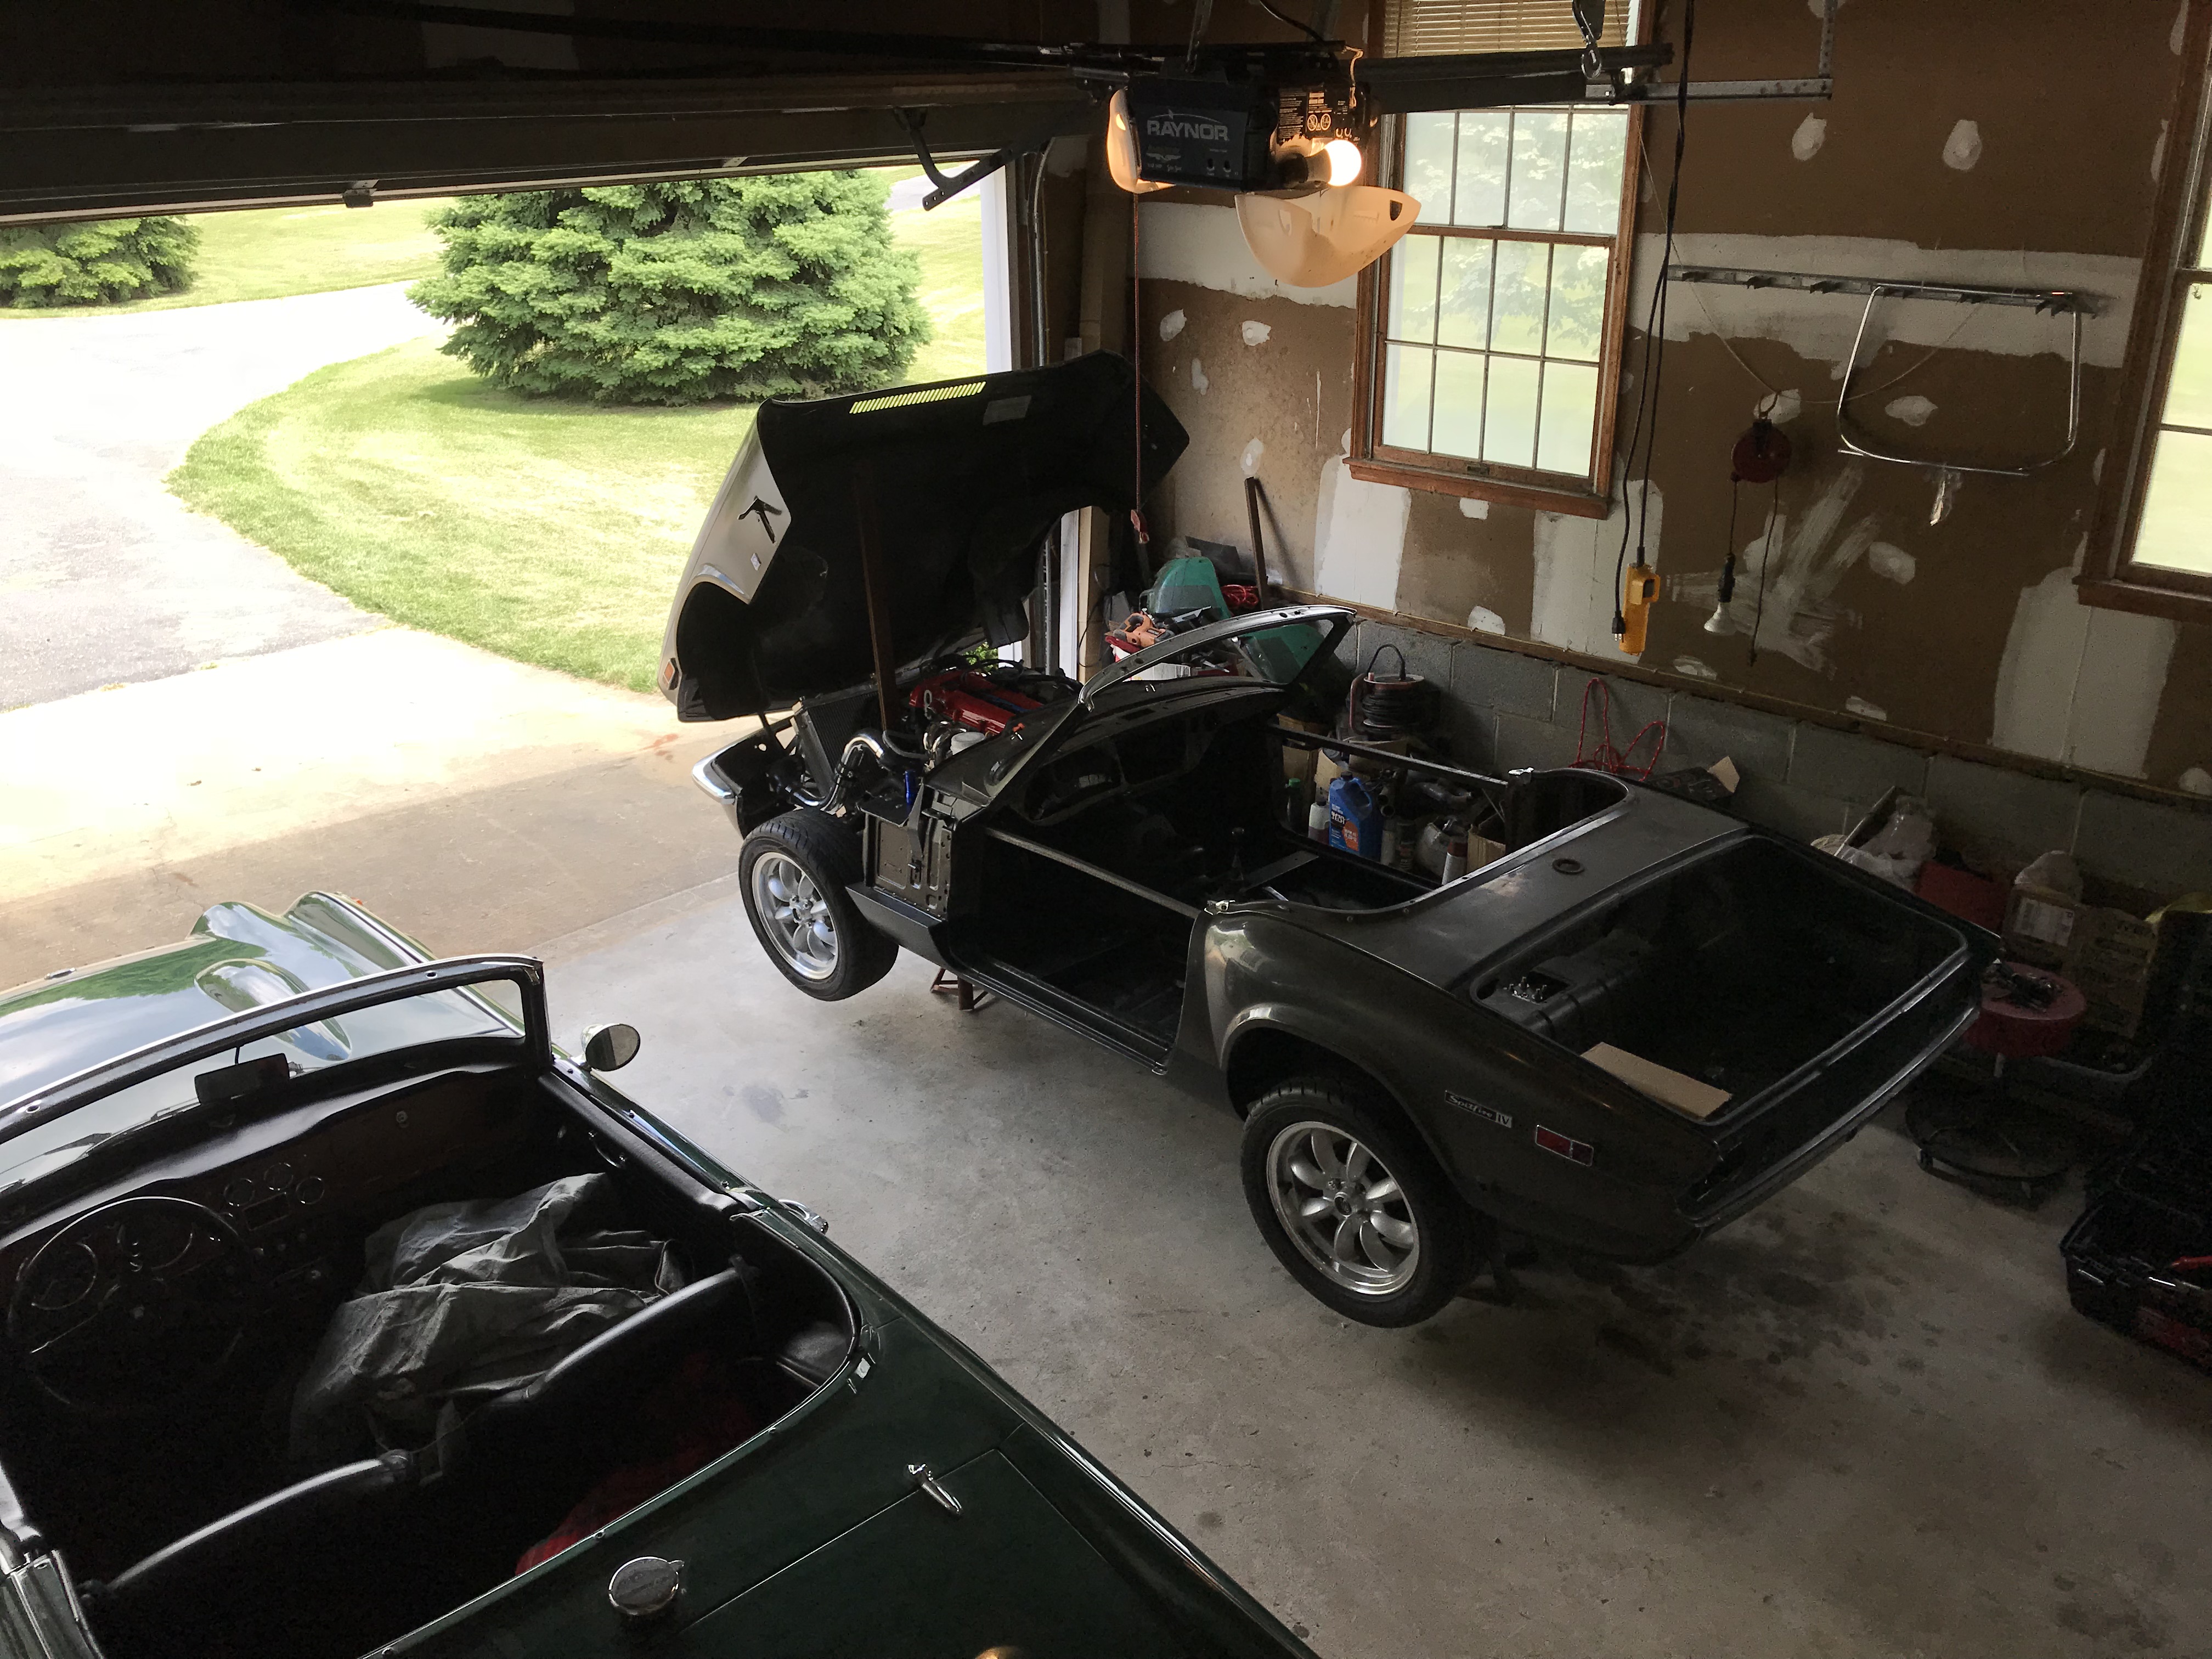
So my four day marathon was successful and the body is now ready to go back on the chassis. Goals for the body shell were to remove all the rust, rust proof the shell and do body work on the areas where the rust repairs would show. So painted with Eastwood rust converter, Chassis black and then undercoated the bottom and wheel wells with two coats of Por 15 bed liner. In keeping with the theme, I did not go crazy on the body work as the rest of the car has dings, so just made it reasonably straight, So this will go back on the body next weekend when I get back from my trip. Won't be done by Carlisle, but I'll still be up there that weekend as I need to find a windshield and some other trim parts, but it should be on the road in June.

Excellent progress! This just keeps getting better and better...
I'm certainy not stealing any of the ideas here, but I may borrow some ;)
This is an excellent build and I'm dying to see it finished. I'll be going down this deep, dark, and hilarous road soon myself. However, I'll not be using the same engine setup, going for something a little more on the "are you serious" side of things lol.
Thanks will have more pictures coming up later today. Working on the final work on the rear end so the body can go back on the frame this weekend. Finished up the rear brake lines, fuel lines and emergency brake cable arrangements. This is almost done so will post the last step and next steps will be getting the body back on the frame.
Are you skipping Carlisle this weekend?
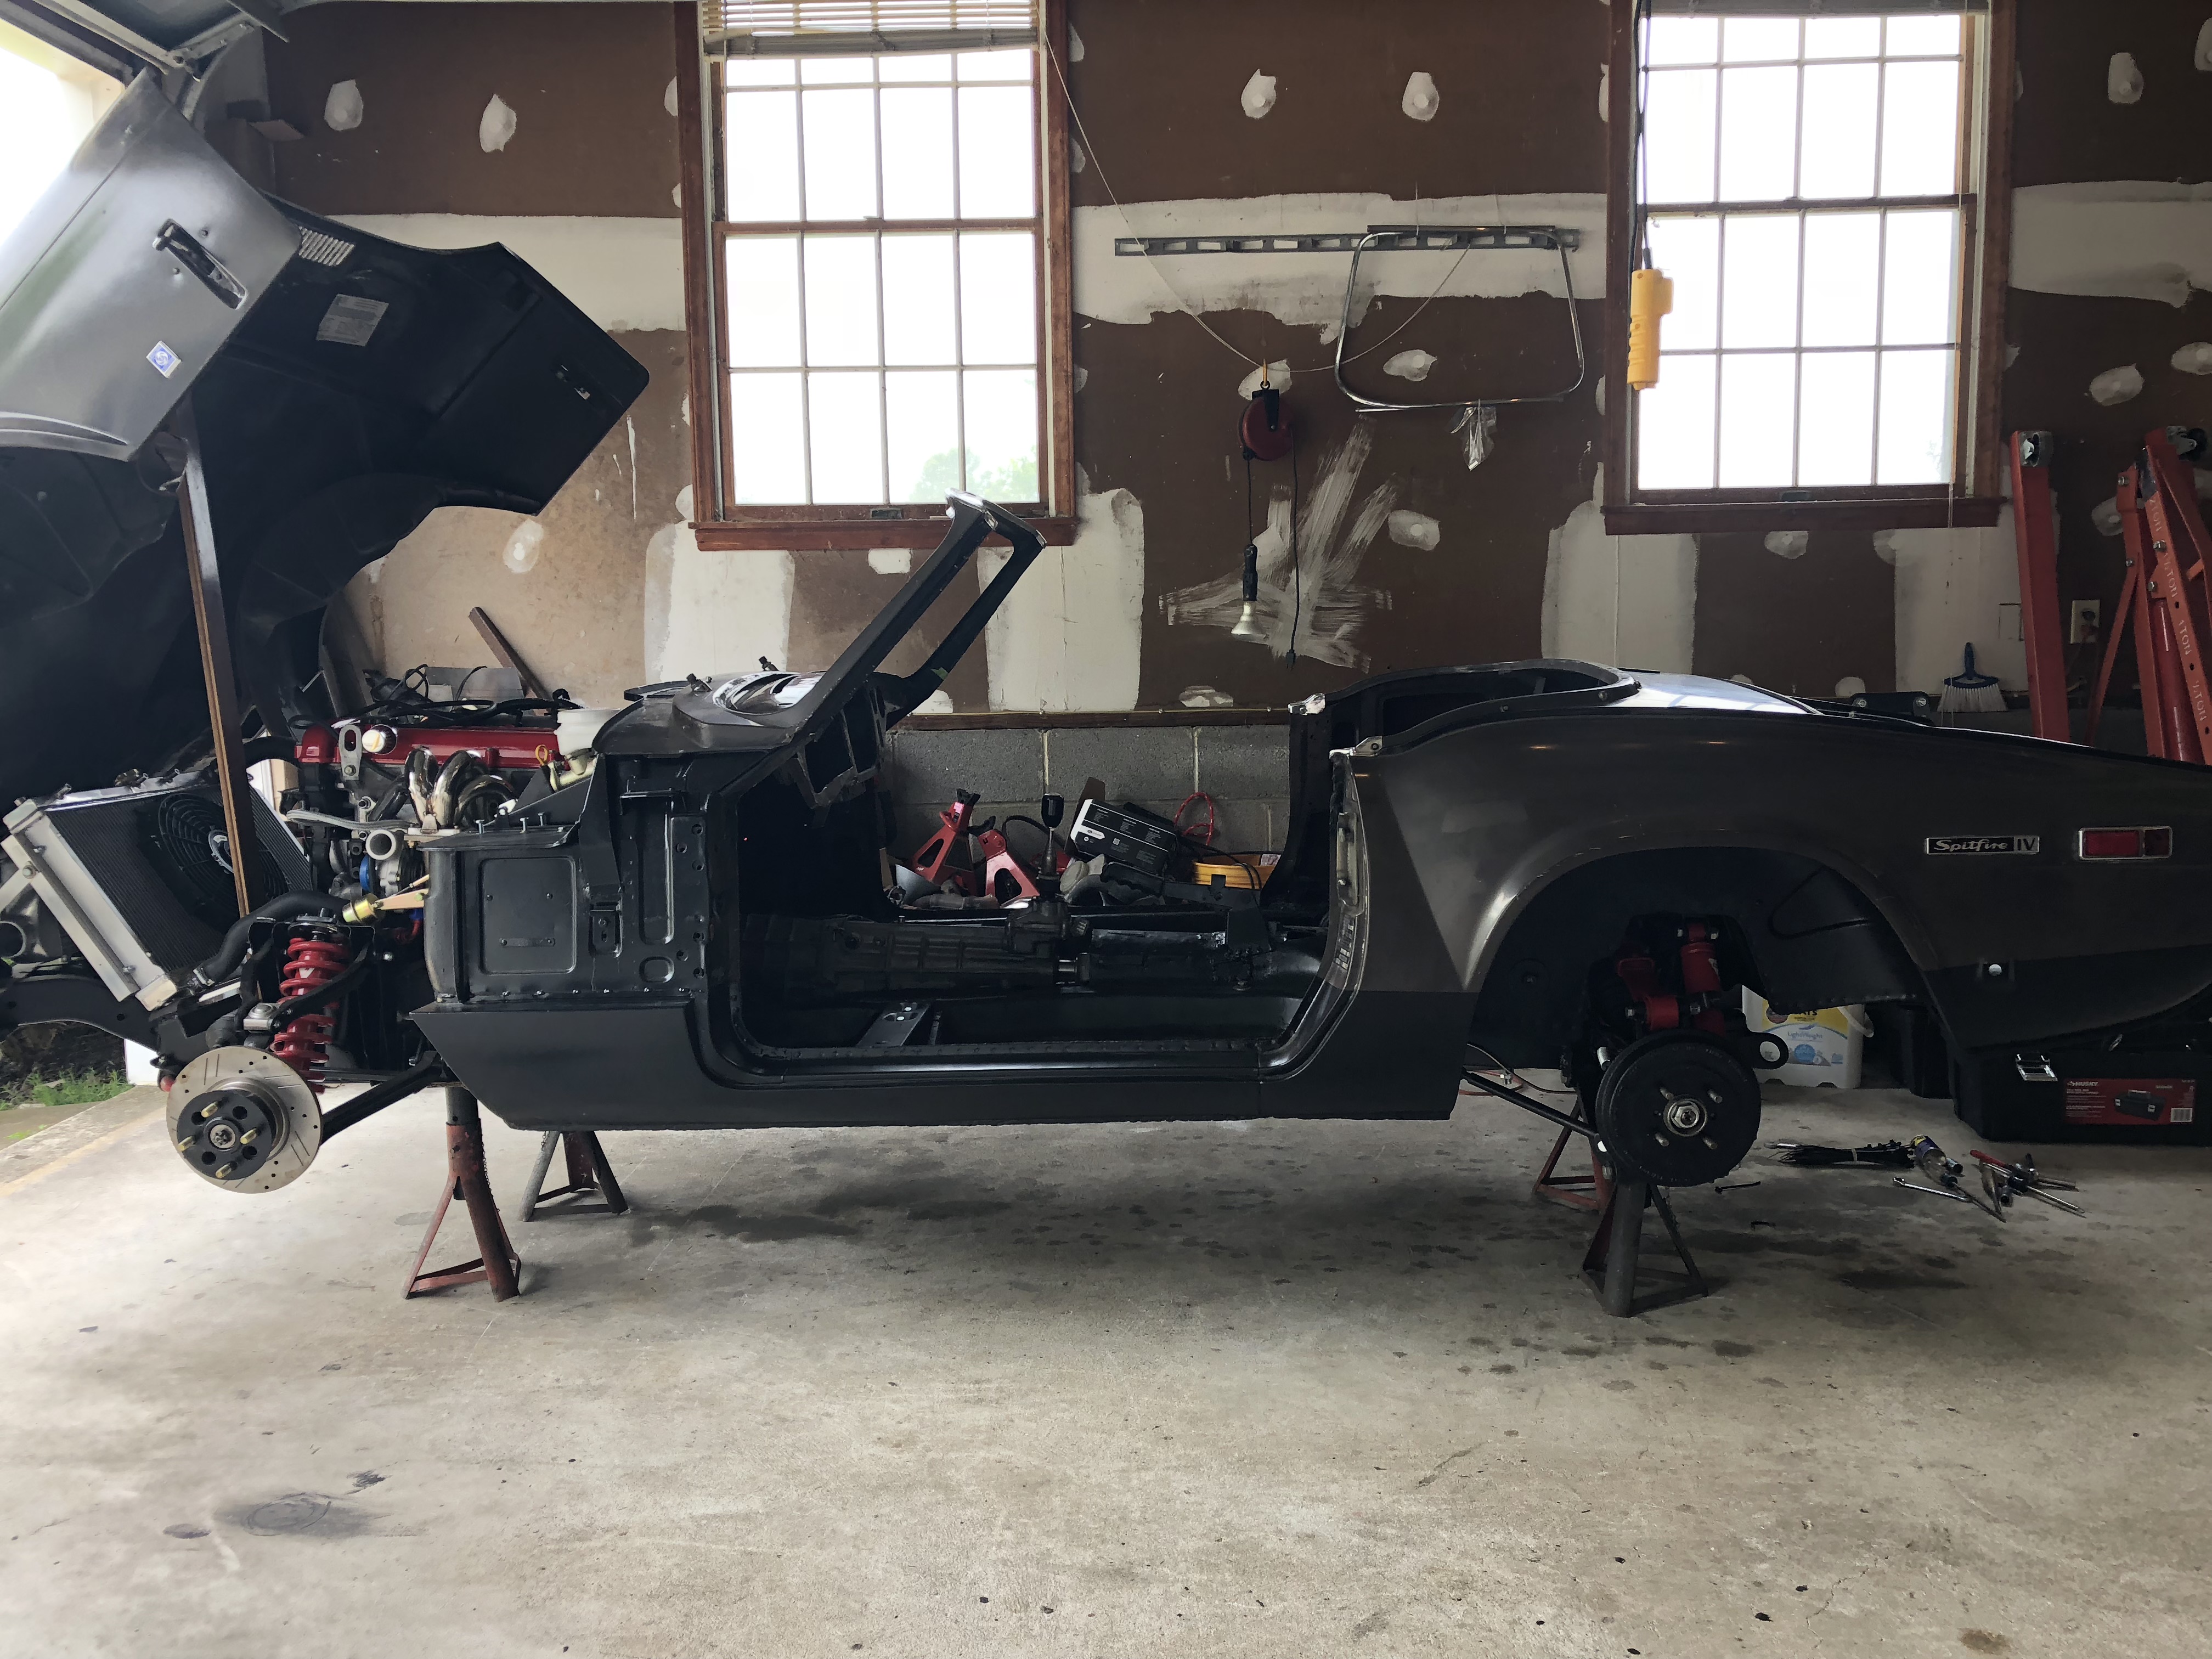
So in the final details necessary to get the chassis ready to mount the body. These things are so much easier with the body off, so while I am anxious for that step, some things like the emergency brake cable are really hard to figure out when you can't see anything. Case in point, how to route the cable that on a Spitfire normally runs around two small 45 bends before connecting in the center to a piece that connects to the pivot on the body that is pulled by the emergency brake lever. I had several issues one being that I had removed 45 bends when I did the differential swap, two was that a GT6 Rotoflex is run a little different and normally has the 45 bends mounted on the body shell. Finally, my brake lever is 6 inches further back so I'll need to shorten the cable that runs to the lever. So the solution needed to route the cable properly, take up the slack and be removable for service. Here is my result, bolts in and seems to work perfectly.
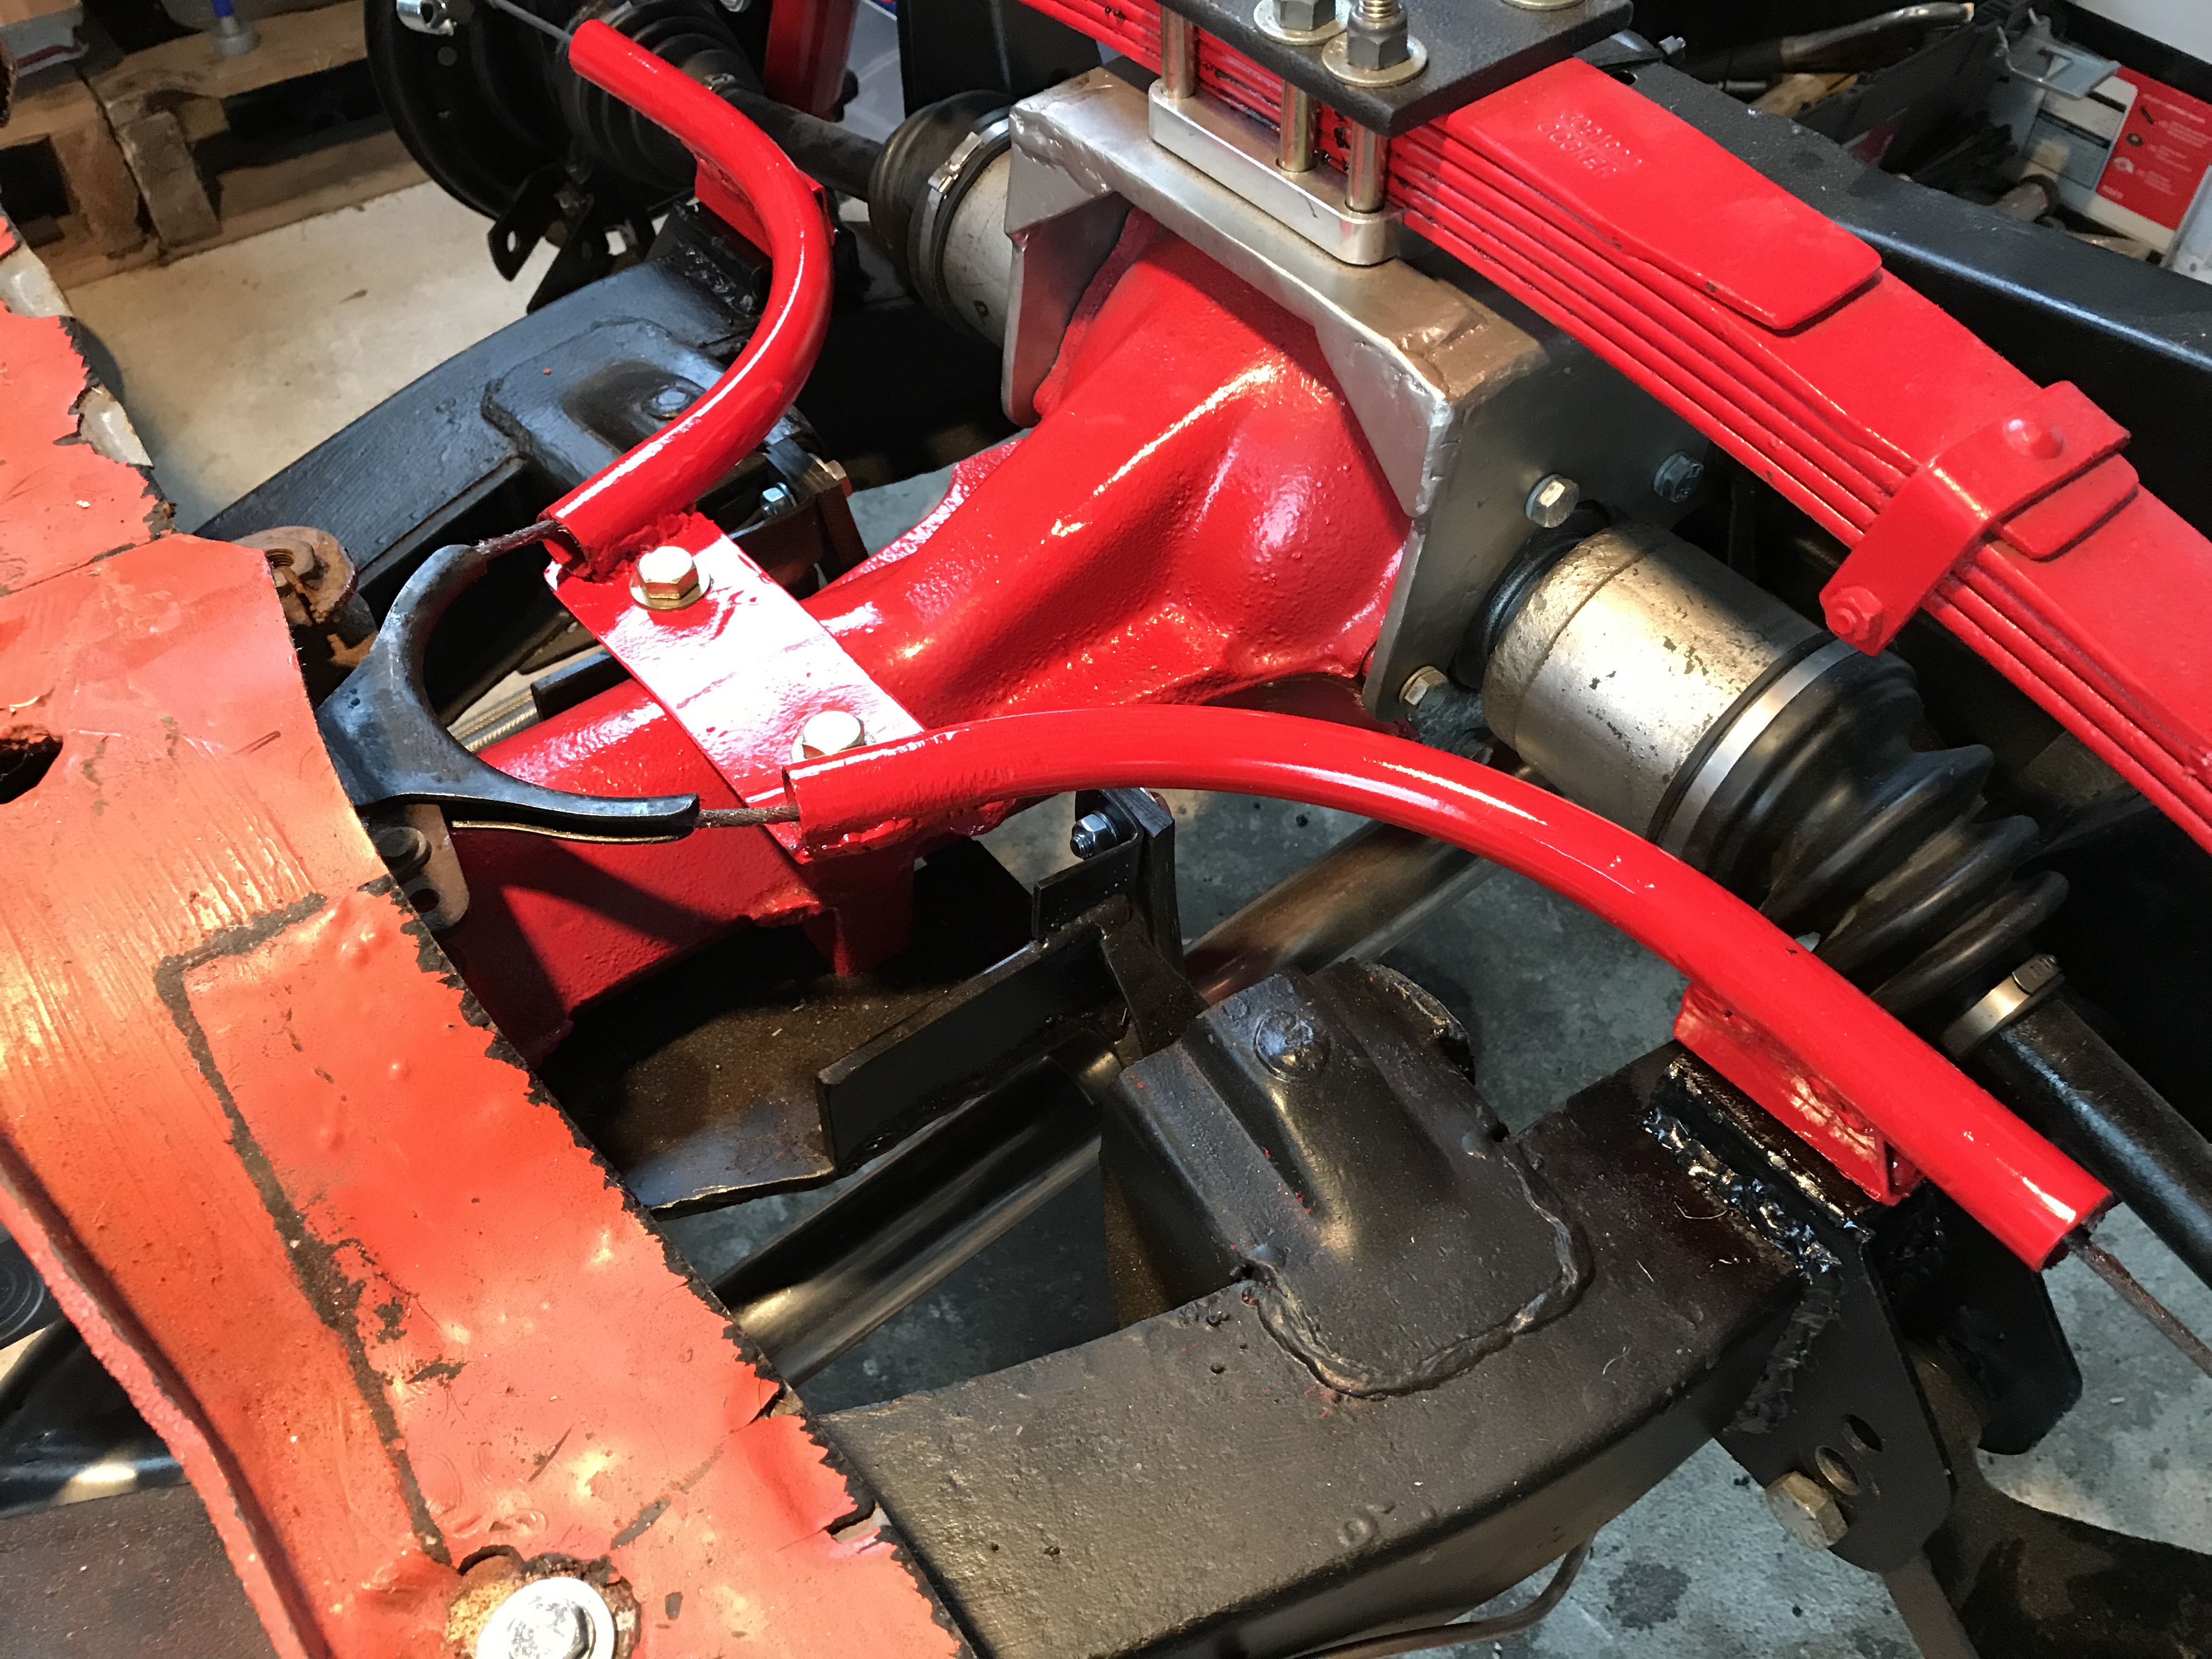
I had kept the floor piece where the pivot bracket mounted so I could bolt it to the frame and use it to figure out the emergency brake cabling before I did the actual body mount. It worked perfectly for this purpose.
Next steps are to apply the firewall heat shielding and wrap the header downpipe and some finish work on the dash and the body goes back on the frame this Saturday!
I really like that solution, nice work

Body on frame pics??
dherr said:
Just a thought... a nylon spacer under the center bolts for your parking brake guide would help for water to drain out the ends.
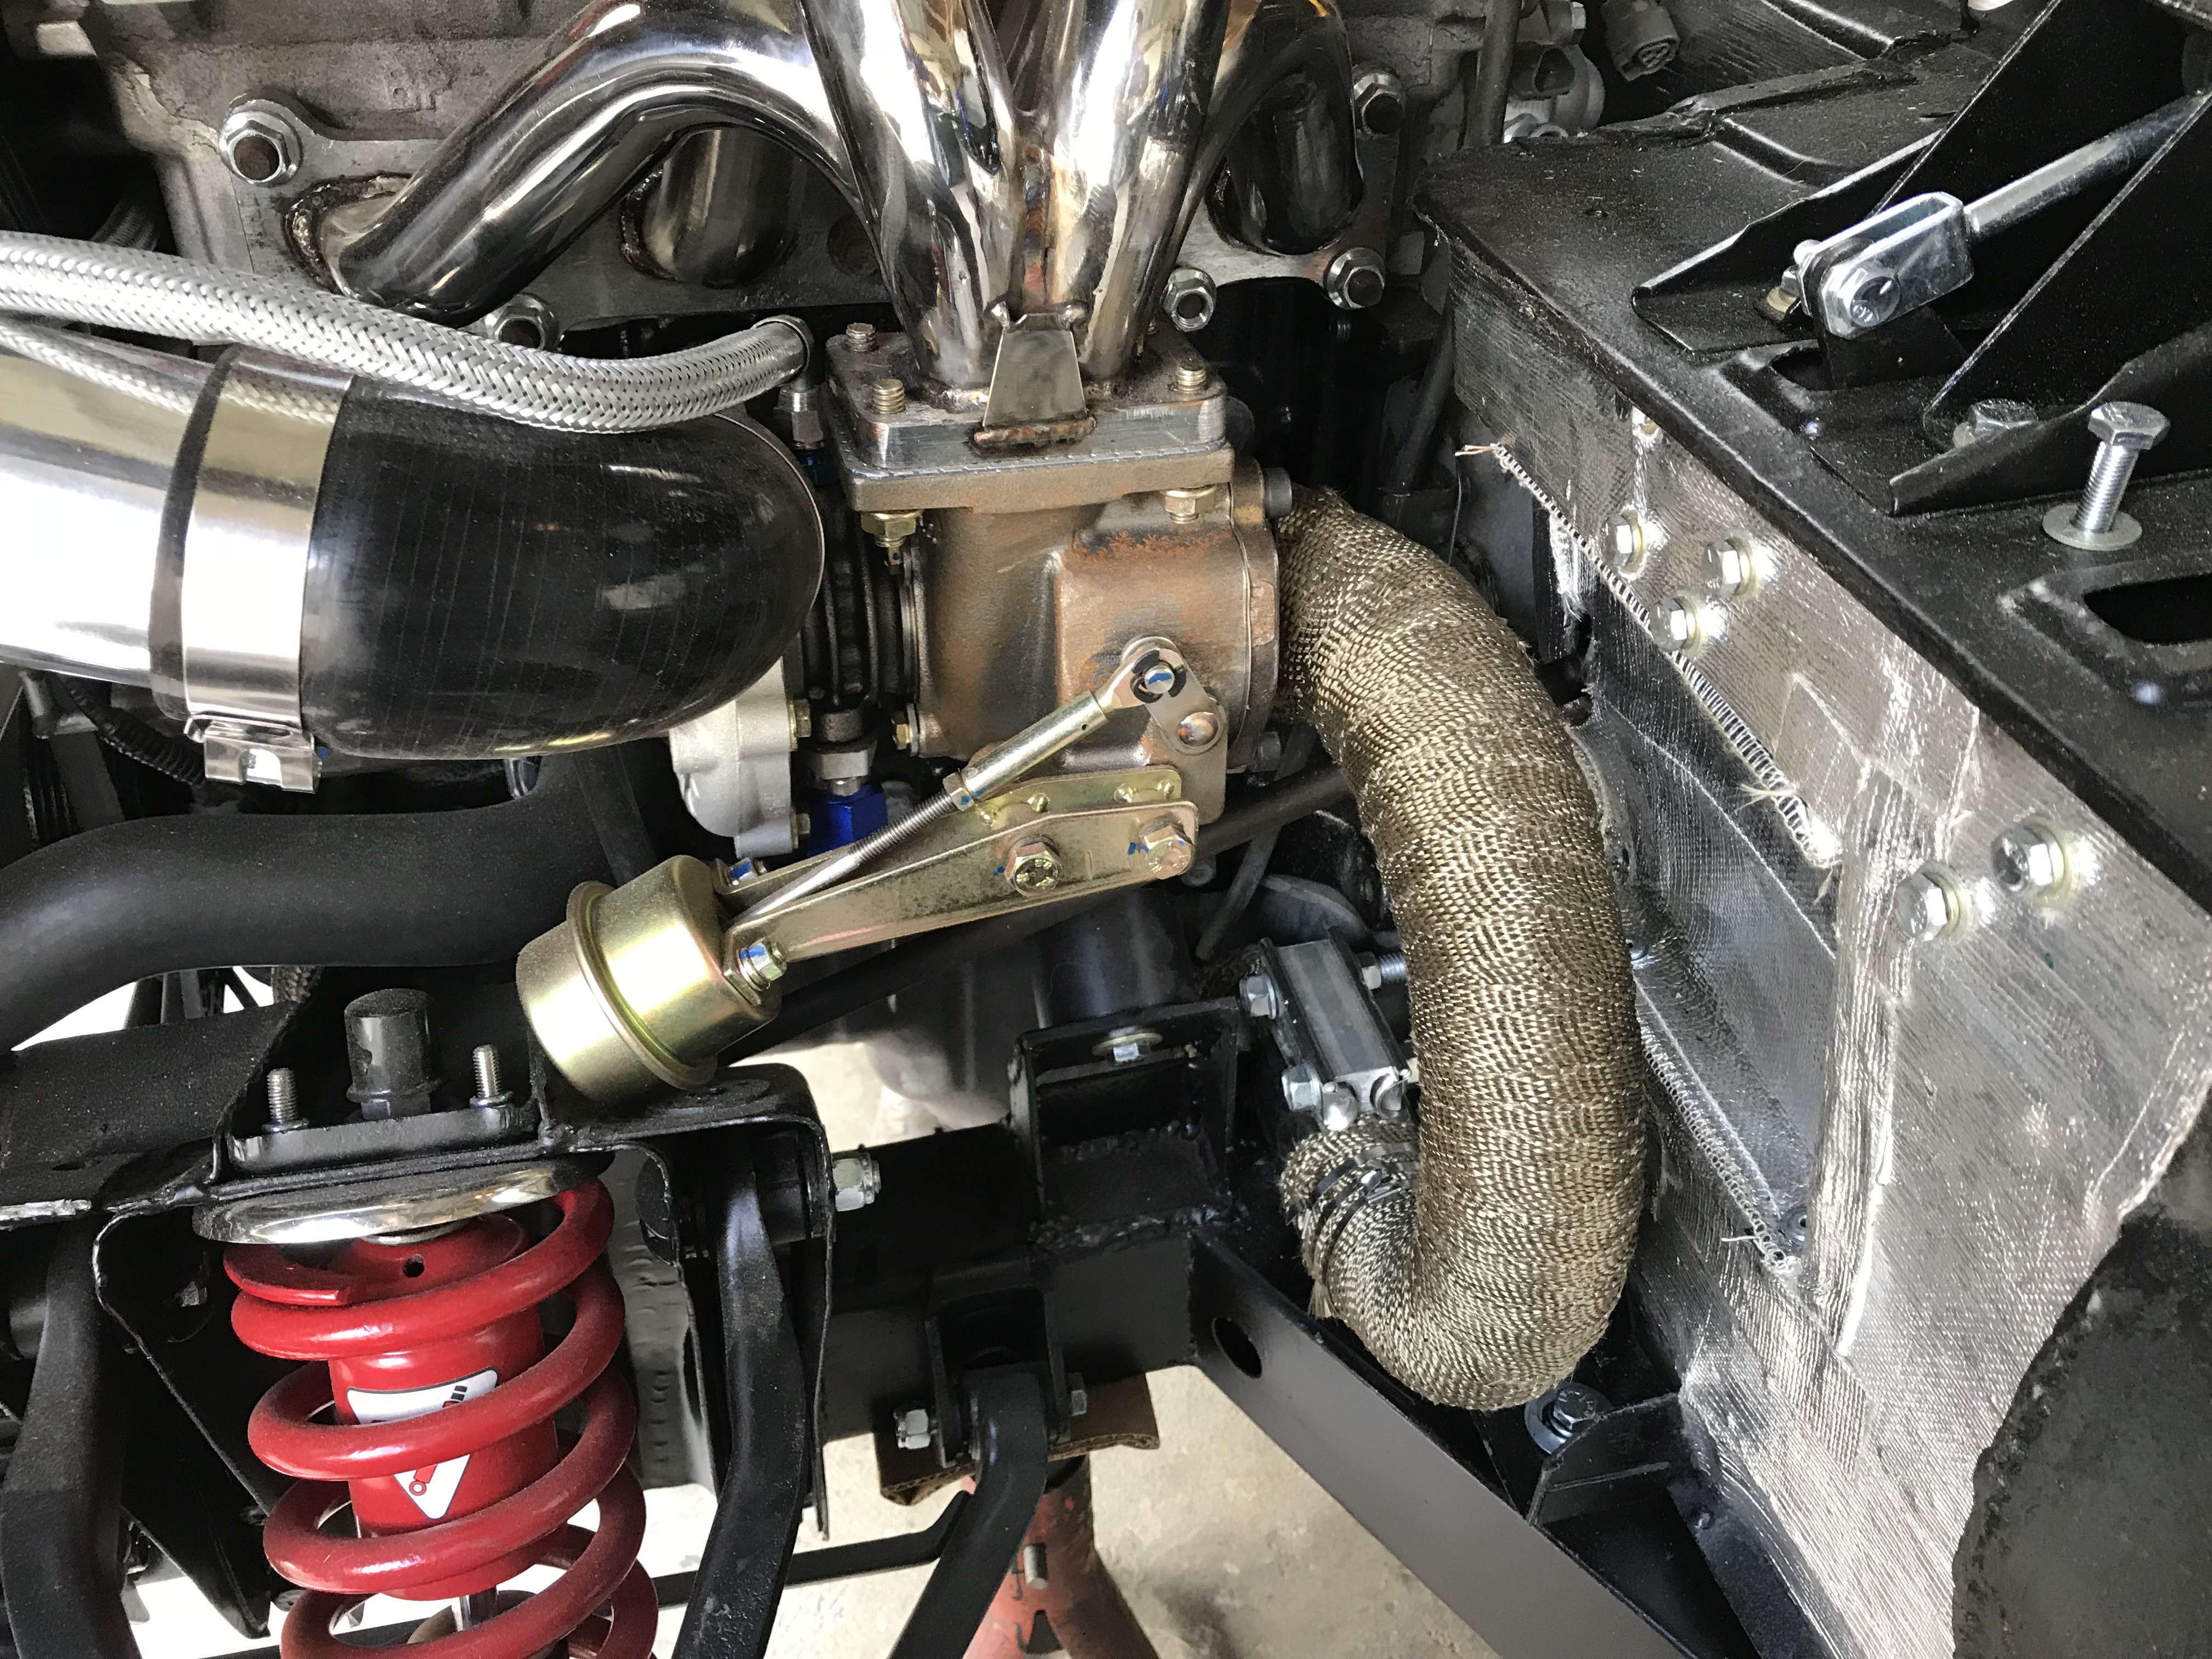
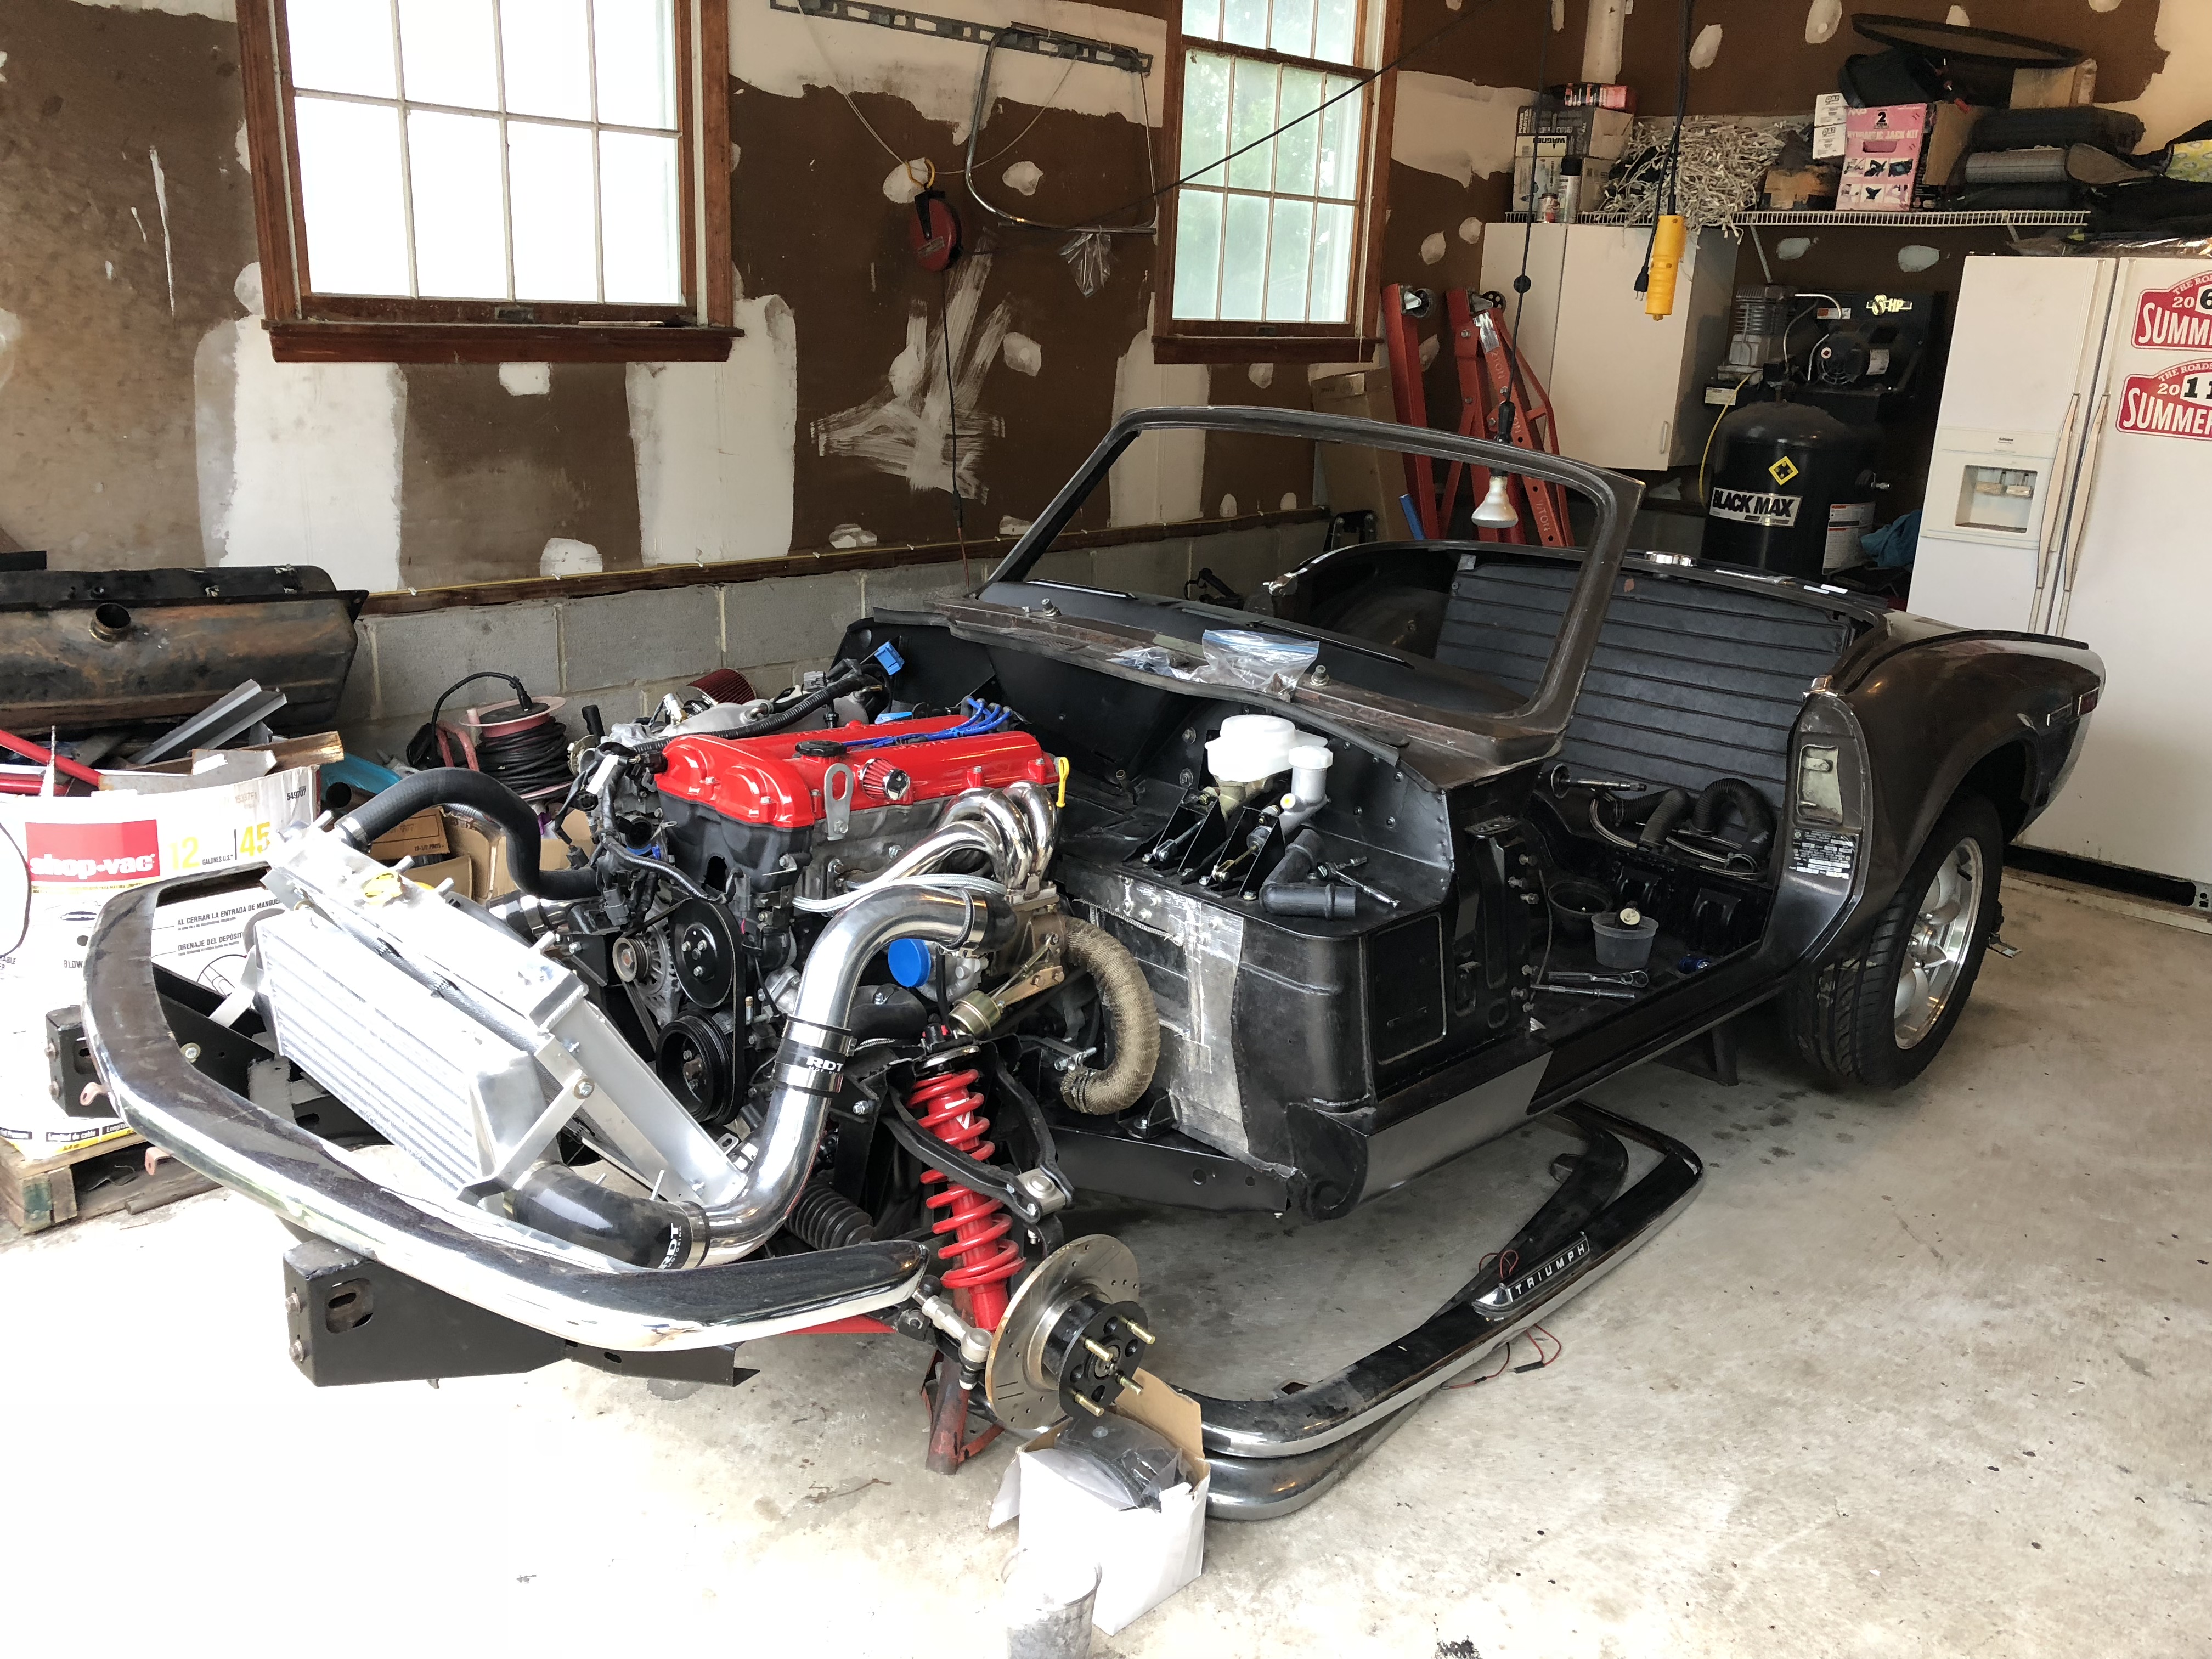
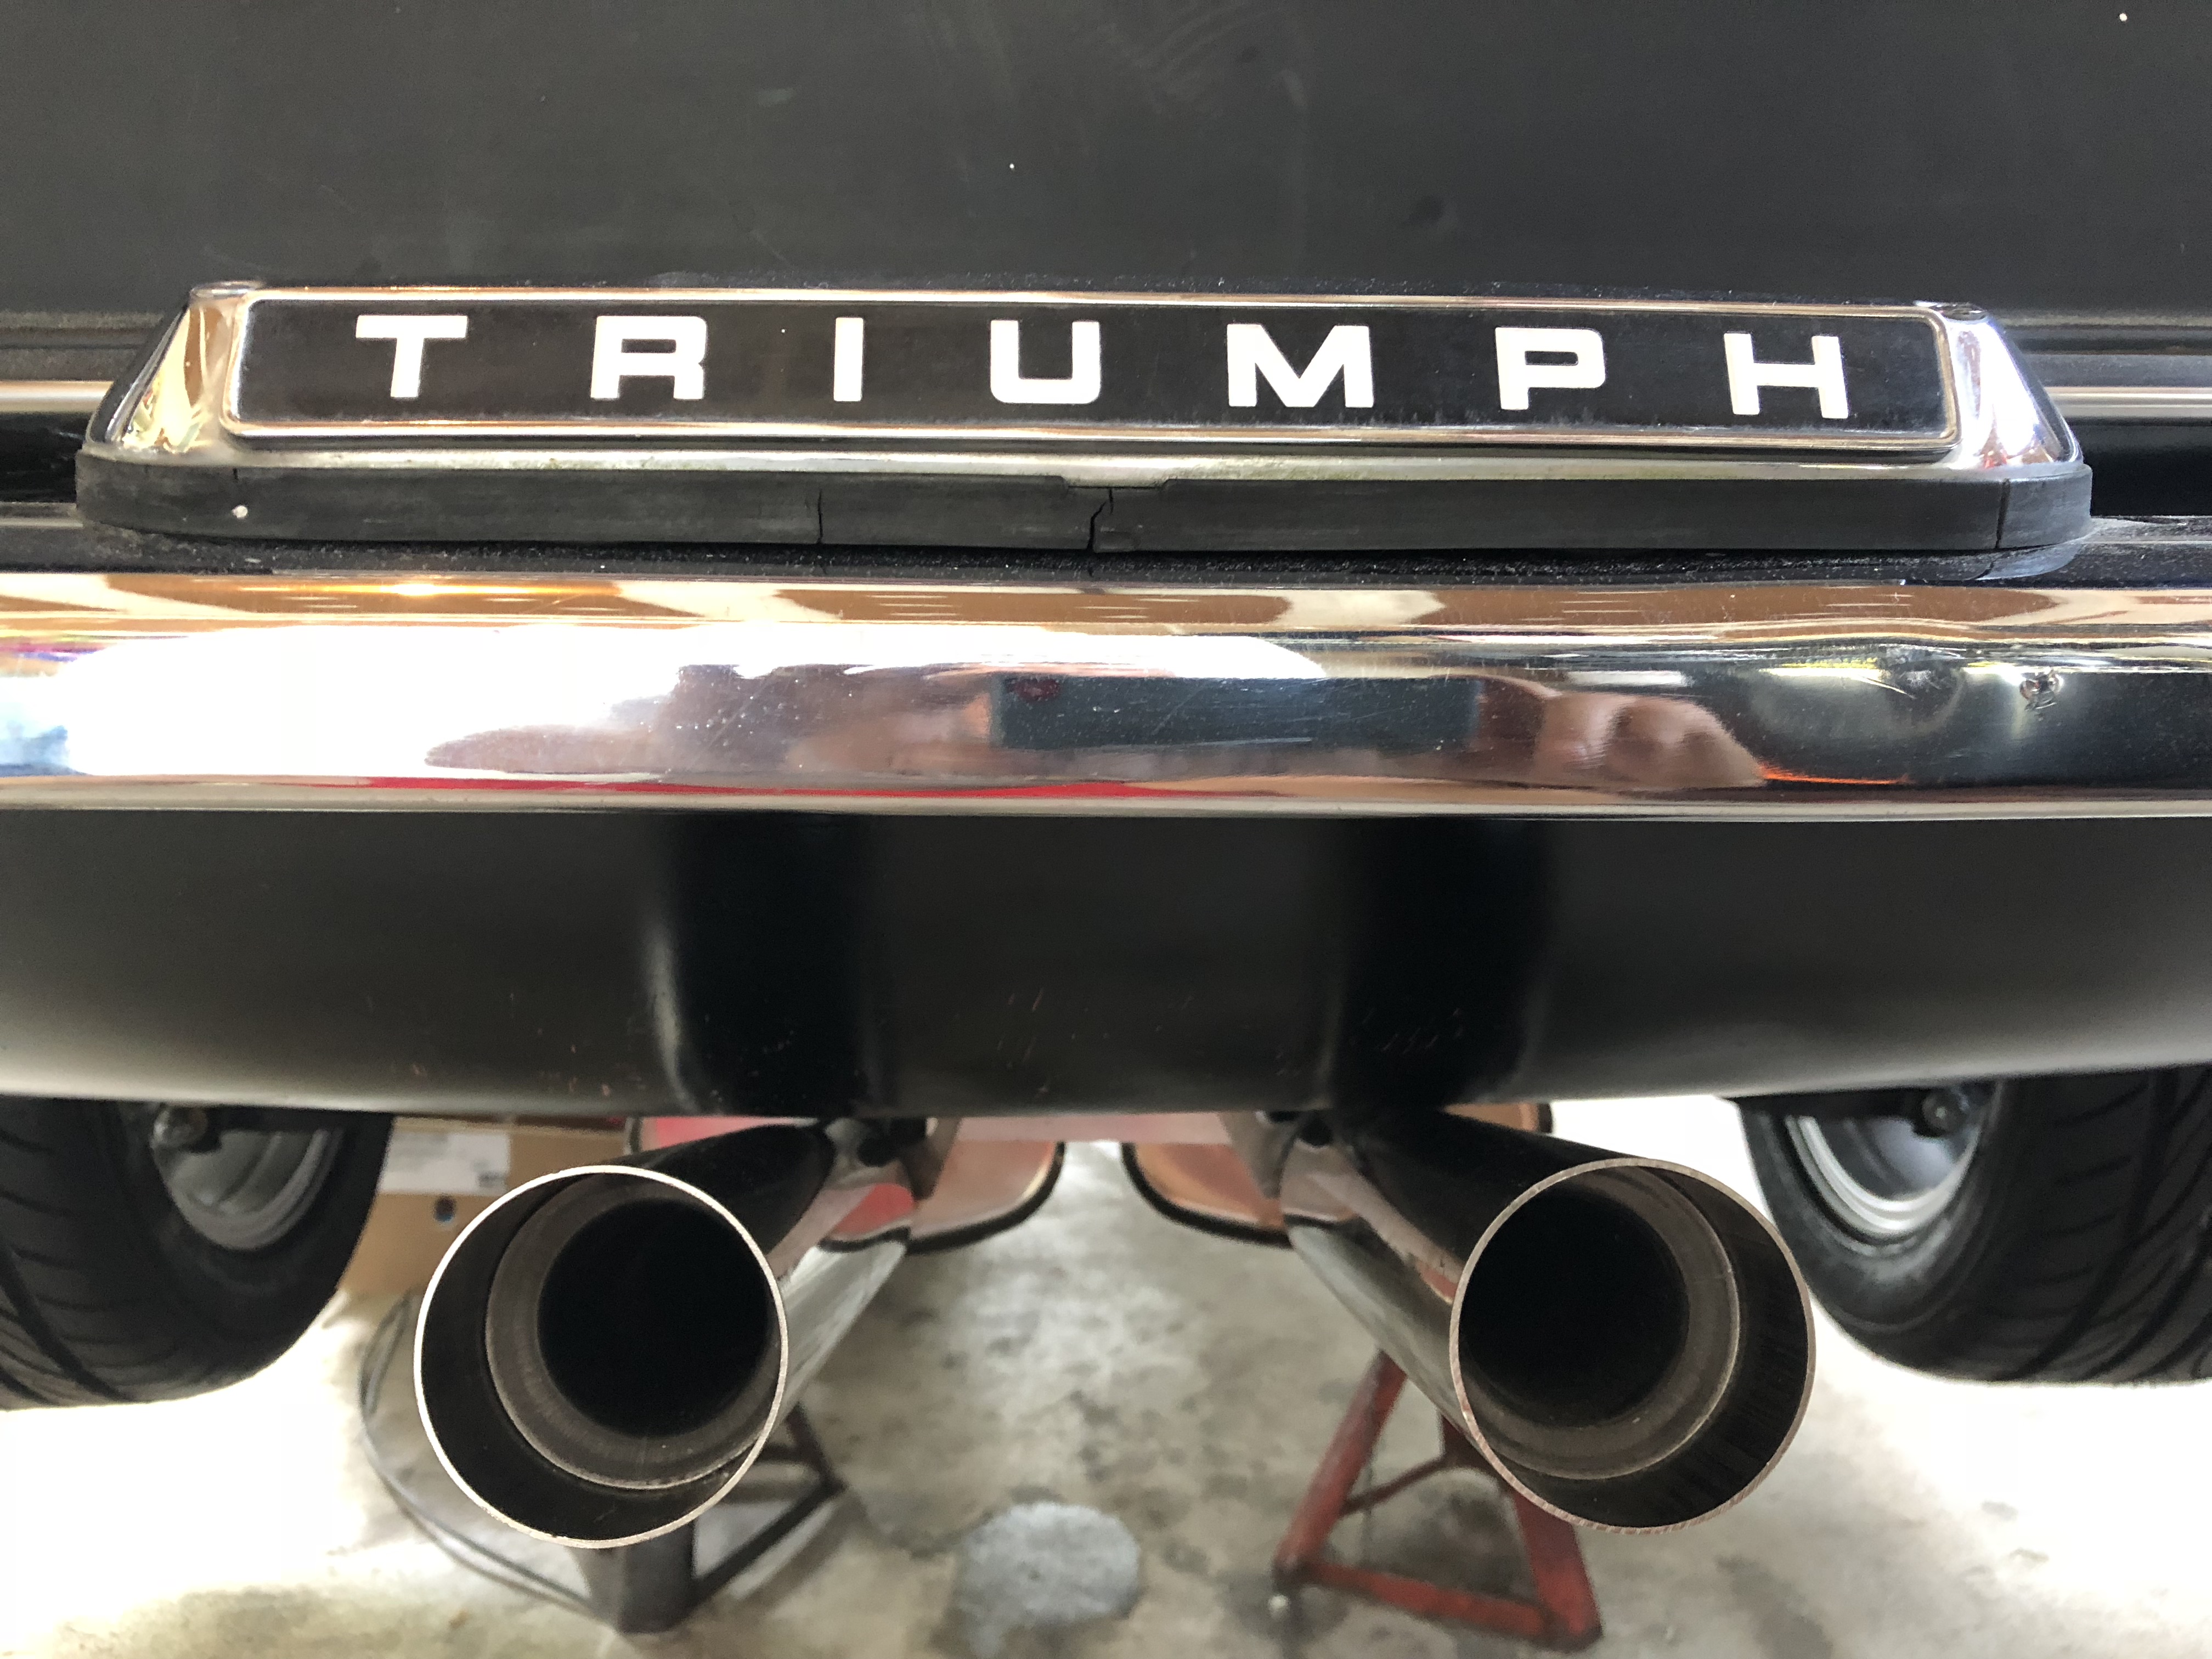
So..... what I thought would be quick work to remount the body became a week long project. Bottom line, when you make changes, refit the body or just get surprised later..... So needless to say, the body did not fit, as the front downpipe still hit the firewall when the body was in proper location and the rear guides I had just built for the parking brake hit the tub on the right side. The rear was relatively easy to fix, in looking at it, I forgot the diff was offset to the right, so it needed to have the right side offset more to the center to be centered on the body. Cut a few welds, moved it over and then pulled it back off to finish the welding and paint it. Problem solved. At the front, I started down a path of creating a space for the front downpipe, but moving things back just creates more problems. Even after creating the "pocket", there was still interference issues. So I decide to build a new downpipe using J Mandrel Bent stainless pipe. This gave me the right bend, and fit better as I used 2" pipe and moved the O2 sensor bung further back on the exhaust. So while 2" is not the best for performance, it should be fine on this small turbo that only had a 2" opening on outlet flange anyway. Lots of clearance now.
Body on the frame now and will finish bolting it down tomorrow. Good to see it looking like a car now. I also picked up some GT6 doors at Carlisle for cheap, so will use the Window wings and windows on the Spitfire doors as I always liked that look.

I was wondering who snagged those doors. I saw them Friday morning. I was tempted, but I already have one extra set.
Do you think a heat shield for that driver's side motor mount might be a good idea? It seems like it'll see a good bit of heat with the turbo so close.
Yeah, picked them up Friday as we were leaving, for $80 it was worth it.
The turbo will be in a blanket, so motor mount should be fine, will put the blanket on once I have the rear water line installed and a small bracket under the turbo installed.
Looking good! It's never as easy as we want, is it?
Depending on your timeline to running, I am planning to have the SpitBird at this autocross on June 16th:
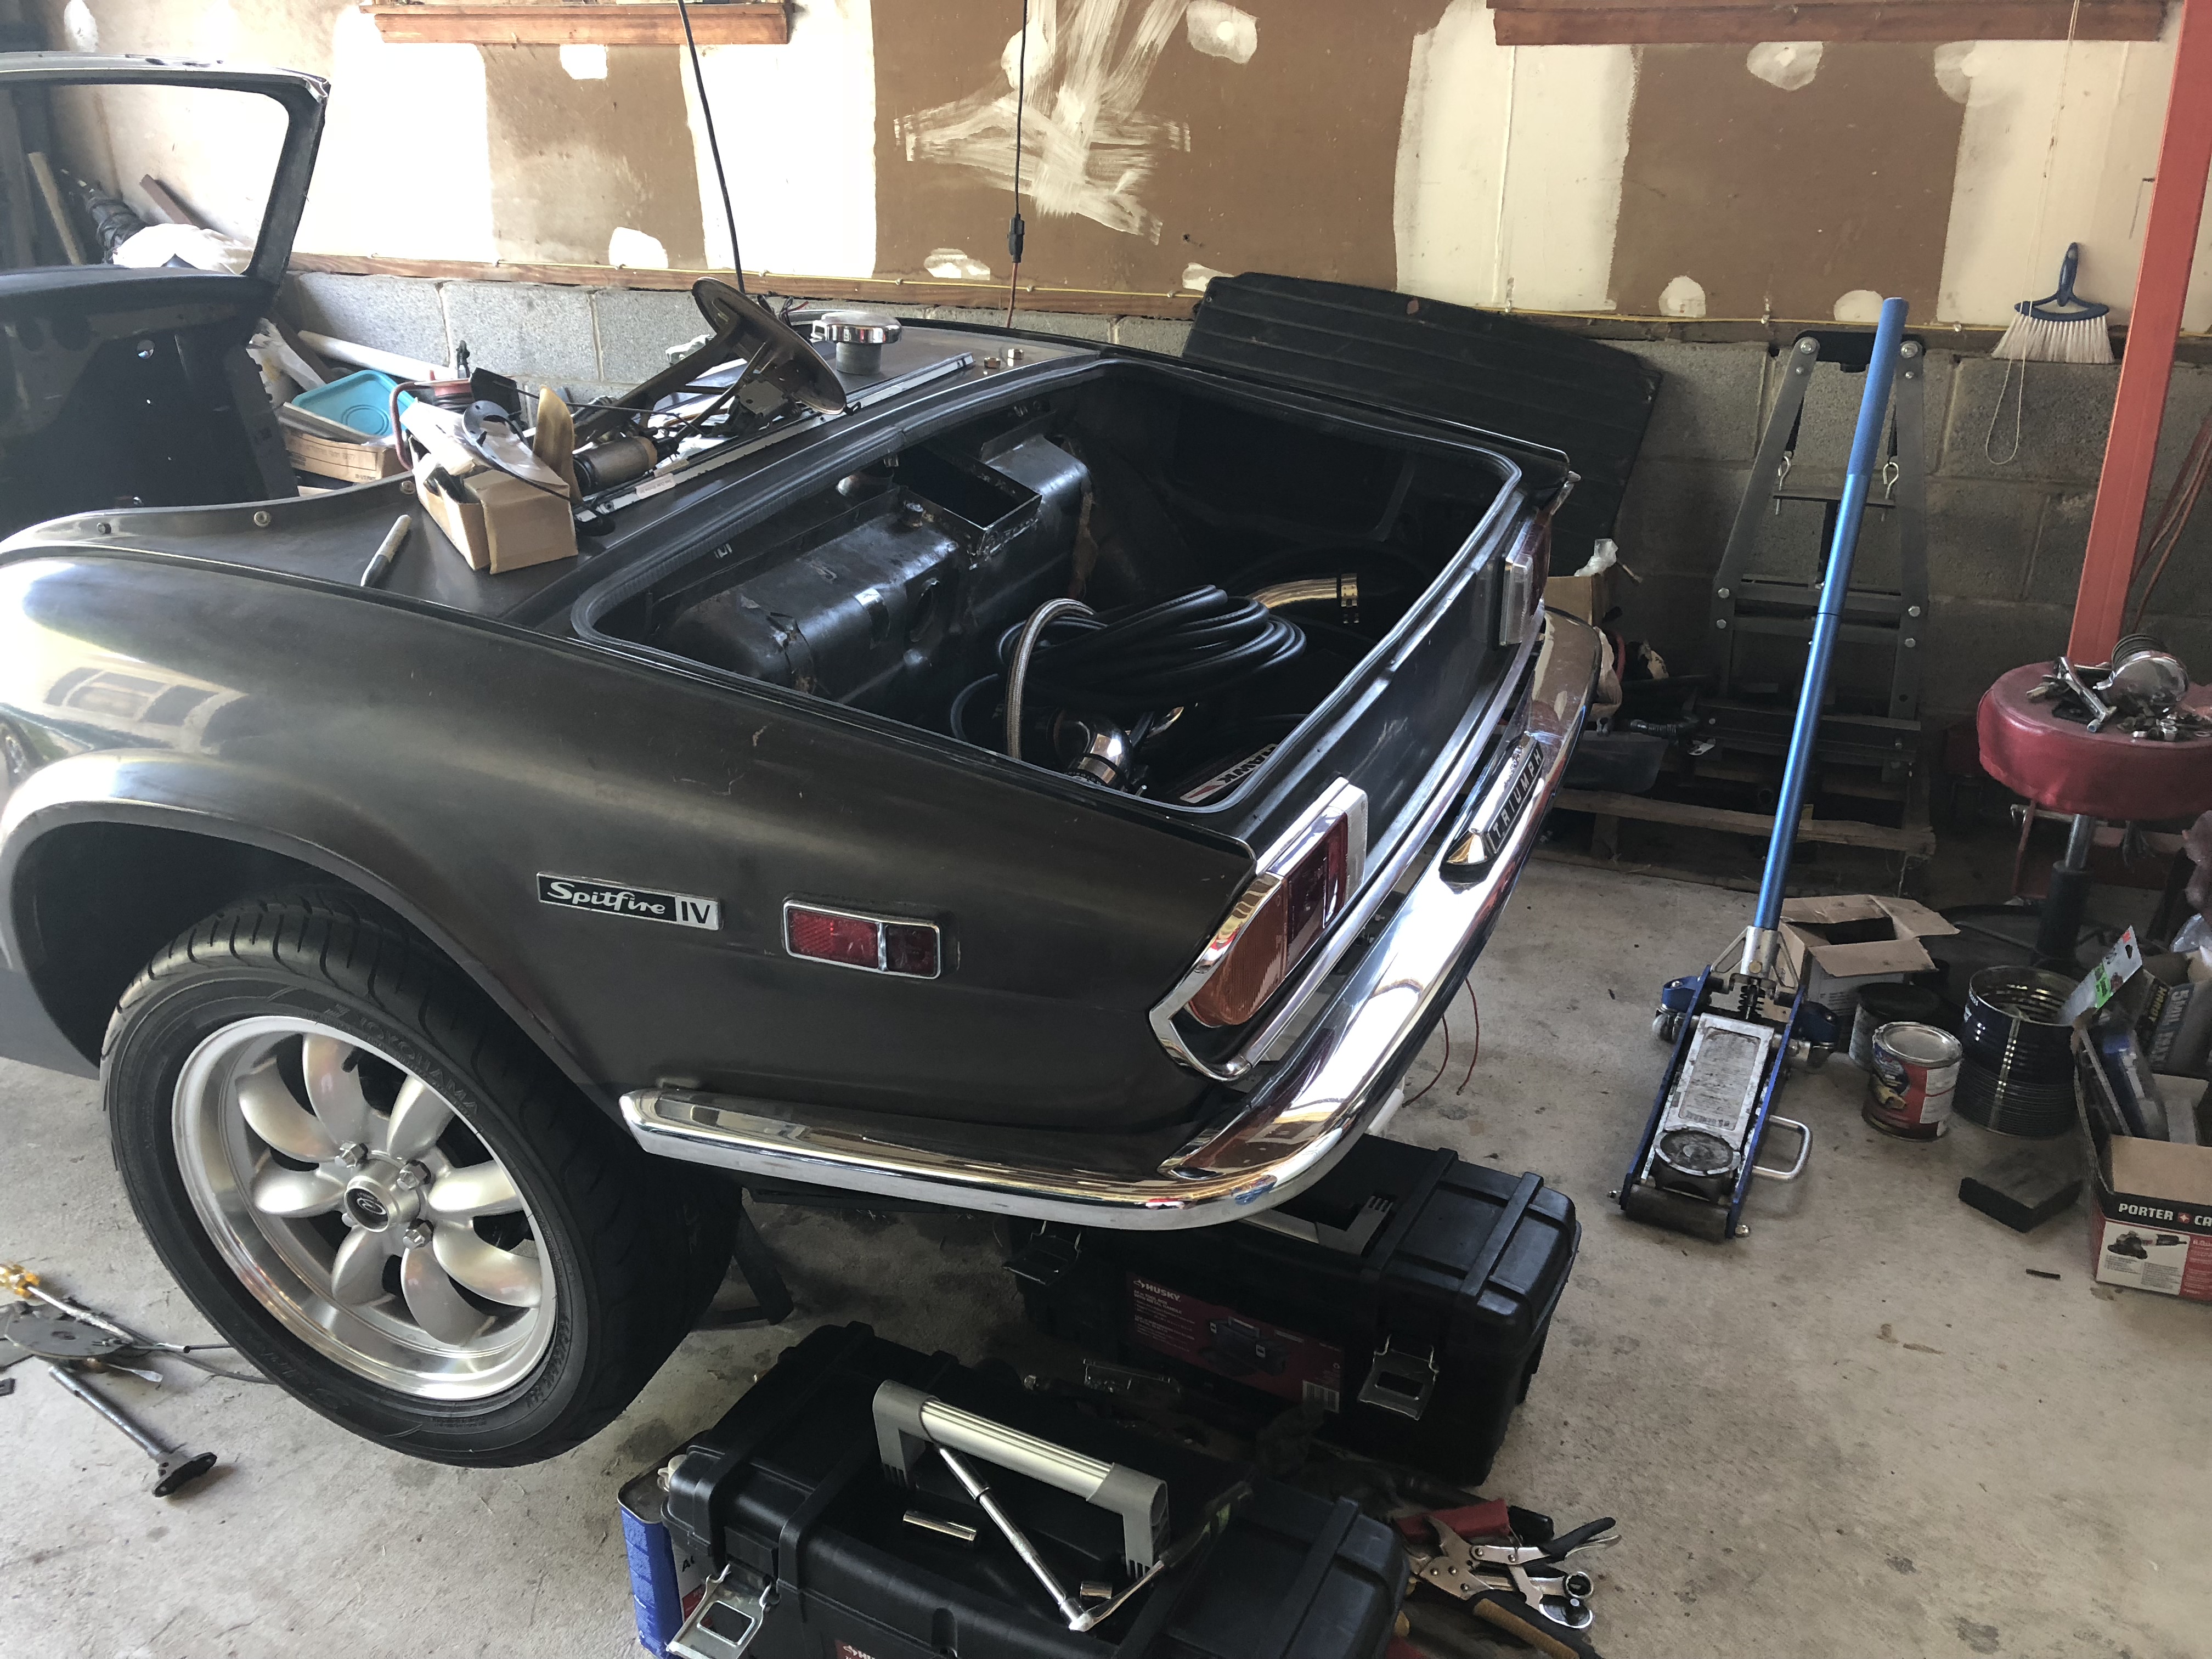
So spend some time on the car this weekend, got the body fully mounted to the frame so I can now reassemble system by system.... as I get everything completed except for the electrical which will be the last thing to install. So steering, finish the front suspension (bent upright/trunnion needs replaced), finish torquing and basic alignment, finish cooling system, fuel pump in tank, lights , finish the brake and clutch lines, bleed the brakes and clutch, and everything under dash and reinstall the windshield. Once this is all in place, the main wiring harness will go in and be shortened as necessary since it is basically a pared down 1999 Miata harness and then graft in the end points for the lights, horn, ignition, heater, etc..... Then I'll get to start playing with the Hydra and fire this thing up.

So glad to see this on Page 1 again!
All you are accomplishing is giving me bad ideas ![]() I can't wait to see this car done!
I can't wait to see this car done!
So an unexpected job change means I have more time at home right now.... so working on the car while I apply for new jobs. A little worrisome, but I'll be okay.
So attacking systems in parallel, so been working front to back based on what equipment I have out, yesterday was "welding day" so I did the following:
1: Welded up the front valance holes so I could use the "clean" pair to paint them black and undercoat the inside, roll the fender edges and reinstall.
2: Welded up the Gas tank upper flange for mounting the Miata fuel pump and regulator. I created the box for the flange, next steps will be to make the flange, modify the pump to be shorter in depth and then seal the tank and reinstall.
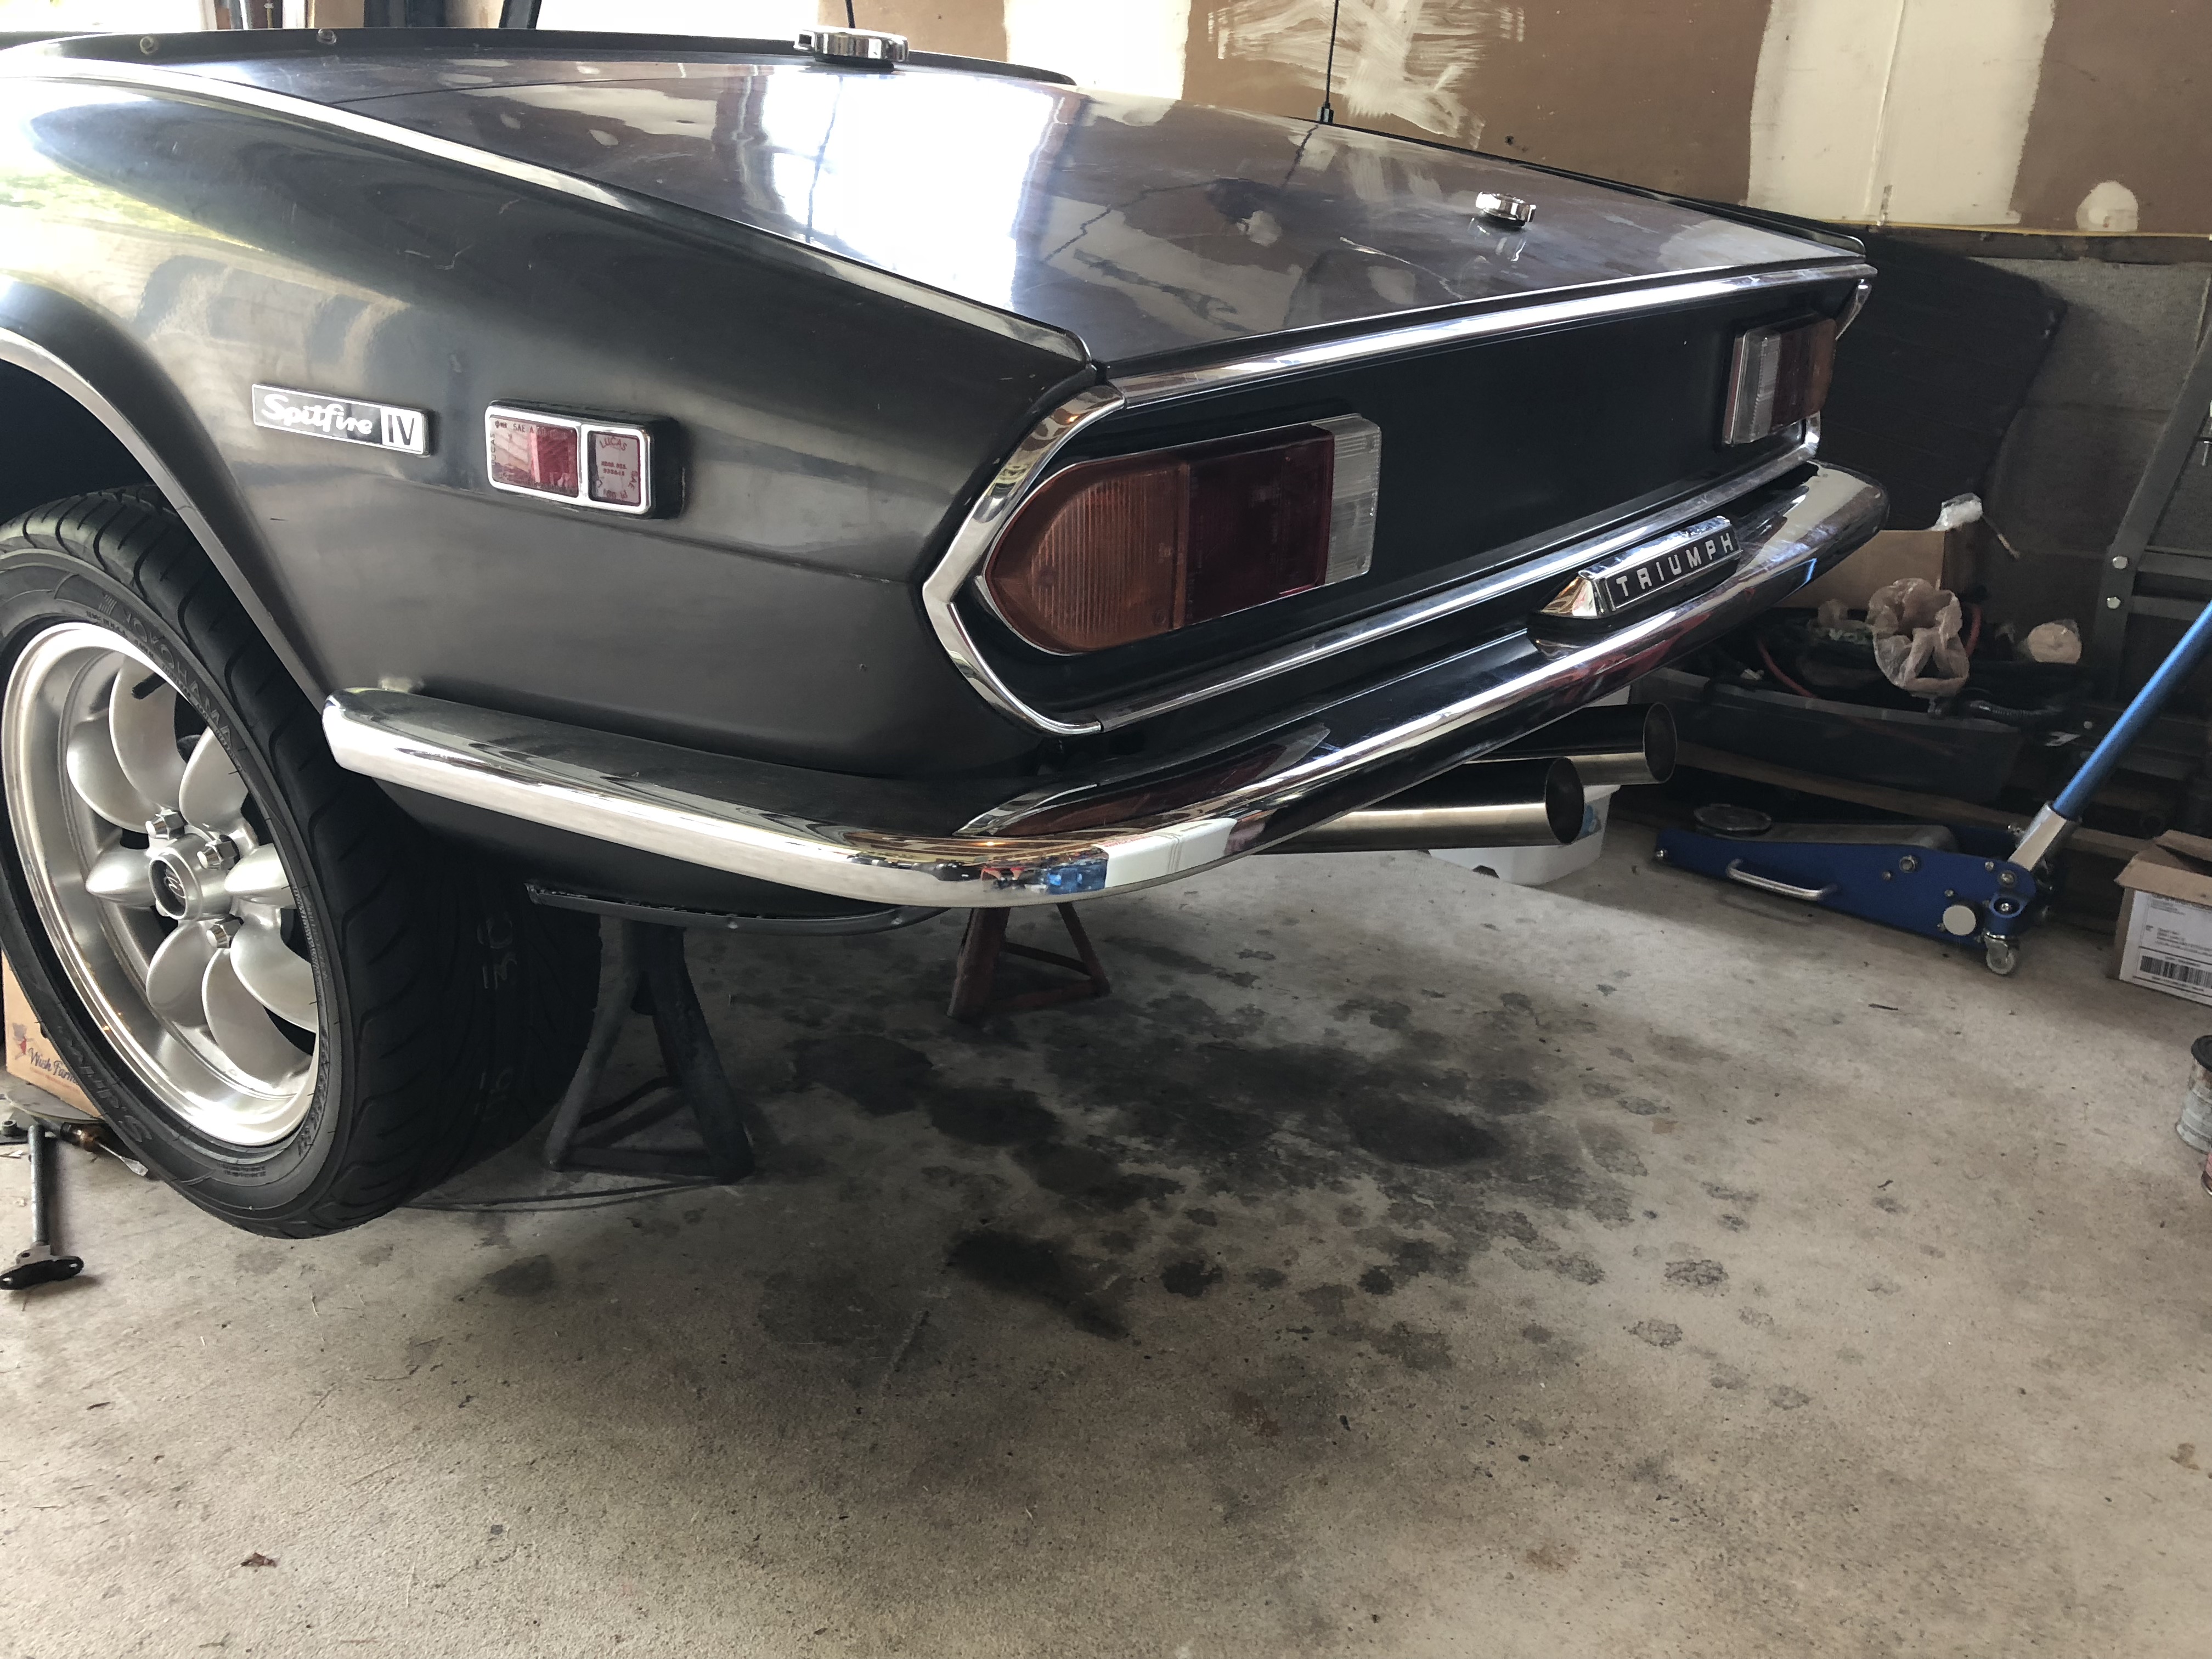
3: Fixed my "good" rear bumper, it had decent chrome, but had two of the brackets that mount it broken off. I carefully removed from the other bumper, set the bumper chrome side down on a soaking wet rag and welded them in place. Just one small chrome discolloration, so I consider this a complete success, bumper looks great on the car!
4: Installed my heater box, dash cover and vents, steering will be next.

Here's hoping you get just exactly the free time you need, and no more or less. Nice work!
Thank you, much appreciated!
Ransom said:Here's hoping you get just exactly the free time you need, and no more or less. Nice work!
Seconded! Looking good!
Finished the exhaust today. I purchased it from Spitbits, really happy with how it looks and hopefully will sound.....

I like how this is turning out. Looks great, and should be a hoot to drive.
You'll need to log in to post.


