


That Valiant wagon is a thing of beauty. It looks like it's in great shape, too.

That Valiant wagon is a thing of beauty. It looks like it's in great shape, too.

NY Nick said:Thanks, I was inspired enough to pull out a photo album and grab a couple pics this morning. I got this car when I was 16 (I thought I was a genius but wasn't). I did the natural gas conversion for a high school science fair project with a lot of help from some great mentors in my life. It worked really well, this is the car I regret selling the most.
Nice, Thanks for Sharing Nick.. That is a lovley '65 Dart 270?? by the looks of it. Only thing I don't like about the '65's is there are a lot of one year only parts in the dash and on the exterior for that car. I do like that it's a 2 door sedan instead of the hardtop - honetly that's what I wish I had - more rigid unibody structure for the twisties and humps n bumps on them fun back roads.
I bet the LPG or CNG conversion mixer was a fun project back in the day. Every now and then folks come on the slant 6 forum looking for propane parts for their slant 6 powered whatever that runs on Propane.
Greg
In reply to JeremyJ :
It's better in pictures than in real life but it's fun to look at and eventually drive once I get all the (new to me) car stuff sorted on it. It's too rainy / cold / salty on the roads to even tinker with it a bit yet around here... but spring arrives march 21st.. It will be better by then.
I really should be working on the '64 Dart Güne Hölle now anyway.. that car('62 Valiant Wagon) is just a distraction for now... you know how it is when you get a new toy.. you wanna play with it now damnit..
Greg
2/10/22
It was above freezing Last Night for a few hours so I went to the garage to get a few things done.
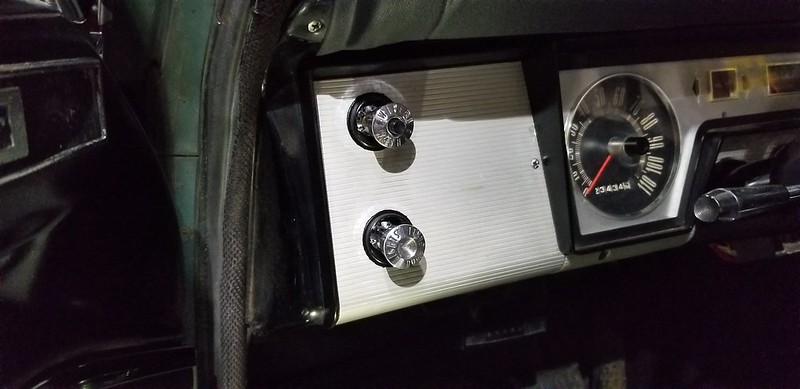
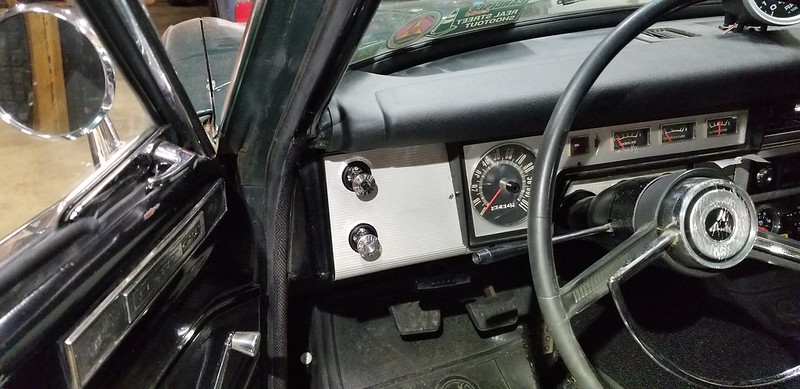
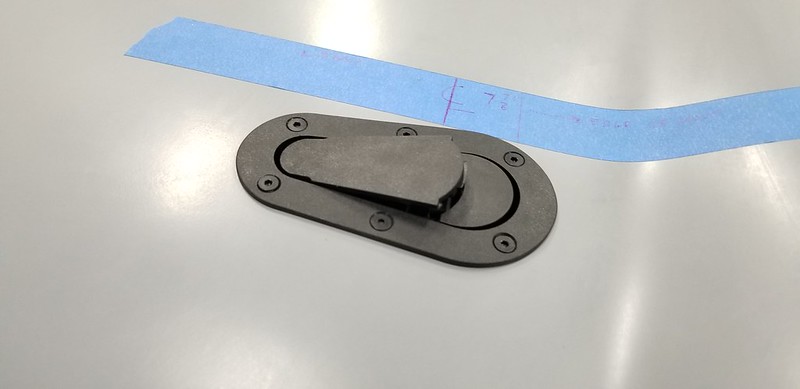
The Headlight / Wiper Switch bezel / Plate had been installed a while back - It came out quite nice:
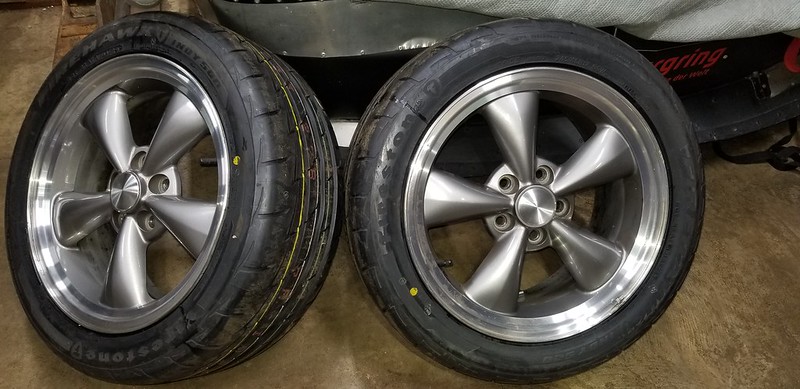
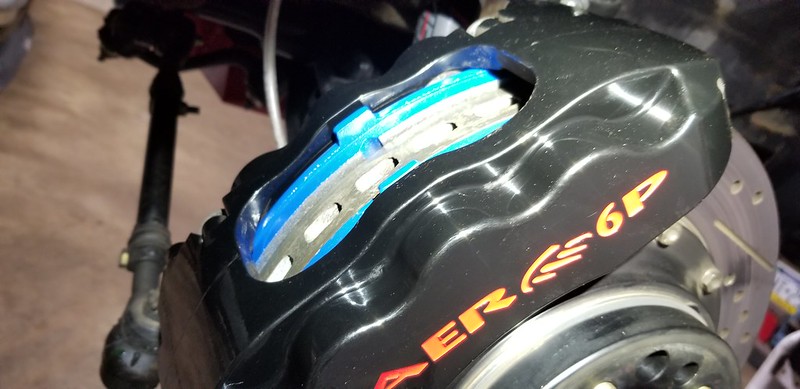
Since I had the car on the rack........ New Tires for the Road Wheels - Mounted and Balanced.
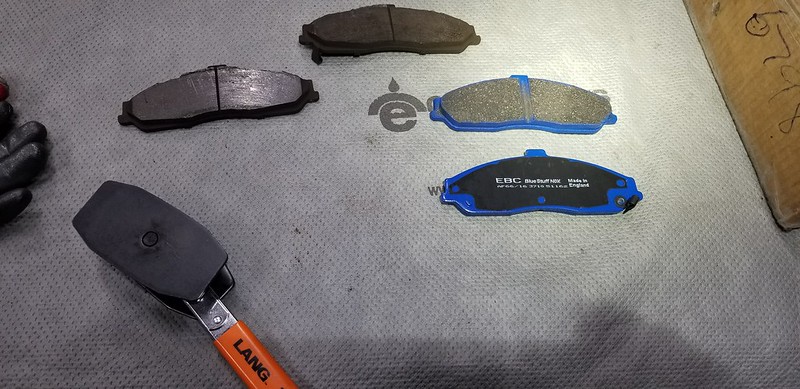
While it was up on the rack, Clean the calipers and install some new pads - Hope to make a TNiA or HDPE day this year.
EBC Blue Stuff on the Corvette C5 Form Factor pads means I can play with all sorts of compound s from EBC, DBA, Porterfield, Hawk and others.
The Lang Tools 279 Caliper Press came in handy, All my other old Mopars Can get by with an old c Clamp.


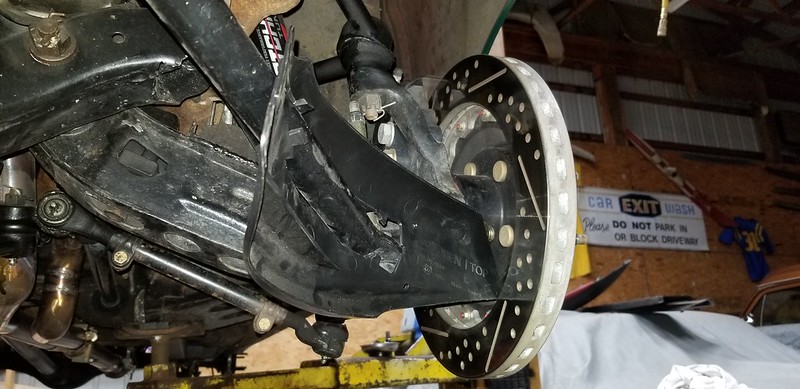
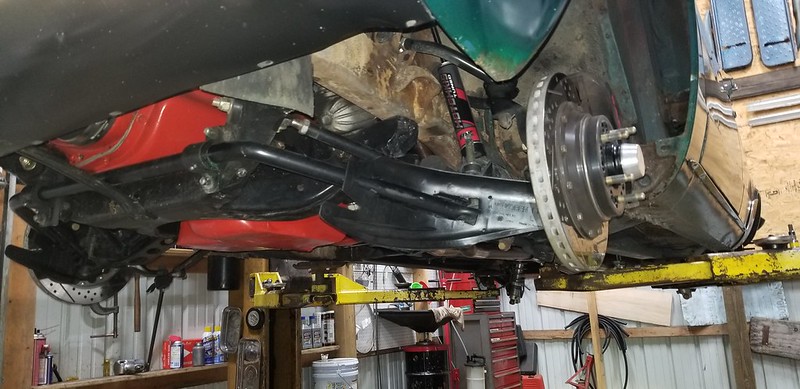
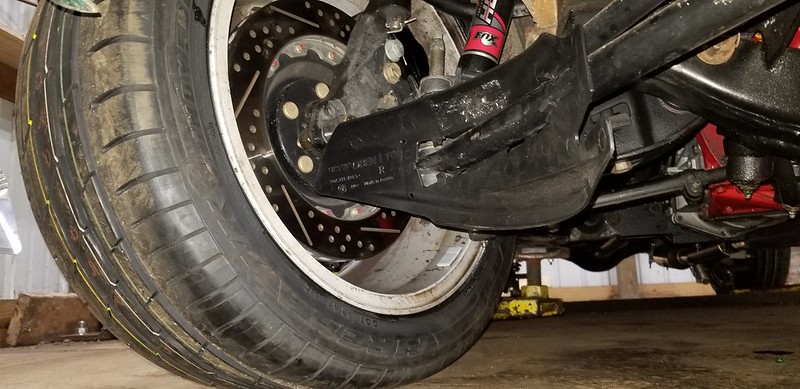
Those Porsche 997 Gt3 Brake Ducts look right at home on the sway bar!

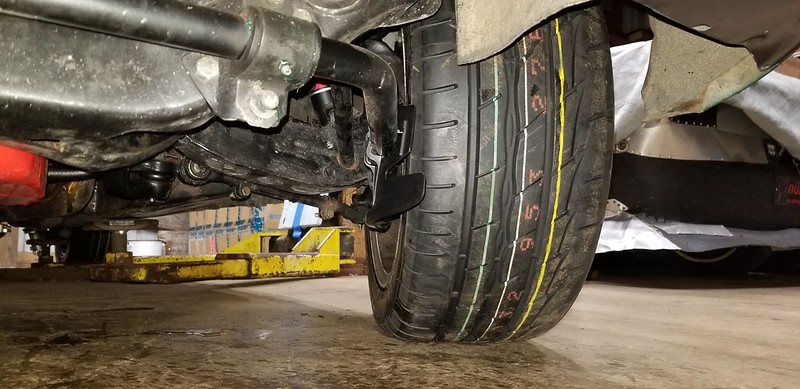

Maybe I will get a Trailer Hitch Fabbed up soon as well!
Till next time.

Interesting brake cooling trick. DId you box the ower control arms?
MadScientistMatt said:Interesting brake cooling trick. DId you box the ower control arms?
Yes they are boxed on the bottom. The plates are cheap and easy to install.
2/14/22
I was able to get some more work done on the car over the weekend.
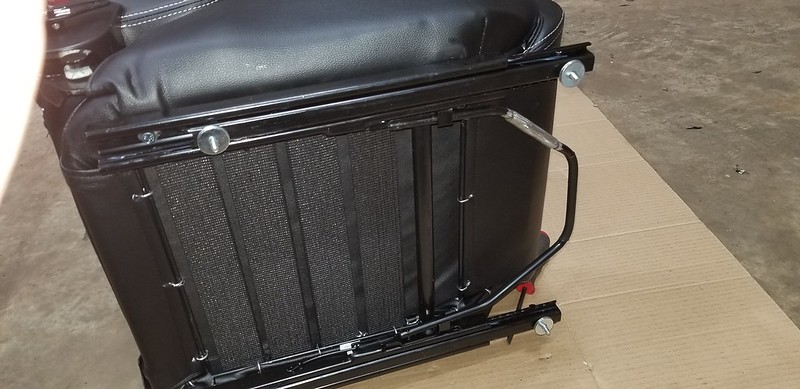
I Ordered some Sparco R100 Street Seats - They are affordable and have Provisions for Head and Helmet support, Belt Holes as well as side bolsters to support you in the corners a bit. I am sure they are not the best seat but they are good upgrade from the stock seats at this point, which were heavy, high and dropping webbing and foam all of the time.
There are not any ready Made Bolt in Siding Seat Brackets that I could find for the '63-'66 A Body MoPars.. so I bought a Corbeau Seat Bracket/ Slider for the '67-'76 A Body. It of course did not fit but with a bit of Tab relocating / Welding and other typical hotroddery I was able to Fit the Sparco Seat to the Corbaeu Sliders and Fit the Sider / Bracket to the Floor of the car.
Welding and fitting to make the bracket fit this car:


Sparco's have a wider track for the sliders than the Corbeau's so I added some Oversized tube and sleeved / welded the seat adjuster handle.
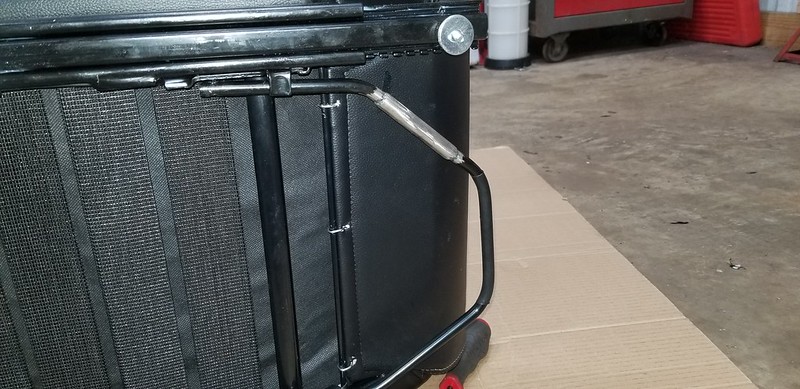

Lots of test fitting to fit a floorboard with goofy stock mounting points and reinforcement plates not underneath the bracket I was adding.


All Painted up..

Started Working on the Harness Bar for the Shoulder Belts.
The Piece Below the quarter window on the '64 Dart is metal, not trim, not removable.. It;s Part of the unibody Structure, so Harness bar will get welded to it.


'Till next time,
Greg
I'm liking this car more and more. Such a cool project. The seats will look great in there.
In reply to JeremyJ :
Well Thanks Jeremy, That's nice of you to share.. I will try not to let you down... but of course you are biased 'ya know.
When the Fiat Fans, British car nuts, German Folks, and Miata people like it too, then I will know I will have archived my ultimate life's goal.![]()
![]()
'till then, there's more stuff to do, and more watering and fertilizing of the money tree to be done.
2/18/22
Got Some more fab work done
Hole Sawed the Right side of the Metal Unibody Panel under the 1/4 window for the removable harness bar.
I Welded in the abutment for the Right side of the bar...Protected all of the glass and soft surfaces with welding blankets or cardboard and tape.
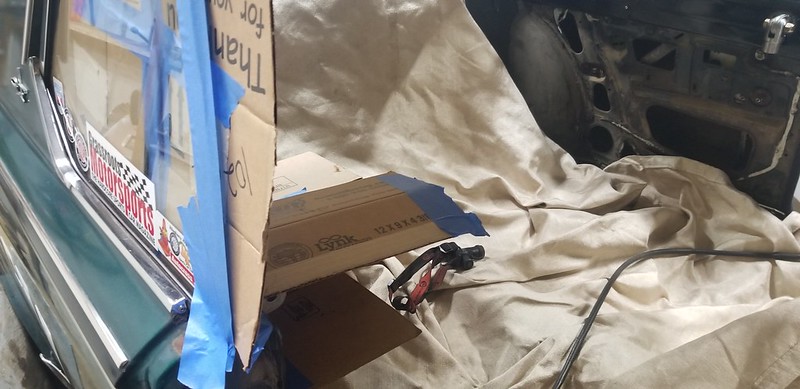
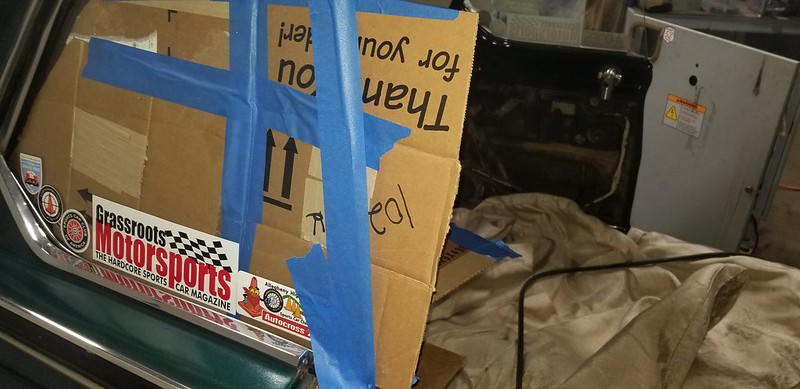
Made a few More little spark/spatter shields during the welding process. I know there are actual products out there for this kind of work, but recycling stuff from the cardboard trash bin with a bit of tape here and there was quicker and possibly somewhat easier as I am not sure what to even look for when it comes to auto body welding shield wrapping materials. Also who can argue with giving some cardboard 2 or 3 uses before going into the bin? I like to use it for lots of stuff.


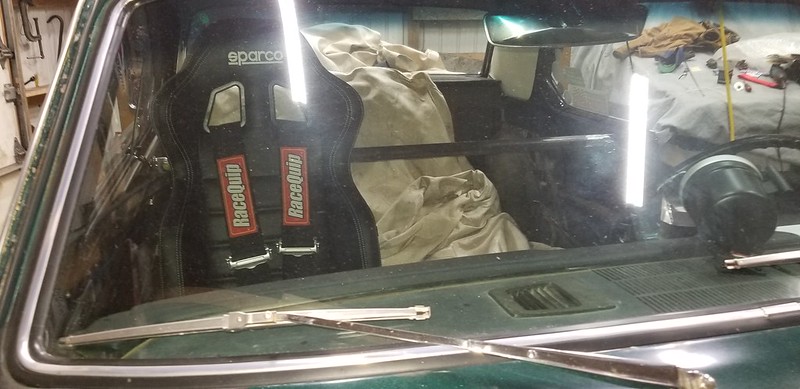
One Sparco seat installed. - Harness Bar mocked up for length, New Belts with camlocks installed. Still need to Hack up a New Corbeau Seat Frame and slider set for the driver's side. (note to self.. the Driver's Side seems to have more area to work with due to the offset of the trans and driveshaft hump).


Greg
That looks OK for a autocross, but the shoulder straps are not ideal. You want them to go over your shoulder and straight back, not down at a sharp angle. Ideally the shoulder harness bar would be back a little and up some, but might be tricky to mount it differently. For track day events or other higher speed events you want to make some adjustments.
In reply to TED_fiestaHP :
Yes I agree, I was thinking that as I was reviewing the Belt install instructions.
I am thinking that i could add tubing to the bar. Sort of adding a hoop that would kick up on the bar.
Though not ideal this arrangement has to be better then the 2 point belts I had before or running shoulder belts to the floor with the low back OE seats.
True this could be a improvement. But if you ever do actually test out the safety equipment, you want the best outcome possible. I ended up with a broken rib, but it could have been worse. Glad I had that HAN's device, not sure what would have happened. Never run the shoulder belts down to the floor, and yes you don't want low back seats.
So yes you are going in the right direction. This is a great project, more fun to stay safe.
Finding a place to secure shoulder belts in an A-body is tough enough on the post cars; on a hardtop, it's a real challenge. If you're not using the back seat, having the belts connect to a bar on the rear package tray would put less compression on your shoulders - would that be an option?
MadScientistMatt said:Finding a place to secure shoulder belts in an A-body is tough enough on the post cars; on a hardtop, it's a real challenge. If you're not using the back seat, having the belts connect to a bar on the rear package tray would put less compression on your shoulders - would that be an option?
Hi Matt, thanks for your suggestion. FOr this build I want to try to preserve the interior of the car in behind the rear seat. Without adding some reinforcement with possibly tubing and bracing, I would think the tray is not sufficiently strong for mounting the belts there. I have seen folks do that with other cars but It's not an option that I want to explore for my build yet.
I also think that by adding the bar in between the 2 quarter windows I can provide a bit more unibody stiffness than what was there originally in the hardtop body style.
Greg
I'm pretty sure the package tray itself isn't strong enough for a belt, but welding a bit of square tubing under it could be pretty inconspicuous.
In reply to MadScientistMatt :
Yes, good call.
2-24-22
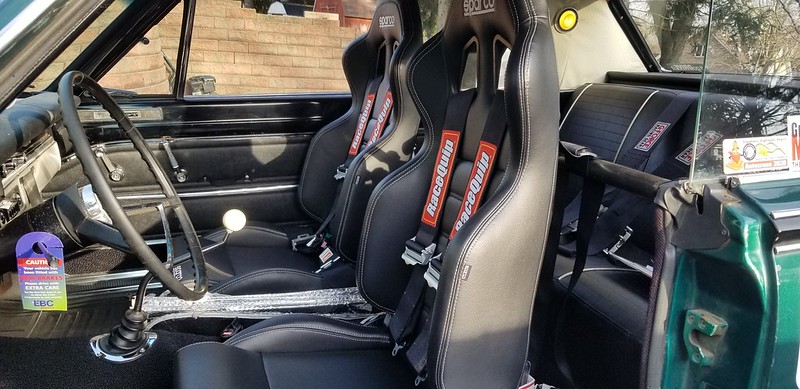
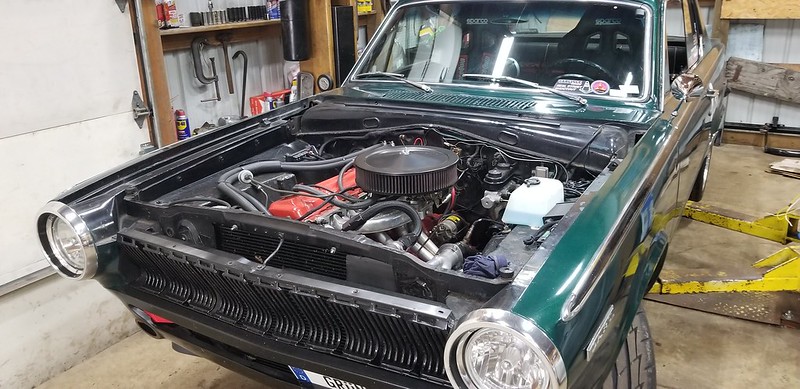
Got the Interior all buttoned up. The Car feels really tight with the new Seats, safety Harnesses and Tires. Found some local twisty Roads and have been breaking in the New EBC Bluestuff Front Pads.
The bottom and side bolsters really cradle you and provide a lot of support during conering, compared to the stock , low, heavy, wide OE seats from 1964.
Next up Should be the trailer hitch install or the fiberglass hood, with aluminum hinges. - Hope to get one or the other done before my April Roadtrip.
3/3/22
I have been working on some small things
- Finishing up the Seat / Belt install
- Adding a Fire Extinguisher
- Adding a recovery strap to the front of the car
- Finishing up some of the interior gauge lights
I hope to actually get to the fiberglass hood this weekend.
Some Interior shots of the seats, Belts and Bar:


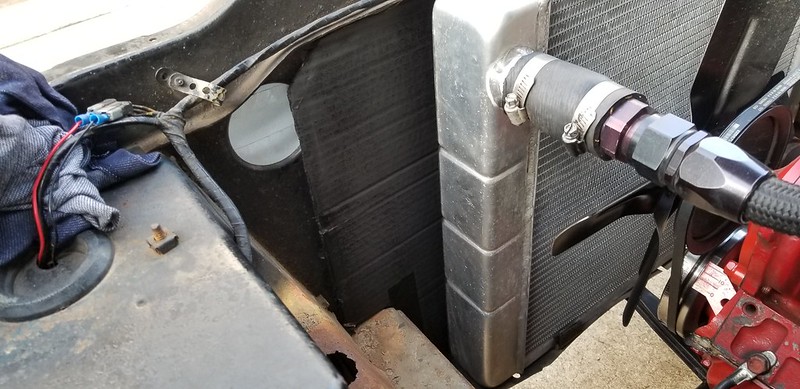
Put some Plugs / Tape and Cardboard(for now) to block up some of the openings in the core support.


Front view shows additional tow strap added.


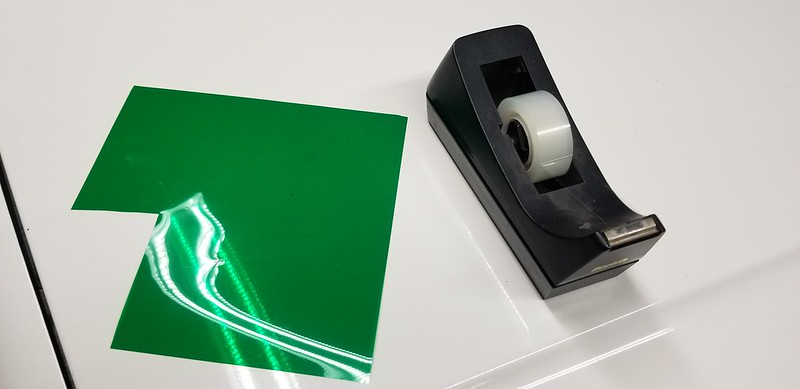
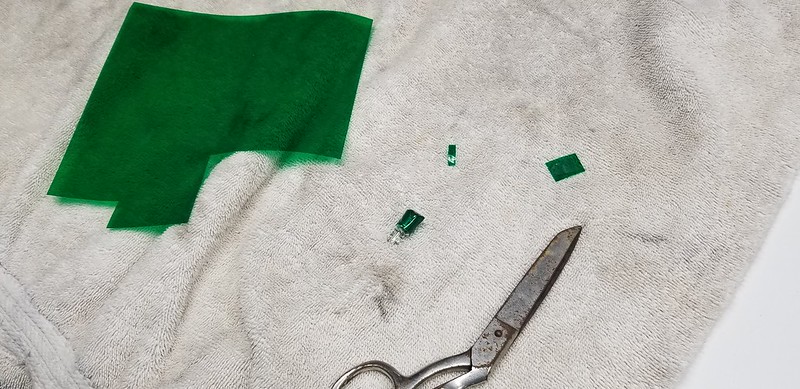
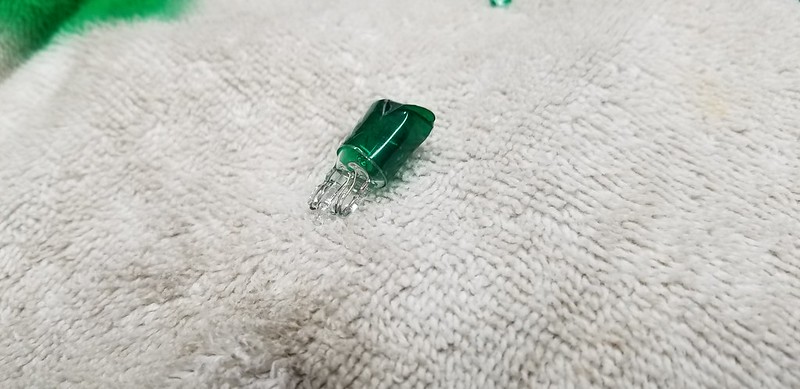
Some materials for getting the gauge lights to match the Dash Lights:
Green lighting gel - cut to size, and attached to the bulb.
Turns gauges looking like this:
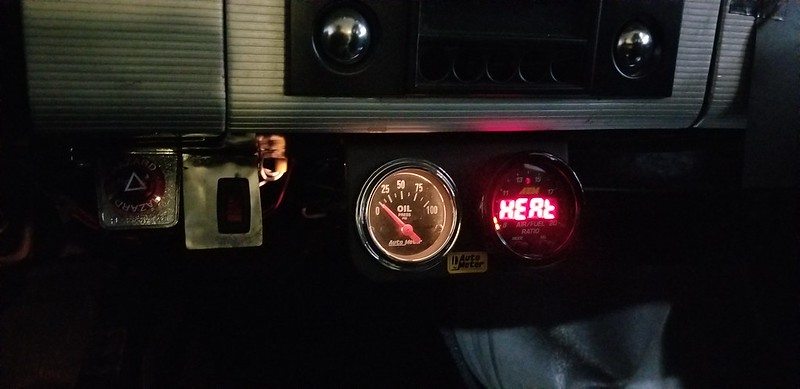
Into something more like this:


3/16/22
I have been able to work on some small bits here and there.
So Long Stock Hood:
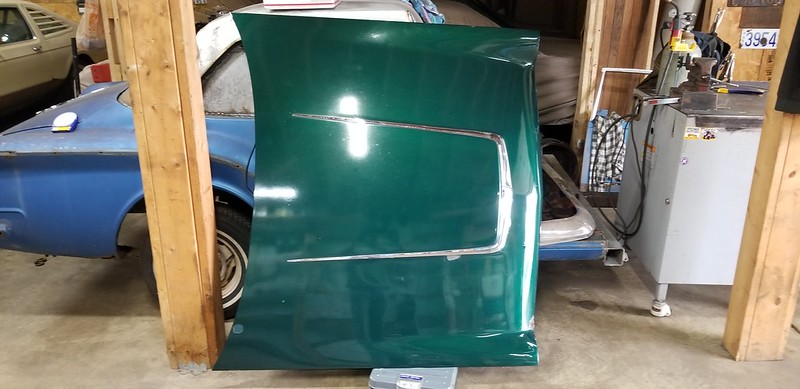
It weighed in at good 60#... Firm.. Rugged.. old Detroit Steel.
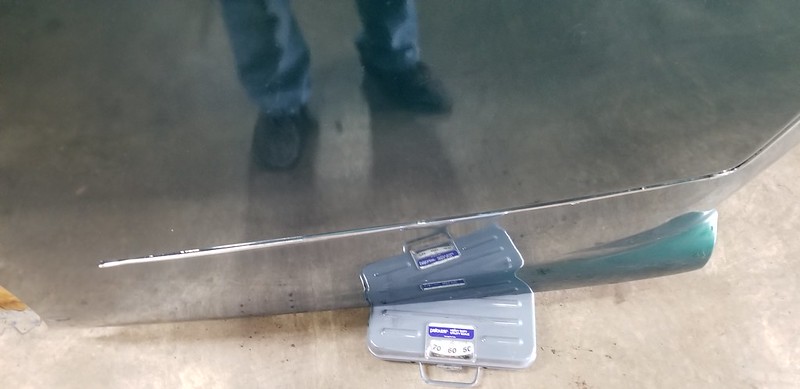
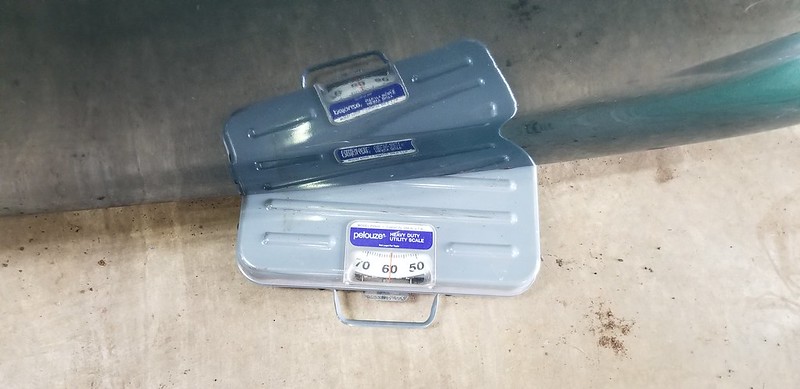
Add another 8# for the Stock Steel Hinges and Springs that I also removed.. Not shown.
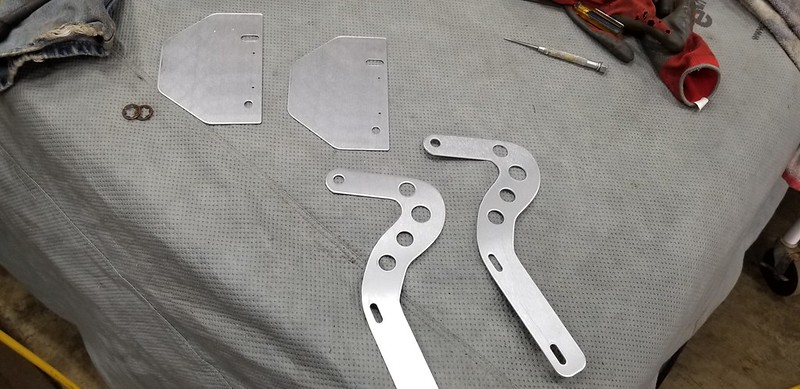
New Lite Hinges and plates - Plates get bent and then epoxied to the fiberglass, while the hinge arms replace the stock steel pieces.
(thanks Rick!)
Here's the new Hood Ready to be fitted - It's a flyweight Pin on / Lift off fiberglass type hood.

Weigh in..

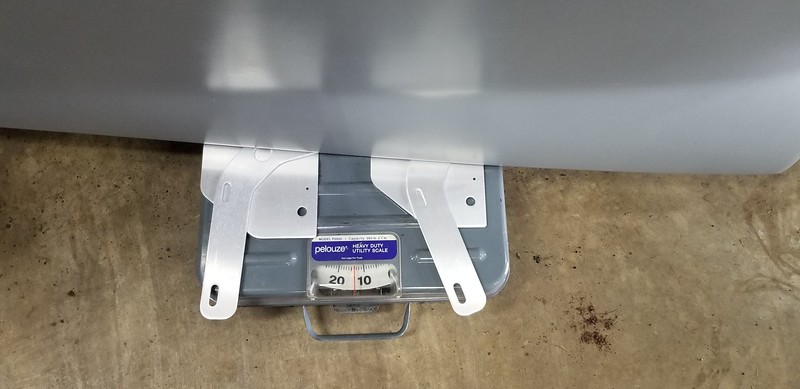
Total with Hinges included: 14#
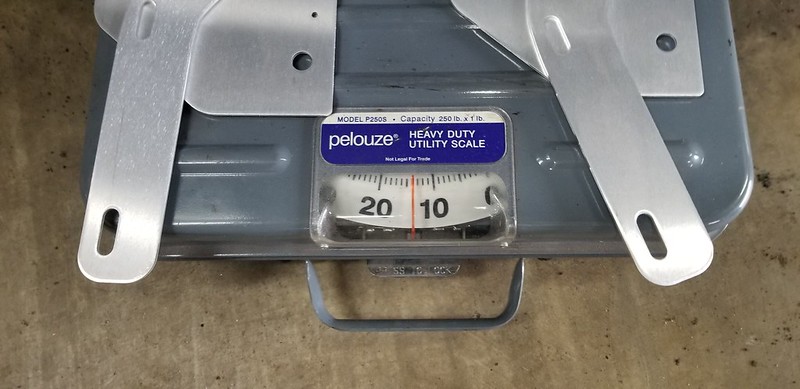
Not bad for a day's work, Losing 54# off the Nose of the car.
One of the many Test fits.. Adding some aerocatch bits for the closure.

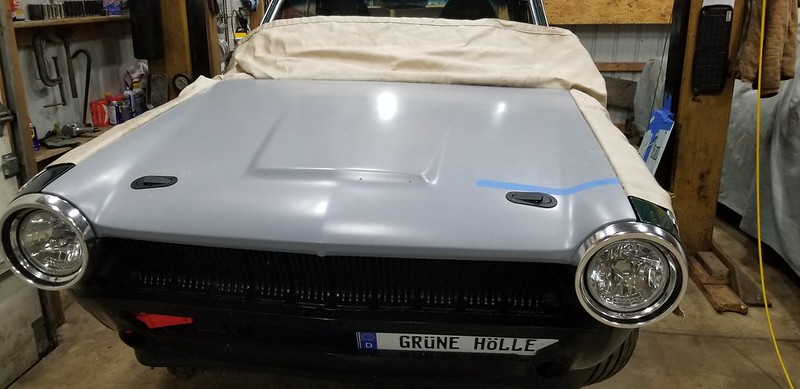

Those Aerocatch parts are nice, quality, and well made - and I think they look great too.
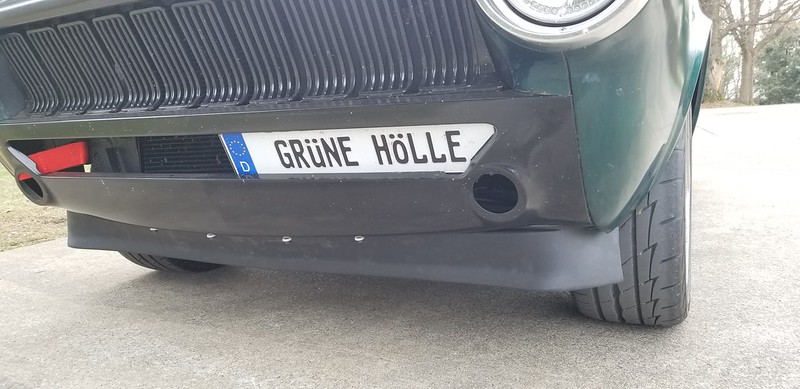
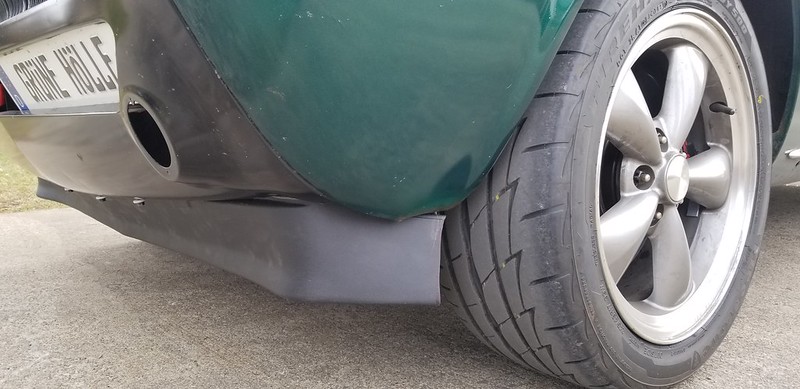
Summit Racing Has Factory Style Air Dams for first gen 80's S10/ GMC S15/ Sonoma for something ridiculous like $11.. I couldn't pass it up so I bought one and hacked it to the underside of the factory front valence - It Prolly should be lower, but for now it's better that what was there before.. nothing.
Had some paint Problems with the fiberglass - will hafta redo it sometime, but it's good for enough for now.


' Till next time..
That air dam manages to be pretty subtle and looks like you could adapt it to a lot of things. Great find!
Yes Matt, thanks.
The problem with my install was that the bottom of the factory front valence is arced and rounded in spots, whilst the S10 air dam is not.. It's dead flat. so some creative futzing was required.
That looks great and it's a really nice weight loss, exactly where it needed to happen.
JeremyJ said:That looks great and it's a really nice weight loss, exactly where it needed to happen.
Yep, Imagine if I went to one of those composite whindshields :-o
Prolly not as drastic of a weight loss but maybe worth considering.
Greg
4/3/22:
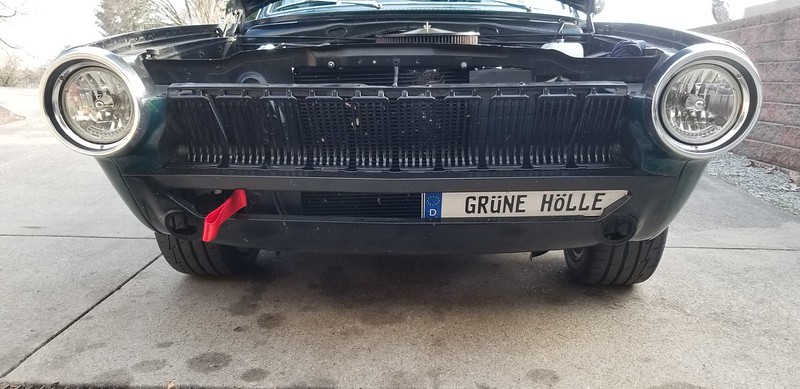
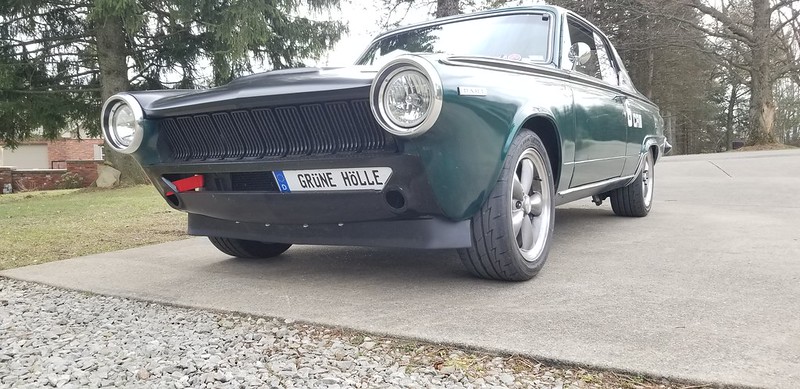
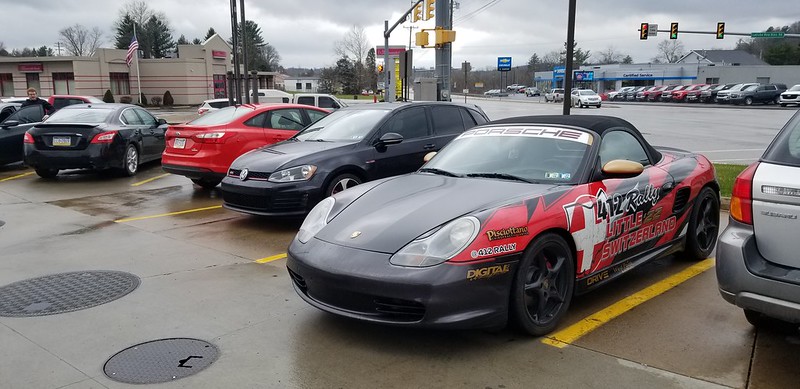
Grüne Hölle went on a 100 driving Rally local to my area - it was pretty fun.
The weather was not so great, mid 40's with steady to spotty rain for the first hour.
It was about 100 miles and very close to home. We had Lunch after and I met some nice people and evne got a free CANOE out of the experience! I'd call that a win.
I went with a group from the 412 Rally 412 Rally
I asked if they would let an old MoPar hang with the modern cars and Porsches, BMW's and Ford Hot Hatches, and they said sure, come along.
The Firehawk Indy 500's performed well inspiring confidence on the wet PA State routes in corners approaching 70MPH or more.. Another guy also had a new set of these on his Boxster
Here was a quick pit stop:

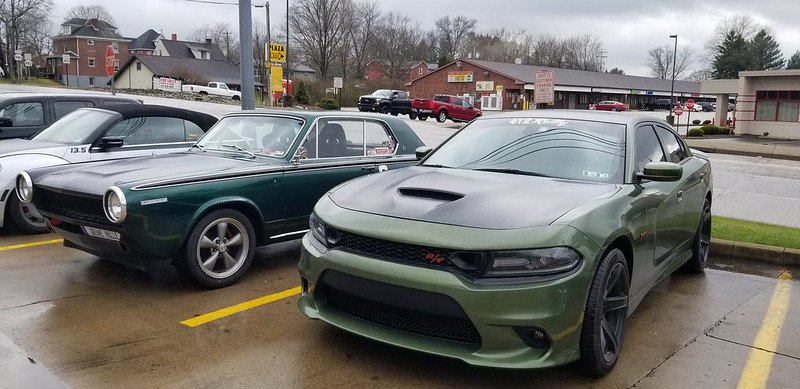
The car needed a good bath by the time I got home - lots of grit on the roads (hopefully not too much salt) and rain make the car dirty.

Hey, some horse tradin' at lunch netted me a free canoe.. The Graphics / Wrap Sponsor had an abandoned CANOE at his shop in the weeds... he said come get it.. So I did....Have been wanting to buy one for the river excursions with my daughter anyway!
It was a good shakedown for the trip to CMP later this month.
You'll need to log in to post.


