1 2 3 4 5
Keith Tanner
Keith Tanner GRM+ Memberand MegaDork
3/3/22 1:02 p.m.

Fair enough, it's a fairly strong look. A boot would have to be fairly voluminous. No matter what, I'll want some sort of plate to seal the base so I can always add a boot if I tire of the exposed mechanism.

It's not really a leather sort of van. Brown painted metal is more prevalent.

californiamilleghia
californiamilleghia UltraDork
3/3/22 1:22 p.m.
maschinenbau said:

Voice of dissent - I don't like the look of the exposed shifter for this van. A brown leather boot would look nice.

You need a boot of some kind for when you spill your nachos and beer ,

 but the machined part looks so nice ,, how about a clear plexiglass cover....

APEowner
APEowner GRM+ Memberand SuperDork
3/3/22 1:26 p.m.

I think it comes down to whether or not you want to go with an integrated look or a more in your face, this is not your hippy uncle's van look.  Either is valid.


Keith Tanner
Keith Tanner GRM+ Memberand MegaDork
3/3/22 2:03 p.m.

We don't eat right at the front of the van, that's what the dining room table is for :) Spillage is pretty unlikely - and I don't see it causing a problem if we did as the bearings will manage a certain level of debris.

If I tried to encase it completely it would have to be a flexible cover like a boot, to use acrylic would require having a gate in the top which would just make it harder to clean in the proposed beer and nacho (how do you make real nachos without an oven?) scenario.

Van is already not hippy, it's a Vanagon and not a bay window or a splitty. It's got solar panels on the roof, visible power monitoring equipment, an iPod mount on the dash and LED lighting, so it's not trying to cosplay as anything. Pretty much all decisions are based on practicality and there's no attempt to hide the machine.

I'll drop the factory boot over top to show what it looks like, this looks a lot more finished that it ever did.

obsolete
obsolete GRM+ Memberand HalfDork
3/3/22 2:07 p.m.

Keith Tanner
Keith Tanner GRM+ Memberand MegaDork
3/3/22 2:08 p.m.

I went looking for prior art (now? really? why not earlier?) and found this picture of how a specialist decided to solve the problem on a customer vehicle. That's the stock Subaru shifter on a pedestal with exposed cables running through an untrimmed hole in the floor. They didn't even wipe off the junkyard lettering. I really, really hope they built a center console around this, but this is the project picture they chose to share on their website.

Pete. (l33t FS)
Pete. (l33t FS) GRM+ Memberand MegaDork
3/3/22 5:14 p.m.

How are you supposed to get to the back with a center console in the way?


Although... if the shifter could swing out of the way....

Keith Tanner
Keith Tanner GRM+ Memberand MegaDork
3/3/22 5:47 p.m.

A lot of people do build center consoles into these things, sacrificing the aisle in the name of storage and convenience. I haven't been tempted, but it wouldn't be unusual.

That setup would probably be pretty nice to drive, it's just crude to look at. Thinking about it, you'd have to retain the existing cable approach direction (ie, go past the trans, do a 180 and approach from the rear) which would be a lot easier for bracketry and packaging. You'd just have to accept the length of the cables and the fact that they're doing two different 180s. I can see the advantages. I probably would have been finished sooner had I taken this route. But I couldn't have used the cables I used, they have different dimensions on the ends. I wonder if they extended the stock cables?

Keith Tanner
Keith Tanner GRM+ Memberand MegaDork
3/4/22 10:59 a.m.

I said I didn't have pictures of some earlier work, so here are a couple of bad ones.

The shift cable extensions. Cut the end off a spare rod end (couldn't find any 1/4-28 nuts around here and I don't have that size tap) and welded a bolt on the end. Works pretty well.

Reclocked side gate lever with multiple positions. It's the original arm with the welds ground off, the stock stud removed (wrong size for my cables) and multiple holes drilled. I had to be careful not to get things too hot while rewelding it as there's a rubber gasket right underneath and I don't want to crack into the trans to remove the lever. I didn't like that one too tight because it gets too easy to hit the wrong gate, so it's on the setting that requires the most cable movement and the least amount of effort. I can also change the leverage at the shifter if I want to go further in that direction.

More pics later.

Keith Tanner
Keith Tanner GRM+ Memberand MegaDork
3/6/22 1:22 a.m.

Progress today! I'm working on prepping the van for the final installation.

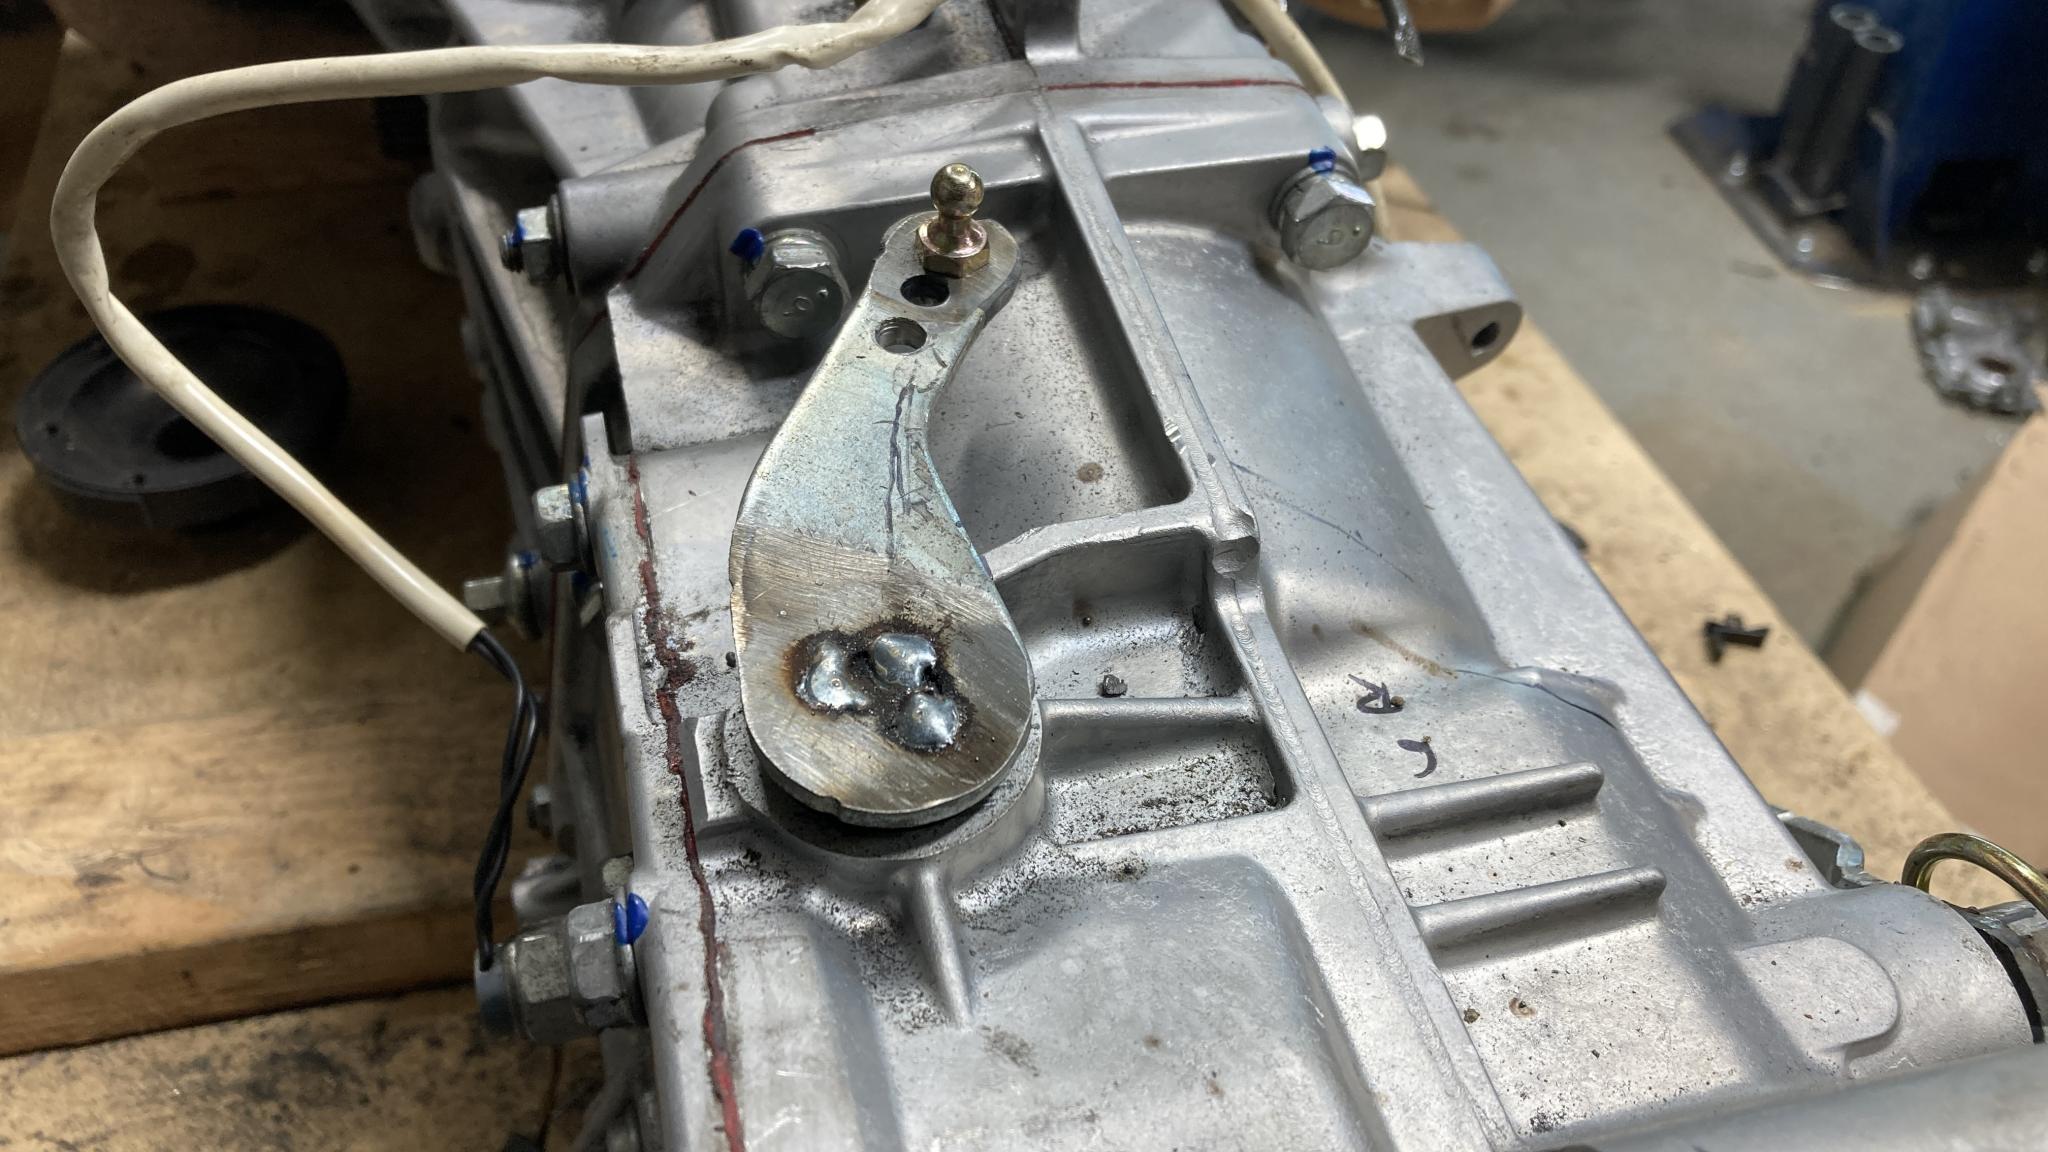
First, the final (for the moment) version of the shifter surround. Sorry, the factory brown rubber boot won't fit over my offset shifter. This will do for now.

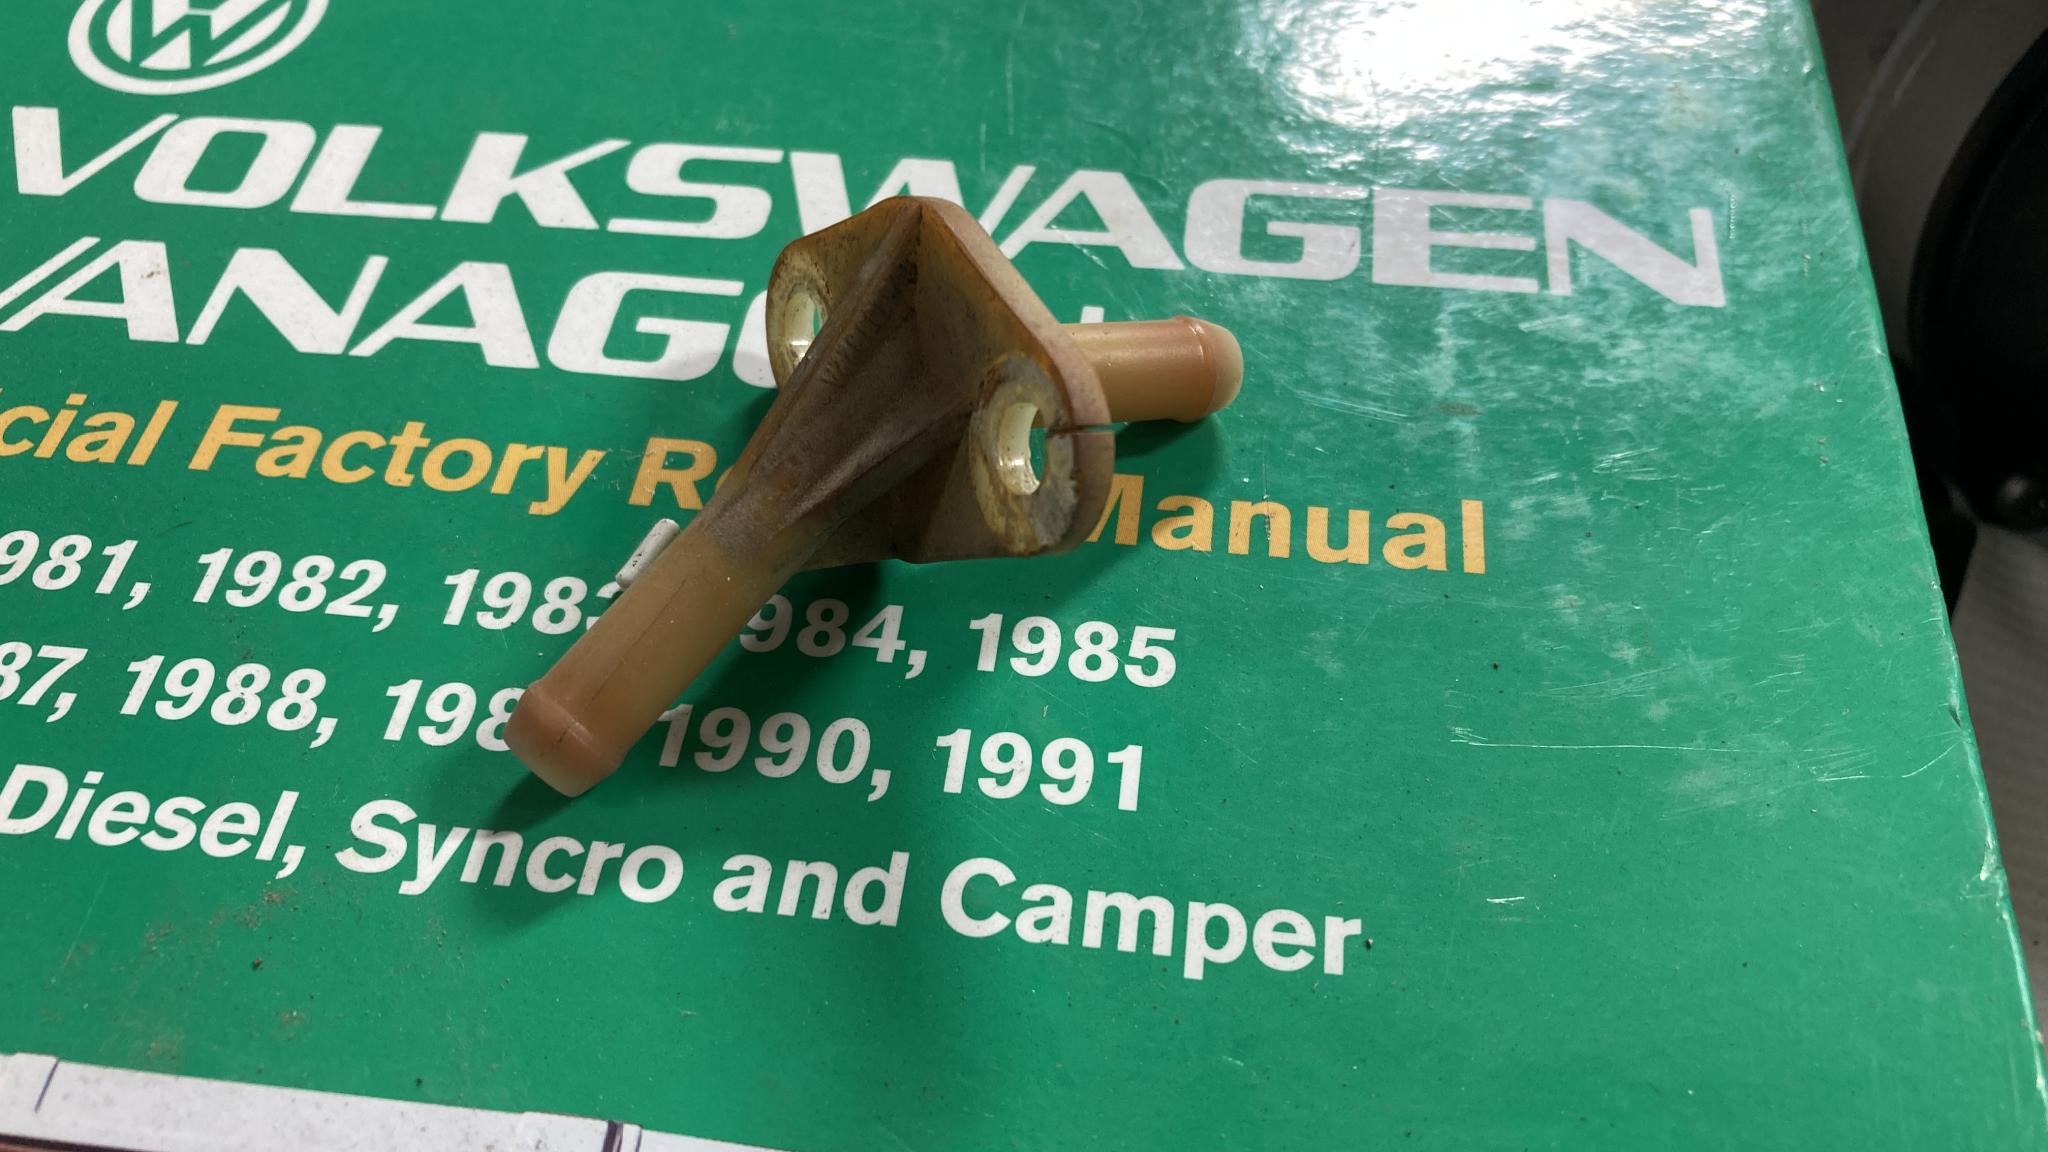
Next, address a known Vanagon problem. This little bulkhead connector allows the fuel line to well, pass through a bulkhead. It makes it easier to pull the stock engine as well, apparently. But it's made of 37 year old plastic  and it points in the wrong direction for a Subaru powered van. So I removed it and rerouted the fuel line to take a different route.

Next was the electrical bits. I'd mentioned a very thick terminal used on the VW starter. I picked up a power distribution block to make life easier...but when I went to install it, I decided to follow the lines. All the wires in this picture went into a junction block thing, to a single circuit with a 30A fuse. I didn't bother figuring out what gauge the wires are, but the holes are 8mm/5/16" for scale. It's become more clear that the folks who did the engine conversion were interested in "as fast as possible" more than best practices.  The red twinned wires aren't burnt at the butt connector, that's a ziptie.

I amputated the junction block and redundant wires and ended up with a single 3' 10ga wire to that 30A fuse. Everything runs to the junction block, then a big fat cable drops down to the starter. Nothing is fused here, I'll probably swap the block out for one with fuses built in even though all the wires are basically running straight to the battery, the starter or the new wire that's got a fuse on it. There is a long wire running up that seems to go to under the front seat, I suspect that's the charging wire for the house batteries. That's the most questionable one at the moment, I need to chase it down and see if it's fused anywhere.

Anyhow, it's MUCH better than it was. One nice thing about this block is that it will be accessible through the top of the engine compartment. I relocated my starting battery to the engine compartment a few years back instead of at the front of the van, which was an odd design choice on VWs part.

Last thing on the to-do list is sound deadening. There's some sort of heavy...foam?...on the rear bulkhead and just above it, held in with a little cage system. It is basically dust that's staying together out of habit. I've tried to replace some of it in the past but it's tough with the trans in place. That's not a problem right now so out it comes. 

Eww.

I cleaned off the panels and added Thermo Tec Cool-It because I have a roll of it kicking around. Good heat  insulation and it'll deaden the panels.

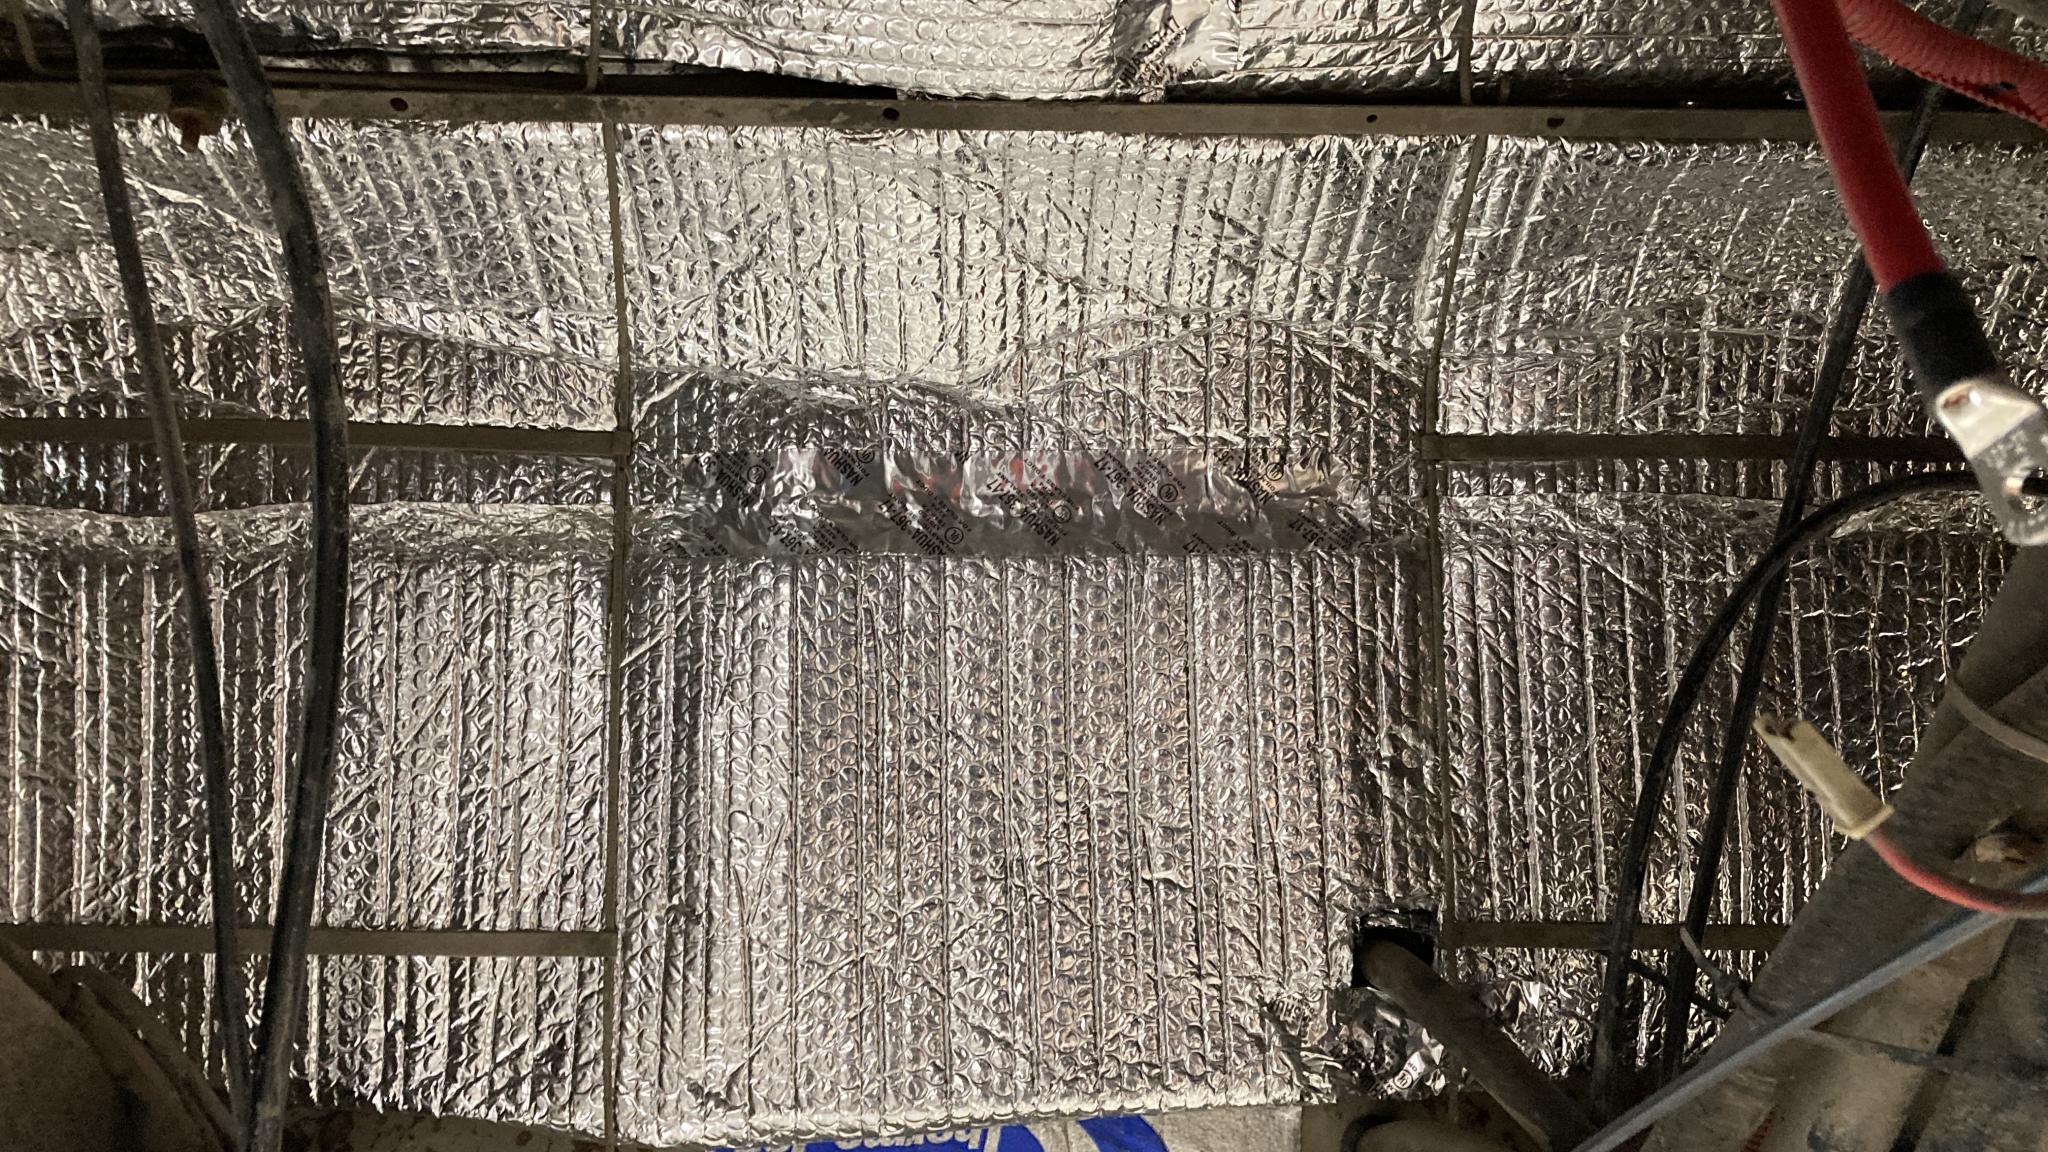
Next, two layers of Reflectix. This is basically aluminized bubble wrap, you can get it from Home Depot for cheap. Two layers because I have a LOT of it and because that fit nicely inside the insulation retaining system. This will cut down on heat and hopefully some noise. Plus it looks very pretty right now when it's all clean.

Is tomorrow the day that this goes in for good? It might be. I think that's a good goal.

AngryCorvair (Forum Supporter)
AngryCorvair (Forum Supporter) GRM+ Memberand MegaDork
3/6/22 11:31 a.m.

In reply to Keith Tanner :

How is the thermo-tec and the reflectix held in place?

Keith Tanner
Keith Tanner GRM+ Memberand MegaDork
3/6/22 11:46 a.m.

Cool-it has an adhesive back, and I added tape around the edges. The Reflectix is held in place by the factory headshield retaining hardware, basically spring wire and straps. You can see it in the last pic, the horizontal and vertical bits. Not something you'd want to fabricate on your own but well suited to the job. 

AngryCorvair (Forum Supporter)
AngryCorvair (Forum Supporter) GRM+ Memberand MegaDork
3/6/22 12:31 p.m.

In reply to Keith Tanner :

Thanks for the info. I've always liked the work you do and the way you describe / explain it. I'm sorry I haven't struck it rich yet. I really wanted you to build me an LS3 Miata.

Keith Tanner
Keith Tanner GRM+ Memberand MegaDork
3/6/22 11:29 p.m.

These posts are like looking at Instagram, you're only seeing the carefully curated results :) I'm a hack.

Speaking of which, the drivetrain is back in and the plan is for it to stay. I'm sure there are a few more things I could have puttered with, but it's time to get moving here. Literally. Drivetrain bolted back in easily. I hooked up the shift cables and adjusted the fore-aft throw to be a little tighter so I could get the 1-3-5 gates closer to the dashboard. There's a little bit of side play in the shifter when it's in gear and I think it's just a small bit of play being magnified by the long lever. It'll work, though.

Then it's the matter of hooking everything up. I'm still working under the car, haven't gone up top to put the intake manifold and all the wiring in place yet. And that means it's time to see if one of the pieces of Subarugears information was correct. Apparently my combination of "Subastub" stub axles and "Subaflange" drive flanges should work with a pair of left hand halfshafts that are for an automatic Type 2, or something like that. I ordered a set of those some time ago, would they fit? Here's where the ugly old parts meet shiny new ones.

The flanges attach to the stubs with a splined fitting and there's a cross hole to lock them in place. It's exactly 6mm (Subarugears is in Australia so it's all metric) so I could drop a bolt through there, but roll pins seem more appropriate. Of course you can't find 6mm roll pins around here but 1/4" is pretty close. I was able to make it work by pressing them in.

There are two depths available depending on which cross-hole you use, and after playing with the left side, I decided the longer version was correct because I had to extend the axle a little to get them to seat. So that's how I built both of them. And then when I went to install the right side, it was tight. Too tight (just) to let me slip the CV joint on to the flange while the other side allowed me to do it. Too tight once we get some suspension movement? Boy, I hope not. But when I'm thinking of it now, it would probably be a good idea to pull that puppy out again, drill out the roll pins and shorten that one. Sigh. Must be why there are two depths, I should have considered that. In case you're wondering, there is absolutely zero information about this on the Subarugears site.

Sigh. 

I also spent some time dinking around with a design for a reverse lockout. The first thought was to restrict the sideways movement of the shifter with a block that can rotate out of the way. I did a quick design for one that I could drop into place and printed it up.

Too much side leverage, I think.  It might be better to restrict a different part of the mechanism. I'm going to keep thinking about this. It's driveable as-is at the moment, so this won't stop me from getting the van mobile.

Keith Tanner
Keith Tanner GRM+ Memberand MegaDork
3/7/22 12:57 a.m.

Getting that roll pin out was a royal pain in the ass. But it's done and now I have a little more room to move on the right side. Yay!

Keith Tanner
Keith Tanner GRM+ Memberand MegaDork
3/9/22 5:52 p.m.

First drive!!!

More later, I'll just leave this here. 
heart

Keith Tanner said:

First drive!!!

More later, I'll just leave this here. 
heart

That's not a YT link!?!?!

Keith Tanner
Keith Tanner GRM+ Memberand MegaDork
3/9/22 5:58 p.m.

You know I'm an old, right?

Pete. (l33t FS)
Pete. (l33t FS) GRM+ Memberand MegaDork
3/9/22 6:04 p.m.

Ok, you are going to hate me...

This is a 6mm roll pin for a Subaru.  And a Subaru roll pin punch.

It is a very long punch.

Keith Tanner
Keith Tanner GRM+ Memberand MegaDork
3/9/22 8:54 p.m.

Since these were not Subaru axles, I didn't expect there to be a Subaru part. I spent less time dealing with them than I would have spent hunting down the parts :) But that's good to know. 

Keith Tanner
Keith Tanner GRM+ Memberand MegaDork
3/9/22 10:00 p.m.

No pics for now, just words. 

Spent some time dealing with motor installation stuff, like building a throttle cable bracket because the old one was attached to the VW trans and trying to remember where everything went - my labeling was incomplete. Cranked the engine over for a while and got oil pressure, then plugged in the crank sensor hidden under the alternator as if it had been my plan all along. Fires and idles, victory. It's likely not getting full throttle but it never has and that's what my DBW project should address. Moving on. 

Tried engaging the clutch in first with the engine running, rear wheel moves the correct direction. Tried in second, it goes faster. Tried reverse, it goes the other way. Moved a Jeep with a dead battery (I think I've lost it) and a V8 Miata and went for a drive. 

Clutch feels good. First gear is a little taller than before but the van doesn't care thanks to the high compression 2.5. The shift action is snicky. Seriously, it's got a very precise feel and there is no question when you get into gear. Due to the long lever, you shift with your fingertips. The side gate is wide - on purpose - so I might play with that. There's no chance of hitting reverse by accident. But man, the feel. I did not expect that. 

Van pulls the tall 6th at 50 easily, although I didn't do any acceleration runs. 

Downsides:

There is a surprising amount of gear noise from the shifter - must be transmitted via the cables. Surprising given how far it is from the trans! I'm going to do some sound insulation on the box but there's only so much I can do there with the open gates. We'll see what that's like as I keep tweaking. 

The spring in the shifter puts the shift lever straight up in the middle gate. With the lever not exactly being right beside the driver, that's not ideal. Between that and the wide side gate spacing, it's a long way to reverse. I can rotate the base a little bit to move it over about 1.5".  I may also try a bent lever to see what it's like with the knob a little closer.

I need to examine more, but it feels like there might be a tiny bit of flex in the lever. Shouldn't be, but I'm going to take a look. 

I also had an incorrect clamp on a cooling line so the 3 mile test drive ended with some steam release. Easy fix. Same with what feels like a bubble in the rear brakes.

Overall, this is a big win and well worth the time. I'll start adding mileage bit by bit and continue to monitor. Maybe I'll shoot a little video too :)

Pete. (l33t FS)
Pete. (l33t FS) GRM+ Memberand MegaDork
3/9/22 10:08 p.m.

In reply to Keith Tanner :

I have not used that tool in about six or seven years, and I have a small collection of those roll pins because replacement Subaru axles come with them.  But, in one of those weird man-brain things, when I read your post about the roll pins, I knew exactly where the roll pins and tool were, so I had to share smiley

I was annoyed to find out that, at least for my automatic WRX, you can pop the axles out without removing the roll pins.  The stubs pop out like as with "normal" axles that have a circlip retainer.  Nothin' worse than having the right tool for the job and then discovering that it is not needed!


That is very interesting about the noise transmission.  My initial reaction was that it should not be possible, part of the reason they use cables is to be able to isolate you from all the mechanical stuff going on.   But then, you're not exactly using gooshy squishy bushings in the cable ends, are you?

Keith Tanner
Keith Tanner GRM+ Memberand MegaDork
3/9/22 10:29 p.m.

There is absolutely no squish anywhere in those cables or their mounts. . I'll take another look at the factory ones - they have plastic ends at least. 

clutchsmoke
clutchsmoke UltraDork
3/9/22 11:05 p.m.

I'm just creeping along for build/ride. Excellent work on this build!

Keith Tanner
Keith Tanner GRM+ Memberand MegaDork
3/10/22 10:29 a.m.

Spent a bit of time last night bleeding the rear brakes - they were basically pneumatic by this point based on the amount of air I took out. I'd had to remove the cylinders to get the rear hubs out. Added some DEI "floor and tunnel" sound insulation to the shift box, fixed some side marker lights that weren't lighting (how did THAT get on the to-do list) and fixed the coolant line clamp. I also rotated the shifter so it's a bit closer to the steering wheel but wasn't able to adjust the side gate throw - I need the lift for that. I'll take it for another test drive later today.

This thing made the transition from "long term project" to "successful test drive" surprisingly quickly. I expected more teething pains. Watch this, the whole drivetrain will fall out on the next drive...

1 2 3 4 5

You'll need to log in to post.

Our Preferred Partners
ZeVVLXnBNv58MFaLvwdLOGP8yHRimywW8K32FBQkuXVV6rB8NQQD1E4GidJCSzC0