1 2 3
erohslc
erohslc HalfDork
4/10/13 11:01 p.m.

Believe it or not, that's the stock Spitfire setup for mounting the suspension turrets to the frame.
The motor sits in between the turrets, but is mounted through a pair of thick spongy rubber motor mounts, so not a lot of stiffness or support there for the turrets.
I'd think about something like a shallow U bent piece (like rollbar tube), projecting just ahead of and over the front of the motor, connecting the turret tops.
Weld to a couple of steel plates that bolt to the turrets, ideally where the motor mounts attached, but maybe they were torched off.
It will defintely make your life easier if this is a bolt-in brace.
There was also a 4" x 4" steel crossmember just aft of the rack that connected the frame rails, but I think it's torched away too.
Easy enough to weld in a replacement, maybe just forward of the rack, plenty of room there.

Or whatever you decide.

Have fun!

AndreGT6
AndreGT6 Dork
4/11/13 9:48 a.m.

http://crazyspitfire.blogspot.ca/

Read away.

jgrewe
jgrewe New Reader
4/11/13 12:10 p.m.

Once I move the engine back it will be easy to add a bolt in cross member near the top of the turrets across the front of the engine. Add a few triangles back down to the frame rails and it should be better than stock.

I will add something to the rear of the turrets too. Probably a short piece of DOM tubing to tie it to the frame better. That spring perch can put quite a twisting load on the frame rail through the turret, need to do what I can to lock it down.

I will rebuild the cross member that was cut out by building a box section similar to what was removed, just put it back in a little forward of the engine. I'll use it as the rack mount too.

Went to Michael's Arts and Crafts yesterday looking at premade foam shapes. Picked up a Styrofoam cutter that is like a long thin soldering iron. Did a little test and it works great. It will cut a smooth line the diameter of the element. I may get another one and bend the element into a "J" so I can carve out sections.

Looks like this one:

http://www.ebay.com/itm/FloraCraft-STYRO-CUTTER-PLUS-Electric-Styrofoam-Cutting-Tool-/400424202745?pt=LH_DefaultDomain_0&hash=item5d3b2471f9

jgrewe
jgrewe New Reader
4/27/13 11:50 a.m.

Read next line in your best Wicked Witch voice

I'M MEEEELLLLTIIIINNNG!

I ended up trading the cylinder heads and some other stuff at my local scrap yard. They let me weigh the stuff I had and then rummage through their bins to find bite size bits I can fit in my crucible without much hassle. After trying to cut the heads up on my band saw I started thinking I would end up wasting a $40 blade for a few pounds of aluminum.

Spent Friday evening making ingots for the upcoming casting projects.

That is a shot of 3 Cummins pistons that almost filled the crucible! They barely fit the ID going in. Maybe a 1/4 gap on the edges.

This was after pouring a few ingots, ready for reload. I preheat parts around the edges of the lid to speed things up. The lid is still just a solid kiln lid, I need to cut a vent hole in the middle of it so it can increase efficiency. For now I sit it off to the side for venting.

This shows how well the kiln bricks keep the heat from reaching the outside. This was after running the furnace for almost 3 hours straight. Just warm to the touch.

Here is most of the nights work. There were 4 more big ones cooling in my ingot pans. Each one is from a 2 1/2"x 2 1/2" angle iron trough 11" long. I welded 4 together to make pouring a big melt easy. Each one is about 3lbs.

The little ones are aluminum cupcakes. Picked up most of the tools at Goodwill for a couple bucks.

erohslc
erohslc HalfDork
4/27/13 9:02 p.m.

Yah, I use the same model kiln. I'm going to get a programmable temp controller, so that I can also use it for heat treating. And looking to plumb it so that i can fill with CO2 or Argon, to do Oxygen free processing.

Looks like the next step involves some sand!

jgrewe
jgrewe New Reader
4/27/13 9:51 p.m.

I'll ask my friend, he may have some stuff laying around that you could use for a controller. He takes trade-ins all the time, lot of stuff not worth rebuilding. I was asking him about making a heat treating oven a while back, he said he's made them before. One of the old timers in the hang out gang mentioned something about stainless steel foil for the process. He worked at Honeywell back in the day making stuff for the space shuttle program, I need to pick his brain more.

erohslc
erohslc HalfDork
4/28/13 7:11 p.m.

Thanks for the offer, but eBay is chock full of stuff for this:

http://www.ebay.com/sch/i.html?_trksid=m570.l1313&_nkw=temperature+controller&_sacat=0&_from=R40

Some of these are very sophisticated, you can create routines with setpoints, temperature ramp and hold, time intervals, soak, etc.

Most use standard thermocouples, etc.many will interface with PC/smartphone, etc.

My issue is time, I travel for work every week, never time to get my own things done.

jgrewe
jgrewe New Reader
5/19/13 7:32 p.m.

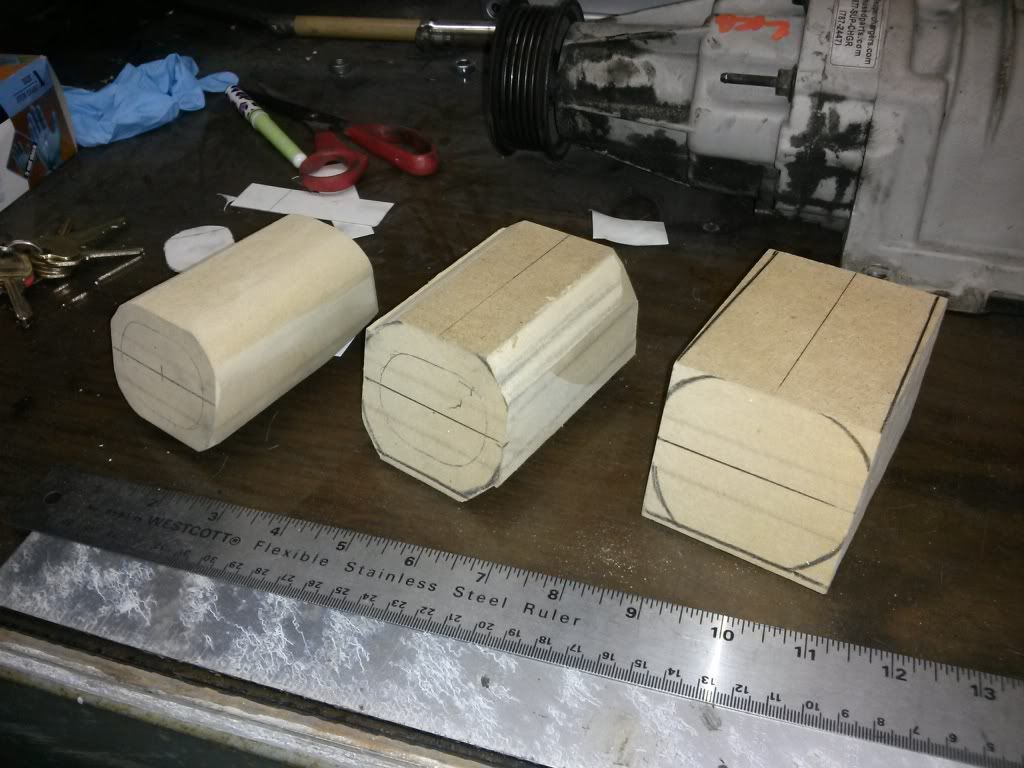
Finally got to play with fire again today. I had spent a bunch of time carving and shaping foam for my motor mount arms over the last week. Its funny how you start to look at things differently when you expand your fabrication skill set. I found myself rummaging through the Sears outlet garbage pile looking for foam packaging parts. I figured I would save a little time starting with foam that was already close to the shape I wanted.

I shaped one mount out of 3/4 thick foam and a block and spent too much time trying to hold them together. Hot glue works but there is about a 2 degree window between not melted glue and melted foam. I then tried Loctite's construction foam adhesive. It didn't melt the foam but it took fore-ev-er to dry and hold.

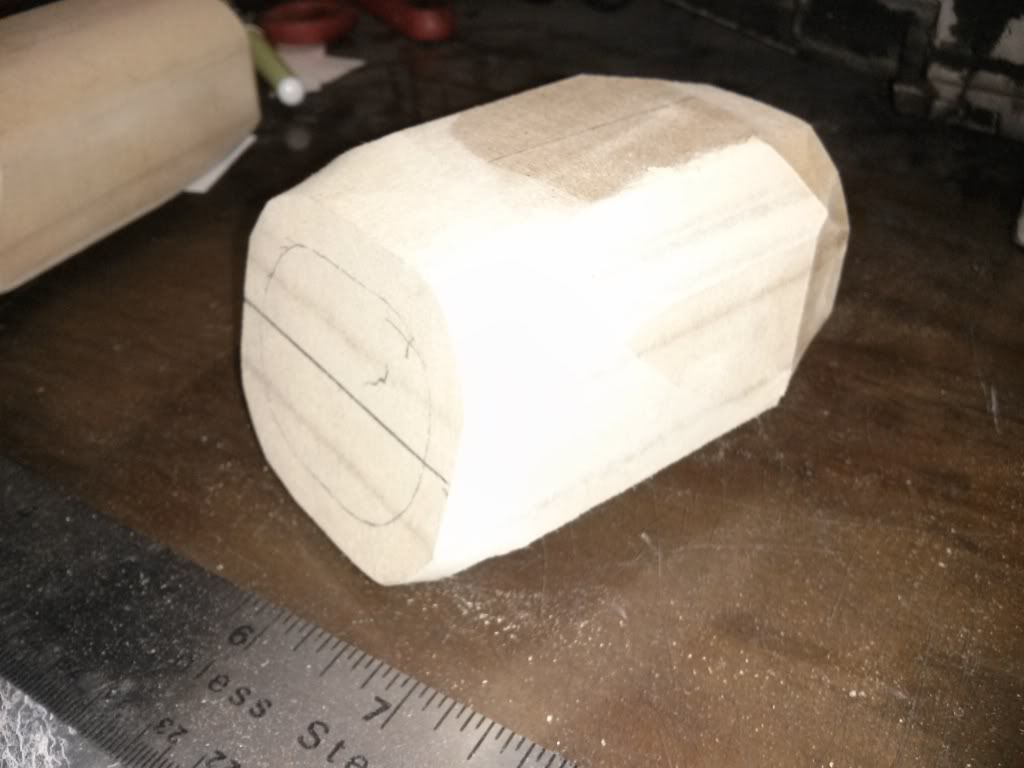
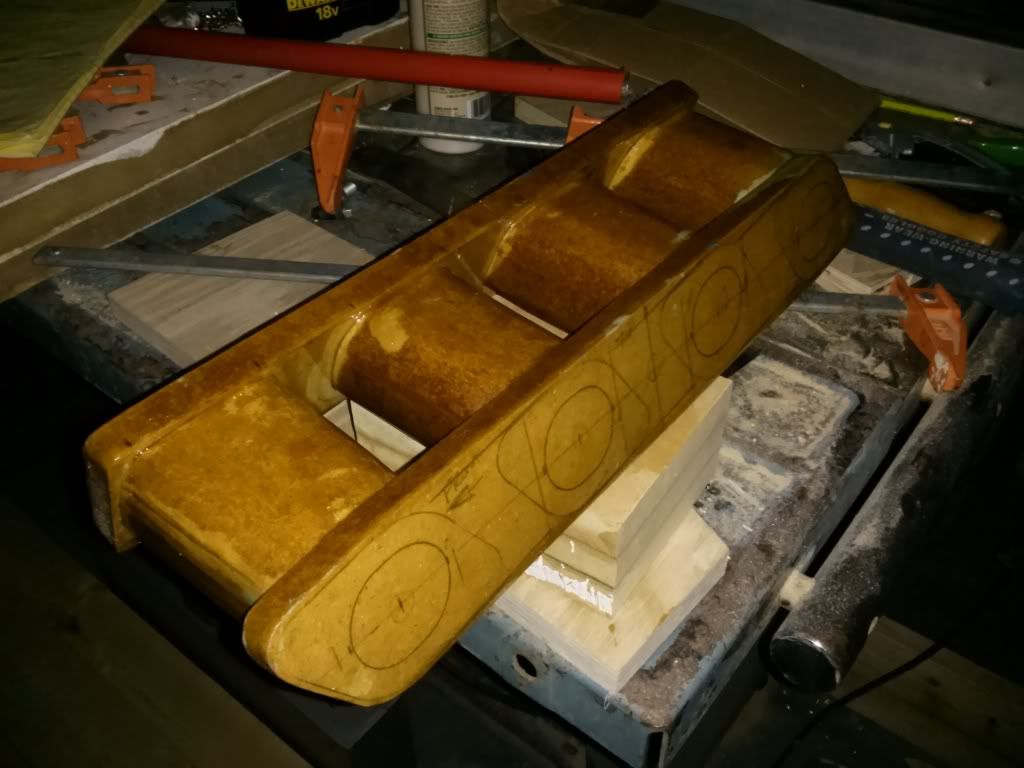
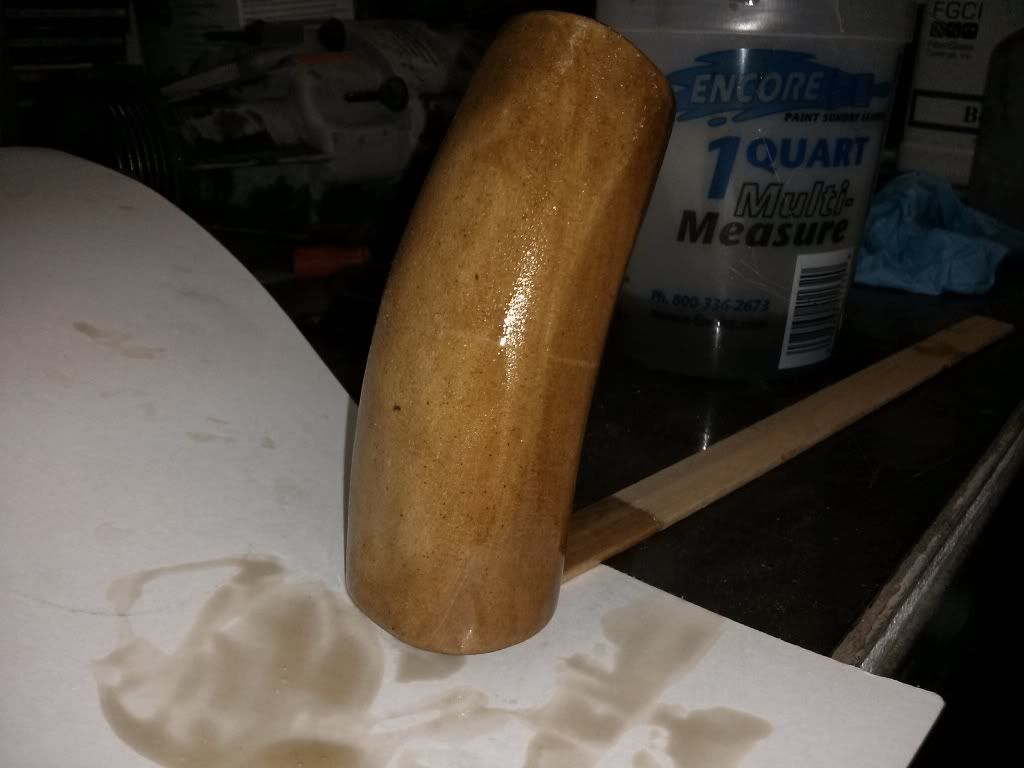
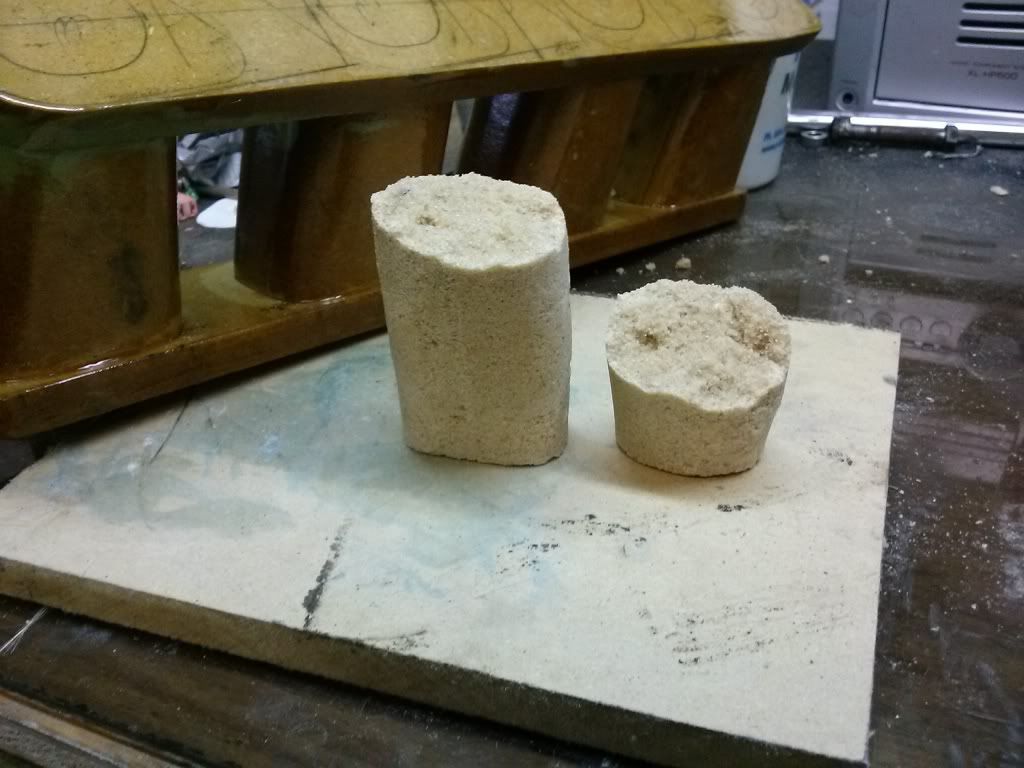
The second mount was carved out of a single piece, I just had to attach the sprue and vents.

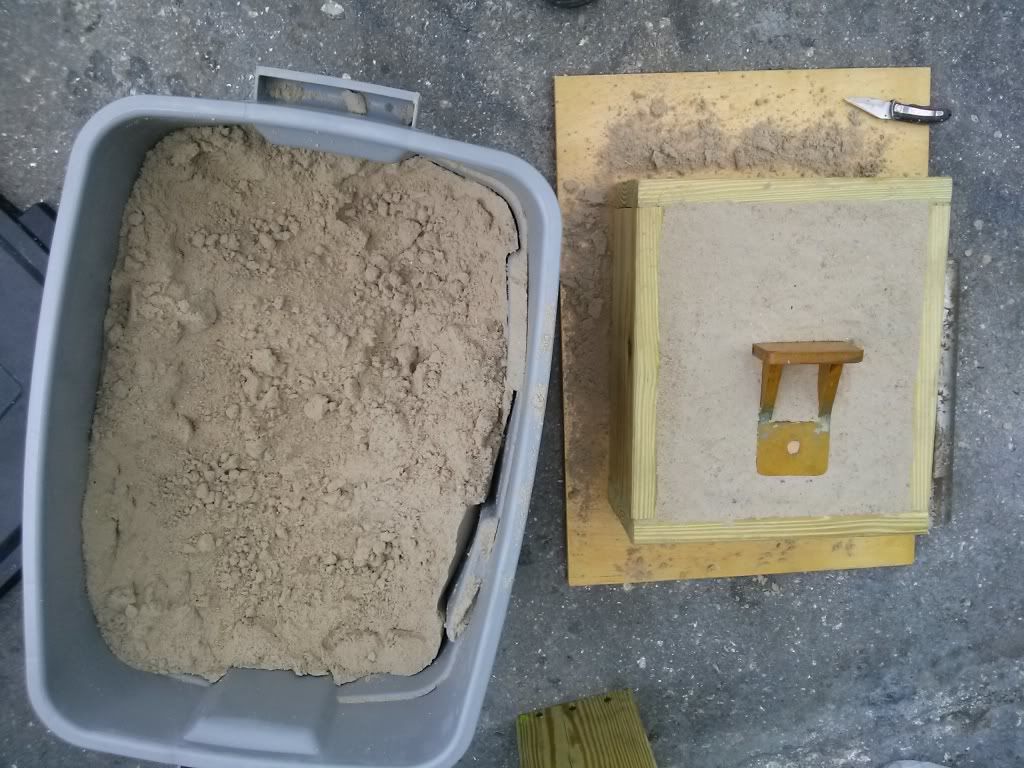
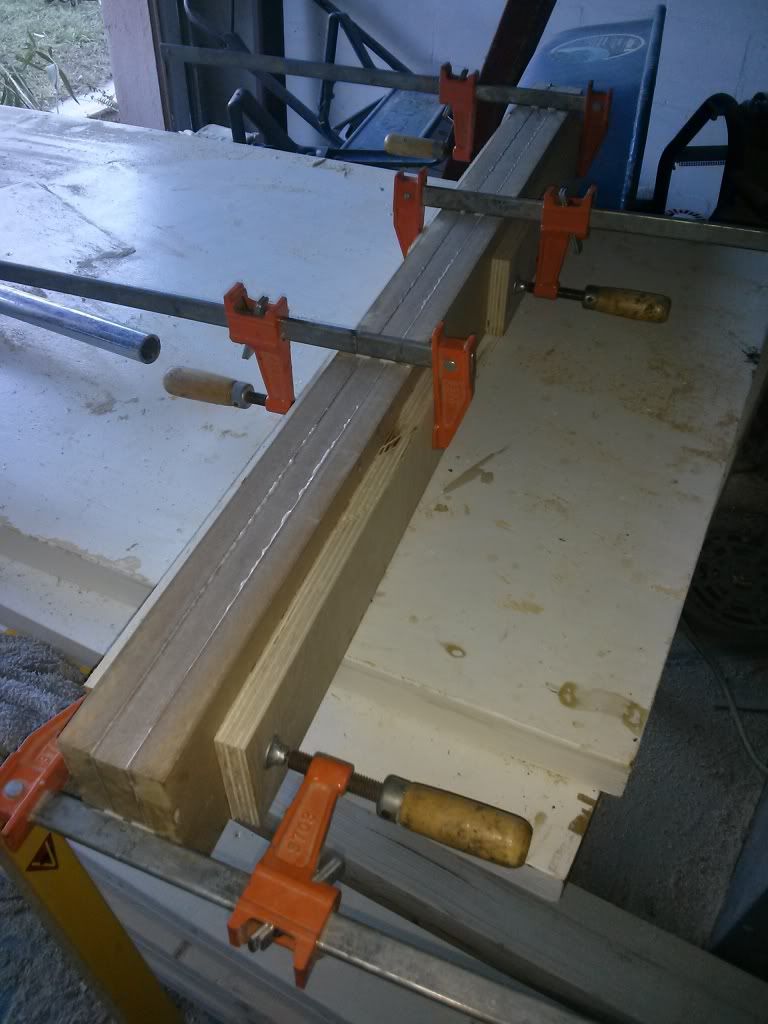
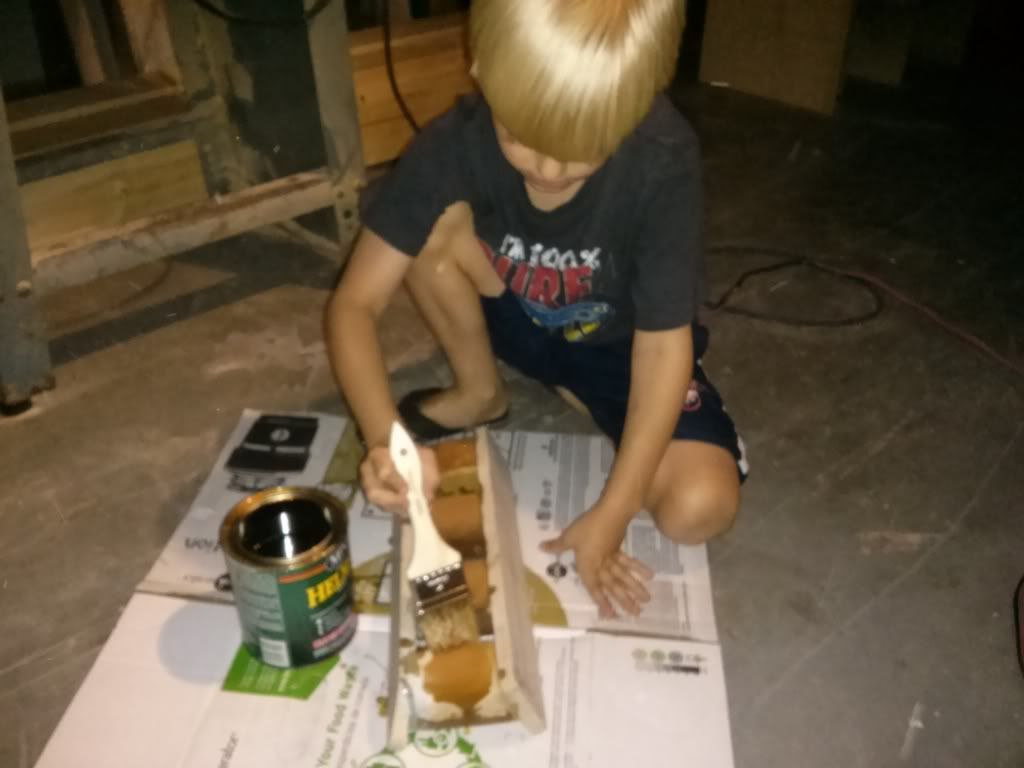
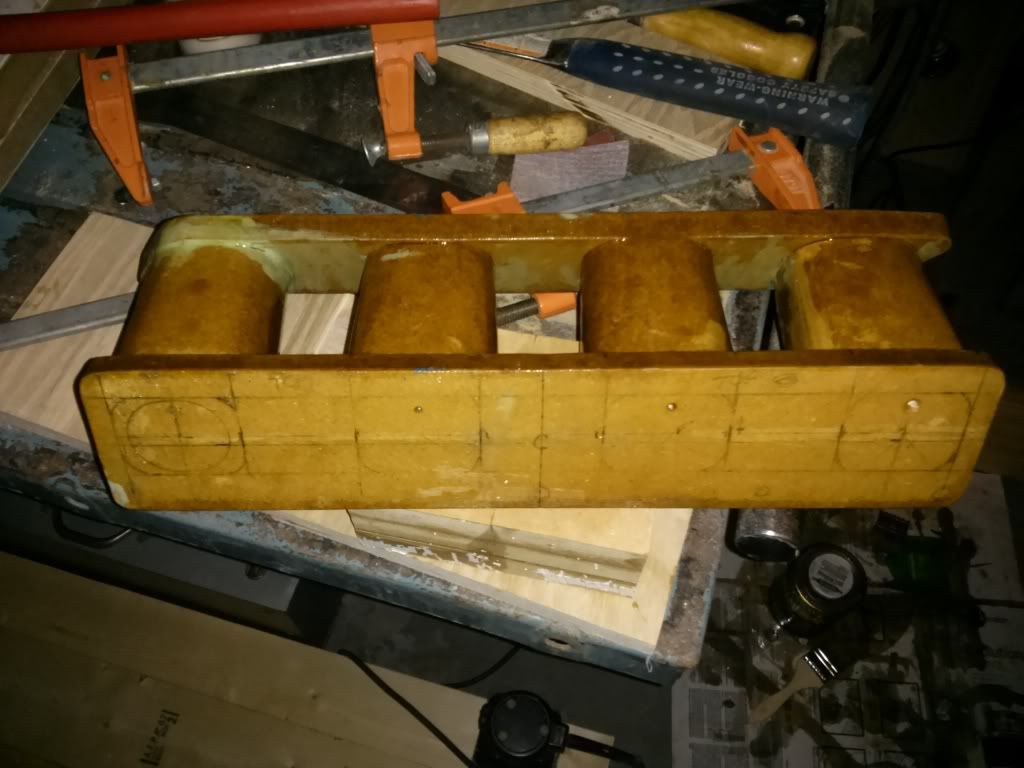
Here are the mounts coated with drywall plaster to help keep the sand back while the foam melts.

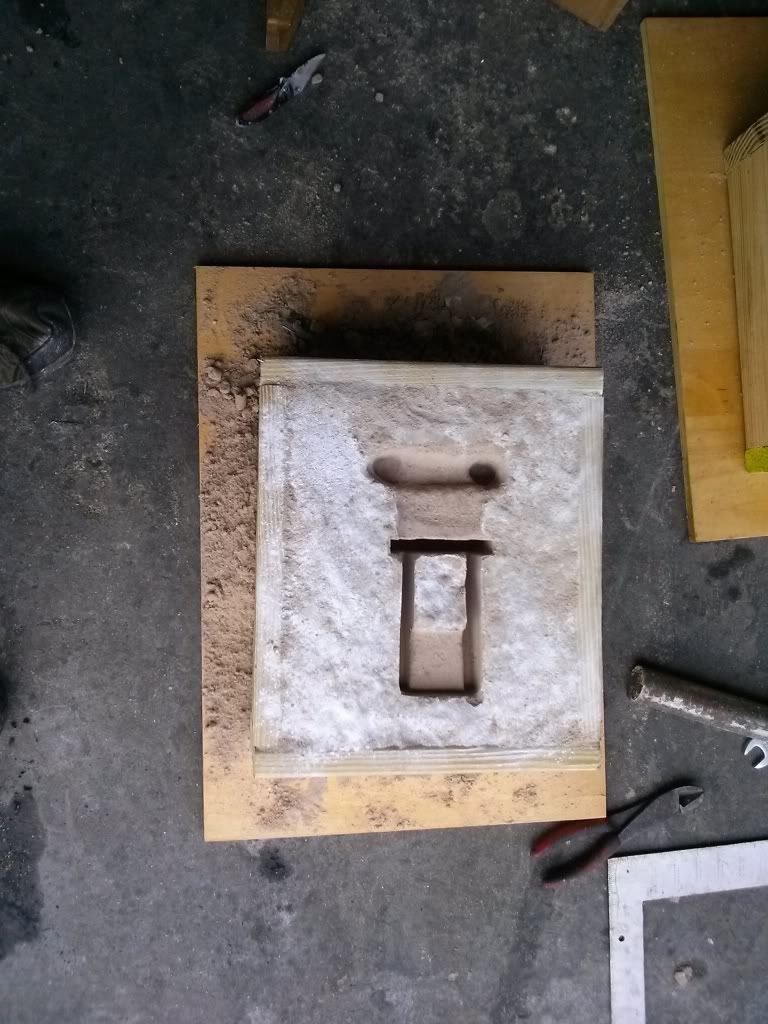
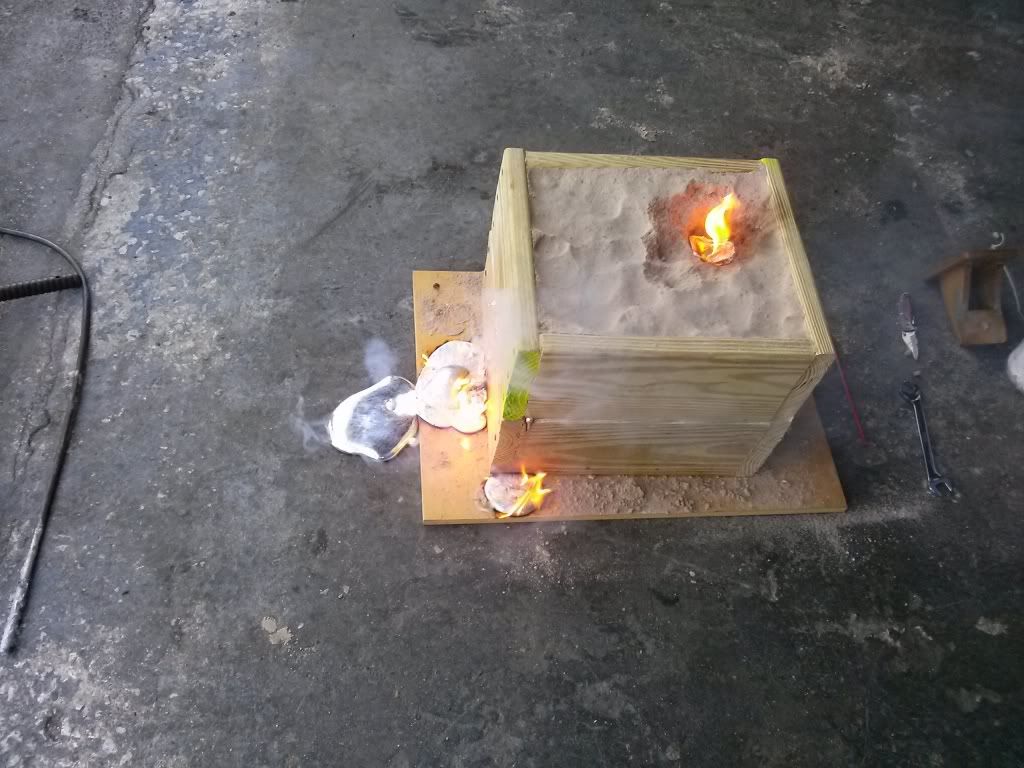
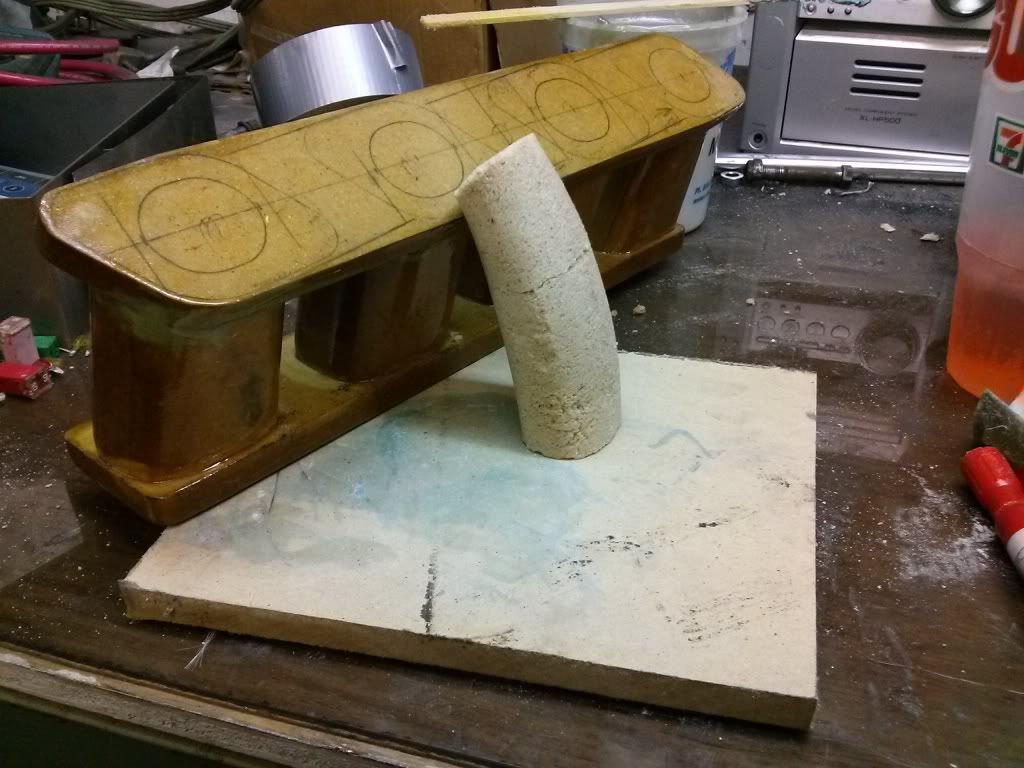
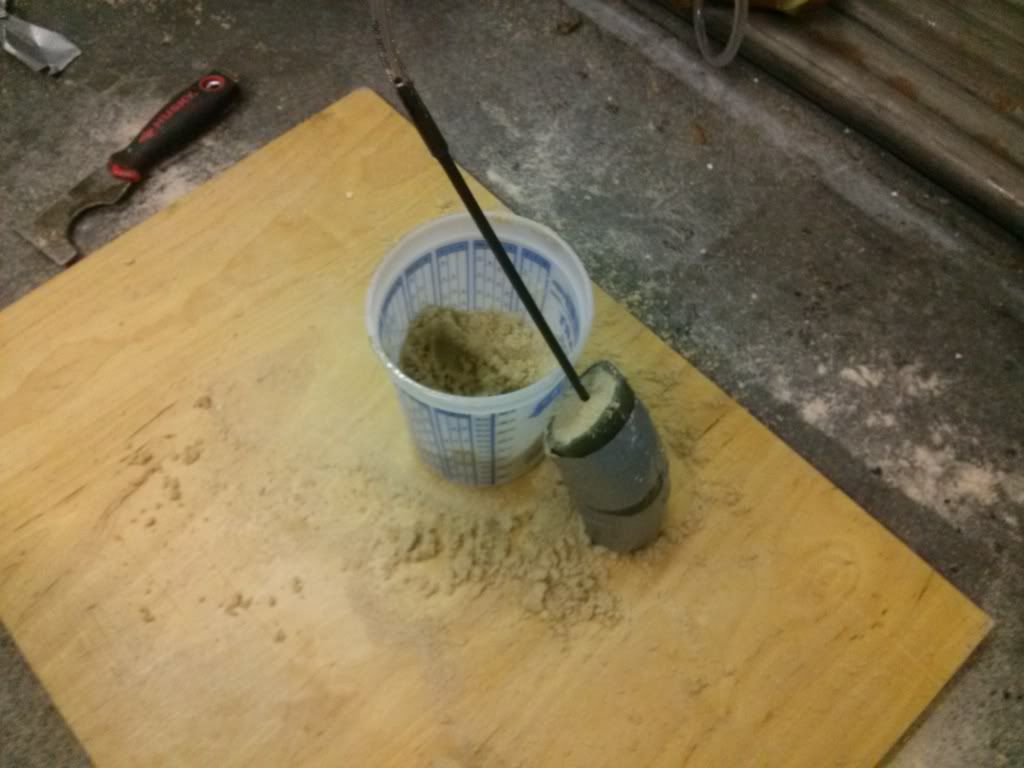
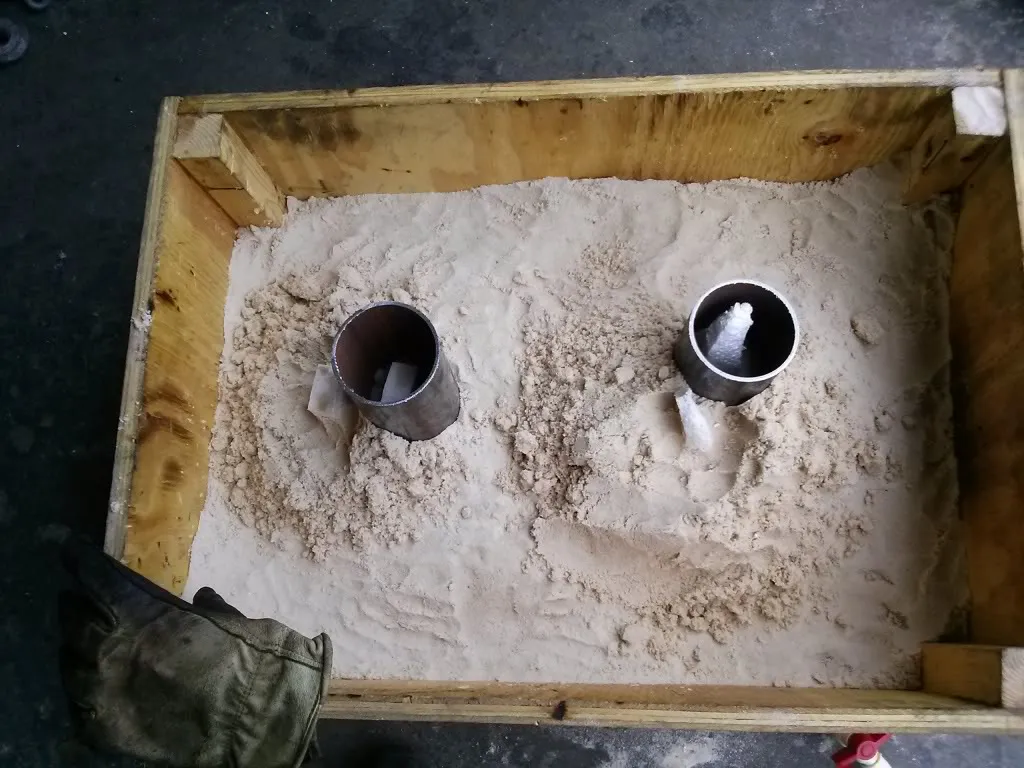
Here they are buried in the sand with head pressure pipes over the sprues. This sand is just plain sand, nothing to make it hold its shape. The foam and plaster do that. Normally the sand is treated with clay and water or oil until it is closer to cookie dough in consistency.

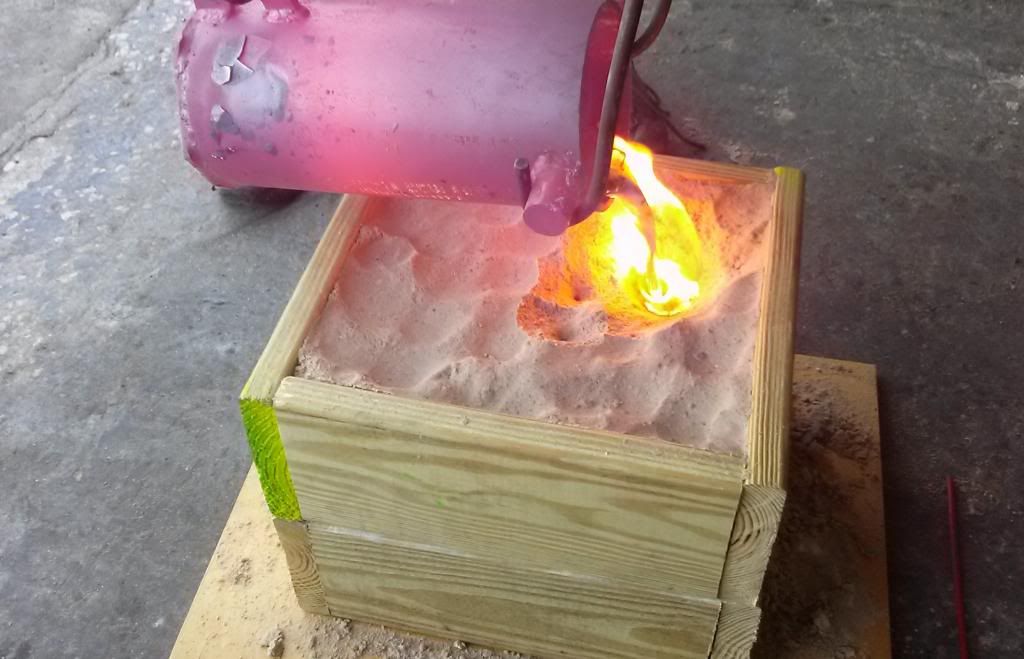
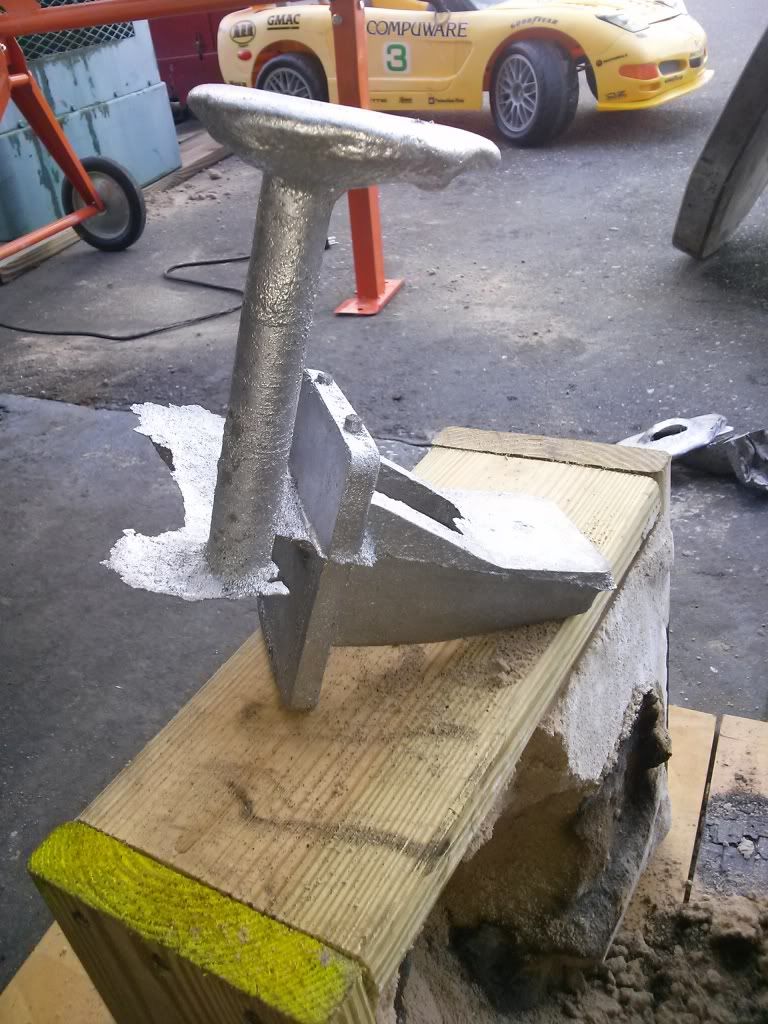
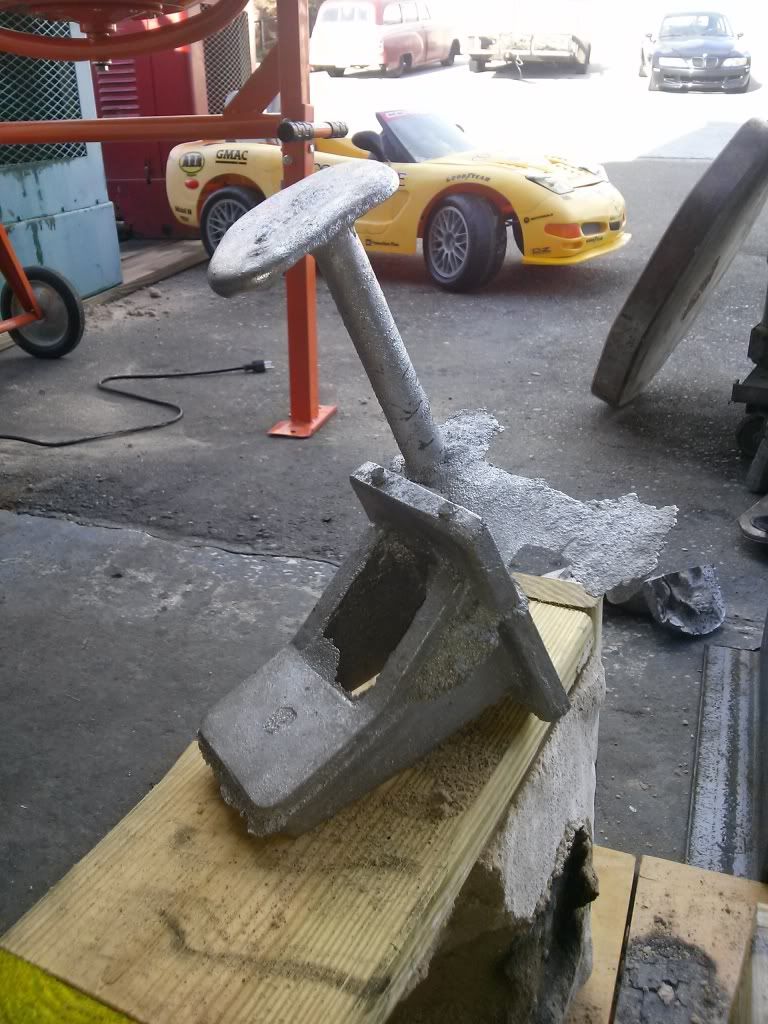
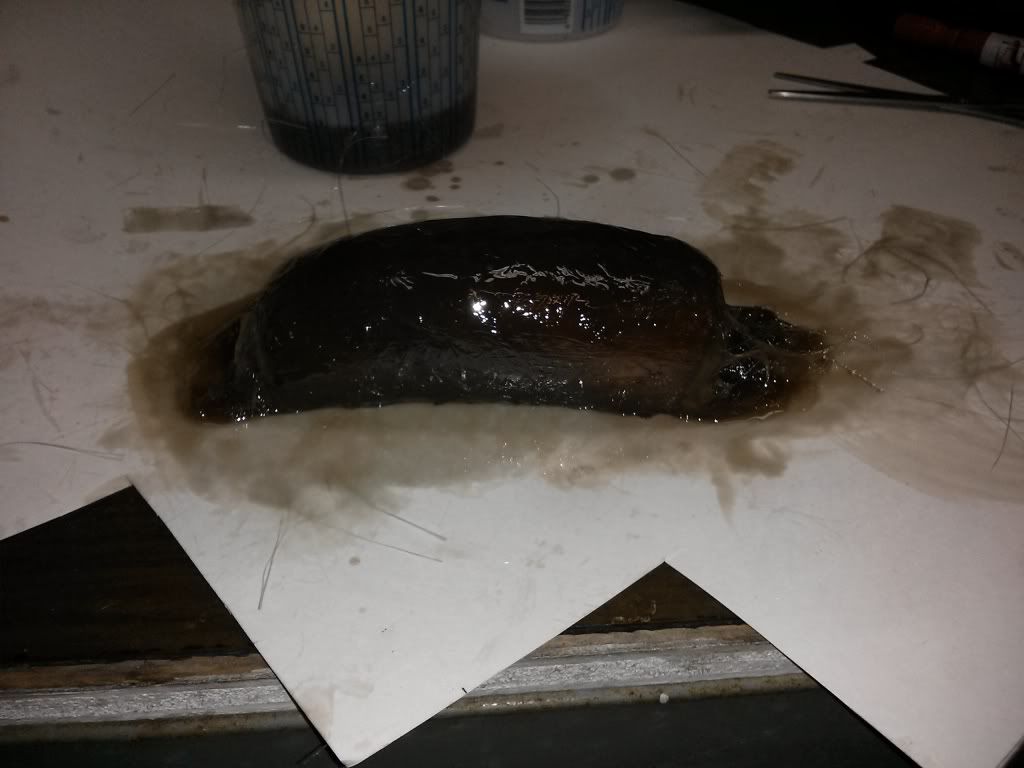
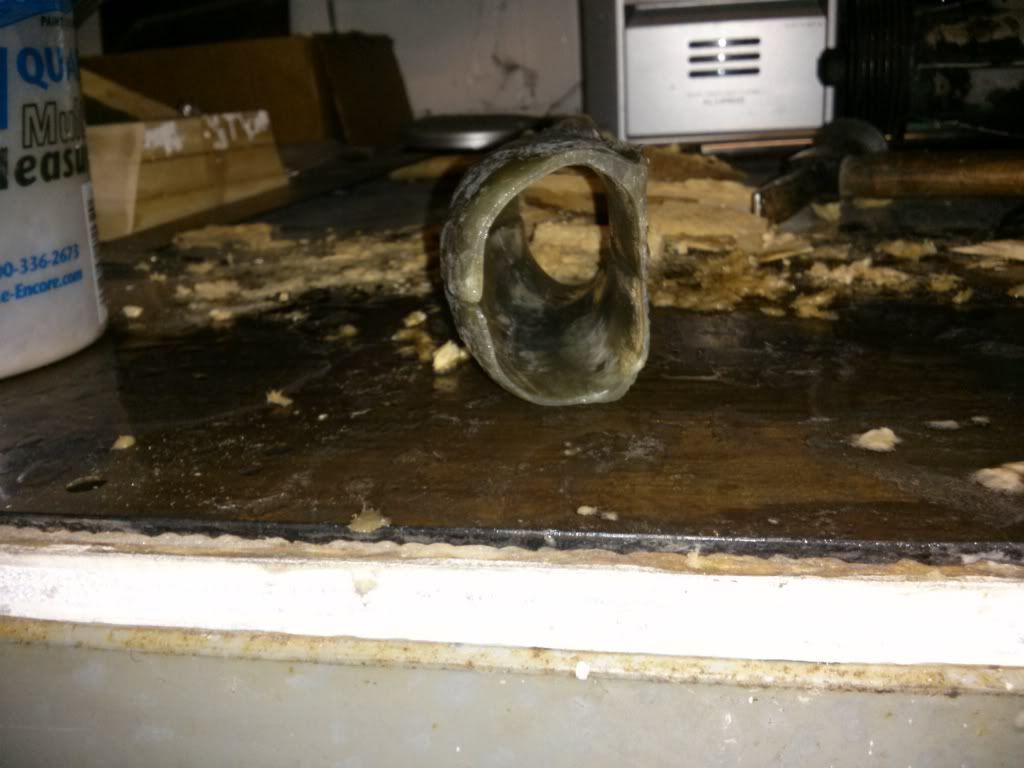
Well, first "Lost Foam" pour didn't go as planned. Remember that loose sand? Well I didn't take into account that the head pressure pipe was going to be sitting on sand that was only a couple inches above a 4"x4"x3/4" pool of molten metal at some point. I put the part in the sand with the surface that would be bolting to the engine facing up. Shortly after the aluminum made it into the foam the sand gave way over the part and the head pressure pipe leaned over. Crap!

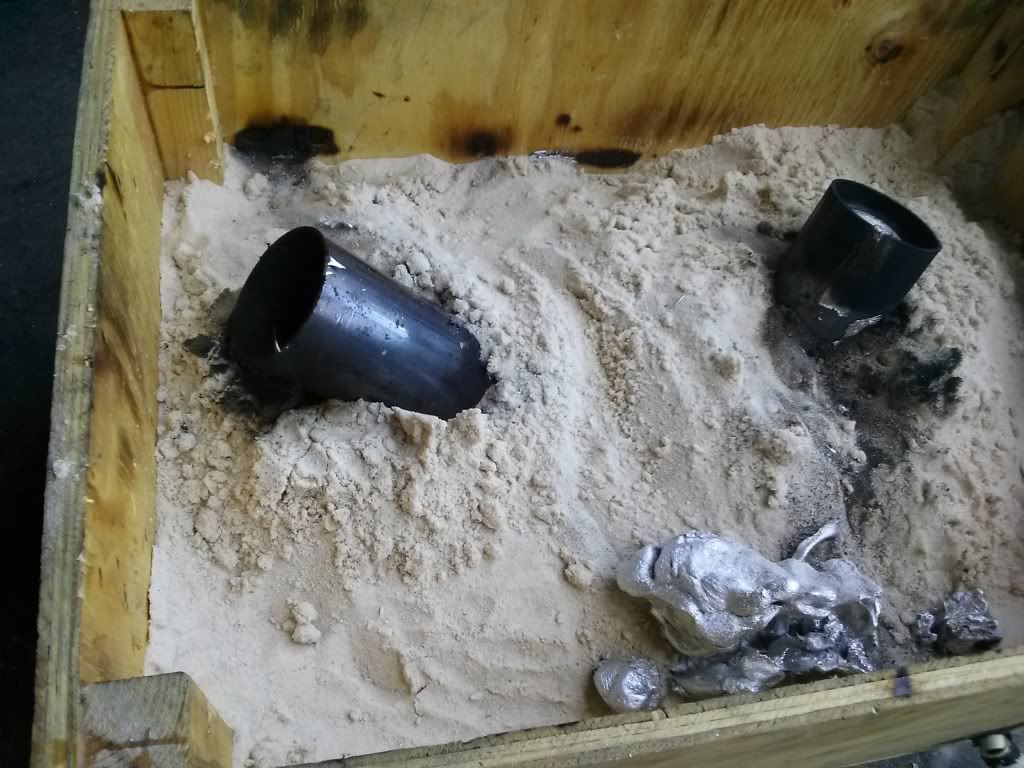
Hoping for the best I waited a few minutes and dug up the parts. I thought maybe they were down low enough in the sand but no such luck.

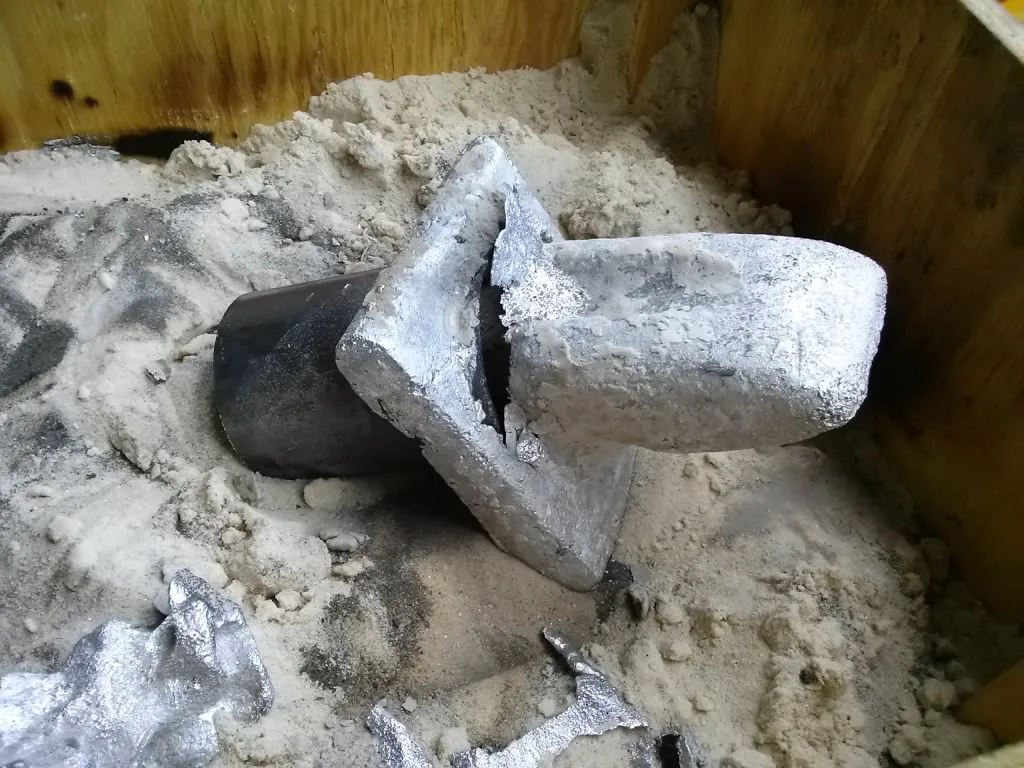
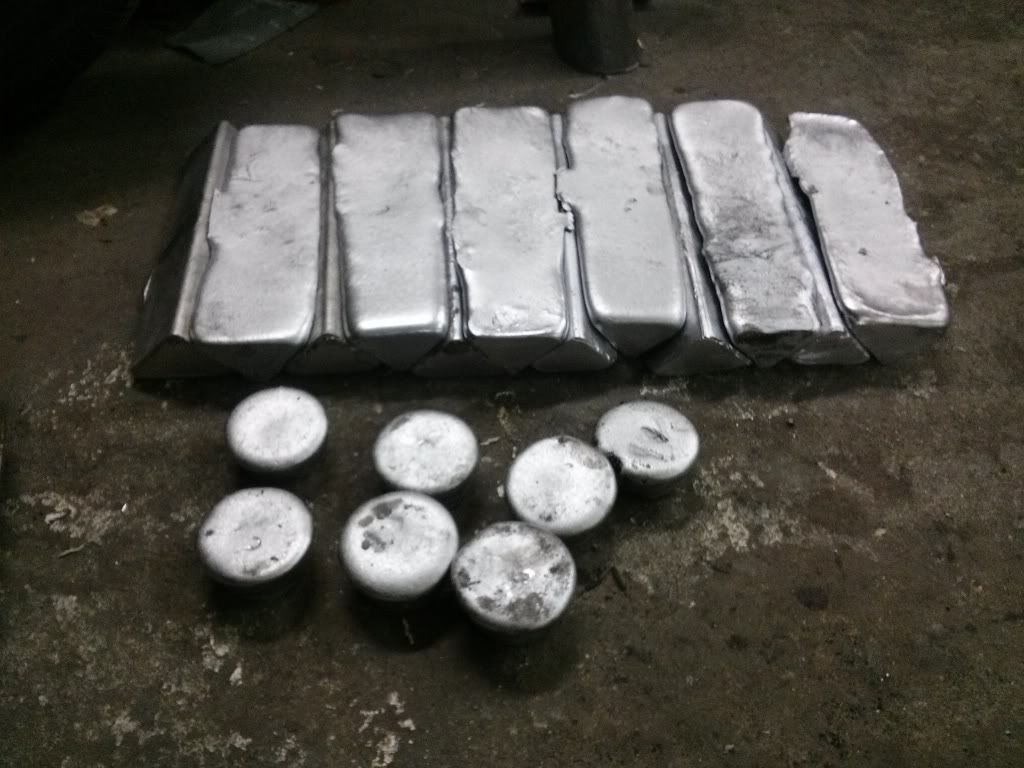
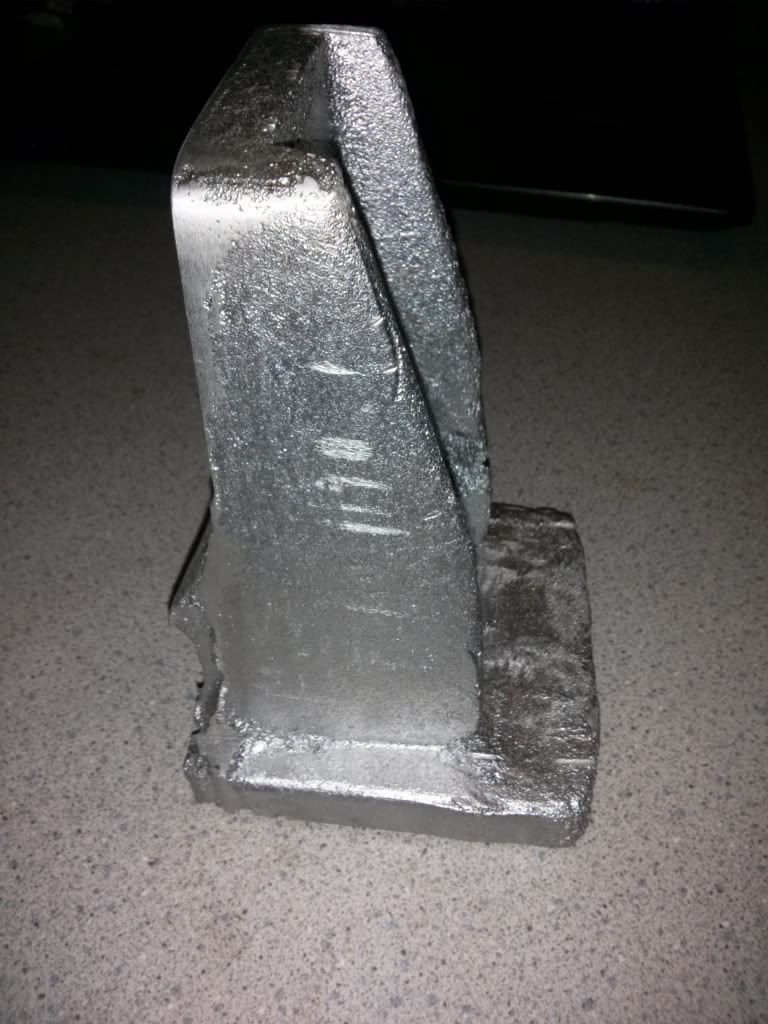
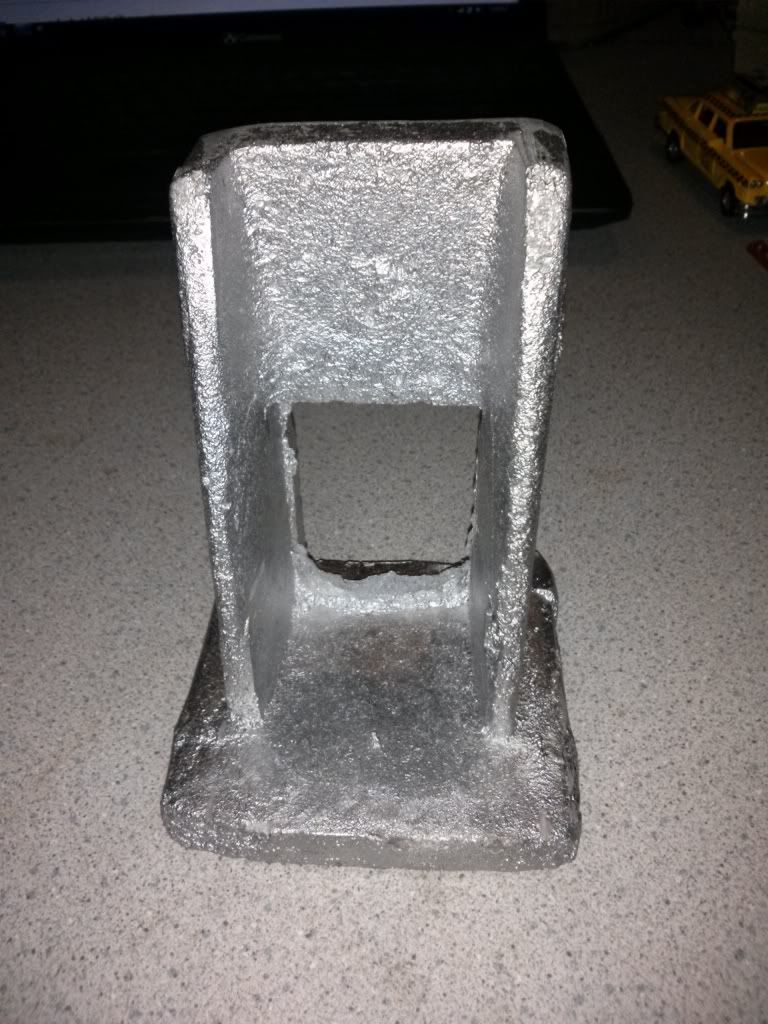
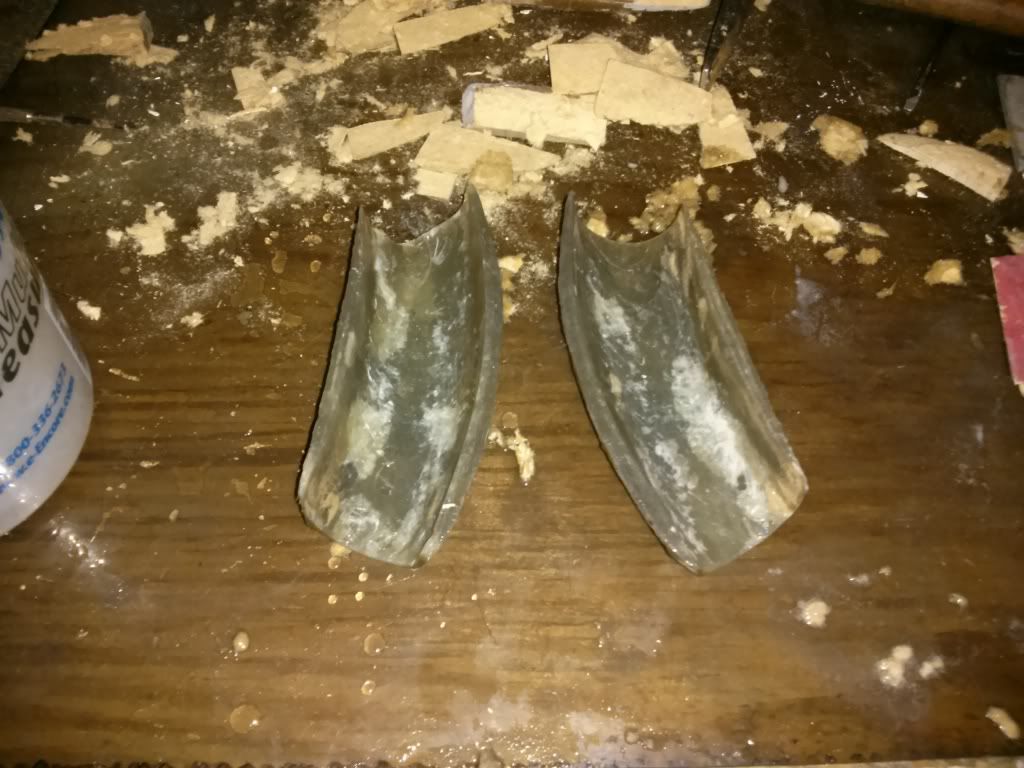
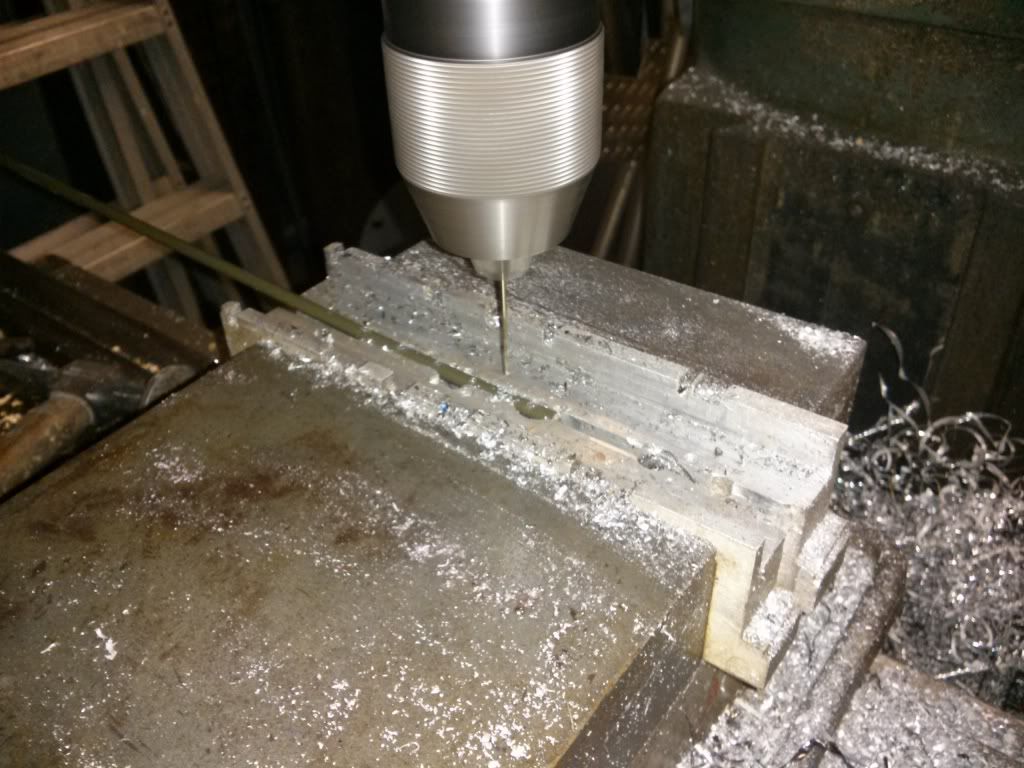
I may have had a couple serviceable parts if it wasn't for that little glitch. I wasn't really happy with the surface but I was going to sand it down and make it pretty later anyway. I planned to mill the mounting surfaces down about 1/4" after cutting the vent and sprue off.

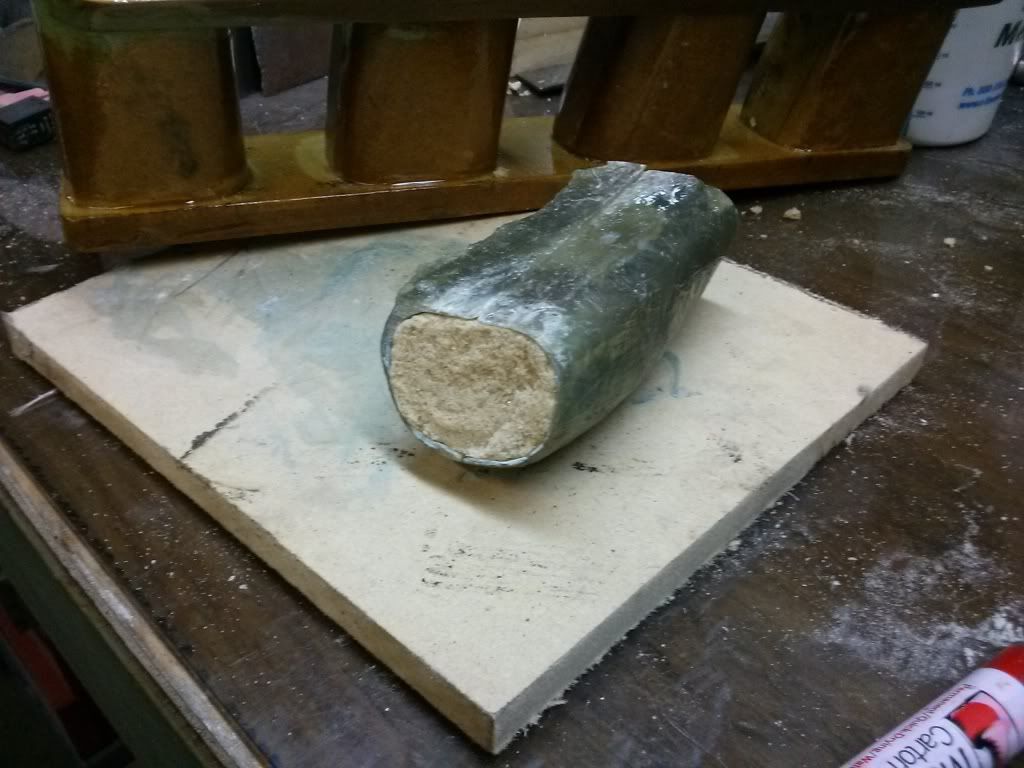
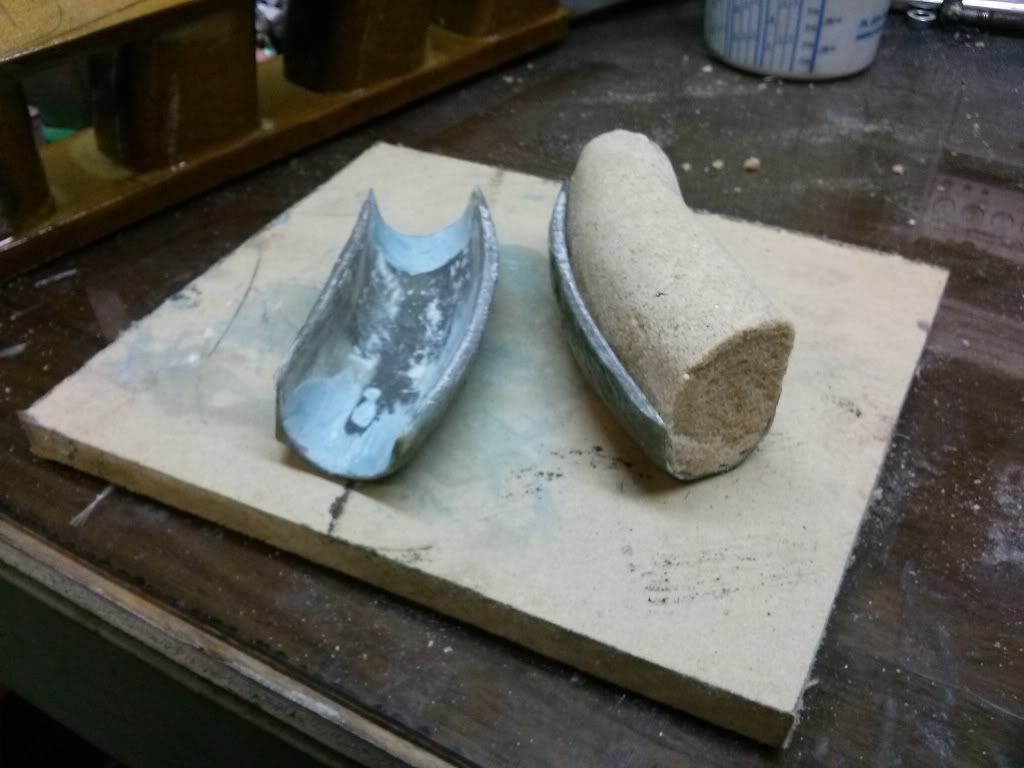
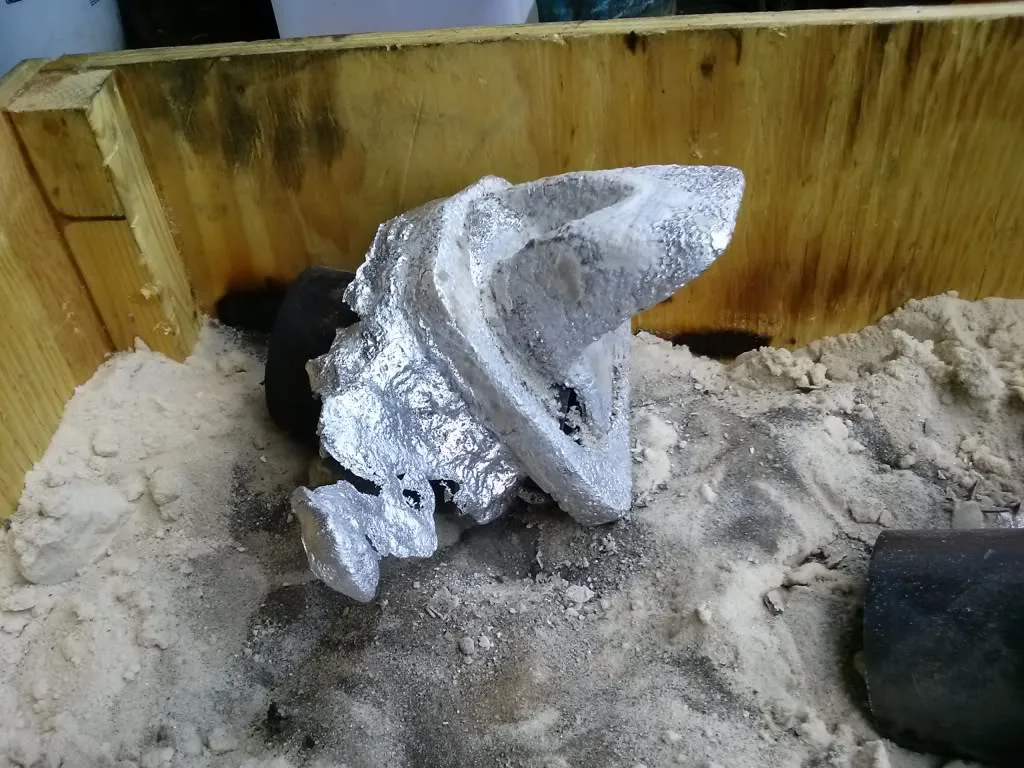
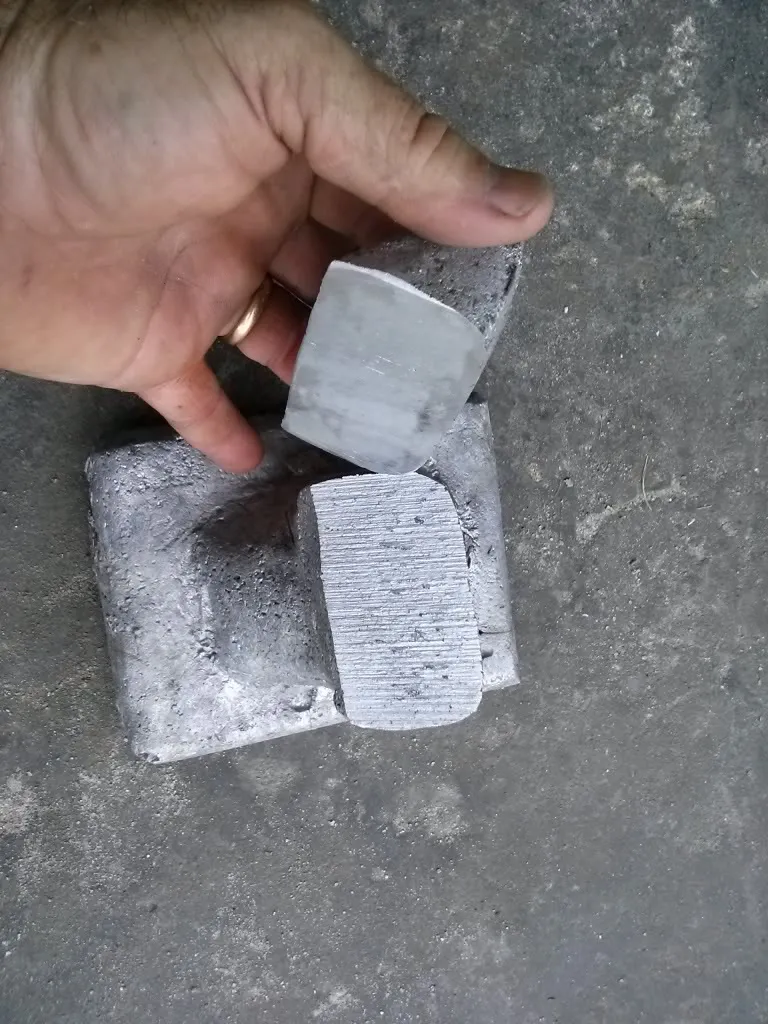
Here I did an autopsy and found the pour was pretty good in general. I hit the one side with the belt sander and it shined up with no voids.

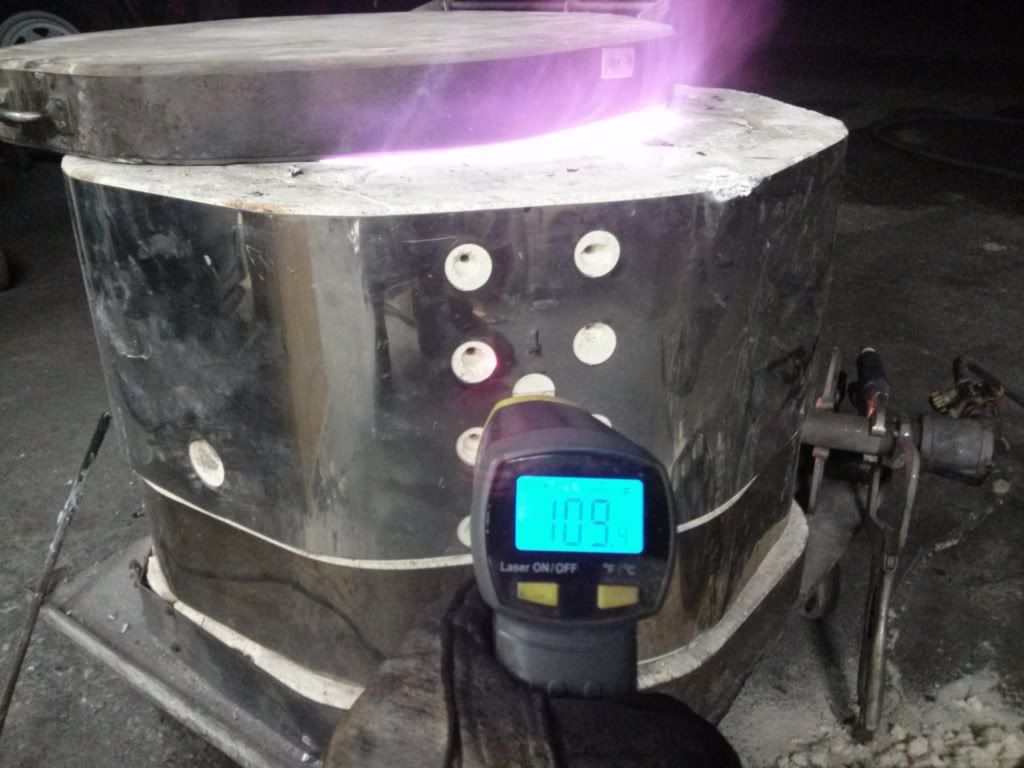
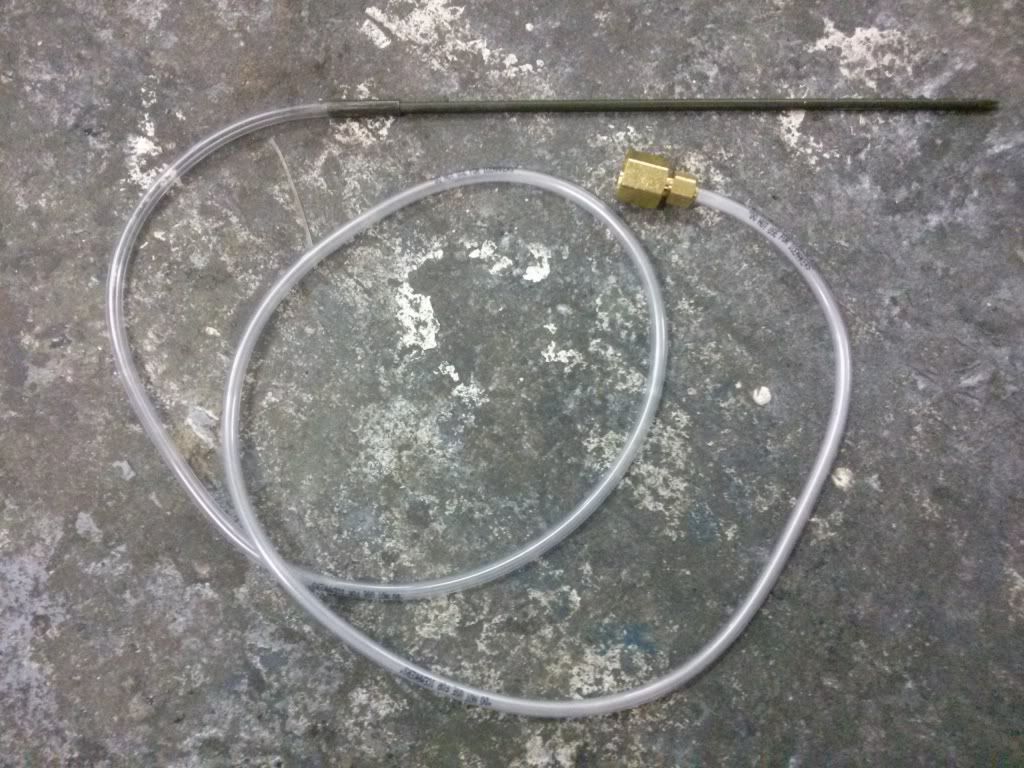
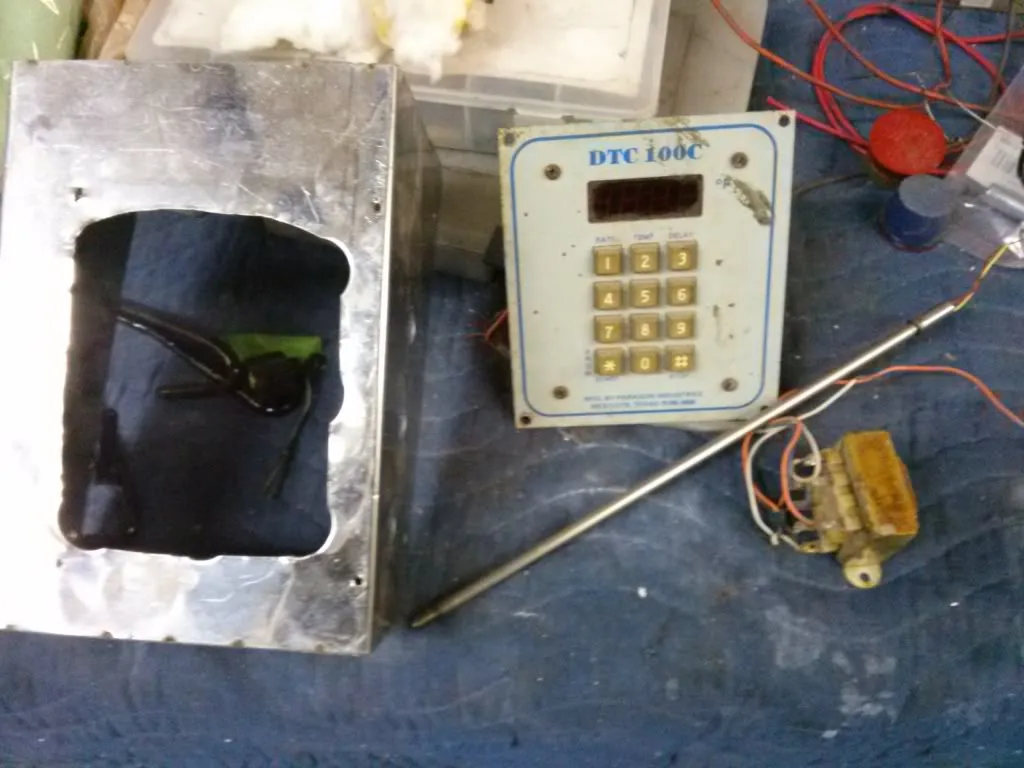
My kiln builder friend came through with pieced together pyrometer. An old kiln controller with a burned out "1000's" digit and an Inconel thermocouple that will handle over 2000F. I just need to remember that 1375F will be "375". It cost me lunch.

New plan! Tomorrow I'm ordering material to make oil based sand instead of the water based green sand I've used before. I'm going to mix up stuff called "K-Bond" that was developed at Kent State years ago. It takes sand, synthetic two stroke oil, methanol, and bentone clay. I need to get some organo-bentone. I have the oil for my weed wacker, the methanol I buy in drums because I make my own bio-diesel and the sand I have left over from my green sand mix.

I'm going to go back to the reusable plug for packing sand around too. I figure I can cut, router,sand, and screw together a part out of MDF faster than I worked with the foam. The best part is if the pour fails I can repack my cope and drag and try again in minutes. Live and learn.

jgrewe
jgrewe New Reader
6/9/13 8:29 p.m.

Kids are out of school, Chumpcar at Daytona is over, its time for a project day.

I spent the last few weeks gathering stuff to make oil bonded sand. I had to get one of the products from a place in Ocala, a friend picked it up on one of his service calls and saved me a bunch of time an money.

I picked up this custom sand mulling machine to make and maintain my sand. If you squint at the picture you may be able to see the HF concrete mixer I started with. Its tough to recognize with all the mods I ended up doing to it.

List of mods: don't install the mixing blades and add a bowling ball to smear the sand around inside of fluffing it.

It worked pretty well for my purposes. Threw in 100lbs of sand and 6 lbs of Bentone 34(magic powder clay) along with 2 qts of synthetic 2 stroke oil and 3.5 oz of methanol. Mixed for a while and ended up with some of the best green sand I've gotten to play with.

Picture shows the sand and the model for the engine mount in the lower flask.

Here is the flask with the part pulled and the gate and well cut in.

Here is the pour

Houston we have a problem!

Still learning how much you can pack oil bonded sand and had a blow out after filling the part enough for aluminum to show up in the vents. Oh well, with the model being made of MDF I can repack another flask and try again and again.

Let thing cool for about 20 minutes and spilled it out. I little clean up with the band saw and I have 3/4 of a mount.

I was in a hurry to cast something so this was really just a test. I need to make some special tools to fit down into the cavity of this part to touch things up before a pour. I think I'm going to change the design slightly to make it easier to pack sand around and add some strength to the part. Instead of the small pad that will sit on the rubber mount I'm going to fill in the area between the vertical arms with a 1/2" thick section.

Over all the oil bonded sand is the way to go. It can be packed quite a bit tighter than water bonded sand because you don't have steam to worry about. I also picked up some sodium silicate so I can make the interior core for my oil pan. You mix it up with plain sand and pack it into the shape you want. Once that is done you hit it with some CO2 and it becomes hard. Should be fun, might make an intake manifold too.

jgrewe
jgrewe New Reader
6/29/13 7:04 p.m.

Had a little time to play this last week. Too much other stuff in the shop to focus on the Spitfire right now.

Second attempt with oil bonded sand went better. From packing the cope and drag to dumping out the finished part was only about 45 minutes. I could probably do it in 30 minutes if I had started the furnace the same time I started packing sand. A lot of waiting involved when you are heating to 1375F then it has to cool off again.

Here is the part before the sprue is cut off. I didn't get a picture after I cut the extra stuff off and machined the surface the bolts to the engine.

fujioko
fujioko New Reader
6/29/13 8:32 p.m.

That is so cool! Looks like your last attempt will clean up well. Do you have any pictures of the finished mount?

I have always wanted to do aluminum casting. Thanks for posting this!

jgrewe
jgrewe New Reader
6/29/13 8:51 p.m.

I'll post some tomorrow. I'm going to cast the passenger side if I can get to the shop.

jgrewe
jgrewe New Reader
11/17/13 9:05 p.m.

If you clicked on this thread, sorry for the dust all over your keyboard, its been a while since my last update.

A couple weeks before my last post I picked up a '57 and my wife wanted me to finish it first. No, not anything as cool as a Bel Air. Its a block construction 3/2 that we are going to live in for a few months while waiting for a bigger deal to go through.

Back to the car!

I cast the other side mount and tried a different amount of time before I busted open the sand. I let it cool for over 20 minutes still buried in the sand and the finish comes out silver instead of dull grey.

The engine is sitting in the car on it's own arms.

Next up is the intake manifold. I'm using GSXR TB's and will cast a manifold instead of the usual plate, stubs of tubing and silicone hose route.

Here are a few process shots.

Raw material, MDF.

Once the runners were roughed I used a belt sander to finish the shape.

Here is my assistant model maker putting a coat of urethane on the finished part. 5 coats until it is glossy all over.

Next is the core model for the air passages in the runners. I only need to make one because the runners are all within a few millimeters of being the same on the outside. Make 4 sand copies and place them into the void the external model makes in the sand.

jgrewe
jgrewe New Reader
11/17/13 9:17 p.m.

Forgot to show the finished manifold model.

With a little more casting practice I will most likely go back a revisit the motor mounts. I did a quick clean up on the passenger side just so I could use it to hang the engine. The top of the engine is about 1 1/2" below the bonnet.

sailos
sailos New Reader
11/19/13 7:25 a.m.
jgrewe wrote: I rediscovered this place while doing research on a project that I picked up recently. Its taken apart 76 Spitfire with a pile of good parts. Backstory: A friend picked up a supercharged '00 Miata for some track fun. He has me keep things safe a running for him. He cracks a piston at Sebring and I need to figure out what to do for a more bullet proof engine. I find Tampa Bay Miata forum and find a few guys that know every bolt on the cars. Meet a guy at an evening get together and we start talking about other cars we have besides Miatas. I'm an RX7, RX2 guy and I also have a '59 Sprite and a 323GTX. He tells me about his stalled project taking up space in his garage. Its a Spitfire with plans to put in a 2.0L Duratec with a T9 5 speed behind it. "I'd sell it if I could get a fair price." Wheels start turning, I start using my google-fu skills to see what is out there for the Duratec/MZR. I strike a deal and take the car home a month or so later. What I got: A very clean BRG '76 Spitfire with no engine or trans. The duratec out of a Focus, quad4rods bellhousing, T9 trans, custom driveshaft and boxes of other things some Triumph, some Ford. What I have in a pile after gathering stuff for the project: Megasquirt, GSXR t-bodies, turbo manifold,(I have a few turbos laying around) 1.8 Miata diff w/Torsen, 15x7 Konig Rewinds(Panasport copies)Miata spindles/uprights. Looking for Miata Sport brakes at this point. The build should go pretty quick. Its the closest thing to a 'shake the box and it falls out assembled' project that I've done in years. And I plan on ripping off as many ideas as I can from the other projects here,lol. I'll post pics tomorrow, here is the previous owner's blog http://invisiblesun.org/blog/

as for me, it is very interesting

jgrewe
jgrewe New Reader
11/24/13 9:29 p.m.

I finished the core box and did a little experimenting today.

First I shaped the core out of MDF which turned out not to be the best material. After the shape was finalized I covered the part with polyester resin.

A quick sanding and about 5 coats of mold release wax was next. Then a fiberglass cocoon was applied.

Here is where the MDF became the problem. Instead of popping out of the fiberglass I had to whittle it out in small chunks without jamming a sharp tool into my hand. The end result was still a usable core box but it was a lot of work.

I cleaned up the inside shape with a little bondo and got ready to make my first core. I mixed up the regular sand and sodium silicate http://www.sciencecompany.com/Sodium-Silicate-Solution-1-Gal-P16464.aspx

Mixing 4% sodium silicate, by weight, into the sand I packed the core box and hit it with CO2 from my welding gas bottle of C25 mix.

I already removed the tape I had holding it together in that picture. Here is one side removed.

The finished core ready for casting and then broken to see just how tough it really is. Very stiff, like sand on Viagra...

Spoolpigeon
Spoolpigeon SuperDork
11/24/13 9:47 p.m.

This

is

awesome

CLynn85
CLynn85 HalfDork
12/3/13 6:08 p.m.

Very cool, really enjoying the sand casting trials and tribulations.

LorenFL
LorenFL None
12/13/13 11:28 p.m.

I finally had to register for the GRM forum so I can heckle.

I'm the dreaded PO of this project.

jgrewe
jgrewe New Reader
12/22/13 5:37 p.m.

Its time for this weeks episode of my Spitwad build.

Casting the manifold using the sodium silicate mix is what I attempted the other day. I had to make a special tool to introduce the CO2 to the sand instead of just holding the hose up to the packed sand like I did for my core box experiments. I came up with a hunk of brake line, some 1/4" clear hose and a fitting to attach it all to my welder's gas hose.

I drilled a bunch of holes along the brake line with a #59 drill bit. That is just a hair over 1mm in dia. I had it from making a propane burner to heat my powder coating oven. I put on a full face shield for this one, safety glasses just didn't seem to be enough and I pictured the thing sticking out of my cheek. Center punching was the only way to go. I hammered the end flat so all the gas wouldn't just blow out the end.

Finished product

In use to make the air passage cores. Just takes a few seconds.

Finished cores with a couple I didn't like in the scrap pile. Smoothing the cores out just takes a little scraping or rubbing with your thumb.

I made new cope and drag boxes for this item. They could probably be a little bigger and I would have other options for routing the aluminum flow. As they are, I'm planning on putting the sprue in the middle and feed it from a soup can sitting on top of the sand with both ends cut out of it. That will give me a nice reservoir above the piece that will hold extra aluminum that will keep things topped off as the part cools and shrinks.

...and I got to use my dado blade on my table saw to cut some grooves for the sand to grip

Here is the model in the sand. You can see the holes where I injected the CO2.

Here is where the Fail portion starts.

After hardening the sand mix I was able to remove the model with quite a bit of effort. I had covered it with release agent but the shape was the problem. There was a small lip, about 1/8", that I had hoped to work around by pulling in a specific direction as I removed the piece. That all worked out but the shape of the runners and the angle of the manifold faces made a clean removal impossible. The area under the runners cracked as I pulled out the model but everything else looked great. I could even use a blow gun to clean out the loose sand without damaging the shape!

My phone died so Fail pictures will come later. I have decided to continue to learn to run before I finish learning to crawl in my casting projects. I'm going to pick up some casting rubber to make flexible castings of the area between the runners. From those, I can make two piece cores that I can place into the void in the sand like the air passage cores.

After I make the soft castings I will fill in the model with bondo to make it a single oval between the two faces. The filler will have some kind of indexing method so the parts can be lined up properly. I'm thinking there is going to be 12 separate cores to prop up in the sand. 4 for the air runners and 2 between each runner and one at each end. Maybe as few as 9 if I can find a good way to bond them together before assembly.

Should be interesting...

LorenFL
LorenFL New Reader
12/23/13 10:45 a.m.

Part of me wishes you'd get this car together in a more "simple" fashion and then remake trick parts as-needed. But, it's going to be incredibly awesome by the time you're done with it!

bgkast
bgkast GRM+ Memberand Dork
12/23/13 4:36 p.m.

Love the sand casting info! That was one of the coolest things we got to do in High School Metal shop!

Ransom
Ransom GRM+ Memberand UberDork
12/24/13 12:47 p.m.

This. Is. Awesome.

I really need to learn more about casting; The metalworking class I took a little while back tried pretty hard to suggest to us that stuff we did there wouldn't be more than decorative, without providing info on what differentiated our process/tools/materials from more functional sand casting...

Jerry From LA
Jerry From LA Dork
12/27/13 7:04 p.m.

Hey jgrewe,

Can we come over and play at your house?

jgrewe
jgrewe New Reader
12/27/13 7:29 p.m.

Well, I keep all this stuff away from the house in case I blow something up. My game room is in a business park far enough from the house that my wife hates to make the drive. (she's actually kind of afraid to step foot in it anyway)

I call it The Atelier or Wardenclyffe South depending on my mood.

Other fun is making biodiesel (over 125K miles on my truck on homebrewed B100)and the latest non-car project is making electricity with a 2JZ engine attached to a 25hp 3 phase motor all fed by an Imbert style gasifier. I hope to be making electricity from wood by spring time.

You're more than welcome to make the trip but I tell people that come over that there is no adult supervision

1 2 3

You'll need to log in to post.

Our Preferred Partners
Nuehx0eopwzYH0iW8Mru2YI2Kv6ttnGmDOkQrxzpGjXHj8zNNdA8185cg0aaaEBx