1 2 3 ... 6
Austin296
Austin296 New Reader
2/22/15 3:34 p.m.

Ive been lurking on here and Locost forums for a while and have decided to start building my project.

I have wanted to build a car from scratch for a few years. I designed the following frame well over a year ago, but never started the project, until now. Some of the design is based off of the tooling my uncle has available(no CNC equipment), and some of the design has changed a little since I made this based on what I have learned since then. I also ran FEA analysis on my frame to prove that if I do wreck it, the frame will protect me(I did side impact loading, below picture was an early attempt).

A little background, I am 24 years old and have an Ocean Engineering degree living in Houston, Tx. I have been restoring GM cars from the 60s with my dad since I was 8. My uncle has a machine shop that he lets me work in(where I will be building the car) and he has extra tubing on his racks that I will be using to build the frame.

As for my goal with this car; this is mainly going to be a street car, but I will probably race it eventually. I enjoy building things and I believe this will be a good challenge so it is my next project.

Three weeks ago I started cutting, bending, & tacking the frame together for the passenger area and front with the intent to finish the back of the vehicle once I got a donor car:

Then I went up to the DFW Autorama and visited adoyle88. After looking at the car he recently completed (Which can be found here) I decided to change some things up.

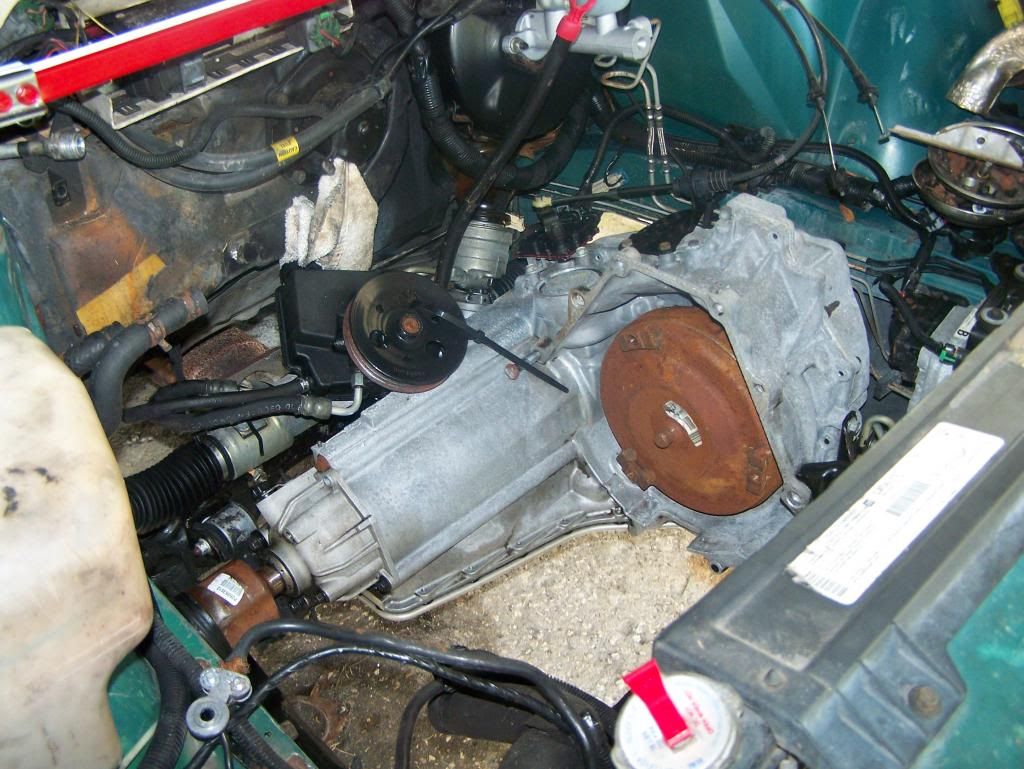
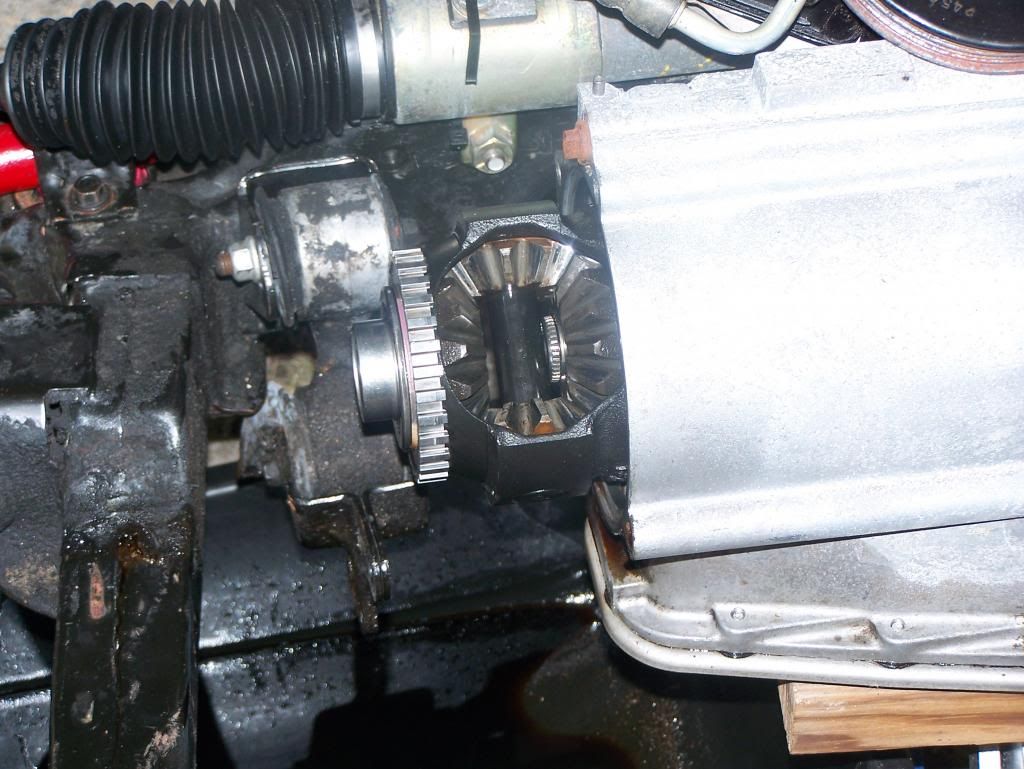
I found my donor car last weekend, a 1998 Buick Riviera with a supercharged V6. Pics to follow.

Austin296
Austin296 New Reader
2/22/15 3:46 p.m.

I found a 1998 Buick Riviera for sale in College Station, Tx. It has the supercharged V6 with 240Hp 280 Tq stock. I took it for a test drive around the block, found that it had some suspension issues and a check engine light on, but the engine and transmission acted great, especially for having 199K miles on the car.

So I bought it and drove it 80 miles back to Houston(last weekend). Yesterday, I got an OBDII scanner so I was able to read the codes yesterday. Turns out the Cam Position Sensor wire was cut due to vibrations(design flaw) so I fixed that and replaced the drivers lower control arm and end link bushings. It drives much better. It still needs an alignment, but Ill take care of that once it is in my new frame.

I also put Seafoam in the gas, oil, & cylinders(man does that make the car smoke for a few minutes) and put 100 miles on the car today and changed the engine oil. It seems to be running great. I will wait to change the plugs and wires until it is in the new frame on the off chance that I knock into it and break a spark plug.

The car hasn't thrown any new codes today so I think it is fixed and ready for disassembly. Sadly my uncle's shop is 2 hrs away so I wont be able to start that process until I get it up there in 2 weeks.

Wally
Wally GRM+ Memberand MegaDork
2/22/15 4:05 p.m.

That should be a fun motor for a go cart. I'm looking forward to see your progress.

NOHOME
NOHOME UltraDork
2/22/15 4:28 p.m.

Count me in for the duration.

bgkast
bgkast GRM+ Memberand UltraDork
2/22/15 4:34 p.m.

Glad to see another midi build!

Dusterbd13
Dusterbd13 SuperDork
2/22/15 5:13 p.m.

This is gonna be fun. Looking forward to the ride.

bluej
bluej GRM+ Memberand SuperDork
2/22/15 5:15 p.m.

Sounds like fun! Keep us up to date.

BeardedJag
BeardedJag Reader
2/22/15 9:23 p.m.

Glad to see another custom chassis build. Really excited someone is using a S/C 3800 engine. I have been wanting to do something with that engine for a while but can not decide on what. Cant wait to see how this turns out!

DLD
DLD New Reader
2/23/15 12:55 a.m.

I look forward to seeing your progress. There's not much more satisfying than building a car from the ground up. I've built 5 race cars over the past 30 years, and it's a lot of fun. I'll be watching. DLD

Lonny
Lonny New Reader
2/23/15 6:58 a.m.

Hey Austin,

I got your message asking how we attached the sub-frame from the donor cobalt to our frame. We used the OEM bolts to attach to threaded inserts welded into the rear tubing and bolts and nuts in the front holes of the sub-frame.

DF Goblin subframe pic DF Goblin subframe pic

I hope this helps.

Lonny Doyle

MattGent
MattGent Reader
2/23/15 12:10 p.m.
Austin296 wrote: I also ran FEA analysis on my frame to prove that if I do wreck it, the frame will protect me(I did side impact loading, below picture was an early attempt).

I doubt that you could generate a reasonable impact solution using shell elements (in workbench?), and most publicly-available material properties will only be linear/elastic, and most solvers neglect inertial effects. IMO these types of analyses should be limited to stiffness/deflection studies for static loading conditions, which what you have appears to be good for.

If it were my frame I would be concerned about the roll hoops (style hoops?) terminating mid-cross-beam, creating a bending load, for the rollover condition. NASA or SCCA rulebooks would be a good place to start on the basic rollbar design.

Austin296
Austin296 New Reader
2/23/15 3:40 p.m.

Lonny,

Thanks for the response and I appreciate the pics. When I tear down the car in 2 weeks I'll see what mounting holes there are in the front ofthe subframe.

Matt,

You are correct, the majority of the analysis I have done has been static, but I am working on doing a drop analysis in solidworks to stimulate a crash(Never done it before so it's not going very well right now).

Regarding the roll hoops, I have changed the design to a single hoop that runs all the way to the base of the frame (see the pictures of what I have tacked together), but I will definitely take a look at the rule books add you have suggested.

AClockworkGarage
AClockworkGarage New Reader
2/23/15 4:53 p.m.

Looking forward to seeing this build unfold. I'm still convinced the 3800 is one of the best engines of all time and can't wait to see what you come up with.

Are you planning on running the 4T65 or will you be doing a manual swap? Or a Comp-G tapshift maybe...

Austin296
Austin296 New Reader
2/23/15 5:38 p.m.

Clockwork,

I plan on keeping the stock transmission. My budget for this car is very tight.

For having 200k miles the Buick drives great. Engine and Trans work flawlessly, it just needs a tune And some smaller diameter tires(2.93 final drive ratio)

I plan on building a second one of these assuming all goes well so I will probably change Trans on that build(After driving this Buick I am sold on the 3800 SC engines).

AClockworkGarage
AClockworkGarage New Reader
2/23/15 6:58 p.m.

2.93 should be plenty in a lightweight car, but you're not stuck with it. A 3.29 swap is very simple and pretty cheap. The HD diff in my project came from a Rivera and only took about 20 minutes to swap. If you wanted to go crazy you could do the drive/driven swap and get a 3.77 FDR. But that's unnecessary overkill.

the diff lives in that little section on the left end there.

Four bolts and it slides out. You don't even need to drain the fluids.

These things are like Legos. There's so much you can do to them, and it's so easy.

Austin296
Austin296 New Reader
2/23/15 8:36 p.m.

Based on the dimensions I took of the engine cradle yesterday, here is how I am planning to build the rest of the frame.

I will probably add more support braces once I get it together if I think it isnt rigid enough. Right now all of the frame is 1.75in OD 0.095in WT. According to Solidworks, it weighs 225lbs including the engine cradle weight. Goal weight is a max of 1600lbs overall.

Clockwork,

Thanks for the tip, Ill take a look into that. The way I am planning the design should make it nice and easy to pull the engine so I could do this at a later date also.

Austin296
Austin296 New Reader
3/10/15 6:22 p.m.

So, I went to drive the Buick to my uncle's shop Saturday; stopped at Whataburger for some breakfast and accidentally hit the emergency brake and it got stuck on... Long story short, i managed to get it to ~25%on and limped the car home 2 miles. At which point my rear disc brakes were so hot I could feel it over a foot away from the wheel. Managed to get the E-brake fully disengaged later(it was rusted to its housing) and started my drive again Sunday morning.

The car drove great for the 2hr drive up to my uncles. The only problem was that it was muddy on his gravel driveway and I nearly got stuck and got to deal with lots of mud on my disassembly.

For being an Illinois car, there were very few rusted bolts, I only snapped 2 off...

After all that disassembly, I had quite a pile of junk...

Finally got everything out of the way so that I could start pulling the wiring harness.

I got the wiring harness disconnected to where it goes through the firewall on the passenger side. Ill take the dash out to continue next weekend.

java230
java230 New Reader
3/10/15 7:52 p.m.

Sweet! I can't wait to see where this goes. I'd love to build my own one day.

Austin296
Austin296 New Reader
3/19/15 8:51 p.m.

So I got quite a bit done this past weekend.

The car started like this:

Then, it became this:

By this time, I started getting frustrated that I couldn't get some components out and may have ripped some things out by force... making sure not to damage anything I still needed. That got me here:

I made sure to label everything so it should be pretty easy to strip excess wiring out of the harness later. Man, this car has too many control modules...(ECU, Cruise Control, Power Steering, A/C, Theft, Power Window, ABS, CommandStar, Headlight, Body Control Modules)

I will leave them all plugged in and then disconnect one by one to make sure I wont mess anything up.

What I am most worried about is the "CommandStar Module" which is a pre-cursor to OnStar. This connects to a big relay bank...

I will leave it plugged in initially so that I can make sure the engine will run, then ill figure out how to bypass it. Any suggestions are welcome.

I am hoping to finish labeling and removing the wiring harness this weekend so I can get the body off the sub-frame and start figuring out how I will connect it with the frame I have tacked together.

patgizz
patgizz GRM+ Memberand PowerDork
3/20/15 9:33 p.m.

you can find some useful links for pruning your harness here

http://www.fiero.nl/forum/Archives/Archive-000001/HTML/20060811-2-070806.html

Austin296
Austin296 New Reader
3/25/15 9:26 p.m.

patgizz,

Thanks for the link. I found a wiring diagram in those links, but I don't think it is complete.

Now, for an update:

I Pulled the column out and the remaining pieces of the interior:

Then I was able to pull all of the wiring harness from the engine compartment through the firewall.

From there, I was able to pull the wiring harness out of the car and lay it out.

That wiring harness is heavy! It weighed over 100lbs...

I spent about 8 hours between Saturday night and Sunday going through the wiring harness. I removed the wiring for the Defroster, seat belt sensors, all of the drivers side window, door, & seat controls, and most of the same for the passenger side. I now have 63 coils of wire of varying colors, each over 10ft long... So I have stipped out ~700ft of wire so far.

This weekend Ill keep going through the wiring harness and finish removing the engine (hopefully). The only things left holding the engine are the exhaust(bolts rusted badly so ill have to cut it), shifter, & 6 subframe bolts.

TIGMOTORSPORTS
TIGMOTORSPORTS Reader
3/26/15 8:19 p.m.

Awesome project - and welcome to the 3800 club

NOHOME
NOHOME UltraDork
3/27/15 7:04 a.m.

Keep going...I want to see where this ends up.

The "stick a FWD drivetrain behind the seats" has always tempted me, but I have a feeling there are a few challenges that I am not fully aware of when it comes to the geometry and geometry control. I can measure what happens with the car on the bench, but once it starts to move over bumps, corner and brake (at the same time!) I lose the thread.

Austin296
Austin296 New Reader
3/30/15 11:02 a.m.

Thanks TIGMOTORSPORTS.

NOHOME, yeah... I am sure I will run into some challenges along the way, but that is part of the fun.

And now for this weekends update:

I finished removing all the wiring that I am sure is not needed. I still have a lot of stuff hooked up to the A/C module and others, but I couldn’t trace them through to plugs I knew I didn’t need so I will leave all of those until I get the engine running once again. Then I will unplug them one by one and if there are no adverse effects, will remove them from the wiring harness. So far, I have removed just under 50lbs worth of wiring and connectors(only cut 2 from the PCM, relating to traction control and gas tank vent solenoid).

Patgizz, Thank you for the Fiero link. I was able to find the ECM pinout through that. Sinister Performance recommended cutting a few more wires out of the ECM that I did, but I am okay with having a few extra to be on the safe side for now. I am glad I finished the wiring for now, It was not at all gratifying and was getting boring.

Which is why I finally pulled the car off the motor this weekend, much more gratifying…

It was interesting to take a look at the engine and how they did some things on it when it was initially designed. For example, I don’t think they could have made it more inconvenient to get to the power steering fluid filler:

I thought it was wierd that there is nothing actually holding the engine to the subframe. There are 2 motor mounts that mounted it to the body, but only some anti-torque mounts on the subframe. I had to use a wood block and a piece of angle iron to support the motor for now until I mock it up and make the main mounts.

I wanted to ask for feedback on this: What do you think about using the stock rack and pinion setup and just fixing it to the center? I was initially going to make a mount to fix each wheel, but getting the geometry just right will be difficult. I figure the factory steering mount will be the best place to fix so that I wont get any bump steer or anything else. I was already planning to use a different steering rack so that is not an issue.

Before leaving, I took measurements of the cradle and will work on figuring out mounting locations over the next two weeks before I can go back and mock it up against the frame.

youngfg
youngfg New Reader
3/30/15 12:40 p.m.

Every car I have checked the bumpsteer on comes from the factory with roll understeer, meaning that when the wheel moves up, it toe's out, so as the car rolls you have to add more steering angle to keep turning the same. Now when you move that to the back of the car the roll understeer becomes roll oversteer, I think that's a bad idea. You will have to at least check the bumpsteer and see how bad it is. Most likely you will have to replace the rack with solid mounts for the inner tie rod ends, that are in a slightly different place to minimize bumpsteer.

1 2 3 ... 6

You'll need to log in to post.

Our Preferred Partners
joJpgRbdnvXPUL2DHxkey0K0z43maIvgkyIxEDFnrJEMRSo6SHIGglnLYBuMM8gP